I turned boring bokeh into hearts with this simple DIY and I LOVE the results
I transformed circular bokeh into heart shapes using a homemade aperture disc that I made using sticky tape and black paper

Bokeh is the out-of-focus specular highlights you see time and again in images such as portraits or still life. It's often achieved by focusing on a subject that’s separated from a concentrated light source (like a string of LED lights). By shooting at a wide aperture to create a shallow depth of field, lights in the background blur into prominent blobs of bokeh. Not all bokeh is the same shape, however – and you can actually change the shape with materials you probably already have at home.
The shape of bokeh is determined by a number of factors including the number of aperture blades in a lens, the shape of those aperture blades, and the aperture being used. It’s therefore possible to manipulate bokeh shapes by introducing a whole new aperture.
In this tutorial, I'm going to show you how to make a heart-shaped aperture disc that will sit on the front element of your lens and transform the bokeh you capture. And if you're not into love hearts, you can use almost any shape you like. All you need is some thick black paper and a few craft utensils. Let's get to work!
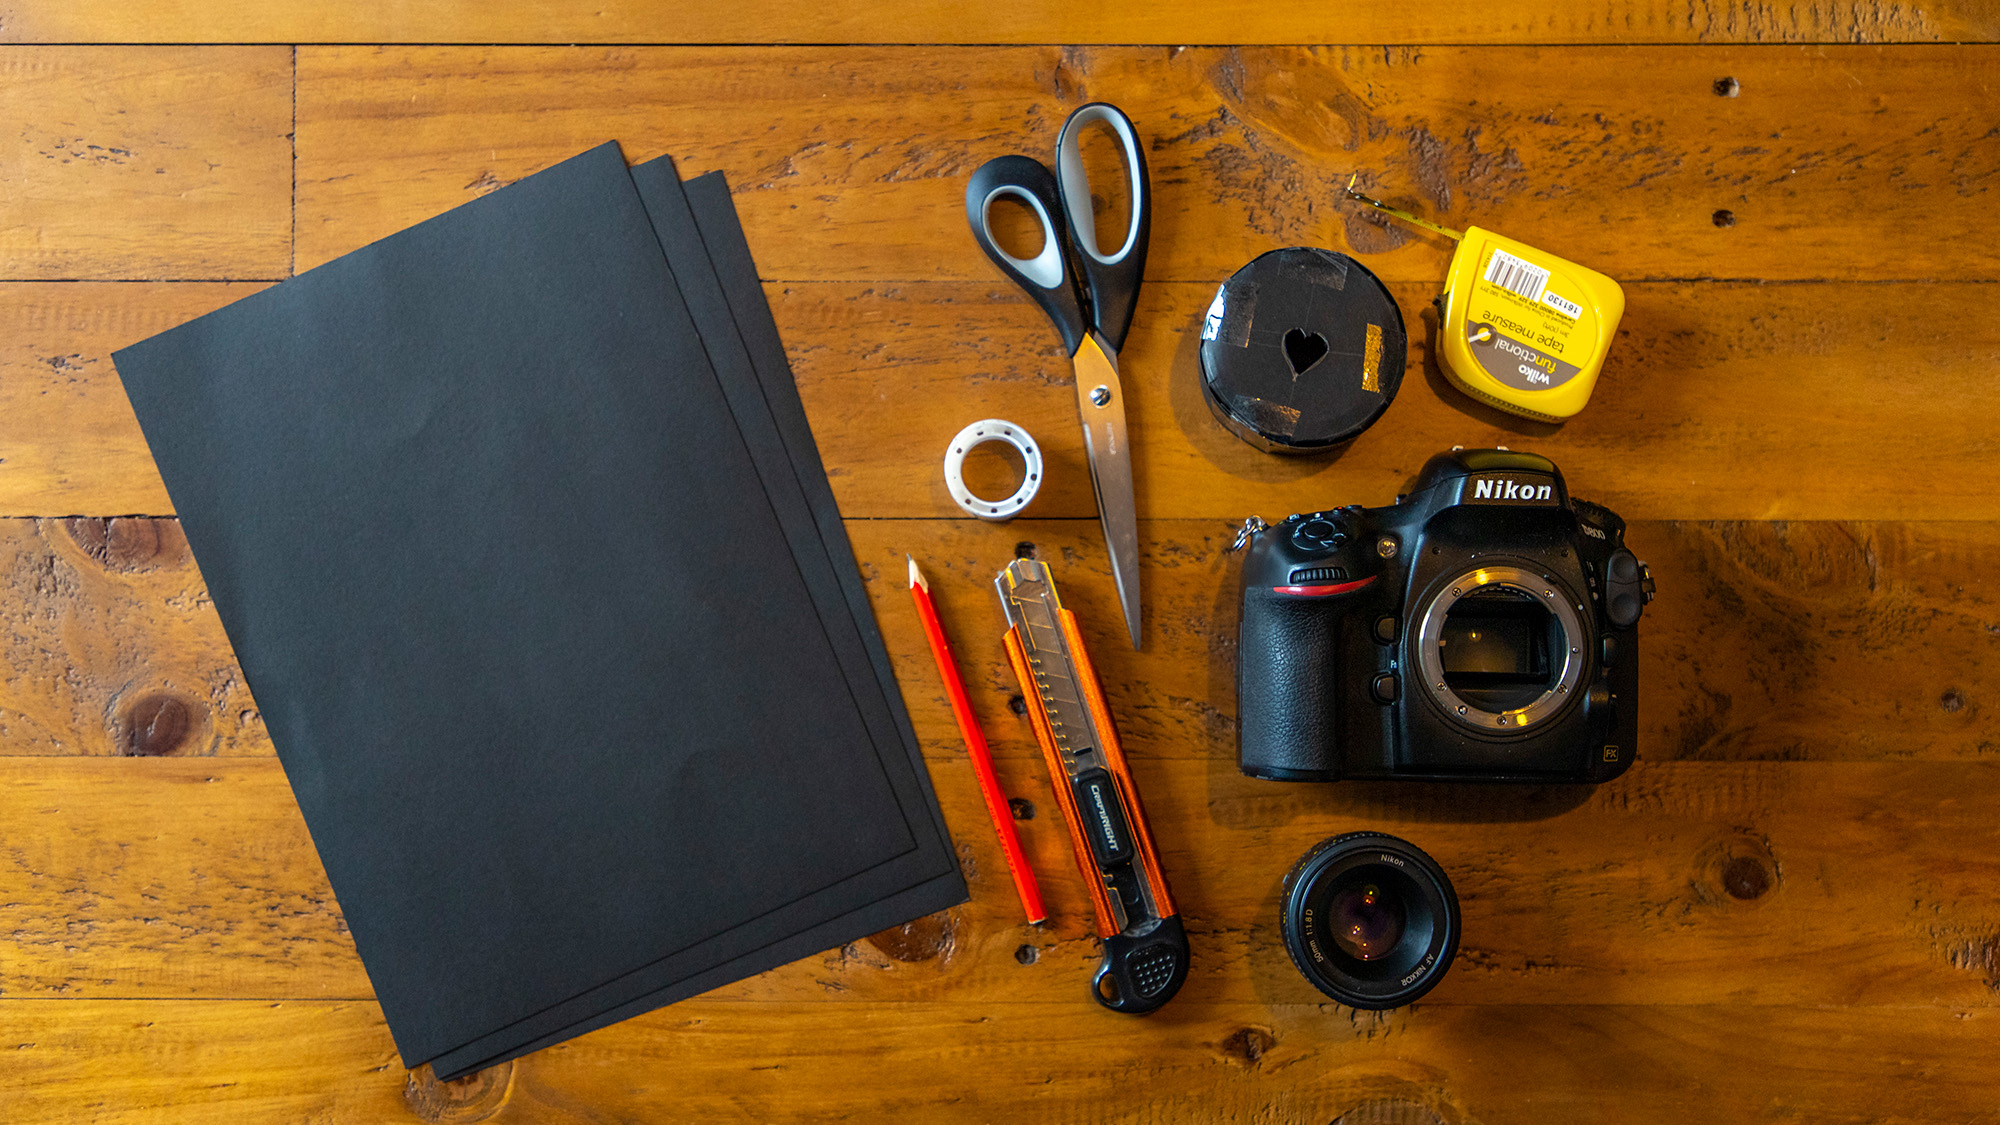
You will need...
- Sheets of thick, black card
- A pair of scissors
- A camera
- A fast lens (like my Nikon AF-S 50mm f/1.8G)
- A tape measure
- A scalpel
- A pencil
- Sticky tape
1. Make a lens hood template
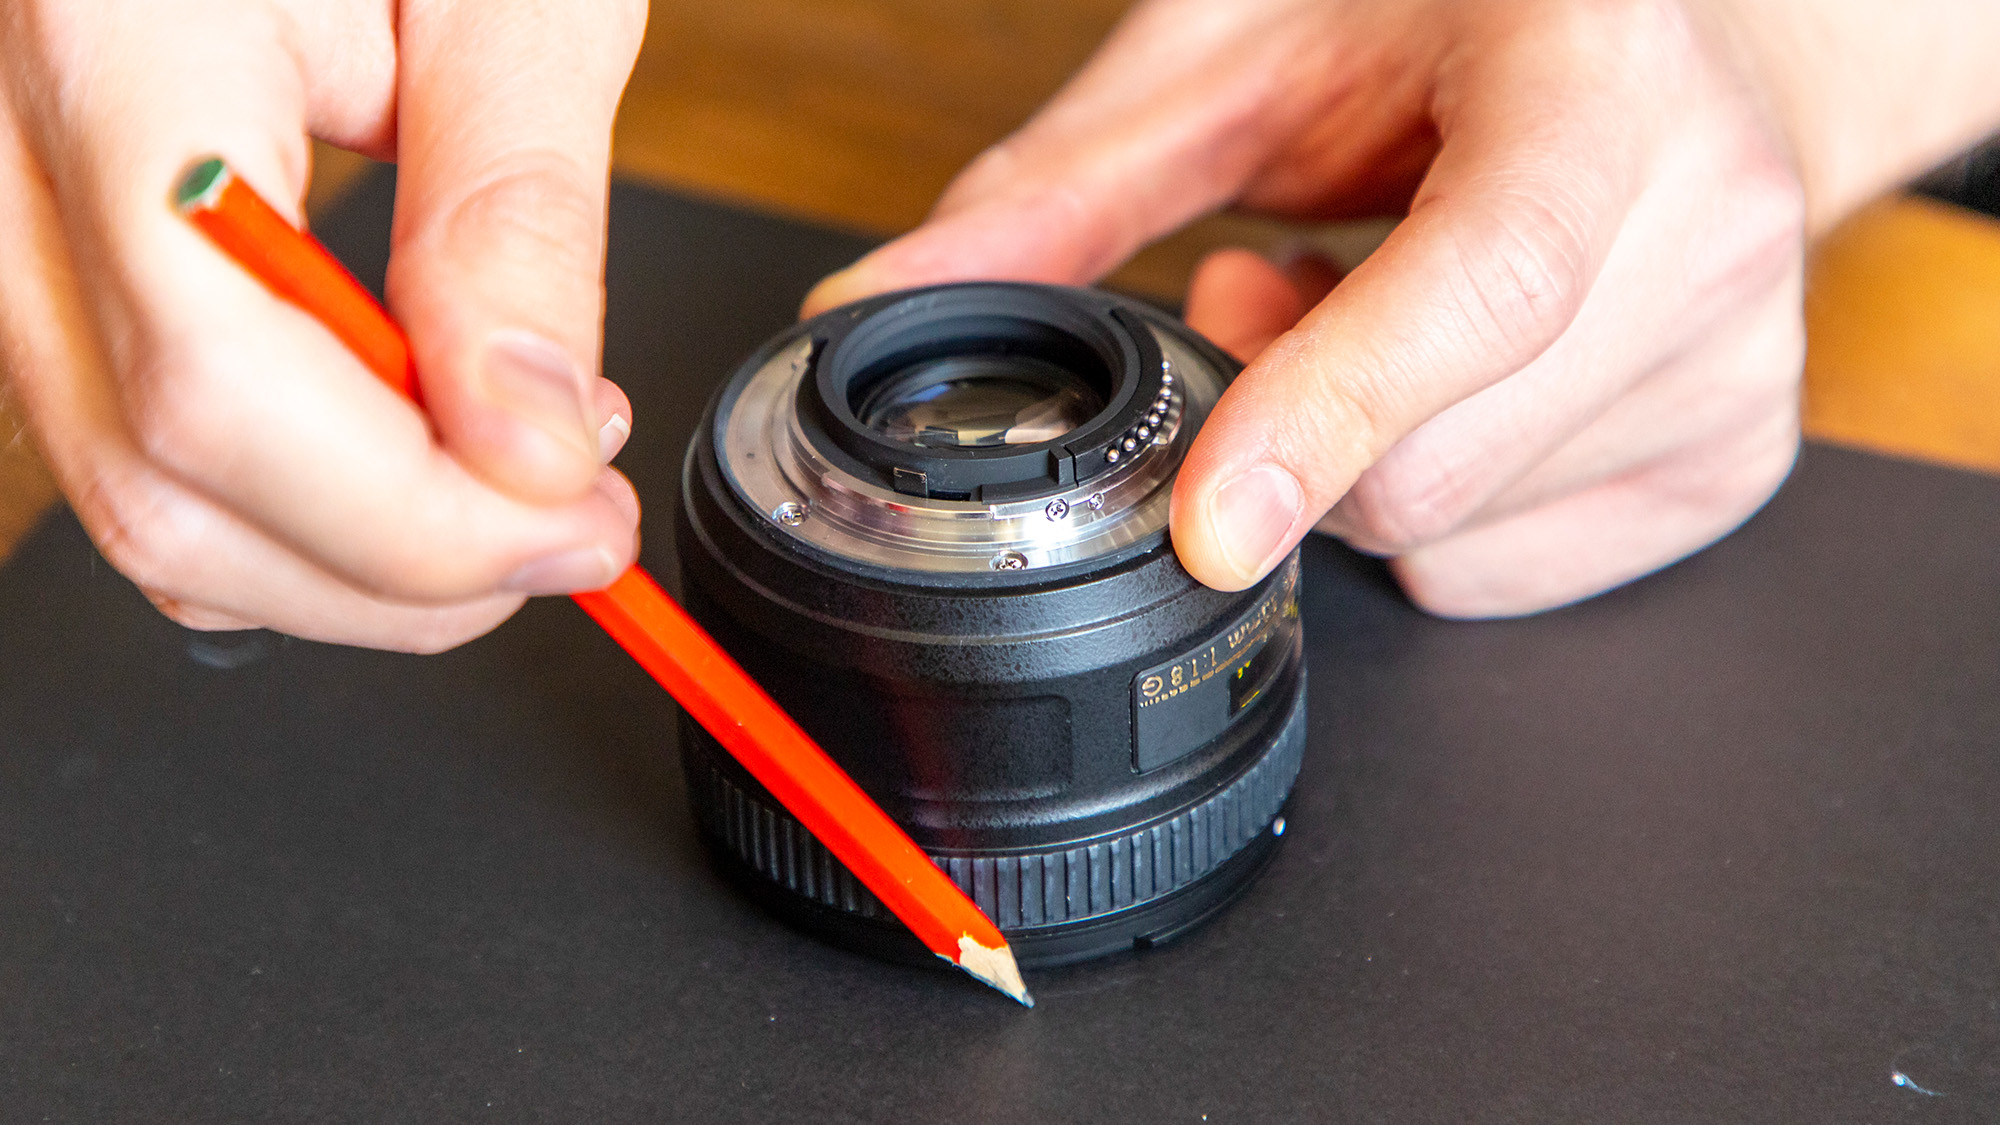
Rest your sheet of black card on a flat surface and place your lens in the middle (front element facing down). Hold your lens with one hand and with your other, use a pencil to draw around the circumference of the lens.
Use a tape measure or ruler to measure and draw a line across the diameter of the circle both vertically and horizontally. Draw your aperture where the two lines meet – you can experiment with different shapes and even short words. My heart measured roughly 1.5x2cm, but you may need to experiment with other sizes depending on the lens and shape you’re using.
2. Cut your lens hood out!
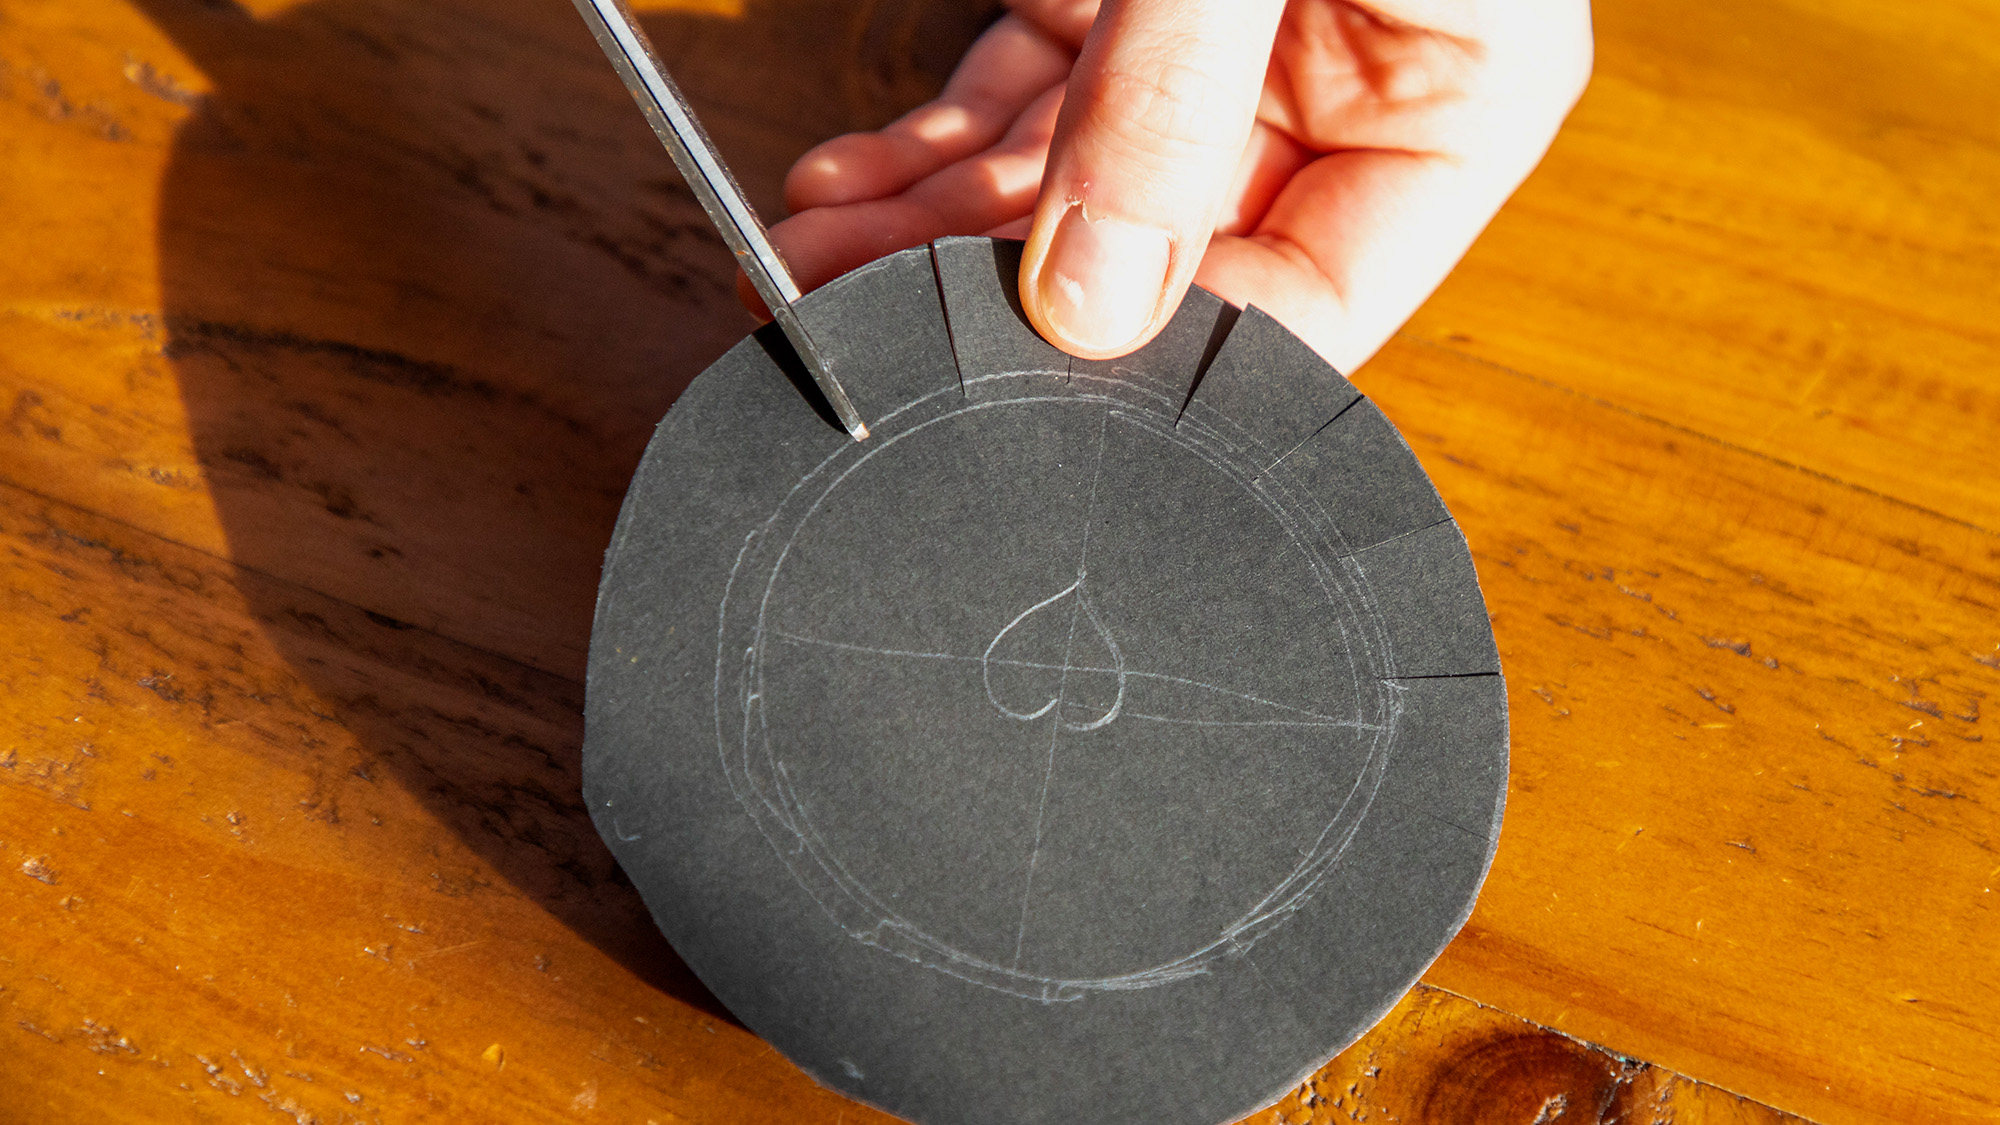
You now need to mark out the tabs that will neatly fold around your lens and secure your aperture disc in place. Pencil in multiple marks (roughly 2cm long) as per my example and use them as a guide in which to draw the outer circle. Cut around the outer circle with your scissors and then carefully cut along the 2cm tab marks.
Use your excess card to draw a 5cm wide band that’s long enough to wrap around the circumference of your aperture disc. This will eventually be stuck to the tabs you’ve just created to form a cylinder cap that will help your disc sit snugly over your lens.
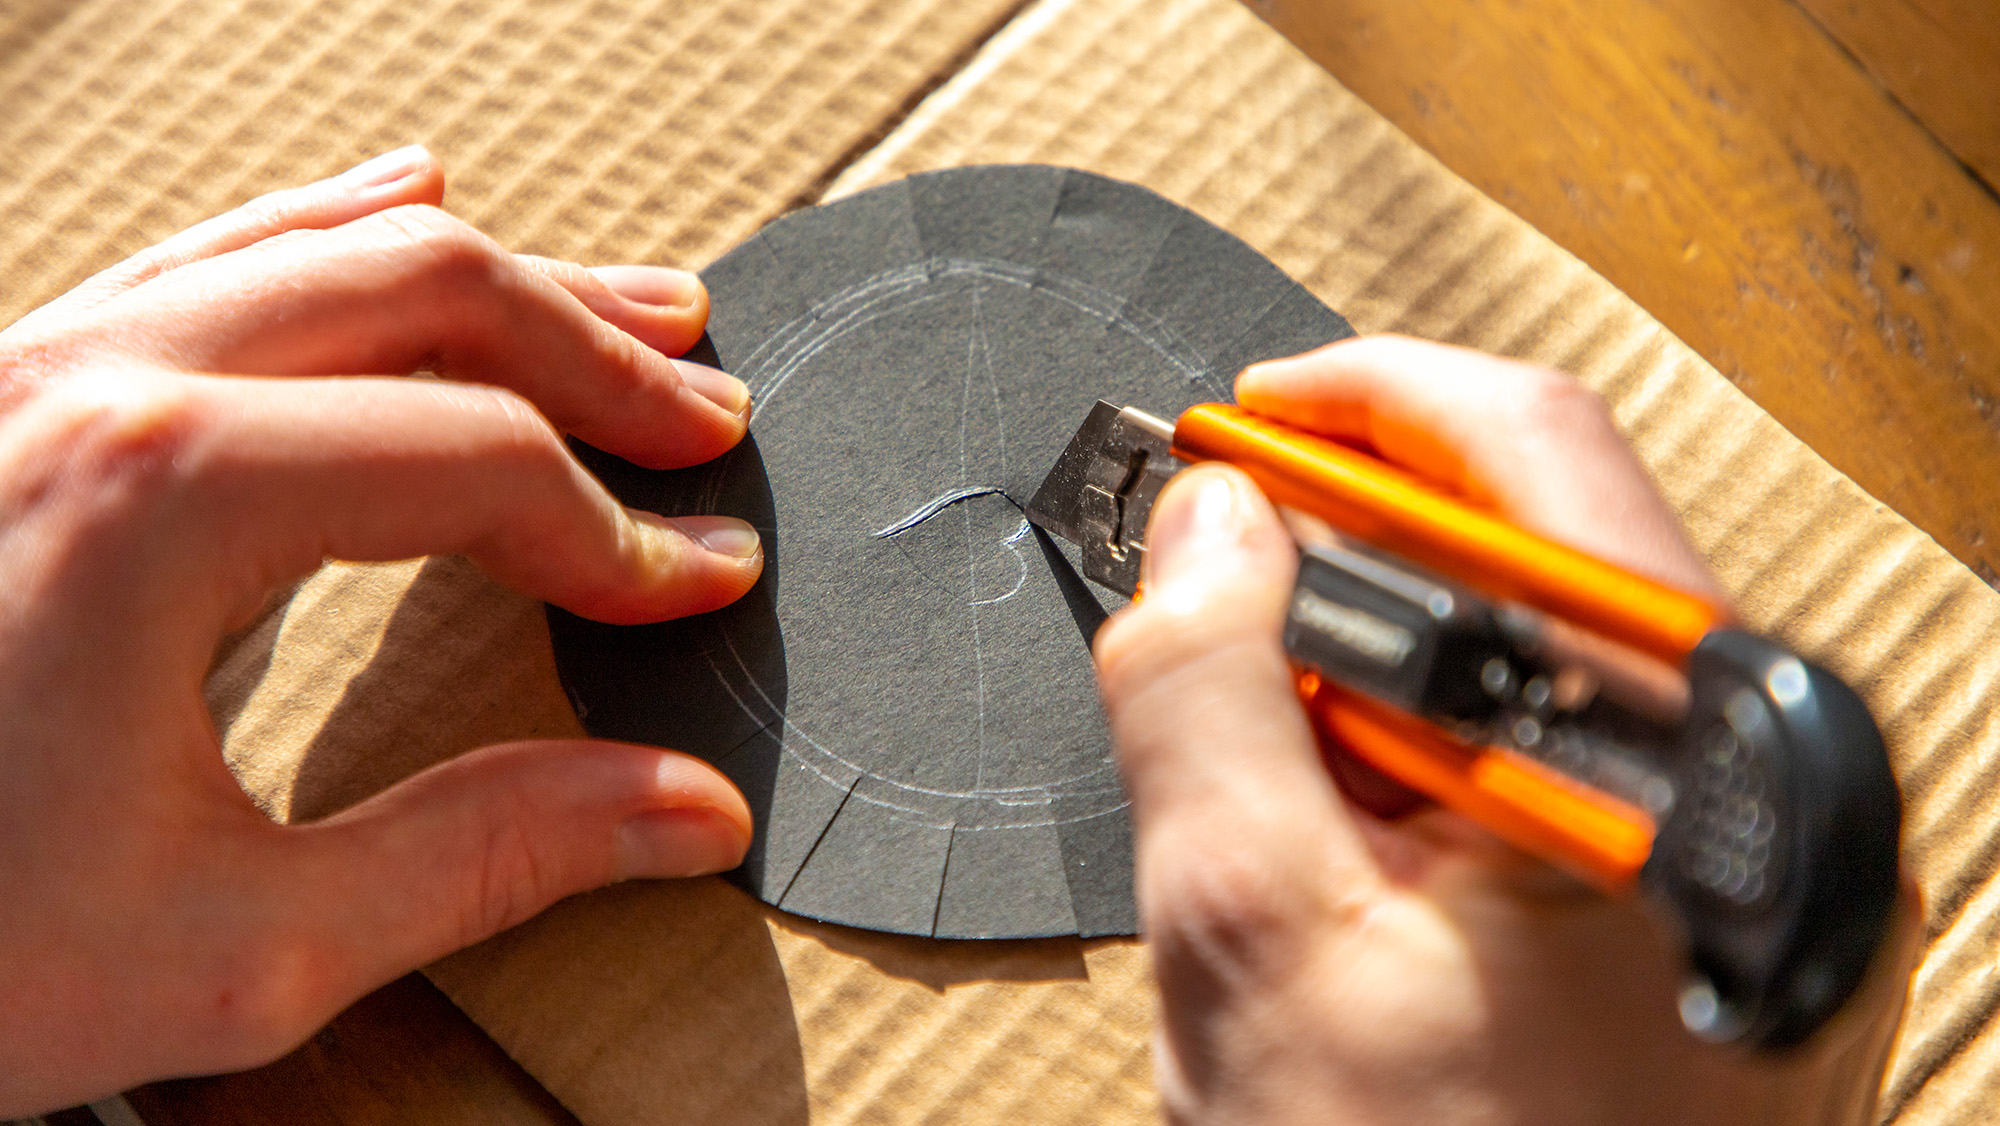
3. Carefully cut around the heart-shaped aperture
Carefully cut out your aperture shape using a sharp craft knife to form crisp lines – make sure you use a cutting mat and take proper care when handling sharp implements.
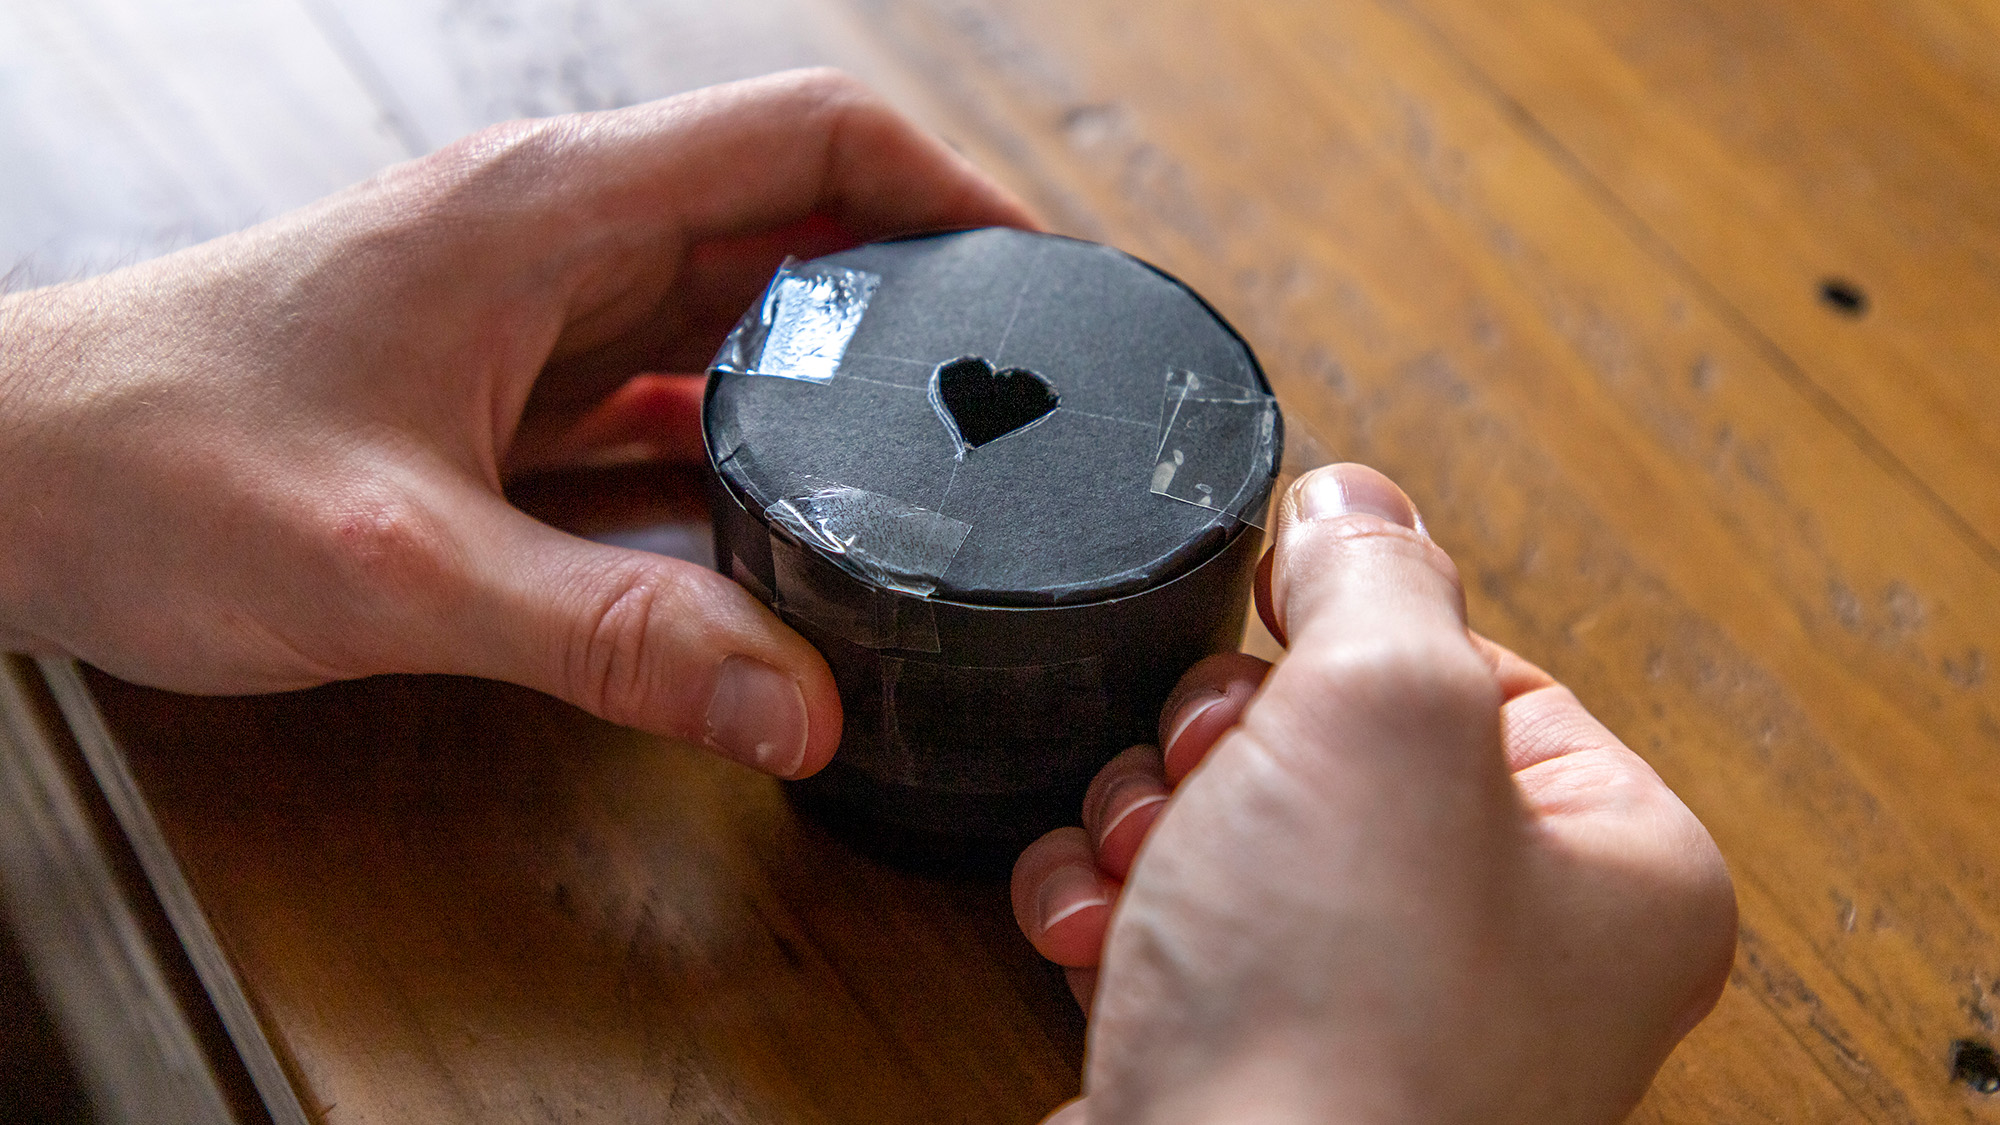
4. Construct your DIY lens hood
Wrap the 5cm band of paper around your lens so the edge of the band sits near the edge of the front element, without overhanging. The band should be wrapped around the lens tight enough so it doesn’t slip, but not so tight you’ll have difficulty sliding it on and off. Once satisfied, secure it in place with a piece of tape and place the aperture disc over the front element. Fold each tab down and tape them flush against the black band (no tape should touch the lens itself).
The makeshift cap should fit snugly over your lens and the aperture shape should sit perfectly over the center of the front element. If you’re concerned about scratching your optic during assembly, use a cheap UV filter to protect it.
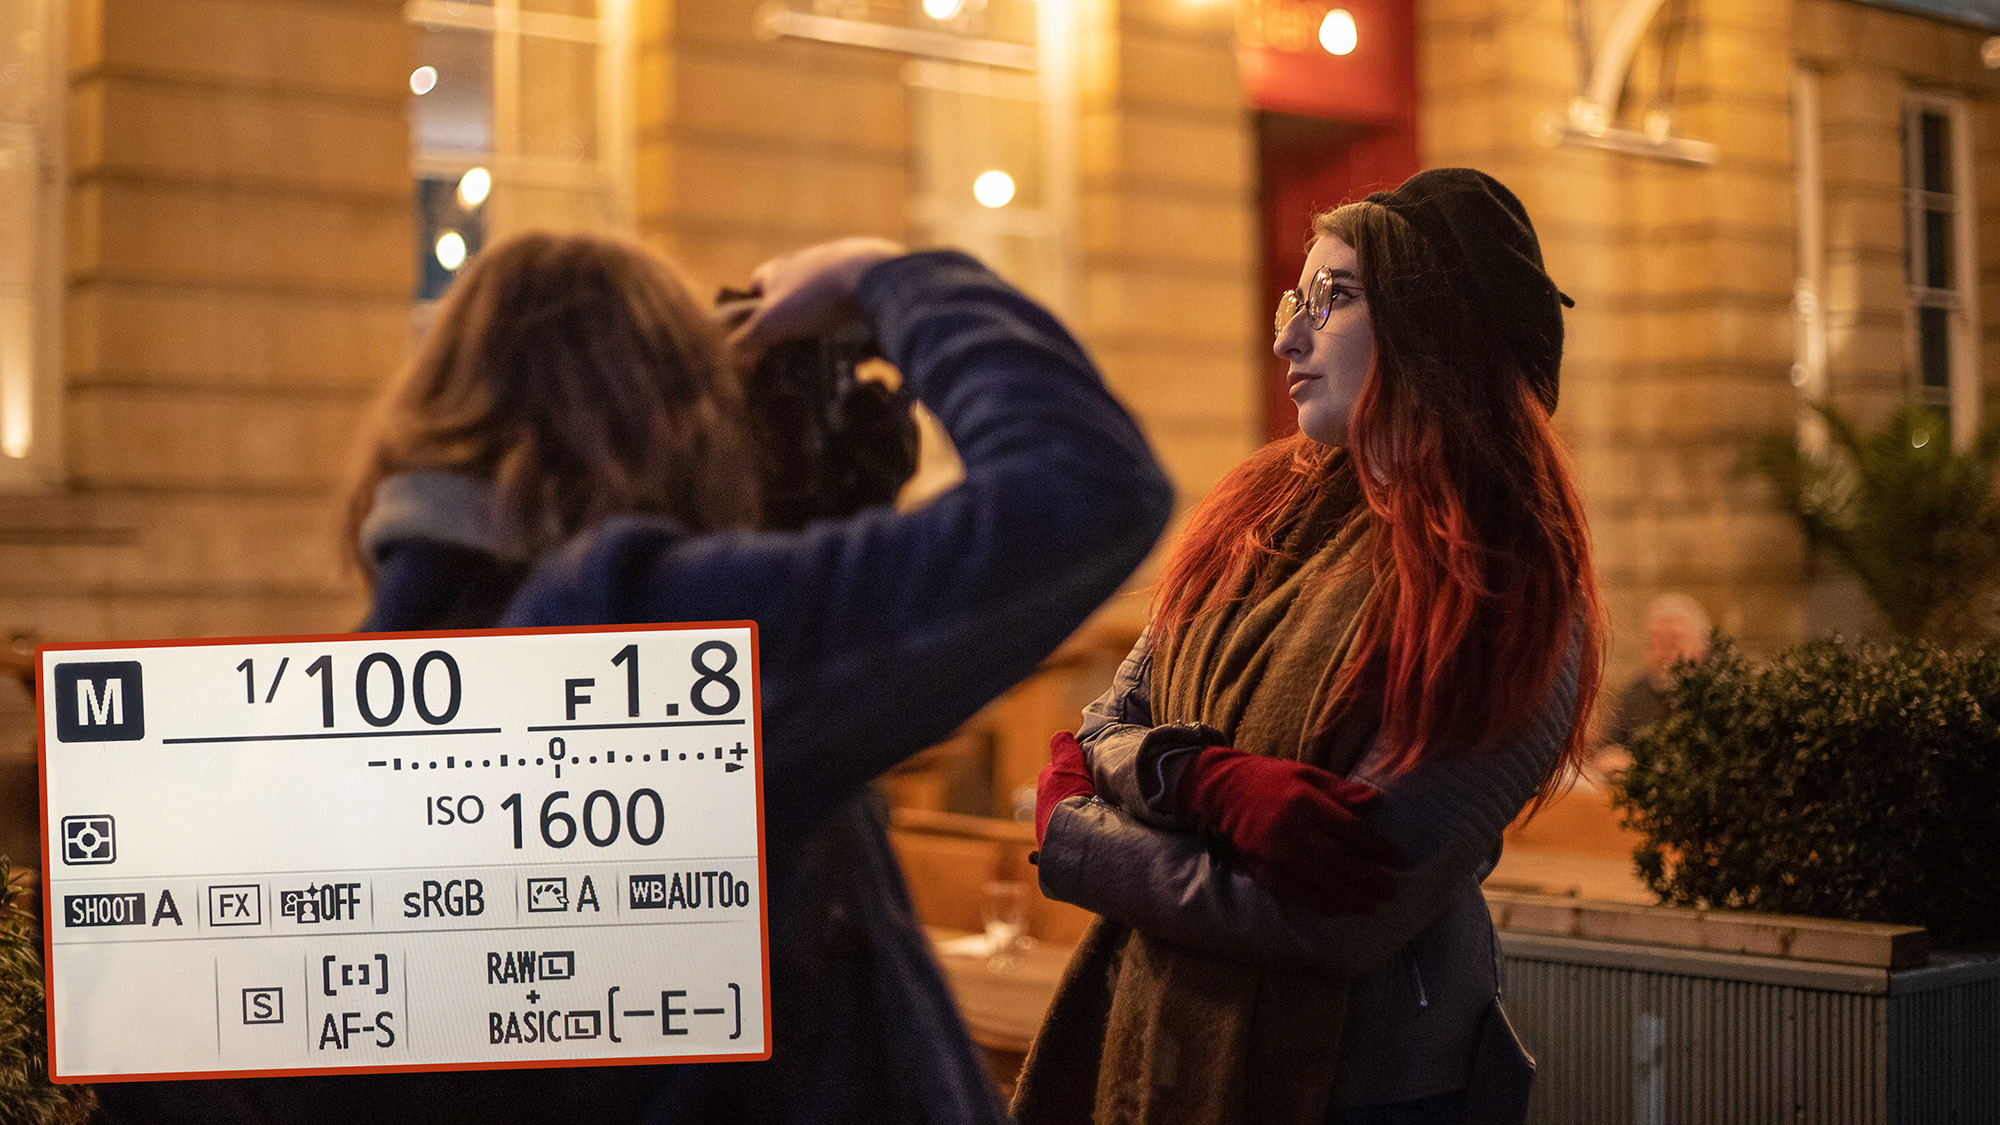
5. Capture your heart-shaped bokeh!
Switch to Aperture Priority mode and dial in the widest aperture. This will make it easier to blur your background and create lots of bokeh. You can increase the size of the bokeh by increasing the distance between your subject and the light source. An easy way to do this is by moving the camera closer to the subject.
Attach your DIY aperture disc and set your exposure accordingly. I shot handheld and wasn’t afraid to push the ISO to reach a shutter speed of 1/100 sec (to eliminate camera shake). I used single-point AF and placed the AF point in the middle of the frame, using it to focus on the model’s closest eye to the camera.
Experiment with different angles and have fun with shaped bokeh.
You may also like
Want more Valentine's Day content? I’m trying to forget my ex this Valentine’s Day, but my iPhone’s Photos app isn’t helping! Here's a quick fix. Want to forget Valentine's Day altogether? iPad has backed Apple into a corner and I don’t know how it’s going to wriggle out. Perhaps you'd like to learn more portrait techniques – here are 14 tips for getting your best ever people shots.
Get the Digital Camera World Newsletter
The best camera deals, reviews, product advice, and unmissable photography news, direct to your inbox!

Mike is Digital Camera World's How To Editor. He has over a decade of experience, writing for some of the biggest specialist publications including Digital Camera, Digital Photographer and PhotoPlus: The Canon Magazine. Prior to DCW, Mike was Deputy Editor of N-Photo: The Nikon Magazine and Production Editor at Wex Photo Video, where he sharpened his skills in both the stills and videography spheres. While he's an avid motorsport photographer, his skills extend to every genre of photography – making him one of Digital Camera World's top tutors for techniques on cameras, lenses, tripods, filters and other imaging equipment – as well as sharing his expertise on shooting everything from portraits and landscapes to abstracts and architecture to wildlife and, yes, fast things going around race tracks...
You must confirm your public display name before commenting
Please logout and then login again, you will then be prompted to enter your display name.
