Digital Camera World Verdict
Adobe Premiere Elements is a great learning tool for novices, and it also has enough control to be of use to experienced videographers who want to perform tasks quickly.
Pros
- +
Low cost
- +
Easy to use
- +
Mac or Windows
Cons
- -
Not worth upgrading if you have Premiere Elements 2019
Why you can trust Digital Camera World
Premiere Elements 2020 is Adobe's latest low-cost video editor. Unlike its big brother Premiere Pro, you buy this software outright - and can be bought on its own, or in a twin-pack with Adobe Photoshop Elements 2020 image editing software.
Like Photoshop Elements, Adobe Premiere Elements 2020 is divided into three sections called Quick, Guided and Expert. However, the Quick section is genuinely useful even to more experienced video creators because it enables the user to join video clips and add transitions in next to no time.
The first step in this process is to select the ‘Combine photos and videos to create a single movie’ option. Then you’re guided through selecting the video clips you want from your file navigation structure or the Organizer. With that done, tapping ‘Import’ pulls in all the clips to a timeline. Premiere Elements will then automatically add a cross-dissolve transition between each one, but you can also click on them in the timeline if you want to change their style.
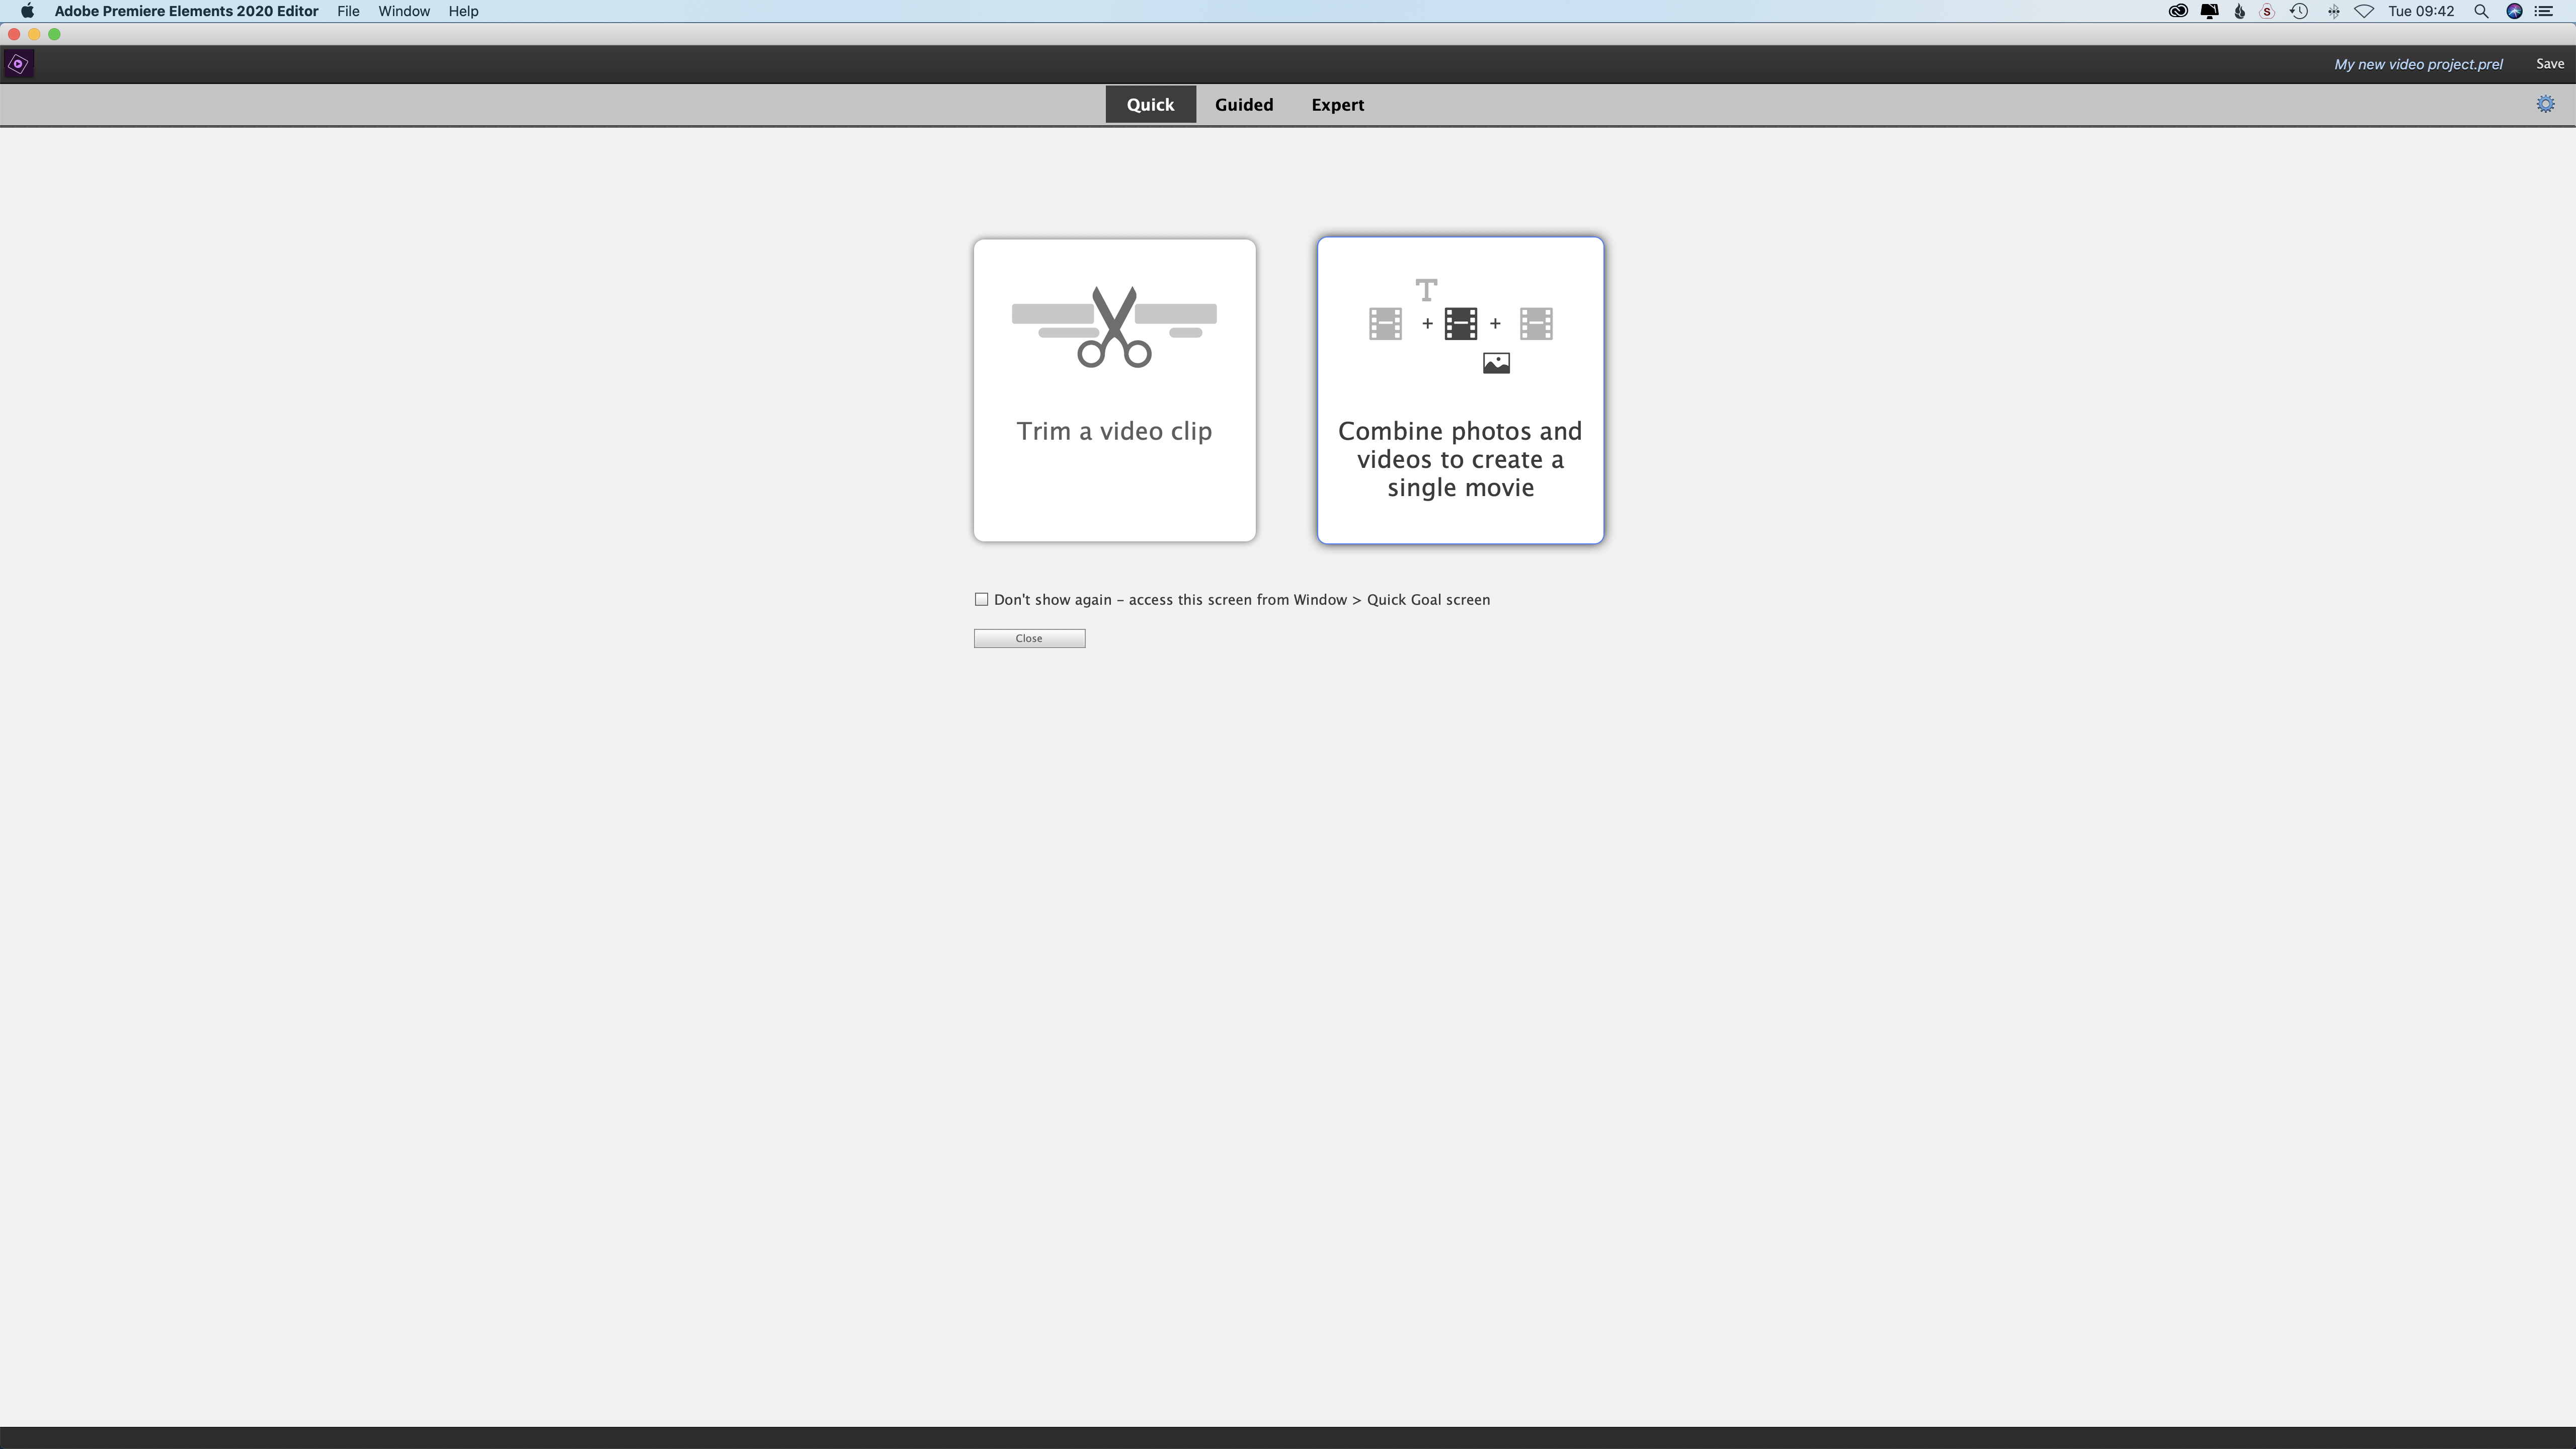
There are also a few simple controls available. For example, you can add text or tap the scissor icon to use the Smart Trim or Time Stretch controls. Smart Trim employs Adobe’s Sensei technology to locate the best sections of your clips and trim around them. You can change the selections if you want, but it’s a good starting point. If necessary, you can add more clips, adjust the volume of the sound and even add music from the library. When you’ve finished, tapping Render outputs your video. It’s a great way to make your first video or create a really quick movie for social media.
Where Premiere Elements differs from Photoshop Elements is that even if you elect to work in Guided mode, the edits are actually made in the Expert area. In addition to the Guided edits that are present in Premiere Elements 2019, the 2020 version adds several new options: ‘Fill Frame’, which fills the blank areas either side of the video shot in upright format; ‘Animate Sky’, to add a moving sky to a still image; and ‘Create Time-lapse video’.
The logical place to start in Guided Edit mode is with ‘Get started’. However, if you jump the gun and opt for something else such as ‘Trim and split clips’ or ‘Add transitions between clips’, the software tells you to add some media first.
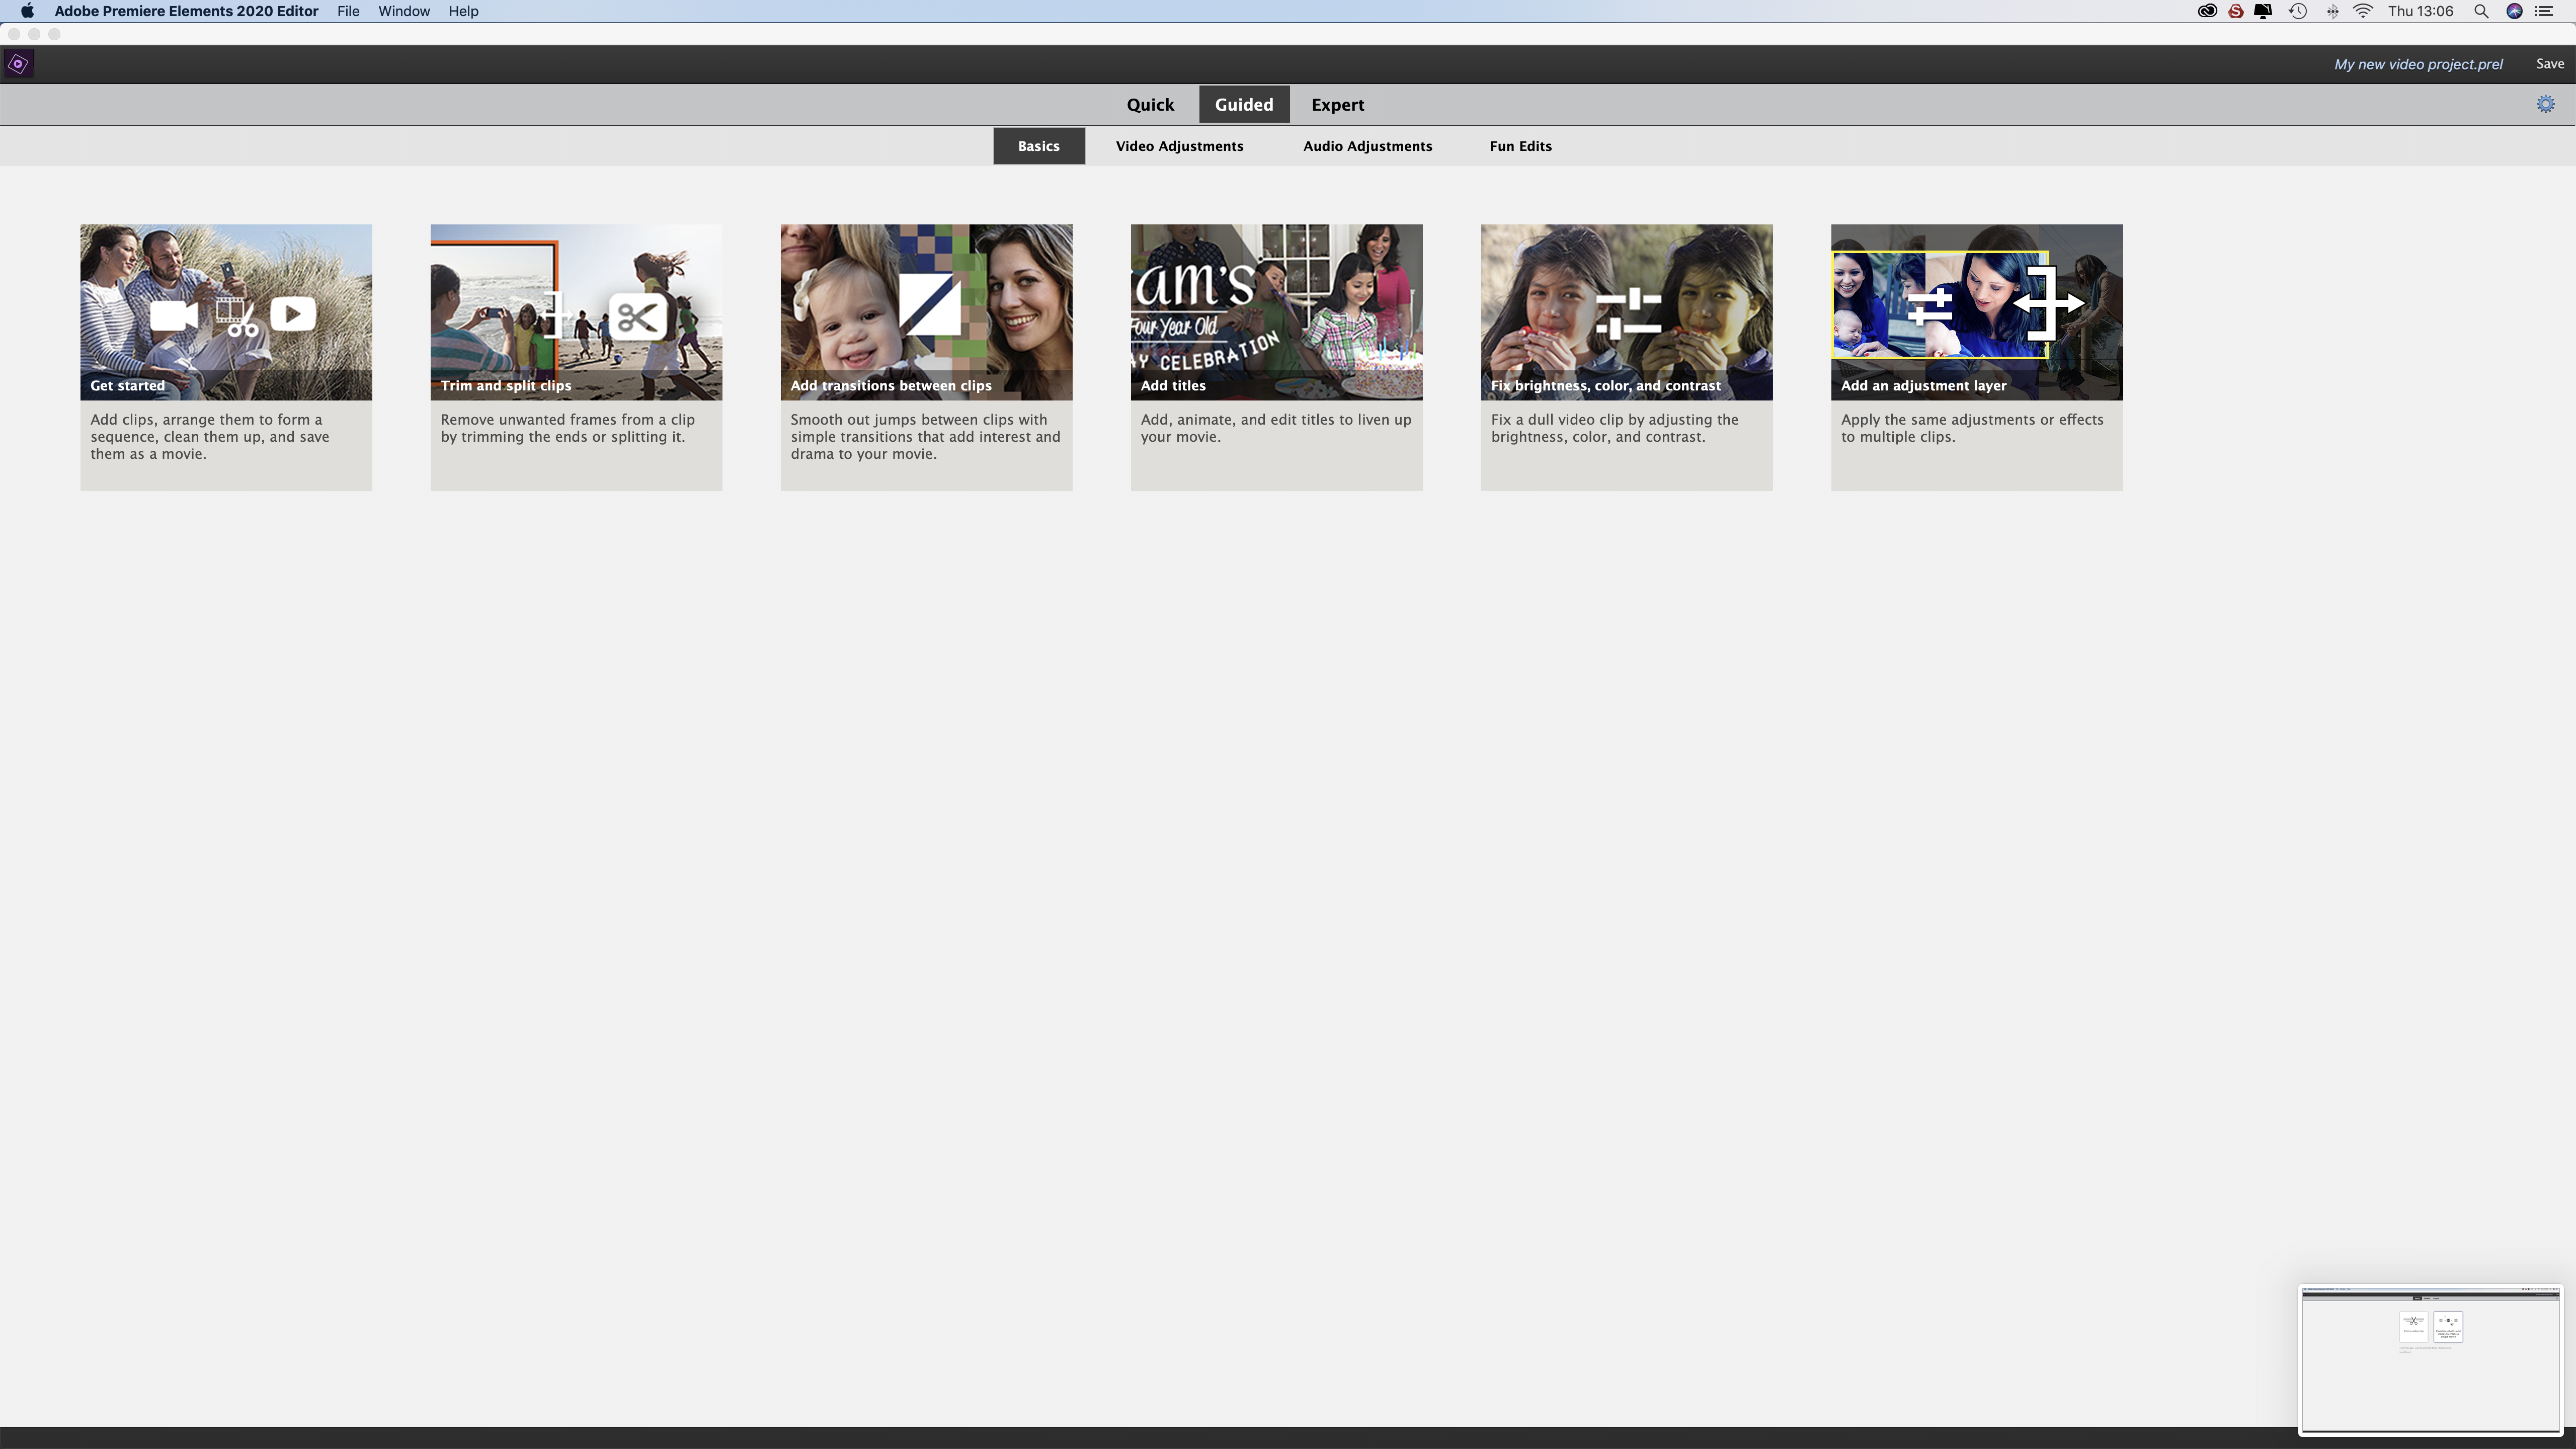
Once you’ve selected the task you want to perform in the Guided edit area, a dialogue box appears to explain what you need to do, and a teal arrow highlights the control you need to select. As you follow the instructions, the explanation moves on. The Guided edits just walk you through all the steps that you need to take. This approach makes it really easy to learn how to edit videos from scratch in Expert mode.
Helpfully, even if you go straight to the Expert area, Premiere Elements gives you some guidance. For example, there’s a box that prompts you to add media, use a template to create a movie, use titles or learn about video editing. The last option takes you straight to the Guided Edits area.
Opting for ‘Create a template-based movie’ lets you choose whether to create a video story, an instant movie or a video collage of clips and stills. When you’ve decided what you want to do, the software downloads any title styles or templates that are needed.
The templates make it easy to join video clips with interesting transitions and music, but the end results look a bit dated. You can export your creation for further editing in the timeline, but it’s easier to use the Guided edits to start from scratch.
One of the great things about Premiere Elements is that you can constantly switch between the Guided and Expert modes. That means if you want to do something new, or if you forget how to do something while you’re in the Expert area, you can hop back to the Guided section to find the relevant guide and then click to follow the step-by-step wizard to find the solution.
There’s a Guided edit that takes you through the process of changing the playback speed of your videos, but once you’ve done it a couple of times it’s easy to do in the Expert area.
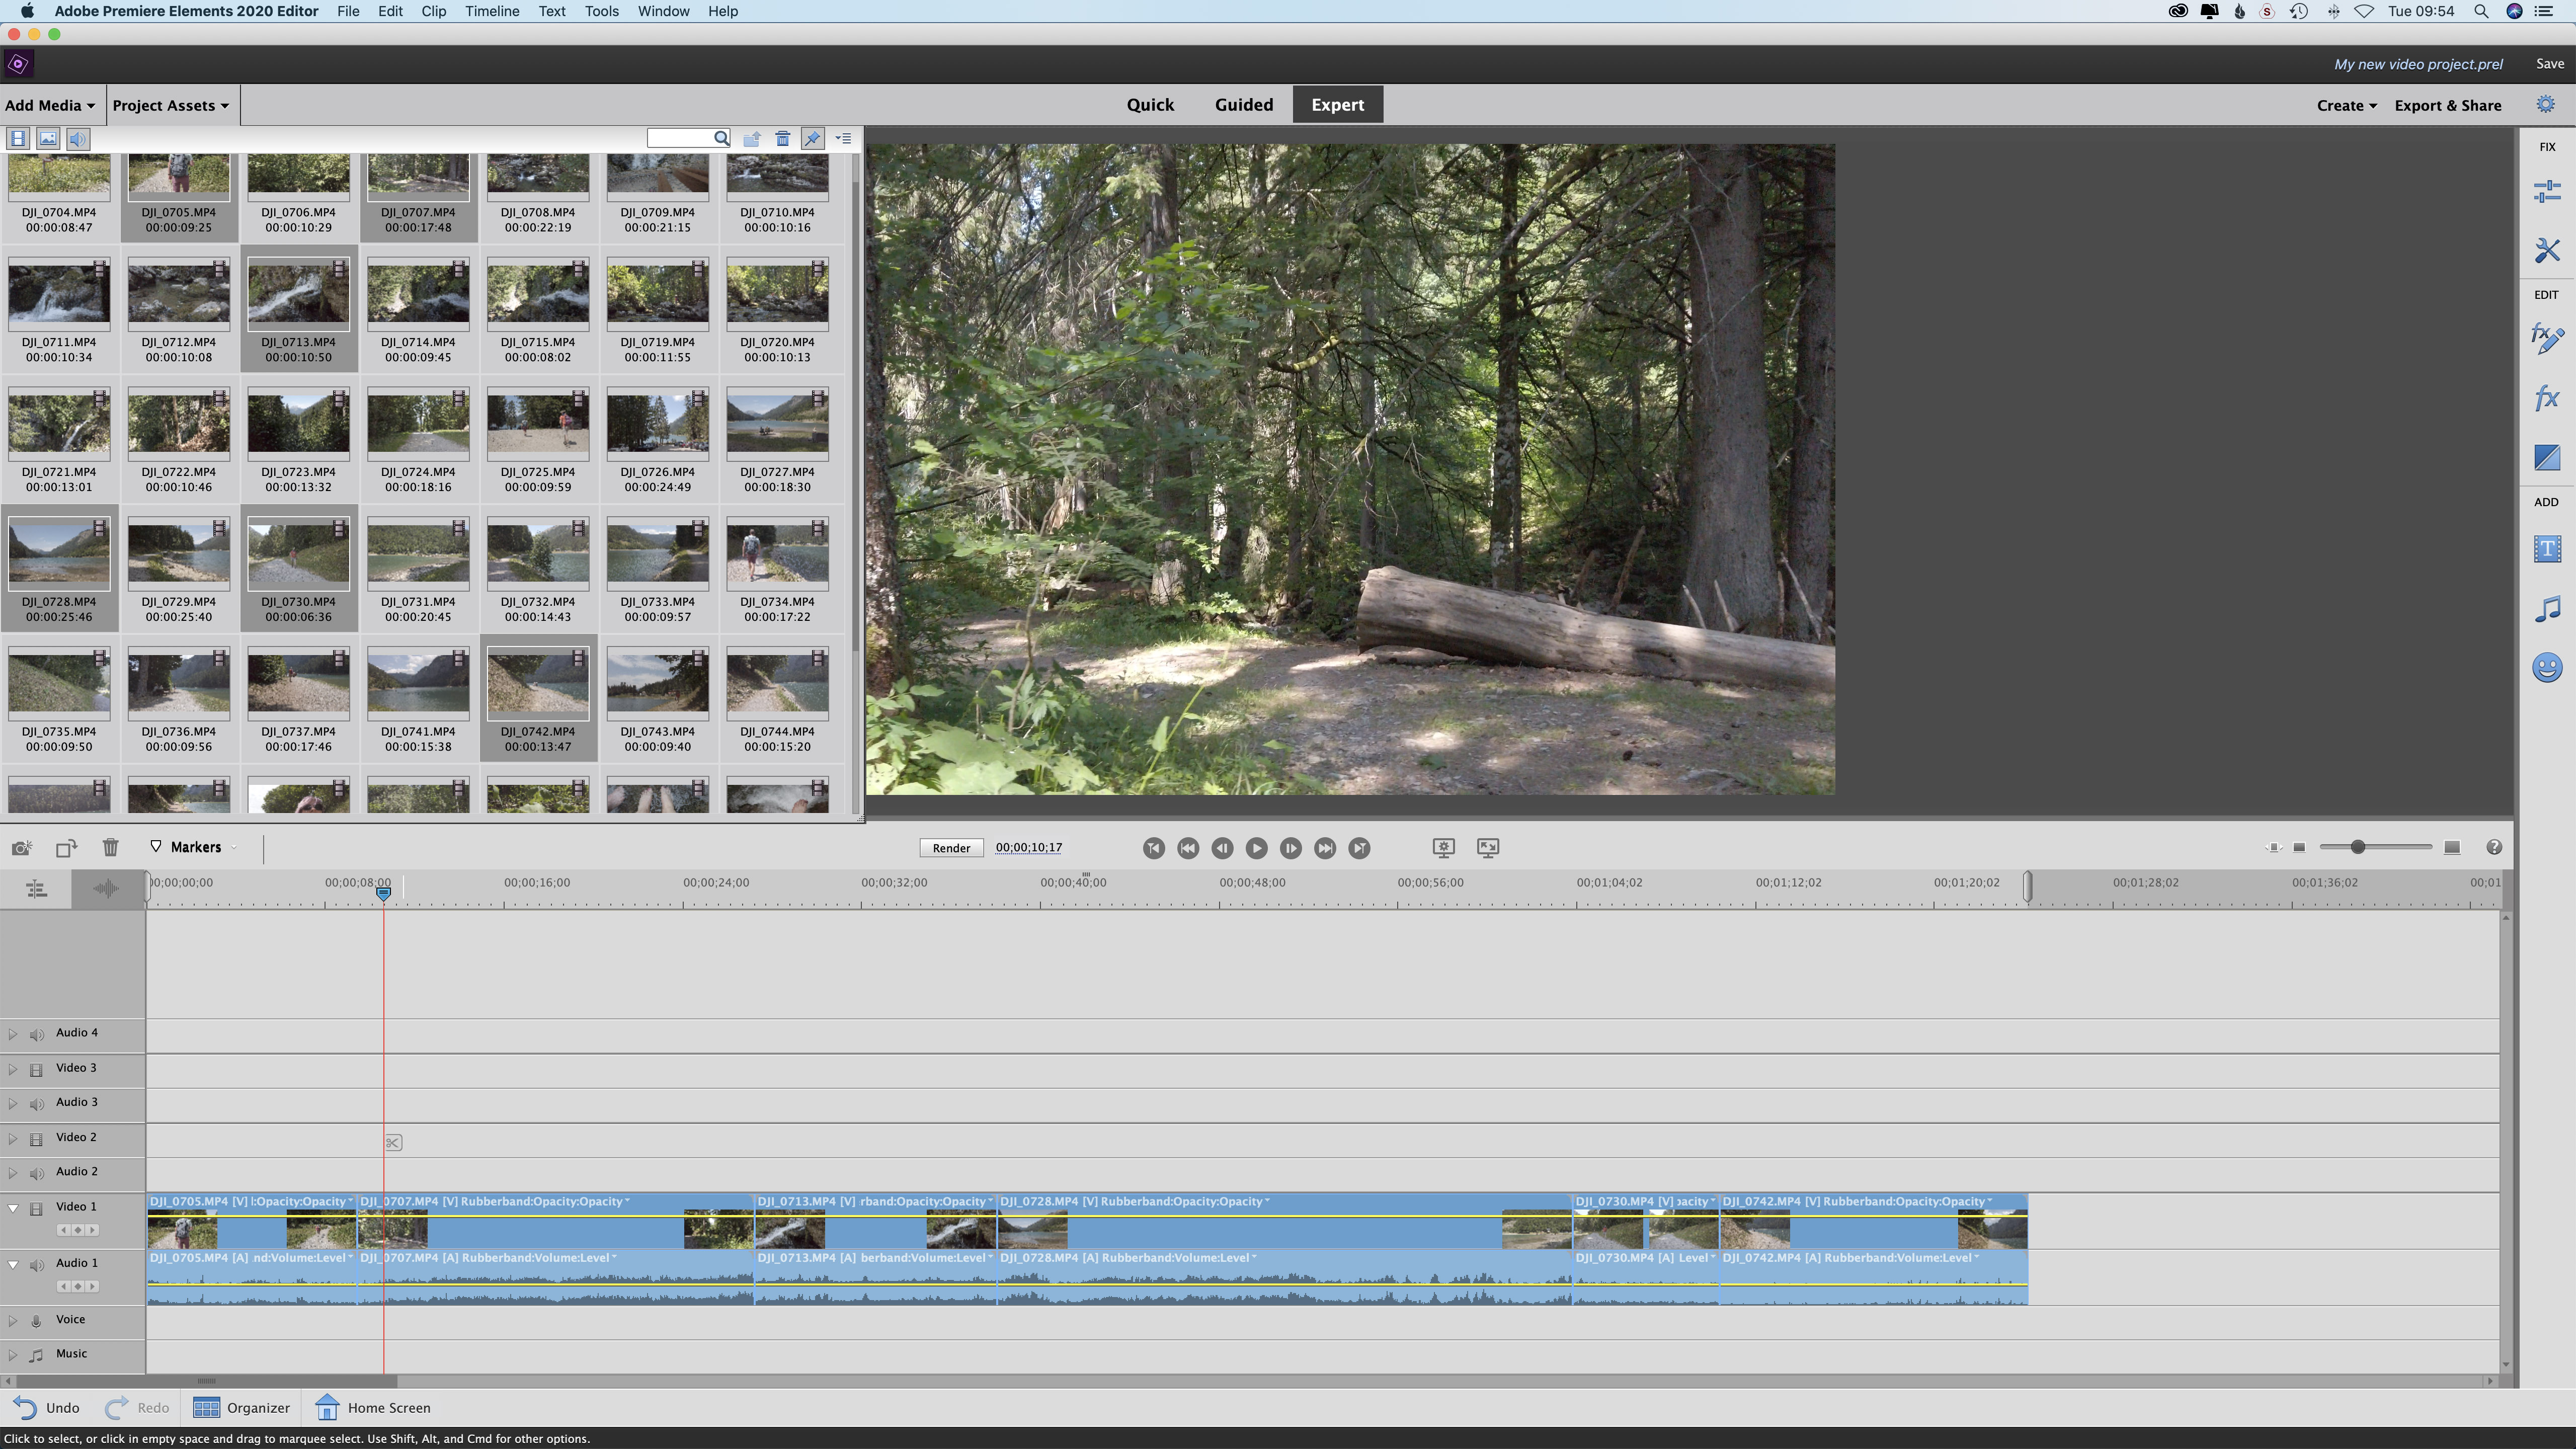
After selecting the clip in the timeline that you want to adjust, click on ‘Time Remapping’ in the Tools section of the Fix column on the right of the screen. Next, you just move the playhead to the point where you want the change to start, and select the area you’re interested in. You can then select the speed change that you want to make and decide if you want it to play forwards or in reverse. Although you can’t control the speed of the transition, ticking the ‘Easing In’ and ‘Easing Out’ boxes makes it smooth.
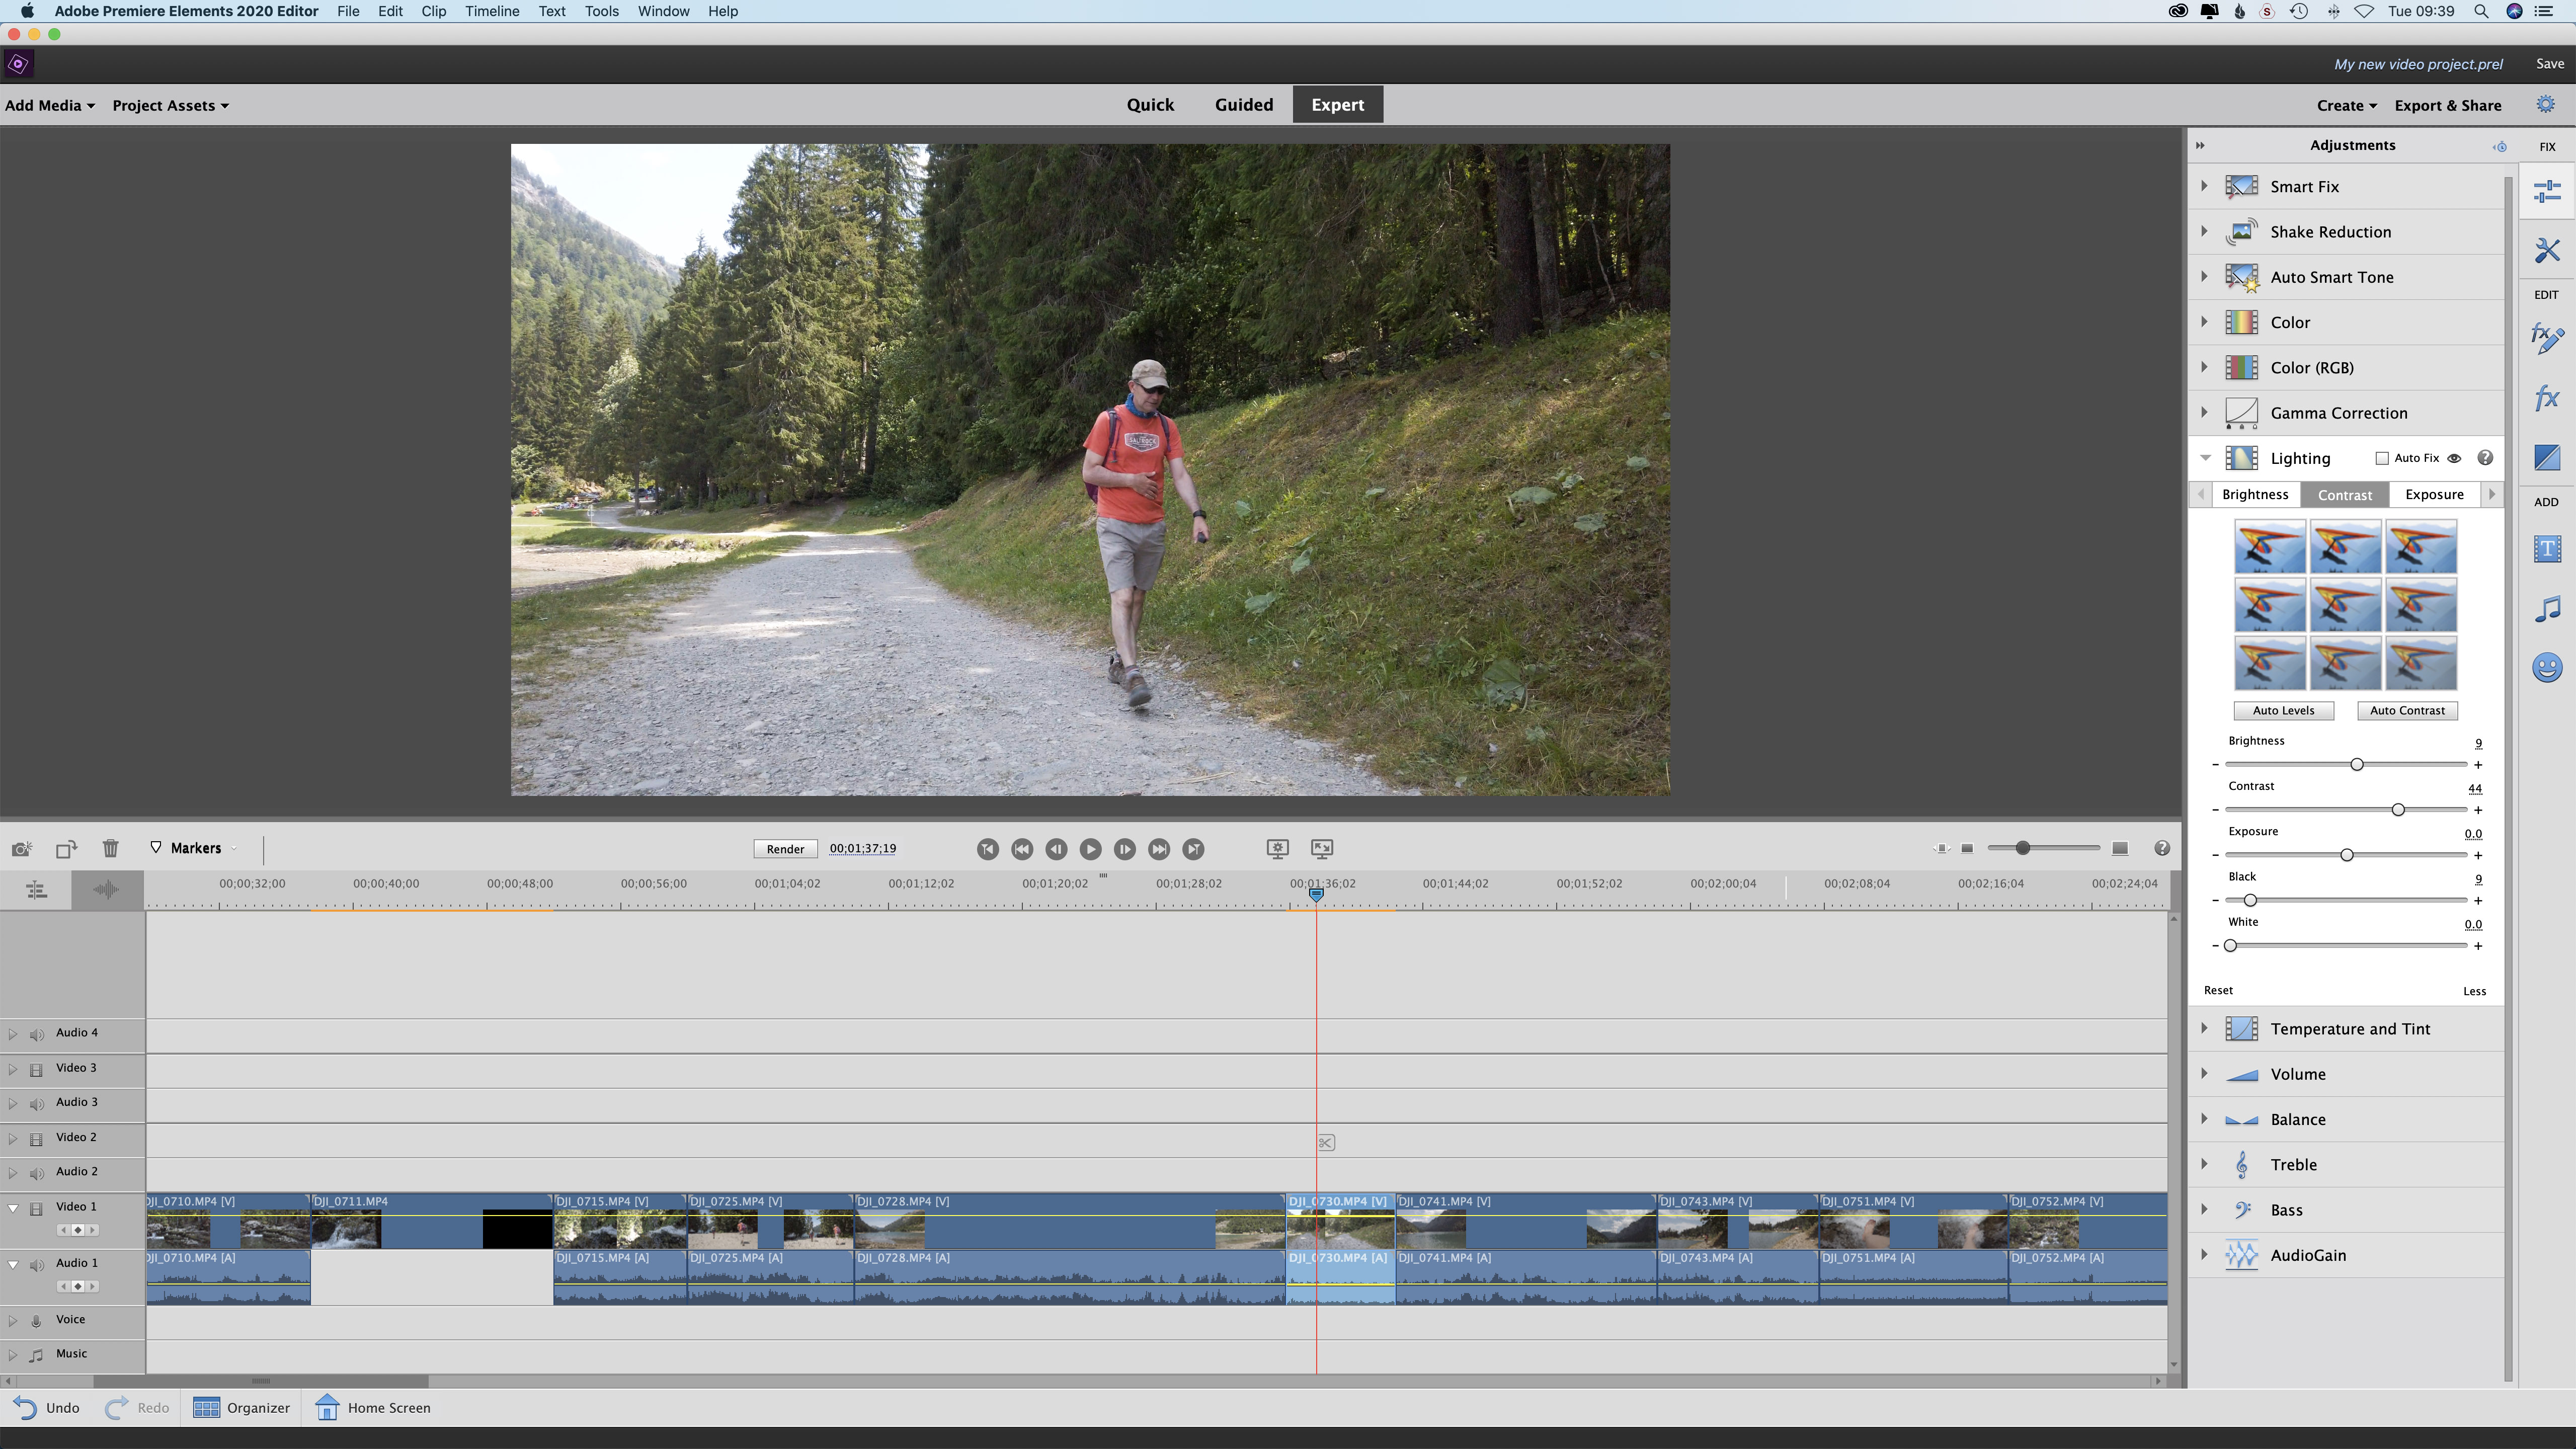
Premiere Elements doesn’t just help you edit clips together and add transitions or music – you can fix brightness, color and contrast issues and even apply an adjustment layer if you want to apply the same adjustments or effects to several clips. There are clickable thumbnails to make quick adjustments to your footage, while the sliding controls offer a bit more finesse.
Further good news is that there are three video and audio channels in Premiere Elements, which makes it easier to create complex edits using different camera angles. For example, you can use the video from one camera and the audio from another and then switch to using audio and video from a third camera or alternative angle.
Verdict
Adobe Premiere Elements is a great learning tool for novices, and it also has enough control to be of use to experienced videographers who want to perform tasks quickly.
Read more
The best video editing software for vloggers and filmmakers
The best laptop for video editing
Best monitors for photographers in 2019
The best photo-editing software you can buy
Angela has been testing camera gear from all the major manufacturers since January 2004 and has been Amateur Photographer’s Technical Editor and Head of Testing for Future Publishing’s photography portfolio (Digital Camera Magazine, PhotoPlus: The Canon Magazine, N-Photo, Practical Photoshop, Photography Week and Professional Photography magazines, as well as the Digital Camera World and TechRadar websites). She is the founder of SheClicks - a community group that encourages and supports female photographers.
