Digital Camera World Verdict
If you’re a professional photographer then time is money - and Aftershoot will certainly help you spend less time on finding the best shots in high-volume collections so you can get on with editing them in an app such as Lightroom Classic. Aftershoot is an easy app to get to grips with but you can delve more deeply into its toolset to refine the way it analyses and culls your images. Recommended!
Pros
- +
Speeds up photo culling
- +
Works well with Lightroom Classic
- +
Customizable culling tolerances
- +
Well-supported with tutorials and guides
- +
No web connection needed
Cons
- -
Sometimes selects portrait images with half-closed eyes
Why you can trust Digital Camera World
After a busy shoot such as a wedding you may have hundreds of photos to peruse to find the best shots to share with your client. This can be a tedious and time-consuming process, especially if you have multiple shots of a subject. At a wedding you’ll probably take multiple safety shots of various family groups to ensure that at least one snap will feature everyone smiling (and they’ll all have their eyes open too). Shoots such as weddings occur in a wide range of locations, so in a dark church (where flash photography is forbidden) you may have to use slower shutter speeds that can lead to shot-spoiling motion blur.
Aftershoot is an app that’s designed to analyze a large collection of photos (using machine learning) and weed out the shots where faces are blurred and eyes are closed. It can also search through a rapidly snapped series of similar shots and present you with the best version according to criteria such as composition and emotion (a shot featuring a smiling face for example).
Aftershoot offers a 30-day free trial, but will cost $119.88 if you commit to a year ($9.99) which works out best if you are doing regular big shoots, but if you want a more flexible arrangement you can opt to pay $14.99 a month (which will better suit those doing just the occasional wedding, say).
Video (above): See Aftershoot in-action in our mini video review
Hardware requirements
Mac
macOS Catalina or higher — Min. 4 core CPU and 8GB RAM,
Windows
Windows 8 or higher — Min. 4 core CPU and 8GB RAM
Key features
A welcome key feature with Aftershoot is that it performs its image-analyzing and culling operation directly from your PC. You don’t need to worry about the hassle (and extra time) of uploading your images to a cloud-based AI service. Aftershoot also has a Beta feature called Aftershoot Edits that does involve uploading your shots to the cloud so it can understand how you like to edit. It can then apply those color and tone tweaks to your best shots when they are exported from Aftershoot to Lightroom Classic (so the actual editing is automatically applied in Lightroom). However the main focus of this review is on using Aftershoot to cull unwanted photos and leave you with the best results.
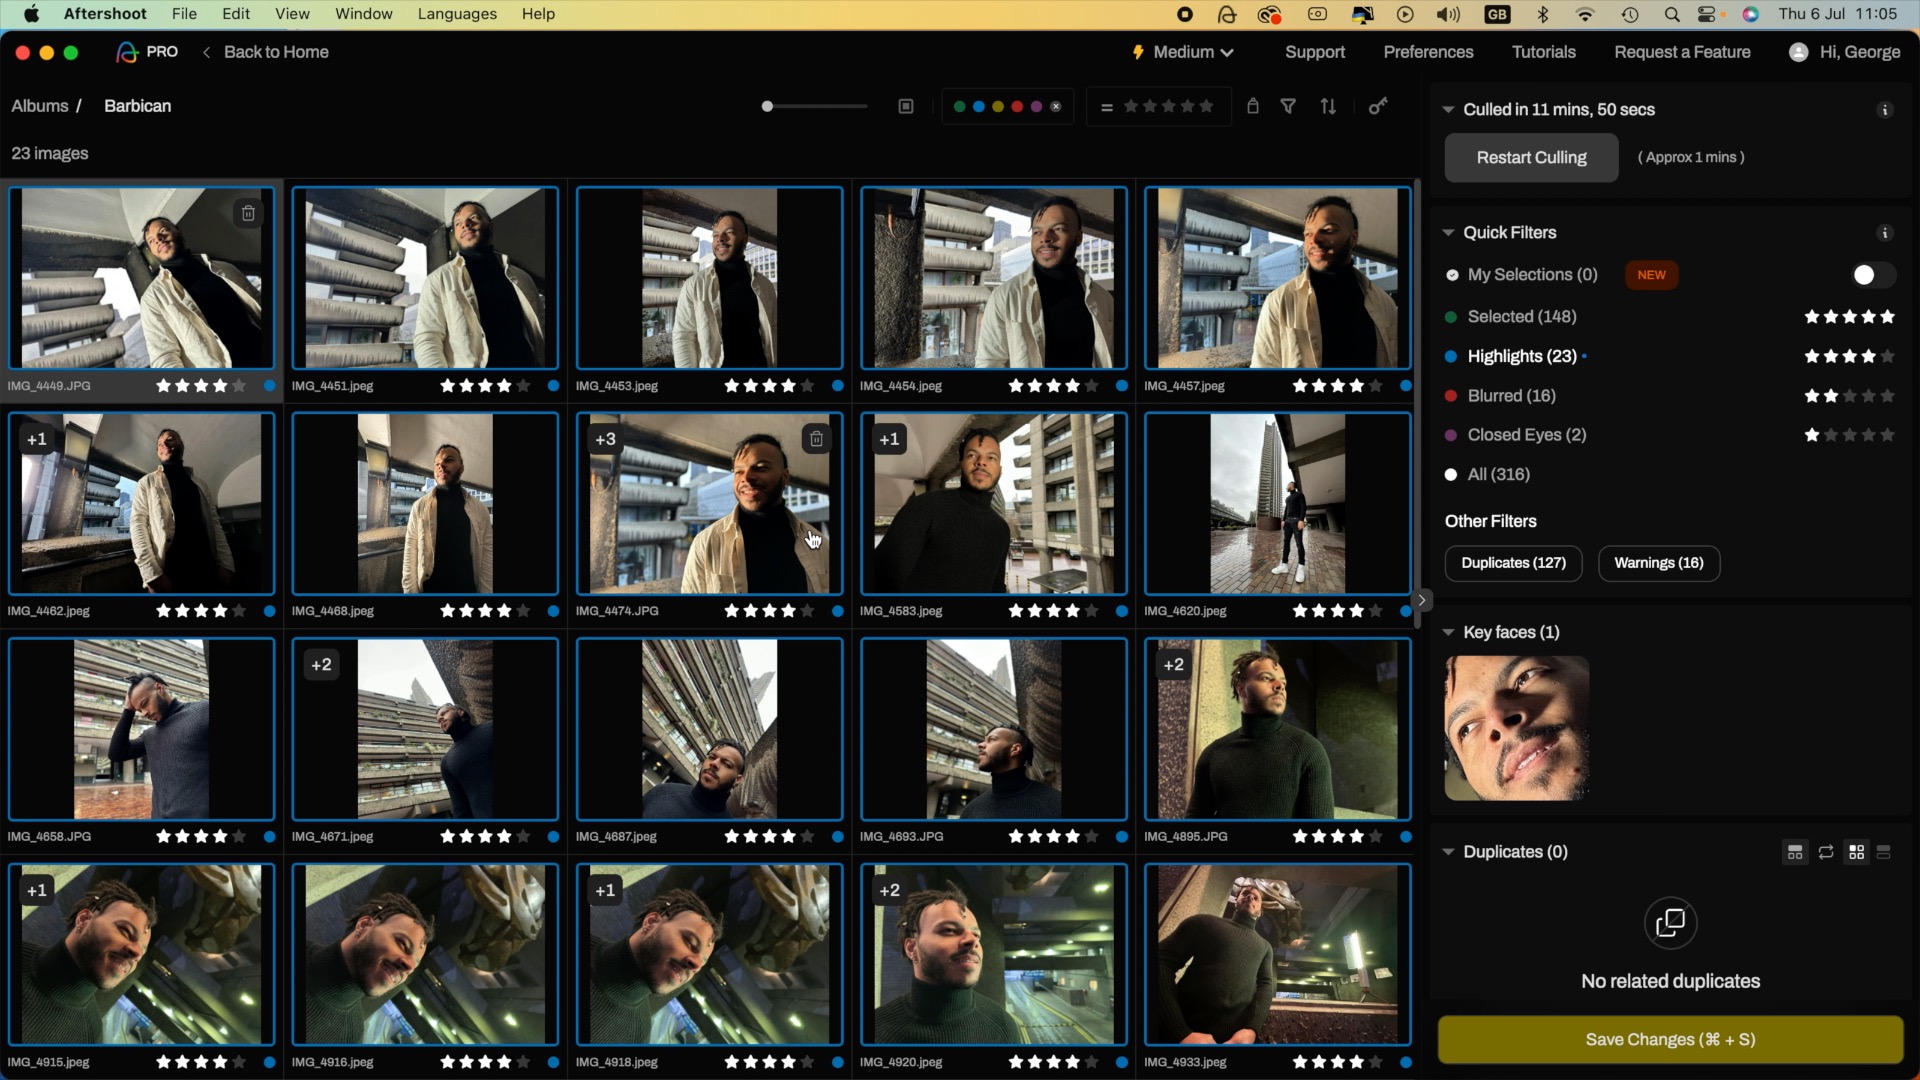
Aftershoot scans an existing folder of photos on your PC’s hard drive and then sorts the shots out into different groups using a range of filters. You can also use the app to ingest (import) shots from a memory card into a folder and create a back-up folder at the same time. After analyzing the shots it then groups them according to color-coded and star-rated filters such as Blurred, Closed Eyes, and Highlights. You can customize the way it creates duplicate sets by adjusting a tolerance preference. Check out our supporting video to see the Aftershoot workflow in action.
Interface and usability
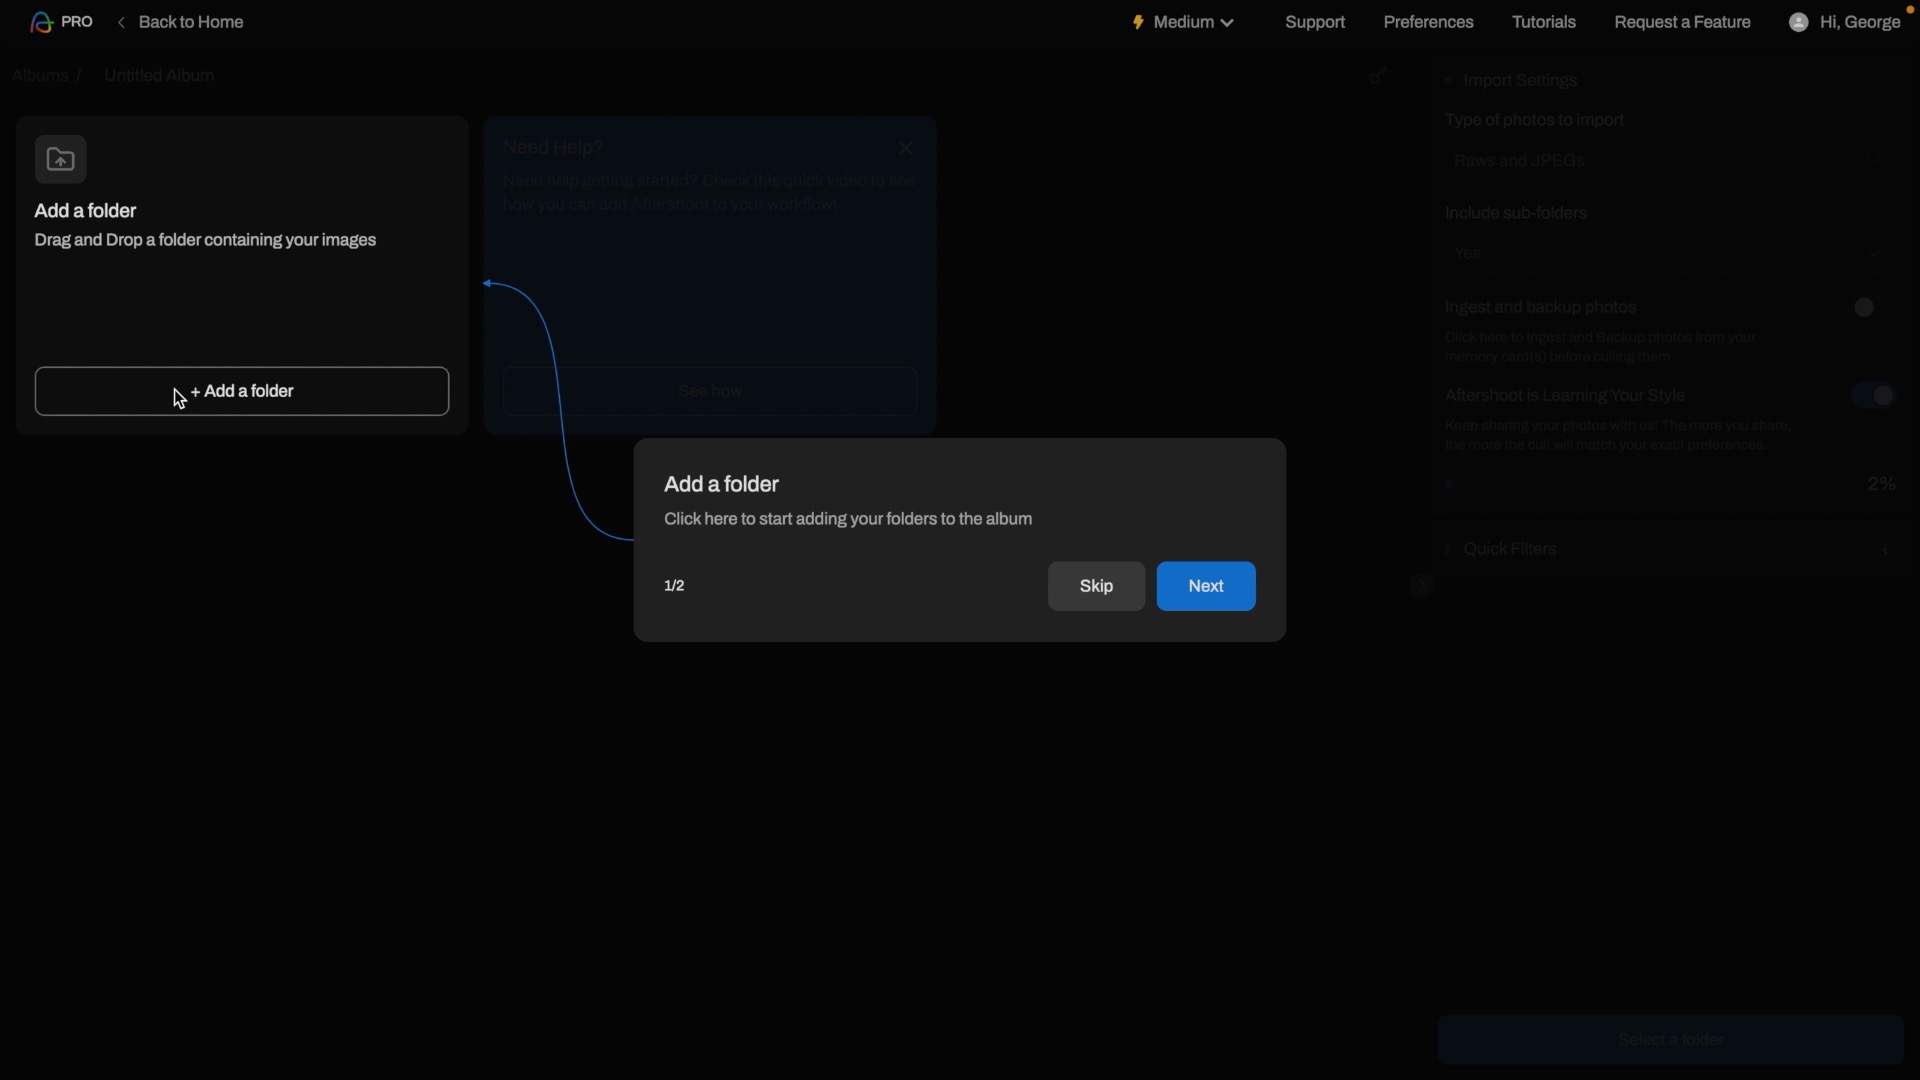
When you first open Aftershoot, pop-up labels helpfully talk you through the process of importing a folder of files for the app to analyse. Explanatory labels appear with blue arrows that indicate the relevant buttons to press to create a new album for Aftershoot to analyse. The predominantly black interface is slick and cleanly designed so your focus is never distracted from your photos. You can view shots as thumbnails in the Grid view or double-click to take a closer look in the Loupe view.
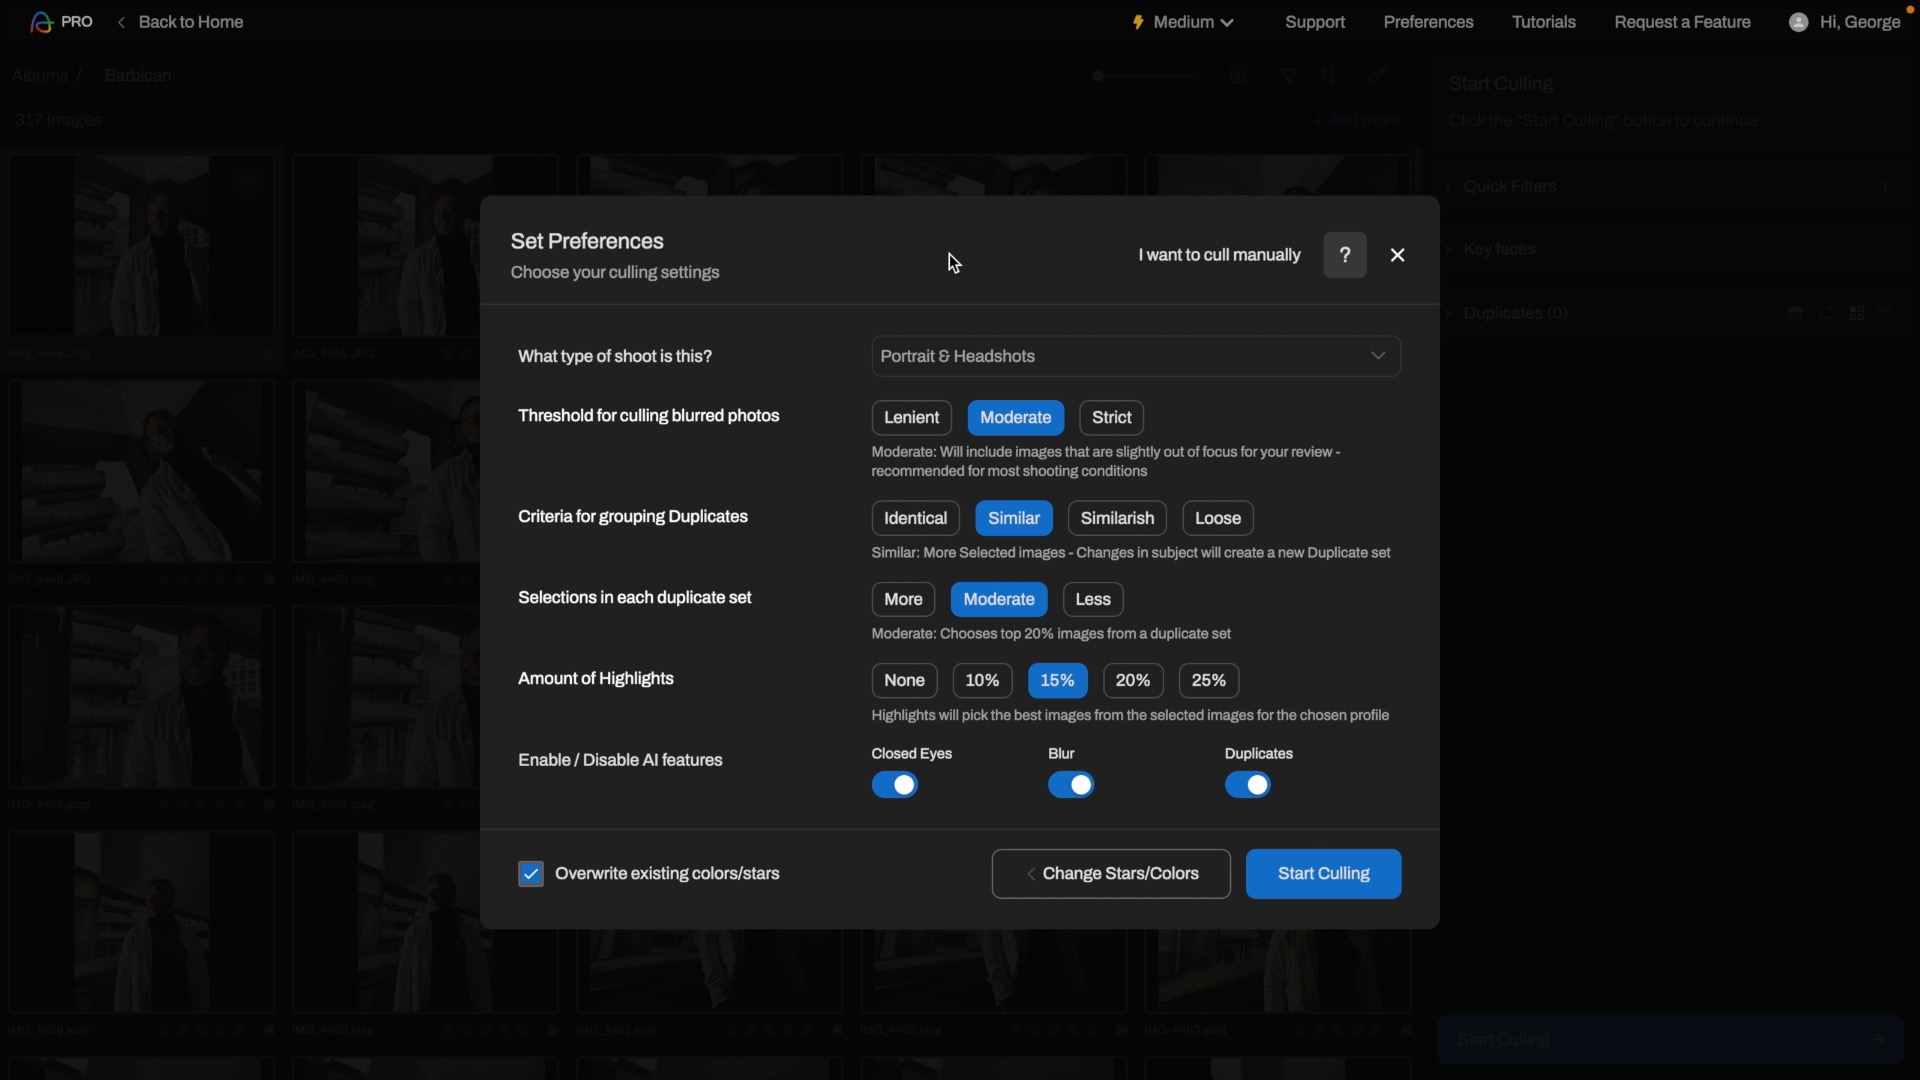
You can adjust the preferences of the culling settings to see more or fewer photos after the cull. For example, you can set the threshold for how Aftershoot deals with blurred photos. A Strict setting will cause it to cull anything that isn’t pin sharp, while Moderate will include slightly blurred shots after the cull. Aftershoot also lets you adjust the criteria for culling duplicates. You can make it only locate and group Identical copies or allow it to group Similar shots by clicking the appropriate preferences button.
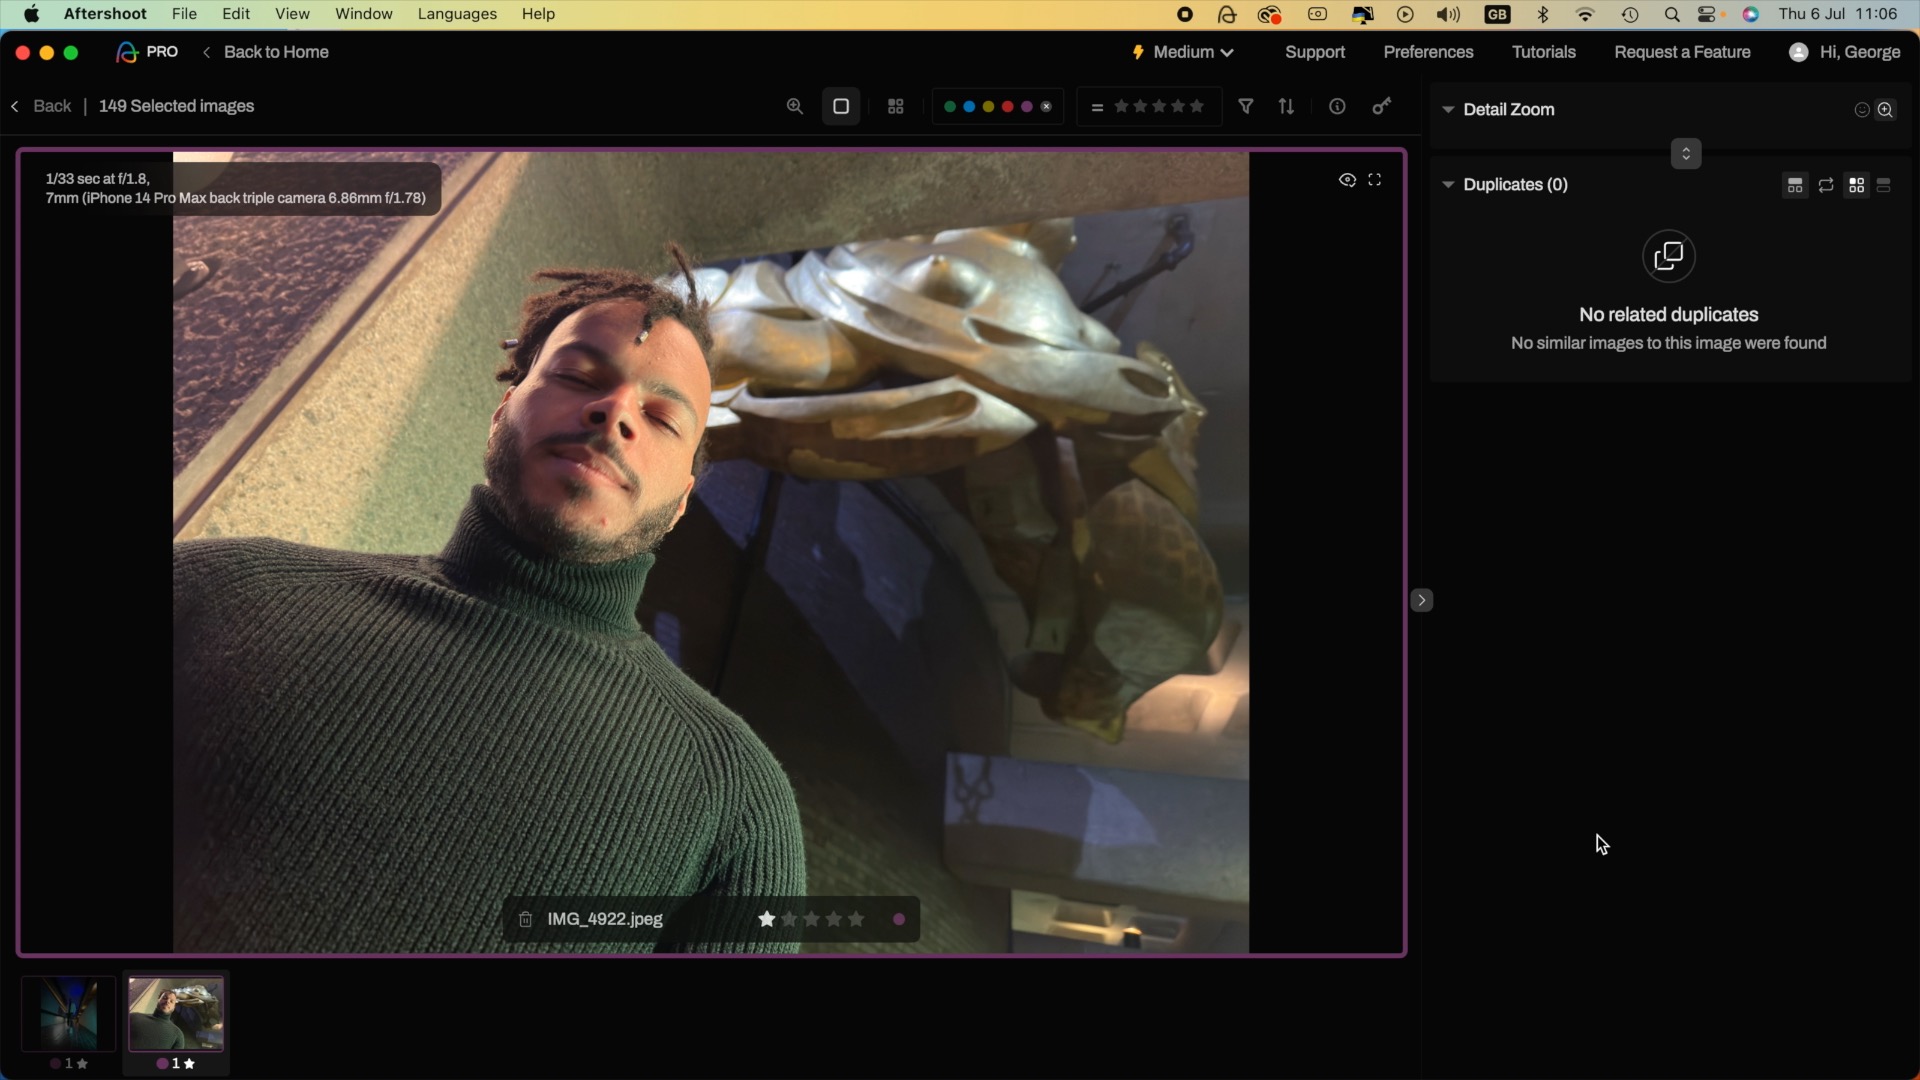
A Loose setting will include a larger collection of files for you to compare. If only one shot is snapped in a specific location and the subject’s face is blurred or their eyes are closed then Aftershoot will still present you with that shot after the cull so that you don’t miss out on seeing it. This reduces the danger of missing out on unique shots captured in specific locations. You can then always delete a duff shot manually later, but Aftershot makes sure that nothing in your shoot will fall through the gaps during the culling process.
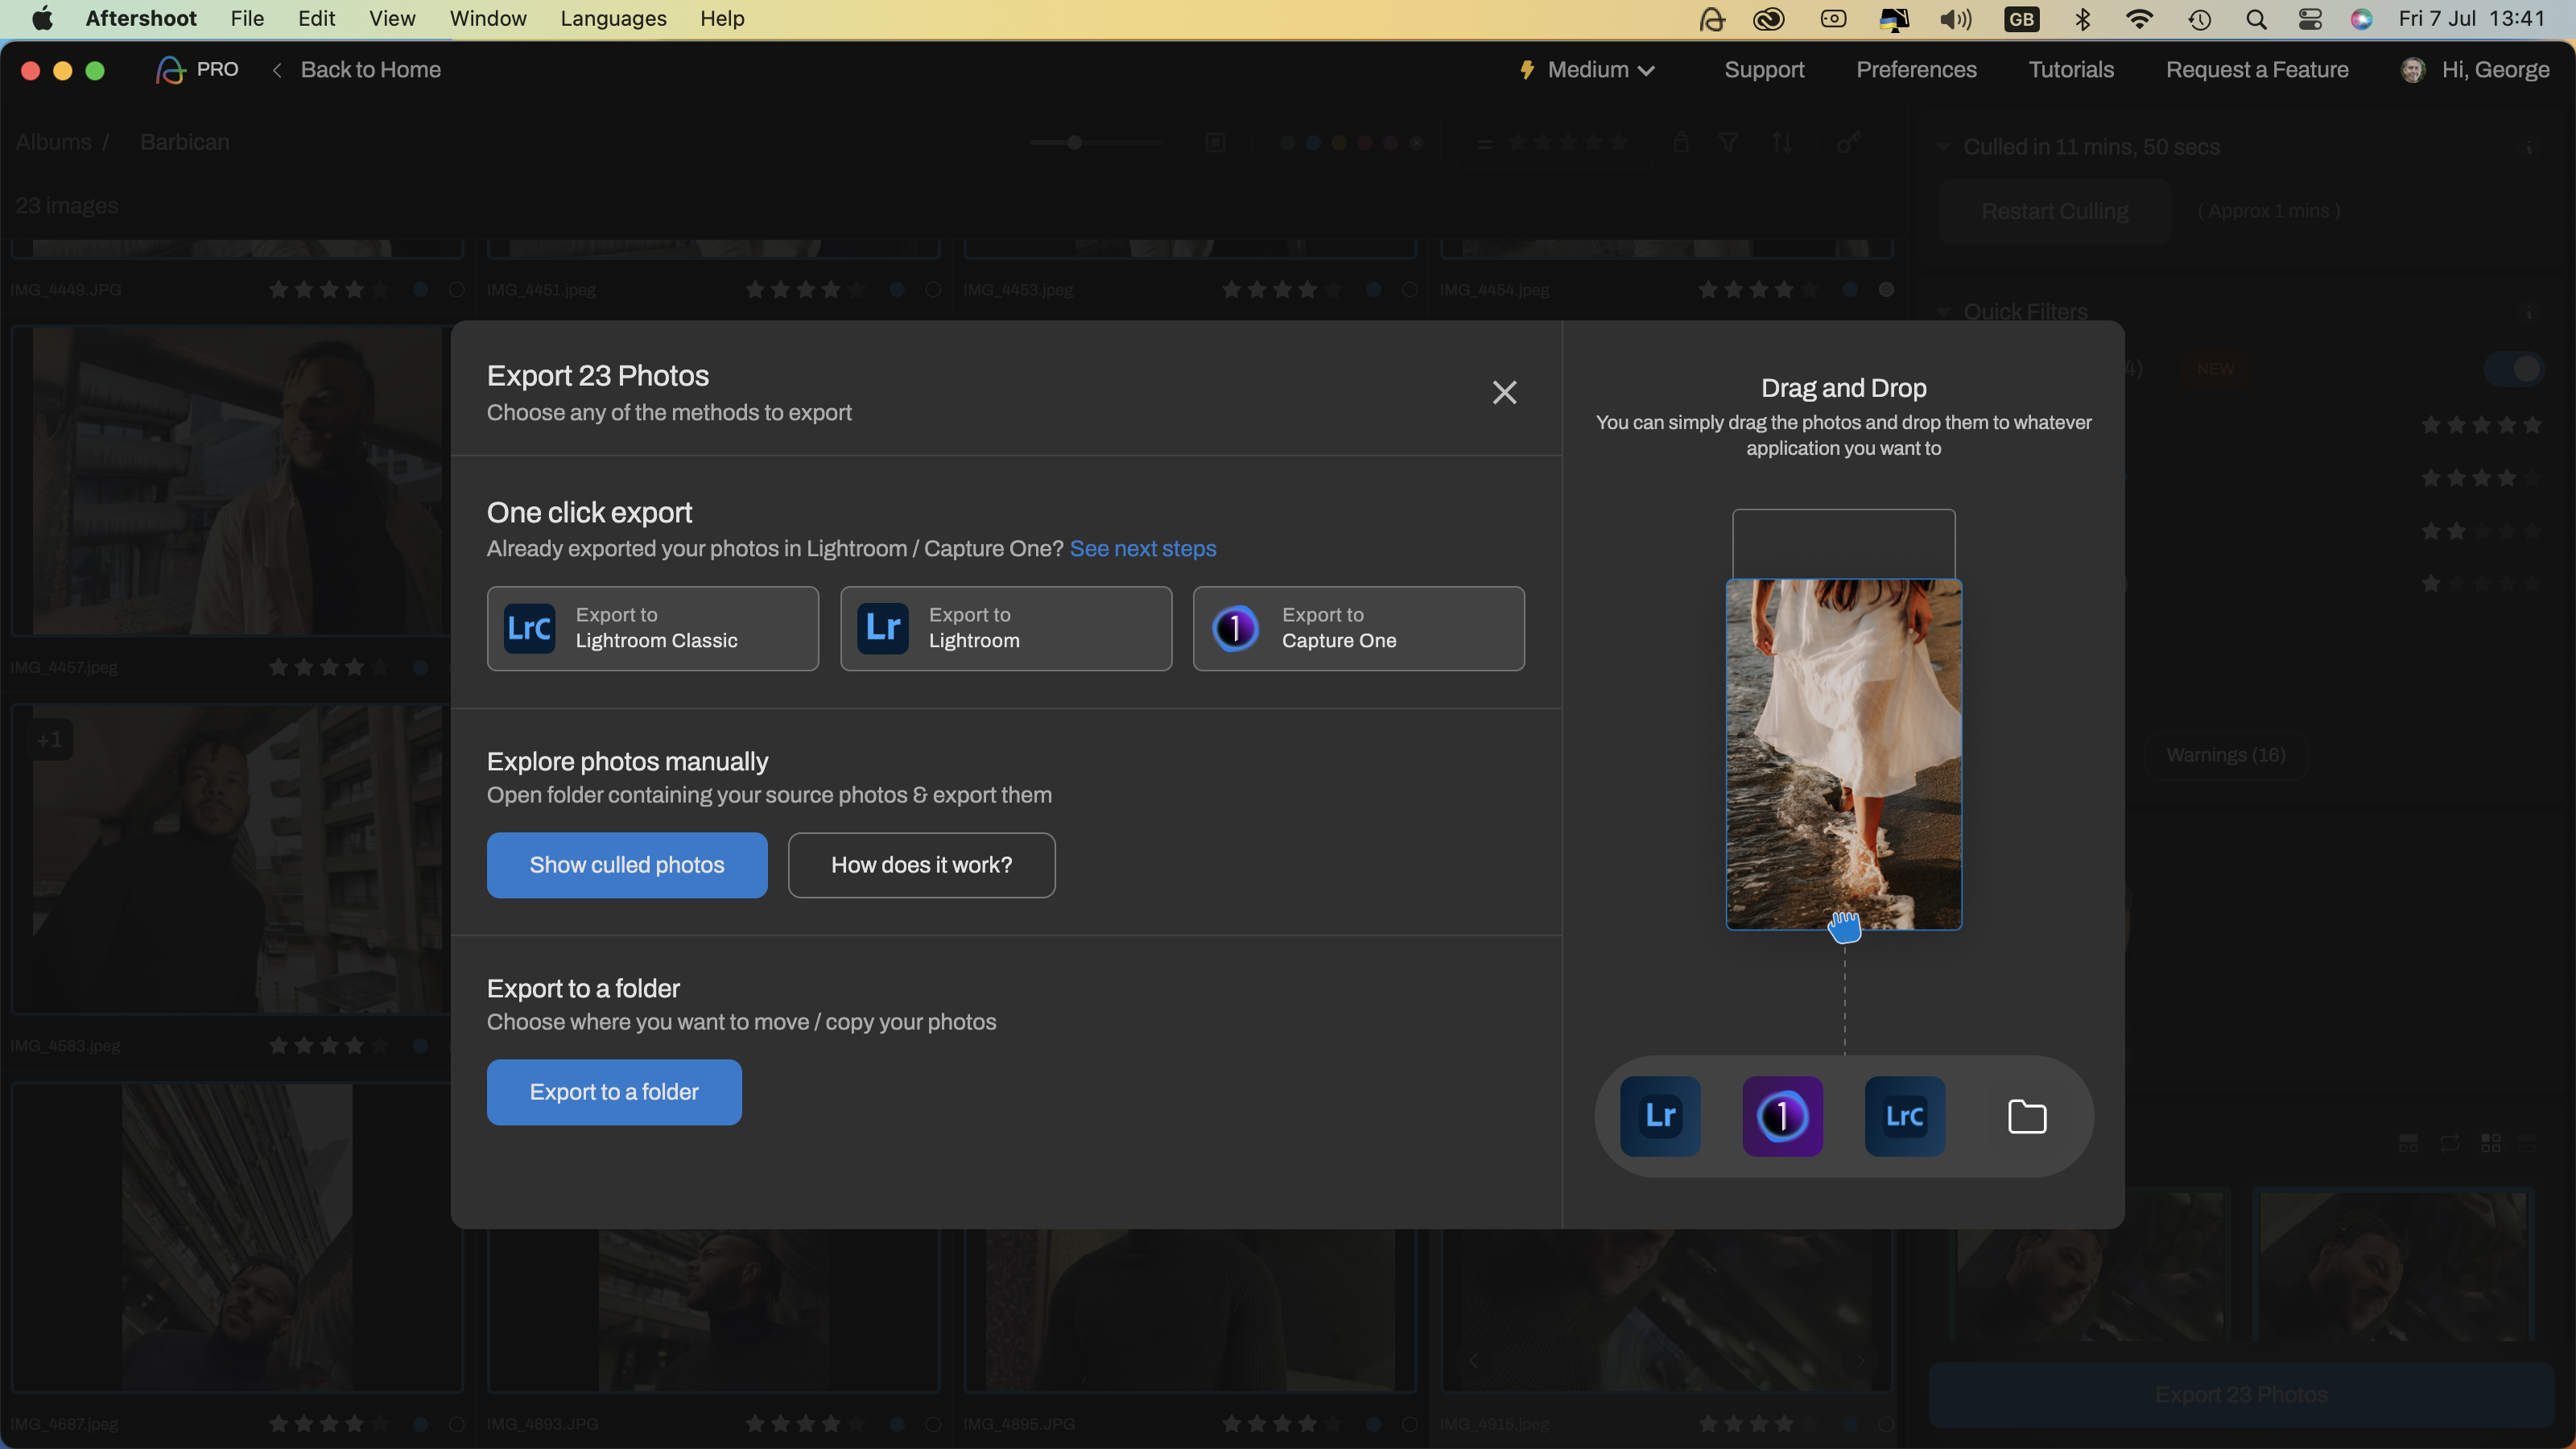
Once Aftershoot has culled your unwanted shots and helped you find your favourites then you can click the Save Changes button. This creates an .xmp file that stores the colour codes and ratings that have been applied to your best shots alongside your original files. When you then send the photos from Aftershoot to Lightroom Classic (or Capture One) you’ll see the same Aftershoot assigned star ratings and colour labels in those apps.
Quality of results
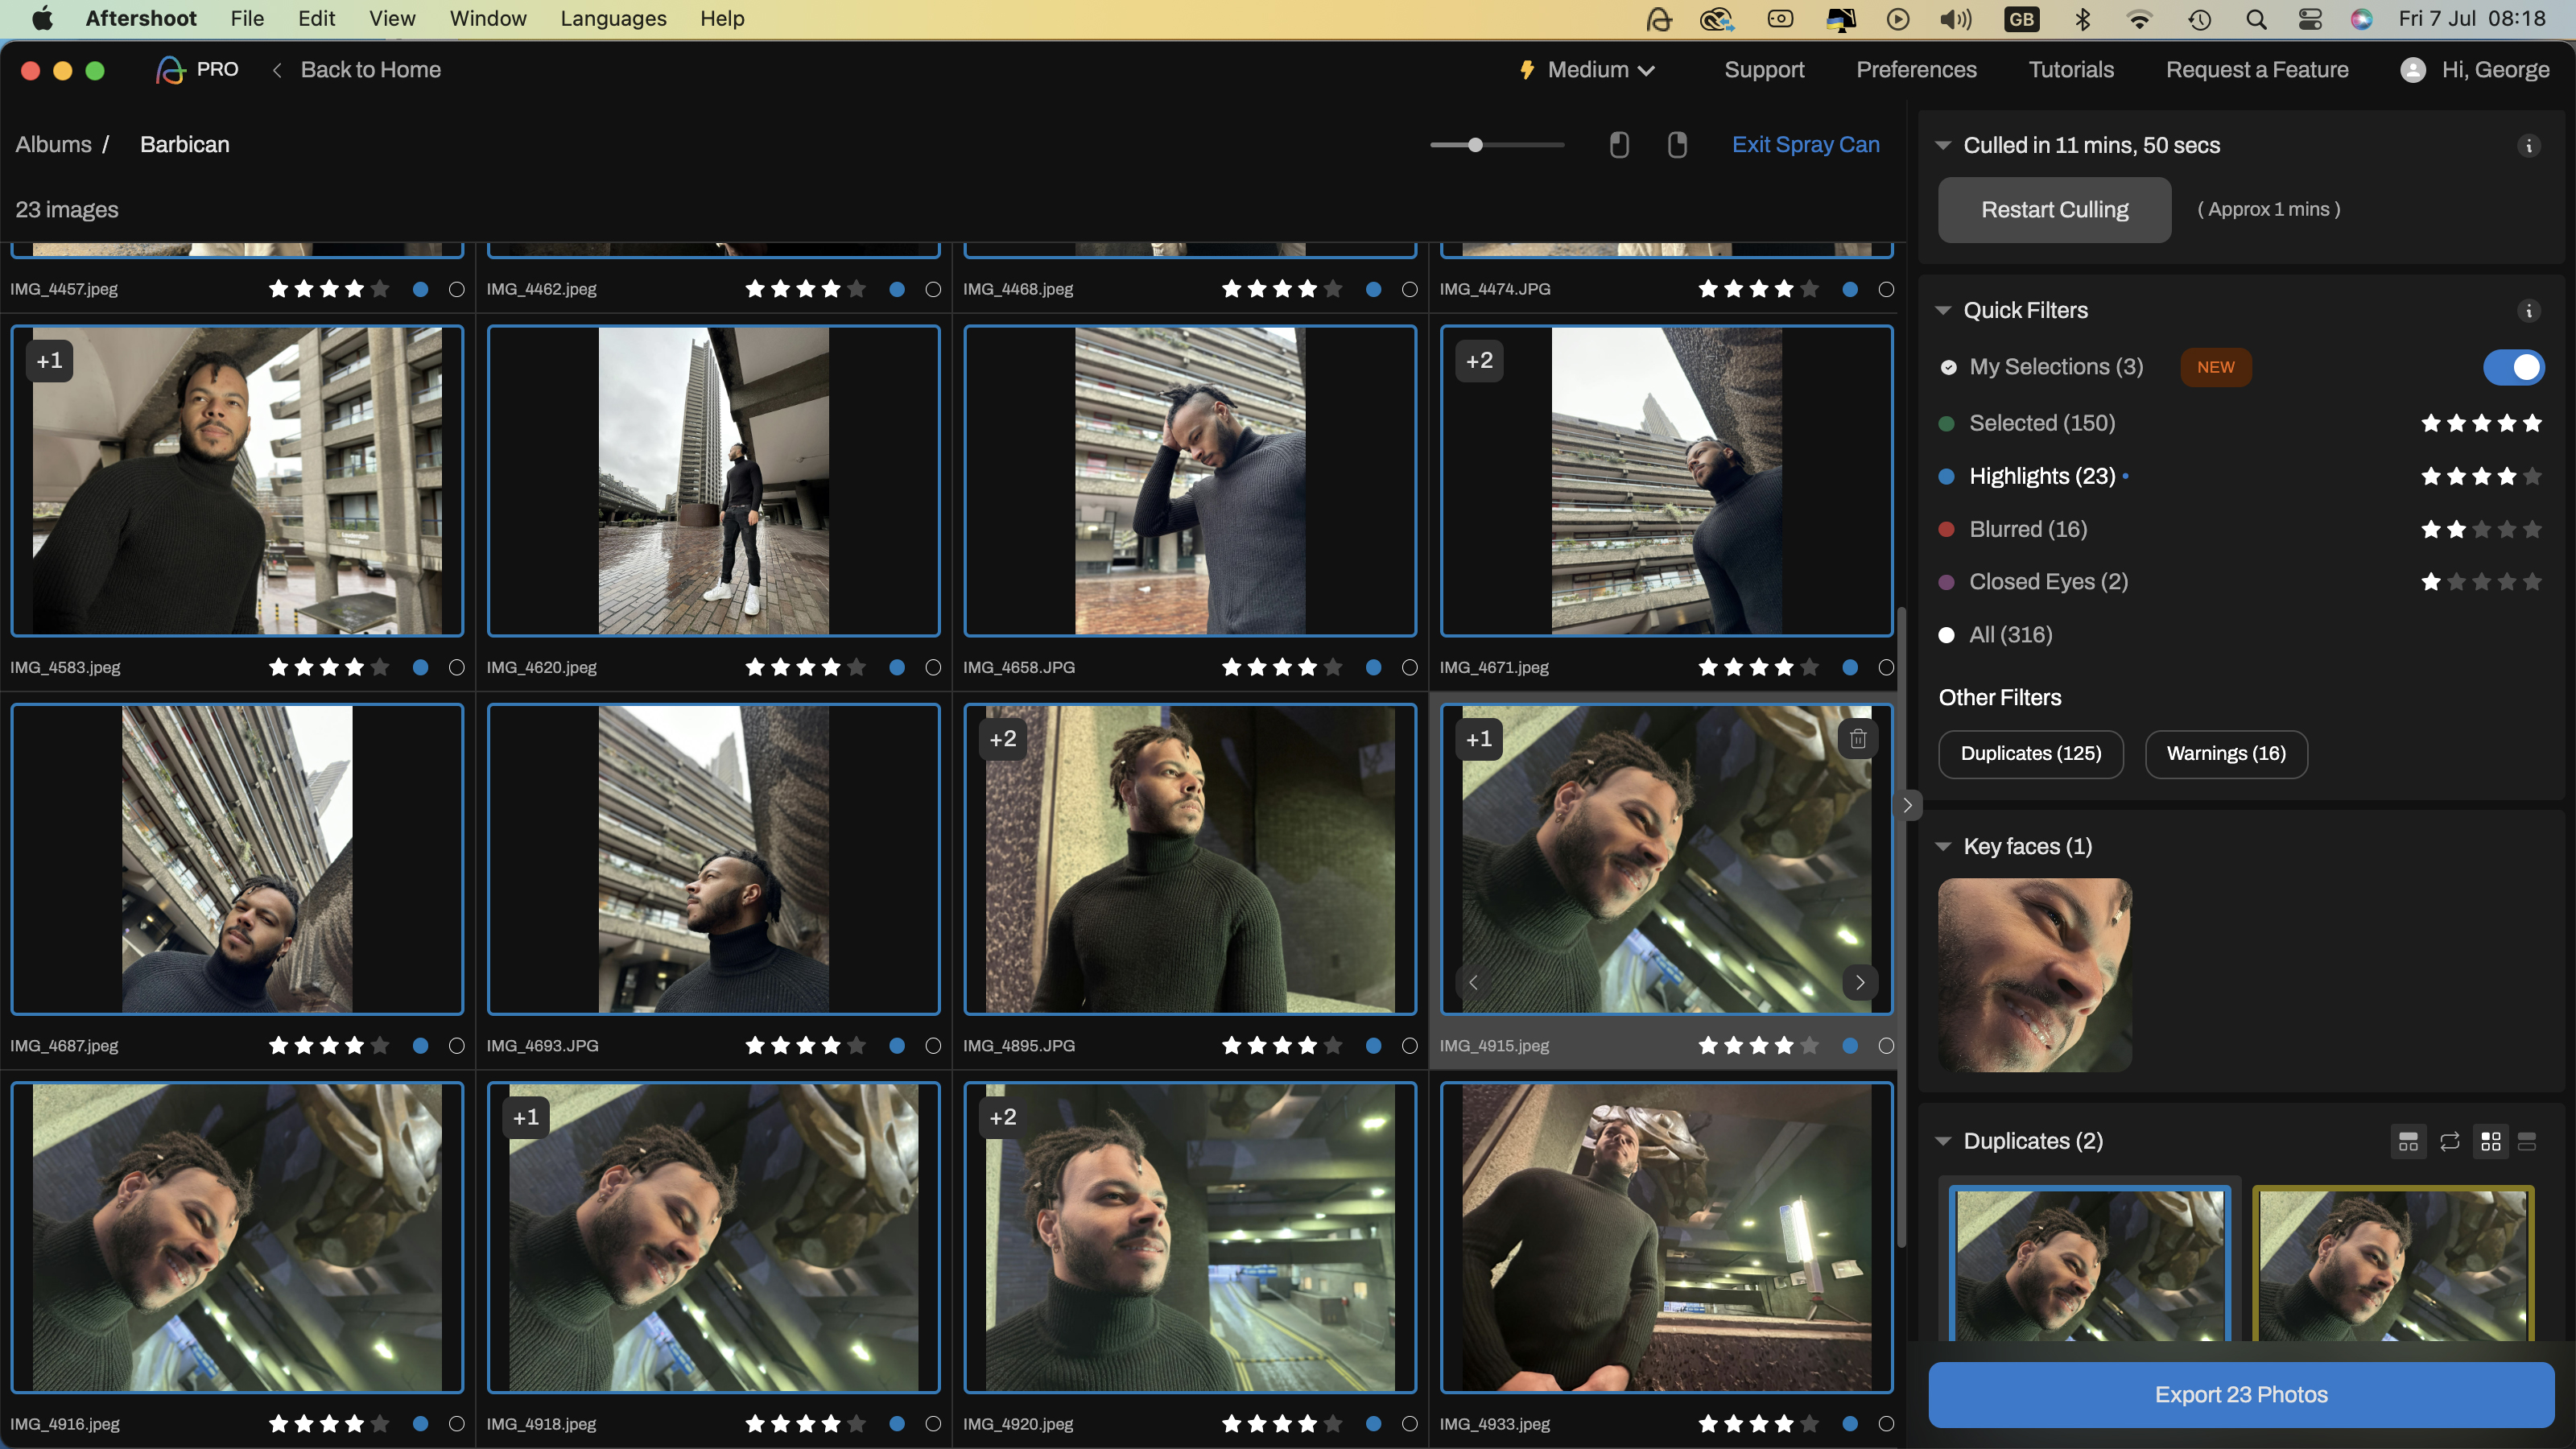
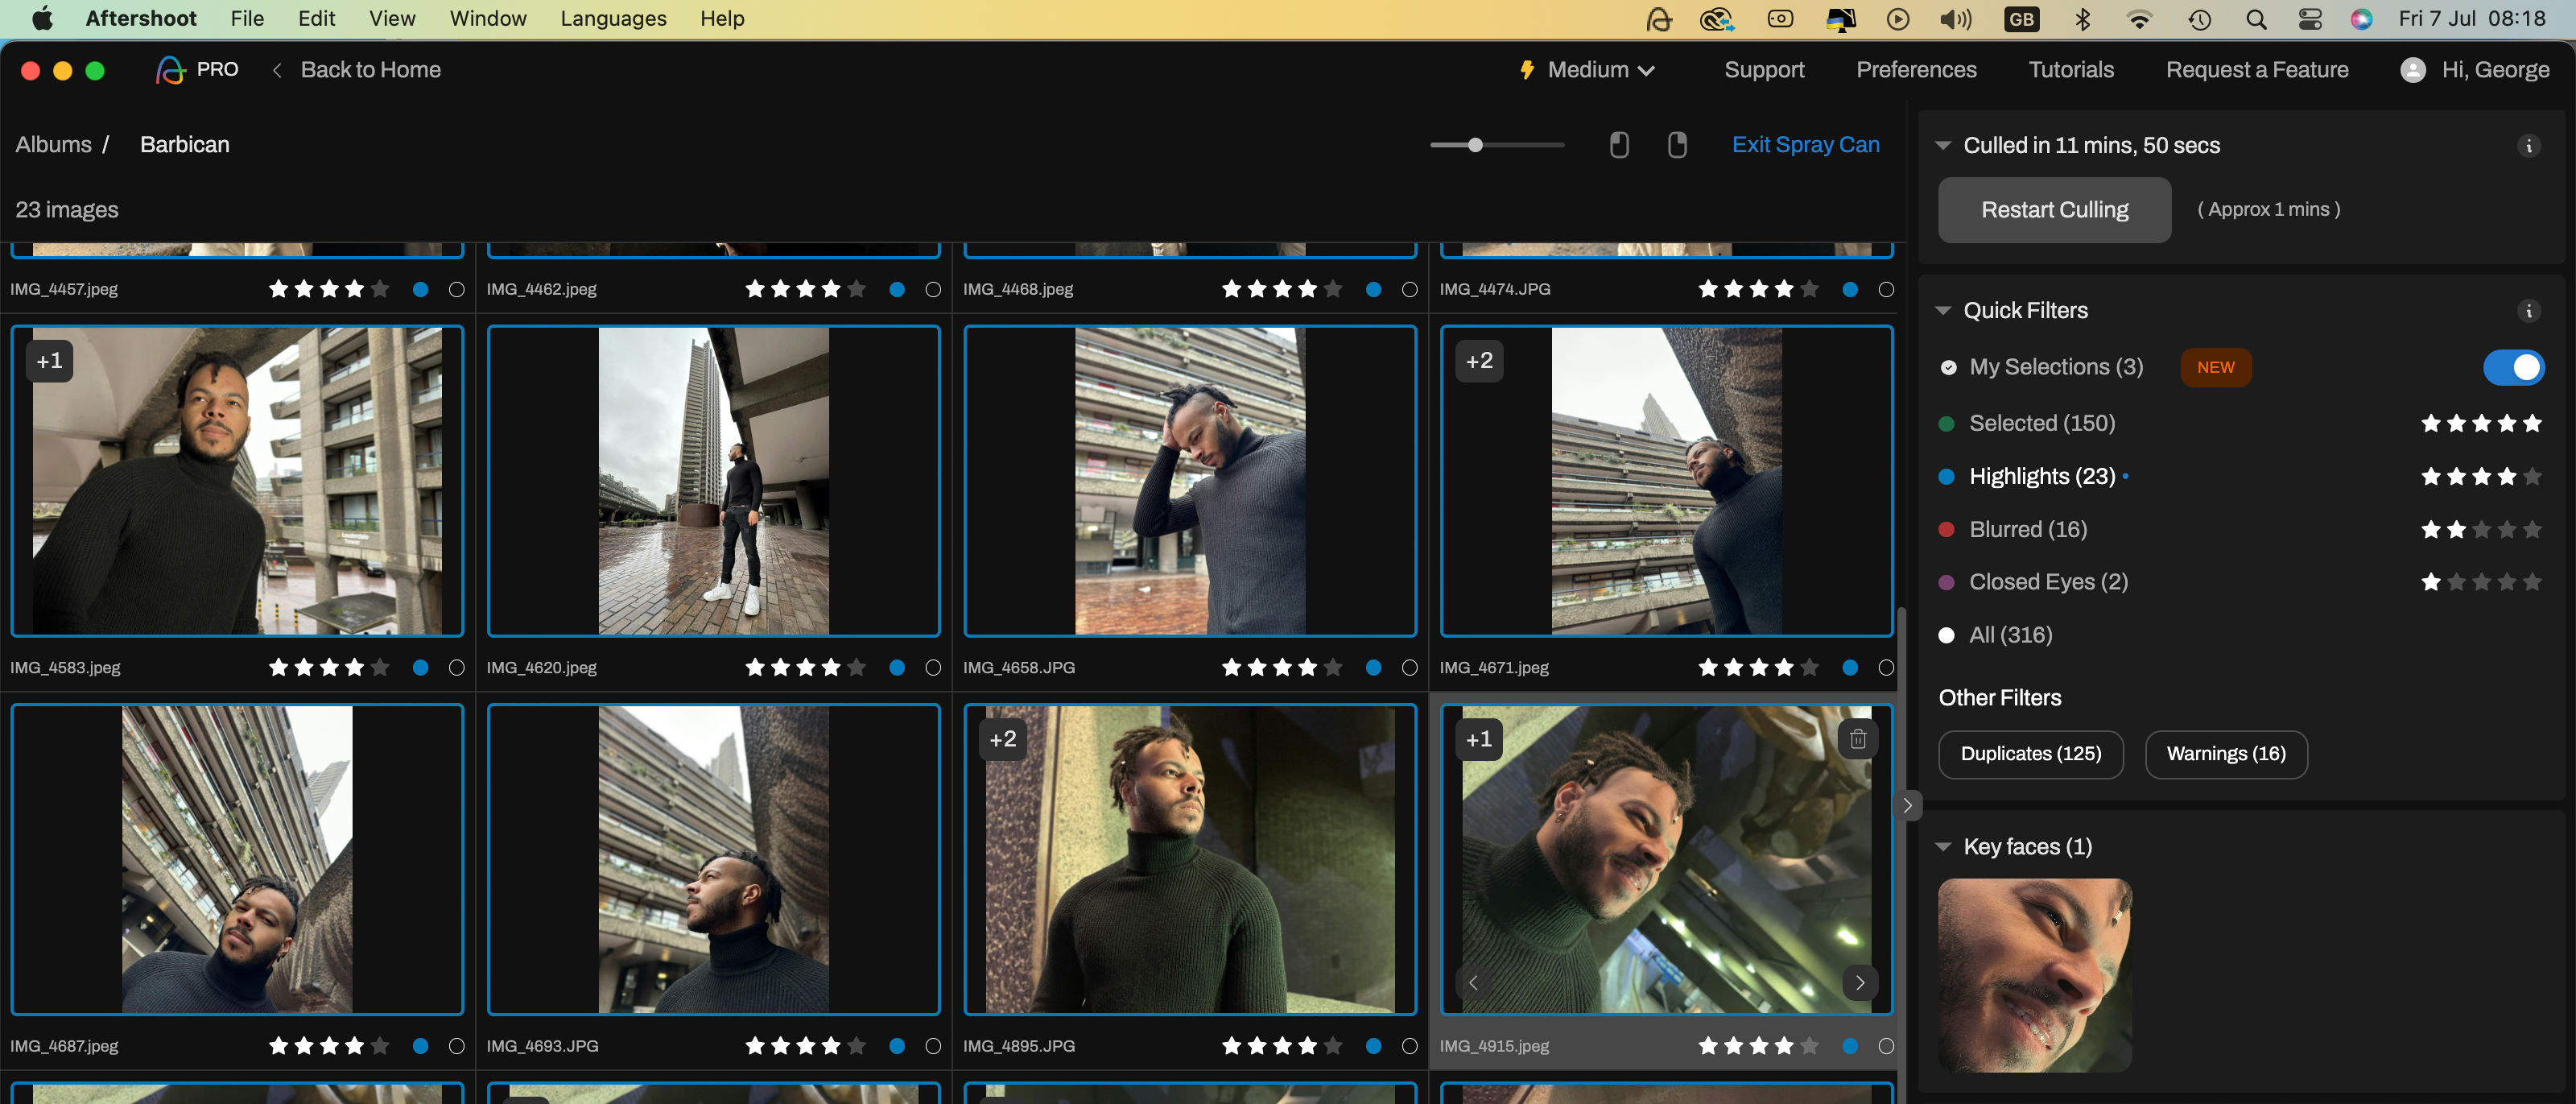
To test Aftershoot we snapped a series of 317 portrait shots in an urban location. We moved around the location for visual variety and got the subject to change his clothes during the shoot. Before the cull, we set the preferences to tell Aftershoot that this was a portrait shoot so it could bias its AI towards that subject. After pressing the big blue ‘Start Culling’ button Aftershoot took 11 minutes and 50 seconds to organize the shots into filterable categories such as Selected, Highlights, Blurred and Eyes Closed. Aftershoot awards Selected shots 5 stars and gives them a green color label.
By clicking on the Selected filter label we could scroll through 150 of our shoot’s best images. It also chose 23 images as Highlights (featuring a 4 star rating and a blue label). Highlights contain shots that are well composed, have strong emotion (smiling faces), and are free from blur (and have open eyes). By clicking on the Highlights filter you can find a quick collection of decent shots to share with your client! Most of the highlights Aftershot chose looked great though one showed the subject’s eyes in a half blink. We could always try setting the Highlights preference to a lower percentage and re-start the culling process to ensure a smaller but higher quality set of highlight images
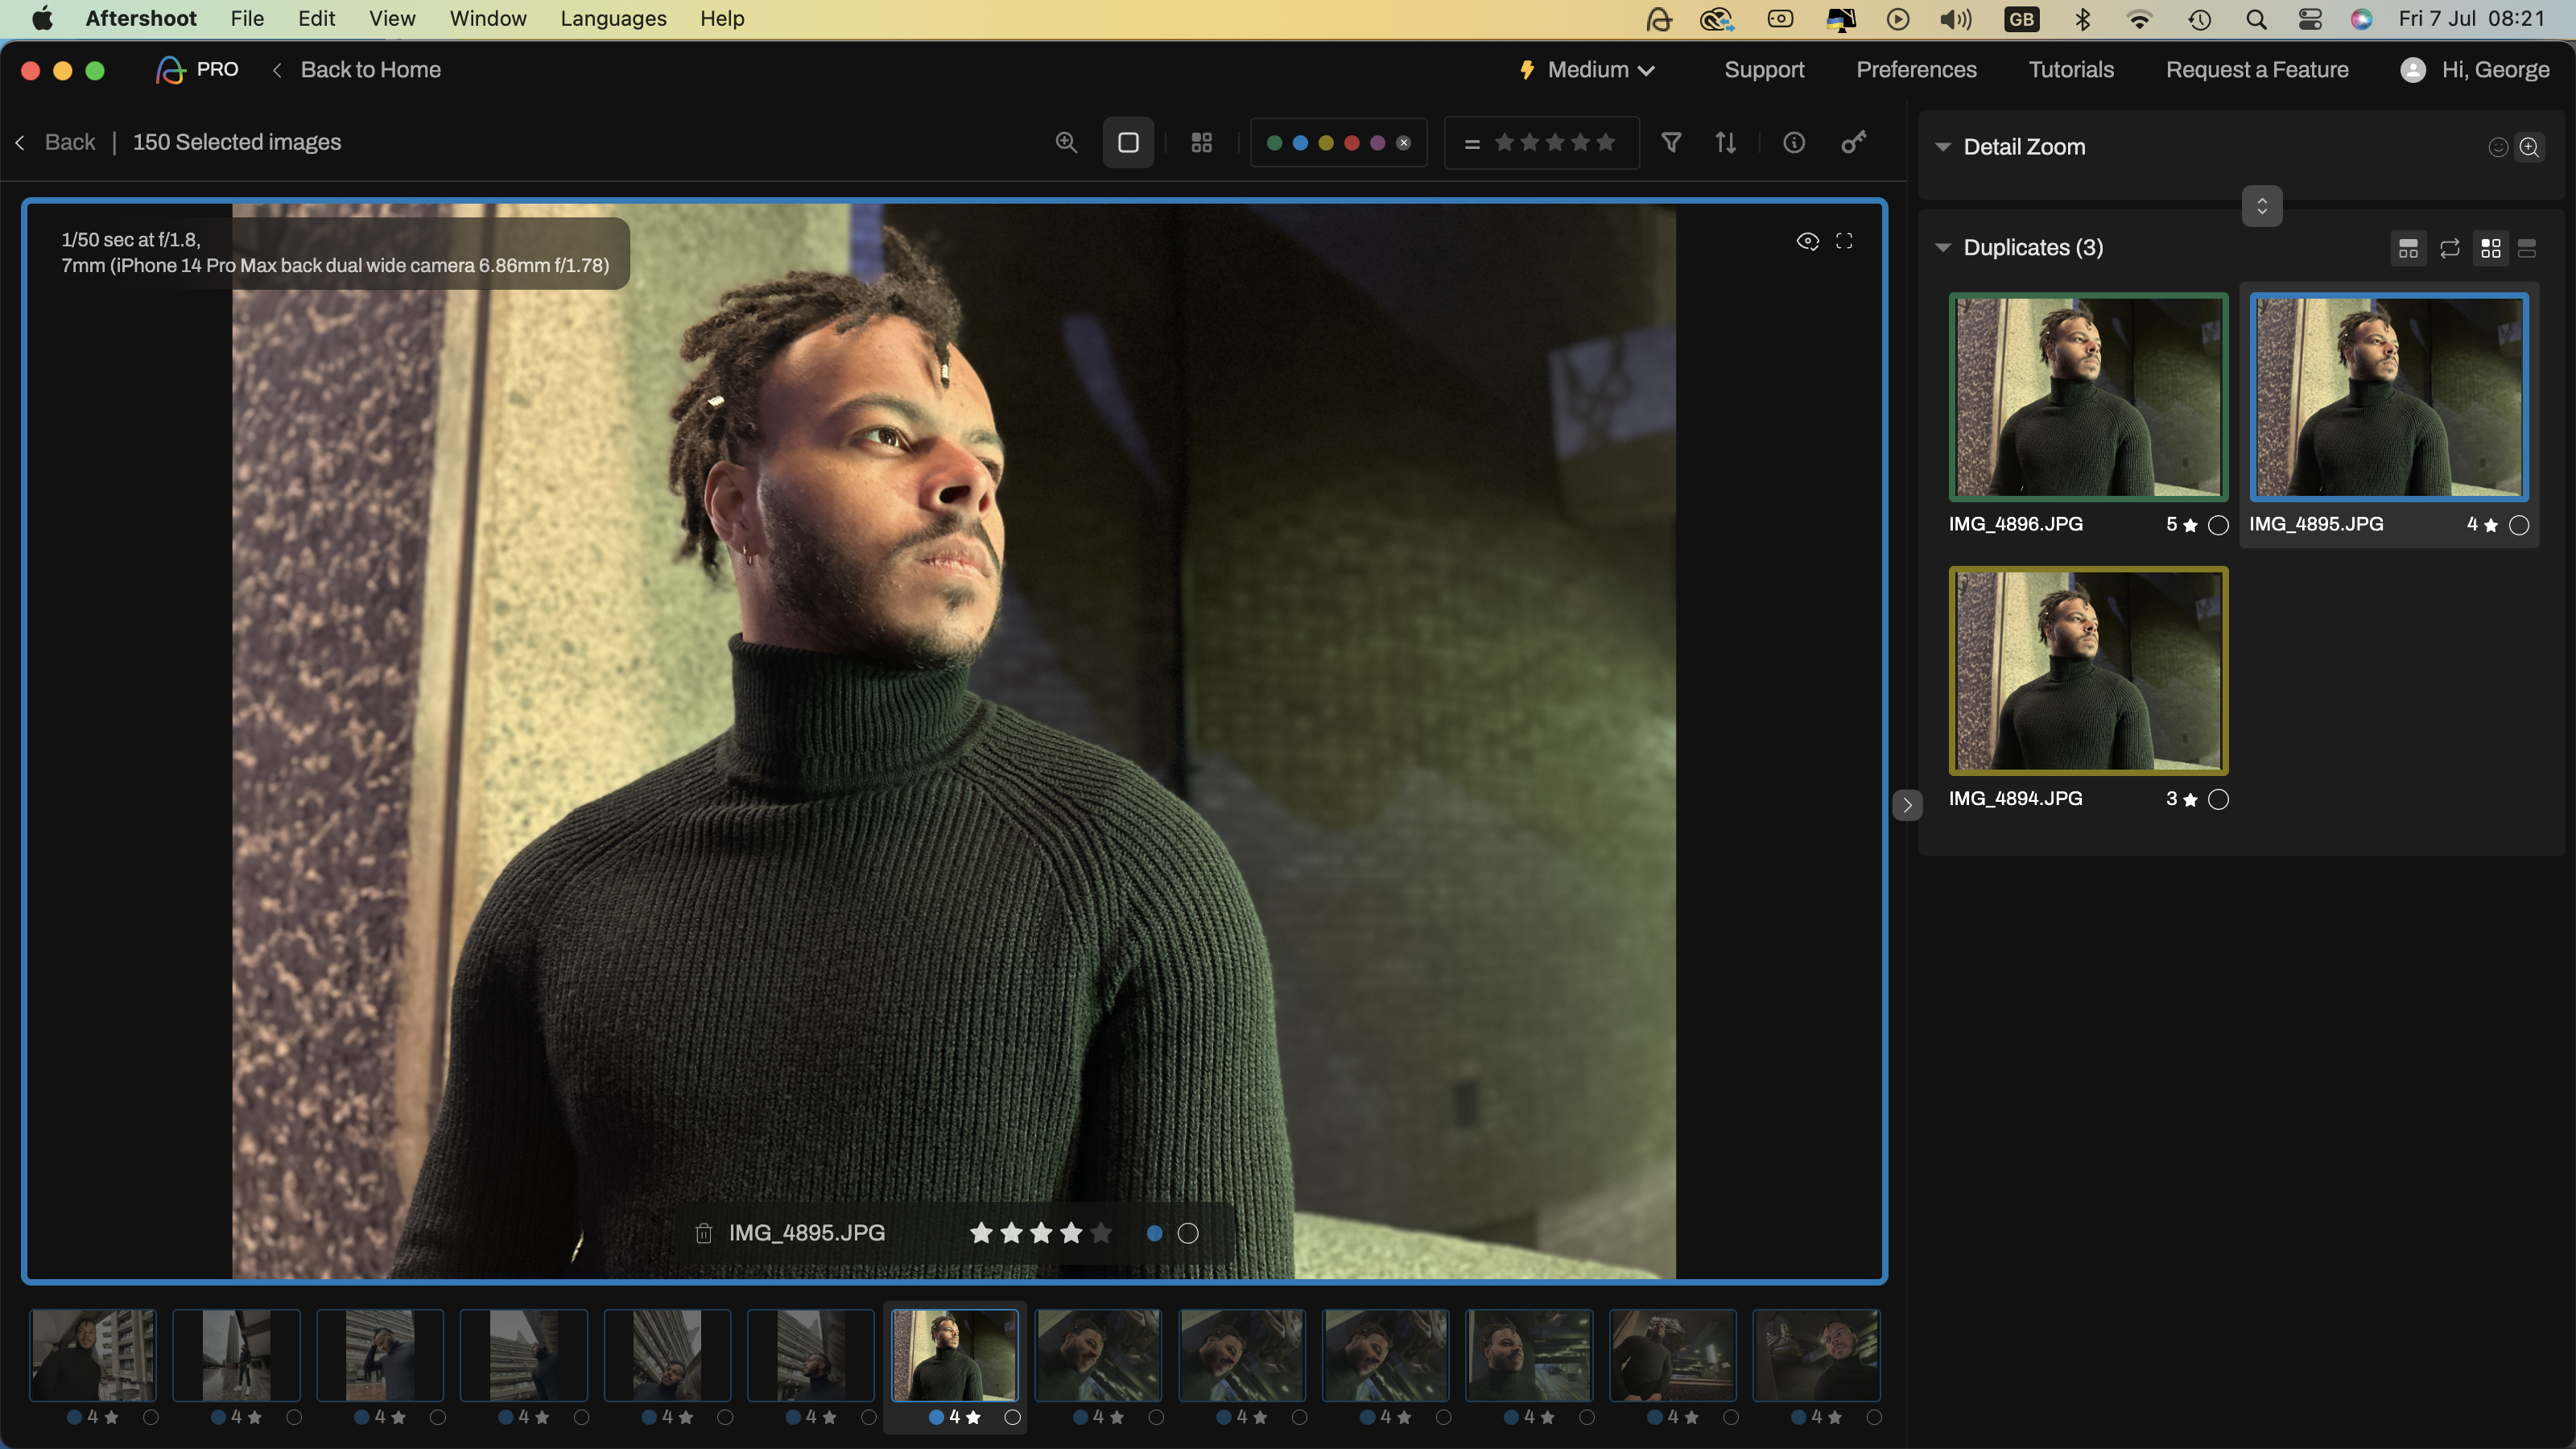
If a Selected shot has some similar (but unselected) images to compare it with then you’ll see a number (such as +4) on the top left of the thumbnail in the grid view. You can click arrows to scroll through thumbnails of similar shots, or view them at a larger size in the Loupe view. If one of the similar shots looks better than the AI-selected one you can tap [A] to instantly add it to the Selected filter (with 5 stars and a green label).
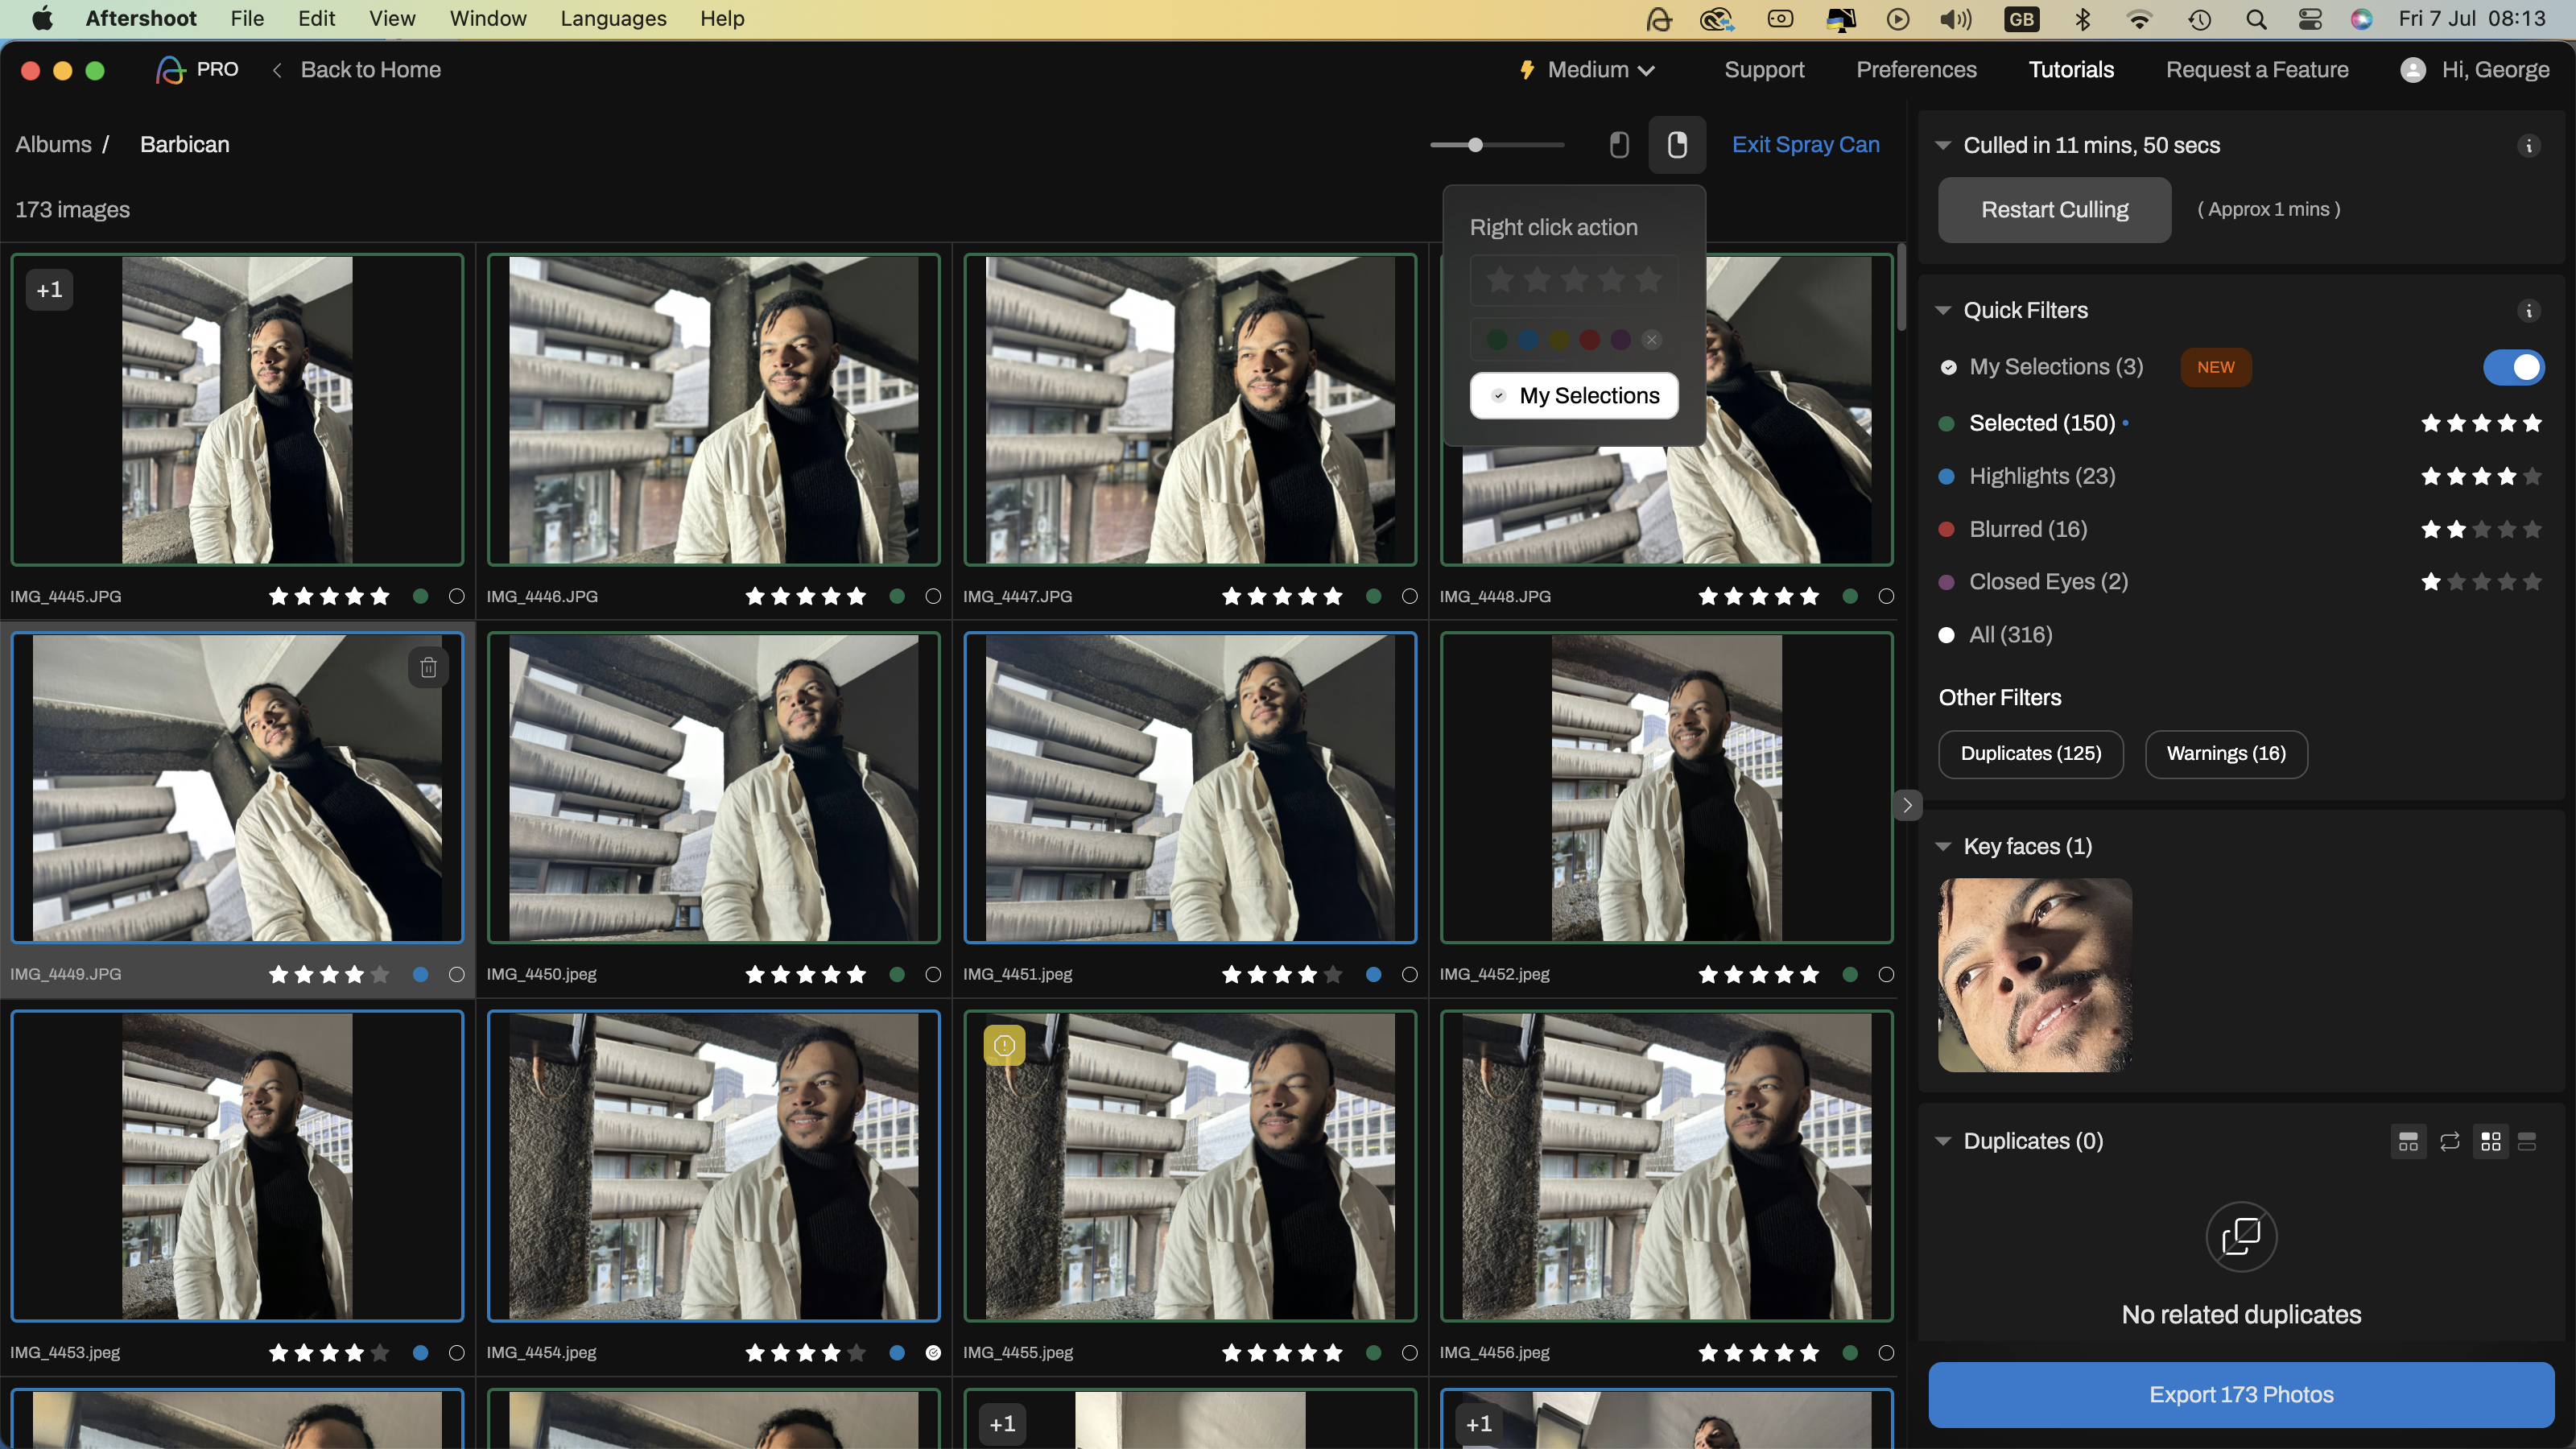
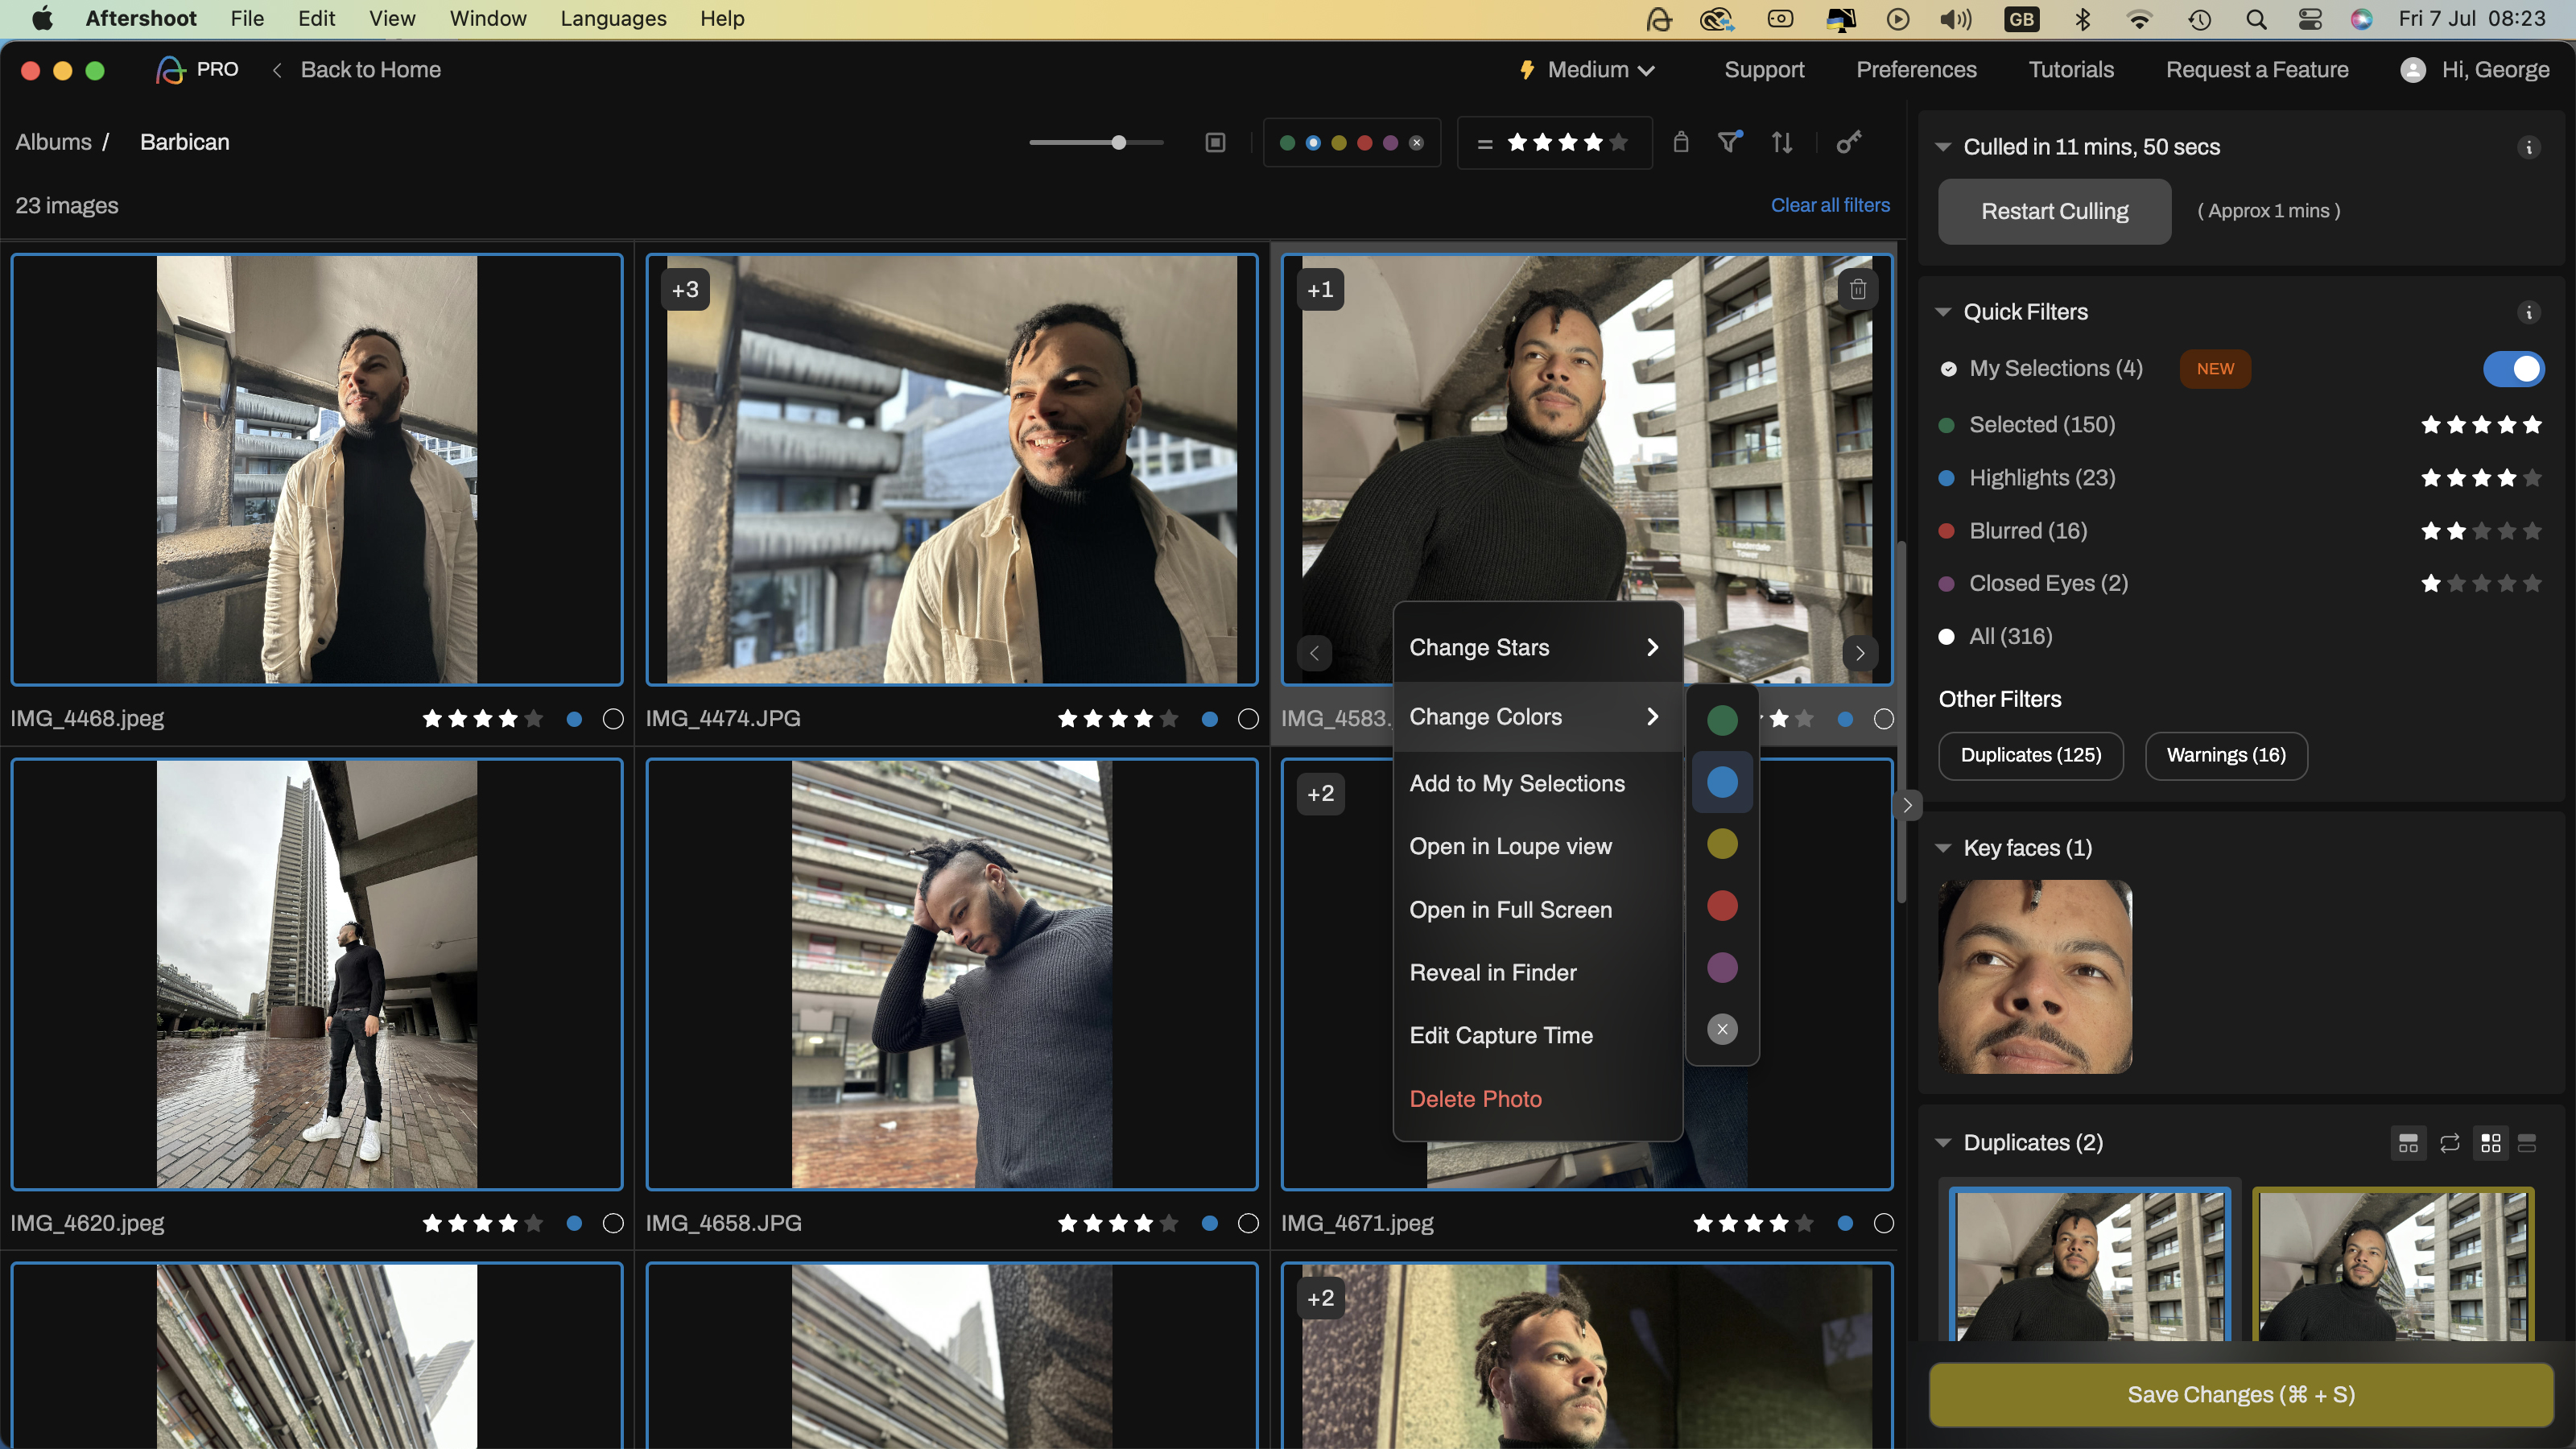
Aftershoot is quick and easy to use but if you spend more time with it you can discover handy tools such as the Spray Can. This can be customized to perform a variety of jobs. We set it up so that when we right-clicked the spare can on a thumbnail it would add the shot to the My Selections category in the Quick Filters menu. Check out our supporting to video (above) to see this handy feature in action).
Verdict
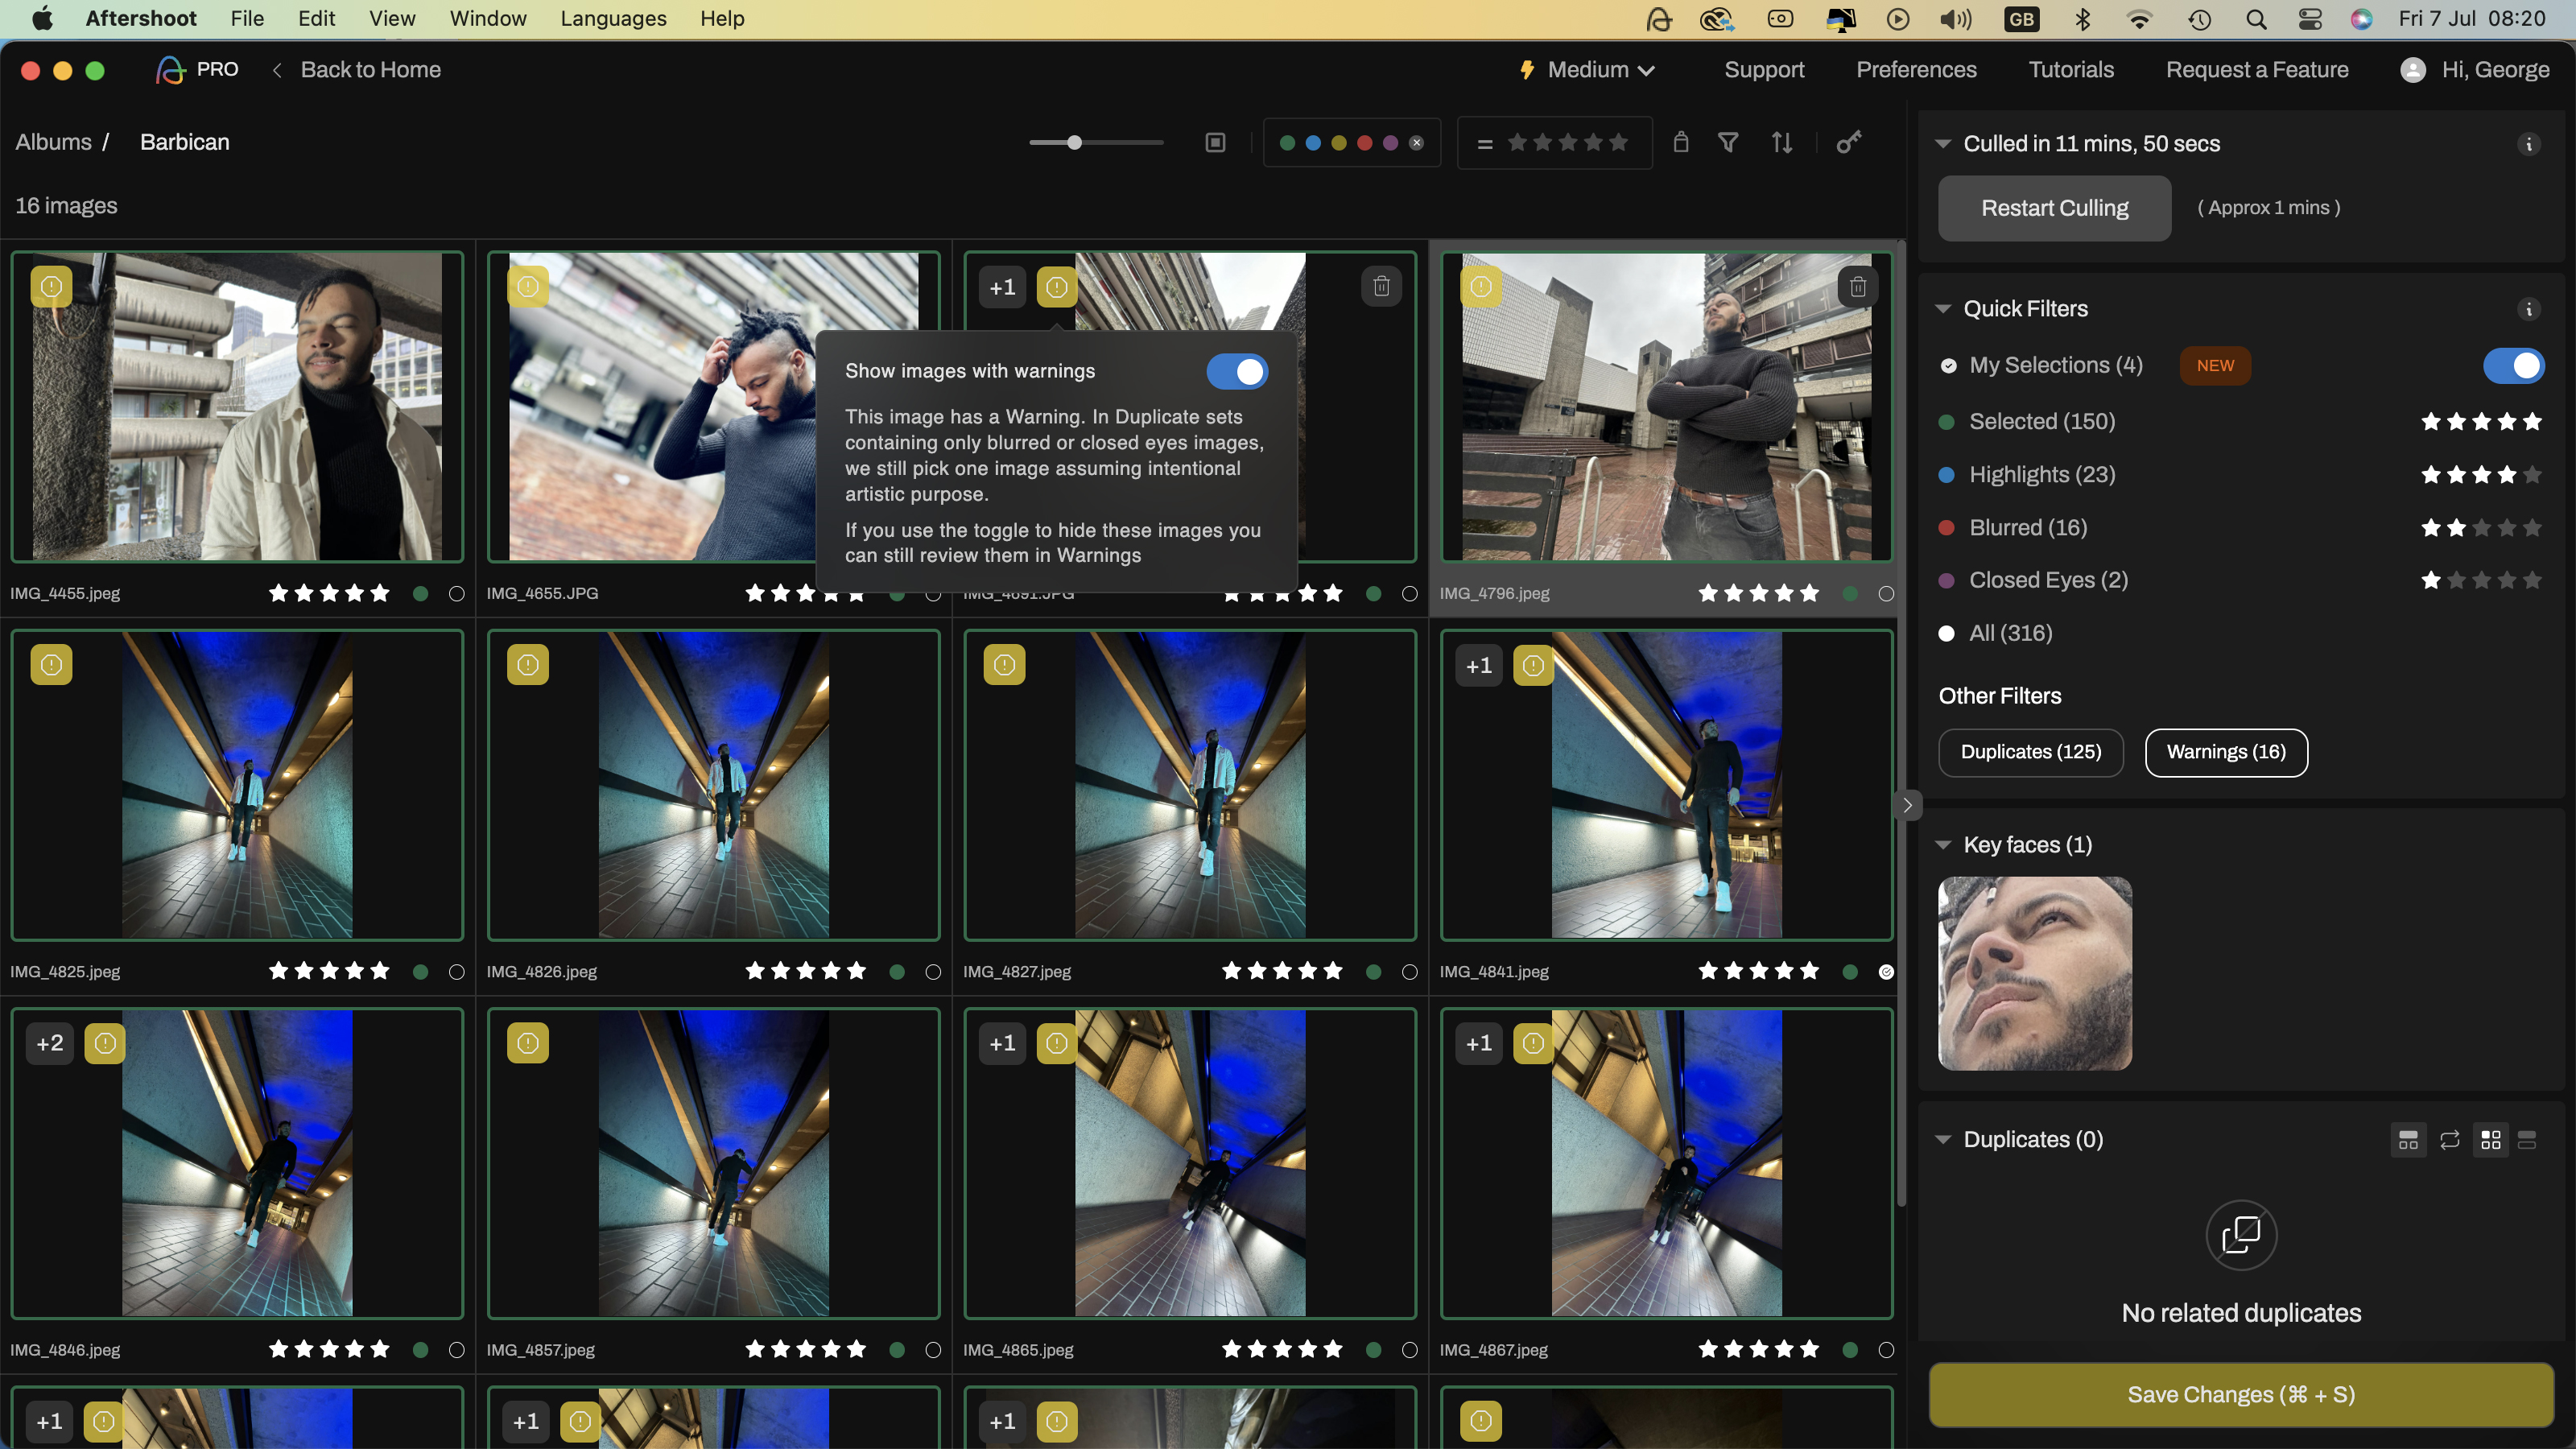
Aftershoot is a pleasure to use. It quickly and effectively whittles down a big collection of images into smaller filterable categories and you can then fine-tune the star ratings and color-coded labels to suit your preferences. When faced with a similar shot that features a smile and no smile Aftershoot will usually chose the smiling versions, but you can view the alternative versions of the shot and choose the mood that you prefer.
No files in the original folder are lost in the cull so you are free to experiment with different culling preferences and it’s an easy job to export the best images to Lightroom Classic (or Capture One) where you can edit them. After a cull you even get an email summarising the highlights of the operation. To cull our 317 photos down to 170 saved us an estimated 19 mins and 20 seconds. Over a few month that’s many hours saved that we can devote to more on interesting pursuits!
George has been freelancing as a photo fixing and creative tutorial writer since 2002, working for award winning titles such as Digital Camera, PhotoPlus, N-Photo and Practical Photoshop. He's expert in communicating the ins and outs of Photoshop and Lightroom, as well as producing video production tutorials on Final Cut Pro and iMovie for magazines such as iCreate and Mac Format. He also produces regular and exclusive Photoshop CC tutorials for his YouTube channel.
