Digital Camera World Verdict
With features and performance aimed at beginners and expert FPV pilots alike, the BetaFPV Cetus X FPV Kit is the most versatile model in the BetaFPV Cetus line-up and the one that offers the most longevity. It’s fast and nimble despite its small size and lightweight, coming in a kit with everything you need to get started with FPV flight straight out of the box.
Pros
- +
Inexpensive kit with everything you need
- +
Several flight modes and speed settings
- +
Goggle DVR can record FPV video feed
Cons
- -
Manual/acro mode is difficult
- -
Even slow mode is fast for beginners
- -
Battery life is short
Why you can trust Digital Camera World
When you’re first getting into FPV drones, micro whoop kits that include everything you need to get started are the perfect option due to their design and performance. Although there are many of these ready-to-fly (RTF) kits available, one that stands out for its cost and features is the BetaFPV Cetus X FPV Kit. This is the best Cetus kit in a line-up of three thanks to more power, improved features, and ultimately more longevity than the Cetus Lite and Cetus Pro FPV Kits.
Wheelbase: 95mm
FC: F4 1S 12A FC
Motors: 1103 11000KV Motor
Props: Gemfan 2020 4-Blades Props
Camera: C04 FPV Camera (Caddx Nano Ant Camera/Runcam Nano 4)
Camera Adjustable Angle: 0°-40°
Receiver Protocol: ELRS 2.4G (Betaflight)
VTX: M04 25-400mW VTX
Transmitter: LiteRadio 3 Radio Transmitter
Goggles: VR03 FPV Goggles
Battery: 2 xBT2.0 450mAh 1S 30C Battery
Flight time: 5 mins
Weight: 55g
The advantage of RTF kits alongside the fact they include everything you need in a neat and compact package, is that they’re pre-built and also relatively inexpensive. What’s more, they’re designed to withstand crashes, which are common in the world of FPV whether you’re a beginner or an experienced pilot, but beginners will naturally crash much more often when learning how to fly by progressing through the flight modes and speed settings.
The Cetus X kit includes the Cetus X Brushless Quadcopter, we tested the Cetus FC version which offers a hover function in one of the flight modes to make it more beginner-friendly, a LiteRadio 3 Transmitter, VR03 FPV Goggles, four 1S batteries, a USB battery charger/battery voltage tester, a carry case and other useful accessories including easy to follow instructions.
The Cetus X FPV Kit costs $310 / £249 / AU$462 when purchased directly from BetaFPV. It can also be purchased from independent online FPV retailers and Amazon where the cost is often higher, but shipping times are much quicker than from China if you’d like to get your hands on your new drone quicker, although shipping from China usually only takes a couple of weeks or so.
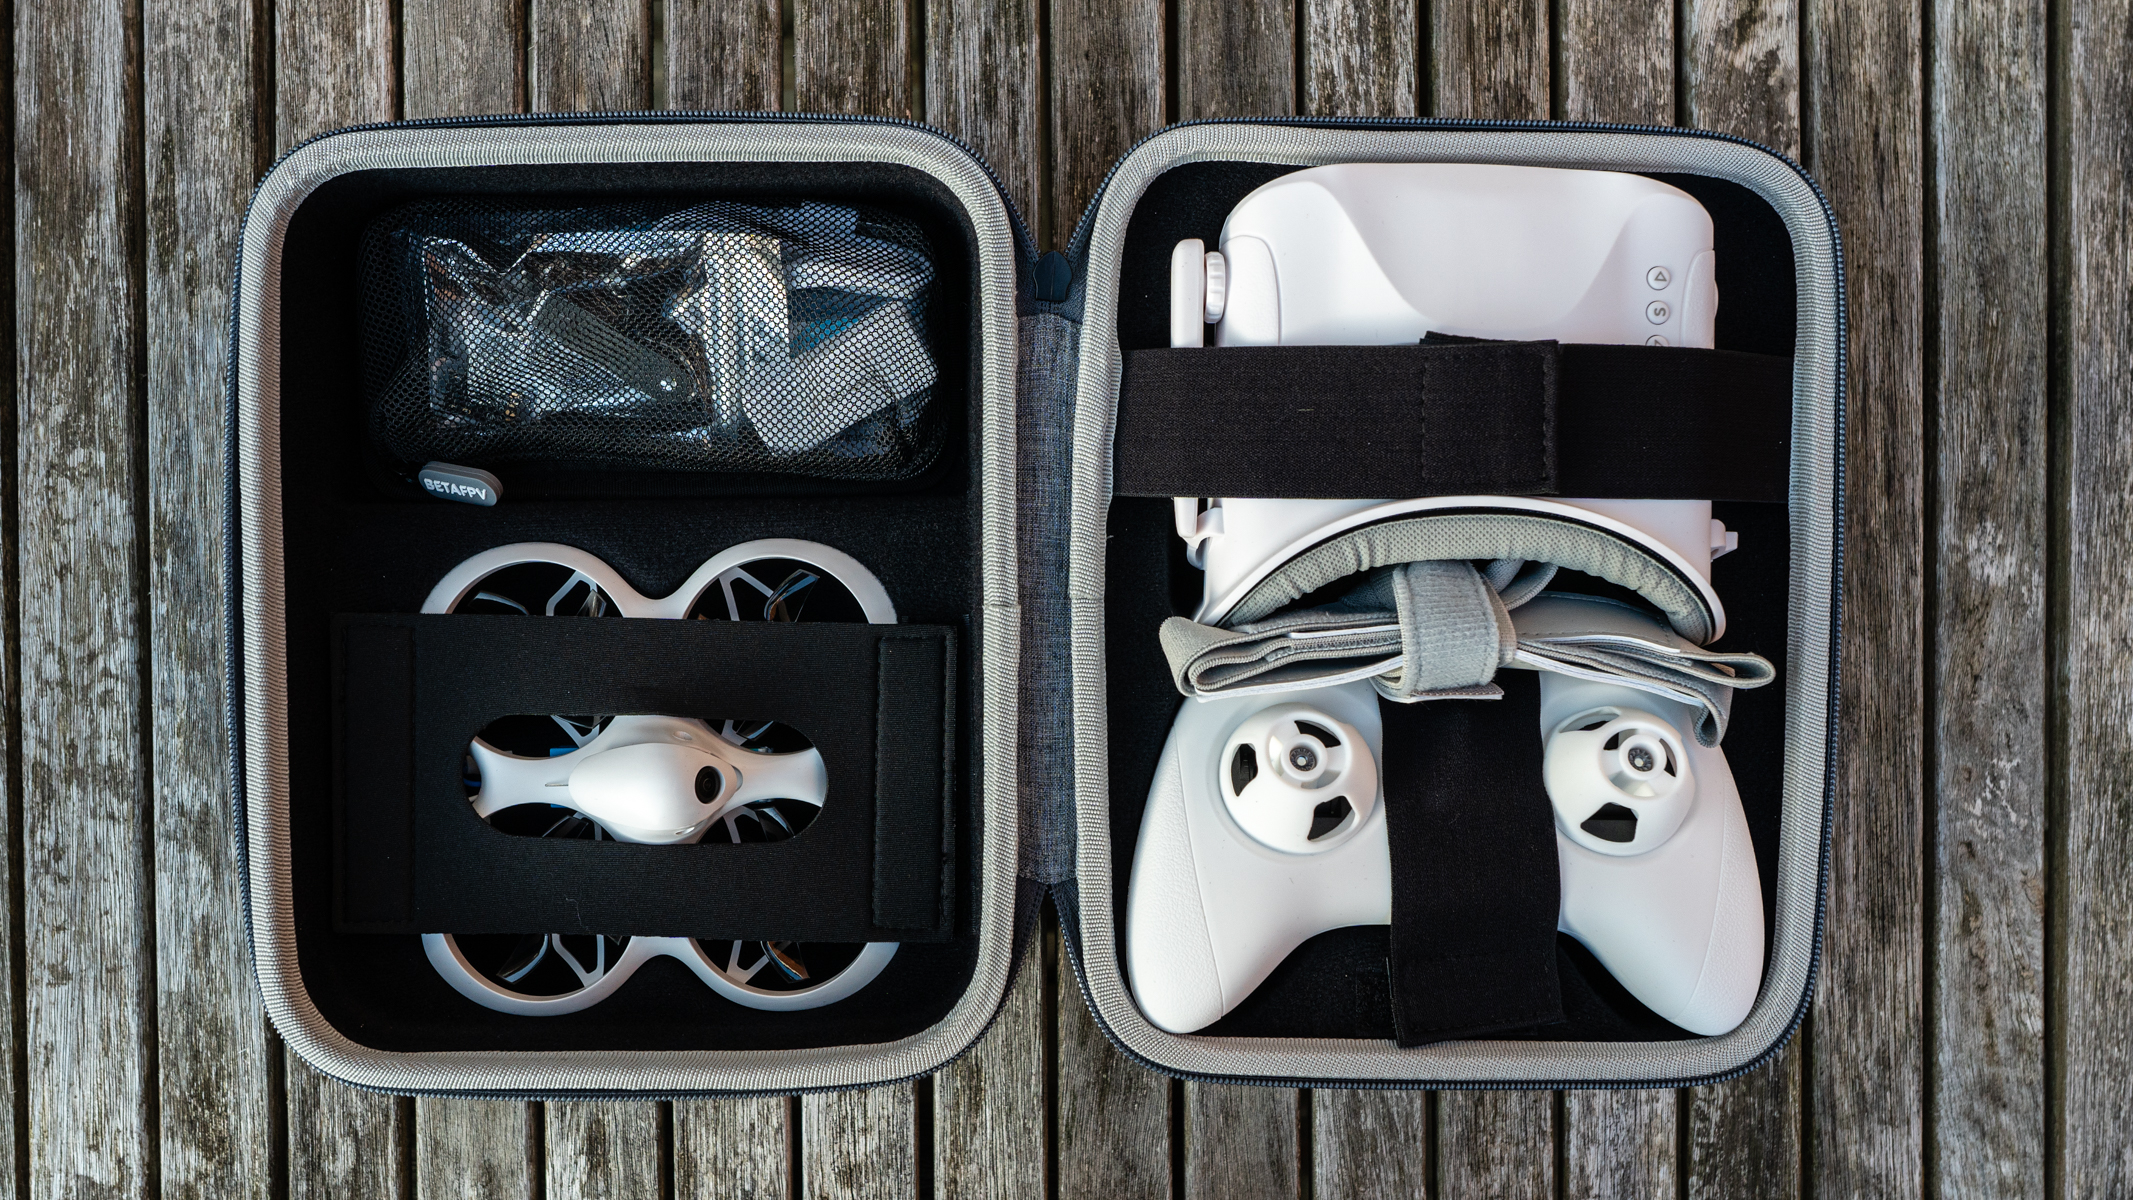
BetaFPV Cetus X: Design & Handling
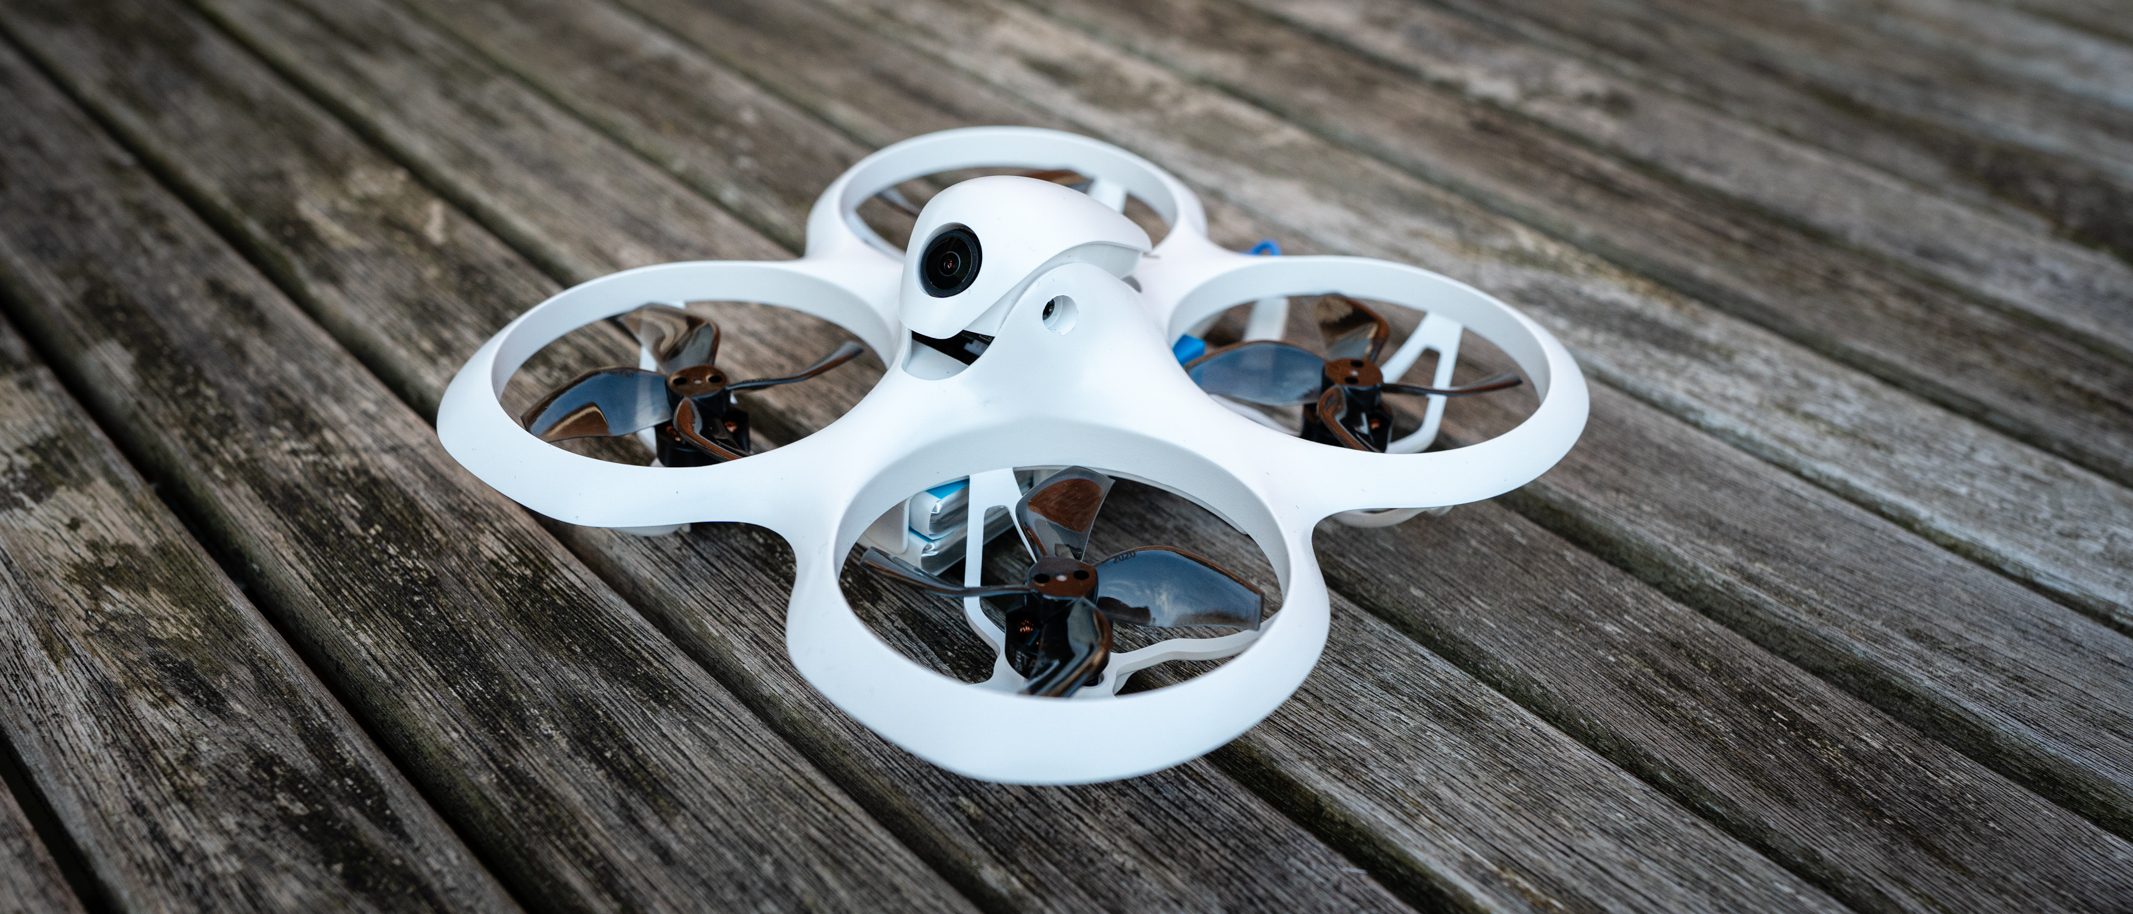
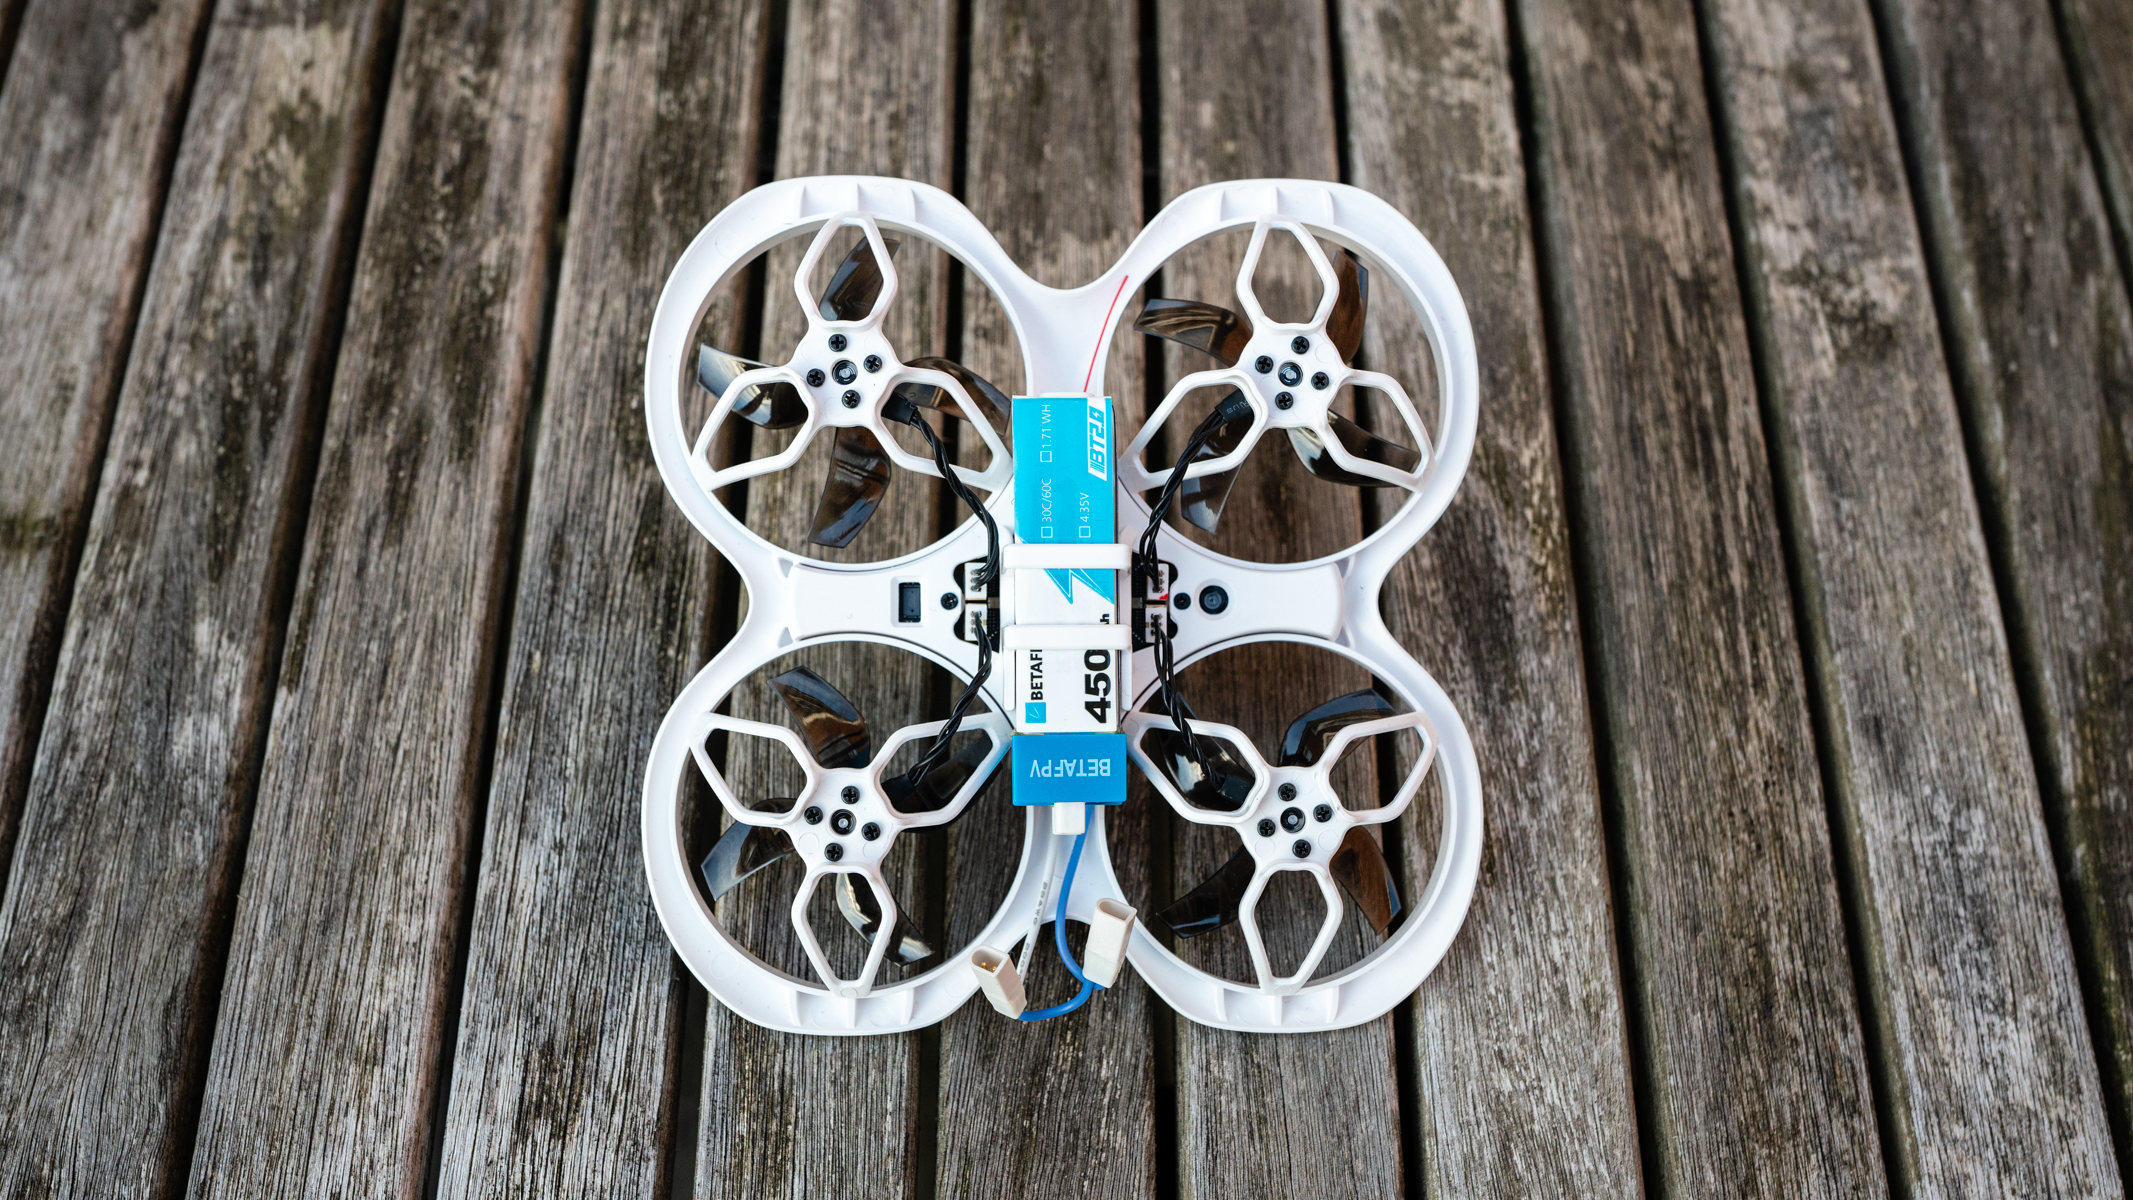
The Cetus X is a micro whoop style FPV drone with propeller guards around and below the propellers to protect both the propellers, people and objects in the event of a collision. The airframe itself is made of PA12 plastic which is pretty tough and designed to withstand impacts, which it does in most situations but it’s far from indestructible. During testing, the Cetus X was flown into a wall at speed which cracked the airframe in several places, but a replacement frame was extremely cheap to buy and it only took roughly five minutes to move all of the components from one airframe to the other.
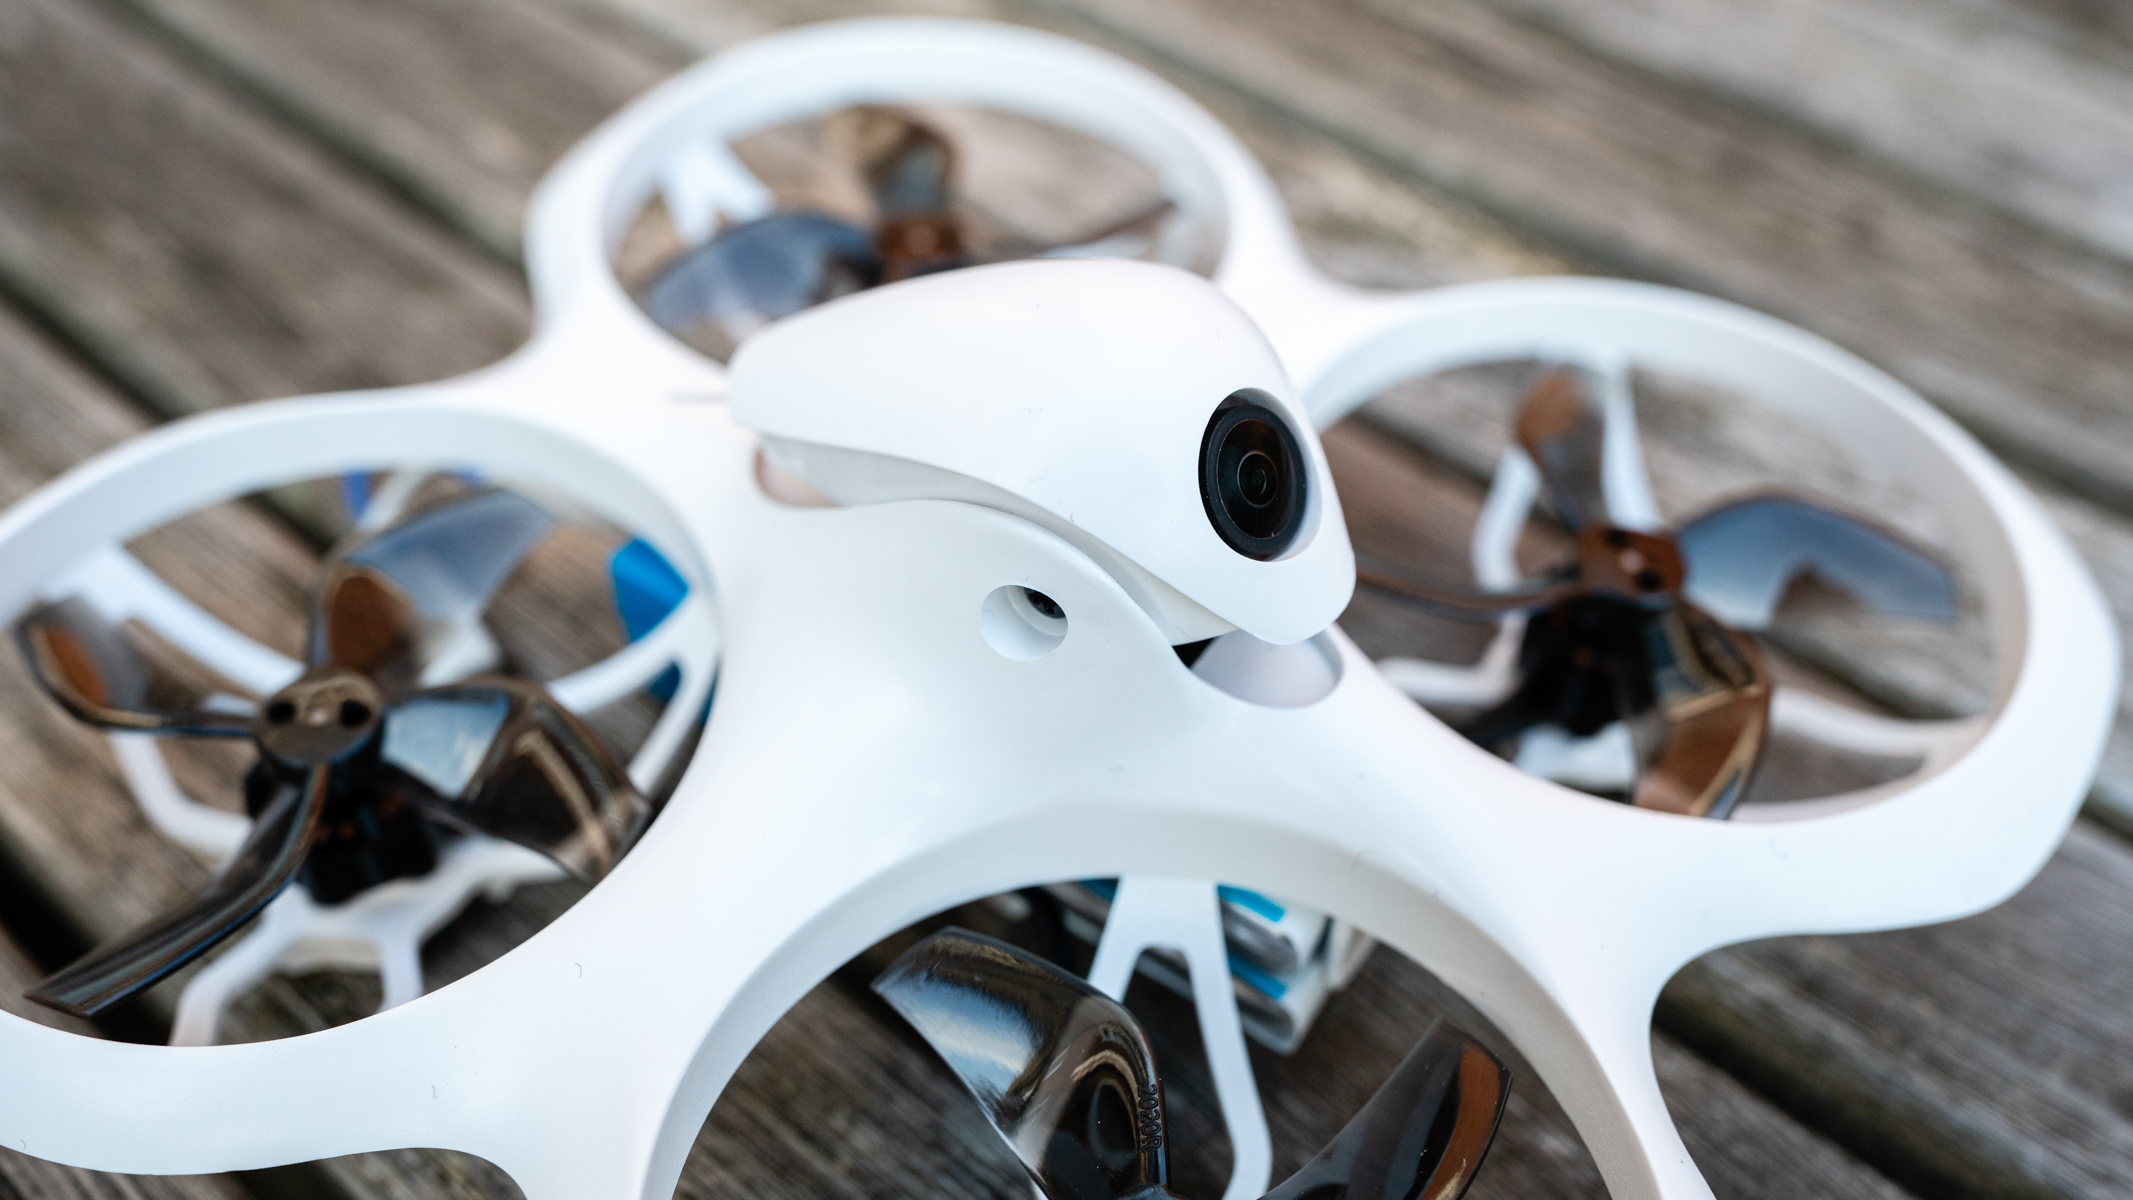
At just 135×135×60mm and with a weight of 2.85oz / 81g including two 1S batteries, it’s pretty small and lightweight but has plenty of power for outdoor acrobatic flight thanks to using two batteries; these fit into the bottom of the Cetus X which is powered on when both batteries are connected. Flight times are still short and typically come in at around three minutes depending on ambient temperature and how vigorously you fly, but charging only takes around 20 minutes per pair of batteries and can be done on location with a USB power bank.
Depending on the speed you intend to fly at, the Cetus X features an adjustable camera that can be set to an angle between 0 degrees to 40 degrees, which is useful because it improves the FPV view the pitot can see during flight. You would typically set the camera to zero degrees for slower indoor and outdoor flights, while faster flights would require the camera to be adjusted around 40 degrees. You have to experiment a little to find the perfect angles, but it’s easy to do and only takes a second to adjust the camera.

The kit comes with VR03 FPV Goggles, which are basic box-type goggles where the FPV video feed is reflected to the eyes with a mirror. These goggles aren’t suitable for use with glasses though, so if you need to wear glasses and goggles at the same time, you’d have to upgrade to a more advanced option from Fatshark, for example, where there’s a dioptre adjustment available in the eyepieces. This does, however, obliterate the cost-effective aspect of the kit.
The BetaFPV VR03 FPV Goggles are otherwise perfect for beginners and provide an 800x480 px resolution that’s delivered via an analog signal, which is prone to break up and interference. This isn’t a problem though, and video transmission can be set to between 25mW and 350mW with the higher amount being more powerful for longer distance flights, but you should check local radio laws before adjusting from the default 25mW. BetaFPV claims that the transmission range is up to 600m, but it’s best to keep a small drone like this within 100m to avoid loss of the drone.
The controller that comes in the kit is the BetaFPV Literadio 3, which is the Frsky D8 version with the Cetus FC version of the Cetus X. This is BetaFPV’s mid-range controller which is comfortable in the hands and features buttons and chunky switches to access flight settings. The internal battery is 2000mAh and provides enough charge for around an hour of flight. The controller can also be used to control FPV simulators on Mac and PC when connected via the USB-C charging cable.
BetaFPV Cetus X: Flight performance
FPV drones are, by their nature, much more difficult to fly than camera drones such as the DJI Mini 3. This is because you have to manually regulate the throttle to keep them in the air and also level the controls when flying in two of their flight modes to avoid crashing. It takes a lot of getting used to, and practicing on an FPV flight simulator is a great way to get to grips with the controls. It’s often said that you need around 50 flight hours to be able to fly in manual/acro mode, which is the most exhilarating mode and the one where you can flip, roll, and dive the drone; it’s the mode that’s synonymous with the FPV drone videos you’ll have no doubt seen online.
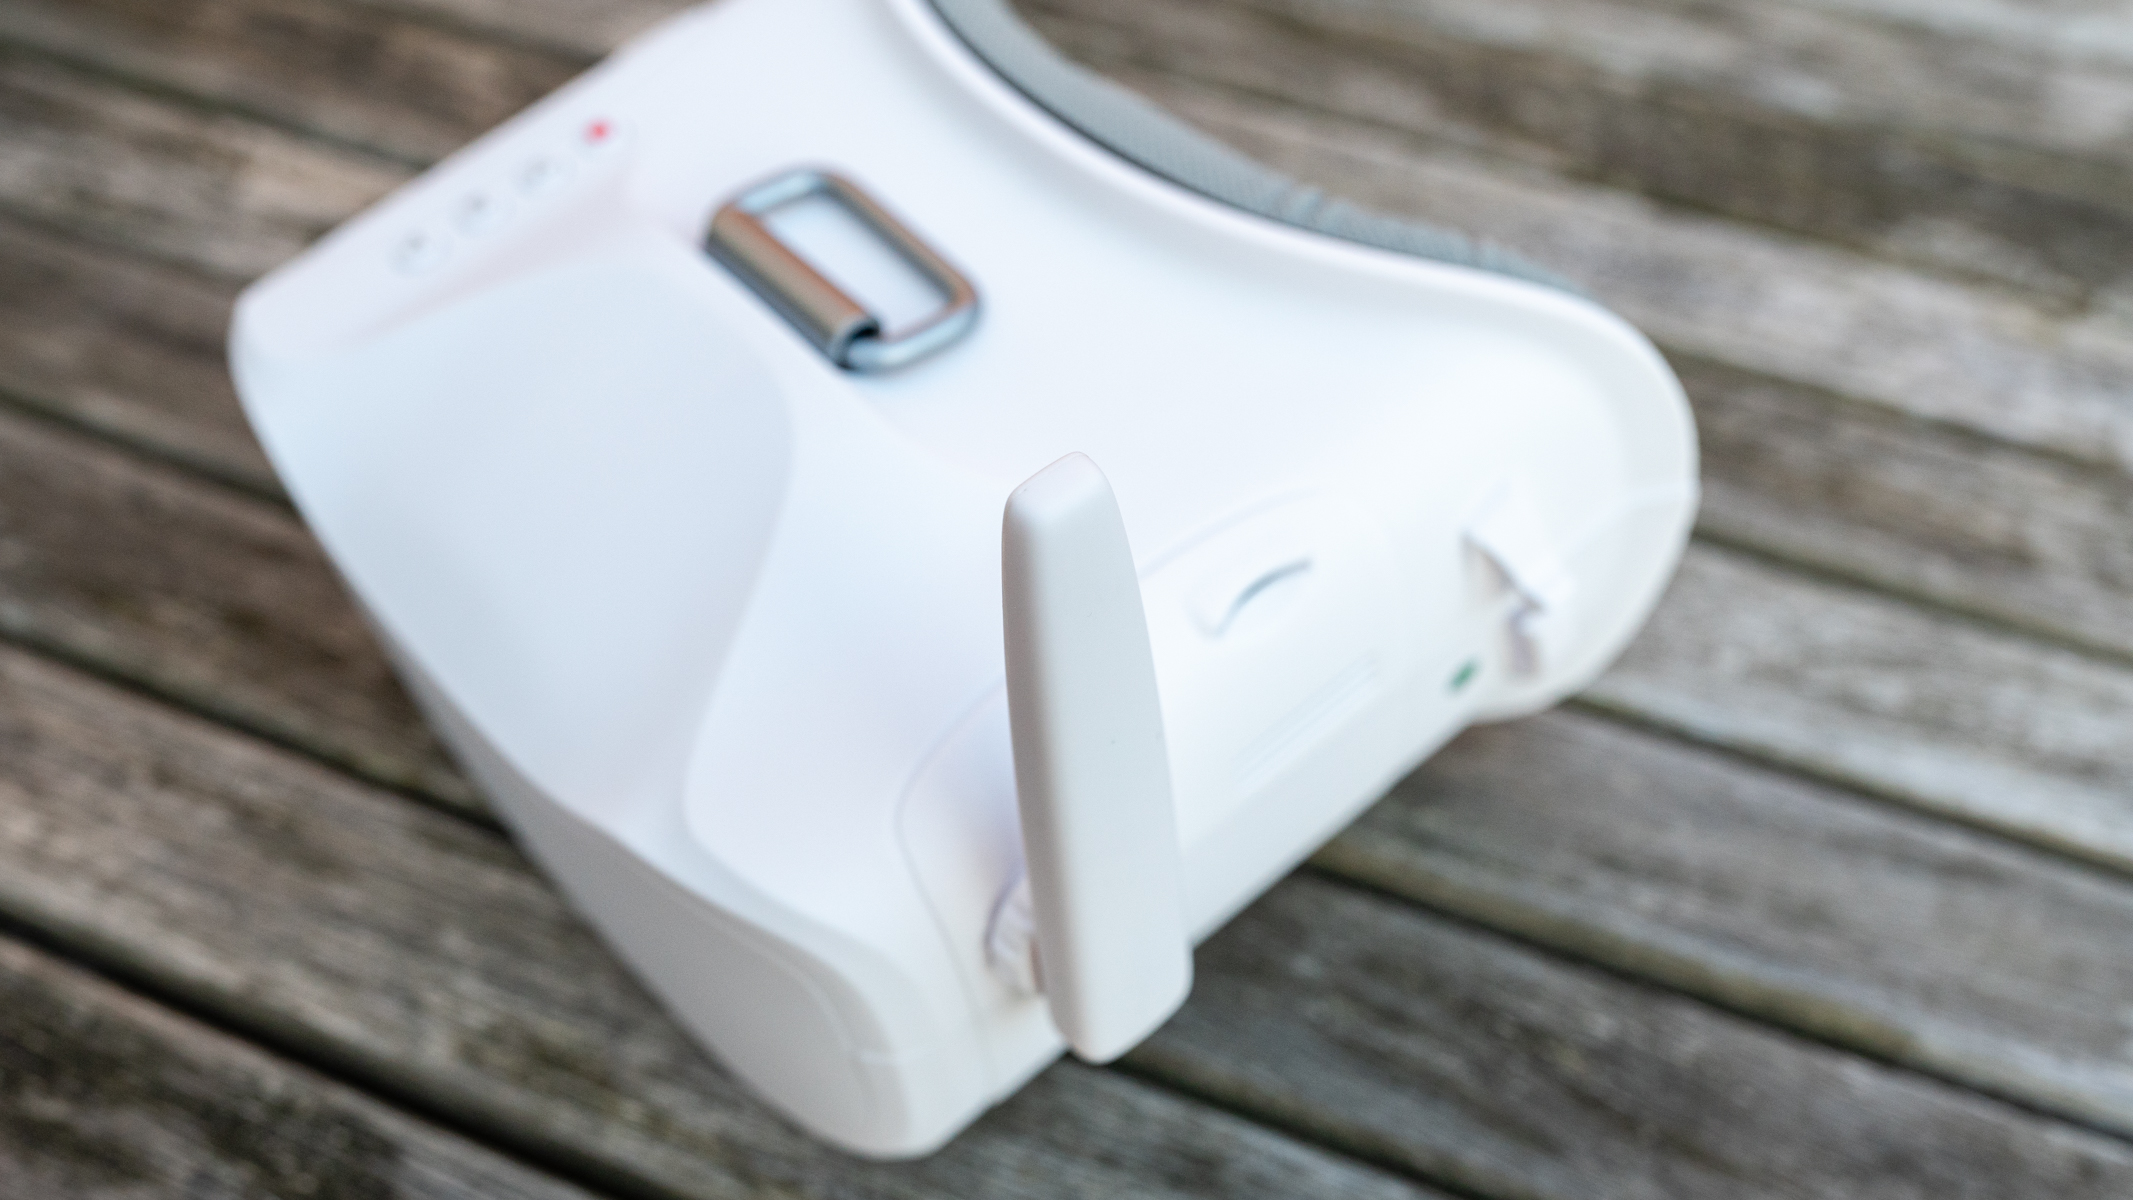
It’s safe to say that the Cetus X is a fast and reasonably powerful drone for its size and weight. For beginners, a drone like this is quite difficult to fly slowly when you’re getting used to the controls, so flying outdoors in an open space is often the best starting point despite three flight modes and three flight speeds being available. Normal mode (Level) keeps the drone level with some basic safety features including the ability for the drone to hover with the Cetus FC version of the Cetus X, Sport (Angle) offers more control but with the pitch and roll of the drone locked at an angle and Manual mode (Acro) is where, as the name suggests, everything is manually controlled.
If at any point you think you’ll crash or have lost control of the drone, you can simply press the Arm button on the controller to shut off the motors and the drone will drop out of the sky. And if you do crash, there’s a handy Turtle Mode that allows you to flip the drone and take off again manually flipping it over. This only works if the drone can be flipped, so its effectiveness depends entirely on the surface the drone crashes onto. Turtle Mode is activated using a button on the controller and then flicking the pitch and roll control stick (right stick).

There’s no getting away from the fact that FPV drones are difficult to fly, but the Cetus X provides just enough beginner-friendly features and flight modes to help you go from absolute beginner to more experienced pilot with a single FPV drone. The great thing about it too, is that the Cetus X performs well enough as a quick and easy fun drone for experienced pilots, so it’s a kit that you’re unlikely to grow out of too quickly, if ever.
BetaFPV Cetus X: Camera Performance
The FPV camera used in the Cetus X is a Caddx Nano Ant Camera/Runcam Nano 4, and the image produced in the VR03 FPV Goggles is delivered via an analog signal and displays at 800x480 px. This may sound awful but it’s fine and more effective than it sounds, to be honest. And although the analog signal is prone to interference and image break-up, it’s perfectly adequate and the quality is something you get used to quite quickly.
The VR03 FPV Goggles also have a built-in DVR (digital video recorder), which means that you can record the FPV feed at the touch of a button when a microSD card is installed. This video, unsurprisingly, outputs at 800x480 px, so it’s low-resolution, but it’s still great to be able to record flight footage to view after flights, share online, and assess how your flight skills are coming along. Another useful feature here is that if you crash and can’t find the Cetus X, you can view the last recorded video with the goggles to help you locate the drone.
BetaFPV Cetus X: Final Verdict
The BetaFPV Cetus X Kit is one of the best RTF kits available, allowing you to start with basic flight modes, including the ability for the drone to level and hover, before advancing on to manual/acro mode where flight is much more difficult but incredibly fun and rewarding at the same time. The ability to take you from beginner to expert pilot and beyond is what ultimately makes it excellent value for money.
The construction of the drone is simple, with the motors and FPV camera simply plugging into the flight controller, so even if you do manage to damage the airframe as I did, or other parts of the drone, it’s a cheap and easy fix. I have no electronics experience, but I still found the replacement quick and easy because everything is plug-and-play with just a few screws here and there. So, if you’re looking for an RTF FPV kit that will get you started in FPV drone flight, the Cetus X FPV Kit is an option you should consider.
Should you buy the BetaFPV Cetus X?
✅ Buy this if...
- You’d like a complete RTF FPV drone kit with everything you need to fly
- You’d like a micro whoop drone with enough power for acrobatic flight
- You want a drone that’s mostly about enjoying flight
🚫 Don't buy this if...
- You suffer from motion sickness – FPV goggles aren’t for everyone
- You’d like to take aerial photos
- You would like to capture immersive 4K video footage
Alternatives
The DJI Avata is the easiest-to-fly FPV drone available and can be flown competently by anyone with the DJI Motion Controller 2. Conversely, expert pilots can also fly in manual/acro mode with the DJI FPV Remote Controller 2 but parts, when available, are more expensive than traditional FPV drones if you crash. The Avata can hover when not in acro mode and capture great quality 4K video footage, but it’s expensive.
If you’re an experienced pilot with electronics and FPV drone self-build knowledge, the BetaFPV Pavo Pico (Amazon) kind of like a mini DJI Avata, but with standard FPV flight modes and weighs less than 150g, making it ideal for flying in tight spaces. This is a more advanced option that won’t be for everyone because it requires an element of self-build, but it’s an interesting option if you know what you’re doing.
James Abbott is a landscape and portrait photographer based in Cambridge. He’s also an experienced photography journalist specializing in camera skills and Photoshop techniques. He is also a CAA-approved drone pilot and professional aerial photographer.
