Digital Camera World Verdict
Blackmagic’s DaVinci Resolve editing software gets better and more feature-packed with each generation. And the latest version 17 is the best yet. It has industry-standard colour processing used by some of the biggest films, and with improved audio and HDR tools, it’s even better. Best of all, the basic version is free while the full-spec version is only £225 or free if you buy the £225 Speed Editor! But it is complicated and takes some getting used to if you are coming from other NLEs (non-linear editors).
Pros
- +
The stunning price
- +
Incredible colour grading tools
- +
Basic version is all many will need
Cons
- -
Not as intuitive as some rivals
- -
Maximum 60fps, UHD and 8-bit in free version
- -
Big learning curve to use it properly
Why you can trust Digital Camera World
If you want the most feature-packed editing programme for the least amount of money, then Blackmagic’s DaVinci Resolve 17 is it. And that’s not just because in basic form, it’s free. The full Studio version is just $295/£225, or if you buy the $295/£225 Speed Editor controller, you get the full version thrown in. It also comes free with many Blackmagic cameras. And once you have it, future Studio upgrades are free.
So with DaVinci Resolve 17 or full Studio version varying between free and $295/£225, it’s far cheaper than any other full-spec editing software packages you can buy. Now just out of Beta testing and available as a final product, DaVinci Resolve 17 has had a major redesign and added even more functionality to its already huge menu of options. From its Fairlight audio processing to Fusion graphics, it has the lot. As well as its industry-standard colour editing and grading, of course. And its new HDR colour features allow fast and easy grading of shots with a very wide dynamic range.
It’s the only single programme that has not just editing and colour correction but professional audio, motion graphics and visual effects built in. It's also the only way to process B-Raw files from Blackmagic cameras.
Key features
Unlike many editing programmes, where work is done in one view where all options are shown, Resolve is split into separate ‘pages’ which give a dedicated set of tools for each task. The Media page is where you organise your clips, Cut and Edit are two different styles of editing pages, Fusion is for visual effects and motion graphics, Color is for colour correction and grading, Fairlight is for advanced audio and Deliver for exporting your finished work.
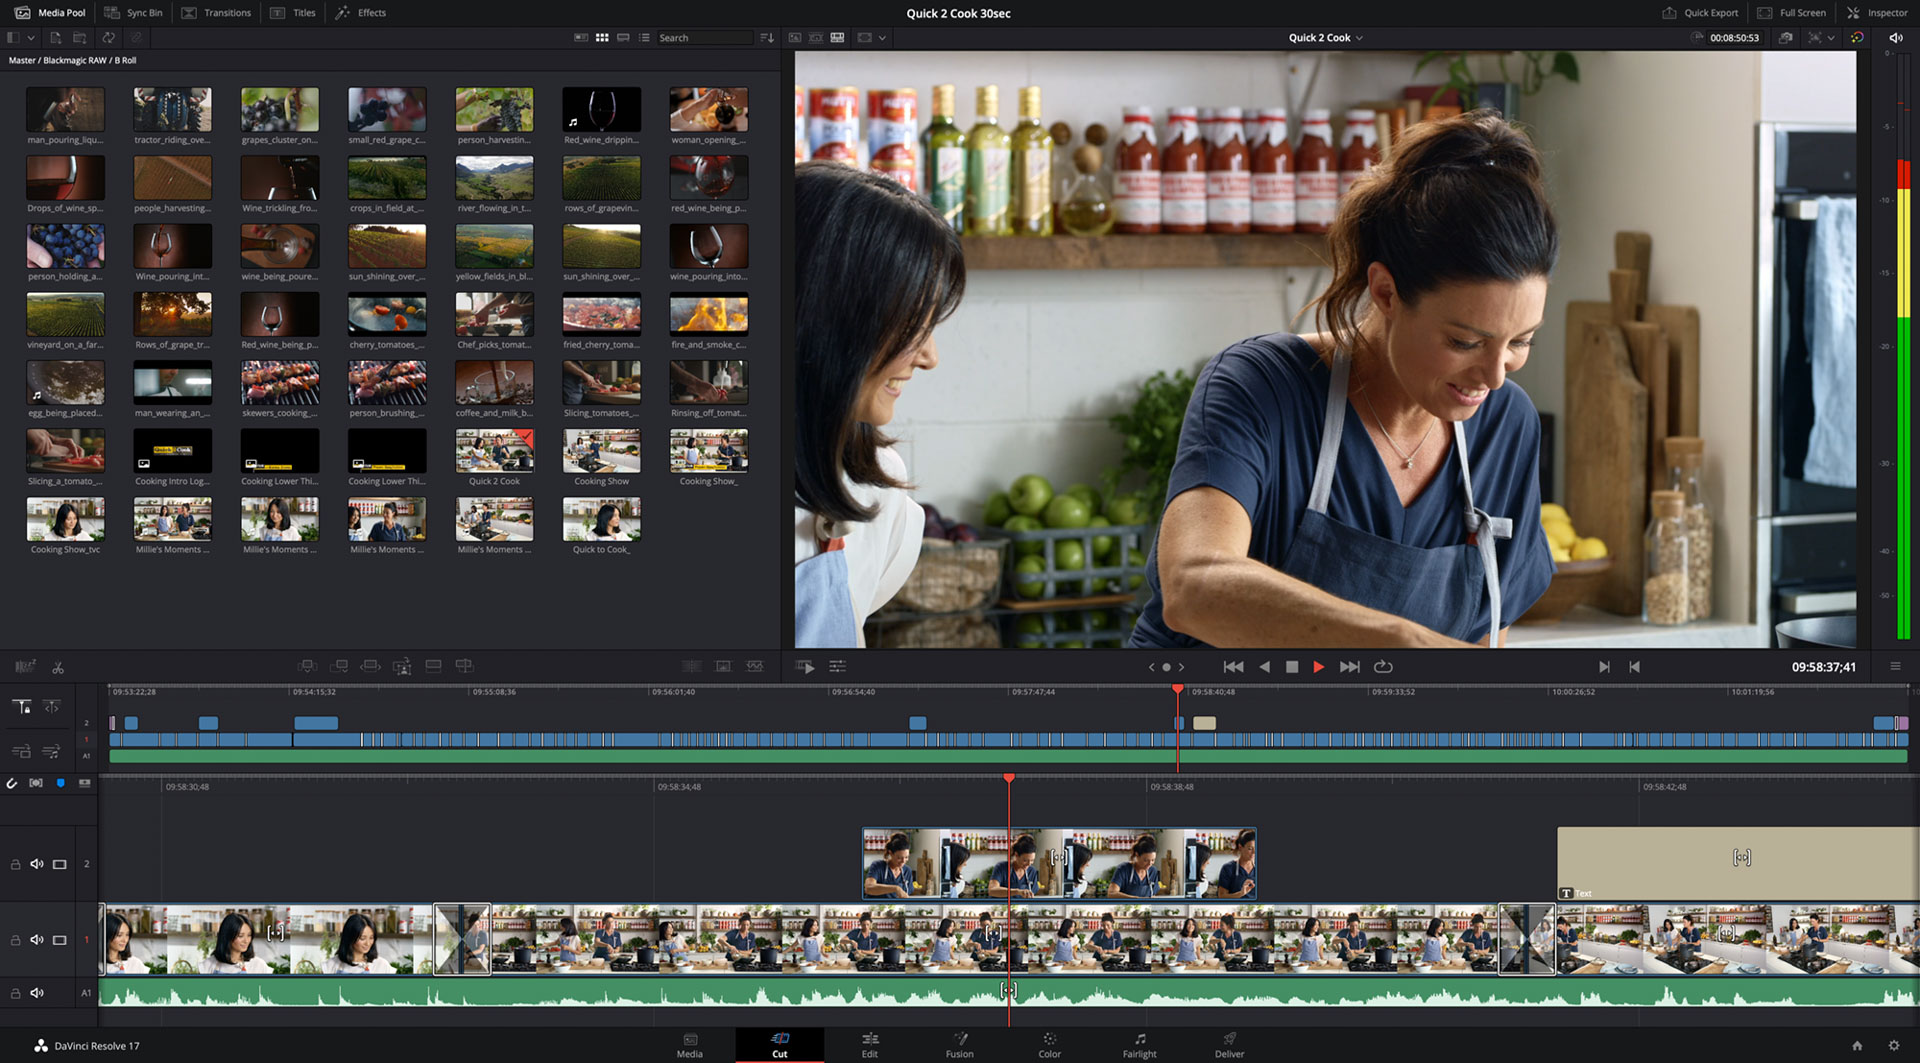
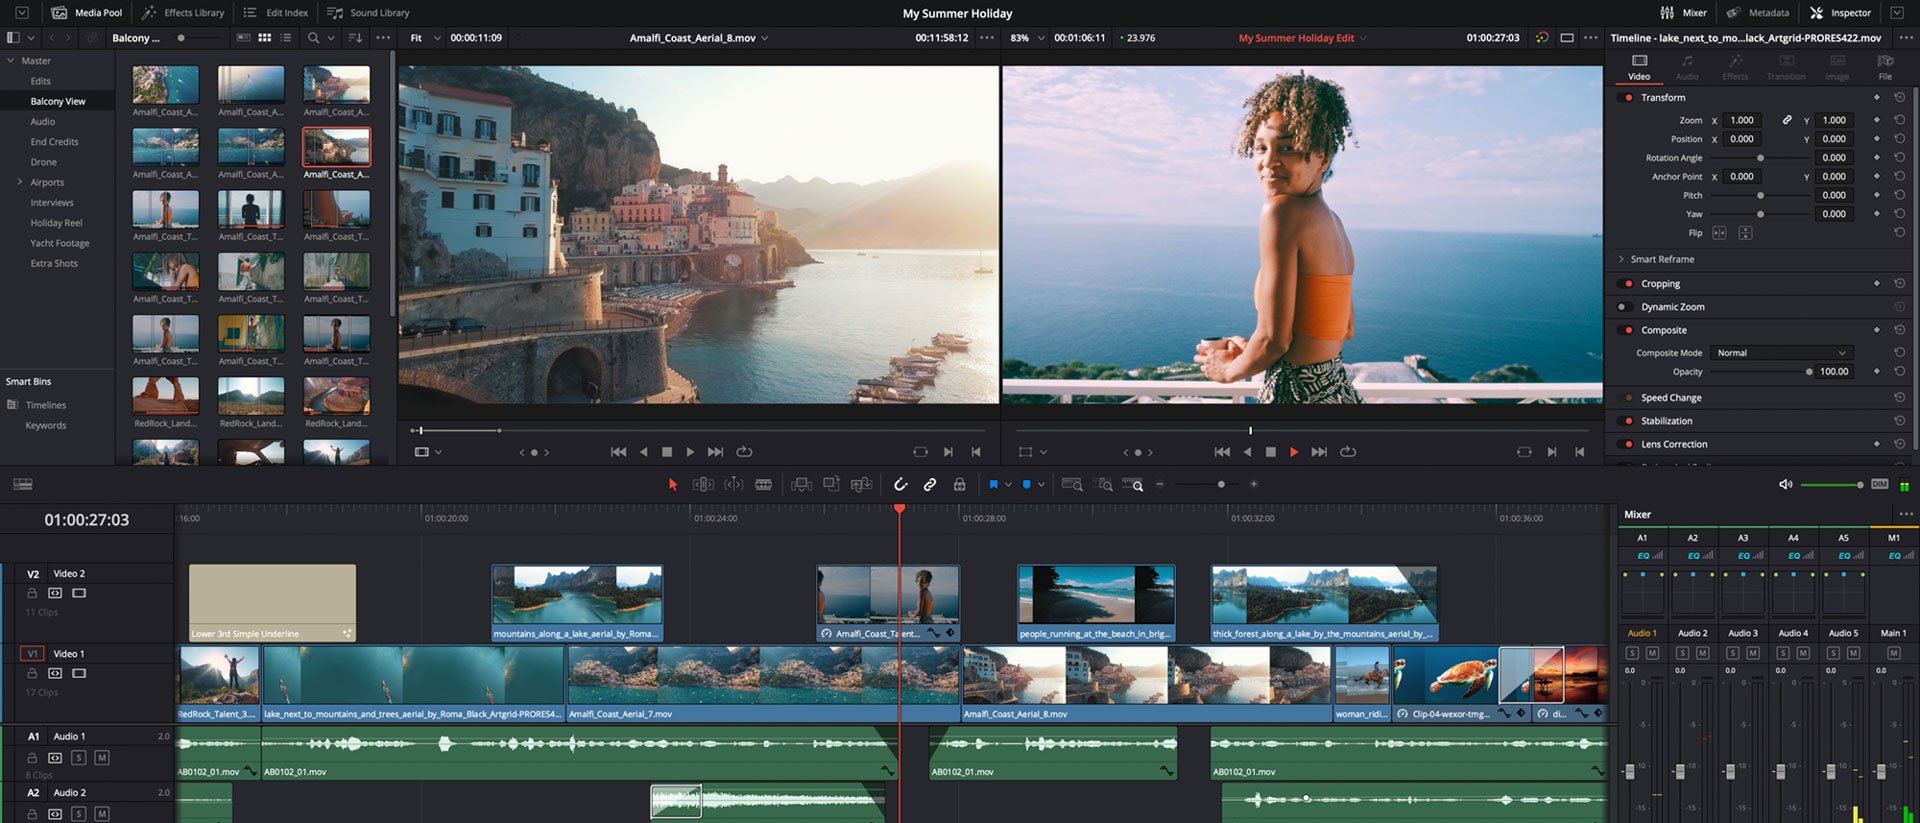
Once work is imported, which can be done by drag-and-drop of either files or entire folders, you edit using either the Cut or Edit pages. Cut is more streamlined for fast work and designed for quick turnaround projects, but allows for multicam edits. But most users will work in the Edit pages for more considered projects.
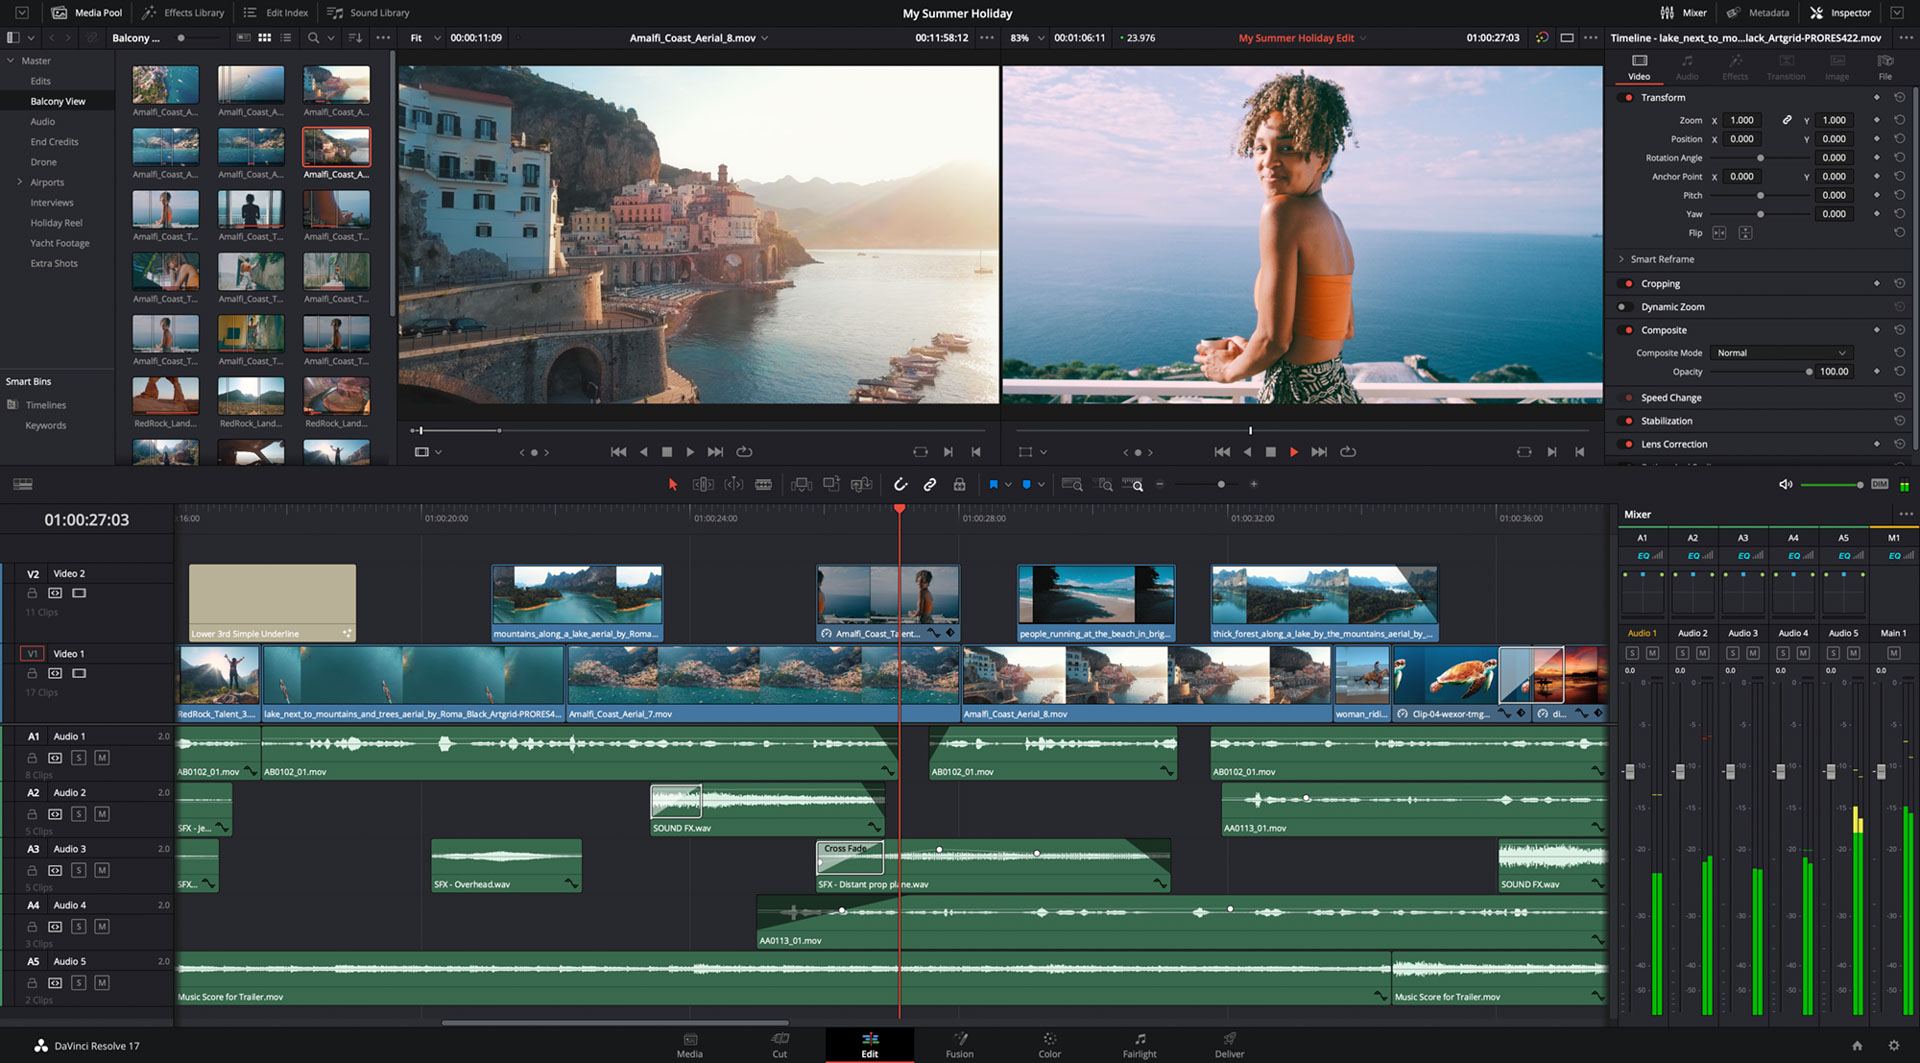
The Edit page features drag and drop editing, smart trimming tools, fast proxy editing, live previews of any effects and has a huge library full of effects and transitions. If you are used to Adobe Premiere Pro or Final Cut Pro X, this is where you will feel most at home as it’s similar.
You double click a clip to load into the inspector, drag the playhead to where you want your clip to start in the time line, mark clips with in and out points, or use traditional I and O as in and out points. Then drag it to the timeline or use the editing overlay, which allows you to insert, overwrite, replace or other editing options. Trimming is similar to other NLEs (no-linear editing programs), too. As is working with multicams, selecting transitions, or adding the built-in 2D and 3D titles, cropping, speed ramping, image stabilisation and more. The edit page also has basic audio controls and quick exports.
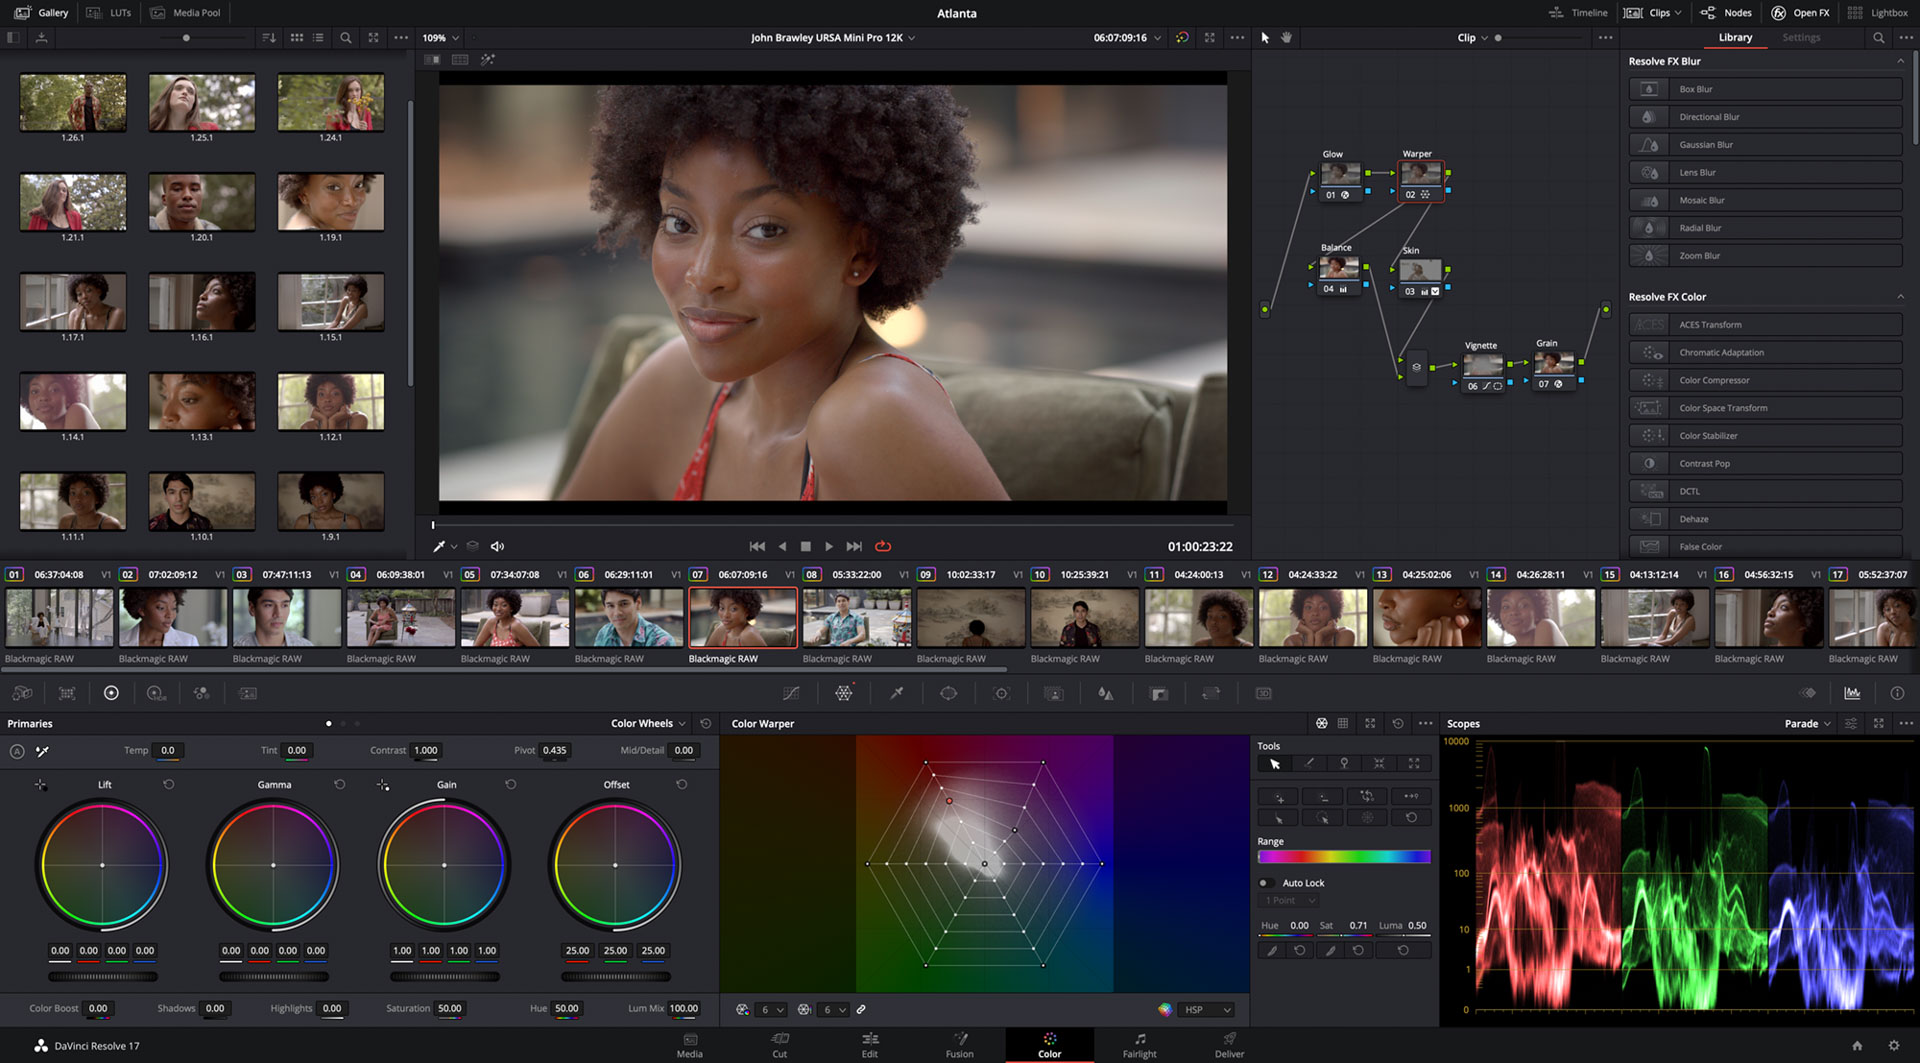
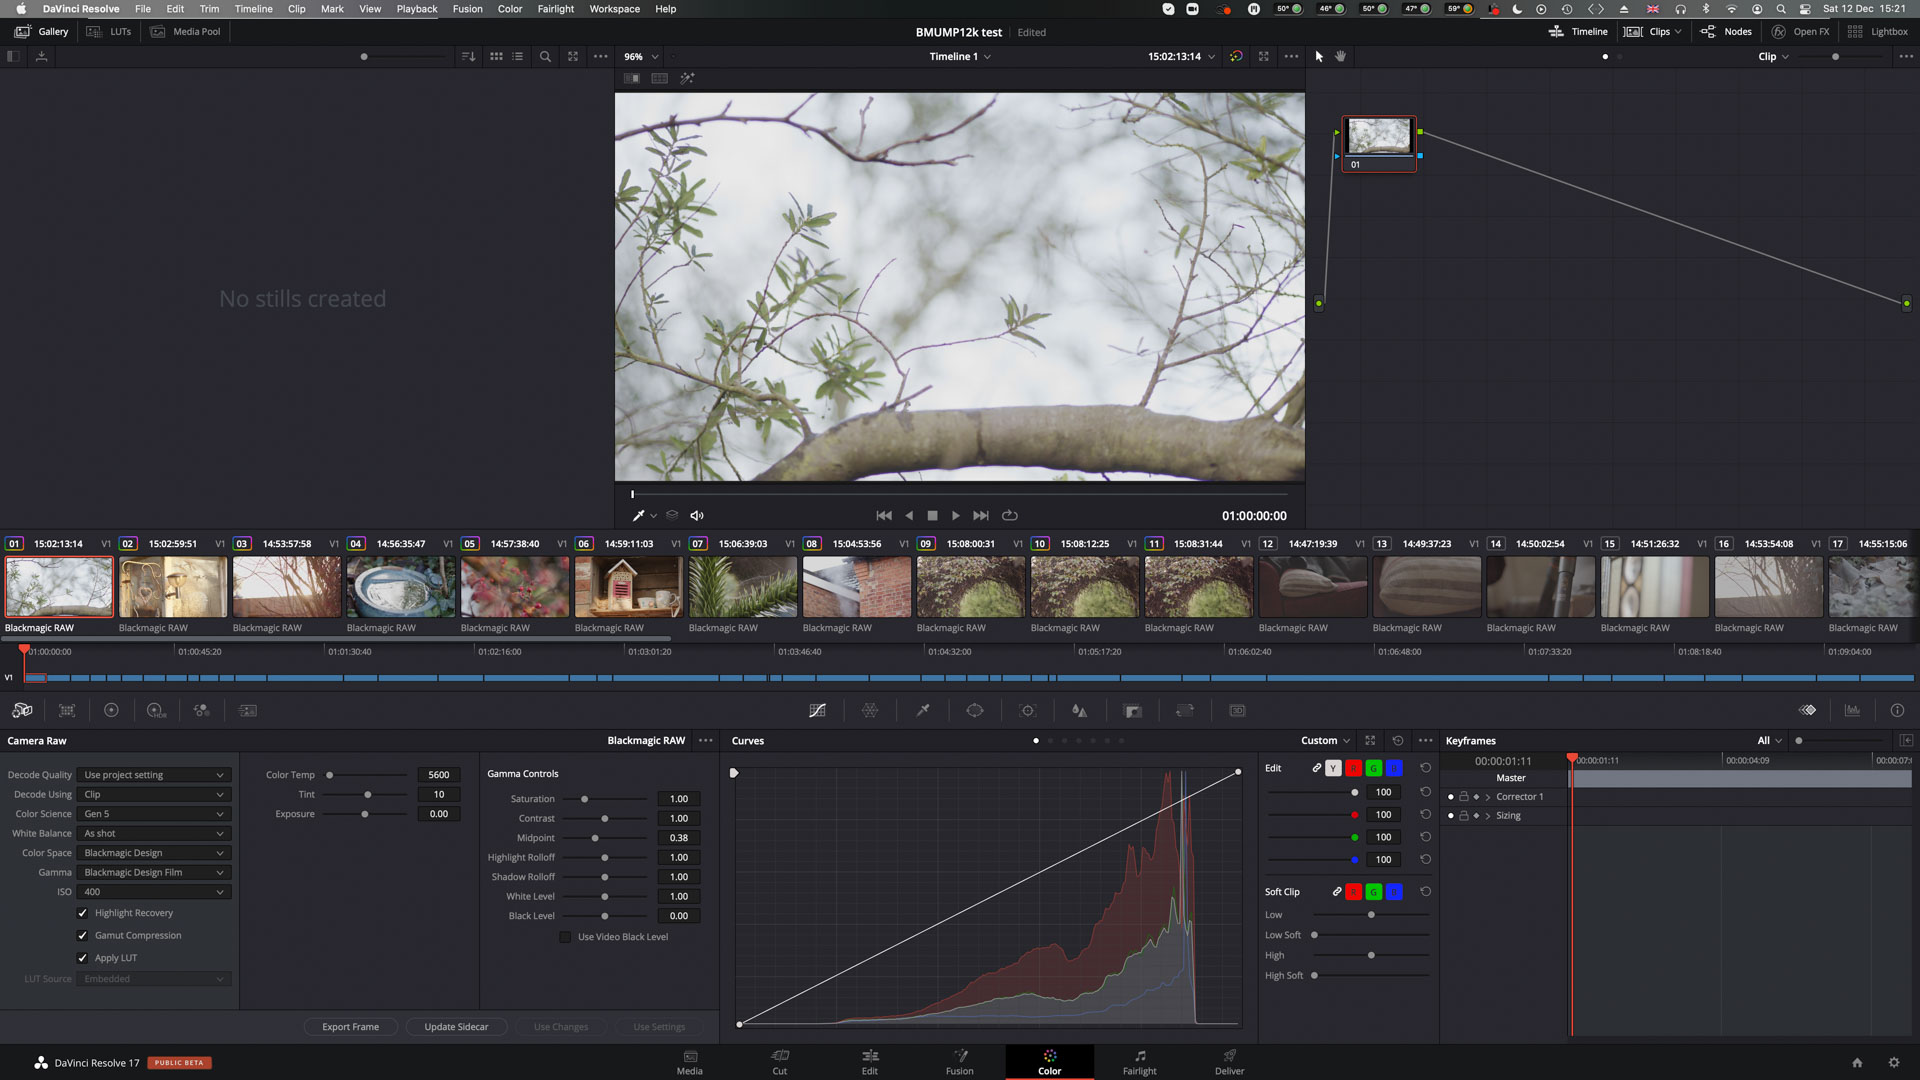
From here, the Color page is a full-on Hollywood-level colour correction and grading tool including Wide Gamut and HDR images. DaVinci makes it as easy as other NLEs by allowing tweaks via conventional sliders or colour wheels which adjust contrast, colour temperature, midtones, saturation and more.
The primary color wheels let you adjust balance and brightness are called Lift, Gamma and Gain – which some call shadows, midtones and highlights. The Offset wheel adjusts the whole image. Or you can click onto a part of the image and tweak the settings for that colour individually. And an Auto Balance and Matching function allows these settings to be applied to similar shots on the timeline.
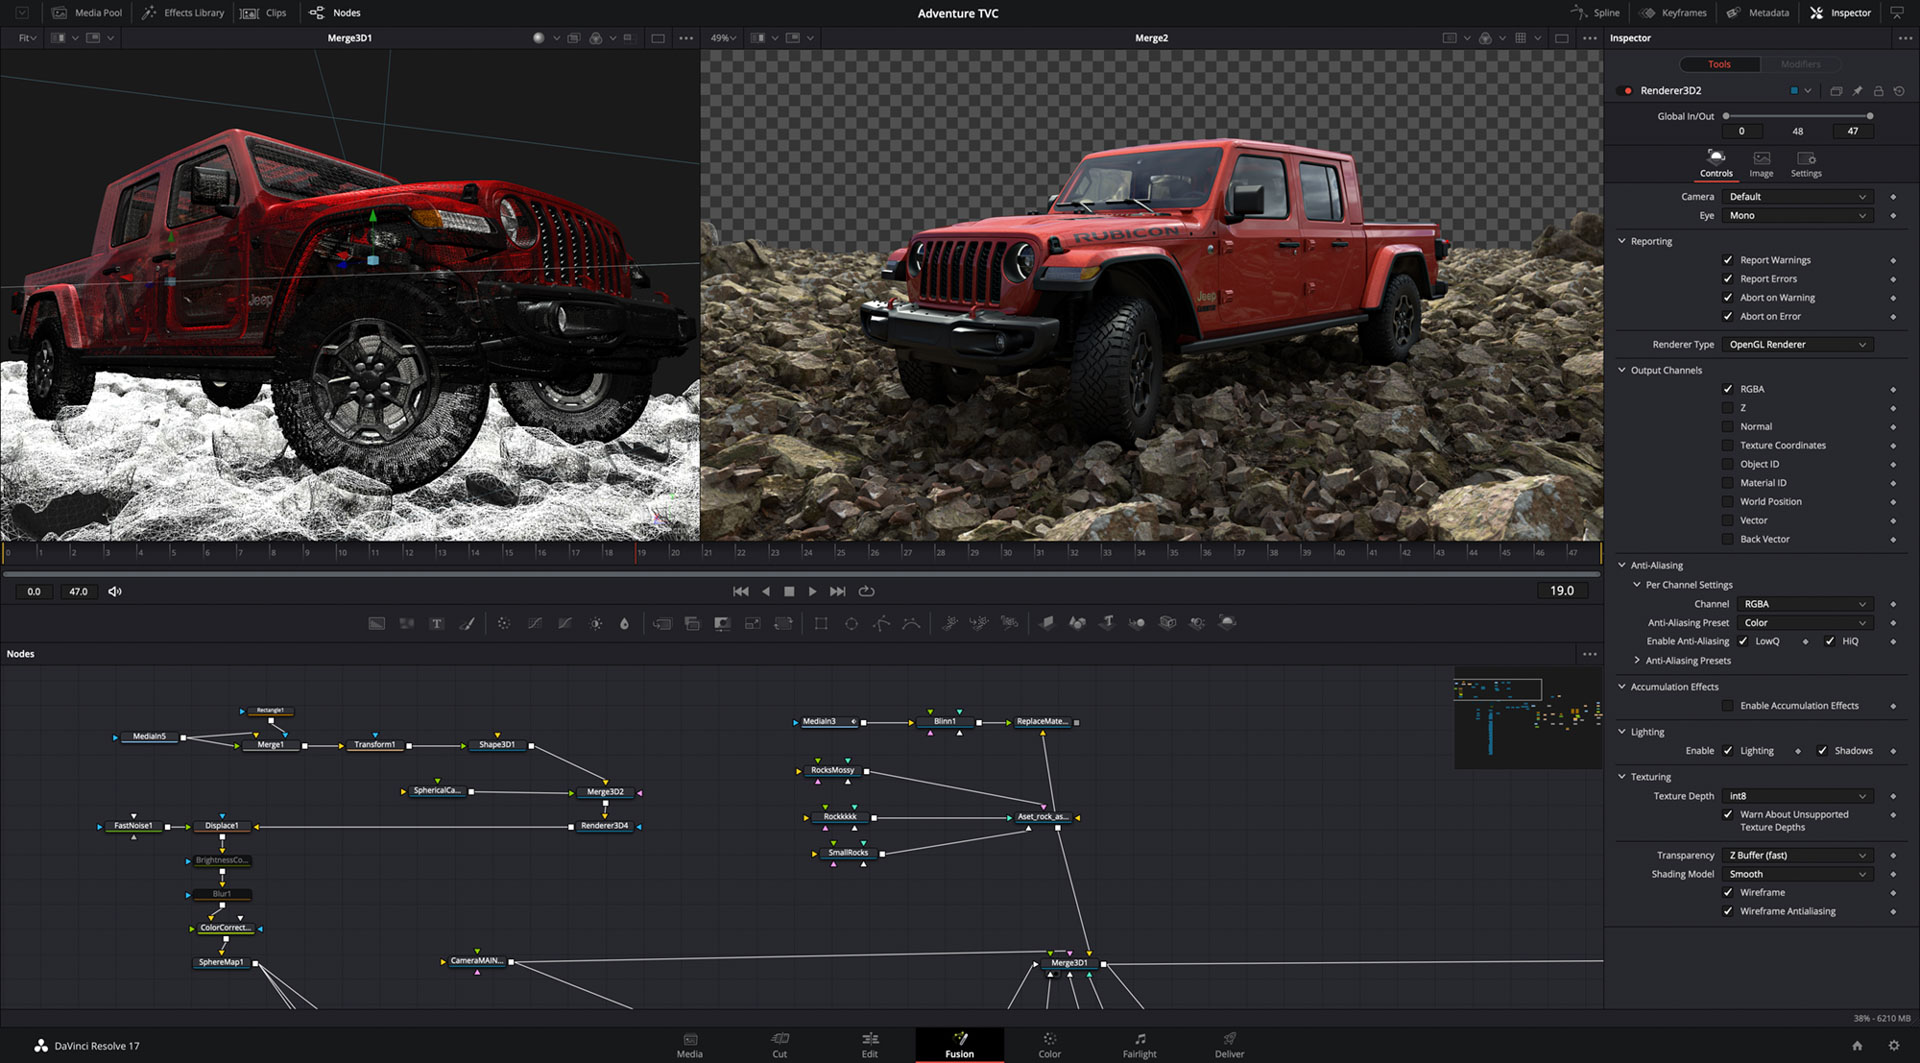
This is all that some might ever need. But for more advanced users, there are lots of very capable options. There are Curves to adjust the colour and contrast in finer detail, and you can adjust hue, saturation and luminance separately too.
Secondary grading lets you adjust just one particular color of an image, Power Windows allow you to select a shape to mask out during color changes, while the Tracker lets you follow that shape through a scene.
Resolve Color works by using ‘Nodes’, where each node is a set of color changes. So the first node is usually for basic image colour balance, the second might be to isolate the sky, the third might be to smooth out skin, a fourth might be to add a flare. Then you can change each one individually.
Tools includes waveforms, vectorscopes, histogram, parades and CIE chromacity. However you like to work, you’re covered. And when it comes to adding your own look, tools like Color Warper lets you set a colour palette that effects certain colors, for example, and paste them onto other shots in the timeline.
Studio version and Speed Editor
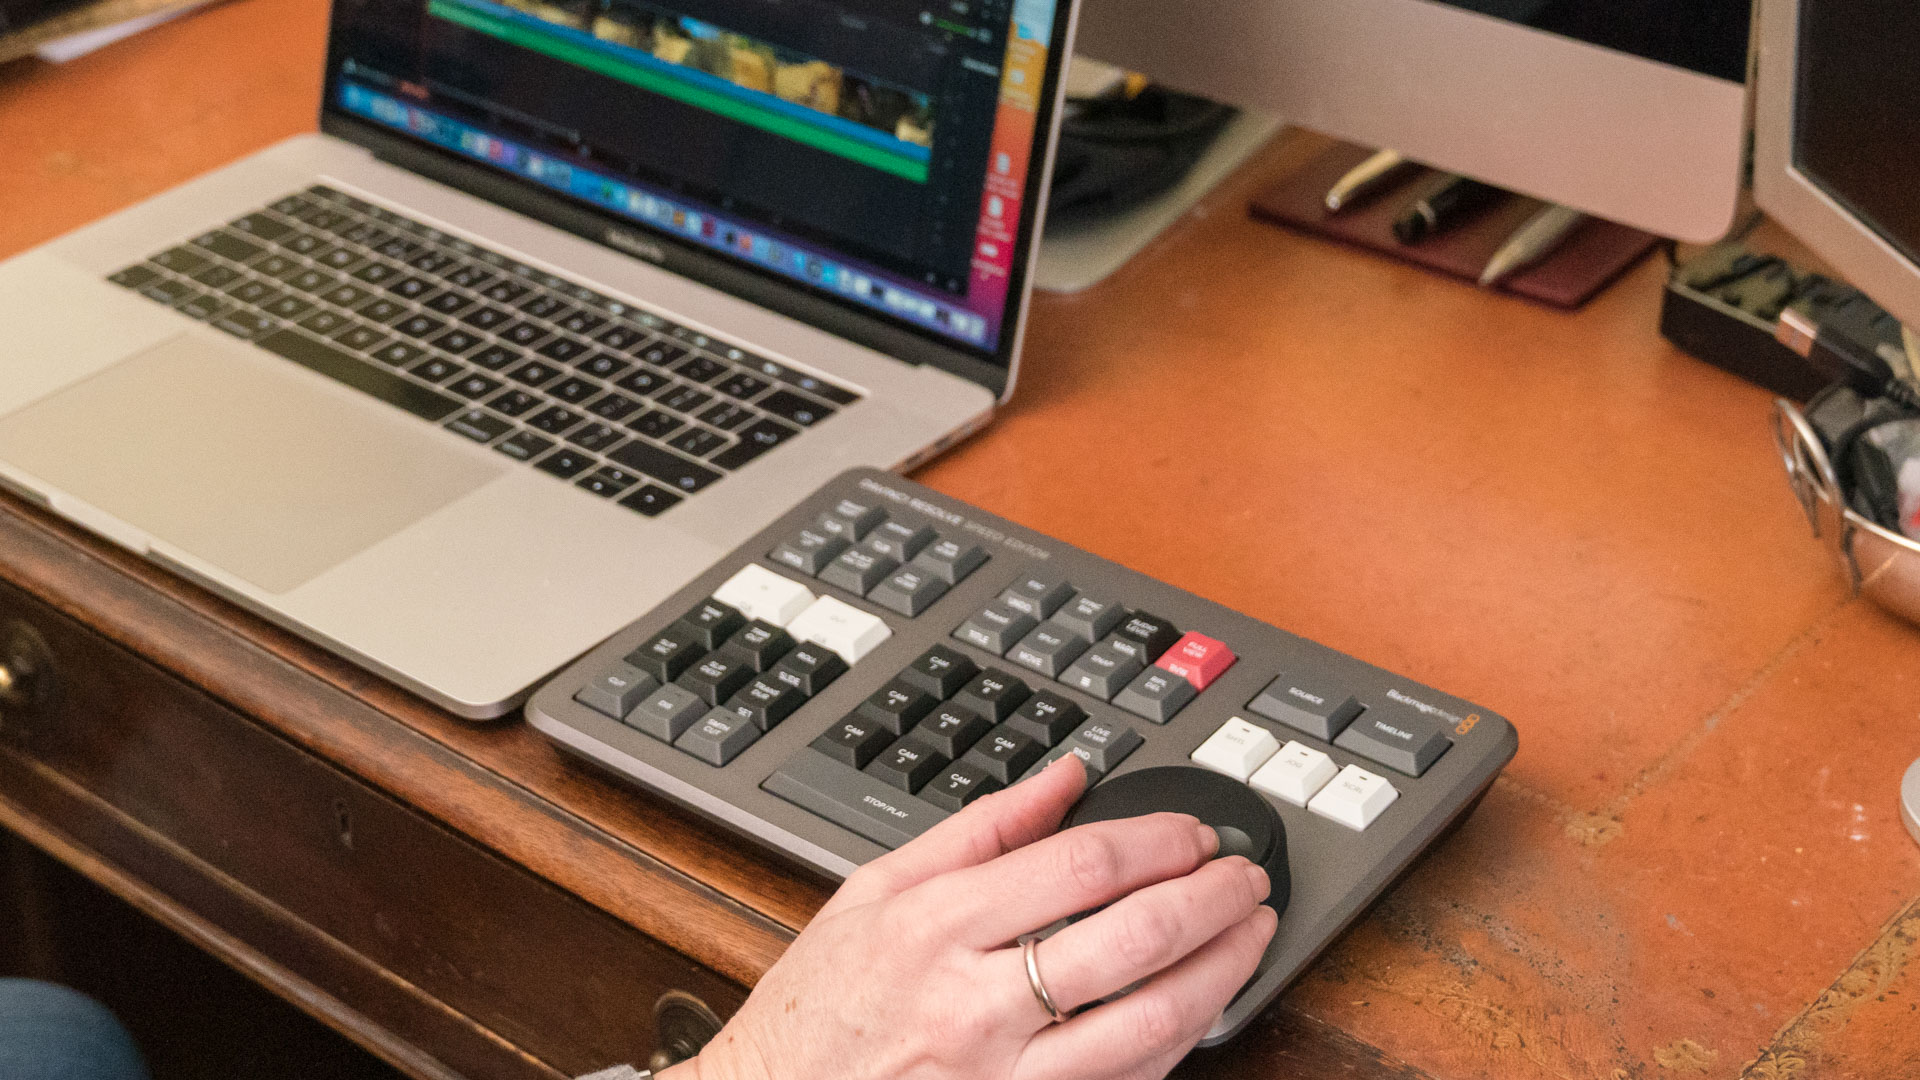
DaVinci Resolve 17 is fast and easy to use, once you know how. It is more complicated than other editing programmes as it is far more than just a non-linear video editor. And this means it takes a lot of learning to get the best out of it.
One way of speeding up your workflow in the edit is to use the $295/£225 DaVinci Resolve Speed Editor keyboard which can let you edit using both hands. It’s a professional-style keyboard with transport controls on the right side and edit functions on the left. This means you can use the search dial and source tape buttons with your right hand to locate the shots you want. Then you can simultaneously mark clips, perform edits or trim clips with your left hand.
It takes some getting used to, but once you do, it’s faster than using a mouse.
The keyboard is a solid and professional-feeling bit of gear, with a machined metal body, and solid keys that do have a slightly old-school feel about them. The search dial has an electronic clutch so you can quickly locate shots and trim edits. It all communicates wirelessly with your computer and its internal battery is charged via USB-C, or you can leave it plugged directly into your computer.
There are clear IN and Out buttons to make edits faster, and Insert buttons to add the clip you have chosen to the edit. It’s also quick at adding transitions. Perhaps best of all, buying the Speed Editor means you get a free copy of DaVinci Resolve 17 Studio.
The biggest benefits are that the Studio version works with footage over 60fps and allows exports larger than UHD 3820x2160 pixels. While the free software works for 8-bit footage, the Studio is capable of AVCHD, AVC-Intra and any All-I H.264 recordings, plus 10-bit encoding.
With All-Intra, 10-bit and 6K now becoming more normal, that could be vital to you. The Studio version can work up to a massive 32K resolution and up to 120fps. You can also get full screen playback on a second monitor, lens correction software and the noise reduction software is far more advanced.
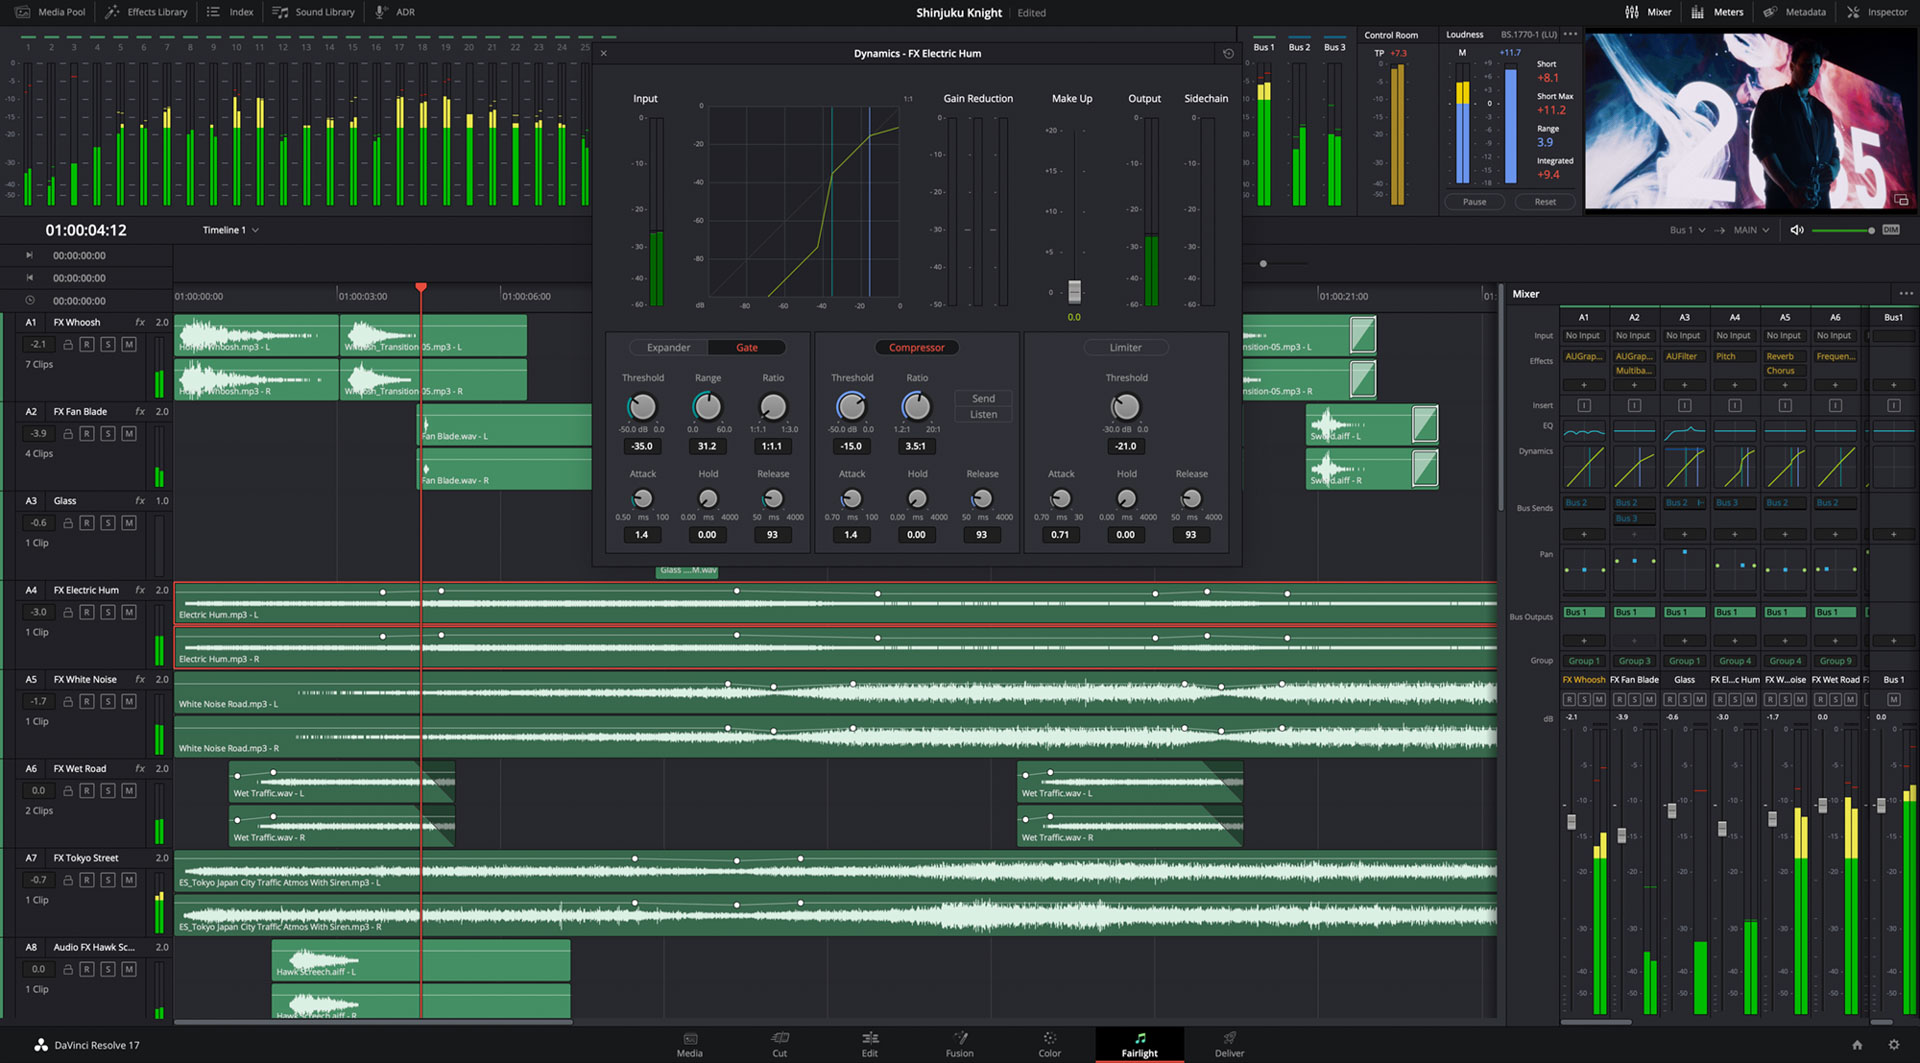
Available only on the Studio version is Neural Engine, which adds artificial intelligence object removal, Auto Color Balance and Matching and facial recognition software. There are more options in the Fairlight audio page and in the Effects Library, too. And the Studio Version offers Dolby Vision in addition to the HDR10+ in the Color page, and there is support for Arriflex cameras.
While free version will use a GPU for processing, the Studio version will recognise up to nine GPUs for even faster working. You have access to GPU hardware accelerated encoding on certain H.264 and H.265 codecs. The Studio version is faster with smoother playback.
And it’s also designed to be used by teams, working either together or remotely, with plug-ins for remote asset management and automation systems.
Speed Editor specifications
Price: $295/£225 (with free DaVinci Resolve Studio 17)
Connections: USB-C
Power usage: 4W max
Operating systems: Mac OS 10.15 or later, Windows 10, 64-bit
Dimensions WxHxD: 245x156x44mm
Weight: 780g
Performance
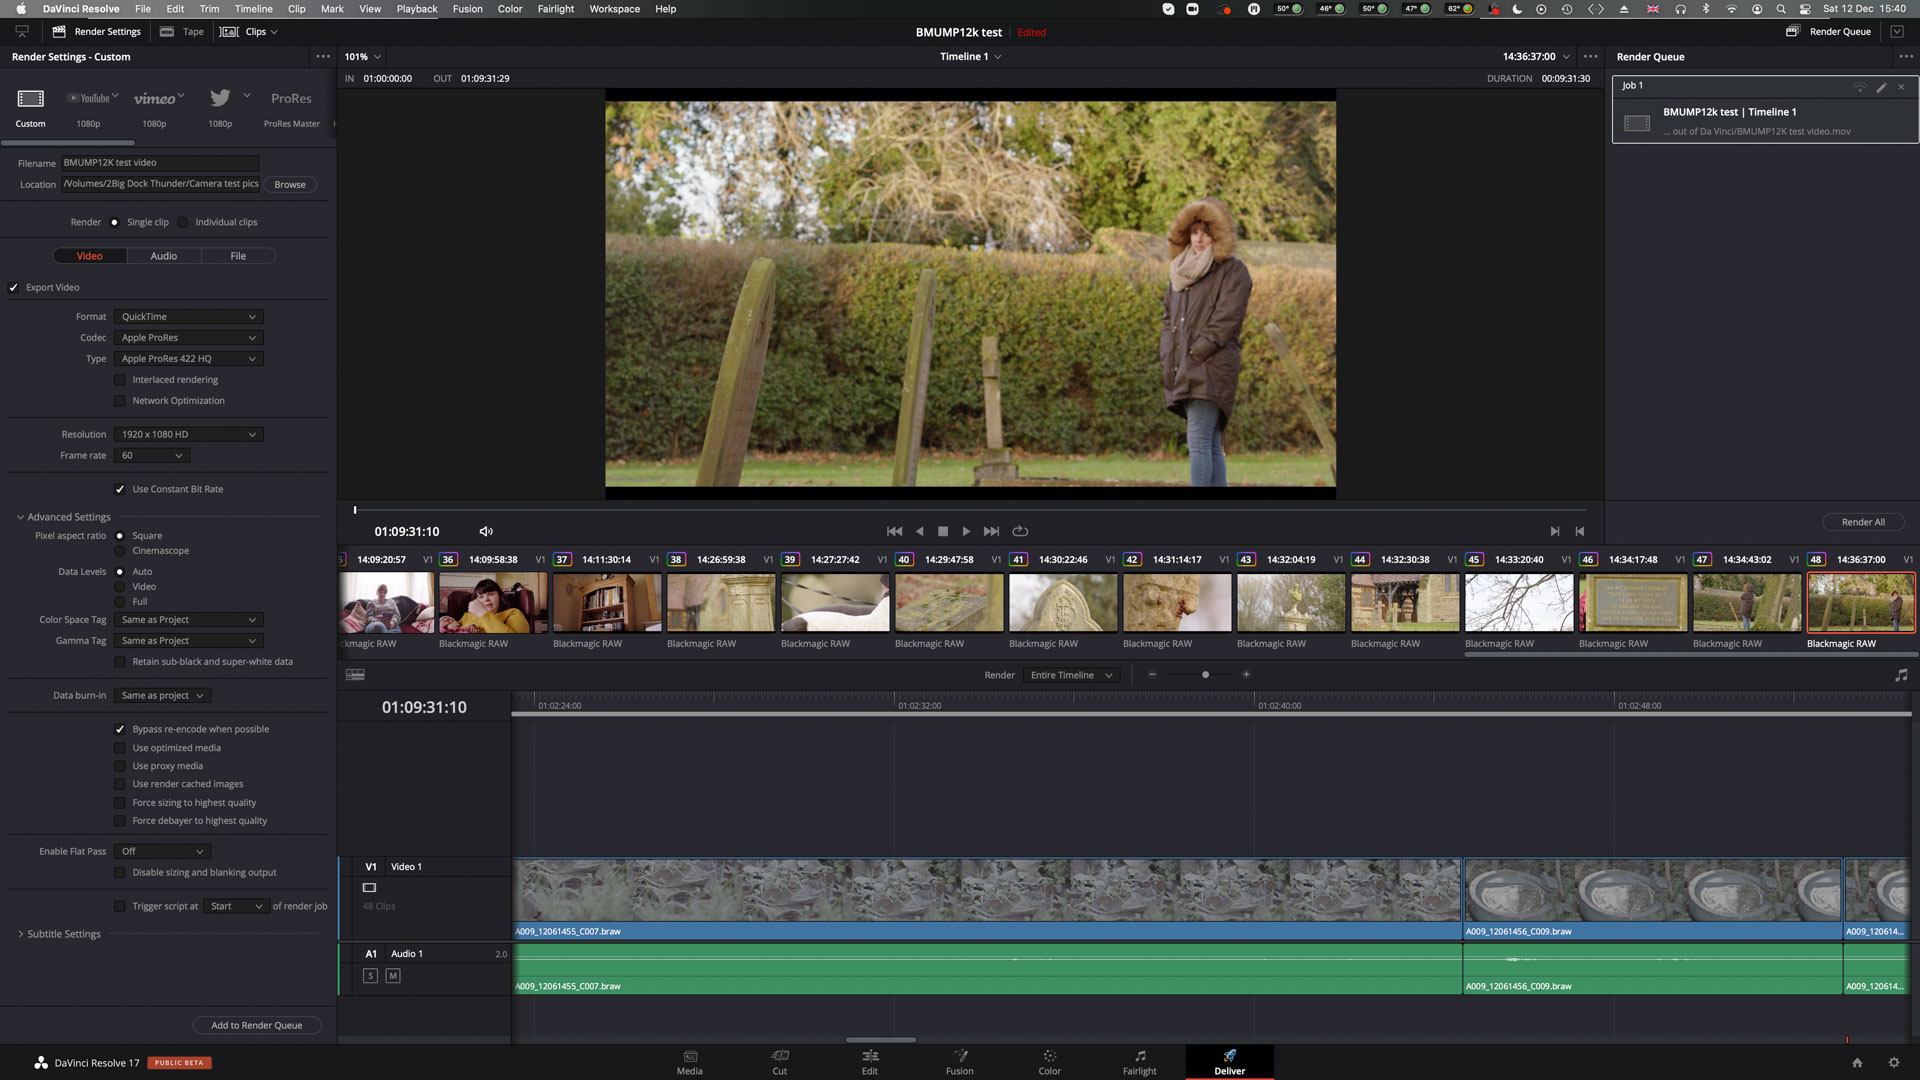
With DaVinci Resolve 17 offering far more features than rival NLEs, you would it expect it to run slower and be more memory-intensive. But the reality is the free versions runs as quickly as most rivals' editing suites. It all depends on the spec of your computer and the file sizes.
If you go up to the Studio version with a high-spec computer running lots of GPUs, then it will run faster. It’s designed for post-production houses and Hollywood studios using multi-camera, large format raw files, so it’s more than capable of running just a few cameras and files in an edit.
The actual editing is quick once you get used to it, but its real advantage for most filmmakers is the colour editing and grading power. To get the best from your files, certainly if you are using raw files, then it offers incredible control. Serious colorists use the Studio version, and you can have exactly the same for not much money.
The hardware is equally good, with the Speed Editor being a useful addition to making fast edits. It’s not for color grading work, but useful in quick edits which might be important to you. And the asking price is the same as the Studio software alone, so it's really the only way to buy DaVinci Resolve Studio that makes sense, unless you got it free with a camera purchase.
Verdict

Blackmagic’s DaVinci Resolve 17 has more firepower and features than any other video editing programme. With two ways of editing at its heart, plus industry-standard colour software and audio software as well as motion graphics and VFX, it’s really in a league of its own.
But all this functionality brings complexity. And although Blackmagic has gone out of its way to make simple operation as intuitive as possible, it’s still a bit daunting to the casual user.
It’s the software you will never outgrow, and at a price that’s impossible to ignore. Buy the Speed Editor, get the Studio version free and for $295/£225 you have industry-standard post production that works in all resolutions and bit rates.
Read more:
• Best video editing software
• Best cinema cameras
• Best cameras for filmmaking
• Best vlogging cameras
• Blackmagic Pocket Cinema Camera 6K Pro review
• Blackmagic Ursa Mini Pro 12K review
• Blackmagic ATEM Mini review
• Best recovery software for photos
• Best password manager
Adam Duckworth is an award-winning professional photographer and videographer based in the UK. He has worked for many top magazines, newspapers and corporate clients for more than 25 years. He was named SWPP UK Commercial Photographer of the Year, and is an Associate of the British Institute of Professional Photography. He has also worked for international publications like Motor Cycle News, Racer X, The Sunday Times, The Guardian, ZOO, Golf World, Today's Golfer, and Mountain Bike Action, among others.
