Digital Camera World Verdict
There are many non-linear editing apps out there, but DaVinci Resolve stands out from the crowd because it is free and is packed full of the type of post-production tools you’d expect to pay for in apps such as Final Cut Pro and Adobe Premiere Pro. Whatever app you use to edit clips it’s well worth exploring what DaVinci Resolve has to offer as it could take your work to the next level (and save you money on an ongoing Premiere Pro subscription!)
Pros
- +
It’s free
- +
Powerful color correction tools
- +
Comprehensive edit tools
Cons
- -
Drag-and-drop editing requires keyboard shortcut (in Edit page).
Why you can trust Digital Camera World
DaVinci Resolve 18.6 is a free nonlinear editing (NLE) app from Blackmagic Design, which also manufactures a comprehensive range of high-end digital video cameras for filmmakers. NLE apps enable you to swap the running order of a program’s clips by dragging and dropping them around in a timeline in a non-linear fashion, compared to the original (and much slower) method of copying clips from a tape player to a tape recorder in a linear video editing suite.
Blackmagic Design also makes other hardware devices such as the DaVinci Resolve Speed Editor which is a console that lets you perform a host of video editing operations using tactile knobs and buttons.
In many ways DaVinci Resolve 18.6 looks and behaves like professional NLE apps such as Final Cut Pro and Adobe Premiere, despite the fact that it’s free to download and use. If you pay to upgrade the free DaVinci Resolve 18.6 to DaVinci Resolve Studio 18 then you’ll find tools that Final Cut Pro lacks (such as advanced HDR grading and voice isolation tools). This review focuses on the free DaVinci Resolve 18.6 app, but we’ll touch on some of the more advanced features of the paid-for version below.
DaVinci Resolve Studio
The free version of DaVinci Resolve 18.6 includes the same high-quality processing as the paid-for DaVinci Resolve 18.6 Studio and can handle unlimited-resolution media files. However, it does limit project mastering and output to Ultra HD resolutions or lower.
DaVinci Resolve 18.6 only supports a single processing GPU on Windows and Linux and 2 GPUs on the latest Mac Pro. If you need features such as support for multiple GPUs, 4K output, motion blur effects, temporal and spatial noise reduction, multiple AI-based tools, HDR tools, camera tracker, voice isolation, multiple Resolve FX, 3D stereoscopic tools, and remote rendering, then you’ll need to upgrade to DaVinci Resolve 18.6 Studio.
For more check out our full review of DaVinci Resolve Studio 18.
Specifications
| Header Cell - Column 0 | Mac recommended system configuration | Windows recommended system configuration |
|---|---|---|
| OS | Mac OS 12 Monterey | AMD Ryzen 9 3900X or Intel Core i9-10900K 3.7GHz |
| RAM | 8 GB of system memory. 16 GB when using Fusion. | 32 GB RAM |
| Memory | Solid State Drive (SSD) with at least 512GB | Solid State Drive (SSD) with at least 512GB |
| GPU | Integrated GPU or discrete GPU with at least 2 GB of VRAM. | NVIDIA GeForce RTX 3070 or 3080 |
| Row 4 - Cell 0 | GPU which supports Metal or OpenCL 1.2. | Row 4 - Cell 2 |
Price
DaVinci Resolve 18.6 is available to download for free! You can find the download link on Blackmagic's website.
However, if you want to unlock all the full features of the software, you can upgrade it to DaVinci Resolve Studio for $295 / £245.
Interface and Usability
Calling DaVinci Resolve a non-linear editing app is like calling James Bond’s Aston Martin DB5 a ‘car’. DaVinci Resolve does so much more than simply enable you to edit and trim clips as we’ll explain.
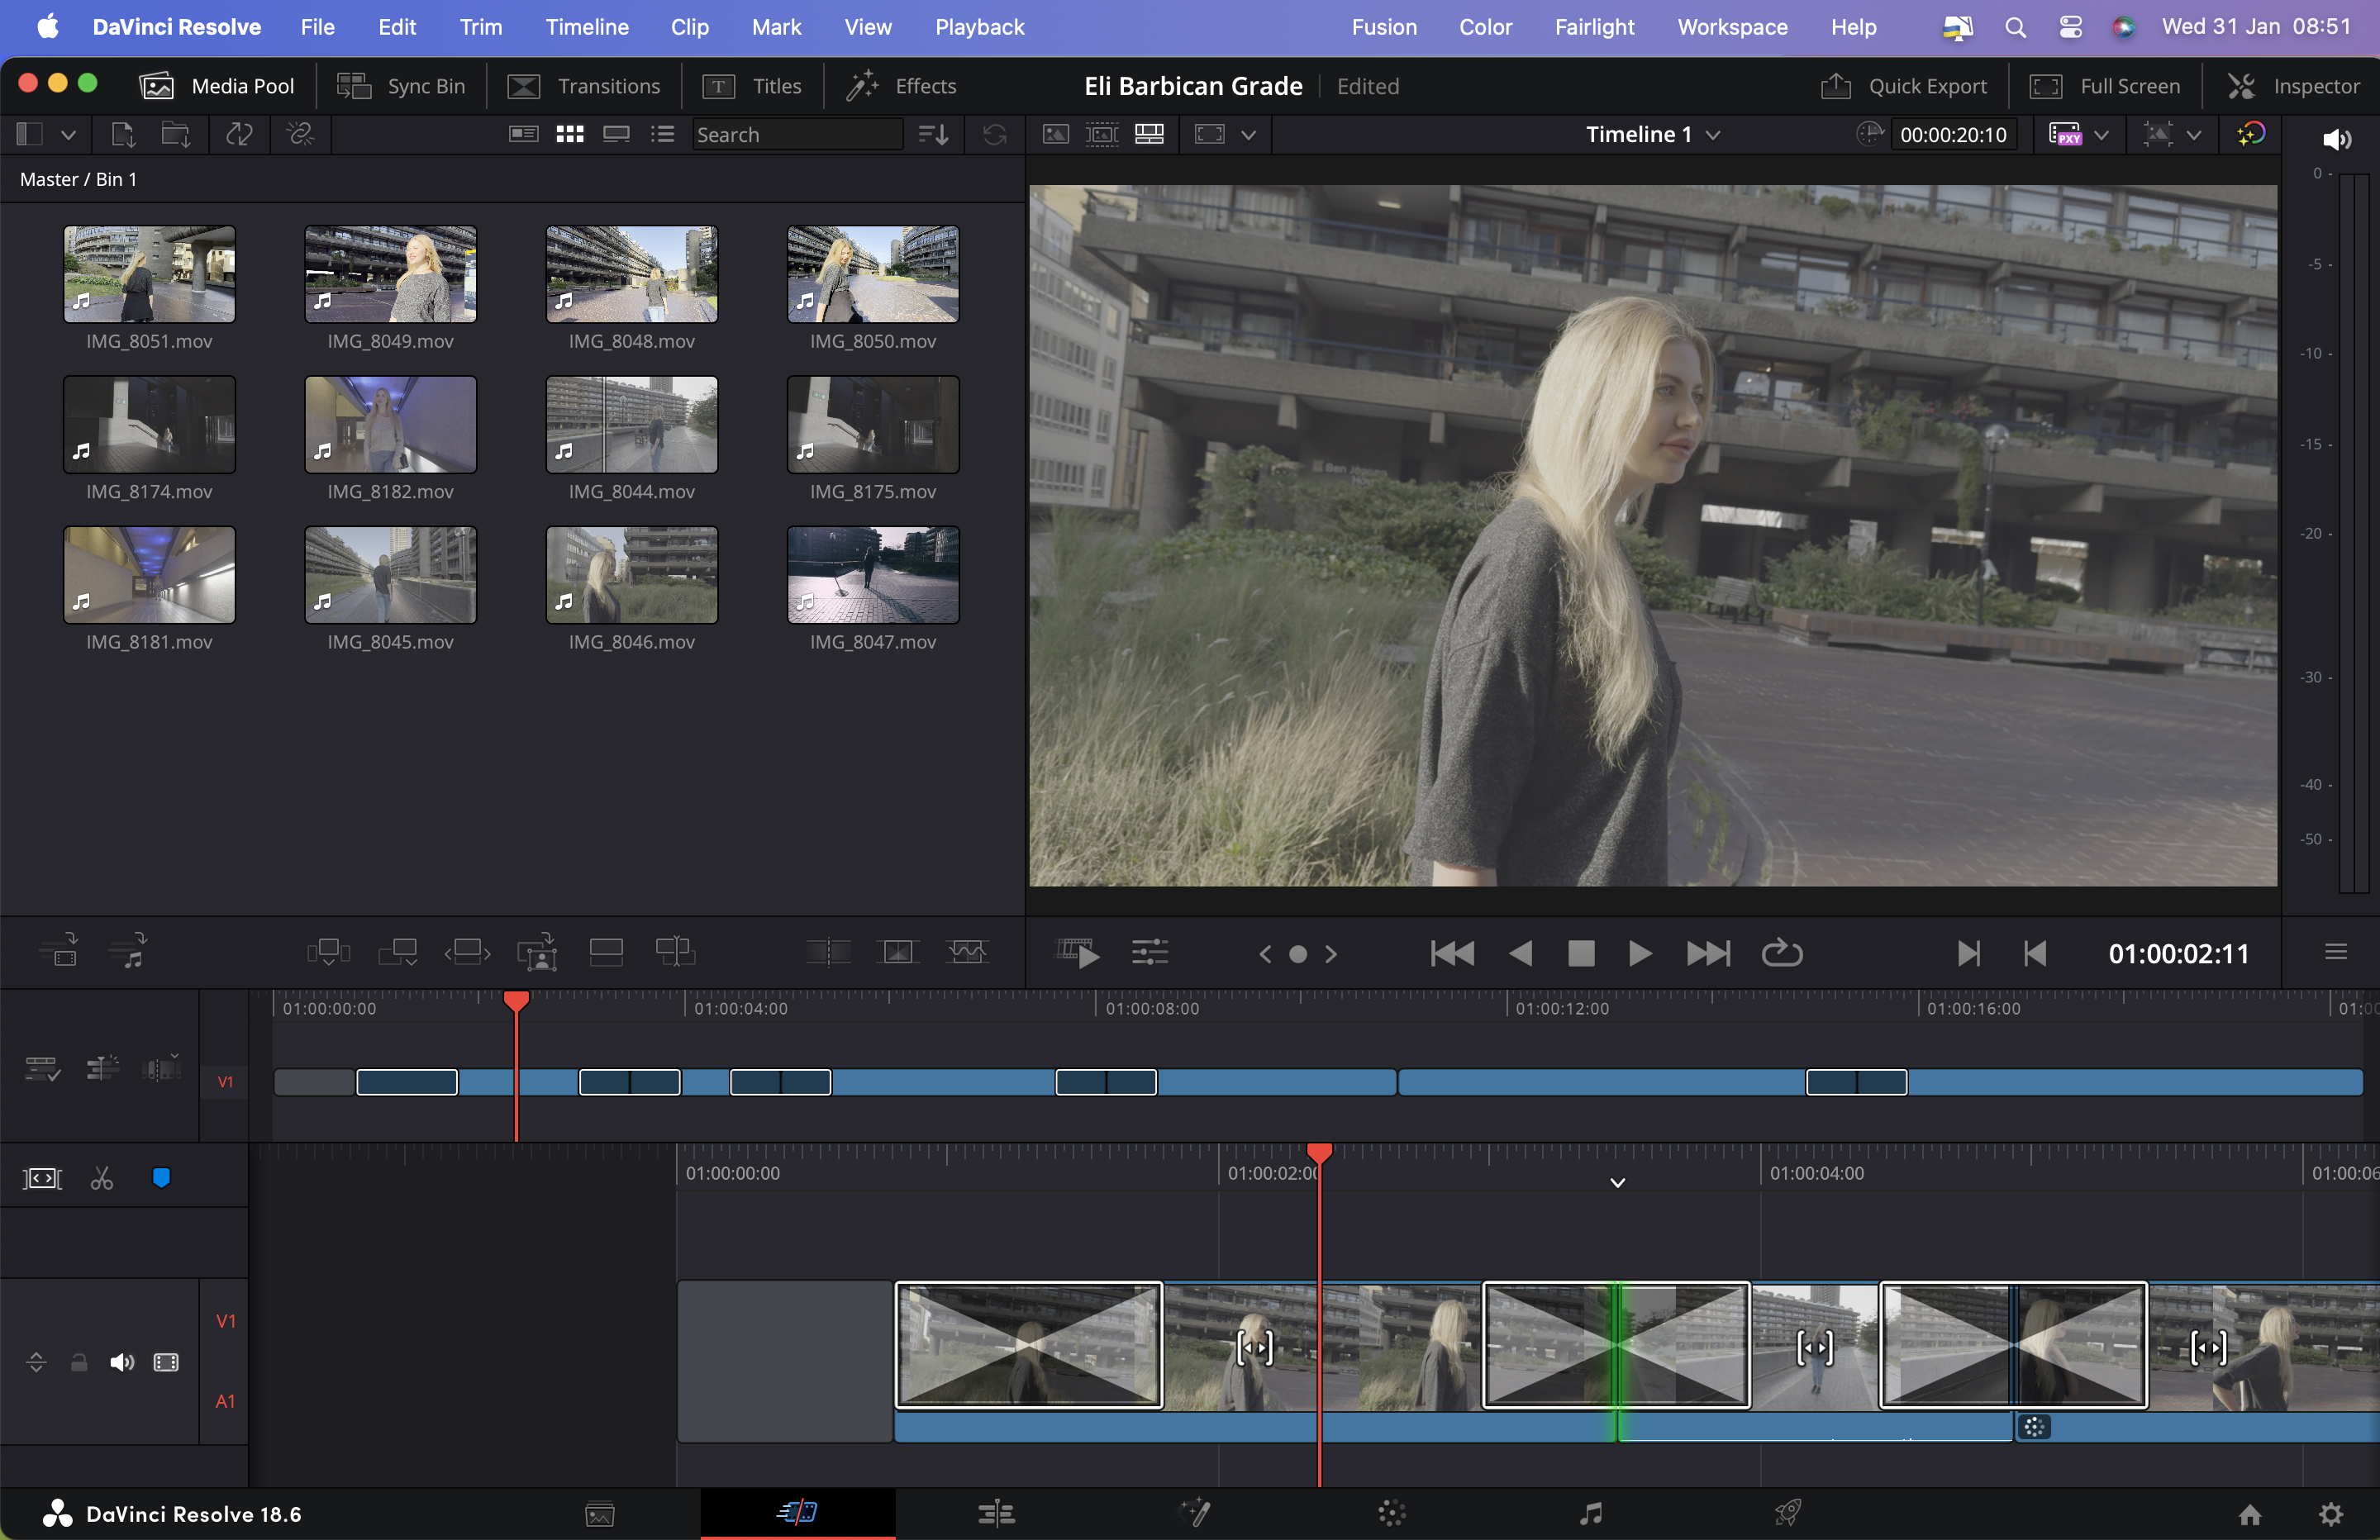
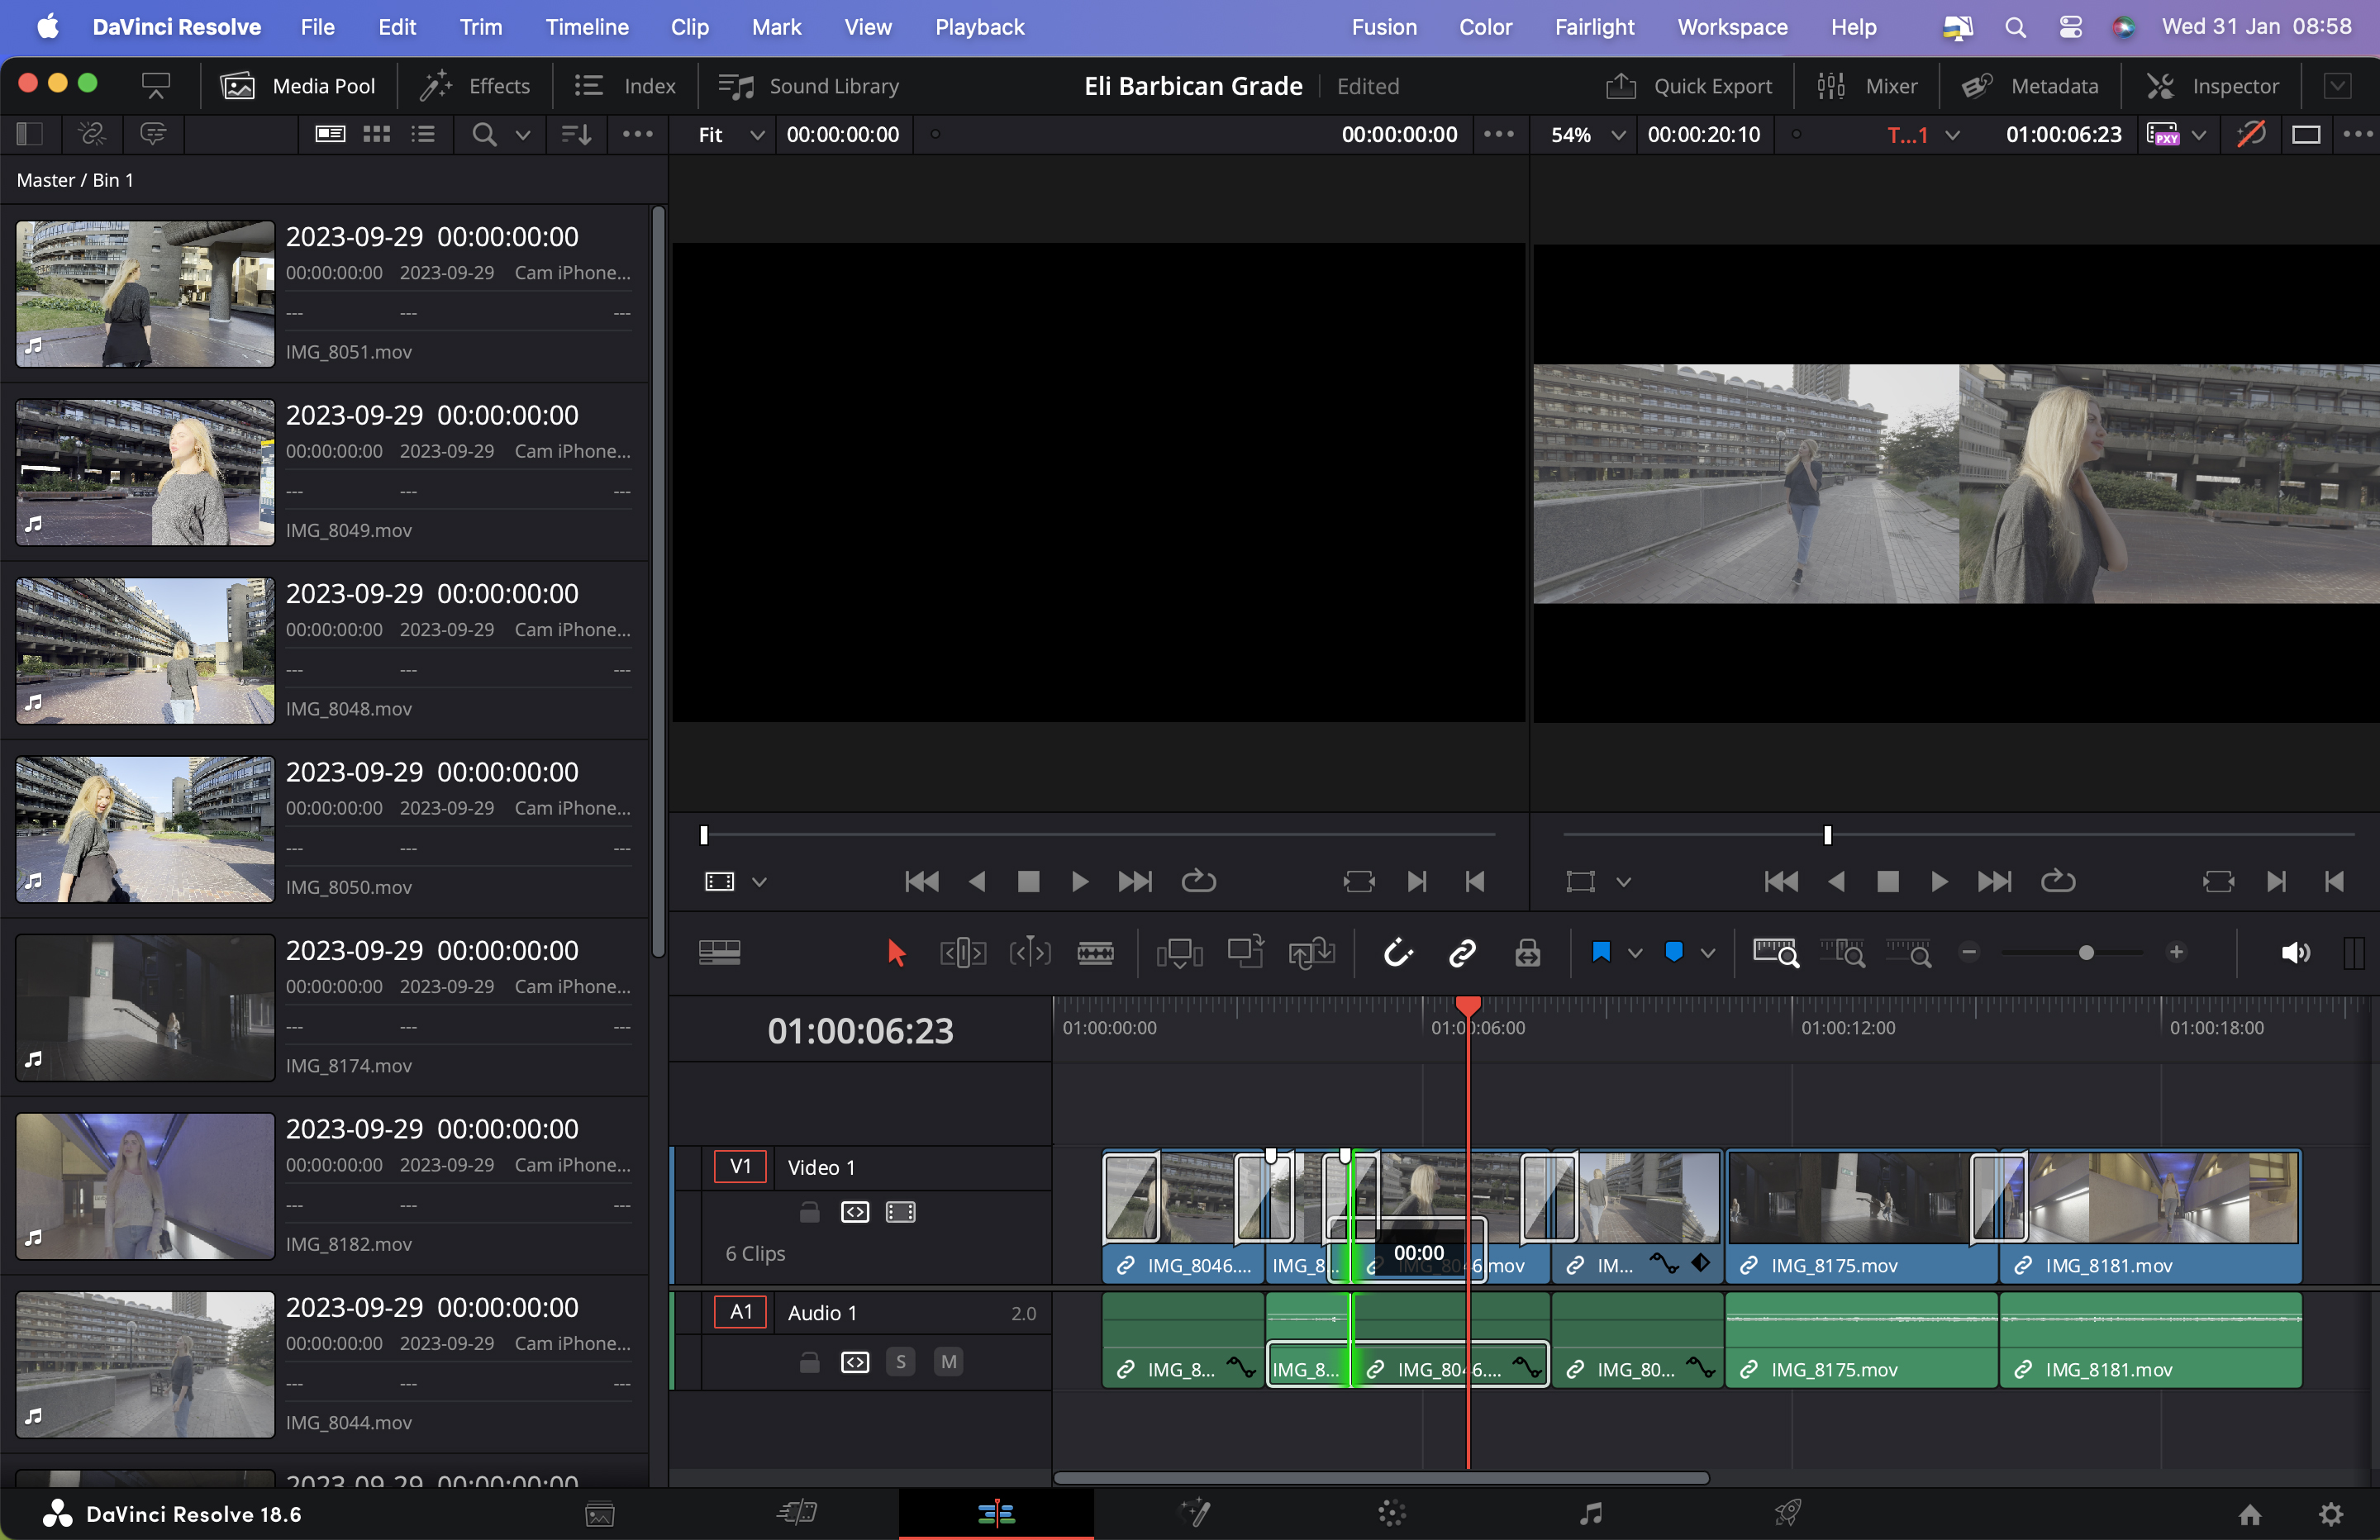
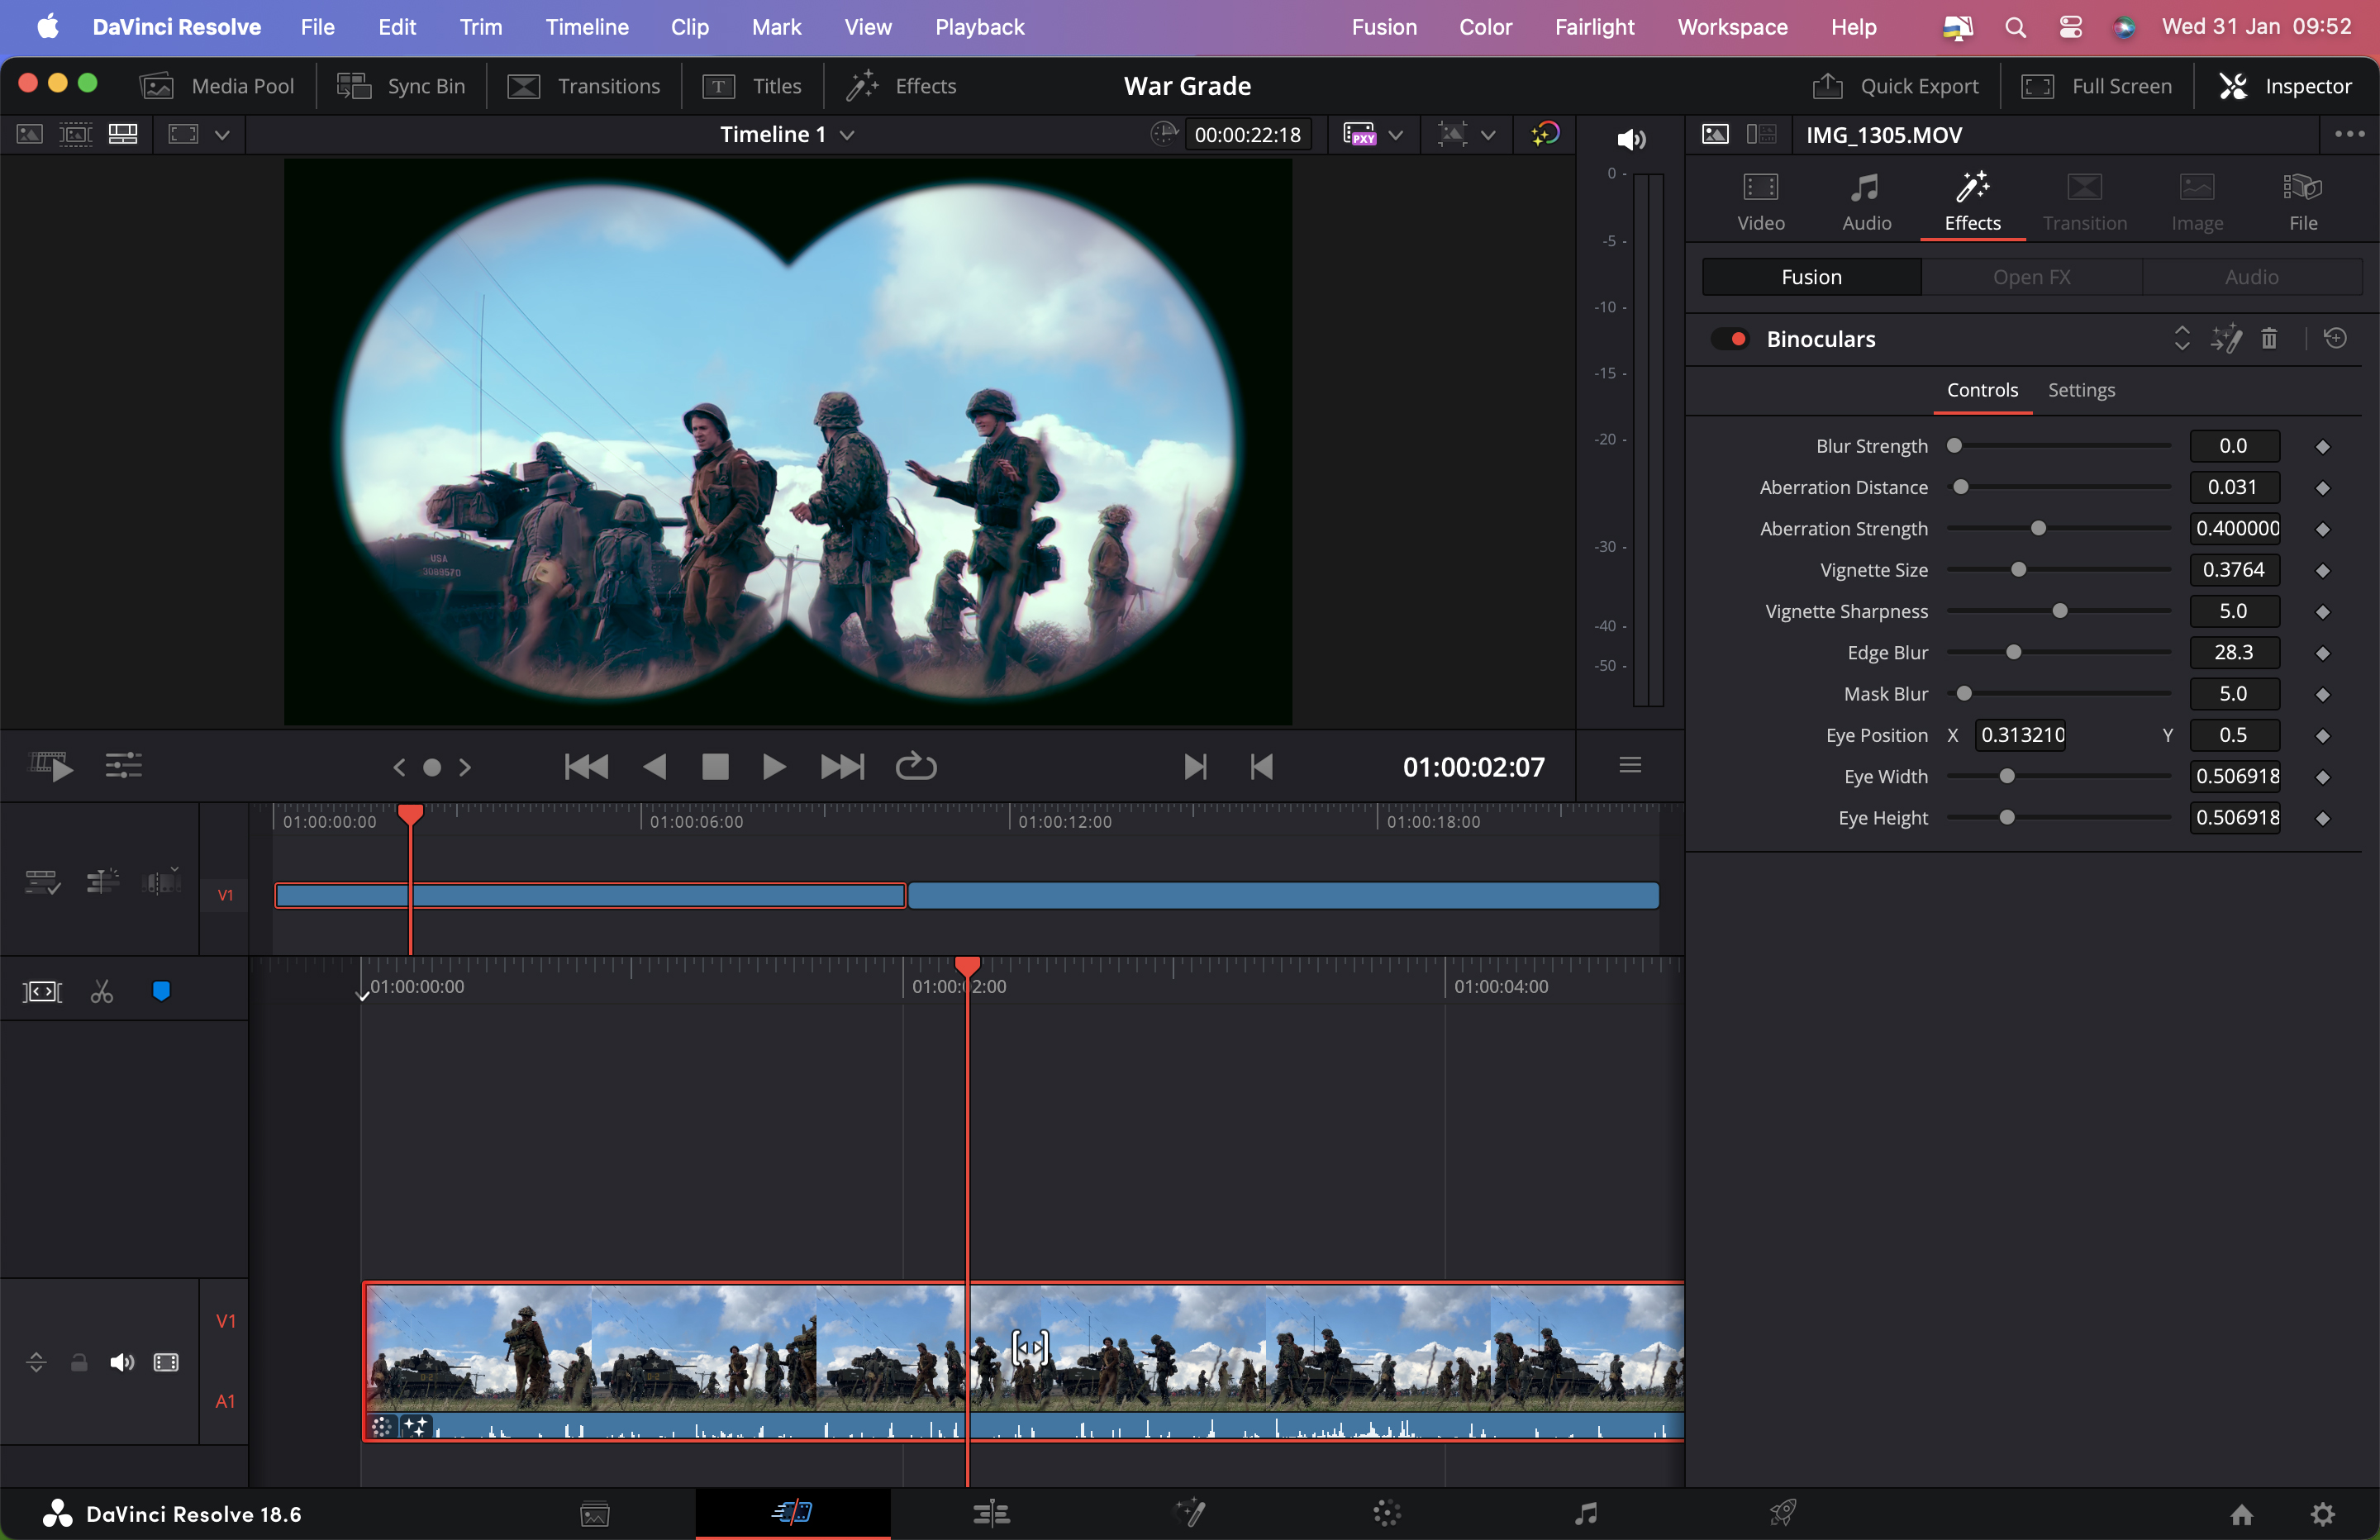
Anyone familiar with NLE apps should be able to get up and running quickly in DaVinci Resolve’s workspace. The app lets you take baby steps on the basic Cut page. Here you can drag and drop imported clips from a bin into a classic timeline and then drag them around to re-arrange the running order in true non-linear fashion, before trimming them. This helps you quickly create a rough edit.
The Edit page gives you a more sophisticated timeline where you can combine (and composite) video and audio in layers and watch your narrative take shape in a classic main viewer. Here you can perform keys and add masks to your layered content.
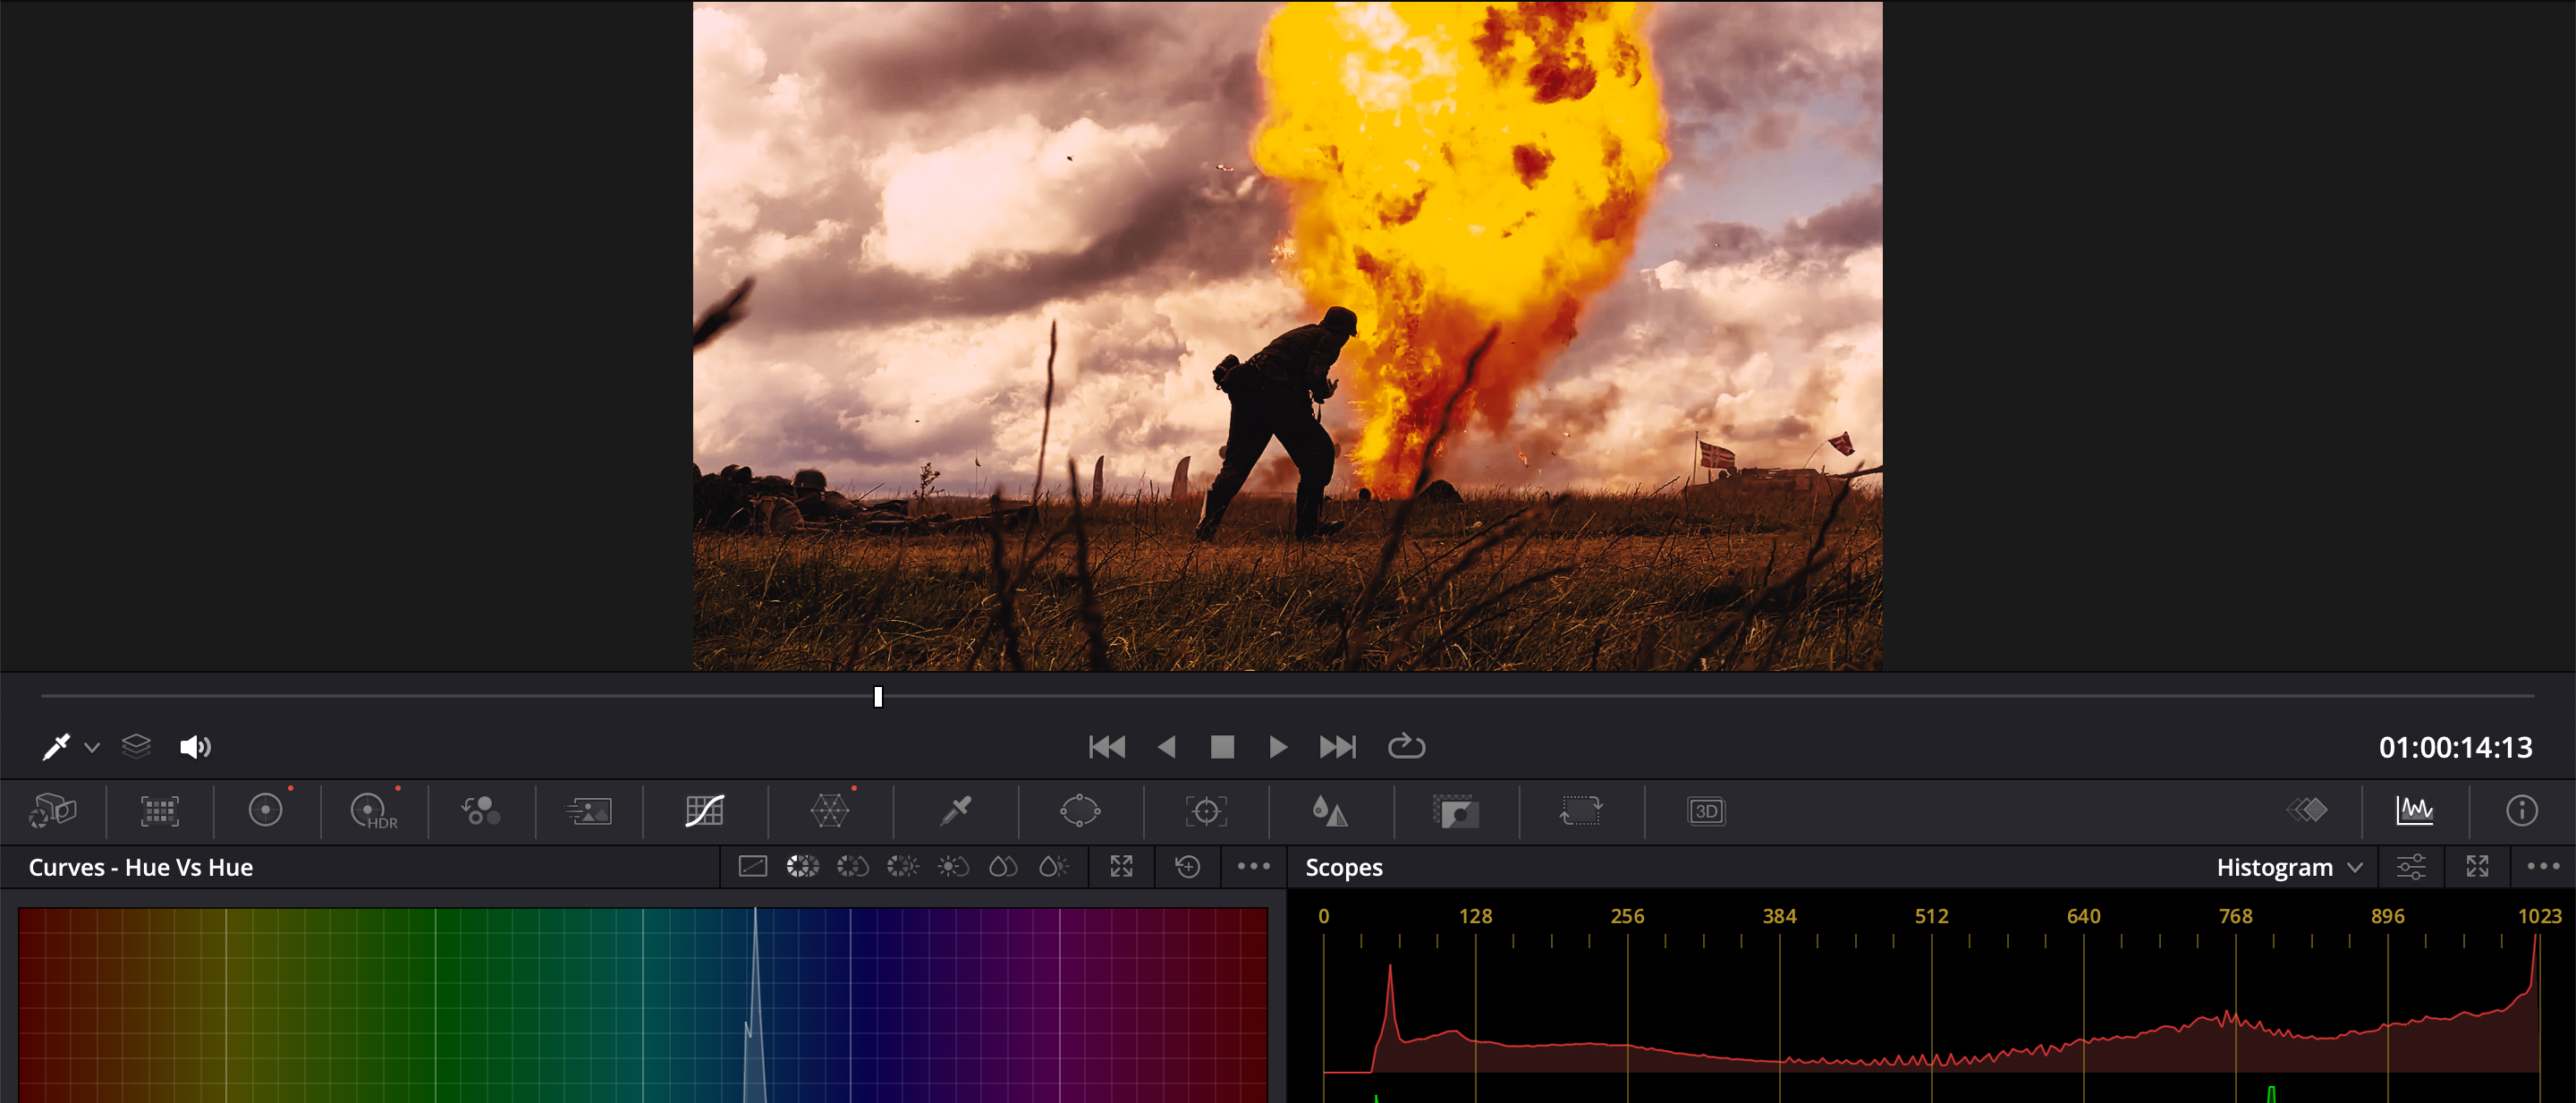
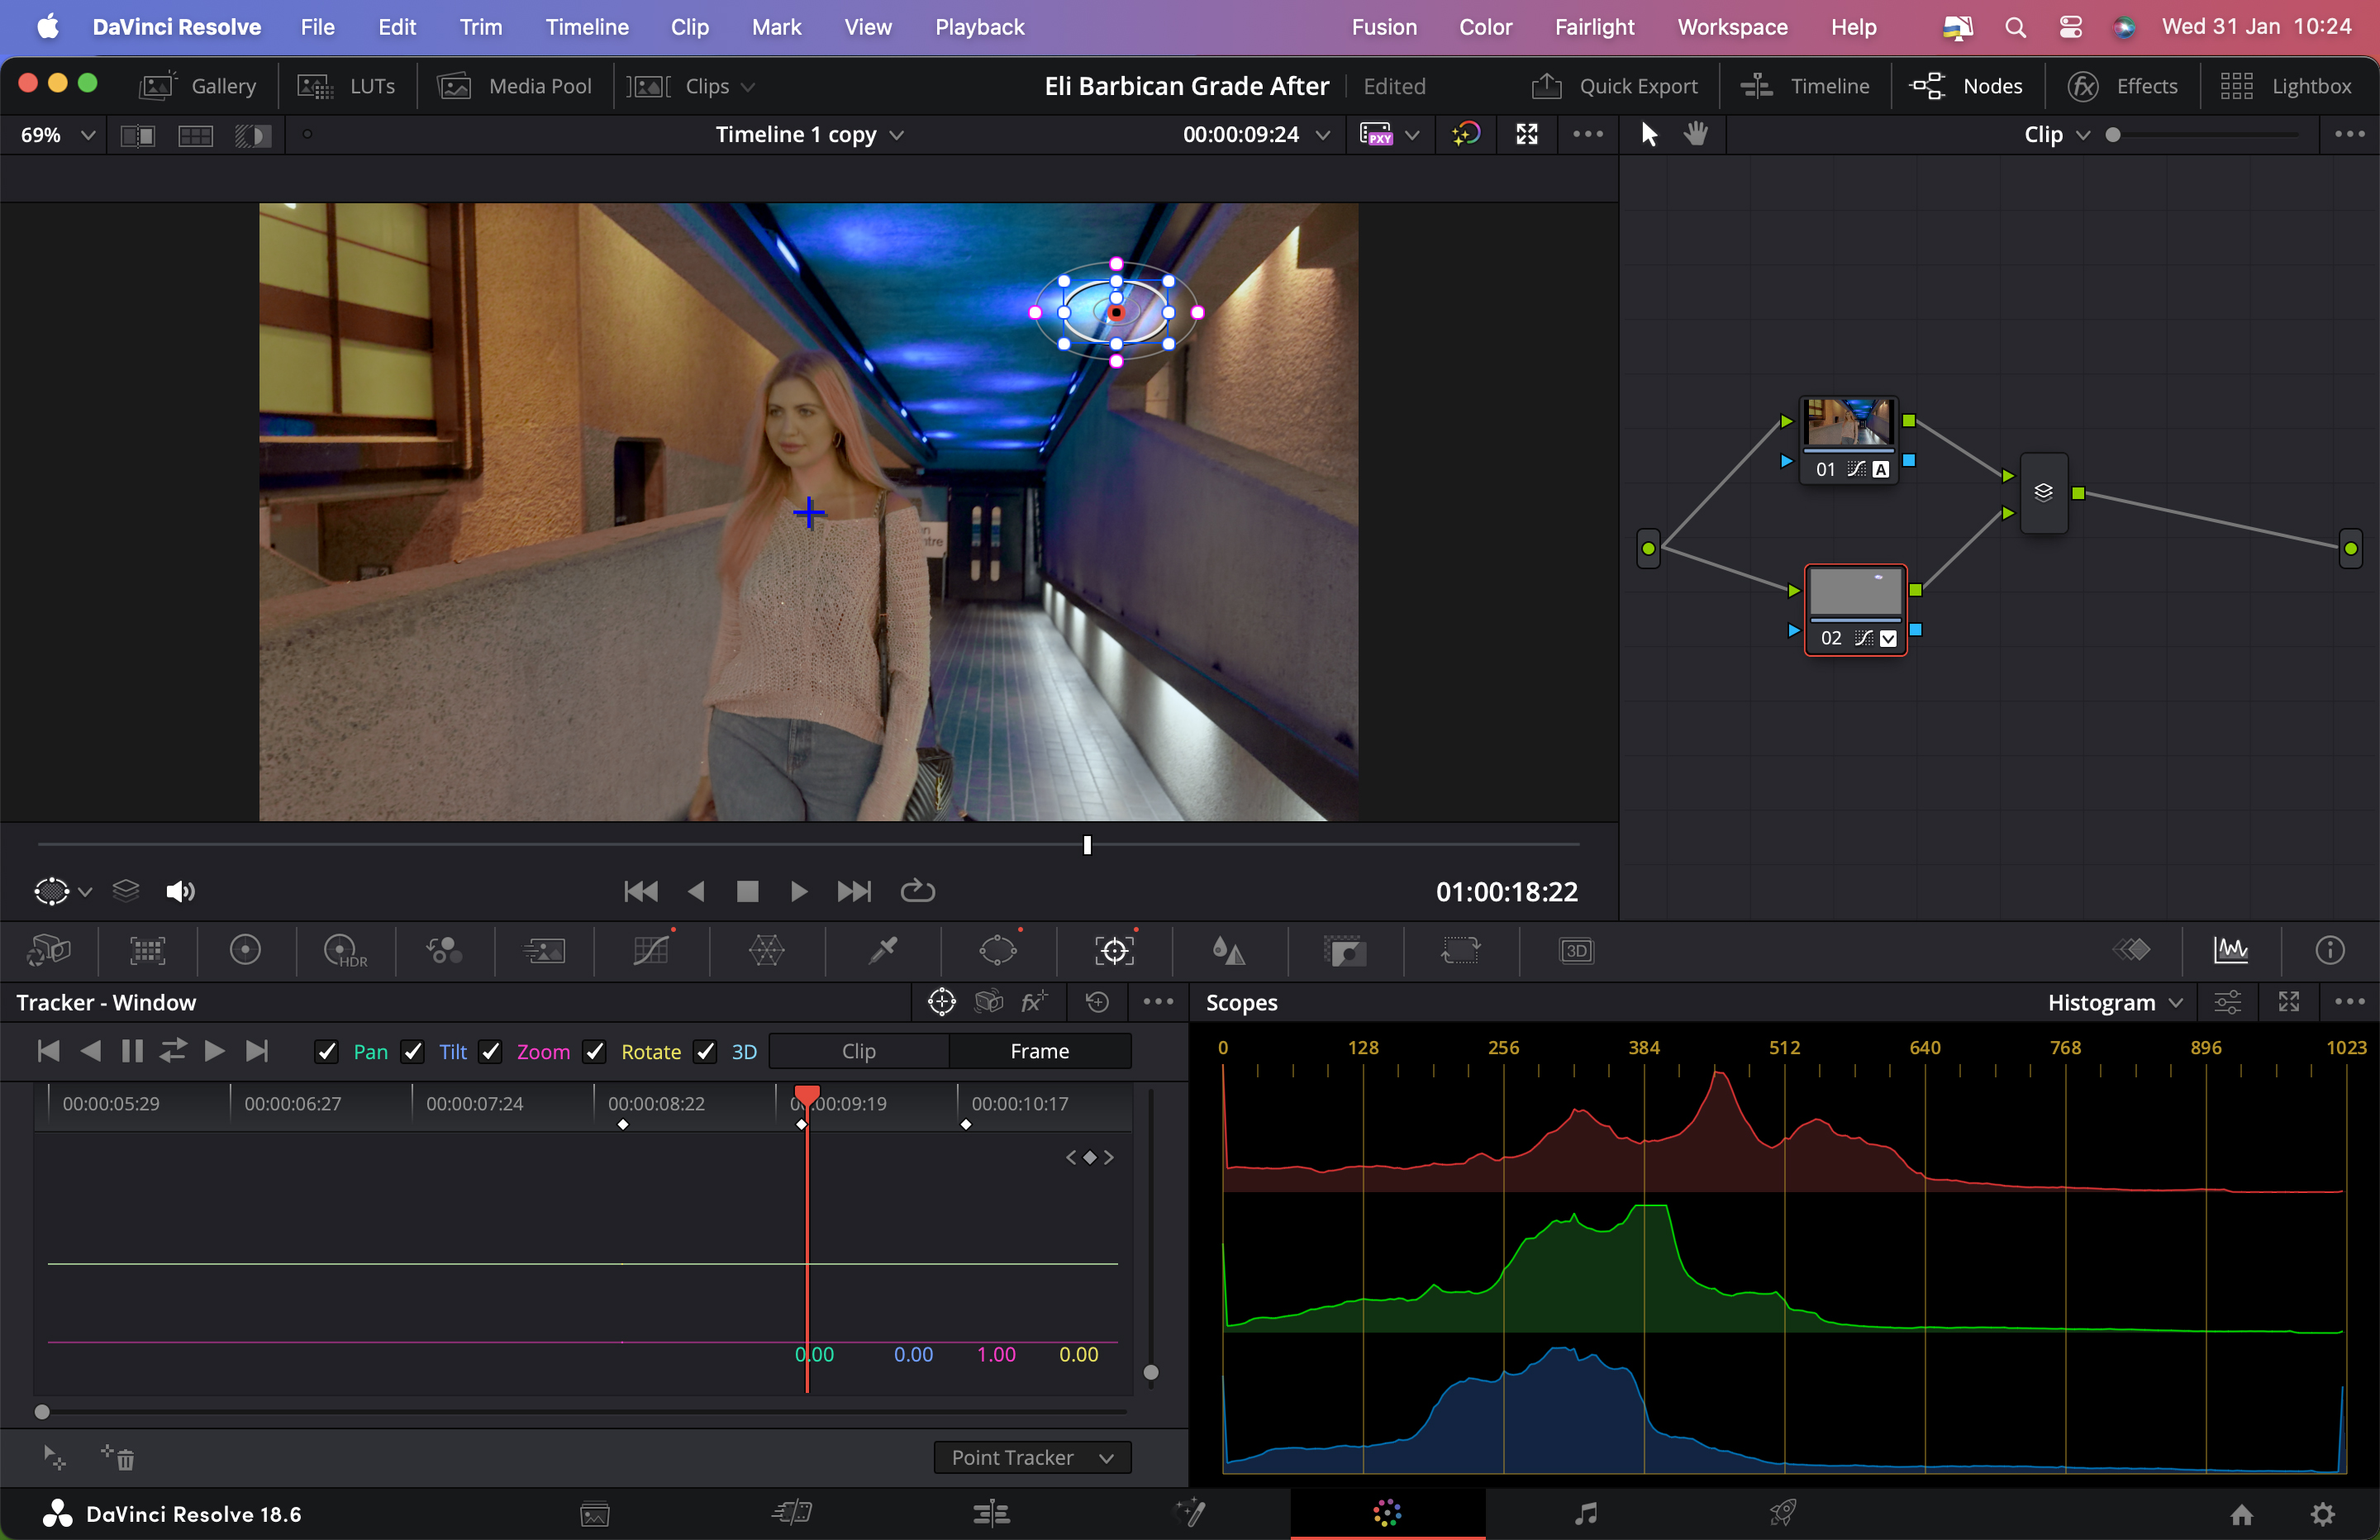
To grade your clips’ colors and tones click on the Color icon. Here’s where you’ll find the type of color grading tools that you’d expect to see in a paid-for app such as Final Cut Pro, including a histogram that gives you a clearer view of the spread of tones in a clip and a vectorscope that helps you produce faithfully rendered skin tones. DaVinci Resolve started out as a color grading app (adding editing tools as the app evolved), so unsurprisingly its grading tools are second to none.
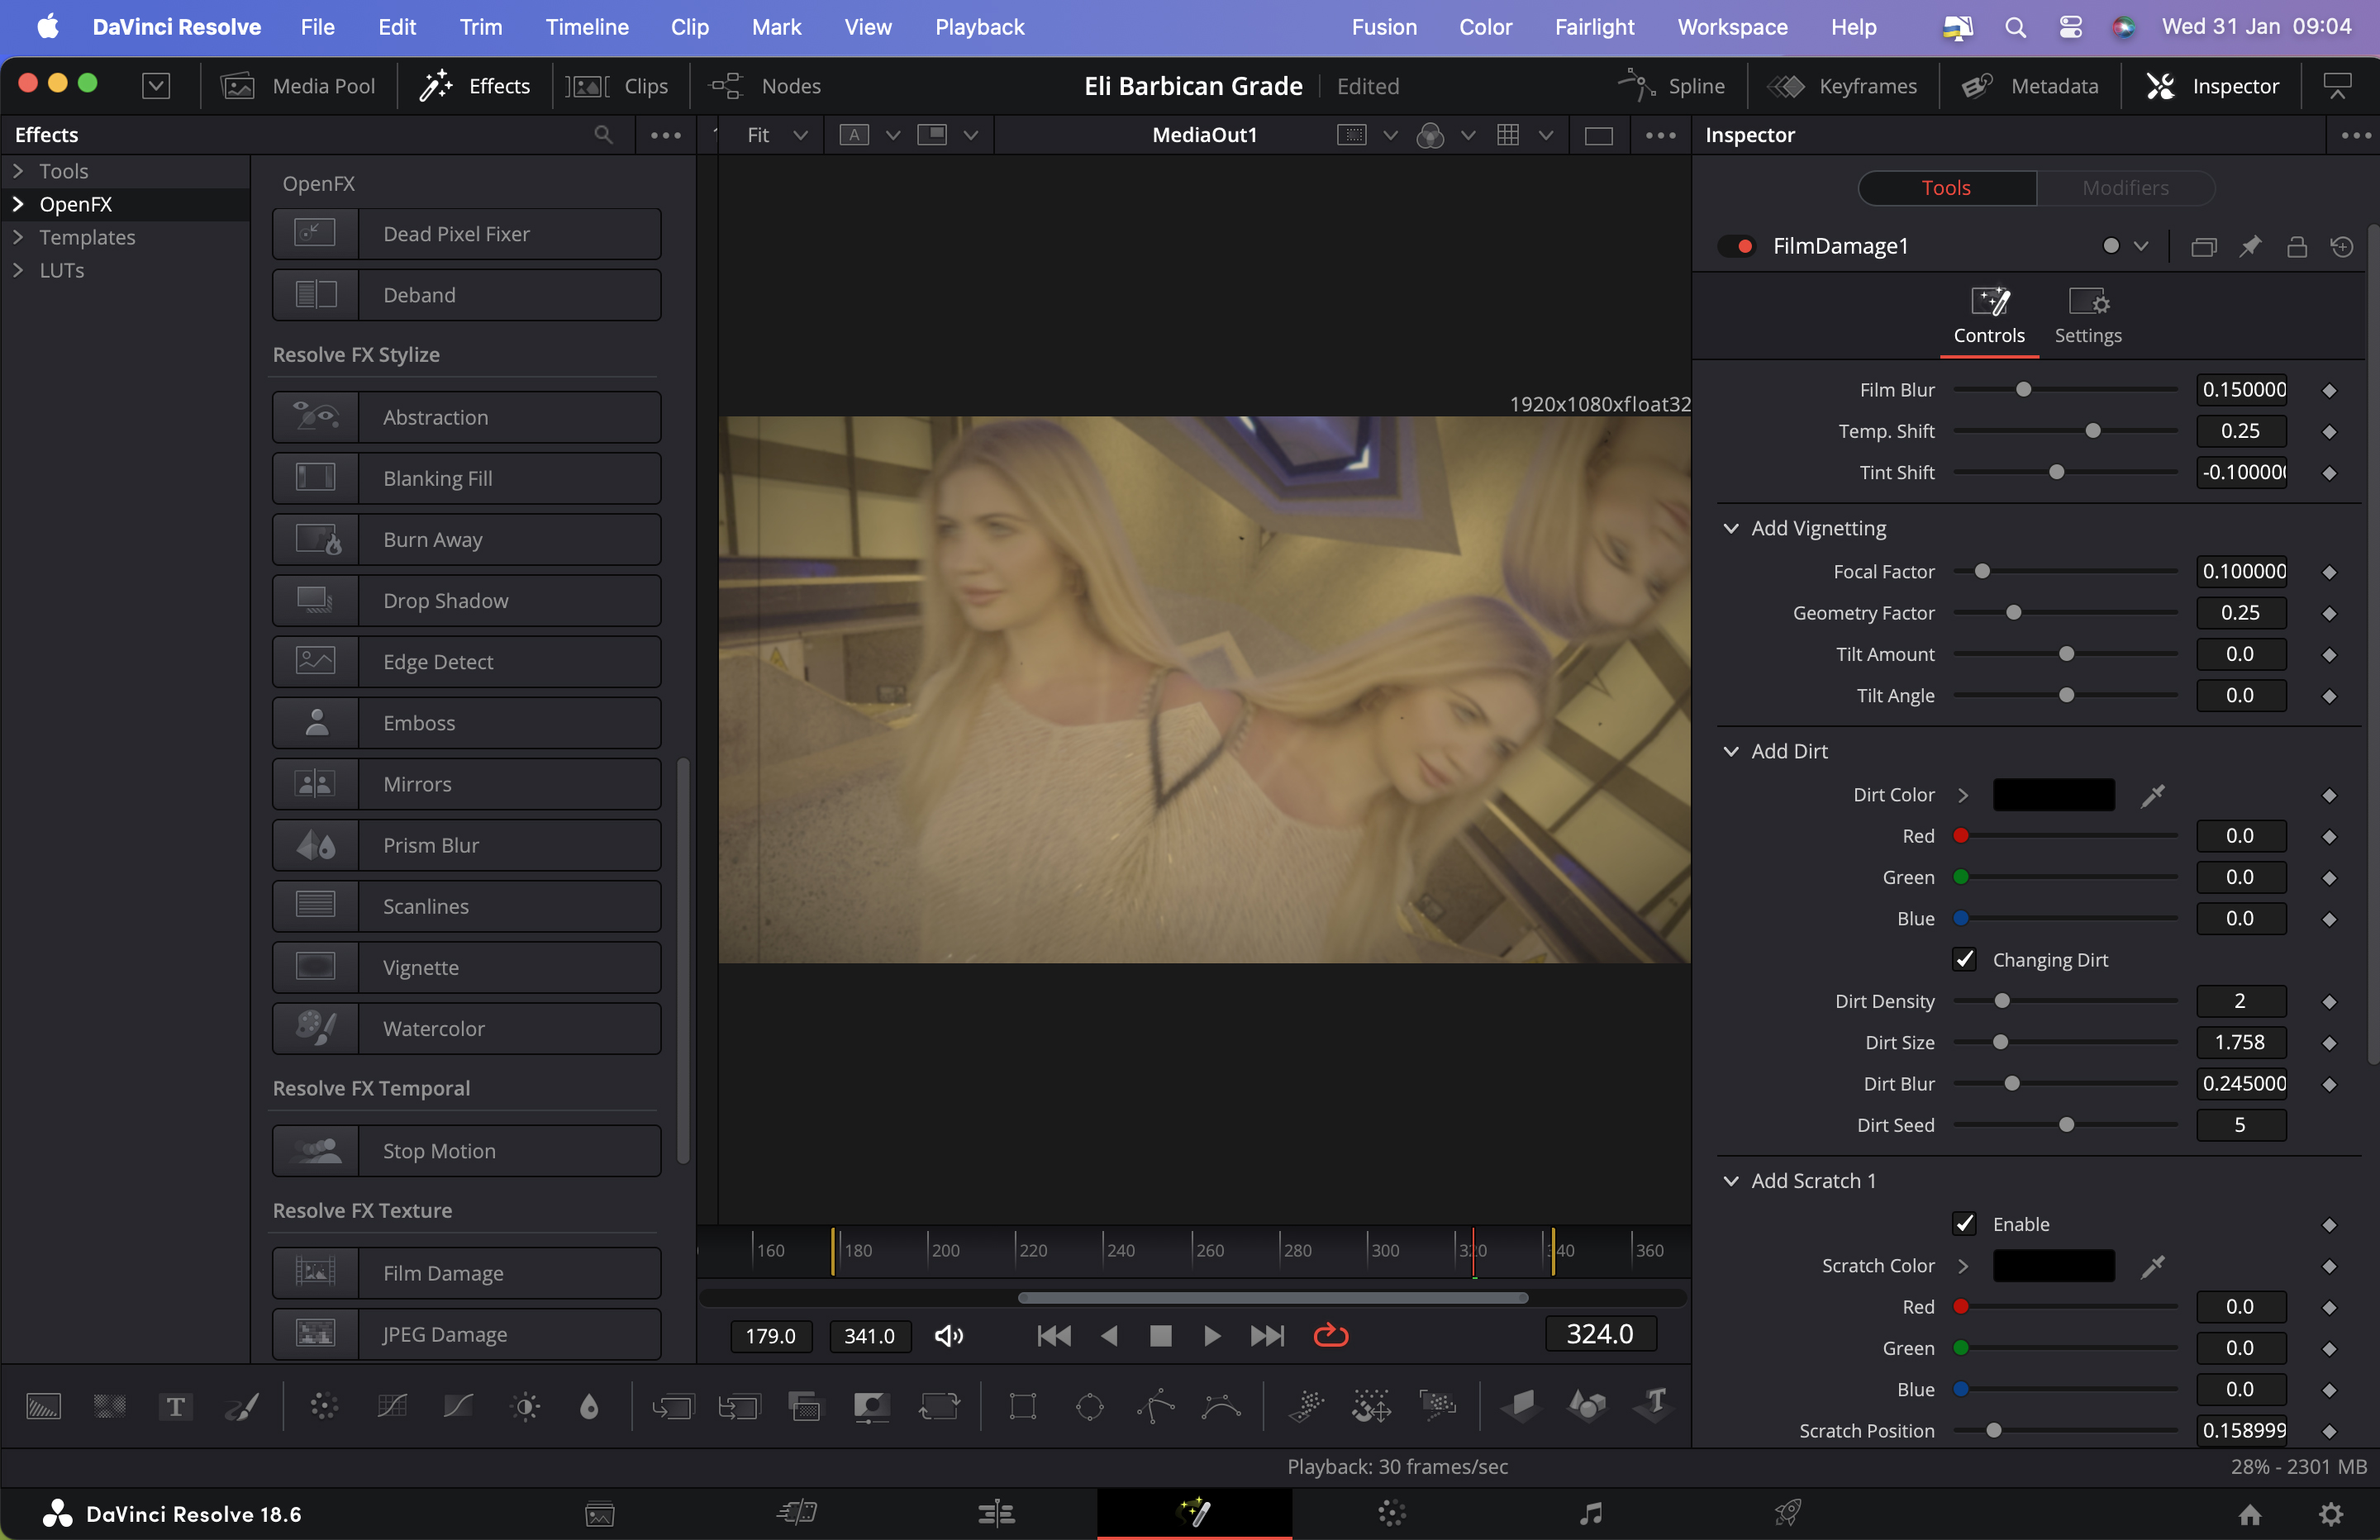
The Fusion page gives you motion graphic tools to enhance your tightly edited and beautifully graded footage and the Fairlight page gives you access to a comprehensive collection of post-production audio tools. It may help to compare DaVinci Resolve’s various pages to Lightroom Classic’s modules, as each page gives you access to a different suite of tools so that you can focus on the task at hand.
Performance
I’ve used NLE apps since they were invented in the 1990s (having learned to edit on linear tape-to-tape edit suits back in the 80s), but my ‘go-to’ app for professional work is Final Cut Pro.
I found it fairly easy to get up and running in DaVinci Resolve 18.6 when it came to importing and editing, though as it was a new app I had to adapt to DaVinci’s differences. One gripe I had was when swapping the order of clips in the main Edit page. When I dragged a clip from the end of the timeline and placed it between two other clips it would over-write sections of the clips (instead of moving them apart to accommodate the new clip). After some googling, I learned that I could employ a keyboard shortcut when I dragged and dropped a clip to avoid overwriting the others, but this made the app less intuitive to use than when editing in Final Cut Pro.
However, when using the more basic Cut page moving clips around in the timeline behaved the way I was used to, with clips sliding aside to let new clips into the timeline (with no overwriting.)
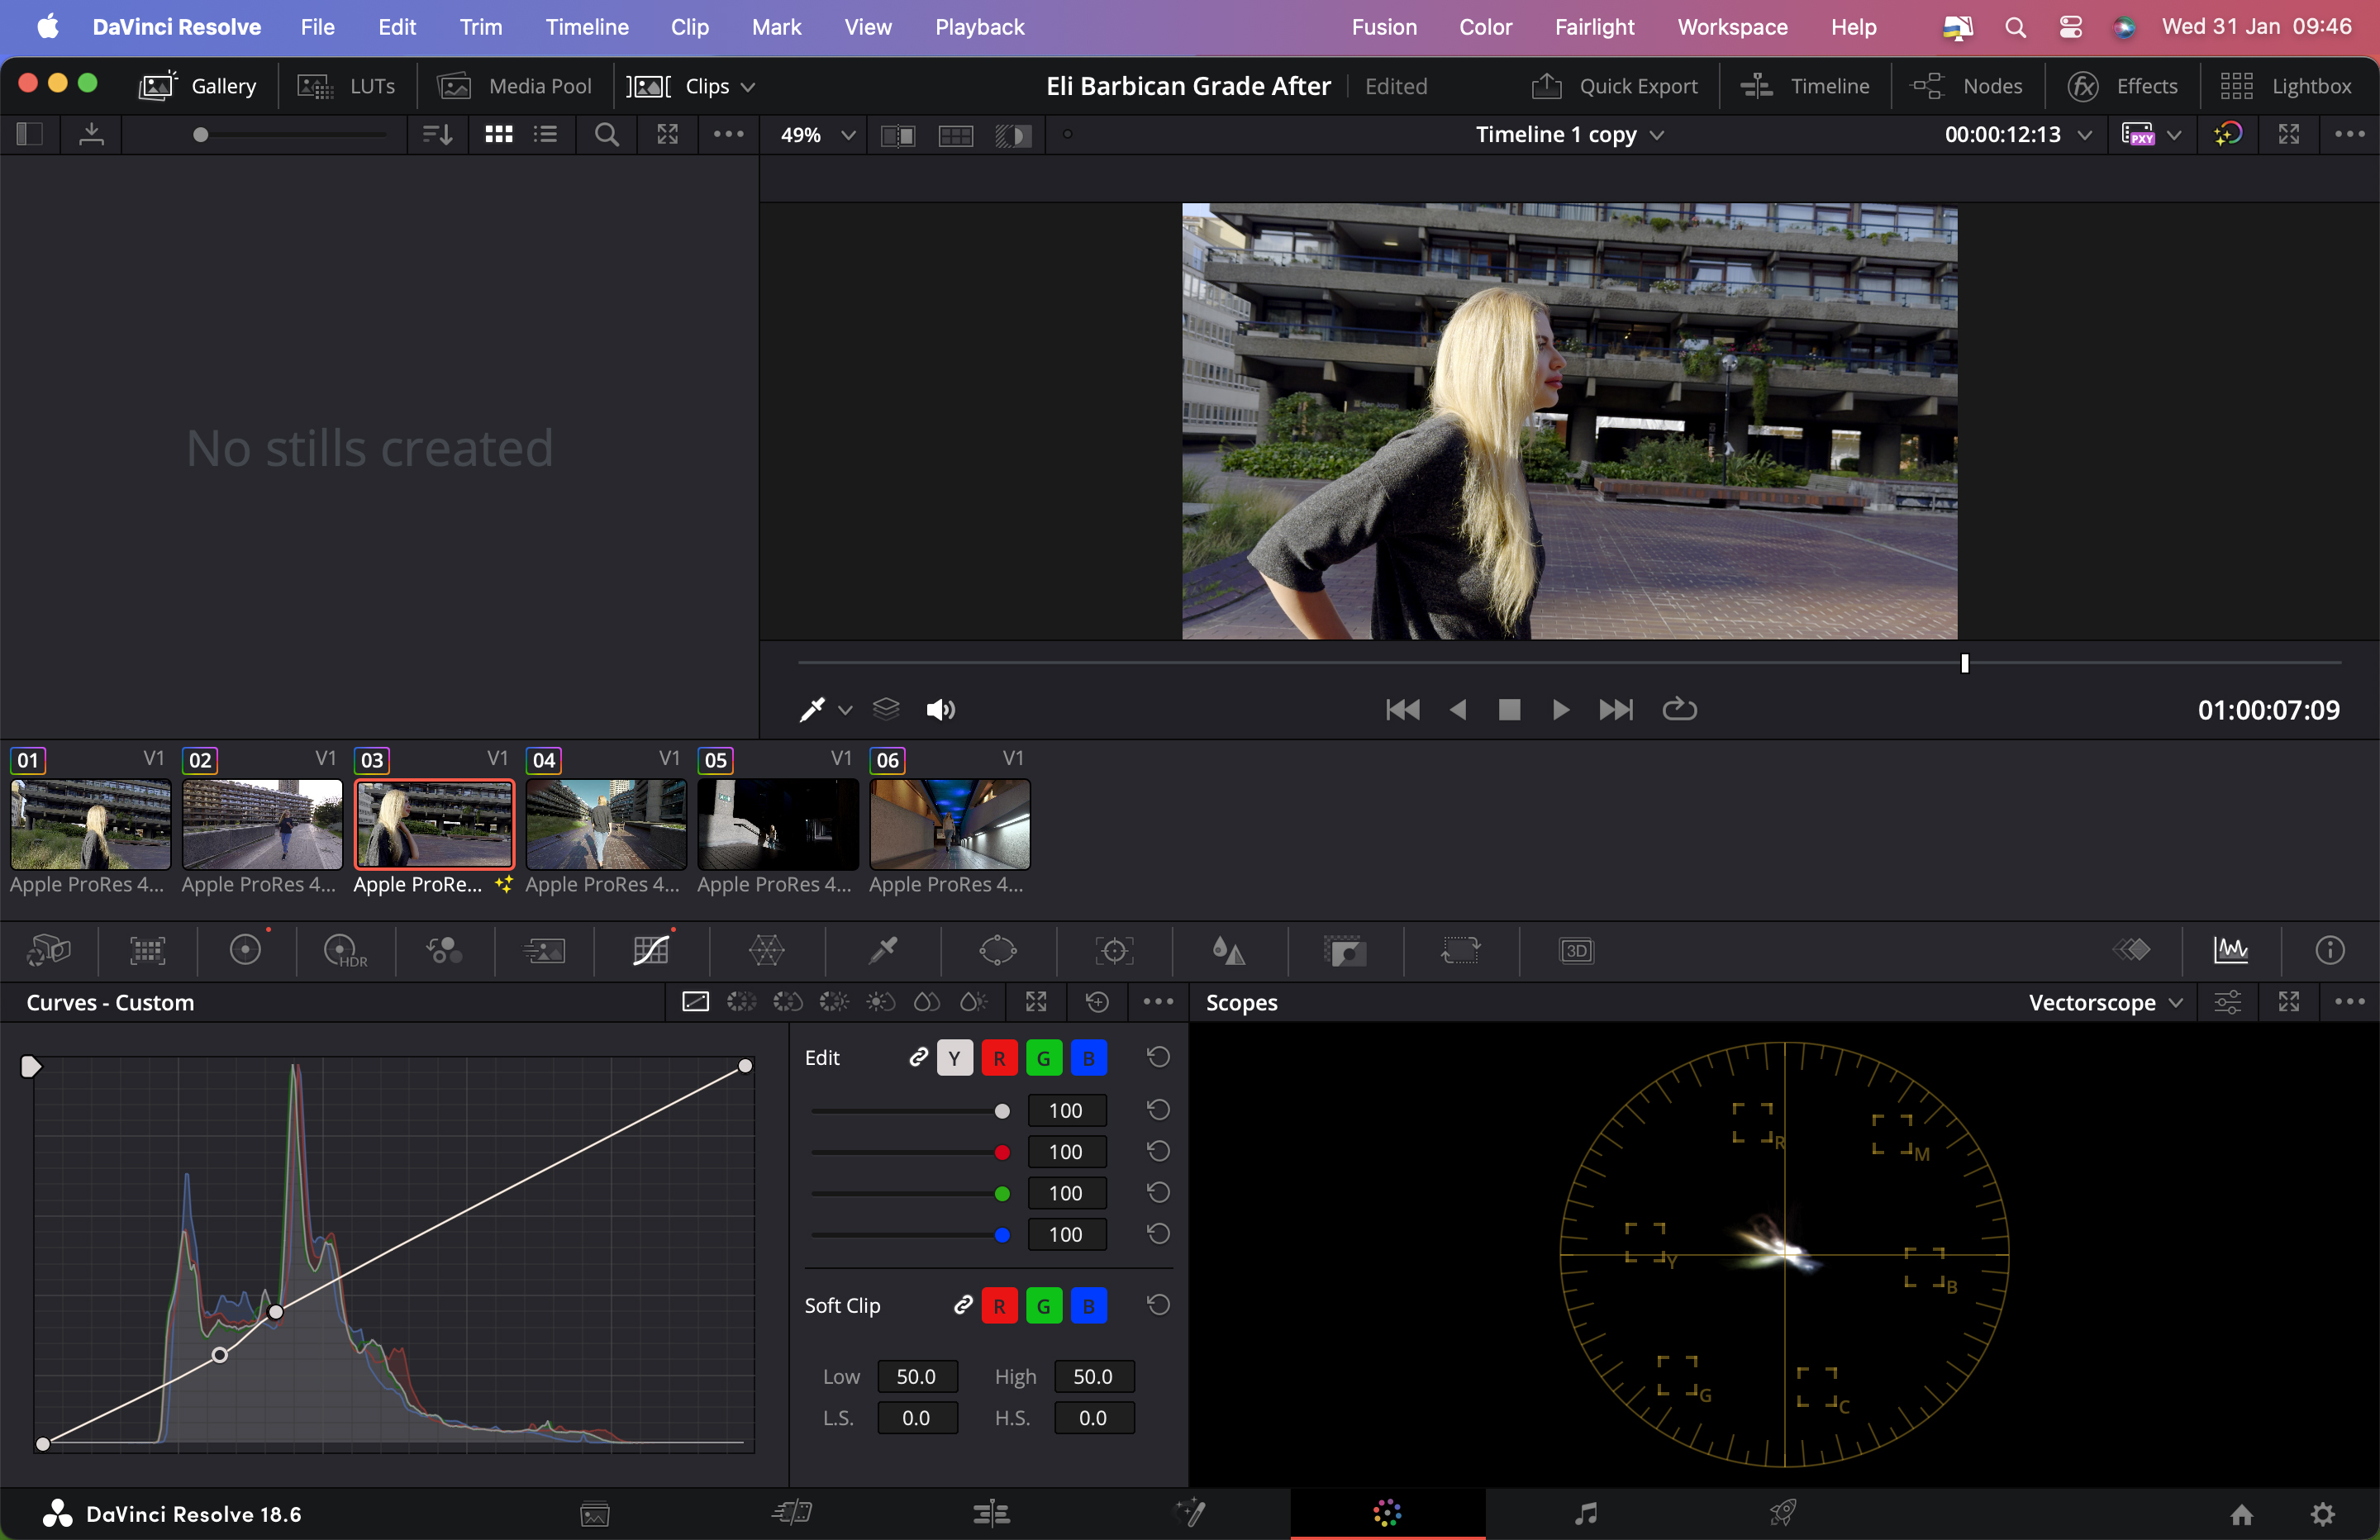
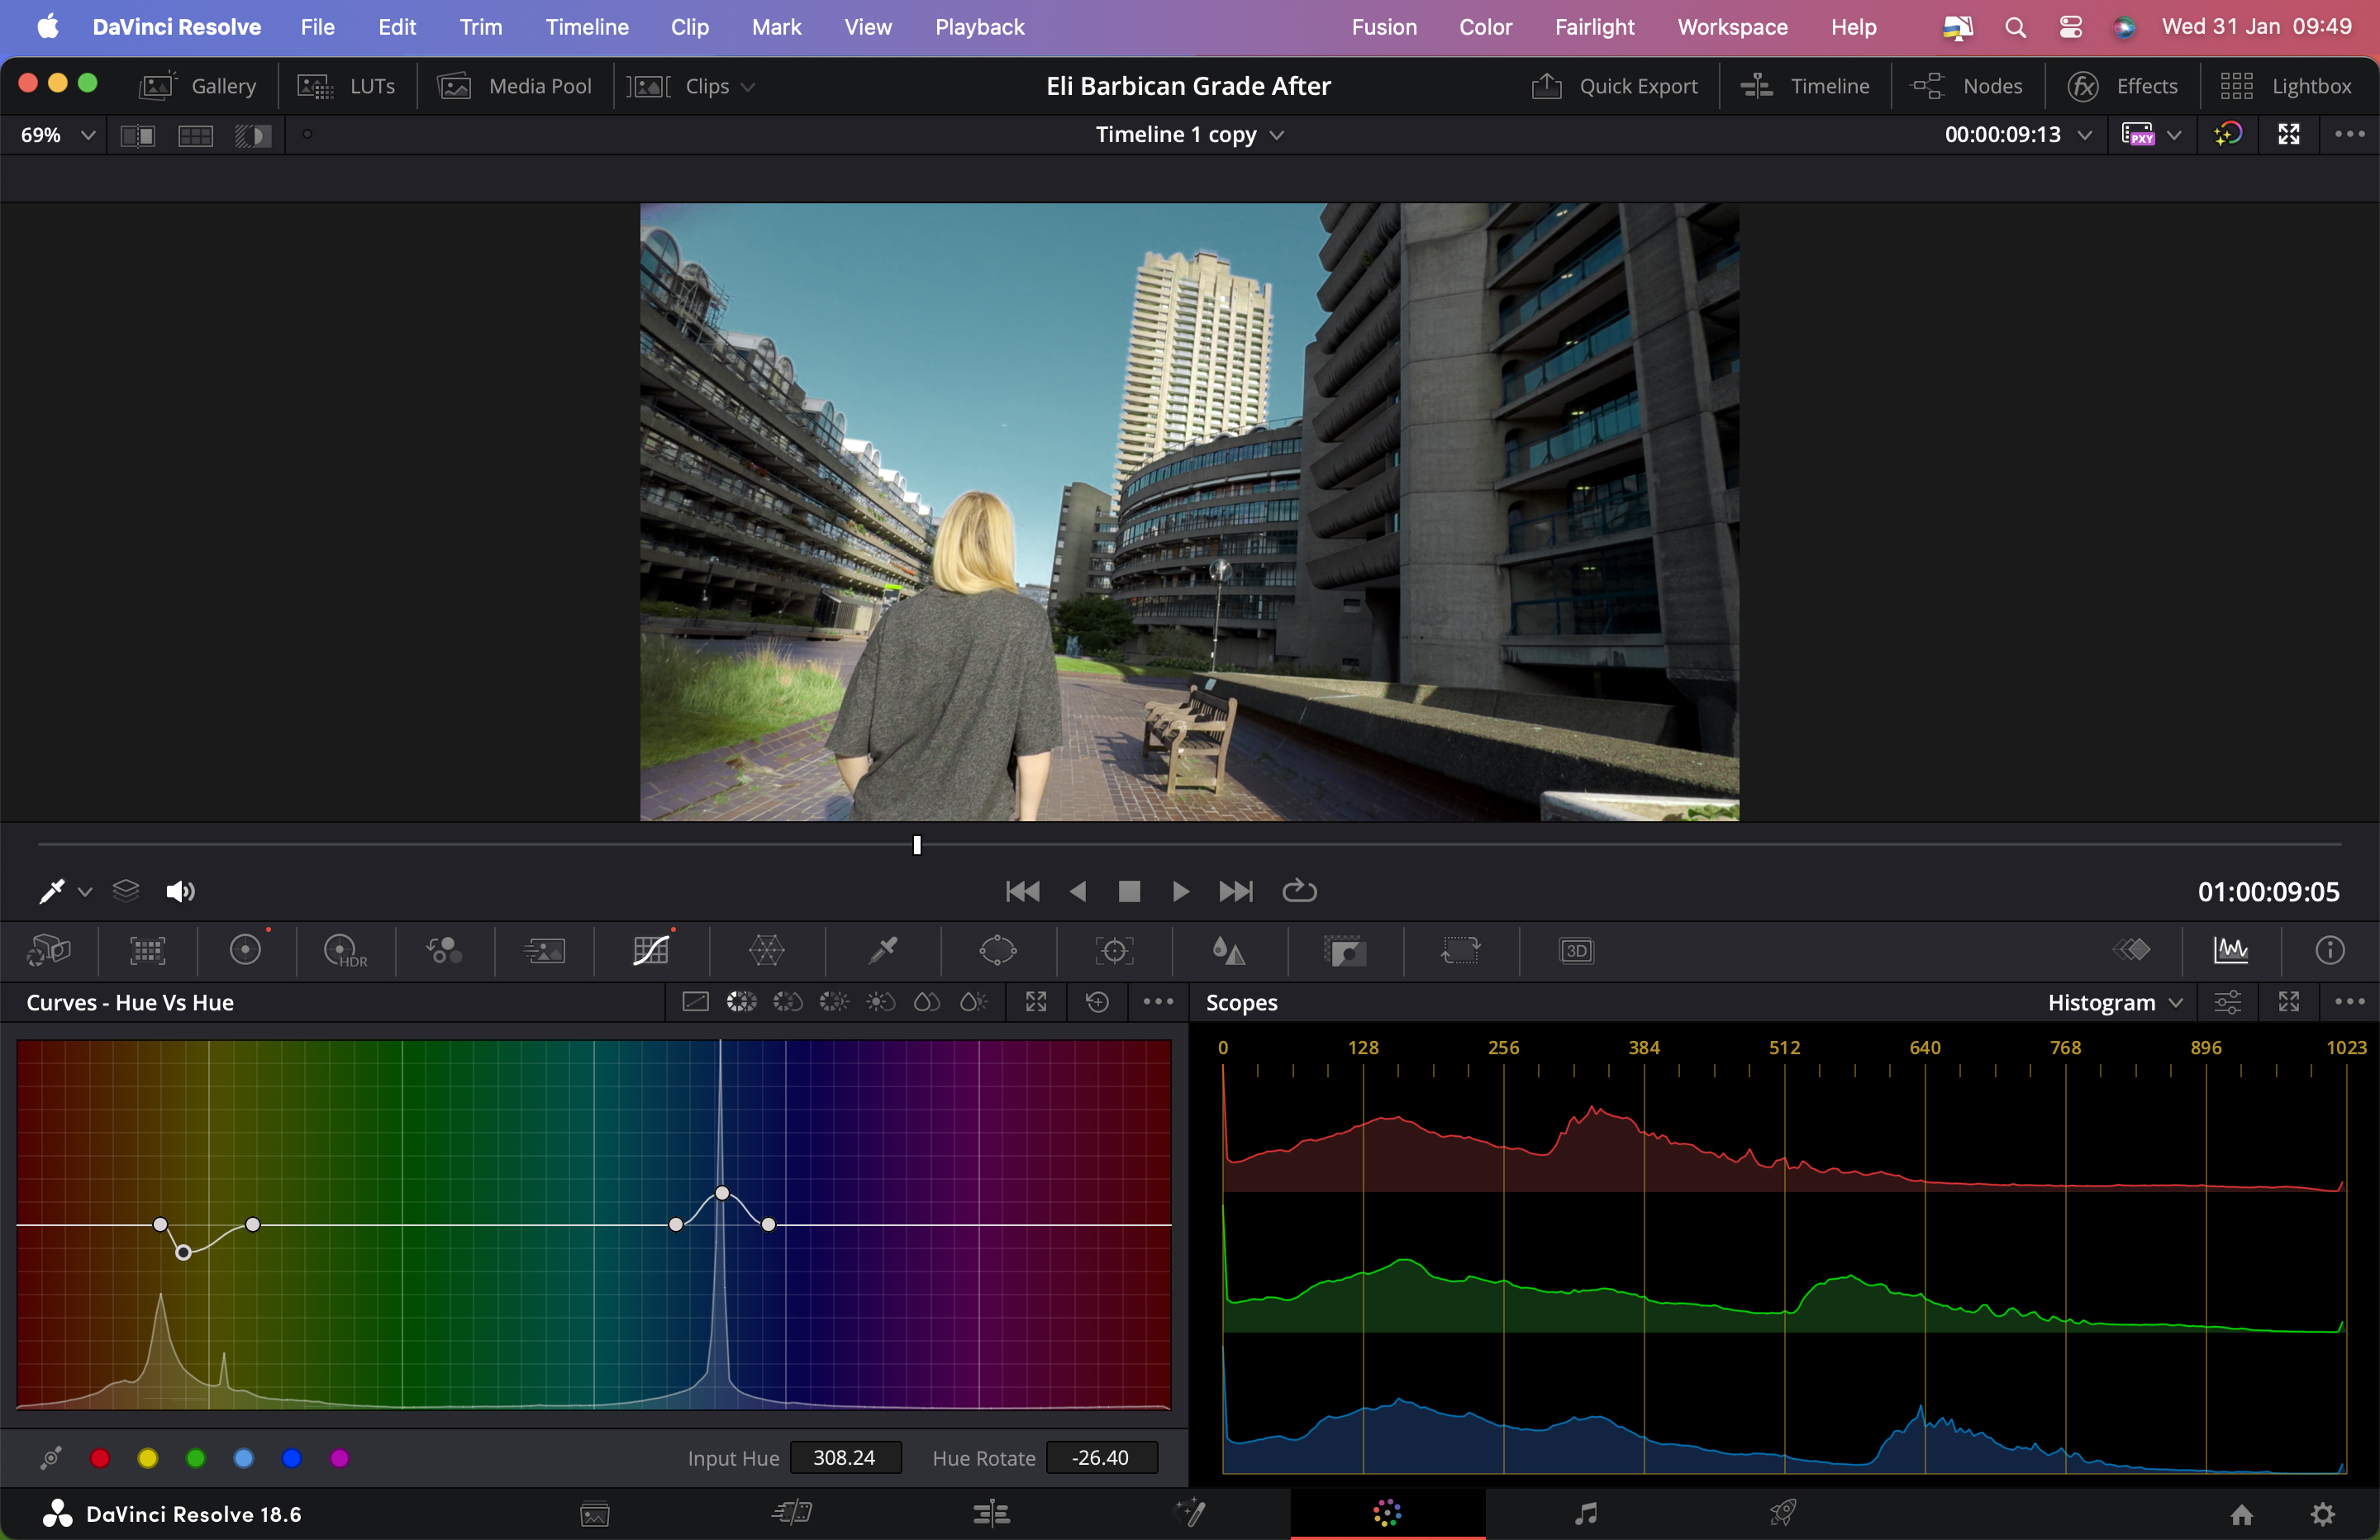
The Color page features a wide range of ways to enhance a clip’s colors and tones. It had no trouble taking the desaturated and flat-toned log color clips from my iPhone 15 Pro Max and giving them more vibrant colors and a richer range of tonal detail with a click on the Auto Color command. Creative grading is catered for too - by using Curves I was able to sample a blue sky and then change the hue from blue to a cinematic cyan just by dragging a point on the curve (just as I could in Final Cut Pro).
A key difference to Final Cut Pro is DaVinci’s use of Nodes. Nodes enable you to apply an effect (or mask) to a particulate clip (in a similar way to applying an adjustment layer to an image layer in Photoshop). You can then unplug and rewire nodes to change their effect on the clip in a very organic way. I found this new way of working was a steep learning curve to climb but this extra level of control is worth mastering. Check out my supporting video to see Nodes in action. I created a mask to brighten a light in a clip, adjusted its blending mode, and made it track the light as the camera moved.
One tool that made me seriously think about defecting from Final Cut Pro was DaVinci Resolve’s ability to use AI to listen to the content of my timeline and then transcribe it as text. This proved a much faster way to create captions and subtitles than having to play a clip and then type out the dialogue by hand. I used to earn quite a lot charging clients to manually transcribe subtitles over a period of days but those days are over!
Verdict
If you use entry-level apps such as iMovie and want to develop your skills as a non-linear video editor, then DaVinci Resolve 18 is well worth a look, though you’ll need to climb a fairly steep learning curve to grasp its suite of tools (especially in relation to color grading).
If you’re a more experienced Final Cut Pro or Adobe Premiere Pro user then DaVinci Resolve definitely deserves your time and attention, and exploring its tools may act as a springboard to motivate you to license the outstanding suite of AI-assisted tools in DaVinci Resolve Studio.
Whatever your experience as a video editor you have nothing to lose but time when you explore what DaVinci Resolve 18 has to offer (and potentially much more to gain when it comes to producing cinematic-looking footage).
✅ Buy this if...
- You need to output at 4K
- You need voice isolation tools
- You need HDR tools
🚫 Don't buy this if...
- You’re a novice video editor
- You don’t need 3D stereoscopic tools
- You’ve yet to explore the free version
Alternatives
If you’re a Mac-based novice video editor and just want to get your content onto your social media feed without climbing a steep learning curve then Movavi will do the job. This is the perfect mid-range video editing app to try out if you want to expand your non-linear editing skills from entry-level apps such as iMovie or Adobe Premiere Elements. When it comes to assets such as filters and transitions Movavi gives professional apps such as Final Cut Pro a run for their money.
If you’re already a subscriber to the Adobe Creative Cloud suite of apps then the NLE powerhouse that is Premiere Pro will be available for you to download. It features many of the tools that Davinci Resolve has such as the ability to transcribe a programme’s audio into text for captions and subtitles. Like DaVinci Resolve, Premiere Pro also enables you to sync up multiple clips into a Multicam clip so you can vision mix using keyboard shortcuts from one camera to another. It also offers powerful keying tools for compositing in layers.
George has been freelancing as a photo fixing and creative tutorial writer since 2002, working for award winning titles such as Digital Camera, PhotoPlus, N-Photo and Practical Photoshop. He's expert in communicating the ins and outs of Photoshop and Lightroom, as well as producing video production tutorials on Final Cut Pro and iMovie for magazines such as iCreate and Mac Format. He also produces regular and exclusive Photoshop CC tutorials for his YouTube channel.
