Digital Camera World Verdict
Despite not getting 5 stars across the board in our Features box-out (it lost a star due to the blurry Starlite filter), I’m awarding the Apexel 10-in-1 Phone Lens Kit 4.5 stars because of its affordability and versatility. Even if one filter is a fail, the rest work really well, so you still get much more for your money than by purchasing smartphone lenses and filters individually. This kit should appeal to videographers who want to add creative in-camera effects such as symmetrical kaleidoscopic reflections. Portrait photographers will also enjoy peering through reflections using the CPL filter or adding creative vignettes such as the Flow and Radial filters.
Pros
- +
Value for money
- +
Compatible with most smartphones
- +
Six creative filter effects
- +
Four lens types
Cons
- -
Starlite filter lacks sharp focus
- -
Mount can slip when adjusting filter
Why you can trust Digital Camera World
New smartphone models such as the iPhone 16 Pro have a collection of cameras that enable you to capture candid street photos via a 5x optical zoom or include more of a landscape using a .5x ultra-wide lens (which also functions as a macro lens). However, a smartphone photographer (or videographer) should consider expanding the range of their camera using a third-party kit like the Apexel 10-in-1 Phone Lens Kit, as this enables them to enhance the look of their clips and stills in a variety of creative ways.
This highly affordable kit features a collection of lenses and filters. The lenses might be useful in enabling you to capture closer or wider angles (depending on the spec of your smartphone camera), but the key strength of the kit is the filters, as they enable your smartphone to capture more distinctive-looking shots in-camera (such as adding streaks of motion blur to the edge of the frame for a more dynamic portrait or enabling you to capture detail that was previously hidden by glare and reflections).
Apexel is a company that specialises in smartphone lenses and I’ve tested and reviewed a few of their products already, such as the impressive Apexel 36x Telephoto that is great for capturing wildlife at a distance with a powerful optical zoom. Some Apexel kits (such as the Apexel 2-in-1 Wide Angle & Macro Lens Kit - were less compatible with my iPhone 16 Pro due to the shape of their universal spring clip mount, but the clip that ships with the 10-in-1 kit fitted perfectly and enabled me to enjoy testing the ten components on a model shoot.
Apexel 2-in-1 Clip-on Lens: Specifications
| Wideangle lens | 0.63x |
| Macro lens | 15x |
| Fisheye lens | 198º |
| Telephoto lens | 2x |
| CPL filter | Circular polarising filter |
| Flow filter | Adds motion blur vignette |
| Star filter | Adds starburst effects to light sources |
| Kaleidoscope x3 filter | Adds three overlapping images |
| Kaleidoscope x6 filter | Adds six overlapping images |
| Radial filter | Adds motion blur radiating outwards |
Video review
Above: video showing the Apexel 10-in-1 lens kit in use
Apexel 10-in-1 lens kit: Price
The Apexel 10-in-1 Phone Lens Kit is surprisingly affordable! At a recommended retail price of $25.99/£26/AU$68, you get a mix of 10 lenses and filters, which is a fraction of what you’d pay for a single DSLR lens.
The quality and effectiveness of the lenses and filters in this kit varies, but even with the odd dud (such as the rather blurry Starlite filter), there’s enough here to enjoy experimenting with to add a range of creative in-camera effects to your smartphone-sourced stills and clips.
Apexel 10-in-1 lens kit: Design & Handling
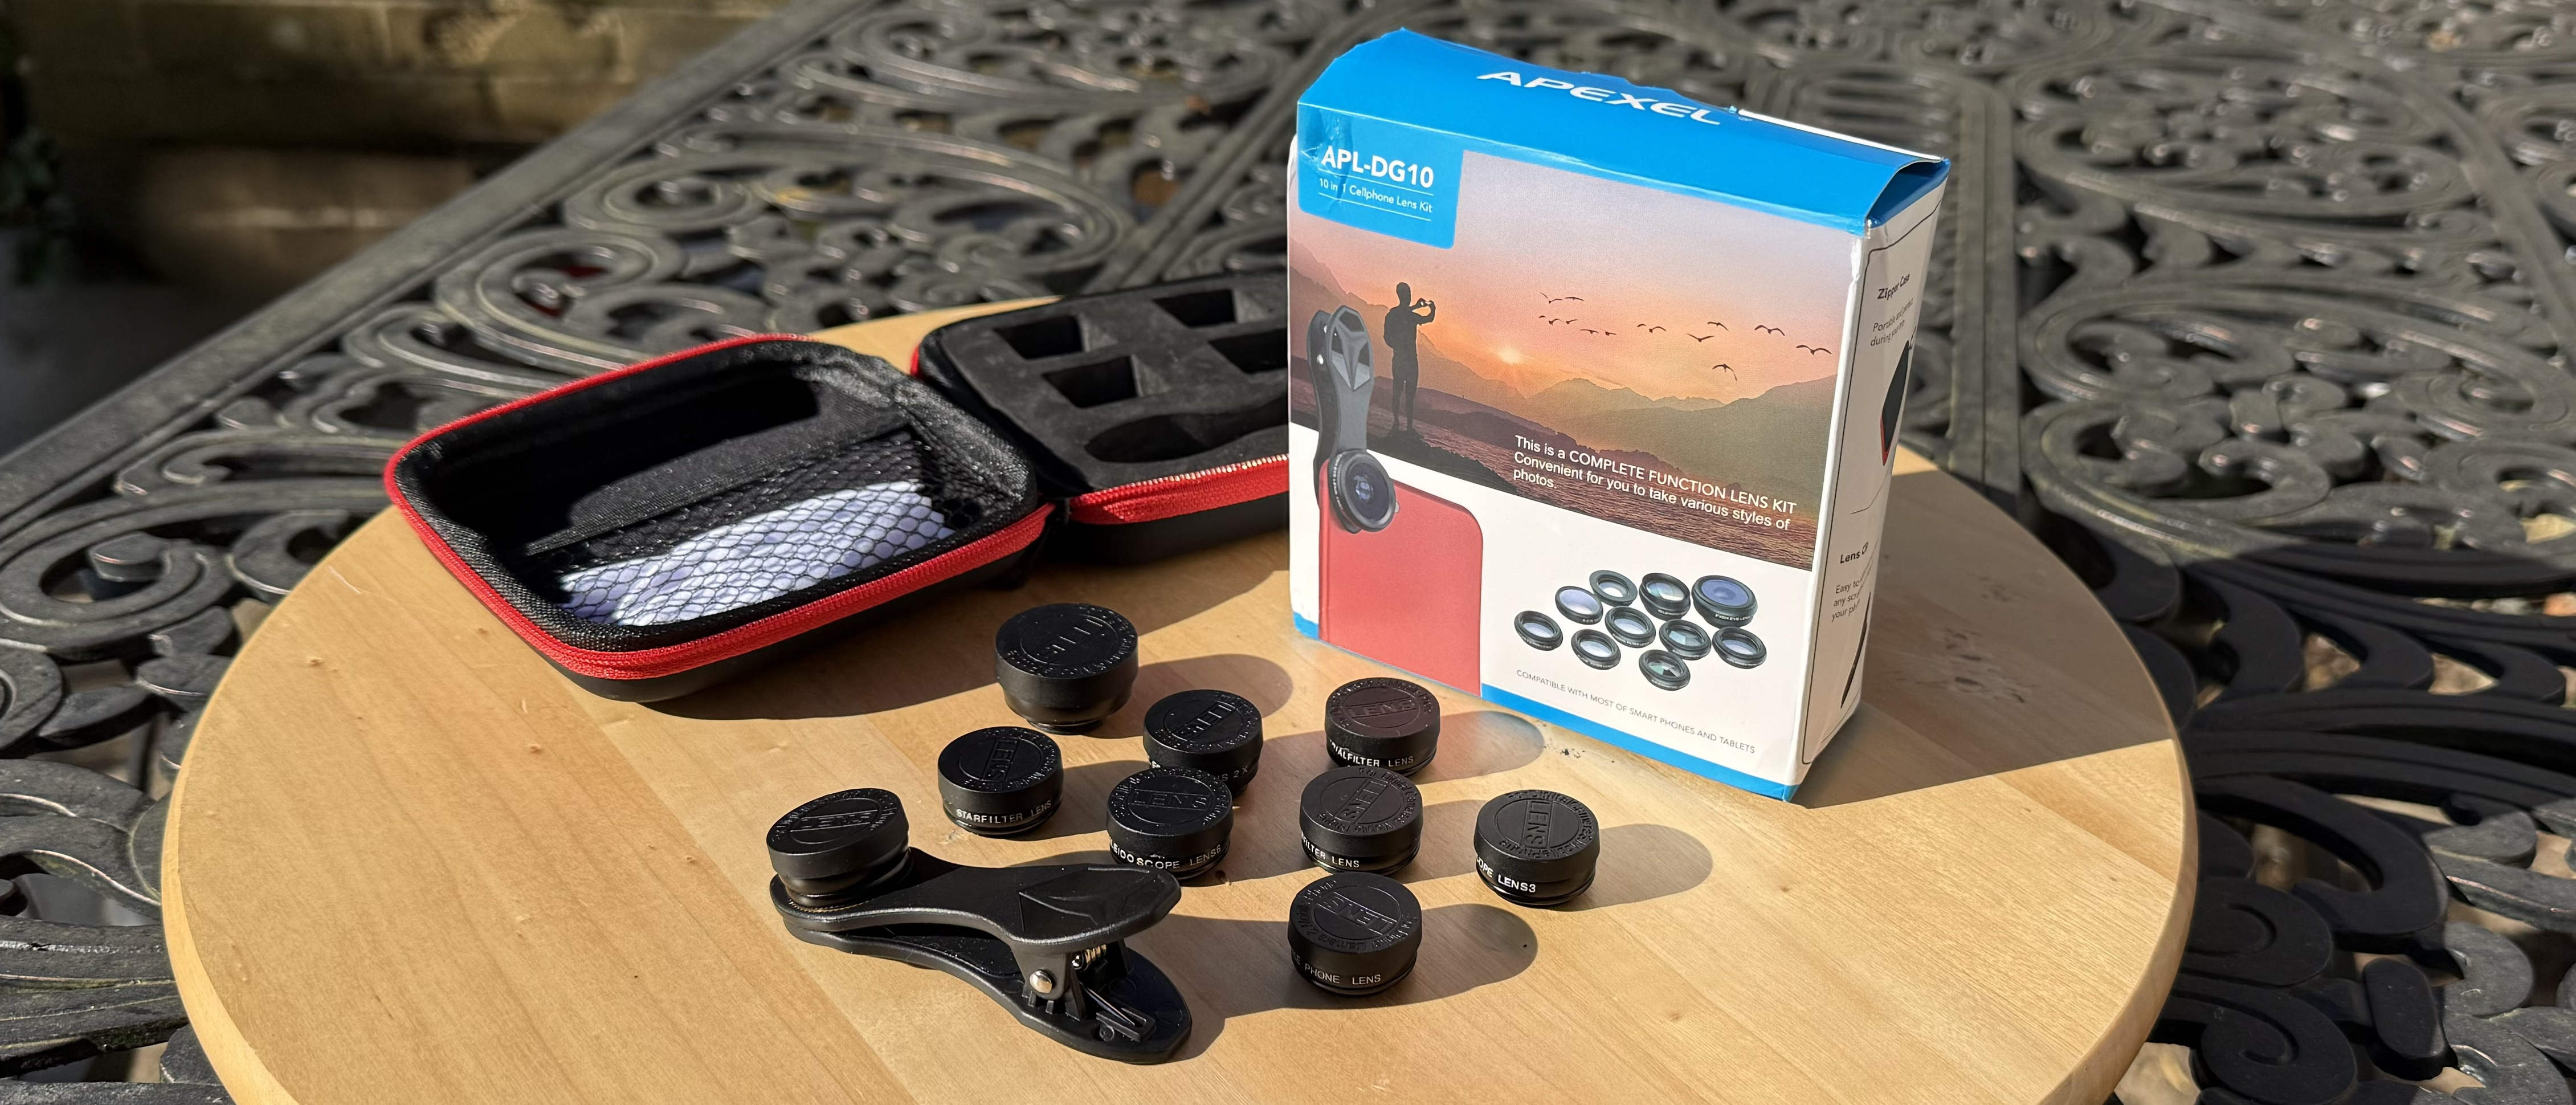
The Apexel 10-in-1 Phone Lens Kit ships in a small but sturdy zippable case. The foam interior of the case has recessed slots in which you can store the 10 small circular lenses and filters safely (without dropping or losing them on a shoot). Each lens/filter has a little lens cap to protect its glass - though there’s no cap for the base of each lens like you’d get with a DSLR lens kit. Helpfully, each lens/filter is labelled (ie Flow Filter, Radial Filter), so that you can identify its role with ease. The lid of the case has a little mesh pocket where you can store the largest lens - the 198º Fisheye. A useful lens cleaning cloth is also provided.
The carry case ships in a card sleeve on which features helpful thumbnails illustrating what each lens/filter can produce. There’s also a bit of descriptive text for each lens, though some of the captions indicate that English is not the writer’s first language.
Like some of the other Apexel lens kits that I’ve tested, this one ships with a universal clip mount. This is basically a black plastic peg with a spring in it. The peg clamps over your smartphone’s body and you then need to position its threaded hole over your smartphone’s main camera. You can then screw each lens/filter onto the mount’s thread and view the effect of the filter/lens in your smartphone’s Camera app display.
With a previous Apexel test subject - the 2-in-1 kit - I couldn’t get the smartphone clamp mount to align perfectly parallel with my iPhone 16’s main camera lens. This caused unwanted blurred edges, plus the lens hood was visible around the edge of my frame. The universal mount on the 10-in-1 kit is better designed and it fitted perfectly over my iPhone 16 Pro’s main camera, so there was no unwanted vignetting or visible lens hood.
Apexel 10-in-1 lens kit: Performance
To test the Apexel 10-in-1 Phone Lens Kit, I popped it into the top compartment of a Brevitē Jumper backpack (which I was also testing) and headed to the city. To compare each Apexel lens and filter, I decided to hire a model so that I could capture some colourful clips and stills to illustrate the Apexel 10-in-1 kit review. Models can be expensive, but I figured that it was worth the expense as I was also generating assets for a Colbor CF5 Fog Machine review (plus it made a change from using myself as the main subject!). For tips on working with models check out my opinion piece: https://www.digitalcameraworld.com/photography/photo-technique/7-tips-for-better-model-photography-in-2025
Before the shoot I made a checklist in my iPhone 16 Pro’s Notes app so that I could ensure that I’d captured enough clips and stills using each of the 10 lenses and filters in the Apexel kit. I often find that without a list I return from a busy shoot and then realise I’m missing some key assets. Check out this review’s supporting video to see footage captured using each lens/filter in the kit. I’ll run through the performance of each Apexel lens/filter in the 10-in-1 kit, starting with the Telephoto 2x Lens…
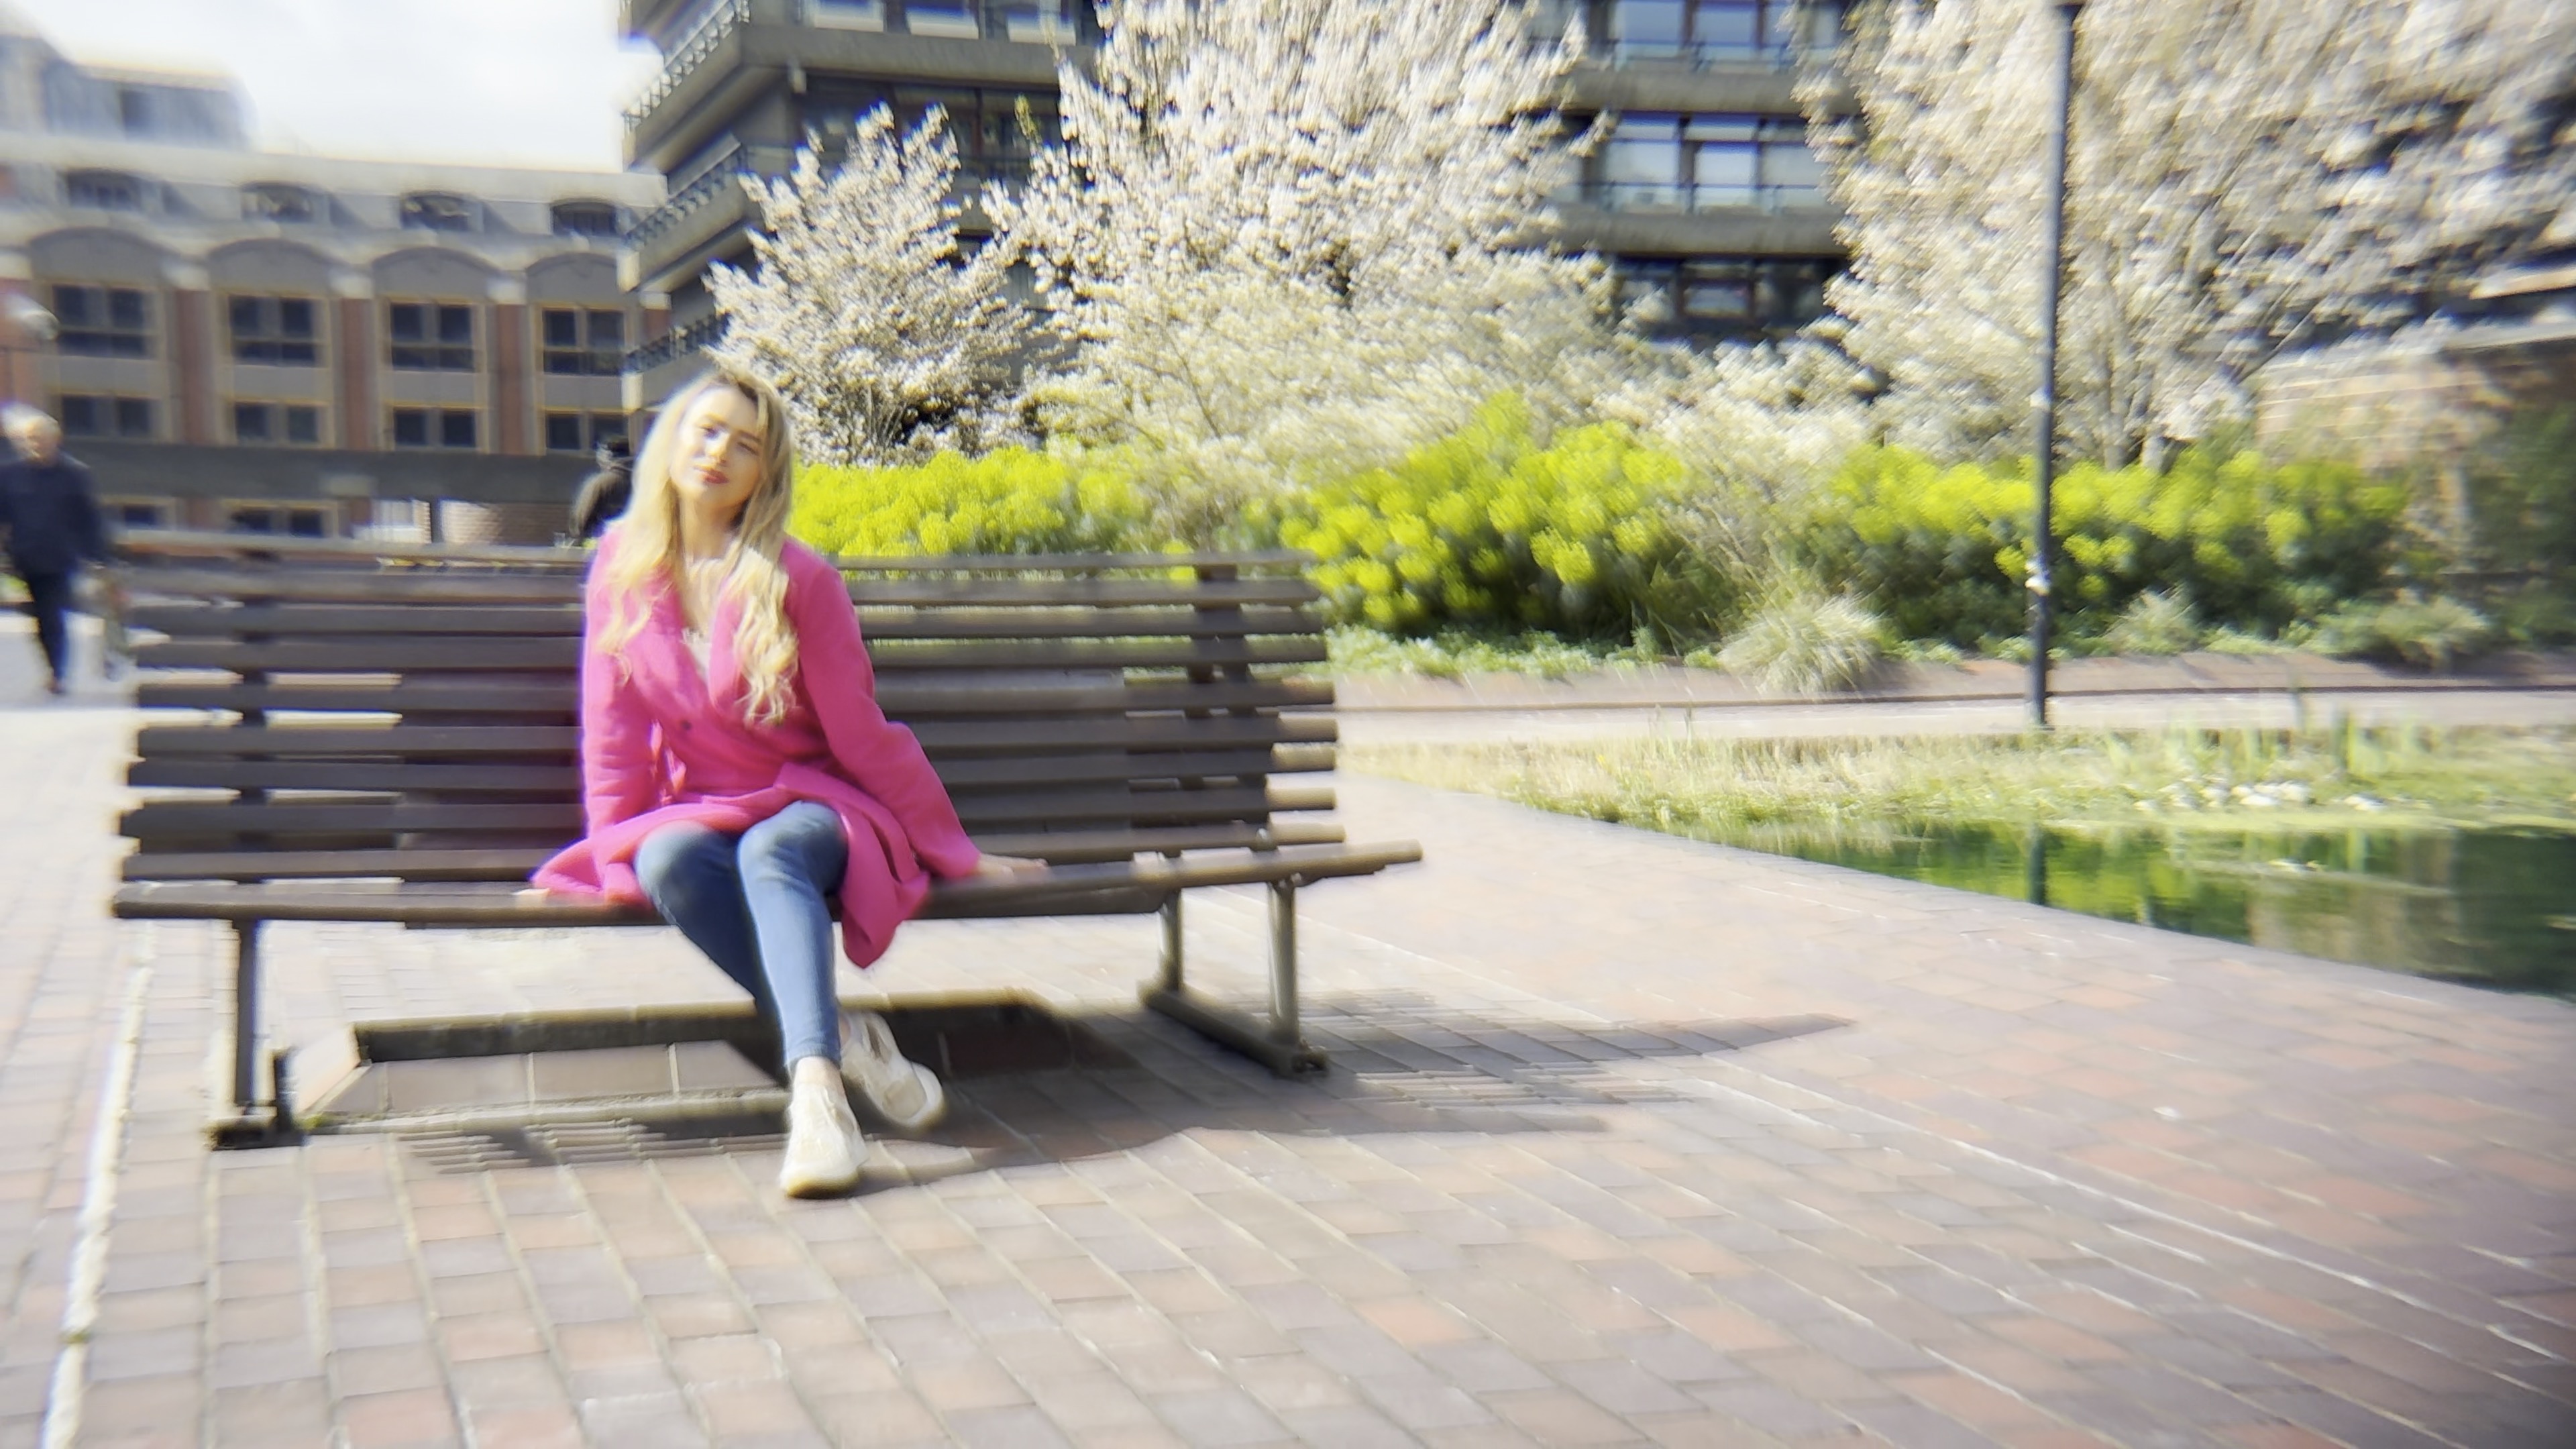
1: Telephoto 2x Lens
My iPhone 16 Plus has a 5x optical zoom, which is the equivalent of a 120mm telephoto lens. I therefore wasn’t expecting the Apexel 2x lens to be of much use to me. Indeed the Apexel 2x lens didn’t even zoom in as close as the iPhone’s native 2x (52mm) lens. When the Apexel 2x telephoto was clamped to my iPhone the edges of the frame looked blurry, and the center wasn’t that sharp either. This isn’t a lens that I’d envisage using again. For me this lens will be redundant in future shoots but that’s not an issue as there are plenty more to play with in this kit!
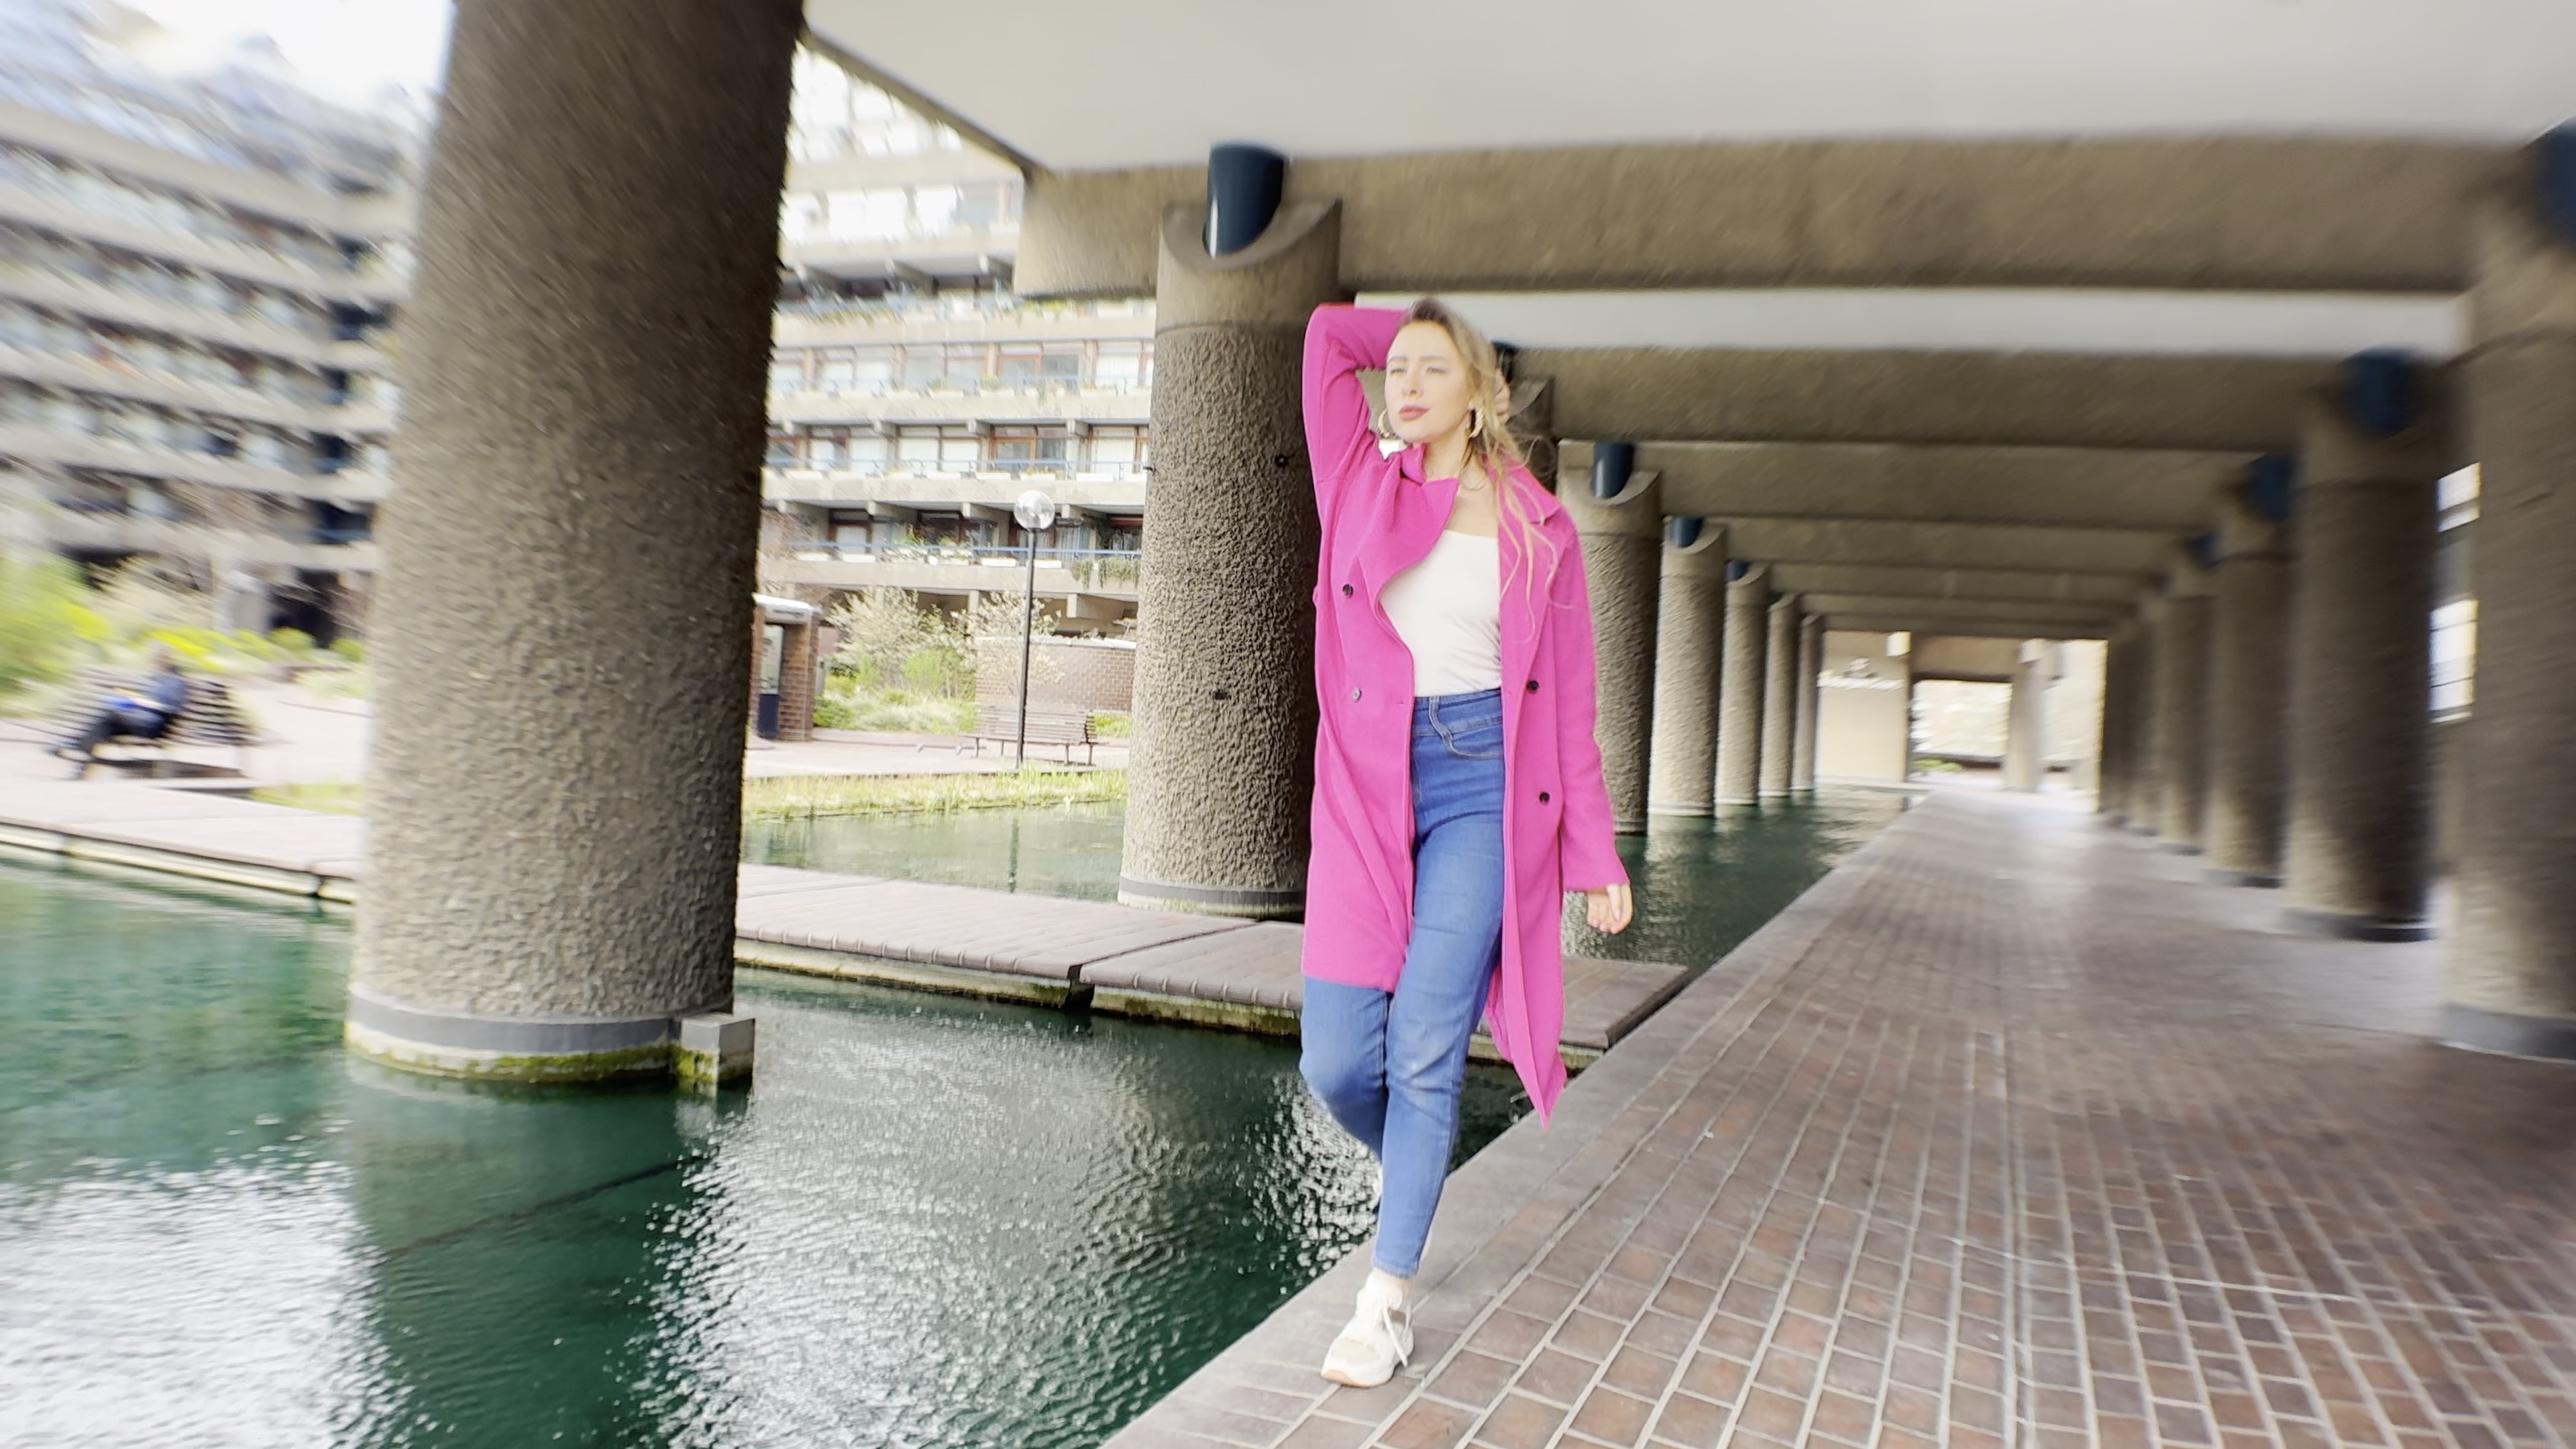
2. Apexel 0.63x Wide Angle lens
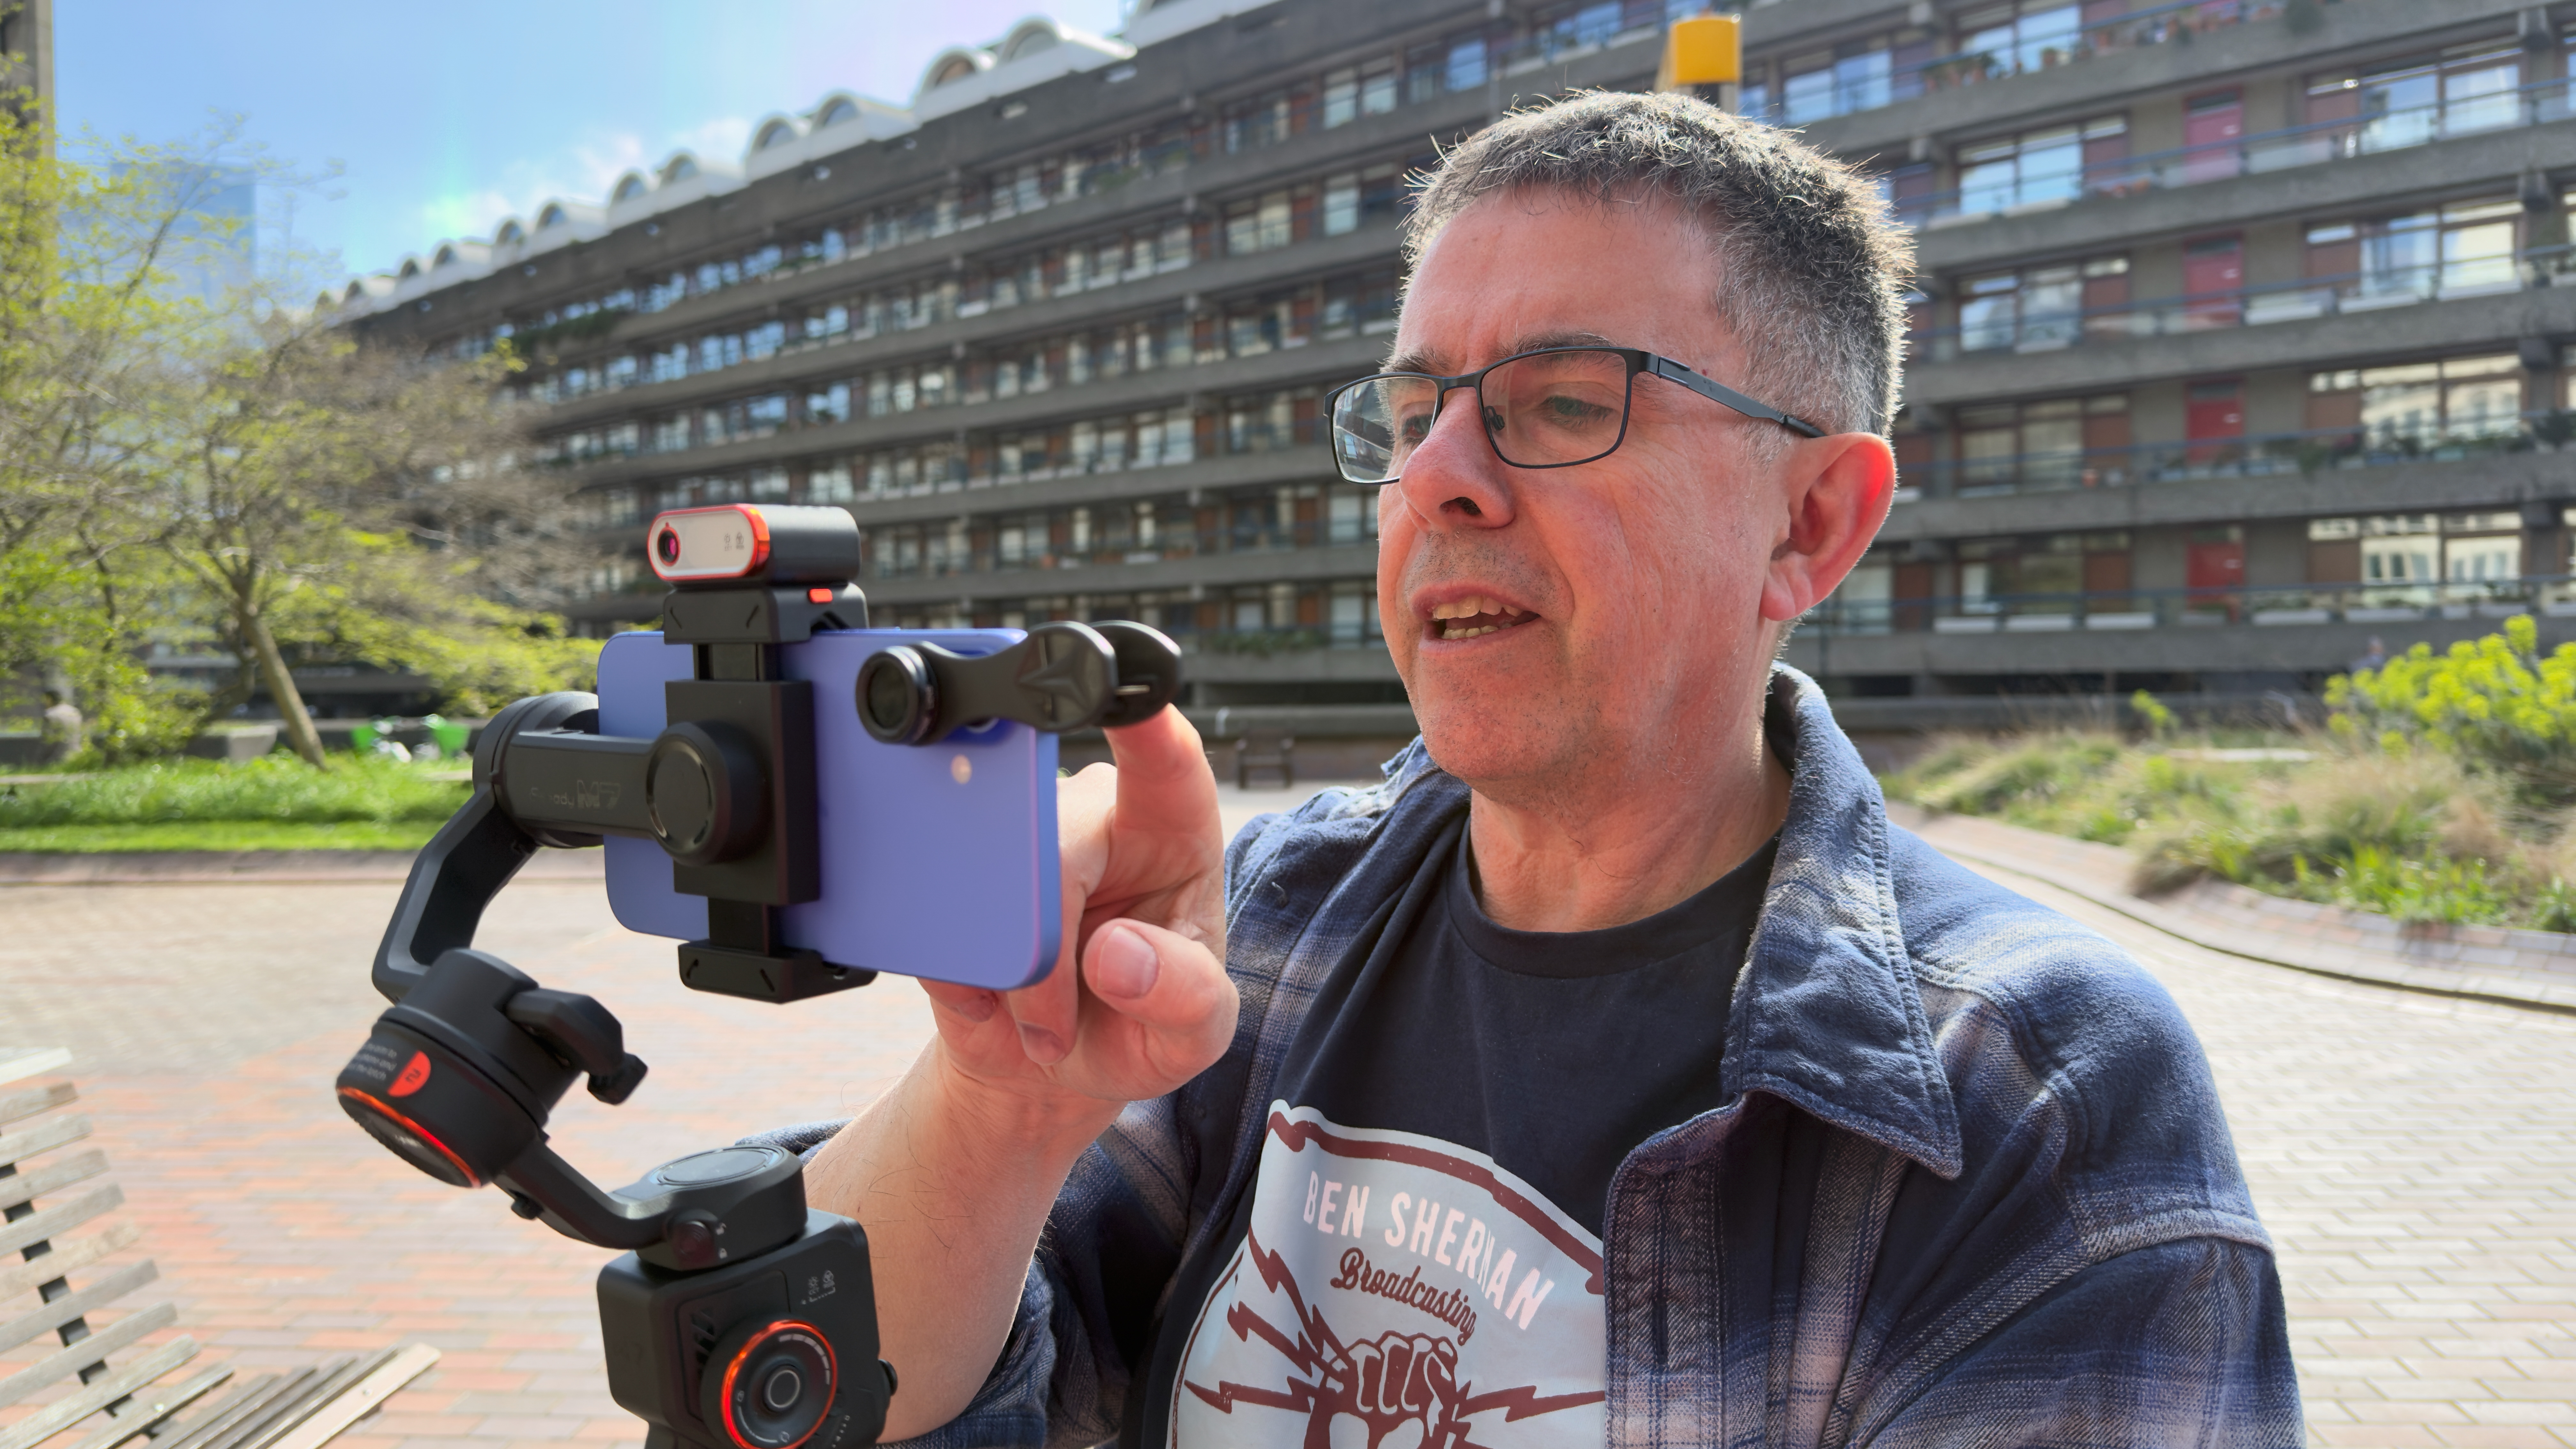
The Apexel 0.63x Wide Angle is piggy-backed onto the Macro lens. You need to unscrew the Wide Angle lens before you can use the Macro - more on that lens later. The iPhone 16 Pro’s native .5x (13mm) camera captures striking wide angle footage in which the edges of the frame aren’t too distorted. The optical effect of the Apexel 0.63x Wide Angle lens is much more evident. Vertical lines near the edge of the frame become curved, barrelling outwards. The edges of the frame are also vignetted with a soft blur. I liked this exaggerated and artefacted wide angle look as it added character and texture to my footage, especially when I tracked through a corridor of pillars to follow my model (using a Hohem iSteady M7 gimbal - https://www.digitalcameraworld.com/cameras/gimbals/hohem-isteady-m7-review).
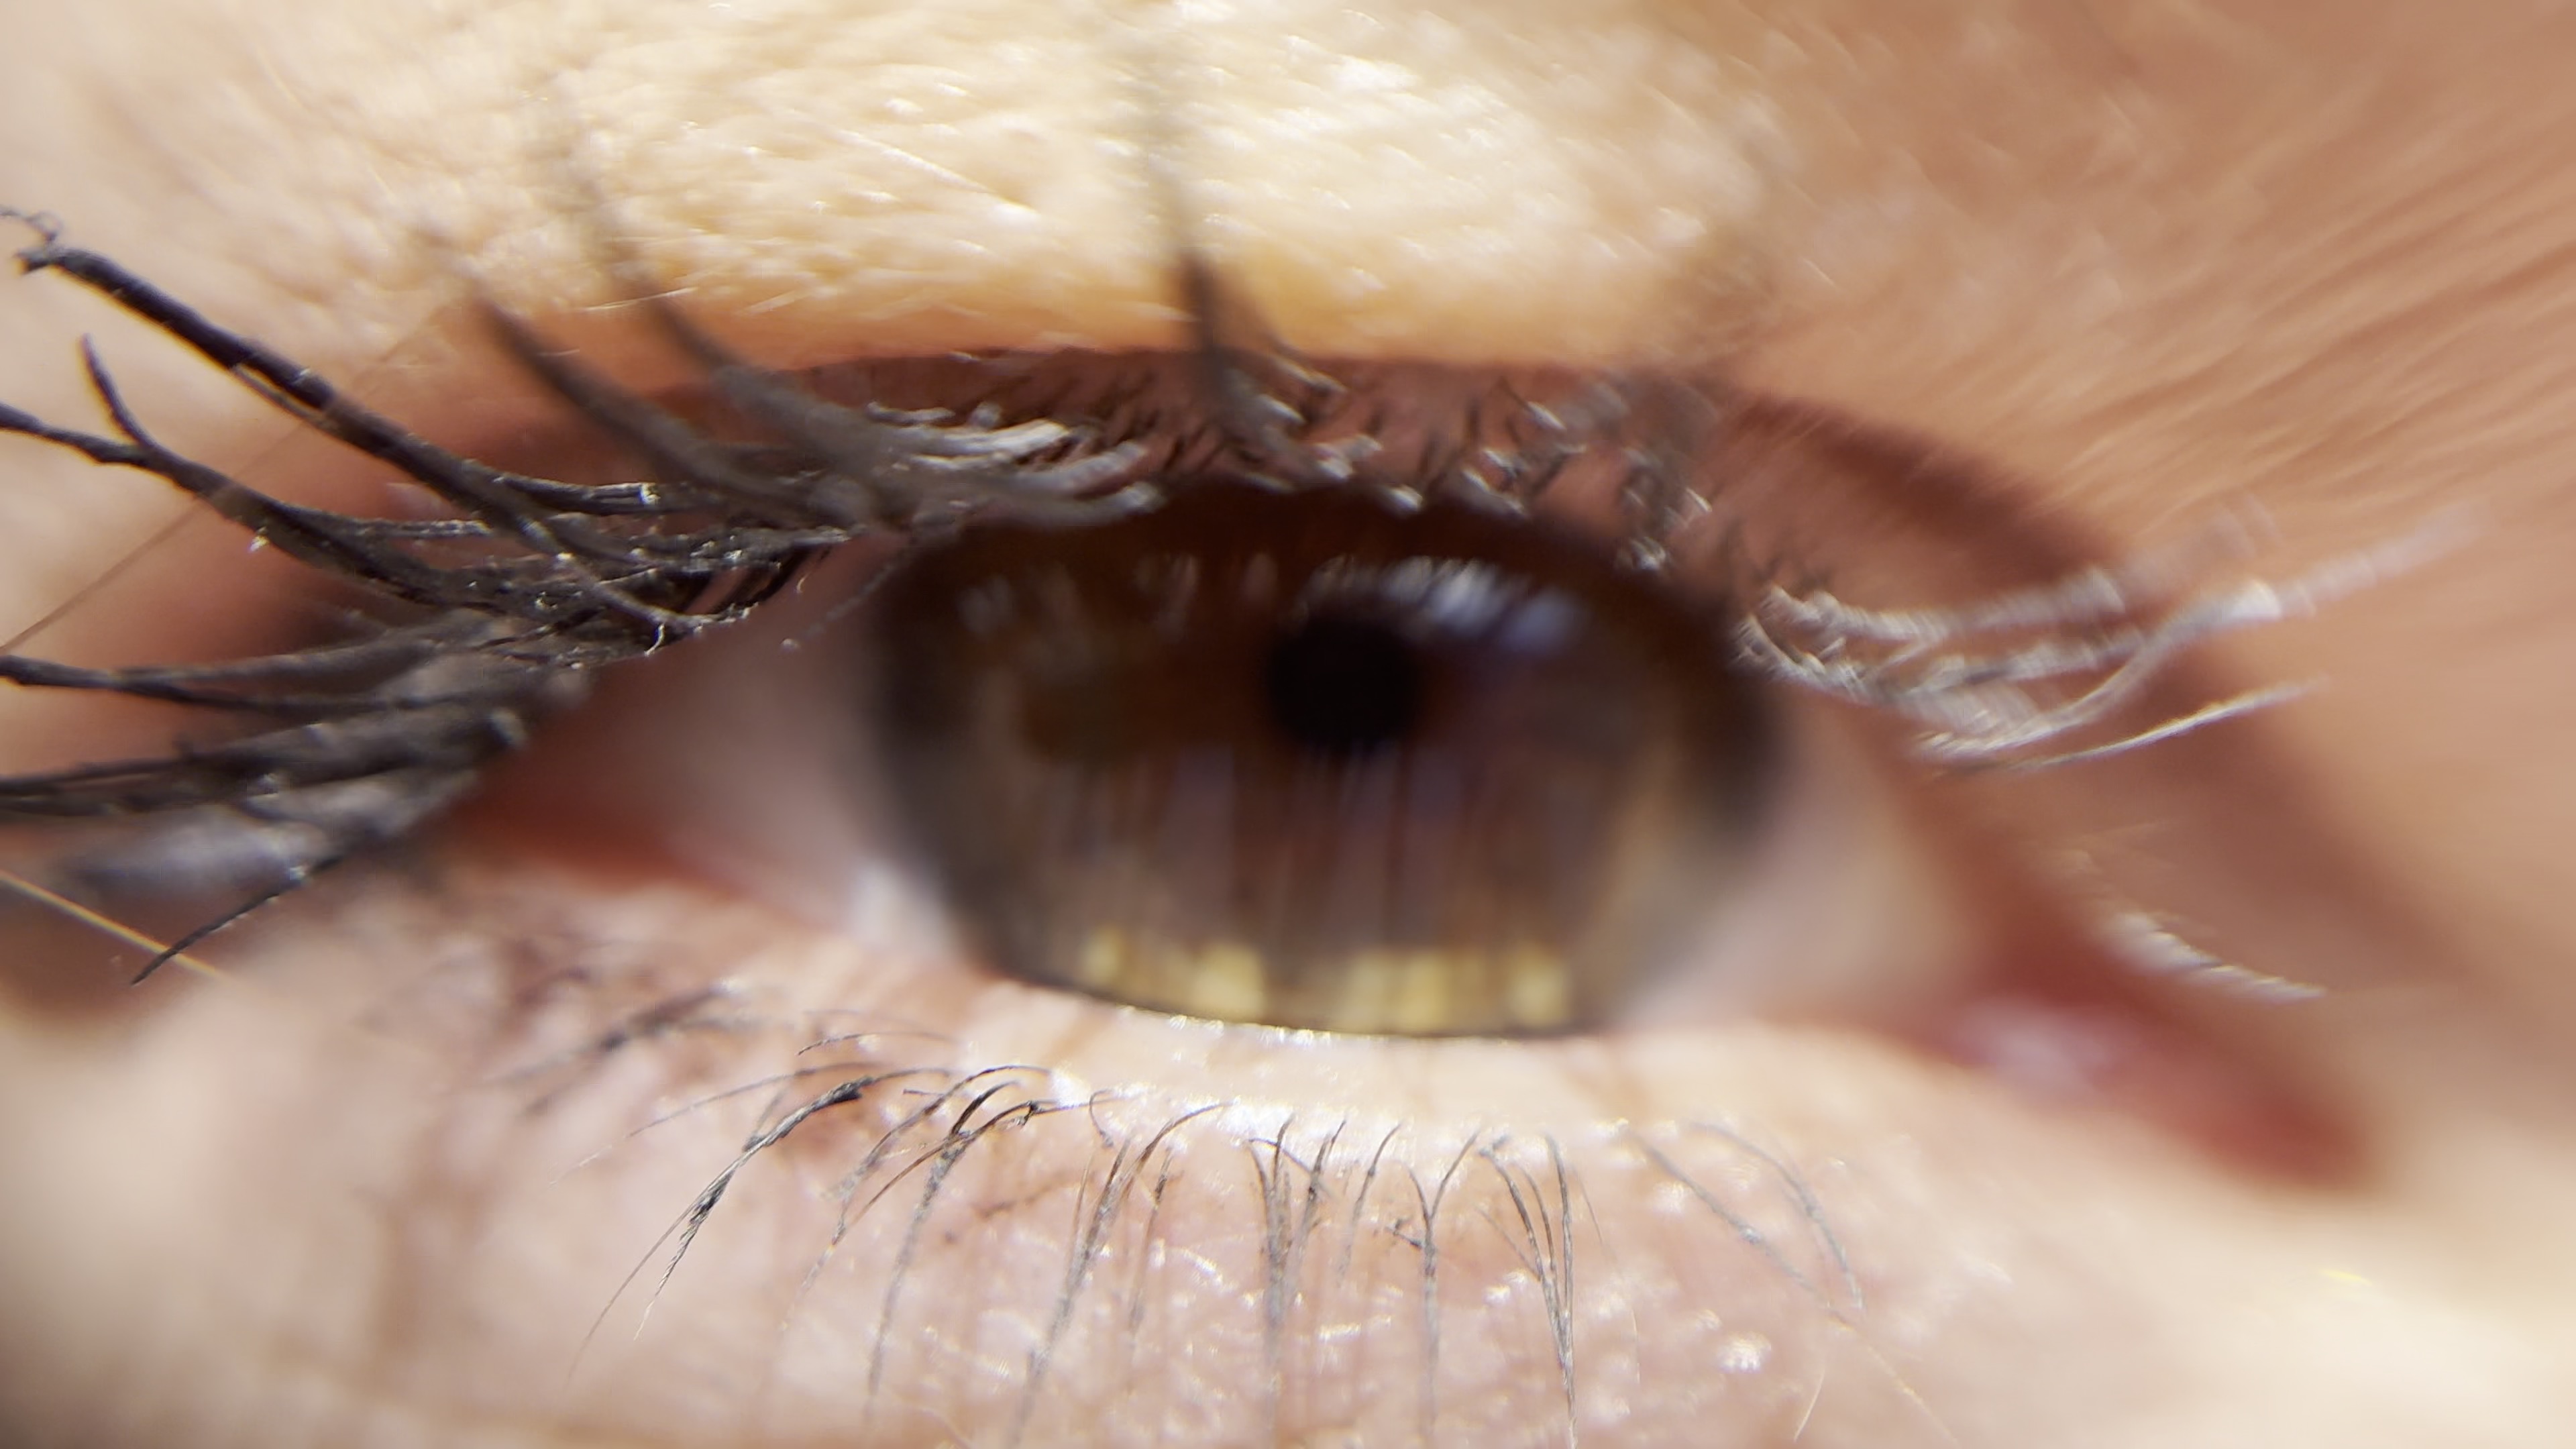
3. Apexel 15x Macro lens
The Apexel 10-in-1 kit’s Macro lens gives you a 15x optical zoom. To use the Macro lens you first need to unscrew the attached 0.63x Wide Angle lens to separate the two. To get a subject looking sharp you need to place the Macro lens in very close proximity to the subject. Since I was photographing a model I tried to get a close up of her eye (rather than the usual flower/insect test subject). The Macro lens has a very narrow depth of field so when Olga’s eyelashes were sharp her iris and pupil where blurred (and vice versa). I was impressed with the Macro lens as it gives a more blurred bokeh than you can using capture the iPhone’s native Macro mode.
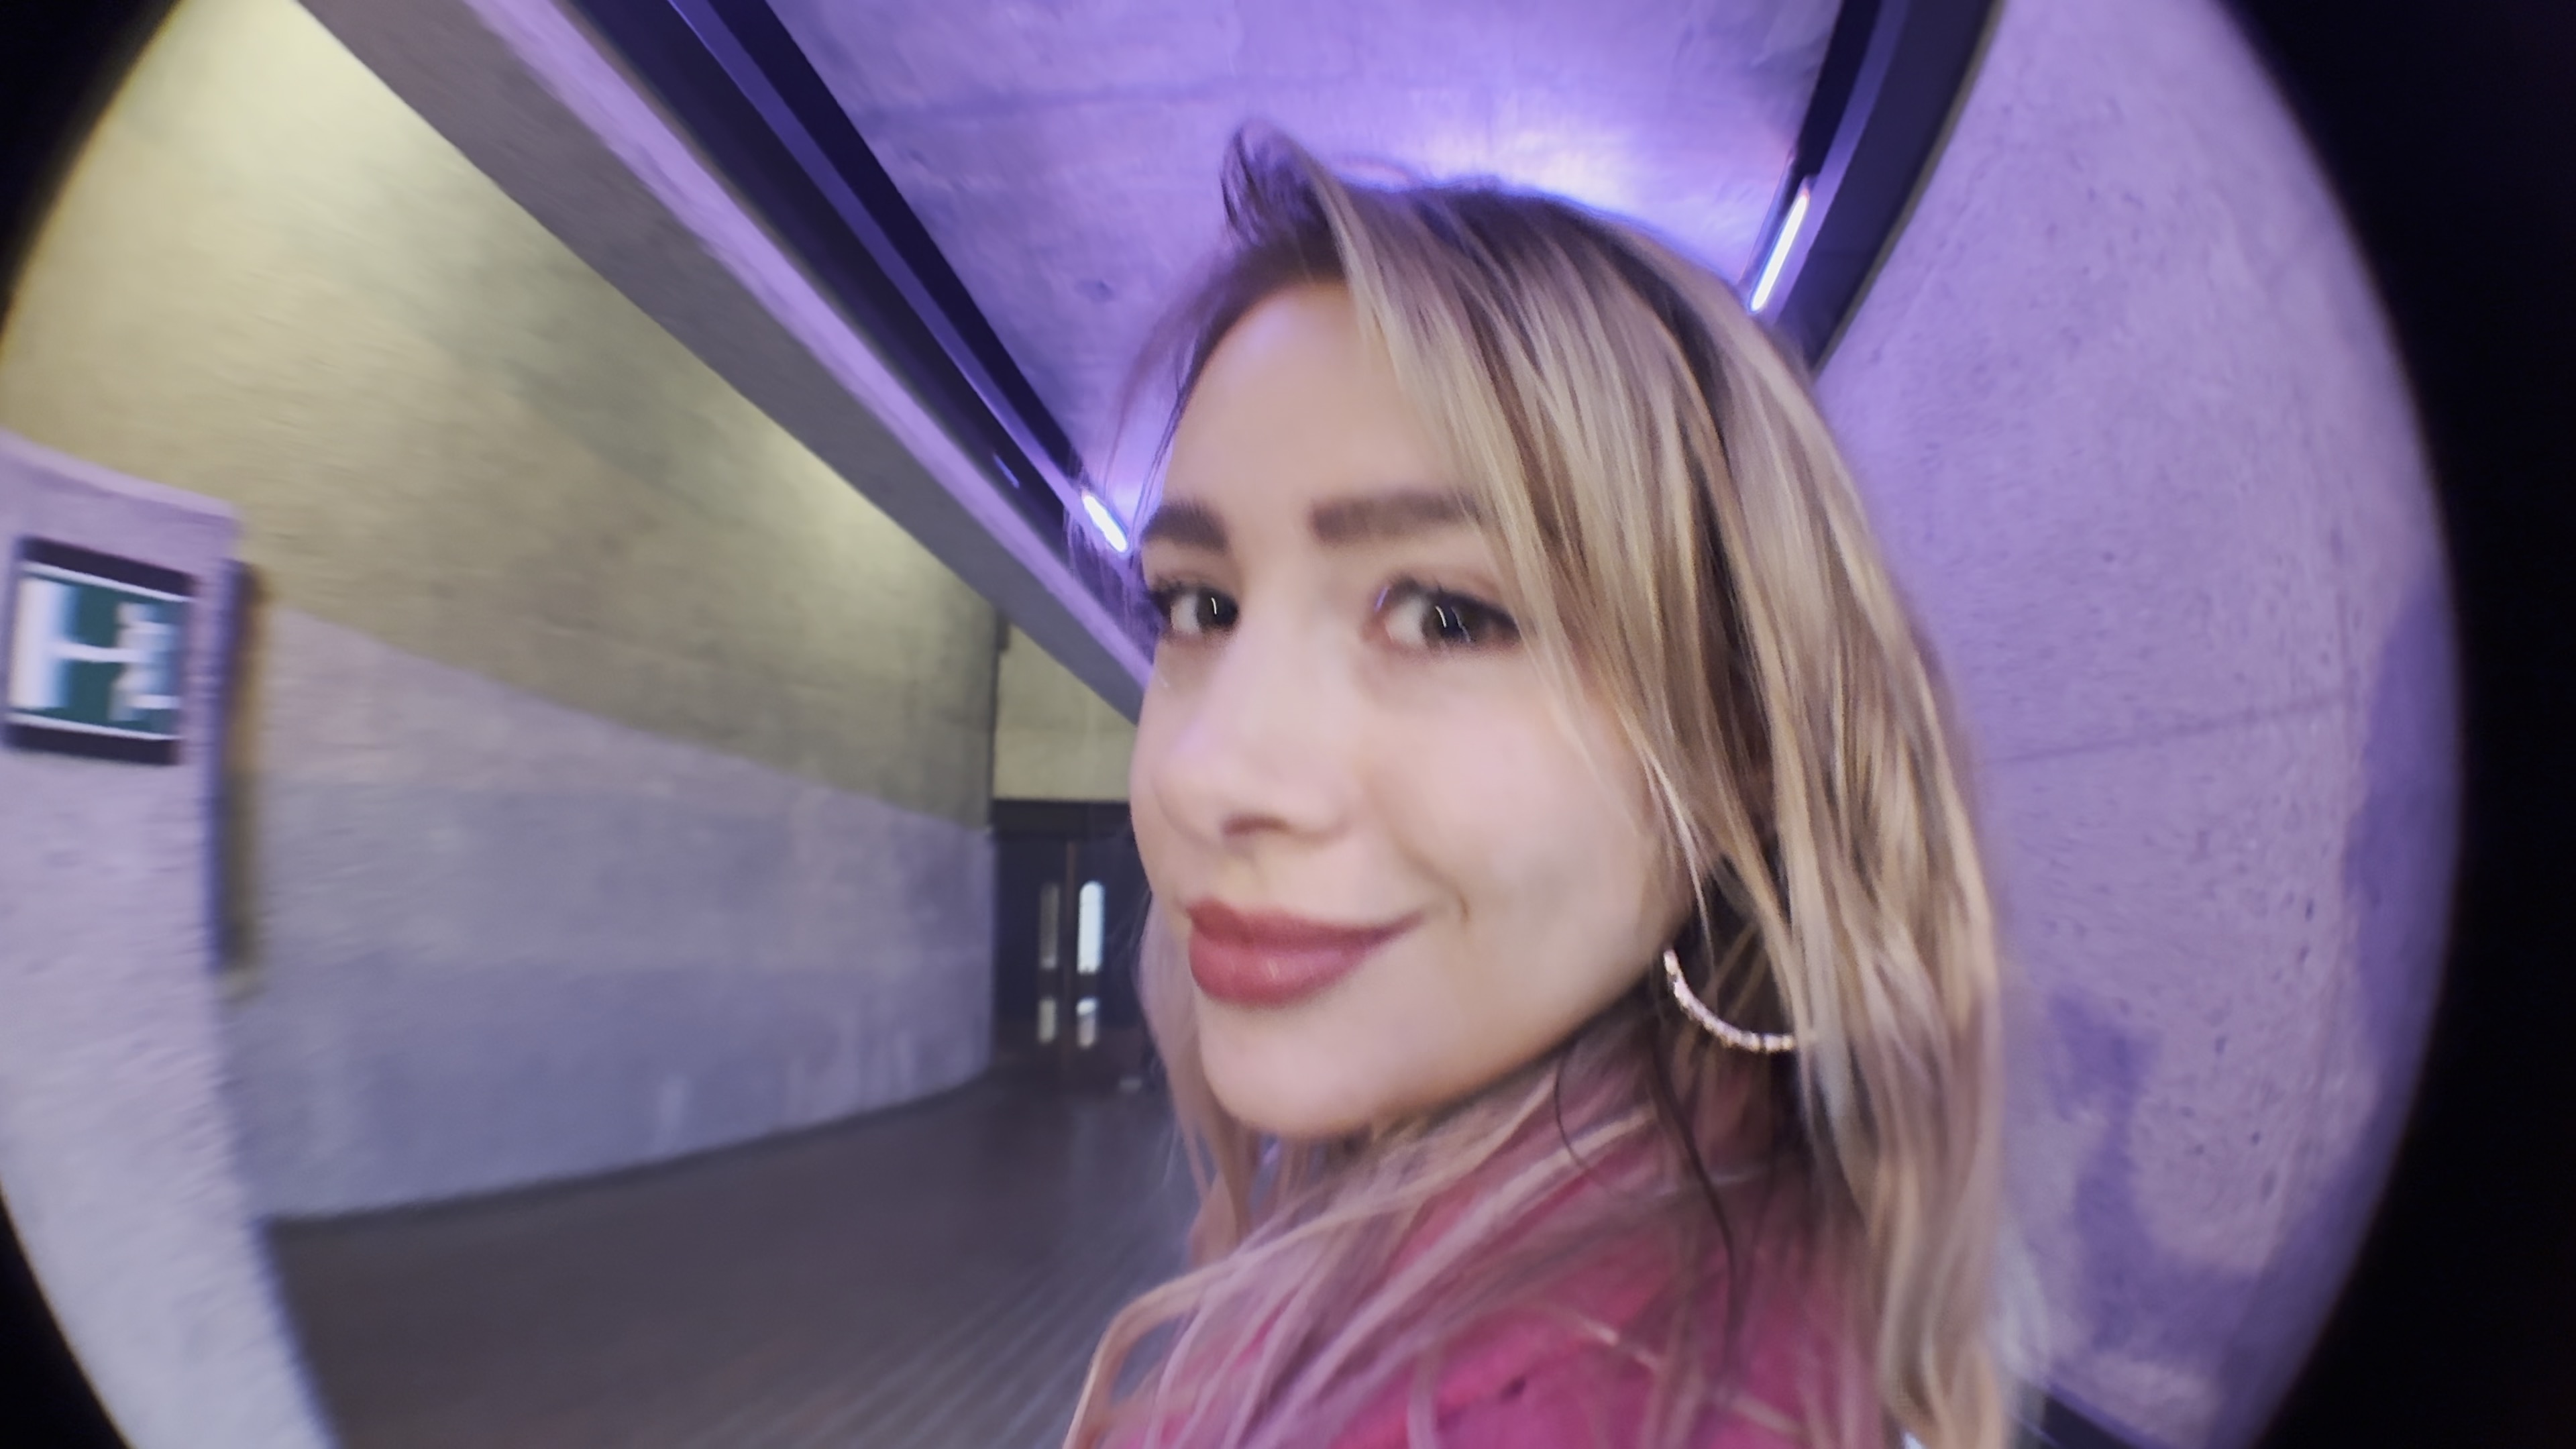
4. Apexel 198º Fisheye
After my close encounter with Olga’s eyeball I headed inside to test a more creative lens - the 198º Fisheye lens. This causes the center of the frame to bulge outwards in a very distorted fashion. The closer you are to the subject, the more they come distorted - which creates a less than flattering look when shooting a model. The edge of the frame features a circular border due to the extreme wide-angle nature of the lens. This may not be a flattering lens to use in portrait photography, but it could be suitable for a nightmare sequence or to illustrate a sinister POV shot in a drama sequence.
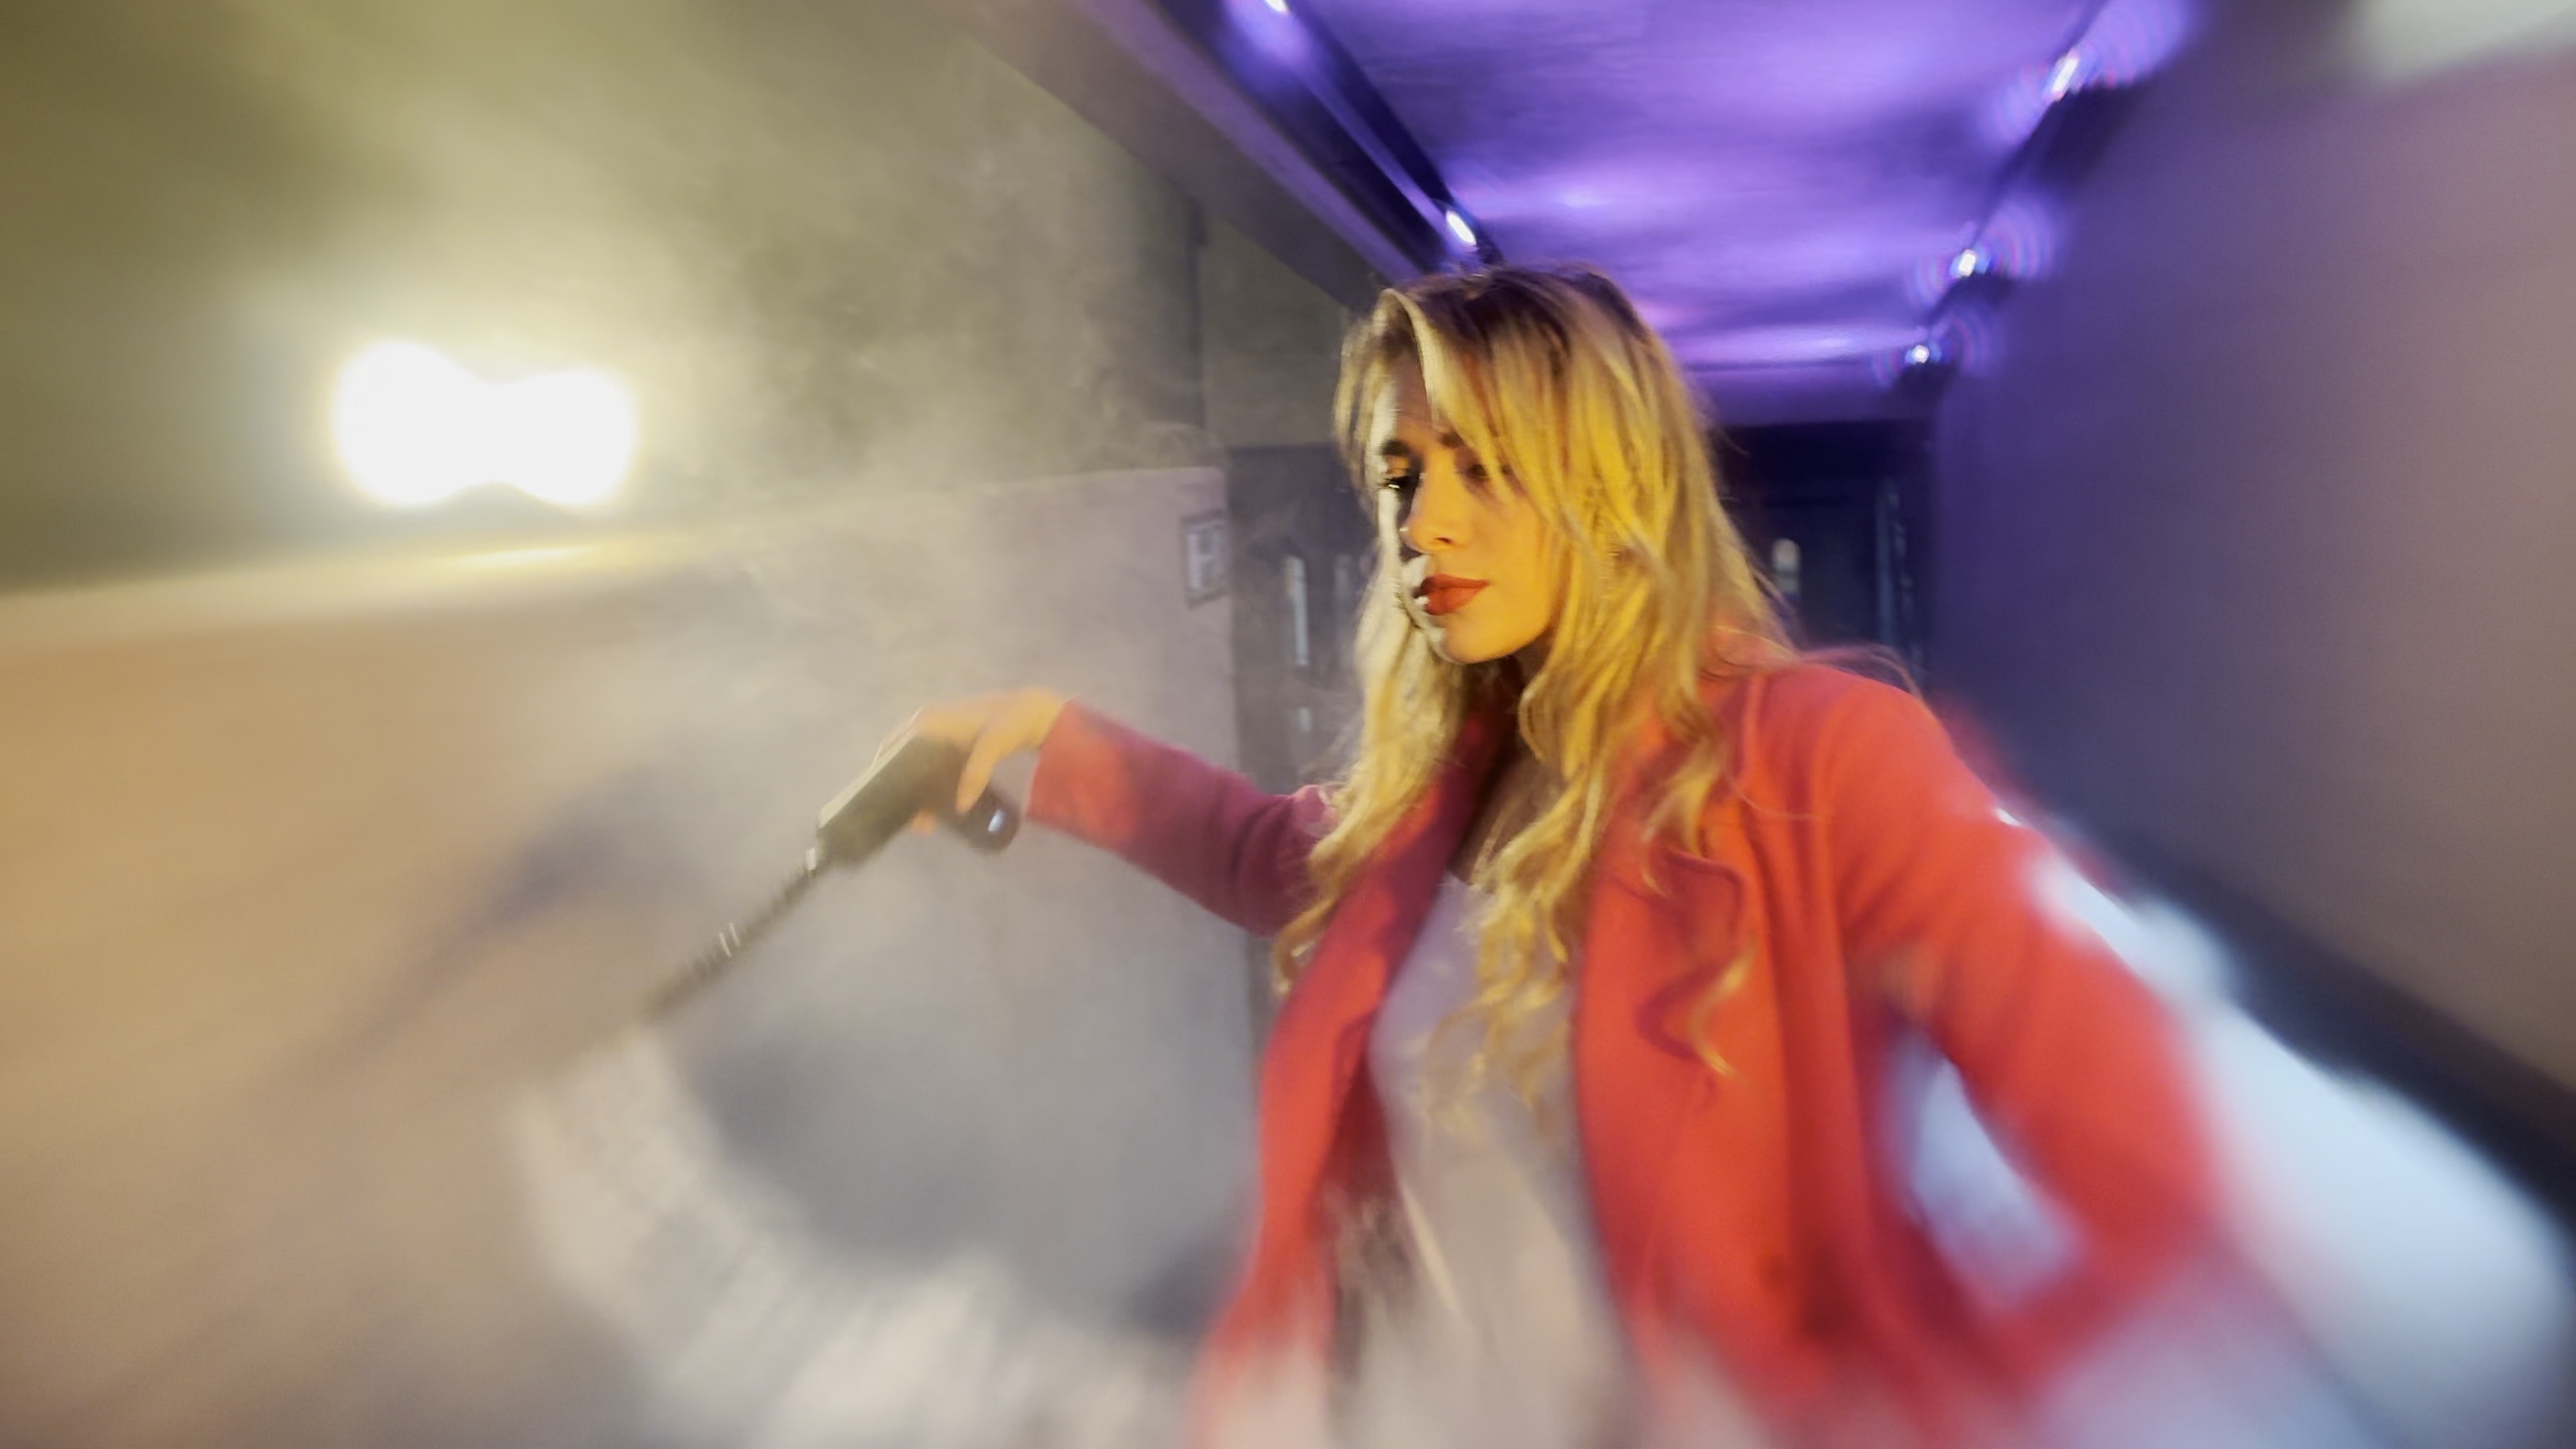
5. Apexel Radial filter
Unlike the Fisheye lens, the Radial filter is perfect for portrait photography. The center of the frame is nice and sharp but details begin to blur in a subtle way towards the edge of the frame. This blurred vignette helps draw attention to the sharp main subject in the center of the frame. By adding the blur in-camera, the filter helps you commit to a particular look (rather than experiment with the radial blur filter in Photoshop). I can see me using this filter again quite often in future portrait shoots.
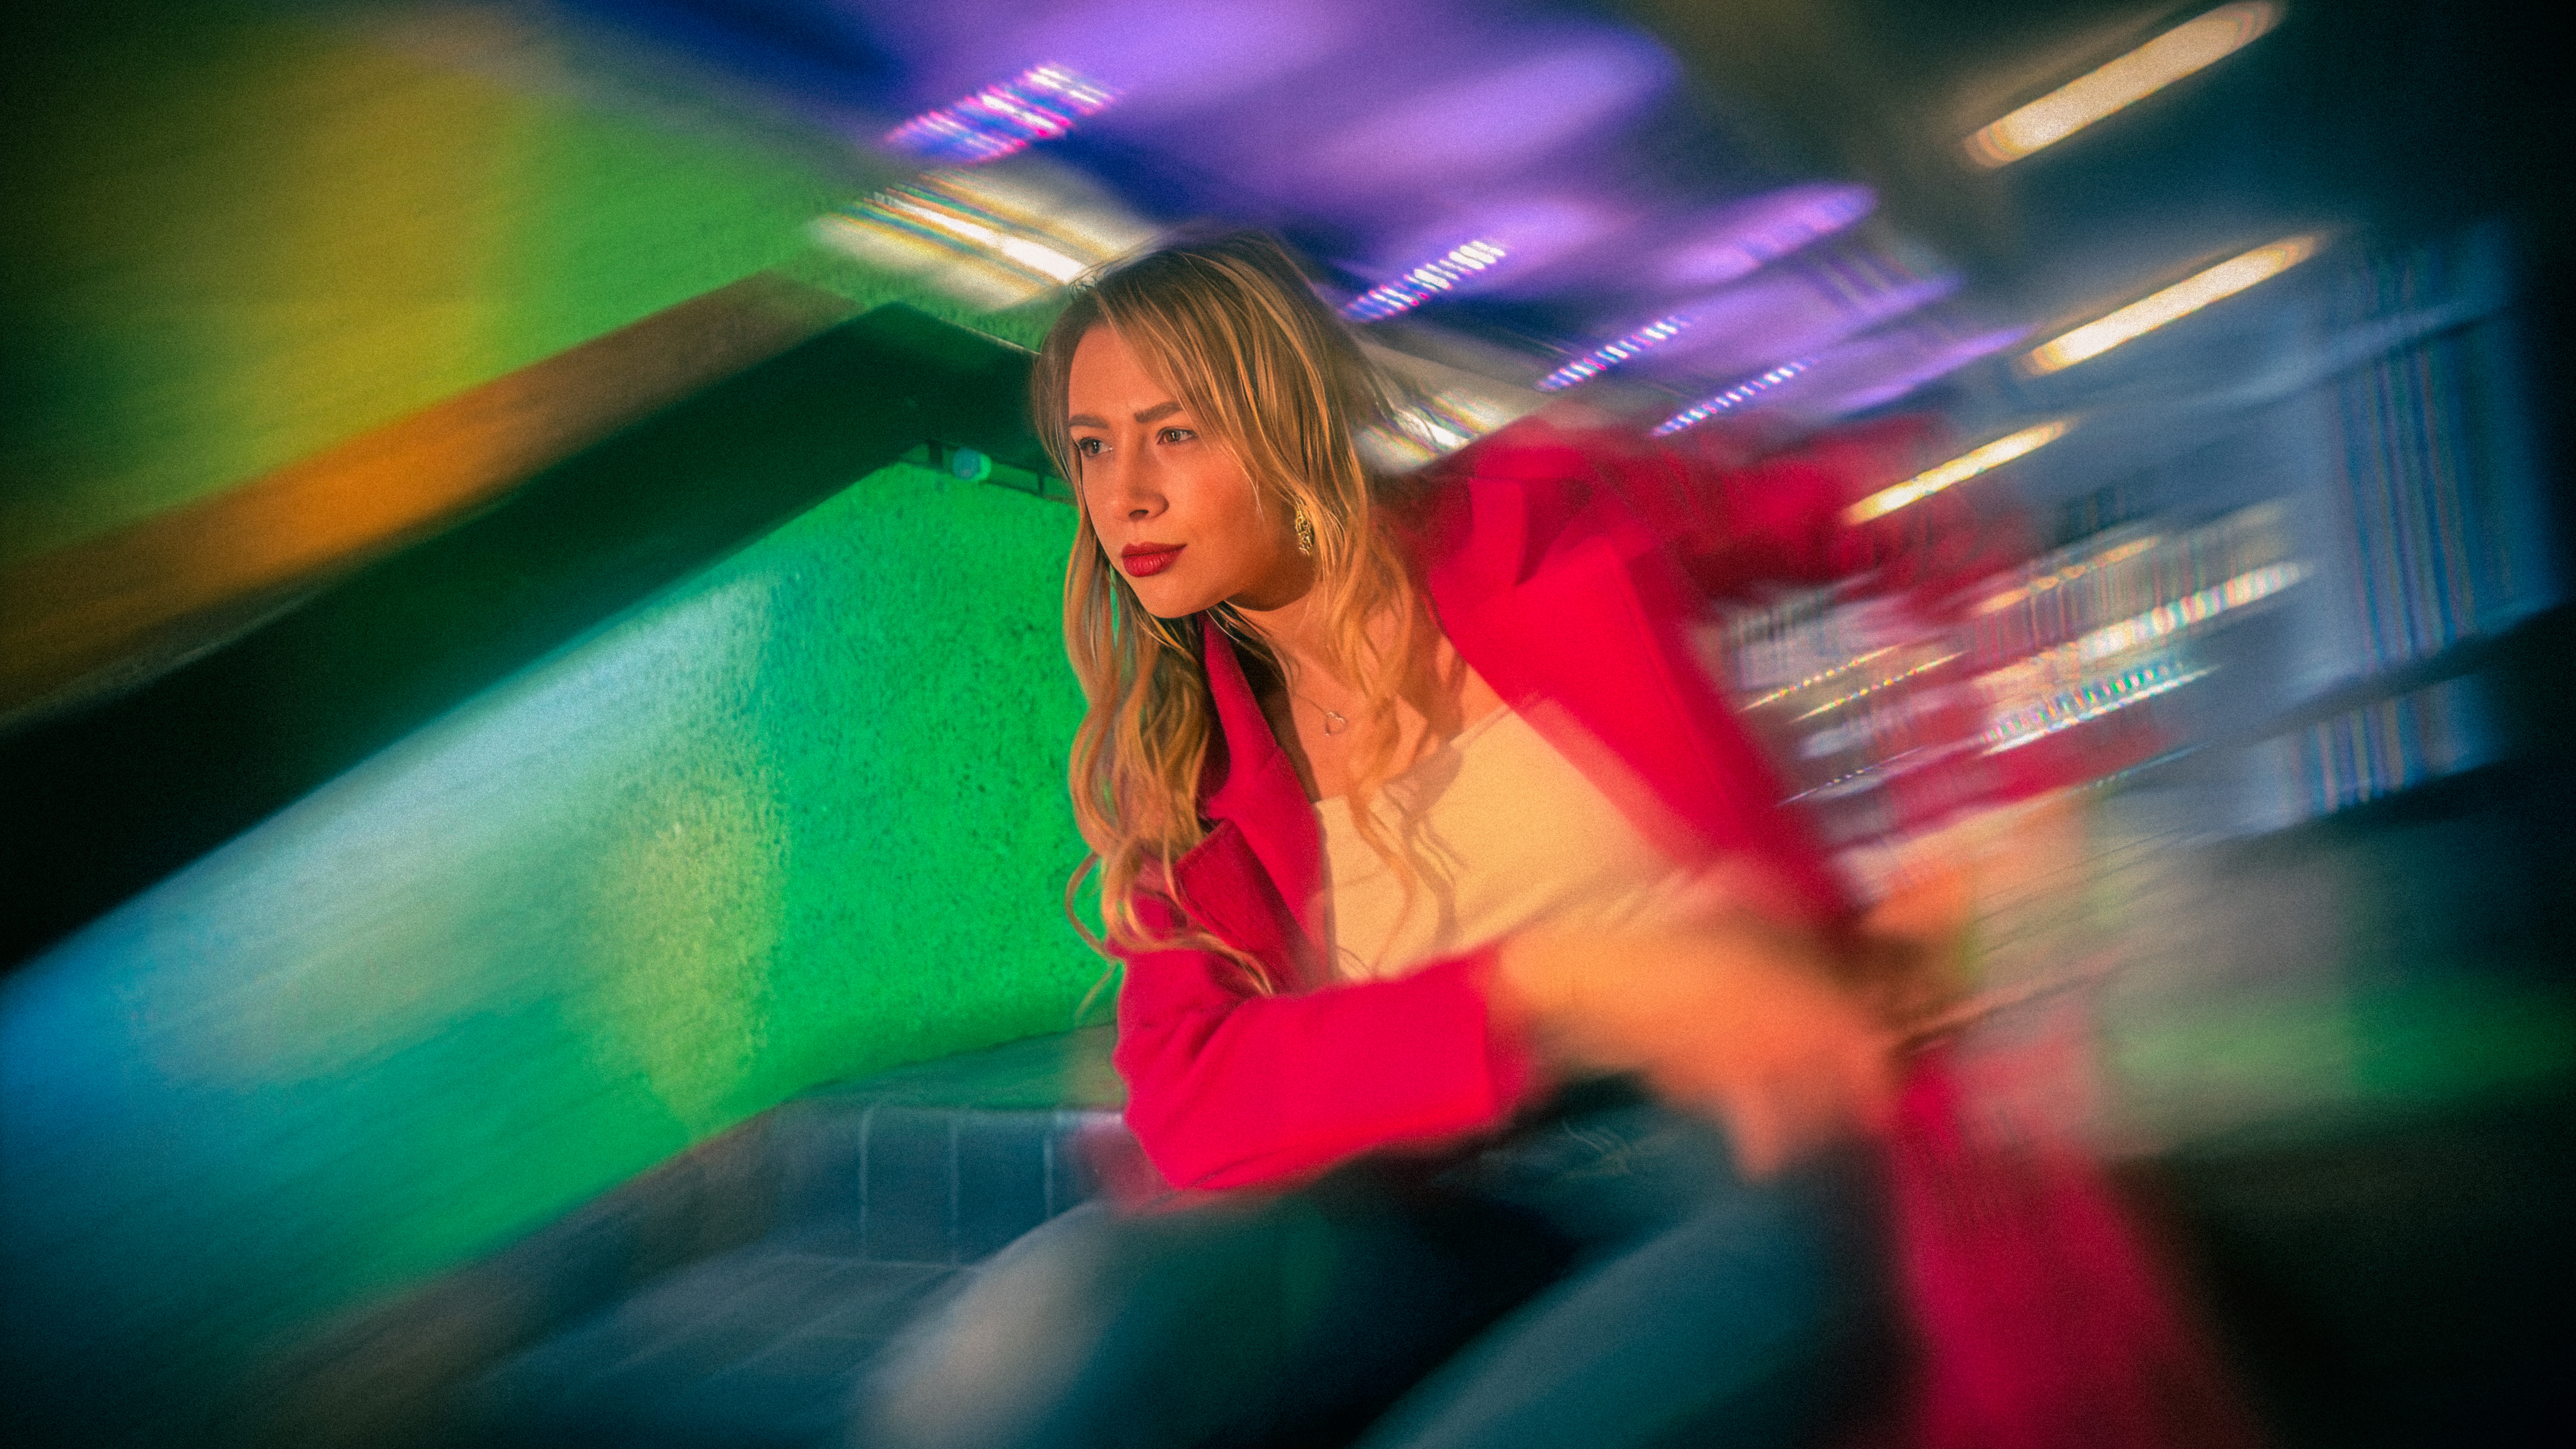
6. Apexel Flow filter
The Apexel Flow filter produces a similar blurred vignette to the Radial filter, but highlights in a scene become striking motion-blurred streaks. I think this would have to be my favourite component of the Apexel 10-in-1 kit and I’ll enjoy using it to add extra texture and energy to portraits.
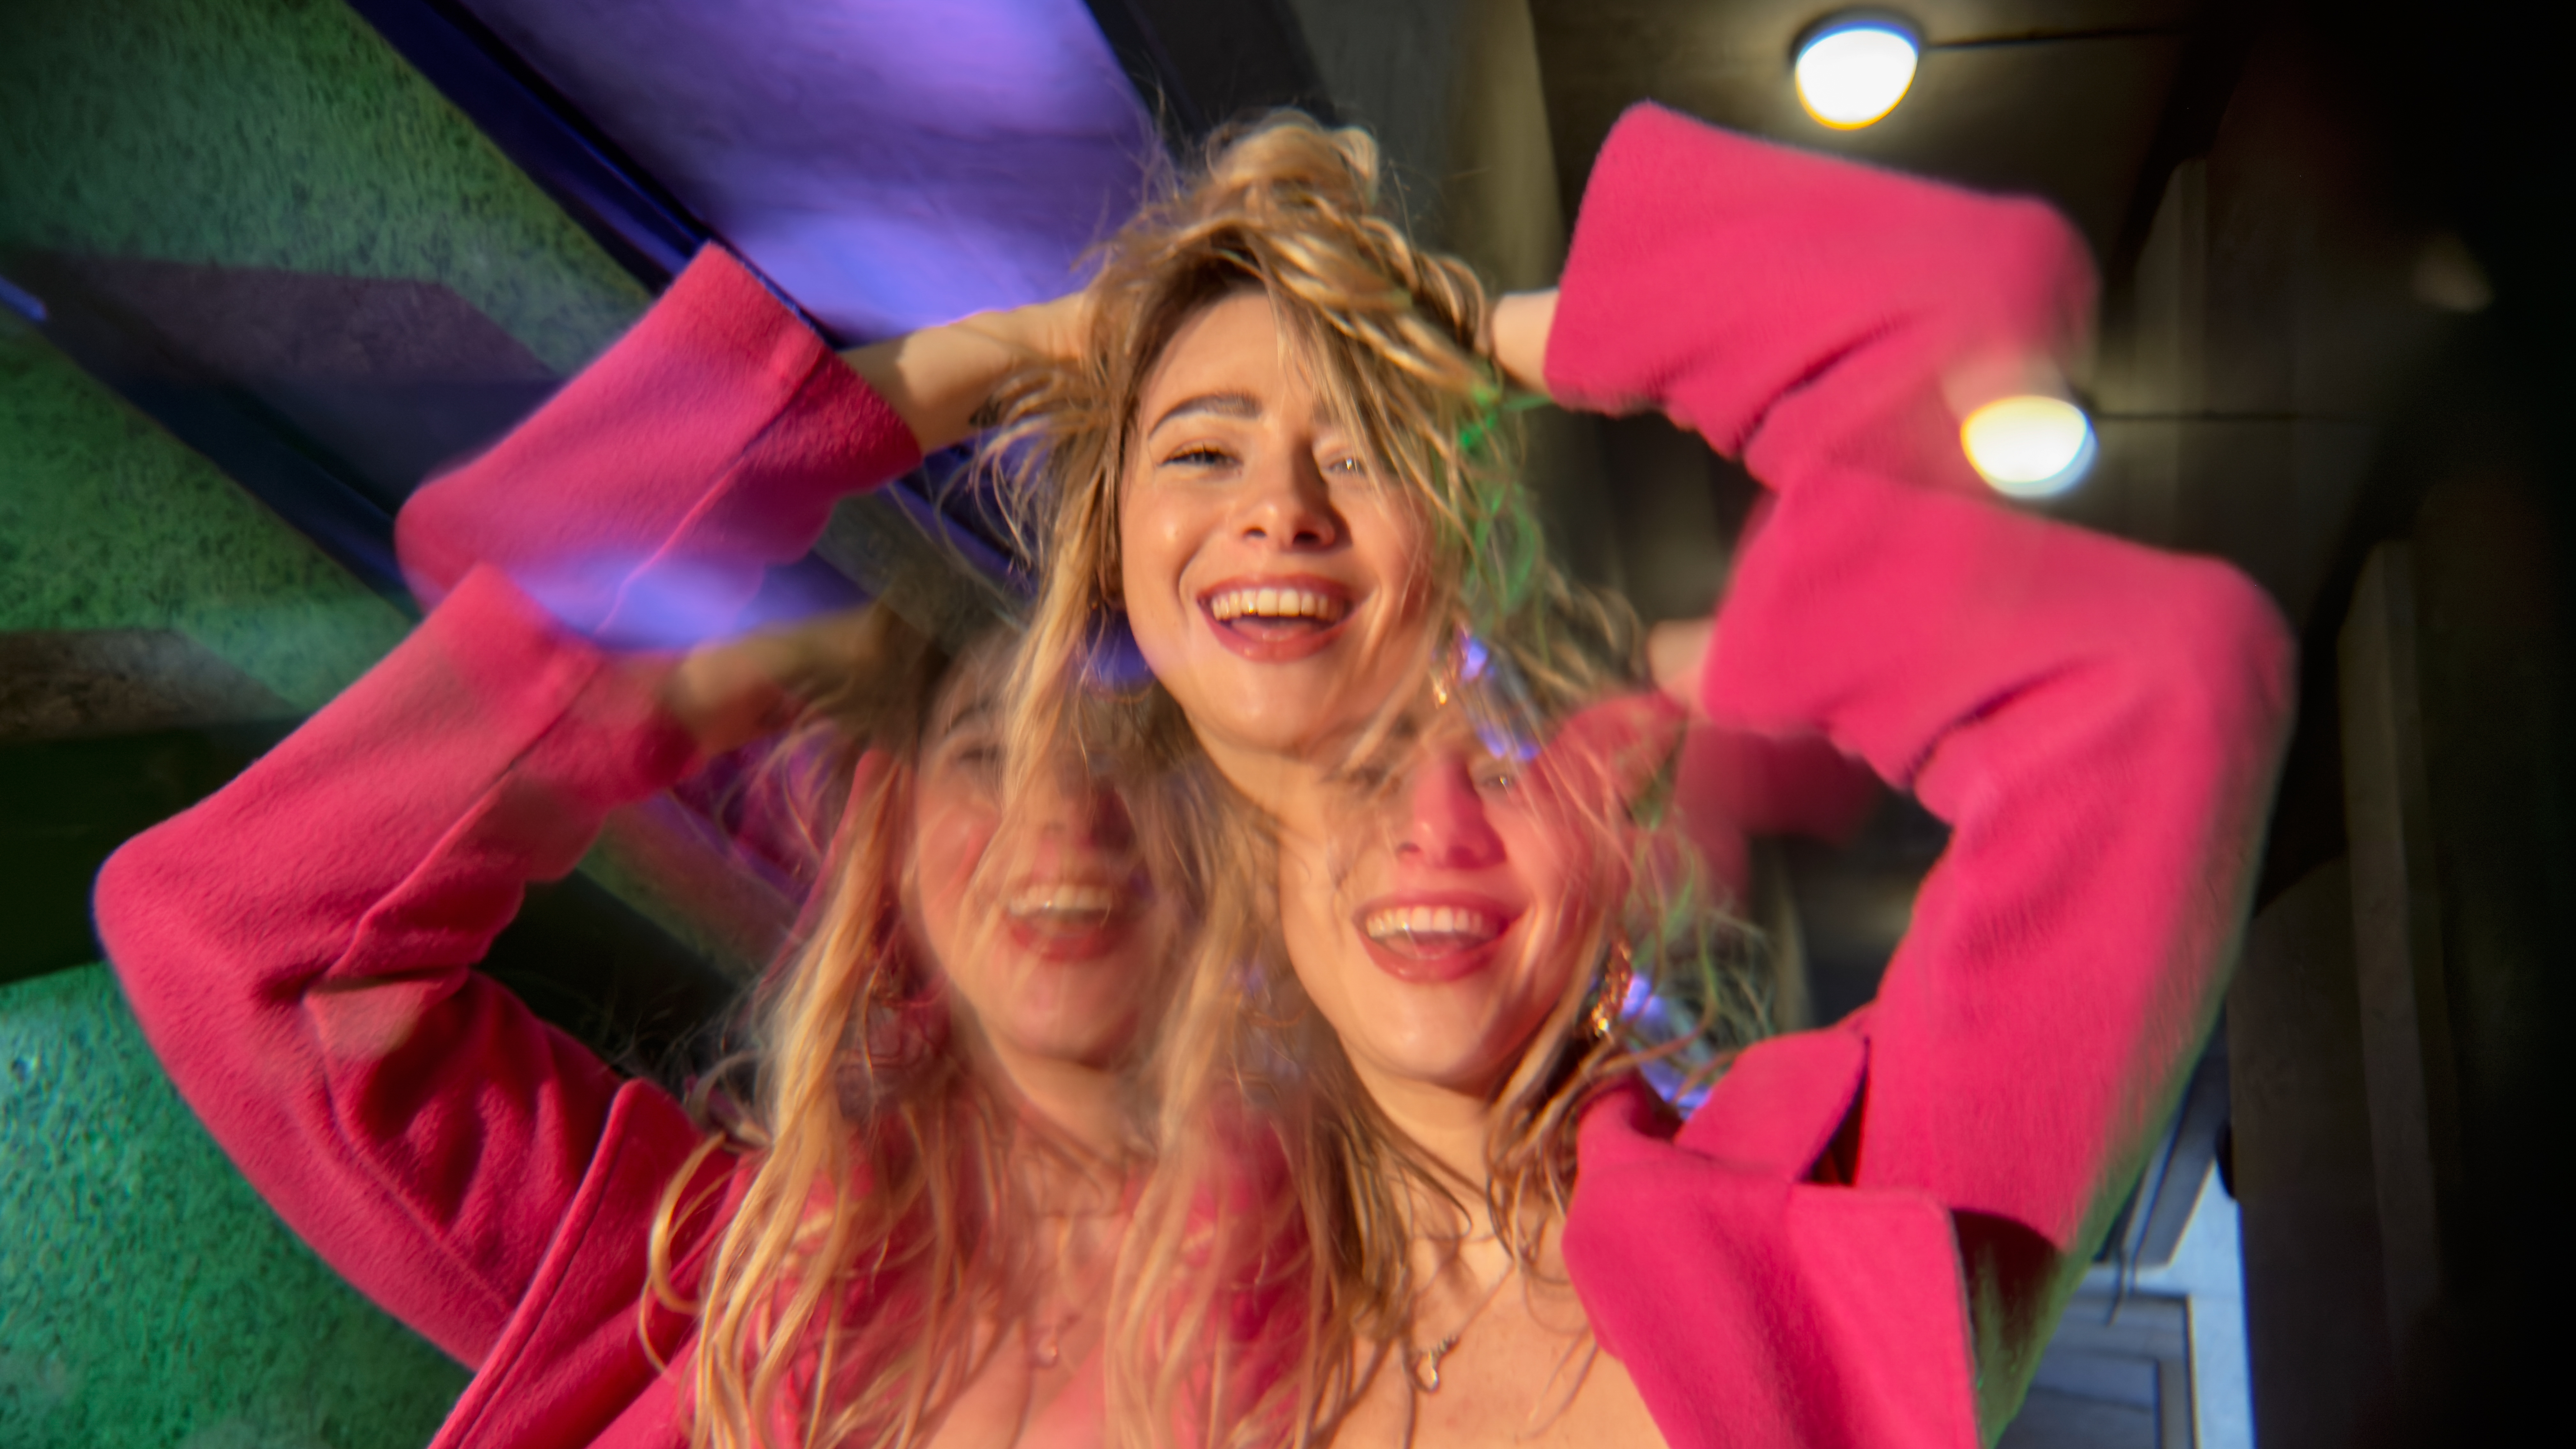
7. Kaleidoscope x3 filter
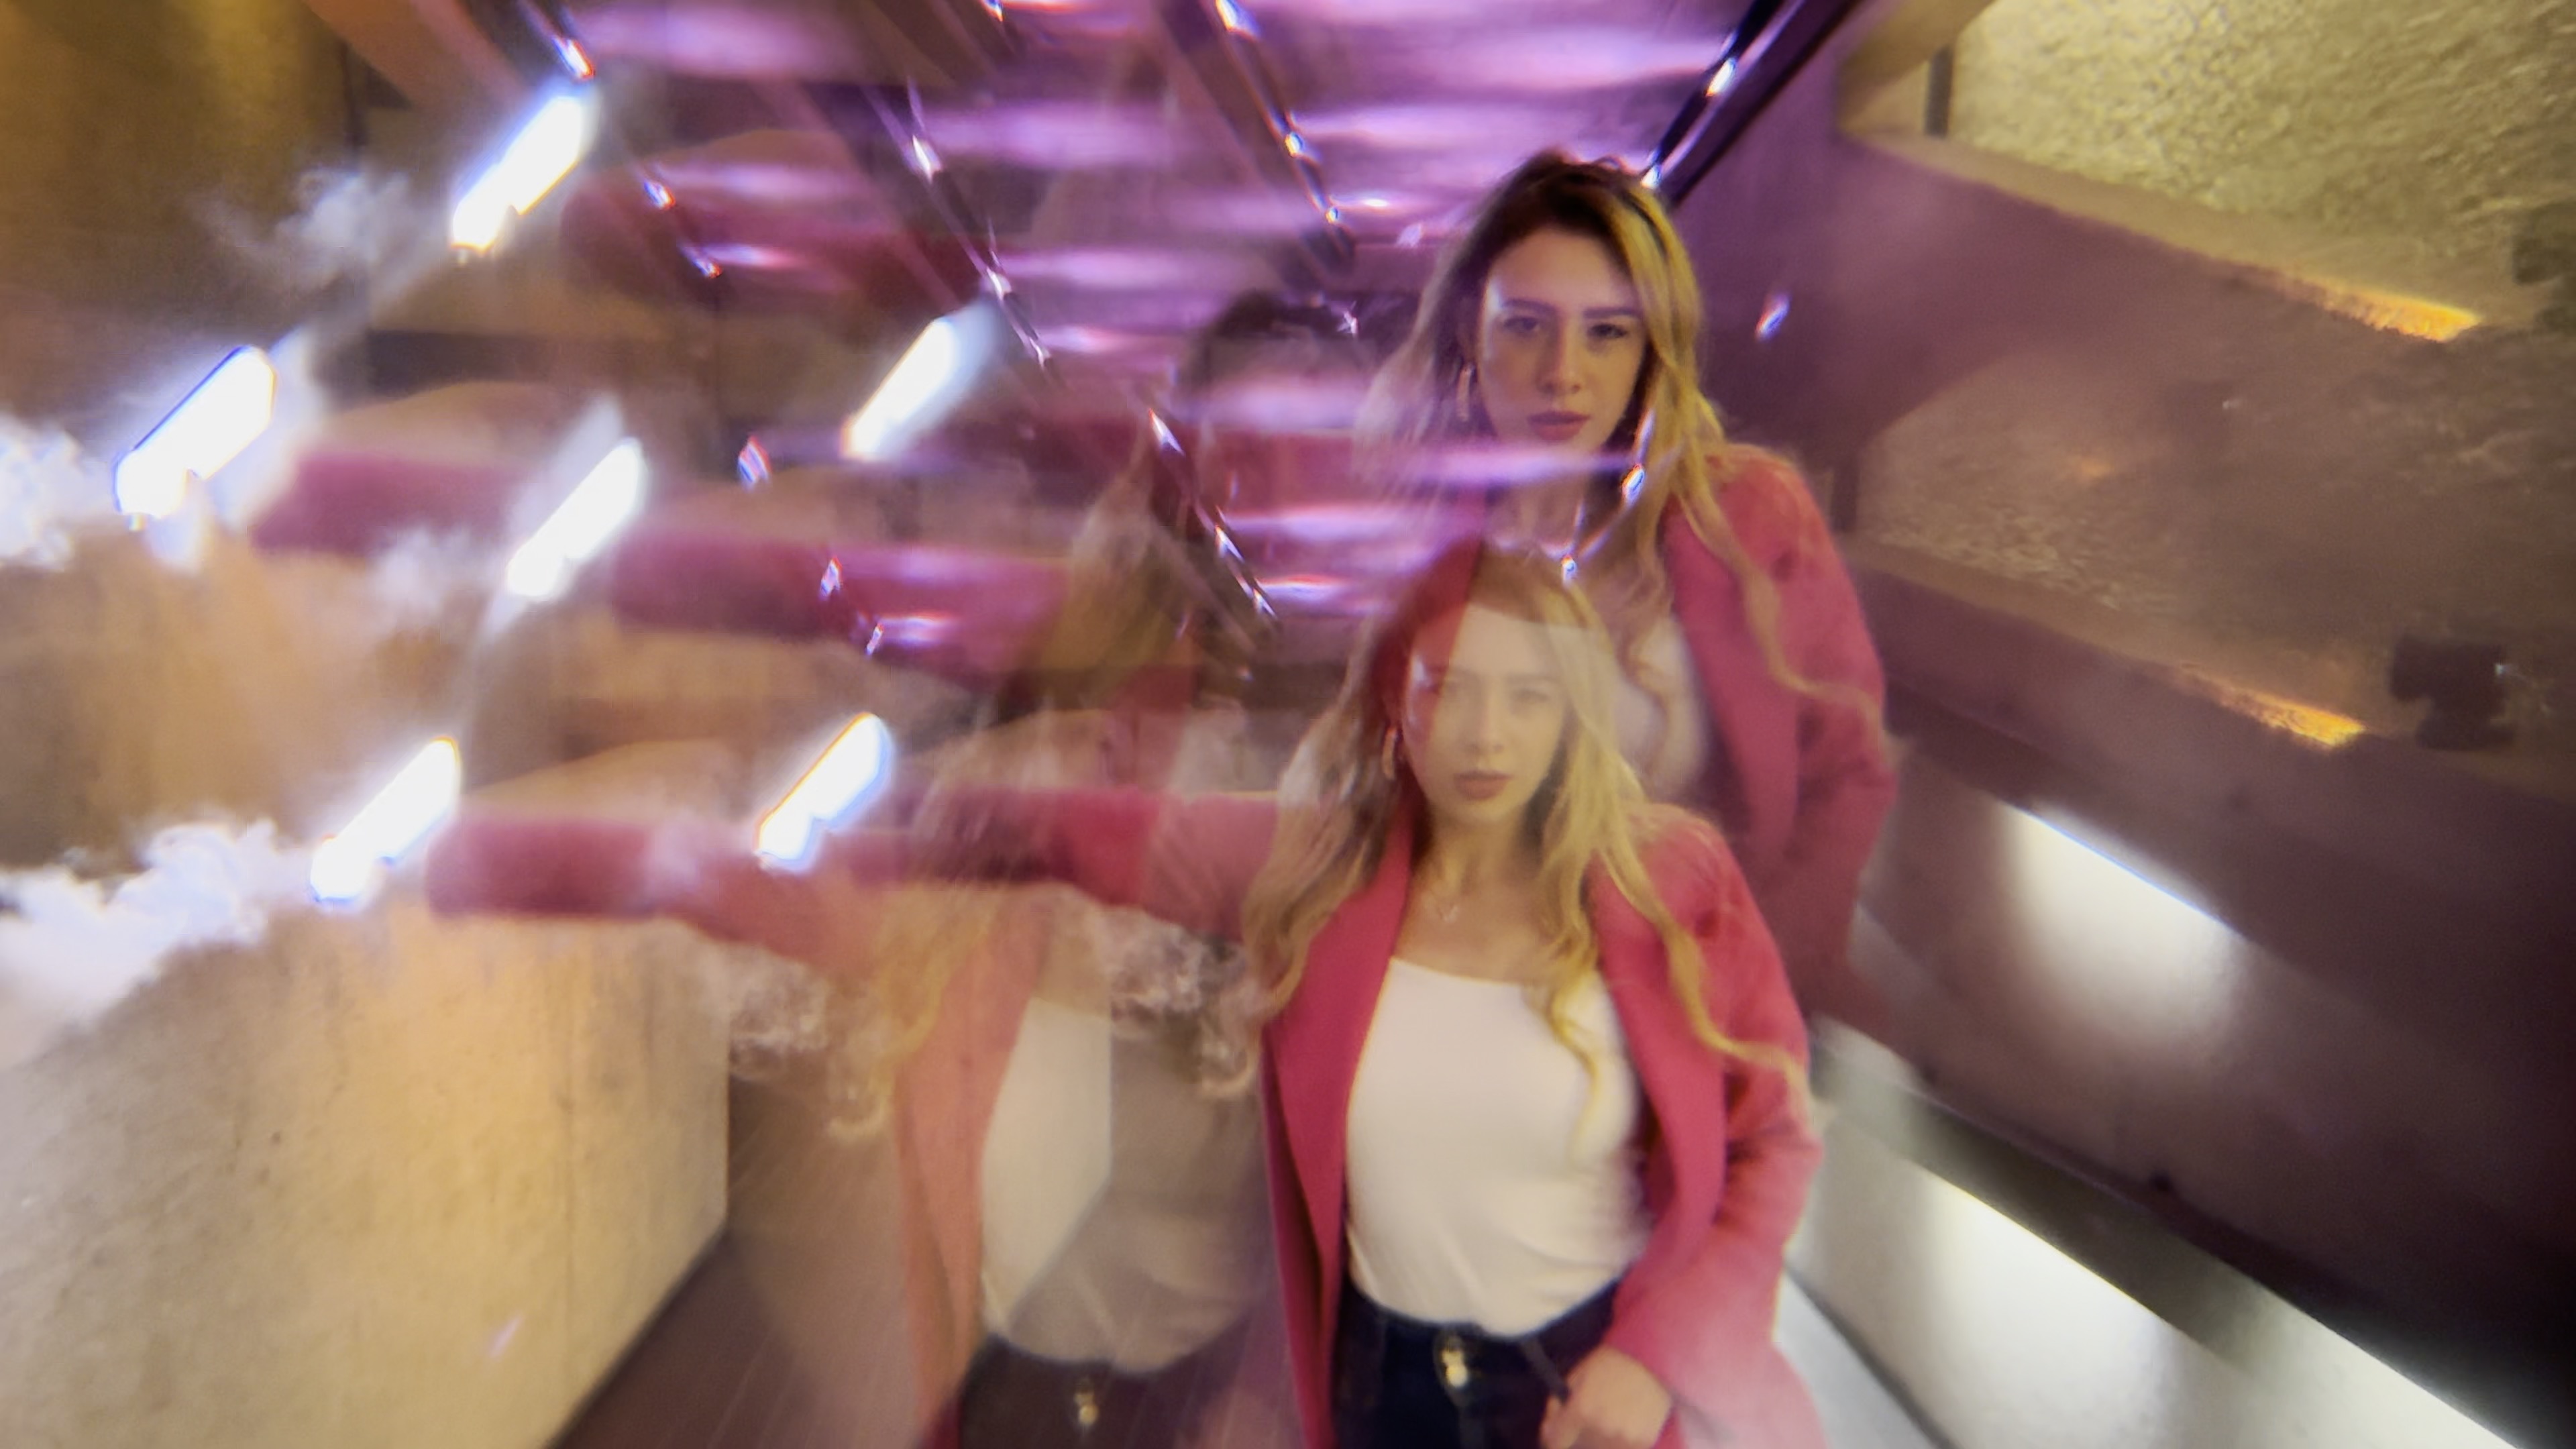
This is where things get really creative. The Kaleidoscope x3 filter creates three semi-overlapping versions of your subject that produces a psychedelic look. This works particularly well when shooting video because as you rotate the rim of the filter the three overlapping images also rotate. The challenge is to rotate the filter without getting your finger in shot (or dislodging the clip mount!)
8. Kaleidoscope x6 filter
As the name suggests, this filter does a similar job to the Kaleidoscope x3 filter but it adds six offset and overlapping images. I found this effect a bit too busy!
9. CPL filter
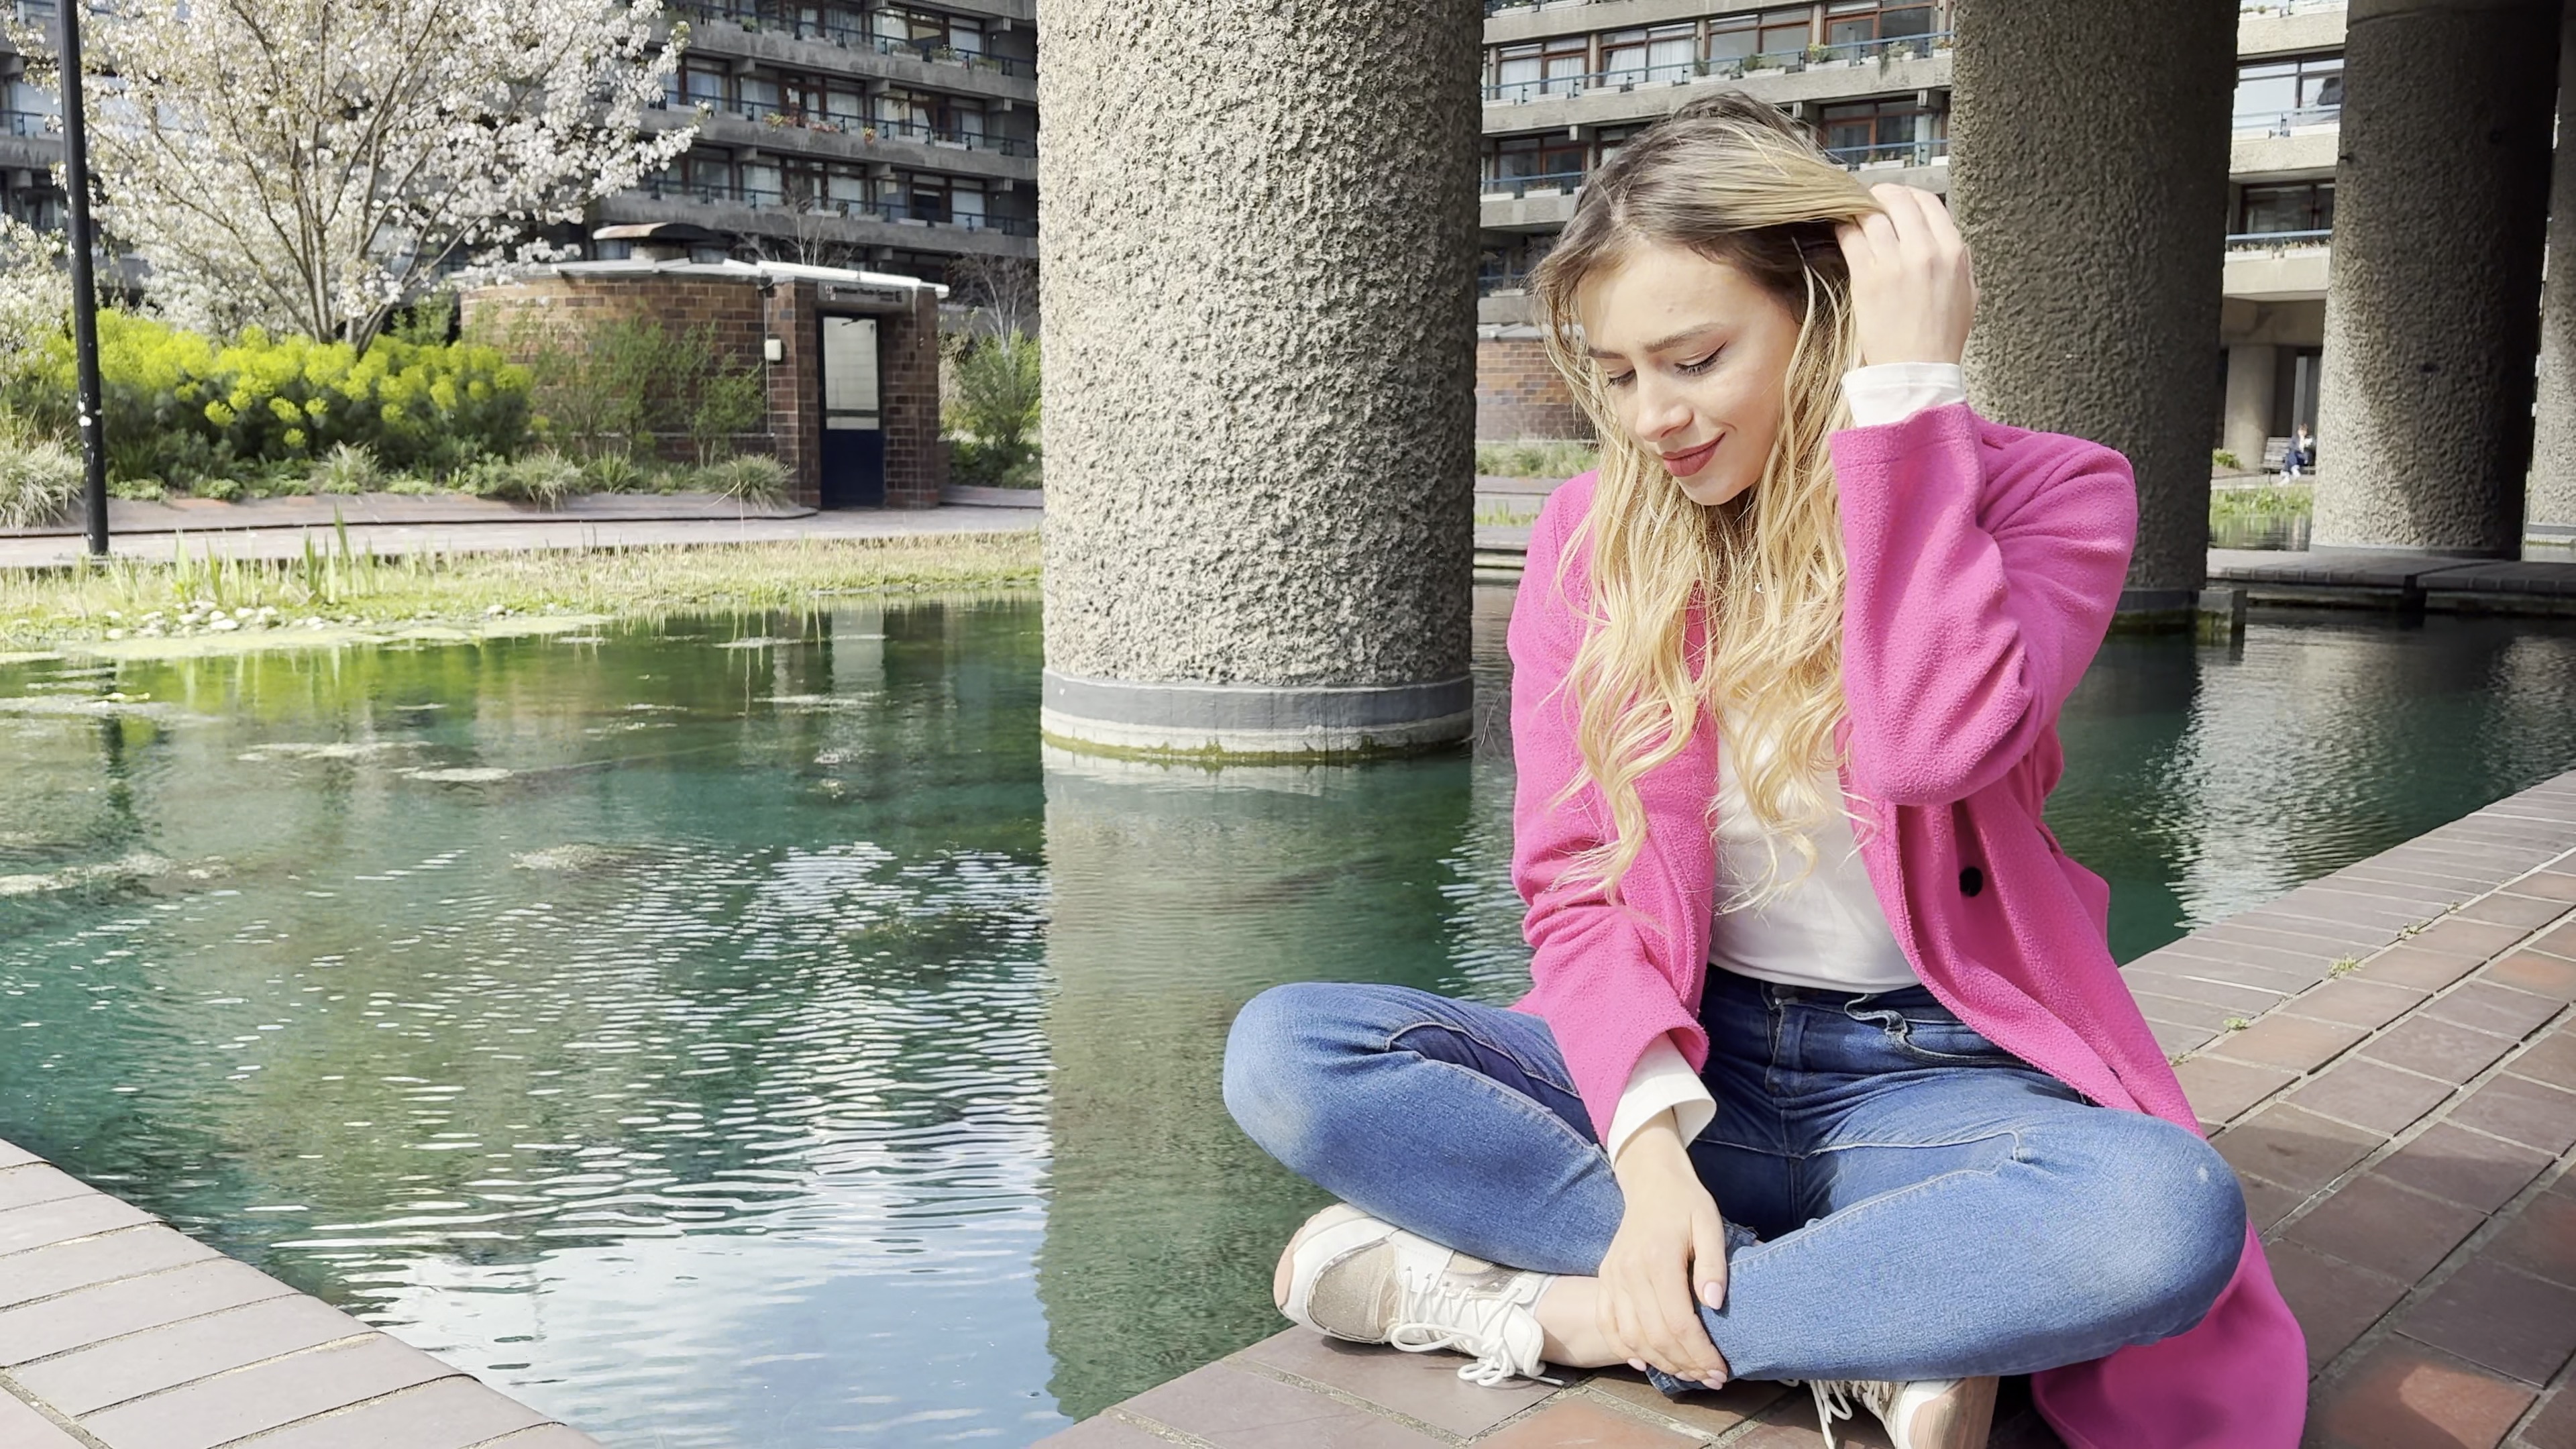
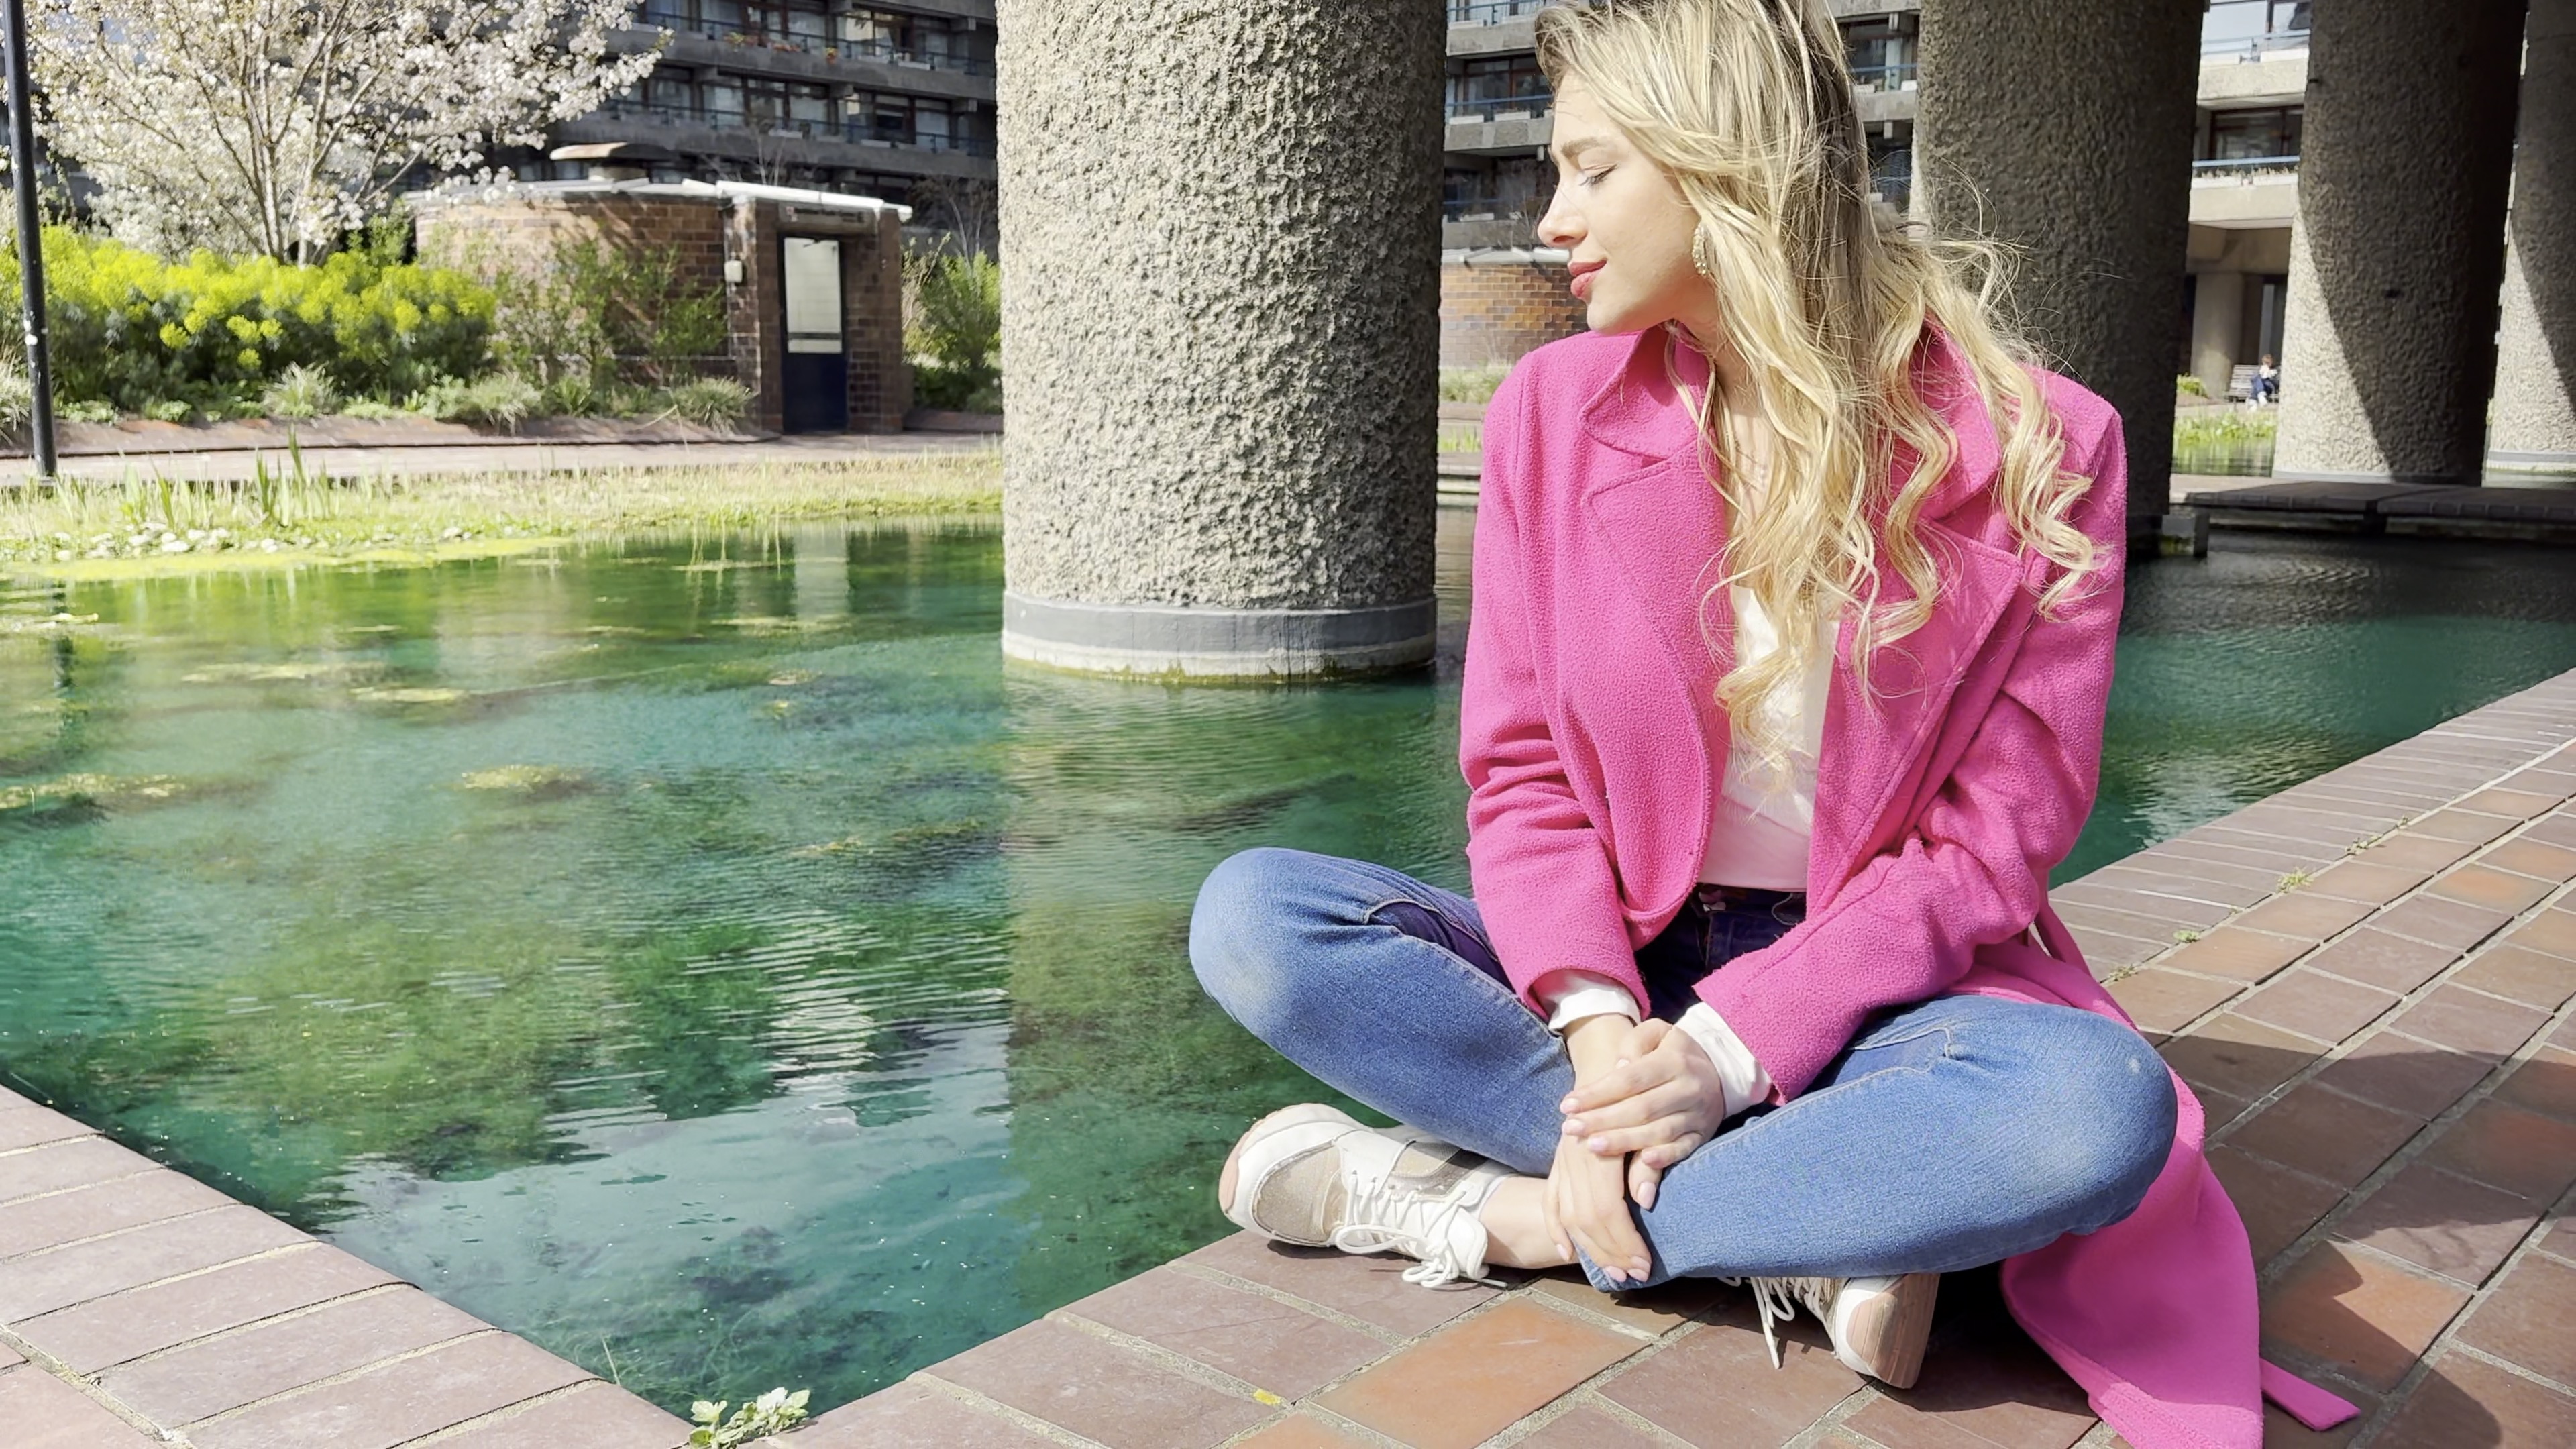
The CPL (circular polarizing) filter is very effective. When shooting Olga by a fish pond, I couldn’t see below the water’s surface due to the reflection of the blue sky. By rotating the polarizing filter I was able to cut through the reflection to see below the water’s surface. It’s a shame that the fish that live in the pool didn’t make an appearance. But all in all a very useful and effective filter.
10. Starlite filter
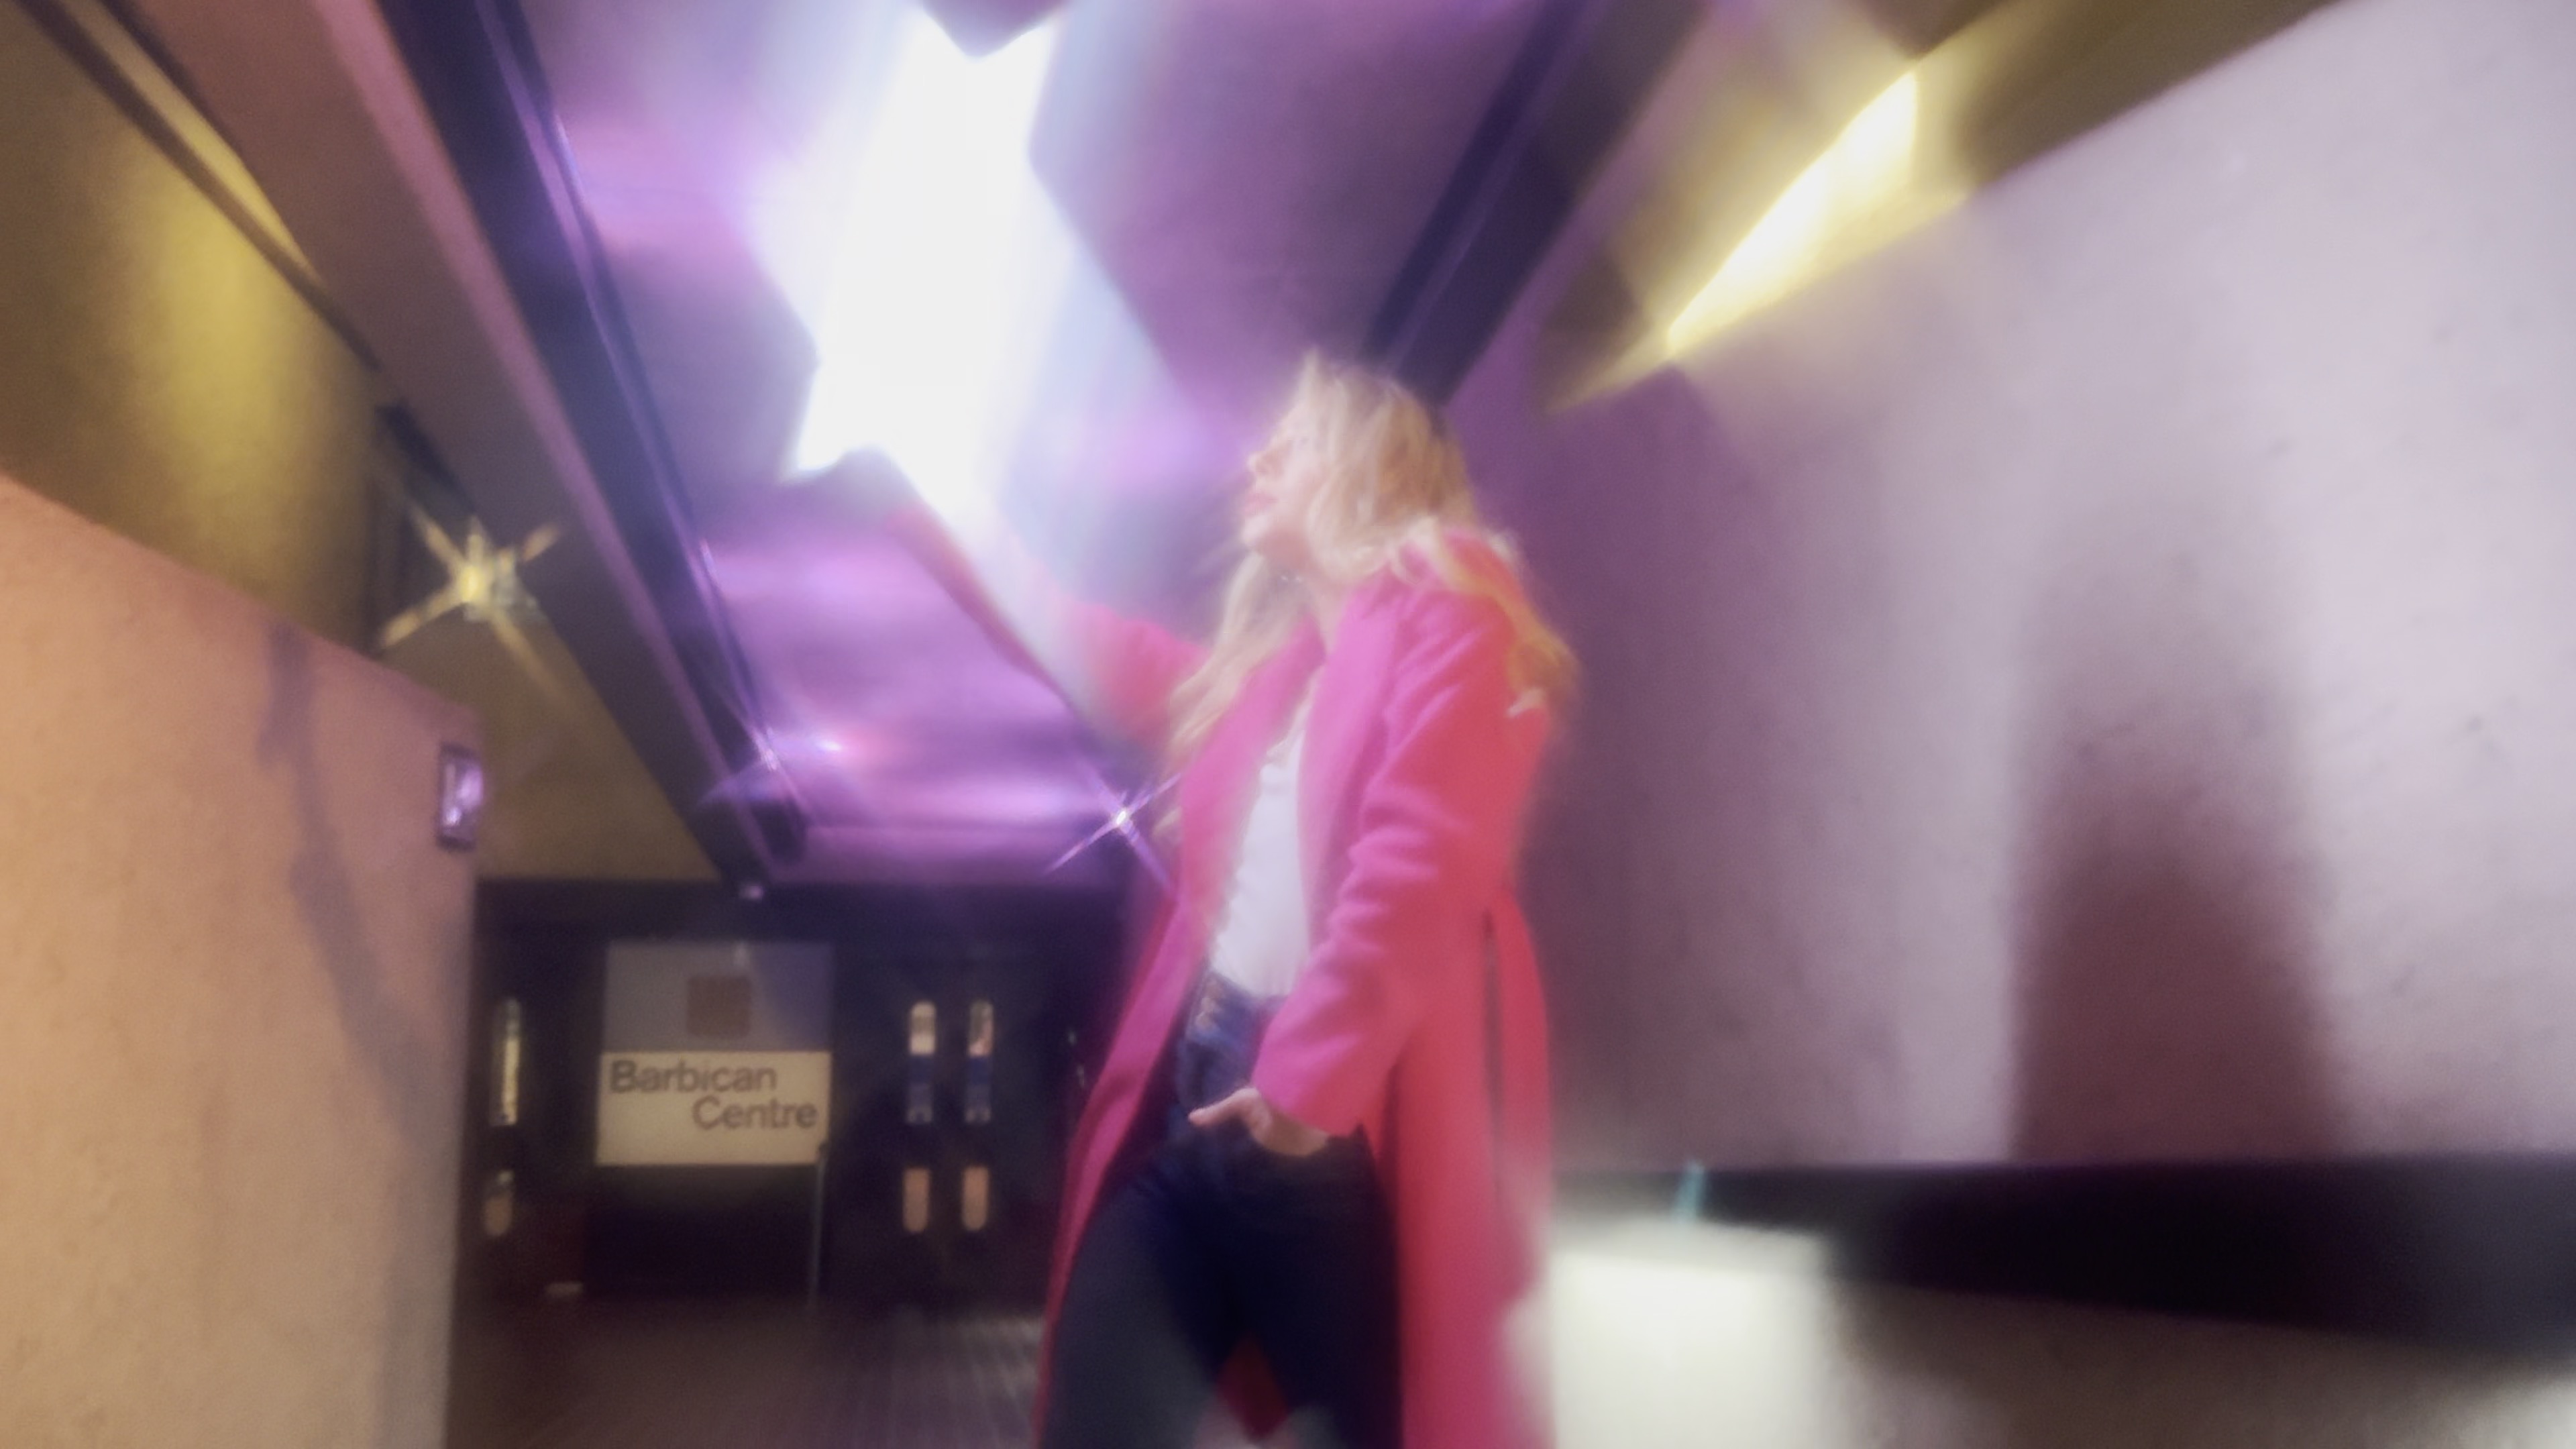
I’ve used Starlite filters before on my old Canon DSLR and I didn’t really like them. You’re stuck with rather dramatic look as star-shaped points of light radiate outwards from every light source in the frame. The Apexel Starlite filter does a similar job, causing four diagonal points to streak out from the center of any light sources in the frame. The overall look of the filtered image is also rather soft, so I can’t see myself reaching for this particular filter very often in the future.
Apexel 10-in-1 lens kit: Verdict
As you can see from my run down, some lenses/filters in this kit are hits (such as the Radial and CPL filters), while others (like the Starlite filter) are misses. However given the cheap price of the 10-in-1 kit I’d still consider it a ‘must buy’, especially if you want to experiment by adding creative in-camera effects such as streaks of radial blur or barreling wide angle vignettes to your clips and stills. The only real filter fail in this kit is the rather blurry Starlite filter and the 2x Telephoto is too weak to be of use to my iPhone 16 Pro. However that still leaves 8 lens/filters that I can call upon if I want to add some creative in-camera effects to my portrait photos or video sequences.
| Features★★★★★ |
| The Apexel 10-in-1 kit is generous collection of 10 filters and lenses so you can capture better macro shots, see though reflections and add create vignetted blur effects to your clips and stills. |
| Design★★★★★ |
| Unlike Apexel 2-in-1 kit the universal mount in this one fitted perfectly with my iPhone 16 Pro and there was no unwanted vignetting. |
Performance ★★★★☆ |
| Most of the lenses and filters do a great job of adding creative in-camera effects to clips and stills (with only the Starlite filter being sub par). |
Value ★★★★★ |
| For a similar price to the Apexel 2-in-1 kit you get 10 lenses and filters (including a wide angle and macro which is similar to the contents of the 2-in-1 kit.) A bargain! |
Alternatives
Apexel 2-in-1 Wide Angle & Macro Phone Camera Lens
If you simply want to expand your smartphone’s ability to shoot wider or closer subjects more effectively then this kit’s 0.45x (140º) Wide Angle, 12.4x (37mm) Macro will do the trick. The Macro lens is particular effective at producing an impressionistic background blur that is stronger than an iPhone 16 Pro’s native Macro mode.
Apexel 36X lens kit
The 36x optical zoom of this telephoto lens was far more powerful than my iPhone 16 Pro’s 5x (120mm) reach, enabling me to capture shots of wildlife without scaring them off. The adjustable mount is much more effective than the cheaper peg mount in the 10-in-1 kit so it should suit any smartphone.
Check out our full guide to the best add-on lenses for iPhones and smartphones
George has been freelancing as a photo fixing and creative tutorial writer since 2002, working for award winning titles such as Digital Camera, PhotoPlus, N-Photo and Practical Photoshop. He's expert in communicating the ins and outs of Photoshop and Lightroom, as well as producing video production tutorials on Final Cut Pro and iMovie for magazines such as iCreate and Mac Format. He also produces regular and exclusive Photoshop CC tutorials for his YouTube channel.
You must confirm your public display name before commenting
Please logout and then login again, you will then be prompted to enter your display name.
