
Photo editing software is only getting cleverer. Thanks to advancements in AI, with just a few clicks you can correct exposure and white balance problems, tweak contrast, even remove unwanted objects, add better backgrounds or replace a sky! But with that power comes the ability to make mistakes, bad mistakes.
Photo editing mistakes are common among photographers, even those with years of experience. Most of these so-called errors are a result of excessive editing, and many times, photographers don’t realise they’re overdoing it. The effect that their editing techniques have on the final product often doesn’t reveal itself until it’s too late. To help you avoid some of the errors we’ve made in the past, here are some of the most common photo editing mistakes that people make and how to avoid them.
In the tips below we have referred to Adobe Photoshop when speaking about certain tools. This is because Photoshop is the most widely used photo editing software. There are many other great editing programs out there and all will have equivalent tools to those we’ve mentioned below.

1. Over-processing the Image
One of the most common photo editing mistakes photographers make is over-processing their images. It’s as simple as going too far with the saturation slider, causing colours to look unnatural. Overdoing the contrast has a similar effect. In that pursuit of perfection, the irony is that over-processing can take away the beauty of the scene as you originally saw it.
How does one avoid this? A good rule of thumb is to simply make adjustments one at a time, and make sure that each adjustment is subtle and natural-looking. It’s also important to make your adjustments as layers rather than editing the image directly. Not only is this non-destructive, but it makes it easier for you to dial something back when you’ve gone too far!
2. Saving images in a destructive way
Destructive editing? This refers to making adjustments directly to a JPEG file, rather than adding your adjustments as layers. When you edit the image directly it can lead to a loss of important data and degrade the image quality.
3. Clipped highlights
As a general rule people are drawn to bright images, which is why you see so much high-key stock photography. If you’re brightening an image, take care not to do it so much that details are lost in the highlights.
Ideally, you want to be able to see some subtle tonal variation in the white clouds above a landscape, for example. Don’t keep brightening an image until they are a uniform mass of burned-out white. It will remove depth and impact from your scene.
A good way to keep track of your highlights is by using Photoshop’s Histogram view. Other software will have a similar tool. In Histogram view, if a large peak starts to develop at the far right of the graph then you know you’ve started to burn out the brighter areas.
4. Not using the right Color Space
Another common mistake made in photo editing is not using the right colour space. Colour space refers to the range of colors that can be displayed in an image, and different colour spaces can have different effects on the look of an image.
The best practice for avoiding this mistake is to use the appropriate colour space for the output of your image. For example, if you’re printing the image, you should use the CMYK colour space, and if you’re displaying it on a computer screen, you should use the RGB colour space.
4. Bad use of filters
When you first start using editing software like Photoshop there’s a natural tendency to try out every available effect. While it’s good to explore the software’s capabilities, as with many things, less is always more - particularly with art filters.
A poor image is rarely improved by a hefty application of the Watercolor Filter, for instance, and the Spherize Filter is probably best left alone in most cases!
6. Tones over-adjusted

Over-adjusted areas of similar tone can be a problem as the subtle gradations are lost and banding is introduced.
This is something to watch out for in blue (as well as grey) skies and any areas that look to be of the same tone, but are actually made up of slightly different tones or shades.
7. Repeating patterns in cloned areas

Although the sample area moves along with the repaired area when you use Photoshop’s Clone Stamp Tool, it’s easy to keep sampling the same patch and this can result in a repeating pattern that’s a dead giveaway that the image has been retouched.
To avoid the problem, take charge of the location of the sample area and resample on a regular basis by clicking while holding the Alt key down.
8. Poor selection or masking
As well as being unattractive, halos and dodgy edges around areas of an image are a sure-fire giveaway that an image has been edited.
When you’re making a selection or applying a mask around areas with lots of fine detail like hair, use the Refine Edge or Refine Mask controls to help select around all the fiddly little details.
It’s easy to use and makes a huge difference without taking much time.
9. No blacks or whites

There are always some exceptions, but generally most images benefit from having some black areas and some white areas. Dark and light areas of a scene give it depth and balance.
Using the Levels tool, you can check whether your image has these areas. You can even use the control to set black and white points in your scene.
Drag the markers under the histogram until they just touch the ends of the trace of the graph.
10. Converting to black and white
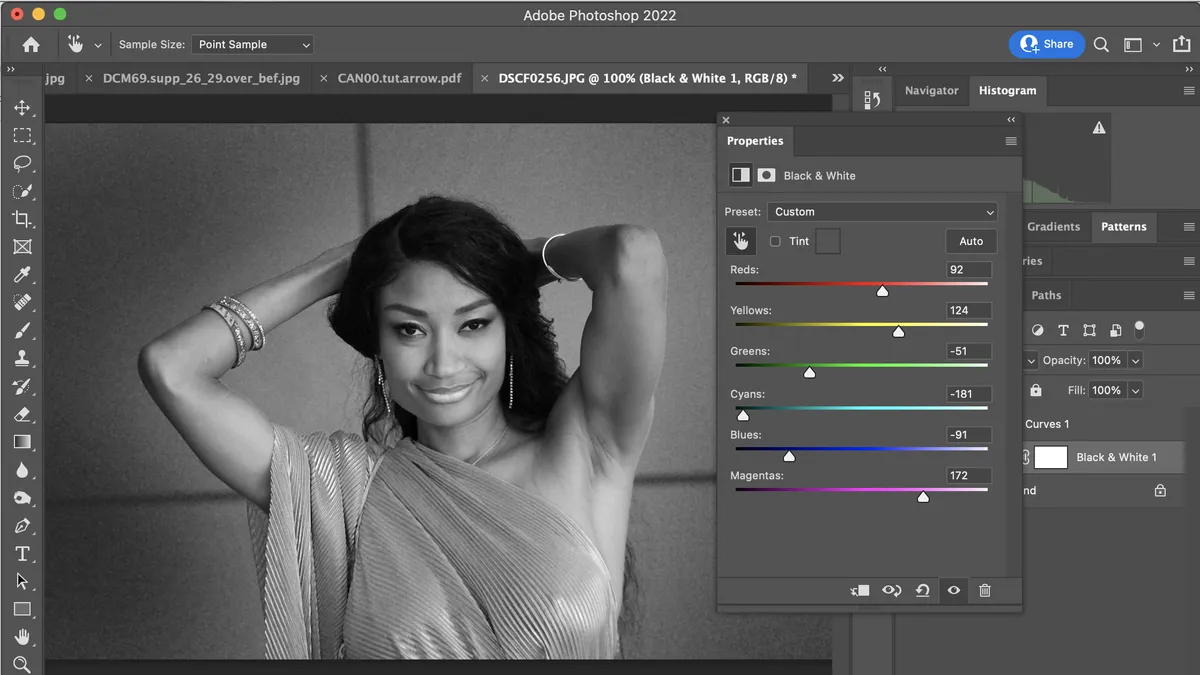
Many cameras have a monochrome or black-and-white setting, but without fail you will always get a better black-and-white image by shooting in color and converting the image to monochrome yourself - ideally from a raw file.
However, if you shoot raw and JPEG files simultaneously you can use the black and white JPEG as a guide while having the full color raw files to make a conversion.
Photoshop’s Black and White adjustment controls allow you to alter the brightness of the colors that make up the image, so you may find you need to adjust several of them to get natural-looking results.
You may also still need to use the Levels and Curves controls to set the black and white points and adjust global contrast.
- 8 composition mistakes (and how to avoid them)
- Common tripod mistakes photographers make
- 8 portrait photography mistakes (and how to avoid them)
- Common wildlife photography mistake
- 10 wedding photography mistakes every beginner will make (and ...
- 7 common landscape photography mistakes
- 5 biggest mistakes you can make when entering a photo competition
