8 tips on photographing the 2019 total solar eclipse
South America is the place to be today, if you are to witness one of the most amazing events in astrophotography
Natural phenomena don’t come much more spectacular than a total solar eclipse… but these events are rare, and you have to be in the right place to photograph them. Parts of North America got to see the moon totally obscured by the earth's shadow on 21 August 2017. And this summer it will be parts of South America that will see the sky gradually darken until the eerie moment of totality.
The event itself takes place on the afternoon of Tuesday 2 July. And the place you need to be is in Chile or Argentina. The first land mass that the total eclipse will be the Pitcairn Islands, best known for their role in the Mutiny on the Bounty story. But the eclipse will hit the mainland at the city of La Serena in Chile. Its path will then cross the Andes to San Juan in Argentina.
The huge cities of Buenos Aires, Montevideo and Cordoba will just miss out on complete totality - but will be great places to see a partial eclipse (or would be good bases to use to head towards to total eclipse zone.
You can check the details for any location for this eclipse using this interactive map by timeanddate.com.
1. Safety comes first
Although the solar eclipse is a very cool thing to photograph, it also comes with an element of danger. Put short, safety precautions must be taken.
Looking directly at the sun can permanently harm your vision, so you should use solar shades if you are setting up and glancing towards the sky.
You should also add a filter to your lens – more on this later.
The best camera deals, reviews, product advice, and unmissable photography news, direct to your inbox!
2. Check you’re on the path
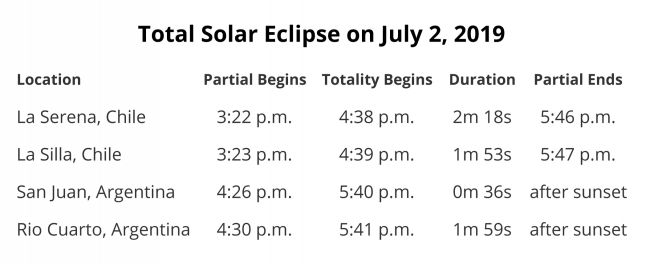
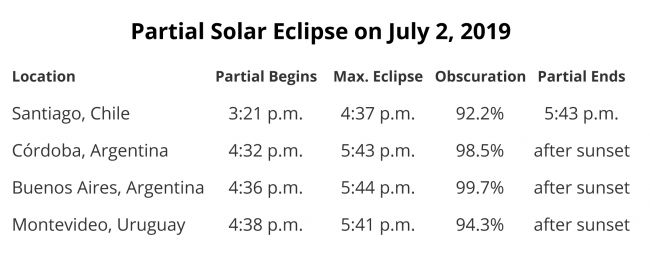
The path of the total solar eclipse will be around 70 miles wide, so you have to be in this zone or you will miss out.
If you live outside of this path, you can choose to travel to the path zone, although you’ll still be able to get photos of a partial eclipse if you are in a neighboring area of Chile, Argenentina or Uruguay.
3. Remember that you’ll have to be quick
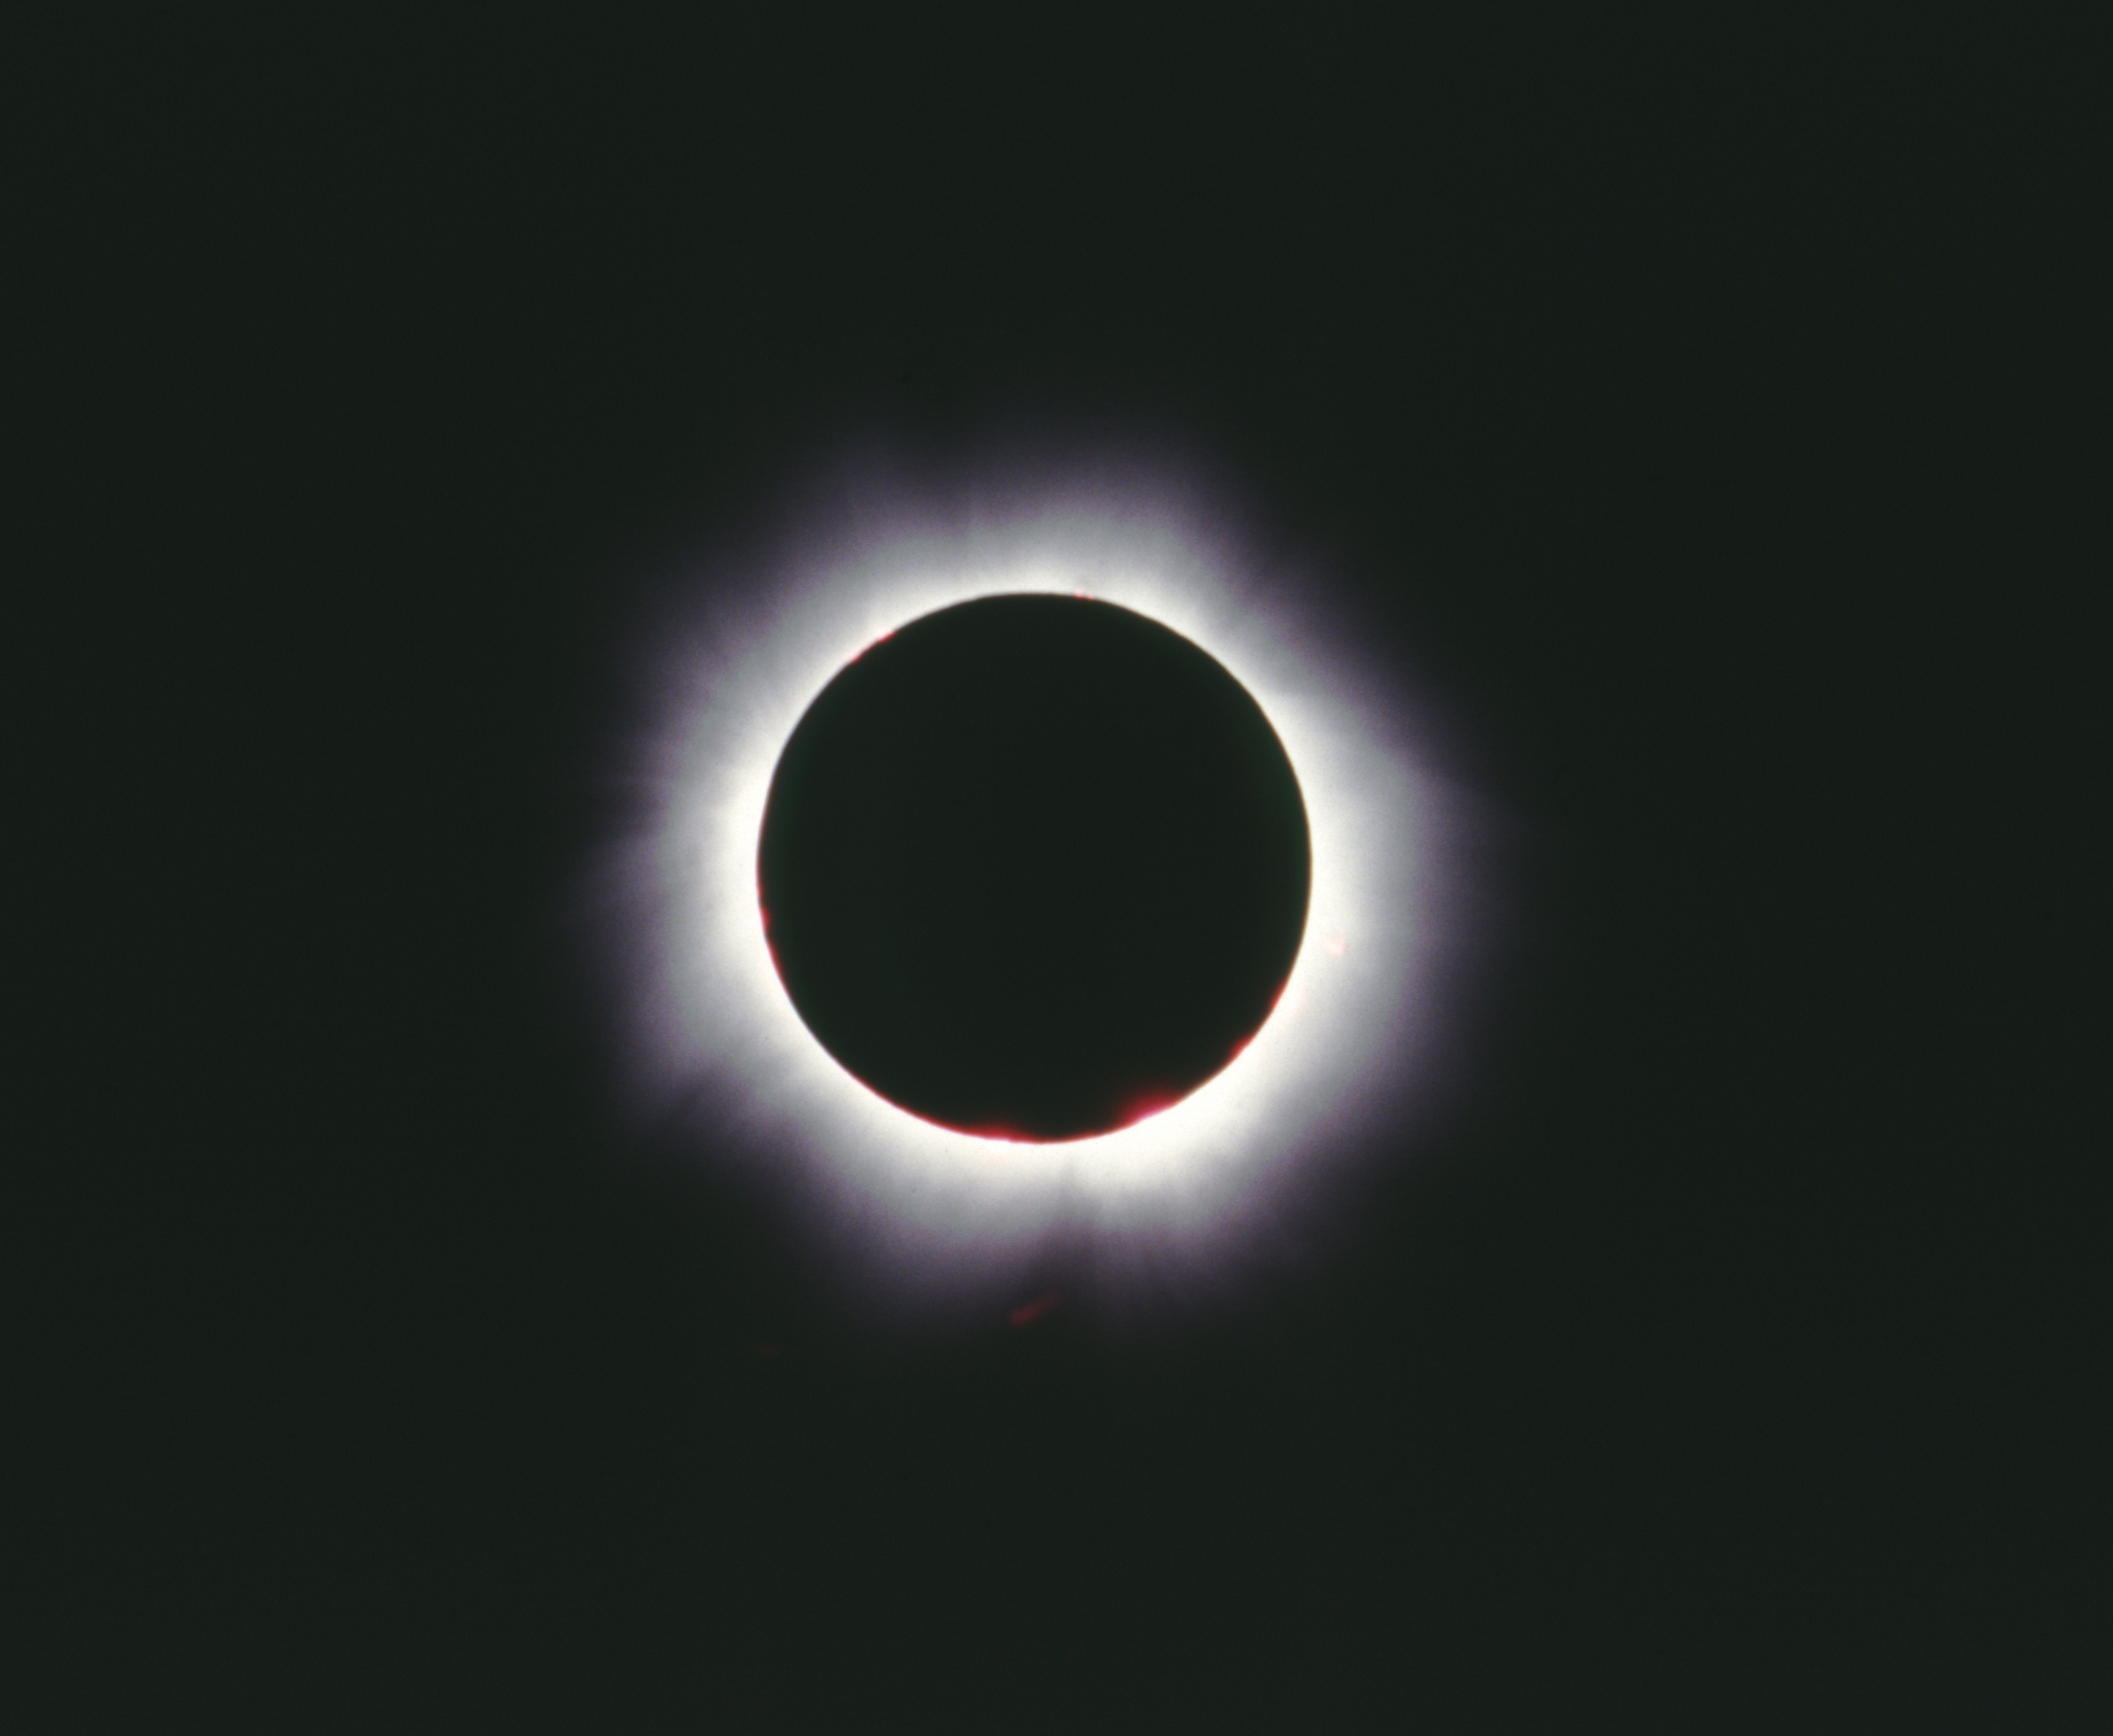
Solar eclipse photography comes with a fair amount of pressure as the full eclipse only lasts for around two minutes.
This should still give you enough time to fire a handful of frames so you can experiment with focal lengths and different compositions. Just make sure you're totally prepared beforehand so you're not fiddling around while it's happening.
4. Make sure you're using the right focal length
A focal length of at least 500mm is recommended when photographing the solar eclipse.
Remember that if you are using a camera with an APS-C sensor, the crop factor of 1.5x (1.6x for Canon) will further increase the effective focal length. This is also good news for Micro Four Thirds photographers, who enjoy a 2x crop factor, turning a 70-300mm lens into a 140-600mm optic.
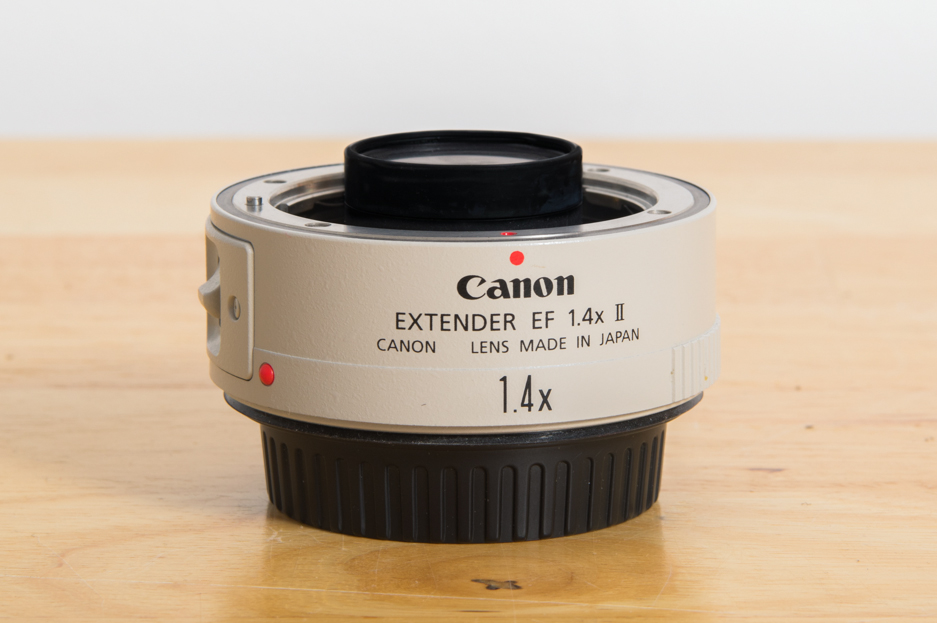
If you are using a full-frame camera, why not add a teleconverter to extend your effective focal length? While using a teleconverter reduces the maximum aperture, this is not such a big issue when capturing eclipse images, so it’s preferable to take the extra range.
Keeping the camera steady is more difficult when using a longer focal length, so make sure to set yourself up on a tripod beforehand.
5. Dig out your filters
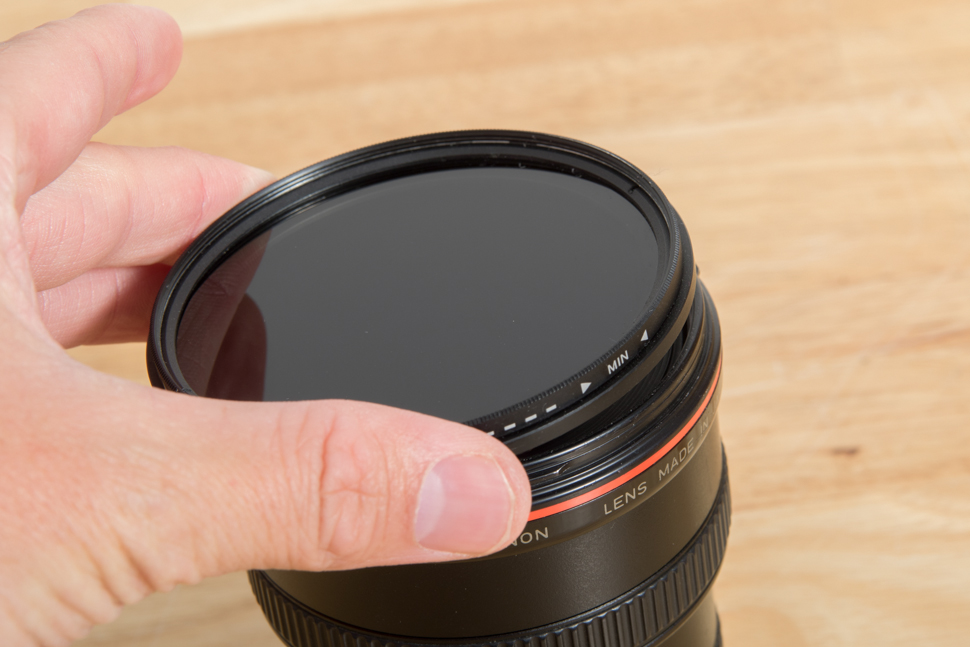
To get a decent image of the solar eclipse, you'll need to reduce the amount of light from the sky passing through the lens and hitting the sensor.
This means using a filter, and solar filters are built specifically for shooting images of eclipses.
If you don’t own, or have access to, a solar filter, you can use a strong ND filter as a substitute. A 10-stop or 15-stop ND filter will do a great job of reducing the light so that you don’t end up overexposing the image.
6. Cover your bases with exposure choice
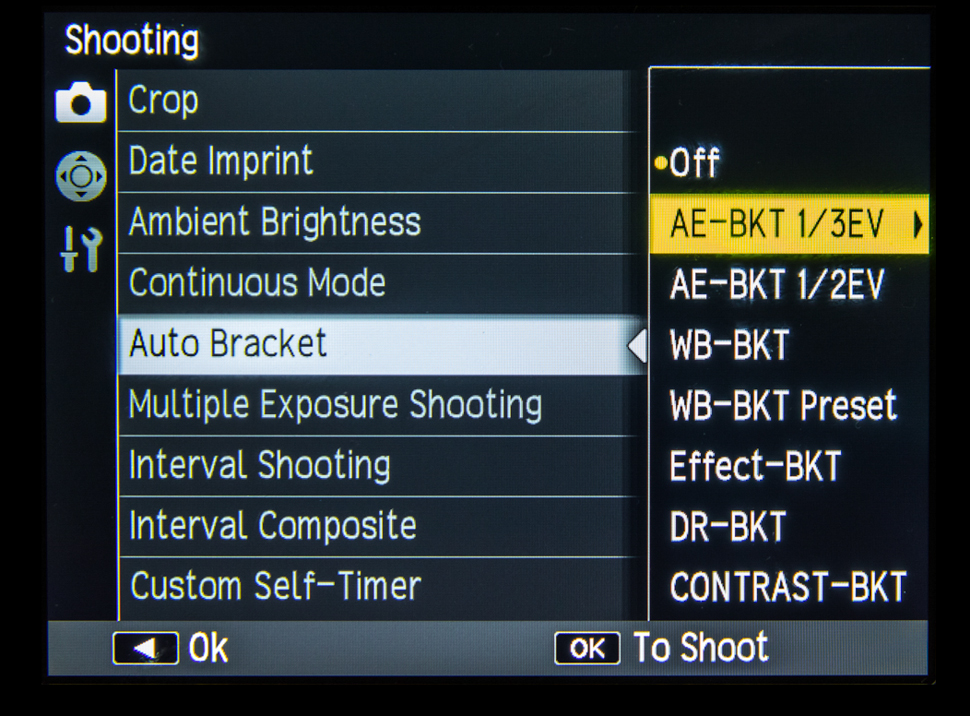
It can be difficult to get the right exposure when shooting an eclipse as the light levels will change as the moon moves across the face of the sun.
Because of these shifting light levels, you should take advantage of your camera’s Auto Exposure Bracketing (AEB) mode. This feature fires off a sequence of images with different shutter speeds, and you can use this as a safety net to ensure at least one of the images will be correctly exposed.
The AEB feature is typically accessed via your camera’s menu screen, although some cameras have a dedicated AEB button.
As a further backup to counter shifting light levels, be sure to use the Raw file format, rather than just capturing in JPEG. Using Raw will enable you to rescue more shadow and highlight details when you edit the image in Raw-conversion software such as Adobe Lightroom.
7. Keep an eye on the weather
While you can make sure you are prepared with all your camera kit set up in good time, one thing that could spoil the day will be low cloud cover.
Use your smartphone and weather apps to check on conditions in your local area. If things are looking poor, you may want to relocate to a secondary shooting location.
8. Get creative
You may think capturing the eclipse would leave little room to experiment or be creative, but all you need is a little imagination.
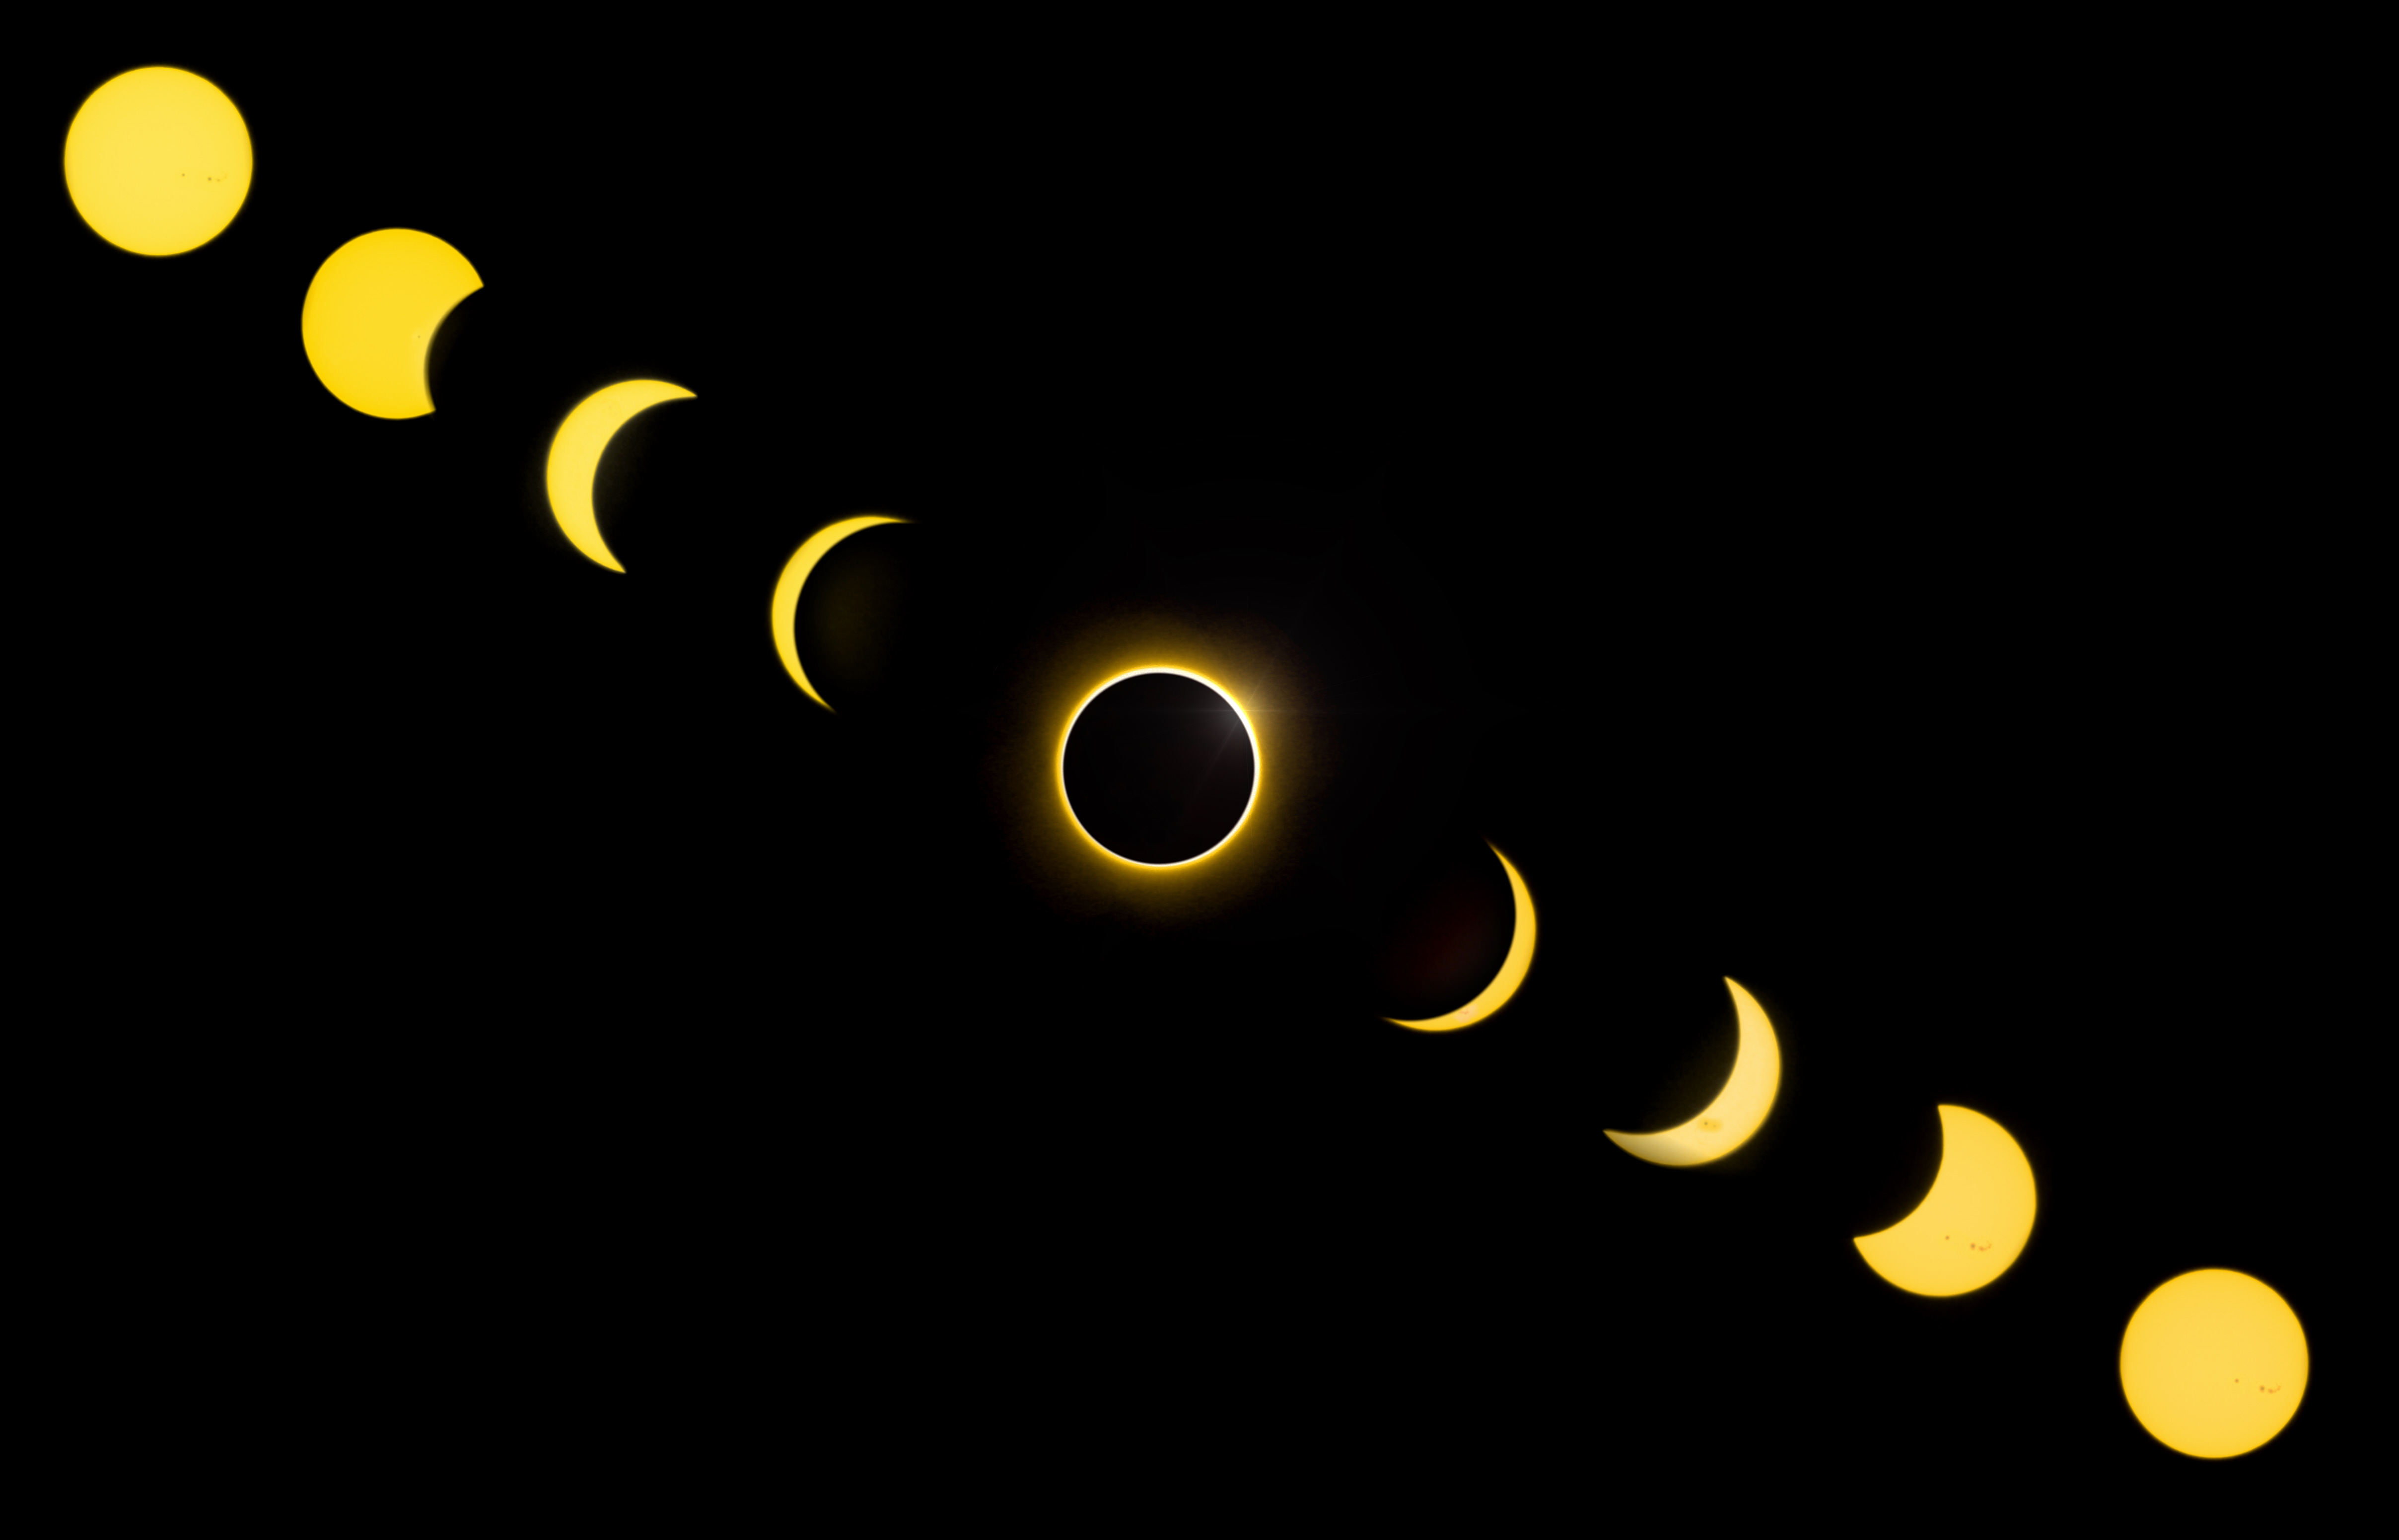
For example, why not try capturing a series of images of the moon transitioning across the sun and then create a composite sequence using software (as seen at the top of this page)?
Alternatively, if you have sufficient focal length, go for a super close-up composition.
Read more:
Astrophotography: How-to guides, tips and videos on getting your best shots
Astrophotography tools: the best camera, lenses and gear for shooting the night sky
Matty has worked for a number of photographic magazines including Professional Photo, Digital Photo and Digital SLR magazine. He is an accomplished car and lanadscape photographer, who runs his own video production and content creation business in Lincolnshire.
