Bird-hemian rhapsody! Try a mobile studio for creative animal location shots
James Paterson uses a mobile studio for creative animal shots on location for fun farm portraits full of character
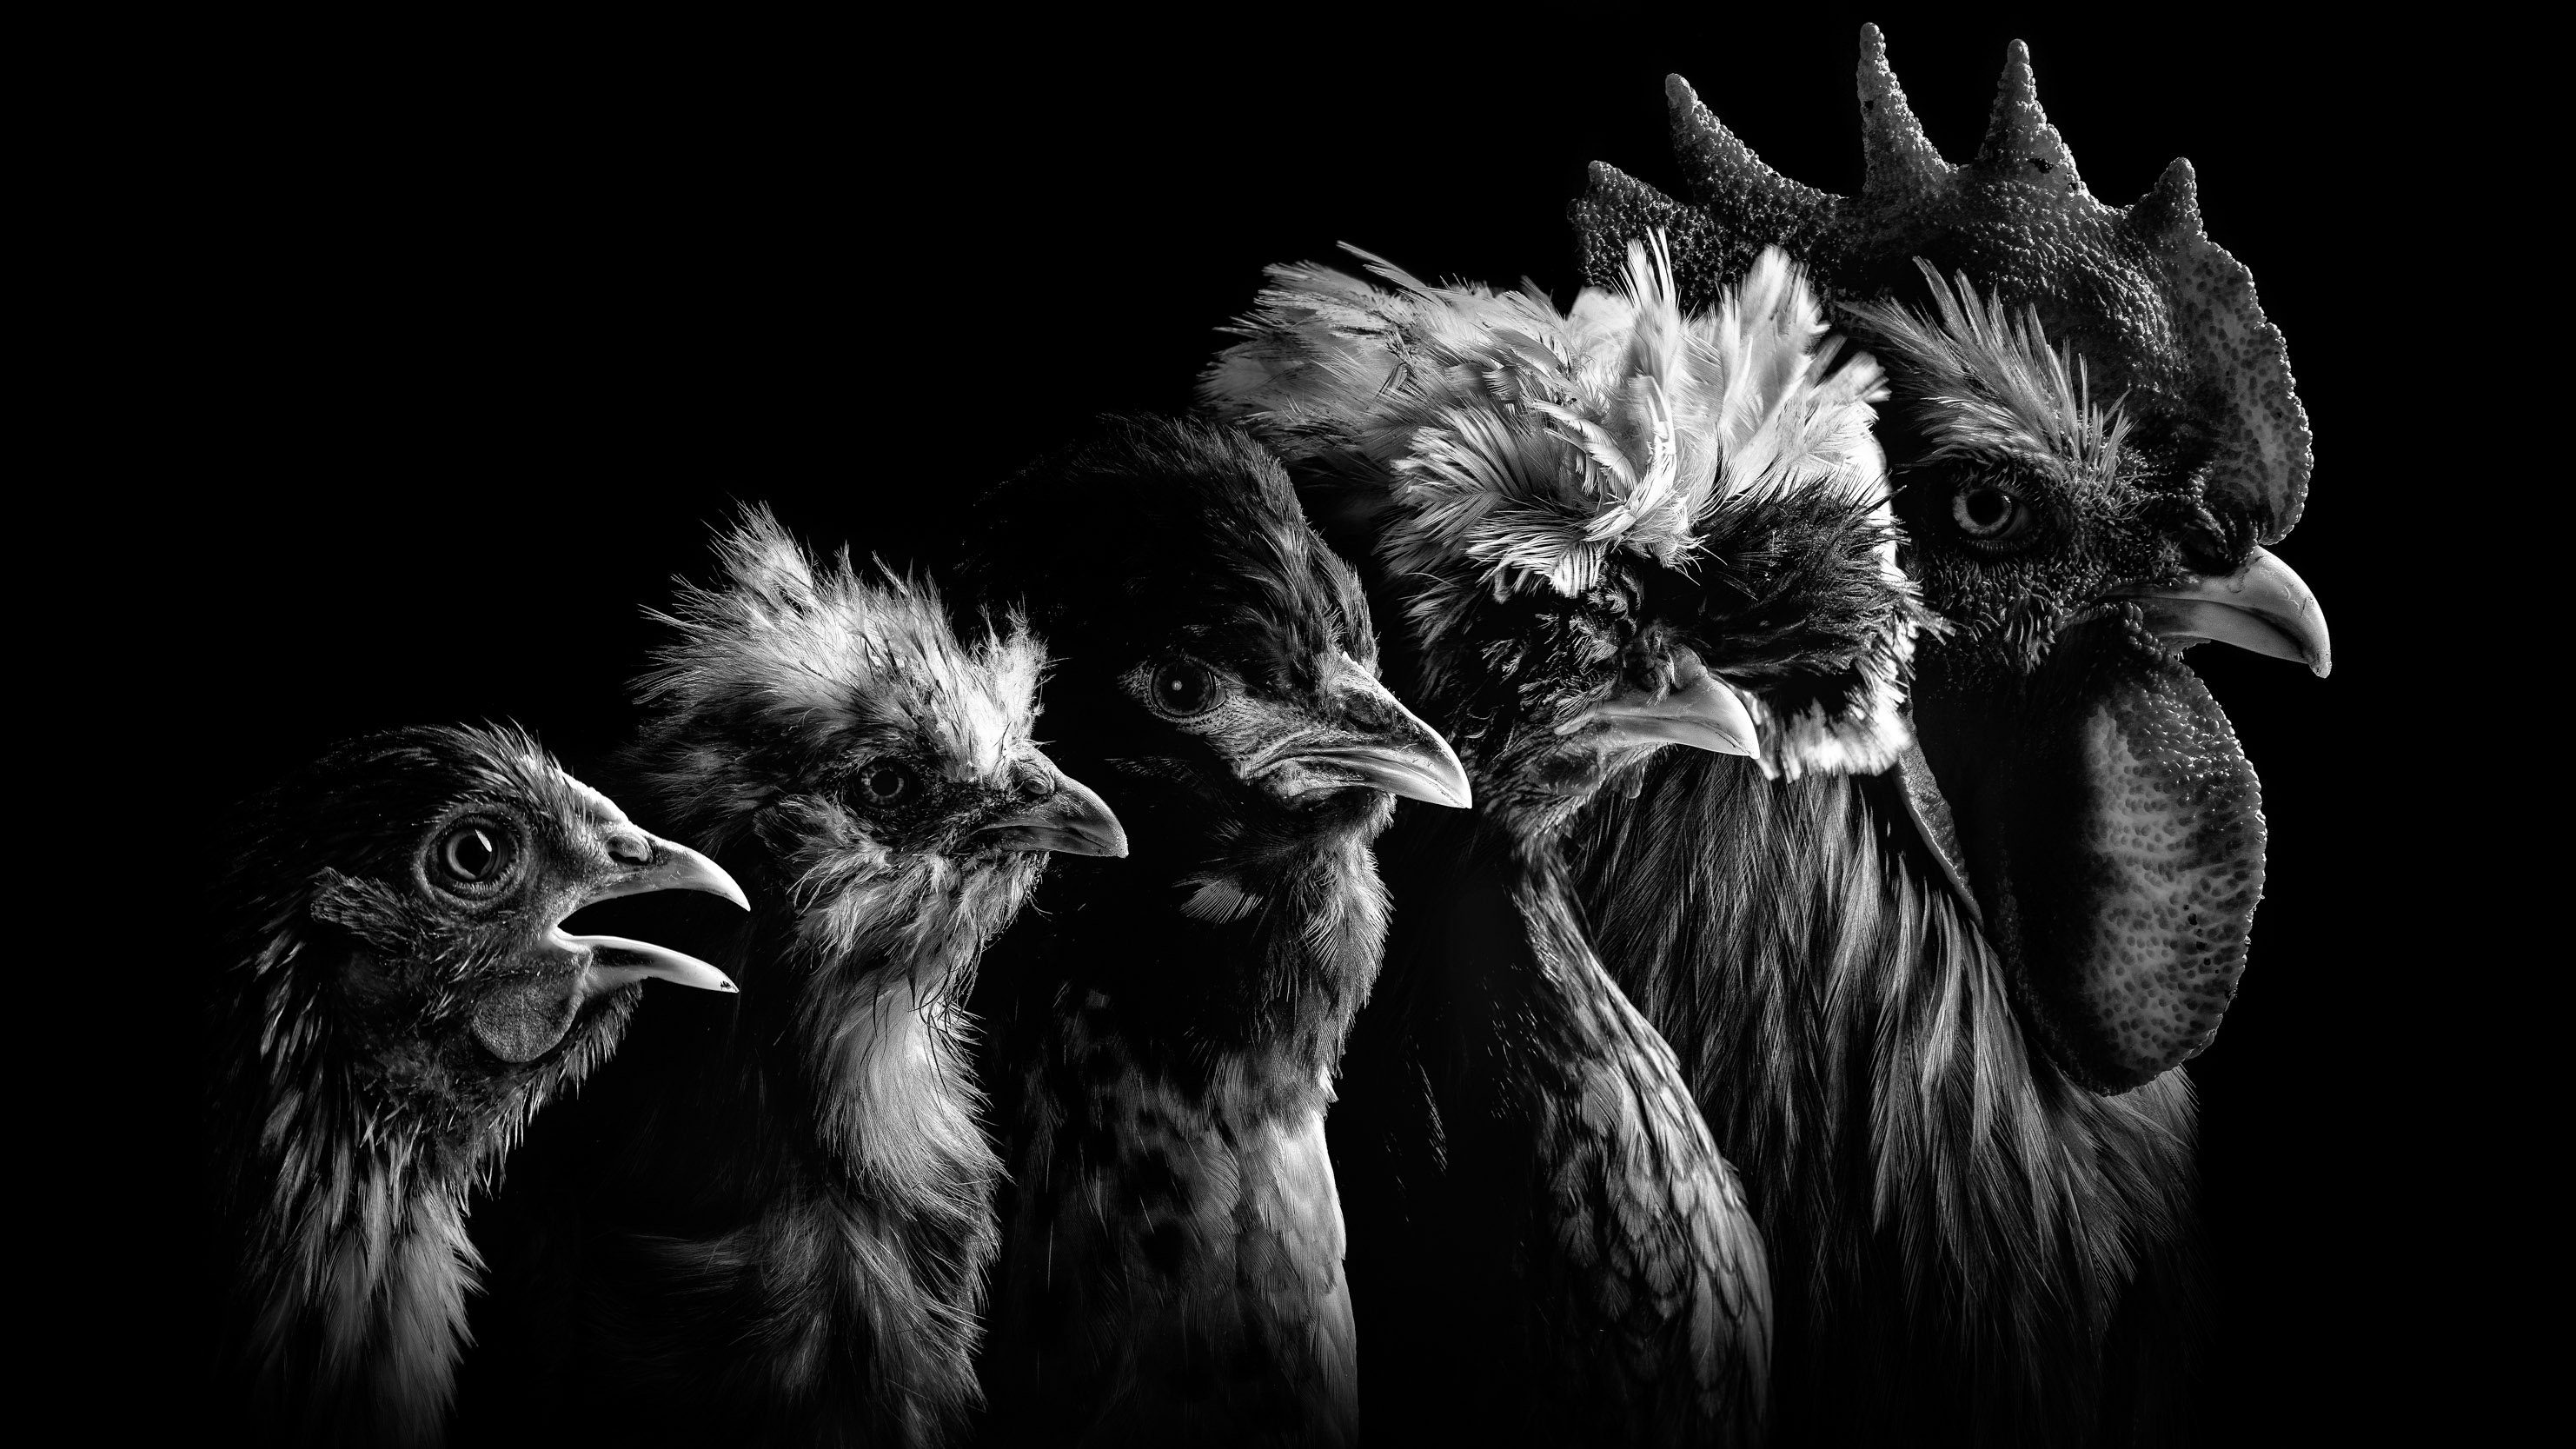
A portable studio enables you to capture subjects in all sorts of places, and with a clarity that only comes from flash lighting. We visited a rare-breeds farm to photograph an array of characterful chickens, goats and sheep, including the beautiful Golden Guernsey goat.
The portable studio approach is especially suited to animals like this, which are likely to be less skittish in familiar surroundings. So, rather than bringing the farmyard animals into the studio, we took the studio to the farm.
Whether you want to capture animals, people or any other kind of subject, a mobile studio can lead to wonderful results. It might seem complicated at first, but in a sense it is a great simplifier. By using plain backdrops and sculpting the light to suit our needs, we eliminate the context, which instead enables us to create bold, simple portraits that celebrate the subject without the distraction of their surroundings.
Our setup involved three lights, but for several shots we used just one – the light to the right of the subject. As such, you don’t necessarily need expensive kit for this; a speed light, a light stand and a modifier like a softbox or umbrella is enough to get started. Of course, one of the best cameras for wildlife photography could probably help. We’ll show you how it’s done, then look at how to combine several shots into a creative group animal portrait in Photoshop.
1. Positioning the animals
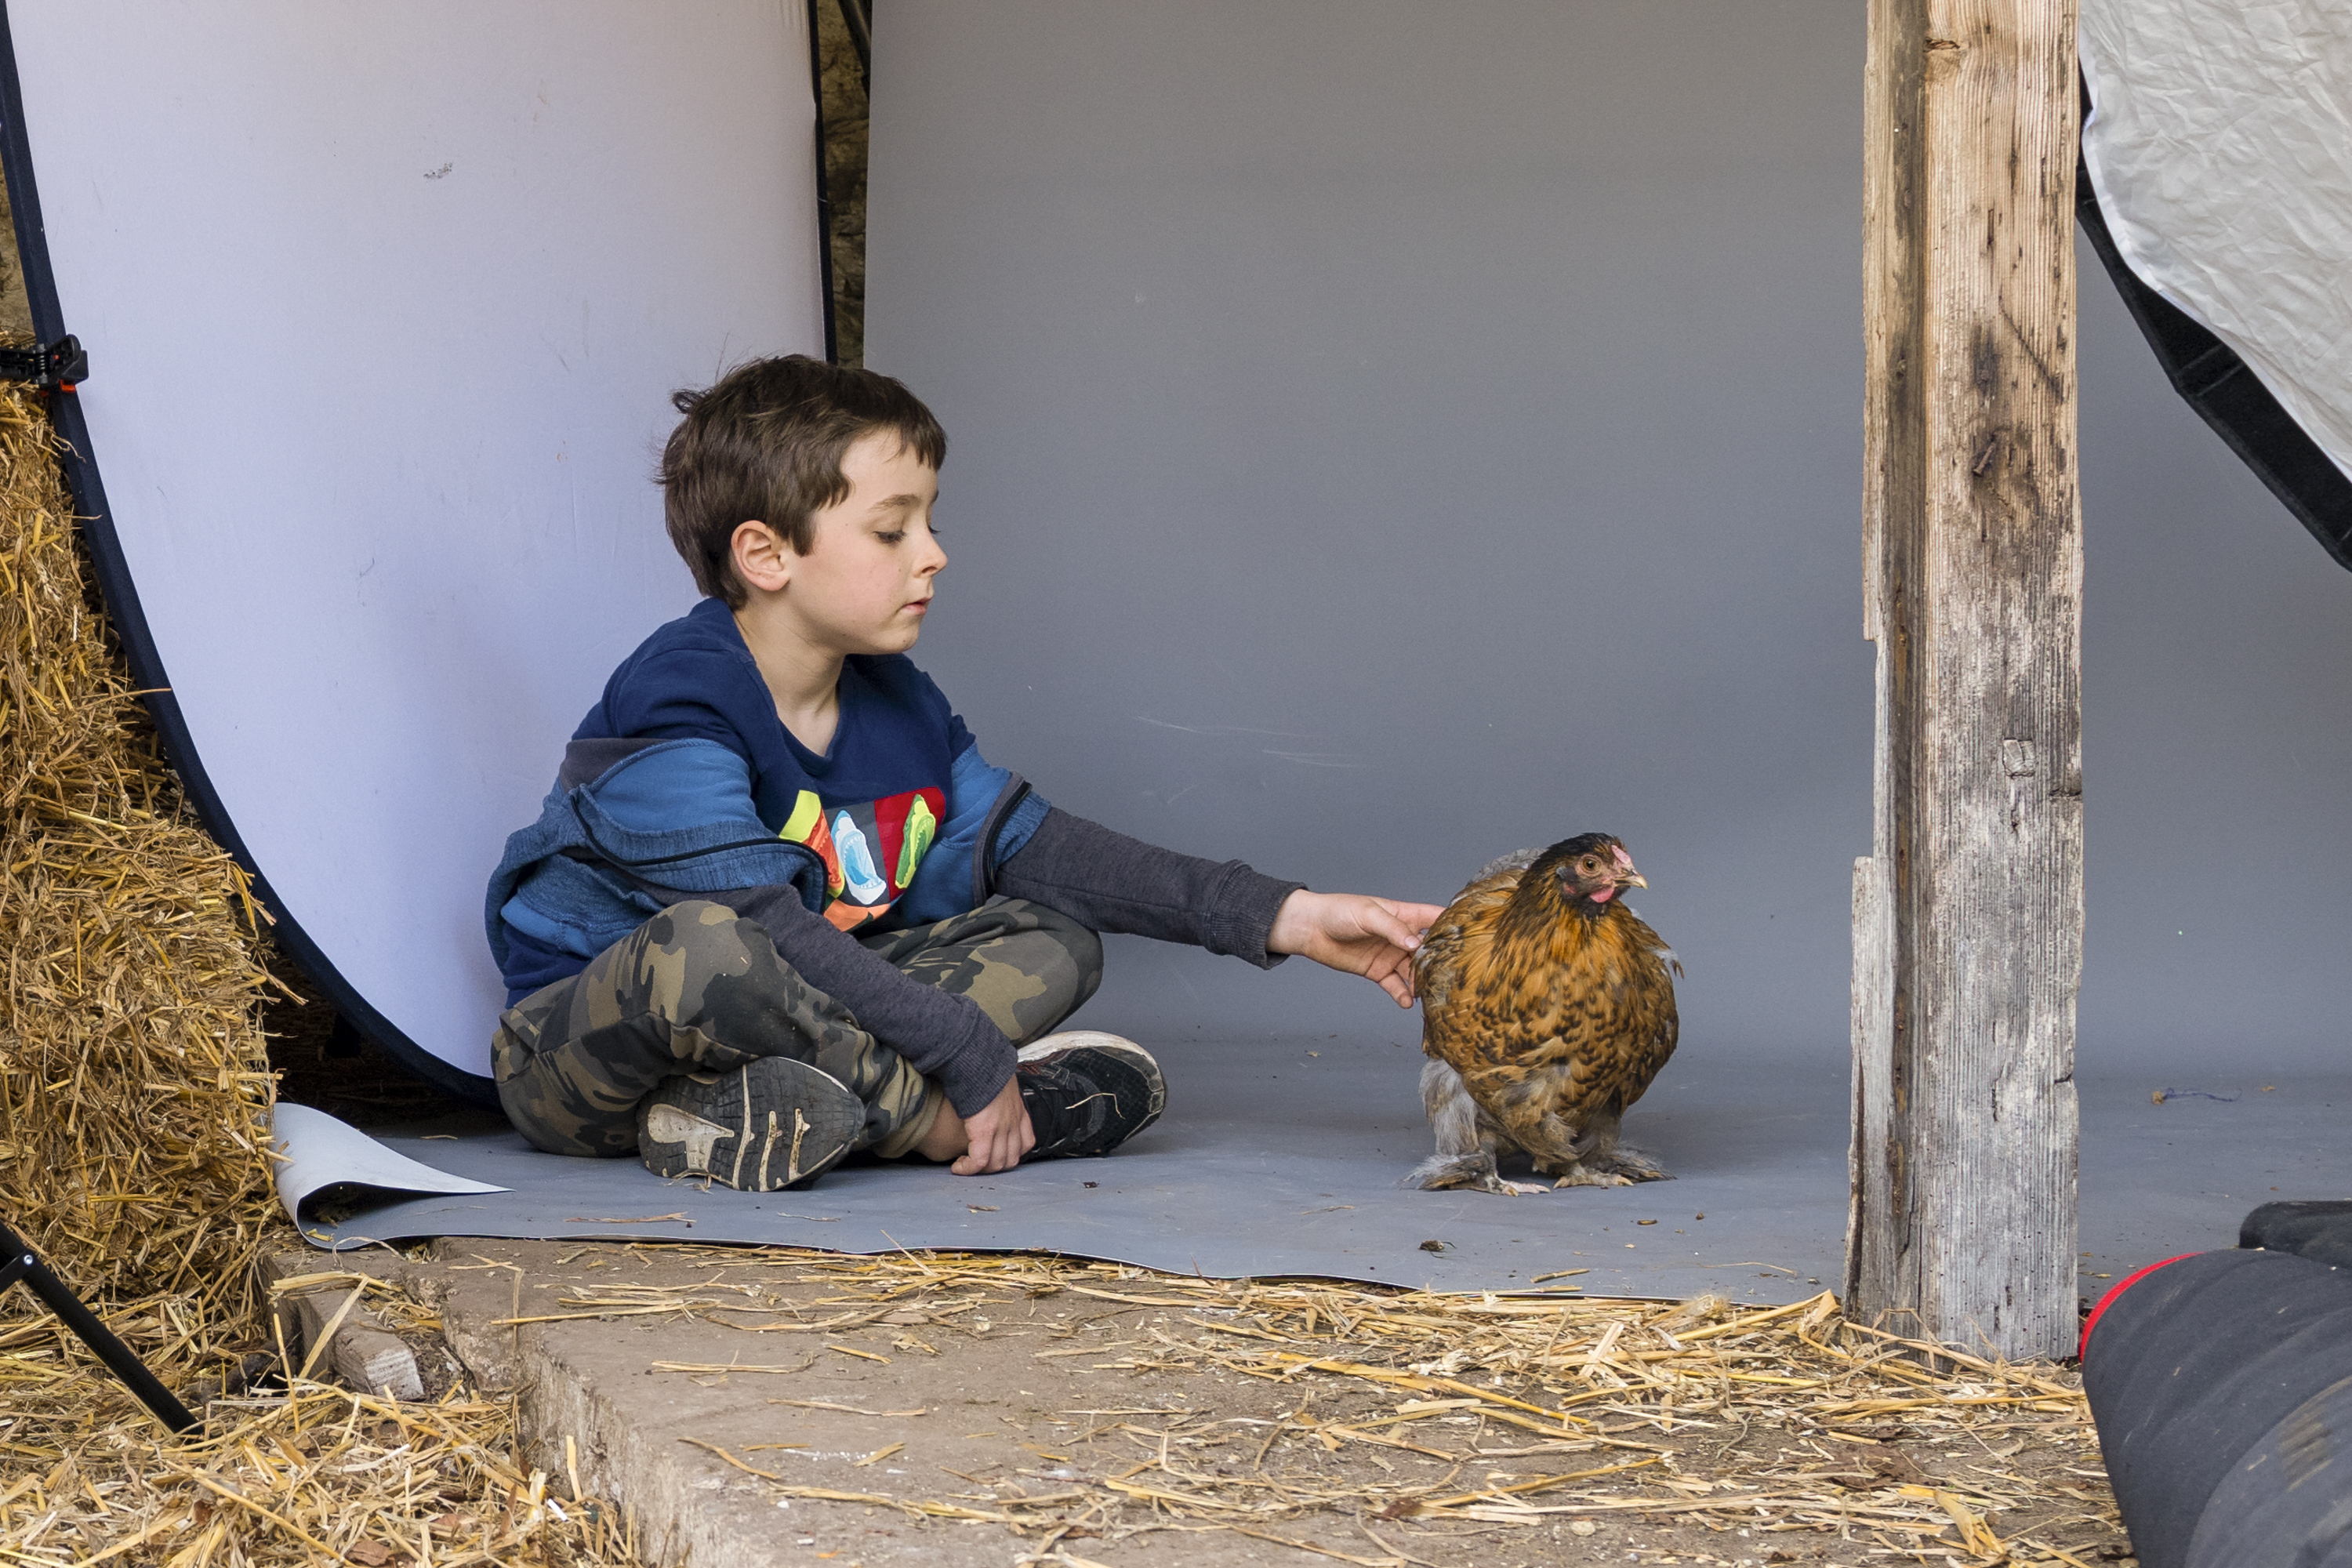
It helps to have another person get the animal into position and keep them calm, so you can concentrate on focusing and composing the shot. Lots of animals suit a side-on or three-quarters angle to the face, as the profiles are often more striking than straight-on.
2. Calm on the farm
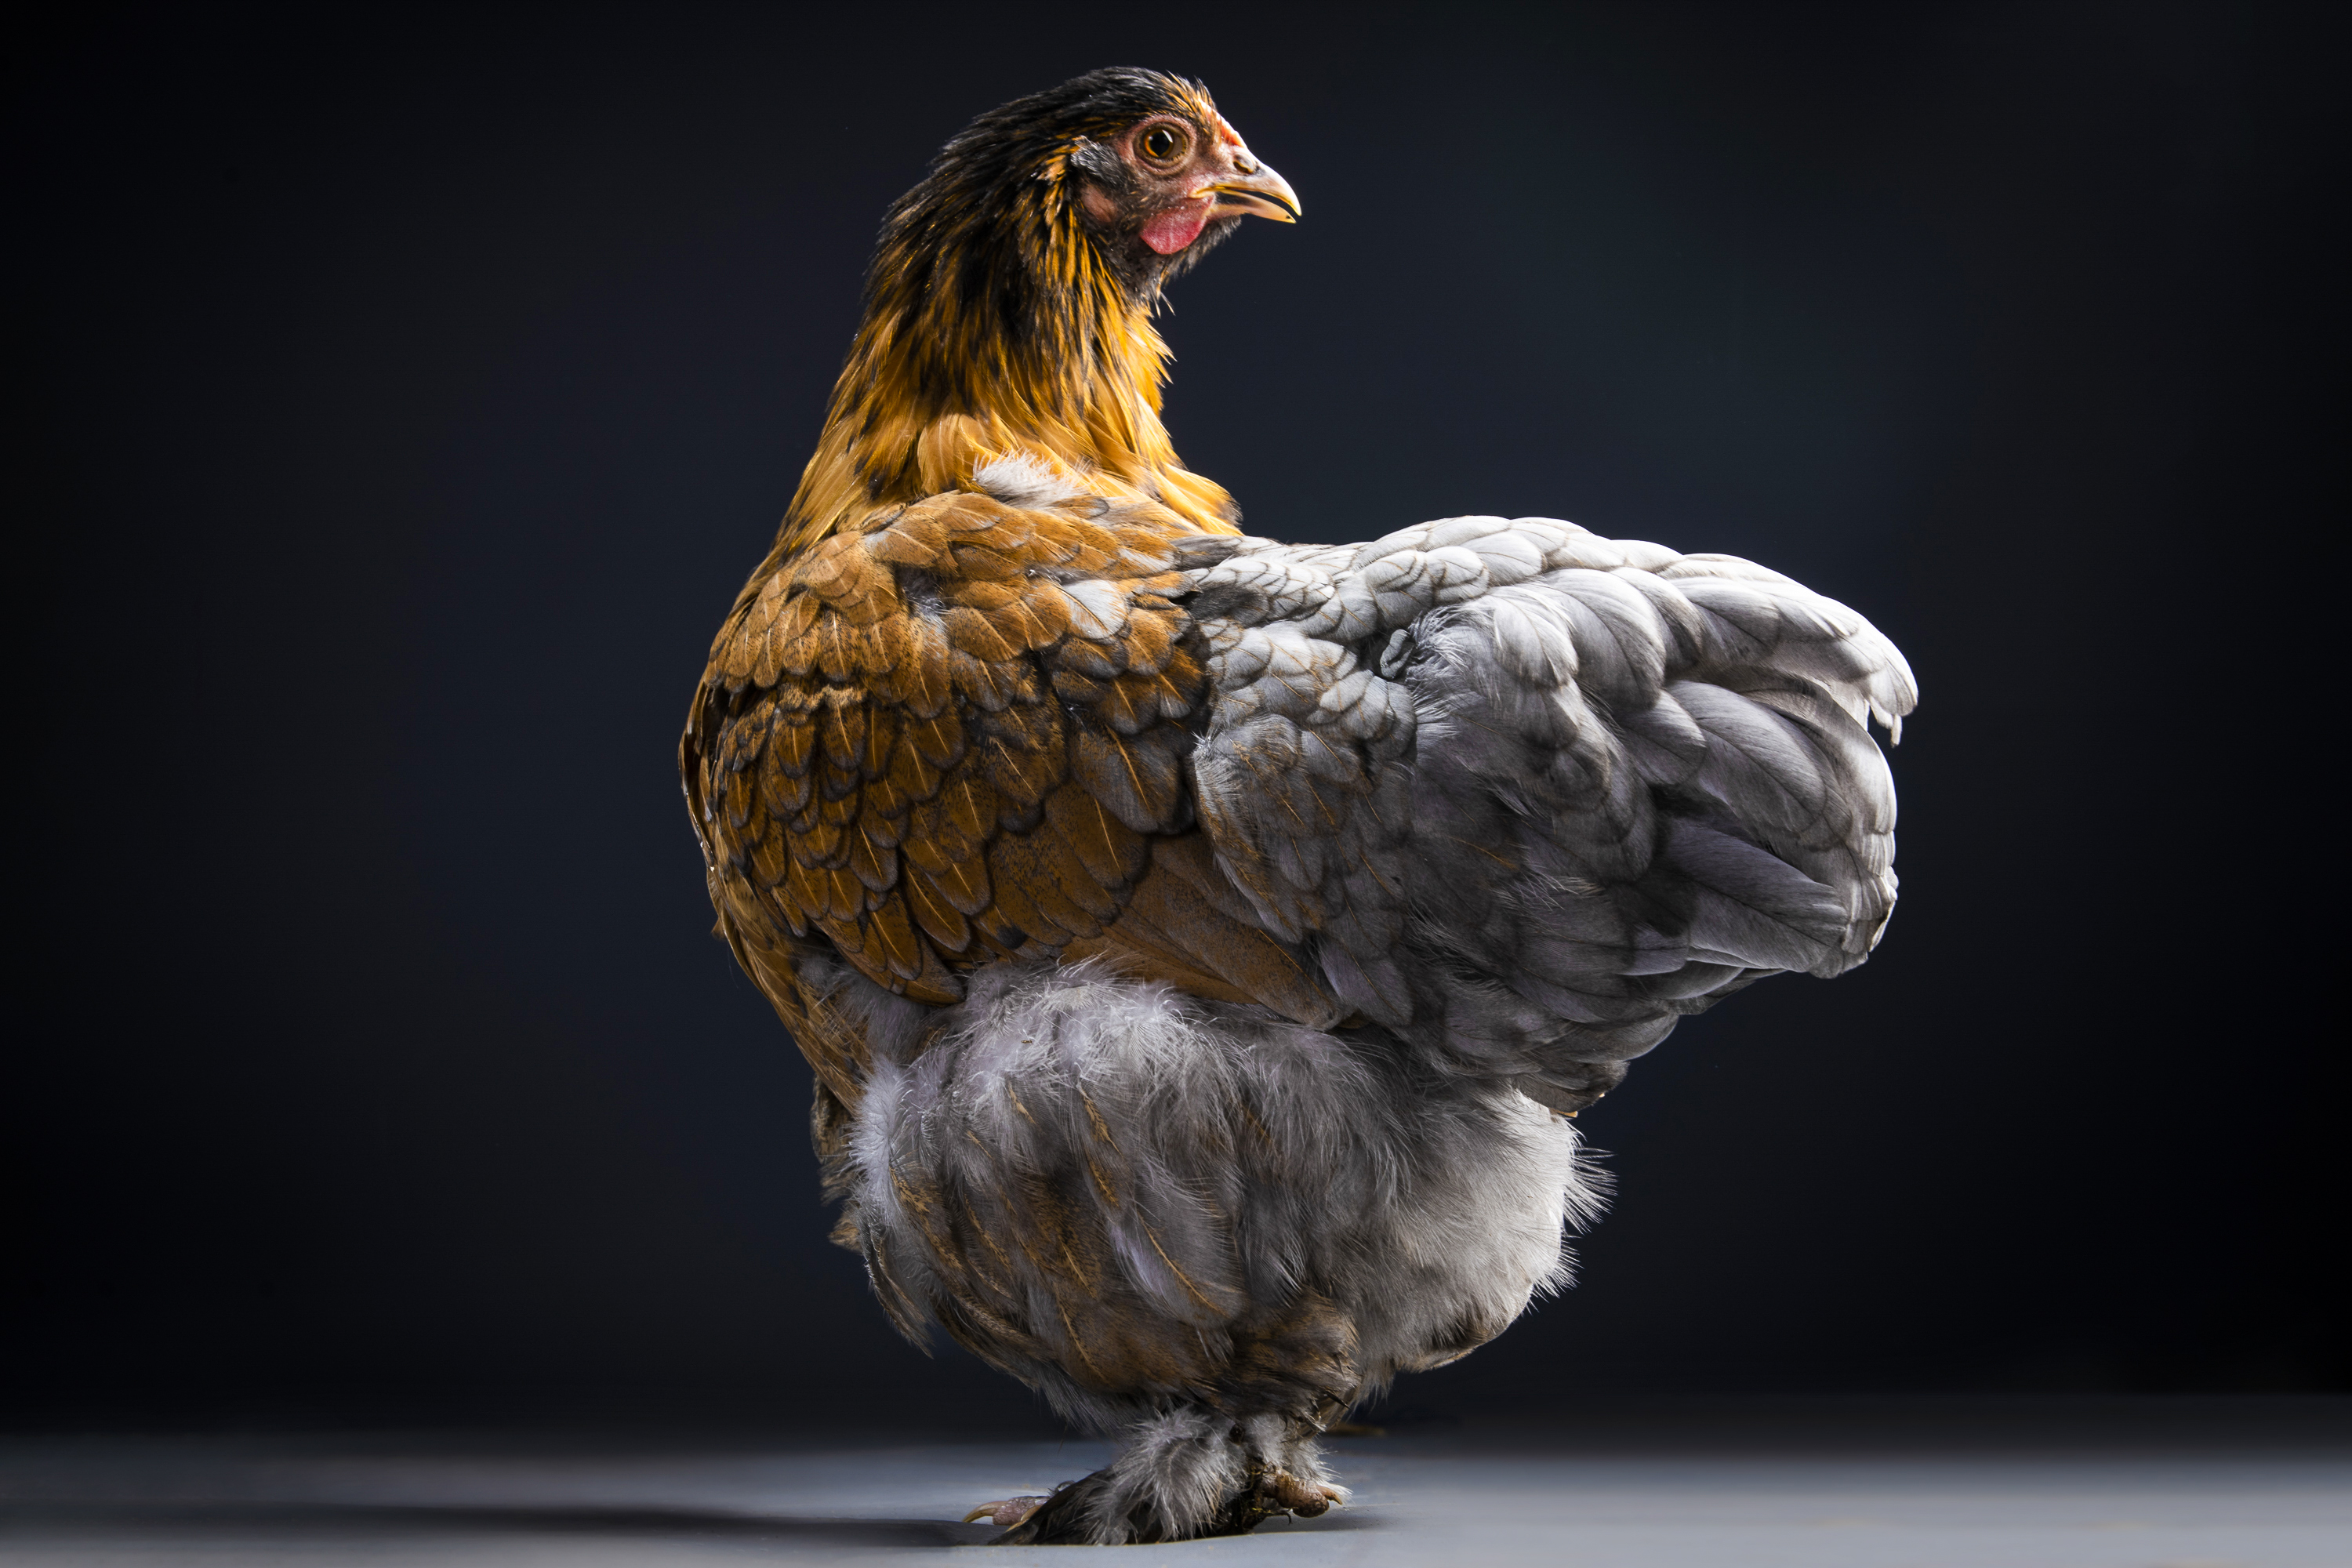
Spend time relaxing the animals before shooting, and turn off beeps on the flash or camera. Keep food and treats to hand to entice animals into position and reward them after. We scattered chicken feed over the floor of the studio, then removed it in Photoshop.
3. Use reflectors as barriers
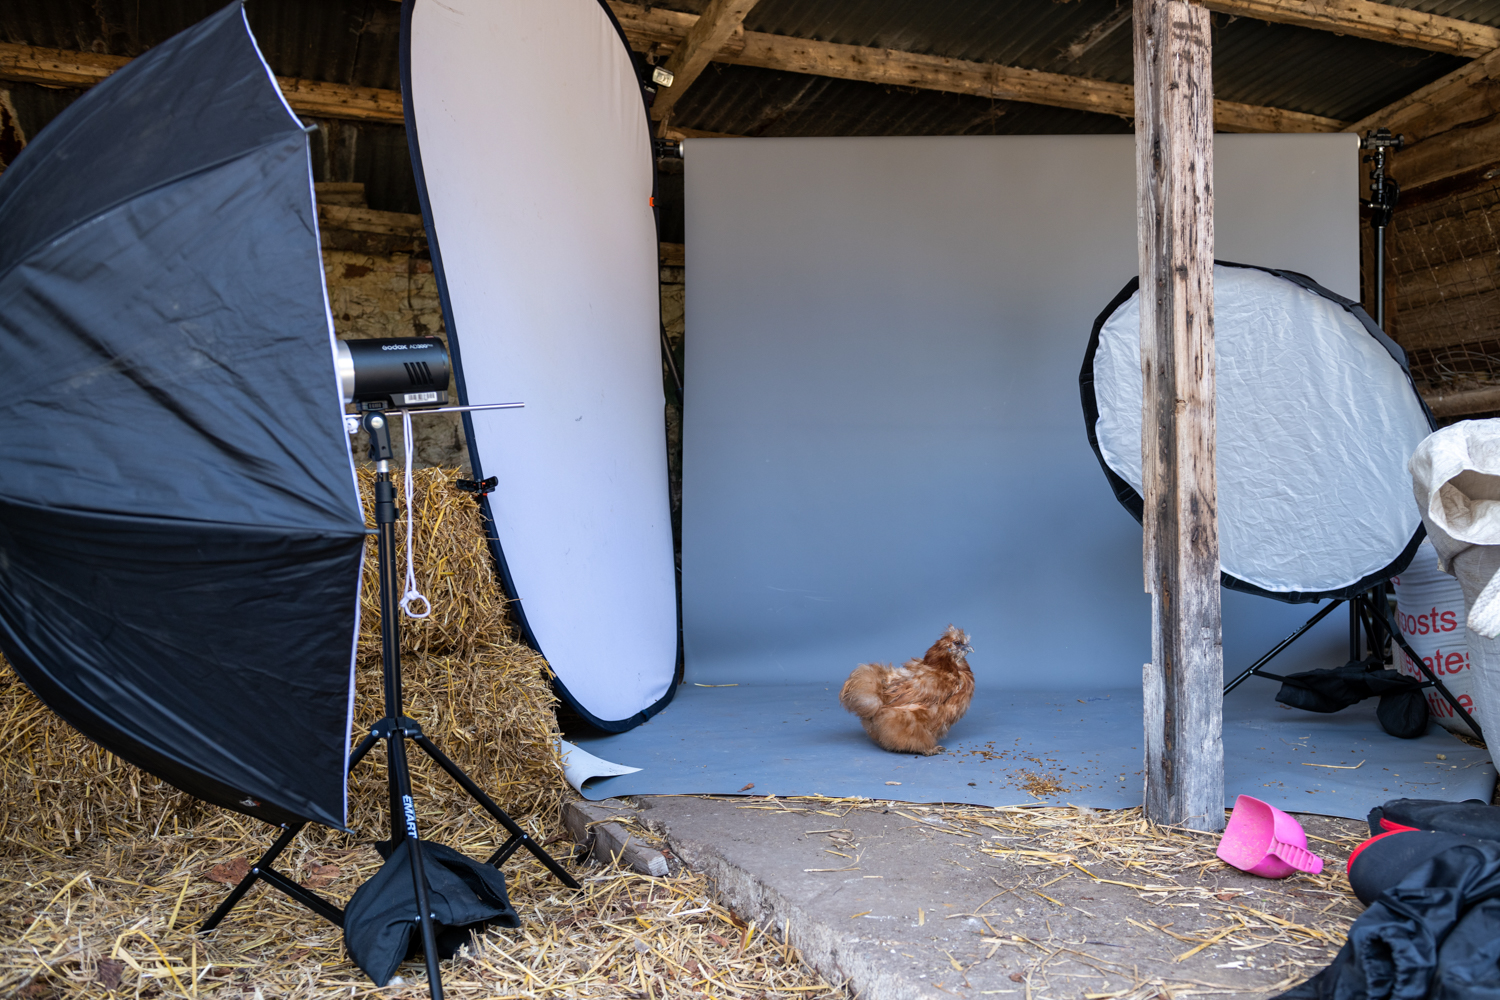
A large pop-up reflector placed to the left here bounces some of the light into the shadows on this side, which helps to balance out the contrast. It also served as a blocker to prevent chickens from scampering off to the side once settled in the space.
4. Master modifiers
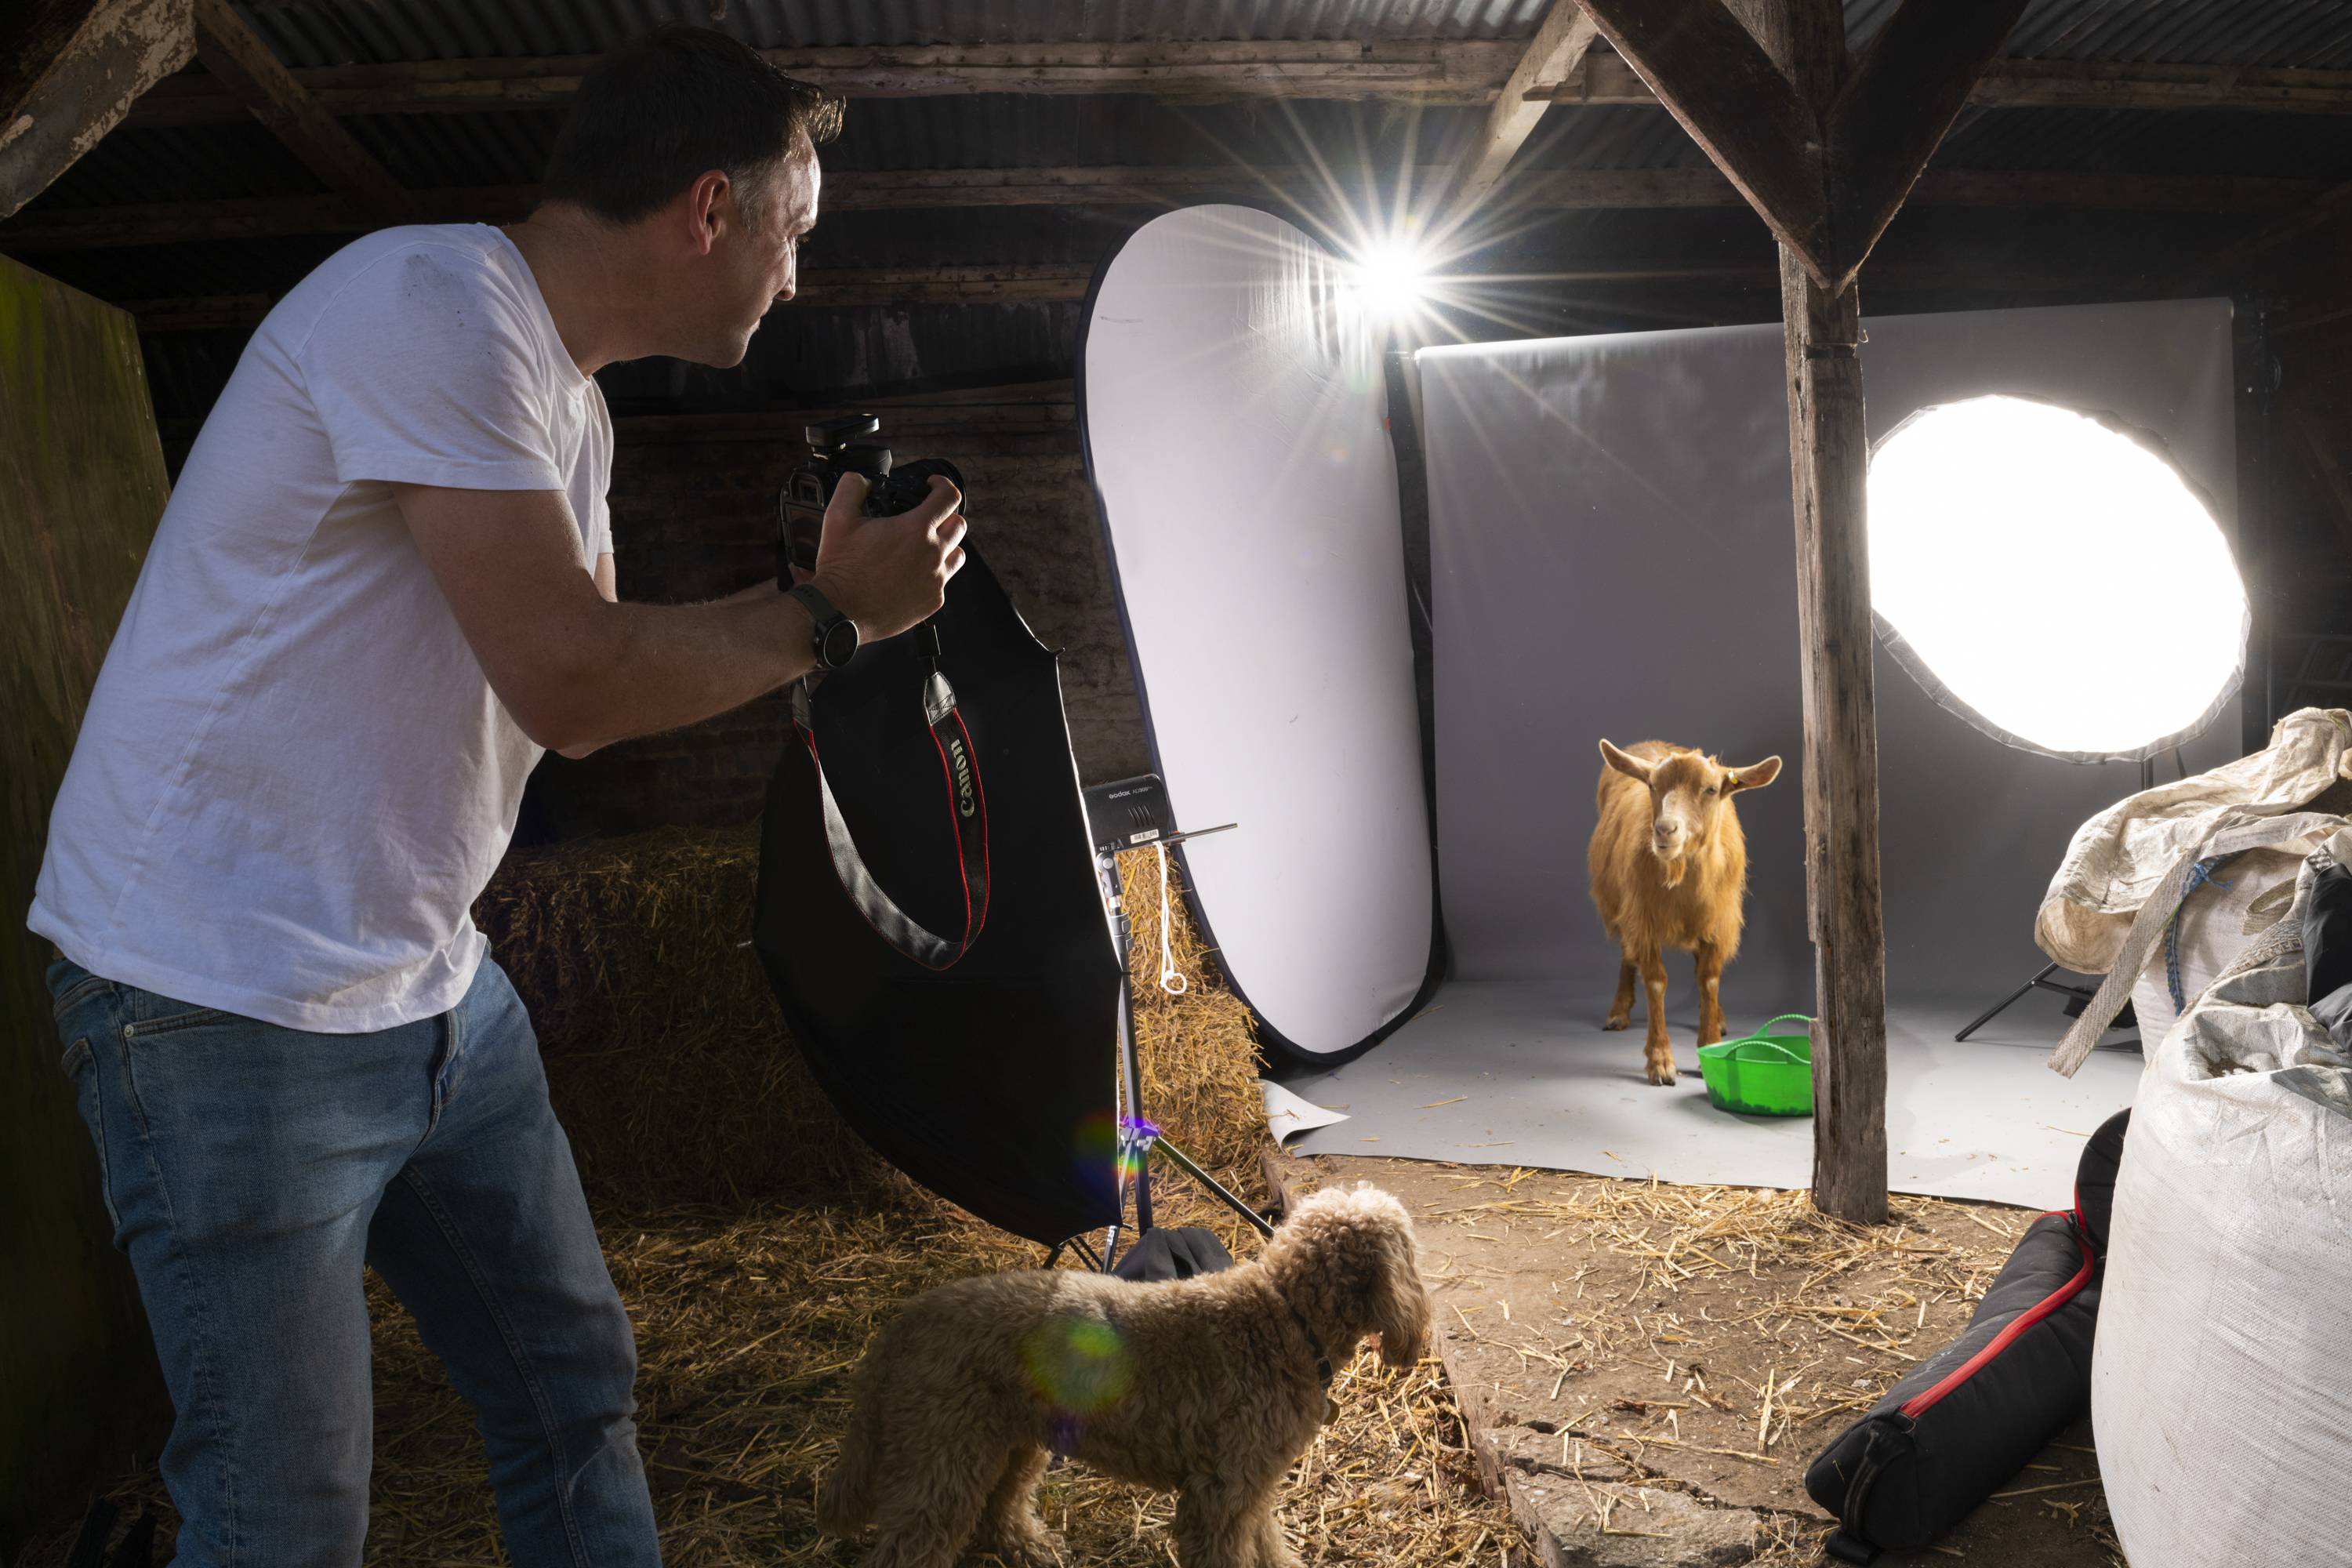
Flash modifiers such as umbrellas are essential for studio work as they transform the harsh light from the flash into soft, even illumination. The larger the light source, the softer it becomes. Remember that with little animals, the source is larger relative to their size.
5. Prepare the images
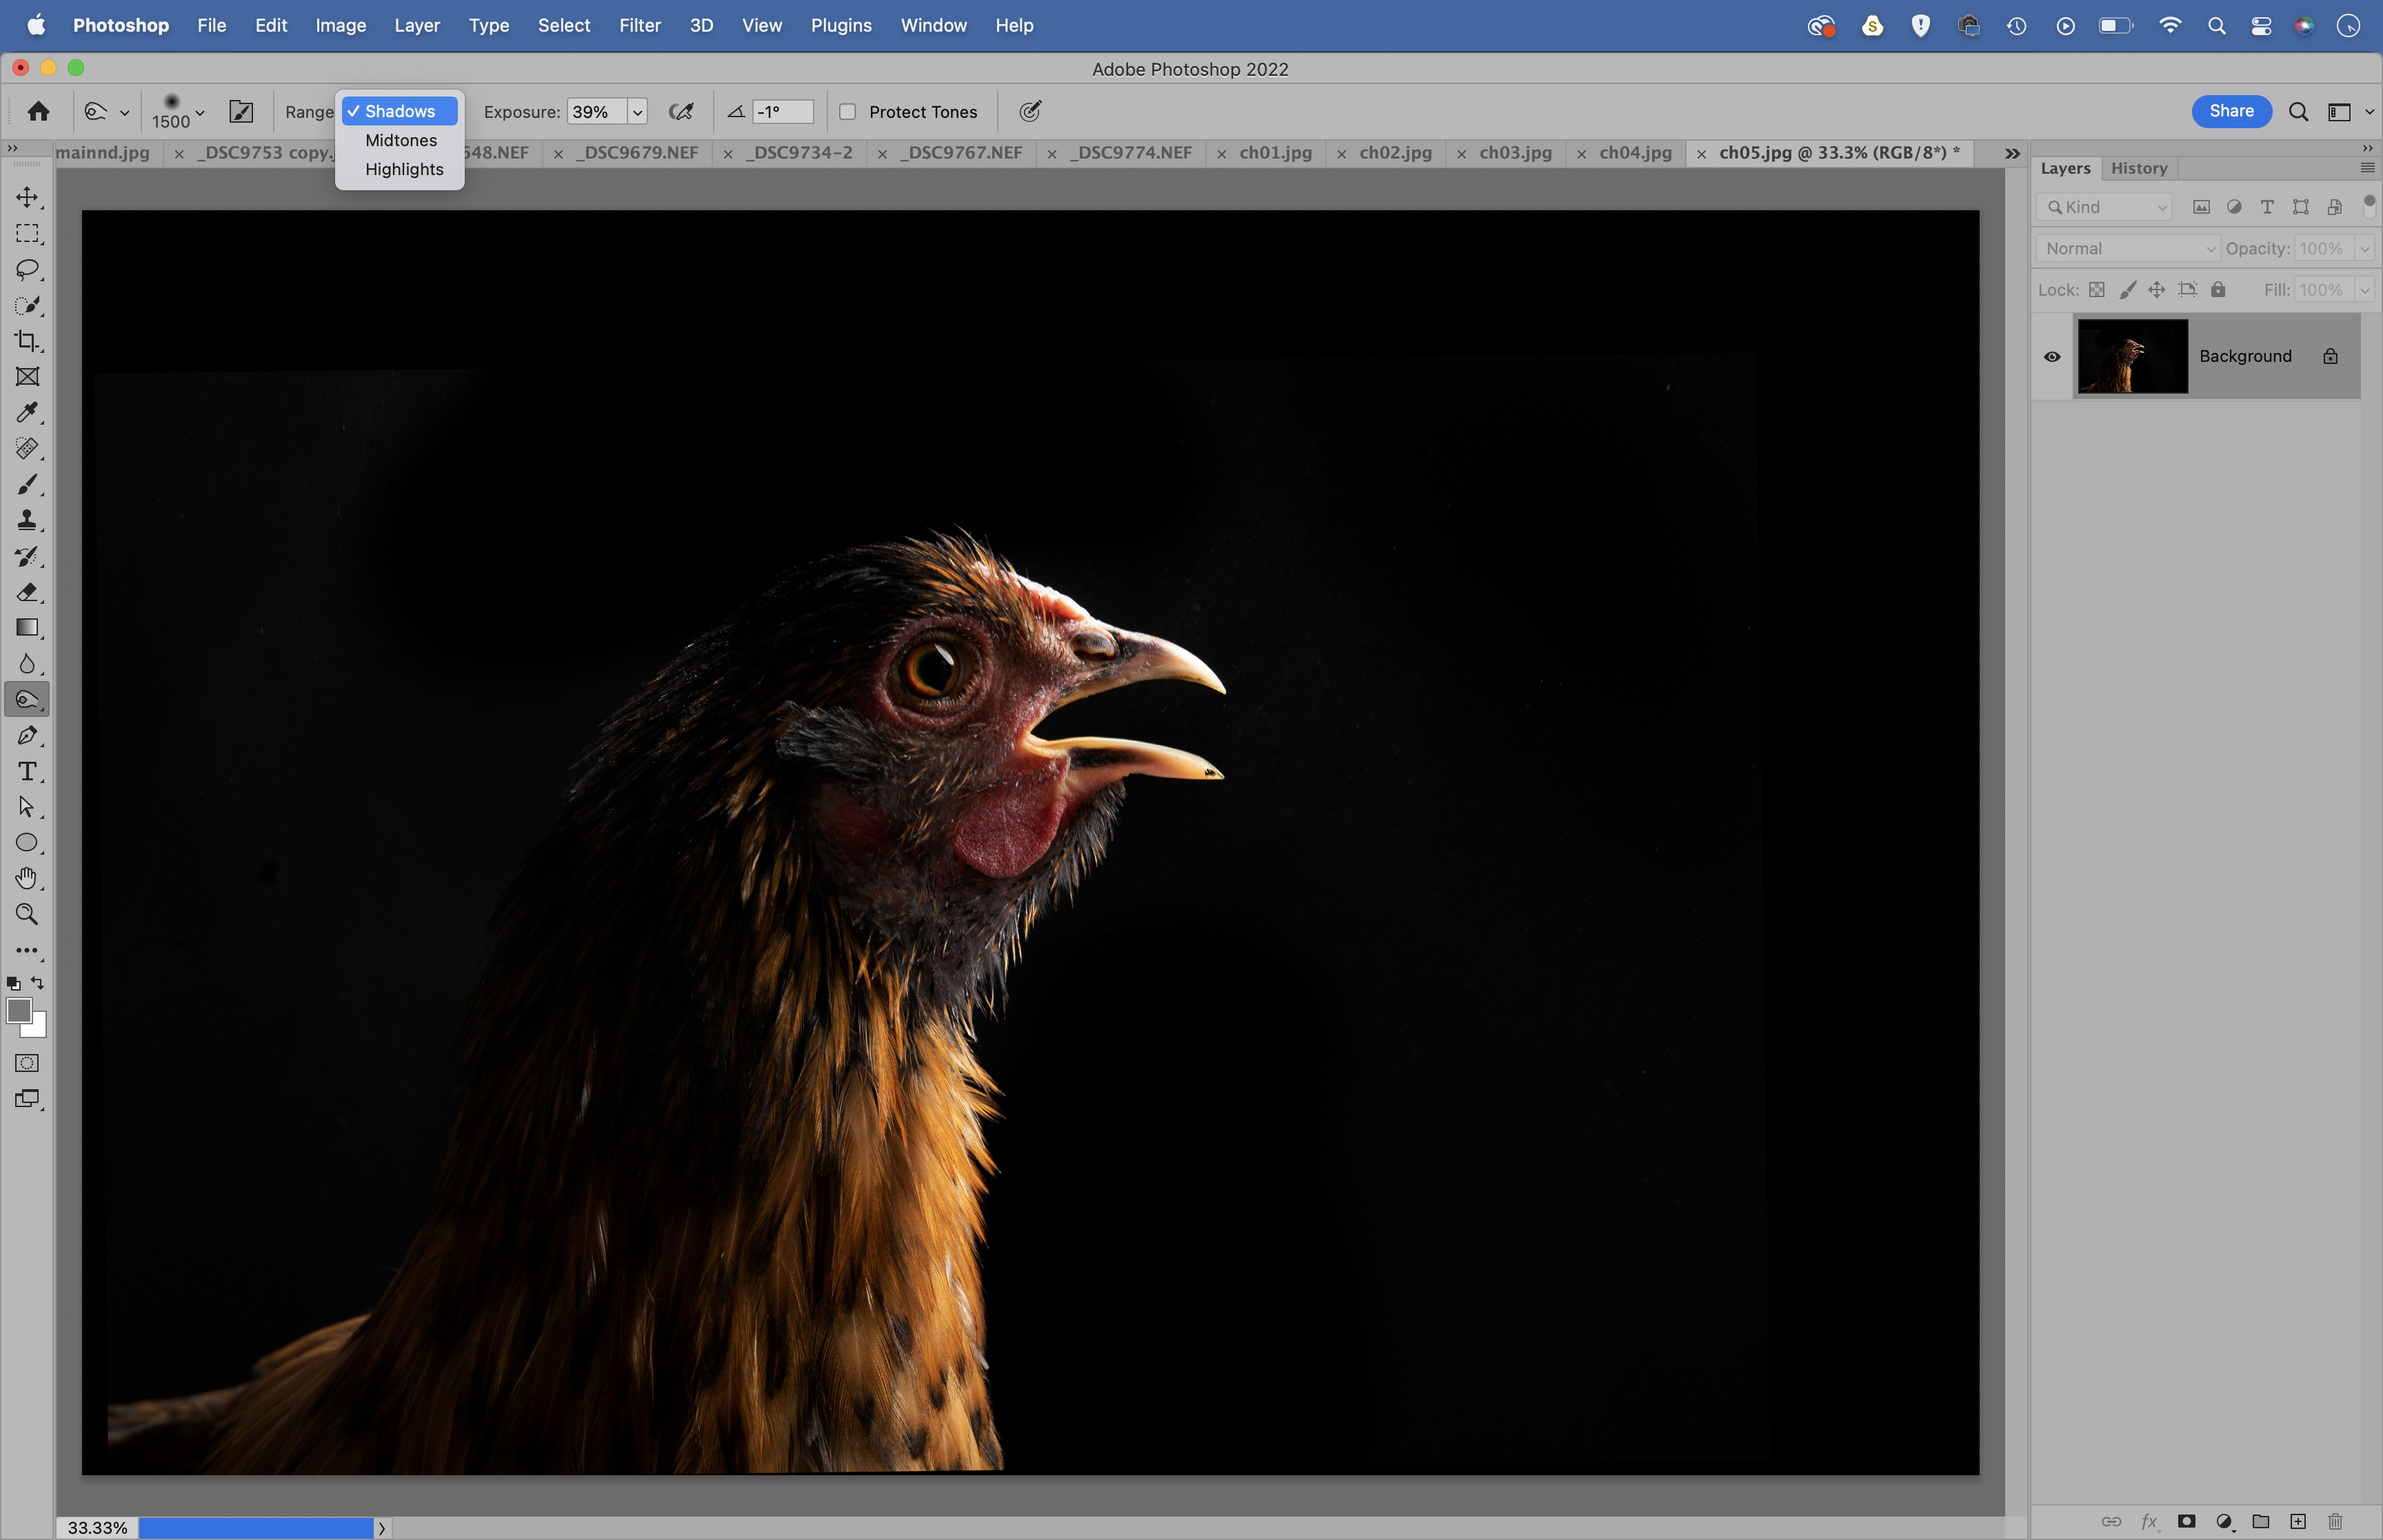
Open the images in Photoshop. Before combining them, it helps if everything outside of the face is completely black. Grab the Burn tool. In the options at the top, set Range to Shadows, strength 40%, then paint to darken areas to full black. If necessary, paint black with the Brush, too.
6. Blend the layers
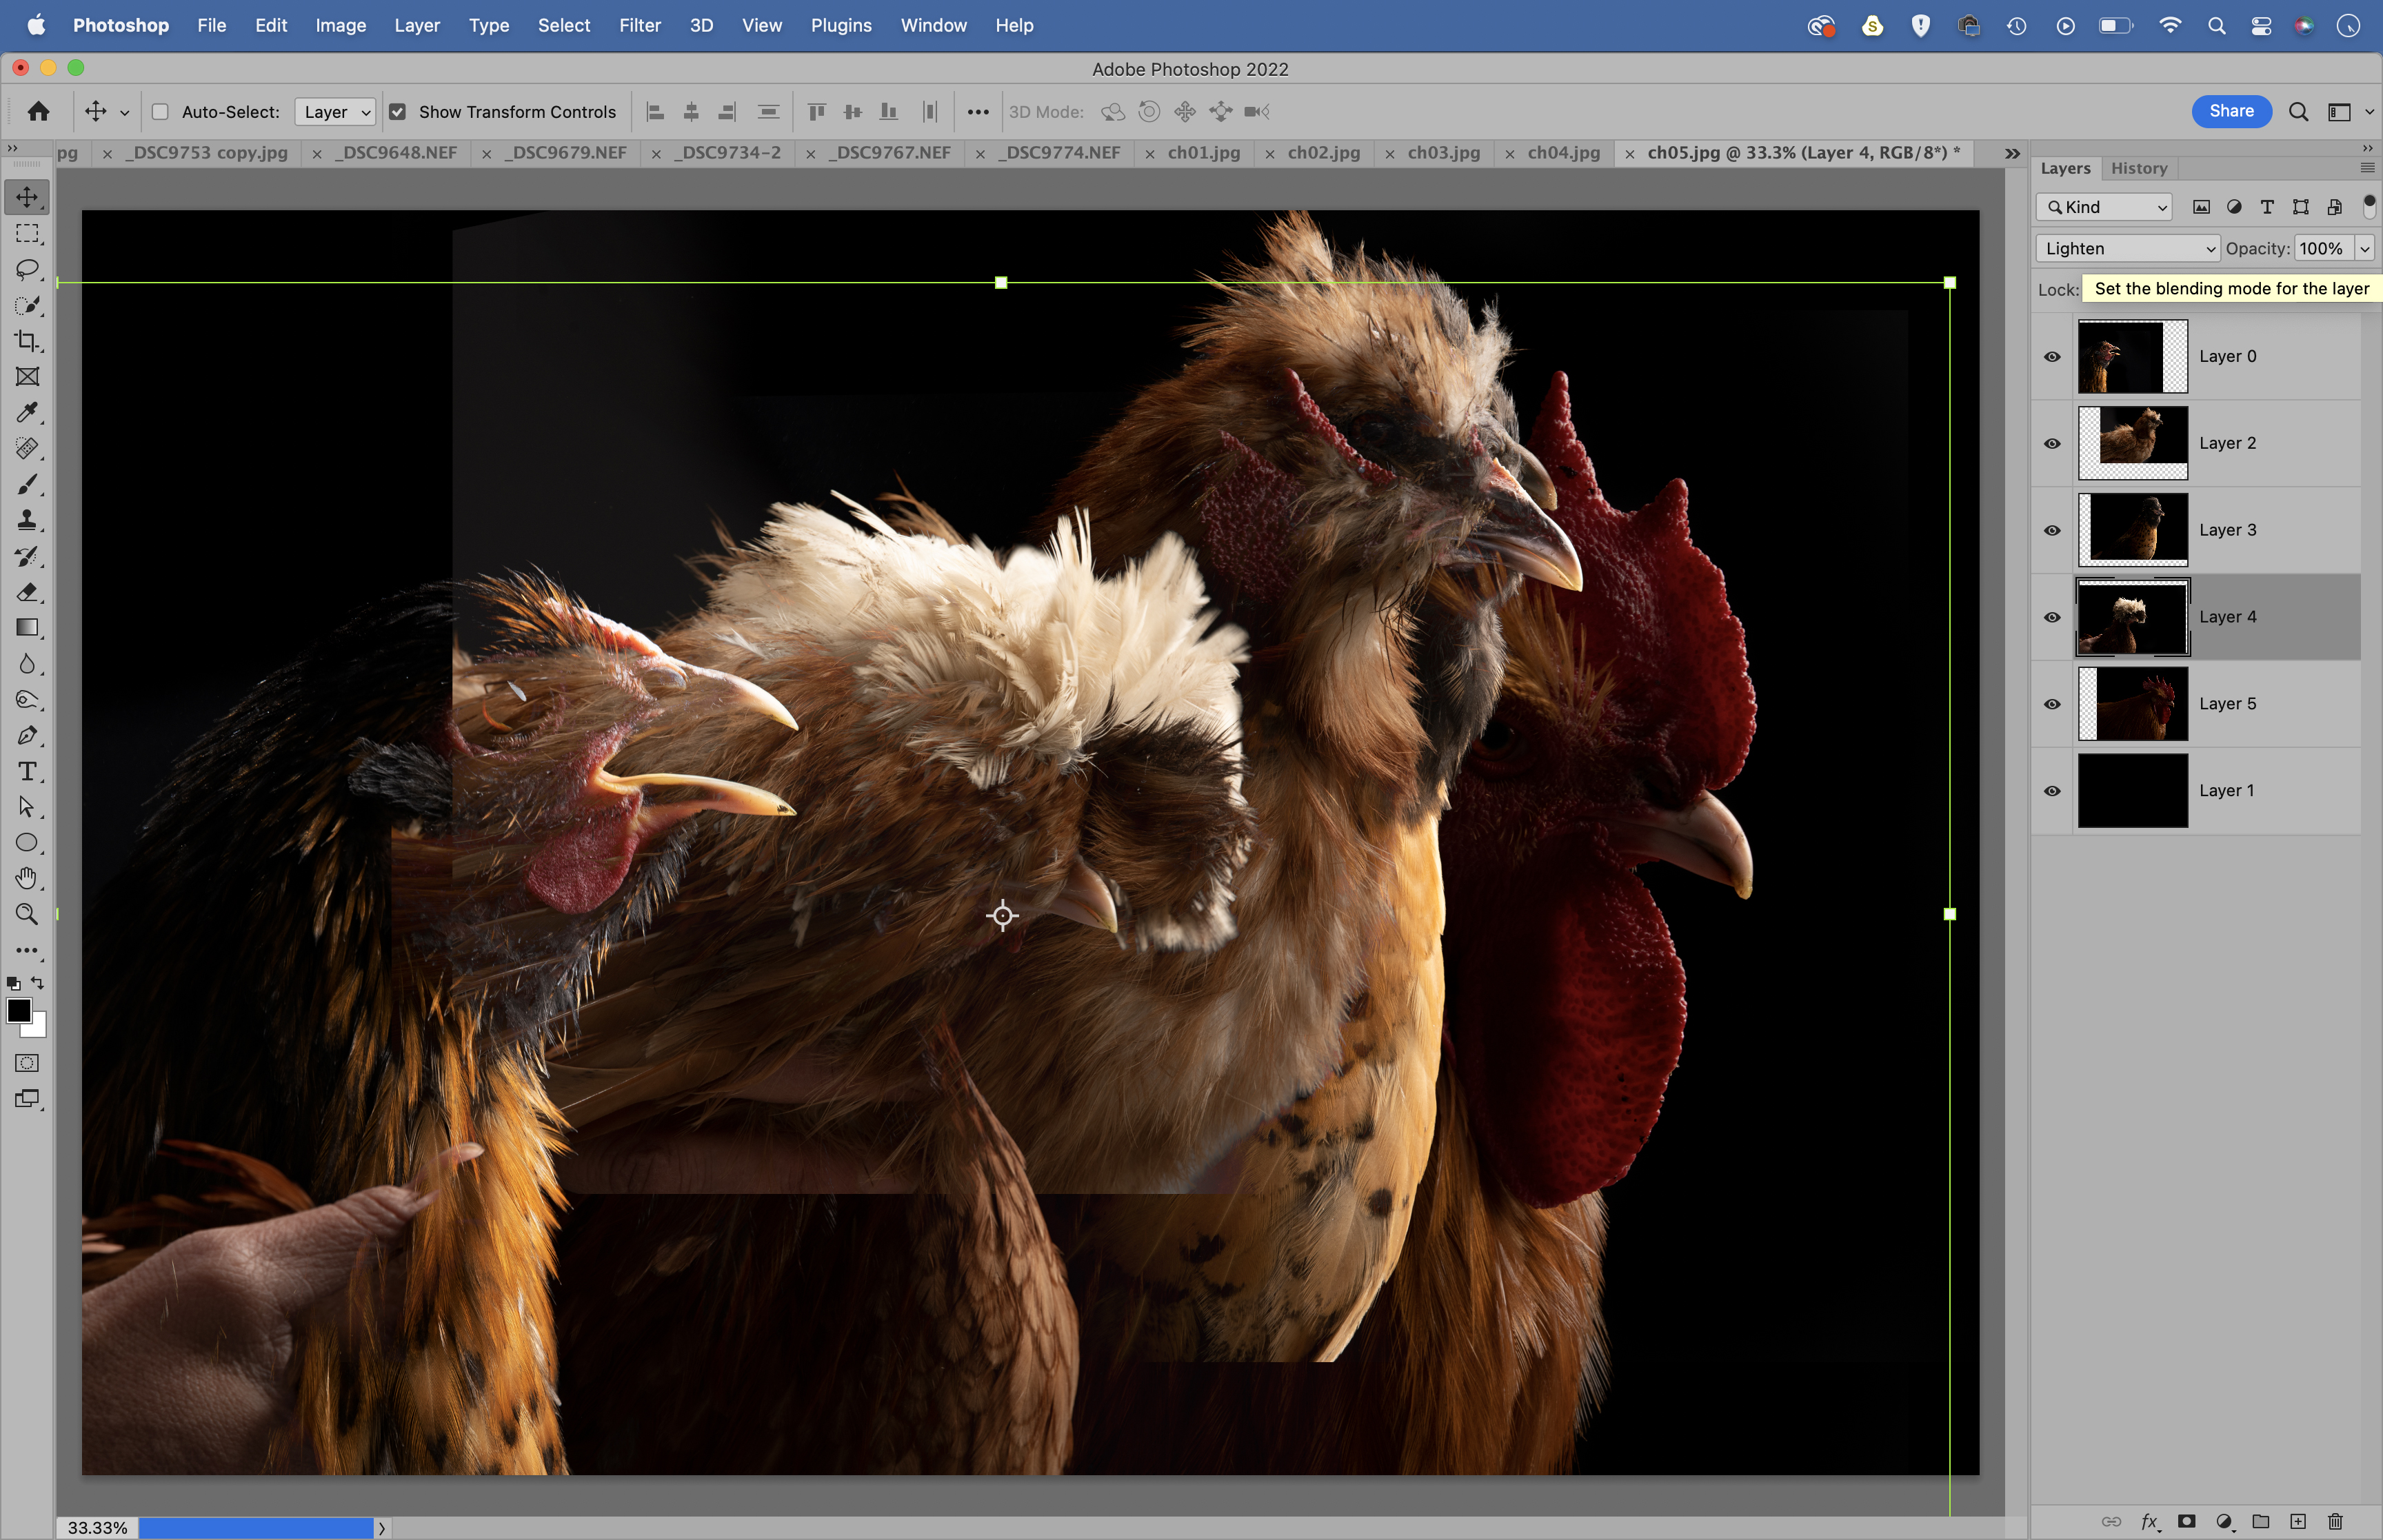
Choose one of the images. Make a new layer and fill with black, then drag it to the bottom. Copy and paste all the other photos into this one document, then Cmd/Ctrl + click to highlight all the layers in the Layers panel except the black one. Set the layer blending mode to Lighten.
07 Position and tone
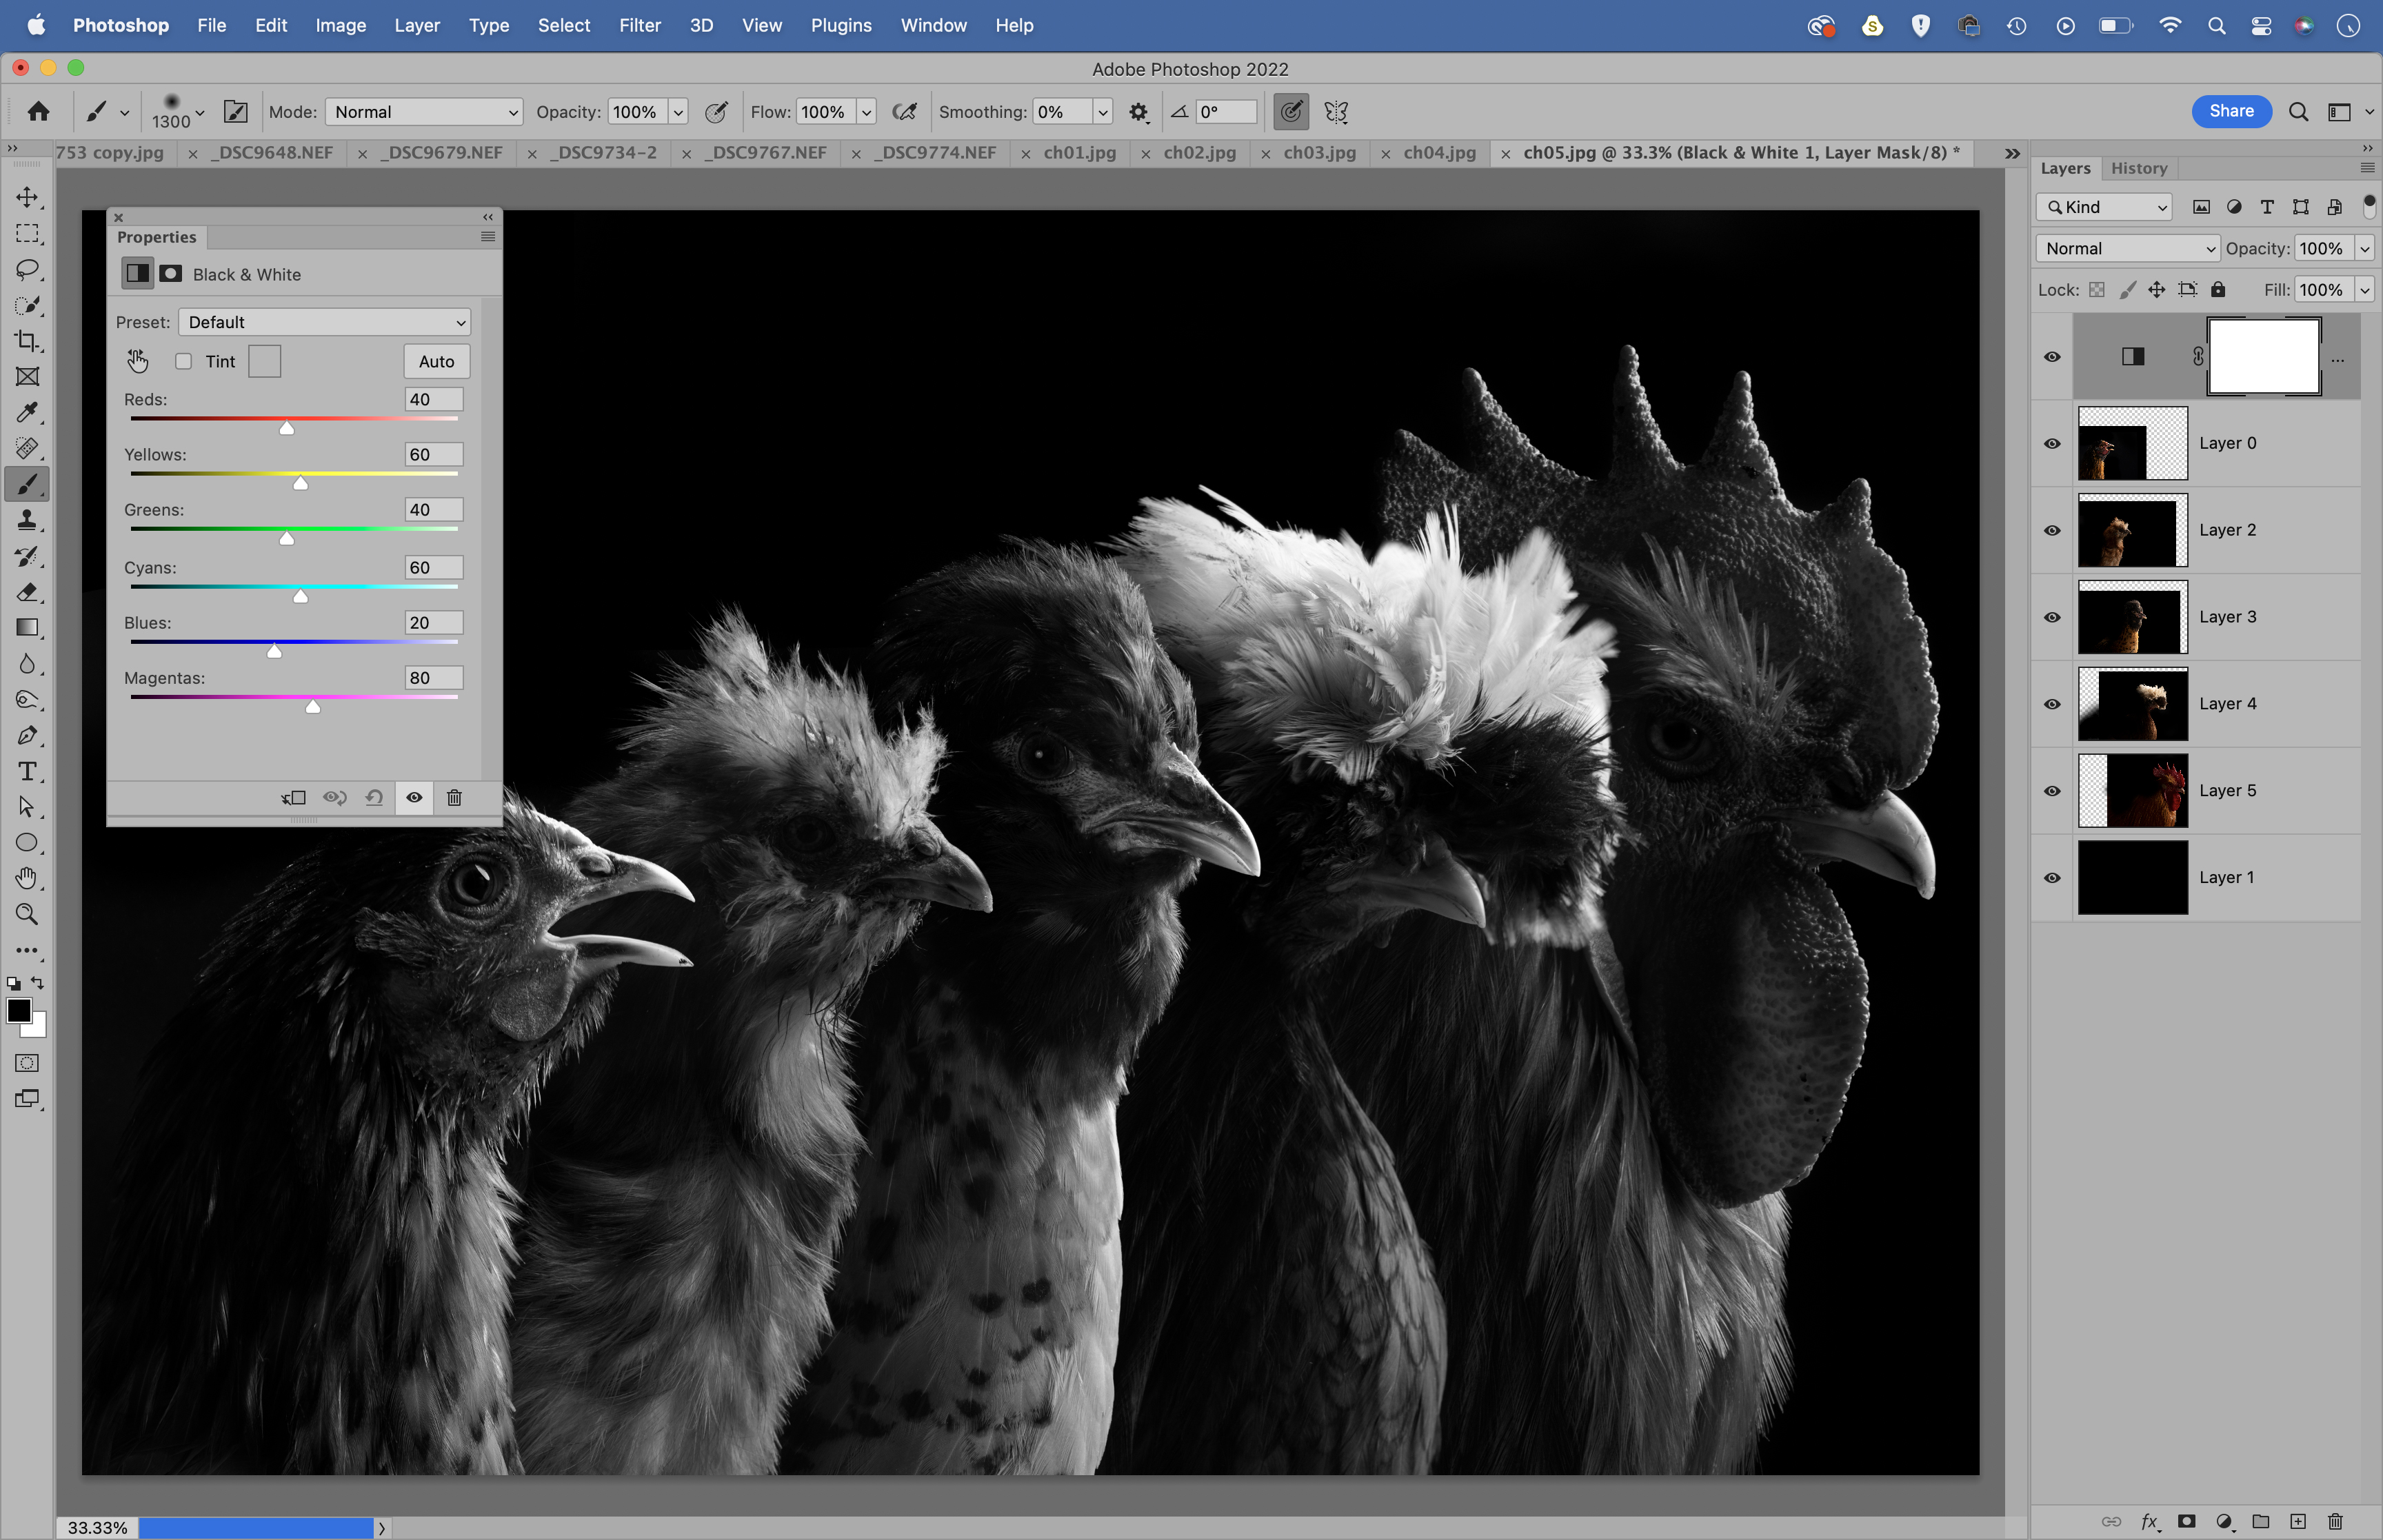
Use the Move tool to position each face neatly in a row. Grab the Brush tool, set the color to black, and paint to darken down any areas in one layer that encroach on the detail in another. Once done, make any tonal changes you like to finish off – we converted to black and white.
PhotoPlus: The Canon Magazine is the world's only monthly newsstand title that's 100% devoted to Canon, so you can be sure the magazine is completely relevant to your system.
Read more:
Best cameras for portraits
Best portrait photography tips
Best photo editing software
Best photo-editing laptops
Get the Digital Camera World Newsletter
The best camera deals, reviews, product advice, and unmissable photography news, direct to your inbox!
The lead technique writer on Digital Camera Magazine, PhotoPlus: The Canon Magazine and N-Photo: The Nikon Magazine, James is a fantastic general practice photographer with an enviable array of skills across every genre of photography.
Whether it's flash photography techniques like stroboscopic portraits, astrophotography projects like photographing the Northern Lights, or turning sound into art by making paint dance on a set of speakers, James' tutorials and projects are as creative as they are enjoyable.
He's also a wizard at the dark arts of Photoshop, Lightroom and Affinity Photo, and is capable of some genuine black magic in the digital darkroom, making him one of the leading authorities on photo editing software and techniques.


