Bring out hidden detail in your landscapes with Photoshop's Dehaze command
Add extra punch to low contrast scenes with the Dehaze command in Photoshop and Lightroom Classic CC
Watch video: Use the Dehaze command in Photoshop CC
As the name suggests, the Dehaze command reduces atmospheric haze in landscape images. Found within Lightroom Classic CC and Photoshop CC’s Camera Raw workspace, the command is a slider that not only lets you reduce the haze, but also allows you to go the other way and make your photos look more hazy.
• The best Adobe Photography Plan deals for Photoshop CC and Lightroom
Of course, the effect isn’t a magical trick that actually eradicates haziness. Instead, it works by applying a boost in contrast and sharpness to a specific part of the tonal range – the part that usually correlates with hazy highlights in landscapes. As such, we can exploit the effect not just for hazy scenes, but also for other types of shots where we might want to use the boost in contrast and detail in other, equally effective ways.
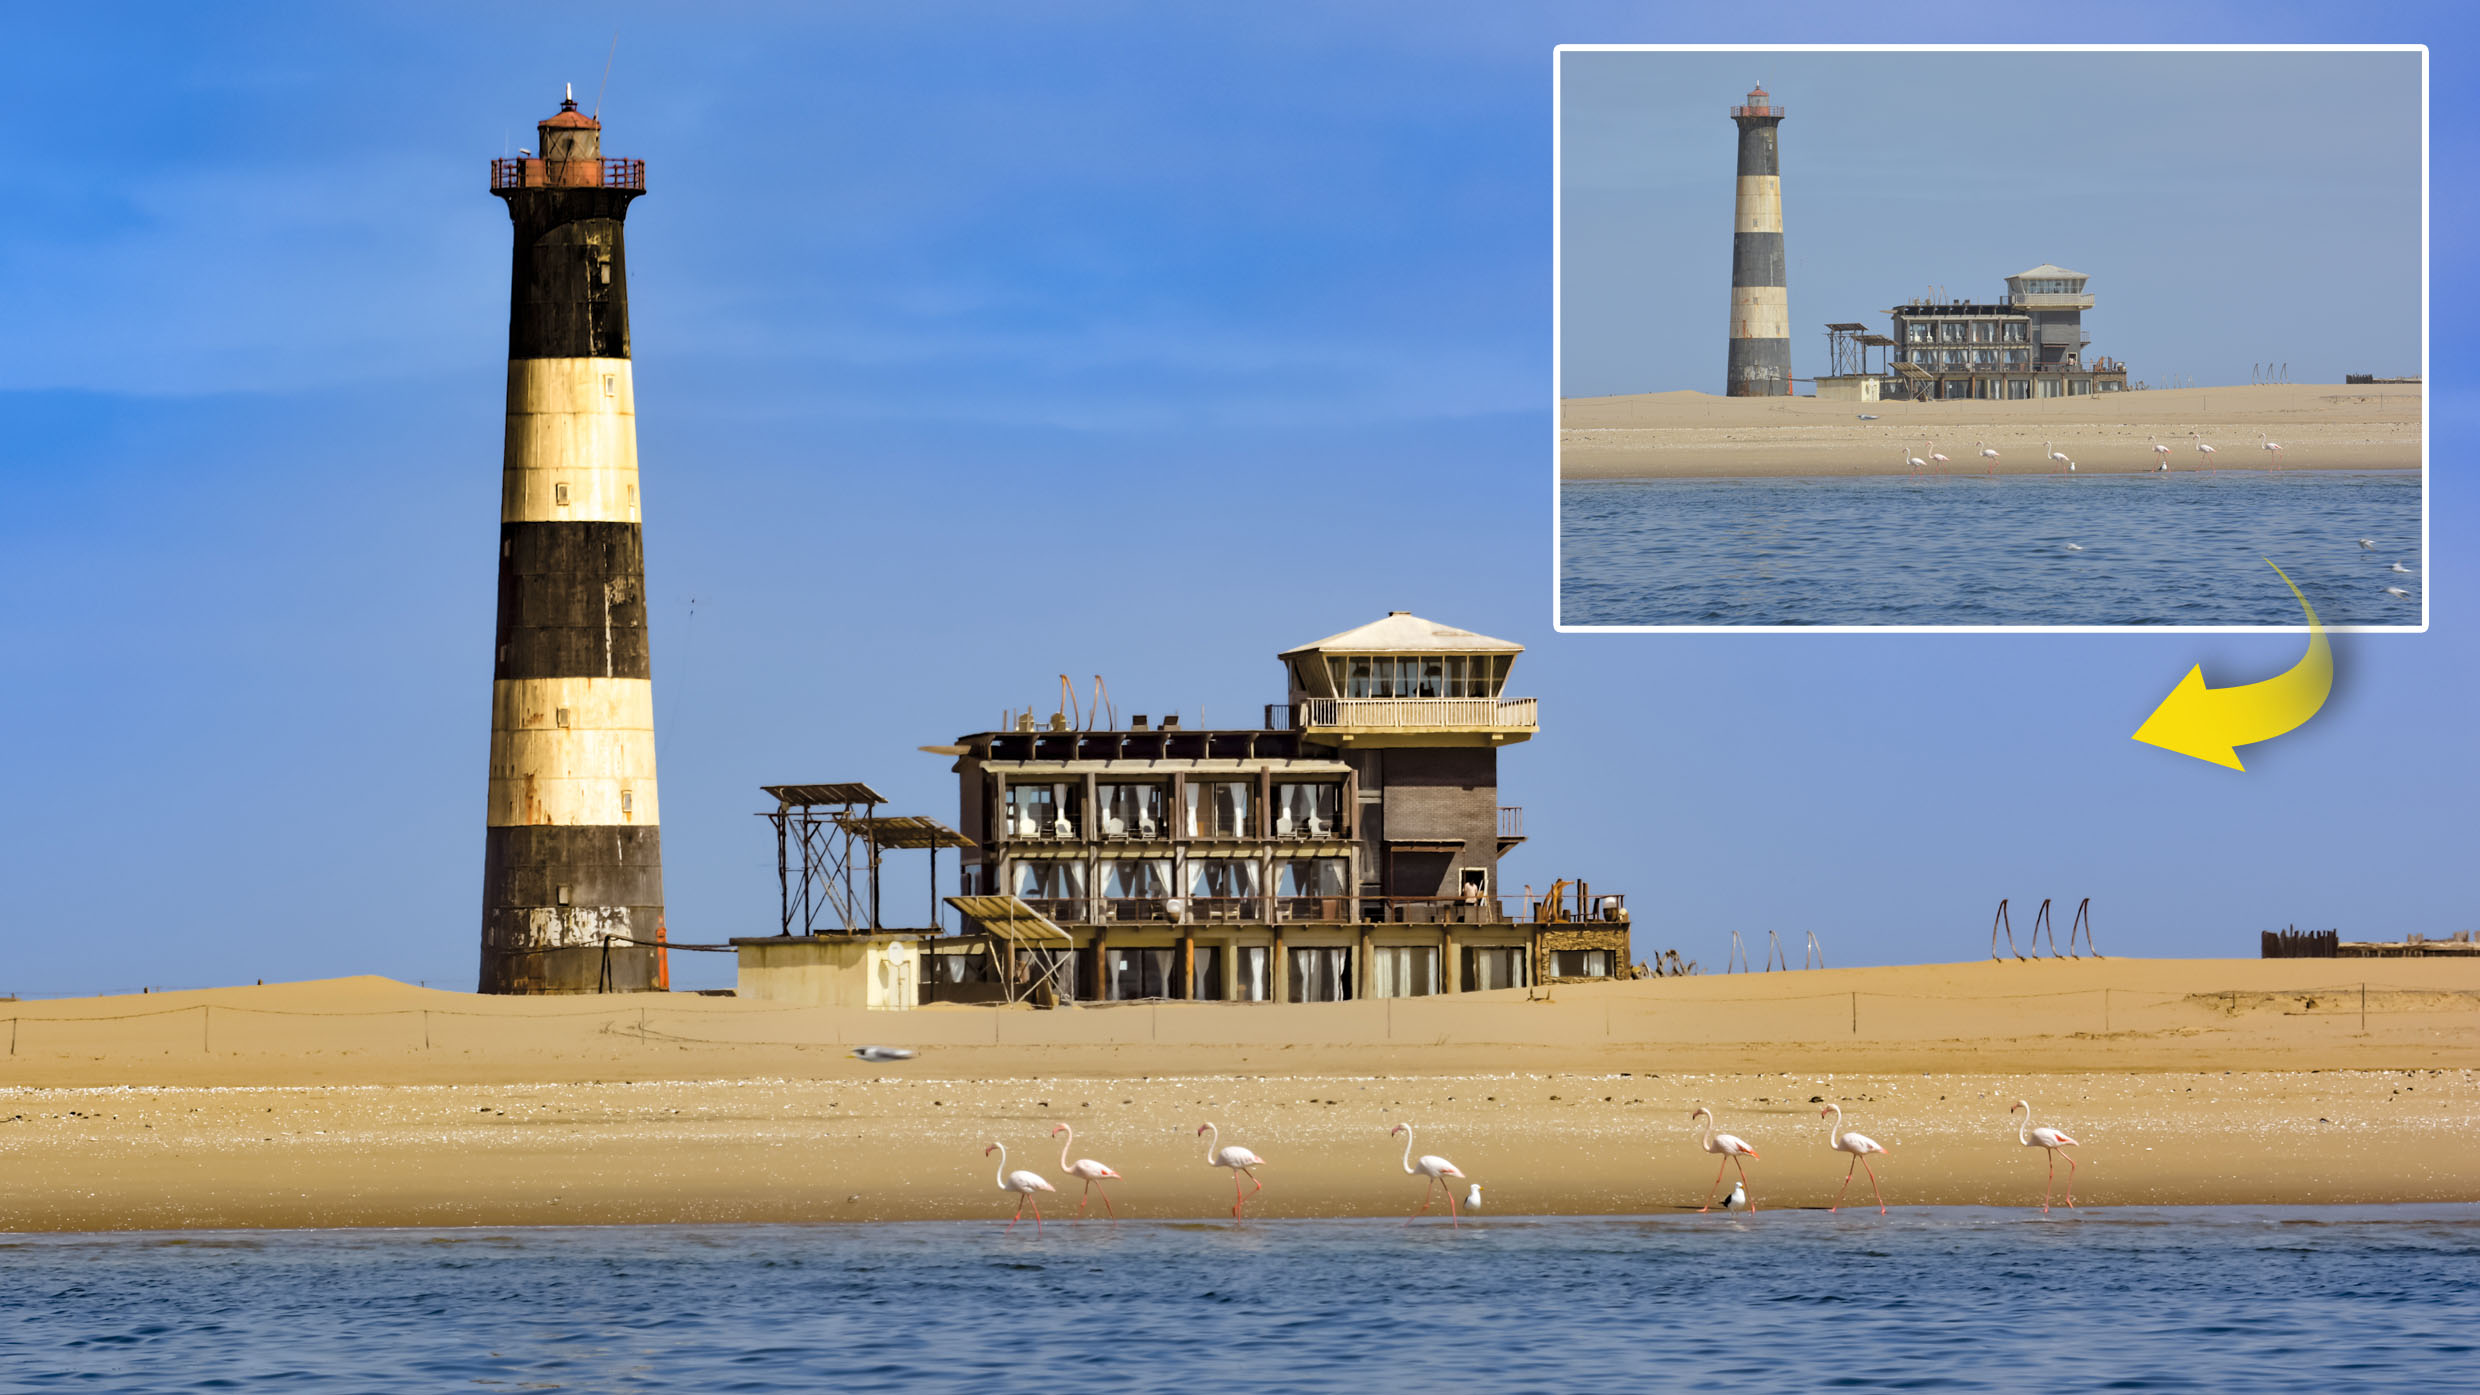
Take, for example, the landscape here. Boosting Dehaze has a wonderful effect on the sky, resulting in a richness of color entirely lacking in the straight-out-of-camera photograph. Dehaze can work exceptionally well on cloud details in skies, teasing out cloud shapes and intensifying colors.
In fact, it can help to boost faded tones in all kinds of photos, not just landscapes. However, it can also produce some unwanted side effects, like deep shadows or color casts. So it might be necessary to tweak settings after to restore balance to the tones. Let’s see how it’s done…
01 Open in Camera Raw
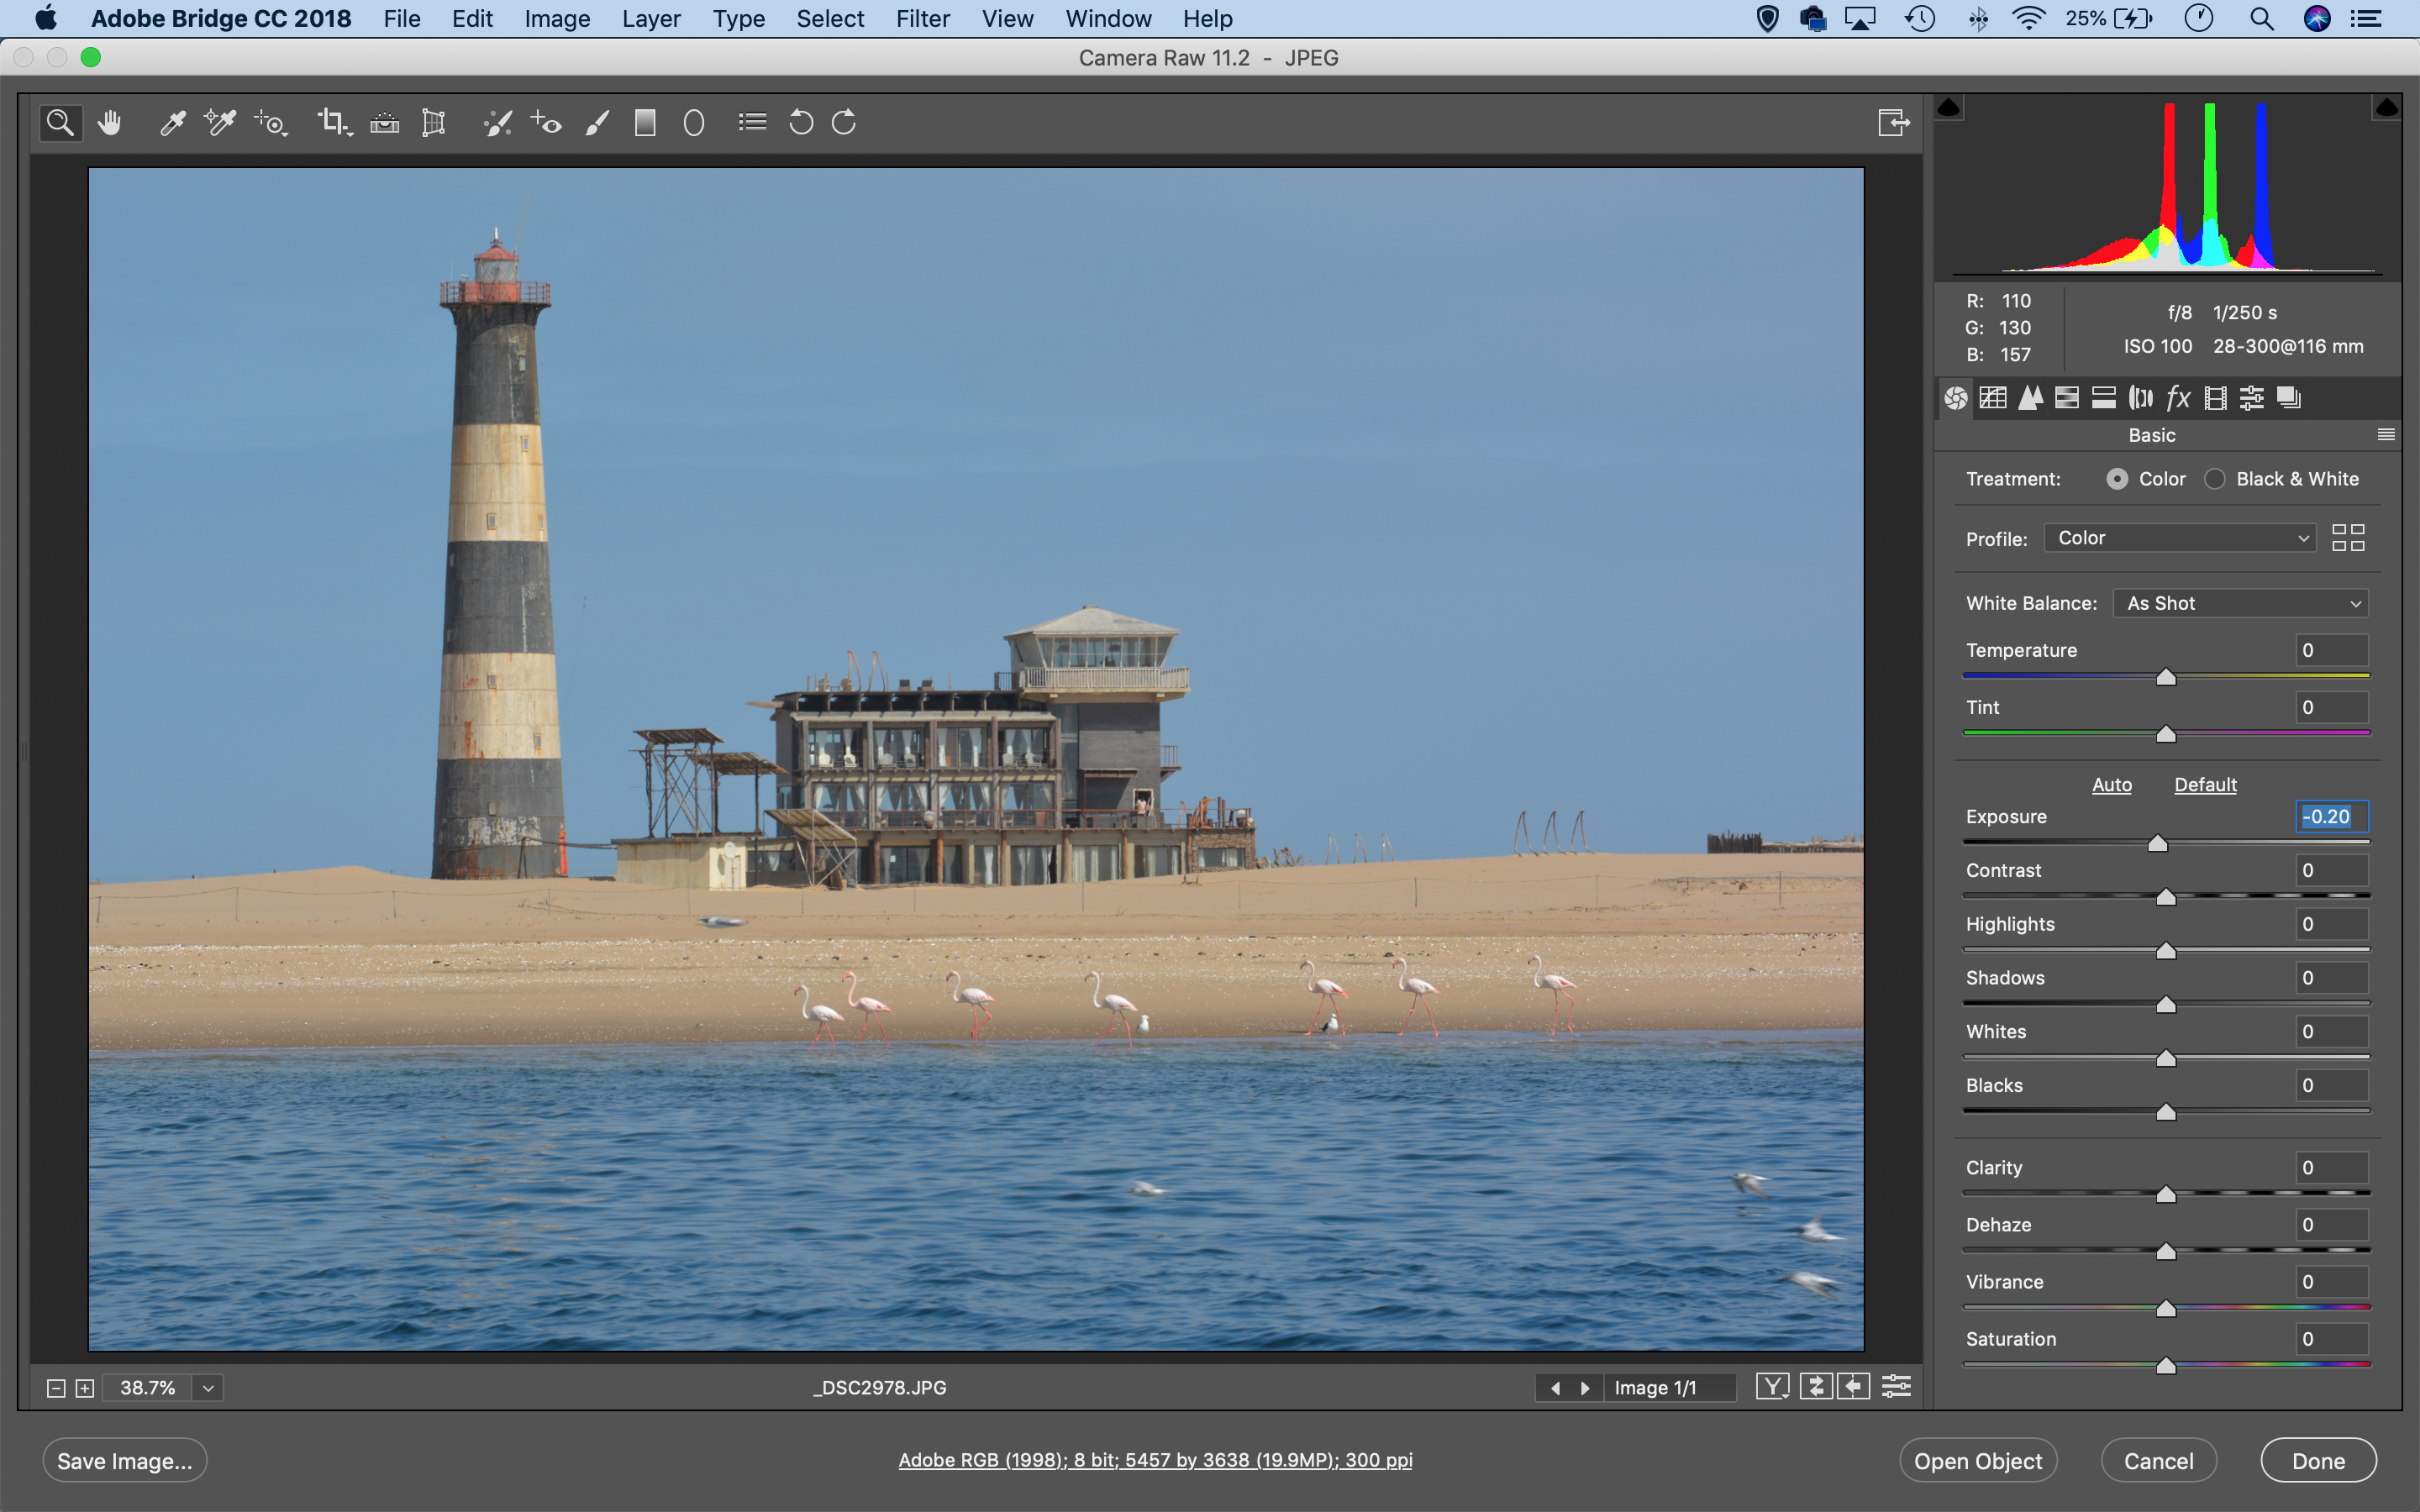
Download the start image here and open it into Adobe Bridge then right-click it and ‘Open in Camera Raw’ (this can be done for Raw and JPEGs). Begin by making initial adjustments to the image using the tonal sliders in the Basic panel. Here we’ve lowered exposure slightly to -0.20.
02 Dehaze the photo
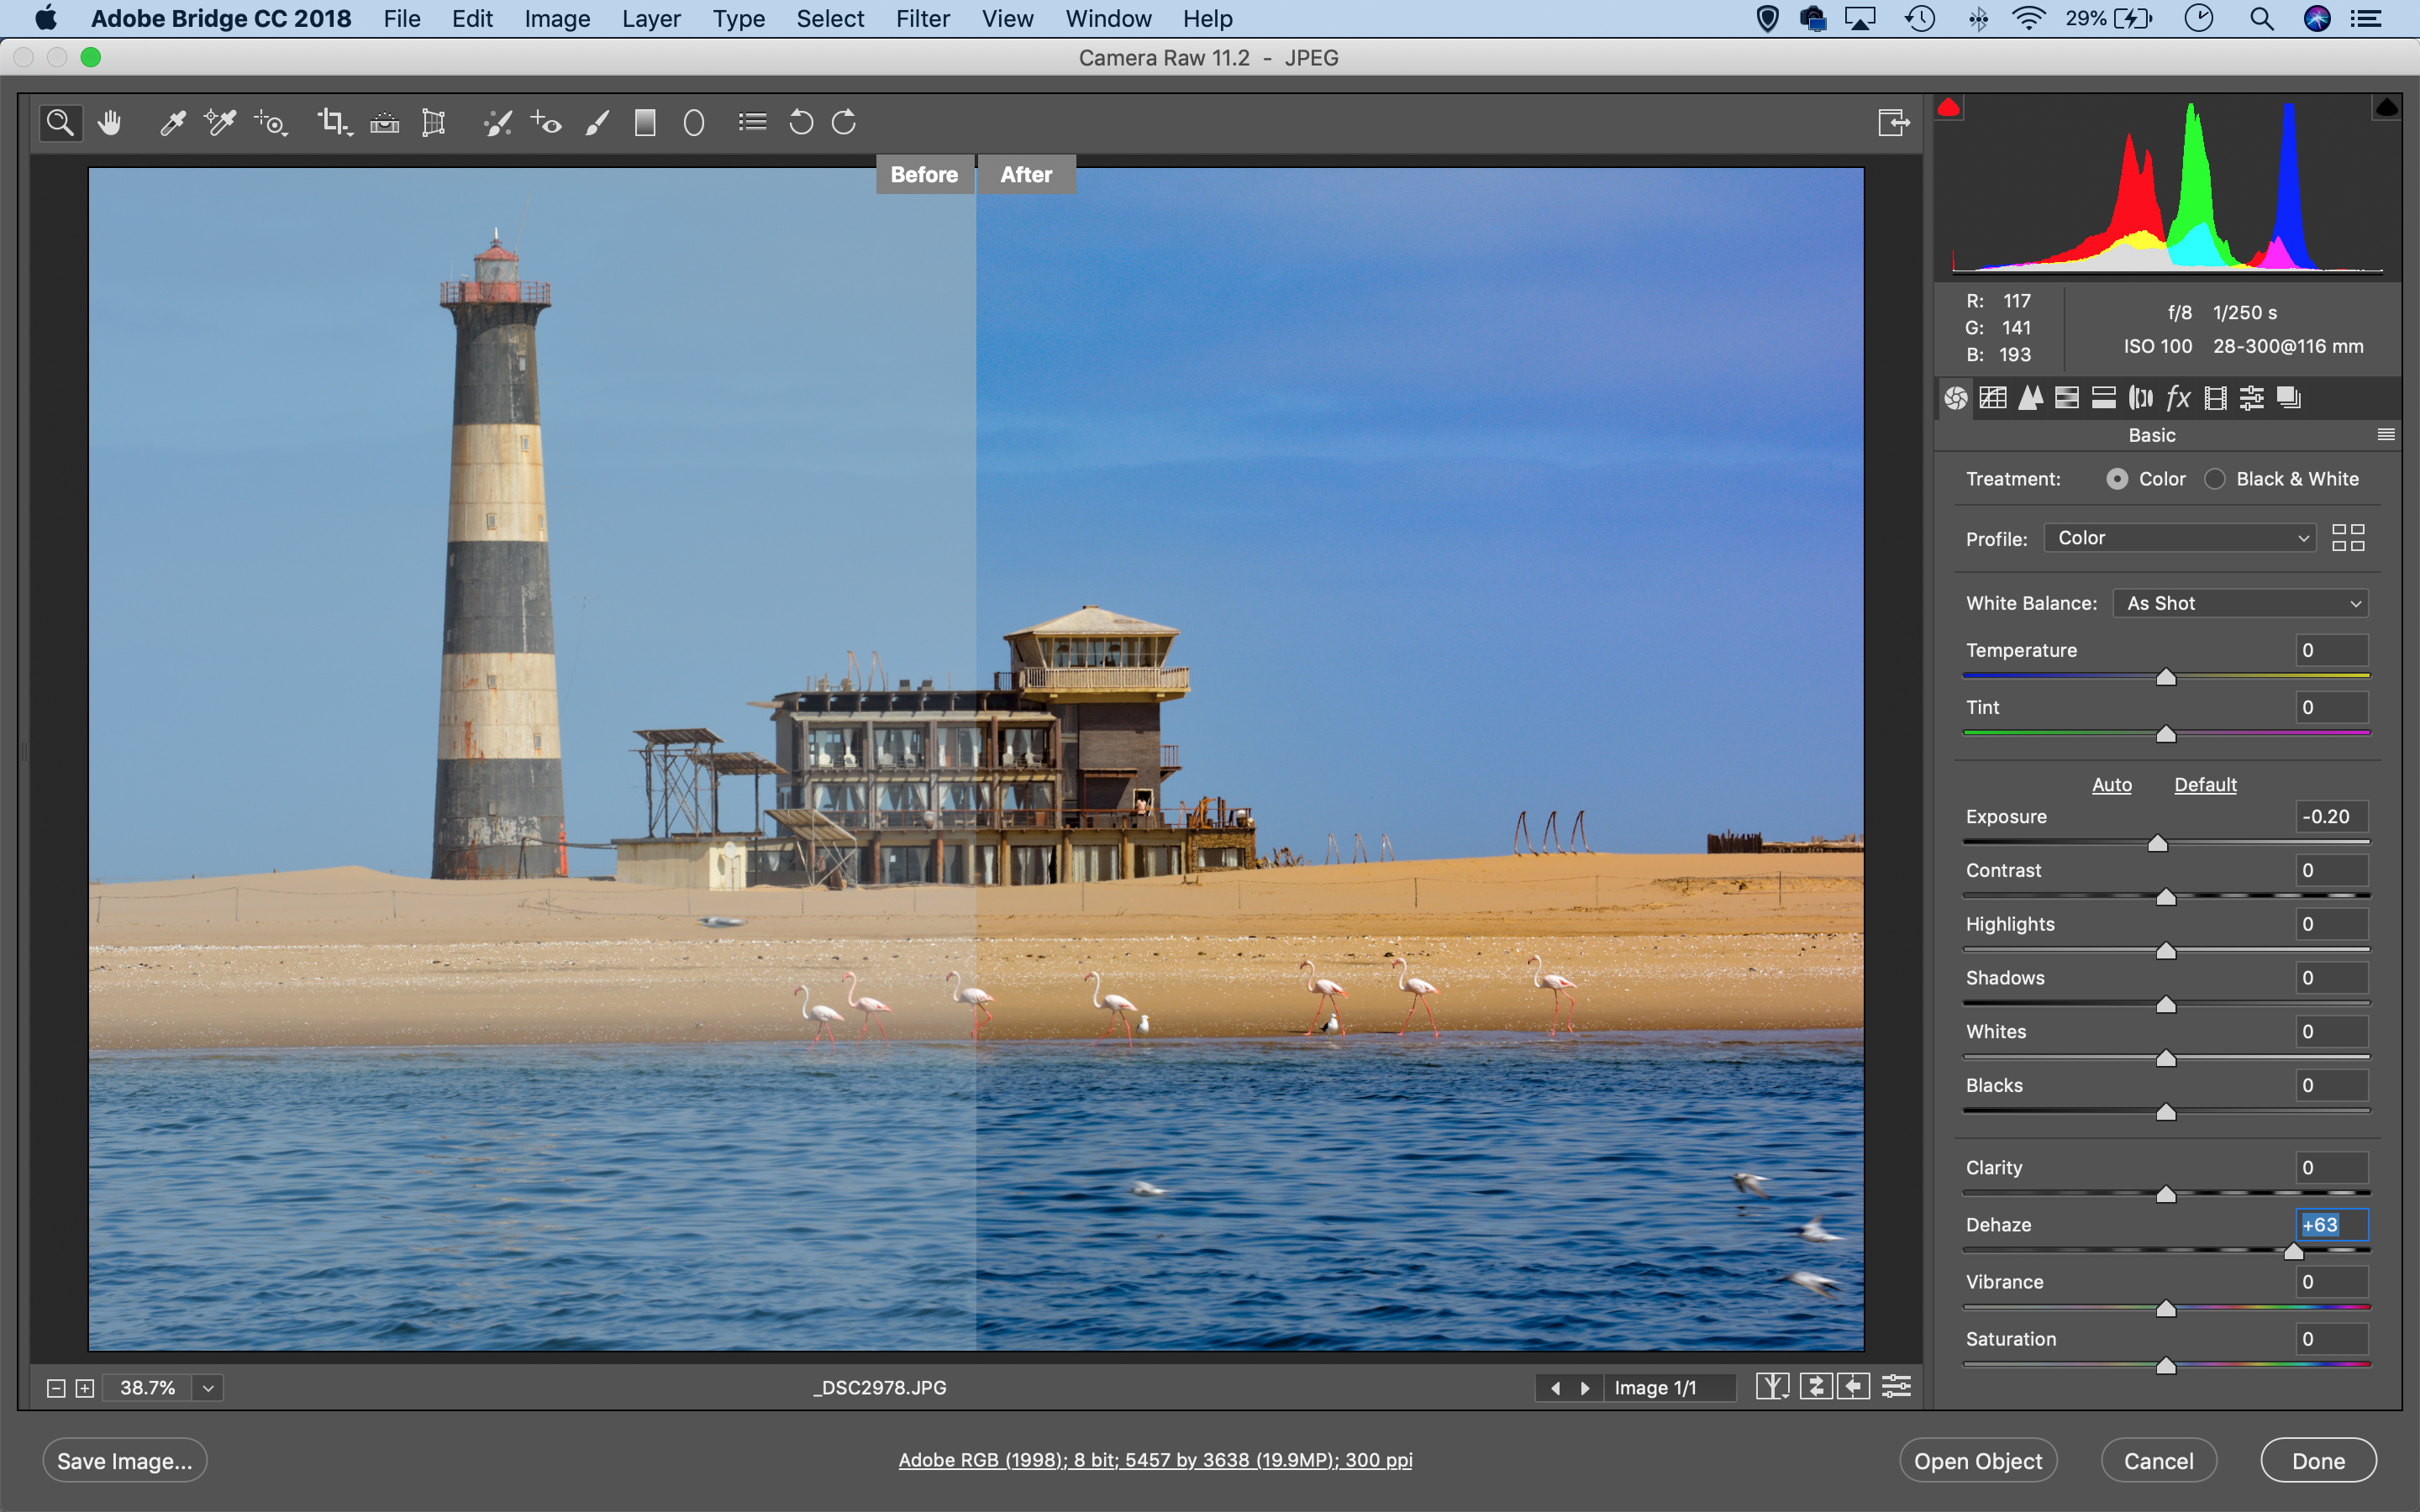
Go to the Dehaze slider in the Basic panel to the right and increase it to add punch to the image. Here it also draws extra colour and saturation out of the blue sky. To help judge the effect, toggle on a before/after view by clicking the split-screen icon at the bottom right.
03 Reduce colour casts
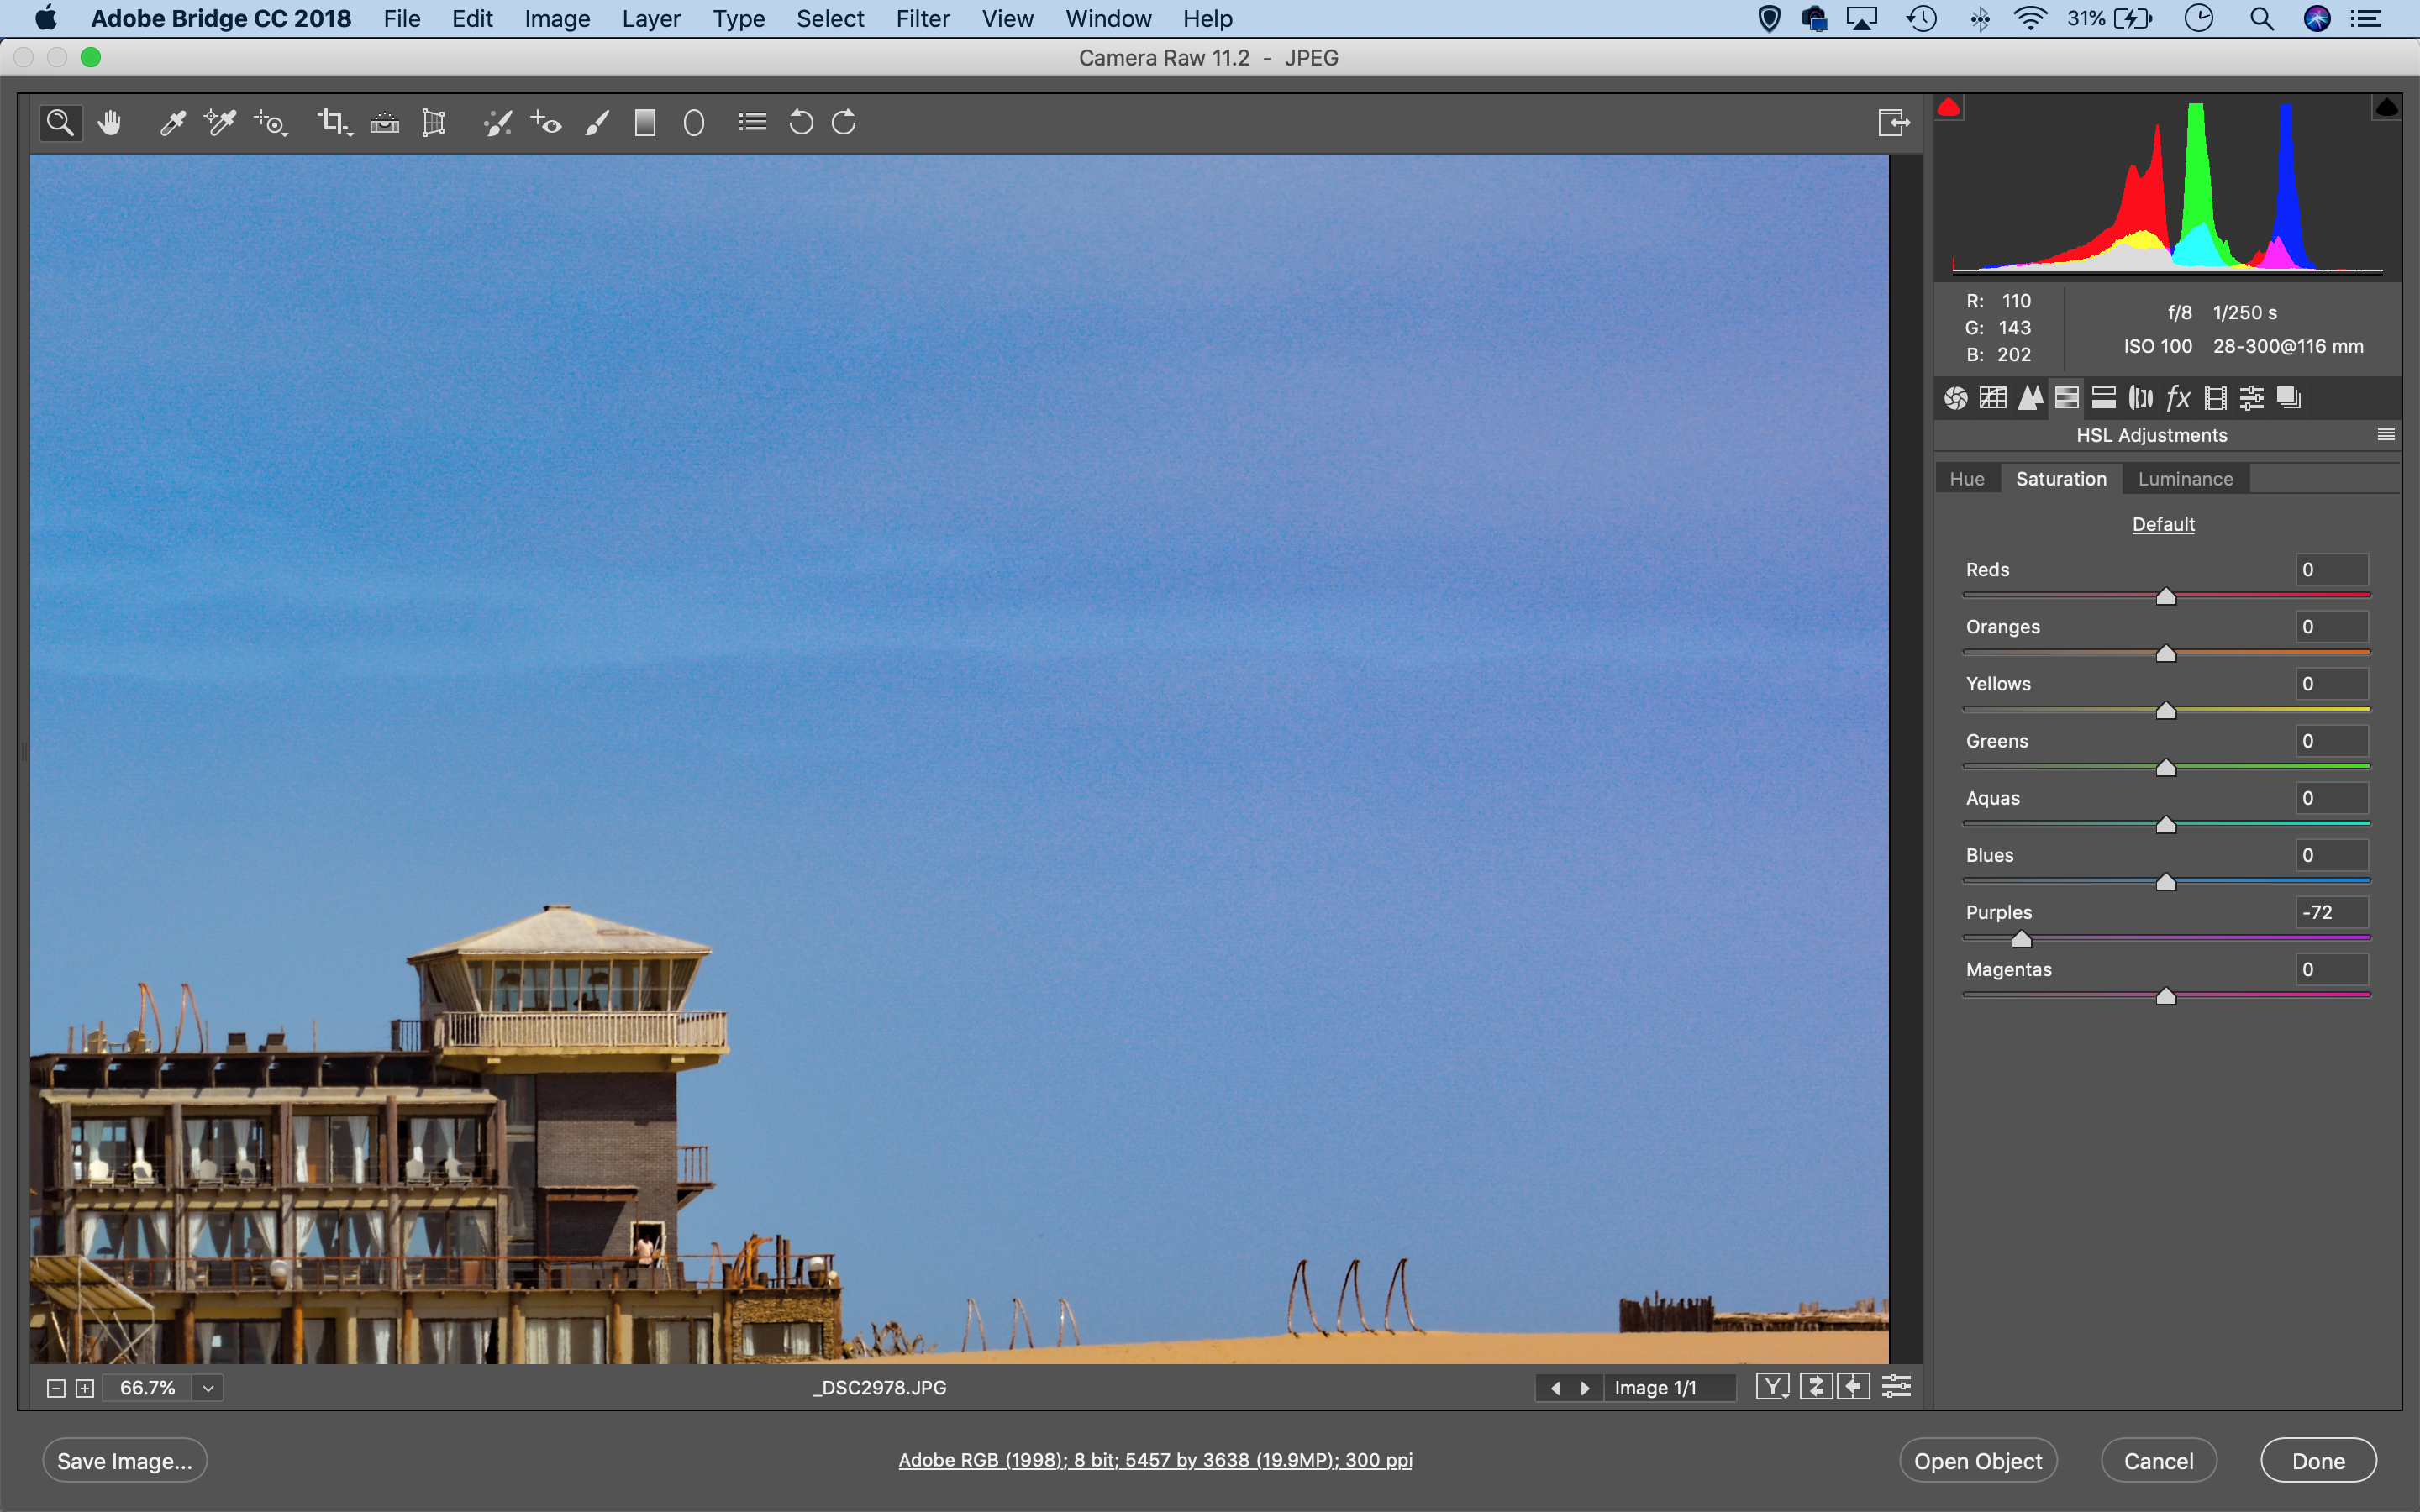
A strong Dehaze boost can result in unwanted colour shifts – here it’s resulted in a slight purple cast across the clouds on the right. To counter it, head to the HSL panel. Click on the Saturation tab, then drag the Purples slider down to reduce the colour shift.
04 Add a grad
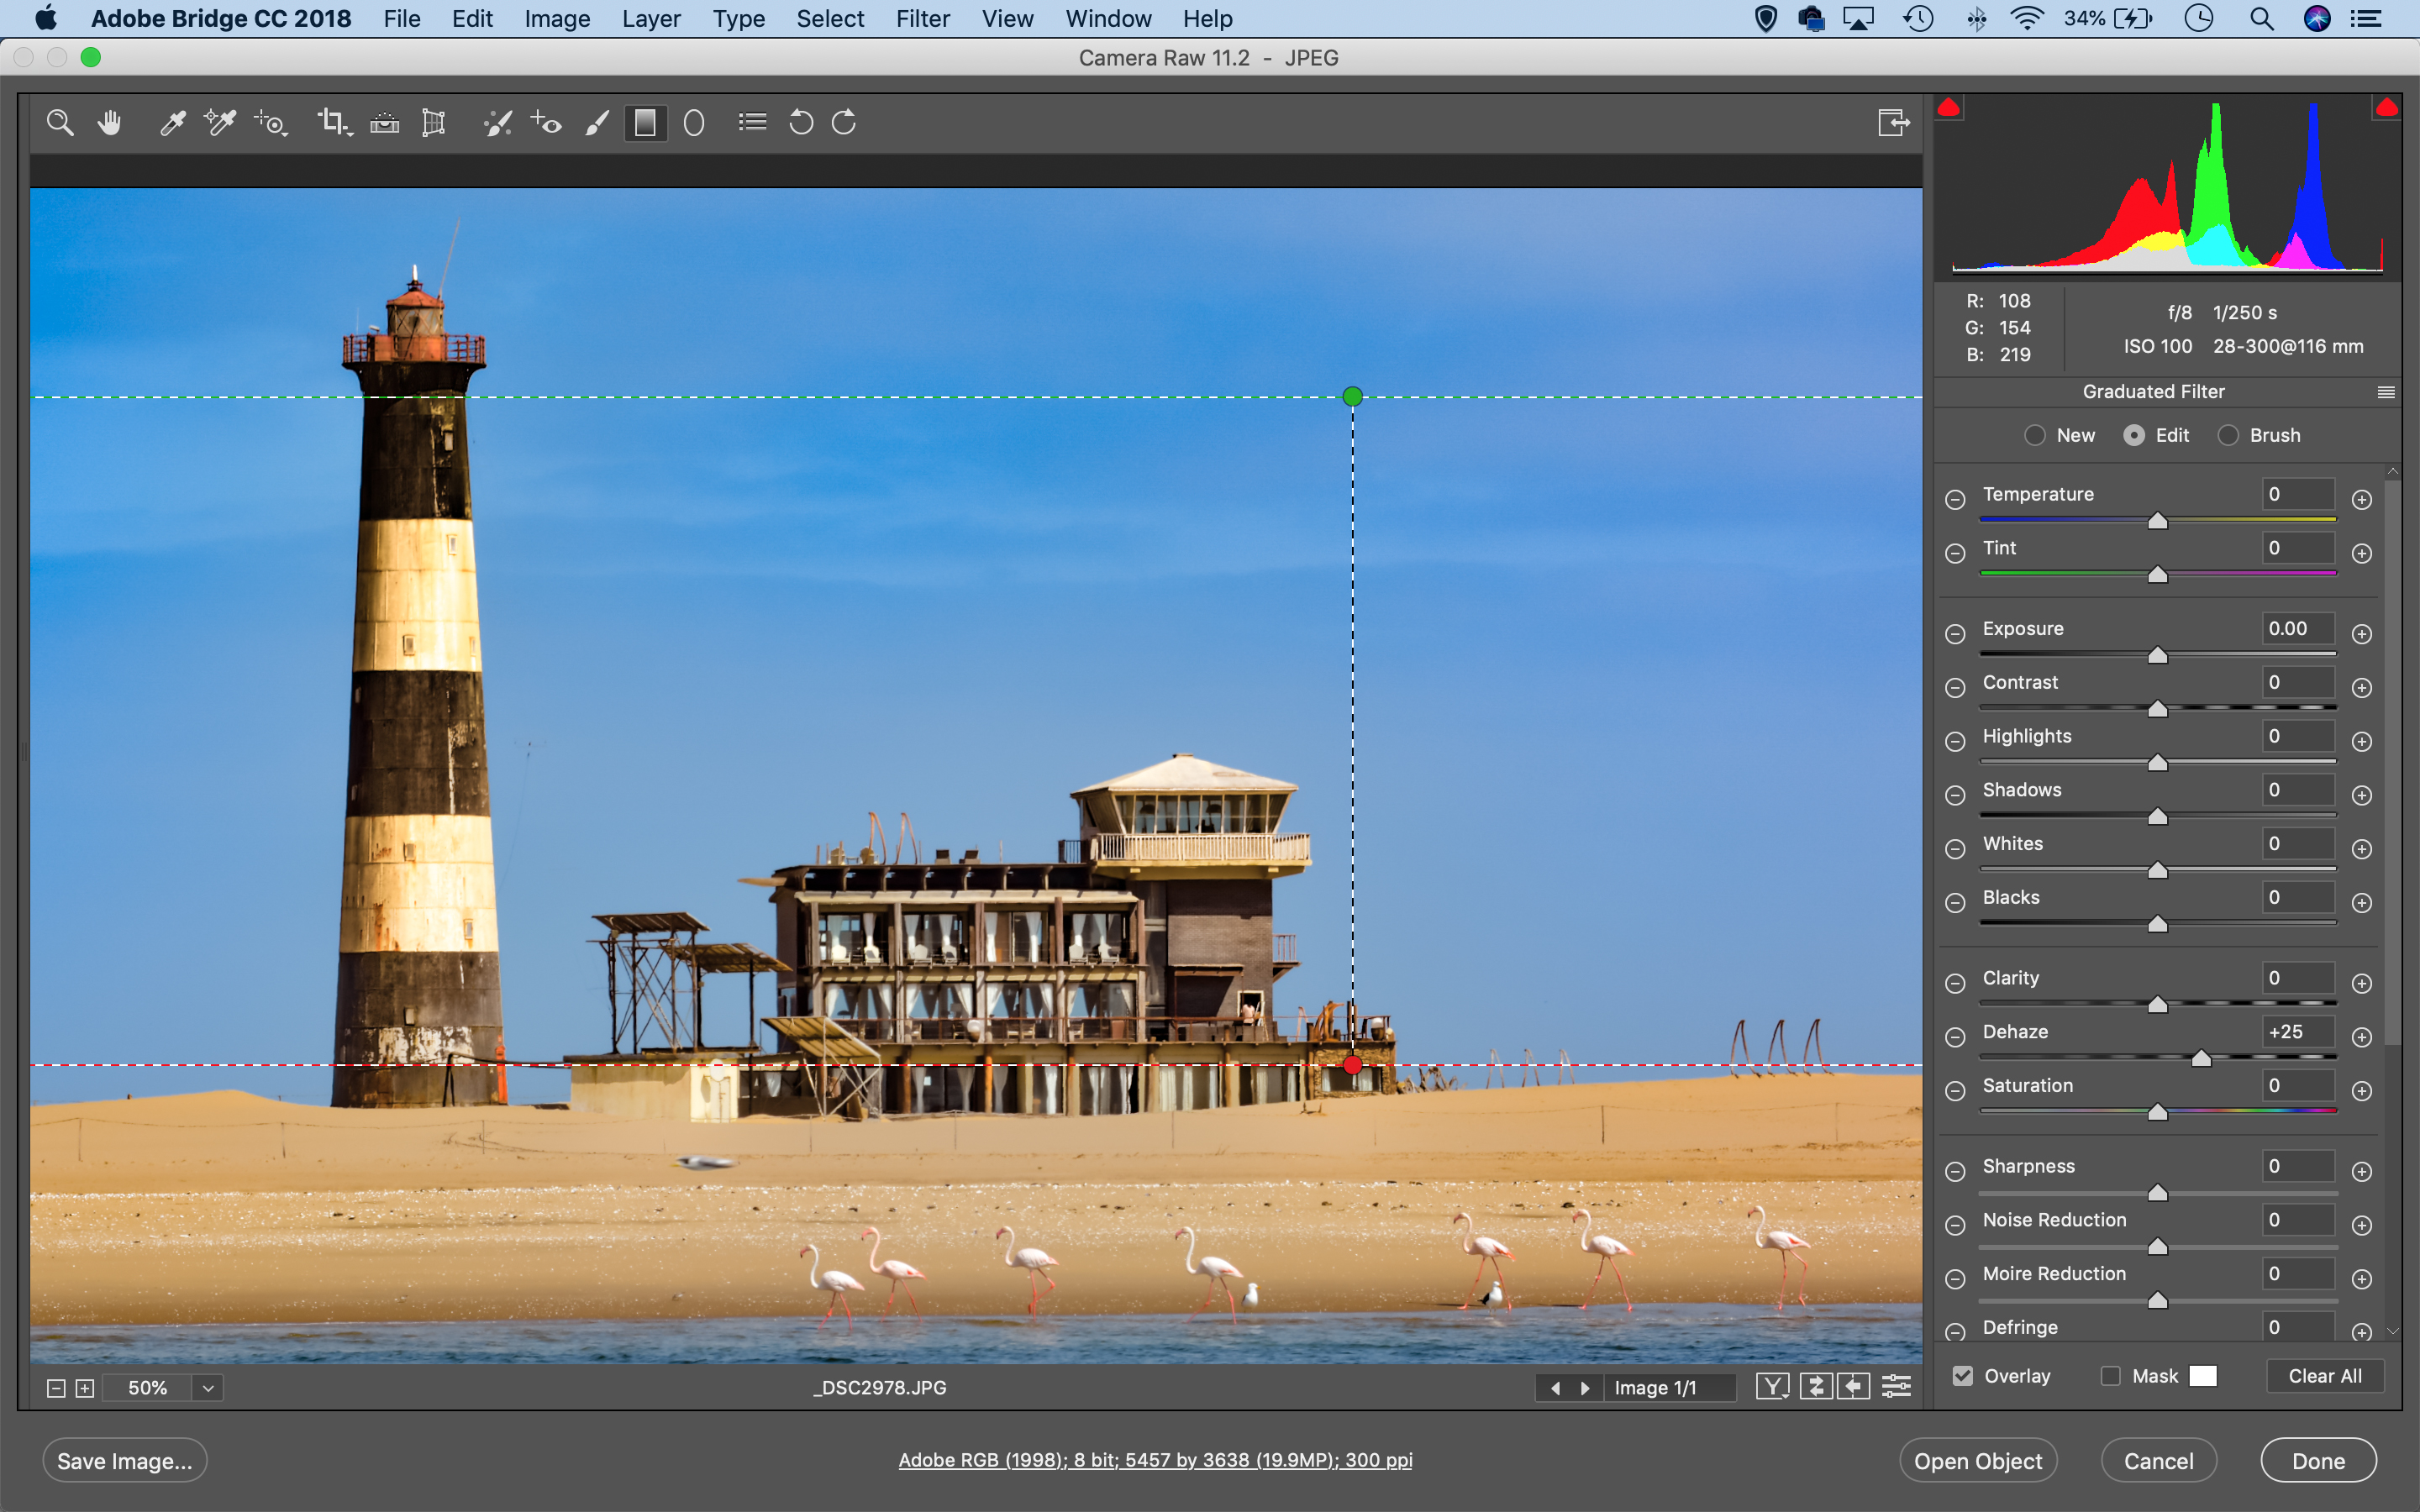
We can apply Dehaze with the Graduated Filter tool. Grab it from the toolbar then click the plus icon next to Dehaze to load the tool with an adjustment. Hold Shift and drag downwards from the top of the sky towards the land. This pulls out a little extra cloud detail.
05 Enhance the building
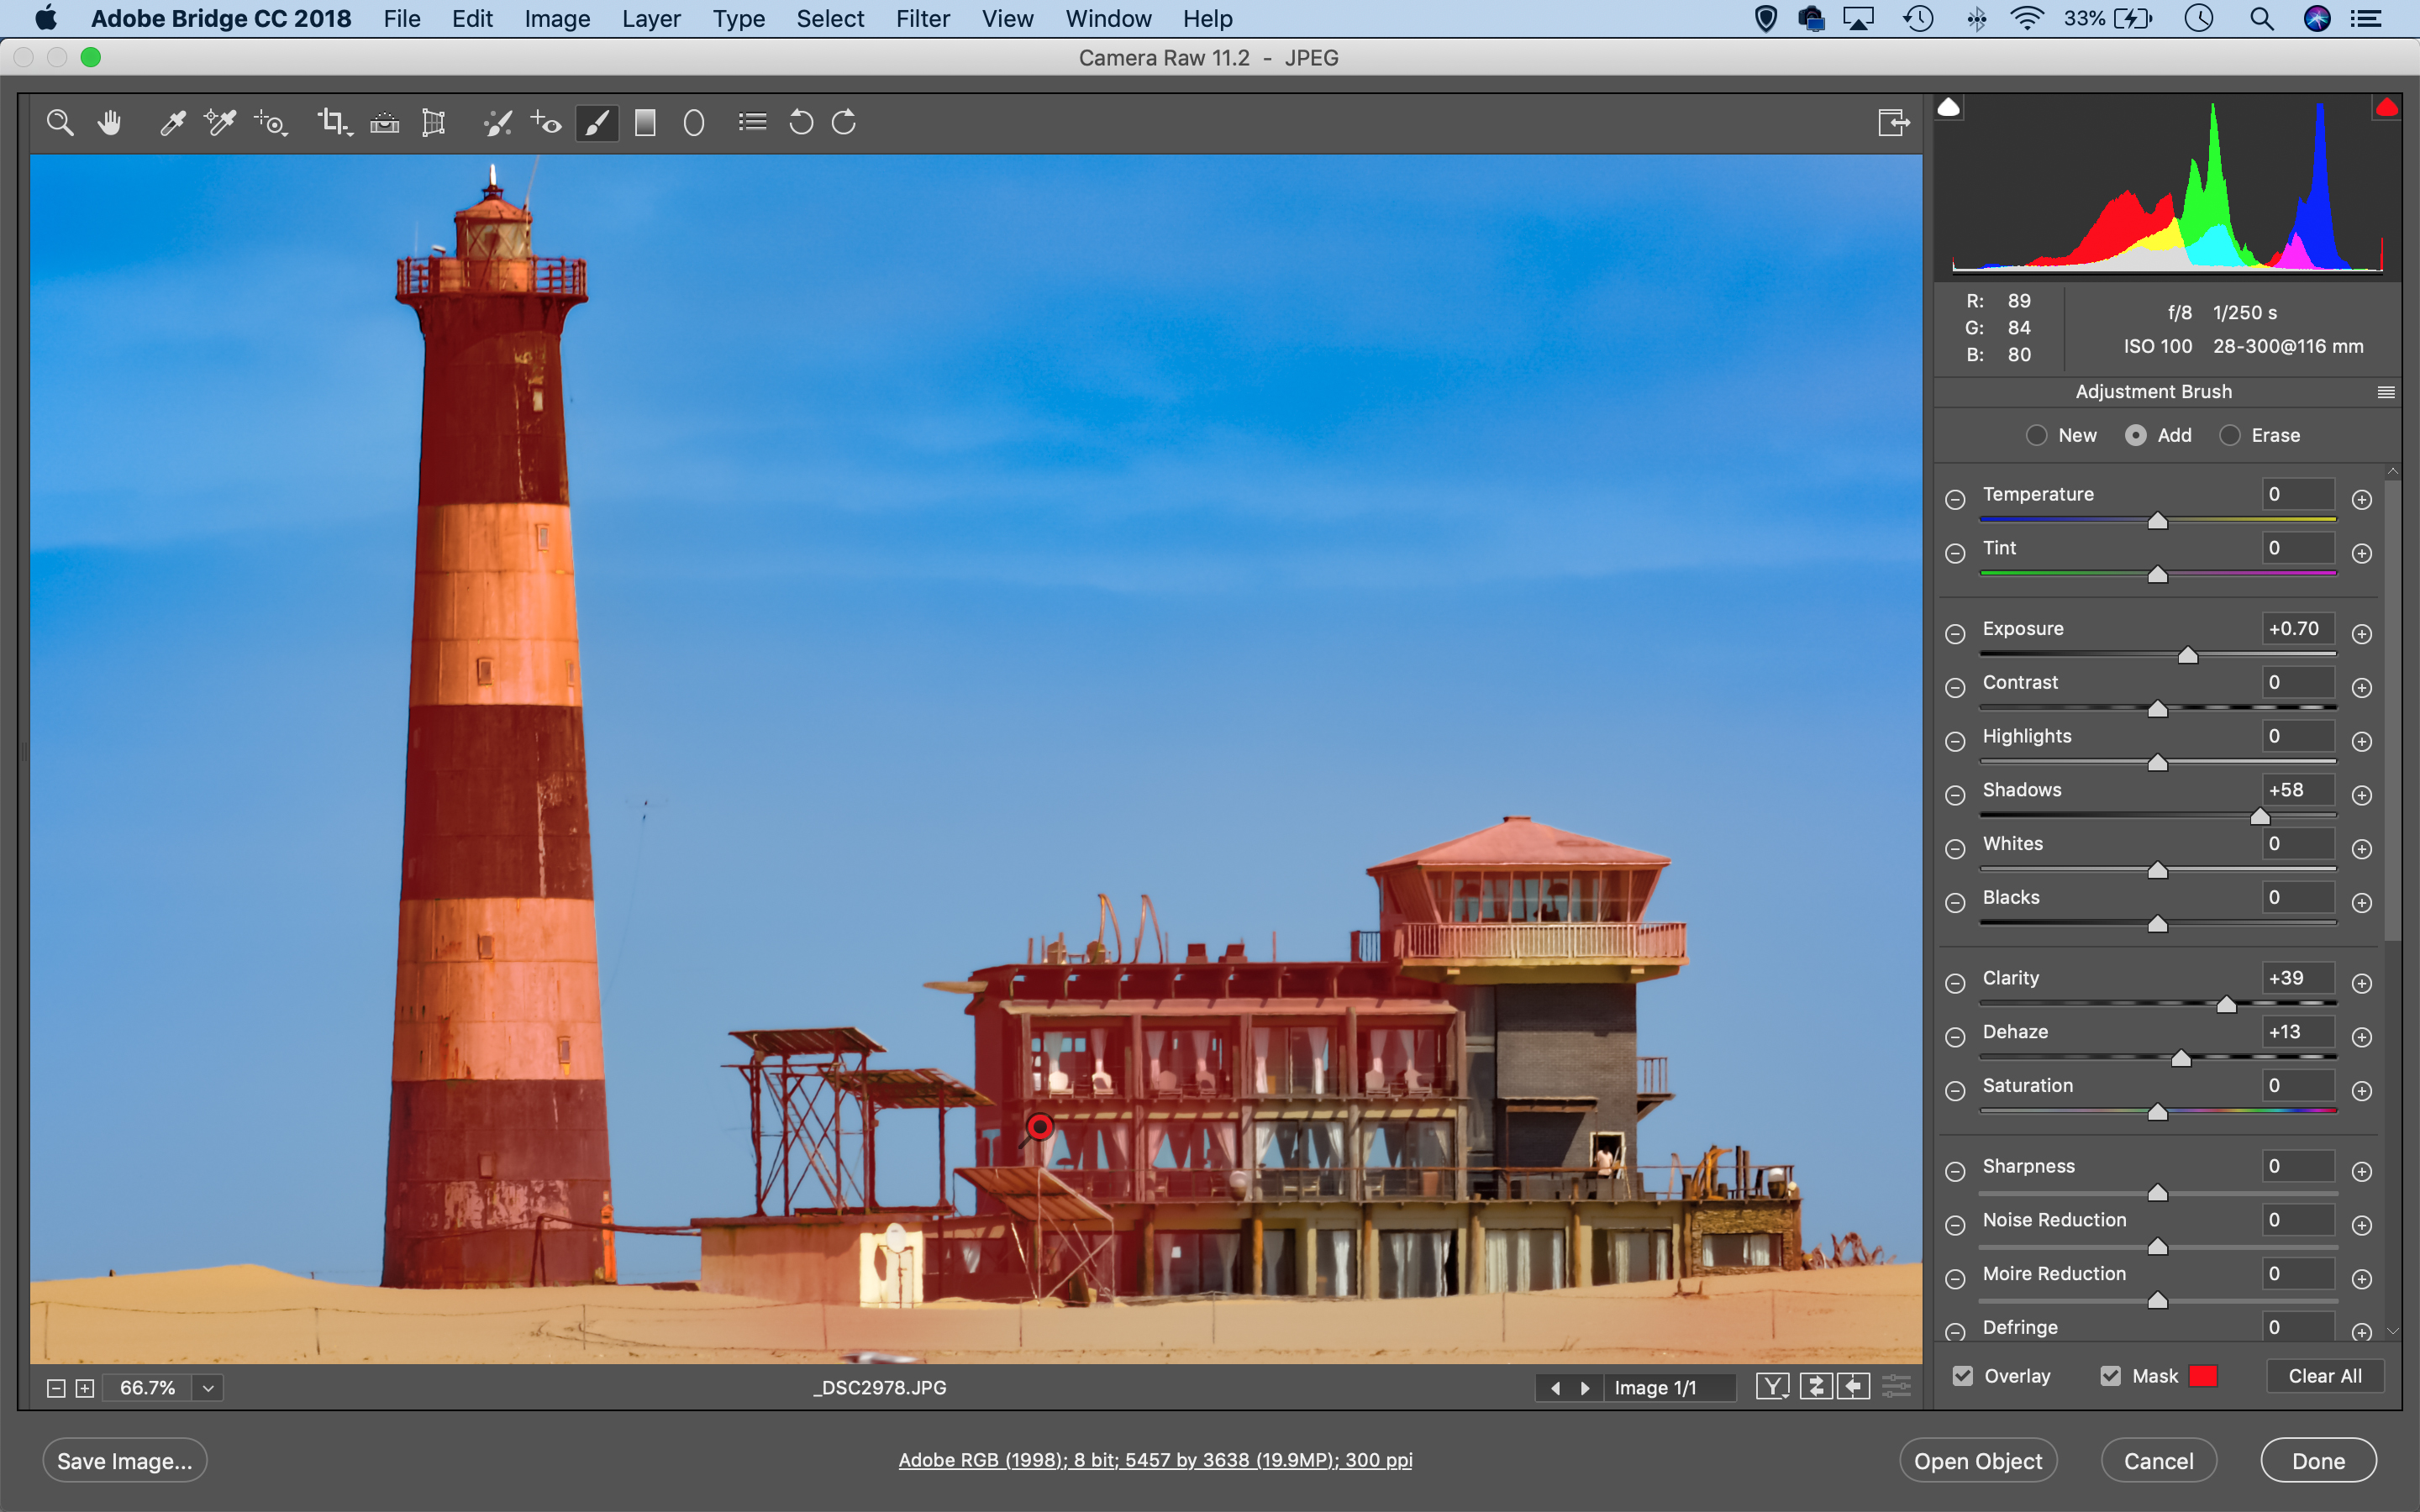
We can use Camera Raw’s Adjustment Brush to add punch and contrast to the building. Grab the tool from the toolbar, then load it with positive Clarity, Exposure and Dehaze. Check ‘Auto-Mask’ then paint over the building. You can hit Y to toggle a mask view on or off.
06 Soften the water
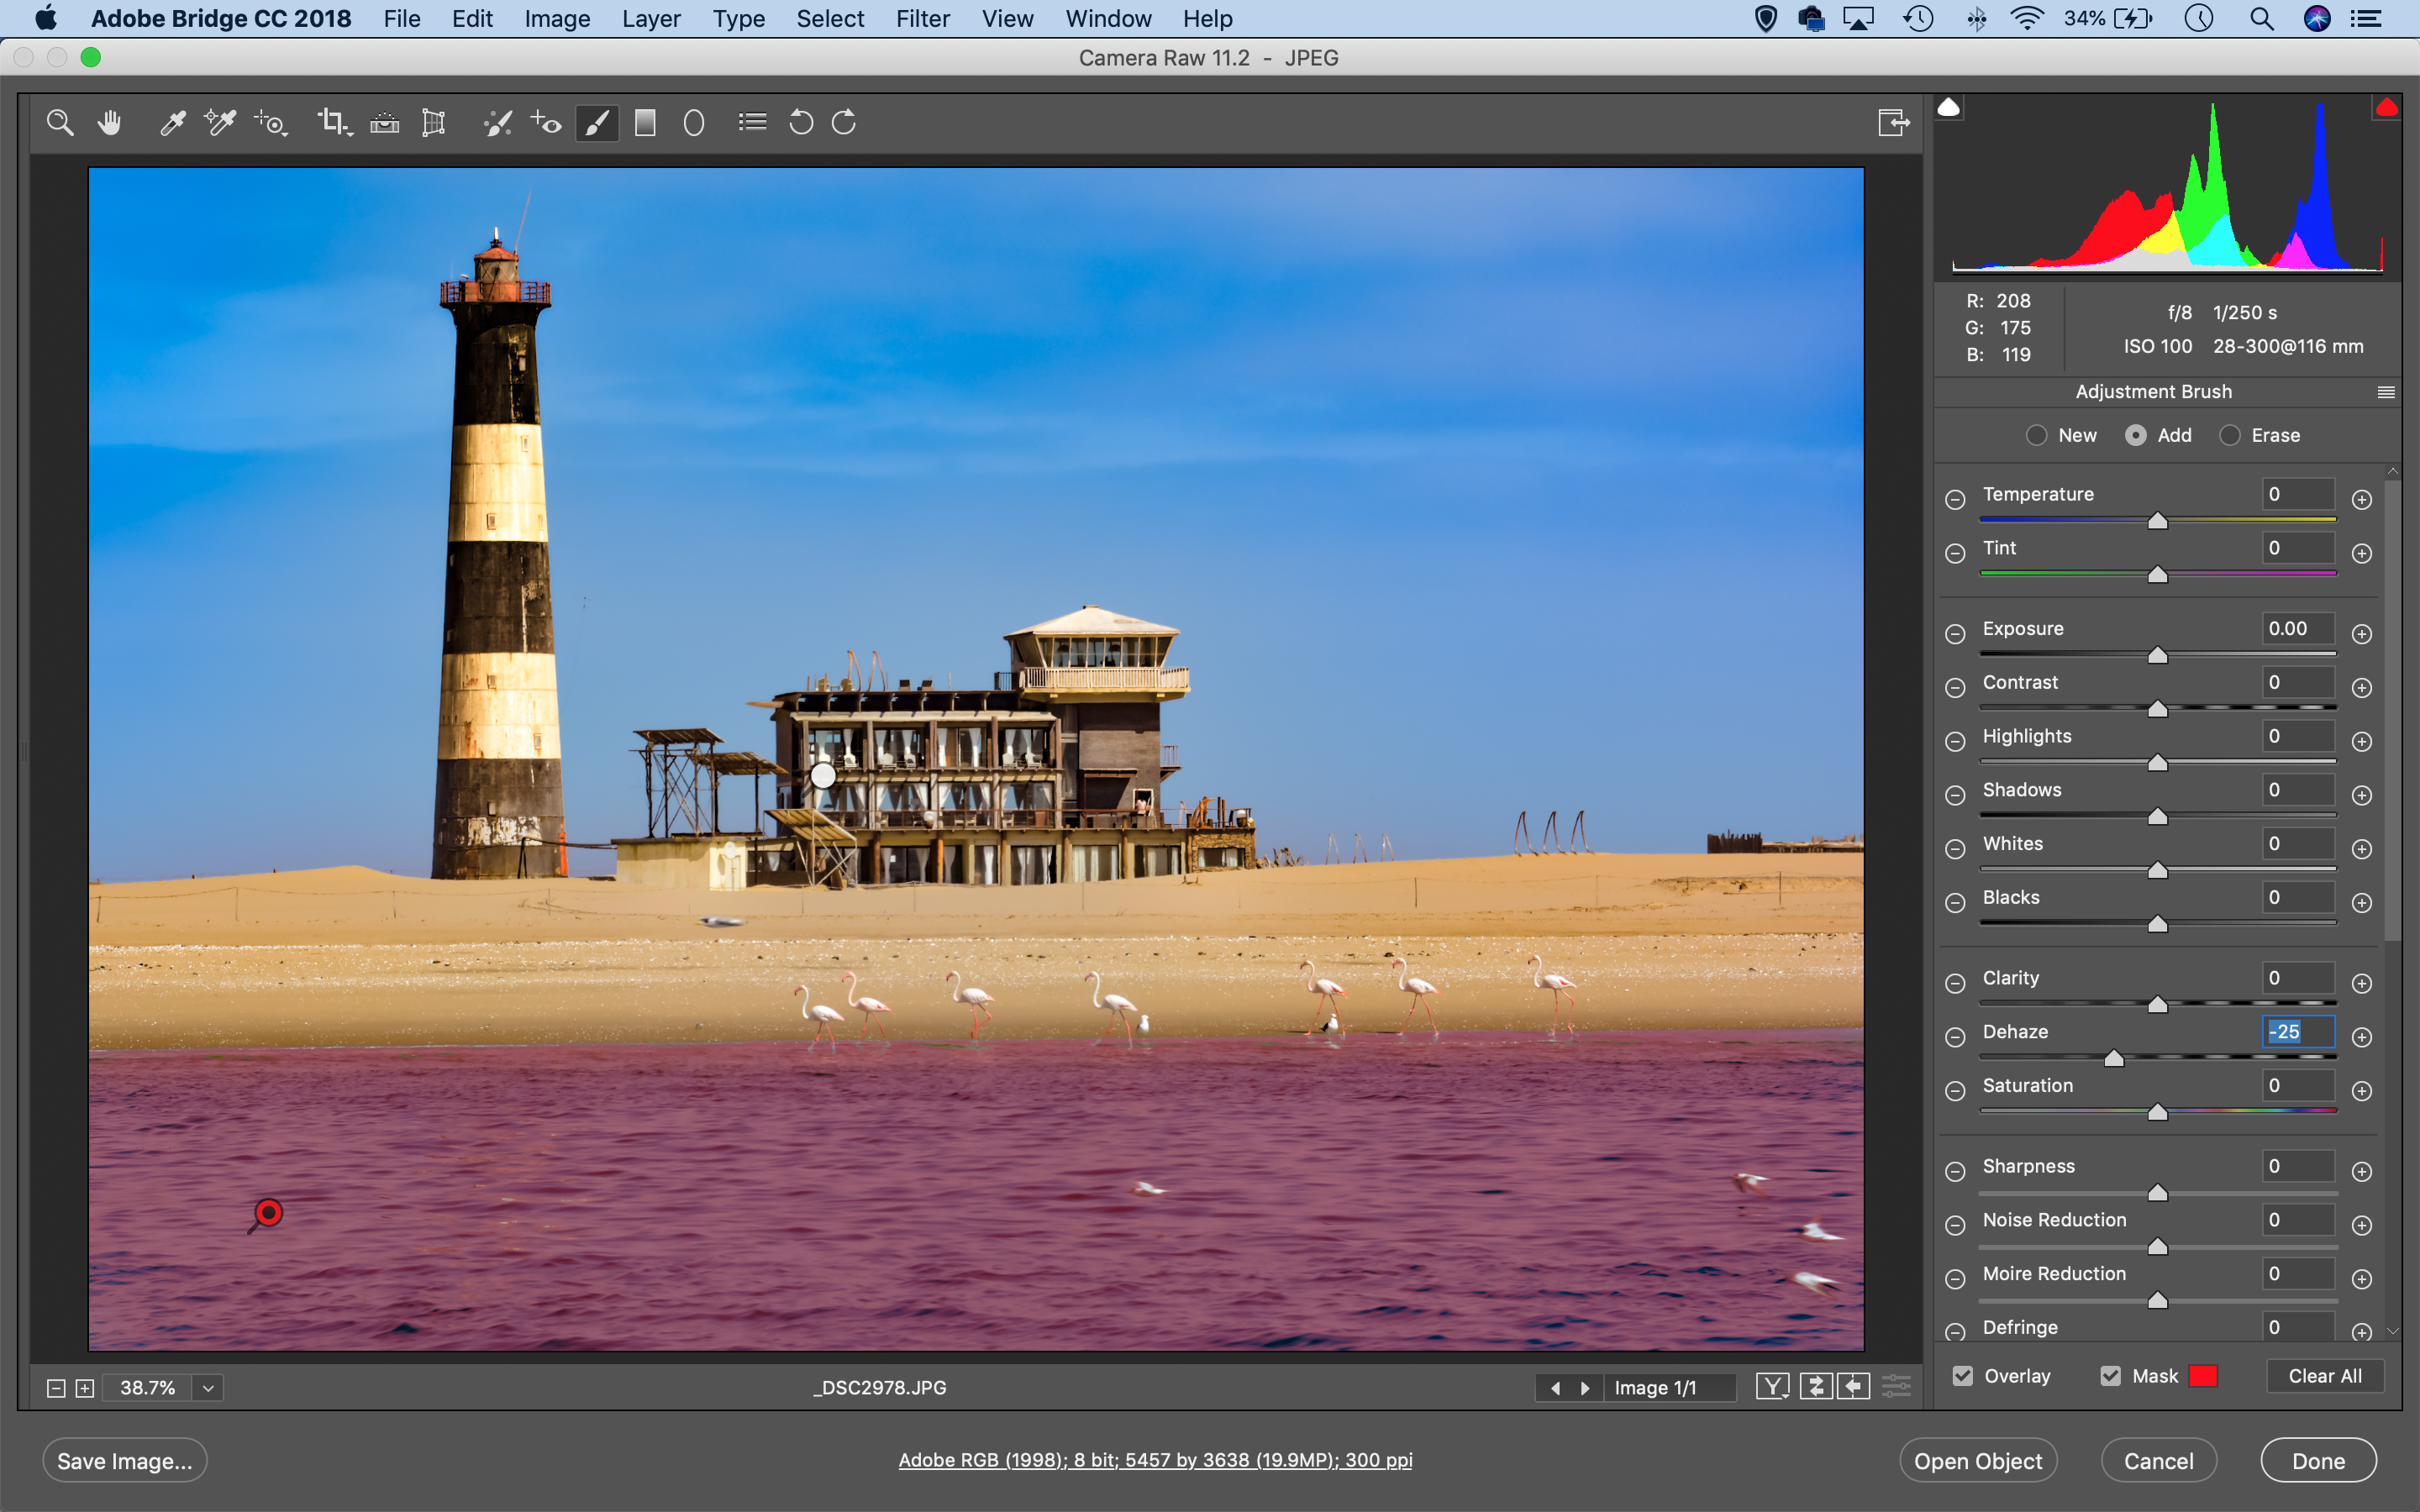
The Dehaze effect is too strong over the water, resulting in over-saturated colours and contrast. With the Adjustment Brush, click New at top right then click the minus icon next to Dehaze. Paint over the water to soften it. Make any other tonal changes you like.
PhotoPlus: The Canon Magazine is the world's only monthly newsstand title that's 100% devoted to Canon, so you can be sure the magazine is completely relevant to your system.
Read more:
100 Photoshop tips
The best photo editing software: image editors for novices through to pros
The best photo-editing laptops: top laptops for photographers
10 best online photography courses – from beginner guides to masterclasses
Get the Digital Camera World Newsletter
The best camera deals, reviews, product advice, and unmissable photography news, direct to your inbox!
The lead technique writer on Digital Camera Magazine, PhotoPlus: The Canon Magazine and N-Photo: The Nikon Magazine, James is a fantastic general practice photographer with an enviable array of skills across every genre of photography.
Whether it's flash photography techniques like stroboscopic portraits, astrophotography projects like photographing the Northern Lights, or turning sound into art by making paint dance on a set of speakers, James' tutorials and projects are as creative as they are enjoyable.
He's also a wizard at the dark arts of Photoshop, Lightroom and Affinity Photo, and is capable of some genuine black magic in the digital darkroom, making him one of the leading authorities on photo editing software and techniques.


