Canon School: Make the most of autofocus on your Canon EOS camera
Part 1: Learn essential Canon EOS camera settings and techniques to take sharper pictures
Welcome to our new Canon School tutorial series. Canon EOS DSLRs have two autofocusing (AF) systems – the optical viewfinder, and the other for Live View. Both require some contrast in the image to work well.
When shooting with the optical viewfinder, the camera uses a dedicated AF sensor to work out when an image is in focus. The AF points you see in the viewfinder correspond with the focus detectors on the sensor.
You can pick a single point or let the camera decide where to focus. If you activate all of the points (or a zone of them), the AF system will usually lock onto the nearest part of a scene, or area of highest contrast.
In Live View, the camera cannot use the AF sensor, so must use the imaging sensor to work out what’s sharp. Live View AF used to be ponderous, with the camera having to focus the lens back and forth to find the point of highest contrast. But Canon’s Dual Pixel CMOS AF tech, which sees each pixel on the sensor acting like an AF point, has made a big difference to Live View AF speed. But a classic optical viewfinder and AF sensor still has the edge.
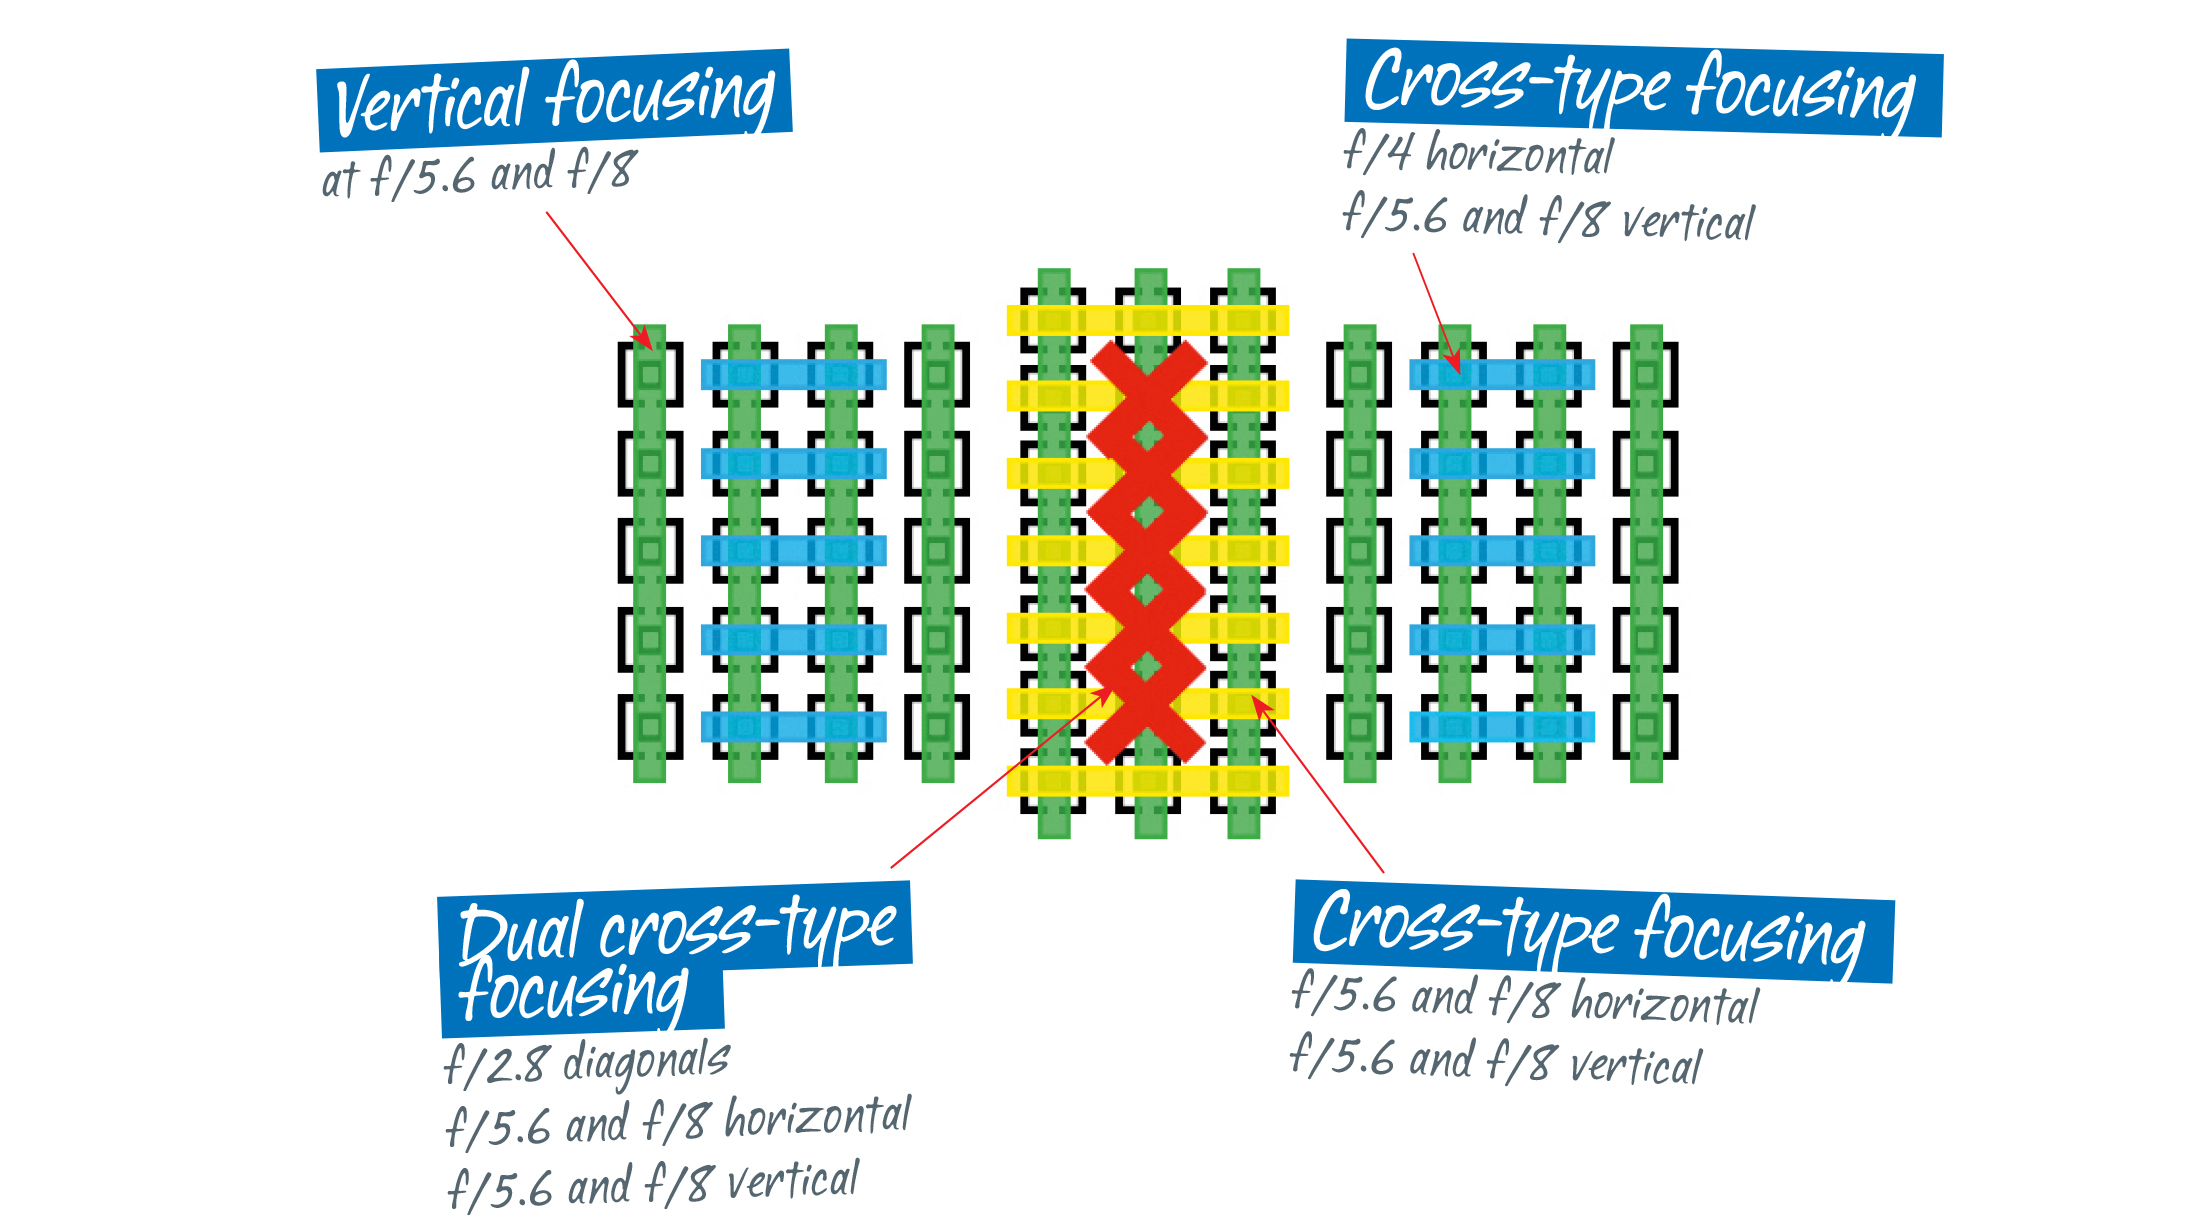
It’s not just the number of AF points in the viewfinder that makes a difference, it’s their sensitivity too. Standard AF points have their sensors vertically or horizontally, and are effective at detecting lines of contrast that ‘break’ the lines of the sensor. ‘Cross-type’ sensors combine vertical and horizontal, while dual cross-type sensors also detect diagonal lines of contrast for greater precision.
1. Activating AF
Autofocus starts when you press the shutter release button halfway and stops when the camera has either found something to focus on (in One Shot AF), or when you take your finger off the shutter release button (in AI Servo AF or Servo AF). Your camera may also keep focusing the lens across a scene or subject and eventually fail in One Shot AF if there isn’t enough light or contrast for it to be able to detect an object.
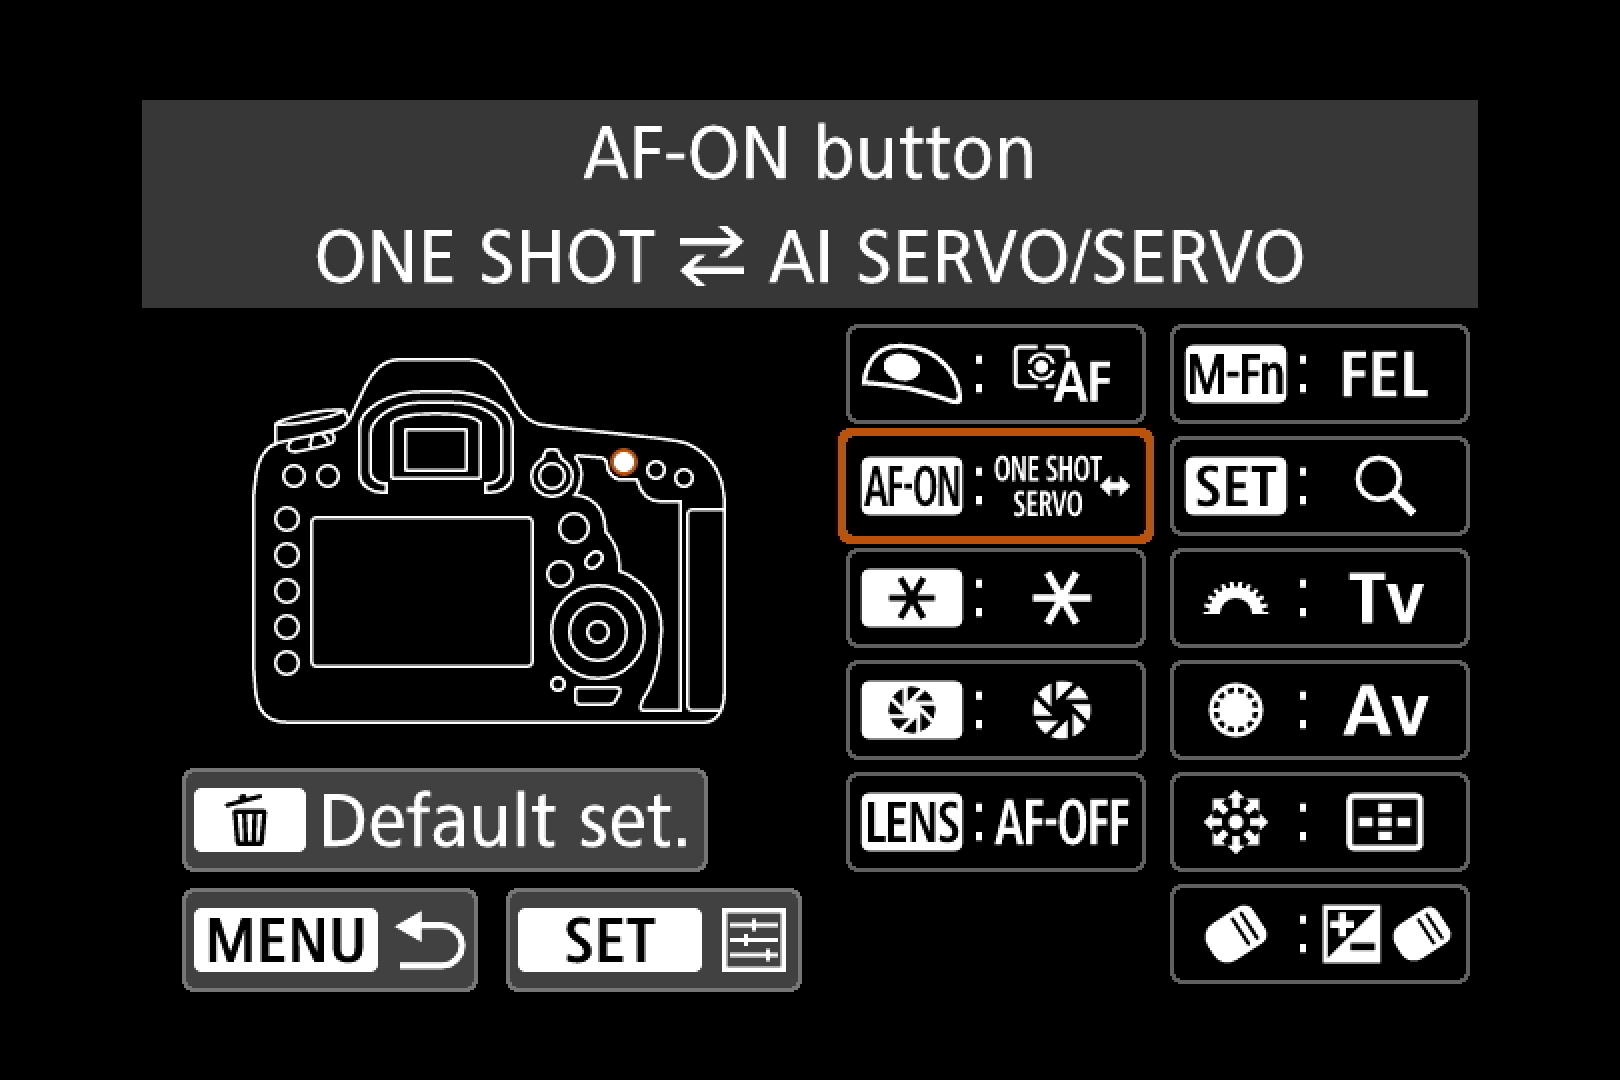
In AI Focus AF, the autofocus switches from One Shot to Servo when it detects movement, but for full control it’s better to switch between the two. Some cameras give you the option of customizing one of the buttons so it toggles between One Shot and Servo when pressed. This is ideal when shooting a subject that stops and starts, or gets obscured behind objects, as you can keep the camera set in Servo mode and then lock the focus at the touch of a button.
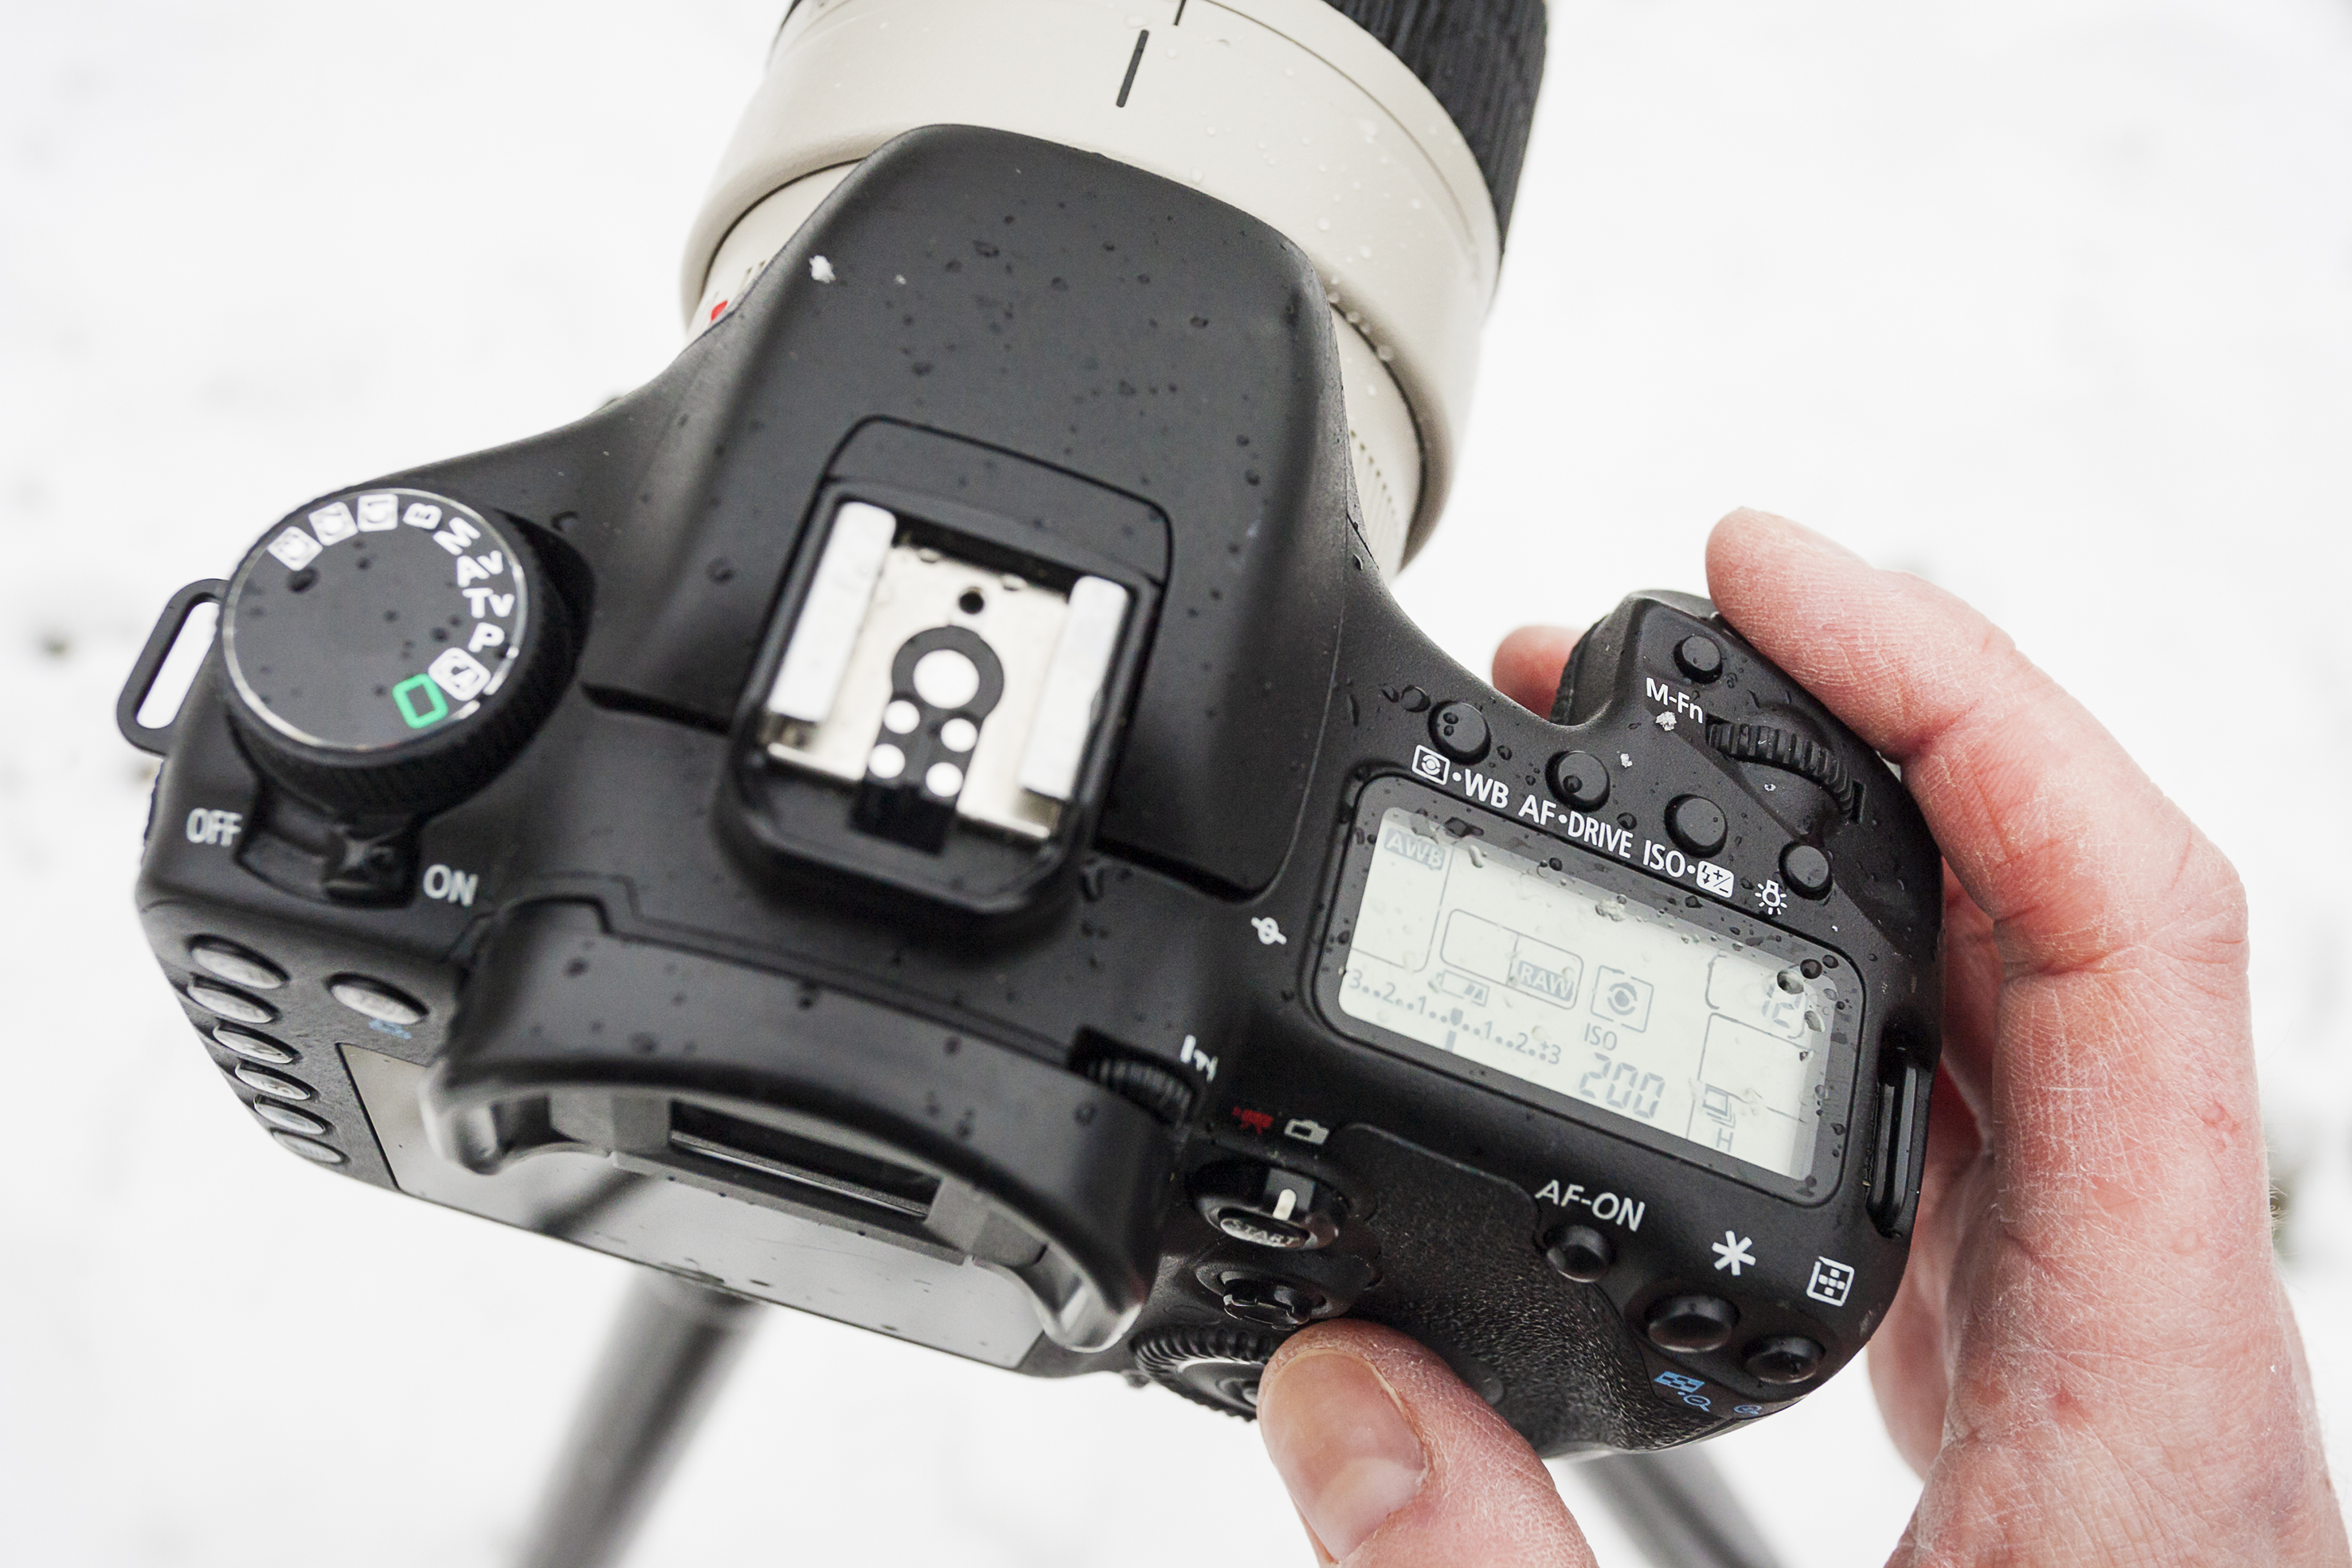
As well as starting/stopping AF, the shutter button also operates the camera’s metering system, but you can separate these functions via the Custom Functions menu. Removing the AF function means you can avoid the camera refocusing if you remove your finger from the shutter button between shots. The customization varies: the Canon EOS 5D Mark IV lets you assign AF operation to a number of different buttons.
2. Faster autofocus selection
Advanced EOS cameras such the Canon EOS 90D and EOS 7D Mark II have a large number of AF points, along with several ways to tweak and select them. But the Custom Functions tab in the camera menu offers shortcuts that can streamline your workflow.
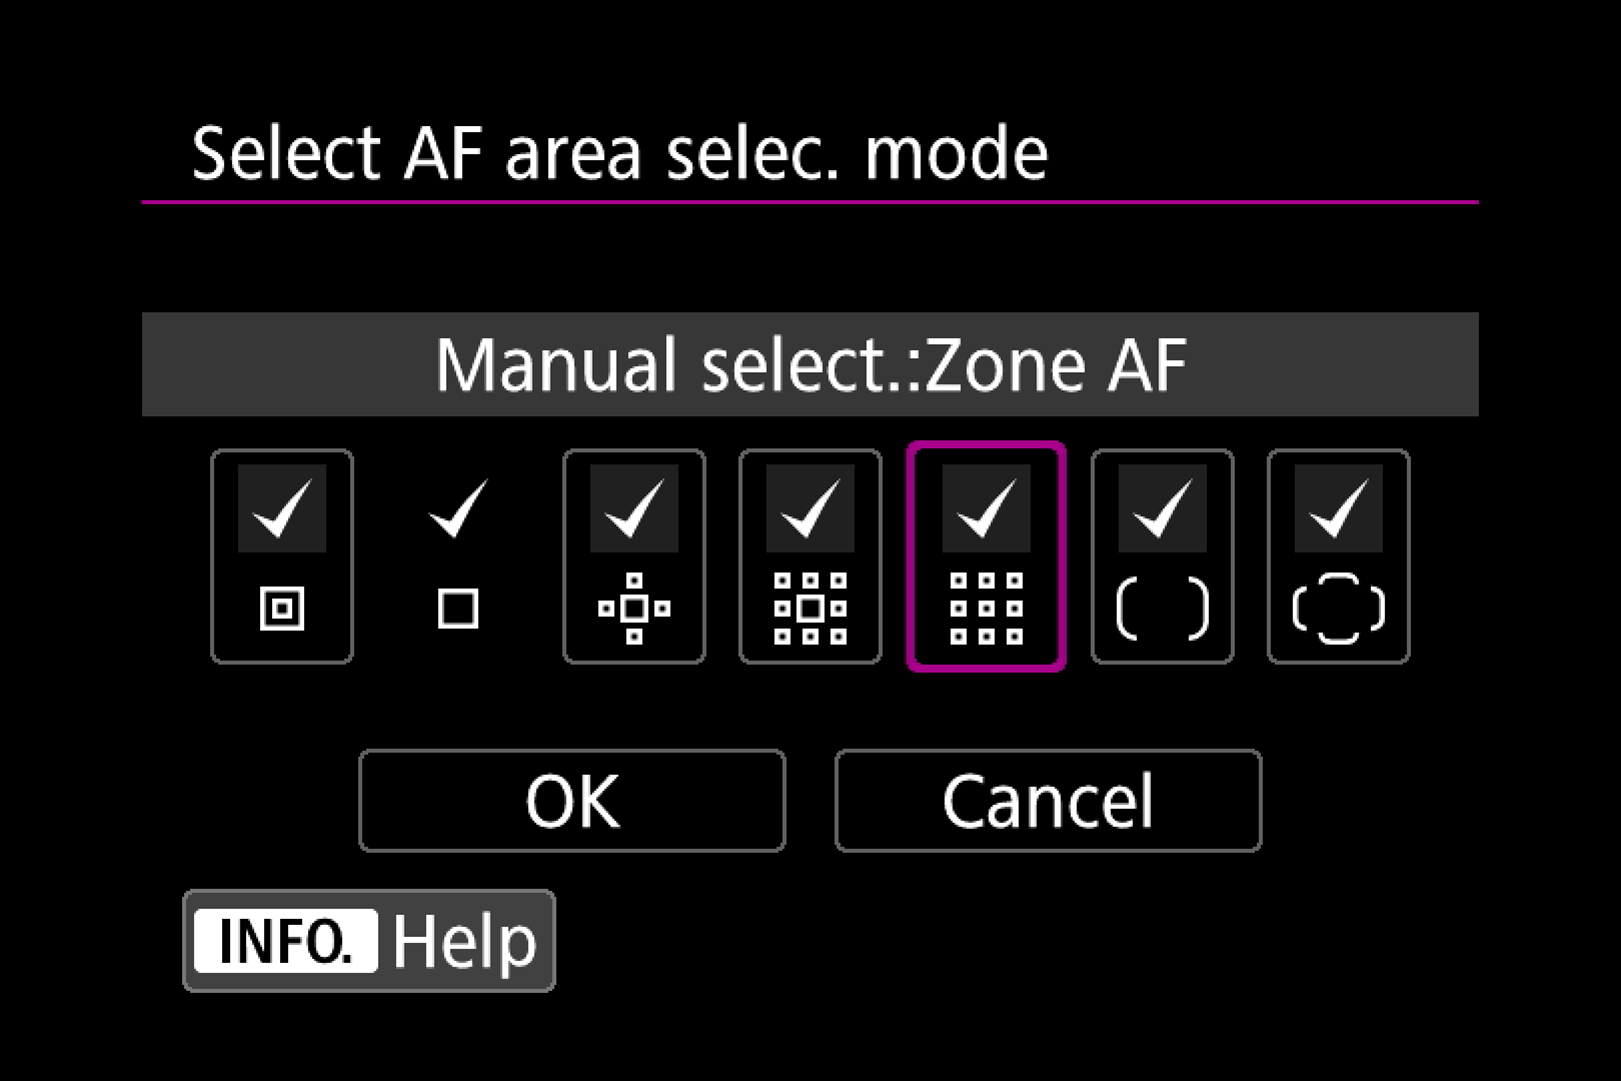
For example, you can reduce the number of selectable AF area selection modes. If you rarely use the expanded AF point or Zone configurations, say, you can remove the checkmarks above them in the menu. This will then allow you to get to your preferred AF area modes more quickly when you’re shooting. The only one you won’t be able to remove is the single-point AF.
The EOS 7D Mark II and 5D Mark IV have more than 60 AF points in their displays, which can take a while to drive a single AF point around, although you can limit the total number of AF points available via each camera’s AF menu tab. On the 7D Mark II you can choose either the full 65-point array, 21 points or 9 points, while the 5D Mark IV offers all 61 points, only cross-type points, 15 points or 9 points.
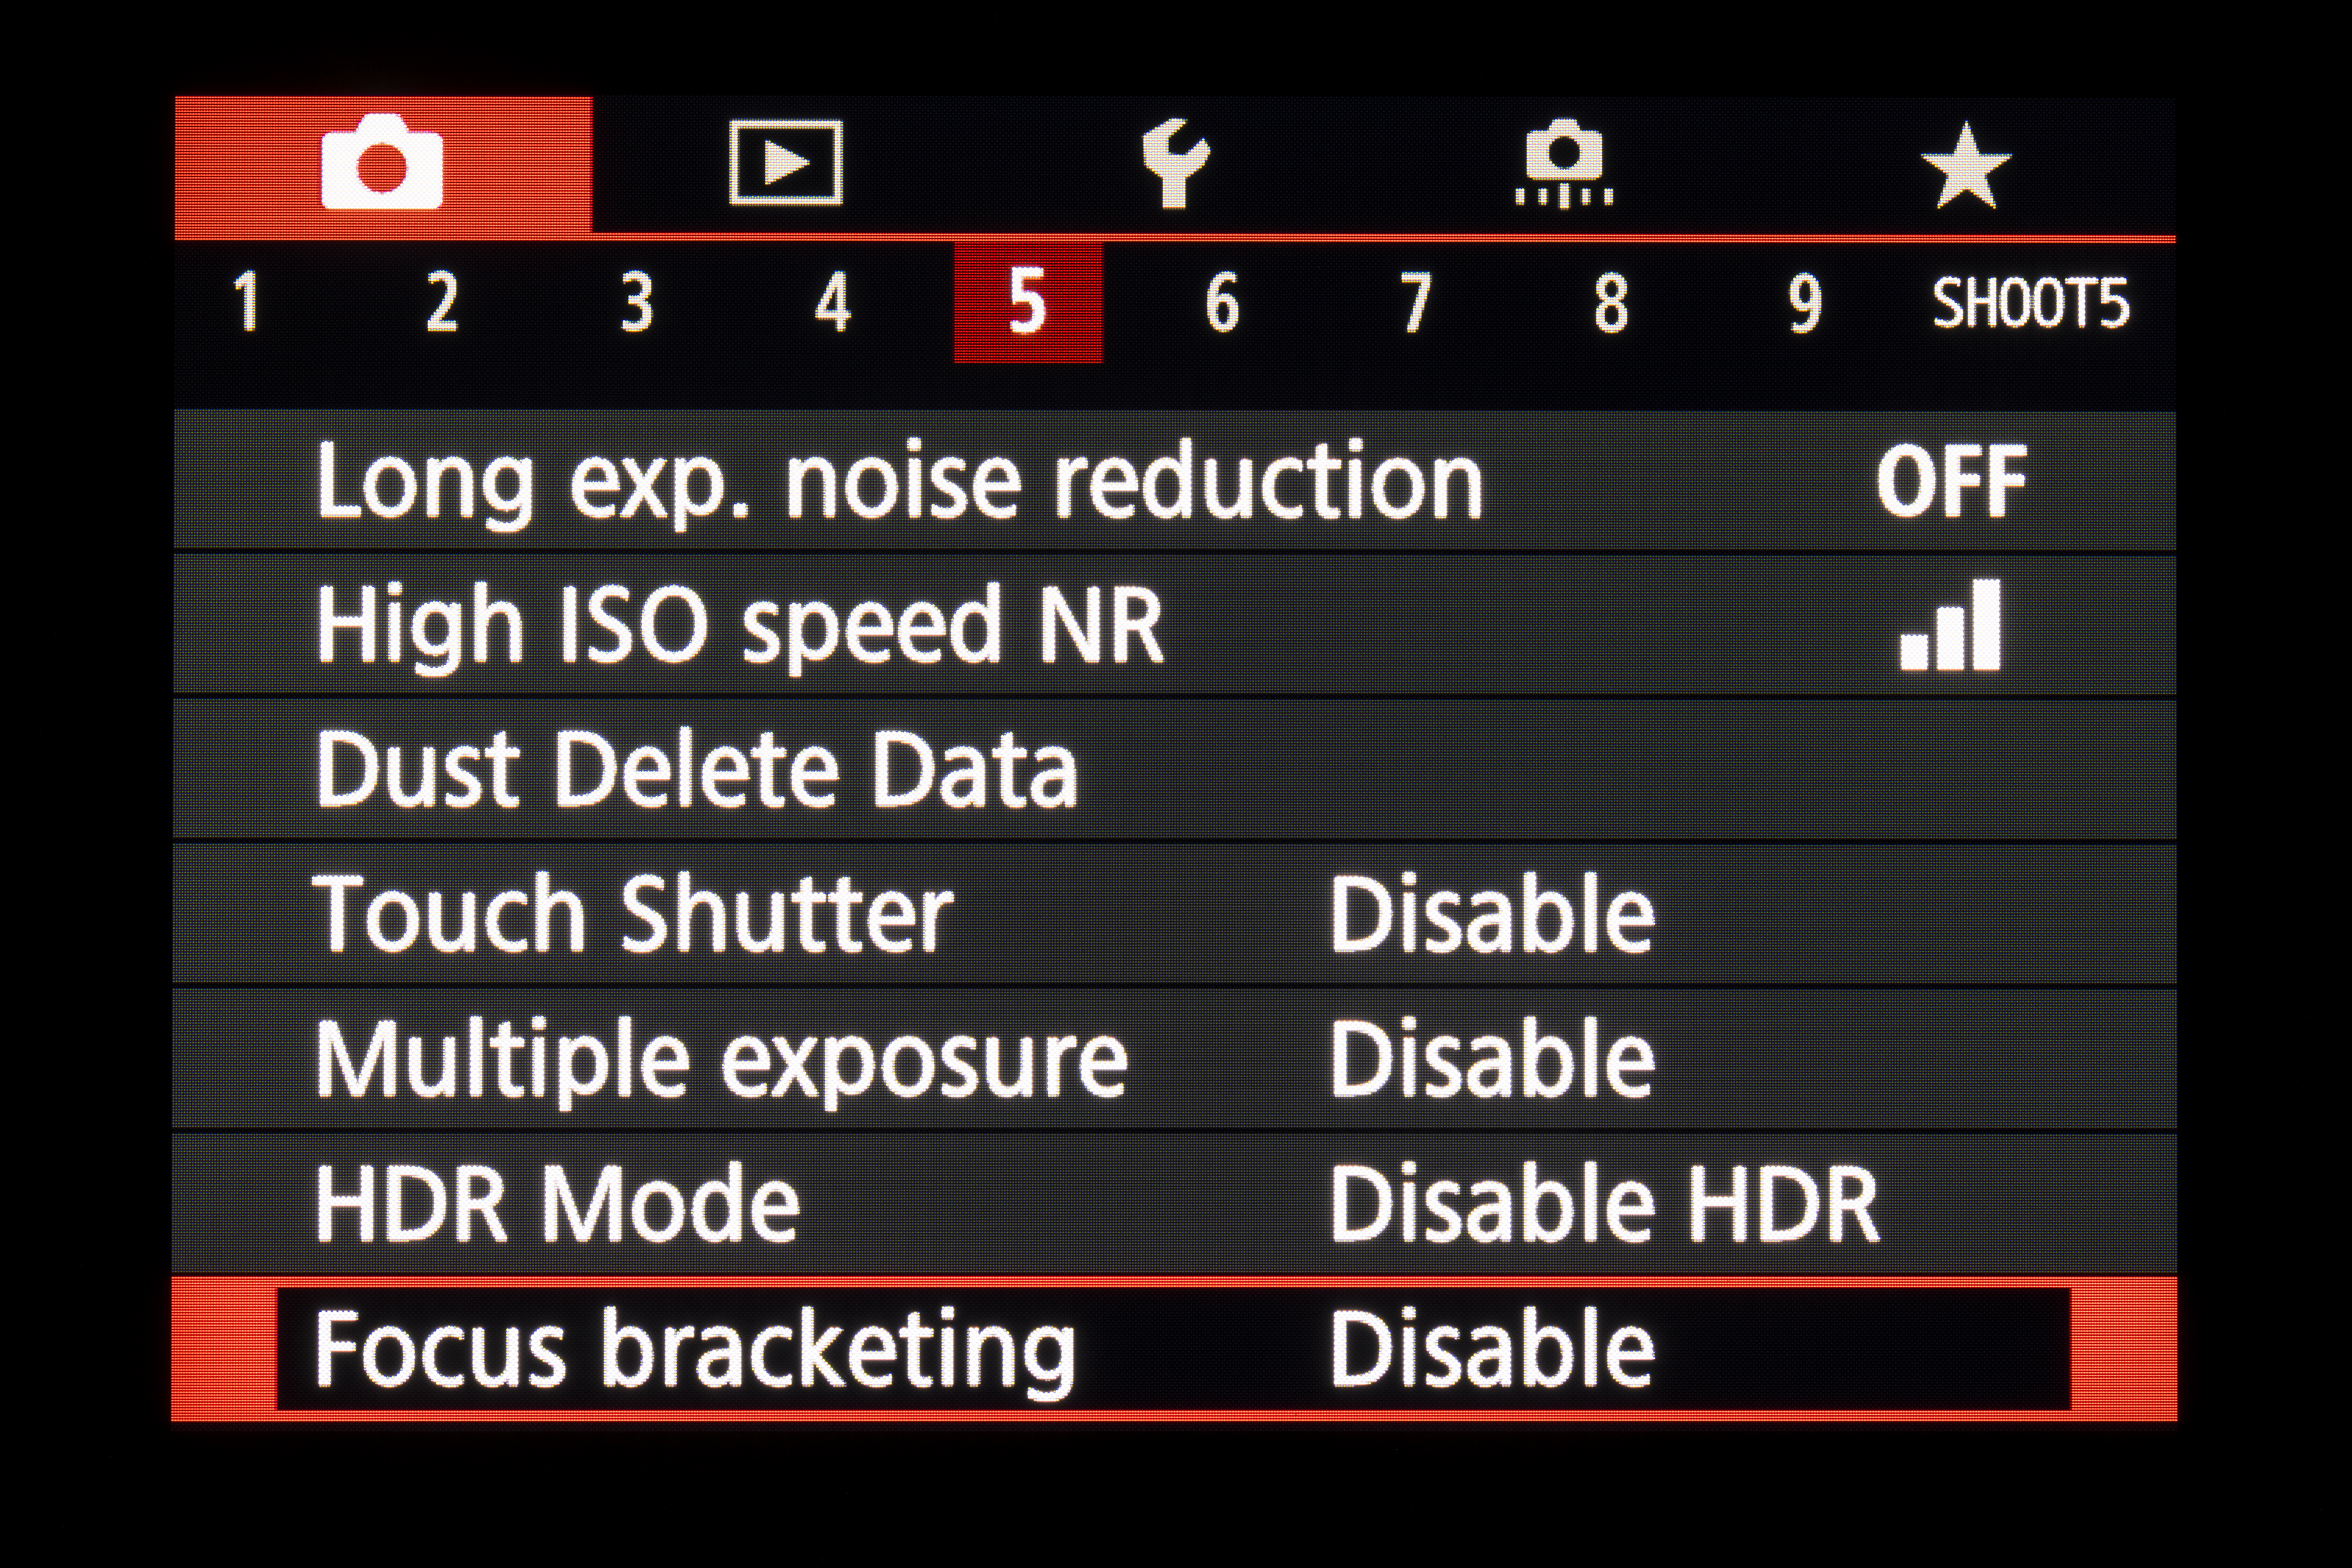
3. Focusing bracketing
First introduced in the Canon EOS RP mirrorless camera, and sure to be seen in new EOS cameras, Focus bracketing is an automated feature that uses small AF adjustments to bring more of a subject into focus. Once enabled, the camera takes a sequence of between two and 999 images, increasing the focus distance between each picture. The resulting shots can then be stacked together in software (including DPP) to produce an image which has an – often substantial – increase in depth of field.
You could use the smallest aperture available on a lens to get the max depth of field, but the smaller the aperture gets, the softer a picture gets overall. When it comes to close-up and macro photography, even an aperture as small as f/22 or f/32 won’t give you a big depth of field.
The lens needs to be set to AF mode for Focus bracketing to work, which feels almost alien when you’re used to taking macro shots using manual focus. For consistent results the camera should be locked on a tripod. If you shoot in Av or M mode, you can choose the aperture – going for a mid-range one such as f/8 or f/11 means that you won’t have to bracket as many shots compared with a large aperture of f/2.8 or f/4.
It’s worth creating a separate folder on the memory card to store your files – you’re given this option when you select Focus bracketing in the red Shooting menu.
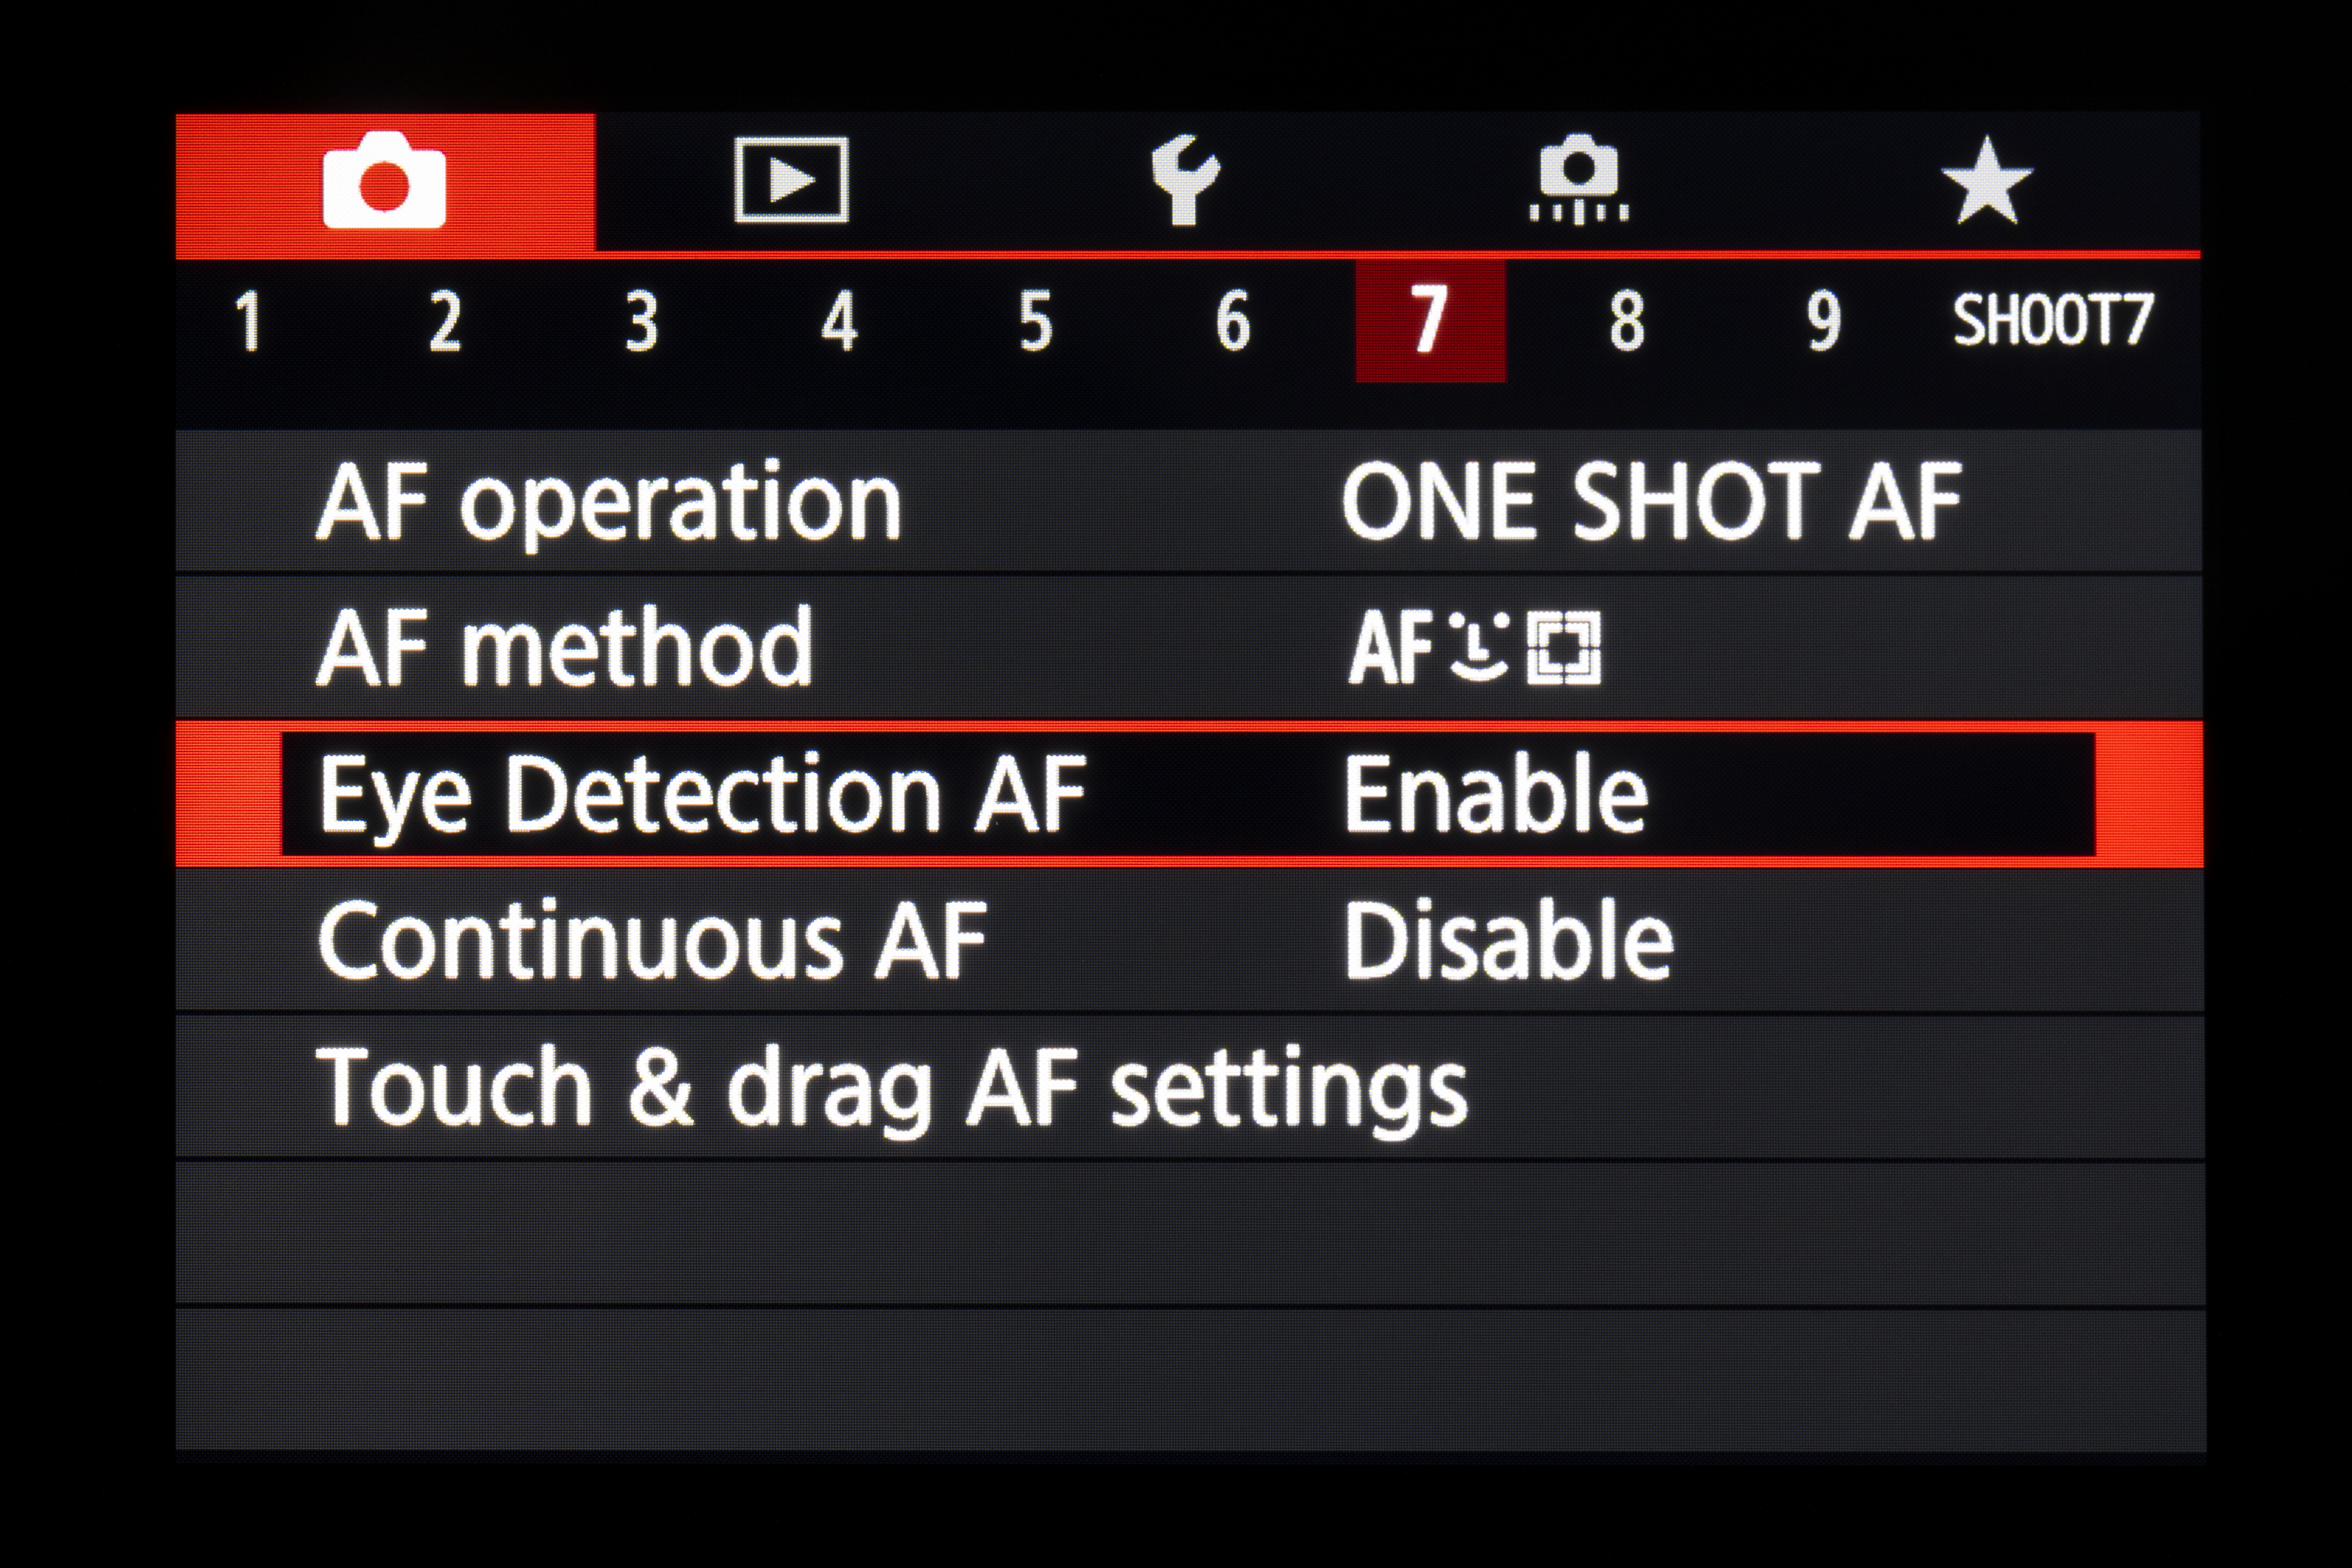
4. Face and Eye AF detection
Face detection AF is a common feature in Canon’s mirrorless cameras and is also available when using shooting with a DSLR’s Live View display. Until recently, only high-end EOS cameras offered this autofocus option when shooting with the optical viewfinder, but the Canon EOS 90D, however, was the first mid-range model to offer up this useful feature.
Face detection through the optical viewfinder sees the camera’s high-resolution RGB metering sensor feed the autofocus system with information about the scene. The metering sensor can recognize colours and it packs enough pixels to be able to detect human faces, making it easier for the camera to keep tracking a person as they move through a scene. Canon calls this Intelligent Tracking and Recognition – or EOS iTR for short.
The 90D also joins the EOS R and RP and a few other models in having the more advanced Eye Detection AF. After setting the AF method to Face+Tracking and enabling Eye Detection AF in the red Shooting menu, the camera will detect a person’s face and display an AF point around one of their eyes to indicate that it’s focusing on it. A recent improvement to the technology sees Eye Detection AF (finally) available during Servo AF, so it’s able to refocus the lens to keep the eye sharp if the subject moves.
You can tap the screen to select an eye to focus on, but even if you inadvertently tap another part of the face, the camera will automatically pull focus on an eye.
Once you’ve enabled Eye Detection AF, you’re able to switch it off without having to dip into the main menu if you press the AF point selection button, followed by INFO. Tapping INFO again resumes Eye Detection.
PhotoPlus: The Canon Magazine is the world's only monthly newsstand title that's 100% devoted to Canon, so you can be sure the magazine is completely relevant to your system.
Read more:
Canon DPP: Canon Digital Photo Professional tutorials
Canon EOS 5D Mark IV best deals
Canon EOS 90D full review
Best Canon lenses
Best Canon RF lenses
Best Canon EF-M lenses
Get the Digital Camera World Newsletter
The best camera deals, reviews, product advice, and unmissable photography news, direct to your inbox!
The editor of PhotoPlus: The Canon Magazine, Peter 14 years of experience as both a journalist and professional photographer. He is a hands-on photographer with a passion and expertise for sharing his practical shooting skills. Equally adept at turning his hand to portraits, landscape, sports and wildlife, he has a fantastic knowledge of camera technique and principles. As you'd expect of the editor of a Canon publication, Peter is a devout Canon user and can often be found reeling off shots with his EOS 5D Mark IV DSLR.


