Capture amazing landscape photography by using your camera's histogram
Use your camera's histogram to shoot stunning landscape photography no matter the light
Watch video: how to read your camera's histogram
Exploring the endless creative opportunities of landscape photography is one of the best things you can do with a camera, but when you're dealing with tricky light, how can you be sure you're getting the right exposure? Luckily, you can use your camera's histogram to help you capture a correctly exposed vista.
Exposure can be a very complicated subject. Many DSLRs and mirrorless cameras offer a choice of metering modes, including matrix, centre-weighted and spot metering, and on top of that there are the intricacies of exposure compensation and exposure lock. But there is a simpler way to get perfect exposure! It combines old-fashioned manual exposure with that miracle of modern digital imaging, the histogram display.
It’s simple. You take a picture, check the image histogram in playback mode, then adjust the settings if you need to and take another shot.
The histogram is basically a bar chart showing the distribution of pixels in your photo on a scale of brightness from complete black on the far left to totally white on the far right. If you don’t see the histogram display straight away, press up or down on the multi-selector on the back of the camera to change the display mode.
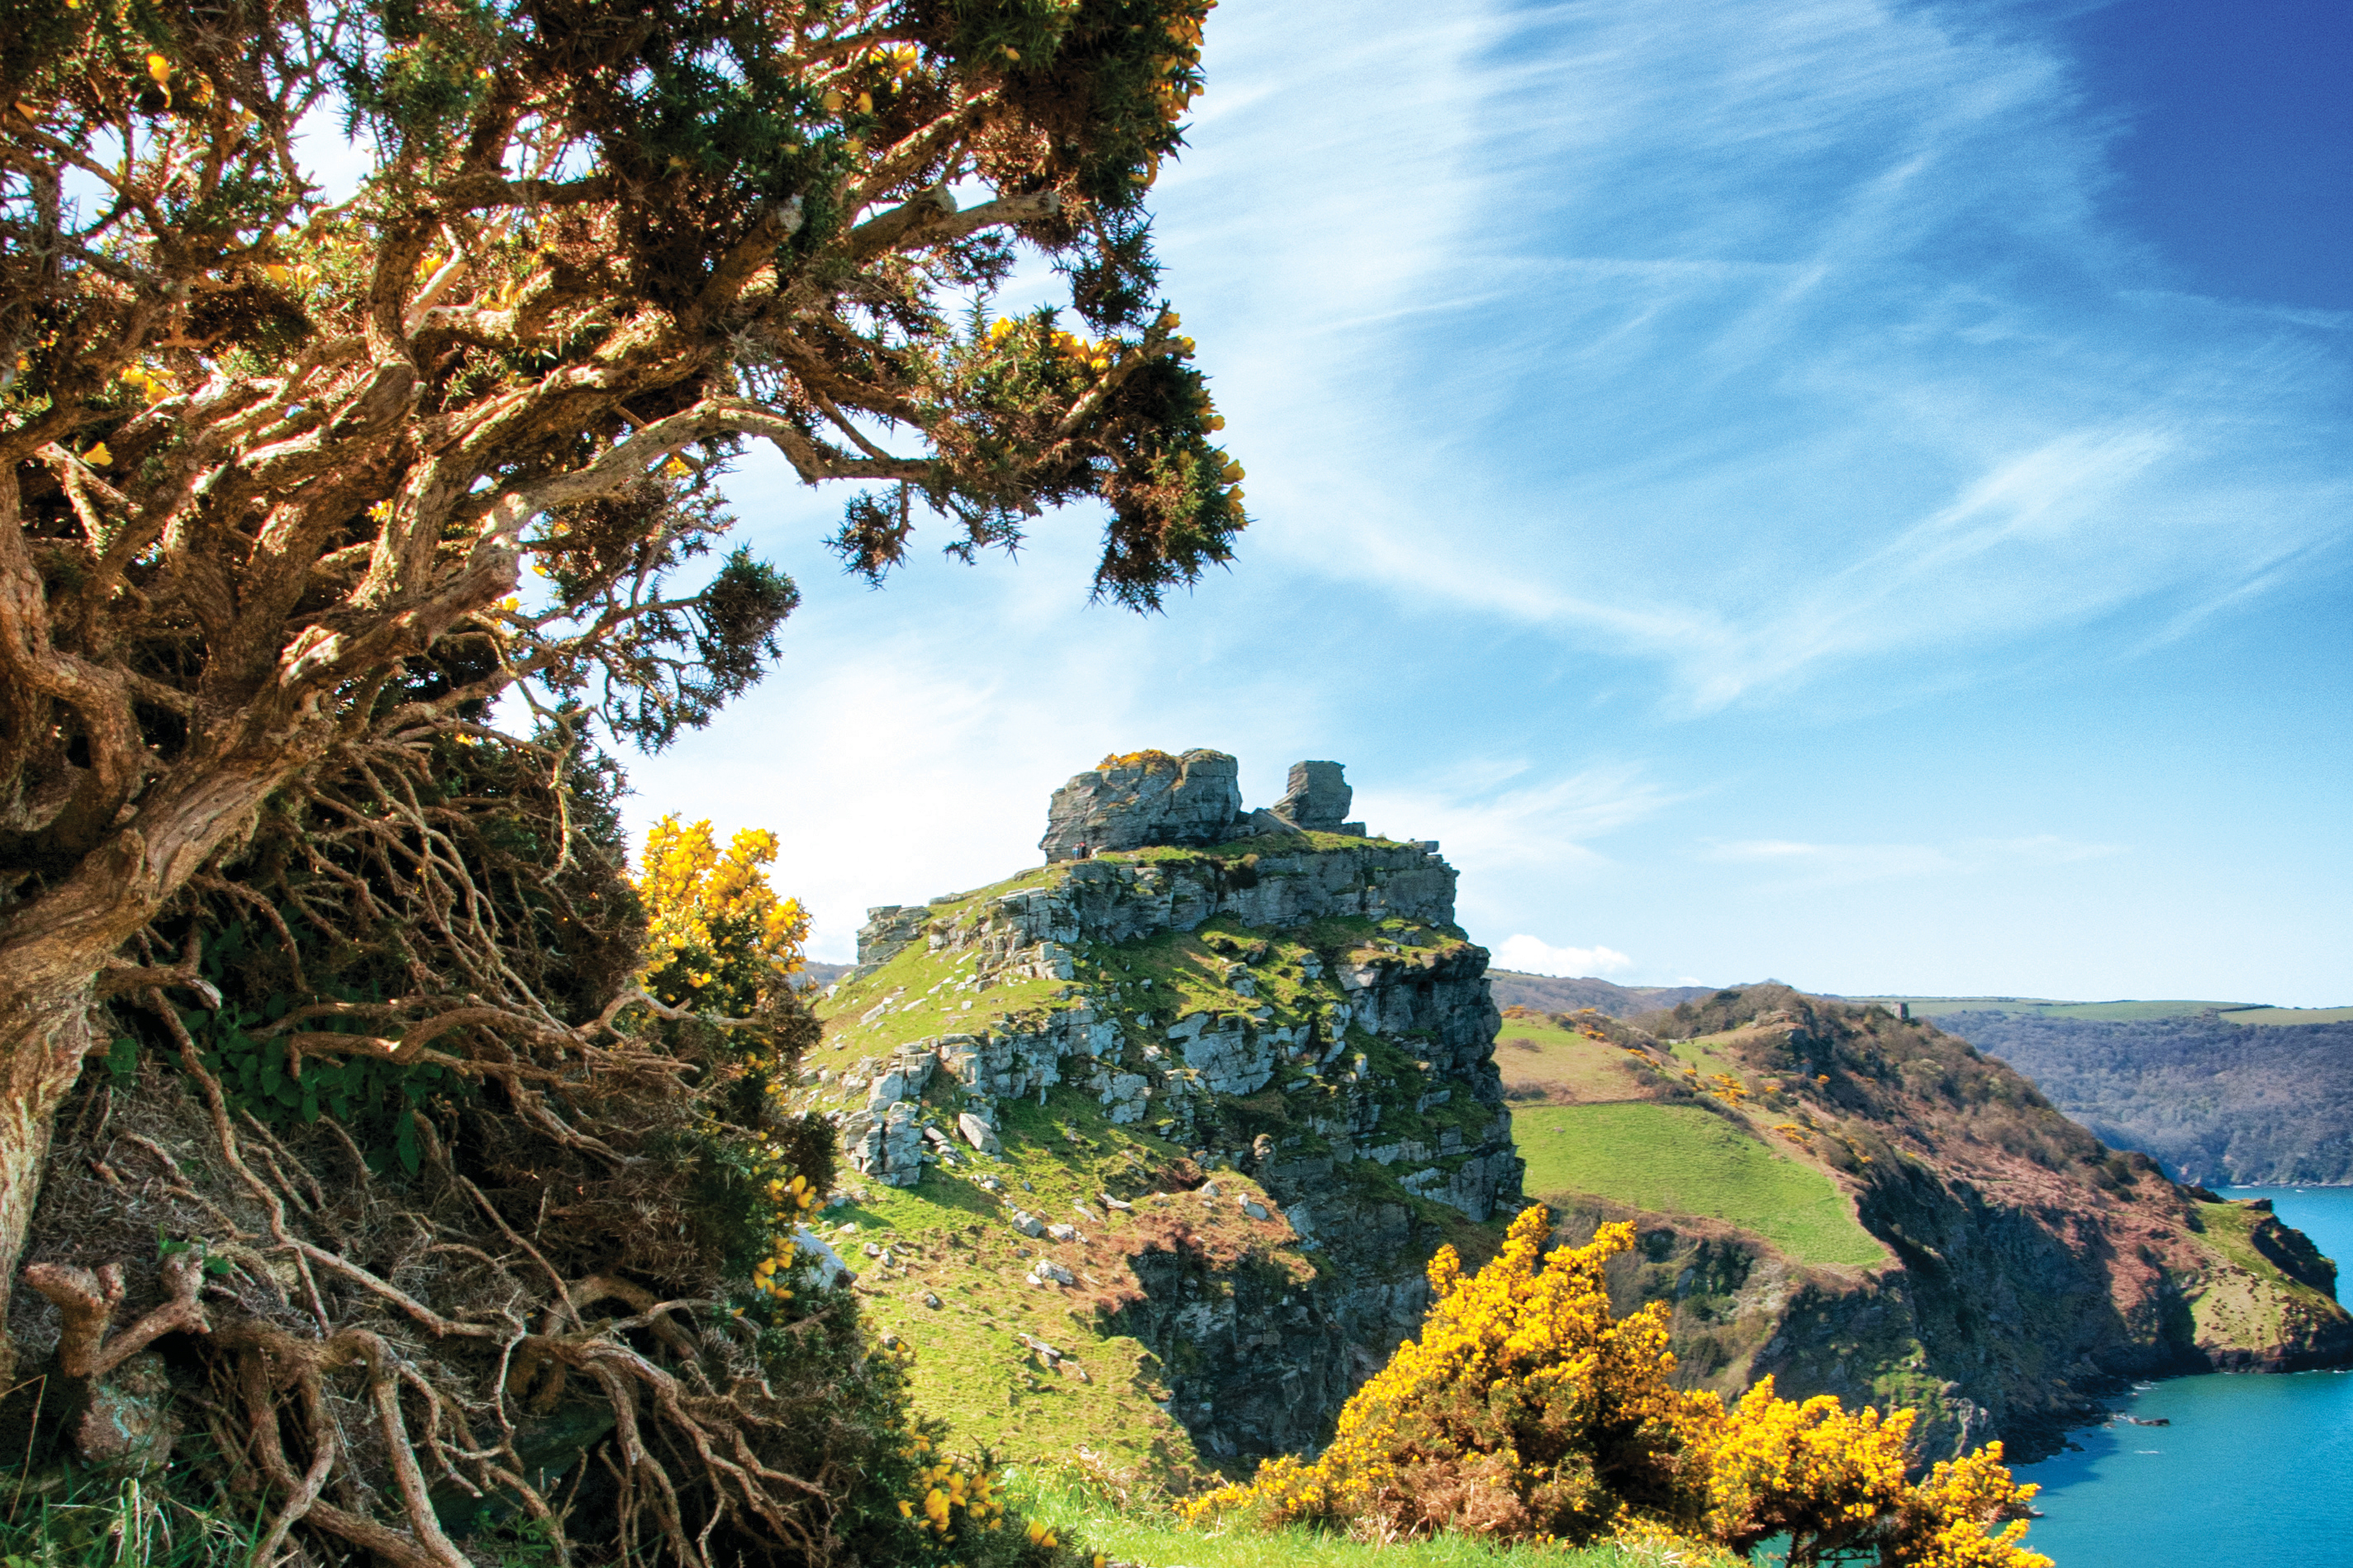
The ‘ideal’ exposure is one where all the tones in the picture (the whole histogram shape, in other words) fits between the two extremes. You probably won’t get it exactly right at the first attempt, and there are many subjects that are particularly tricky but your camera’s histogram is still the most accurate and reliable way of getting that perfect exposure.
You can’t use this technique for all kinds of photography (there isn’t time for it with sports), but for landscape photography it’s ideal. You have the time to set the camera on a tripod, look at the results properly and make those small but vital adjustments.
Using manual exposure might seem like an old-fashioned way to take pictures, but combine it with your camera’s histogram information and you get a thoroughly modern approach to exposing shots.

01 Keep it steady
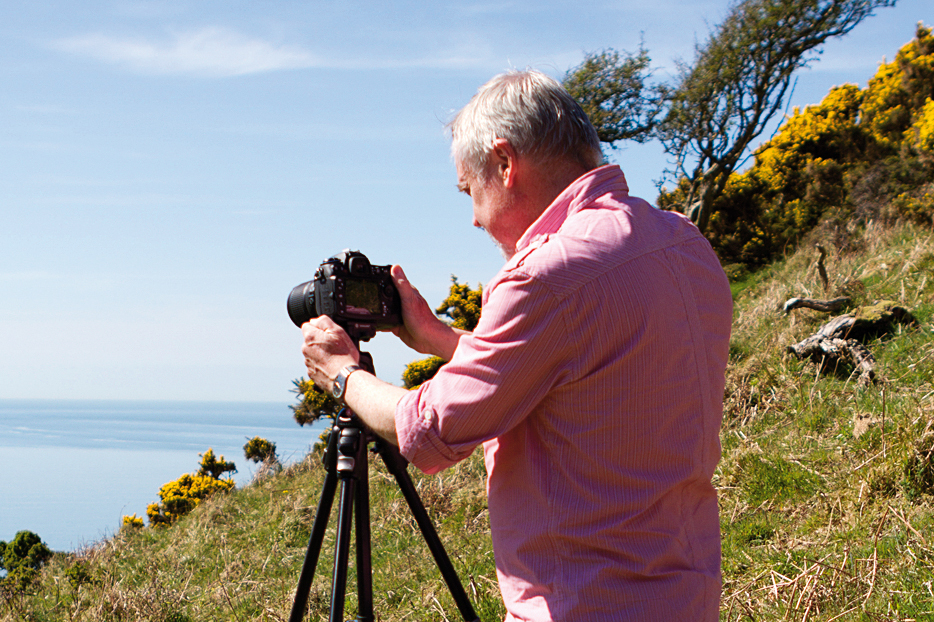
Use a tripod, because any slight change in the framing will affect the shape of the histogram and make it harder to judge the adjustments you need to make. Tripods also encourage you to plan the composition more carefully and take your time over getting the best shot possible.
• Read more: Best tripods
02 Switch to manual
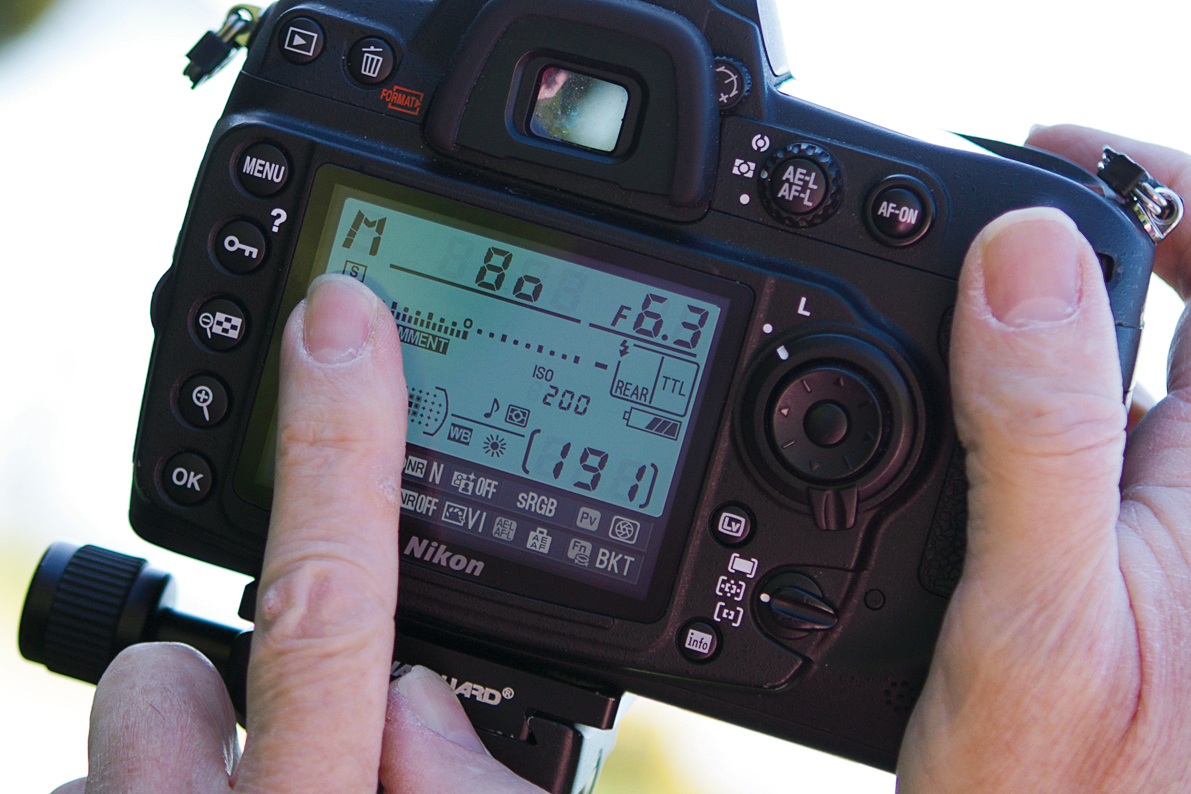
Manual mode makes it easy to change the lens aperture or shutter speed to adjust the exposure. You could do this in any of the auto modes, but then you’d need to use the exposure compensation control to adjust the exposure, and you’re not so in tune with the core camera settings.
03 Use the Sunny 16 rule
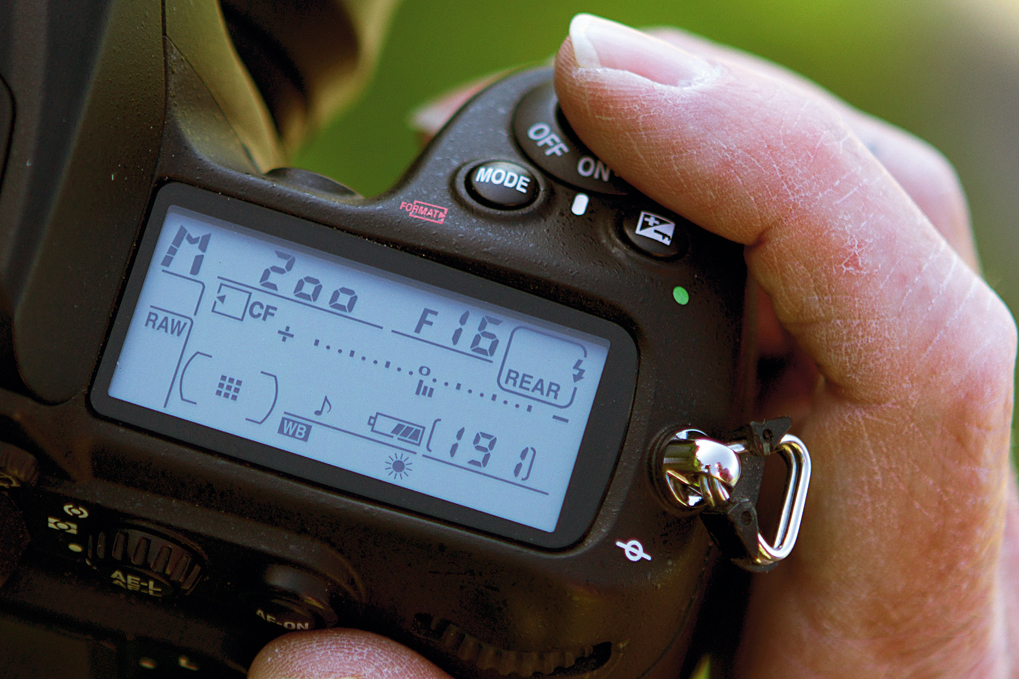
Take a guess at the correct exposure! We’re using the old ‘sunny 16’ rule. This says that in bright light you set the aperture to f/16 and the shutter speed to the ISO setting. Our camera is set to ISO200, so our exposure is 1/200 sec at f/16. This is only a starting point, so an estimate is fine.
04 Check the histogram
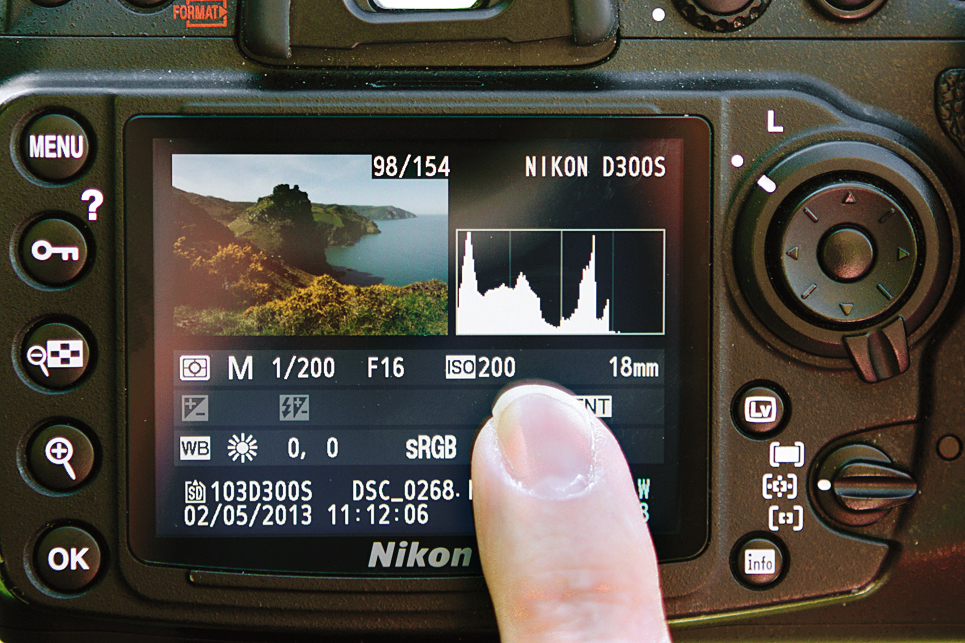
Take a shot and look at the picture’s histogram on the LCD display. If it’s over to the left and doesn’t reach the right-hand side, your shot is underexposed. Worse still, if it’s so far to the right that it’s chopped off at the edge, the picture is overexposed and the highlights are ‘clipped’.
05 Achieve the perfect exposure
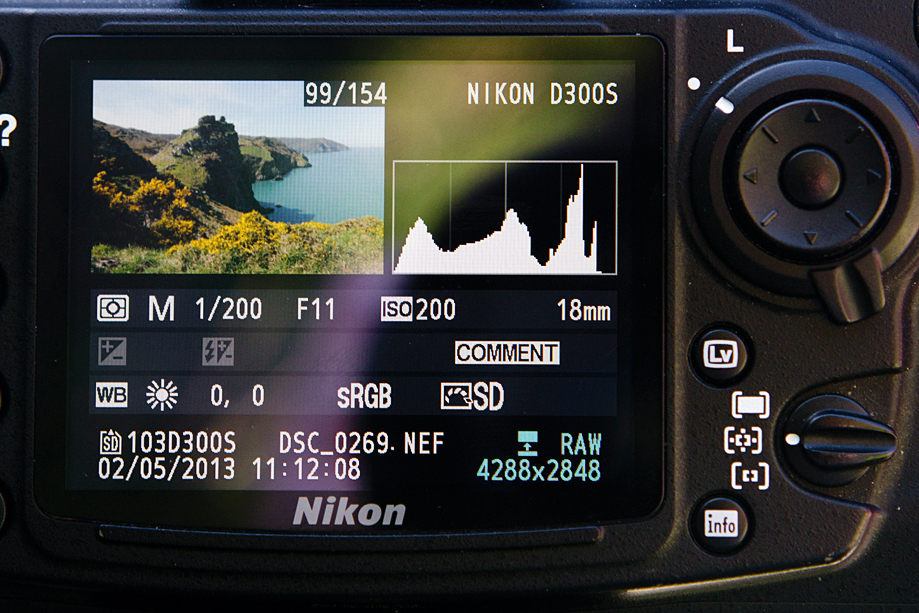
The perfect exposure is one where the histogram fits completely within the scale. Most of the time you can achieve this by fine-tuning the camera’s exposure settings. With the right exposure, our scene’s histogram fits just within the histogram scale.
06 Histogram too wide?
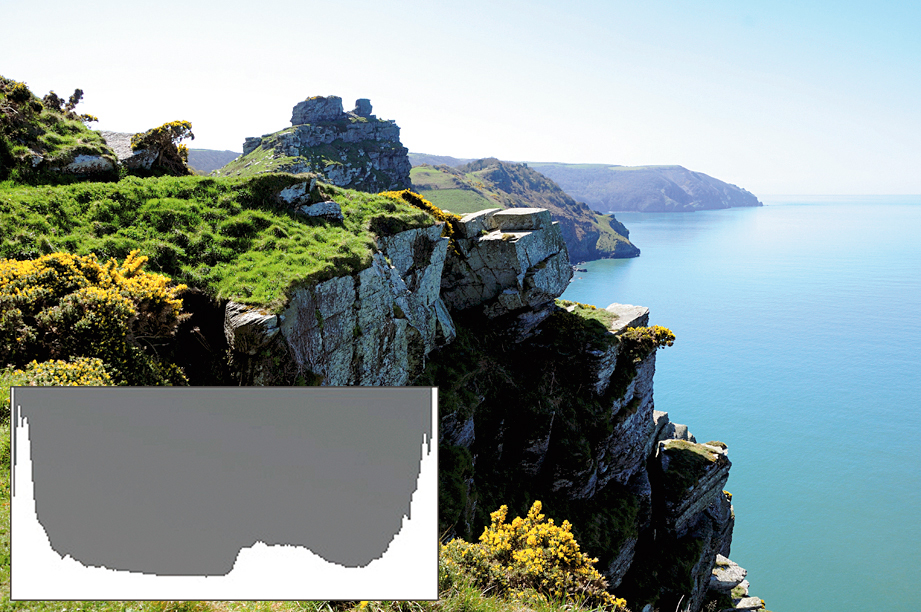
We’ve moved to include more of the shadowed side of the cliff in our shot, and now the histogram won’t fit, whatever exposure settings we use. In other words, the ‘dynamic range’ (brightness range) of the scene is greater than our camera can capture. So what do we do?
07 Go for a grad
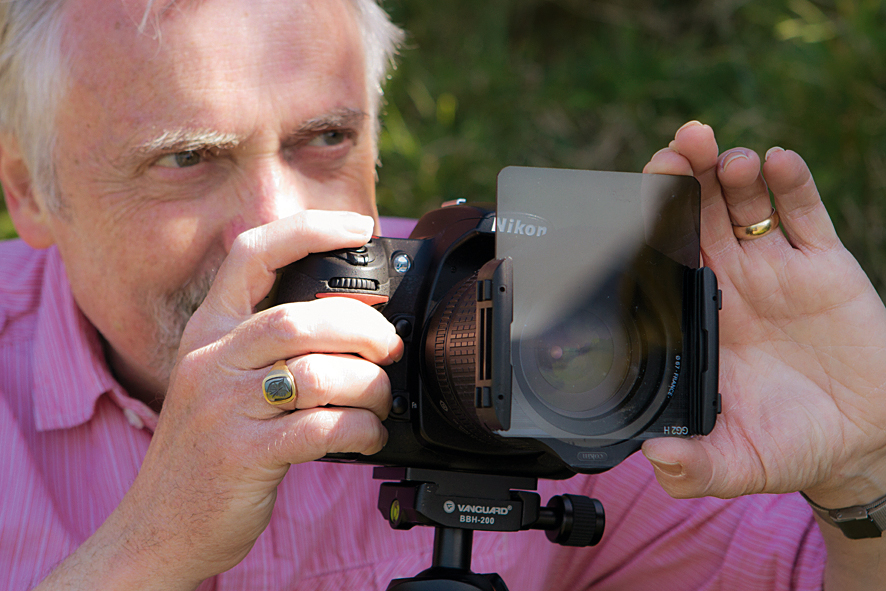
This is a common problem for landscape photographers, but the solution is simple – use a graduated filter. This darkens the sky but leaves the landscape unaffected. The skill lies in choosing a filter of the right strength and positioning the graduation on or just above the horizon.
08 Histogram just fits
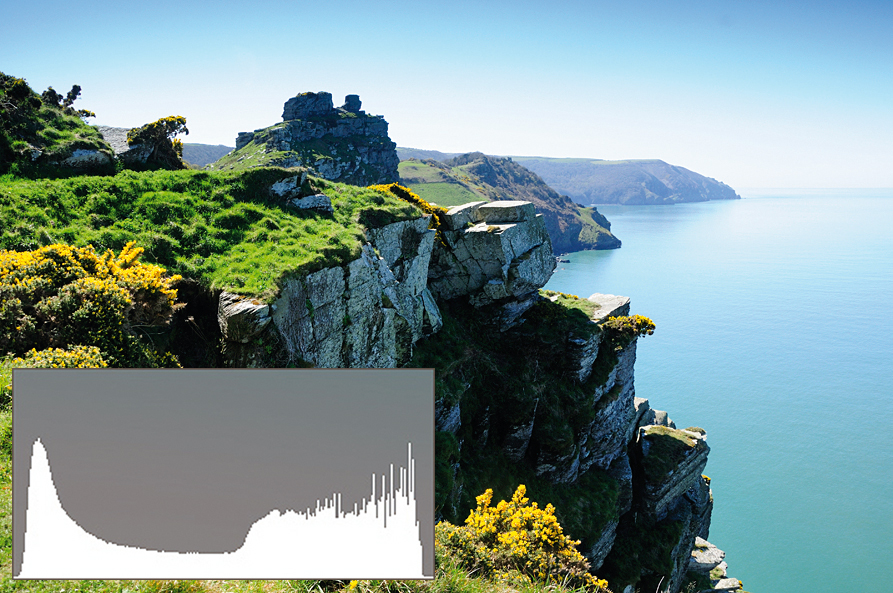
In our first attempt, the shadows in the cliff face were filled in and the sky was overexposed. The graduated filter has enabled us to increase the exposure slightly for the shadows and bring that bright sky back within the dynamic range of the camera’s sensor.

Top tips: Know your histograms
Here are some more unusual subjects and histogram shapes to look out for. They might look ‘wrong’, but they’re exactly how they should be
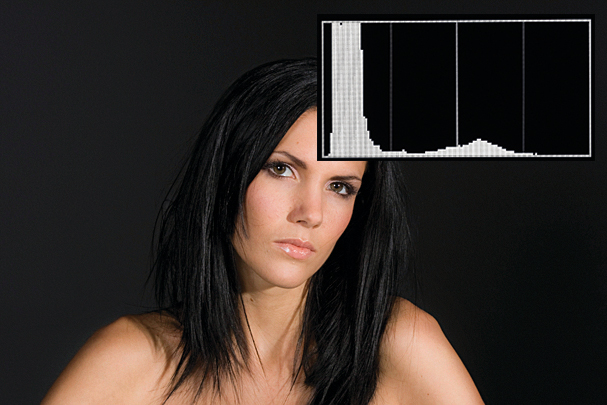
01 Light subject, dark background
For this shot you’d expect the histogram to peak at or near the left (black) end of the scale because of the large area of dark-toned background. The smaller peak to the right corresponds with the model’s skin tones.
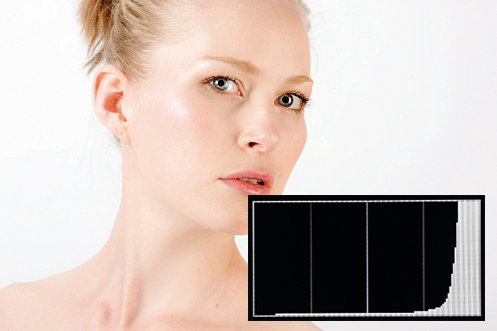
02 Light subject, light background
The white background produces the peak towards the right (highlights) end of the scale. The model’s skin tones are only slightly lighter, with some darker detail, which is why the histogram tails off towards the left.
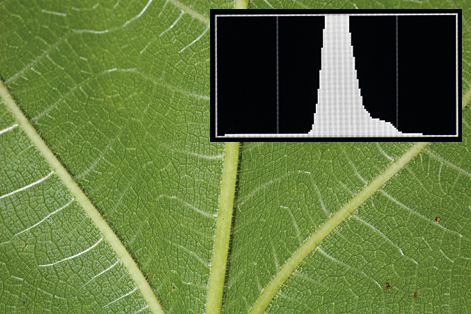
03 Low contrast
This is a low-contrast subject shot in soft light, so the histogram doesn’t quite reach to either end of the scale. This means the picture doesn’t have the maximum possible brightness range, but that’s entirely in keeping with the subject.
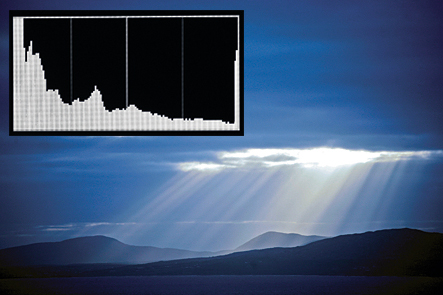
04 High contrast ‘double peak’
This is typical of landscape pictures taken into the light. The histogram has two peaks: the one on the far left corresponds to the dark landscape tones, while the one on the right corresponds to the bright sky.

More videos:
Hyperfocal distance and depth of field explained for landscape photography
Landscape photography composition: cheats to create effective frames
Sunset photography: tips and settings for perfect pictures
Get the Digital Camera World Newsletter
The best camera deals, reviews, product advice, and unmissable photography news, direct to your inbox!
Rod is an independent photography journalist and editor, and a long-standing Digital Camera World contributor, having previously worked as DCW's Group Reviews editor. Before that he has been technique editor on N-Photo, Head of Testing for the photography division and Camera Channel editor on TechRadar, as well as contributing to many other publications. He has been writing about photography technique, photo editing and digital cameras since they first appeared, and before that began his career writing about film photography. He has used and reviewed practically every interchangeable lens camera launched in the past 20 years, from entry-level DSLRs to medium format cameras, together with lenses, tripods, gimbals, light meters, camera bags and more. Rod has his own camera gear blog at fotovolo.com but also writes about photo-editing applications and techniques at lifeafterphotoshop.com
