Capture One 22 brings built in HDR blending: here's how it works
Capture One pro Paul Reiffer shows how Capture One's HDR feature can be used to create a single HDR raw file
The best camera deals, reviews, product advice, and unmissable photography news, direct to your inbox!
You are now subscribed
Your newsletter sign-up was successful
HDR photography is both a creative tool and a technical solution. HDR can be used to create intense and dramatic effects, but in the world of professional photography it's just as likely to be used for ultra-high contrast scenes where you don't always want the technique to be obvious. This is what Capture One 22's HDR feature is designed for. It can merge multiple bracketed raw files into a single DNG raw file which you can then edit like any other.
This series on Capture One has been specially commissioned from globetrotting pro photographer and editing expert Paul Reiffer.
• See the full Capture One series
• Capture One 21 review
• Best photo editing software
HDR techniques can be used to capture the detail in a landscape’s shadows and highlights for which there’s no “ideal filter” that can be used in front of the lens;
Or we could find ourselves shooting an interior where the contrast between the view through a window and the dark room inside is too great;
Article continues belowWhatever the reason, every now and then we’re faced with the challenge of needing to “blend” exposures to create a final image.
Historically that’s needed a plugin to achieve with Capture One, resulting in a flattened image that can’t be edited with the same tools as a raw file – until now.
With Capture One 22 comes native HDR blending to a single raw output file. Having streamlined the process and interface, Capture One now makes things easy when it comes to blending a bracketed sequence of exposures together.
1. Shooting an HDR sequence
Typlically, we’d aim for between 3 and 5 individual shots of the same scene – with a fixed aperture, fixed focus, fixed White Balance and fixed ISO – the only thing that should be changing between each frame should be the shutter speed. Many cameras offer an automated exposure bracketing function to achieve this, but if not, aim for around 3 stops of difference between each capture. Then, once the images are inside Capture One, the process becomes easy
The best camera deals, reviews, product advice, and unmissable photography news, direct to your inbox!
2. HDR merge in Capture One
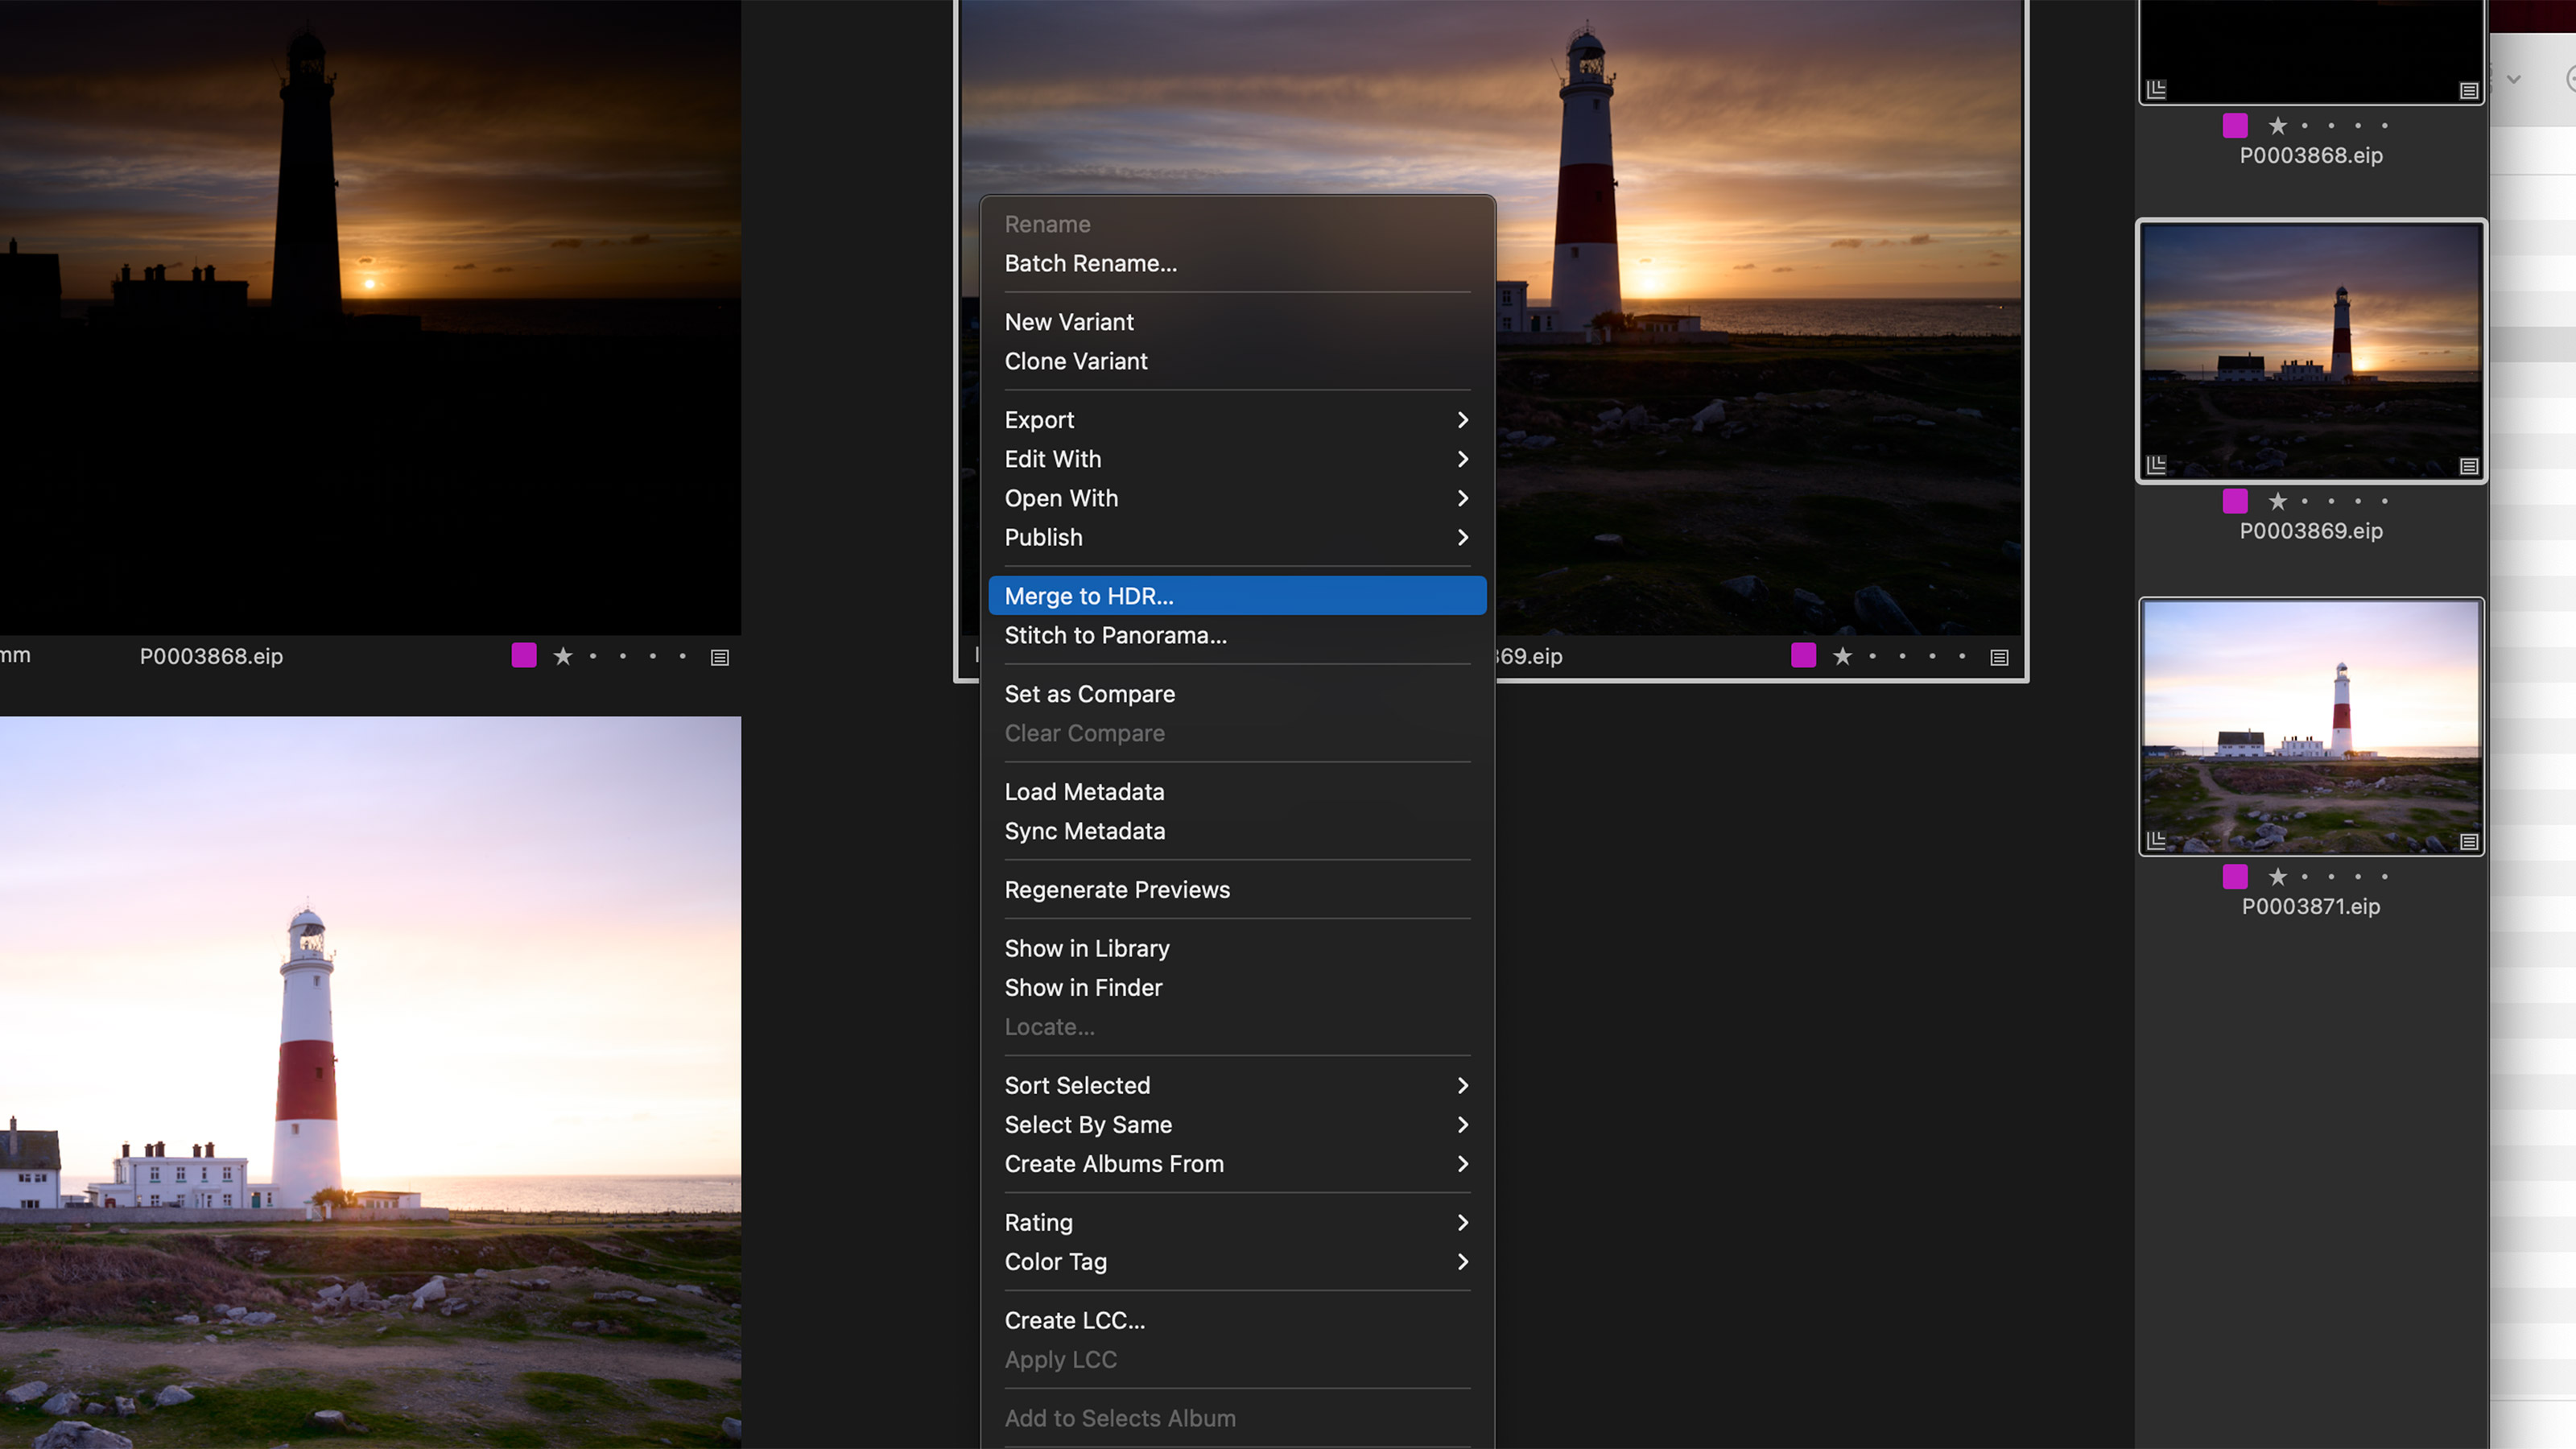
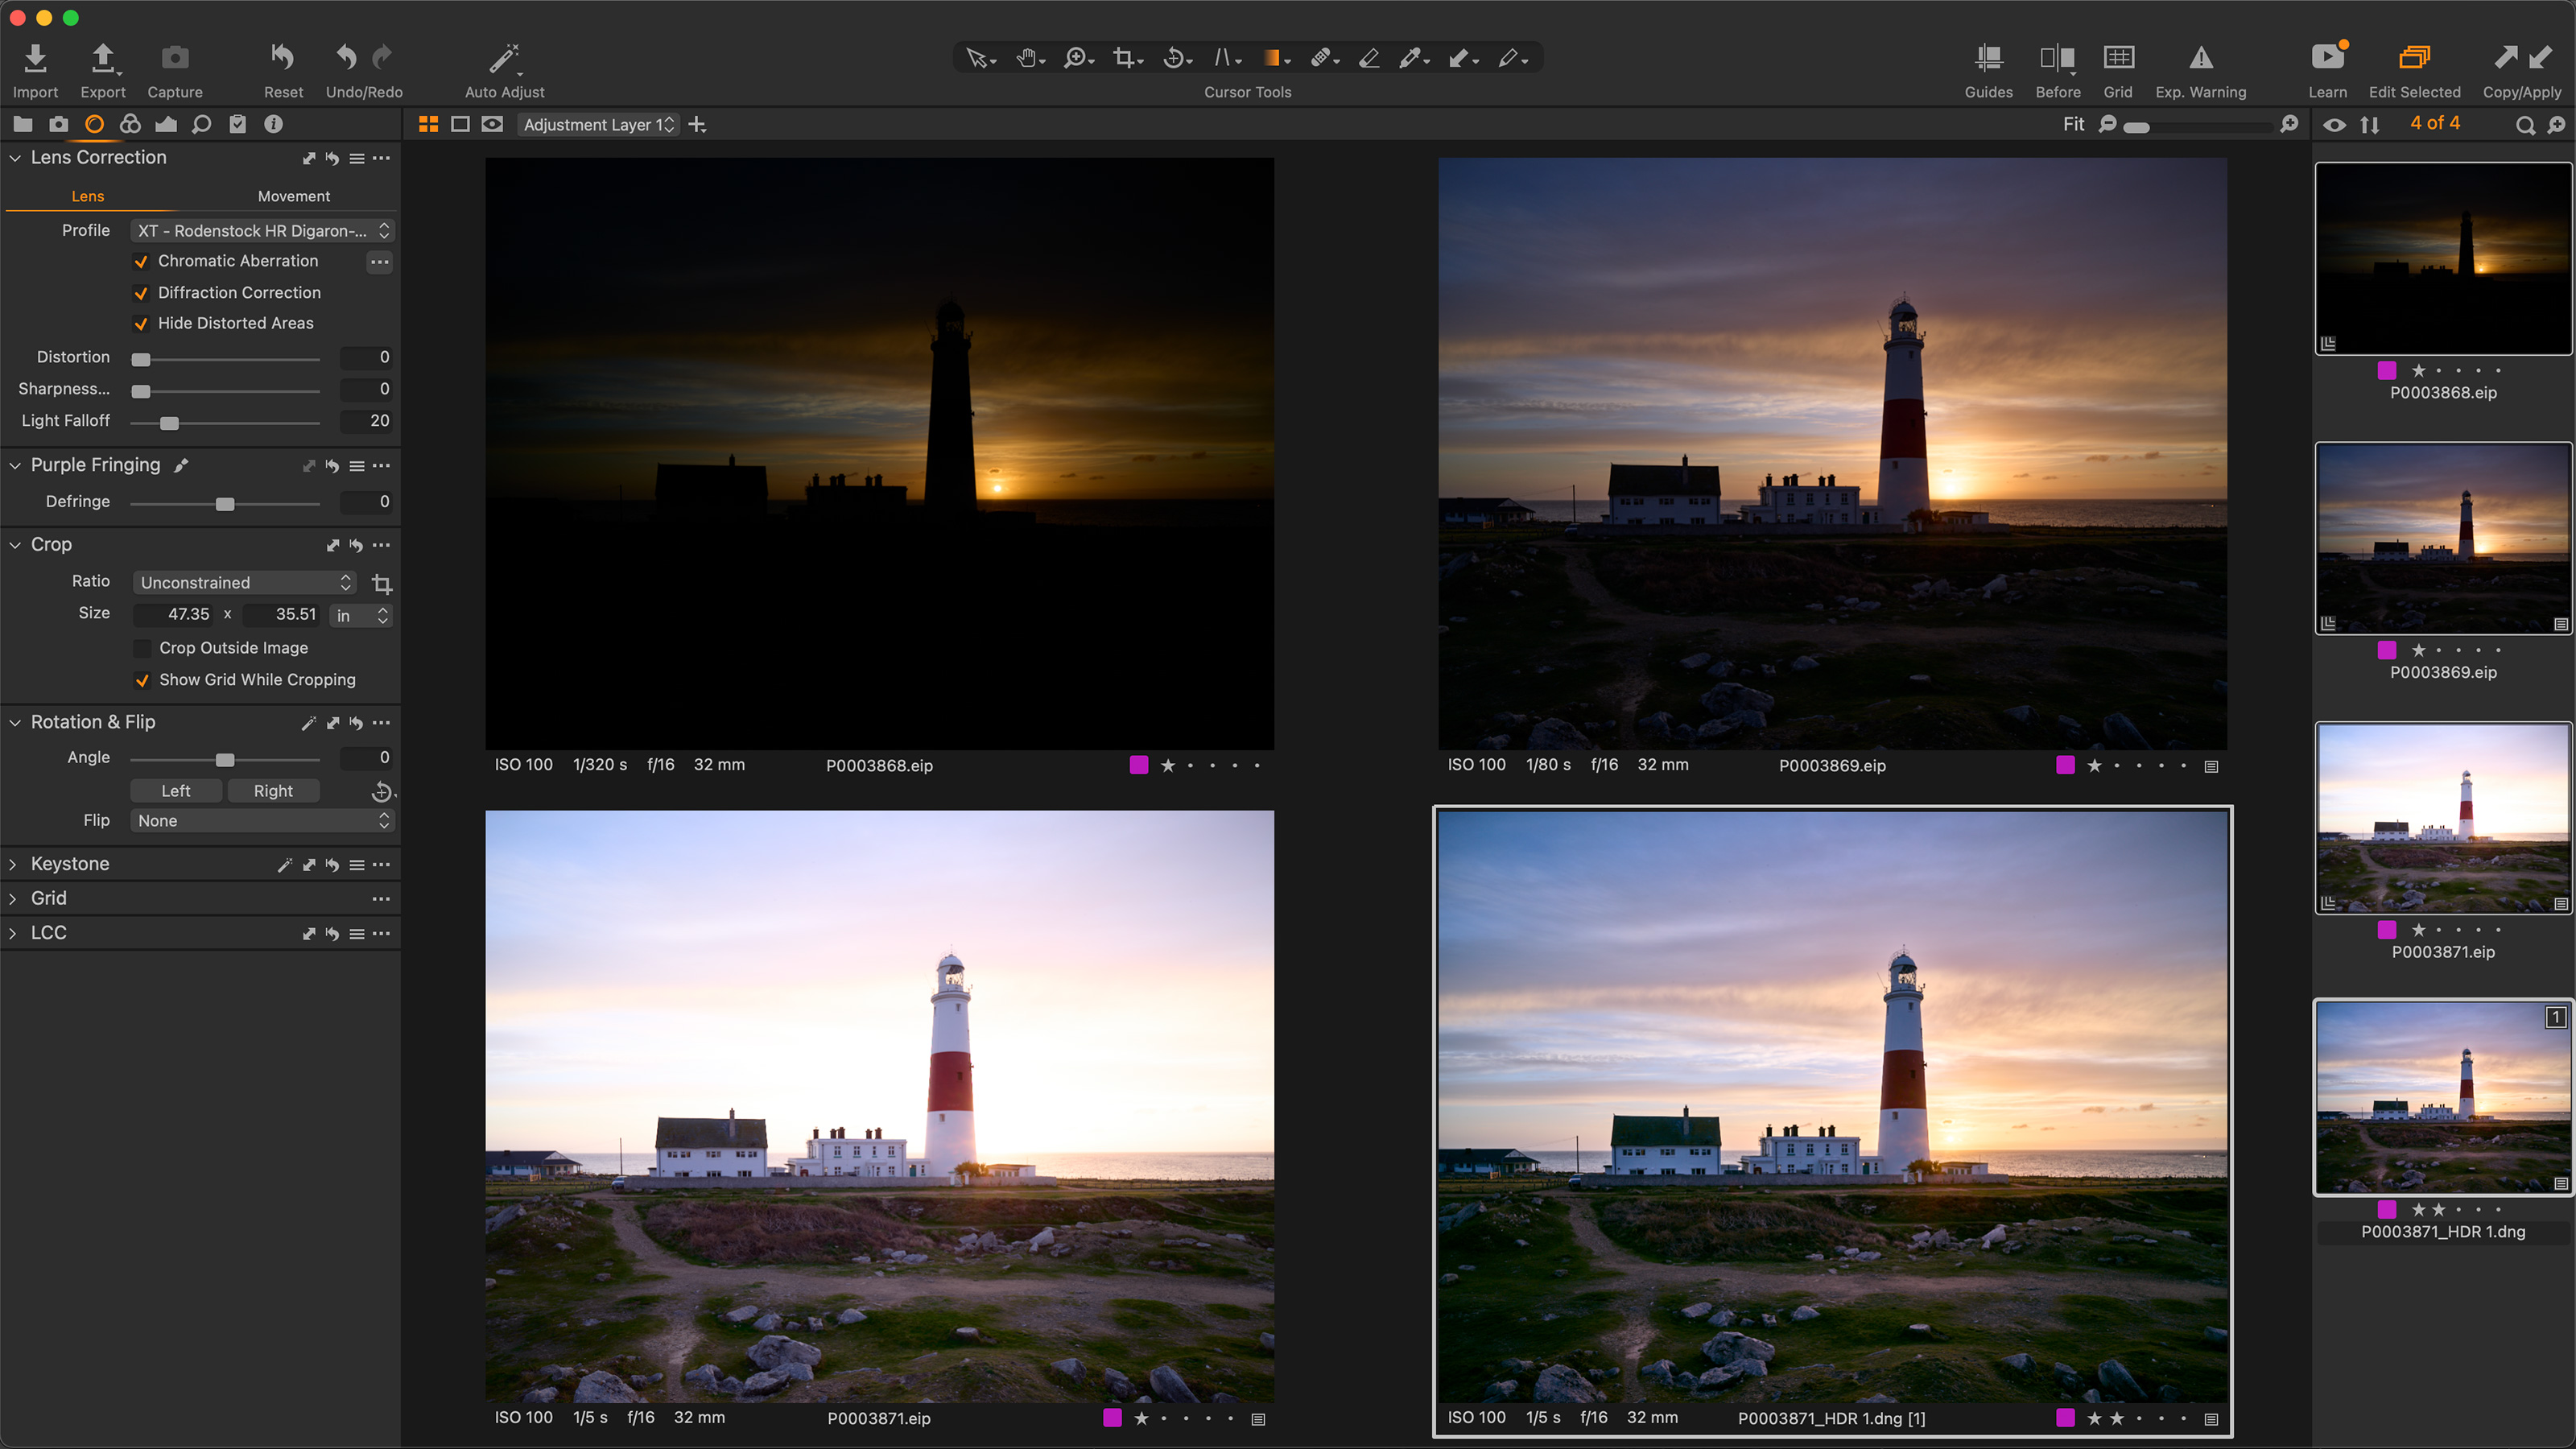
After importing your sequence into Capture One, you’ll need to make any lens corrections up front – diffraction correction, chromatic aberration, light fall-off and so on. Once complete, you’ll select the images you want to blend together, right-click, and select “Merge to HDR”.
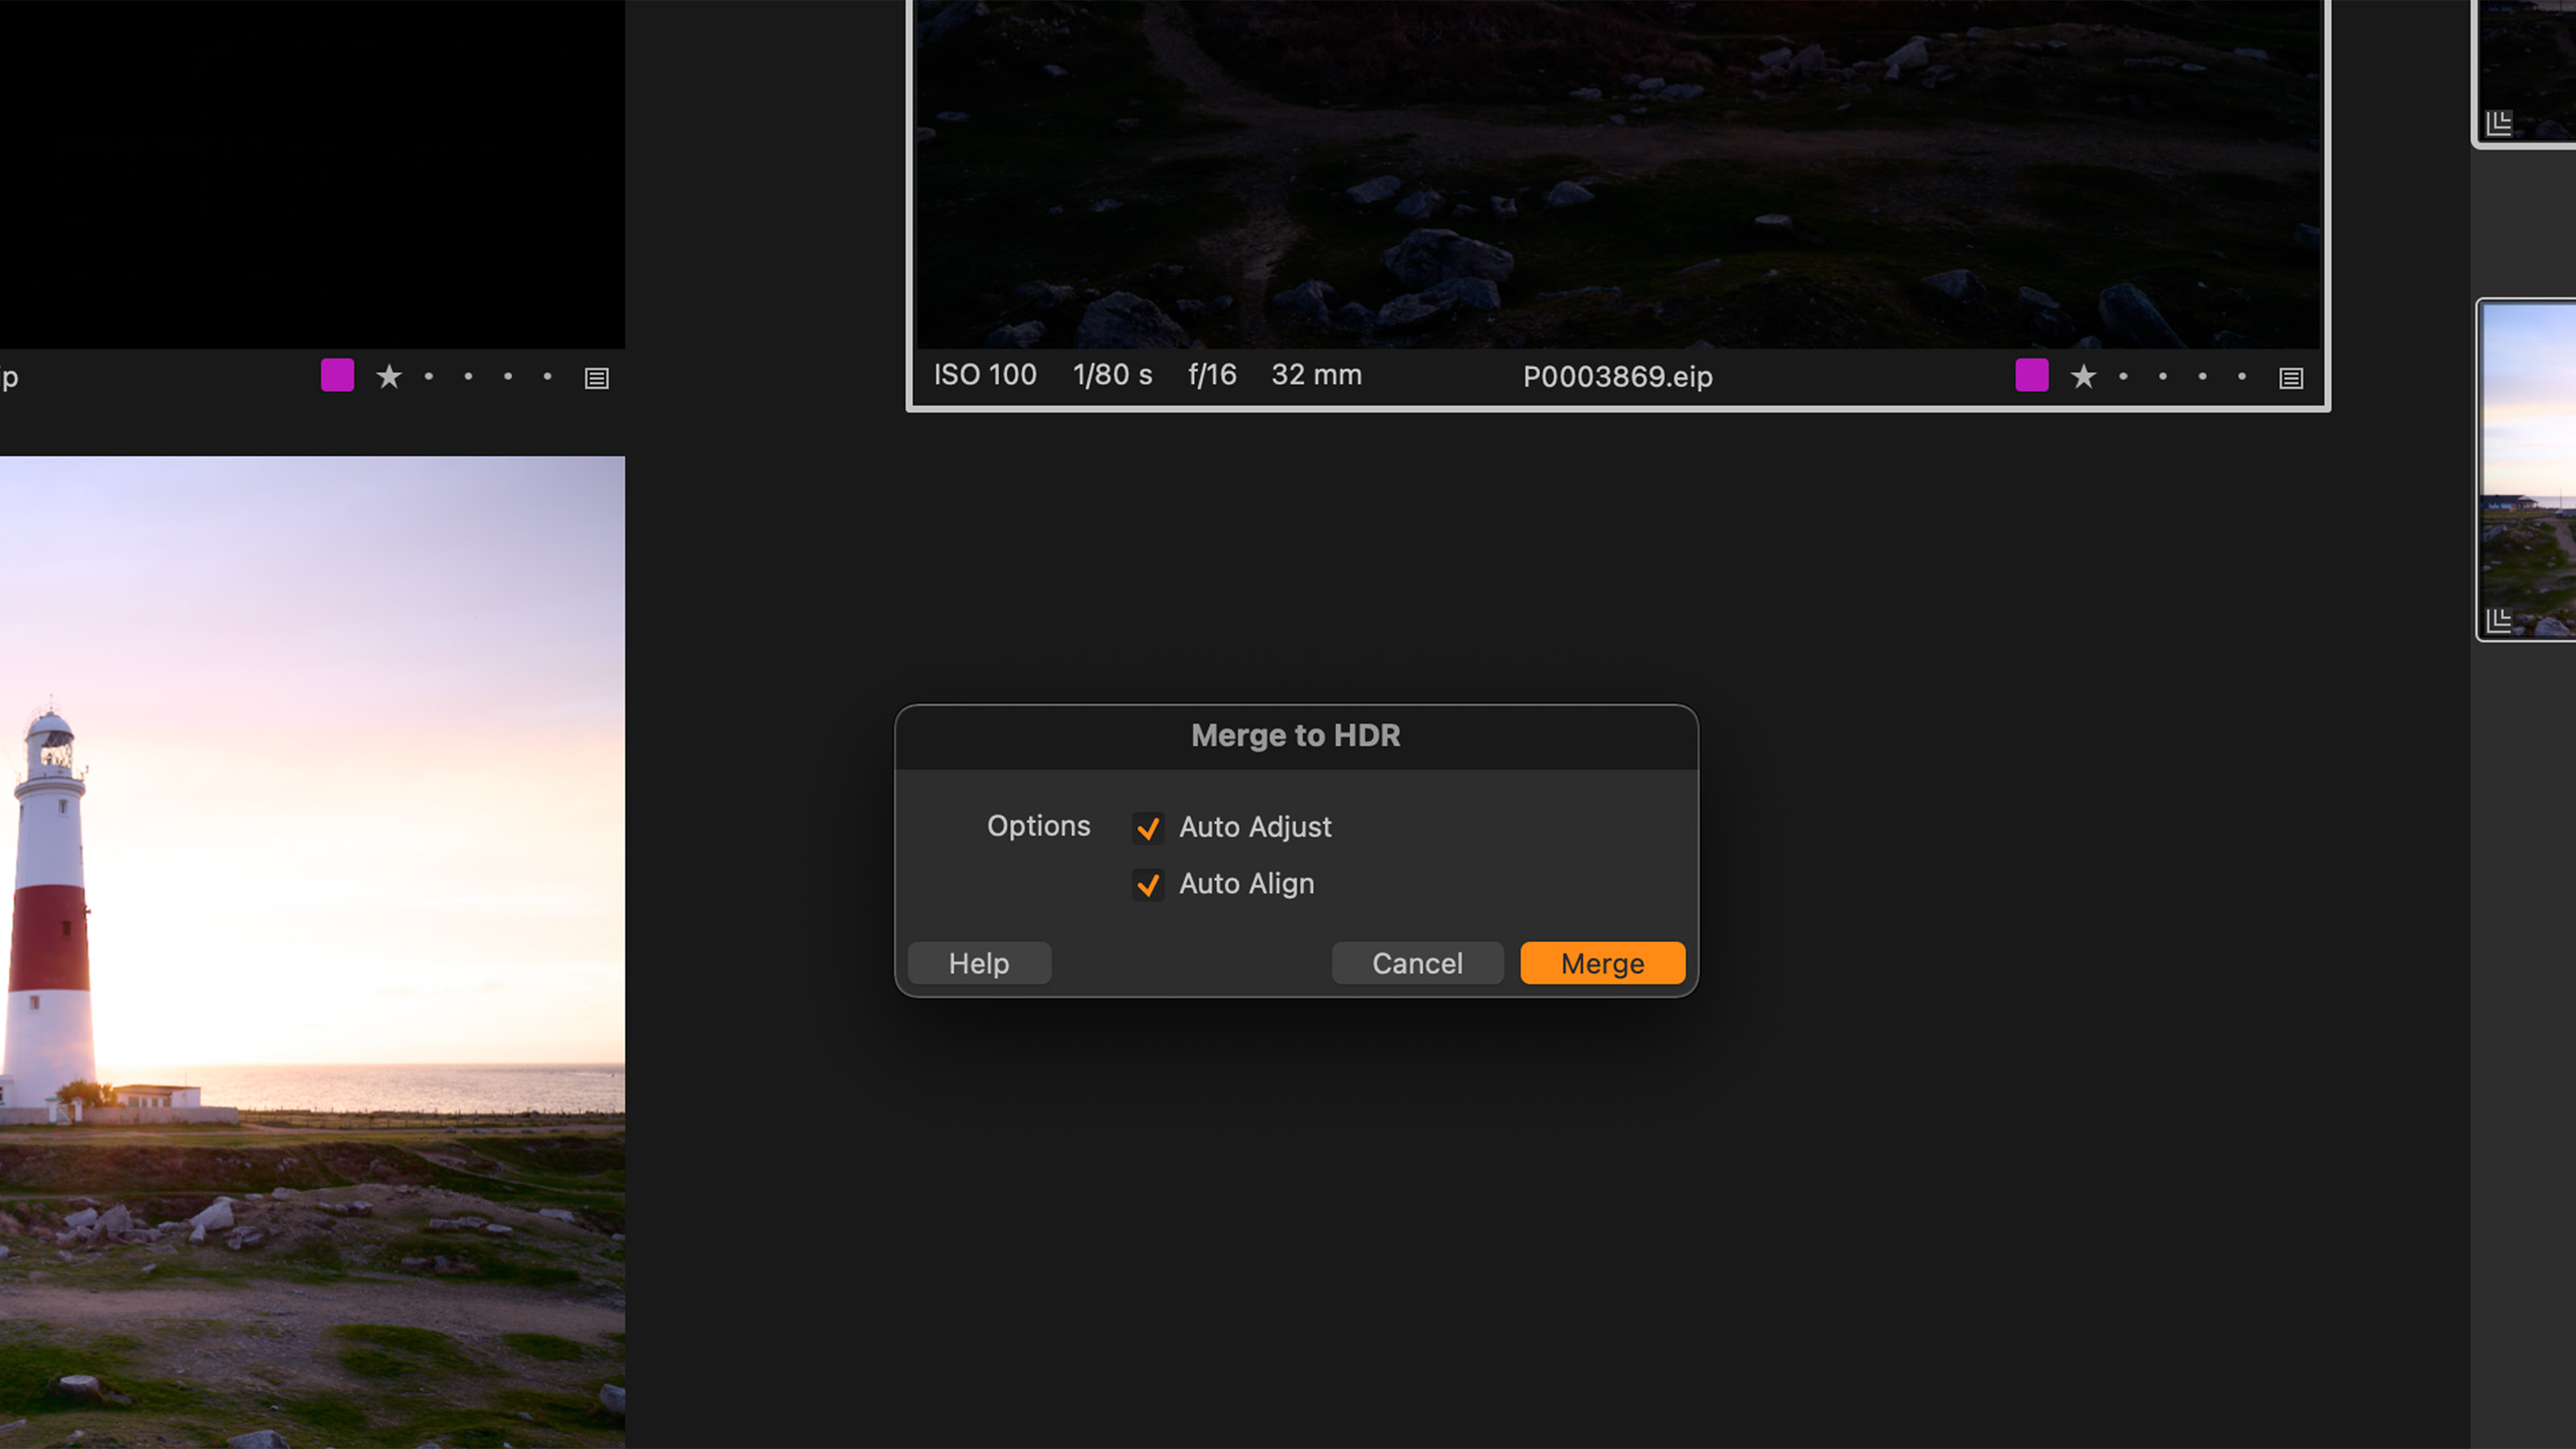
There is one single dialog box that appears, and this is the only interface you’ll see with the new function, asking two simple questions:
• Auto-Adjust: Do you want Capture One to apply some adjustments to the output raw file to deliver a “middle-exposed” shot with detail in shadows and highlights, or would you prefer to do this yourself?
• Auto-Align: While not recommended at the point of capture, if your individual frames moved (or were handheld), Capture One can align them automatically and merge the relevant parts. If you shot on a tripod, this shouldn’t be necessary.
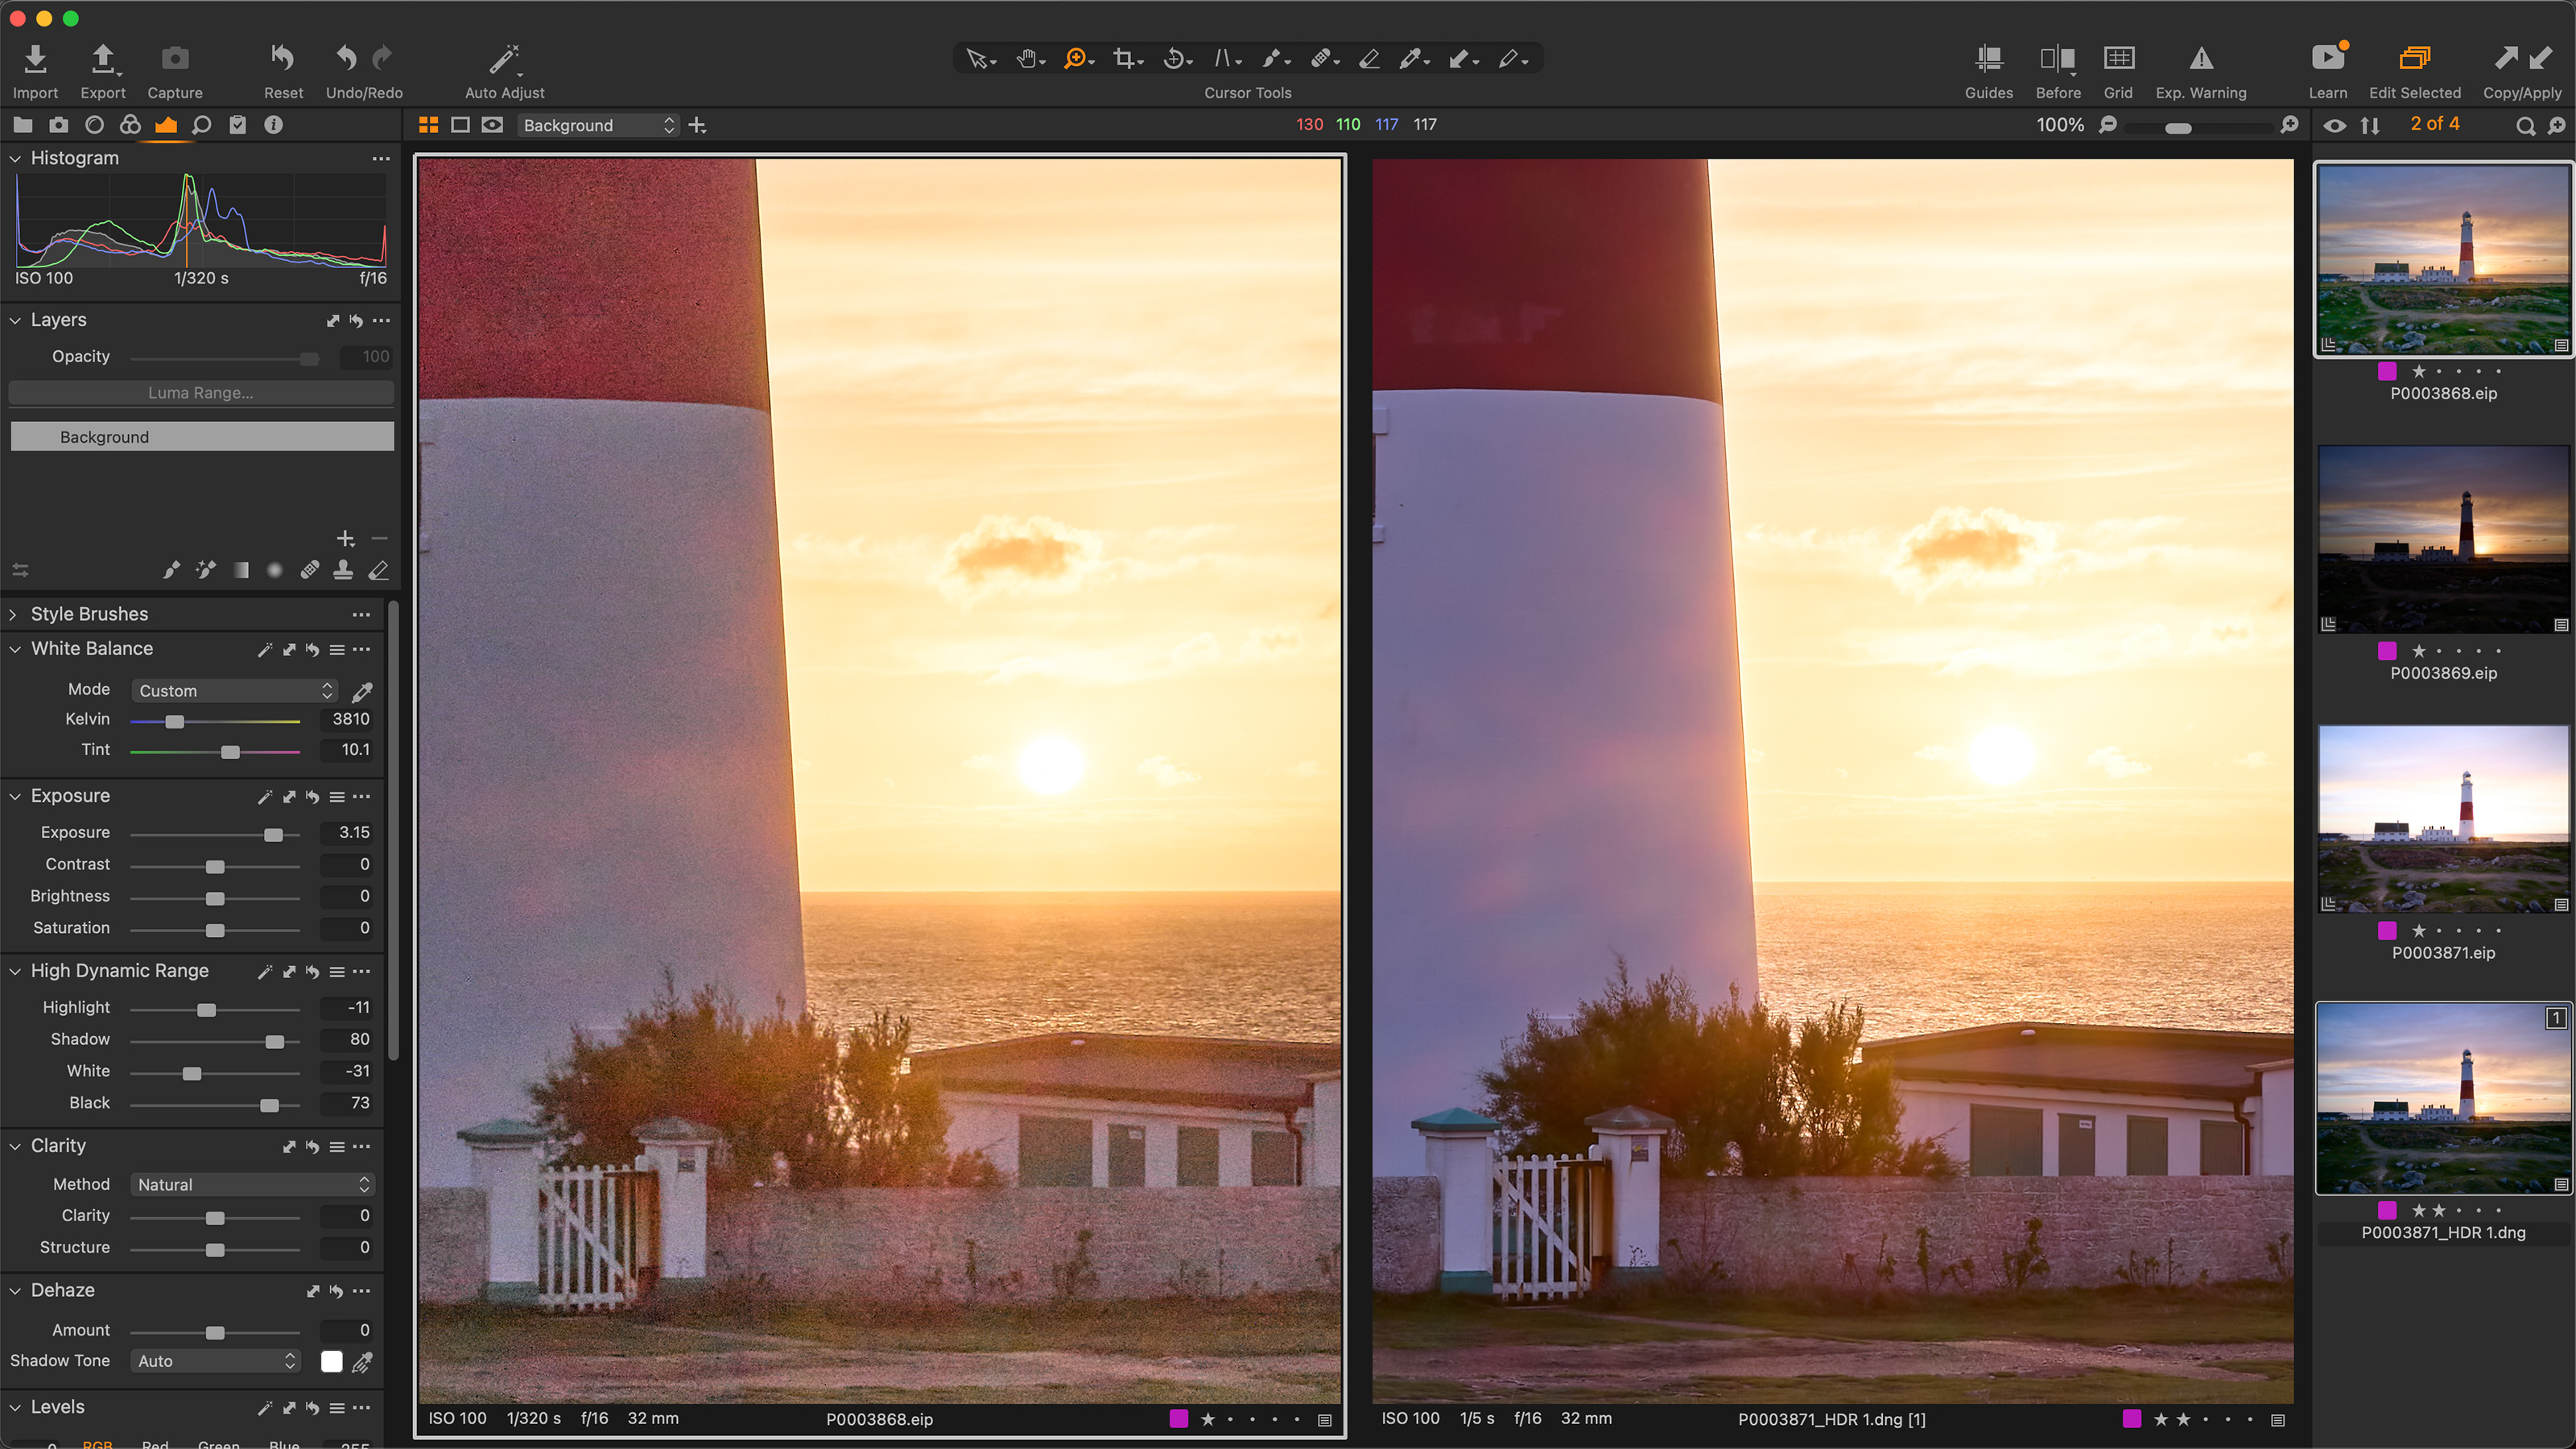
The output, after processing, will be a DNG file created alongside the images you selected in the browser – and is fully editable just like any other raw file you’ve used.
You may find you need to adjust the HDR sliders to pull down some of the highlights in the final merge, but given it’s a raw image, you can make any such changes to your taste.
You don't need to use HDR merge all the time. Very often, it's possible to use the regular HDR panel within Capture One to recover the dynamic range in a single frame raw file.
However, there is one other benefit to using the new function with bracketed shots: Noise reduction. Noise is random, by nature – so part of Capture One’s algorithm delivers clean shadows as it blends the multiple frames together, removing unwanted noise from any given area. While it’s possible to “push” the shadows in a single shot, the result from an HDR blend can be a lot less noisy in the shadows.
When to use HDR
Merging multiple frames into an HDR image isn’t for everyone – and there are certainly examples of overdone blends that we’ve all seen out there.
But used correctly, to deliver a realistic mix of detailed shadows, clear highlights across a noise-free image, the new raw output HDR Merge function in Capture One 22 can be a powerful tool for landscape, architectural and commercial photographers alike.
About Capture One
Capture One is an all-in-one non-destructive image cataloguing, raw processing and editing tool, and its closest rival is Adobe Lightroom Classic. Capture One regularly features in our guide to the best photo editing software, thanks to its high-quality raw processing, in-depth color controls and layer and mask based editing.
Get Capture One Pro 22: $299 or $179/year
Capture One Pro is available either for a single one-off license fee on a paid-monthly subscription or an annual subscription which offers a big saving over the monthly option.
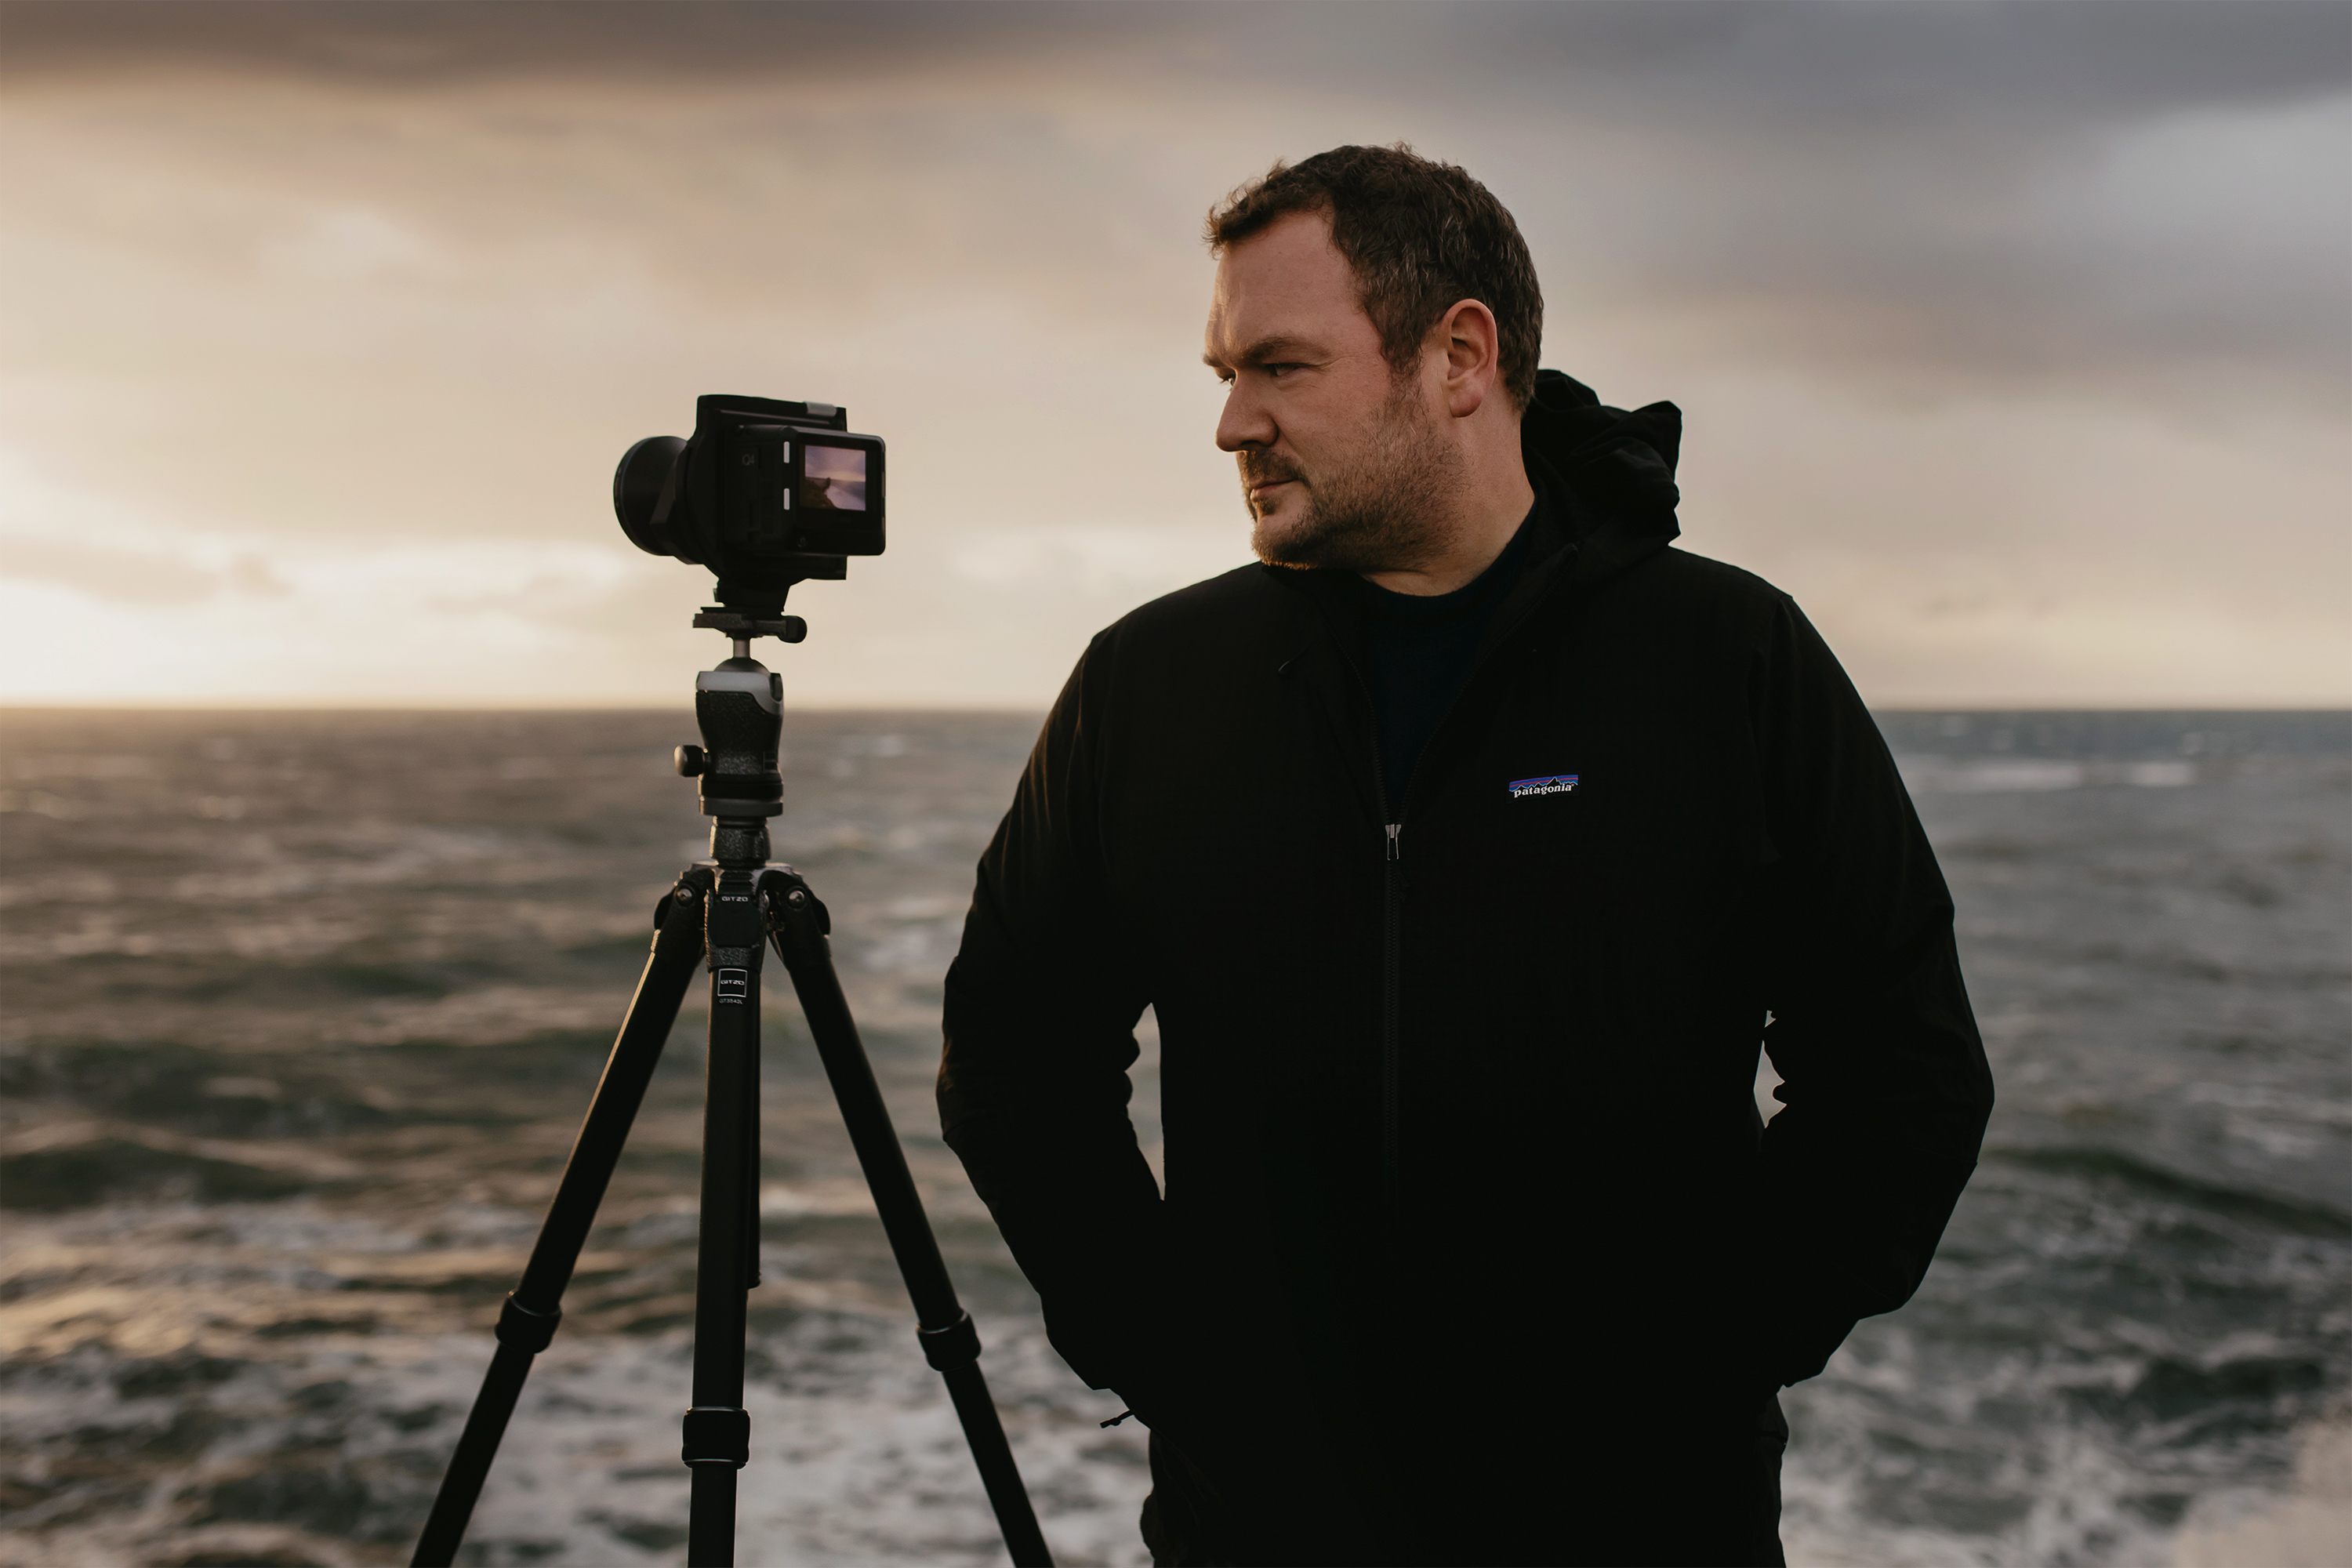
Paul Reiffer is an award-winning photographer and landscape artist. As a global ambassador for both Phase One and Capture One, he specialises in grand vistas, electrifying cityscapes and iconic views. His images have been published all around the world in well-known books, newspapers and magazines as well as supporting global travel and hospitality brands to reach and excite their audiences. His technical expertise is regularly called upon for industry insights, and through his luxury workshop programme as well as online channels, he’s carved out a unique style of teaching that is now appreciated by thousands worldwide. Shooting with ultra-high-resolution Phase One cameras, his work is used commercially by interior designers and clients ranging from National Geographic to British Airways, Marriott, Land Rover and many more.
