Capture One Luma Ranges: how to use them for complex adjustments and masks
Pro photographer Paul Reiffer shows how Capture One's Luma Range feature can make light work of complex masking
The best camera deals, reviews, product advice, and unmissable photography news, direct to your inbox!
You are now subscribed
Your newsletter sign-up was successful
We continue our series of pro editing secrets for Capture One software with a look at Capture One's Luma Ranges. With these you can make adjustments based on brightness value without the need for time-consuming manual masking.
This series on Capture One has been specially commissioned from globetrotting pro photographer and editing expert Paul Reiffer.
• See the full Capture One series
• Capture One 21 review
• Best photo editing software
Capture One has an amazing array of helpful tools designed to select and adjust specific sections of your images – from Gradient Masks to the latest “Magic Brush”, Auto-Mask and, of course, the standard brush.
But it’s sometimes easy to forget one of the most powerful tools available to us in terms of isolating areas of a challenging shot, that can be applied to each and every type of mask – The Luma Range.
Article continues belowWith the ability to select specific brightness values of an image, not just being based on a pixel’s position, the Luma Range offers up an unique way of selecting certain areas of a complex photograph in a way that can get the very best from your camera’s dynamic range while keeping the shot true to life.
Often when we’re shooting in high contrast scenes, we’d like to separate out the bright areas from the shadows and treat them differently. While the HDR sliders can help us with brightness, it can’t help adjust white balance or other aspects individually from the rest of the shot, resulting in compromises needing to be made.
When we know there is a set region (in brightness terms) of an image that has more detail available to us, but where a blanket change to, say, Exposure won’t help – the Luma Range allows us to refine the selection to only certain values for ultra-sharp, accurate, natural masks.
Step 1: Create a mask
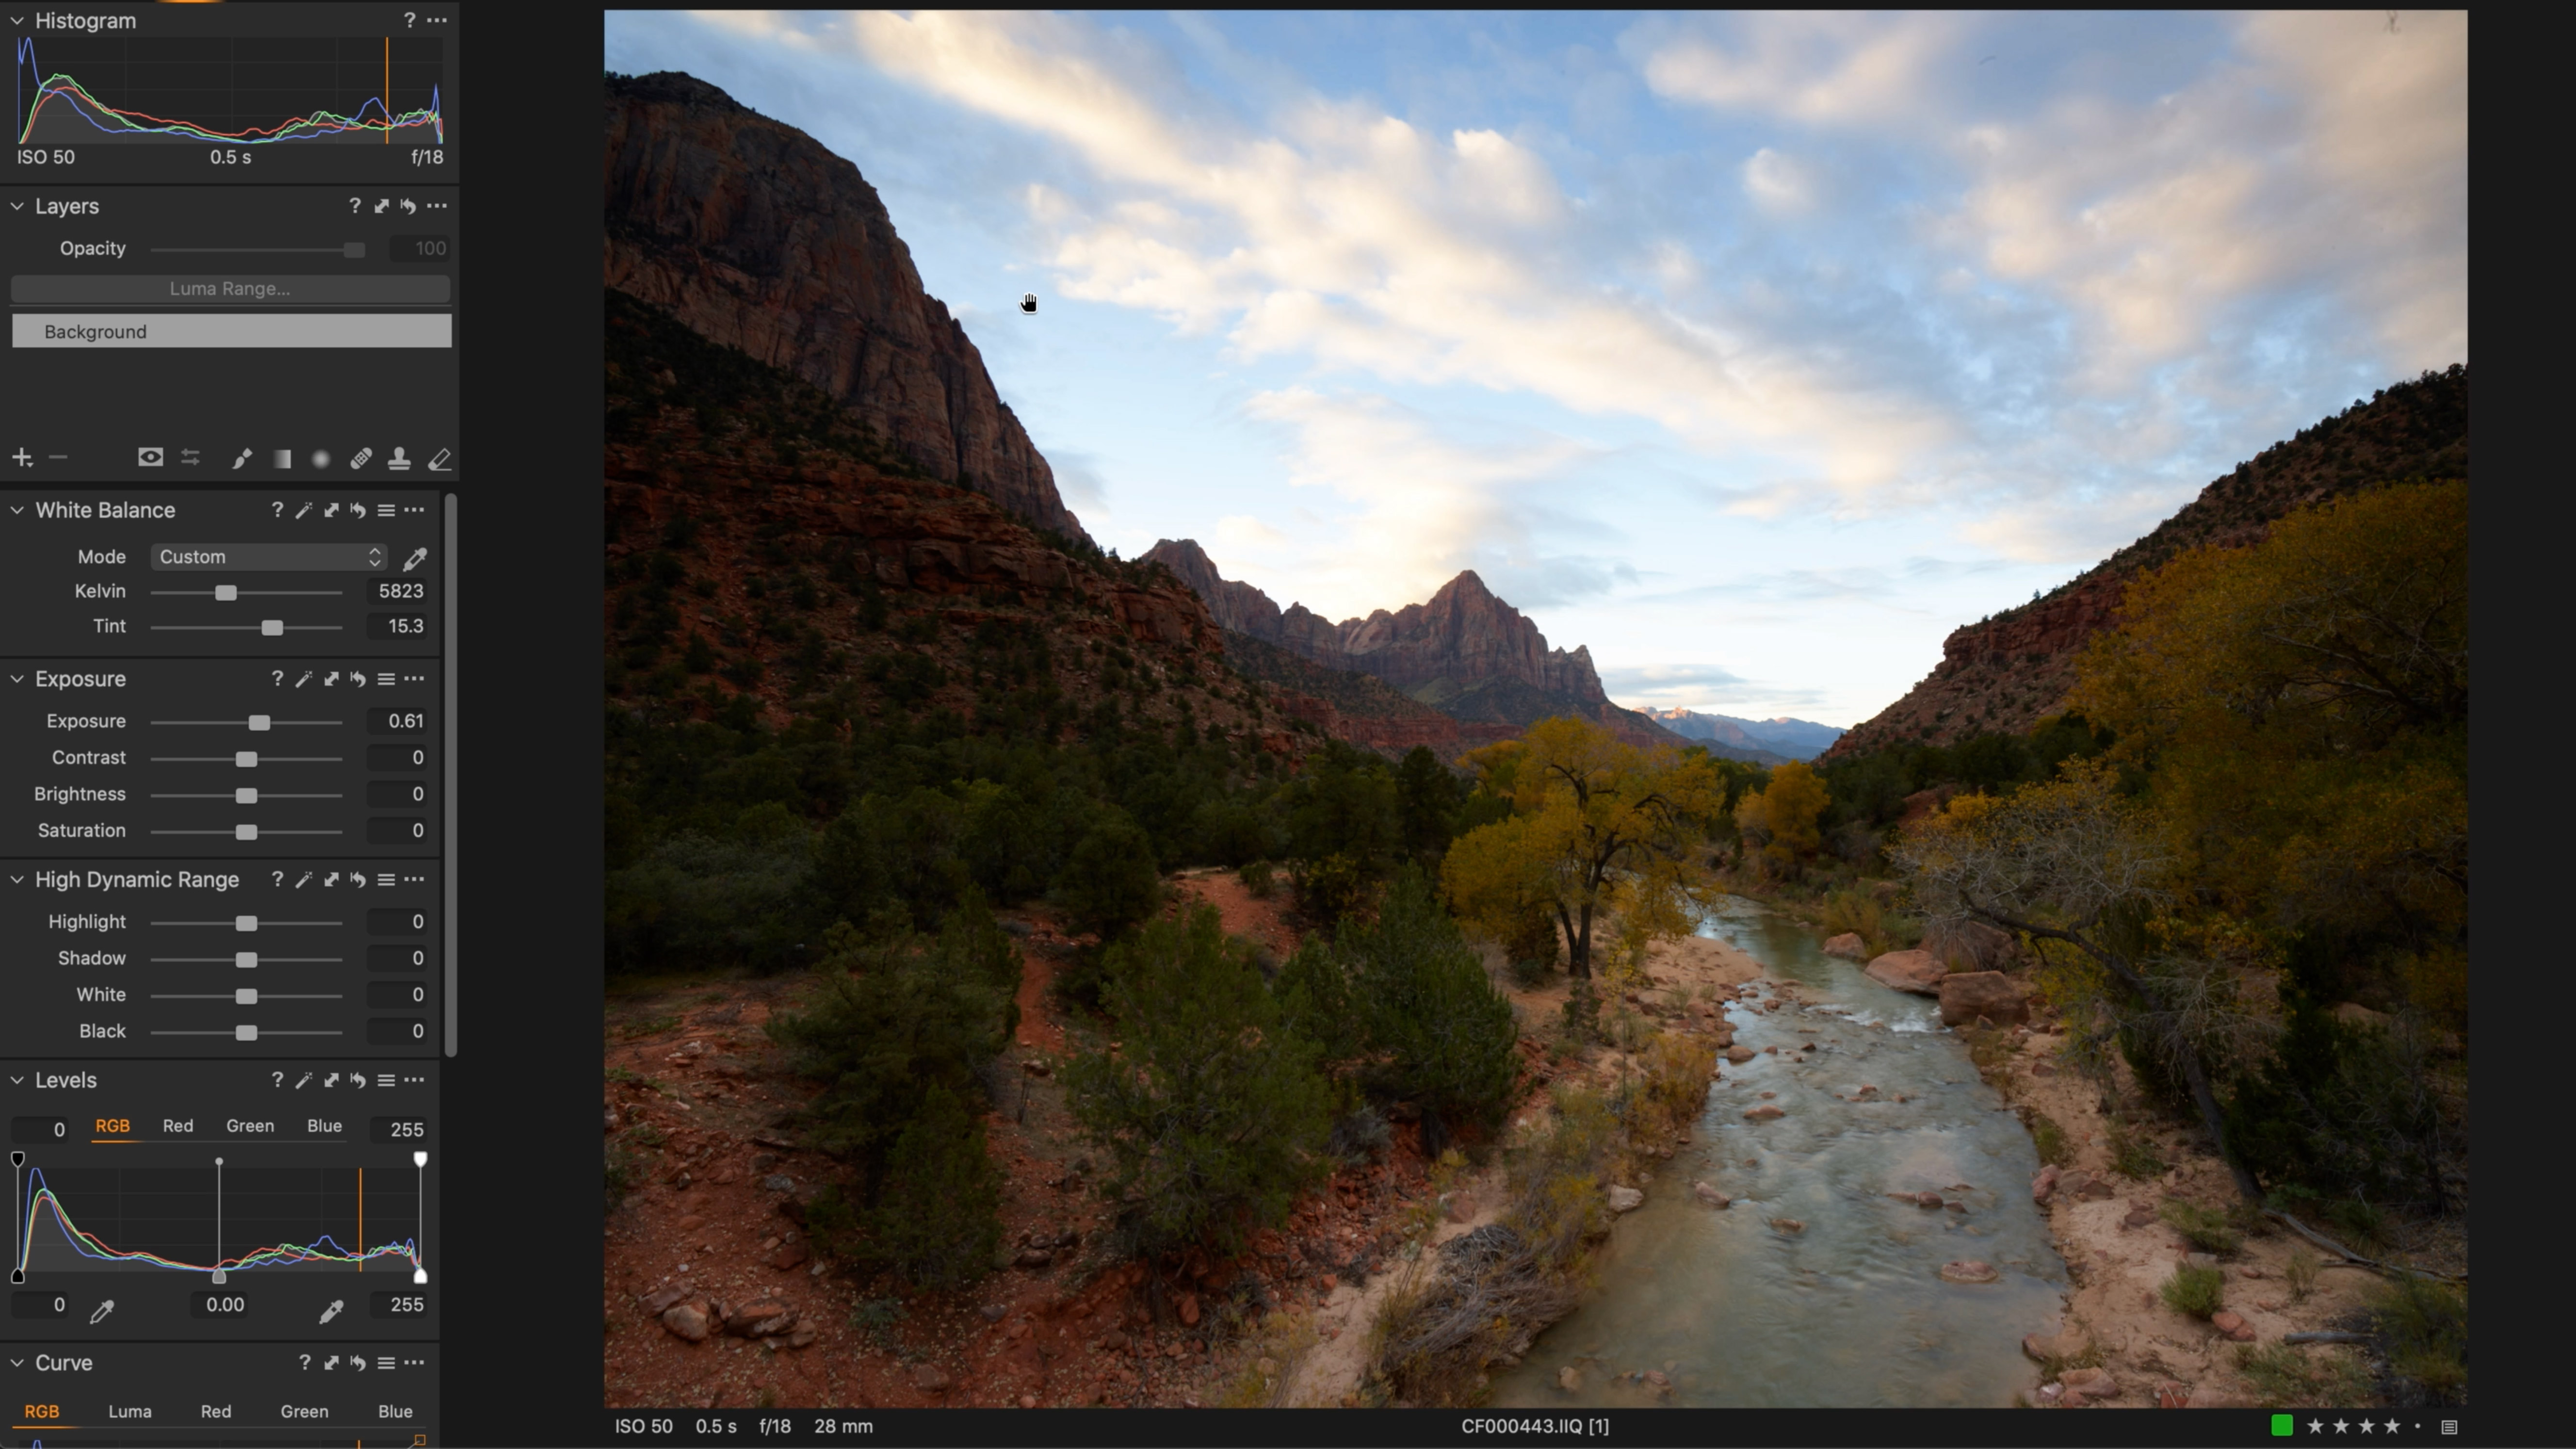
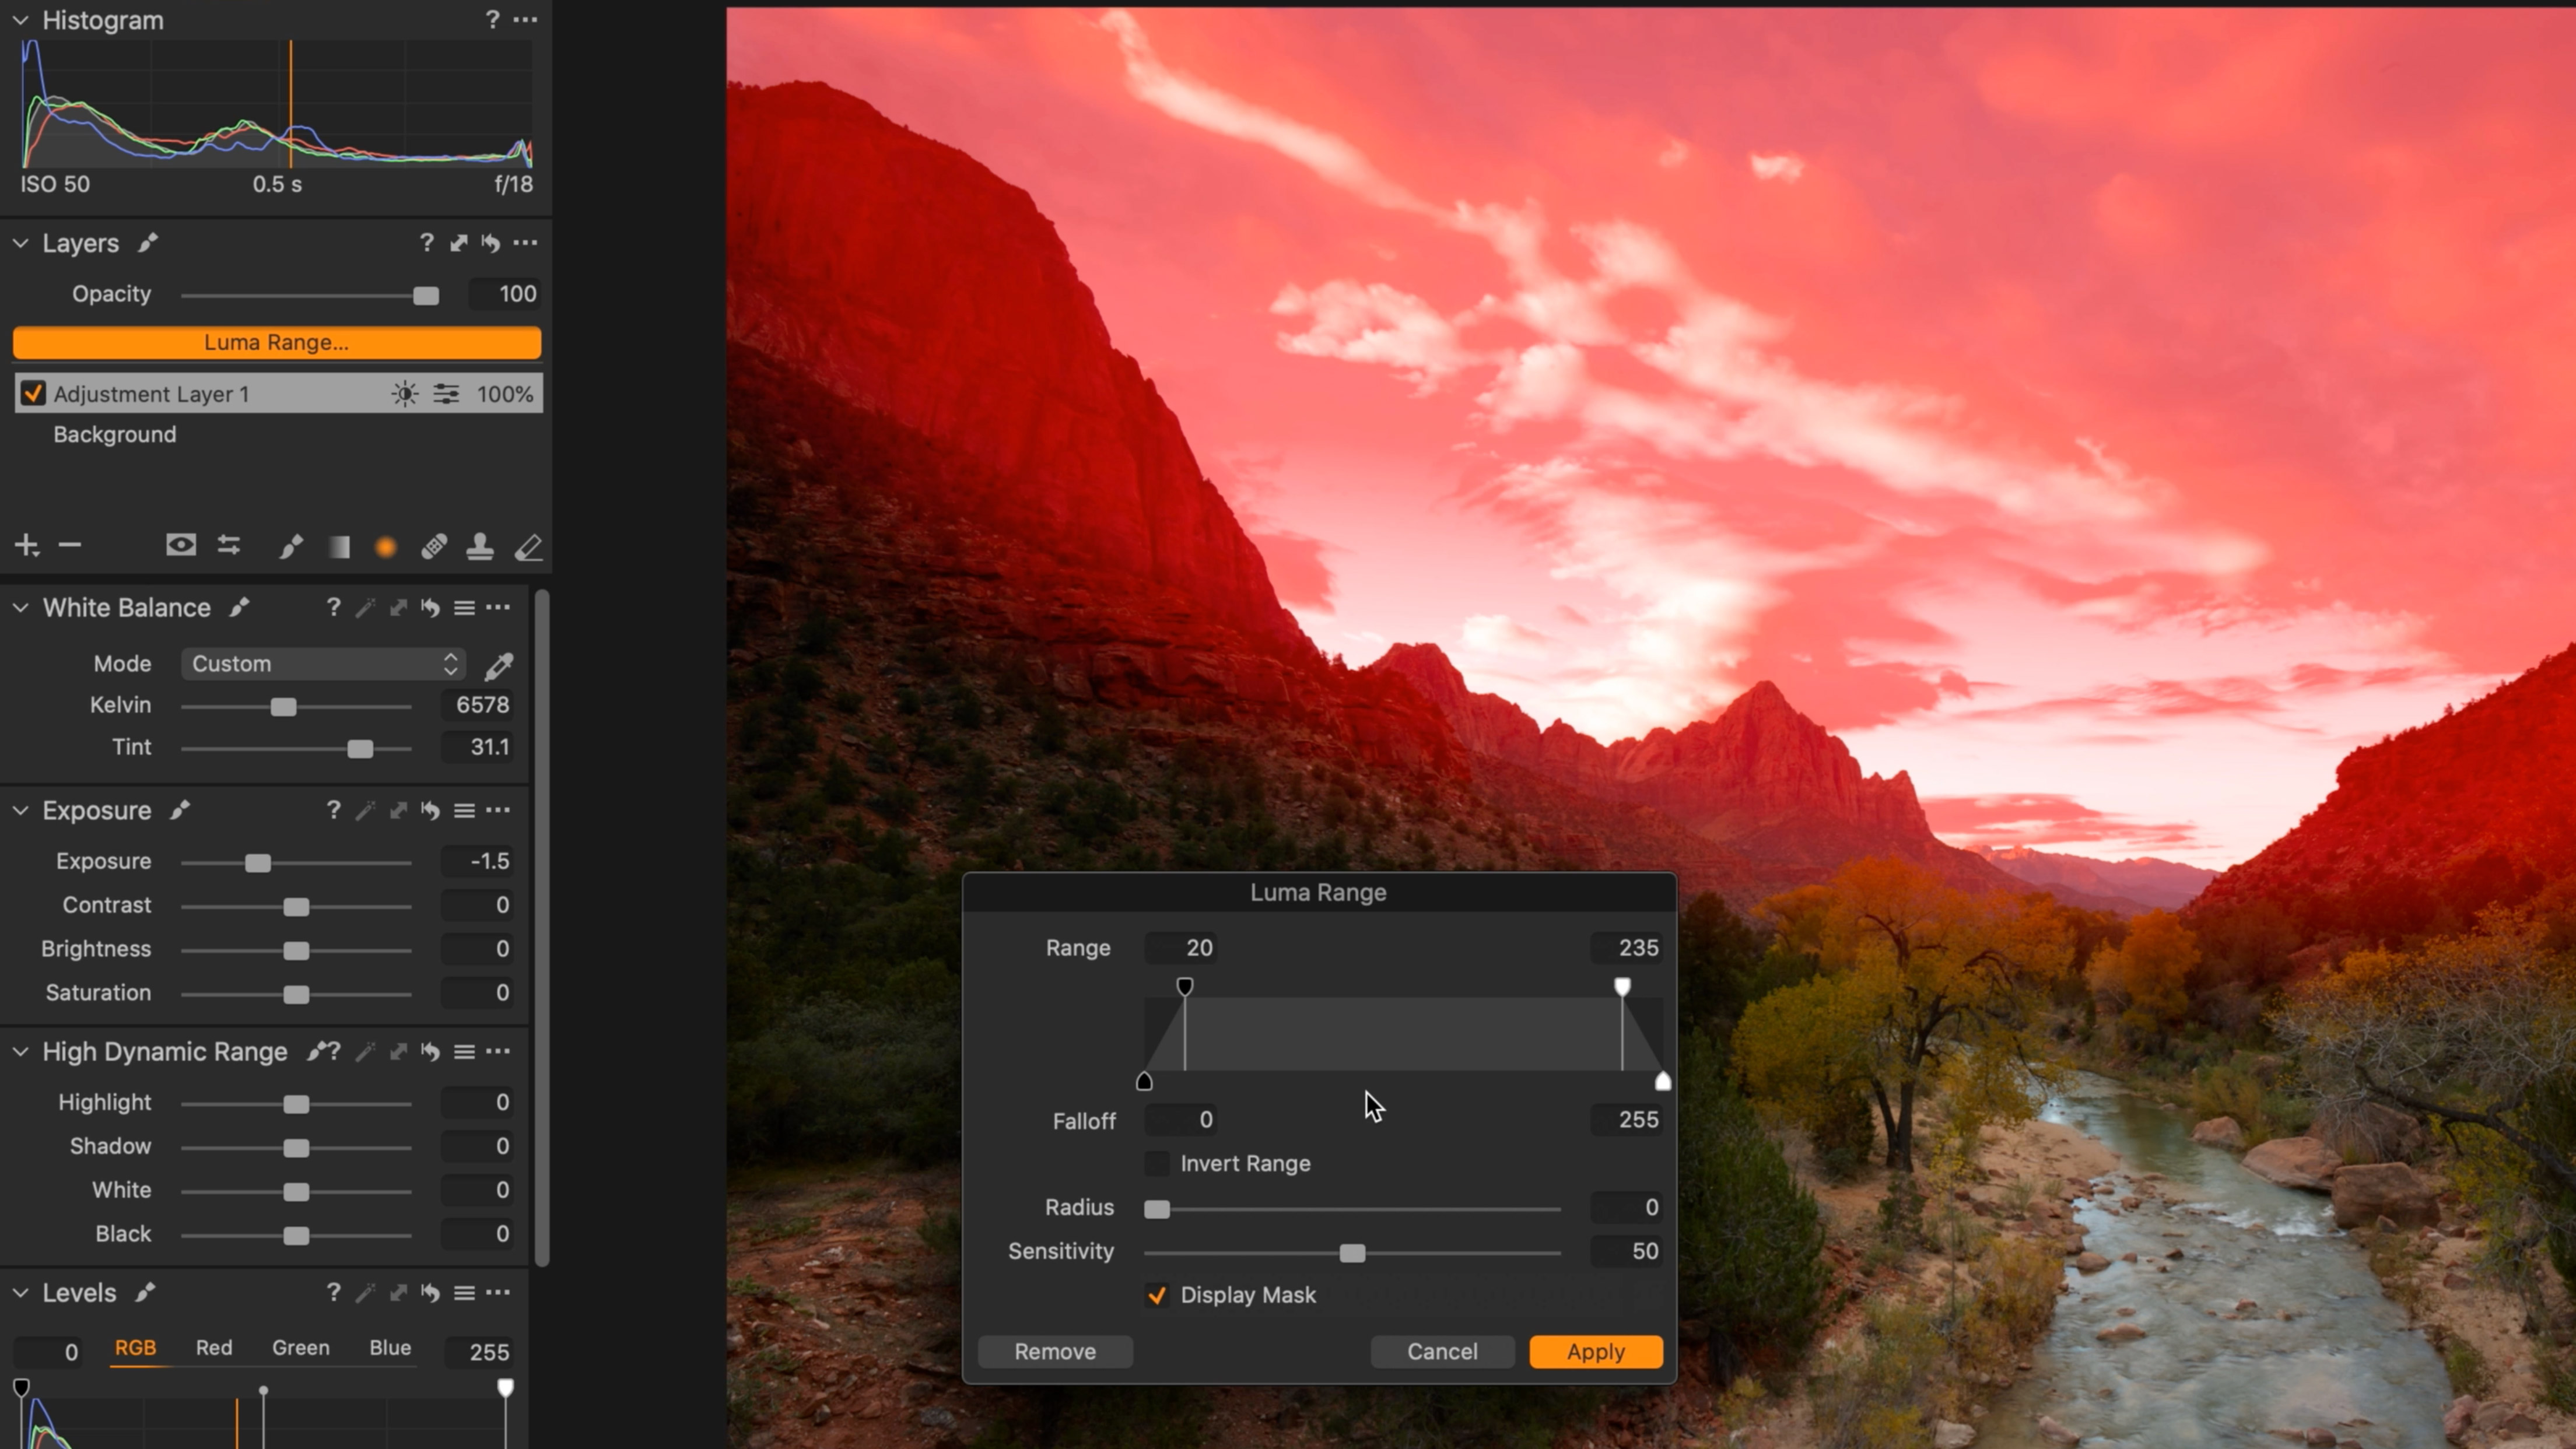
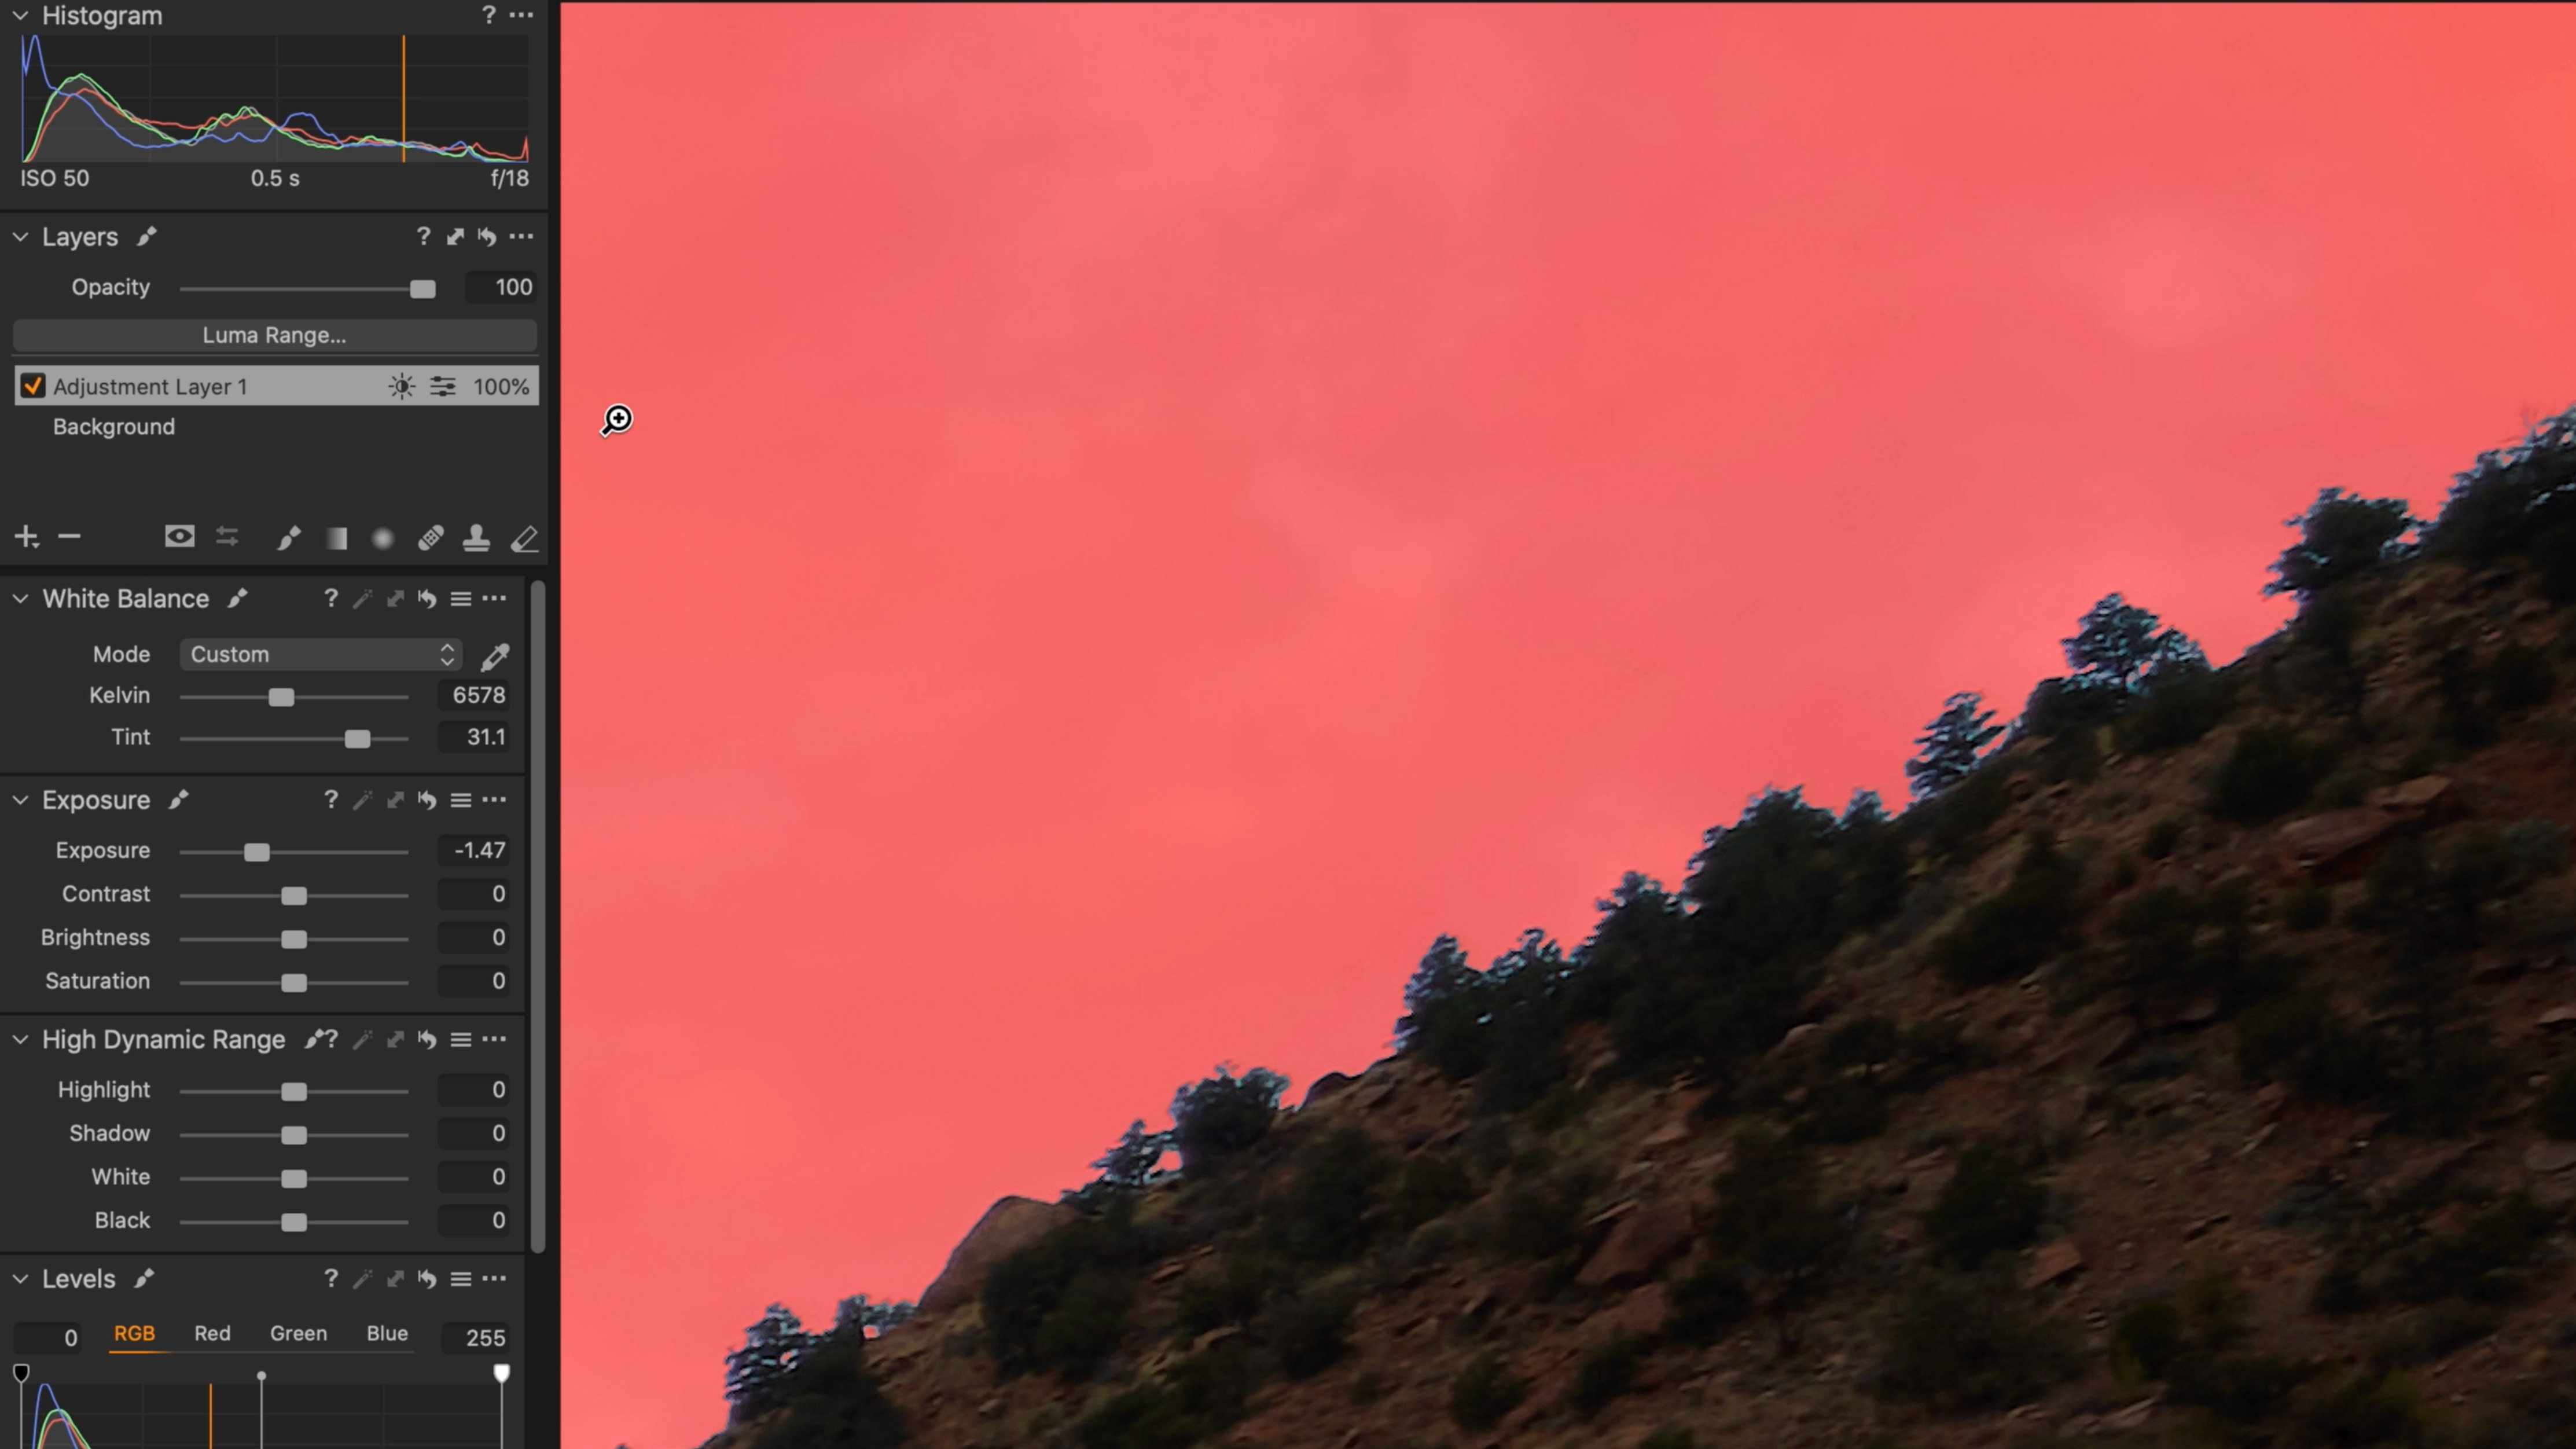
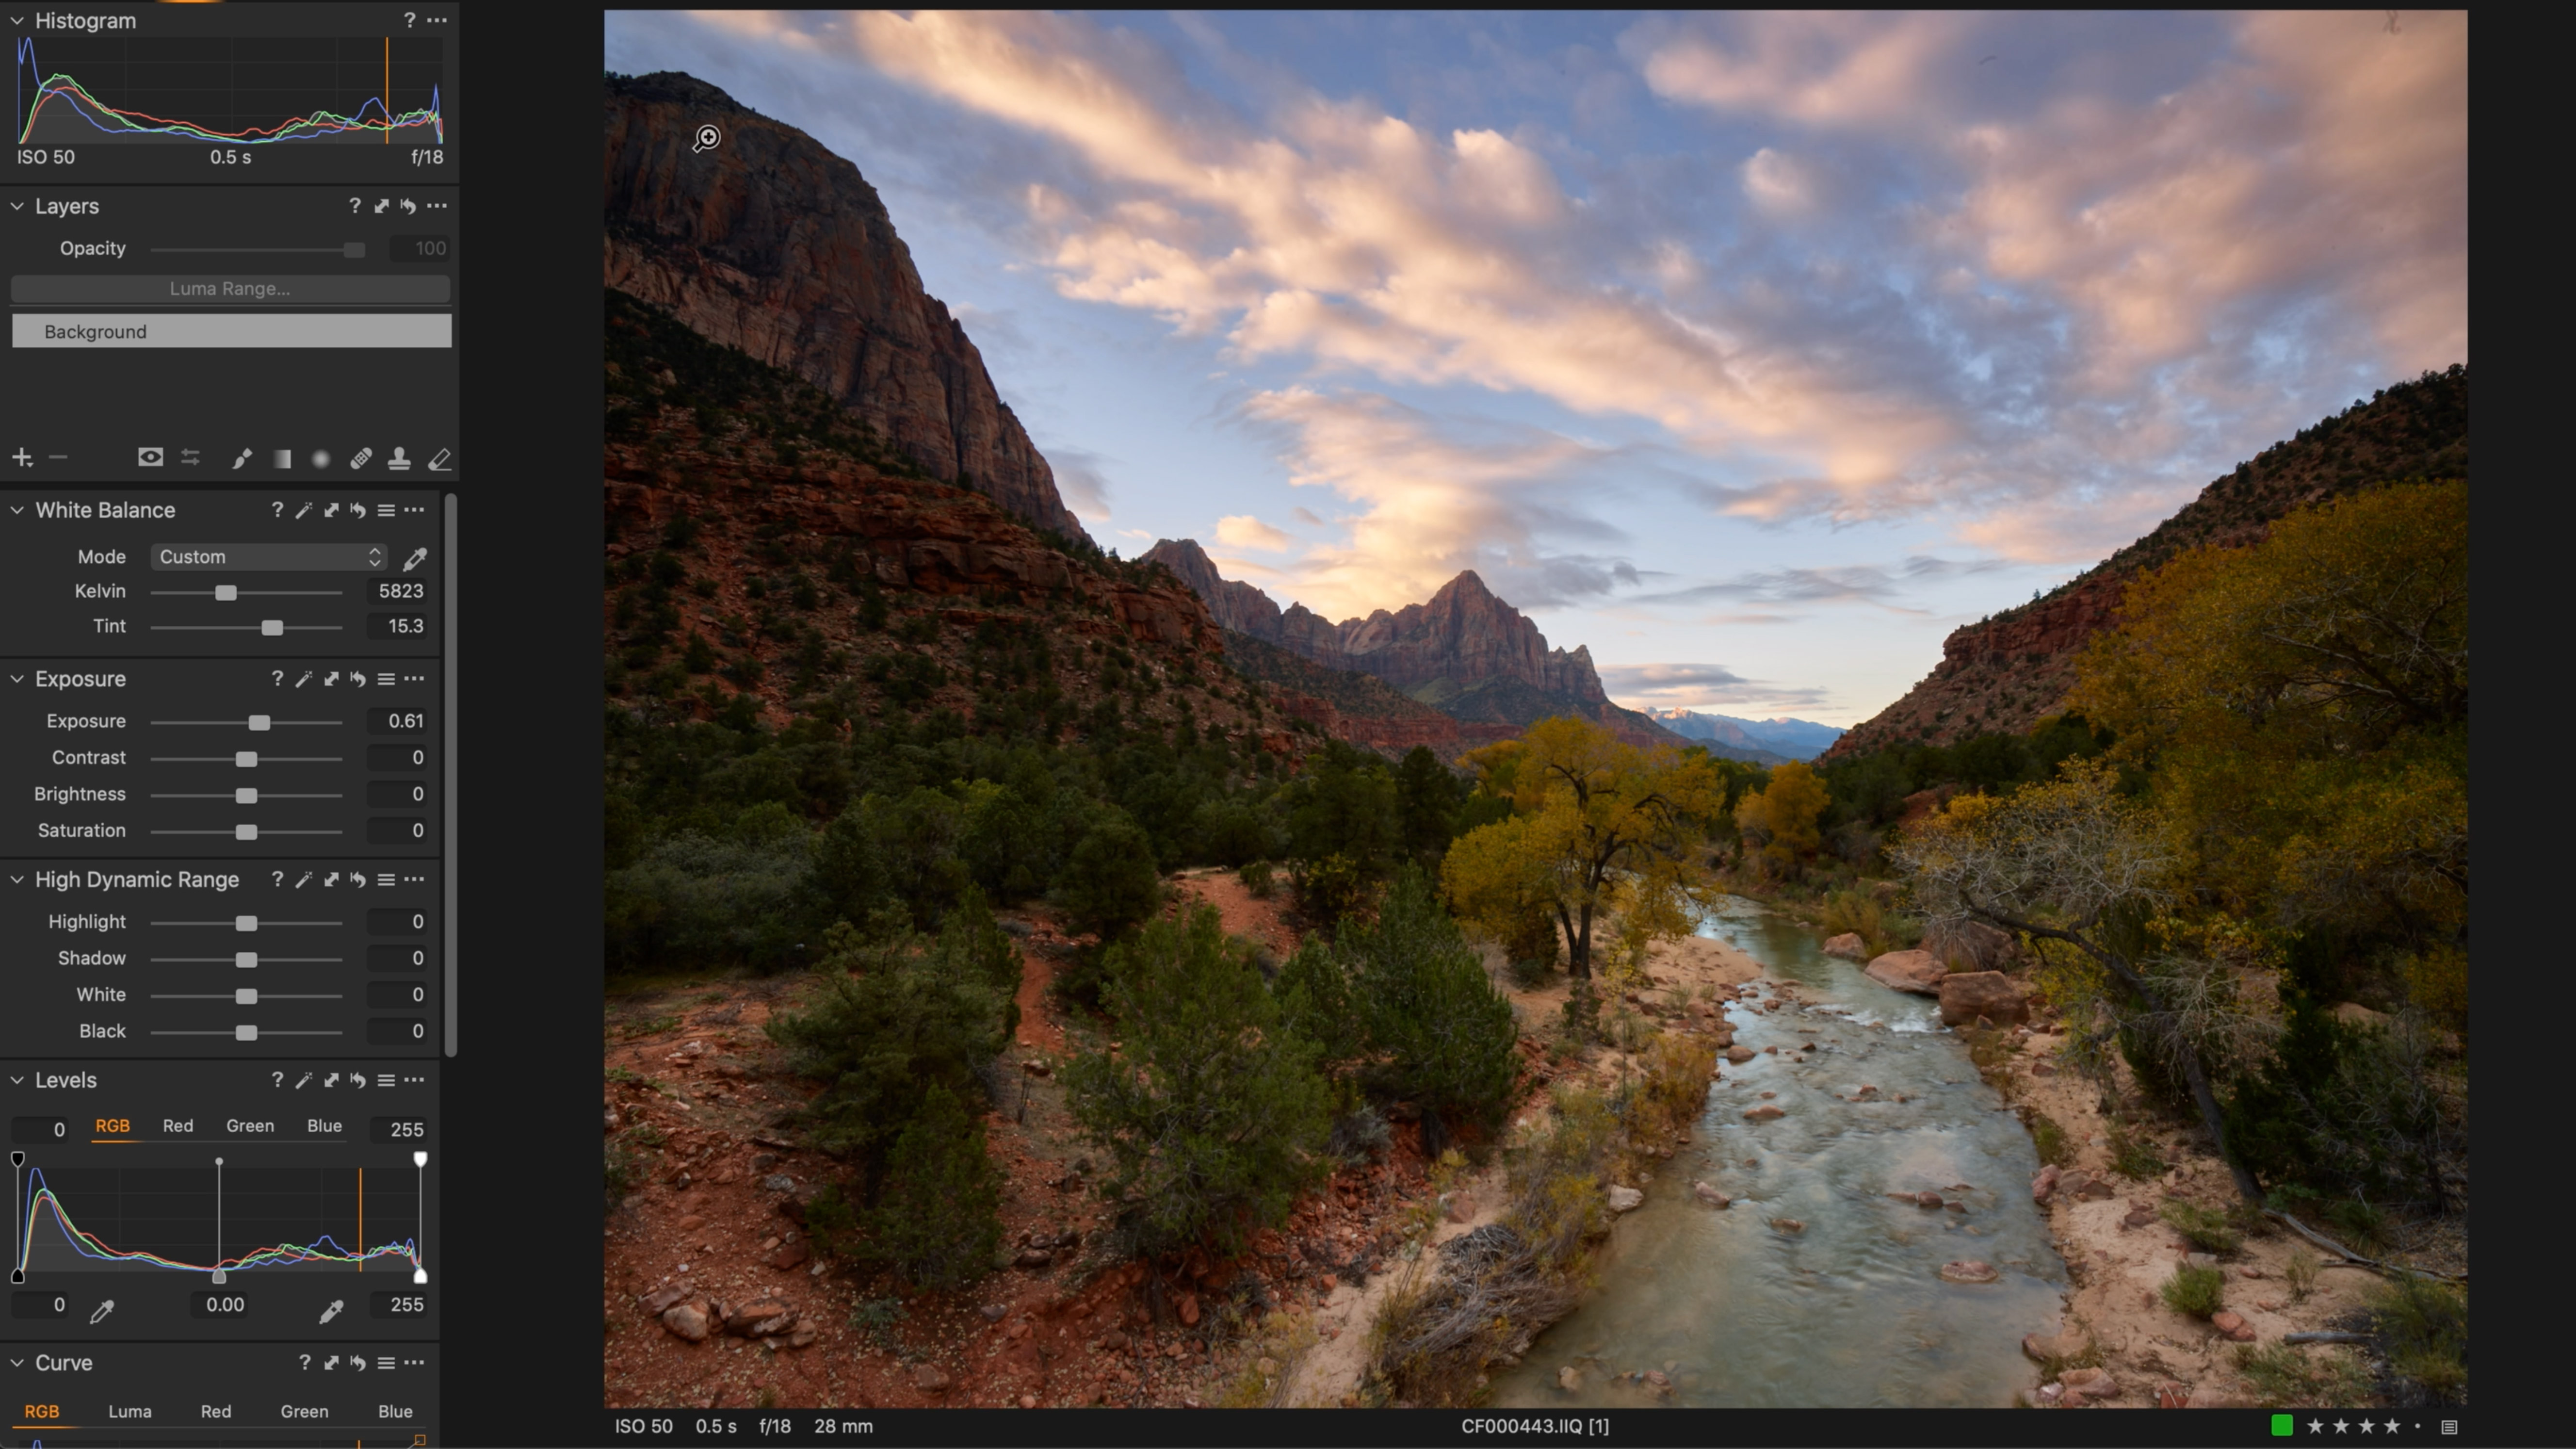
On any mask layer, having created some form of initial mask, click the “Luma Range” tool at the top and you’ll see the popup appear. That popup will start out with the initial “ramped” selection – starting at 0 masking for values of 0 on the histogram, increasing (ramping up) to 100% mask for values above 20.
The best camera deals, reviews, product advice, and unmissable photography news, direct to your inbox!
Likewise, for the highlights, the default mask will include anything below 235 on our histogram and then slowly fade to having 0% mask on anything that’s 255.
Step 2: Adjust the Luma Range
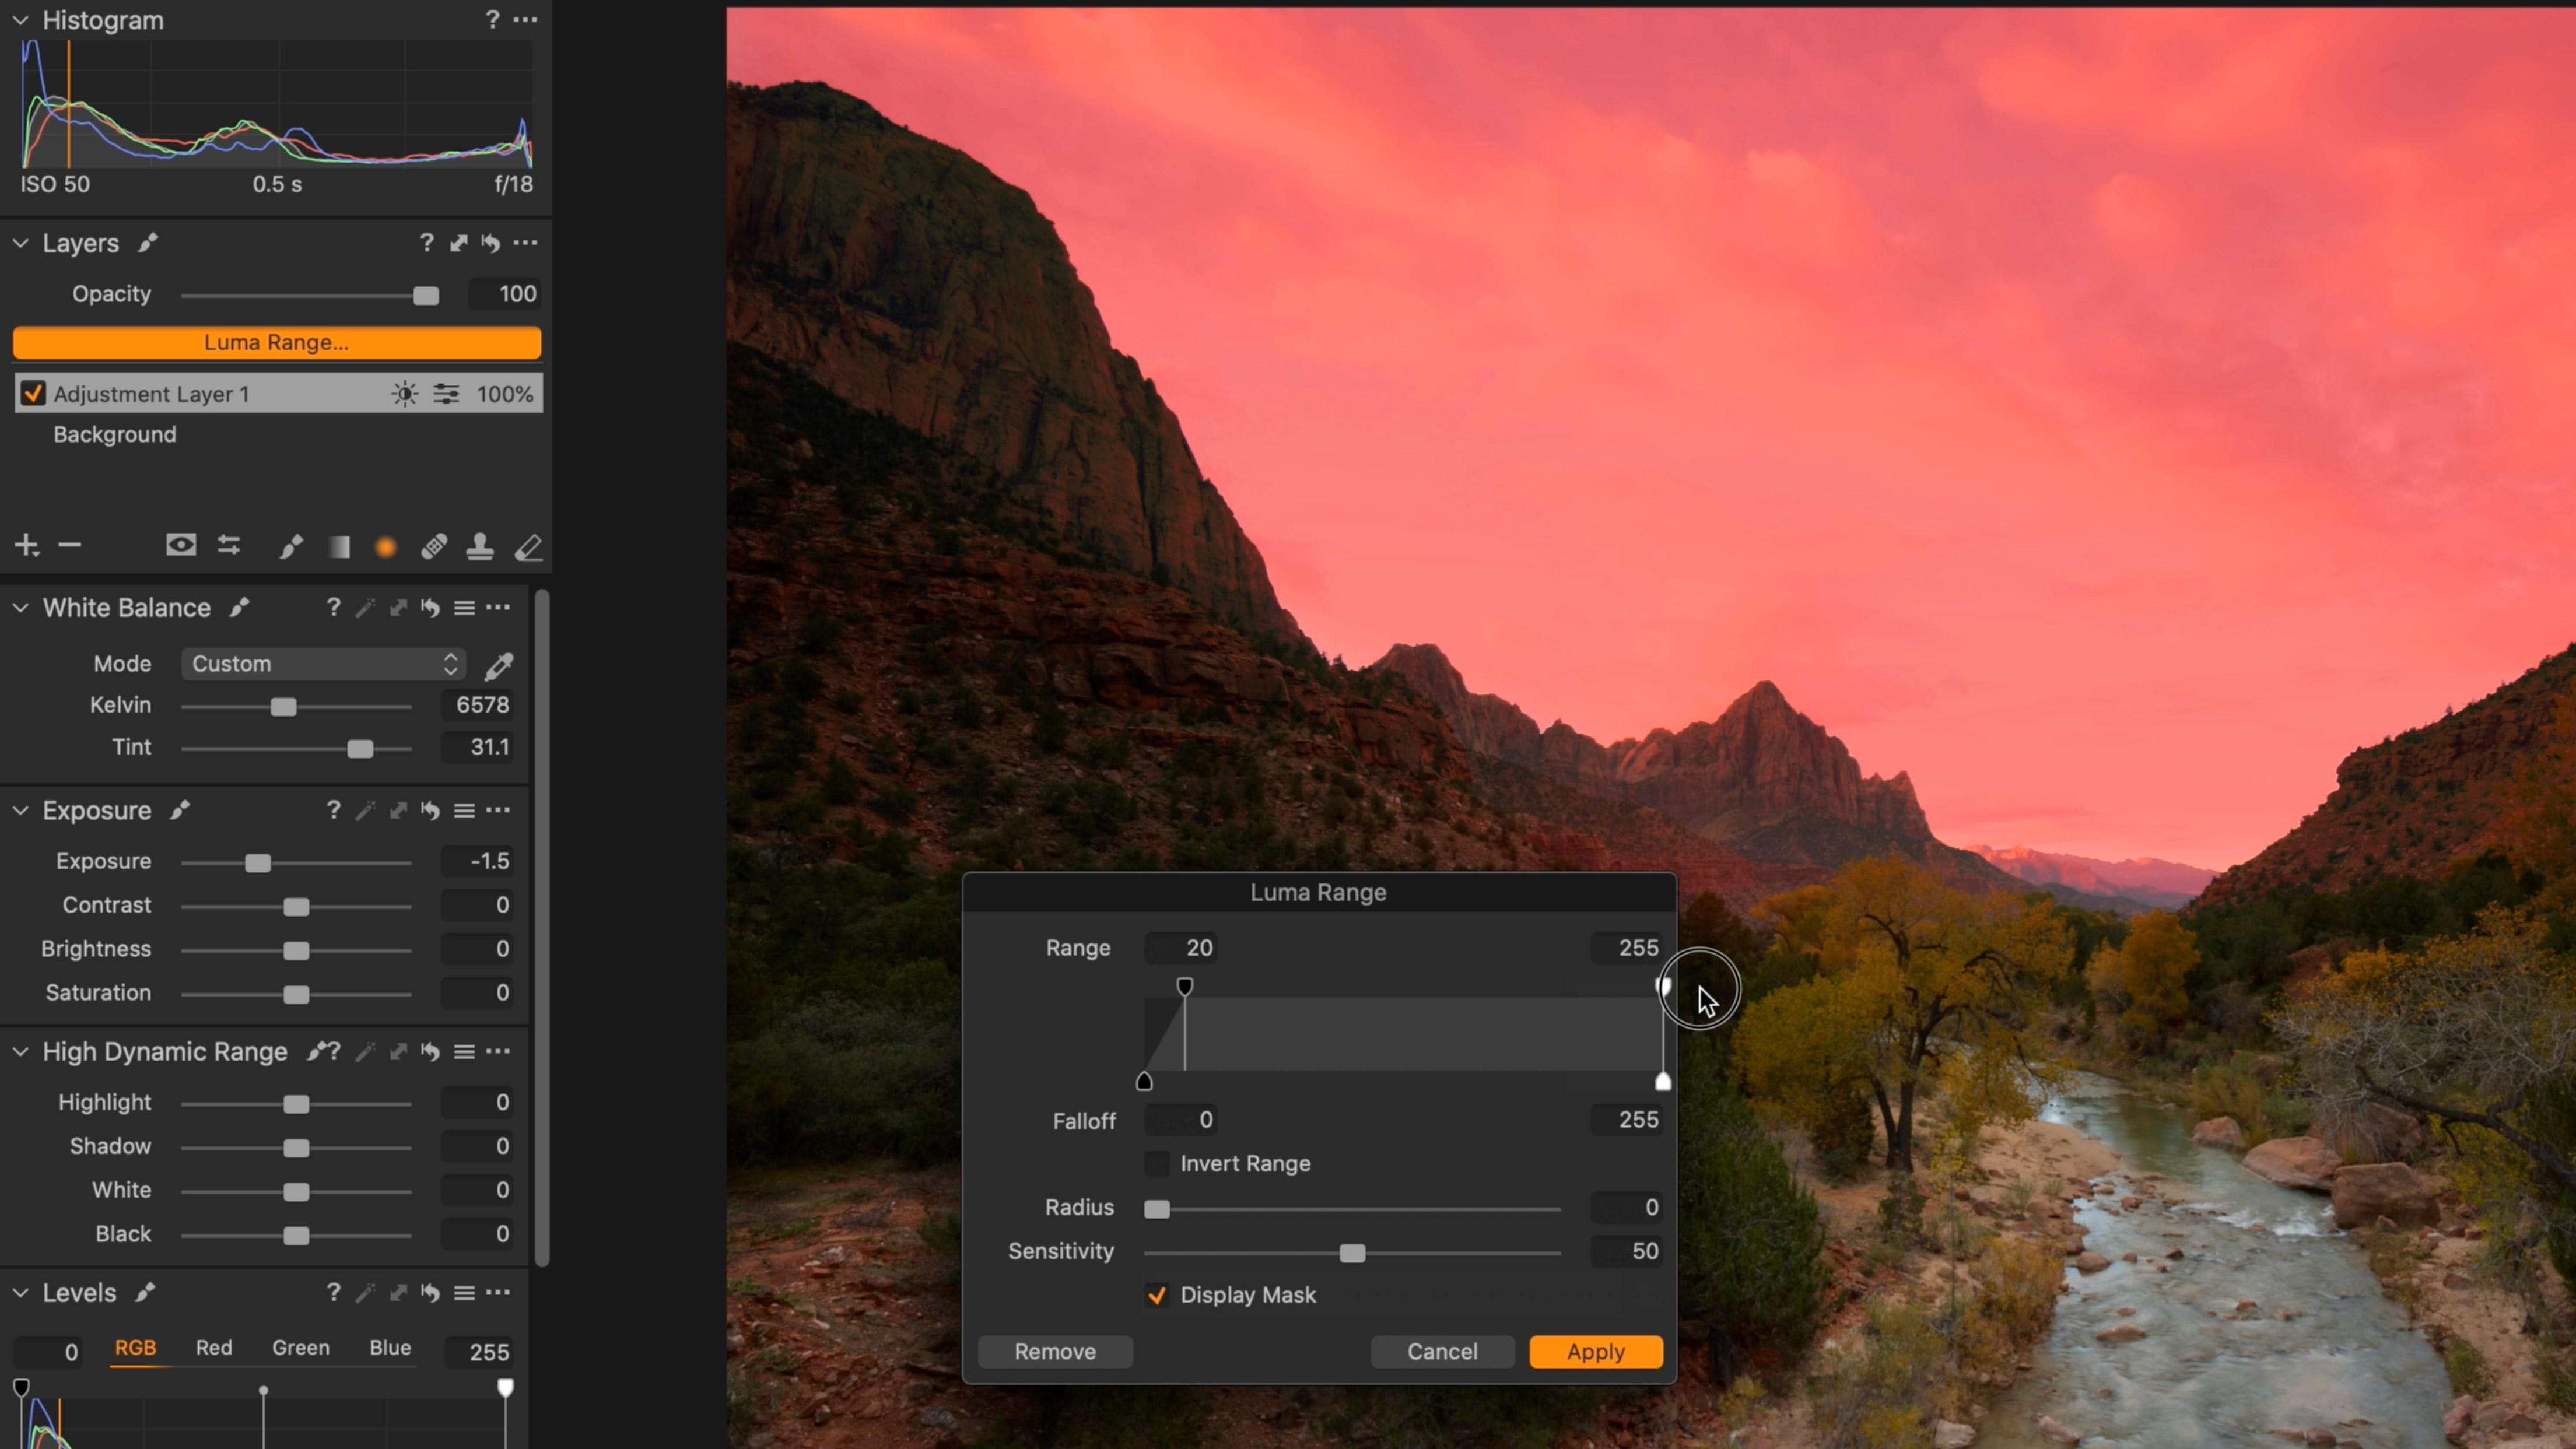
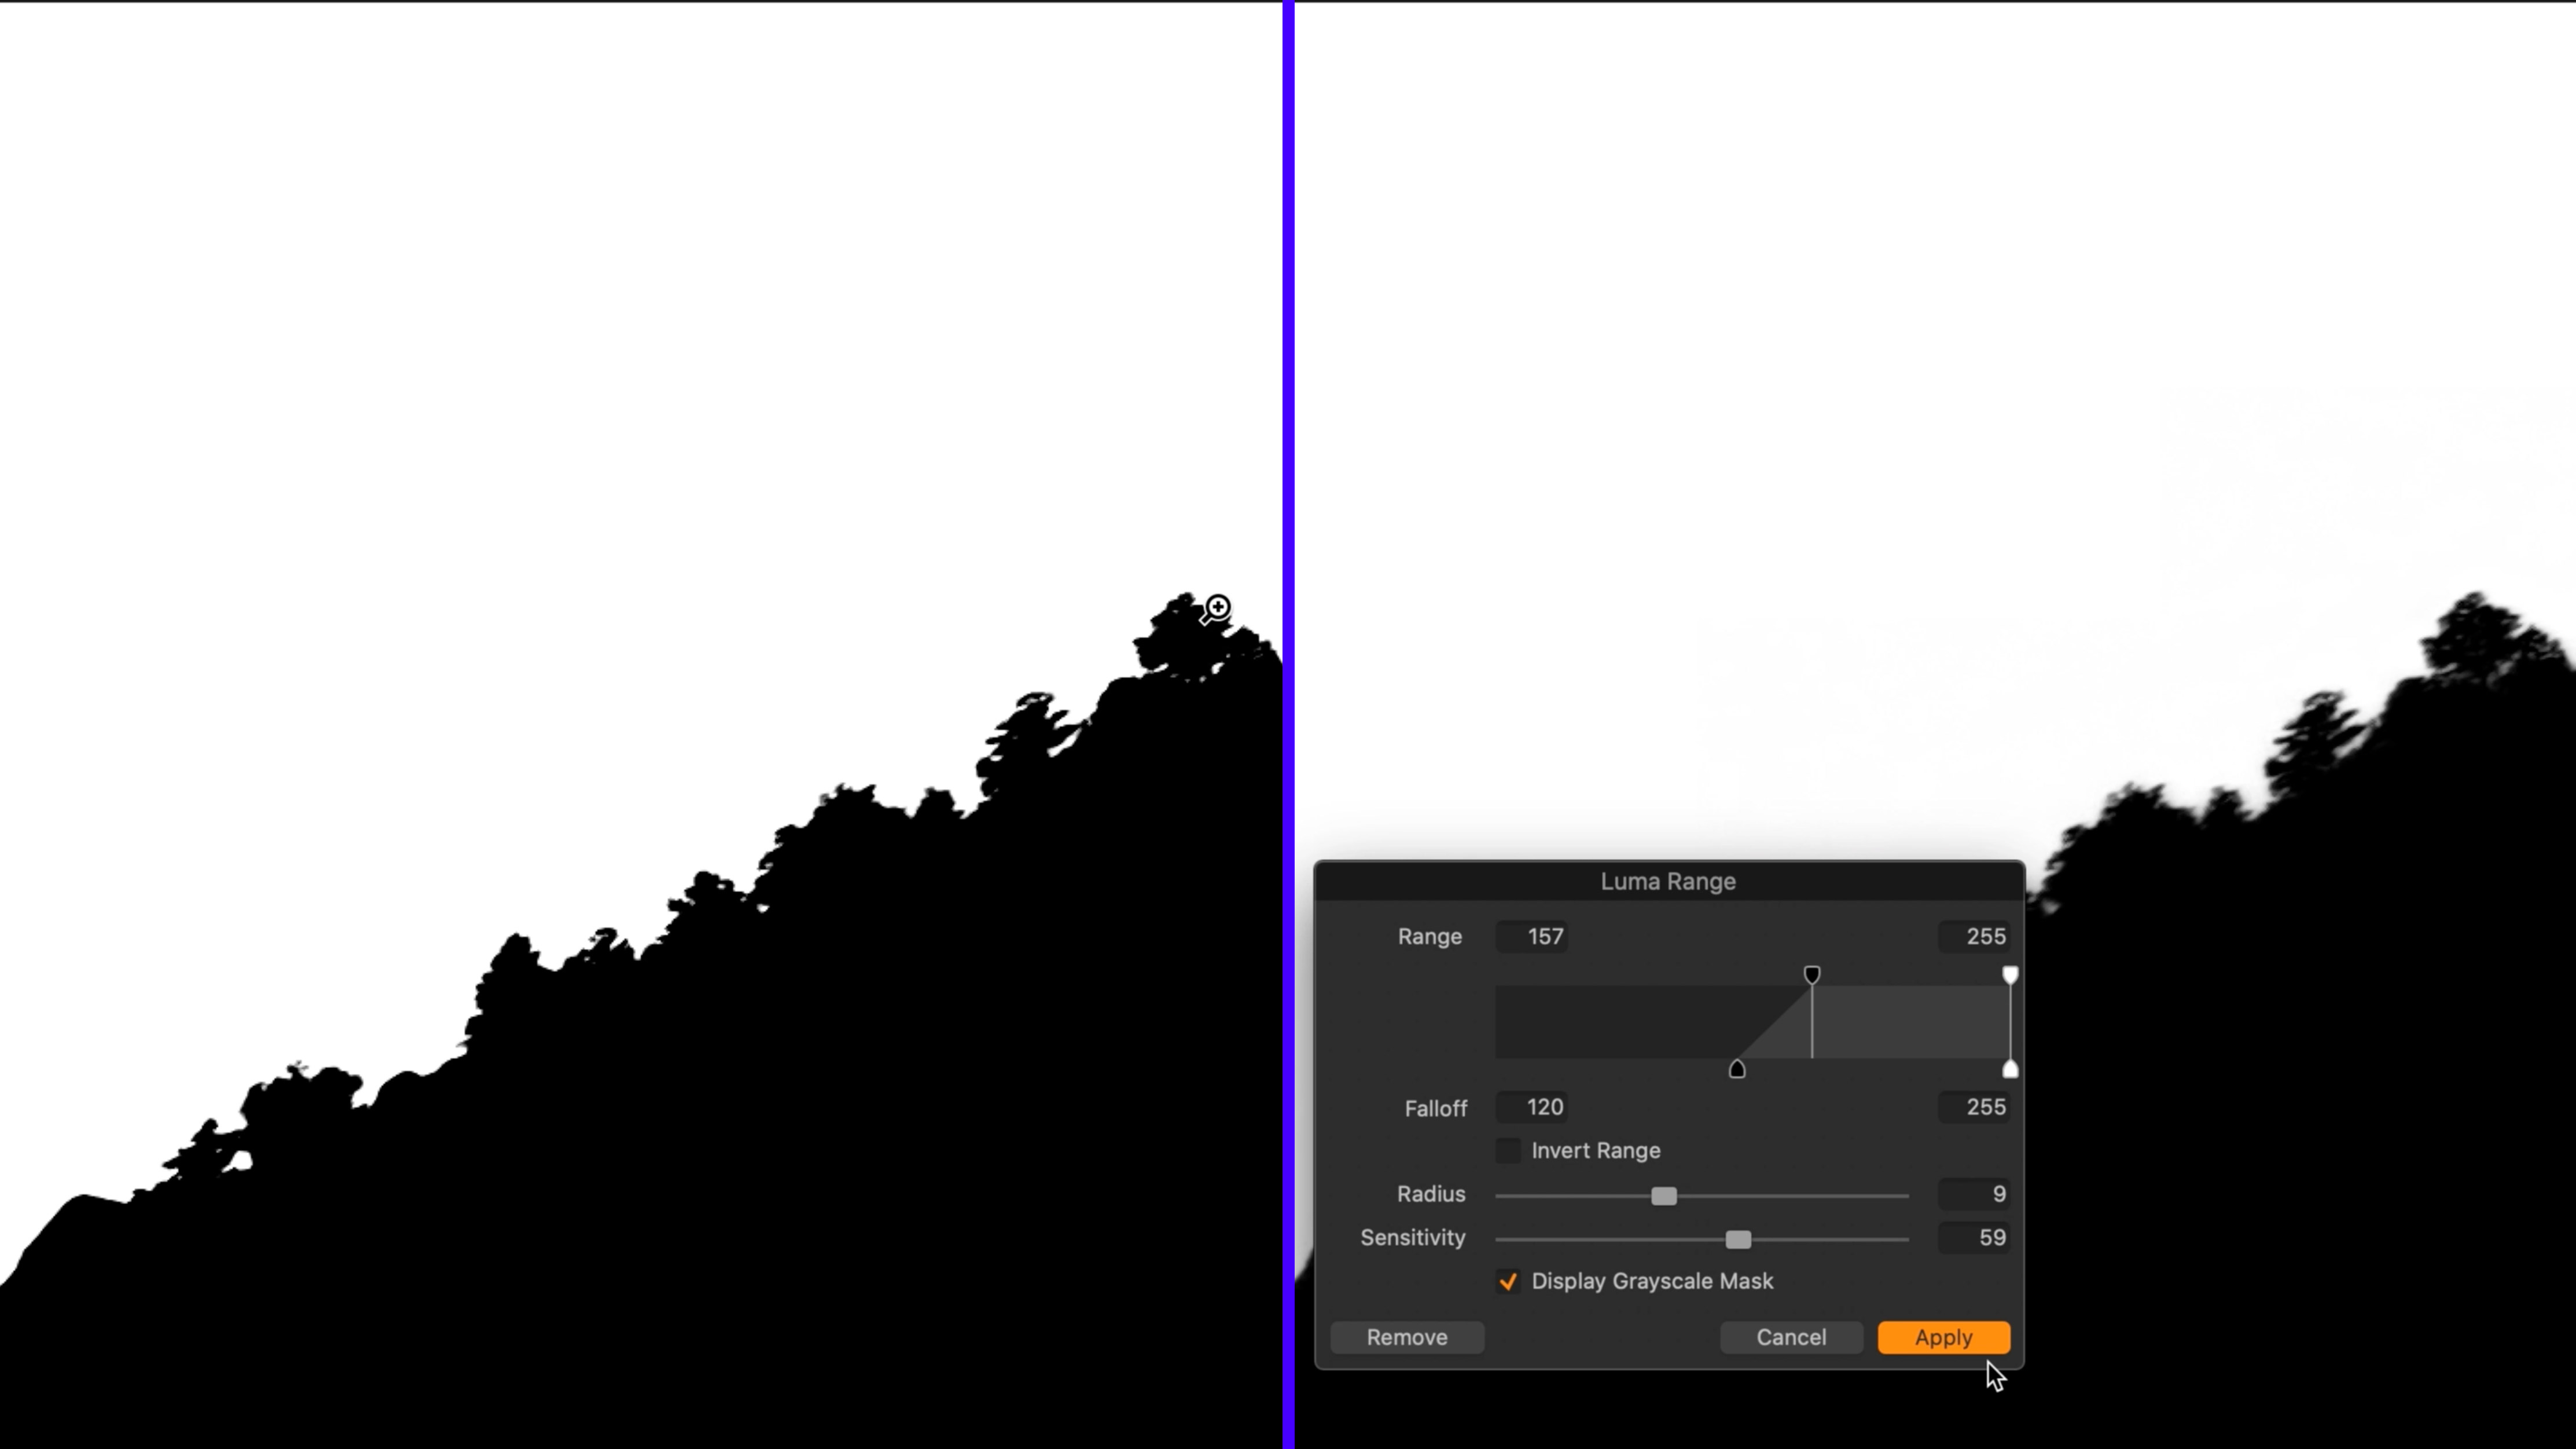
In this case, we want to include the brightest parts of the sky, so we slide the upper value to be 255 as well (so there is no falloff, everything under 255 but before 20 is now included). You’ll see the mask itself adapt to show you what’s now included.
Step 3: Exclude the darker tones
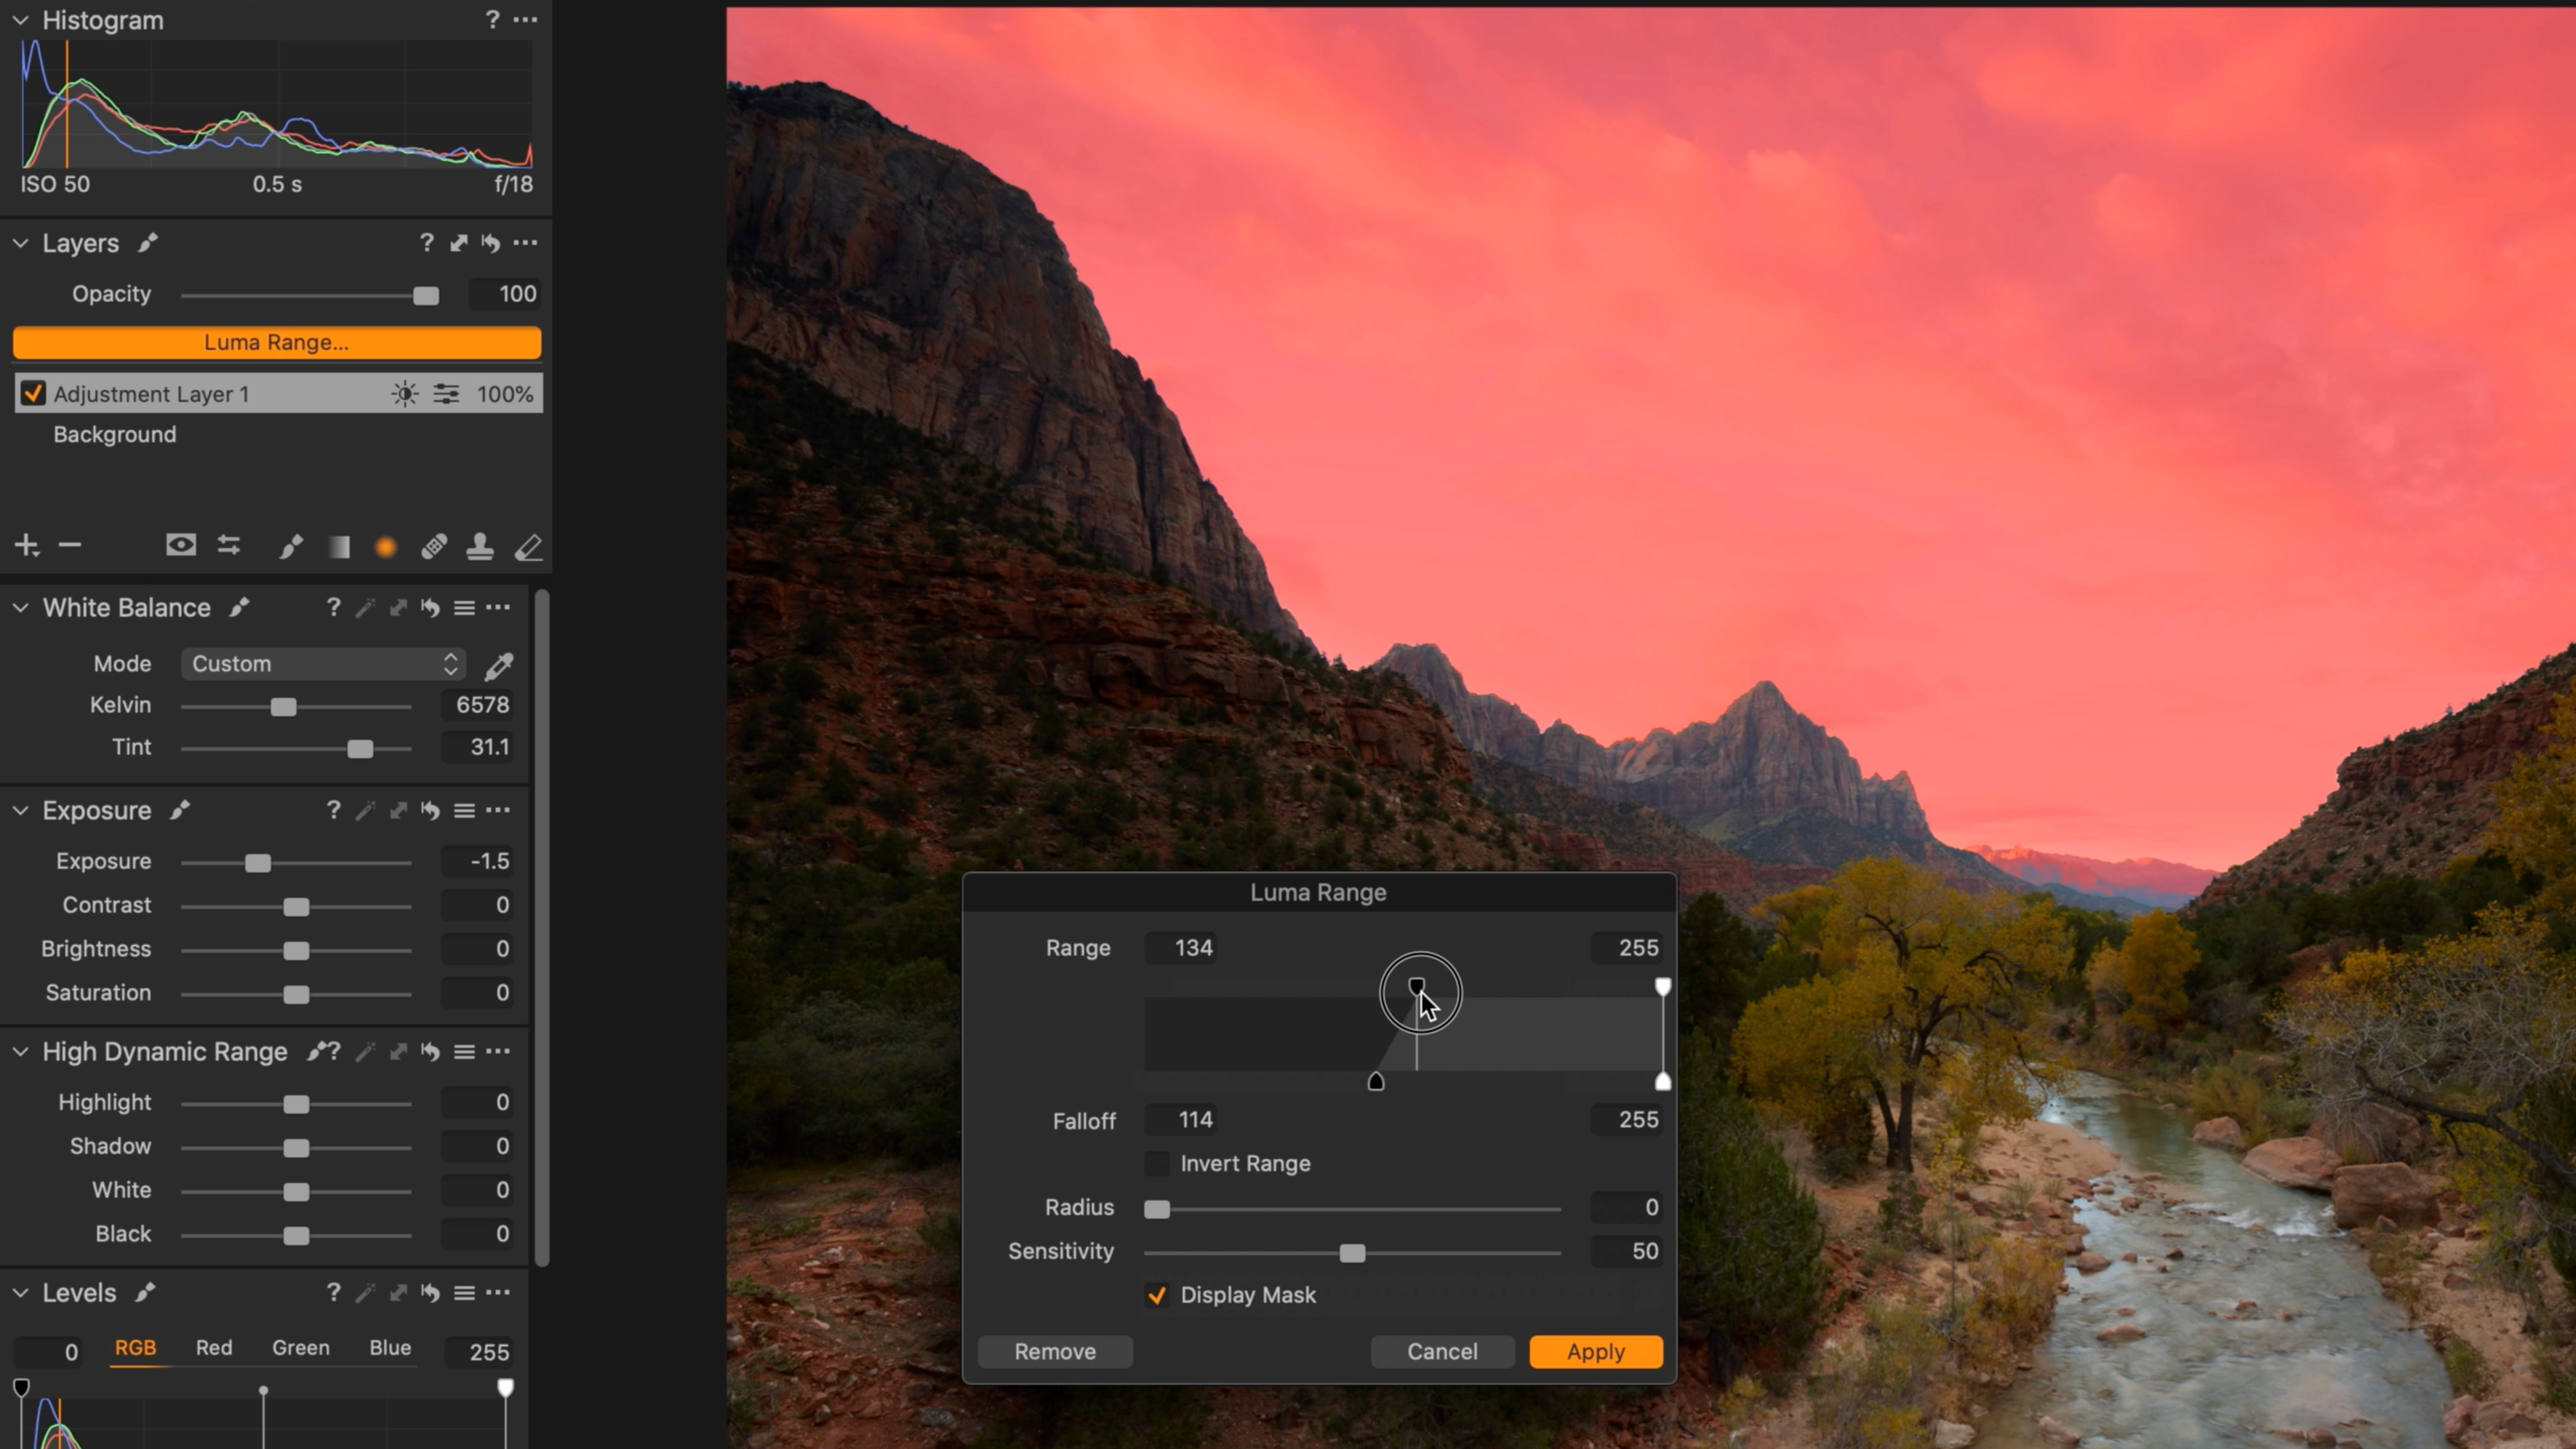
Doing the same with the shadow end to exclude the mountains, we now slide it up until the mountains are outside of the mask but everything else remains.
Step 4: Check the edges
One quick check on the tree-line (or hair-line, area around the subject, etc) and we can see there’s some mask artefacts around the details. This is simply a by-product of the selection that’s been made to decide what’s included or excluded, and we need to soften that transition.
Step 5: Radius and Sensitivity
Using Option+M, we can bring up a greyscale mask, along with the Luma Range, where we can now use Radius and Sensitivity sliders to soften those boundaries for a perfect line.
Once complete, you now have a selection that only includes the chosen parts of your image based on their initial position (through the brush/gradient tool) and then also their value on the histogram from 0 to 255 (or any range you choose within).
Step 6: Make your adjustments
With that in place, you now have complete control of that area to adjust it independently of the rest of the image, allowing the edit to matches what you saw.
Luma Range can be used for any mask
There are a number of different ways to create a mask, but remember, the Luma Range can be applied to each and every one of them to further refine your selection. Especially useful in detailed areas, or where Magic Brush can’t quite guess what you’re trying to do, it’s one of the most powerful ways of selecting a region of an image that exists in Capture One.
About Capture One
Capture One is an all-in-one non-destructive image cataloguing, raw processing and editing tool, and its closest rival is Adobe Lightroom Classic. Capture One regularly features in our guide to the best photo editing software, thanks to its high-quality raw processing, in-depth color controls and layer and mask based editing.
Get Capture One Pro 22: $299 or $179/year
Capture One Pro is available either for a single one-off license fee on a paid-monthly subscription or an annual subscription which offers a big saving over the monthly option.
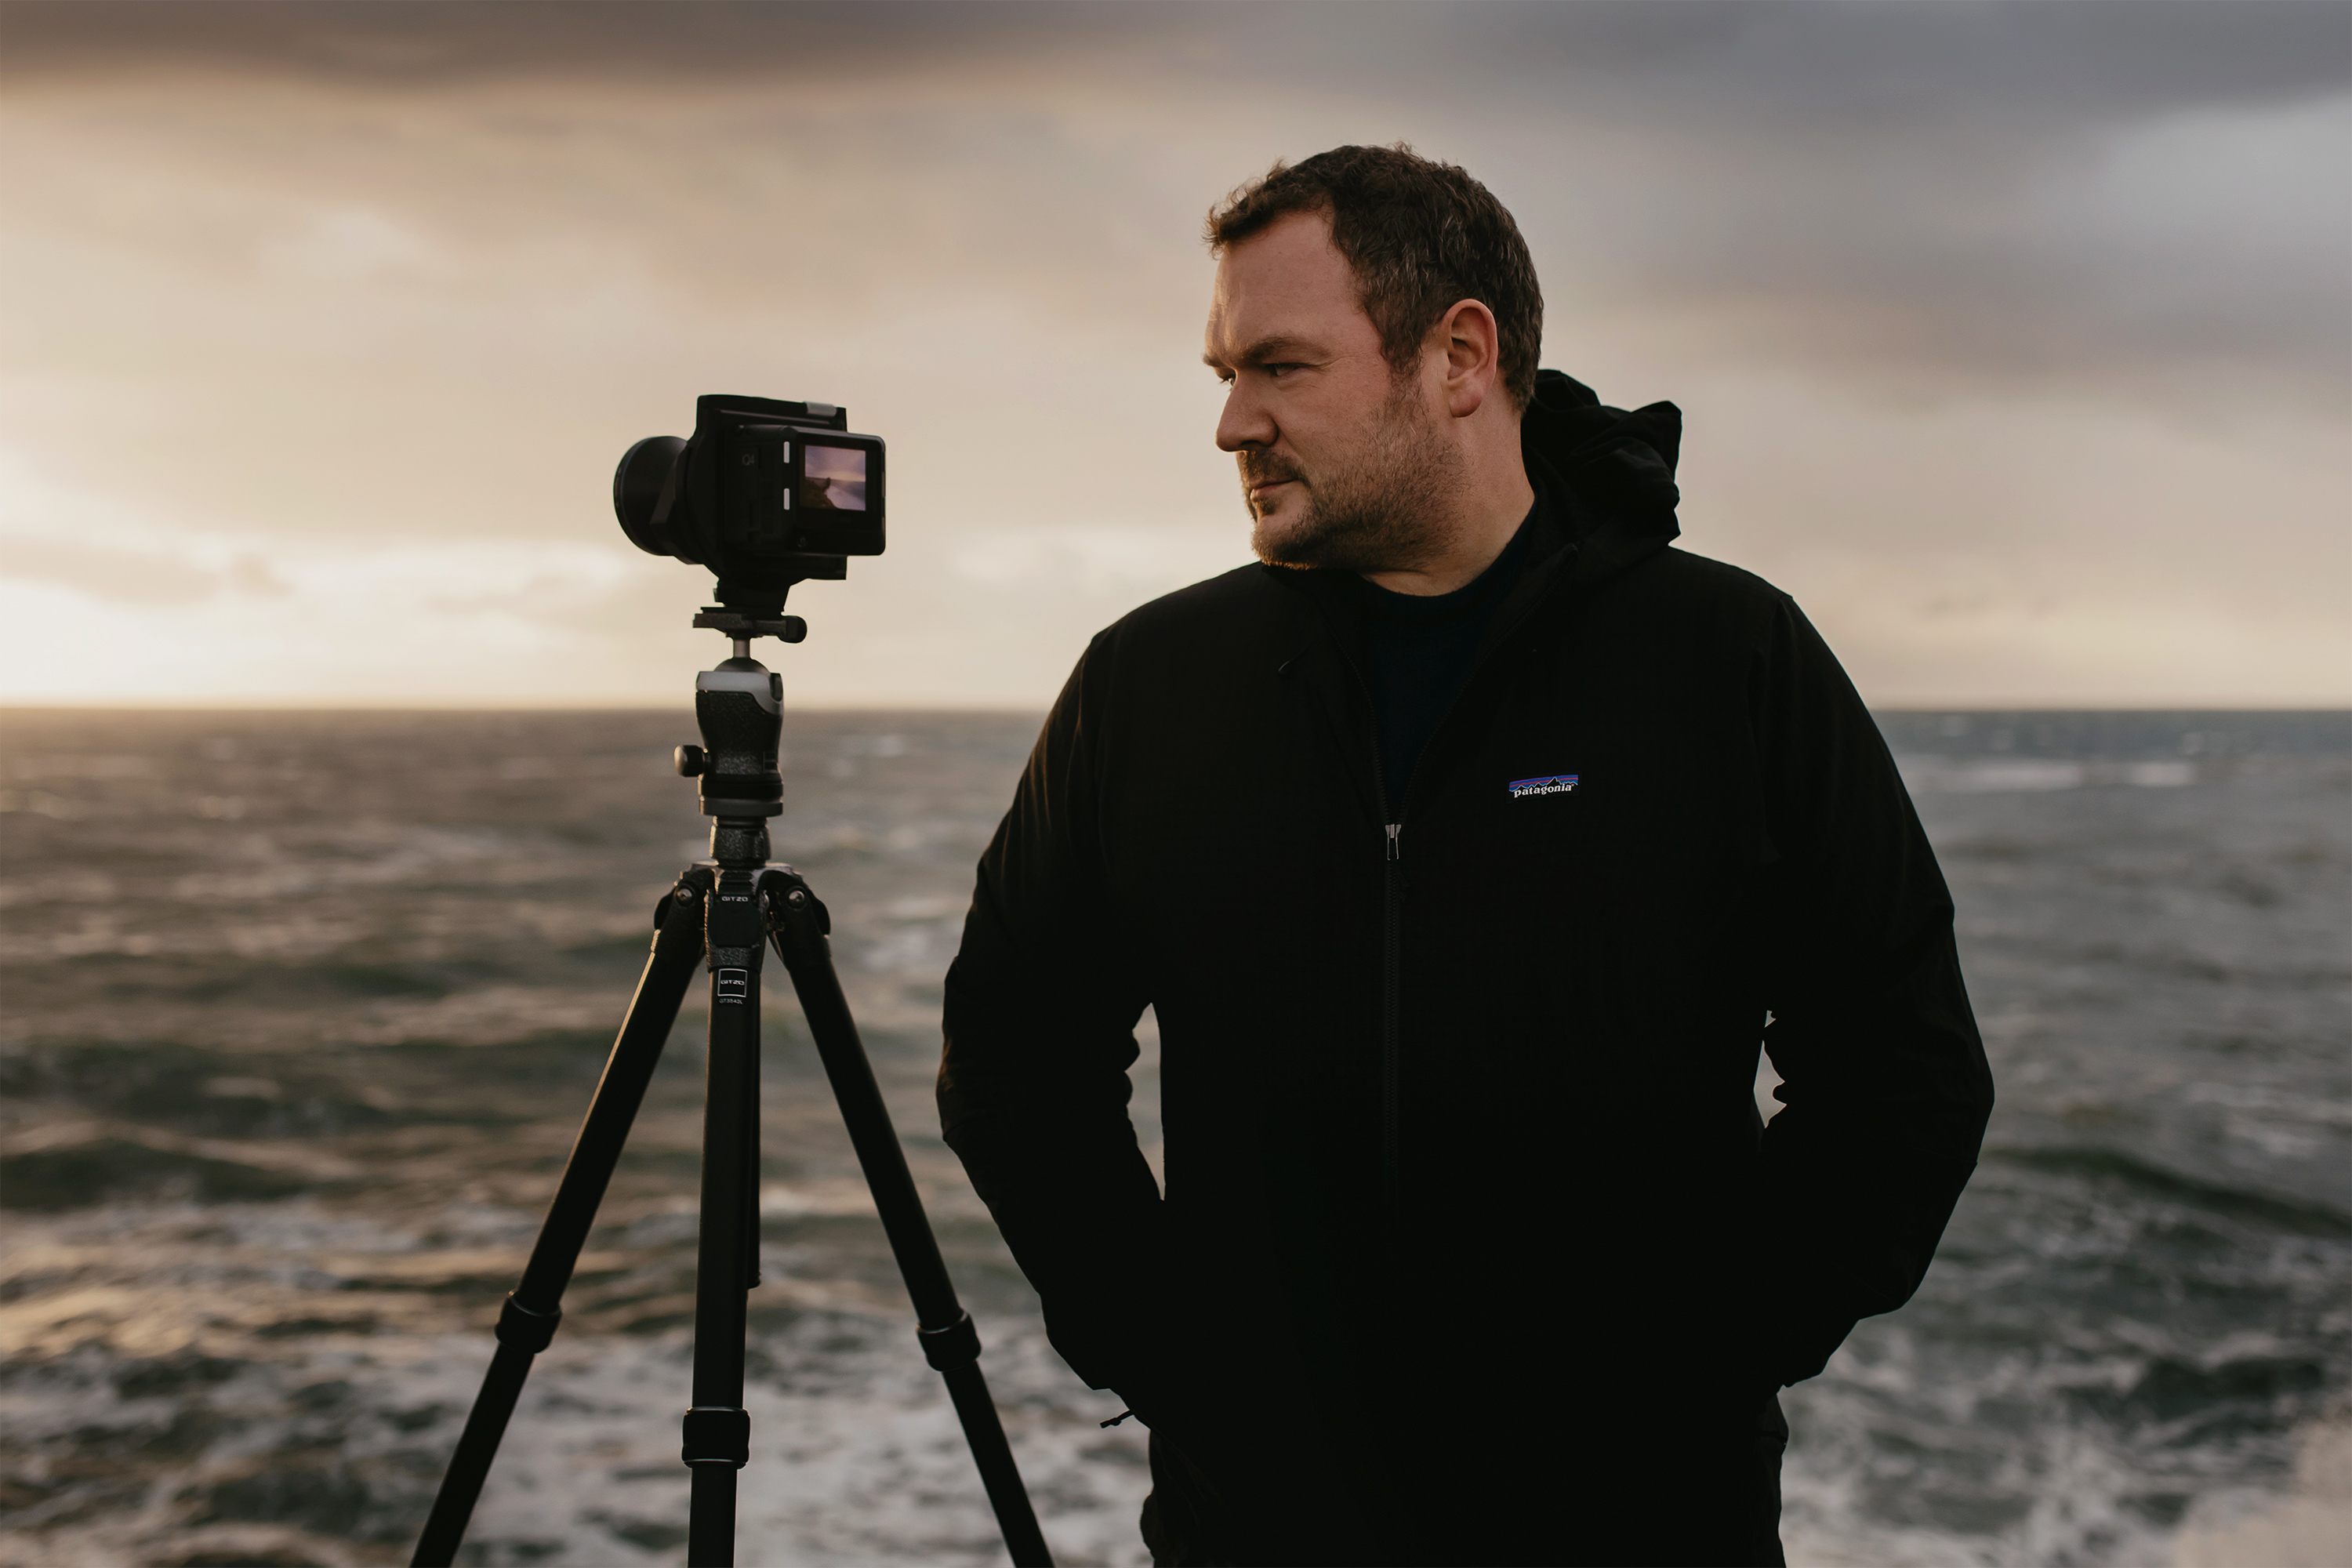
Paul Reiffer is an award-winning photographer and landscape artist. As a global ambassador for both Phase One and Capture One, he specialises in grand vistas, electrifying cityscapes and iconic views. His images have been published all around the world in well-known books, newspapers and magazines as well as supporting global travel and hospitality brands to reach and excite their audiences. His technical expertise is regularly called upon for industry insights, and through his luxury workshop programme as well as online channels, he’s carved out a unique style of teaching that is now appreciated by thousands worldwide. Shooting with ultra-high-resolution Phase One cameras, his work is used commercially by interior designers and clients ranging from National Geographic to British Airways, Marriott, Land Rover and many more.
