Capture One's Skin Tone tool: how to use it for more uniform skies!
Pro photographer Paul Reiffer reveals the secrets of Capture One's Skin Tone tool, and how it can be used for so much more
Welcome to this series on pro editing secrets for Capture One software. In this instalment Capture One expert Paul Reiffer talks about a powerful portrait enhancement tool in Capture One, and then uses it for something completely different...
This series on Capture One has been specially commissioned from globetrotting pro photographer and editing expert Paul Reiffer.
• See the full Capture One series
• Capture One 21 review
• Best photo editing software
Landscape photographers will know that many factors can cause an uneven sky in your images – using a polariser on an ultra-wide lens, a filter placed in the wrong position, or even just the natural variation of color and brightness from the sun across the width of a scene.
Controlling or reducing the amount of tonal difference across skies is one of the many subtle professional touches that can separate professional-quality images from also-rans. If you do need to control or reduce the amount of tonal difference across areas like these, there’s a specific tool within Capture One that’s designed to do exactly that, although it’s somewhat hidden under an unusual name.
Originally designed for use on portrait images (for variations and blemishes on human skin) the “Skin Tone” tool can be an equally useful addition to a landscape photographer’s toolkit when it comes to evening up the sky (or ground, for that matter) in a few clicks.
The Skin Tone tool allows us to select a range of colors in an image, choose a target value to shift colors to when selected within that range and then “smooth out” all the other shades to match. As such, if we have variations in the green grass of a field, or a sky that has an inconsistent tone across the scene, we can use this tool to make them more even.
Step 1: Where to find the Skin Tone tool
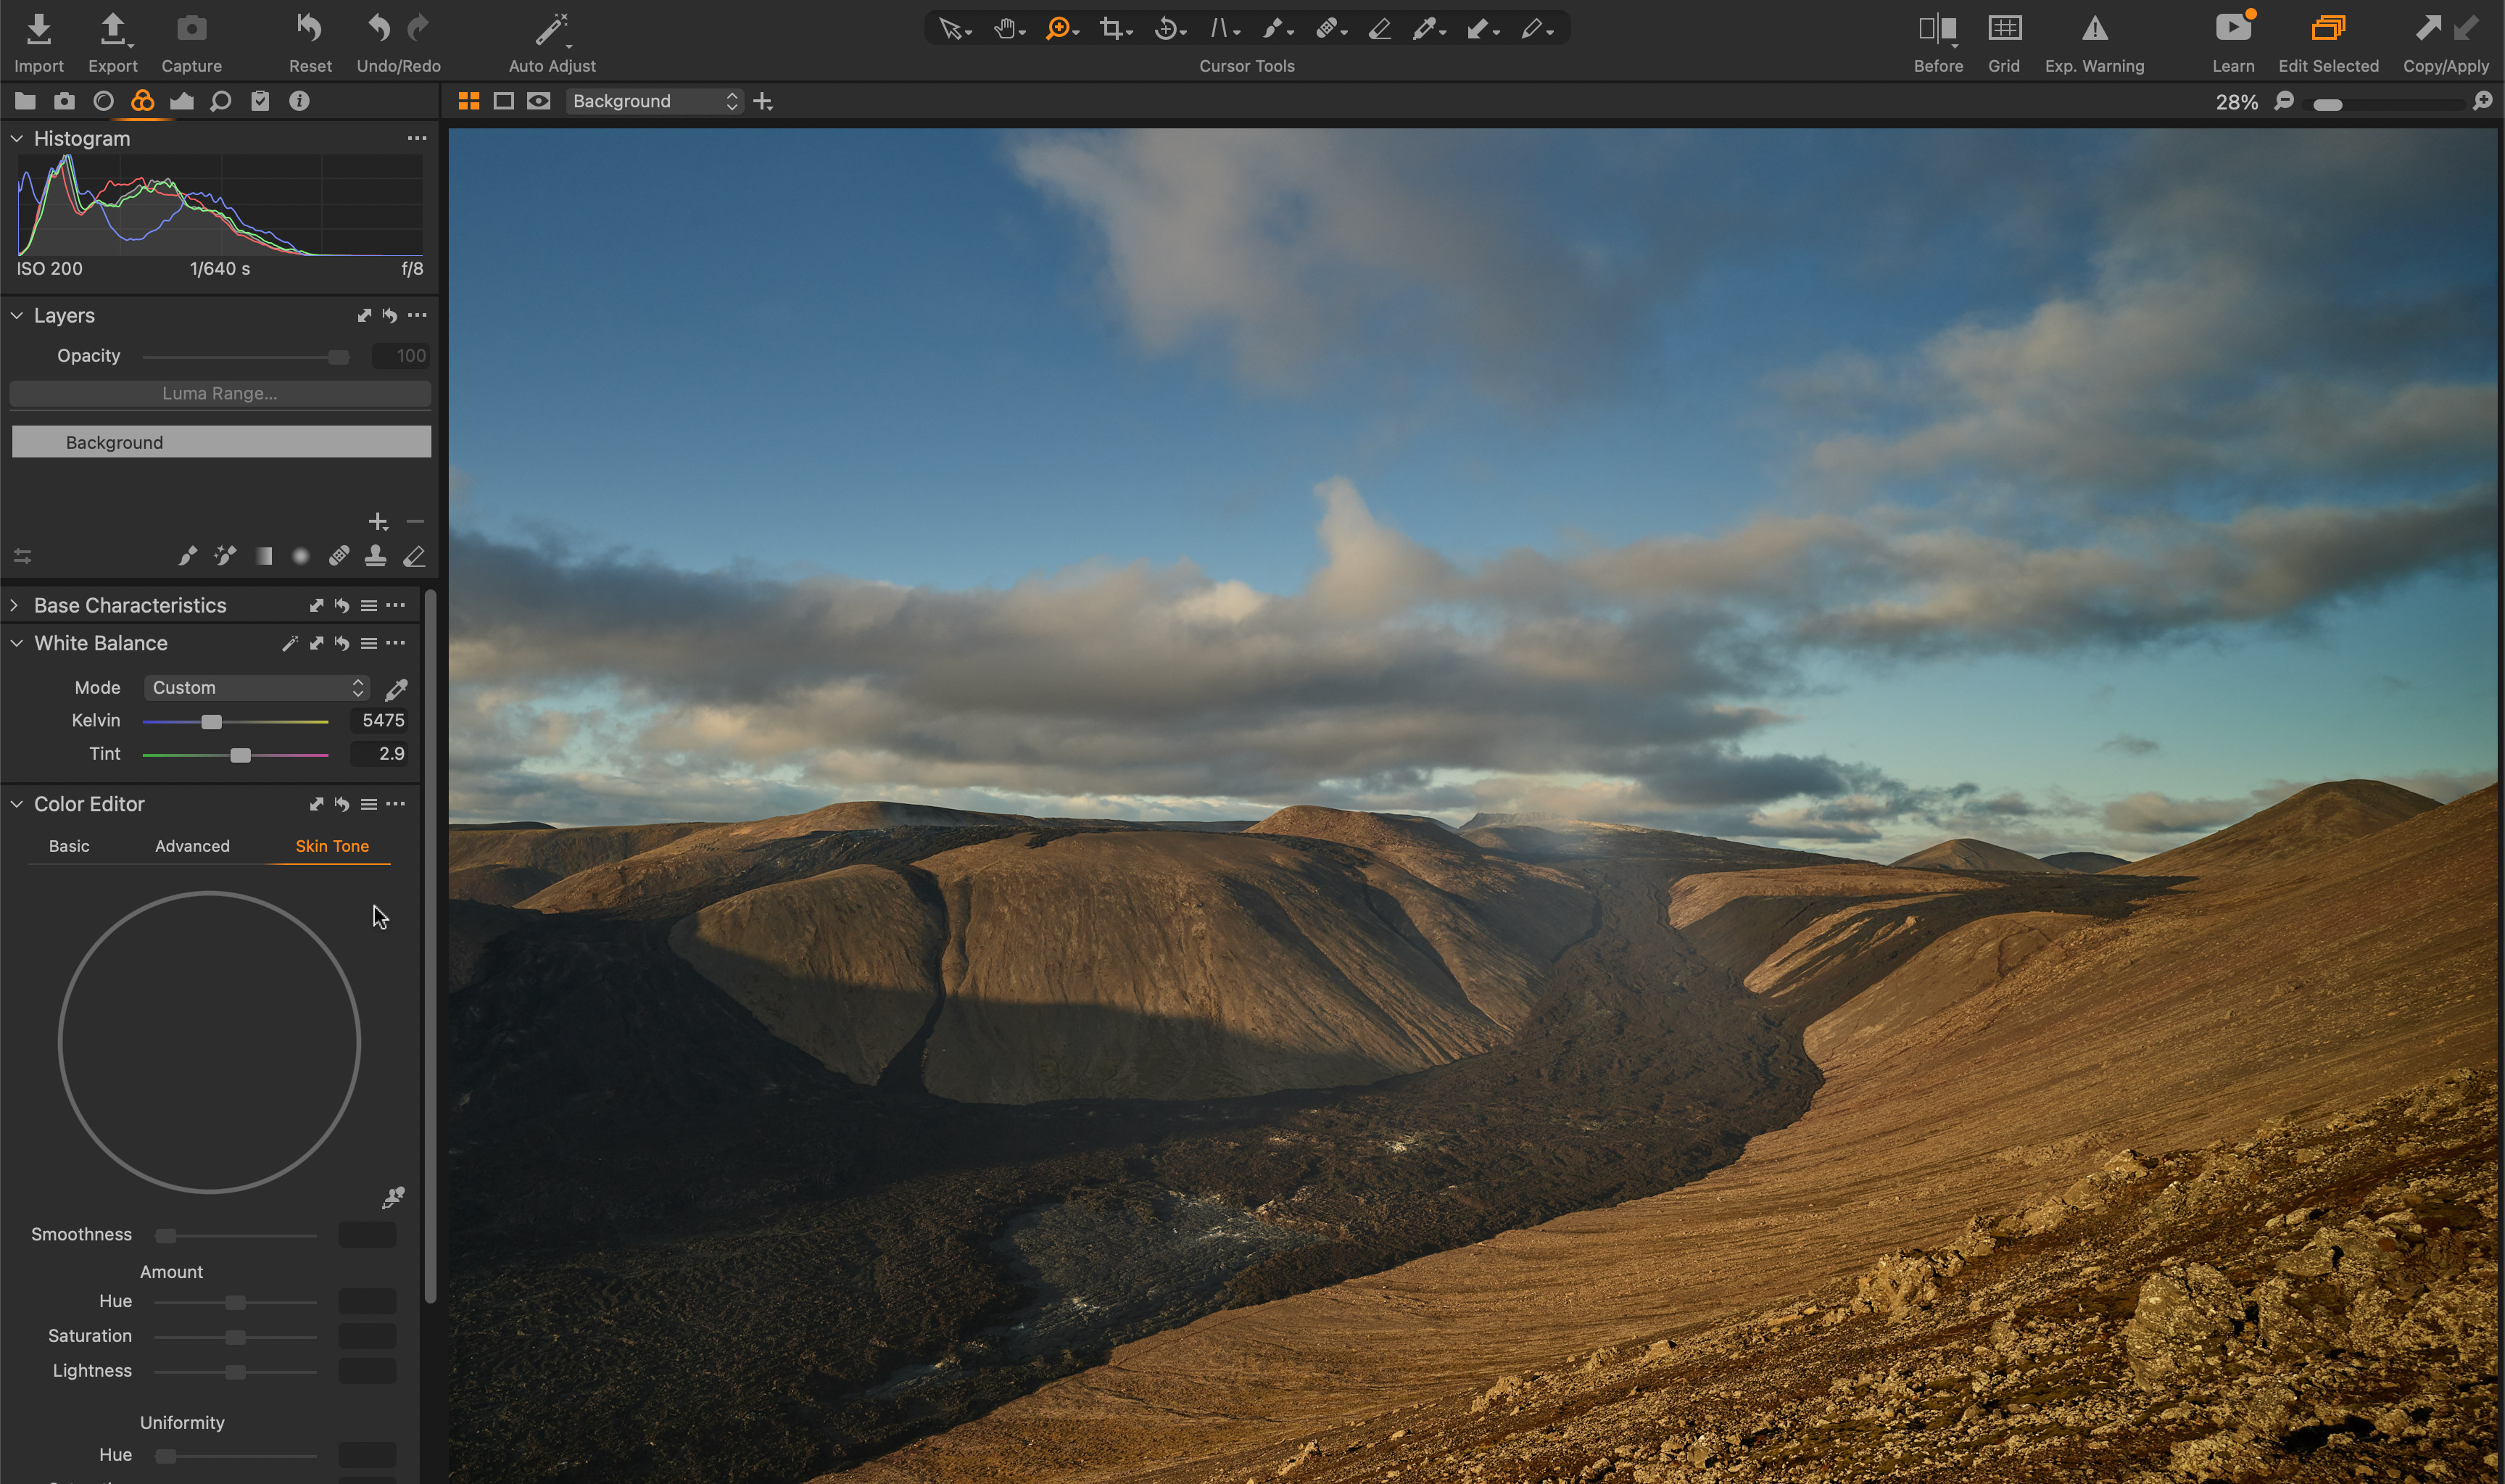
So here's our start shot. As you'll see, the sky has a (perfectly natural) color shift from left to right, but it just doesn't look right and it needs to be fixed... with the Skin Tone tool.
You’ll find the Skin Tone tool in the “Color Editor” tool, within the “Color” tab (by default) – you can click the gadget in the top right corner of this screenshot and all the others to see a bigger version.
The best camera deals, reviews, product advice, and unmissable photography news, direct to your inbox!
Next to “Basic” and “Advanced”, you’ll see “Skin Tone” – and clicking it take you to the tool. Don’t be alarmed by the empty color wheel, we’ll be adding our selection in a moment.
Step 2: Draw a mask over your target area
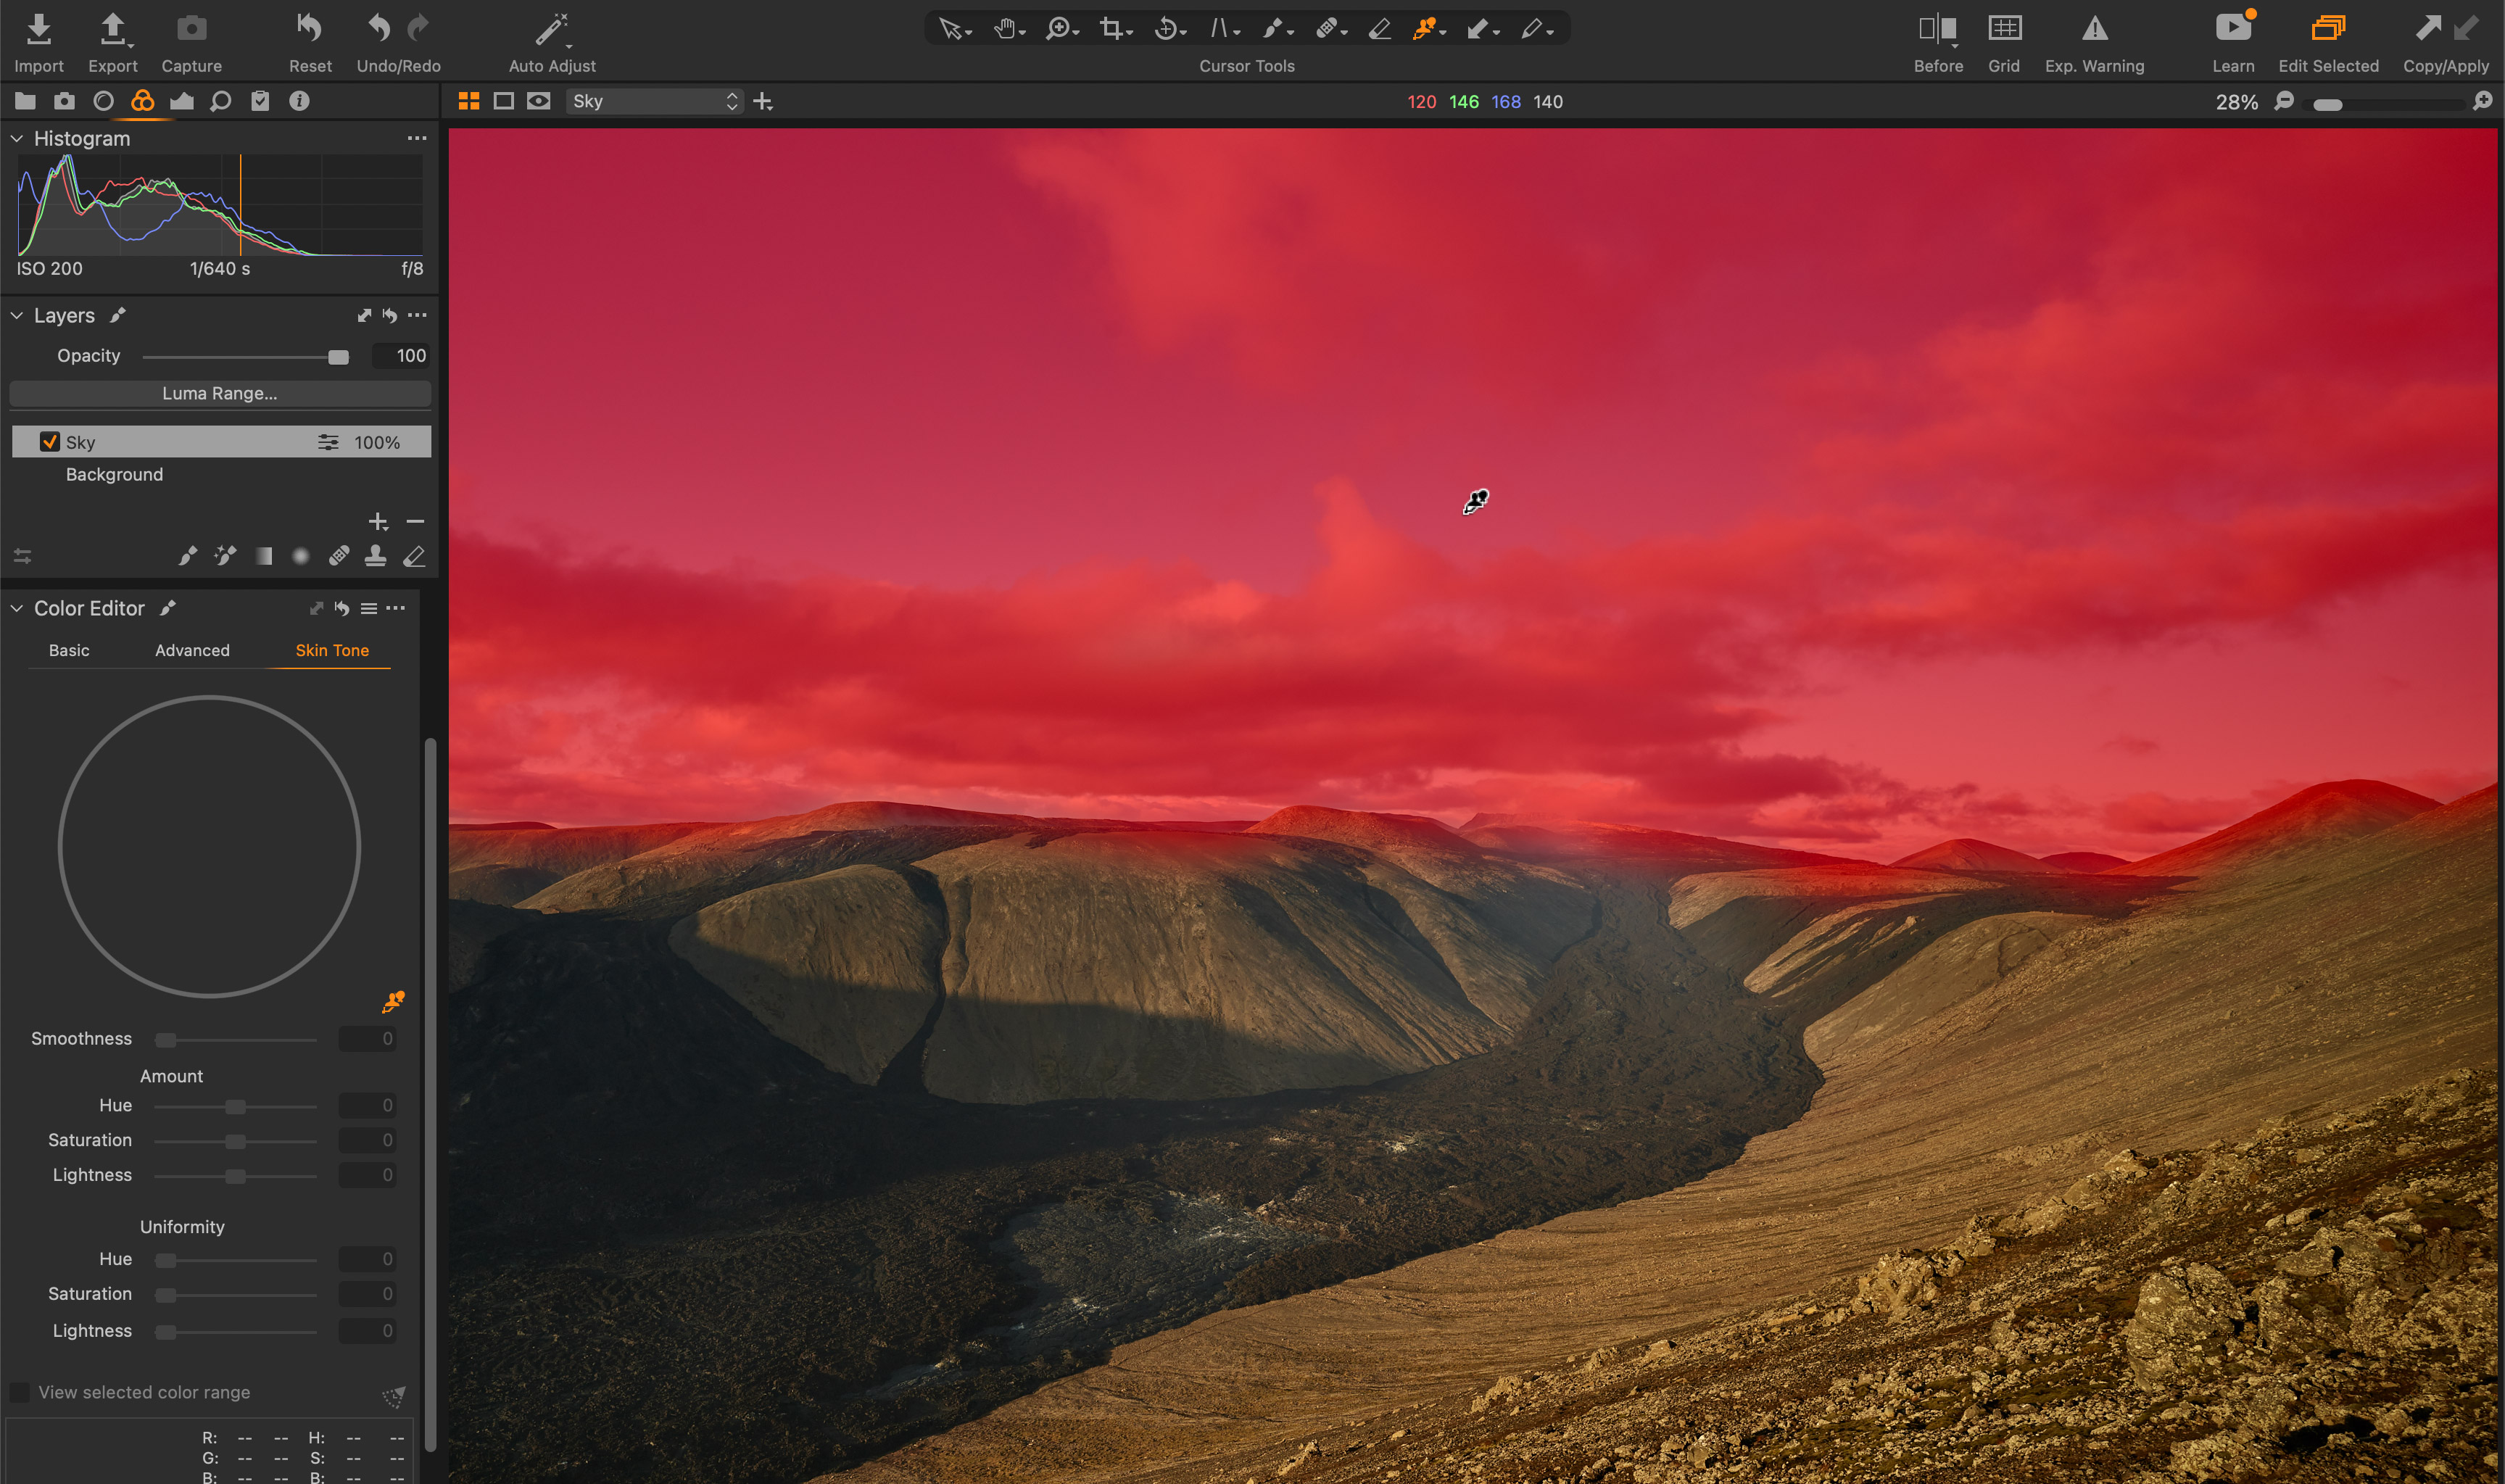
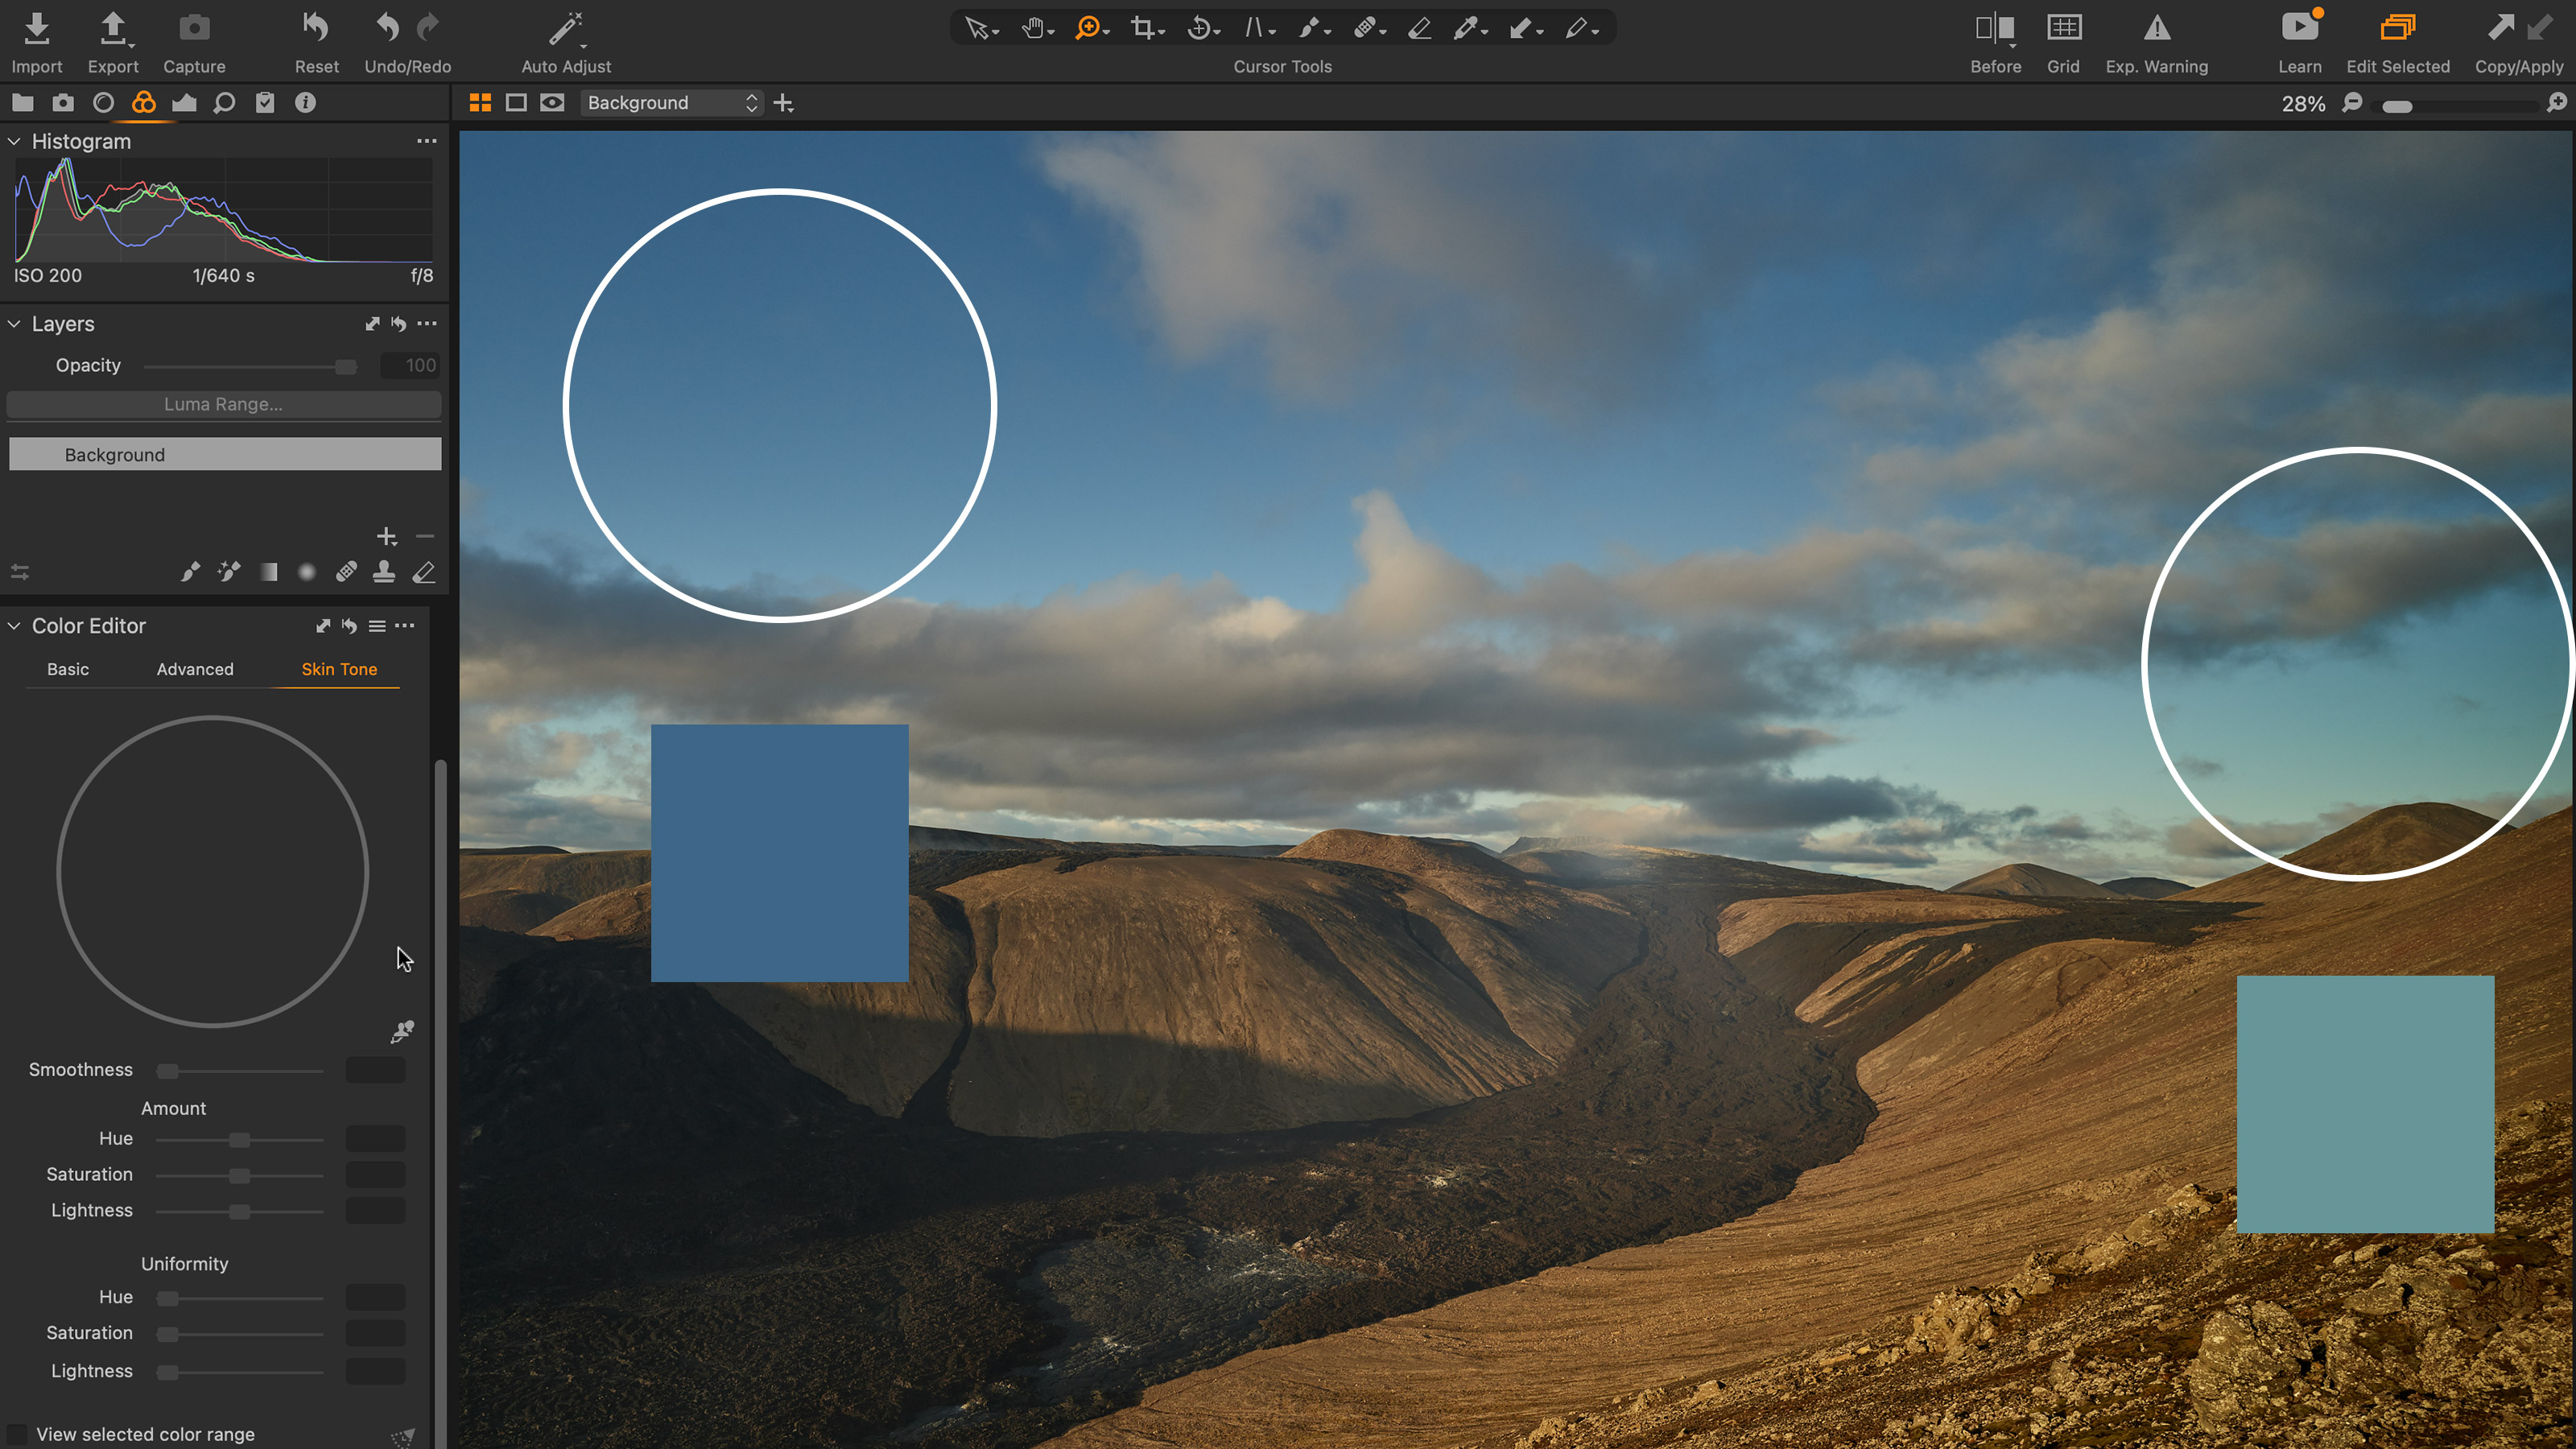
Because the tool works on a color range, not a specific area of the image, to ensure your changes only affect the region of the image you want to alter – draw a mask over your target first. That could be the sky, the grass, or (as originally designed) somebody’s skin.
You'll find Caputre One's masking tools on the top toolbar. The regular brush tool should be fine for this.
Step 3: Select a target color
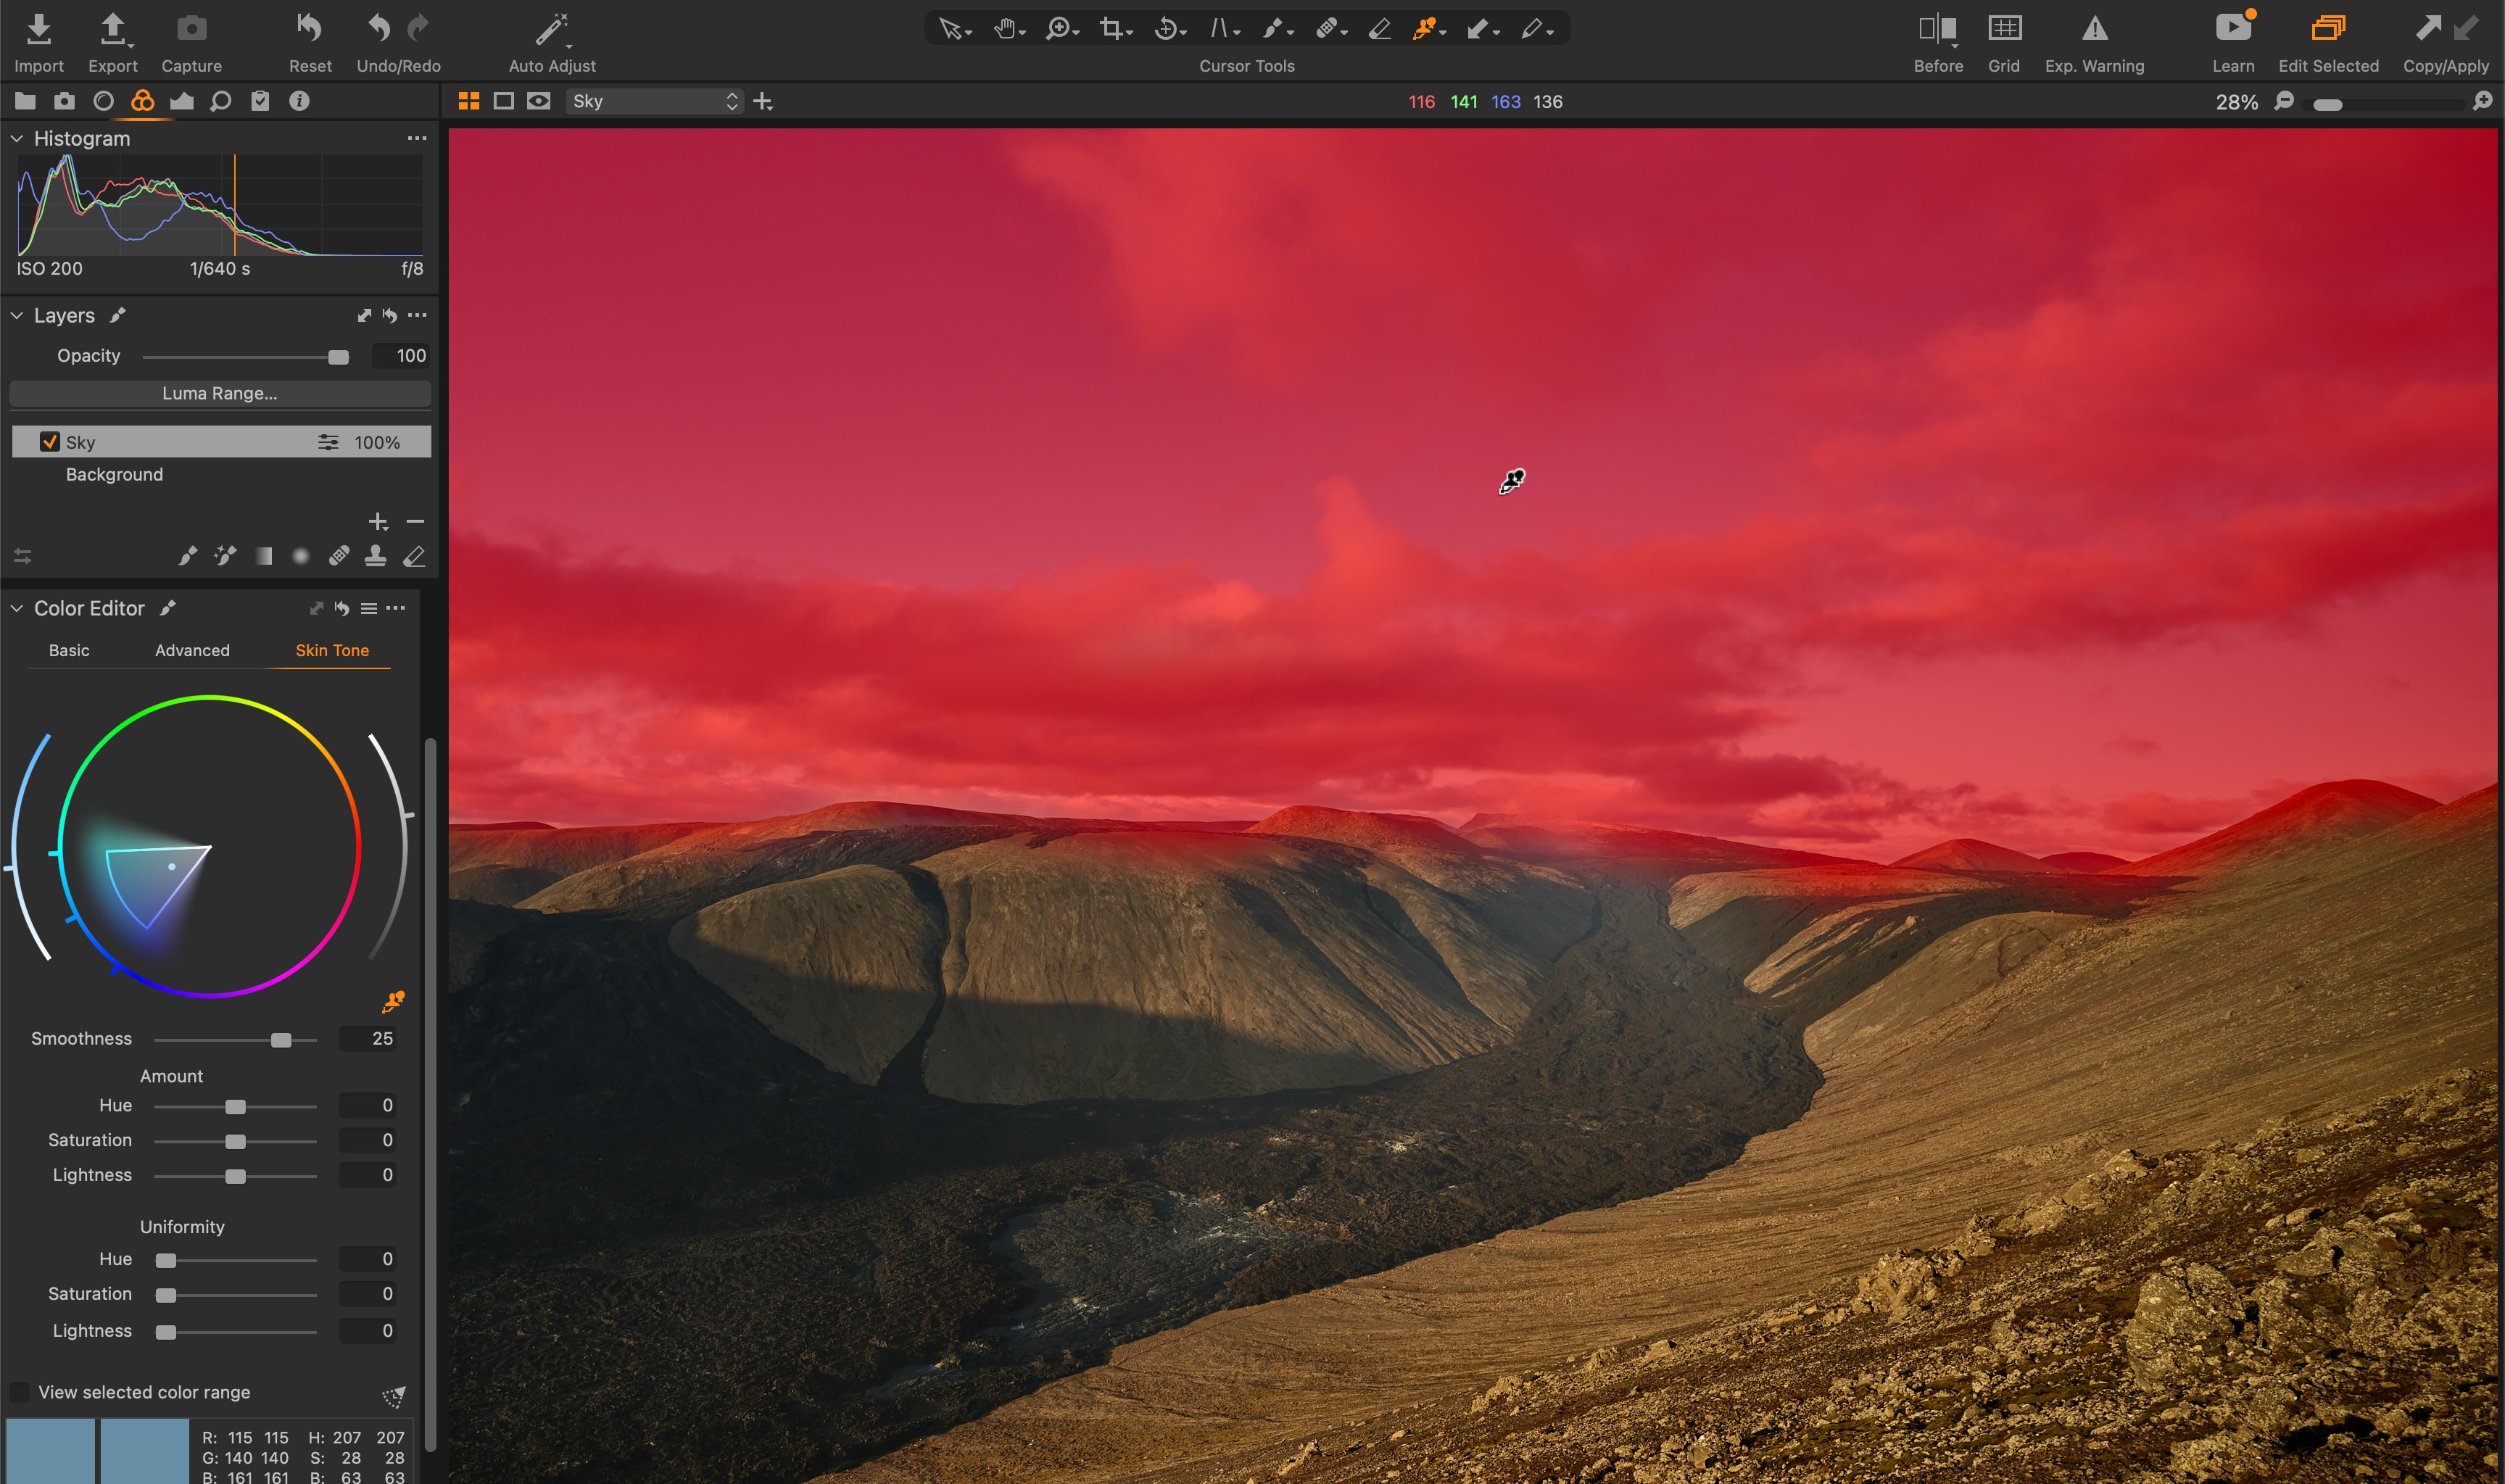
Click on the color-picker icon in the Skin Tone tool, and select the target color that’s closest to the middle of the range of tones in the problem area for your image. (In this case, the average tone of blue in the middle of the sky). You’ll see the color wheel in the tool then highlight that specific color and those which surround it.
At this point, press M to disable your mask if it’s showing. Checking the “View Selected Color Range” box will turn all non-selected colors to greyscale to allow you to focus on the range that’s been selected.
Step 4: Amount and Uniformity
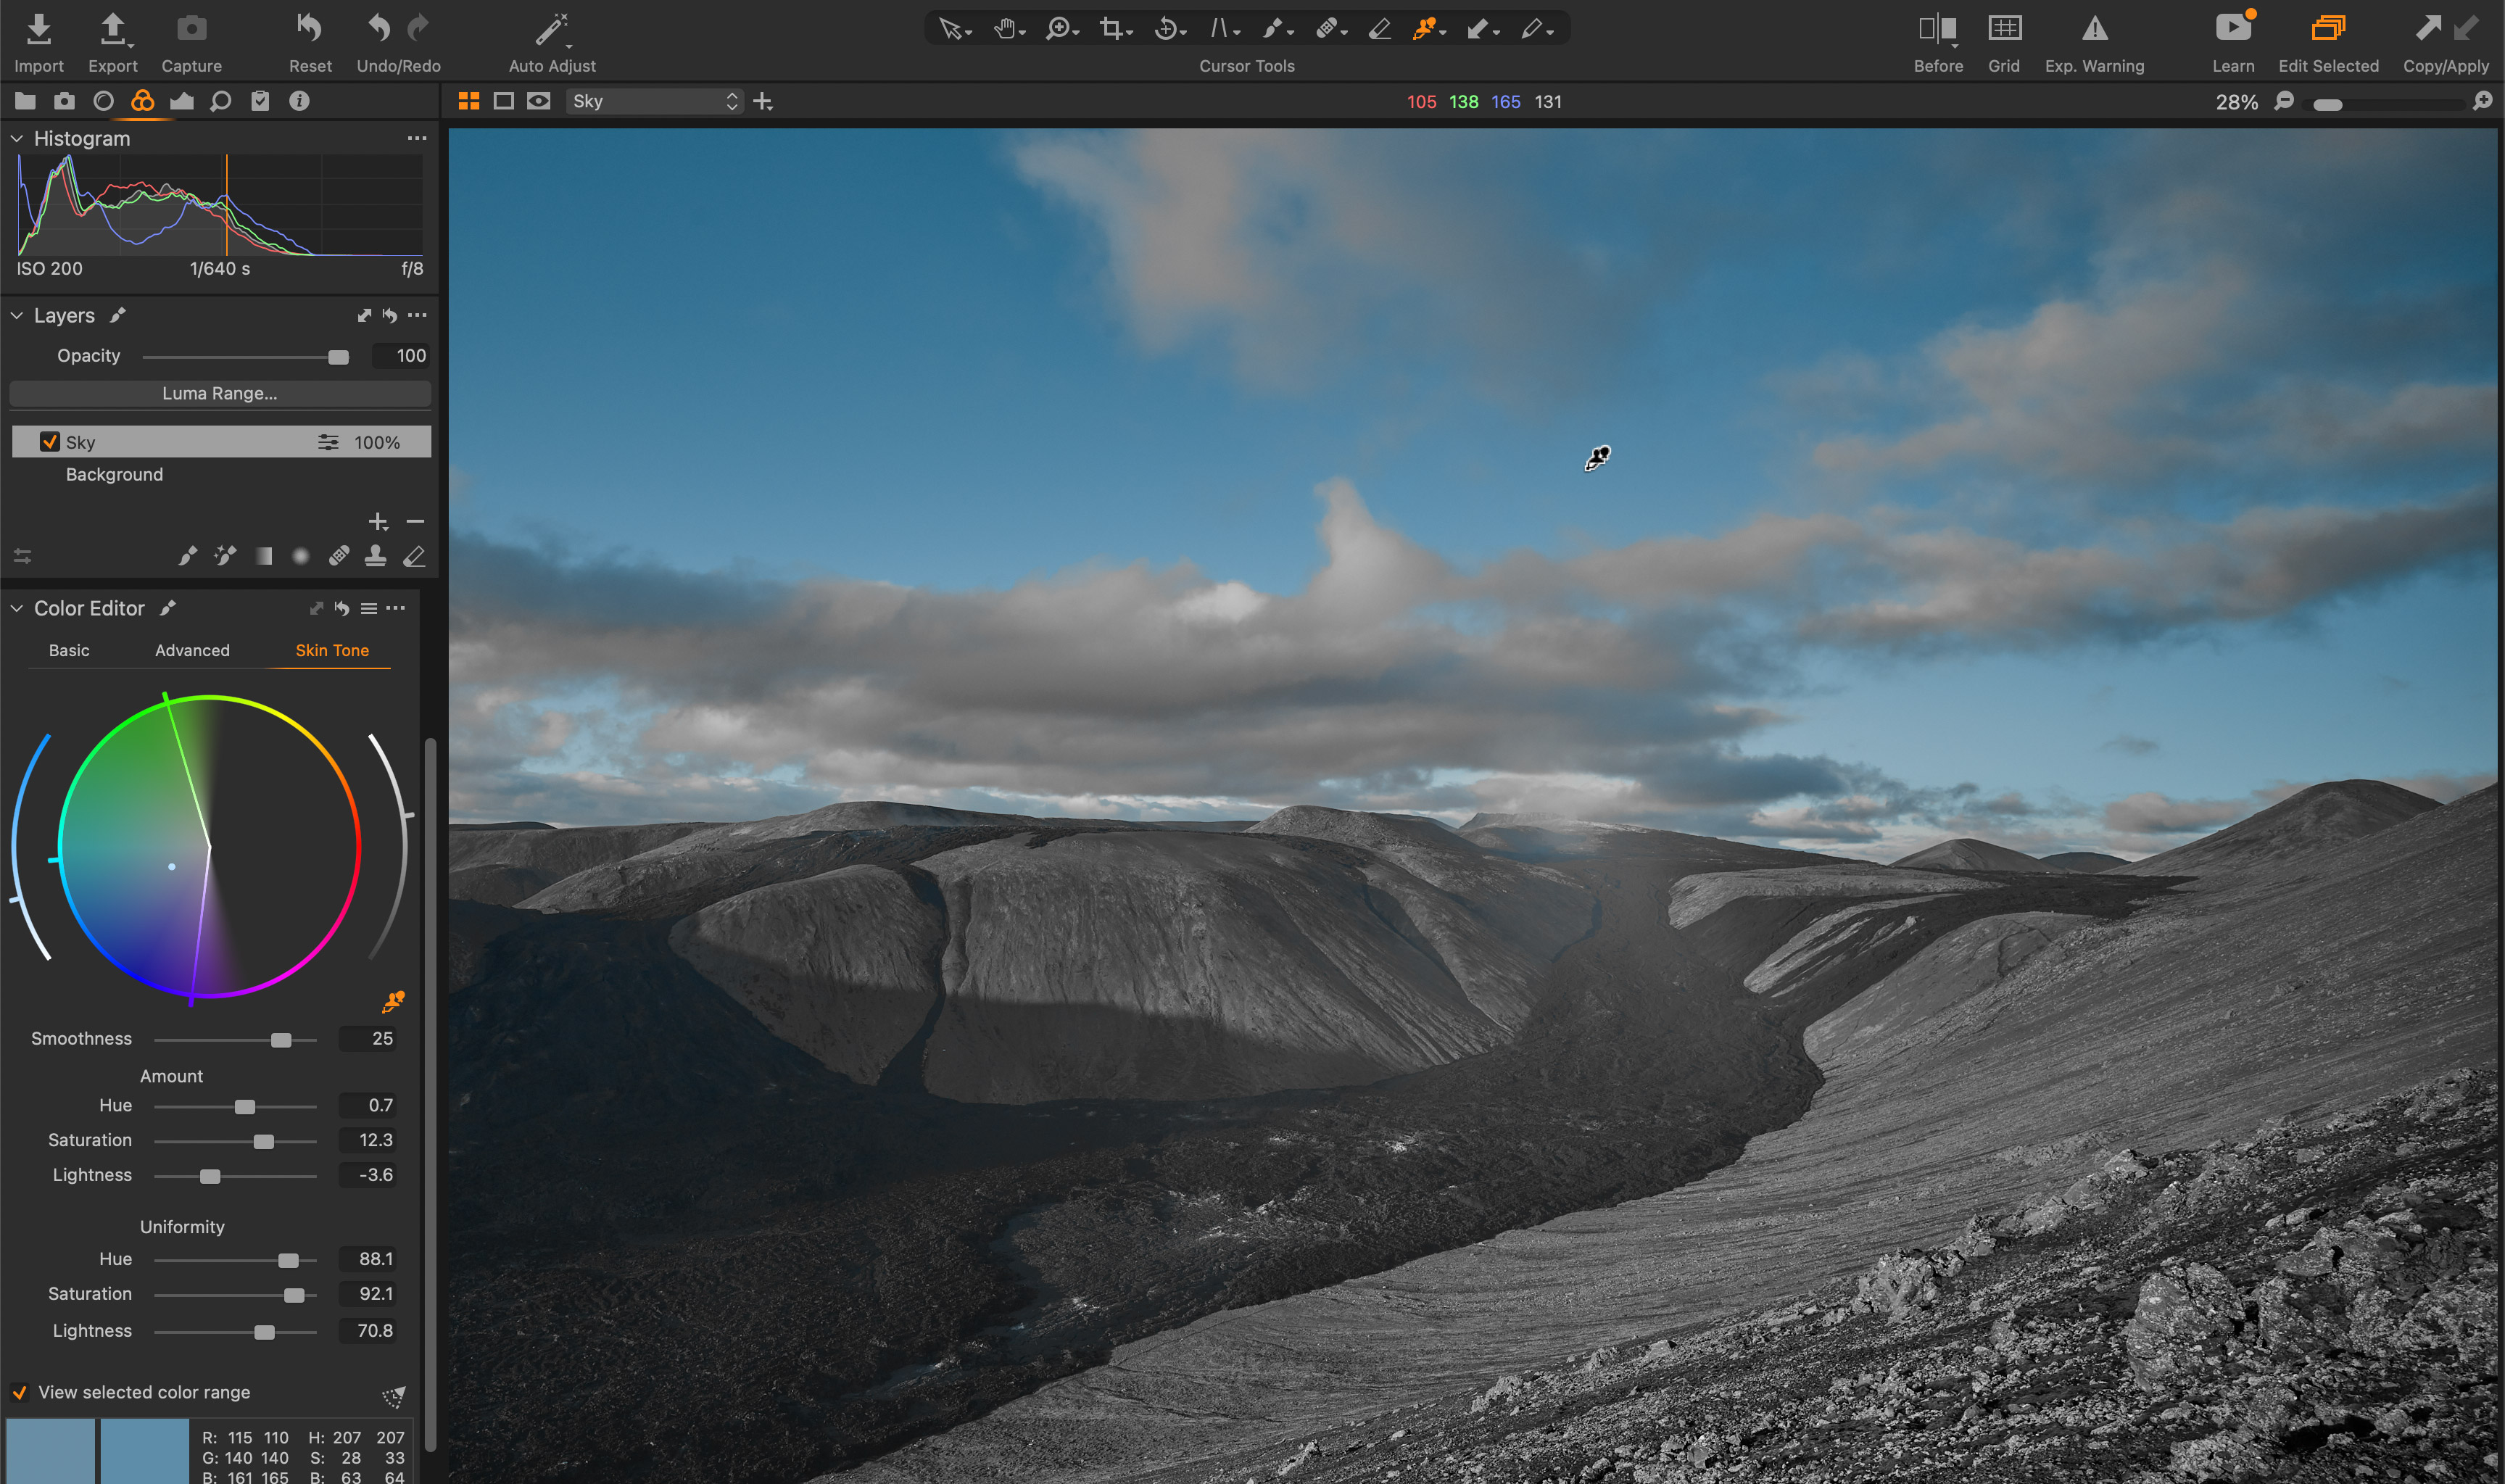
You’ll then set the following sets of values:
Under “Amount”, you’ll set any changes to hue, saturation and brightness that you want to apply to the target color.
Under “Uniformity”, you’ll set how closely aligned all other colors in the area selected in the color wheel will become in relation to that target color.
Step 5: Changing the color range
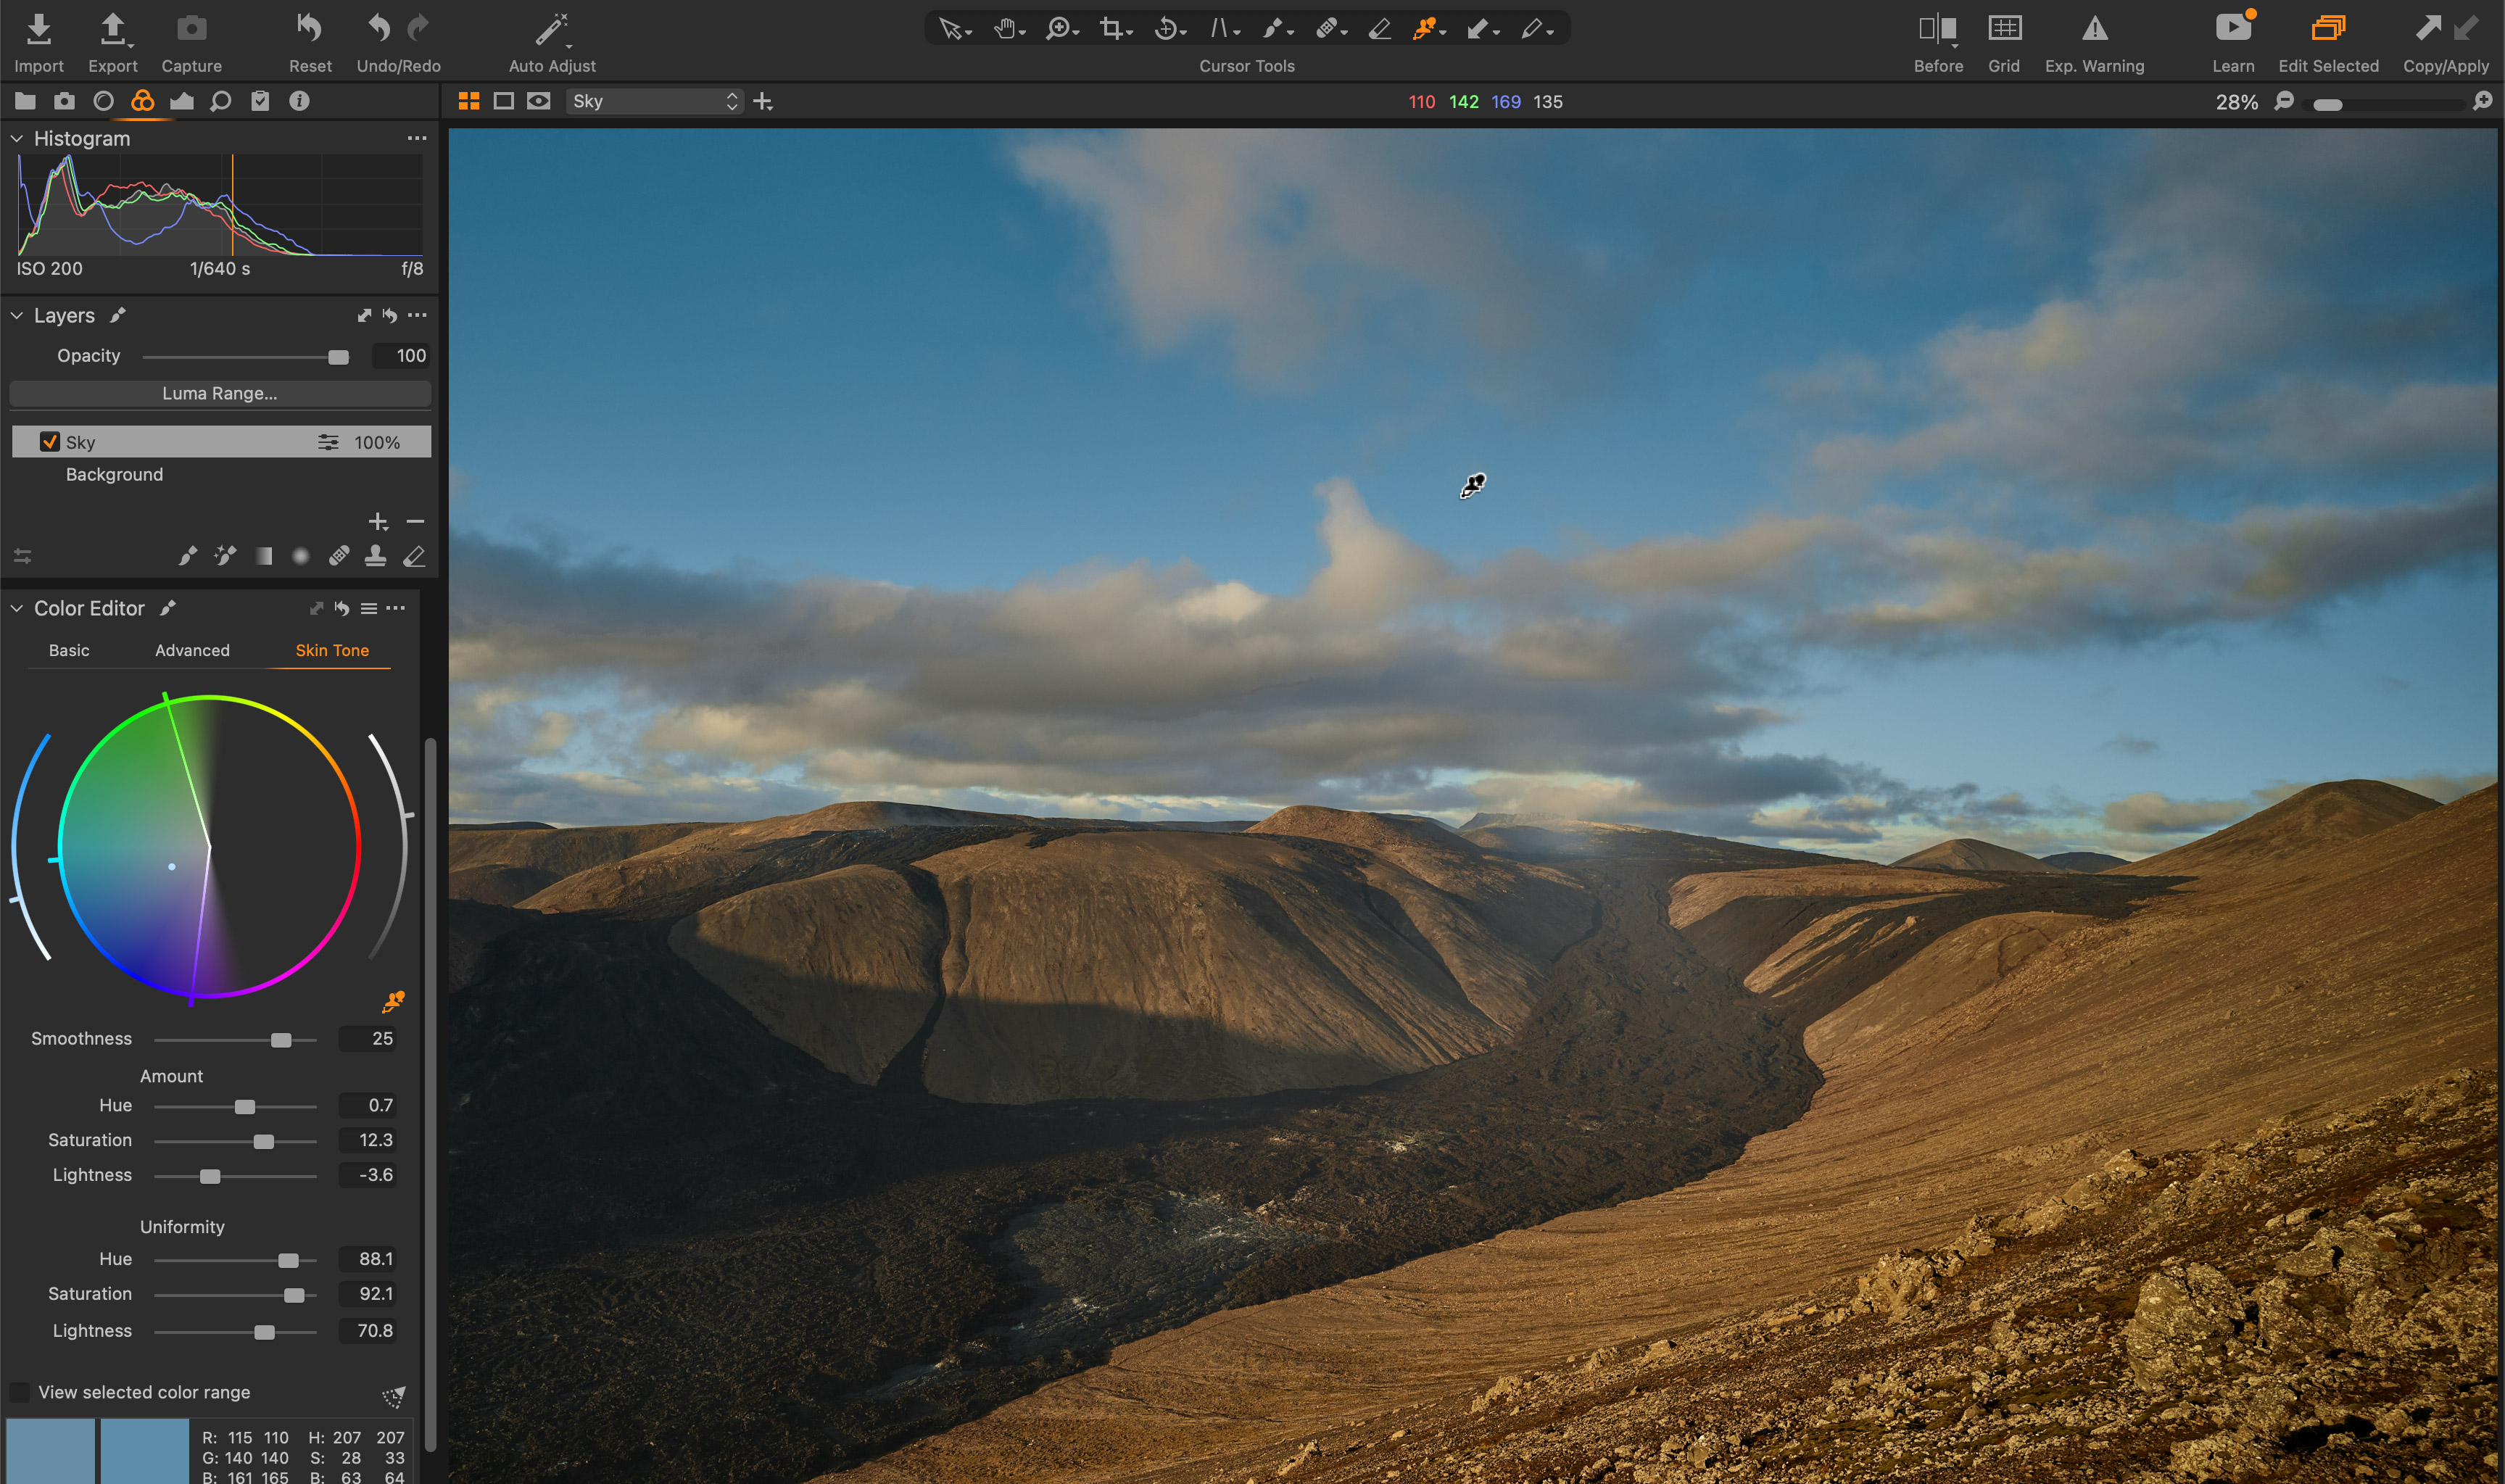
The higher the uniformity values, the closer all other colors will become. If you want to affect a broader range of colors, just drag the wedge in the color wheel to be wider and select a higher “smoothness” value.
Just be careful with clouds, as they need to stay neutral to remain realistic!
The Skin Tone tool is not just for skin tones!
The Skin Tone tool really should be renamed as the “fix color differences tool” – but for now, you can use it as a secret weapon should any issues occur in an area of an image that you expected to be more uniform than it turned out. You need to be careful to stay true to the image, but a small amount of tweaking here and there to these regions can add a much-needed finishing touch to a landscape shot.
About Capture One
Capture One is an all-in-one non-destructive image cataloguing, raw processing and editing tool, and its closest rival is Adobe Lightroom Classic. Capture One regularly features in our guide to the best photo editing software, thanks to its high-quality raw processing, in-depth color controls and layer and mask based editing.
Get Capture One Pro 22: $299 or $179/year
Capture One Pro is available either for a single one-off license fee on a paid-monthly subscription or an annual subscription which offers a big saving over the monthly option.
Paul Reiffer is an award-winning photographer and landscape artist. As a global ambassador for both Phase One and Capture One, he specialises in grand vistas, electrifying cityscapes and iconic views. His images have been published all around the world in well-known books, newspapers and magazines as well as supporting global travel and hospitality brands to reach and excite their audiences. His technical expertise is regularly called upon for industry insights, and through his luxury workshop programme as well as online channels, he’s carved out a unique style of teaching that is now appreciated by thousands worldwide. Shooting with ultra-high-resolution Phase One cameras, his work is used commercially by interior designers and clients ranging from National Geographic to British Airways, Marriott, Land Rover and many more.
