Colorize old photos by restoring them in Photoshop
Breathe new life into old prints! Restore and colorize photos using a series of straightforward Photoshop CC skills
Watch video: How to colorize photos in Photoshop CC
Restoring old photos is one of the most satisfying of digital touch-up jobs. Not only are we able to remove dirt, scratches and all the other detritus of time, we can also add our own creative input by colorizing these old prints. This is a simple process of painting on different layers set to the Color Blend mode, a technique that – with a little practice – even the complete Photoshop CC novice can get through.
• Download Photoshop and try for free
Often the trickiest part of the process is choosing which colors to use, but with some images a little research can help. Here, for example, our initial plan was to paint London’s famous Tower Bridge with the iconic bright blue styling that we see today.
After a little digging, though, it emerged that when the bridge first opened in 1894 the cables were chocolate brown (they were only painted blue in 1982). We also discovered a painting of the opening ceremony by William Lionel Wylie that proved invaluable. It’s details like this that can not only help you choose the right colors, but also lends the photo extra authenticity.
If you like, you can take things beyond hand-coloring and add other enhancements too. Here the original sky was washed out, so we dropped in a few clouds from another image to add depth to the scene. Touches like this might leave an archivist aghast, but if it makes sense visually then a little creative license can add to the effect of the photograph.
01 Tidy up messy marks
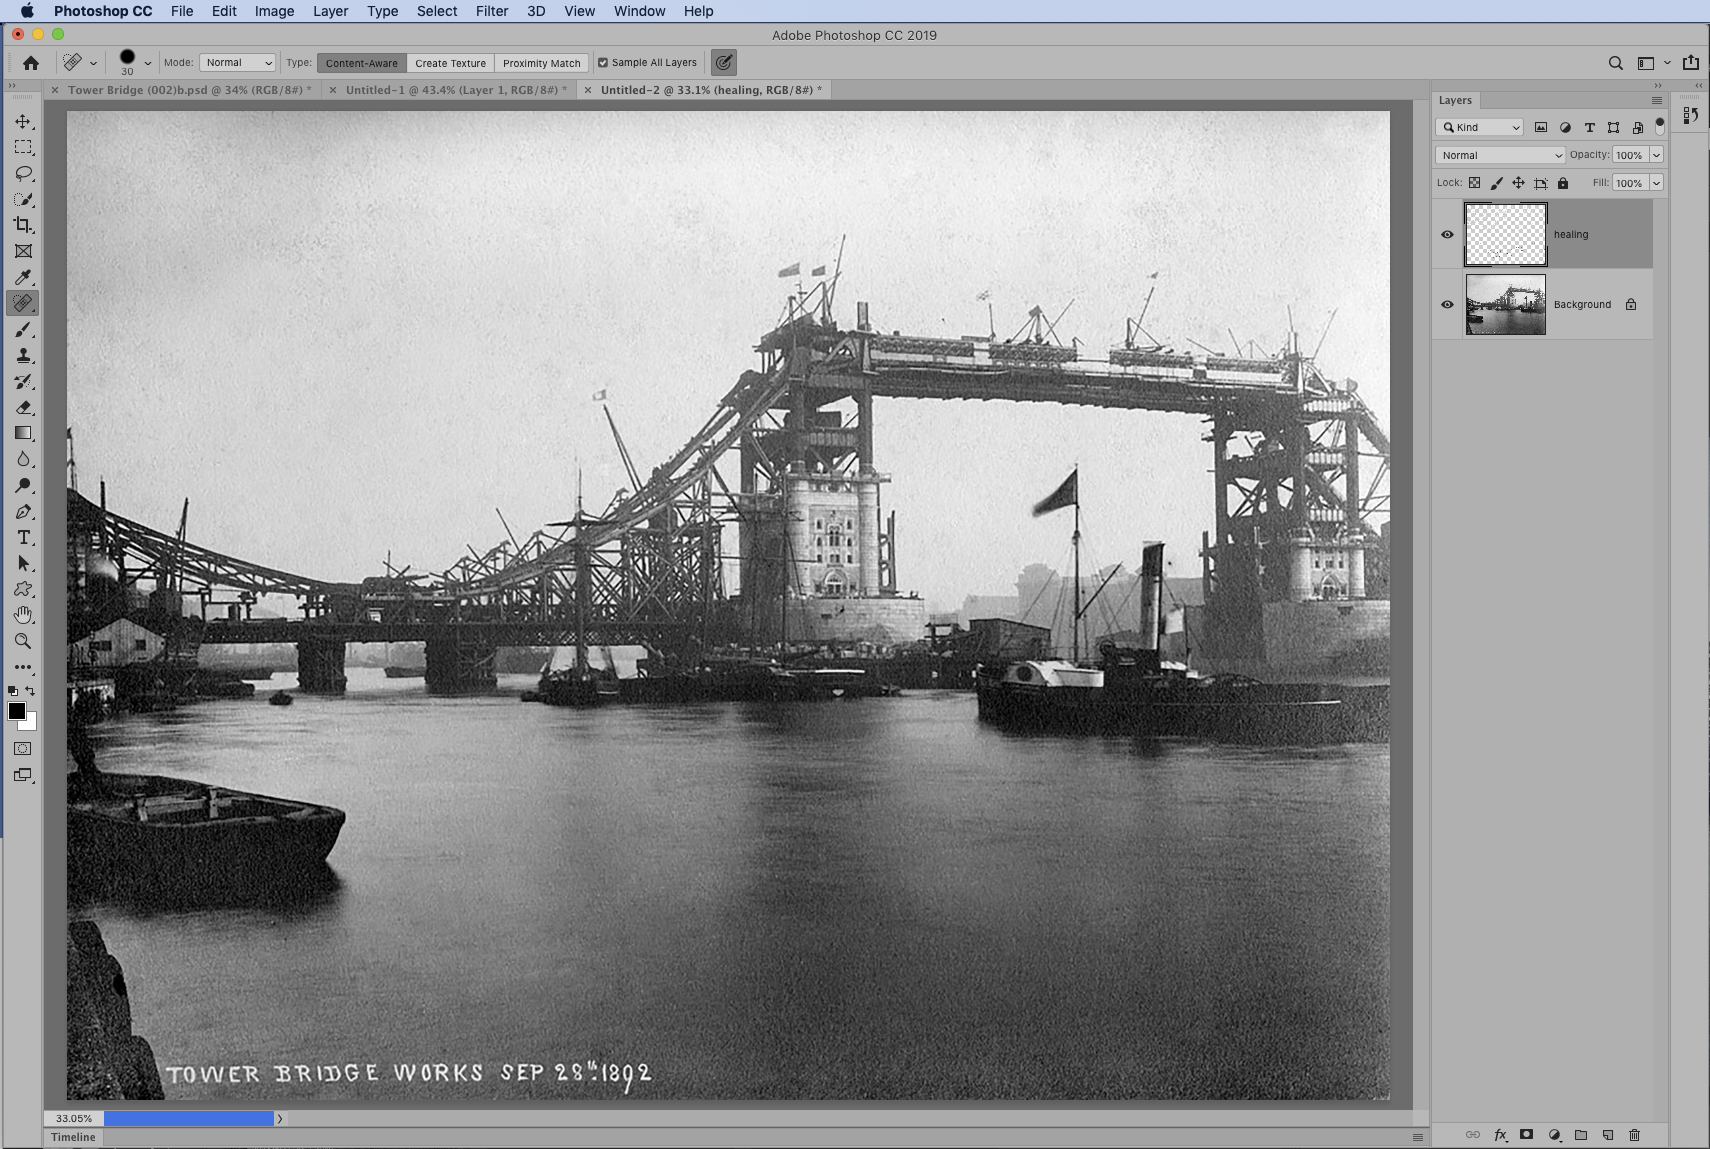
Open your old photo (or download the Tower Bridge here), then go to the Layers panel and click the New Layer icon. Grab the Spot Healing Brush. Check ‘Sample All Layers’ in the tool options then zoom in close and paint to retouch small marks.
02 Add a color
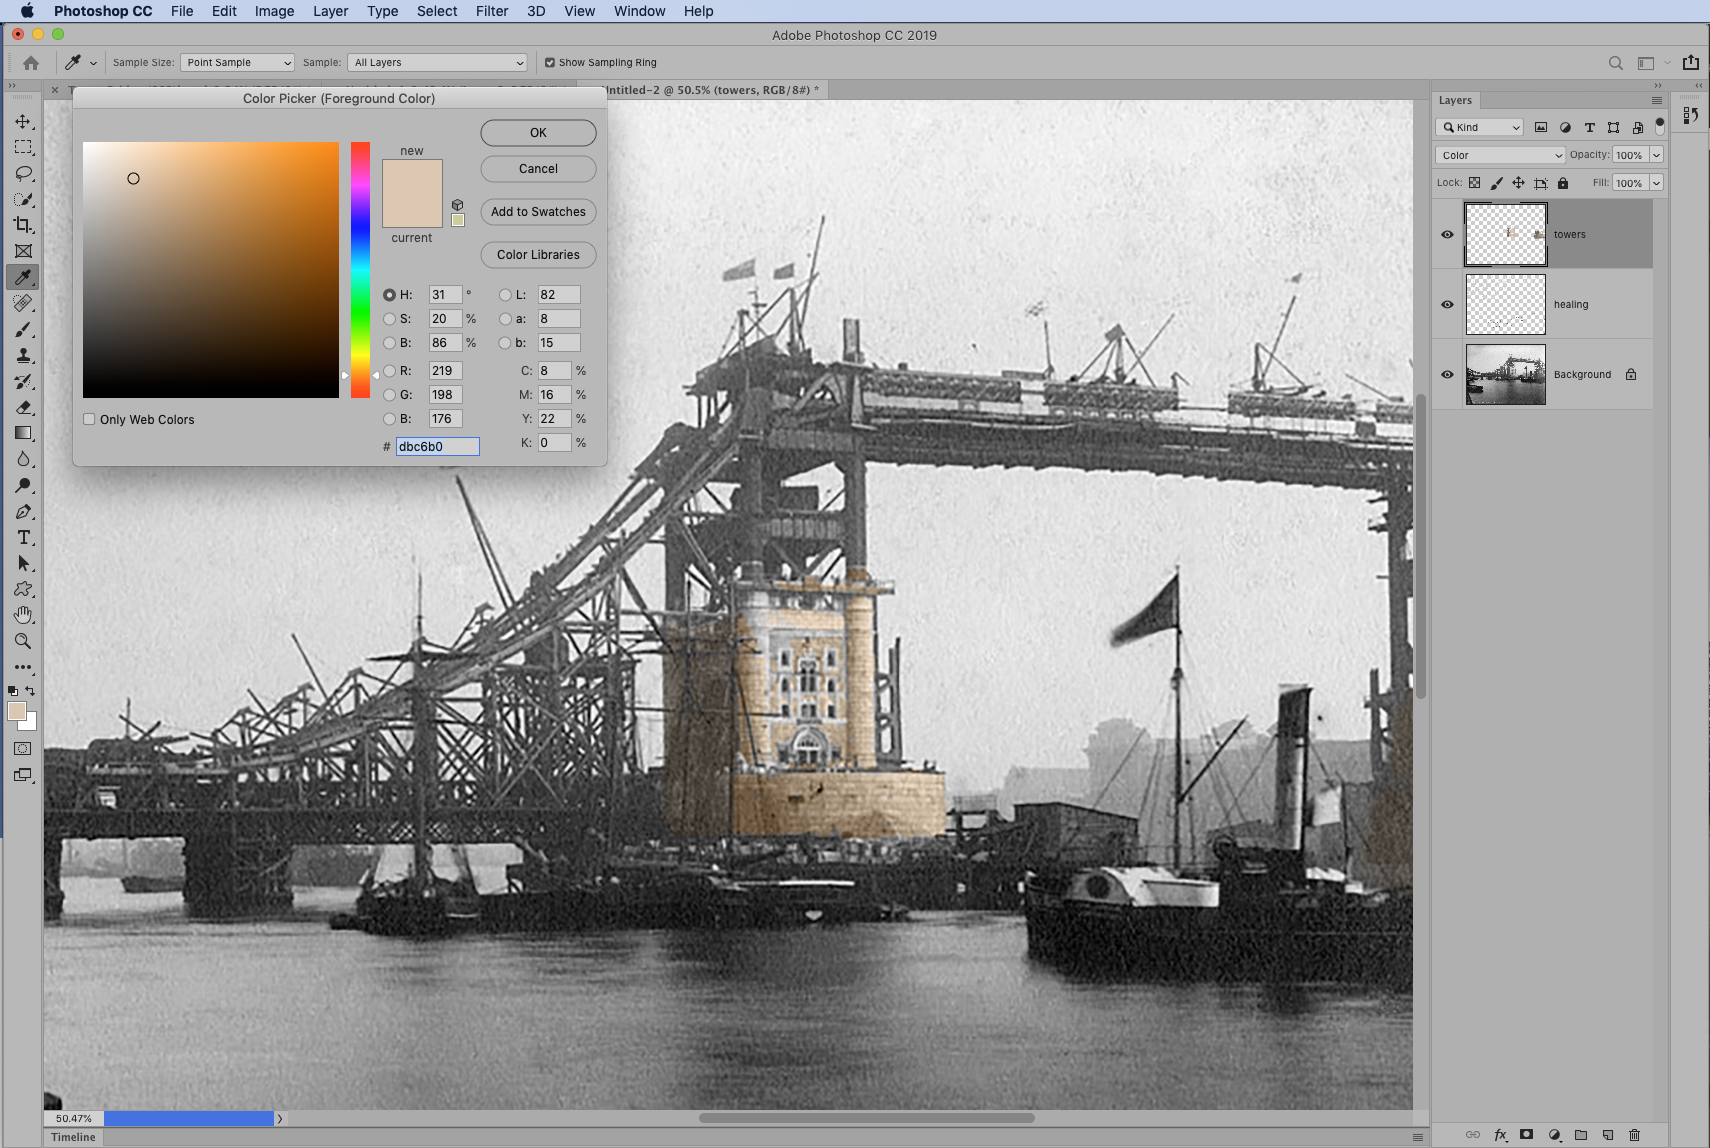
Click the Create New Layer icon again, then go to the Blending Mode dropdown at the top of the Layers panel and change it from Normal to Color. Grab the Brush tool and choose a color, then zoom in close and start painting over objects in the scene to colorize them.
03 Paint onto new layers
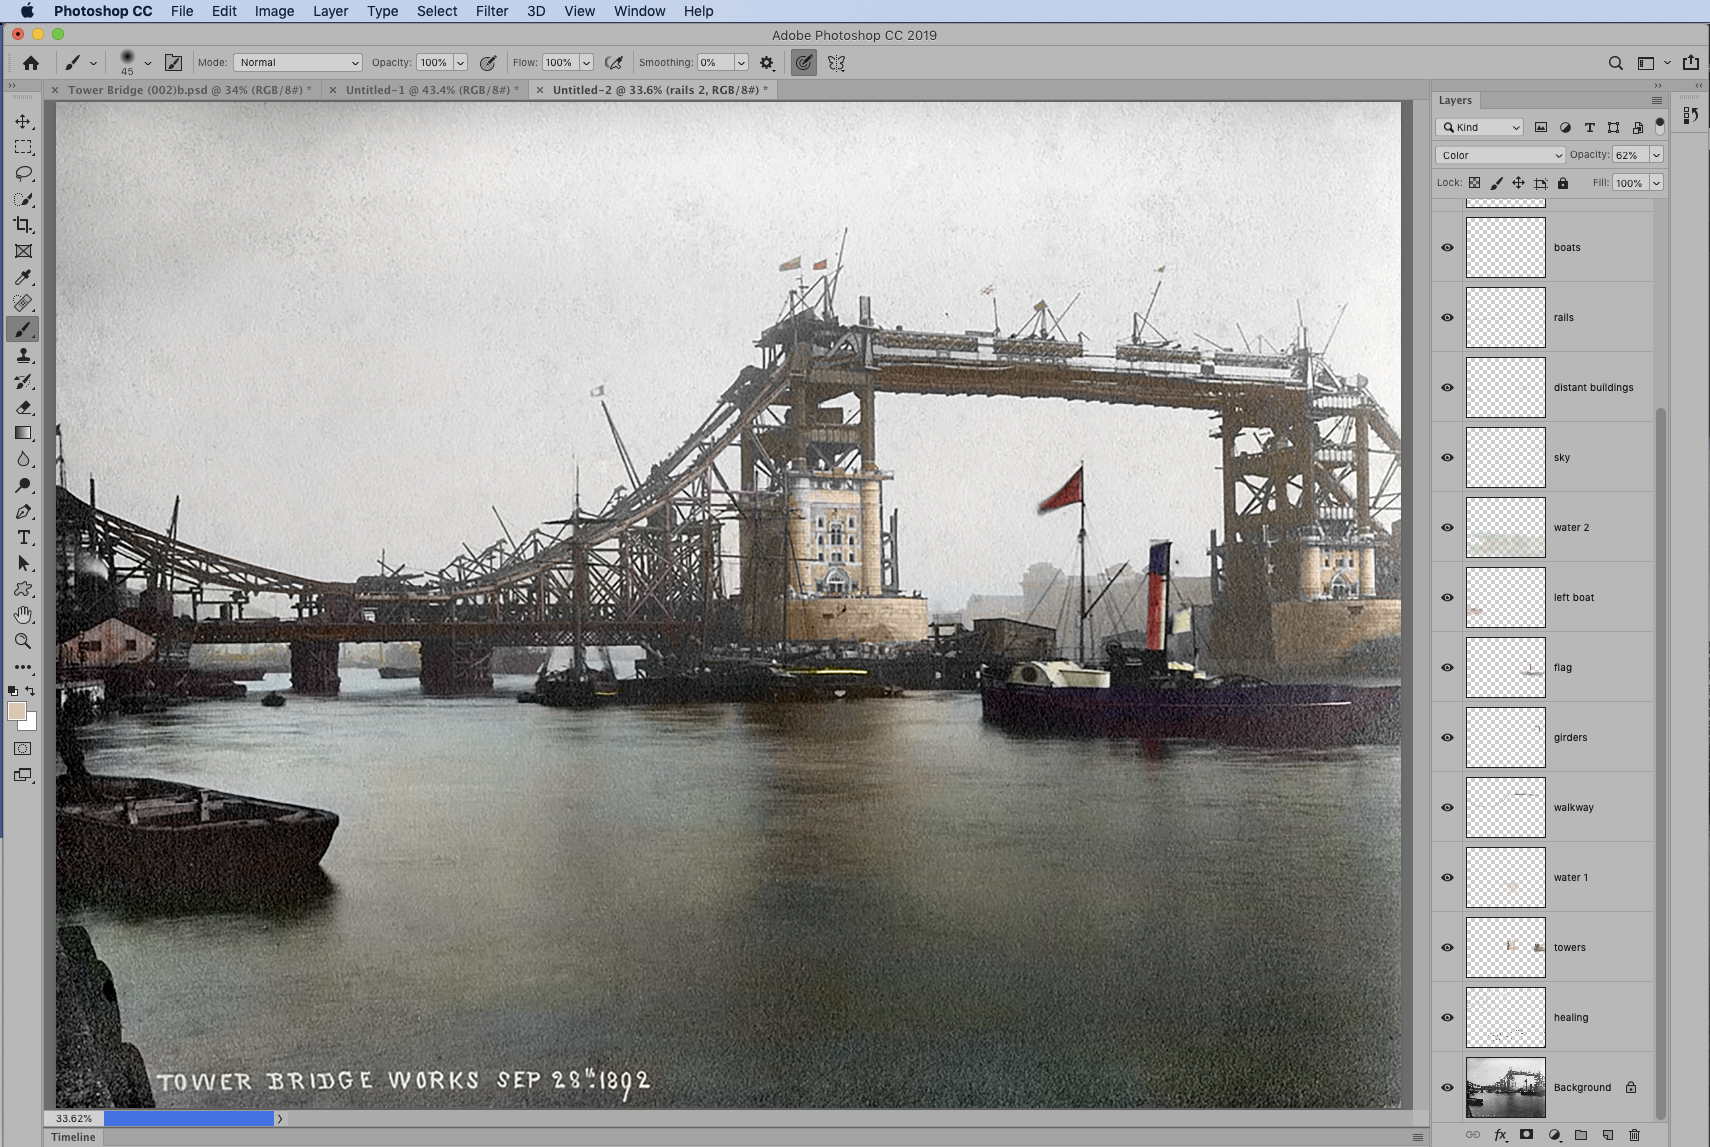
Continue on, adding new layers set to the Color Blending mode for each new color you add. If a color appears too strong, simply lower the layer opacity until it looks right. If a color is too bright, try duplicating the layer (Cmd/Ctrl + J) then set the Blending Mode to Multiply.
04 Select the sky
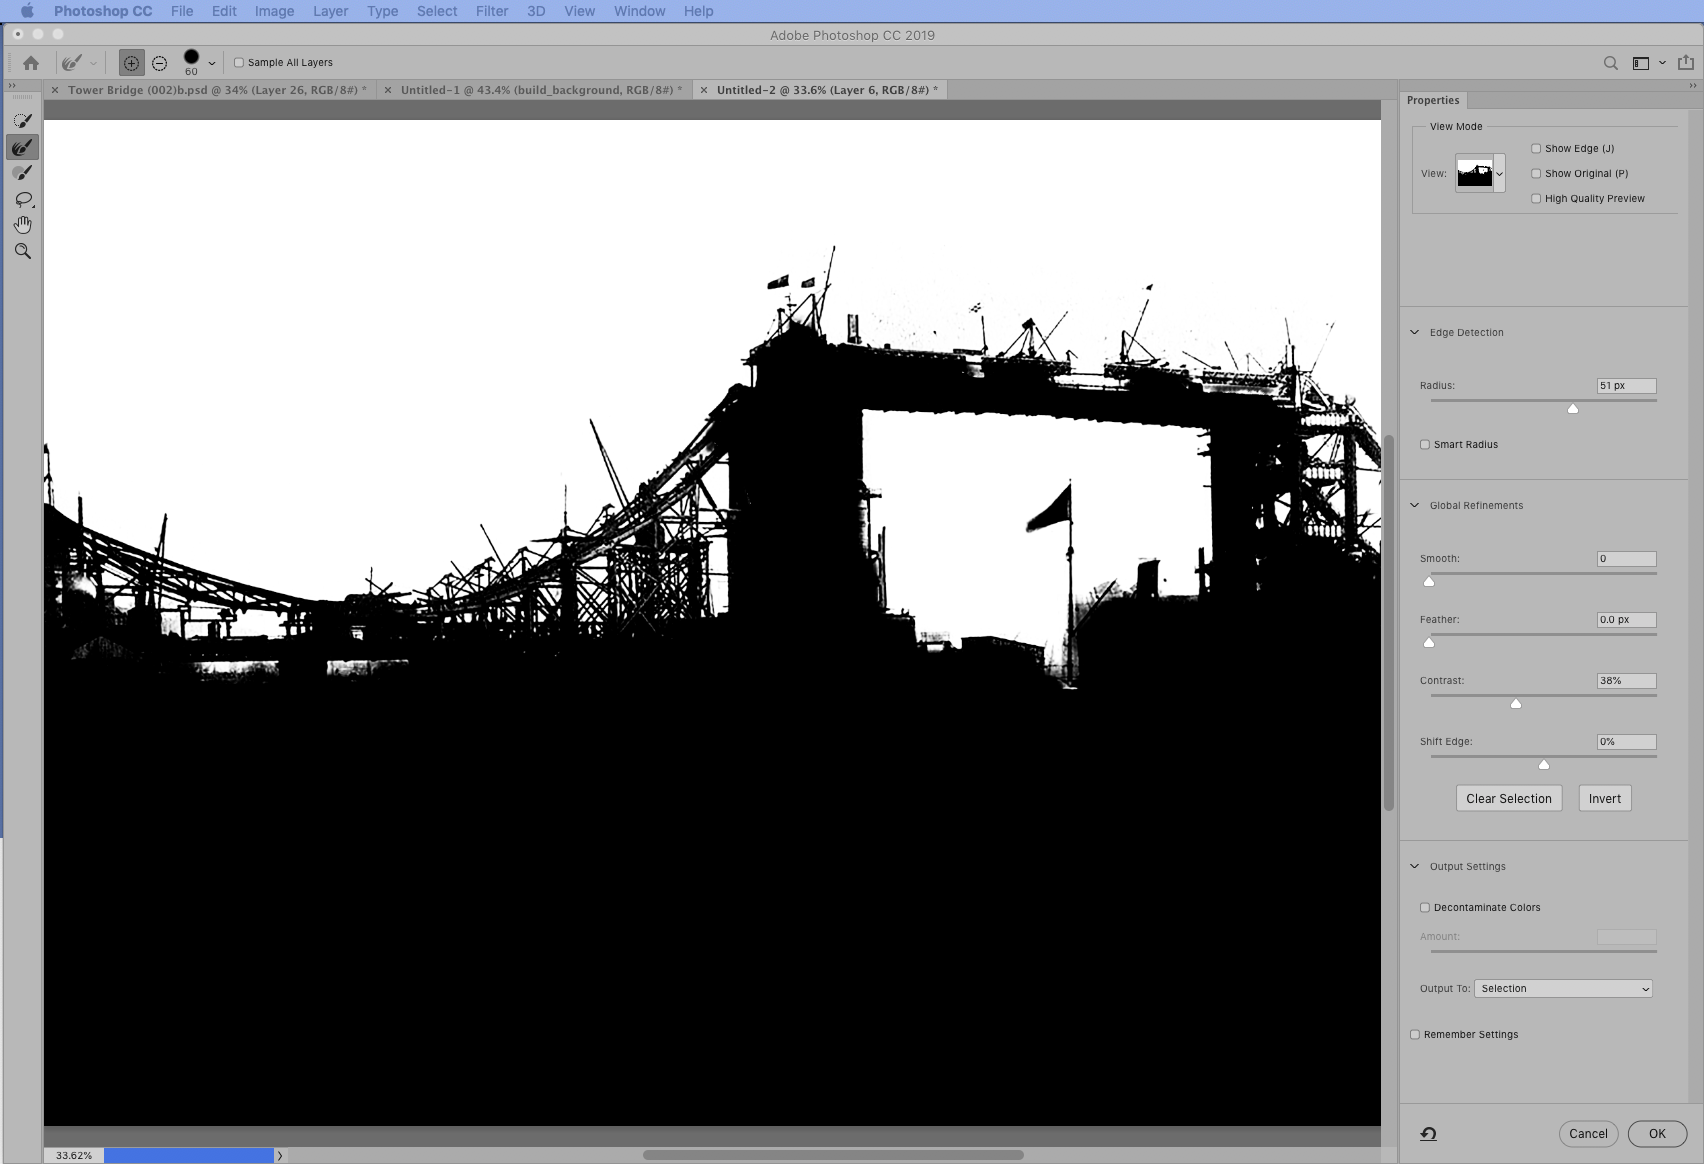
Hit Cmd/Ctrl + Shift + Alt + E to merge a layer, then go to Select > Select and Mask. Get the Quick Selection tool and paint over the sky to select it. Next grab the Refine Edge Brush and paint to up the refinement over the bridge. Set Output to: Selection and hit OK.
05 Drop in a new sky
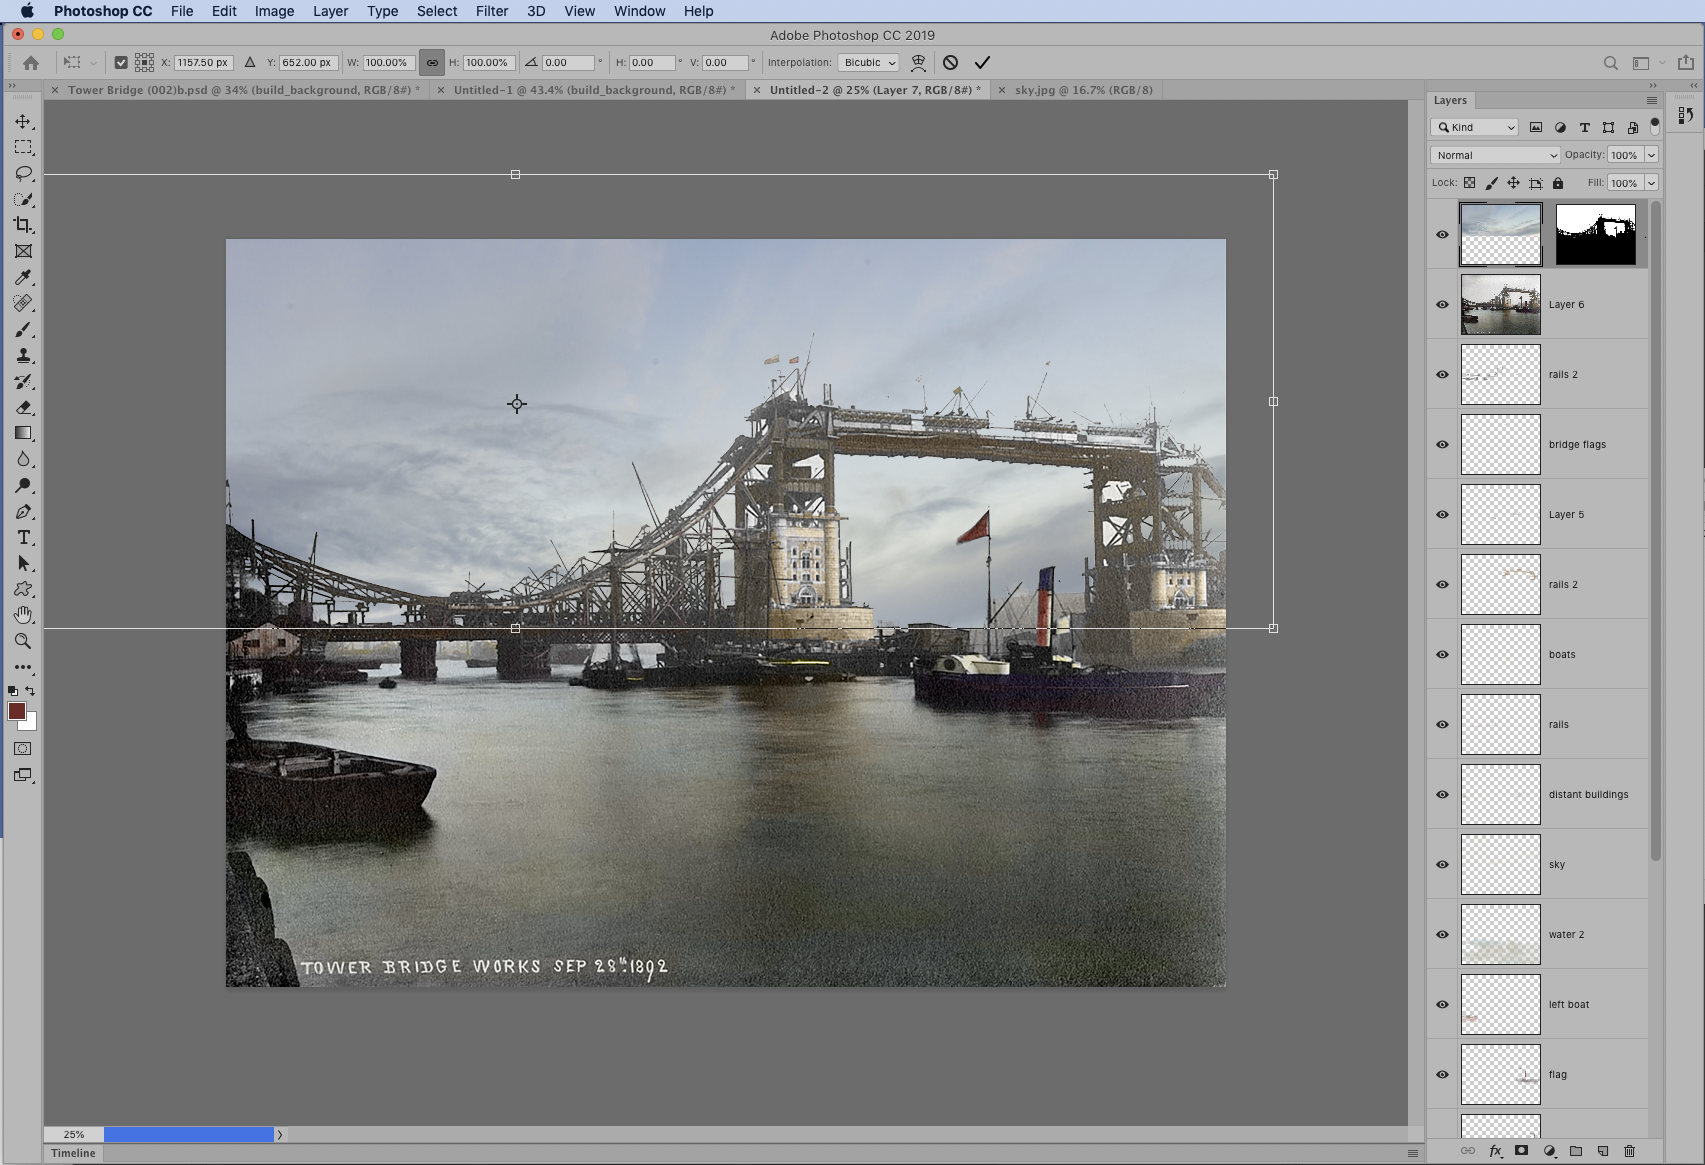
Open a picture of a sky or download our Sky.jpg start file here and use the Move tool to drag it in to the bridge shot. Click the Add Mask icon to convert the selection to a mask. In the Layers panel, click the link on the image and mask thumbnail and select the shot thumbnail and use the Move tool to alter the sky.
06 Boost the tones
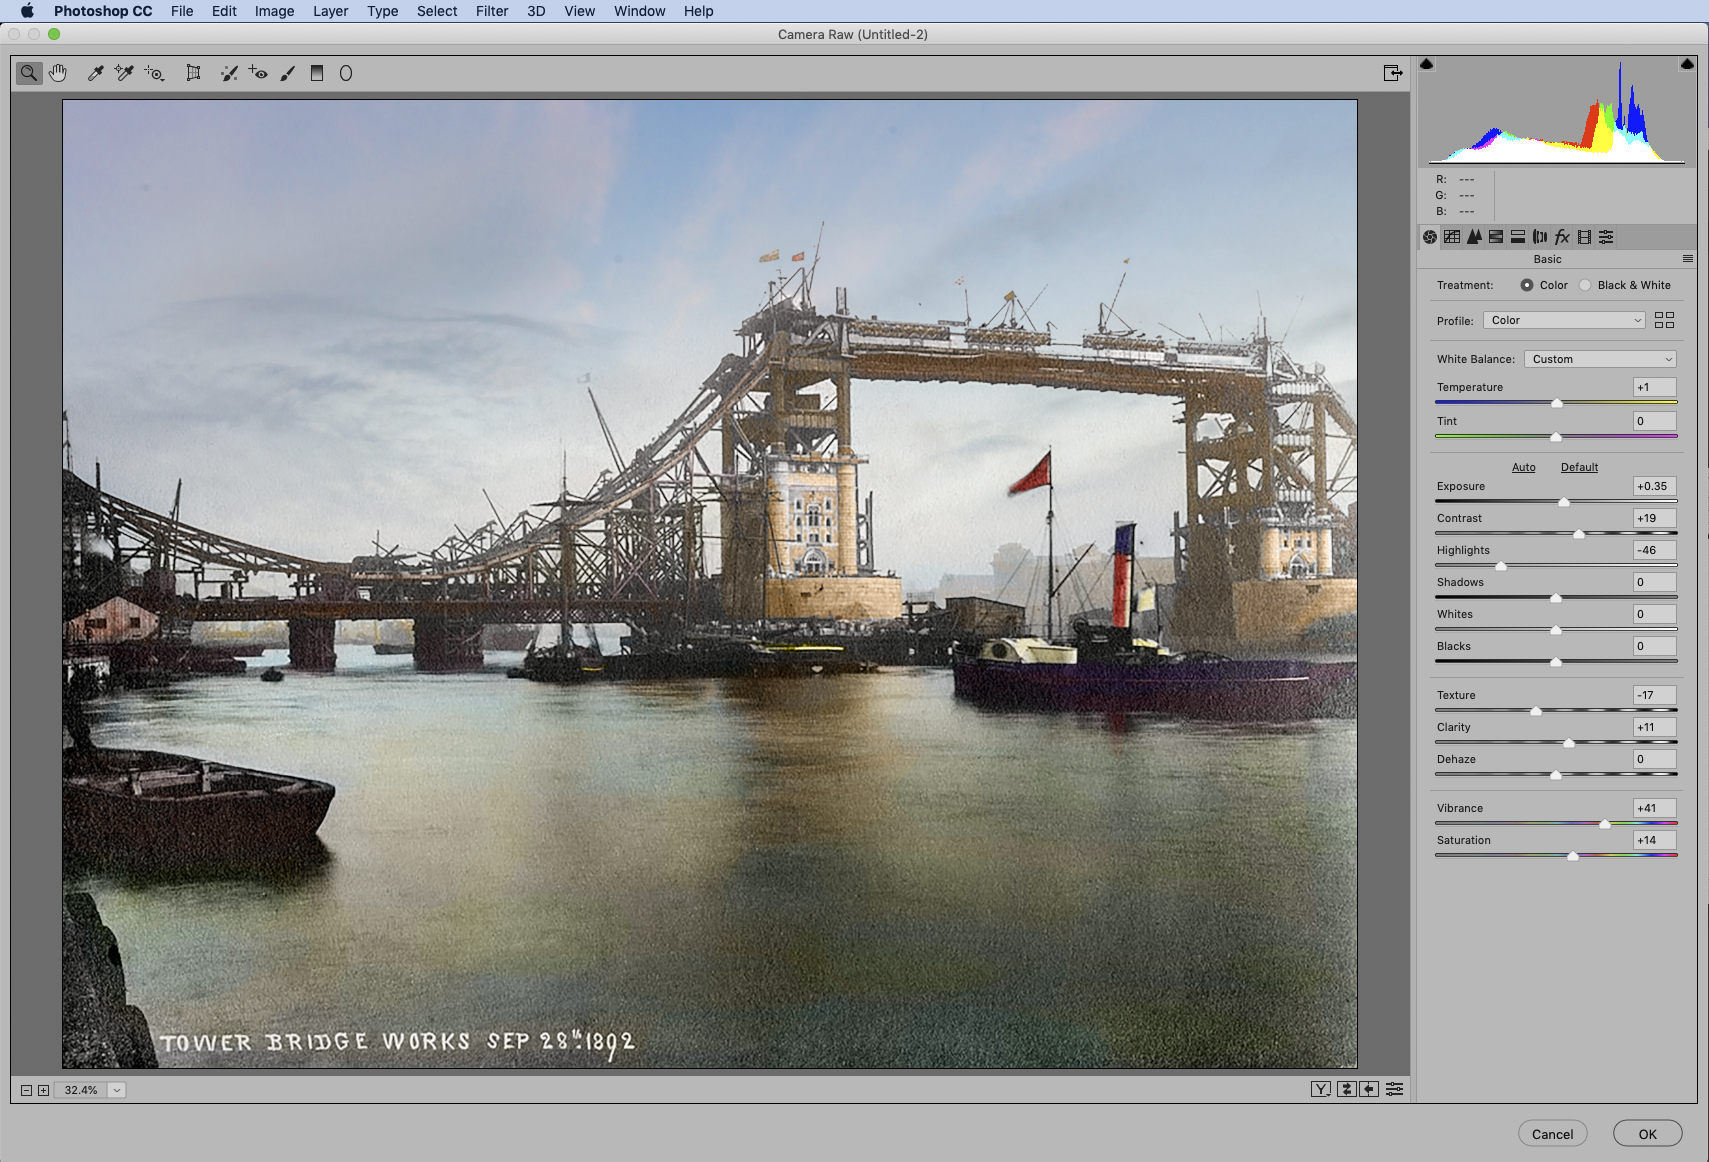
Highlight the mask thumbnail, then grab the Brush tool, hit 2 for 20% brush opacity and brush black to soften the sky. Hit Cmd/Ctrl + Shift + Alt + E again, then go to Filter > Camera Raw Filter. Use the tonal controls as shown to boost the colors and finish off the photo.
PhotoPlus: The Canon Magazine is the world's only monthly newsstand title that's 100% devoted to Canon, so you can be sure the magazine is completely relevant to your system.
Read more:
100 Photoshop tips
The best photo editing software: image editors for novices through to pros
The best photo-editing laptops: top laptops for photographers
10 best online photography courses – from beginner guides to masterclasses
Get the Digital Camera World Newsletter
The best camera deals, reviews, product advice, and unmissable photography news, direct to your inbox!
The lead technique writer on Digital Camera Magazine, PhotoPlus: The Canon Magazine and N-Photo: The Nikon Magazine, James is a fantastic general practice photographer with an enviable array of skills across every genre of photography.
Whether it's flash photography techniques like stroboscopic portraits, astrophotography projects like photographing the Northern Lights, or turning sound into art by making paint dance on a set of speakers, James' tutorials and projects are as creative as they are enjoyable.
He's also a wizard at the dark arts of Photoshop, Lightroom and Affinity Photo, and is capable of some genuine black magic in the digital darkroom, making him one of the leading authorities on photo editing software and techniques.


