Common photo problems and how to fix them in Photoshop: #10 My highlights look muddy
If you need to shoot objects against a white background, the right lighting is only the start – you'll also need Photoshop!

Whether you're selling on eBay, creating a fine art print or fulfilling a commission from a client, the ability to shoot an object against a white background is really useful. It's also next to impossible to achieve with lighting alone! Here's how to finish the job in Photoshop.
See all 15 instalments
• 15 common photo fixes
Adobe trial downloads
• Download Photoshop
• Download Lightroom
• Download Premiere Pro
Computers and photo editing
• Best photo-editing software
• Best laptops for photographers
• Best desktop computers for photo editing
Photo tips and ideas
• 11 home photo projects
• 44 tips cards to cut out and keep
• Photography tips for beginners
Welcome to the tenth instalment in our 15-part series on how to fix common photo problems in Photoshop, Lightroom and Adobe Camera Raw.
We don't know how long the global coronavirus is going to last, but for those of us confined to home working, at least we can try to do something constructive with our time – and what could be more constructive than learning some new Photoshop techniques to rescue, repair and reinvigorate all those nearly-right photos in our back catalog?
In this instalment we'll show you how to hike up the highlights in Photoshop to make your product shots brilliant.


Photoshop dodging and burning
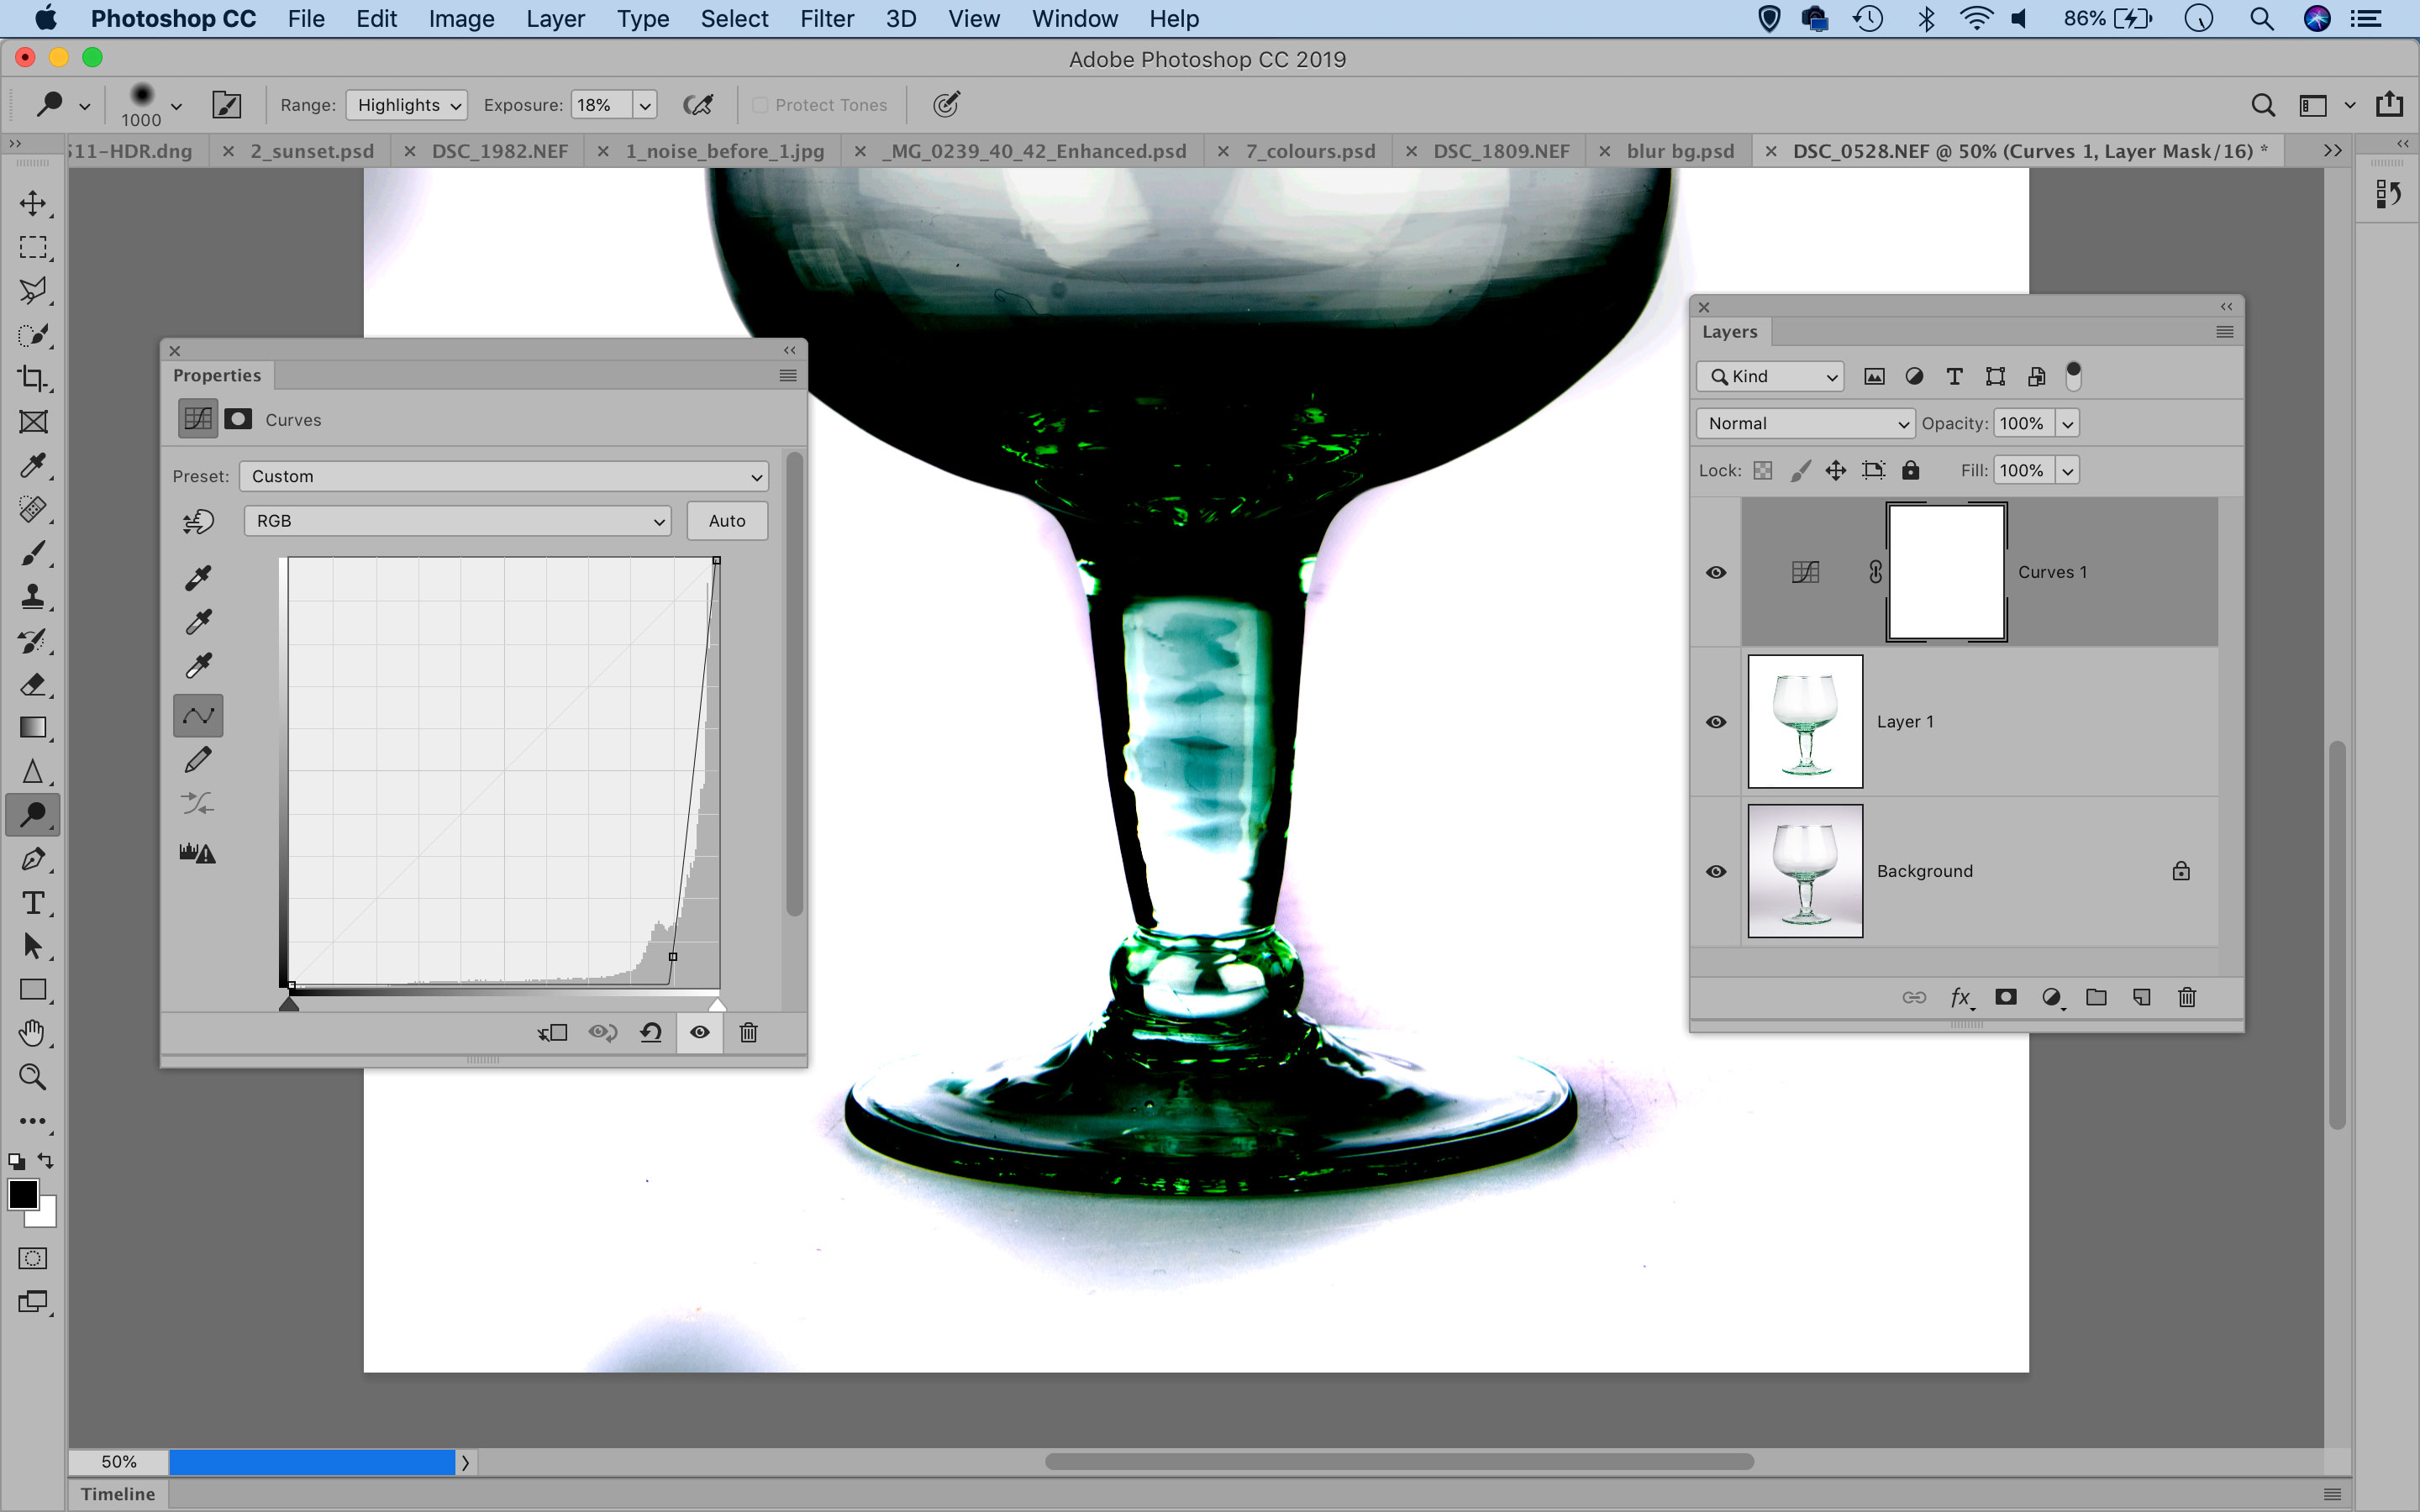
The high-key, white-backdrop look is ideal for product and portrait photos, but sometimes it can be tricky to get the background fully white in- camera. It’s easily fixed in Photoshop, though.
Duplicate the layer with Cmd/Ctrl+J, then grab the Dodge Tool. Set Range: Highlights in the tool options at the top, uncheck Protect Tones and press 1 for 10% Exposure strength. This allows you to paint over the whites to brighten them without affecting the rest of the tonal range, so you can brighten the backdrop.
If you’d like to check that the backdrop is 100% white, add a Curves Adjustment Layer and drag down on the curve line to temporarily darken the image to near- black, then highlight the layer below and continue dodging to fix any areas that have been missed.
Jargon buster
Dodge tool: This gets its name from the 'dodging' and 'burning' techniques used by darkroom workers to lighten or darken different regions of a print. The Photoshop version is much more sophisticated, with the ability to choose the tonal range affected (Shadows, Midtones, Highlights), the size of the brush and the strength of the effect.
Next instalment: #11 My prints are too contrasty
If you don't use Photoshop or Lightroom, why not sign up for the trial version? You can use this free for a period of 7 days and then decide which of three Photography Plan subscriptions would suit you best.
Get the Digital Camera World Newsletter
The best camera deals, reviews, product advice, and unmissable photography news, direct to your inbox!
The lead technique writer on Digital Camera Magazine, PhotoPlus: The Canon Magazine and N-Photo: The Nikon Magazine, James is a fantastic general practice photographer with an enviable array of skills across every genre of photography.
Whether it's flash photography techniques like stroboscopic portraits, astrophotography projects like photographing the Northern Lights, or turning sound into art by making paint dance on a set of speakers, James' tutorials and projects are as creative as they are enjoyable.
He's also a wizard at the dark arts of Photoshop, Lightroom and Affinity Photo, and is capable of some genuine black magic in the digital darkroom, making him one of the leading authorities on photo editing software and techniques.

