Common photo problems and how to fix them in Photoshop: #9 The background is too sharp
Background blur and bokeh effects can add a dash of magic to a picture, but they're often easier to apply digitally

The best camera deals, reviews, product advice, and unmissable photography news, direct to your inbox!
You are now subscribed
Your newsletter sign-up was successful
Everybody loves background blur, but sometimes it's easier said than done. If you need to use a wide-angle lens or a small lens aperture in bright light, or if you're using a camera with a smaller sensor, you often end up with more depth of field than you wanted. The answer? If you can't blur the background in-camera, do it with Photoshop!
See all 15 instalments
• 15 common photo fixes
Adobe trial downloads
• Download Photoshop
• Download Lightroom
• Download Premiere Pro
Computers and photo editing
• Best photo-editing software
• Best laptops for photographers
• Best desktop computers for photo editing
Photo tips and ideas
• 11 home photo projects
• 44 tips cards to cut out and keep
• Photography tips for beginners
Welcome to the ninth instalment in our 15-part series on how to fix common photo problems in Photoshop, Lightroom and Adobe Camera Raw.
We're publishing this mini-series for all those photographers currently stuck indoors thanks to the coronavirus crisis. Once we've eaten all the biscuits and watched all the Netflix box sets, we're all going to be looking for some useful home projects, and what could be more useful than fixing up all those nearly-good photos gathering virtual dust on our hard drives?
Article continues belowIn this instalment we'll show you how to create background blur in Photoshop and make your subjects really pop.
Photoshop selections and blur tools
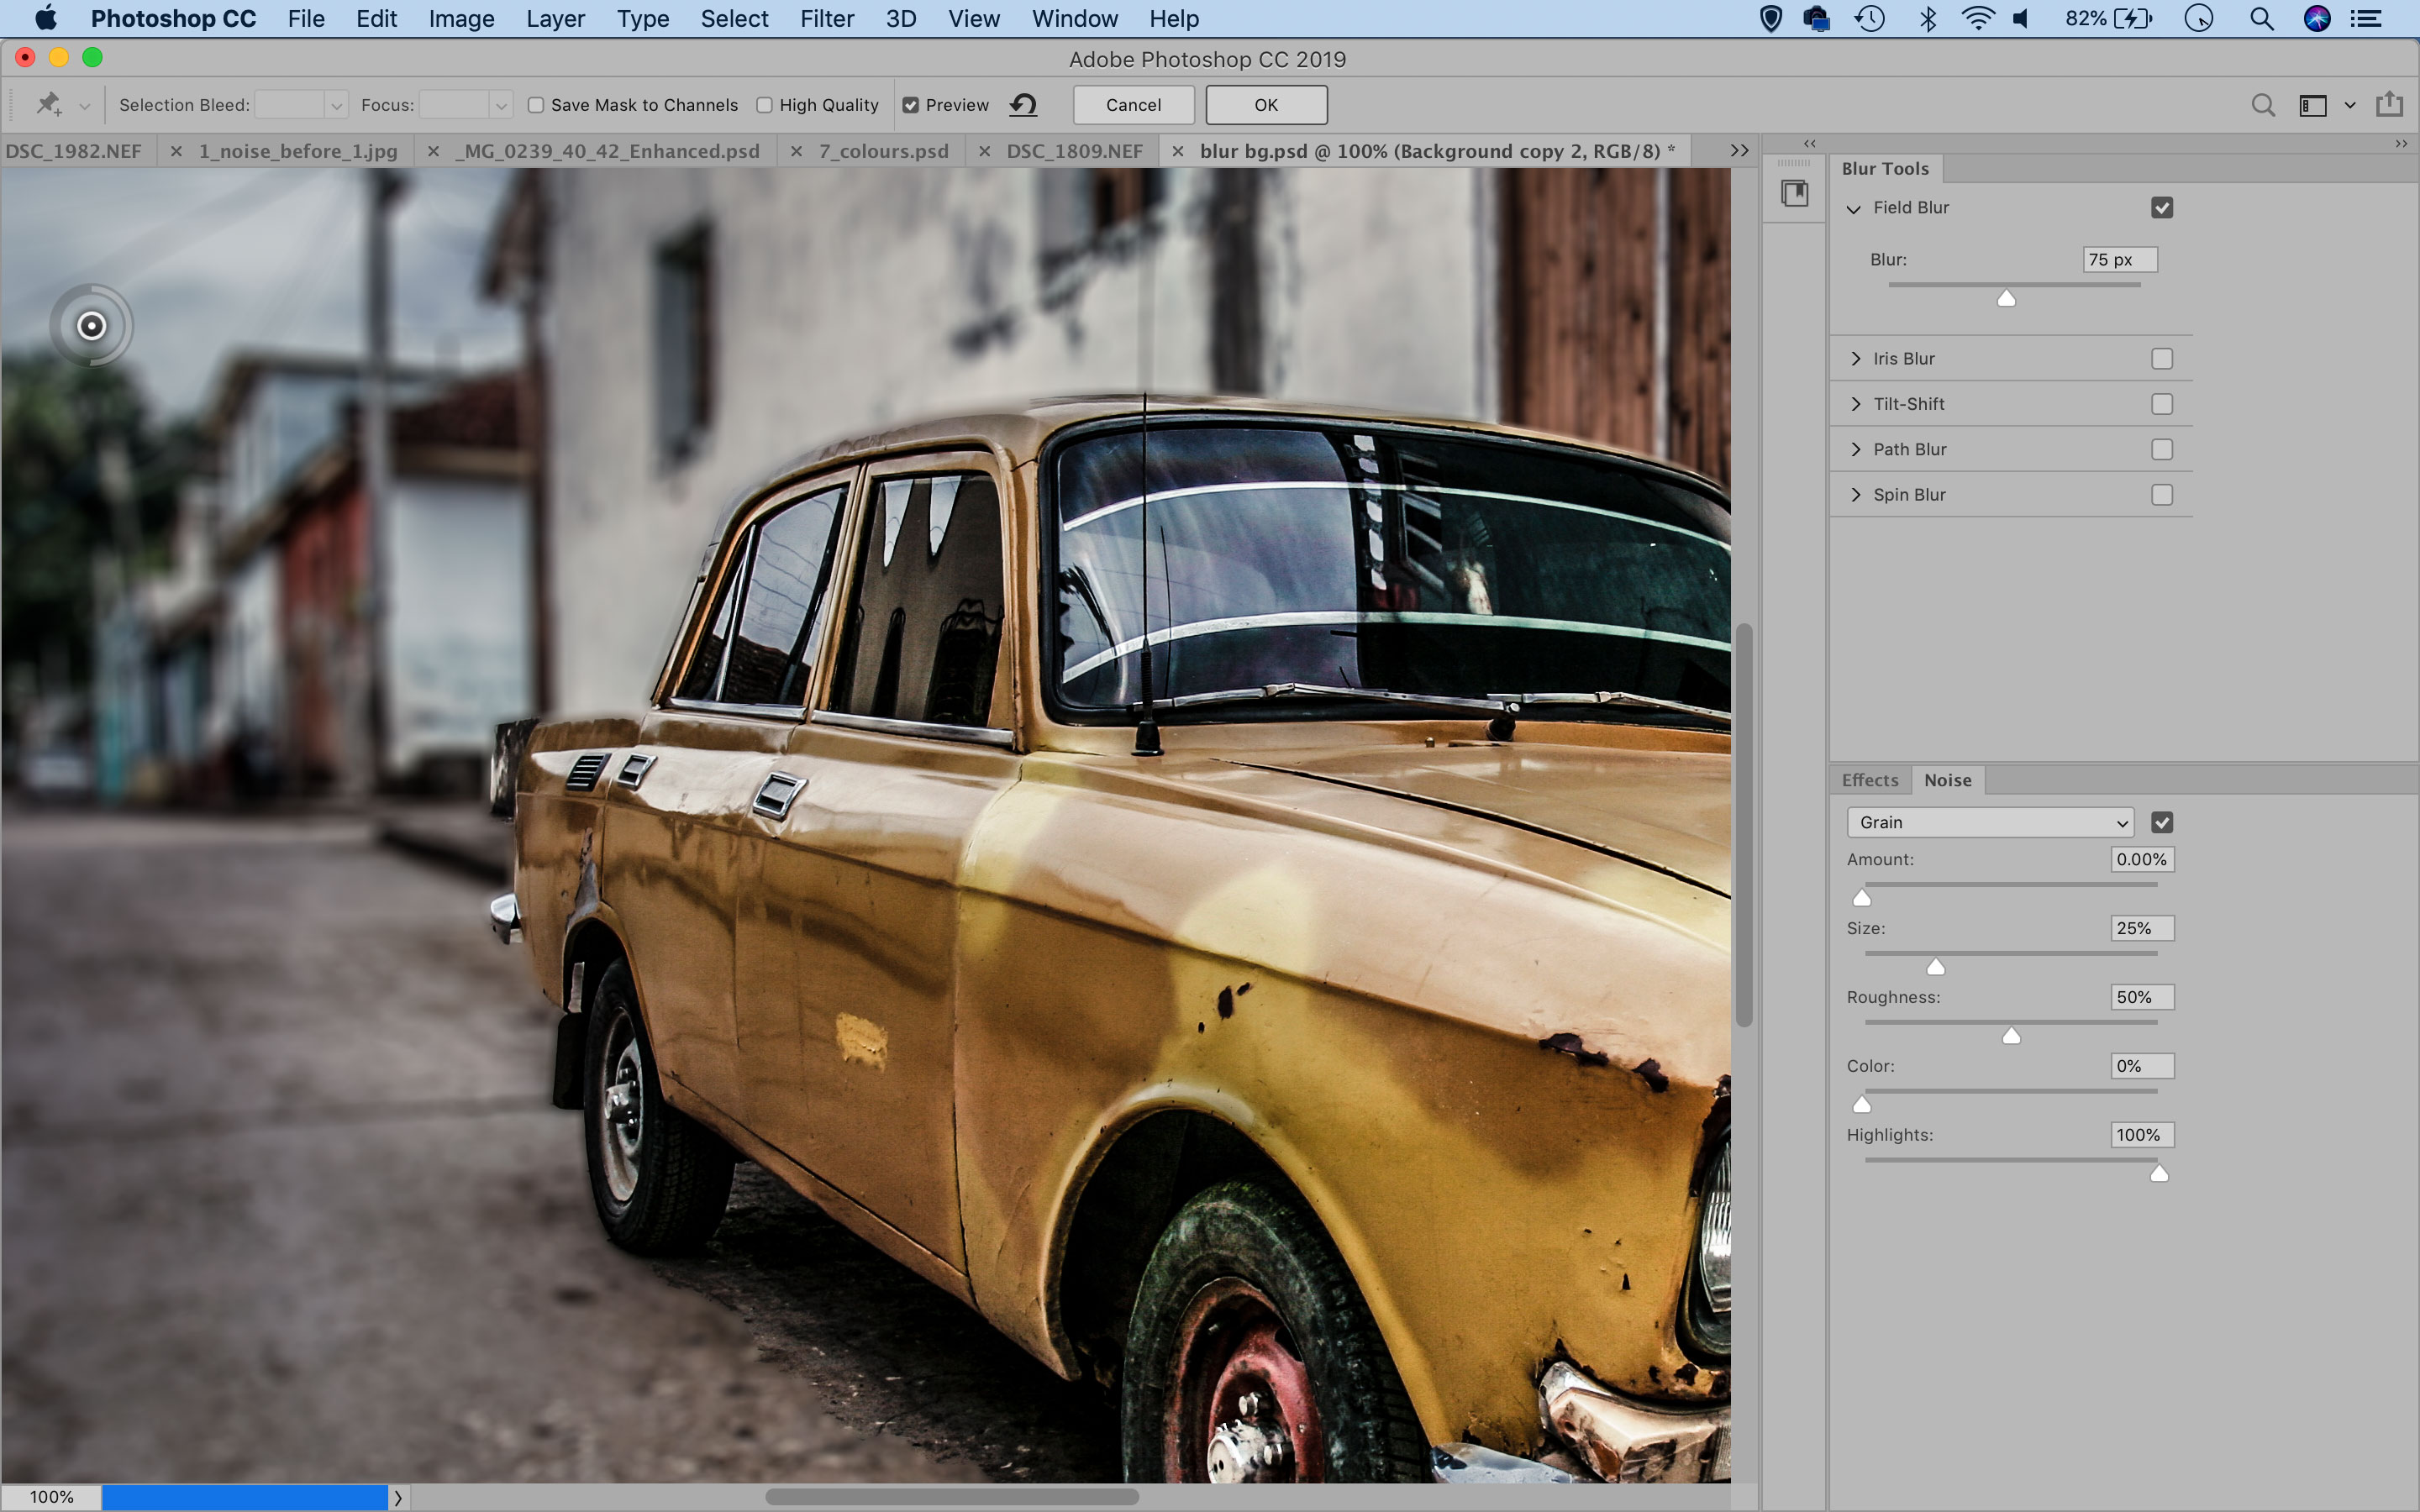
Everybody loves a soft, creamy backdrop, but what if you only realize it’s right for your shot after the photo has been taken? You can add a blur effect to the backdrop after the fact, using a combination of Photoshop selections and blur filters.
To start, go to Select > Subject to select the object you want to remain sharp, then Select > Select And Mask. Increase the Radius to soften the edges of the selection, then set Output: New Layer with Layer Mask and click OK. This layer contains your main subject, rendered sharply.
Now highlight the bottom layer, right-click it and select Convert To Smart Object. Now you can blur the layer using either the Lens Blur Filter or the Field Blur Filter. Lens Blur gives you lots of options to change the characteristics of the blur (you can even add an alpha channel here to affect how it plays over parts of the image). Field Blur has slightly simpler options, but you can add more than one blur point, which allows you to create fall-off by using stronger blur in more distant parts of the scene.
The best camera deals, reviews, product advice, and unmissable photography news, direct to your inbox!
Jargon buster
Smart Object: Normally, filter effects are permanent once you've applied them. If you want to change the settings you have to go back and start again. But with a Photoshop Smart Object you can change the filter settings any time you like, as they are now 'non-destructive'.
Non-destructive editing: This is where the changes you make are not permanent and can be undone or changed at any time in the future. One of the best examples is Adjustment Layers in Photoshop. All the adjustments you make in Lightroom are non-destructive too.
Lens Blur filter: A Photoshop filter that recreates the look of genuine lens blur, right down to lens bokeh characteristics, the shape of the lens aperture and how highlights are rendered.
Field Blur filter: A more complex Photoshop filter than enables you to create blur effects that increase realistically with distance, and includes options to simulate tilt-shift lenses, for example.
Alpha channel: A special kind of mask associated with certain filters and effects, and which controls how the effect is applied to the image and which areas are treated.
Next instalment: #10 My highlights look muddy
If you don't use Photoshop or Lightroom, why not sign up for the trial version? You can use this free for a period of 7 days and then decide which of three Photography Plan subscriptions would suit you best.
The lead technique writer on Digital Camera Magazine, PhotoPlus: The Canon Magazine and N-Photo: The Nikon Magazine, James is a fantastic general practice photographer with an enviable array of skills across every genre of photography.
Whether it's flash photography techniques like stroboscopic portraits, astrophotography projects like photographing the Northern Lights, or turning sound into art by making paint dance on a set of speakers, James' tutorials and projects are as creative as they are enjoyable.
He's also a wizard at the dark arts of Photoshop, Lightroom and Affinity Photo, and is capable of some genuine black magic in the digital darkroom, making him one of the leading authorities on photo editing software and techniques.


