Create a fantastic polygon portrait in Affinity Photo with macro magic
Transform a portrait image into bold polygon patterns with the help of Macros in Affinity Photo
Watch video: Use Macros in Affinity Photo
Some image effects take mere seconds to create, but it’s usually those that require a little more work that are all the more rewarding for it. In this project we’ll look at how to transform a portrait into a series of striking geometric shapes.
Unfortunately we can’t just run a filter over the image; we have to create each individual polygon shape. This makes the overall impression completely unique, though, rather than the generic look you often see when filters are used.
Each triangular shape in the face and hair here has to be plotted out by hand, which will take time and patience. Thankfully there is a way we can speed up the process.
Macros are a handy Affinity Photo feature that enable us to record a set of tasks (much like Actions in Photoshop CC). This means that we can make a Macro for a repetitive sequence of edits, then apply the sequence again with a single click. We begin by making a triangle with the Pen Tool, then blur the area and add an inner glow effect. Each step we make is recorded in the Macro. Once done, we can use the Pen tool to move the triangle into a different position and then hit play on our Macro to repeat the sequence.
It might take an hour to cover the face, but it’s a nice mindful task that can easily be done while watching TV or listening to a podcast, and the angular results are worth the effort.
01 Make a triangle
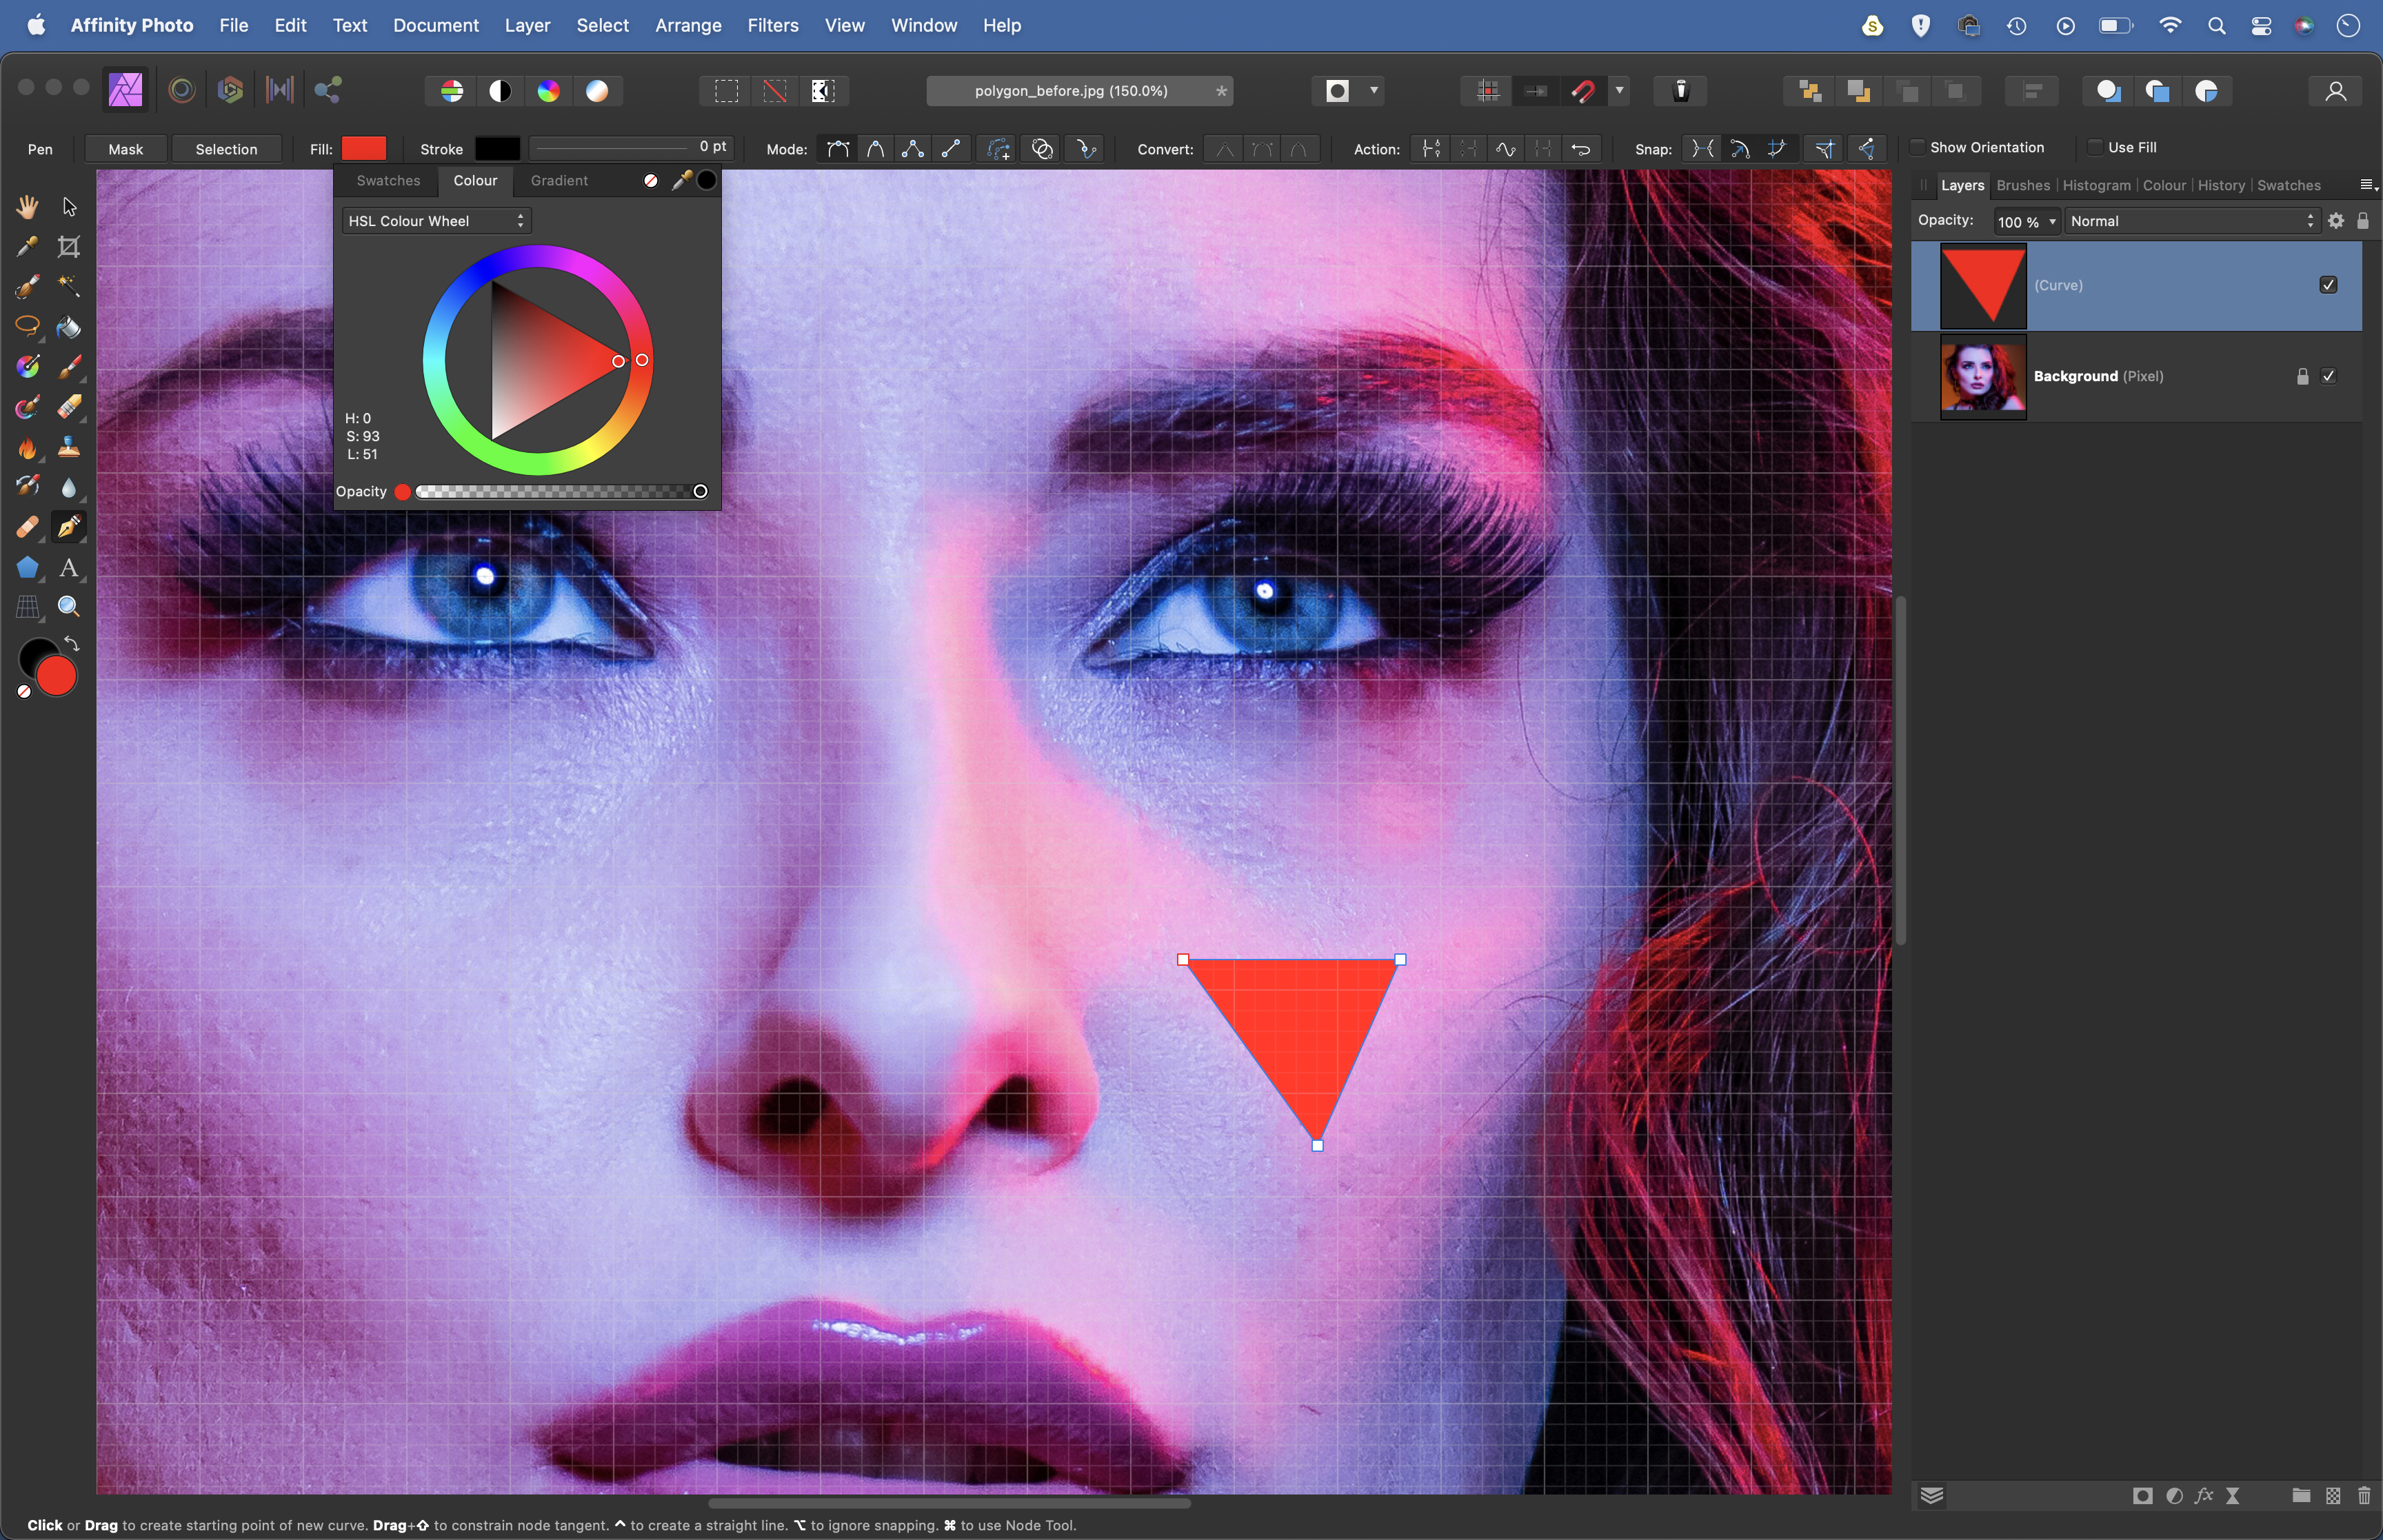
Open the portrait and grab the Pen tool. Click four times to make a triangle over the cheek. Go to the Fill box in the options and choose any color to fill. Double-click the layer name and call it ‘pen shape.’ Go to Window > Studio > Macro and hit the Record button.
02 Blur the area
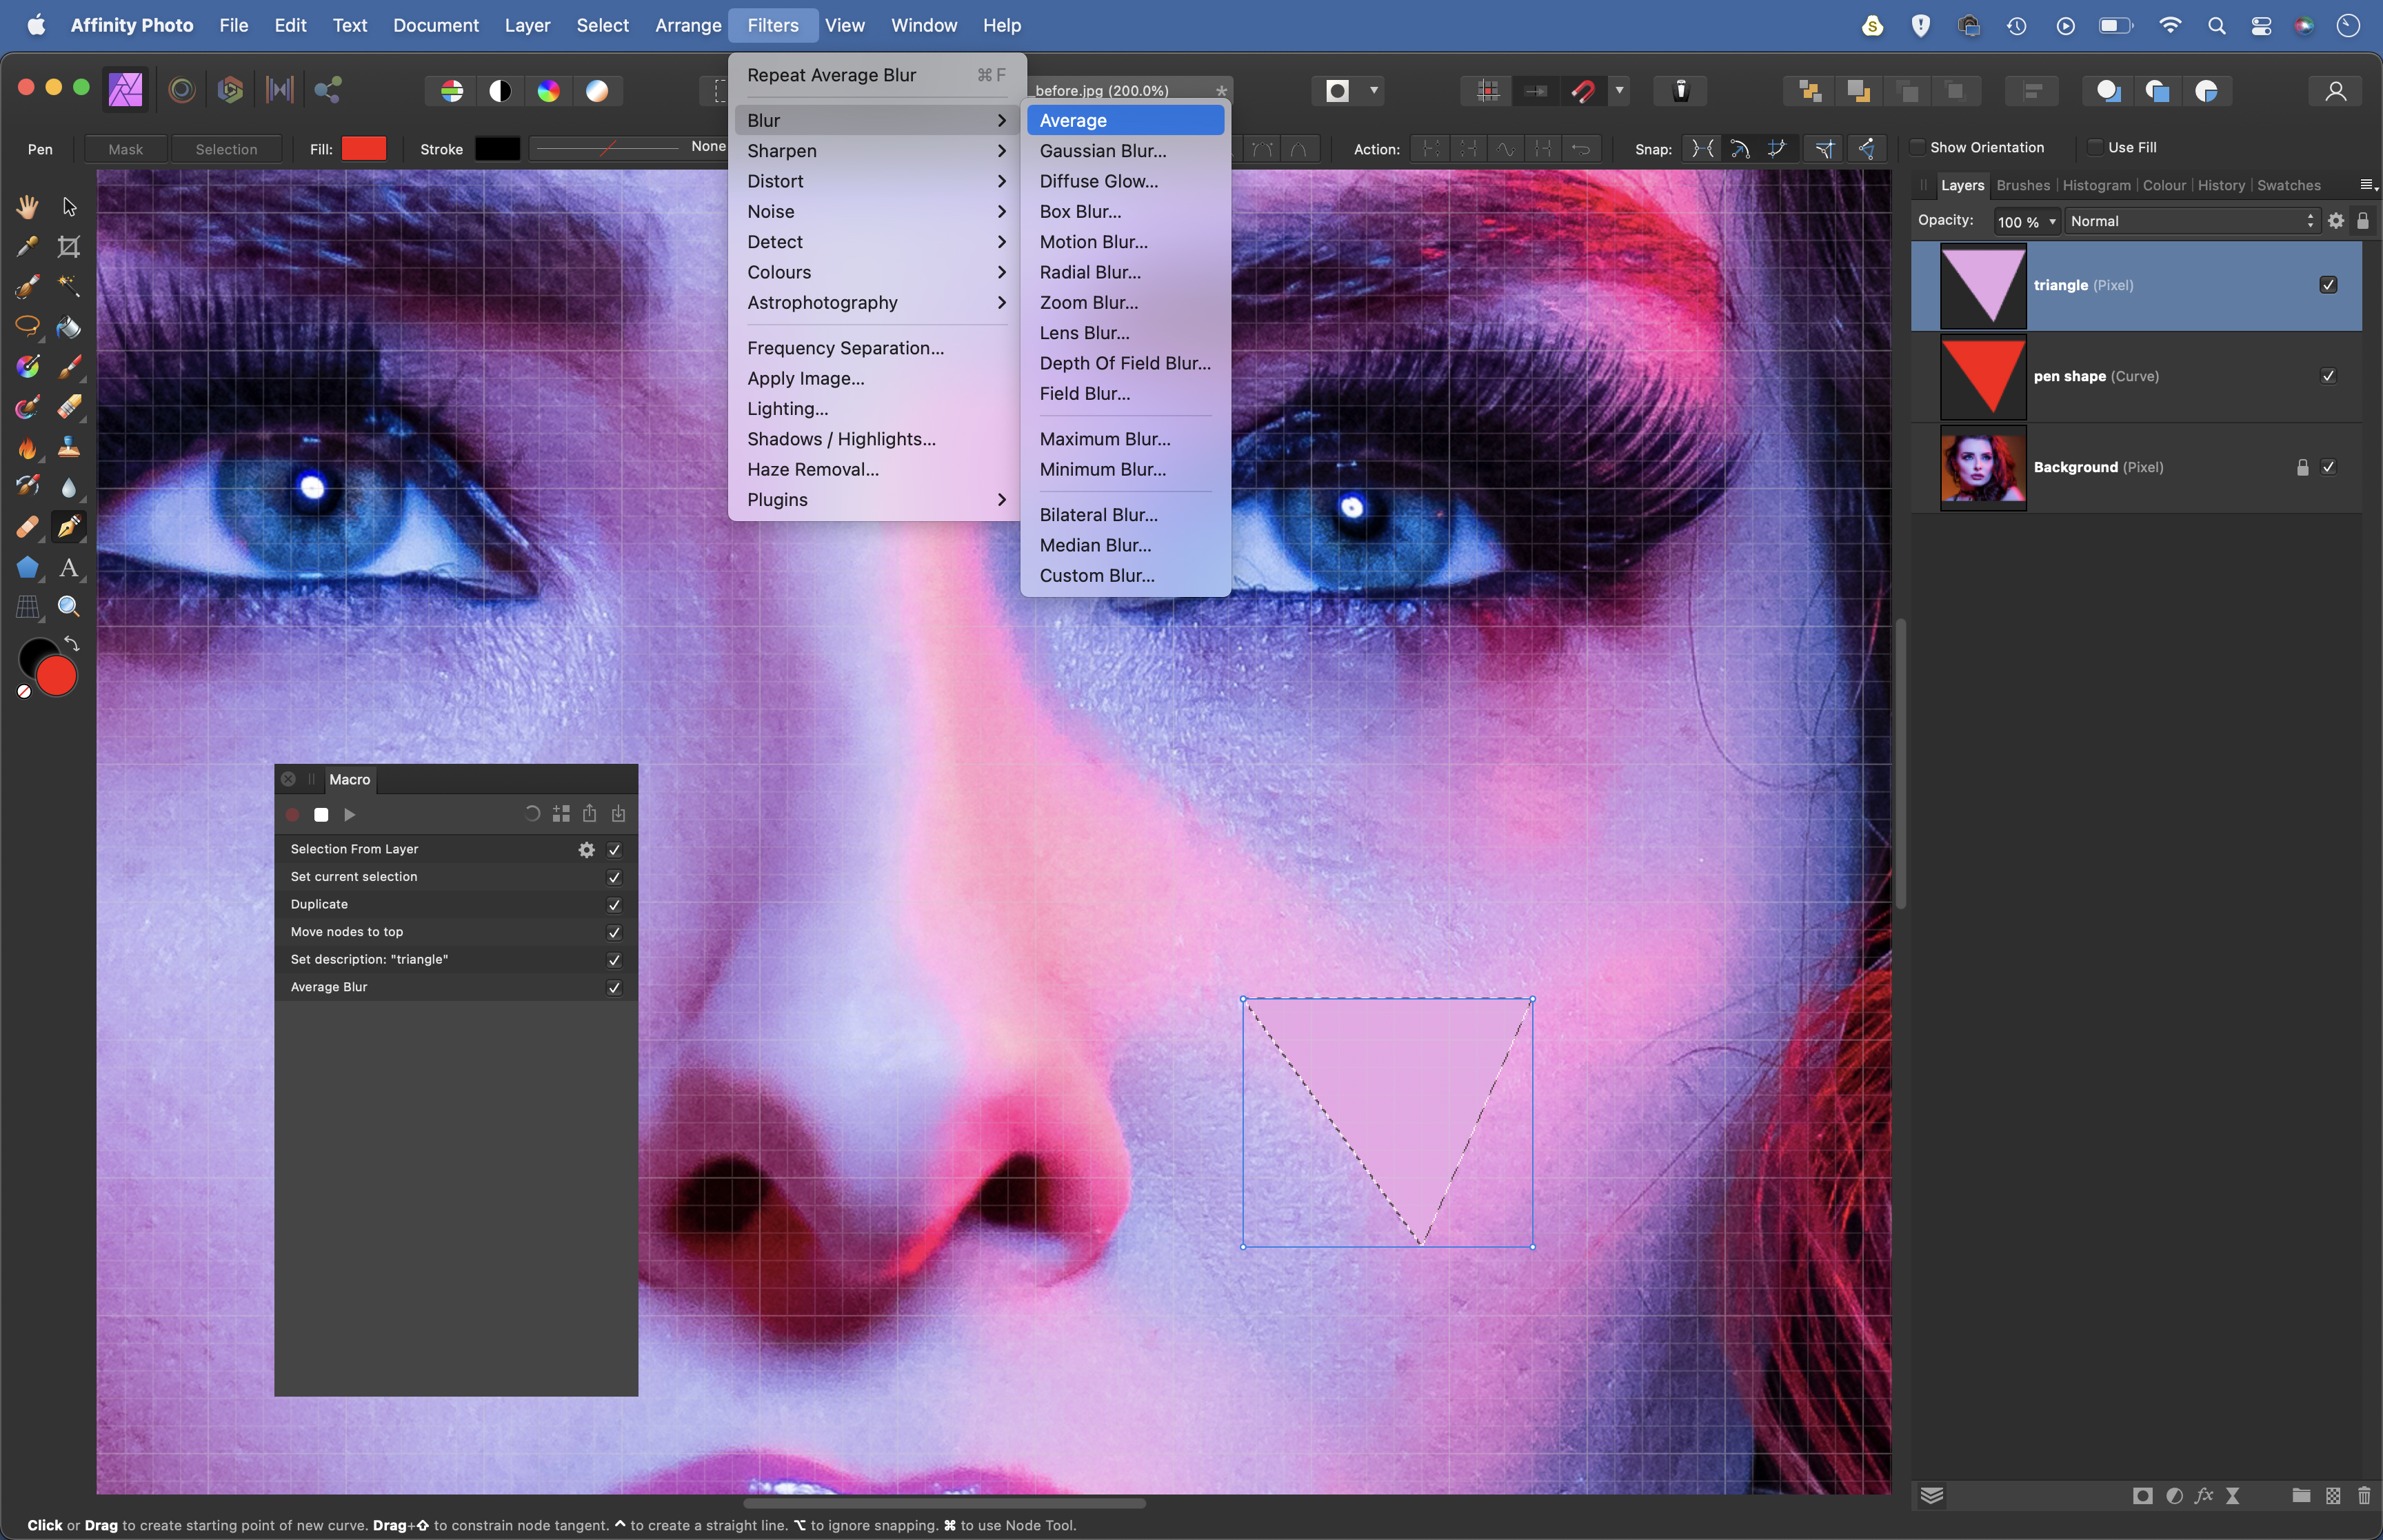
Hold Cmd/Ctrl and click on the shape layer to load a selection, then click on the background layer and hit Cmd/Ctrl + J to copy the selection to a new layer. Go to Arrange>Move to Front, then rename the layer ‘triangle.’ Go to Filter > Blur > Average.
03 Finish recording the macro
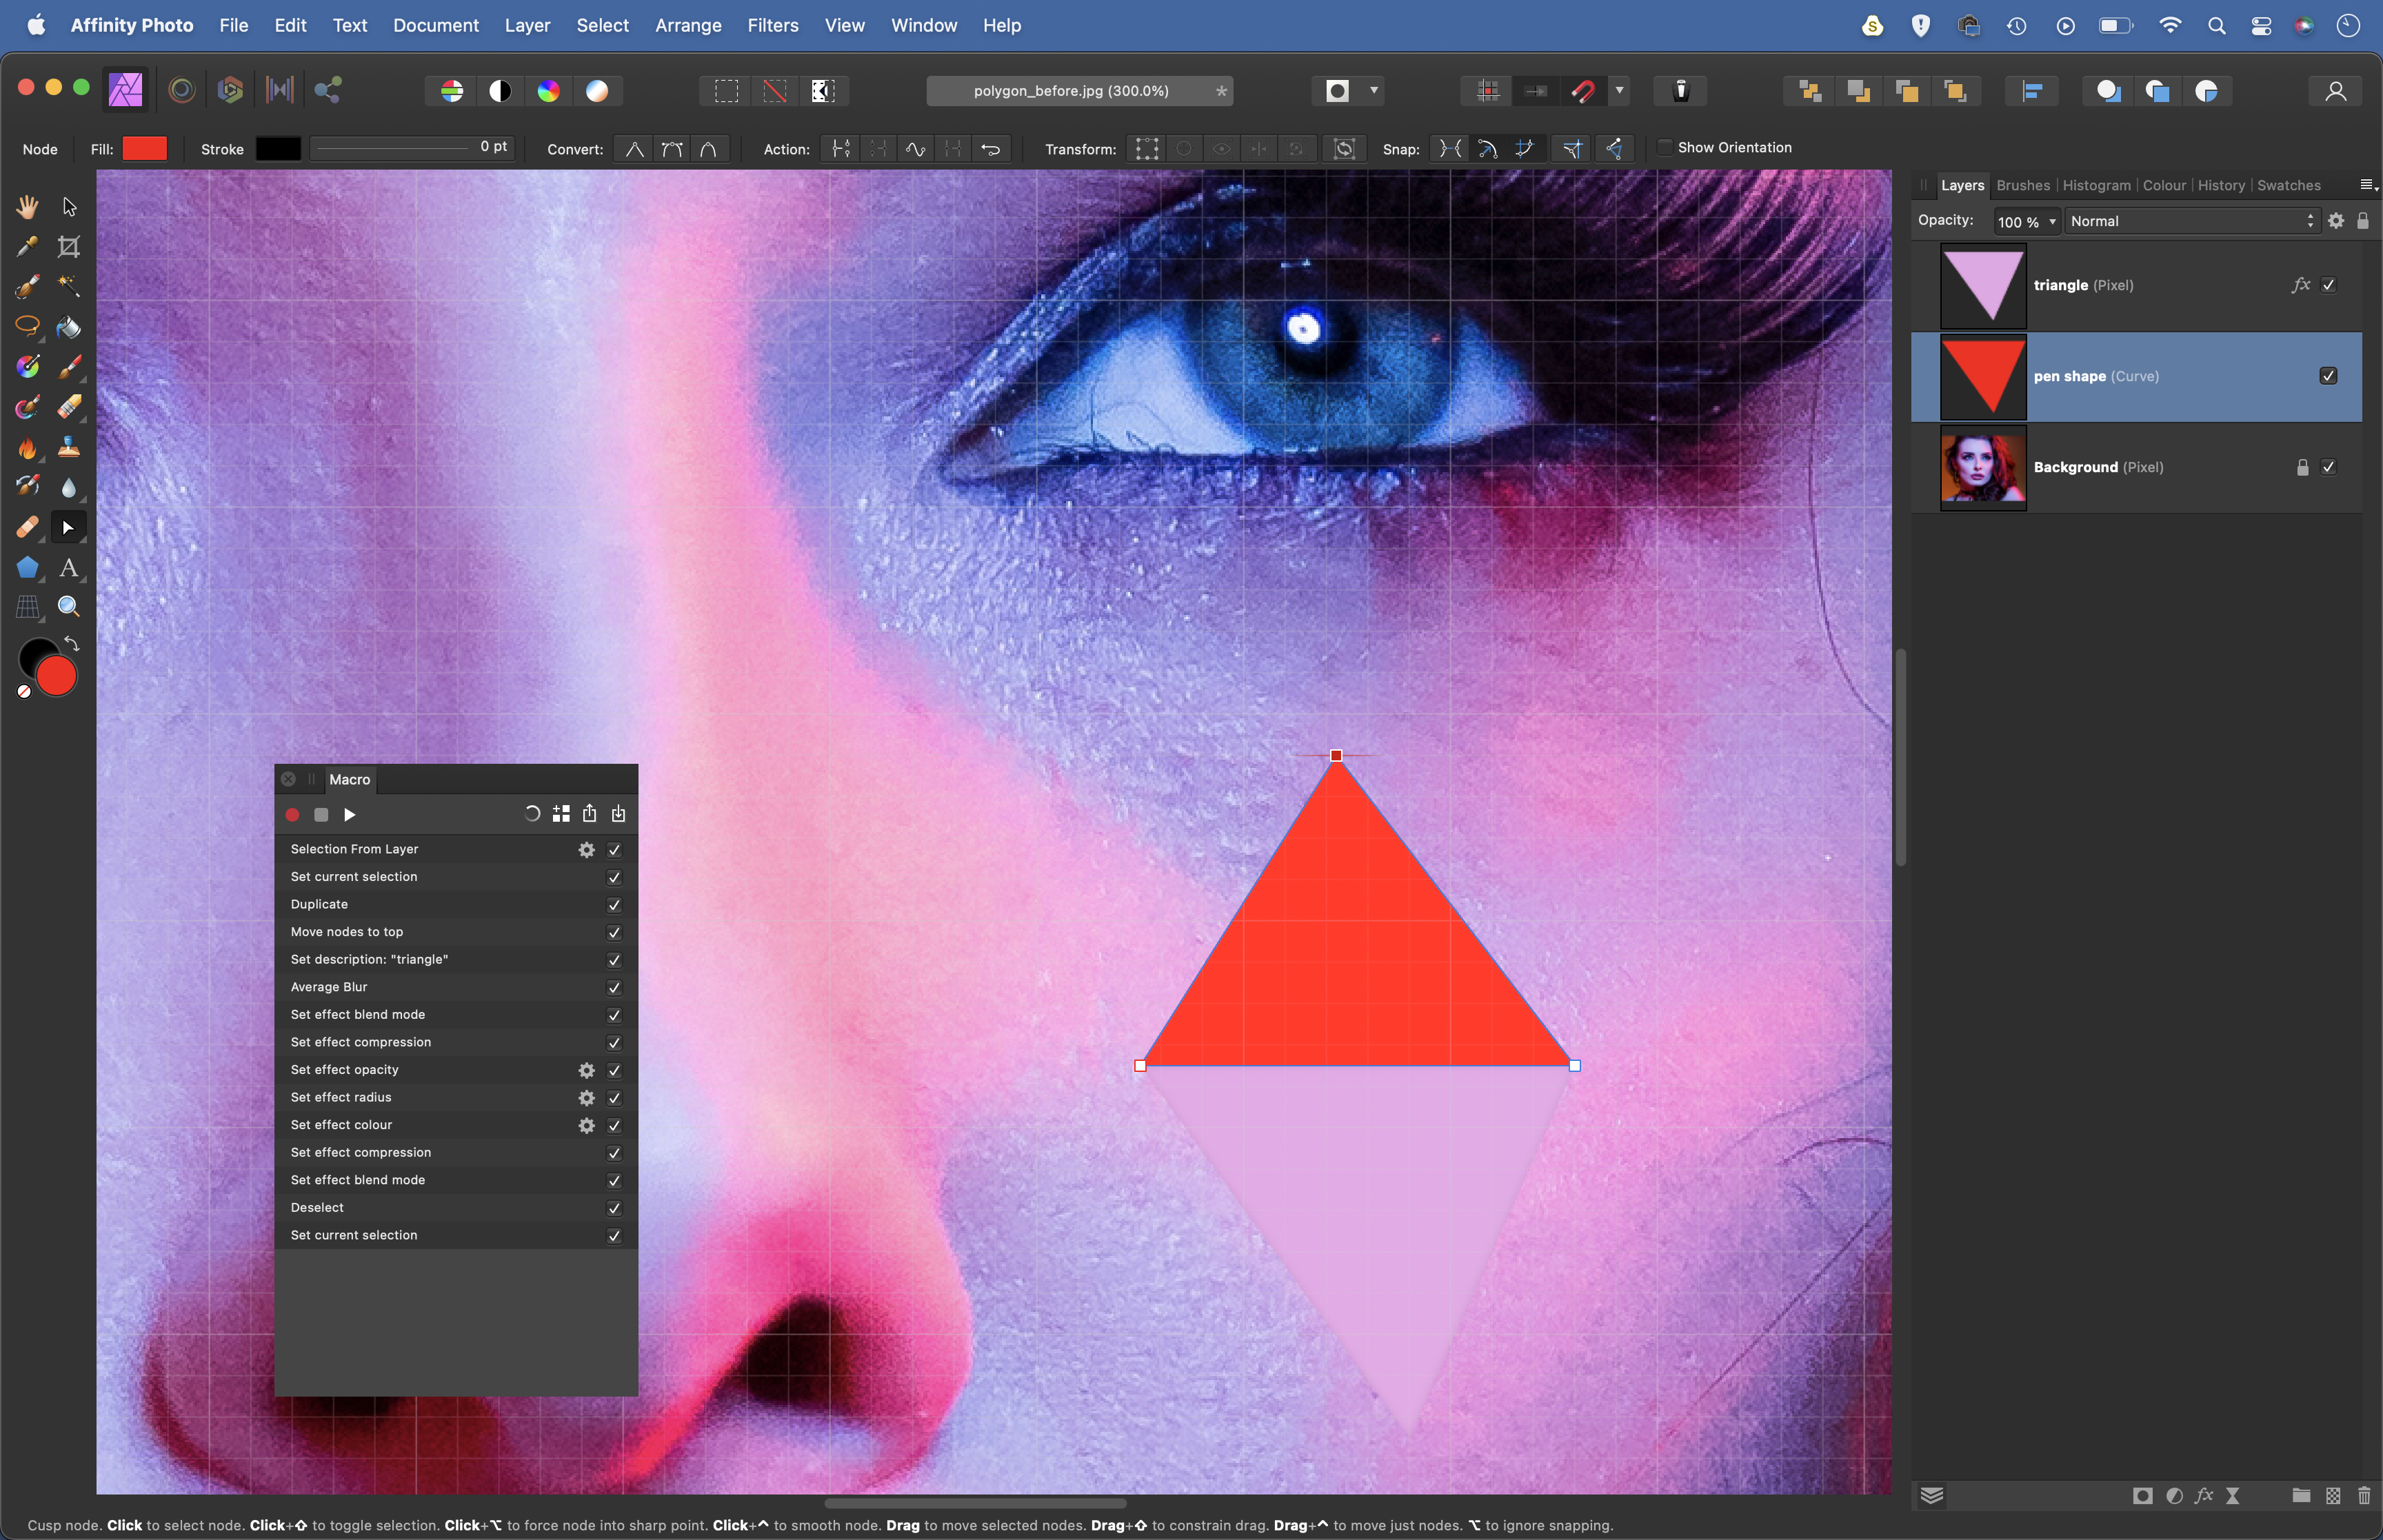
Click the fx button in the Layers panel and pick Inner Glow. Set blend mode to Multiply, choose a grey colour and set Opacity to 20%, Radius 5px, Intensity to 0, hit OK. Press Cmd/Ctrl + D to deselect, click on the Pen Shape layer. Press the stop button in the Macro panel.
04 Reposition the shape
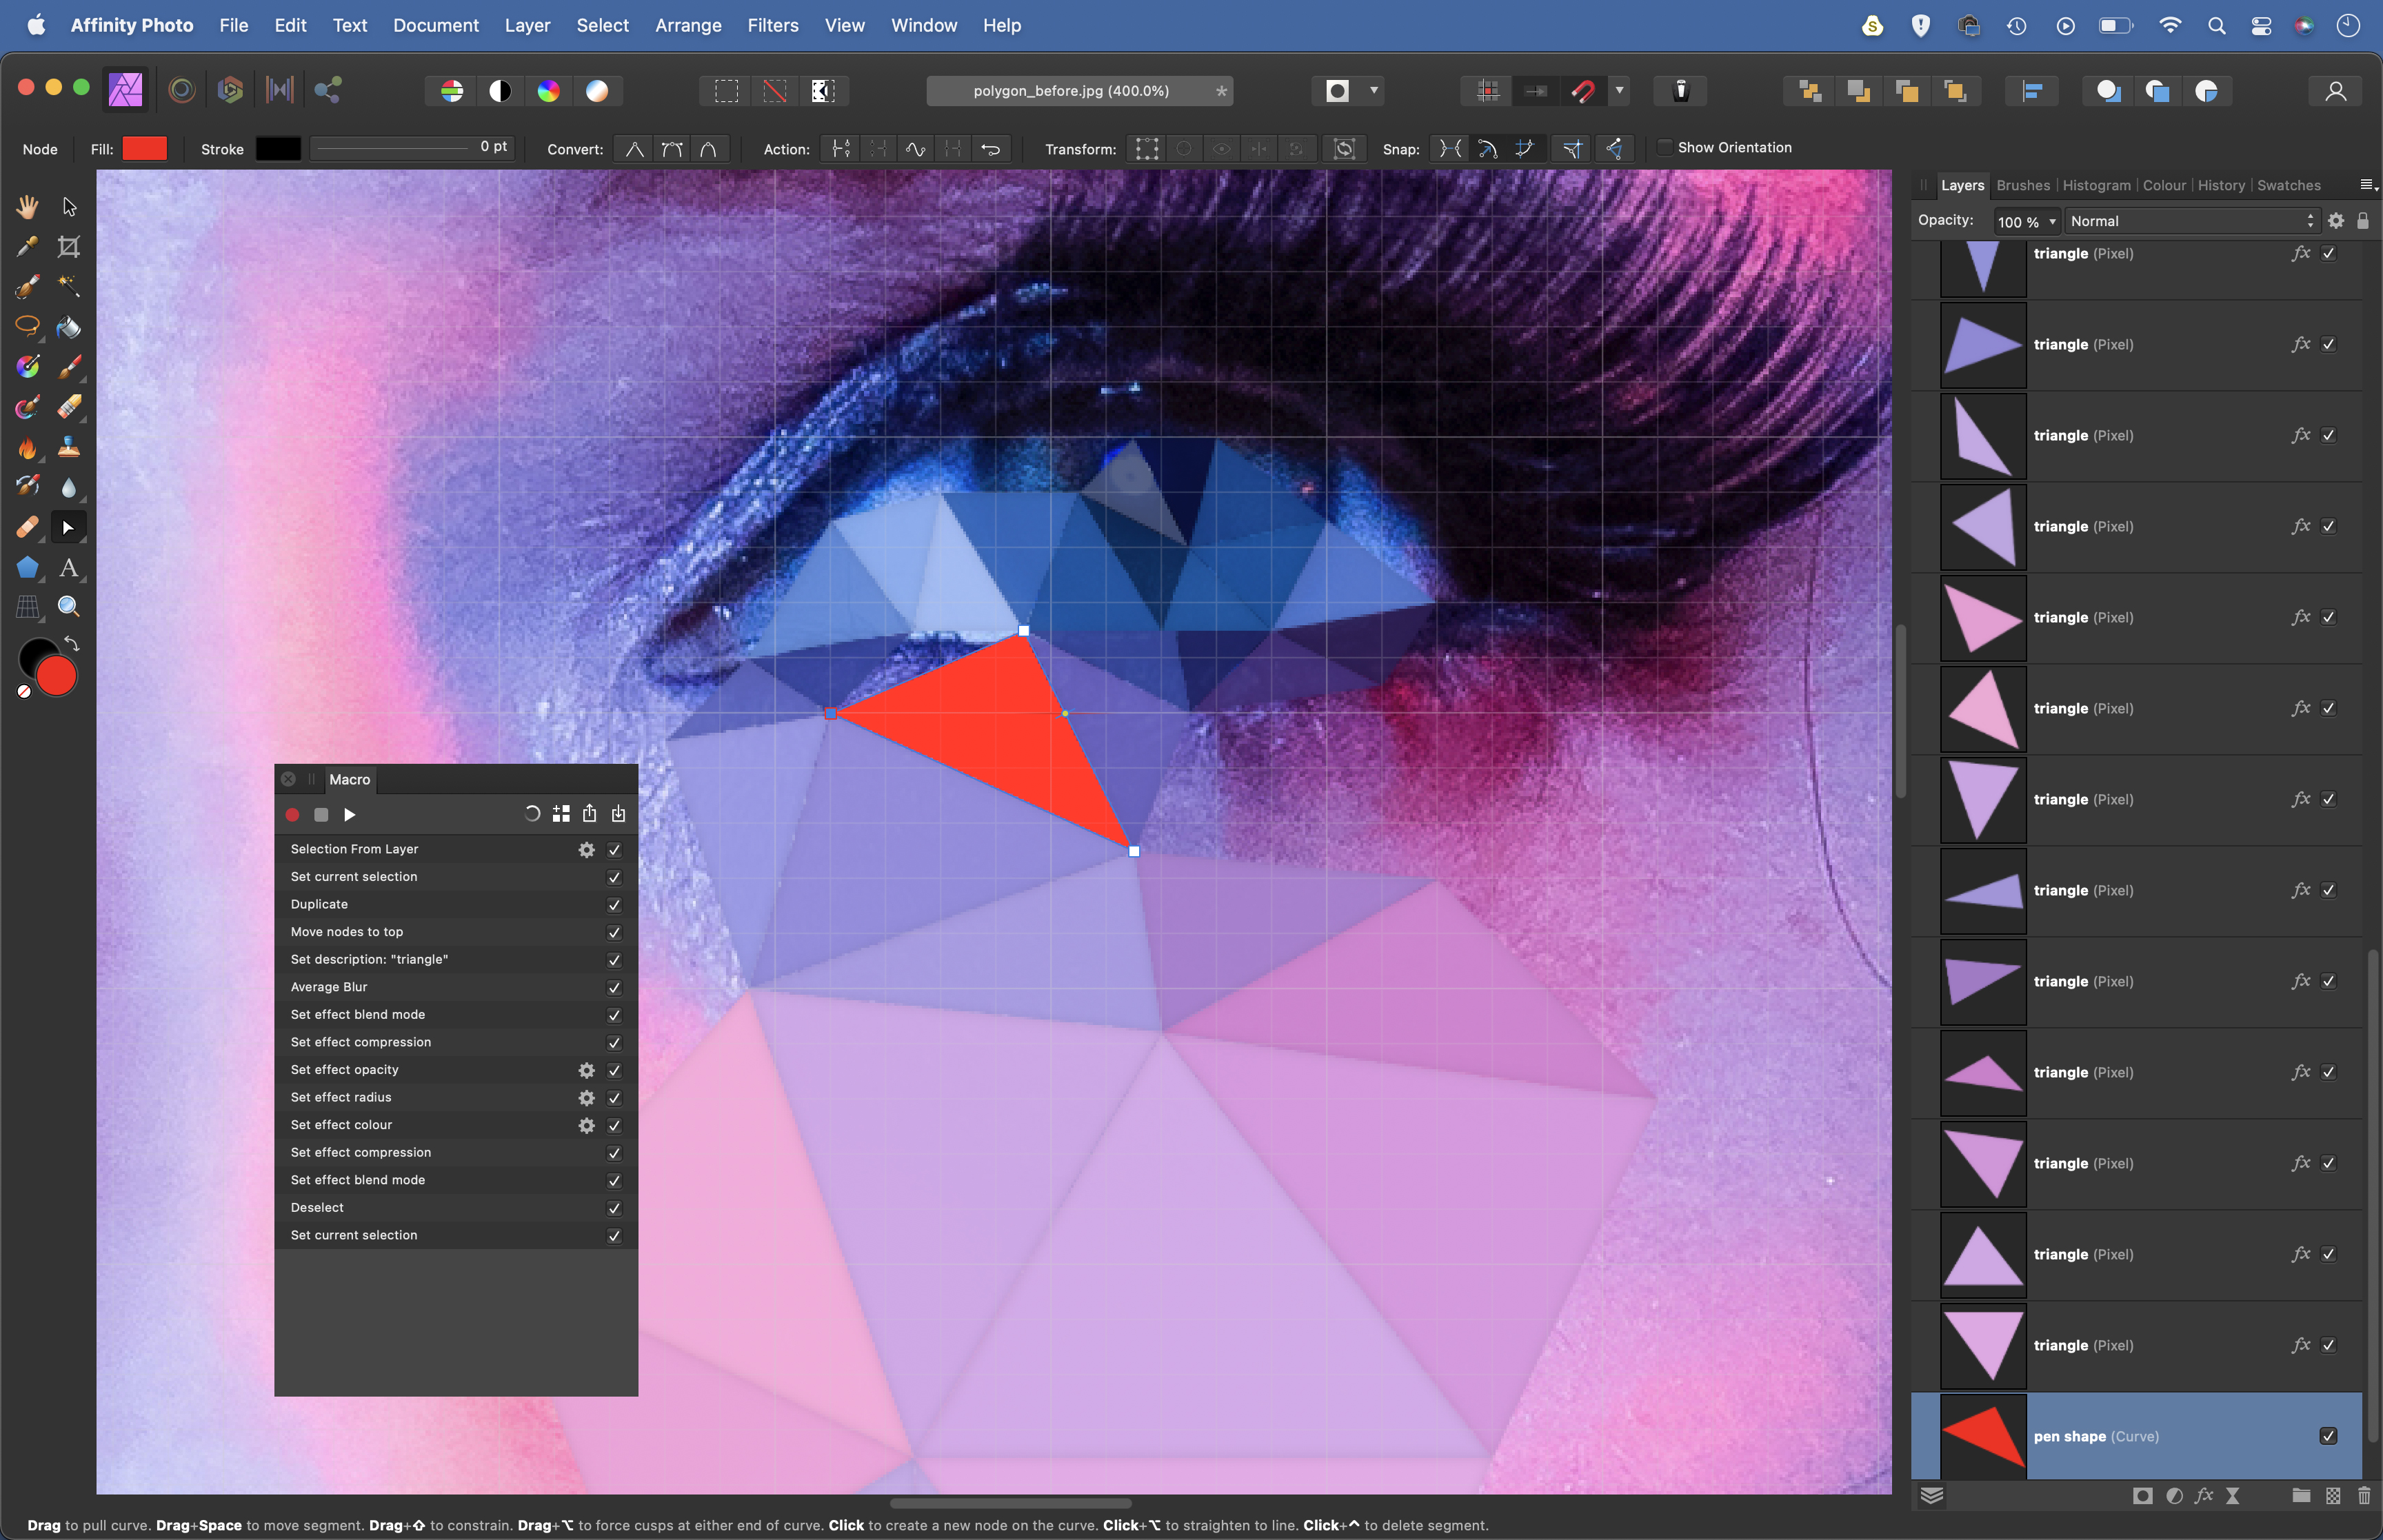
Grab the Node tool from the toolbar. Click on one point of the triangle and drag it to another position, then hit the play button in the Macro panel to repeat the process to create a second triangle. Keep making triangles this way to build up the polygon effect.
05 Build it up
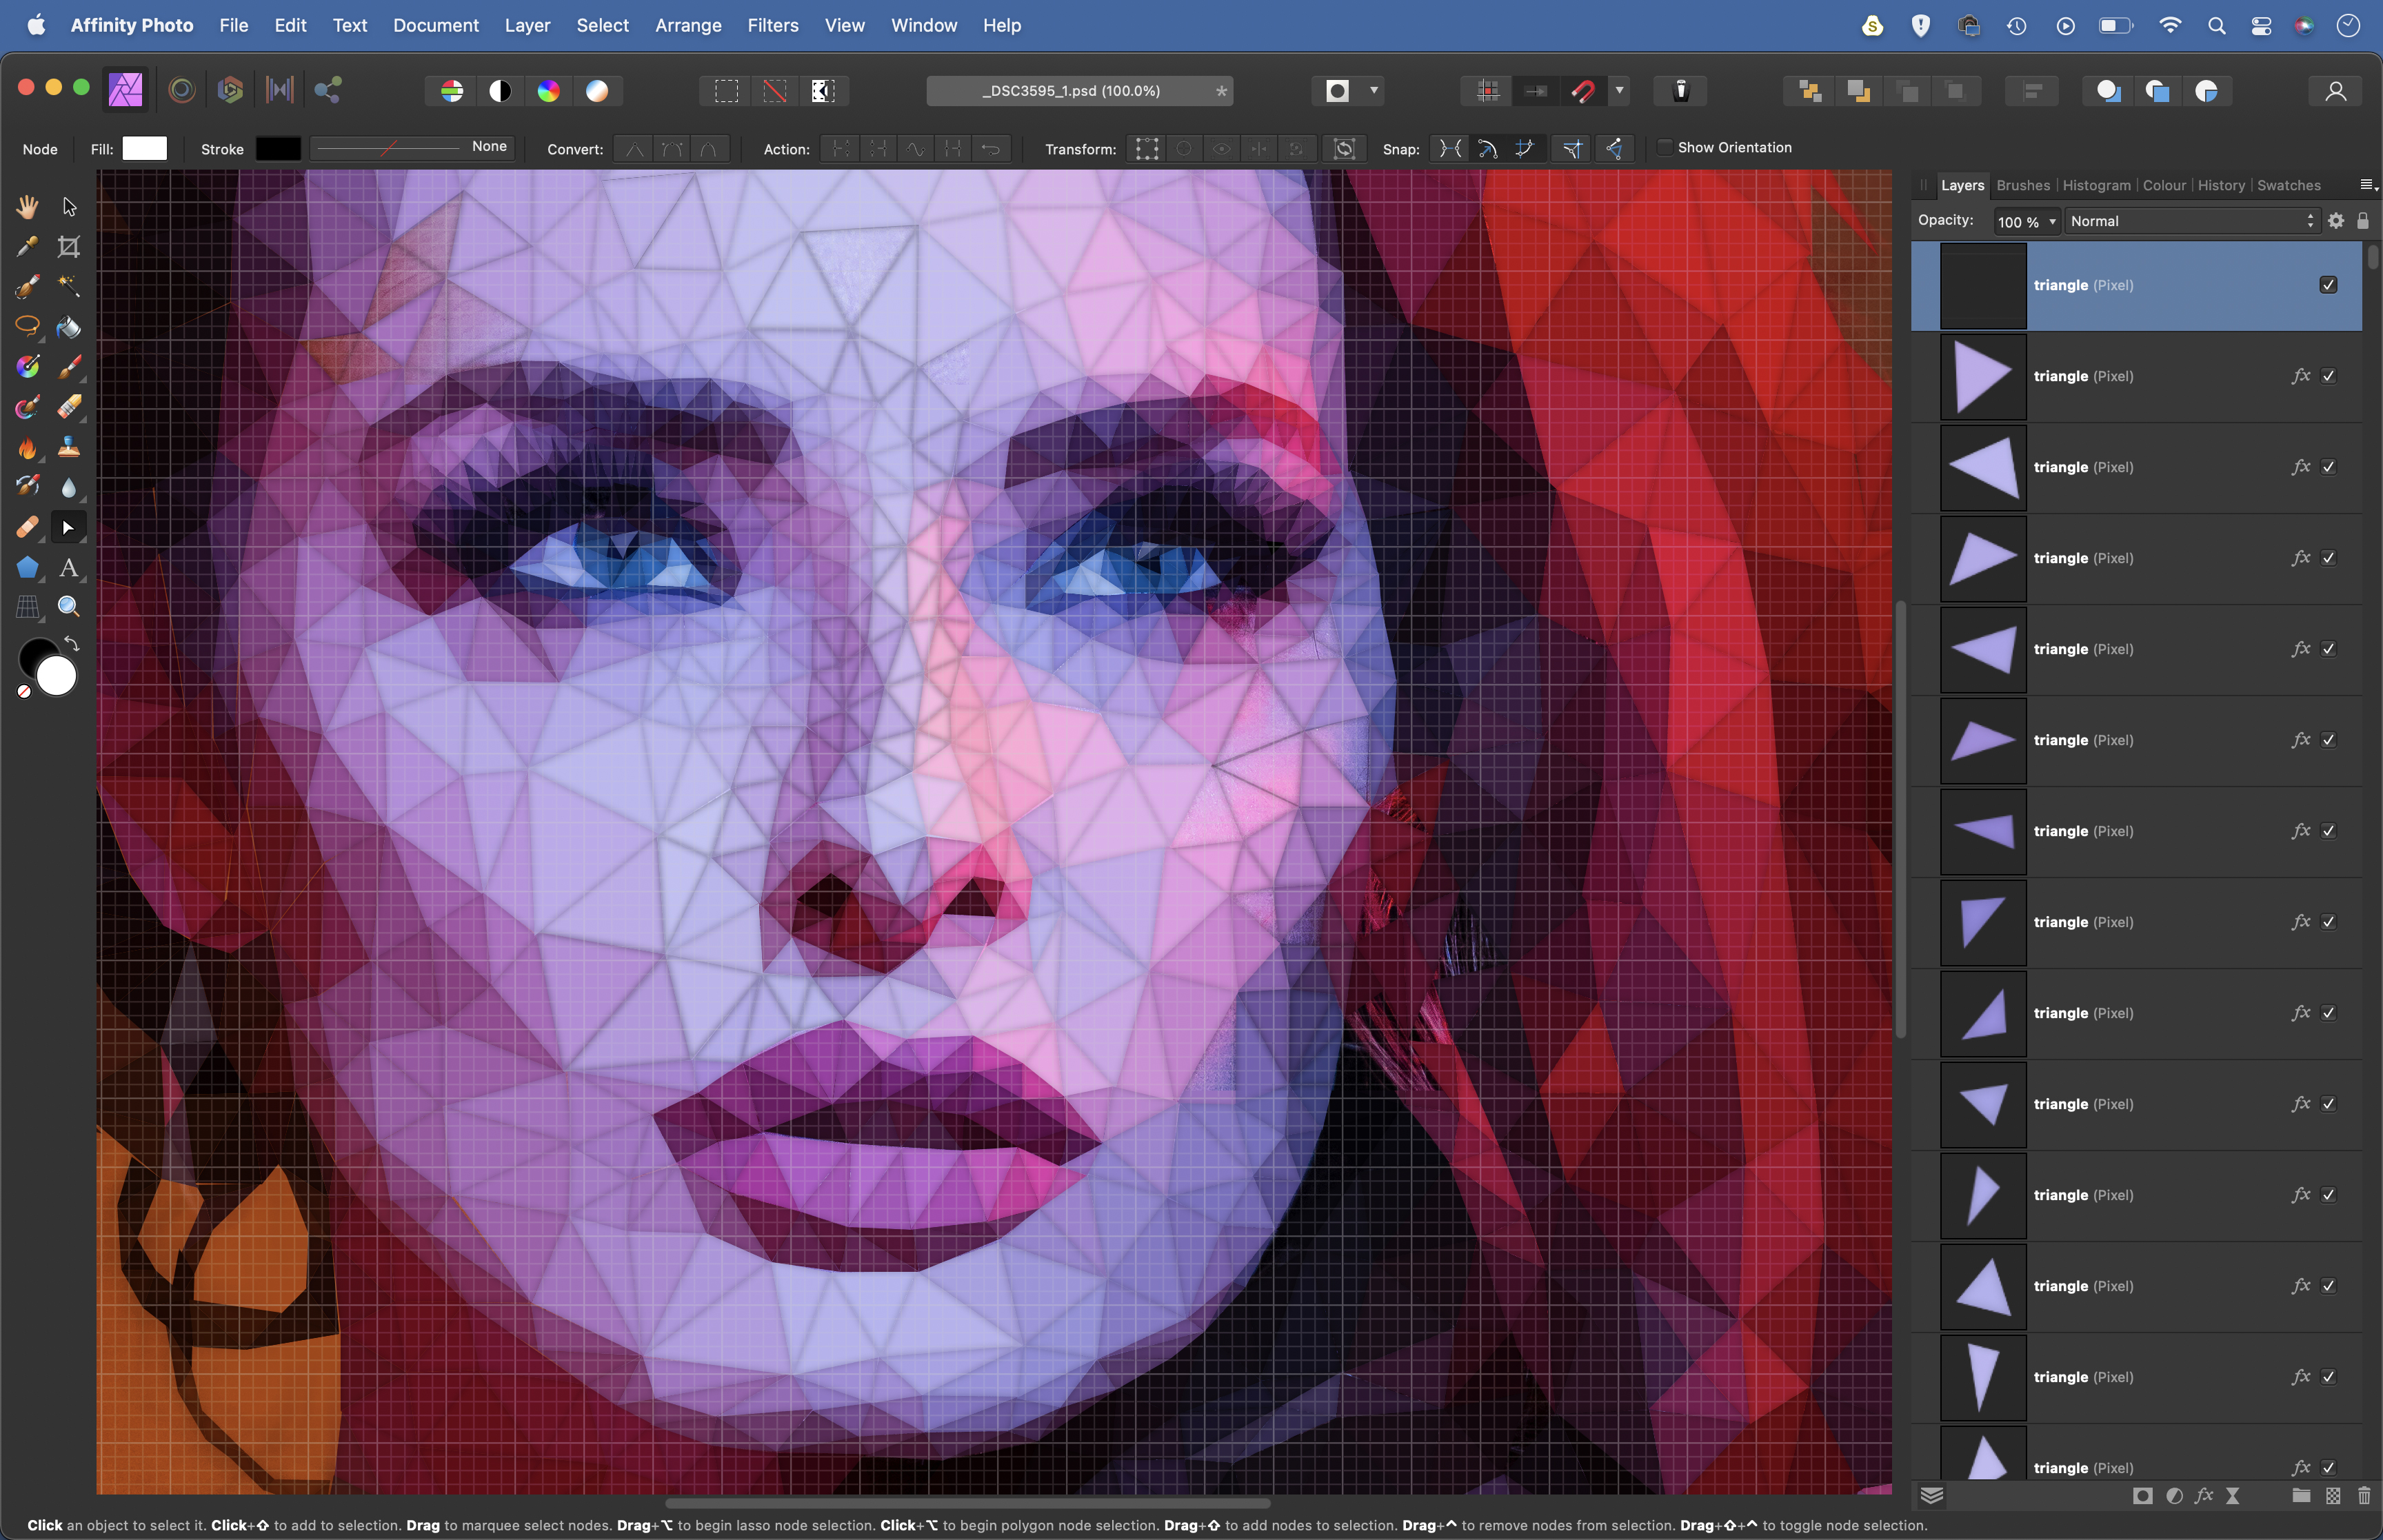
Plot triangles to cover the subject, using the Macro and Node tool. Try to keep triangles in areas of similar color. Use larger triangles for smooth areas like the cheeks and smaller ones for details like eyes. Each one should meet at the corner with the one beside it.
06 Finish it off
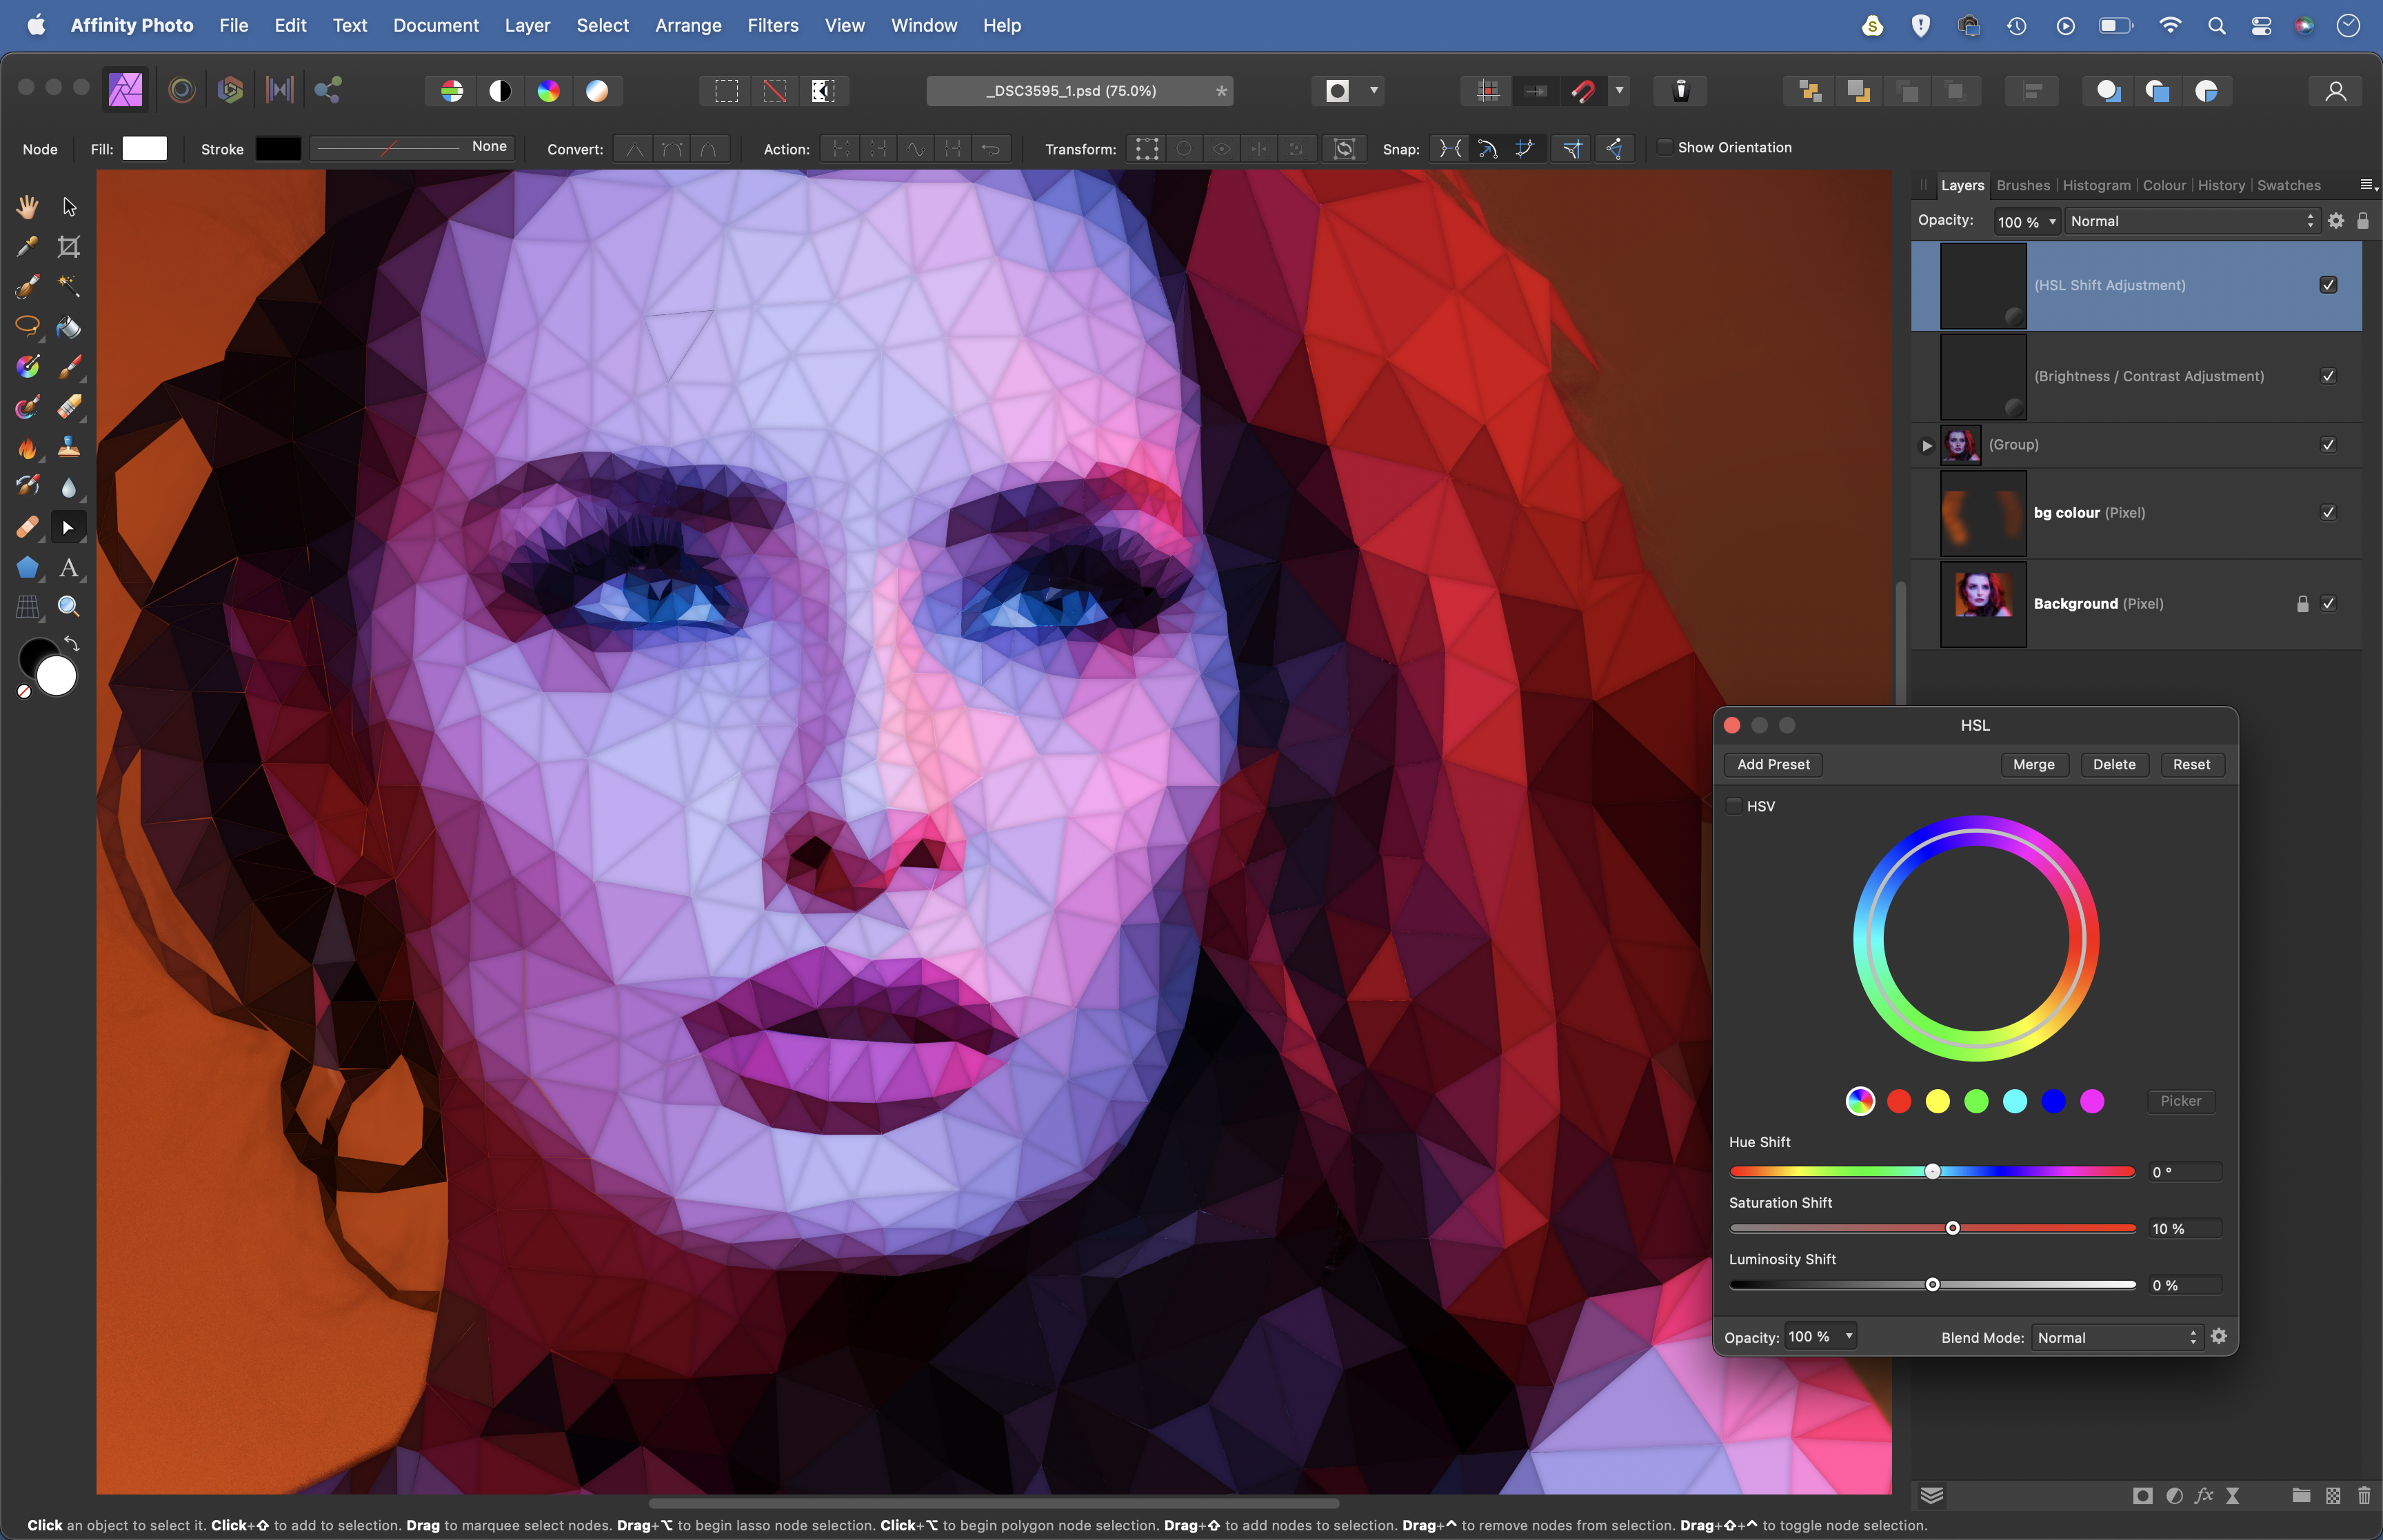
Cover the whole subject, then make a few more shapes for the background. Once done, finish off by boosting the colors and the contrast. Add a HSL Adjustment and boost the saturation, then use a Brightness and or Contrast adjustment to increase contrast.
• See more of our Affinity Photo tutorials
PhotoPlus: The Canon Magazine is the world's only monthly newsstand title that's 100% devoted to Canon, so you can be sure the magazine is completely relevant to your system.
Read more:
Best photo-editing laptops
Best photo editing software
Best online photography courses
Get the Digital Camera World Newsletter
The best camera deals, reviews, product advice, and unmissable photography news, direct to your inbox!
The lead technique writer on Digital Camera Magazine, PhotoPlus: The Canon Magazine and N-Photo: The Nikon Magazine, James is a fantastic general practice photographer with an enviable array of skills across every genre of photography.
Whether it's flash photography techniques like stroboscopic portraits, astrophotography projects like photographing the Northern Lights, or turning sound into art by making paint dance on a set of speakers, James' tutorials and projects are as creative as they are enjoyable.
He's also a wizard at the dark arts of Photoshop, Lightroom and Affinity Photo, and is capable of some genuine black magic in the digital darkroom, making him one of the leading authorities on photo editing software and techniques.


