Create a fantastical fairytale composite scene in Photoshop CC
Discover how you can create a fantastical composite image and learn a host of essential Photoshop CC skills
Watch video: Make a fantasy fairy-tale scene in Photoshop CC
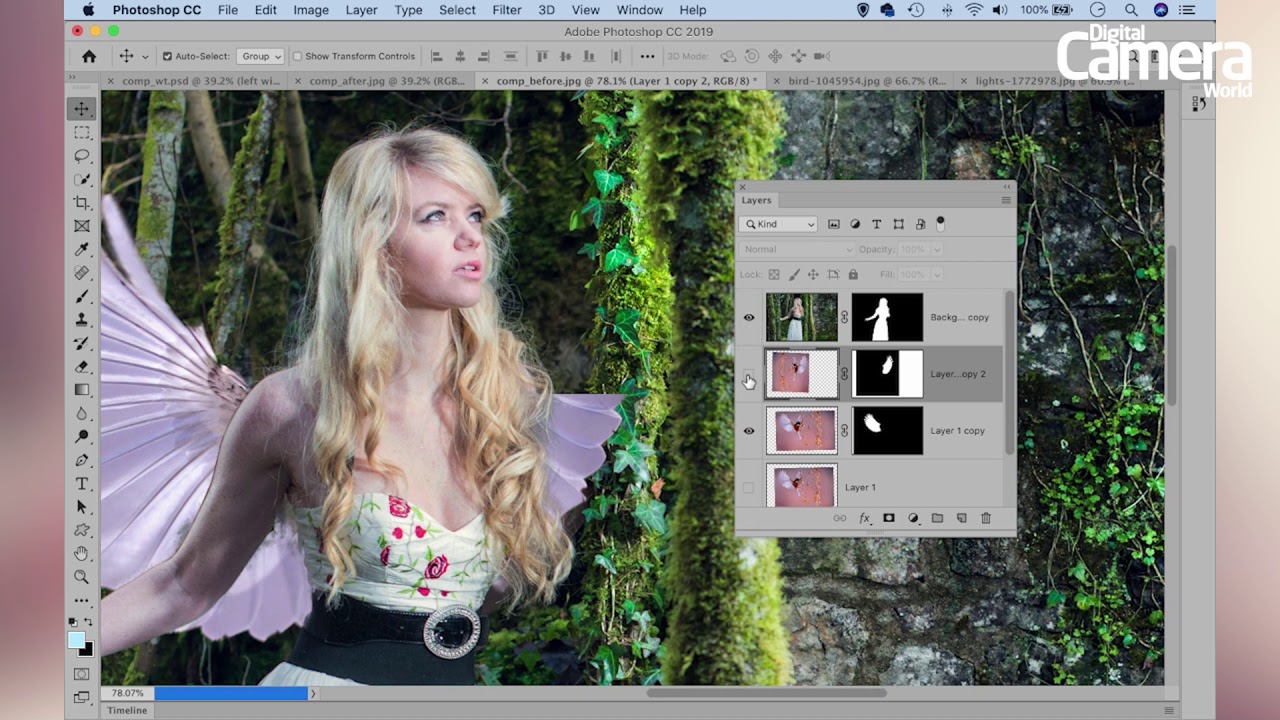
With a few simple Photoshop layering skills you can create all kinds of fantastical composite images like our fairy scene here. This is created using a range of effects and compositing techniques.
To begin, we’ll isolate our subject with a selection (kick-started by the useful ‘select subject’ command) and then make a cut-out. This way, we can bring in a set of wings – copied from a bird – and position them behind the body so it looks as if they are attached to her back. This kind of compositing is best done with a combination of selection tools and layer masking. We’ll make use of the powerful Select and Mask command to do both at once.
• Read more: 100 Photoshop tips
After adding our fairy-like wings, we’ll go to create a pattern of spirals using a clever, little-known Photoshop CC command called ‘step and repeat’. This works by repeating a previous transformation on a duplicate layer. So all we have to do is paint a series of dots and then duplicate and rotate them slightly, then use our step and repeat shortcut to create a beautiful array of swirling patterns.
Finally, we’ll blend in an image of bokeh and apply a few tonal tweaks to give our image a dream-like quality. If you prefer to watch and learn there’s a full walkthrough in the accompanying video. If need be, you can also download the bird and bokeh images used in this project for free from Pixabay (search for images 1045954 and 1772978).
01 Cut out the subject
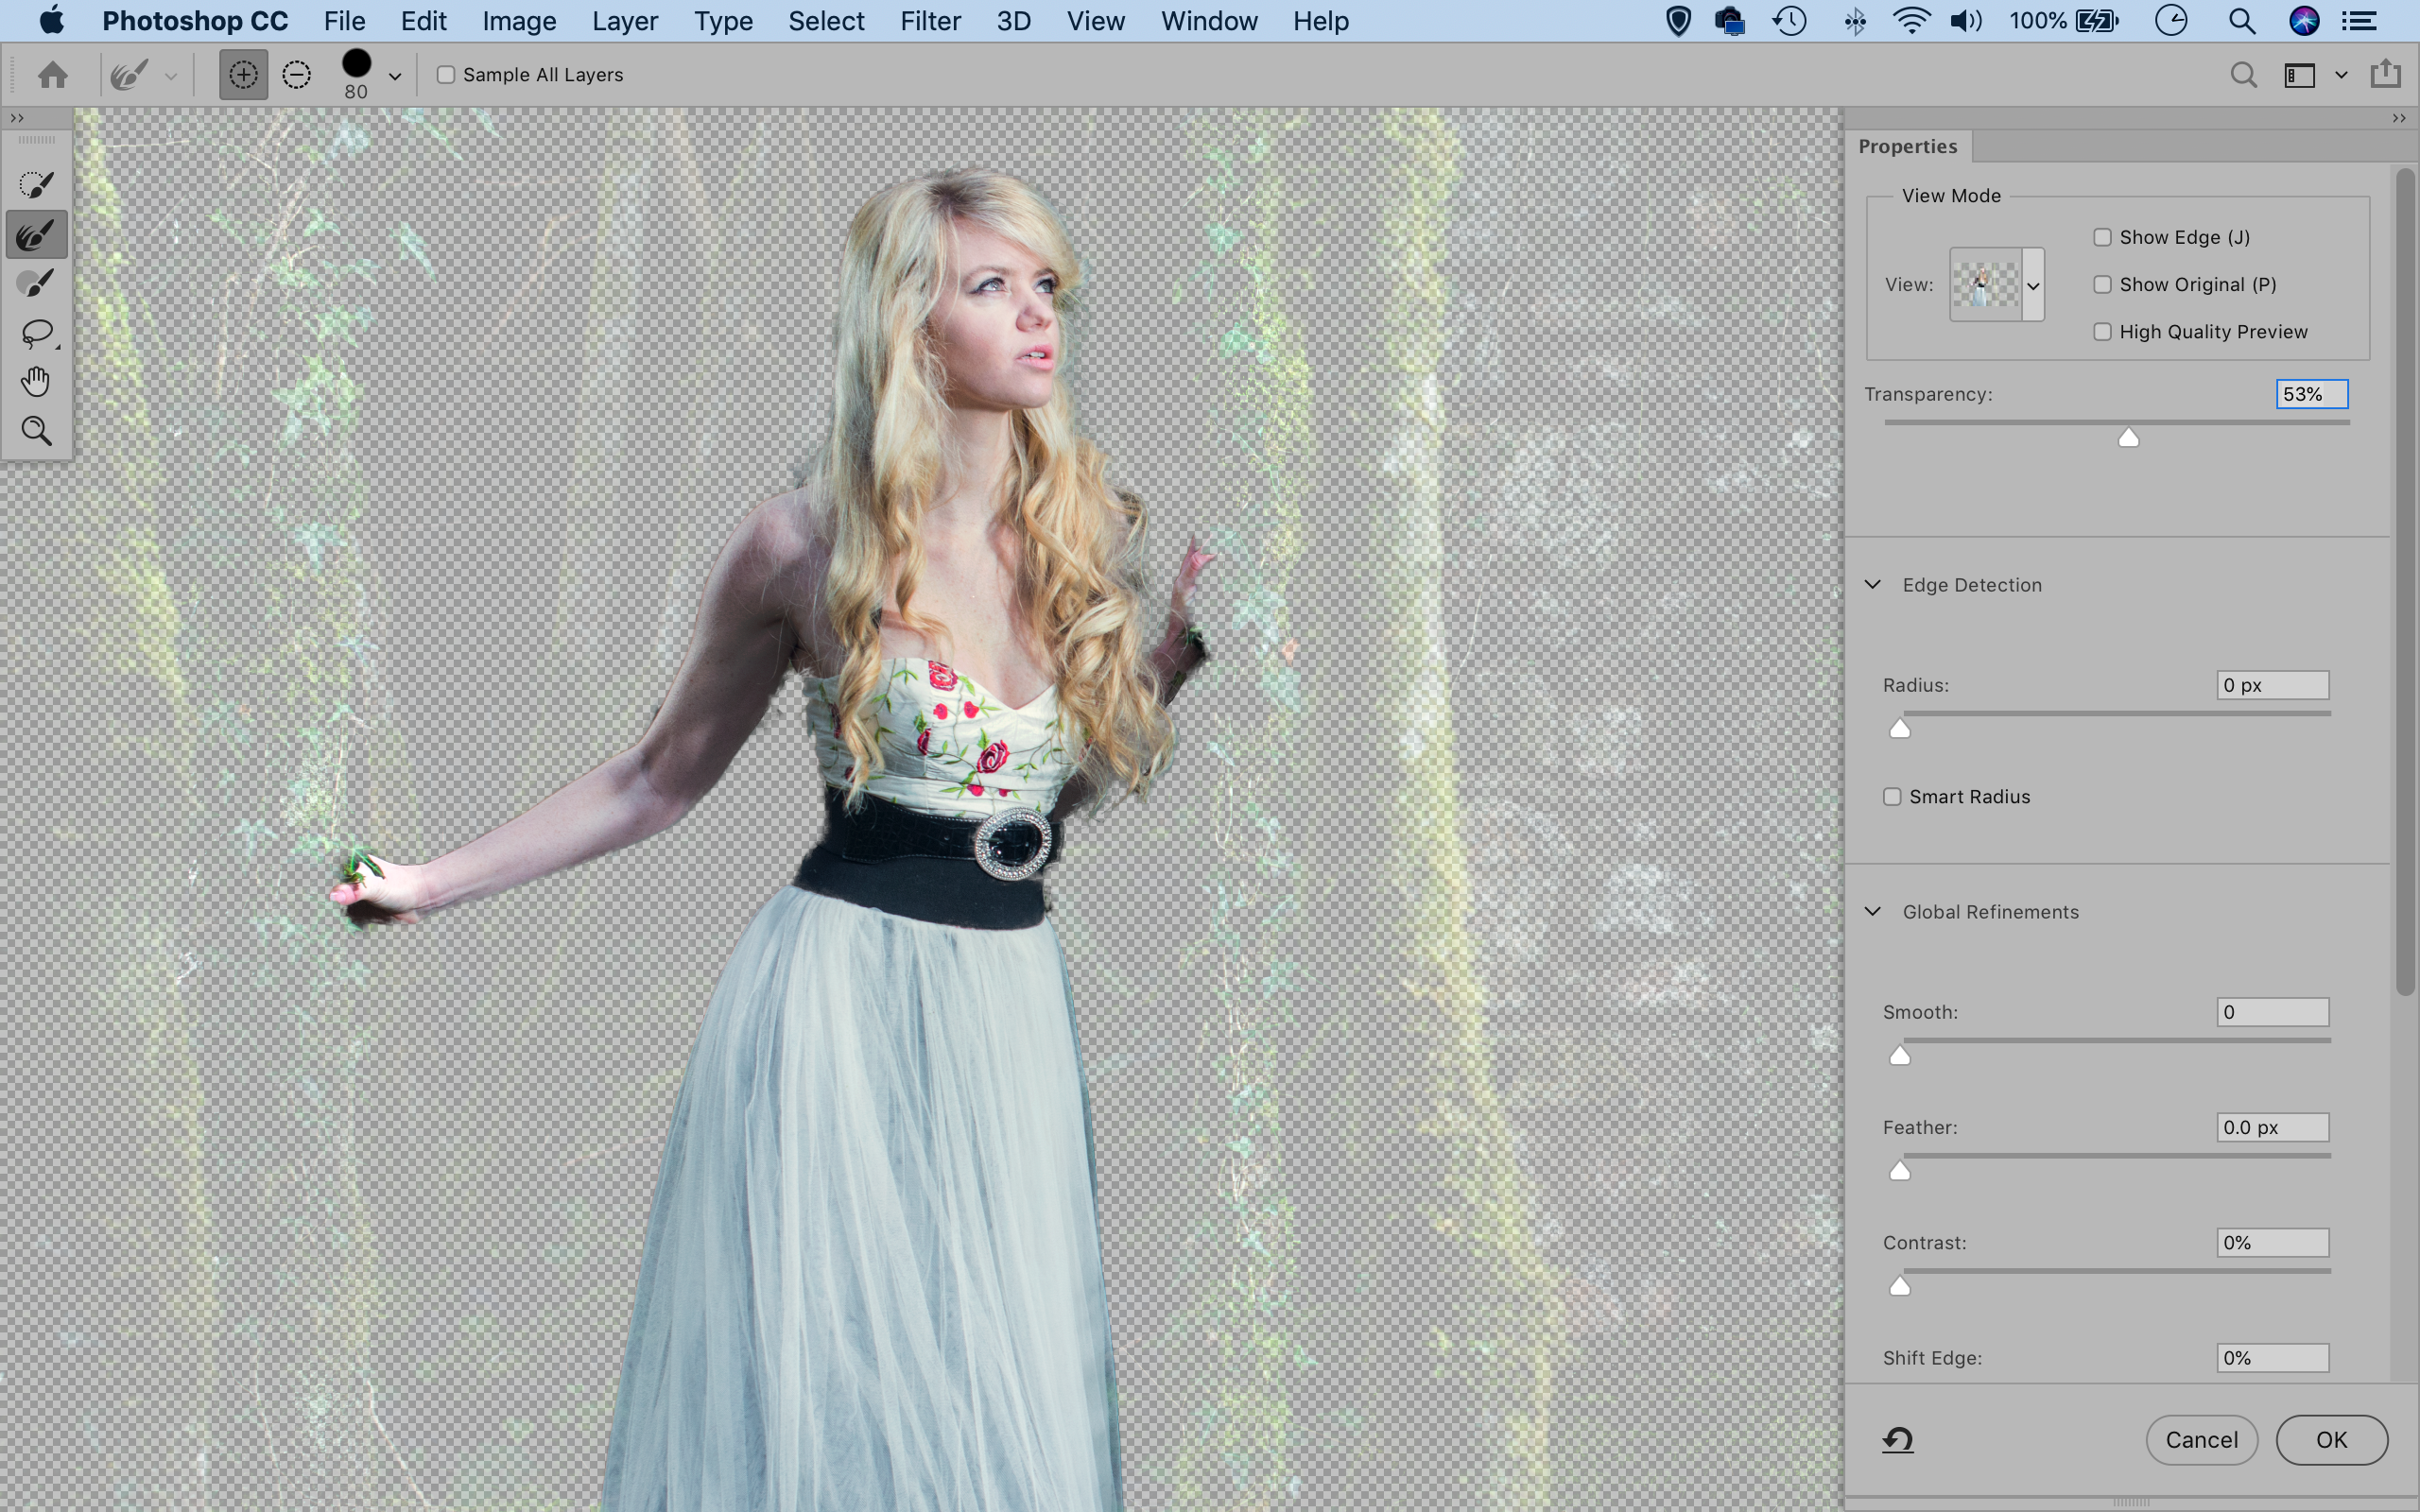
Open the comp_before.jpg start file (download here) and go to Select > Subject. Next go to Select > Select and Mask. Increase Radius to improve the selection, then choose Output to: New Layer with Layer Mask and hit OK. Highlight and reveal the bottom layer. Then open the bird photo.
02 Add a wing
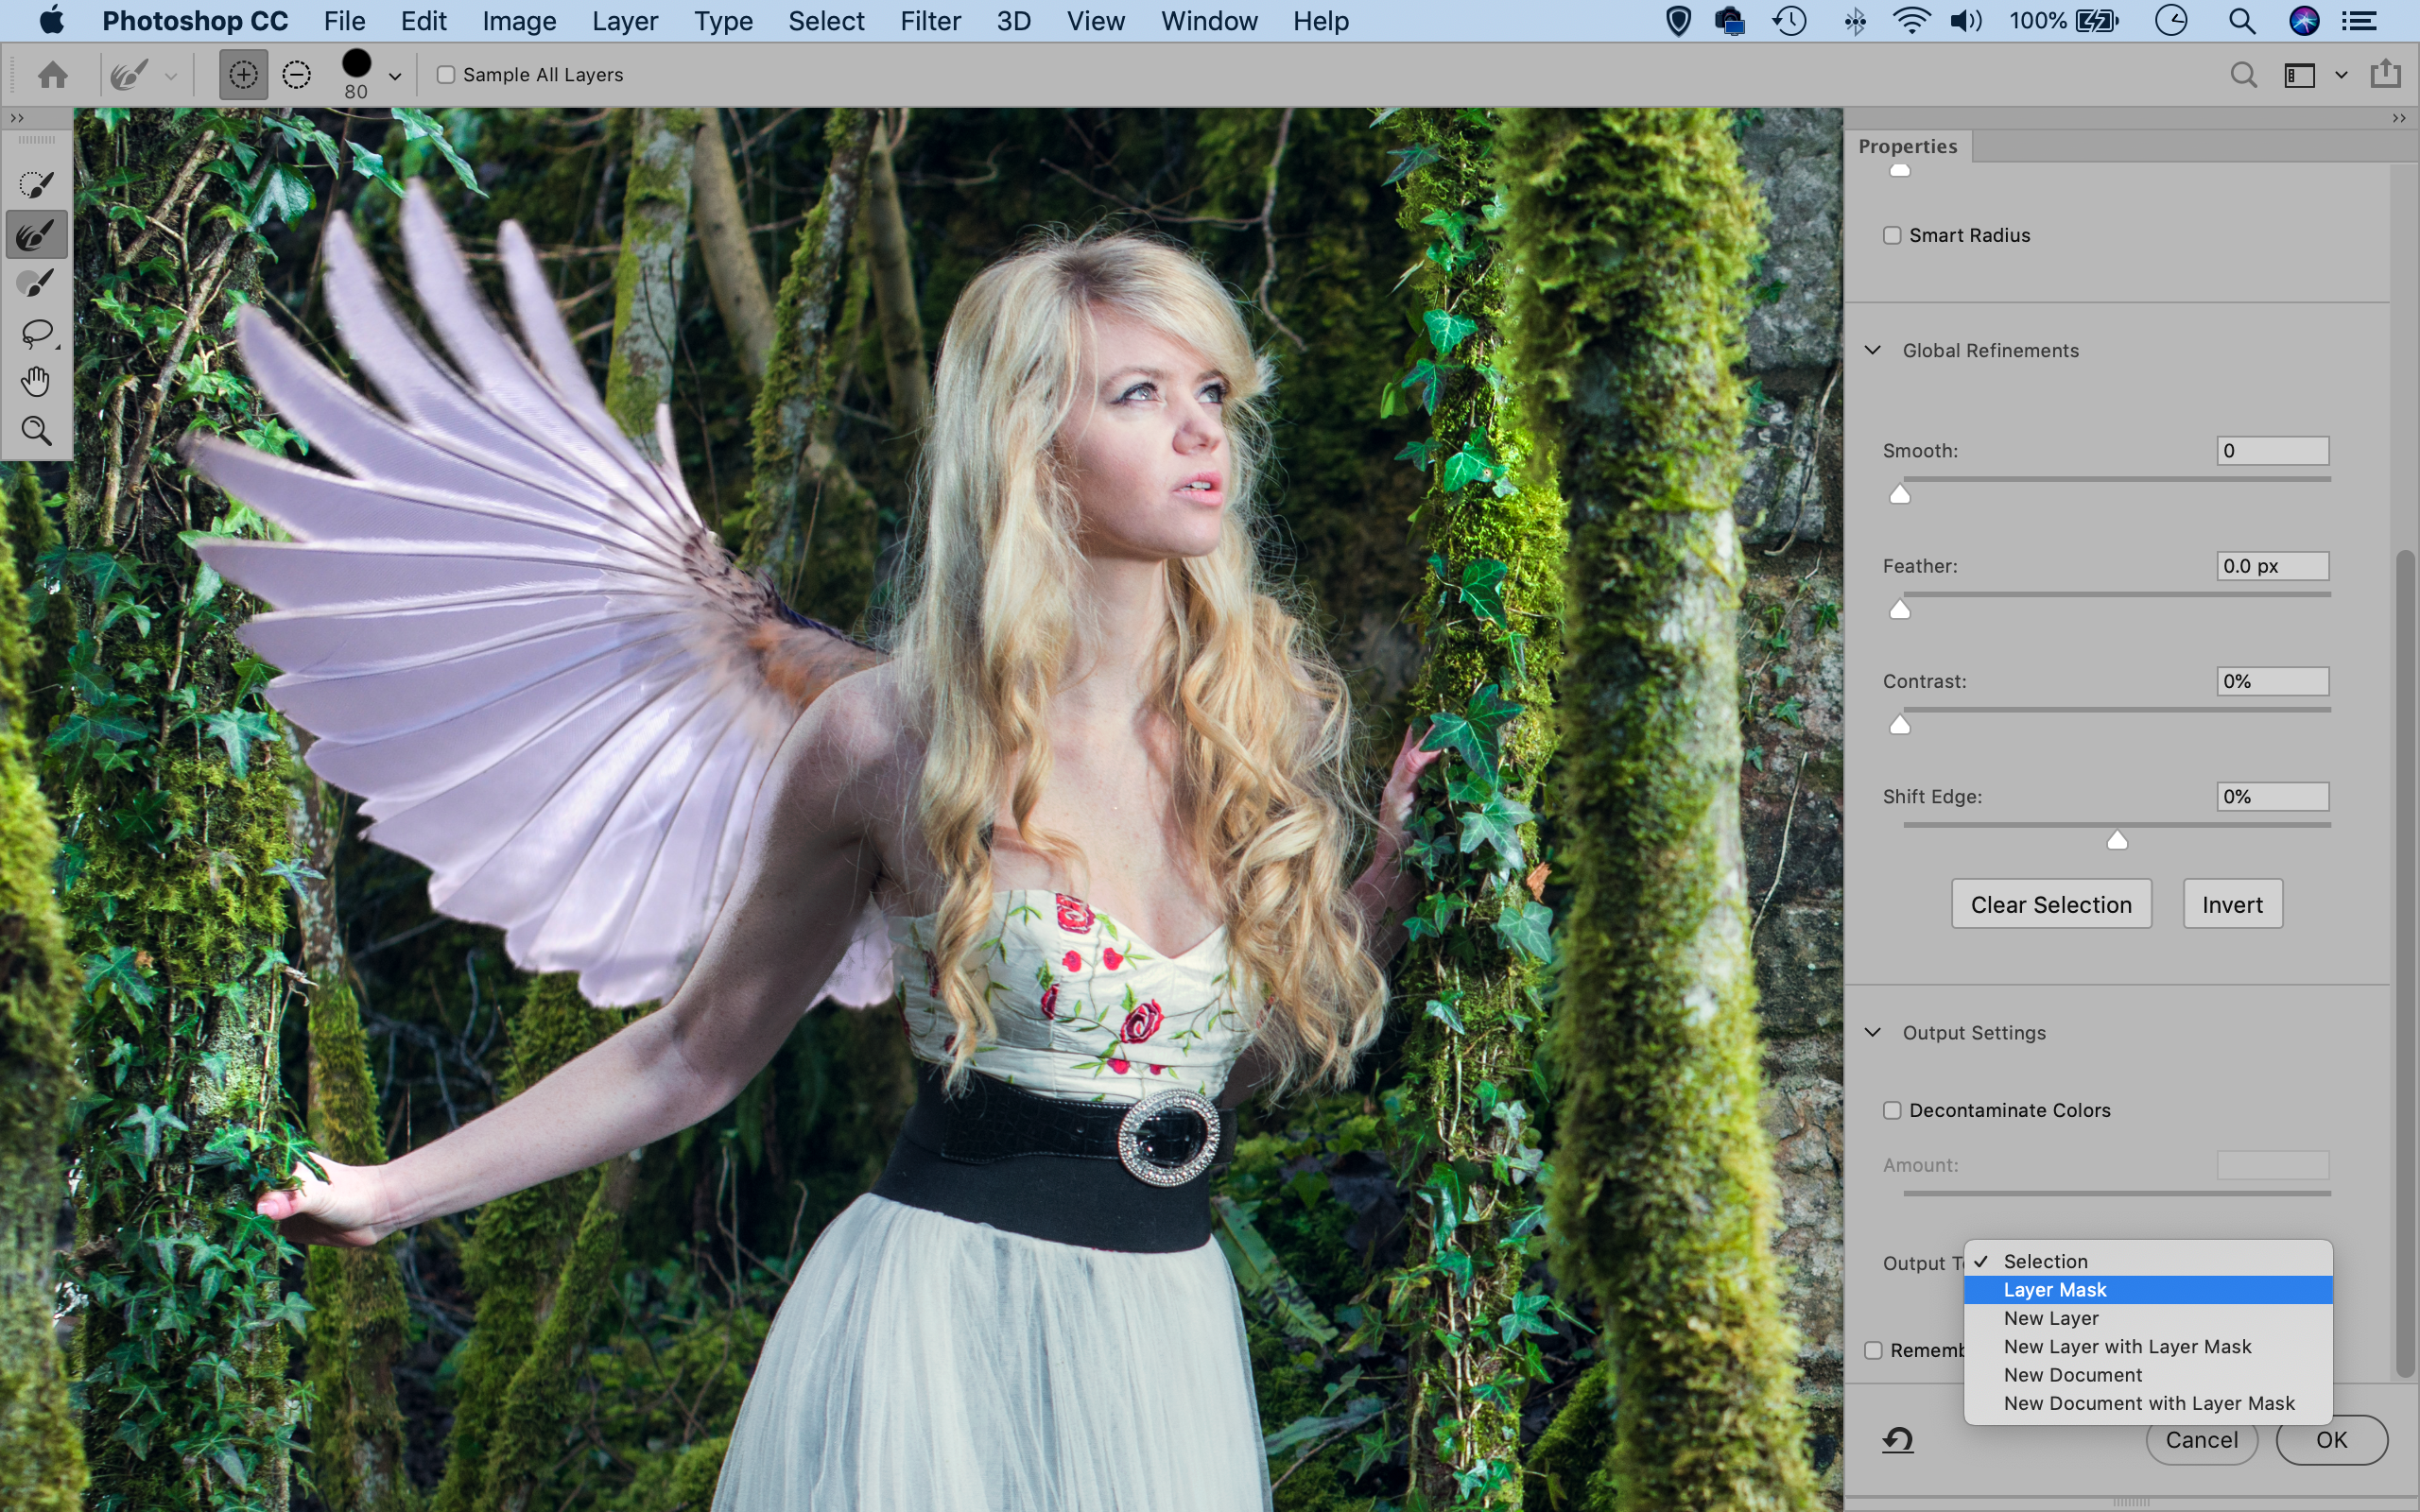
Use the Move tool to drag in the bird. Hit Cmd/Ctrl + T to transform and move the wing, then go Select > Select and Mask. Get the Quick Selection tool and paint the wing to select it, then use the Refine Edge brush. Then, set Output: Layer Mask and hit OK.
03 Copy and flip
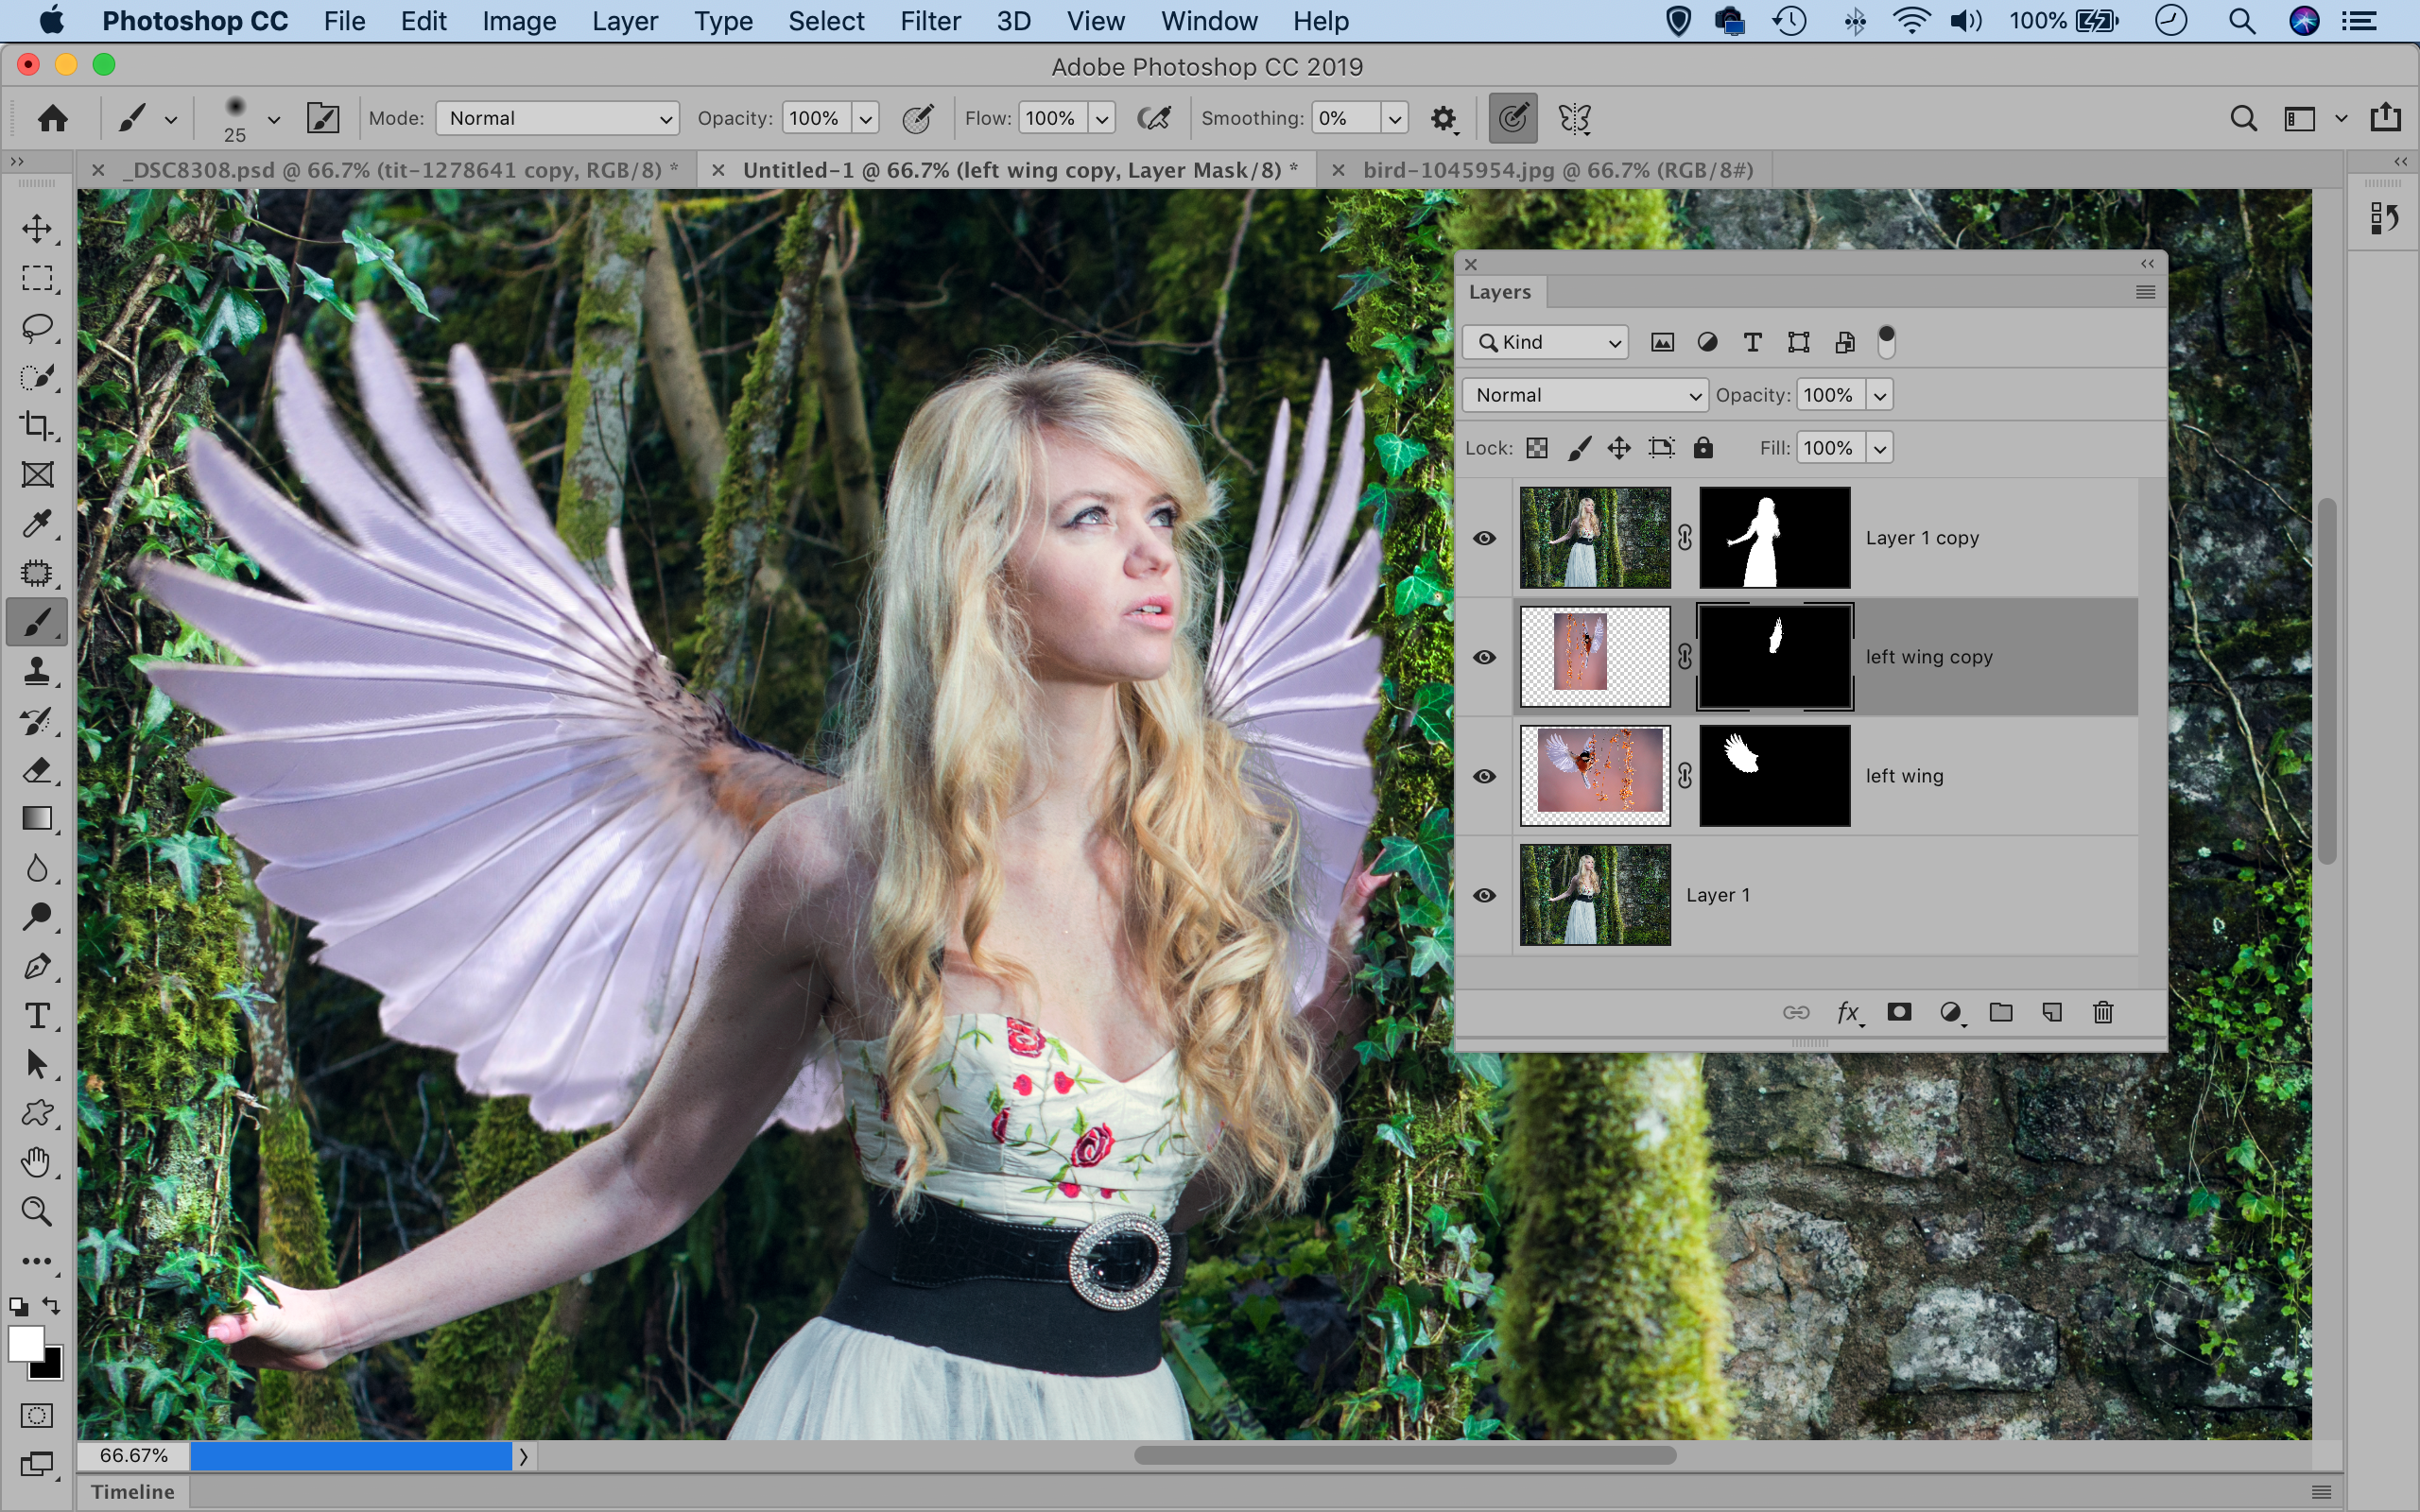
Duplicate the wing layer with Cmd/Ctrl + J, then hit Cmd/Ctrl + T to transform. Right-click and ‘Flip Horizontal’ and position the second. Highlight the mask thumbnail on the layer, get the Brush tool. Paint black over the wing to hide bits that overlap the tree.
04 Paint in shadows and dots
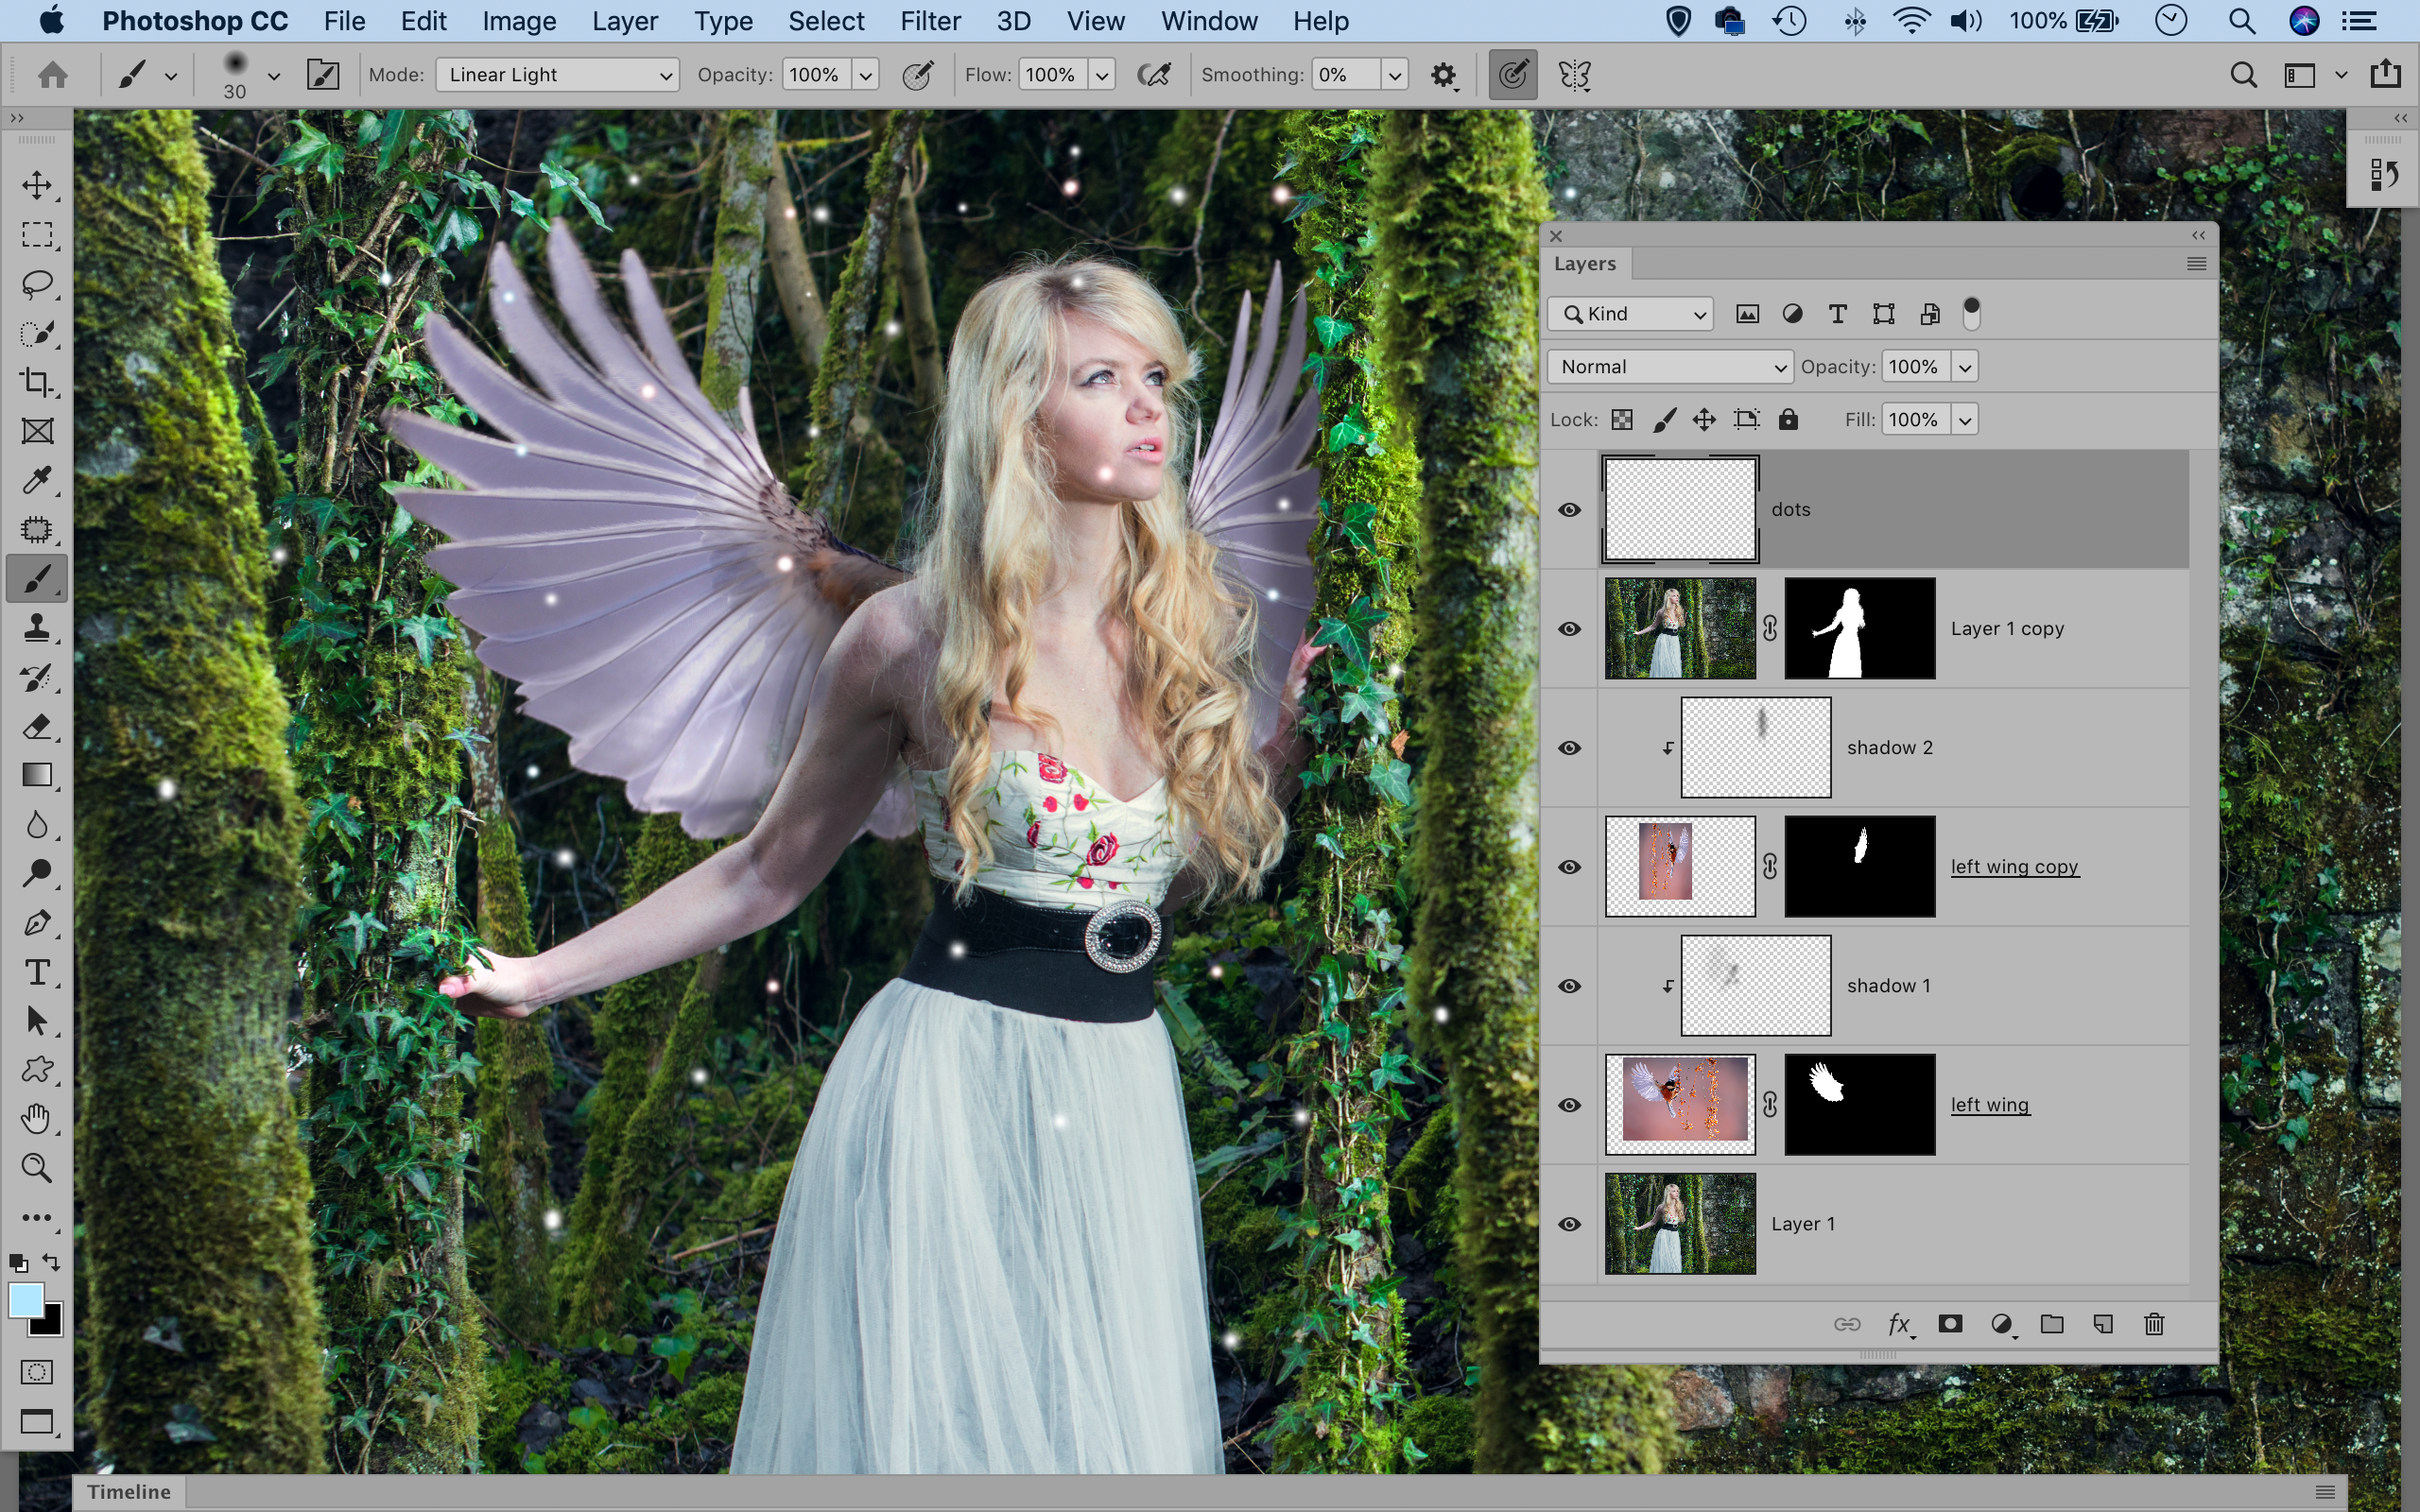
Add a new layer then Alt-click the line between it and the wing layer. Paint black to add shadows over the wing where it meets the body. Repeat for the other. Next add a new layer at the top of the stack. Paint an array of small bright dots over the image as shown.
05 Create a spiral
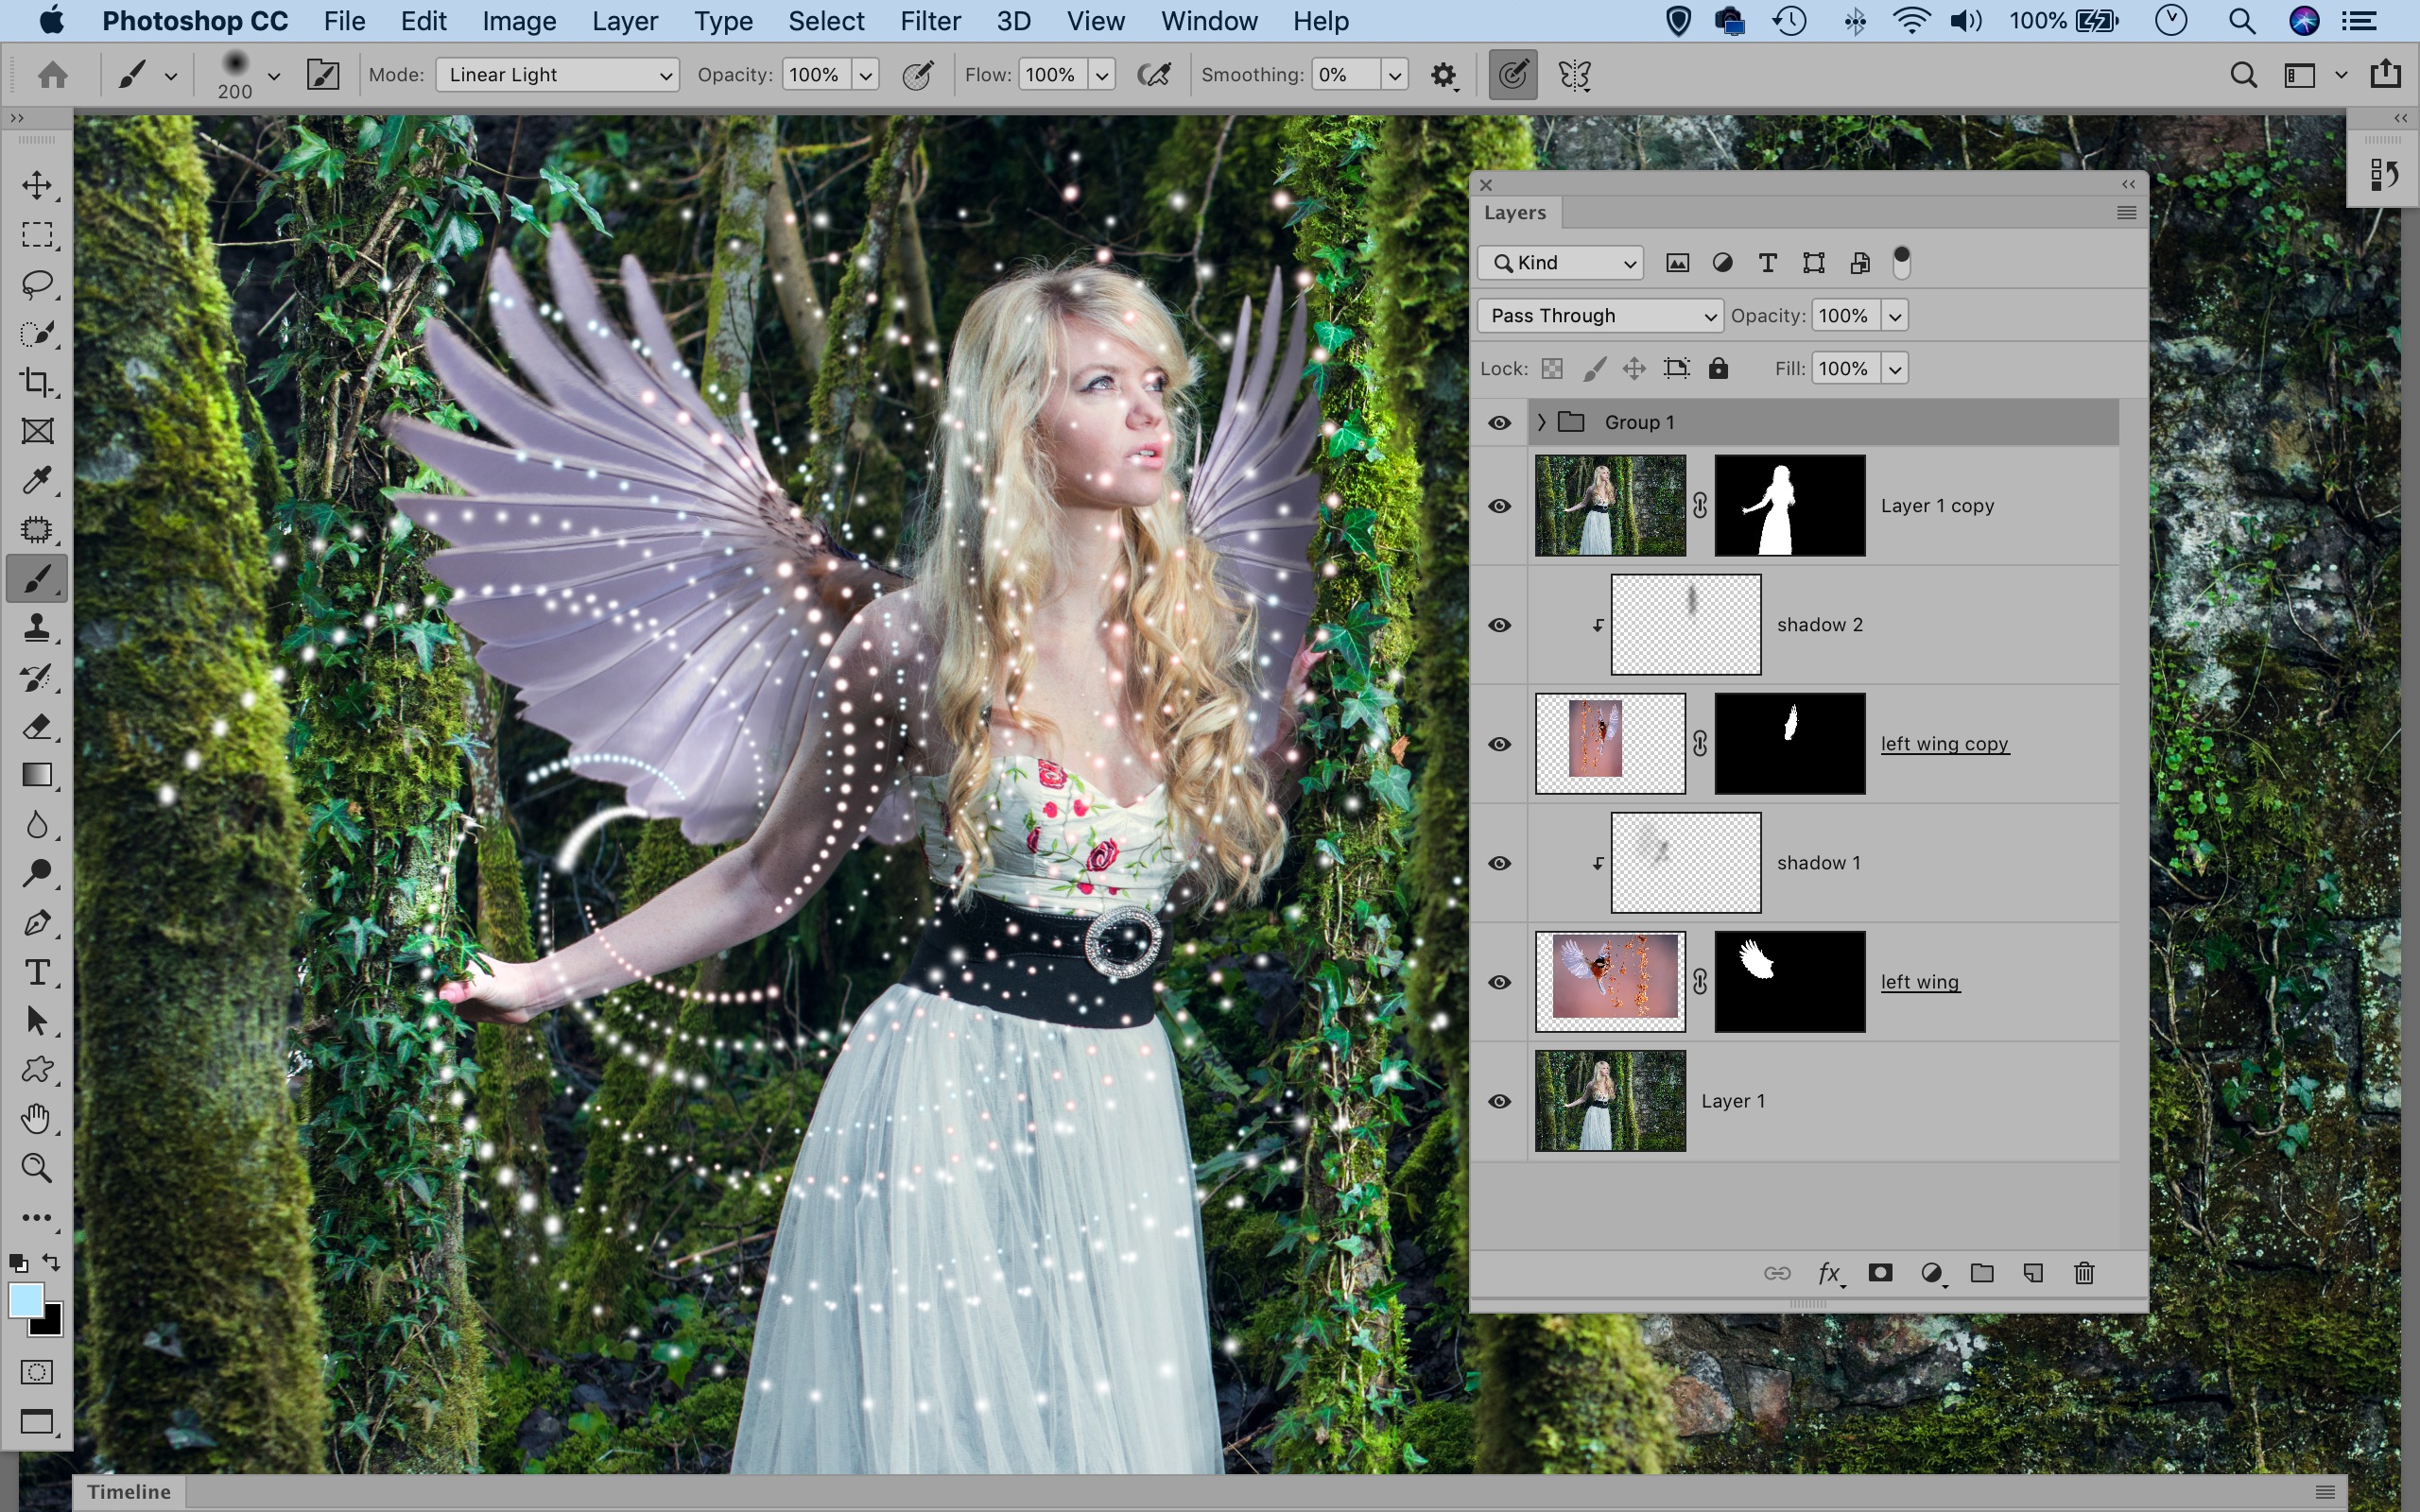
Press Cmd/Ctrl + J to duplicate the dots, then Cmd/Ctrl + T to transform. Rotate, reposition and make the layer smaller. Next press Cmd/Ctrl + Shift + Alt + T to ‘step and repeat’ the dots into a spiral. Then, highlight the dot layers and press Cmd/Ctrl + G to group.
06 Blend in bokeh
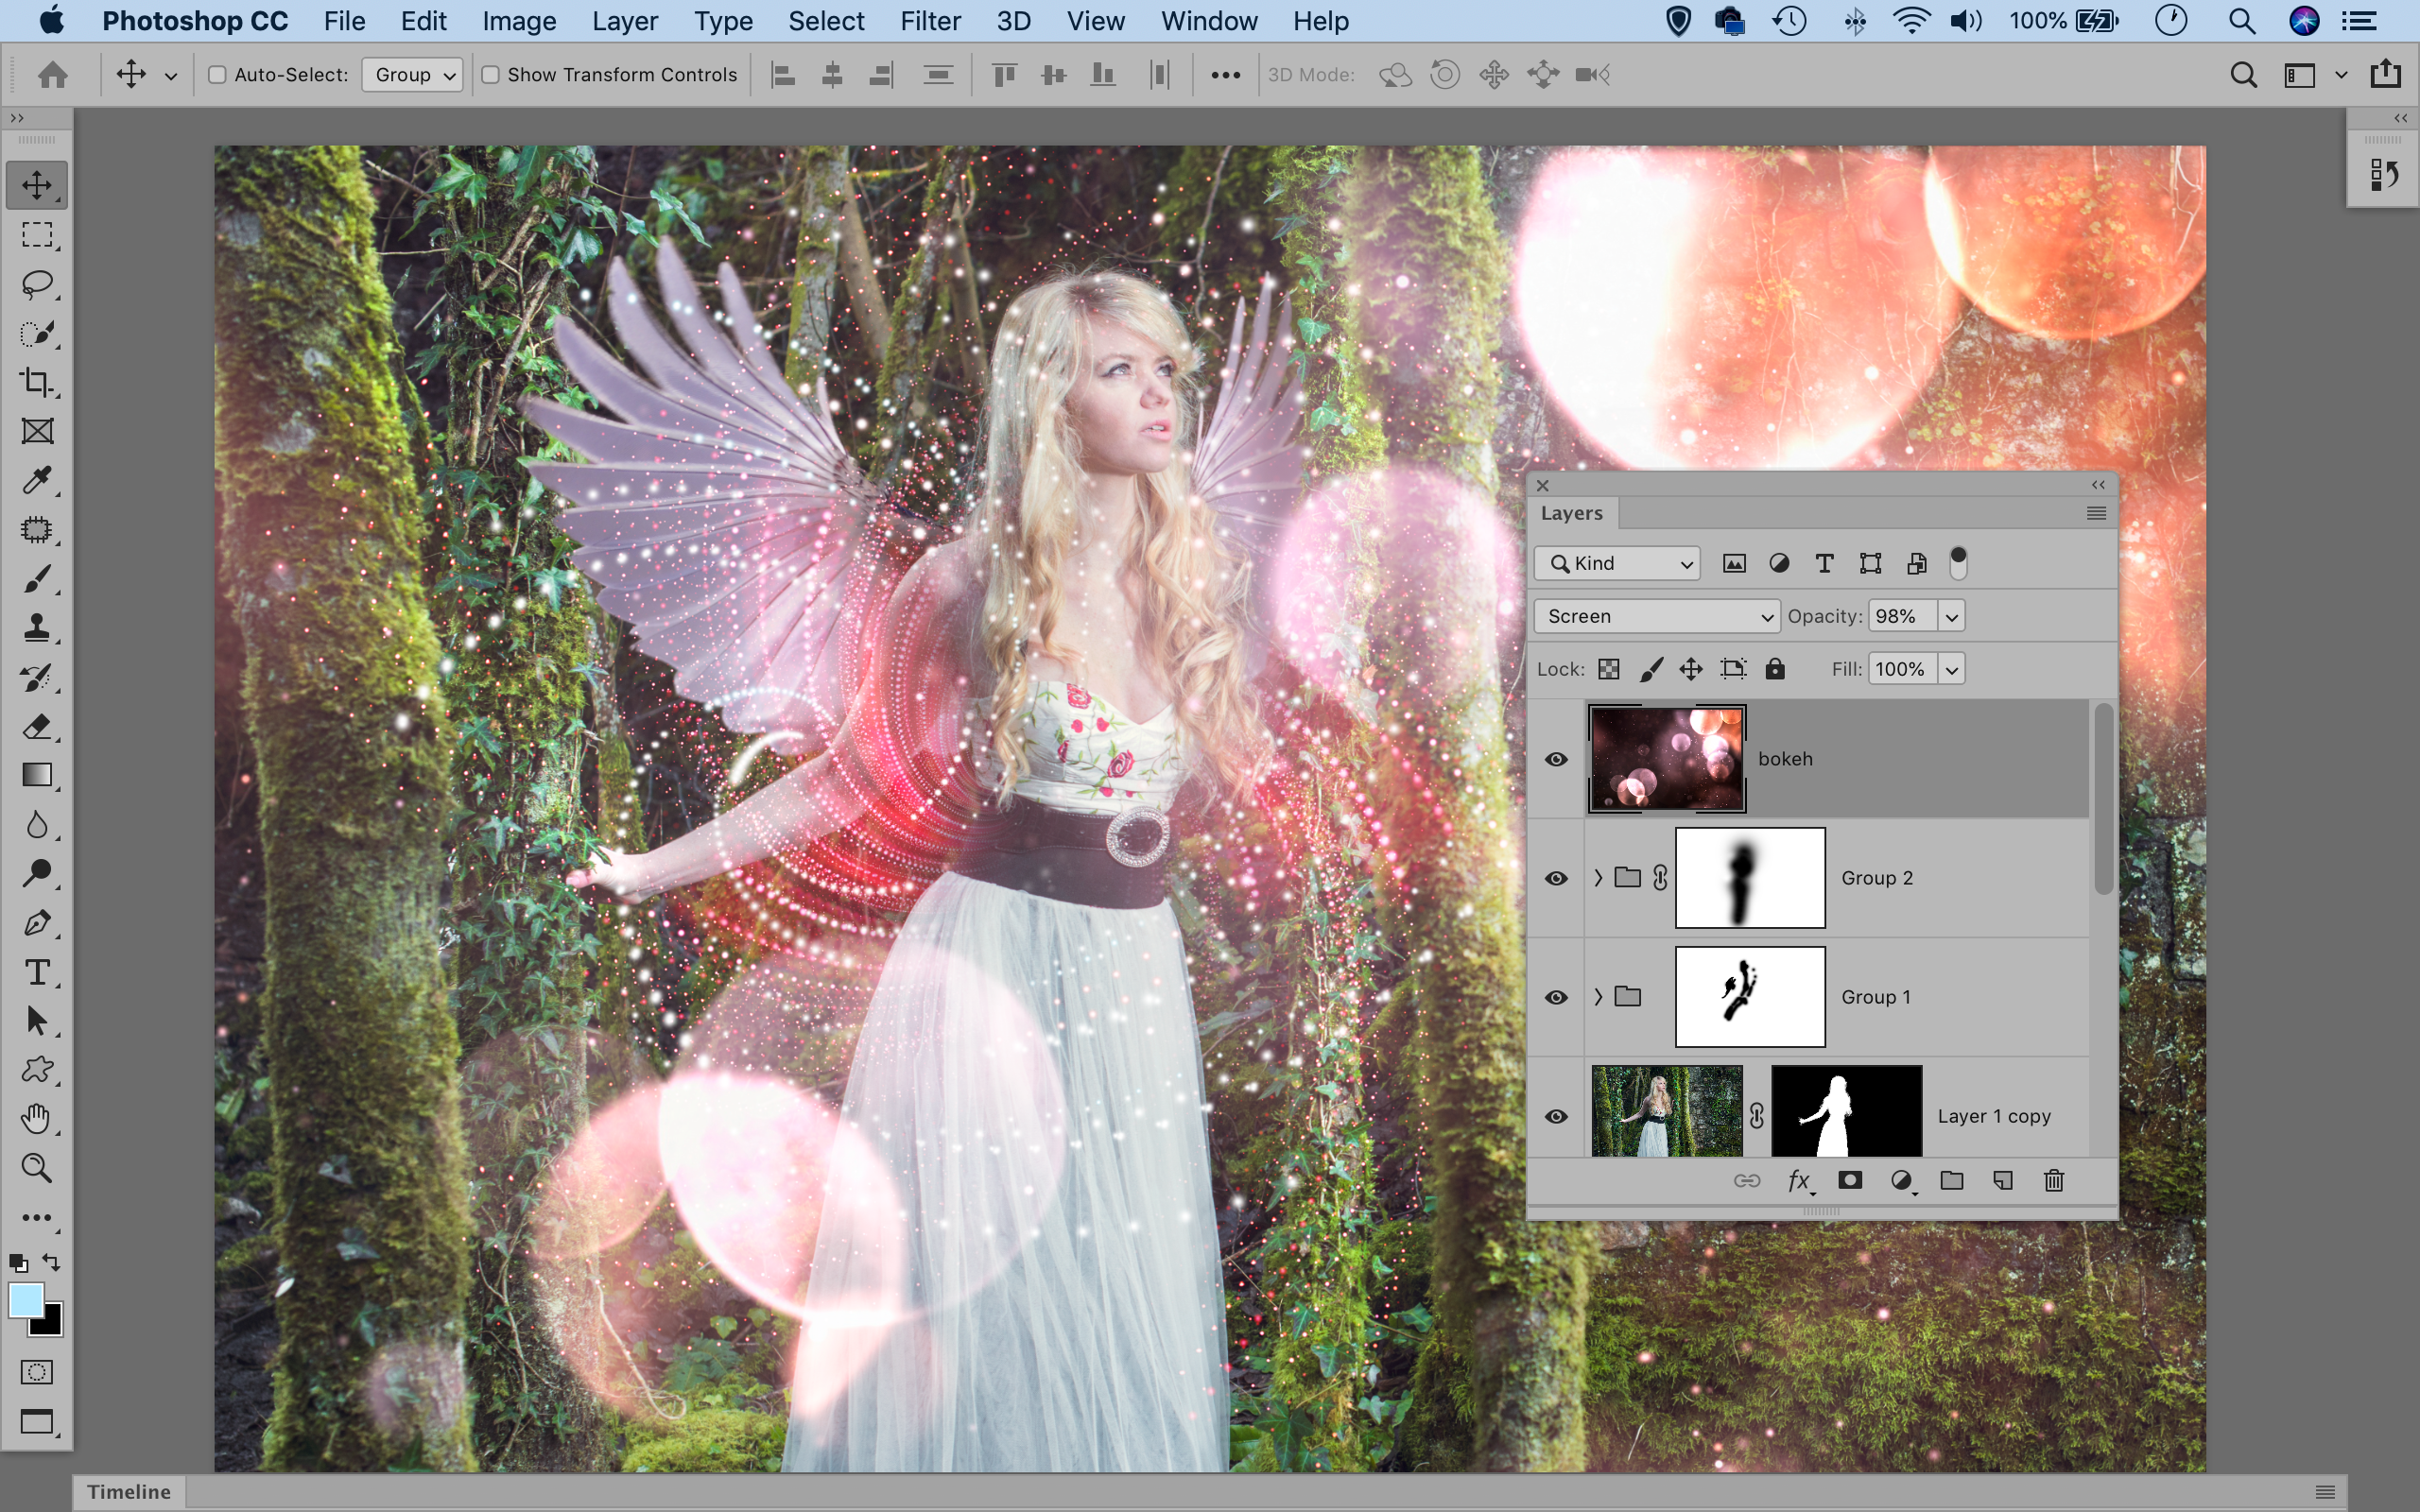
Click the Add Layer Mask icon in the Layers panel then paint black to hide parts of the dots. Create more spirals in the same way. Next open an image of bokeh (Pixabay image 1772978). Copy in the image and set the Blend Mode to Screen and adjust the tones to finish the image off.
PhotoPlus: The Canon Magazine is the world's only monthly newsstand title that's 100% devoted to Canon, so you can be sure the magazine is completely relevant to your system.
Read more:
The best photo editing software: image editors for novices through to pros
The best photo-editing laptops: top laptops for photographers
10 best online photography courses – from beginner guides to masterclasses
Get the Digital Camera World Newsletter
The best camera deals, reviews, product advice, and unmissable photography news, direct to your inbox!
The lead technique writer on Digital Camera Magazine, PhotoPlus: The Canon Magazine and N-Photo: The Nikon Magazine, James is a fantastic general practice photographer with an enviable array of skills across every genre of photography.
Whether it's flash photography techniques like stroboscopic portraits, astrophotography projects like photographing the Northern Lights, or turning sound into art by making paint dance on a set of speakers, James' tutorials and projects are as creative as they are enjoyable.
He's also a wizard at the dark arts of Photoshop, Lightroom and Affinity Photo, and is capable of some genuine black magic in the digital darkroom, making him one of the leading authorities on photo editing software and techniques.
