Create amazing monochrome masterpieces in Software
Make the most of being at home by re-editing old images and create stunning black and white effects to revitalize them!
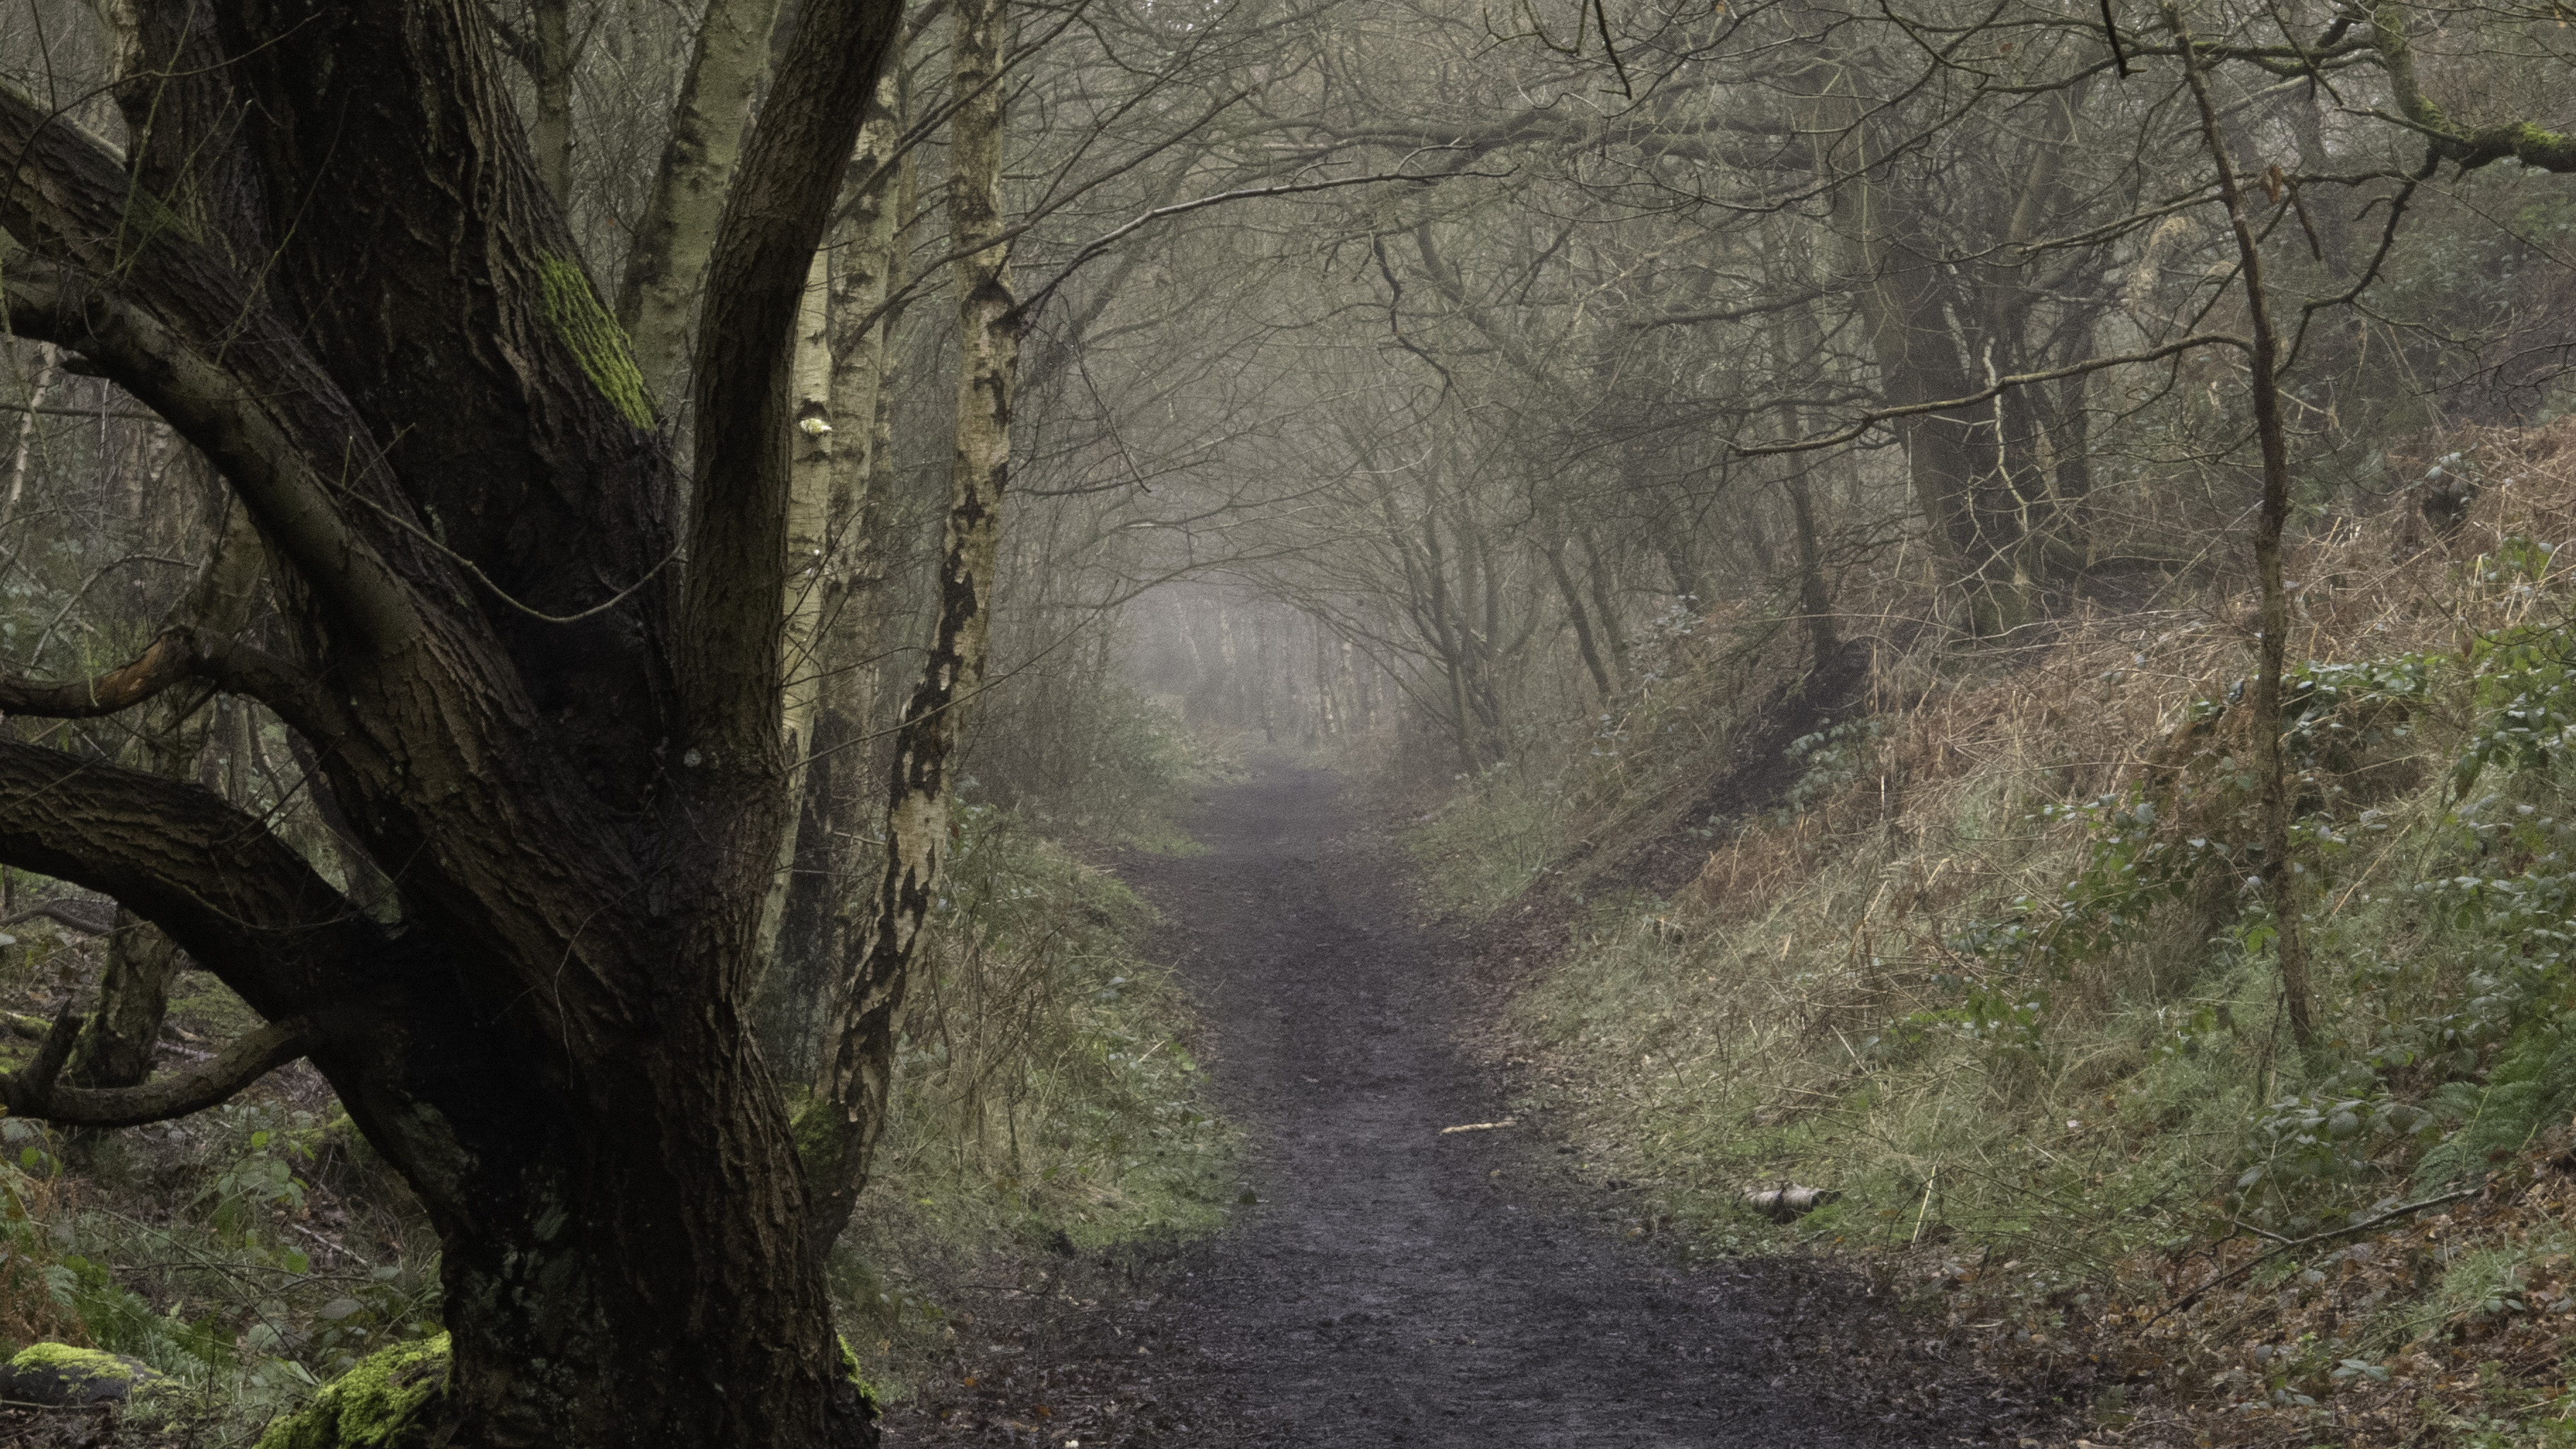
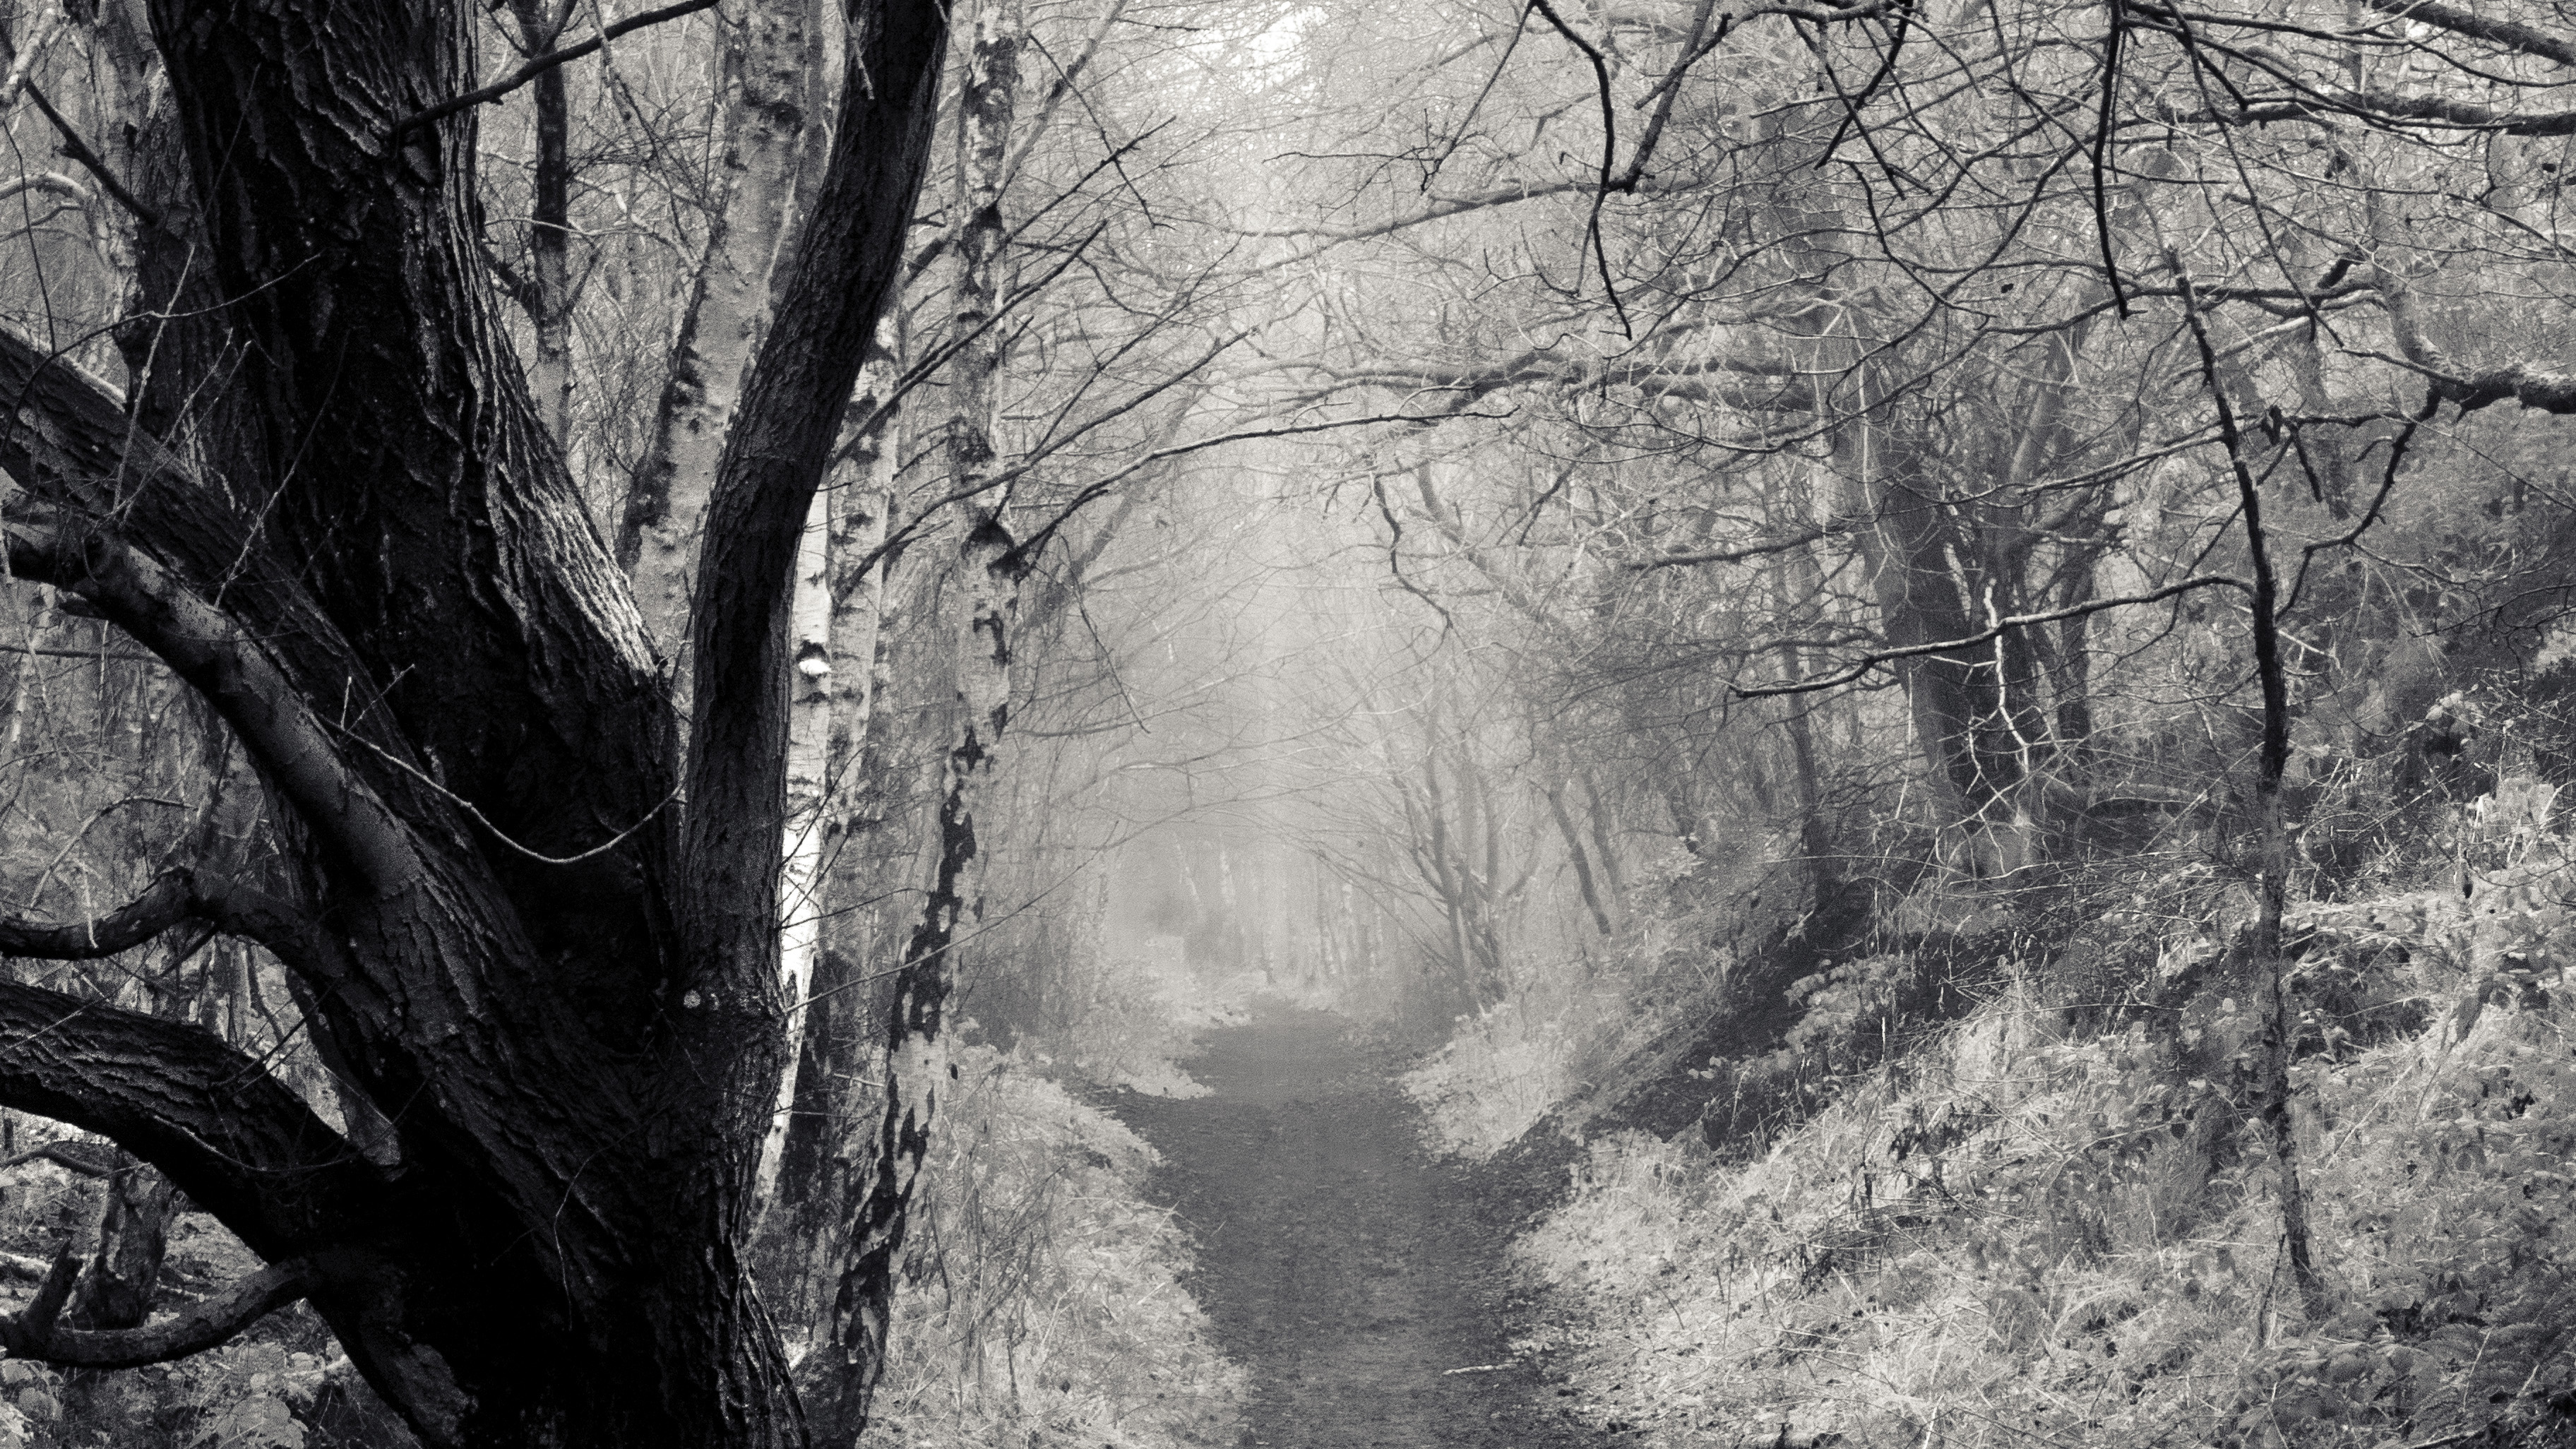
Staying at home is the perfect opportunity to revisit some of your older photos and re-edit them to see what other potential you can find within them! Mono conversion is a great way to reimagine your shots.
Any successful digital photographer, working at the professional level, understands the importance of bespoke image processing. No two images benefit from identical editing settings and if working with as clearly discrete genres as color and monochrome photography it is even more crucial to identify how and why the processing recipes differ.
Since we are working without color, correction of white balance is an area we can be less concerned about, but this does not mean that color can be ignored entirely. Depending on those present in the landscape, it will often be necessary to adjust contrast via the HSL panel in Lightroom or Camera Raw and the dedicated Black and White controls in Photoshop. These can also be used for creative effect, to alter the balance of tones based on the distribution of colour values throughout the frame.
The element which is of paramount importance when processing a monochrome file, after the basic conversion is complete, is the distribution of light and shadow, since these are all we are left with once the color has been stripped. Dodging and burning on a local scale is a powerful method of contouring shape and form within the landscape.
In a colored scene the viewer’s eye is drawn to both areas of strong color contrast and extremes of brightness. Since the latter takes almost total control in a mono shot, with the exception of varying focus, the process of directing attention is simplified at the processing stage.
Try this recipe and who knows - you might have a mono masterpiece hiding on your hard drive!
Convert to monochrome
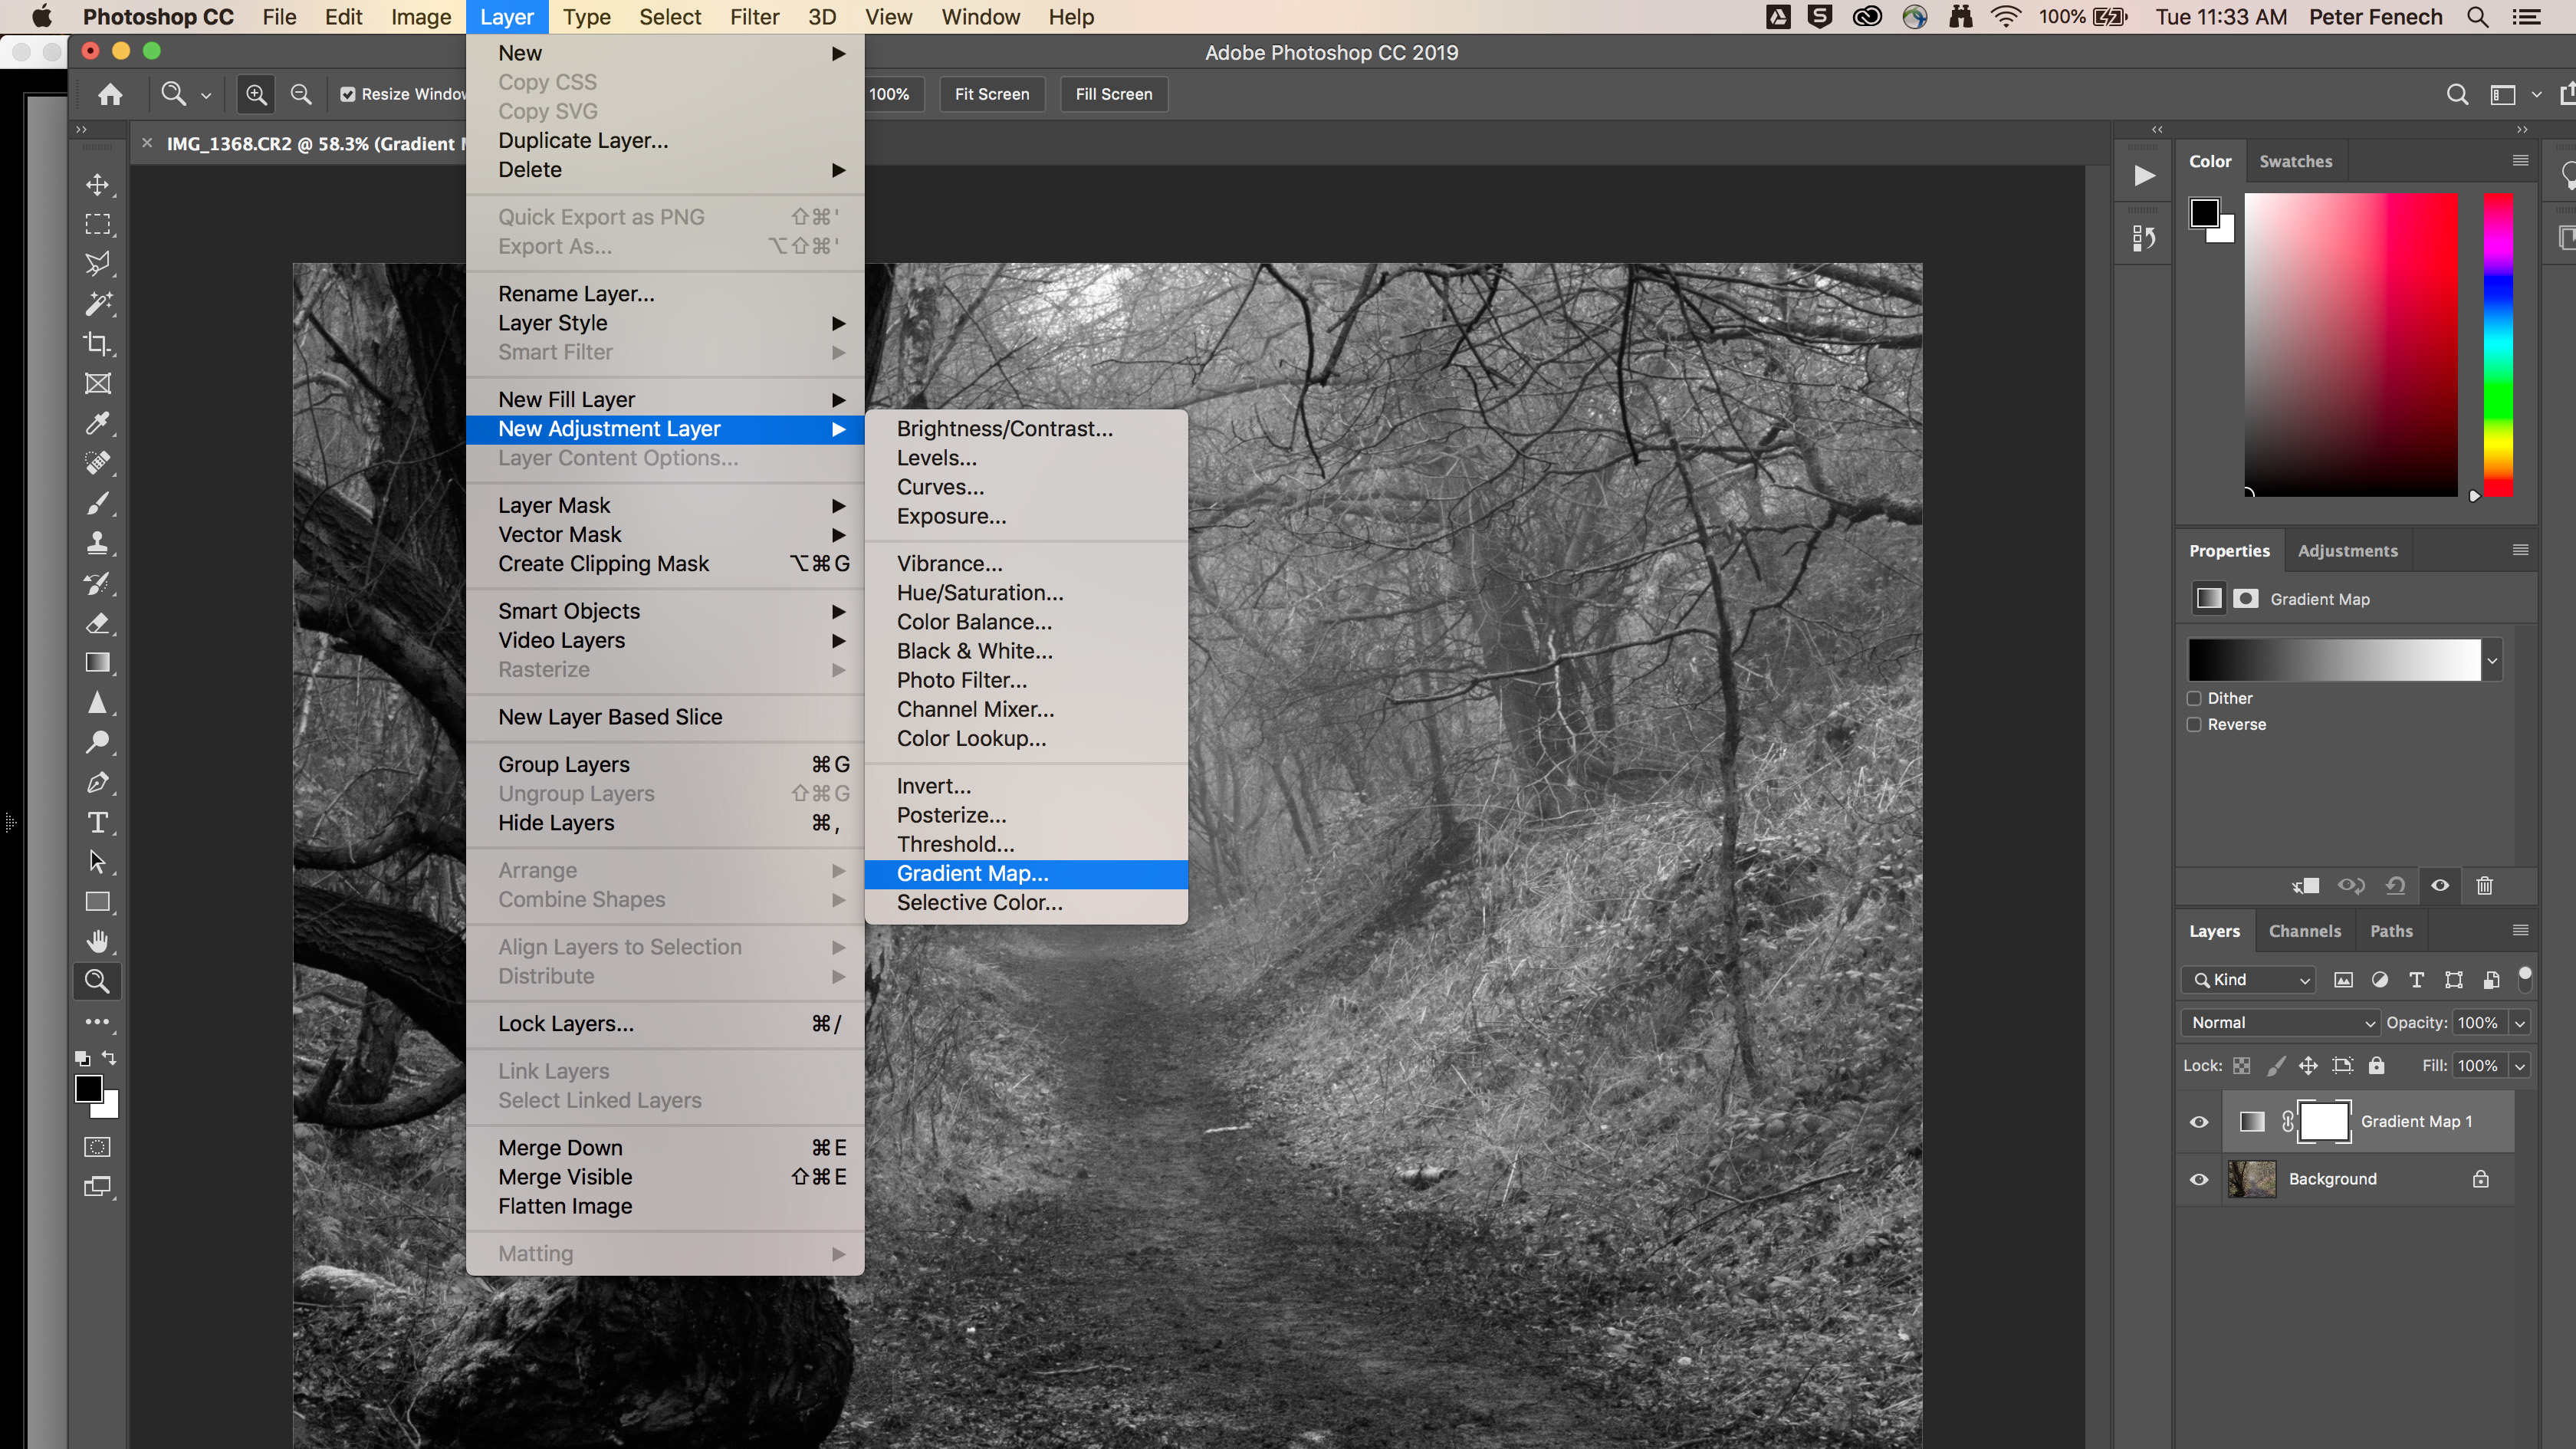
In Lightroom simply click on the Black and White Tab in the Treatment panel, which will give a basic mono conversion. In Photoshop consider setting the standard black/white Foreground and Background colors (D) then adding a Gradient Map Adjustment Layer for good default contrast.
Set Blacks and Whites
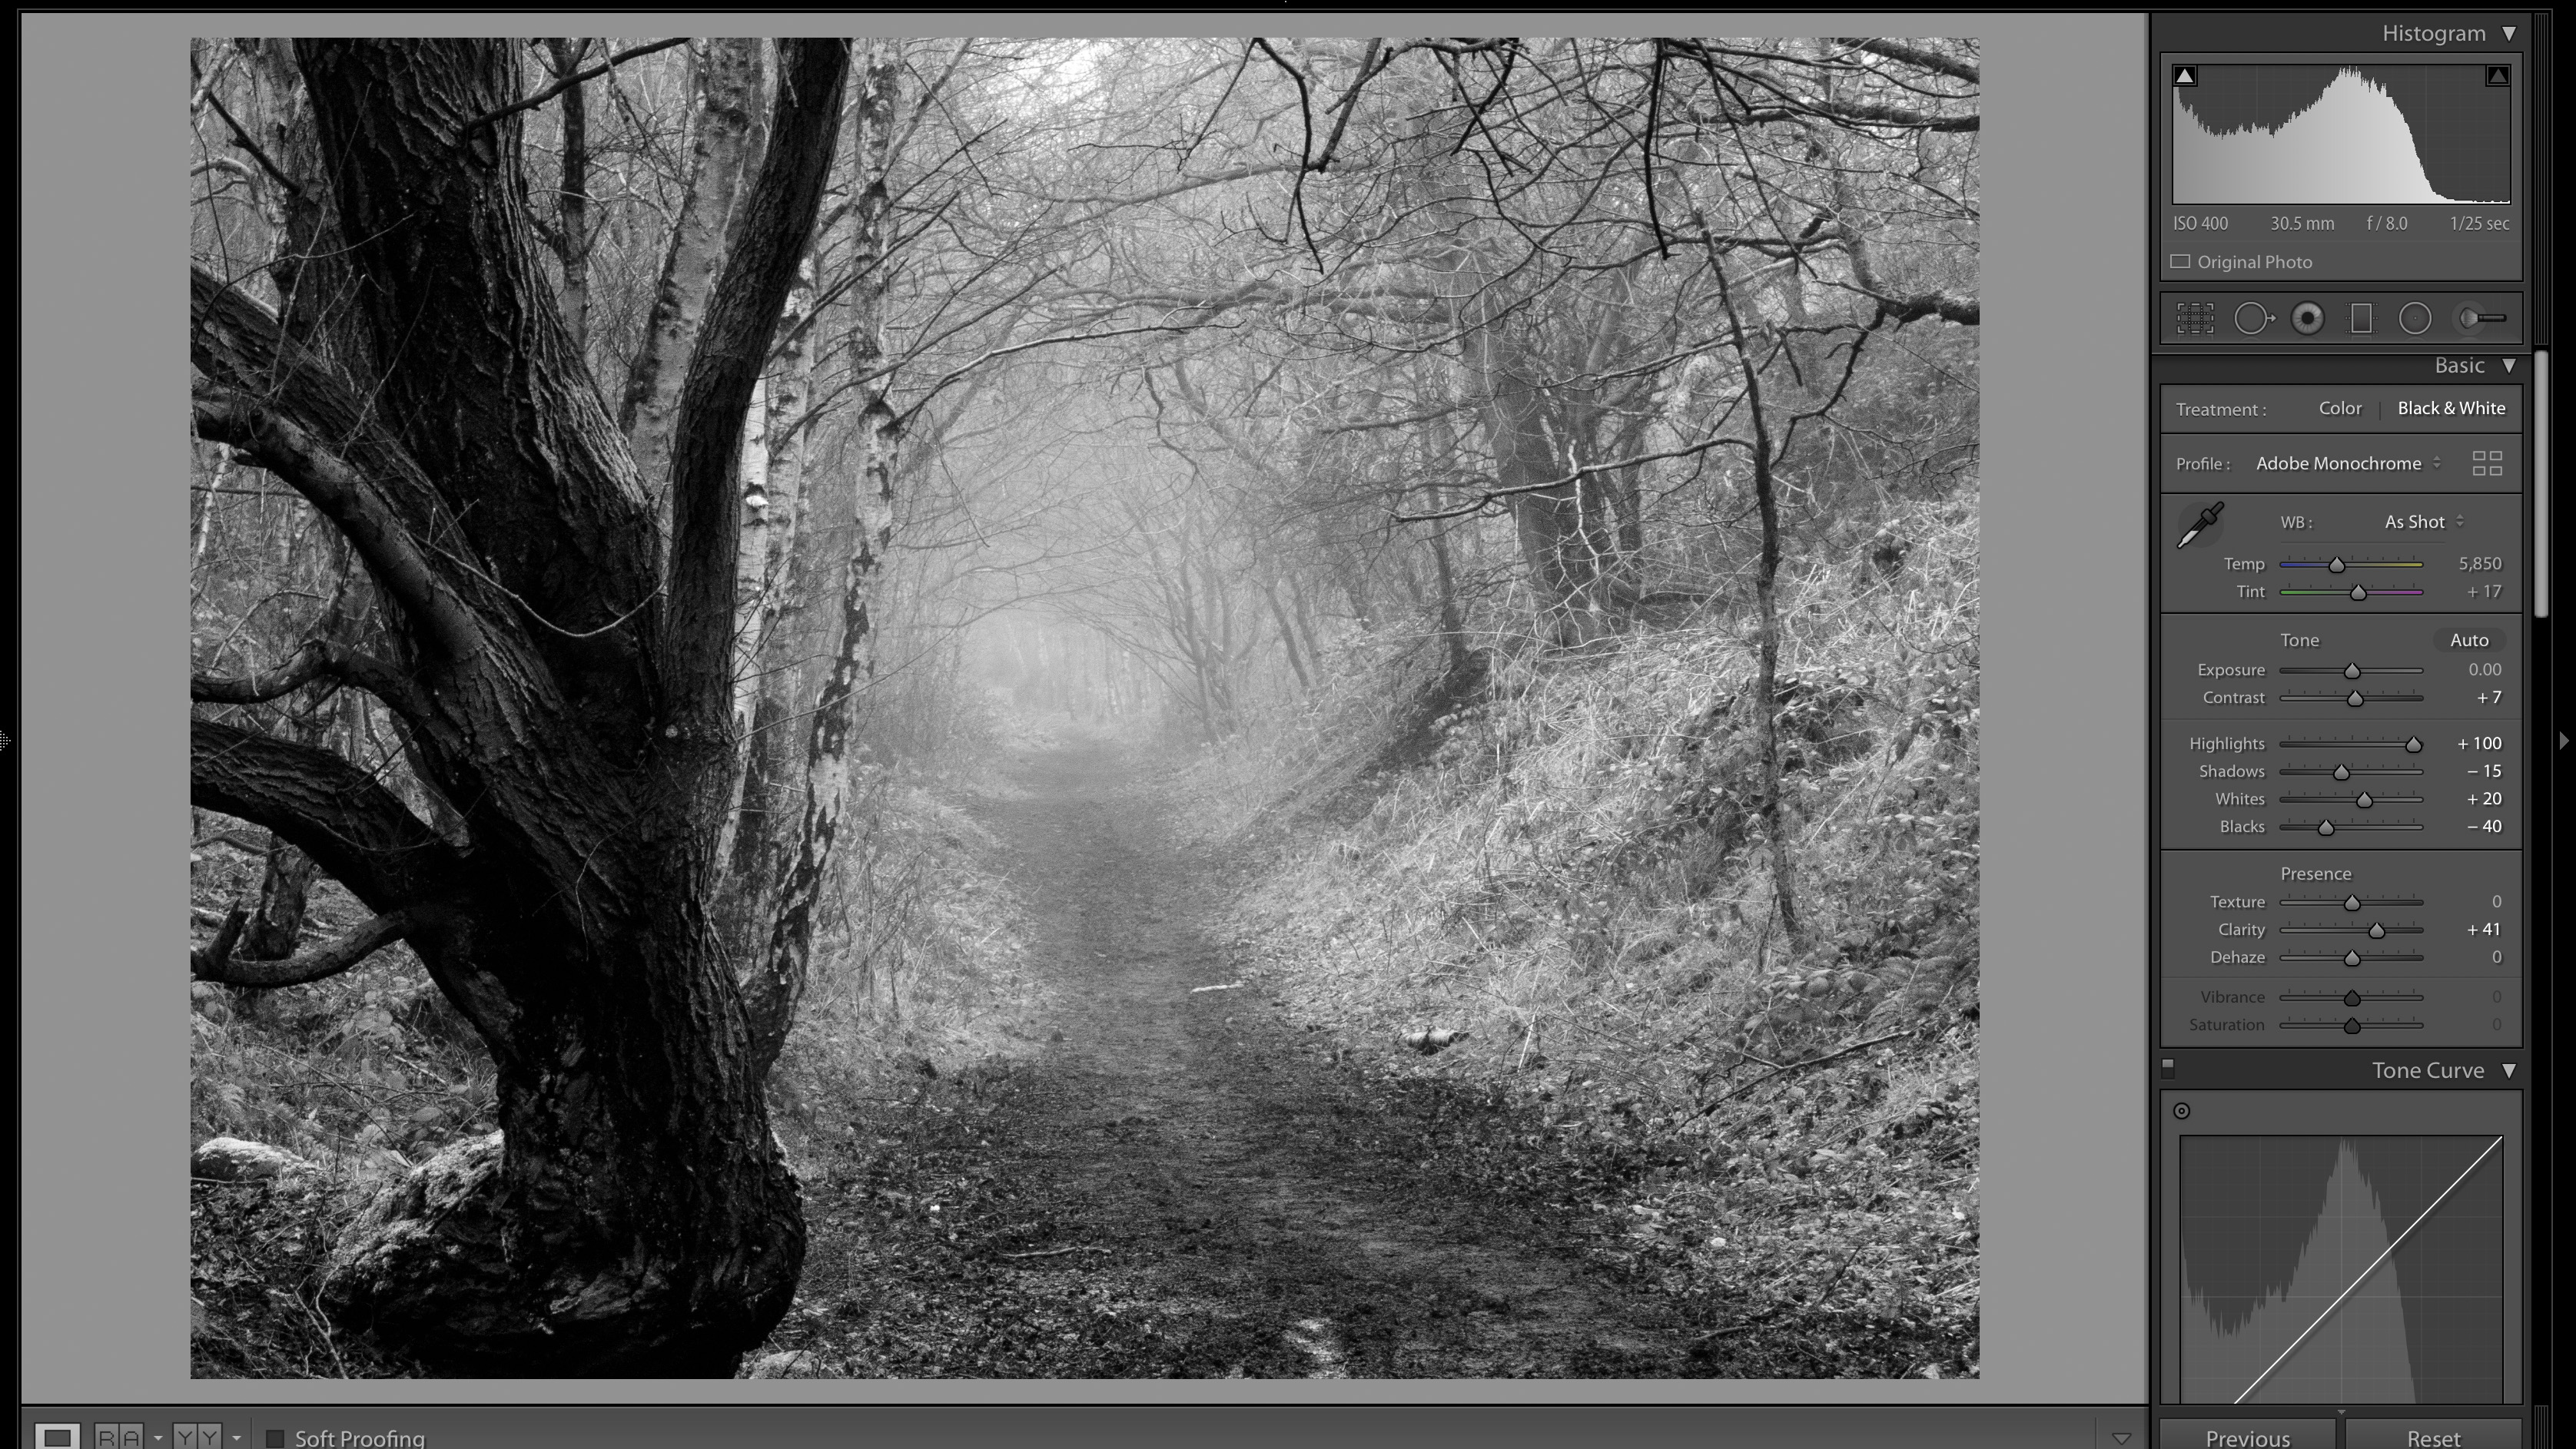
If working in RAW add contrast by setting the Black and White points. Hold down option (PC: alt) while dragging and stop just before clipping occurs. Next increase Contrast and adjust the Highlights and Shadows sliders until satisfied. Here we want to keep all tones in range.
Adjust HSL
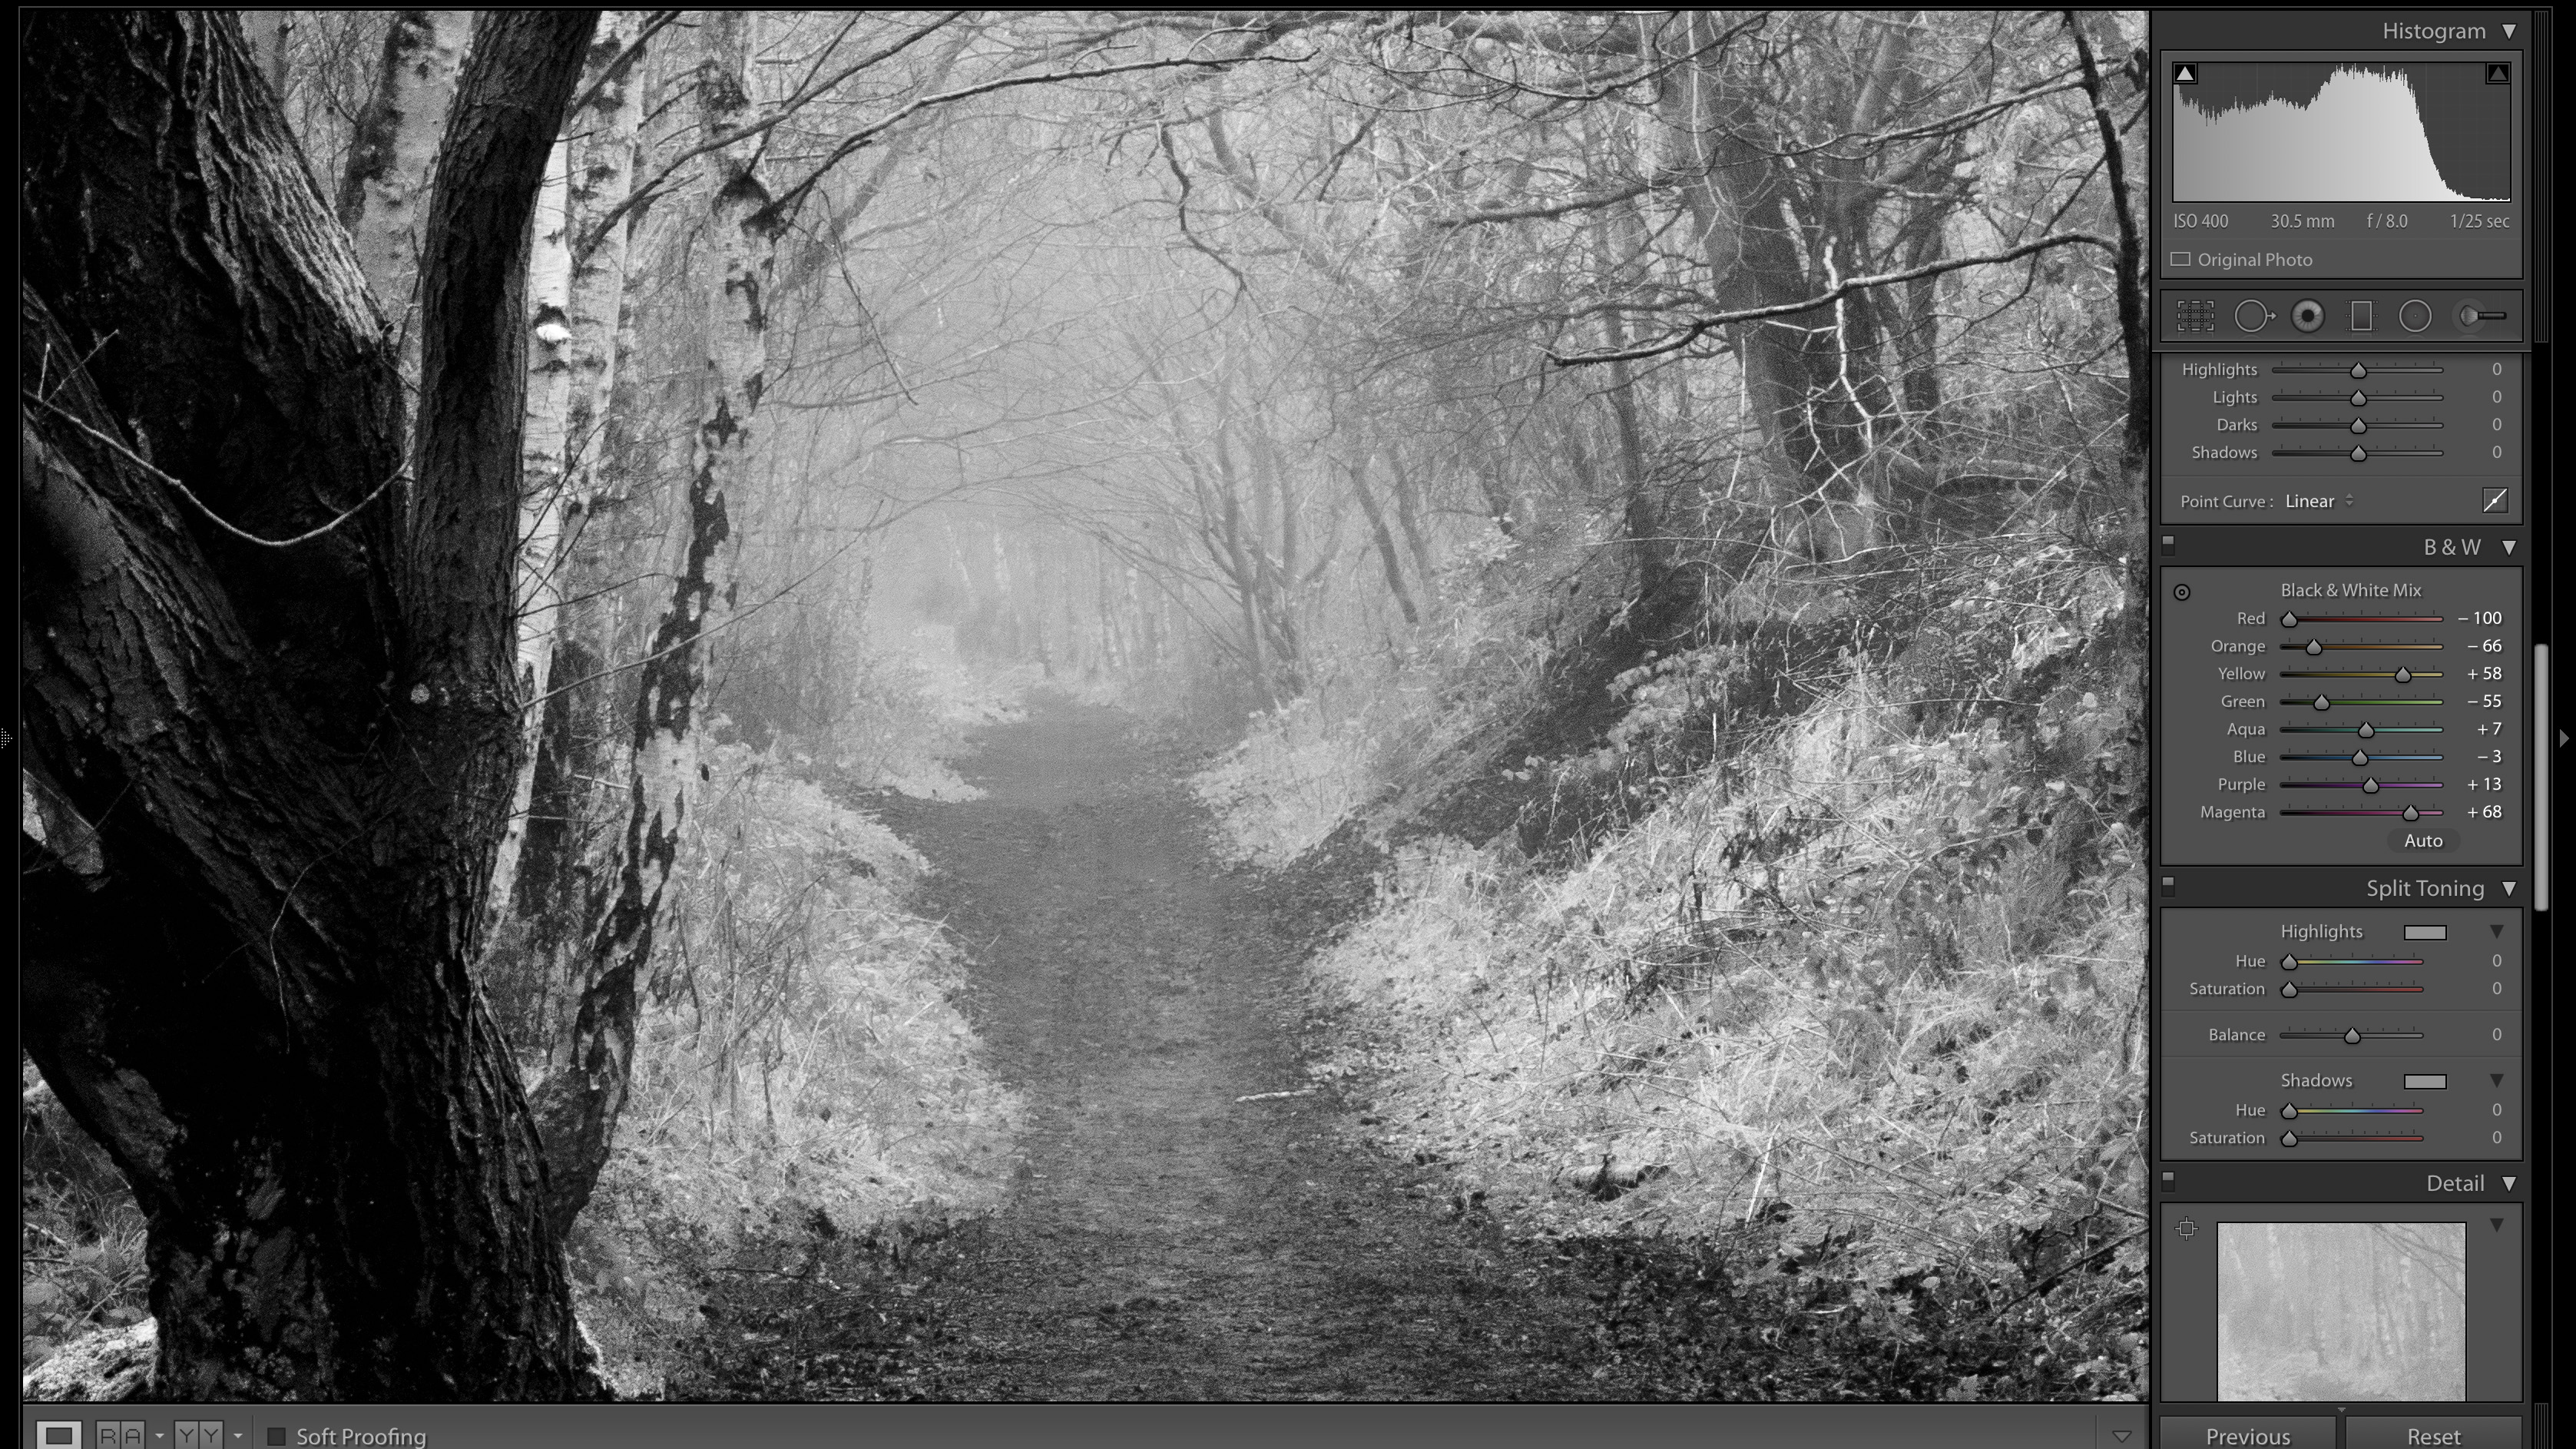
Manage the relative balance of each color by using the sliders in the B&W Panel in Lightroom (named HSL/Color when Color Treatment is selected). Move each slider to brighten or darken colors - here lowering Red darkened the path and increasing Yellow brightened the foliage.
Dodge and burn
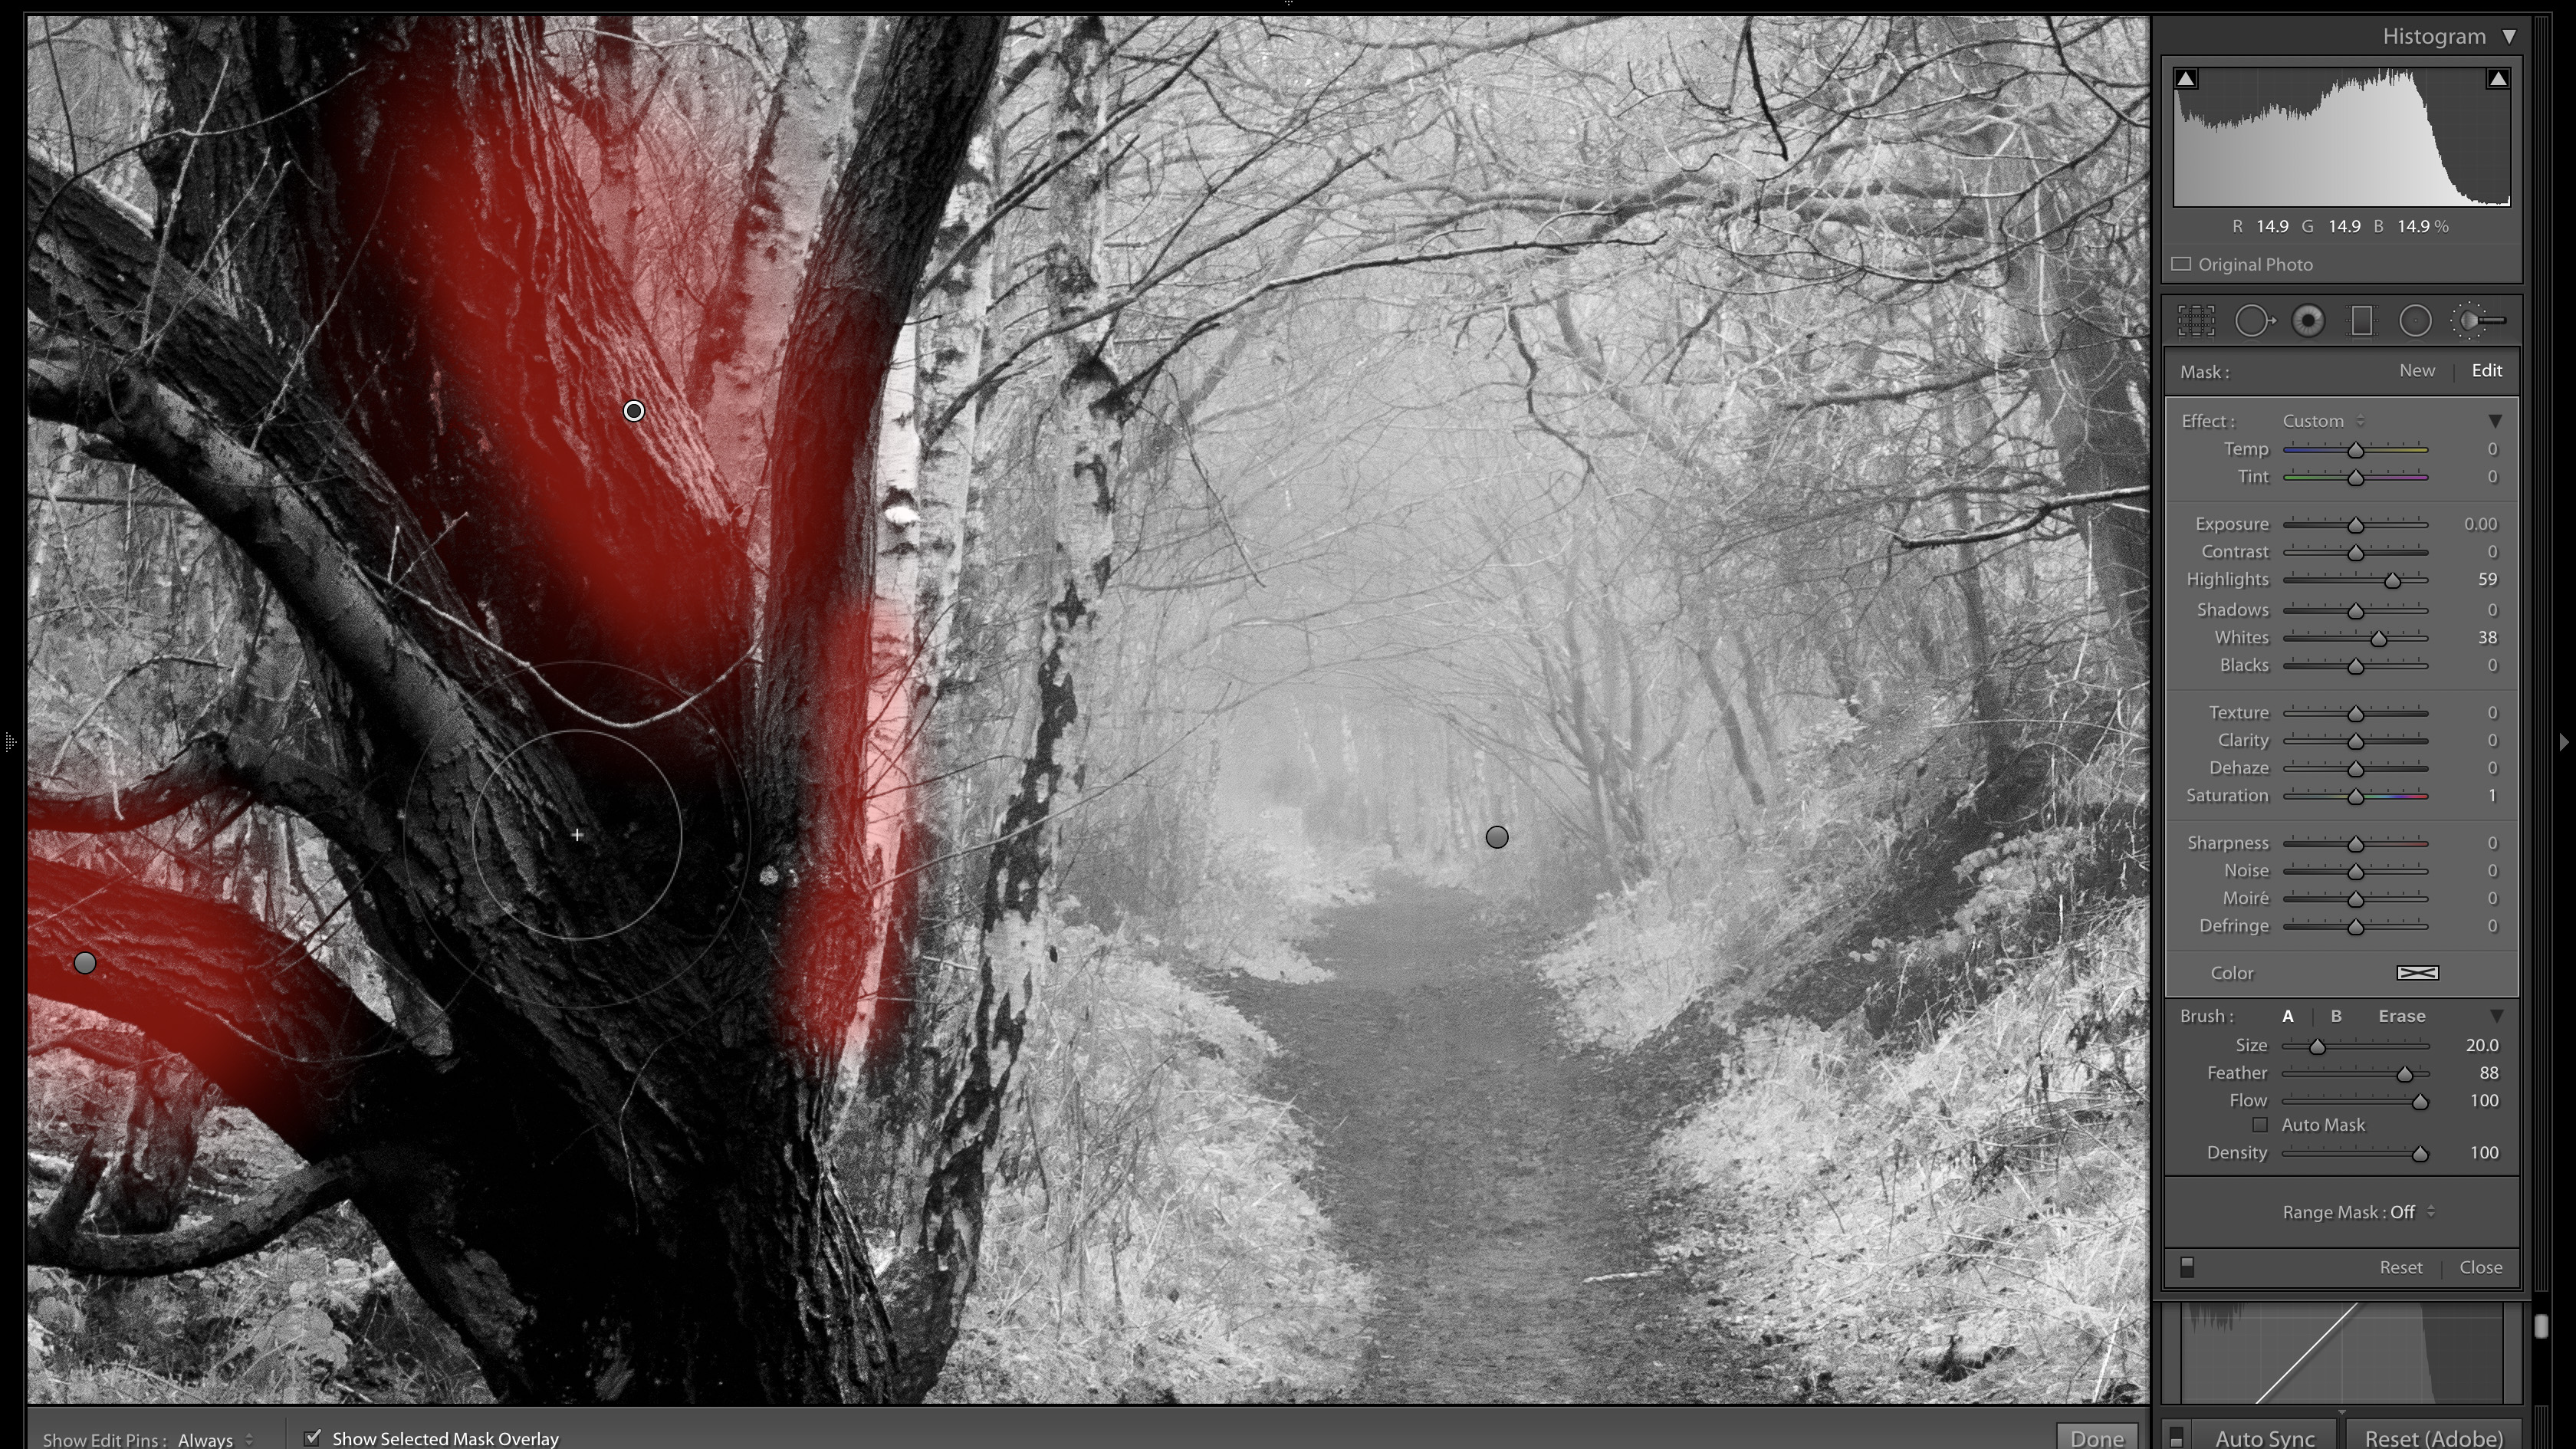
Use either the dedicated Dodge and Burn tools in Photoshop or manipulate the highlights and shadows using the Adjustment Brush in Lightroom (K). Subtly brighten highlight areas and darken the shadows to introduce local contrast and better outline the form of subjects.
Customize color theme
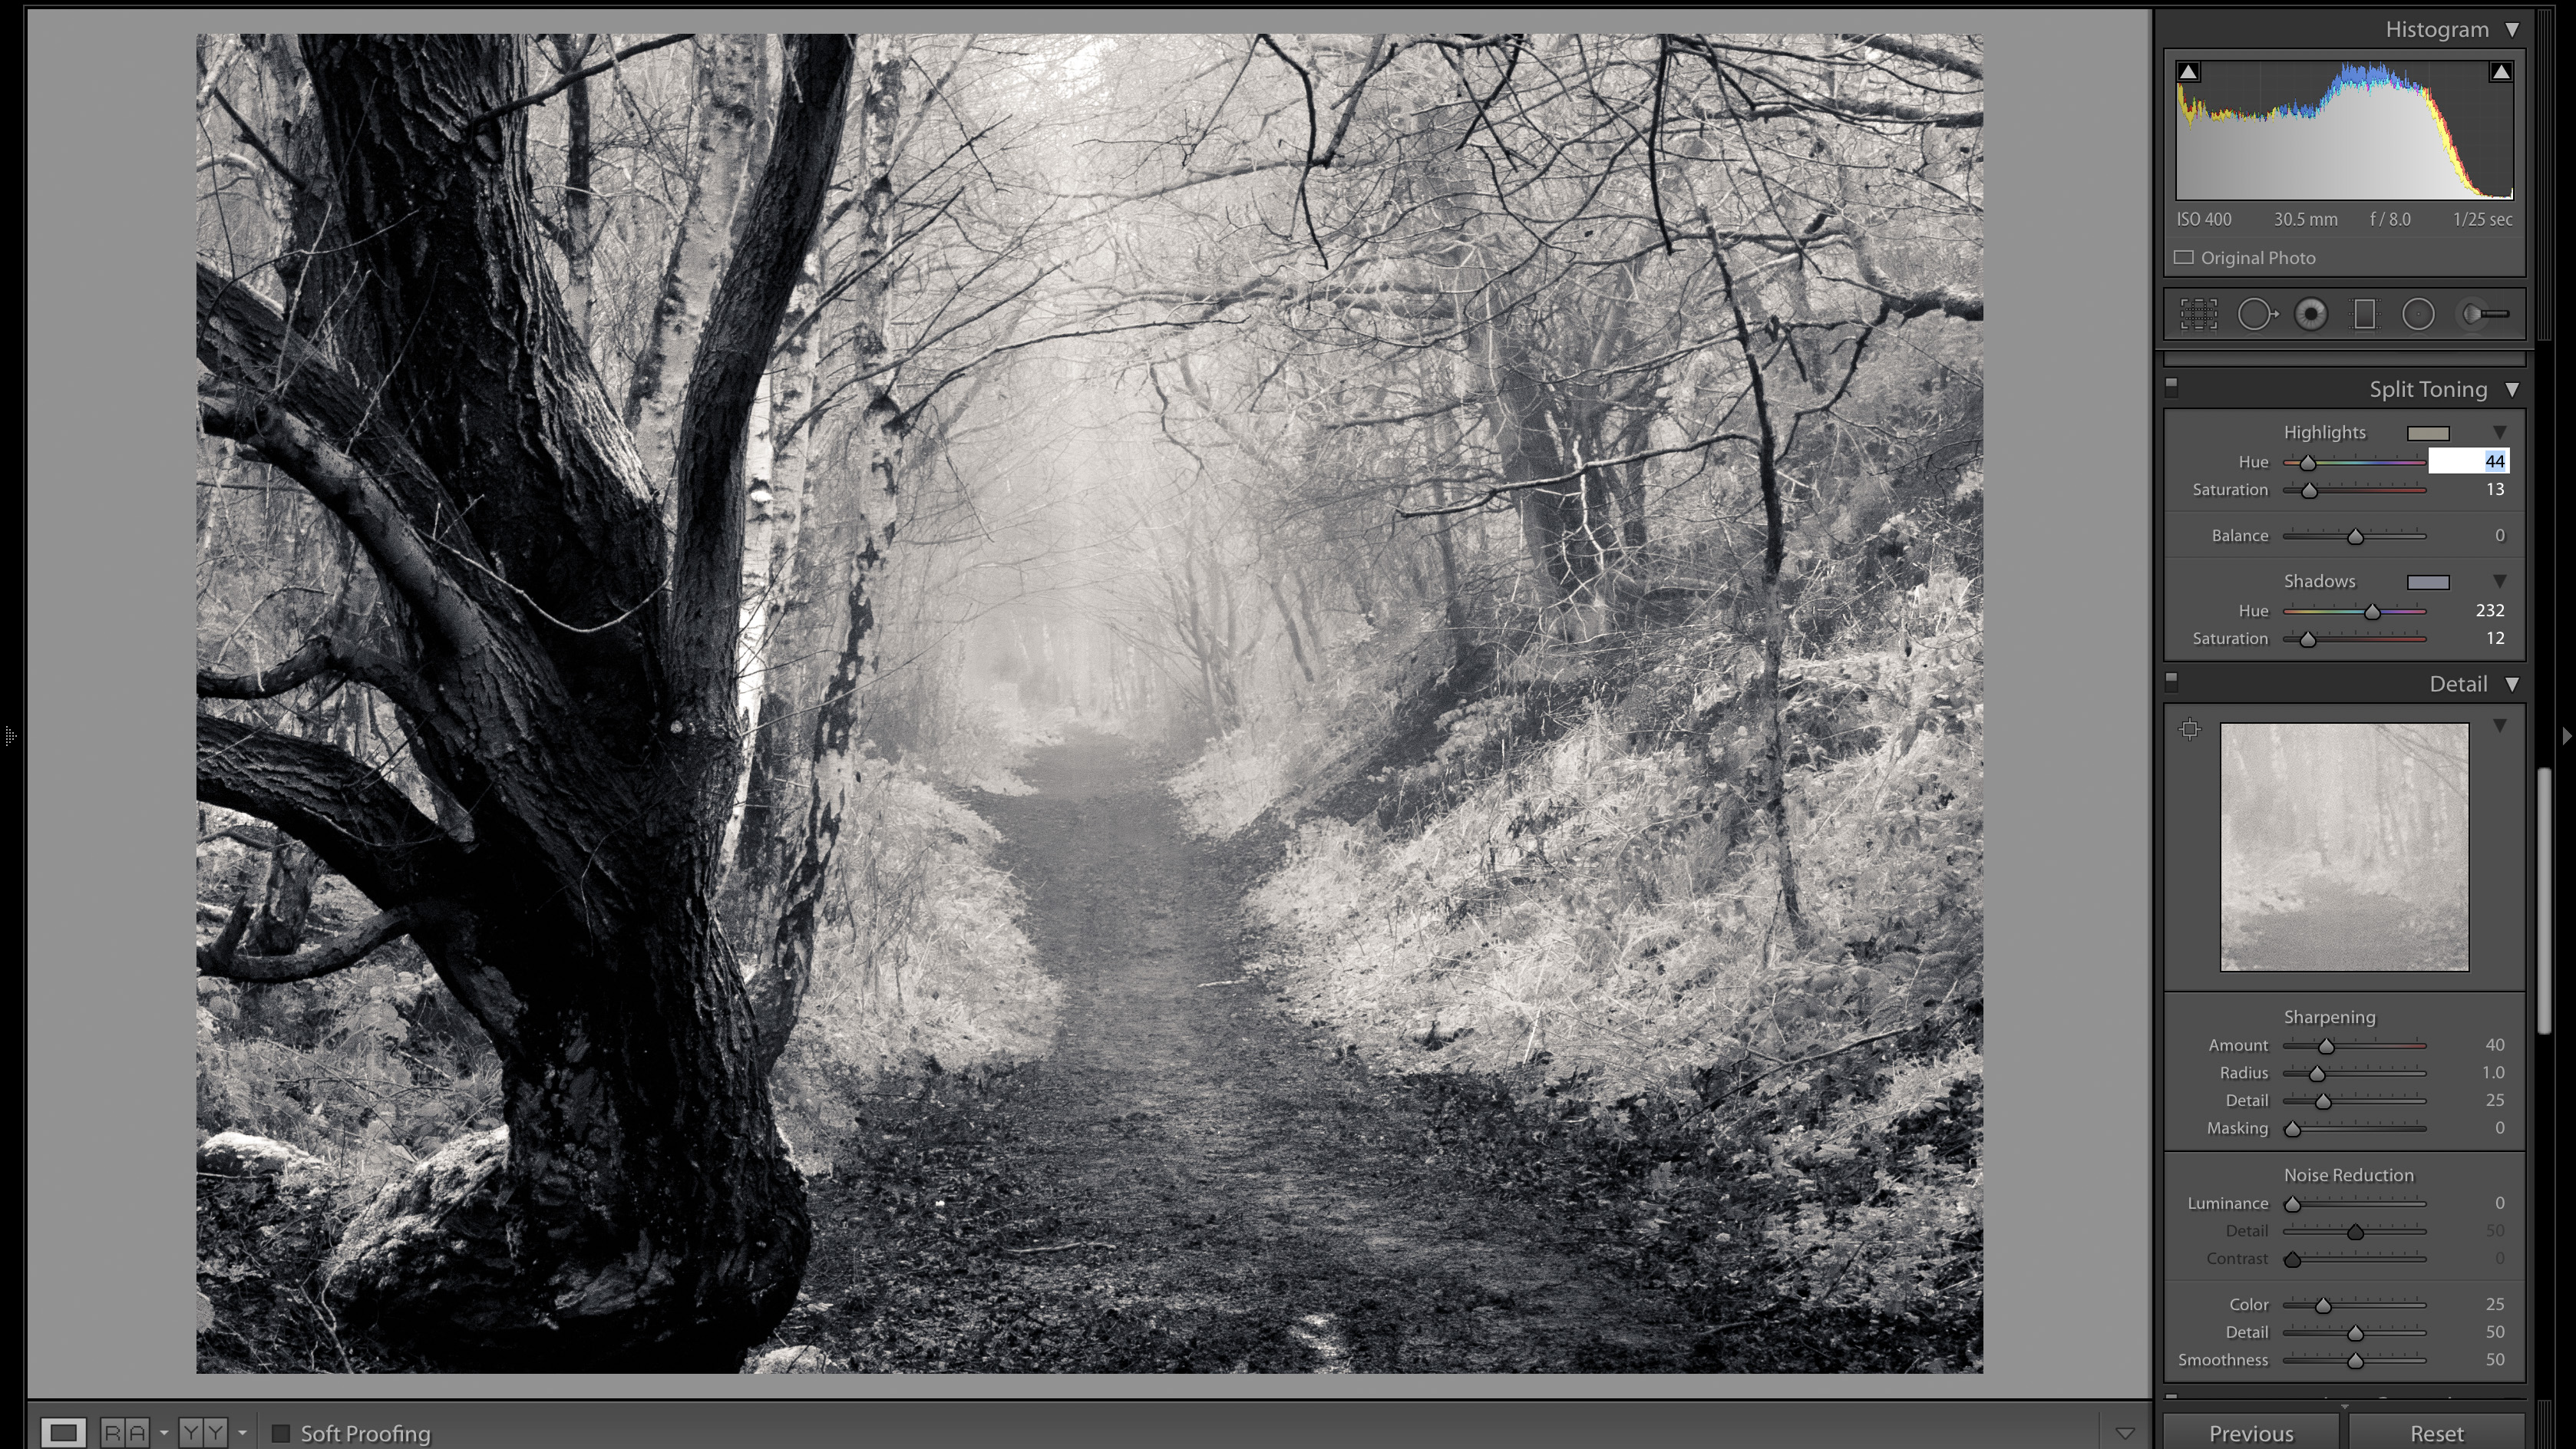
Try working with colour toning to add bias to the shadows and Highlights for a stylised look. Here the Split Toning control was used to slightly warm the highlight areas and add a cool tone to the shadows. This gives a richness to the tonality of the scene.
Add texture
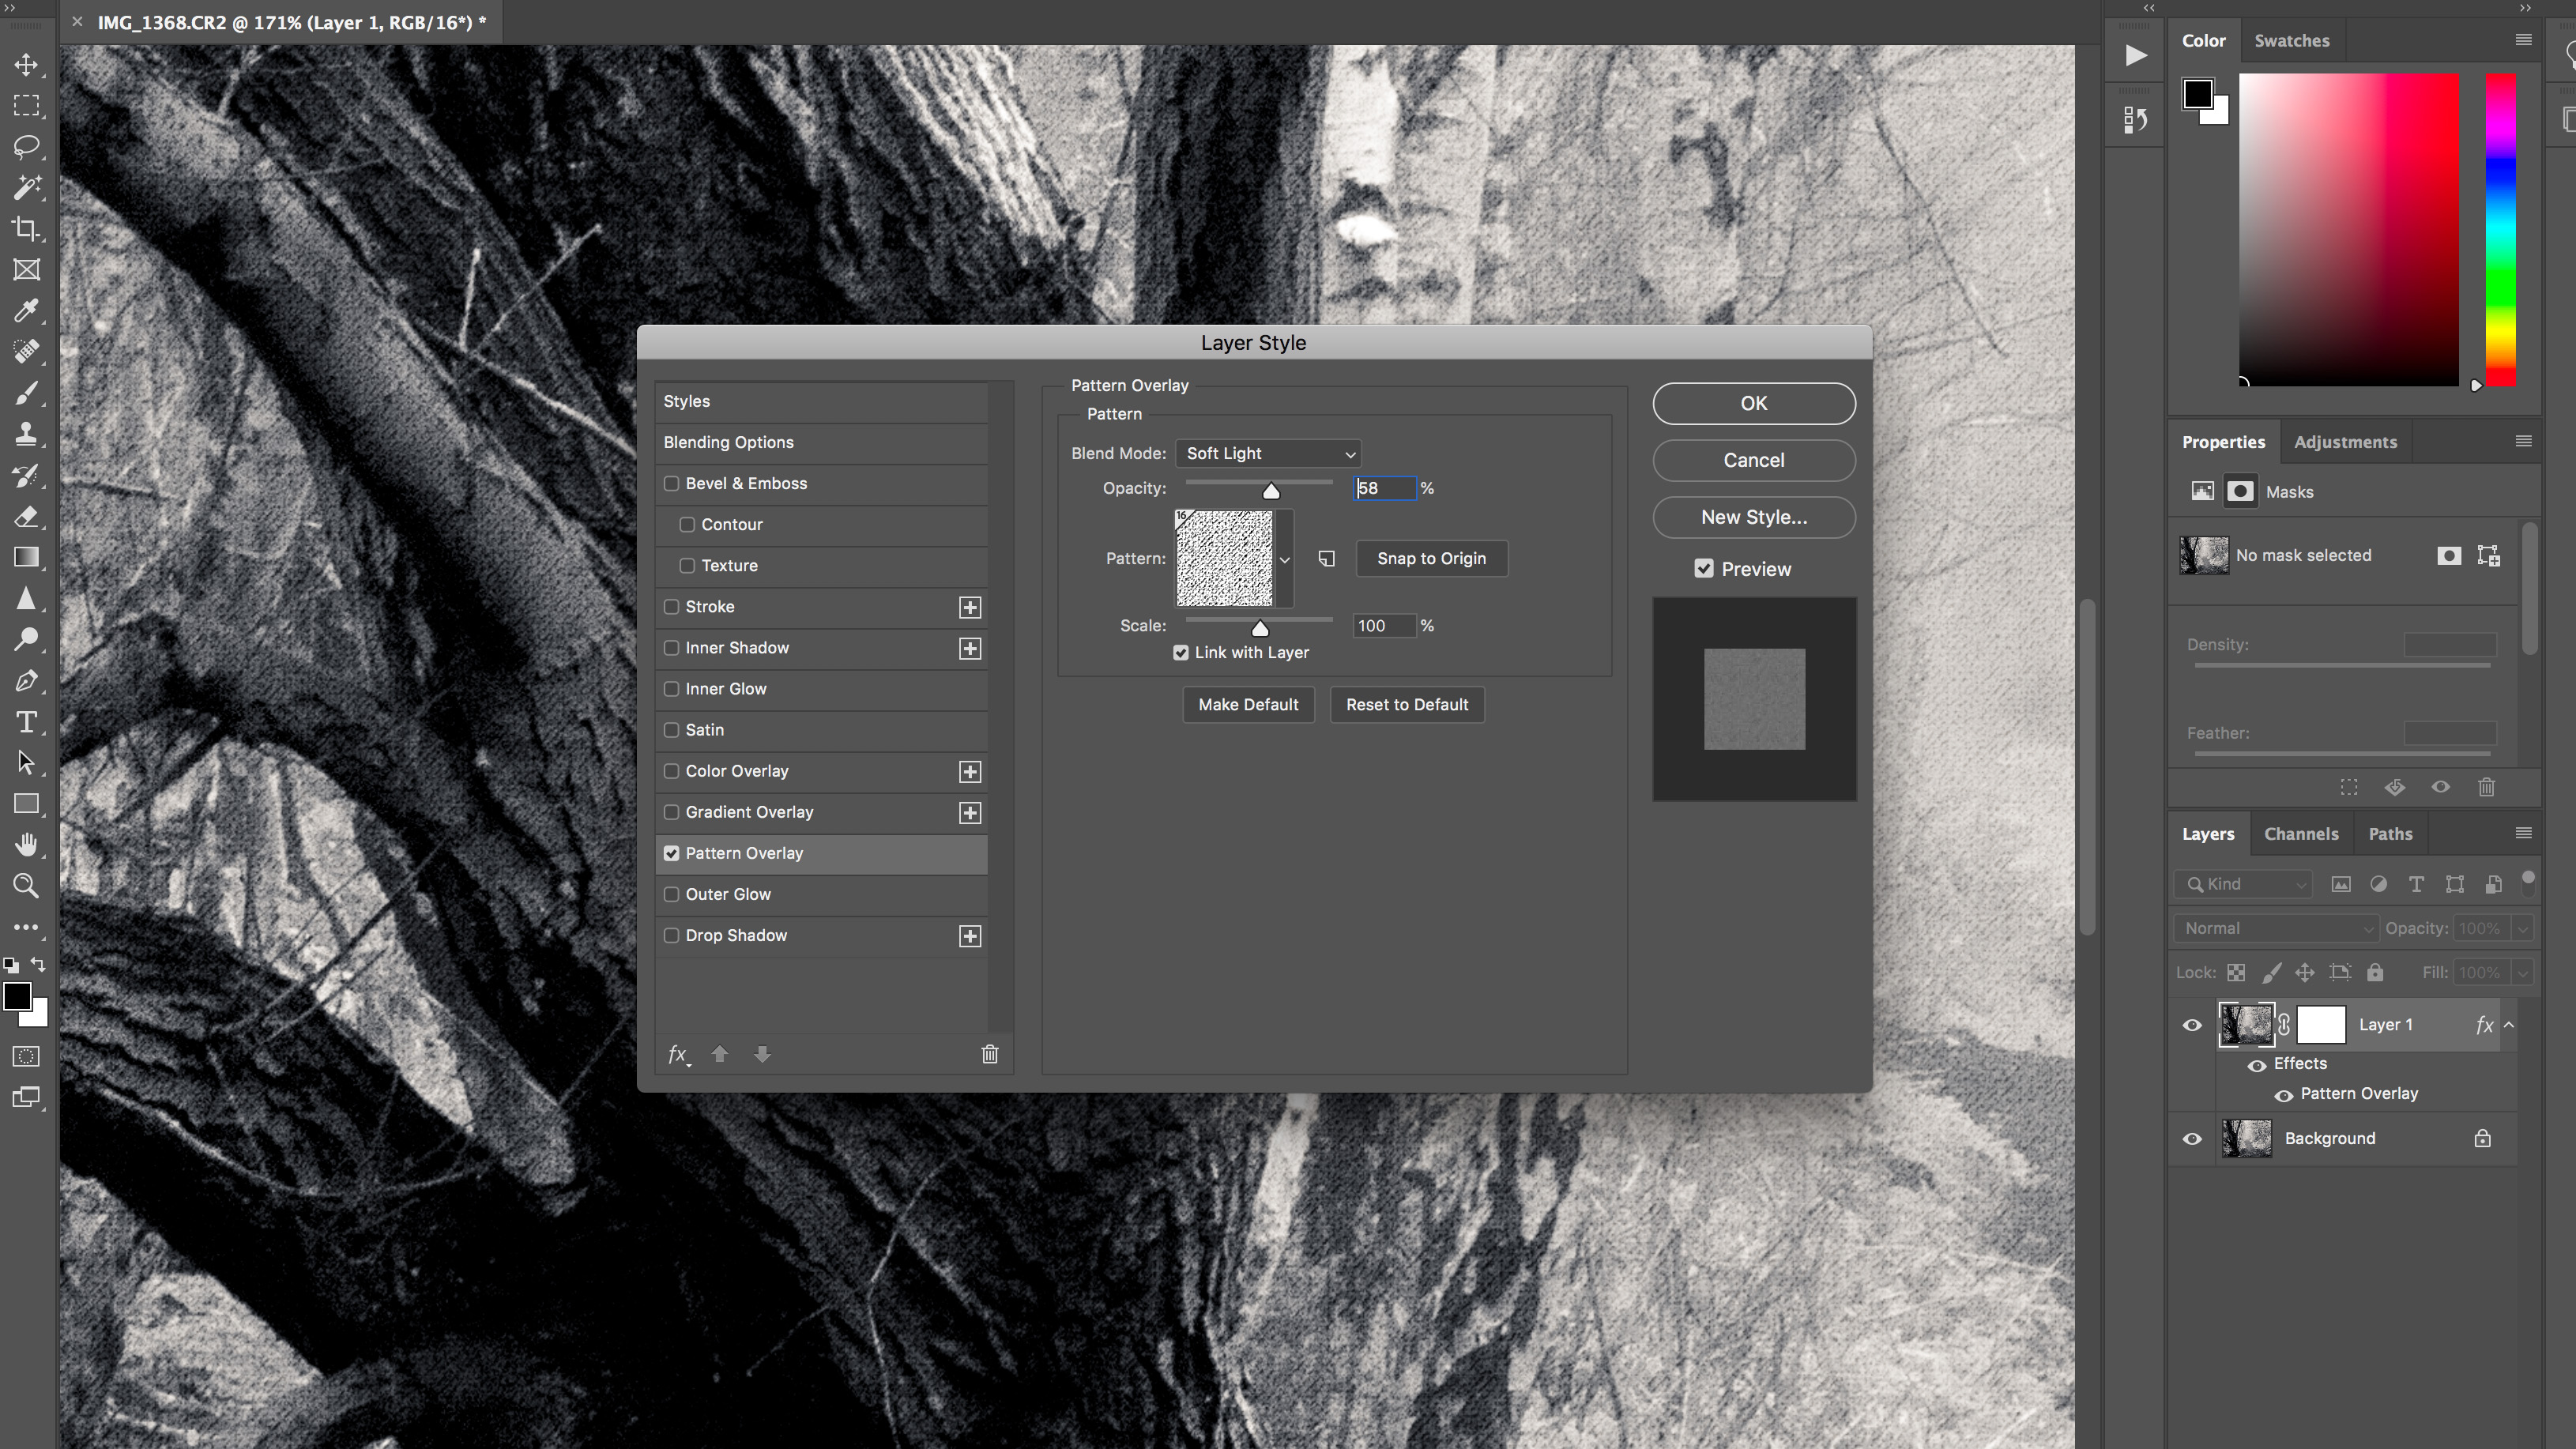
If your image is destined for print it will pick up some of the texture of the paper, but if the file will be used for screen viewing try adding some fine grain noise or a Pattern Overlay. This will give the landscape a classic filmic quality.
Read more
Best laptops for photo editing
The best photo editing software: image editors for novices through to pros
The best free photo editor in 2020: free software that still does a great job
Get the Digital Camera World Newsletter
The best camera deals, reviews, product advice, and unmissable photography news, direct to your inbox!
Digital Photographer is the ultimate monthly photography magazine for enthusiasts and pros in today’s digital marketplace.
Every issue readers are treated to interviews with leading expert photographers, cutting-edge imagery, practical shooting advice and the very latest high-end digital news and equipment reviews. The team includes seasoned journalists and passionate photographers such as the Editor Peter Fenech, who are well positioned to bring you authoritative reviews and tutorials on cameras, lenses, lighting, gimbals and more.
Whether you’re a part-time amateur or a full-time pro, Digital Photographer aims to challenge, motivate and inspire you to take your best shot and get the most out of your kit, whether you’re a hobbyist or a seasoned shooter.
