Create an immaculate conception with Affinity Photo
Recreate classic conceptual album art while demonstrating key compositing skills in Affinity Photo

The best camera deals, reviews, product advice, and unmissable photography news, direct to your inbox!
You are now subscribed
Your newsletter sign-up was successful
Start here
• Affinity Photo tutorials
The tutorials
1. Affinity Photo vs Photoshop
2. RAW editing with Affinity Photo
3. Focus merge with Affinity Photo
4. Replace a sky in Affinity Photo
5. Moody mono in Affinity Photo
6. Six Affinity Photo landscape tips
7. Color correction in Affinity Photo
8. Live Filters in Affinity Photo
9. Create a classic wet plate look
10. Remove objects in Affinity Photo
11. Paint an abstract portrait
12. Enhance skintones in Affinity Photo
13. Create HDR in Affinity Photo
14. Replace a sky in Affinity Photo
15. Affinity Photo double exposures
16. Affinity Photo Denoise tool
17. Affinity Photo retouching
18. Restore old family portraits
19. Change clothes in Affinity Photo
20. Create super-charged sunsets
21. Fix faces with a flourish
22. Get creative with composites
23. Liquify faces with Affinity Photo
24. Make a tropical composite
25. Let it snow in Affinity Photo
26. Create an immaculate conception
Watch video: Create an immaculate conception
This tutorial is inspired by the surreal, conceptual album covers of artist Storm Thorgerson, who crafted dozens of iconic sleeves for some of the world’s biggest bands. Like Thorgenson’s trademark surreal landscapes, we’ll make an otherworldly scene filled with unexplained objects. Our red orbs here are made using simple compositing tools and tonal tricks in Affinity Photo.
We’ll begin by creating a sphere, which is simply a matter of making a circular shape, then adding a gradient and dodging and burning different parts to make it look 3D. Once done, we’ll duplicate our mysterious sphere around the scene, resizing and repositioning as we go to make our orbs recede into the distance. We’ve used an eerie desert landscape here (download for free from www.pixabay.com, search for image no. 1170031) for our base image, but you can use whatever scene you think might work for what you have in mind.
Article continues belowOnce done, all we have to do is make our strange shapes look as if they belong within the space. Little visual tricks can help us out here – we can mask bits and pieces to look as if the orbs are behind things in the scene like the trees. We can also add shadows of the orb shapes on the ground, making sure they match up with the direction of the shadows in the scene.
Along the way we’ll encounter key Affinity features like the Shape tool, Transform controls and layer masking. These are great features that can be put to use in all kinds of weird and wonderful projects…
Read more:
The best camera deals, reviews, product advice, and unmissable photography news, direct to your inbox!
Step 1: Make a circle
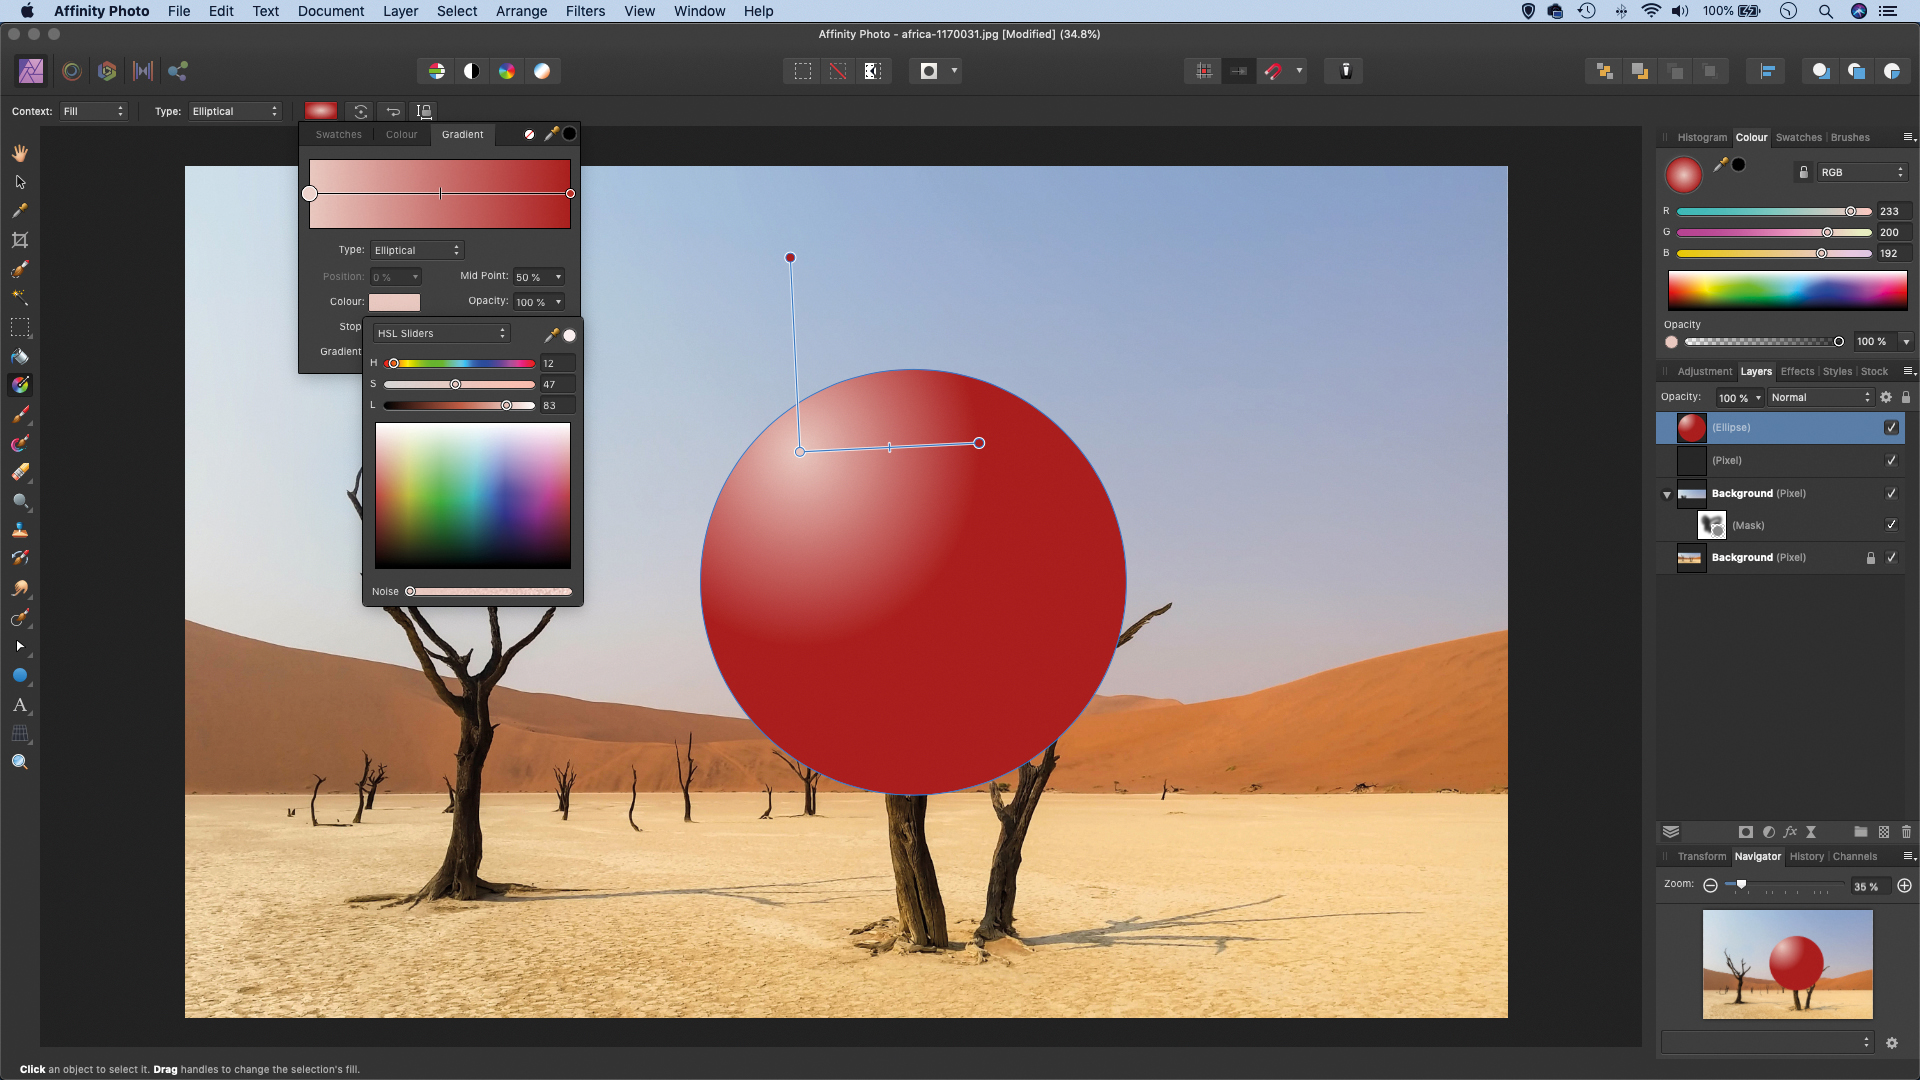
Open your image into Affinity (ours is from www.pixabay.com, search for 1170031). Get the Ellipse tool from the toolbar (with the shape tools), then hold Shift and drag out a circle. Next, grab the Gradient tool. Set Type: Elliptical then click the colour box to choose two colours for the gradient.
Step 2: Add a grad
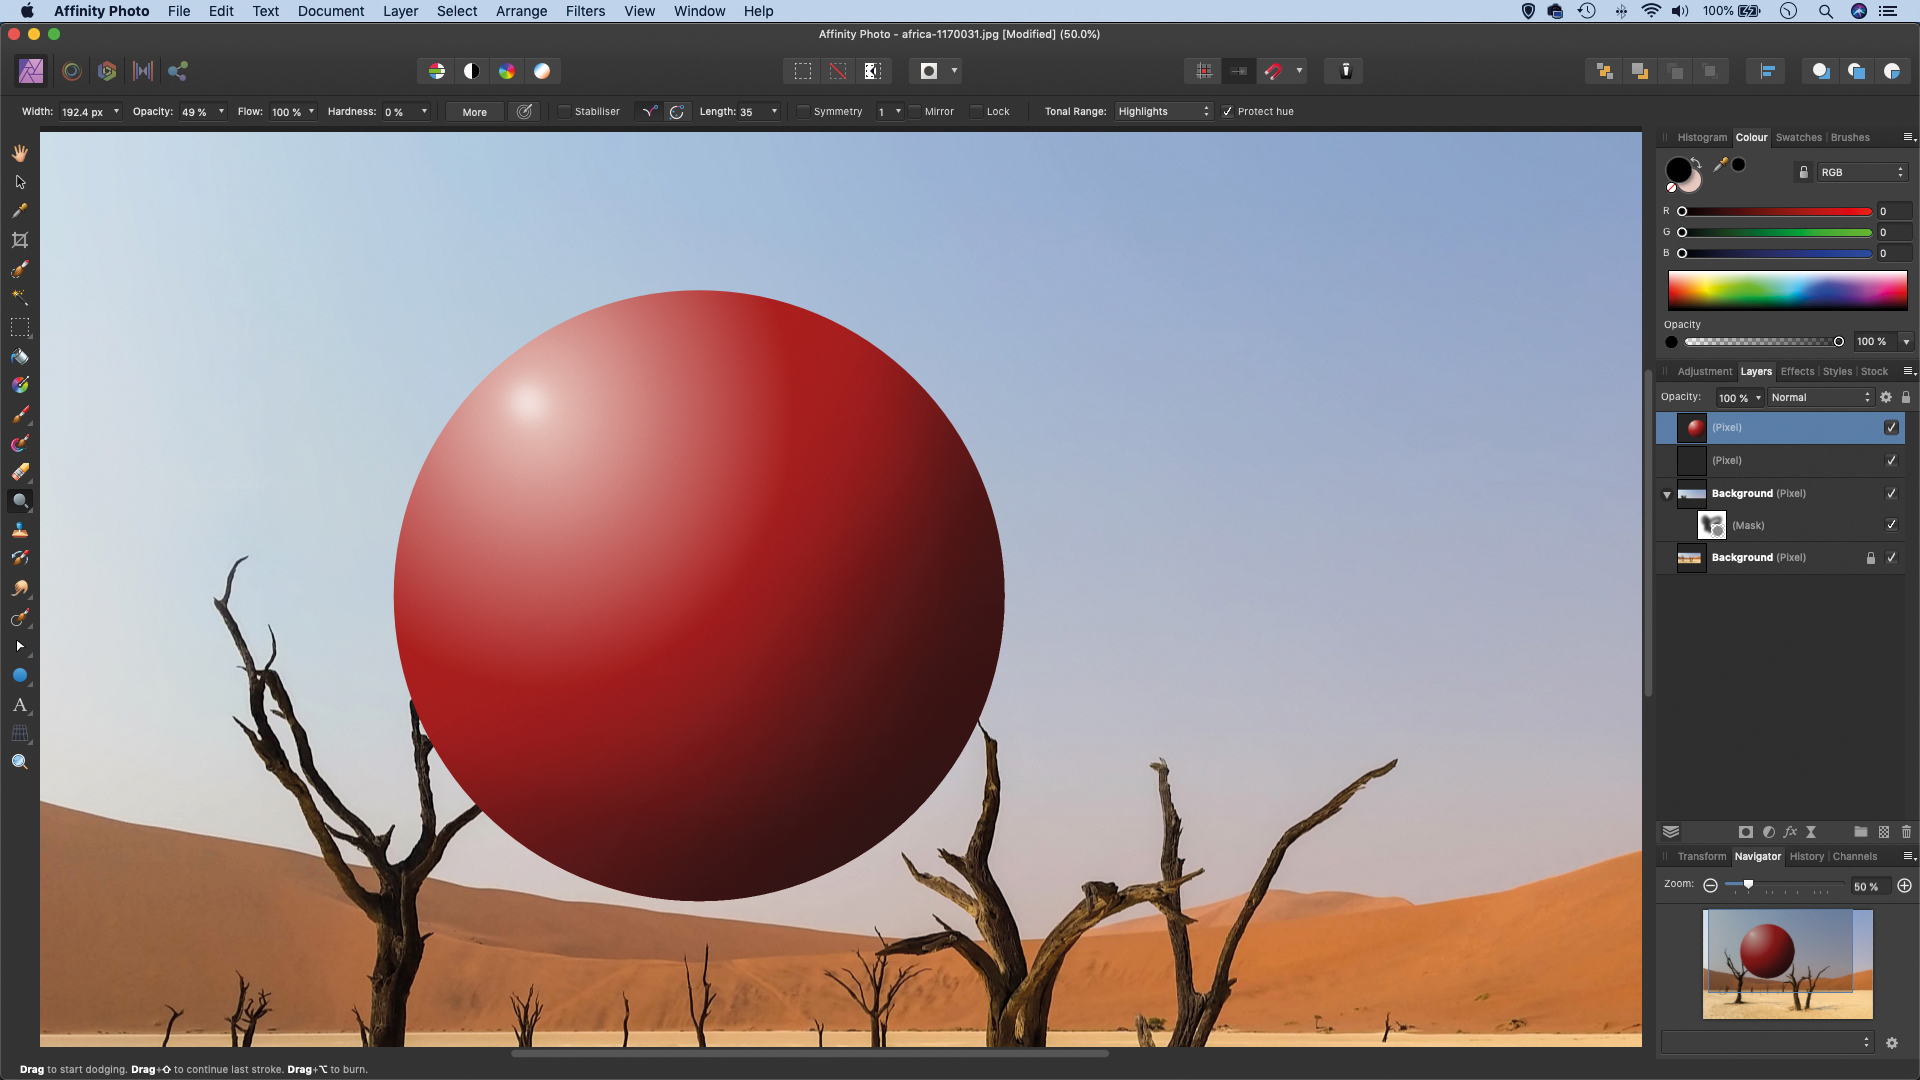
Drag the gradient controls to position it to one side of the sphere (matching the angle of the lighting). Next, grab the Burn tool. Set it to Tonal Range: Midtones and paint the bottom and side to add a shadow to one side of the sphere. Switch to the Dodge tool and paint a bright specular highlight too.
Step 3: Drag quick copies
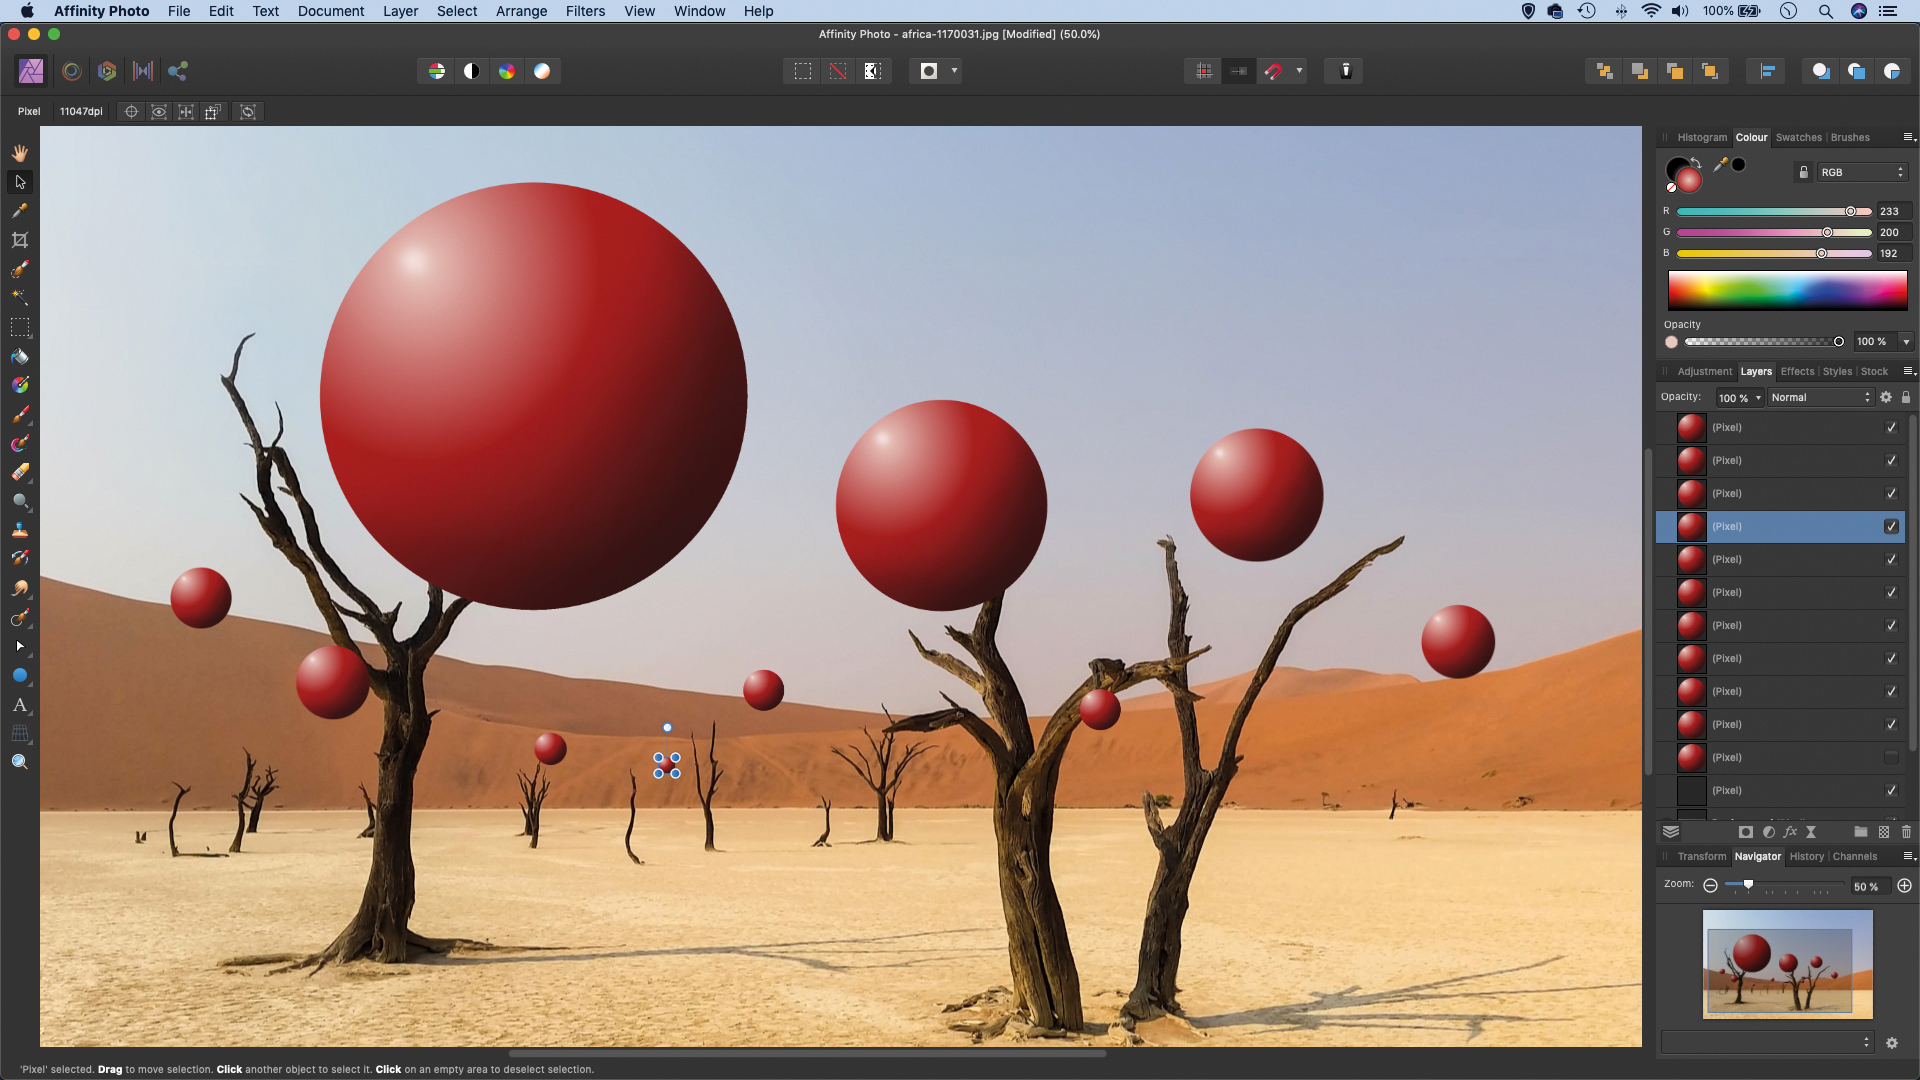
Grab the Move tool, hold Alt and drag the sphere to make a copy. Position it elsewhere and use the bounding box controls to resize it. Make more copies. Once done, highlight the top sphere layer, hold Shift and click the lowest one to select them all, then hit Cmd/Ctrl+G to group them together.
Step 4: Create the shadows
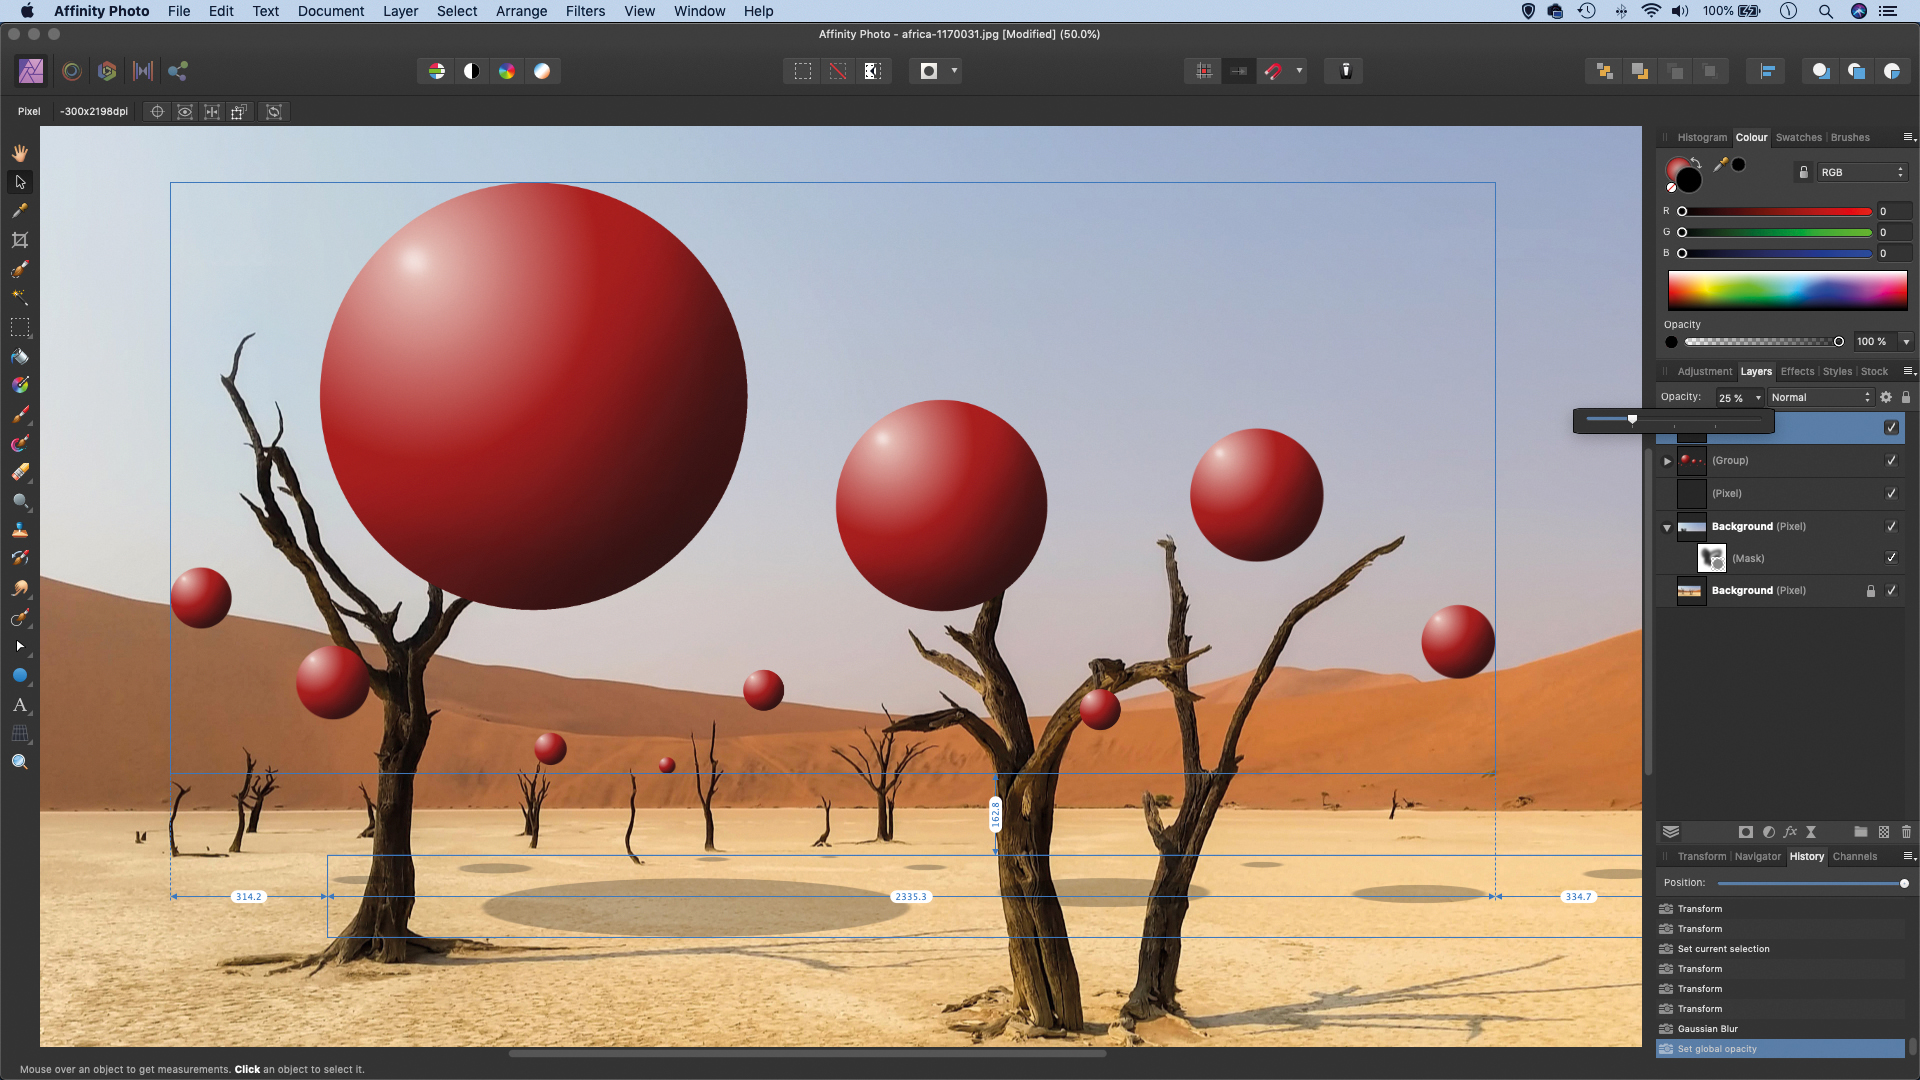
Hold Cmd/Ctrl and click the thumbnail of the sphere group to load it as a selection. Click the New Pixel Layer icon to make a new layer then go to Edit>Fill and fill with black. Grab the Move tool and drag the top middle point of the bounding box down to flip the layer, then position the shadows over the ground, giving the spheres some presence.
Step 5: Blur the layer
Go to the Layers panel and lower the opacity of the shadow layer to about 25%, or choose a value that closely matches the existing shadows in the scene. Next, go to Filter>Blur>Gaussian Blur and apply a small amount of blur to the shadow layer to soften the edges slightly.
Step 6: Mask the branches
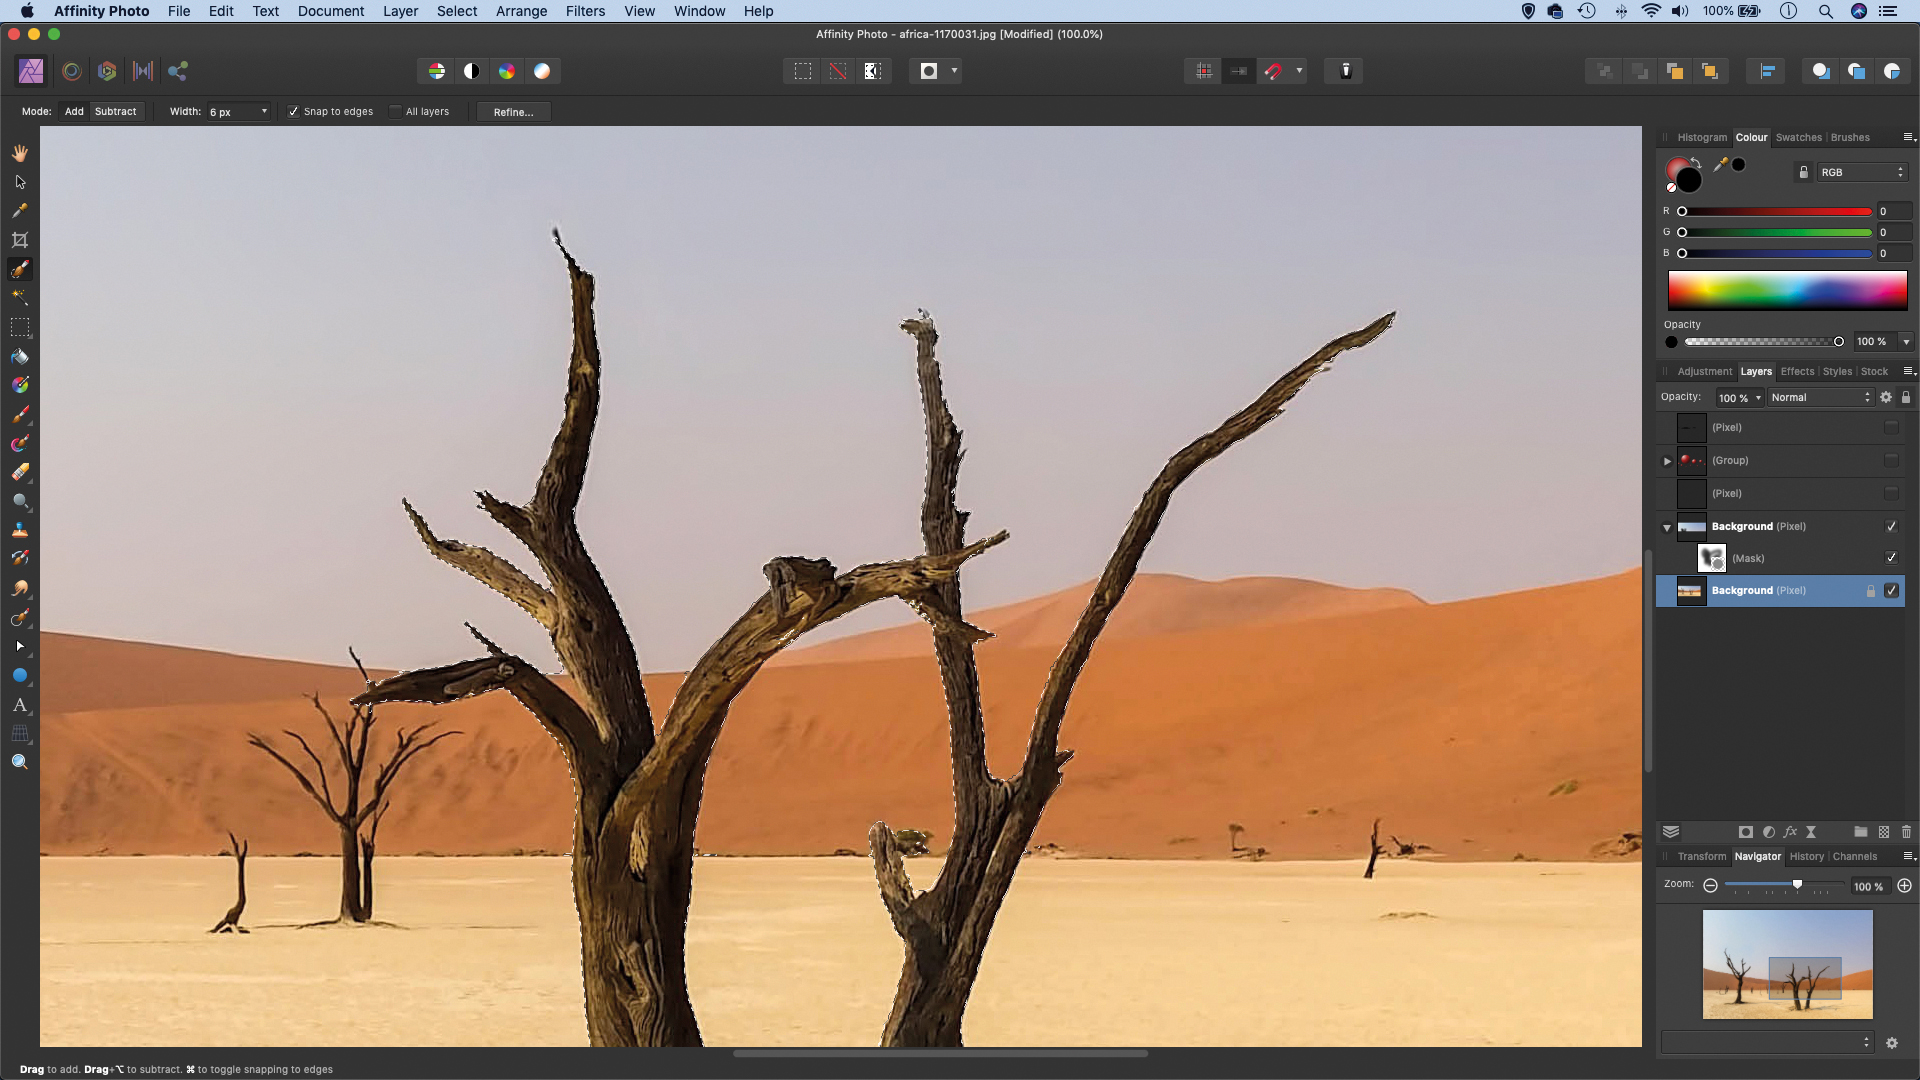
Hide all but the bottom layer, then grab the Selection Brush and check ‘Snap to Edges’ in the options. Paint over the branches, or anything you want in front of the orbs. Then copy to a new layer with Cmd/Ctrl+J and drag the new layer to the top.
Quick tip
There are a range of different gradient styles to choose from, ranging from the standard linear gradient, to the elliptical choice. You can choose the colours for your gradient in the tool options. As well as choosing a colour for the brightest and darkest points, you can add more colour ‘stops’ into the blend by double-clicking on the gradient line in the colour picker.
About N-Photo magazine
This tutorial originally appeared in N-Photo, the monthly newsstand magazine for Nikon photographers. Why not subscribe to a print edition, and have the magazine delivered direct to your door every month?
Alternatively, we have a number of different digital options available, including:
• Apple app (for iPad or iPhone)
• Zinio app (multi-platform app for desktop or smartphone)
• PocketMags (multi-platform app ideal for Android devices)
• Readly (all-you-can-eat digital magazine subscription service)
If you wanted a printed version of any of our most recent issues we have a selection of back issues to choose from in our online store.
Read more:
• Photography tips and tutorial videos
• The best photo editing tools and accessories
• The best desktop computers for photo editing
• The best photo-editing laptops right now
• The best photo editing software today
N-Photo: The Nikon Magazine is a monthly publication that's entirely dedicated to Nikon users. As a 100% independent magazine, you can be assured of unbiased opinion from a trustworthy team of devoted photography experts including editor Adam Waring and Deputy Editor Mike Harris.
Aimed at all users, from camera newcomers to working pros, every issue is packed with practical, Nikon-specific advice for taking better photos, in-depth reviews of Nikon-compatible gear, and inspiring projects and exciting video lessons for mastering camera, lens and Photoshop techniques.
Written by Nikon users for Nikon users, N-Photo is your one-stop shop for everything to do with cameras, lenses, tripods, bags, tips, tricks and techniques to get the most out of your photography.
