Create mythical beasts in Photoshop and learn essential compositing skills
Create fun animal combos and discover a host of essential Photoshop skills, mad doctor James Paterson explains
Watch video: Create fun animal combinations in Photoshop CC
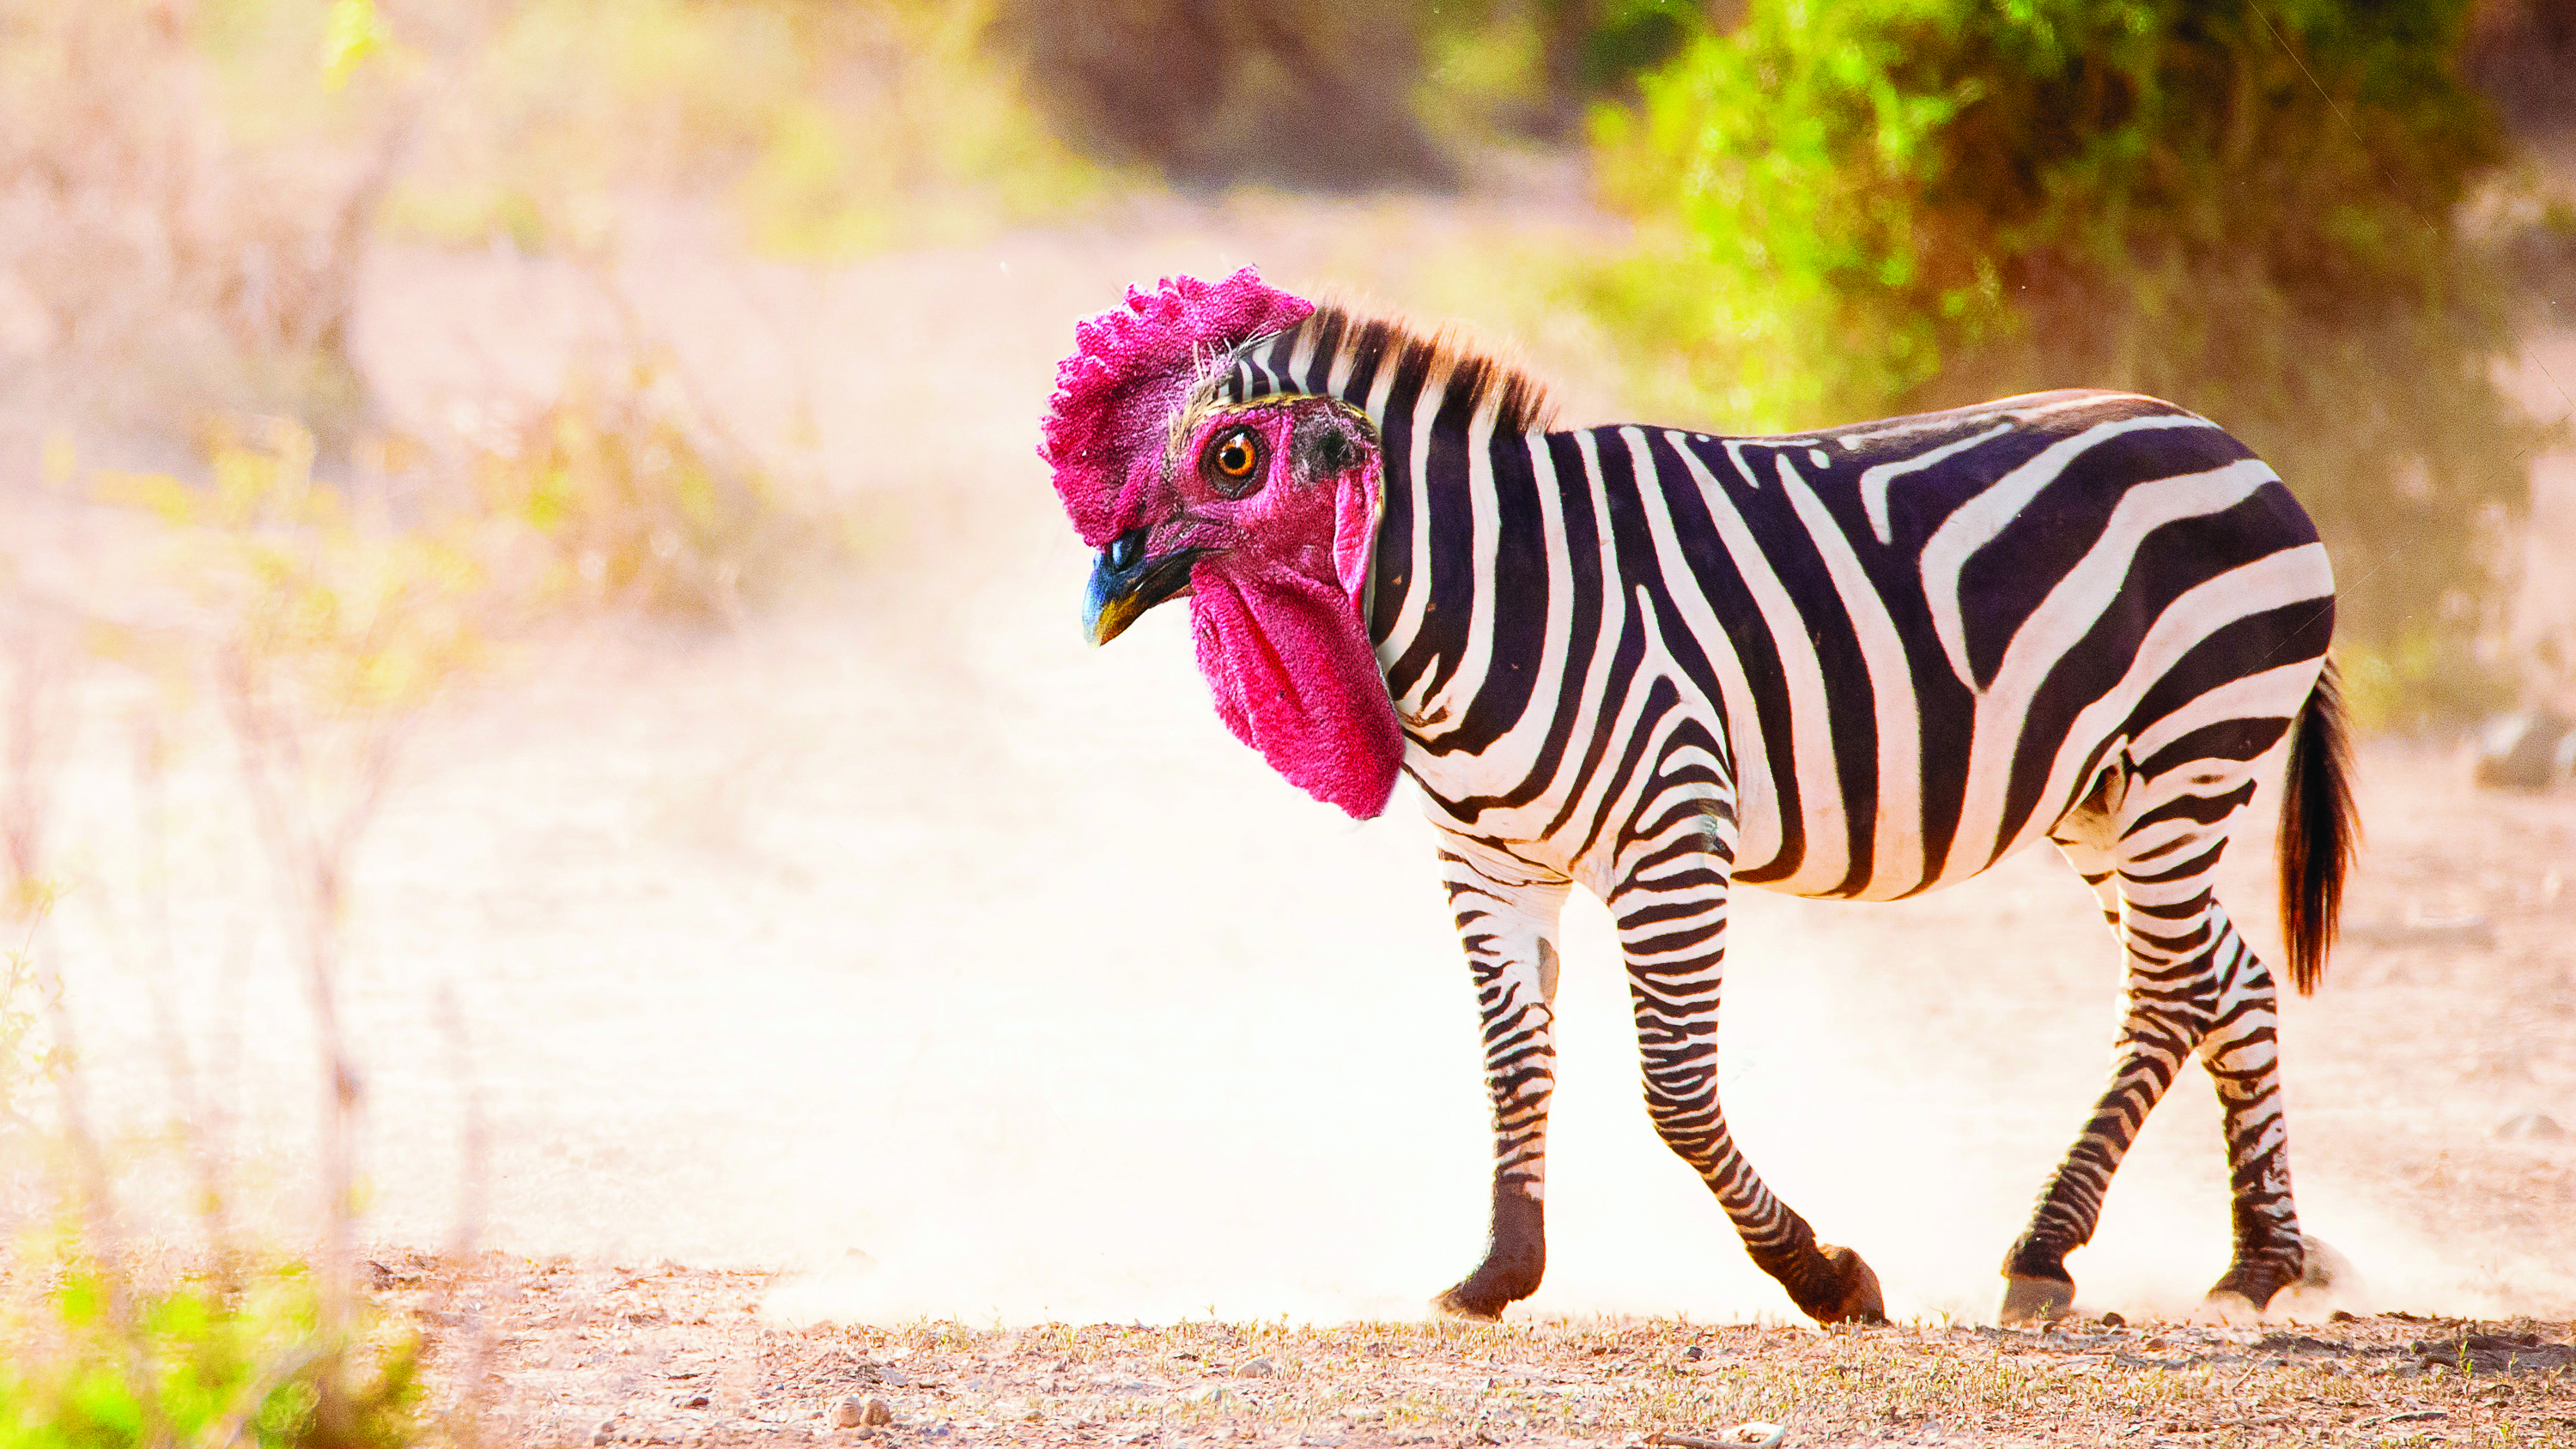
Ever wondered what the offspring of a hippo and a hamster might look like? Or a poodle and a gorilla? With a few simple Photoshop CC skills you can unleash your inner Dr Moreau and find out. Using a combination of selection and layer skills we can create all manner of creature combos. We’ve supplied the starting images for our zebra/cockerel hybrid (a ‘Zockera’?) but why not try the technique out on your own macabre creations?
However, keep in mind that the success of an effect like this – or any composite – begins with the choice of images. There needs to be some consistency in the lighting, camera angle, and the subject’s pose for the composite to work. If for example, you have one shot that’s lit with the hard midday sun and another that’s shot in the shade, then the shadows will fall differently on each and they’ll be difficult to match up. So aim for consistent quality and direction of lighting.
Photoshop offers lots of useful tools for compositing two or more photos into one, but two of the most useful for this kind of Photoshopping are the Quick Selection tool and Layer Masks.
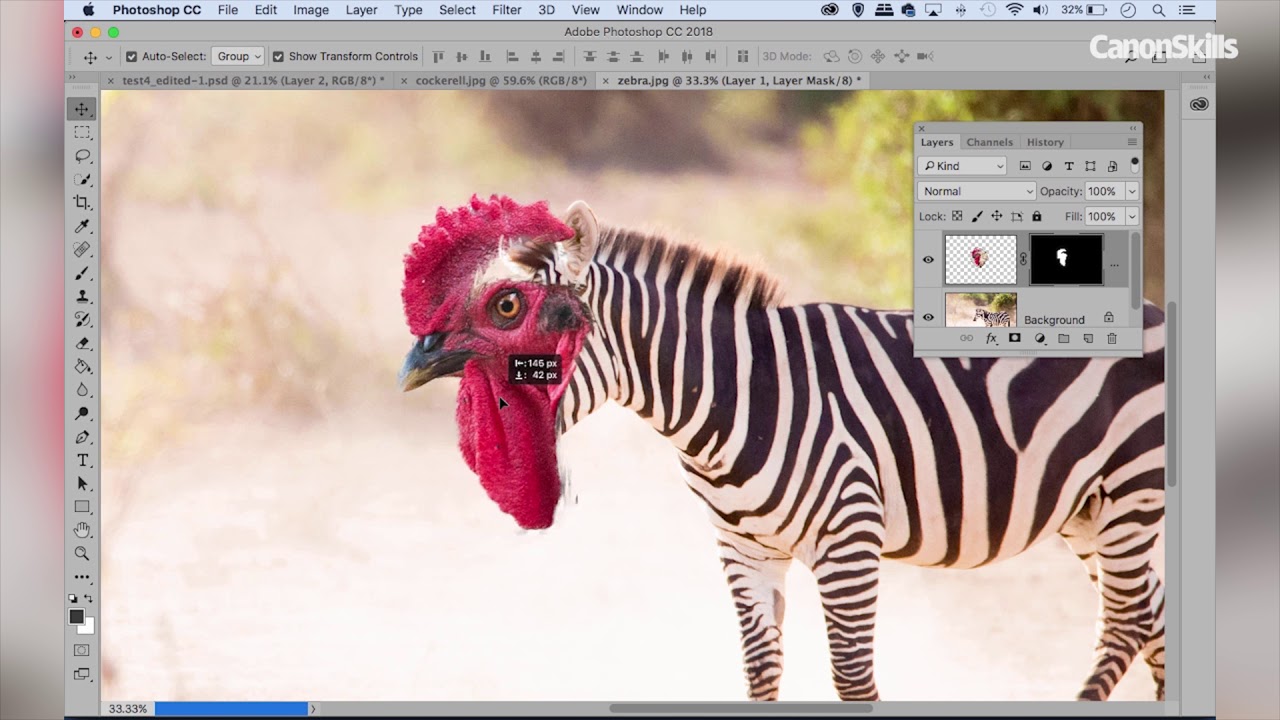
We can paint over the head of the cockerel with the Quick Selection tool to swiftly isolate it. After improving the selection with the powerful Select and Mask command, we output it as a layer mask, then fine-tune the blend of layers until everything fits together as we want.
01 Copy the body parts
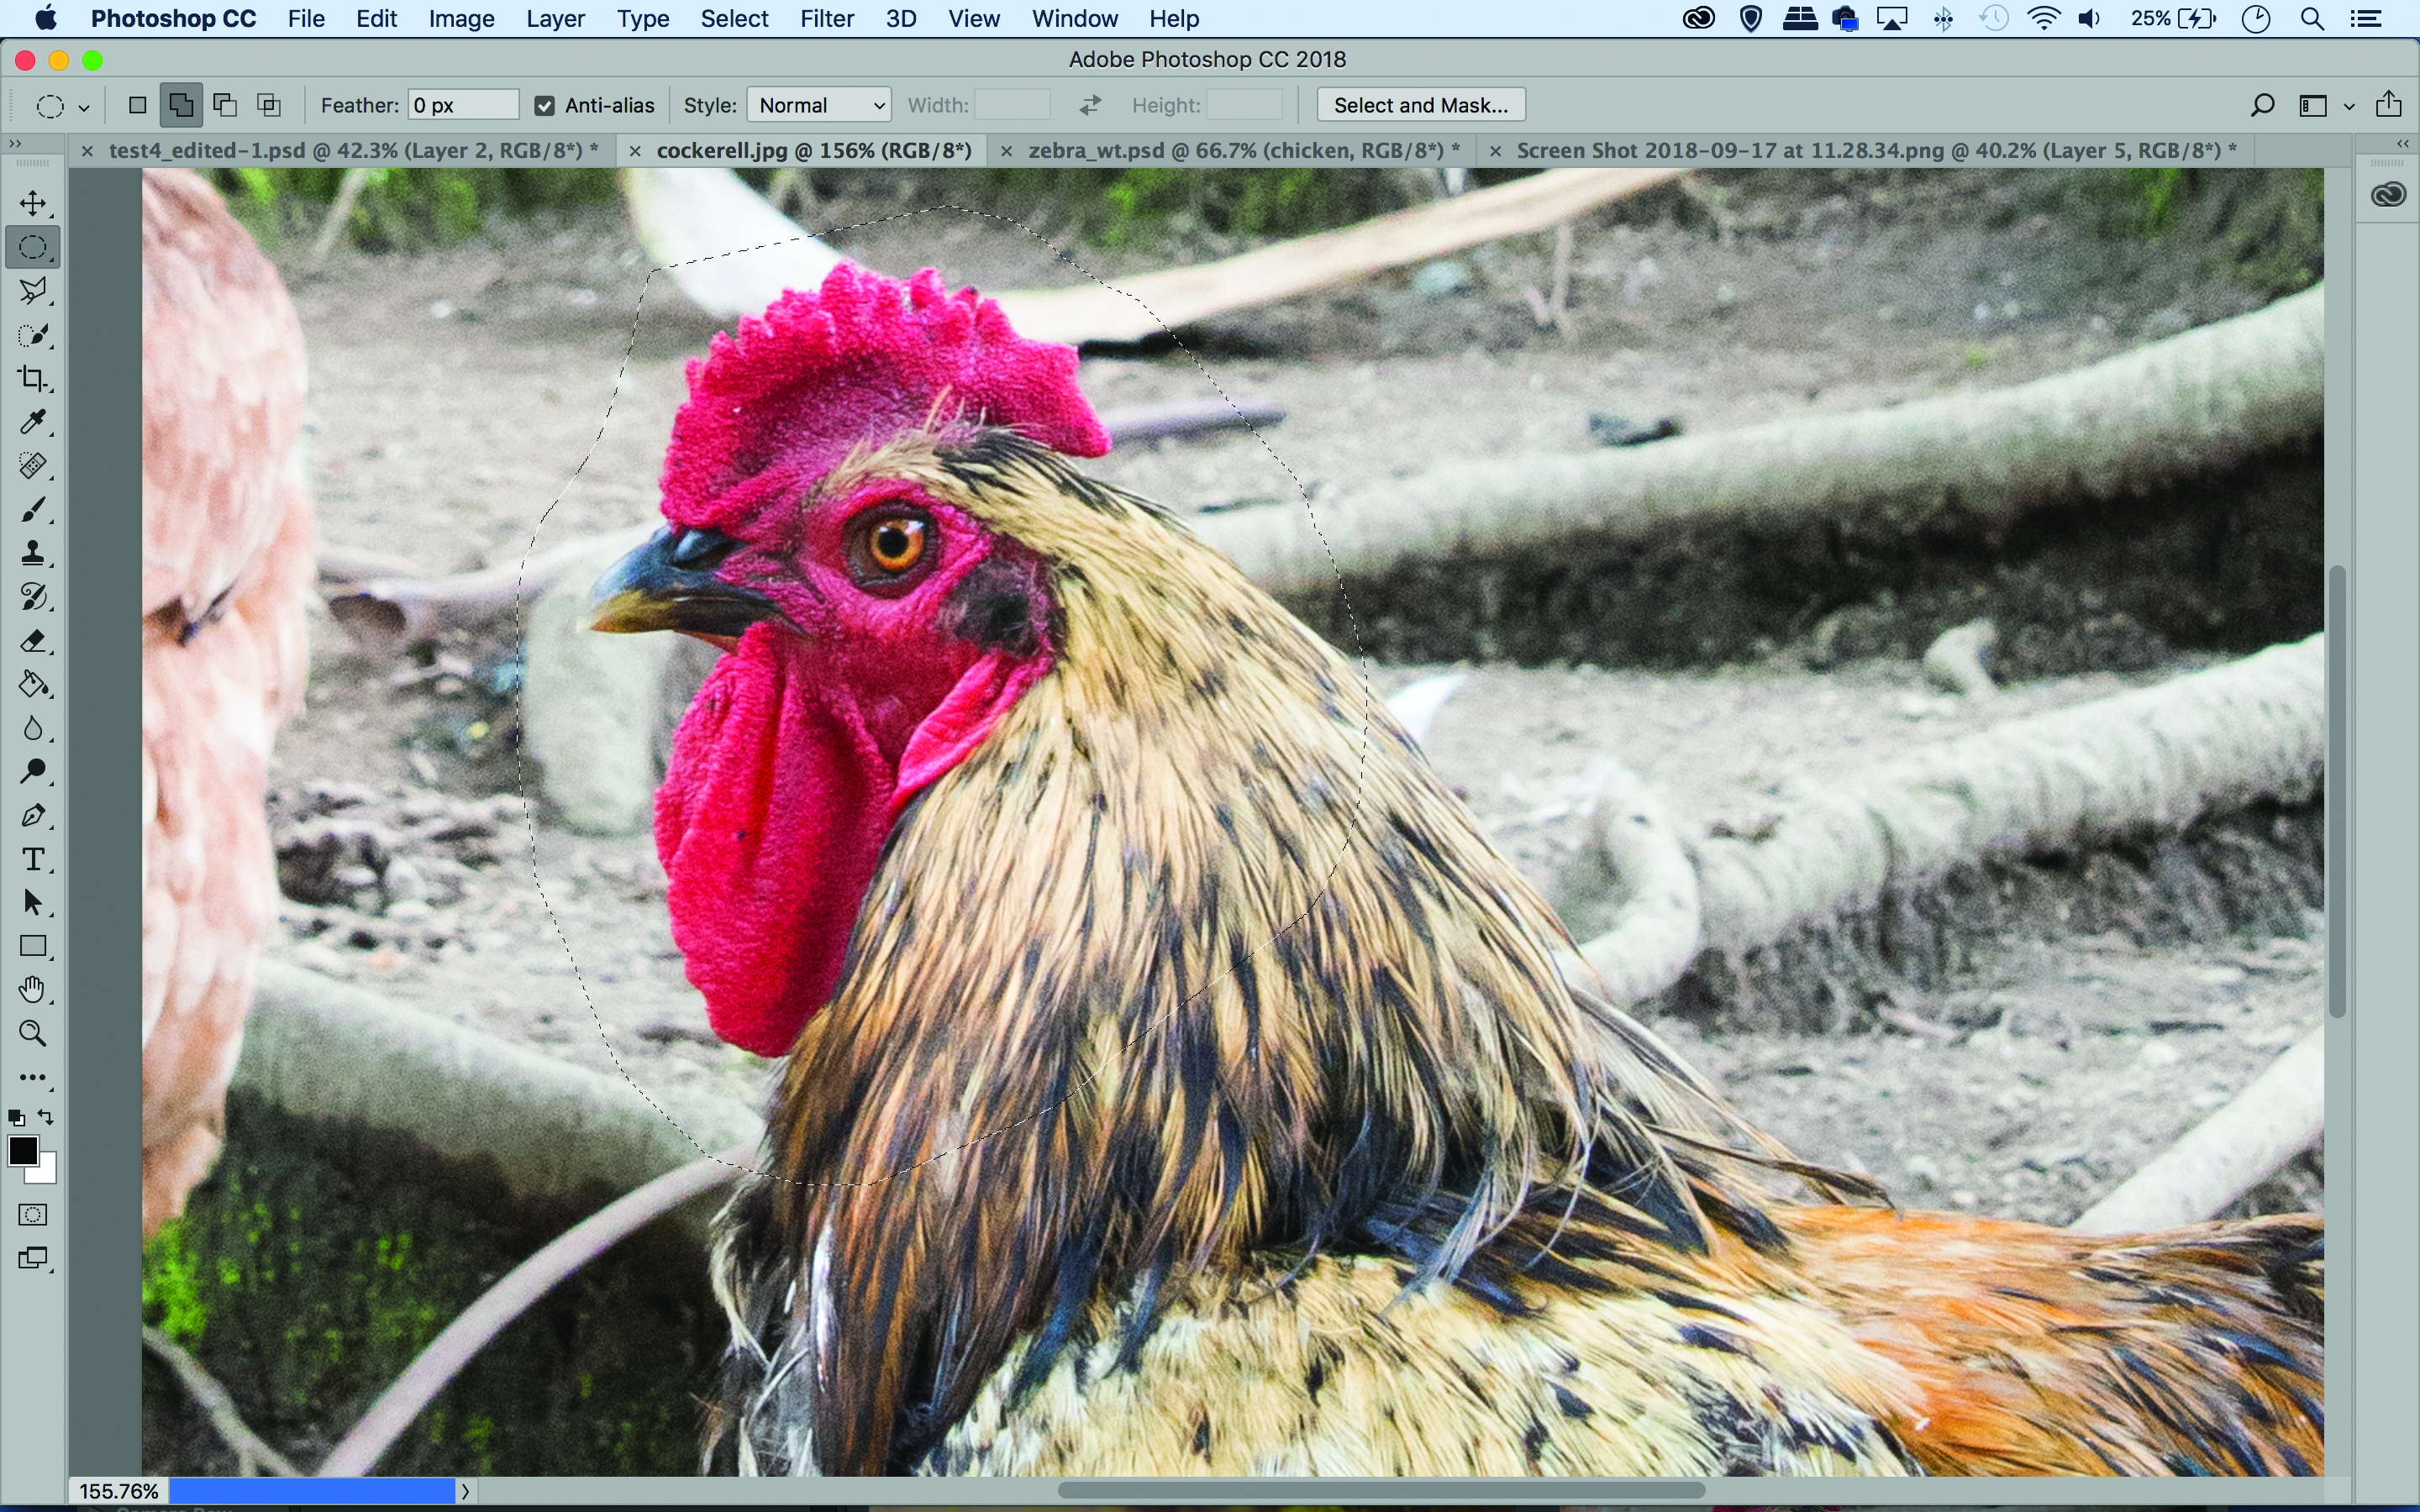
Download the start images and open cockerell.jpg and zebra.jpg into Photoshop CC. Go to the cockerel image and grab the Lasso tool, then drag a rough selection around the head. Hit Cmd/Ctrl+C to copy, then go to the other image and Cmd/Ctrl+C to paste onto the canvas.
02 Position the head
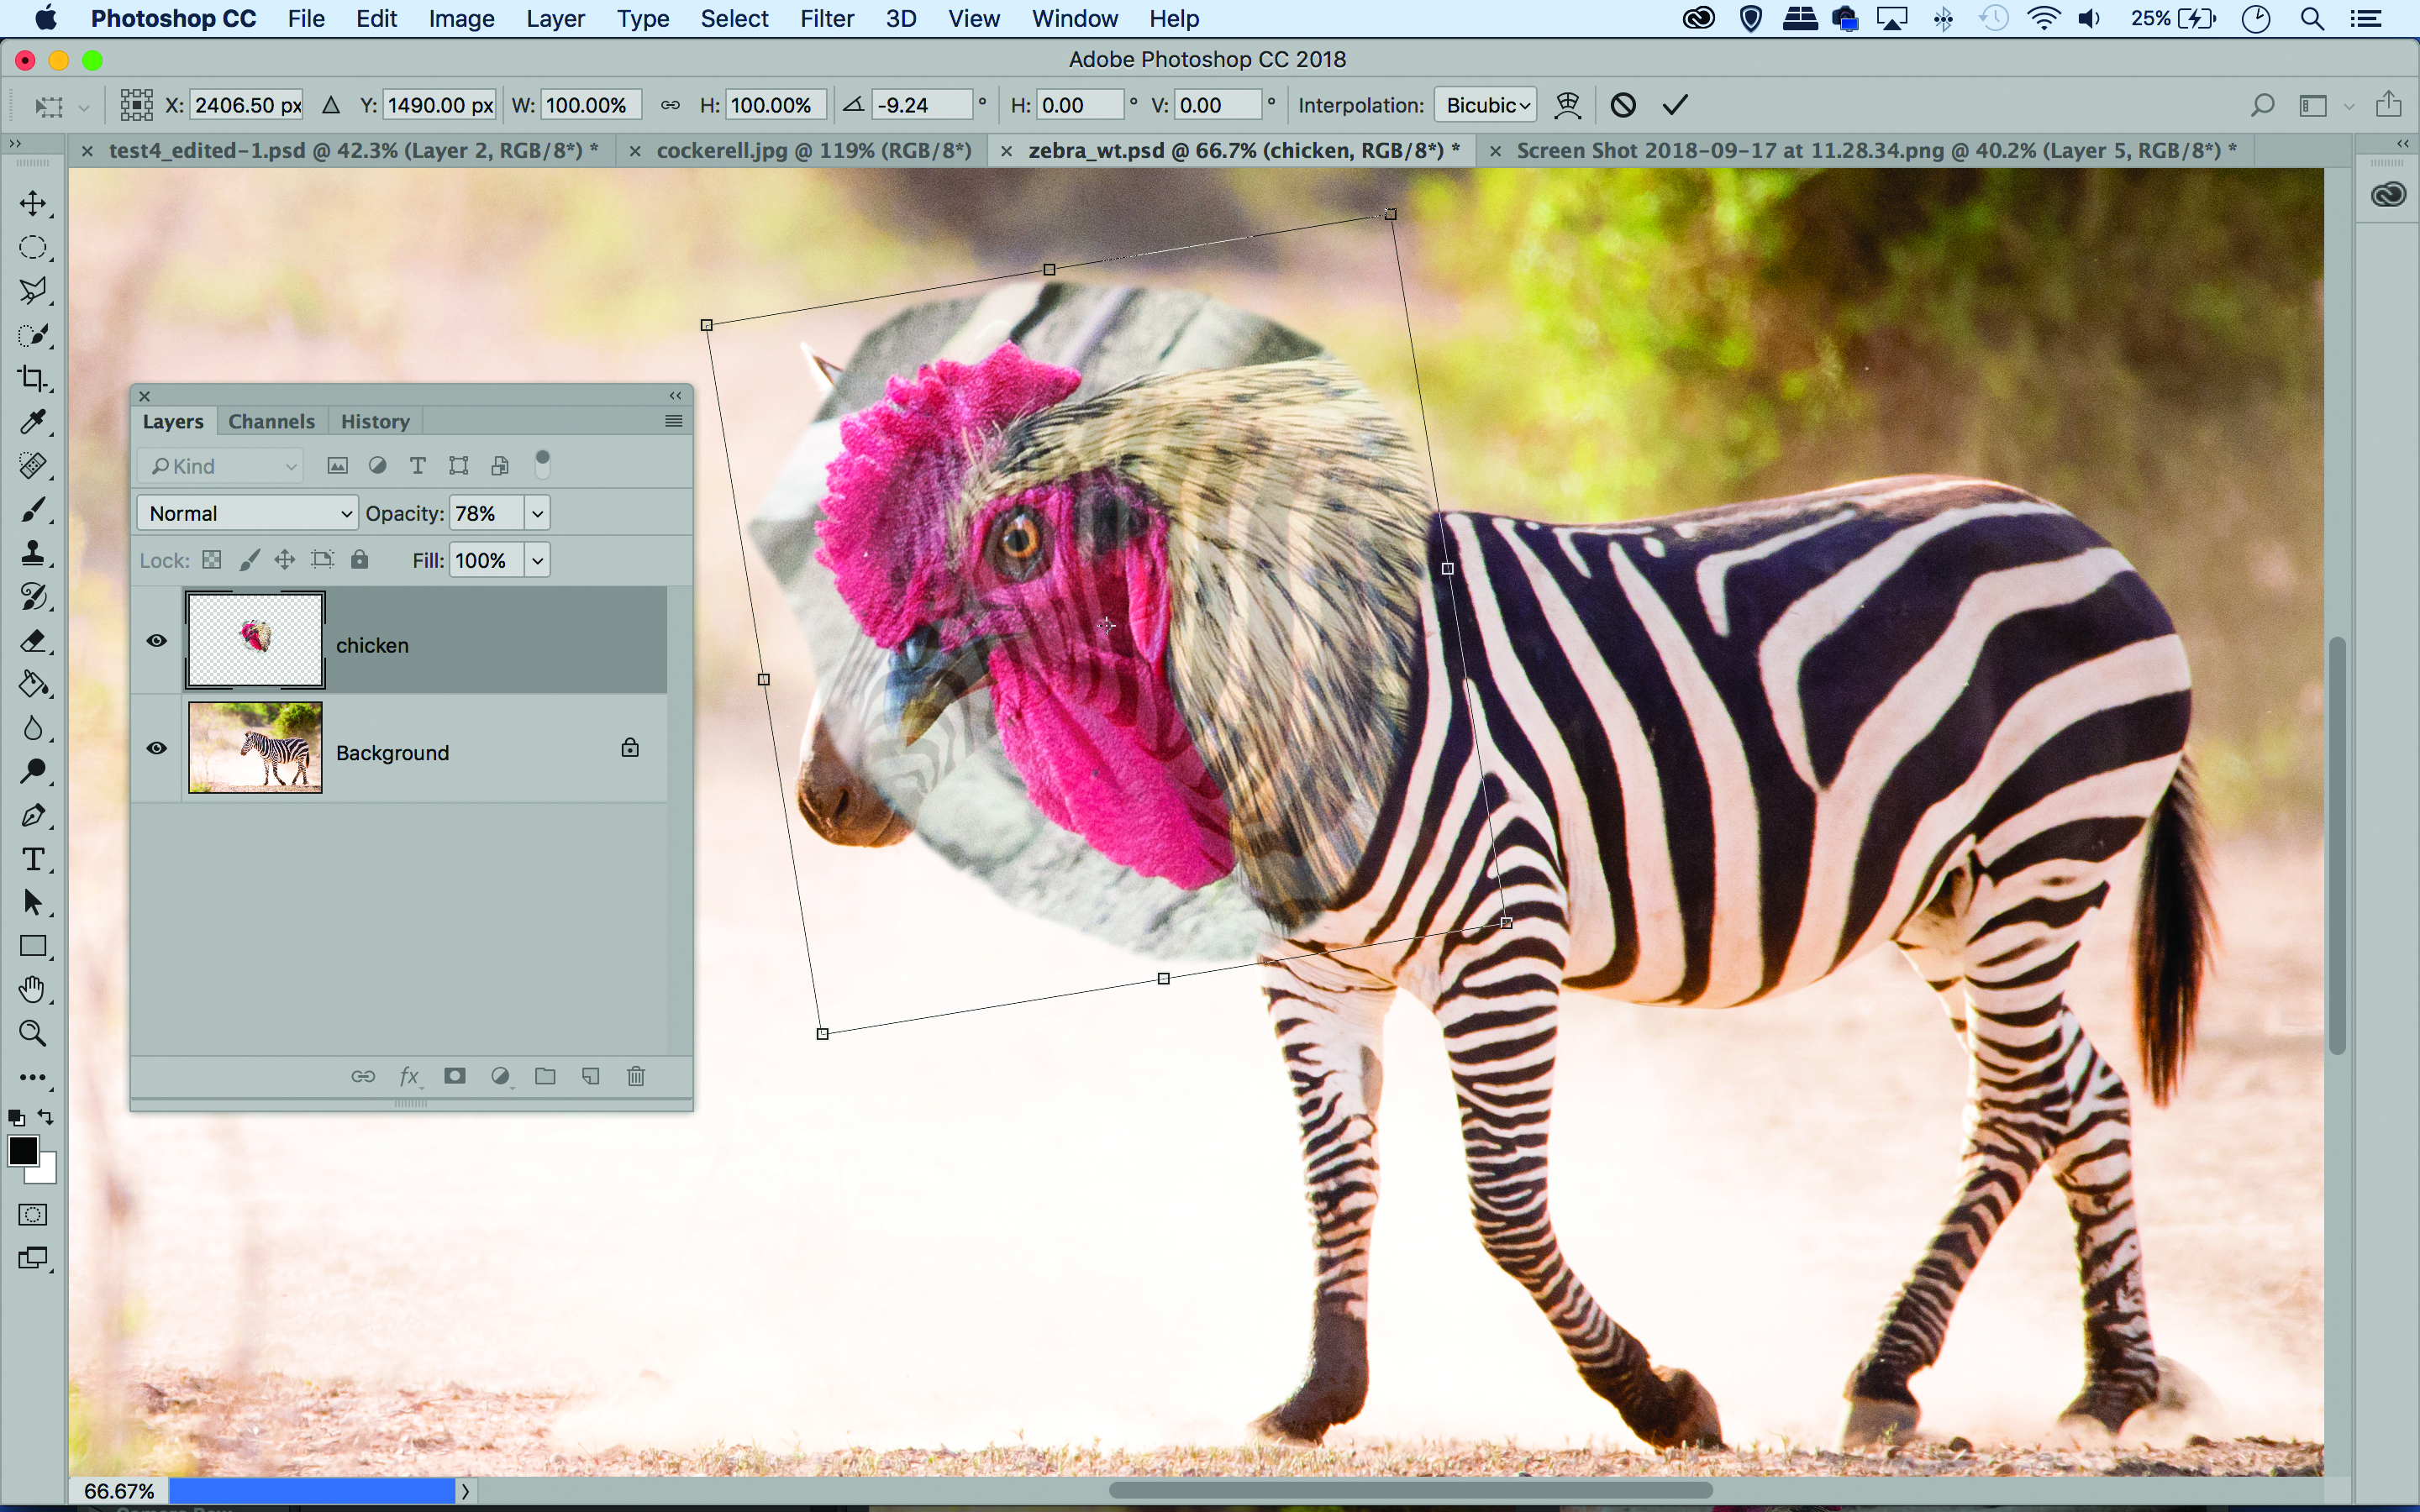
Go to Edit>Transform>Free Transform. Drag the corner of the bounding box while holding Shift to resize the layer. Fine-tune the positioning until it fits in. You can go to the Layer Panel and temporarily reduce layer opacity to help you see how the images match.
03 Make a precise selection
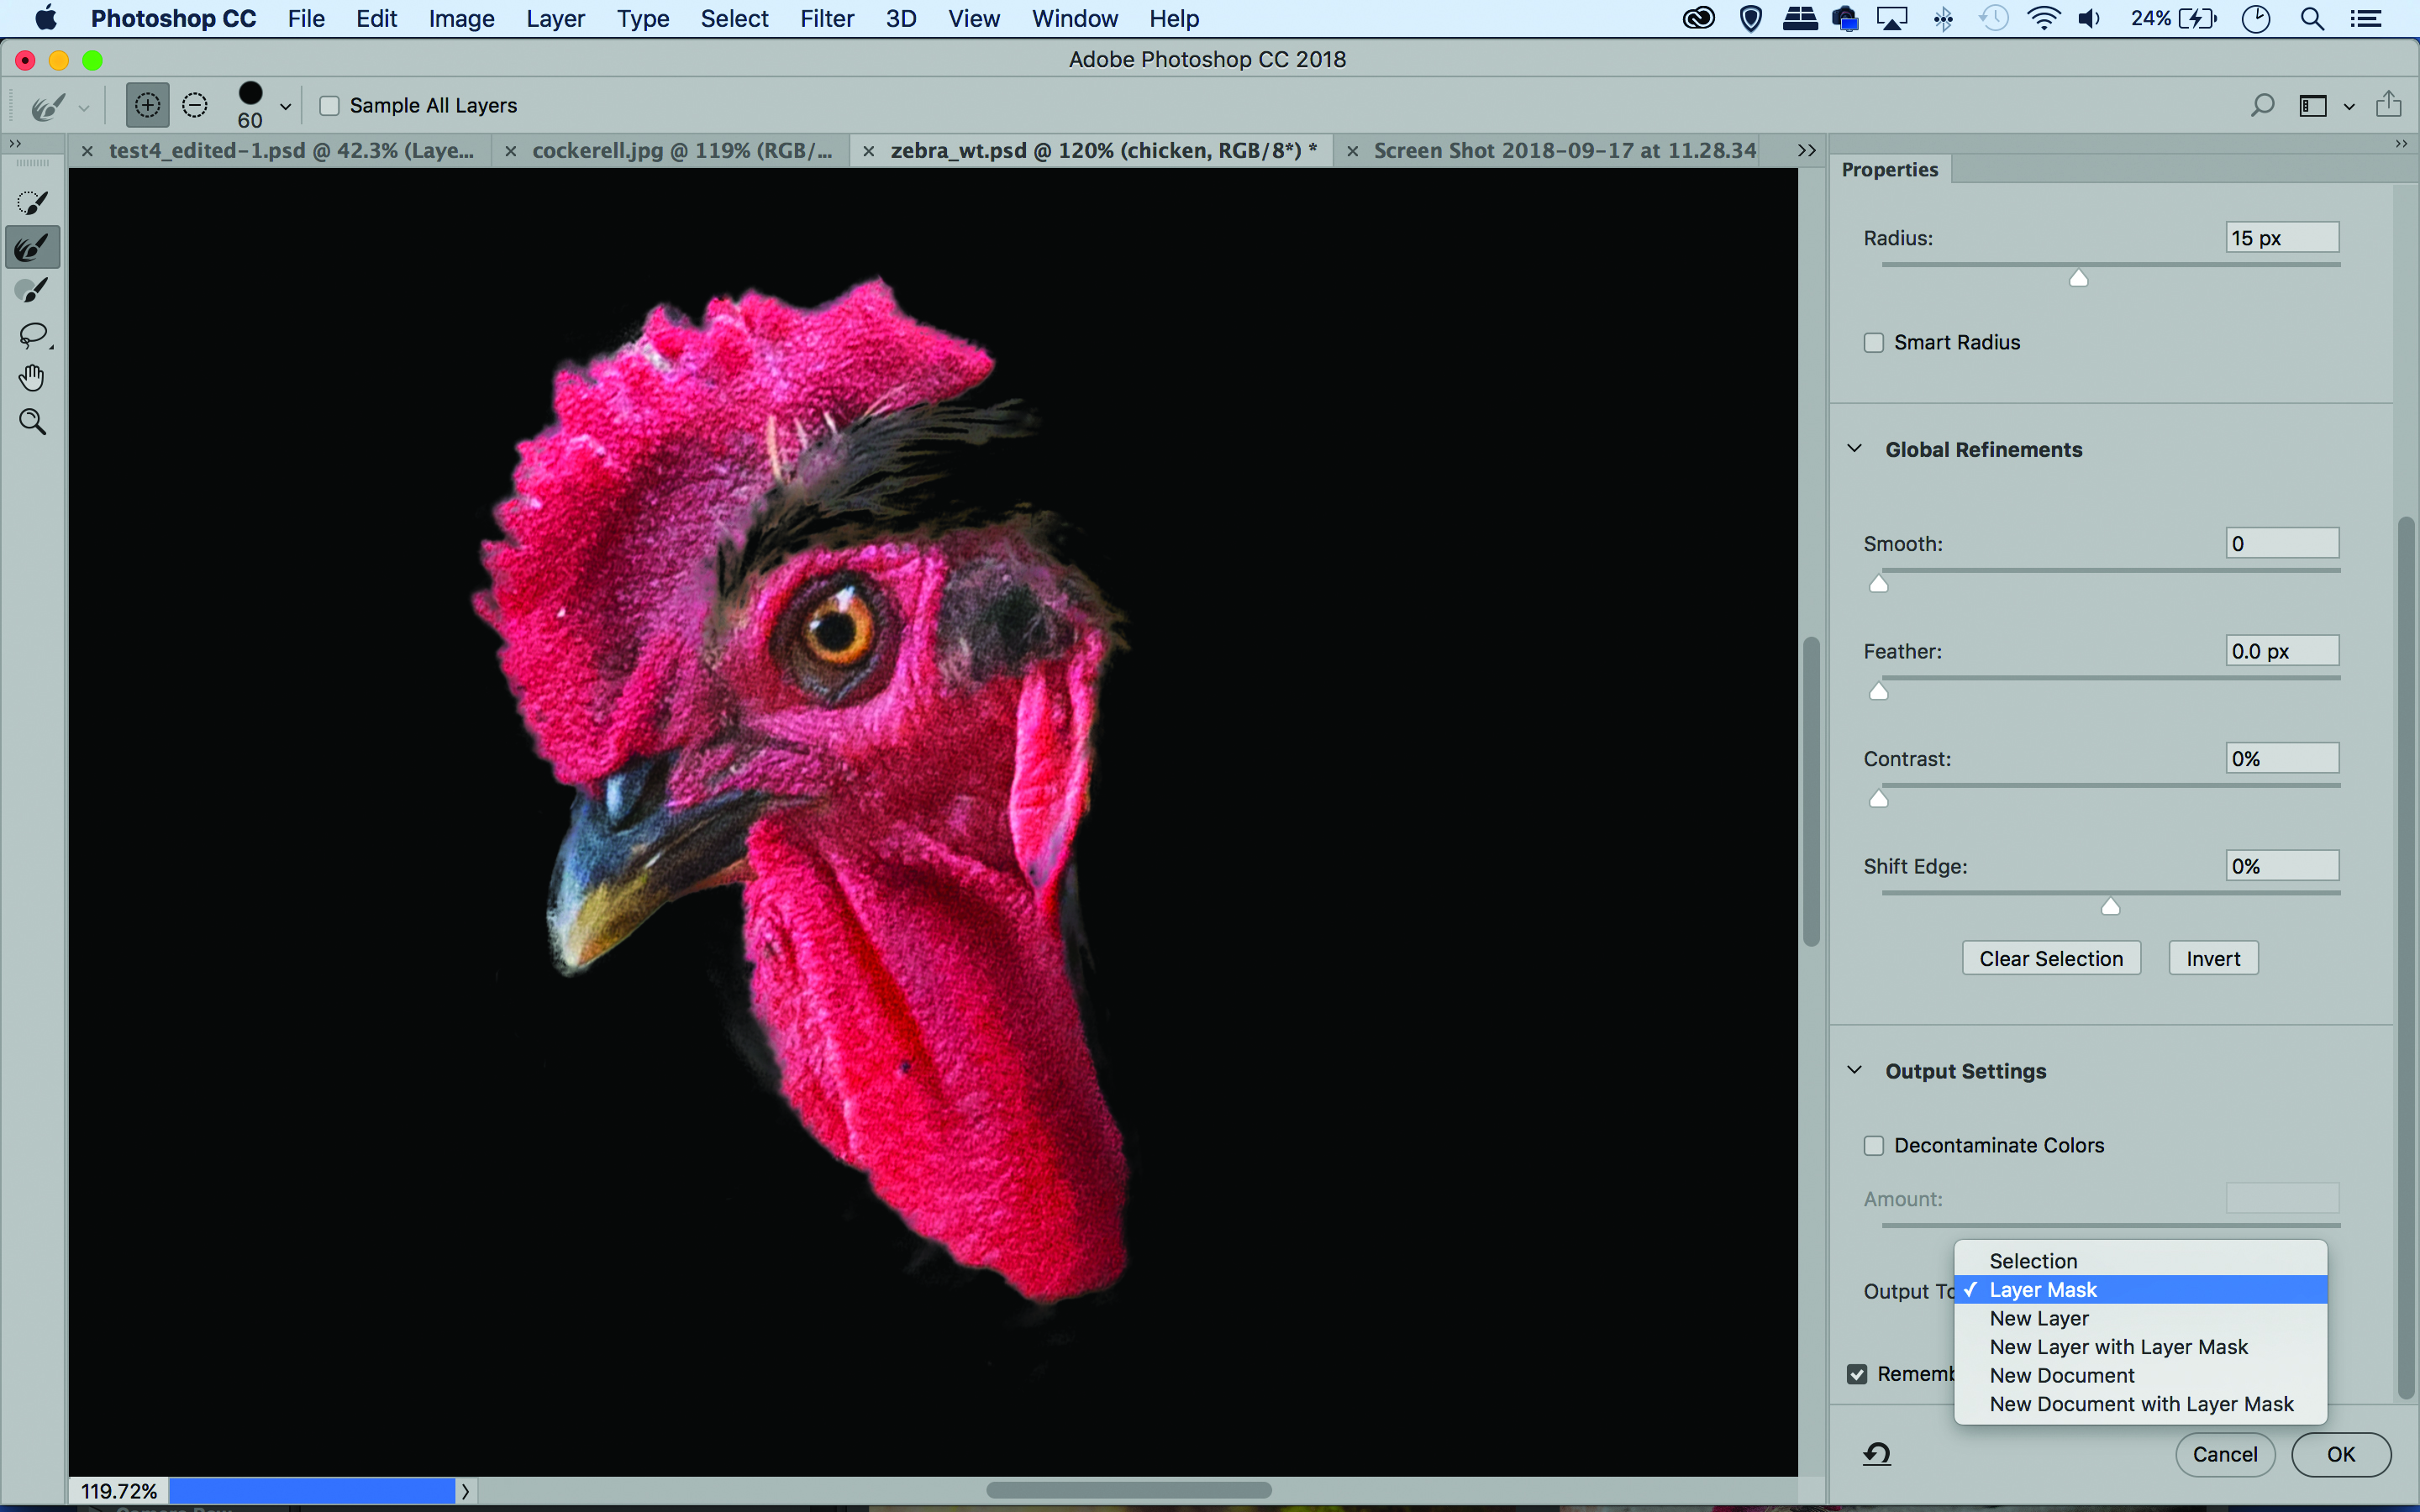
Get the Quick Selection tool and paint over the red bits of the head to isolate. Click ‘Select and Mask’ in the tool options, then up the Radius to 15px and paint over messy bits of the edge with the Refine Brush tool to fix selections. Set Output: Layer mask and hit OK.
04 Clone out the overlap
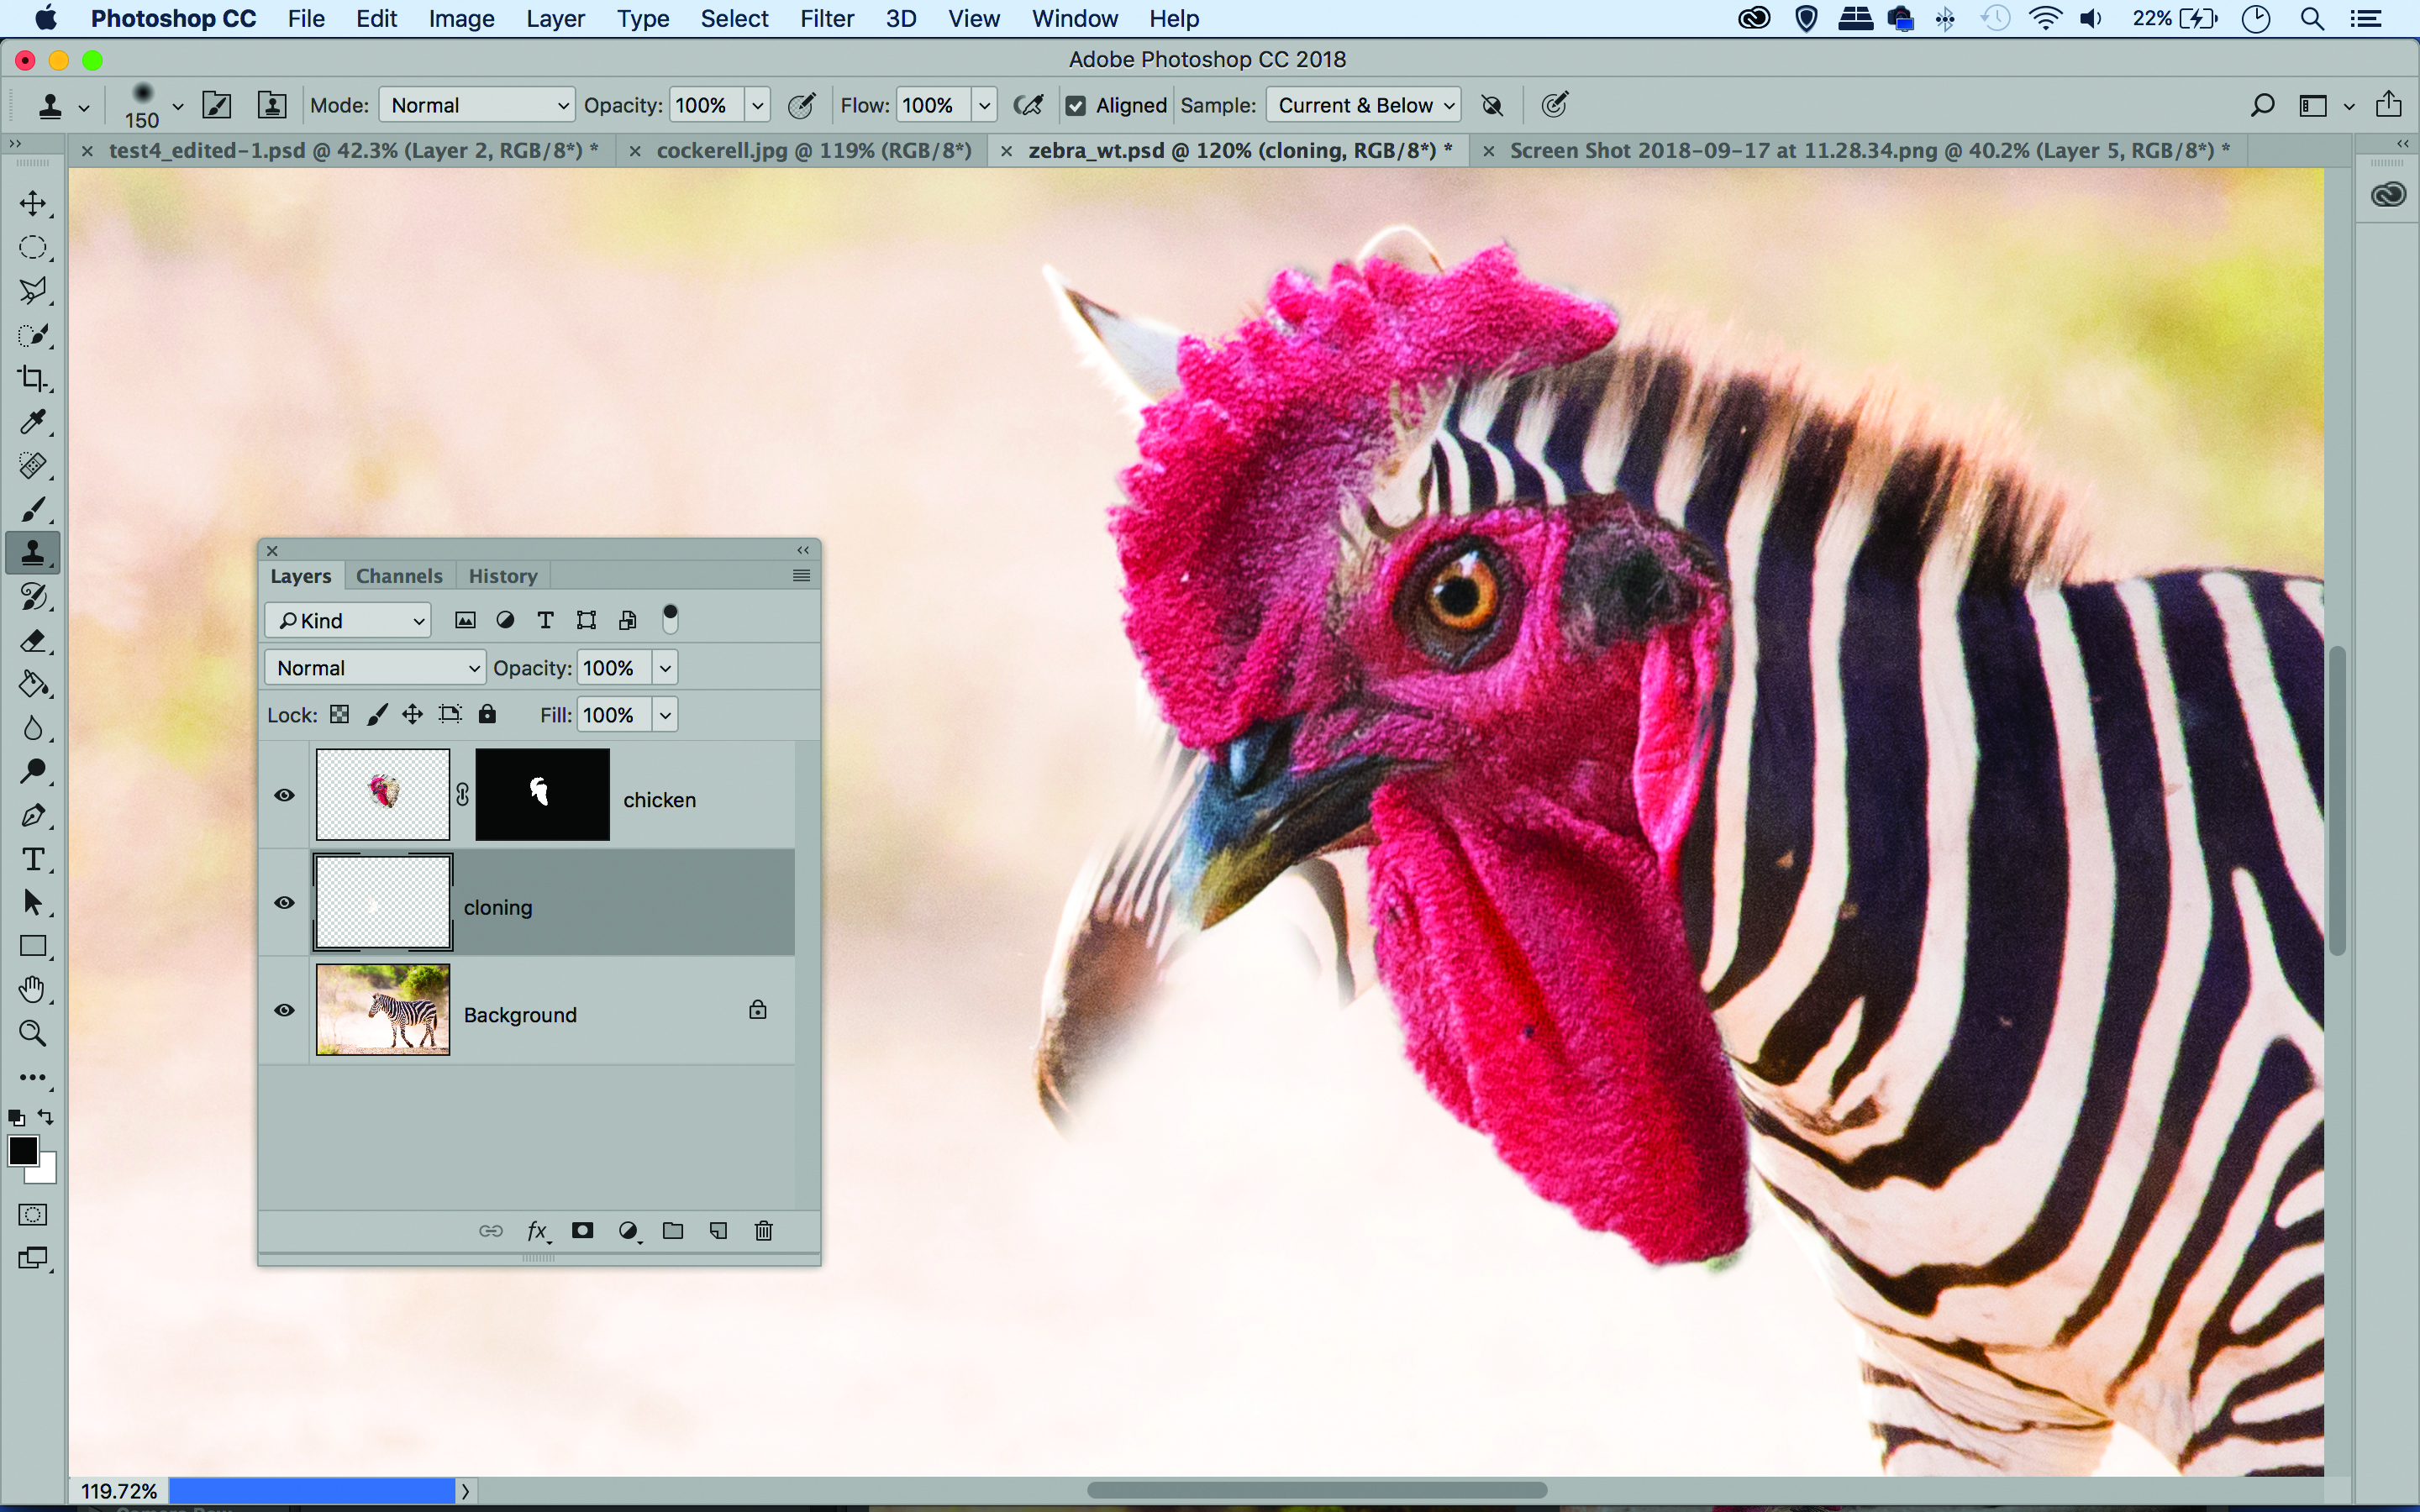
Highlight the bottom layer, click the new layer icon in the Layers Panel to add an empty one. Grab the Clone tool then set ‘Sample: Current and Below’ in options. Hold Alt and click to sample a source from the backdrop, then paint to remove clashing zebra head.
05 Perfect the blend
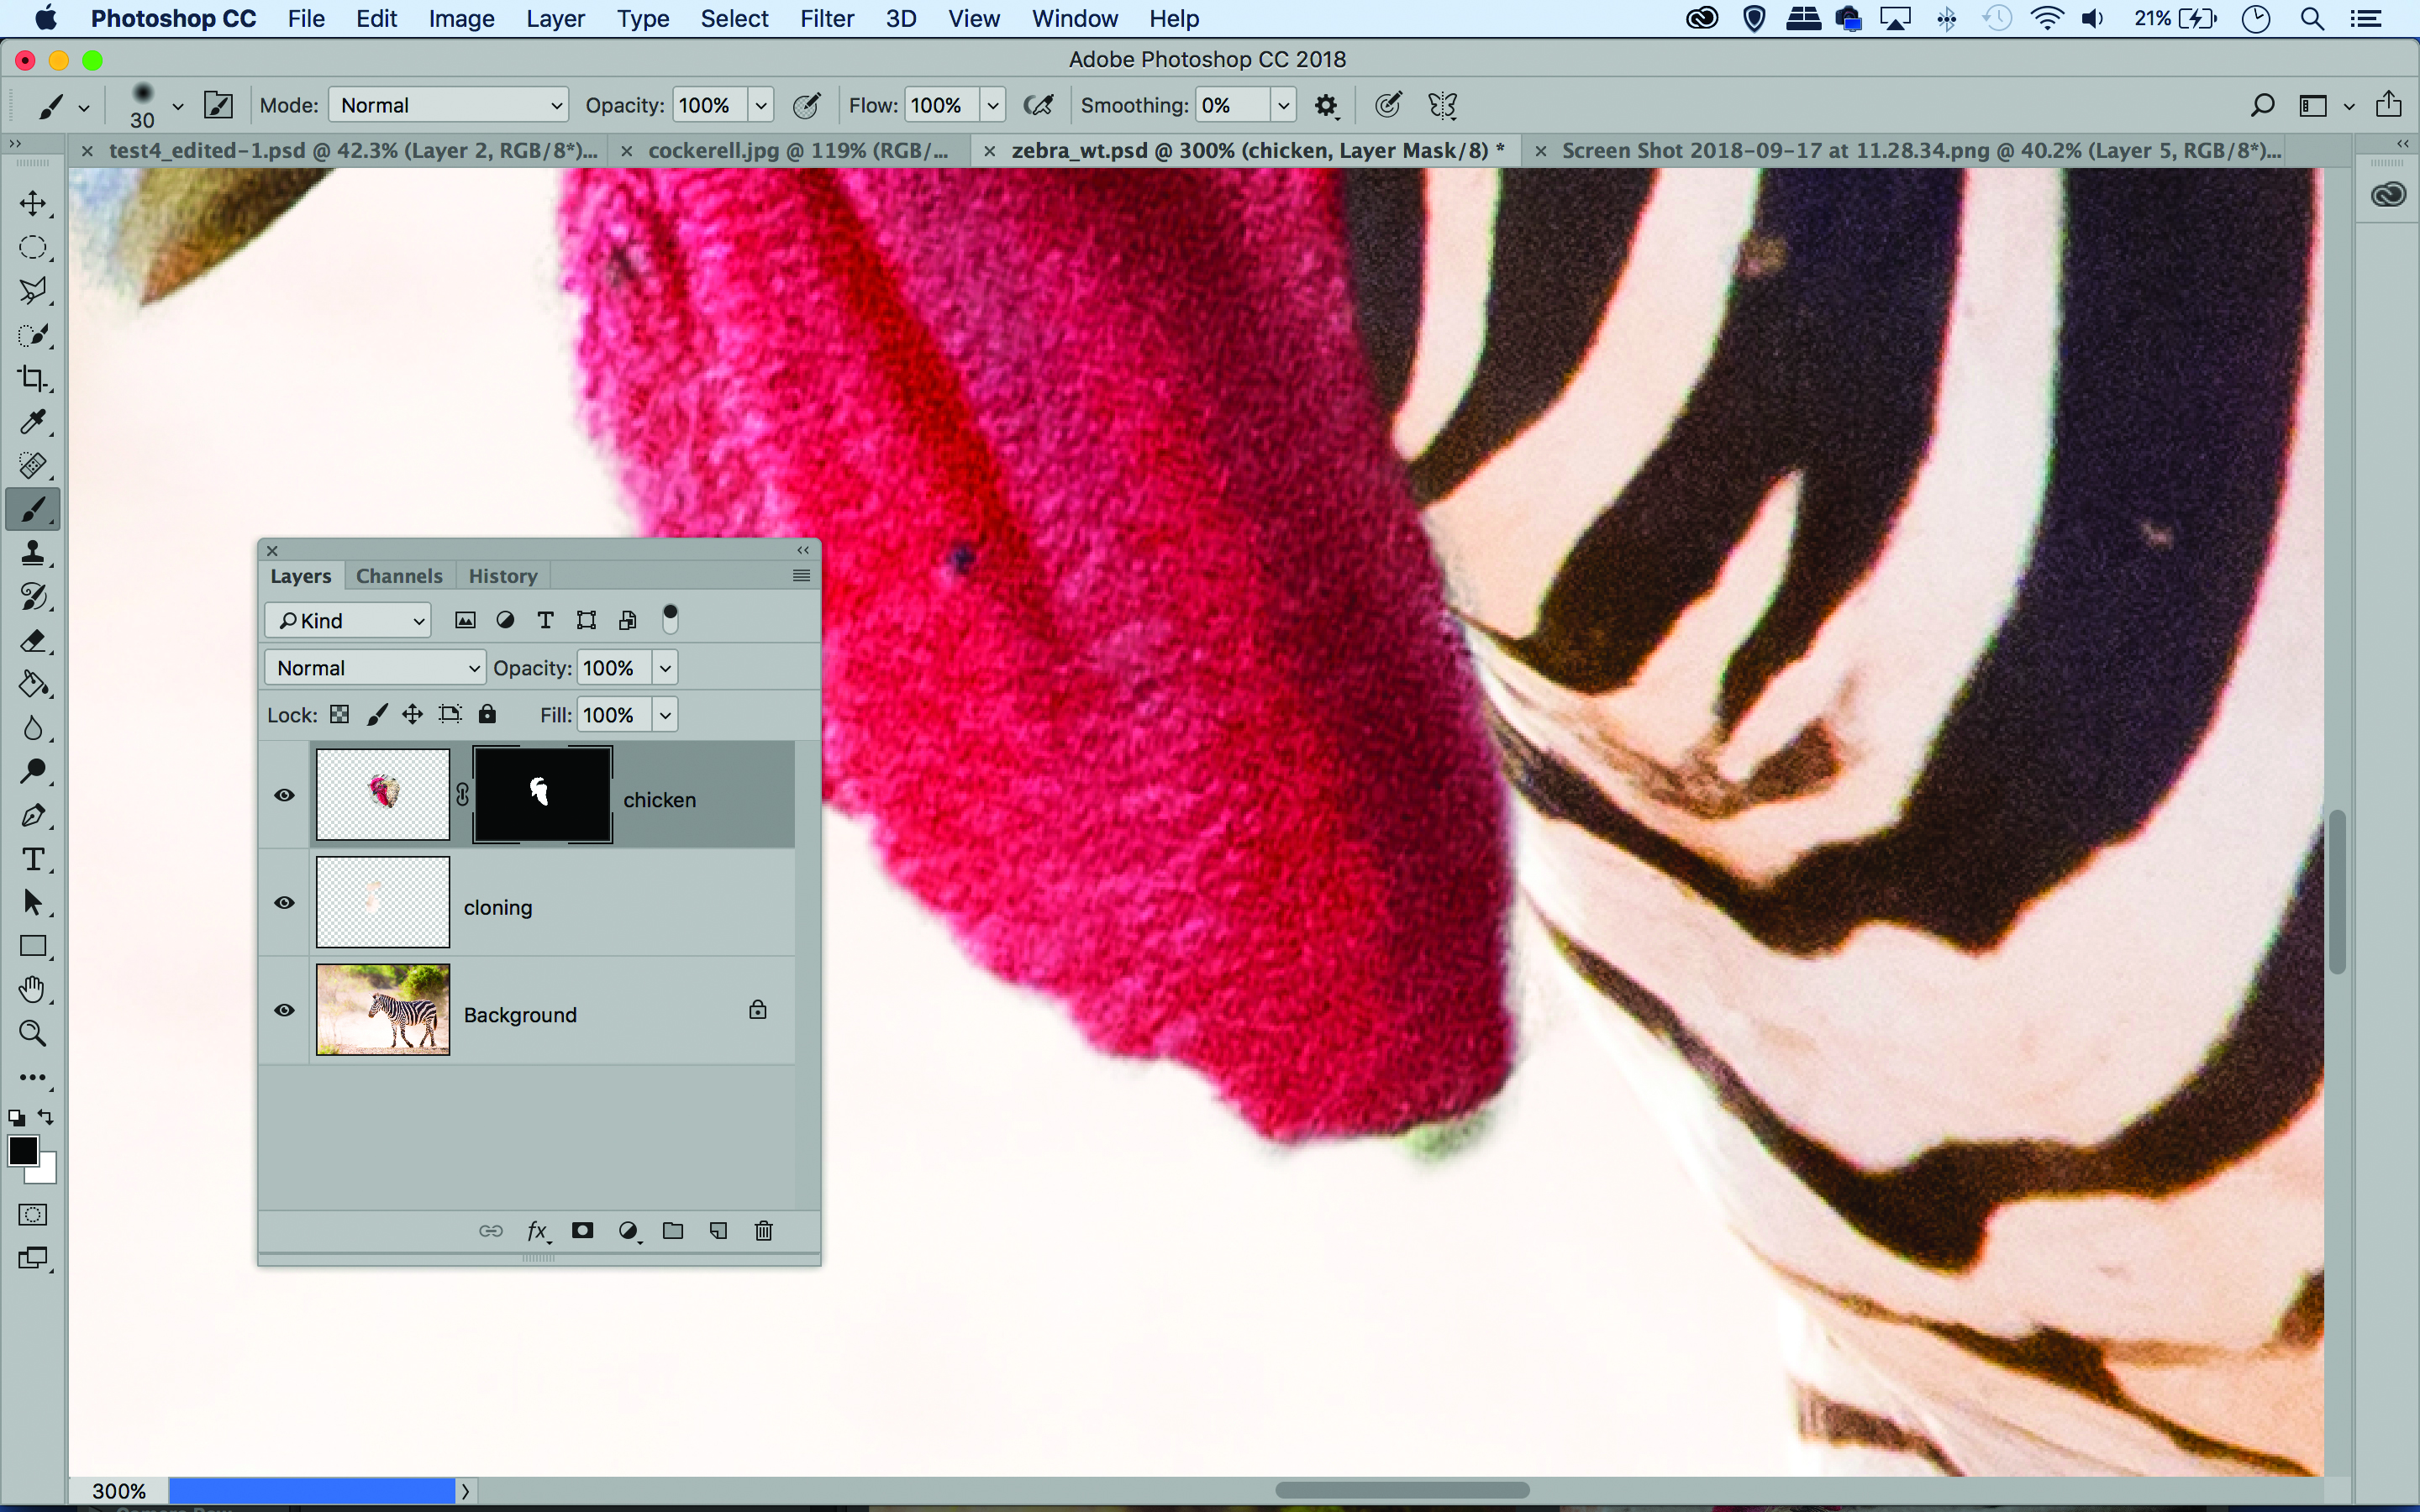
Highlight the layer mask thumbnail on the top layer then grab the Brush tool and set D to reset colours to black and white. Zoom in close and perfect the edges of the layer – either by painting black to hide or white to reveal. Hit X to switch between the colours.
06 Add a shadow

Highlight the layer below the chicken and add another new layer. Grab the brush tool and paint with black along the edge of the chicken head where it meets the body to add a shadow, then lower the layer opacity until it looks natural. Make tonal tweaks to finish off.
PhotoPlus: The Canon Magazine is the world's only monthly newsstand title that's 100% devoted to Canon, so you can be sure the magazine is completely relevant to your system. Every issue comes with a disc of video tutorials too.
Read more:
The best photo editing software: image editors for novices through to pros
The best photo-editing laptops: top laptops for photographers
10 best online photography courses – from beginner guides to masterclasses
Get the Digital Camera World Newsletter
The best camera deals, reviews, product advice, and unmissable photography news, direct to your inbox!
The lead technique writer on Digital Camera Magazine, PhotoPlus: The Canon Magazine and N-Photo: The Nikon Magazine, James is a fantastic general practice photographer with an enviable array of skills across every genre of photography.
Whether it's flash photography techniques like stroboscopic portraits, astrophotography projects like photographing the Northern Lights, or turning sound into art by making paint dance on a set of speakers, James' tutorials and projects are as creative as they are enjoyable.
He's also a wizard at the dark arts of Photoshop, Lightroom and Affinity Photo, and is capable of some genuine black magic in the digital darkroom, making him one of the leading authorities on photo editing software and techniques.
