Create striking shape-shifting effects in Affinity Photo
Use this fun Affinity Photo technique to make a creative image for your screen wallpaper

Watch video: Create striking shape-shifting effects in Affinity Photo
Affinity Photo is a great tool for photo editing, but it’s also brilliant for making abstract images and incorporating elements of graphic design into your photography. In this project, we explain how to combine your photos with triangle shapes for an inventive effect that would look great as a wallpaper for your computer or phone.
The technique for this encompasses lots of fundamental Affinity Photo skills, from shifting images and shapes around to using shadows and adjustment layers. It’s also a good example of how you can make use of shortcuts to speed up your editing.
While the build-up of shapes here might look complicated, it really only takes a few minutes to create. We begin by making a handful of triangle shapes and a few lines to go with them. This is a simple task with the array of shape tools in Affinity Photo. From here, we can merge our shapes and then drop them on top of our portrait image.
This bit can be a bit fiddly – there’s a few ways to drop one layer on to another, and we need to take care that the shape layer latches to the side of the image layer thumbnail, so that the side of the thumbnail turns blue. This way, the only parts of the portrait that are visible are those that are directly on top of the shape. Once done, we can add a shadow to give the illusion of depth to our effect, then simply copy and reposition the portrait and shapes to build it up.
To follow along download the start image here or use one of your own portraits.
1. Make a triangle
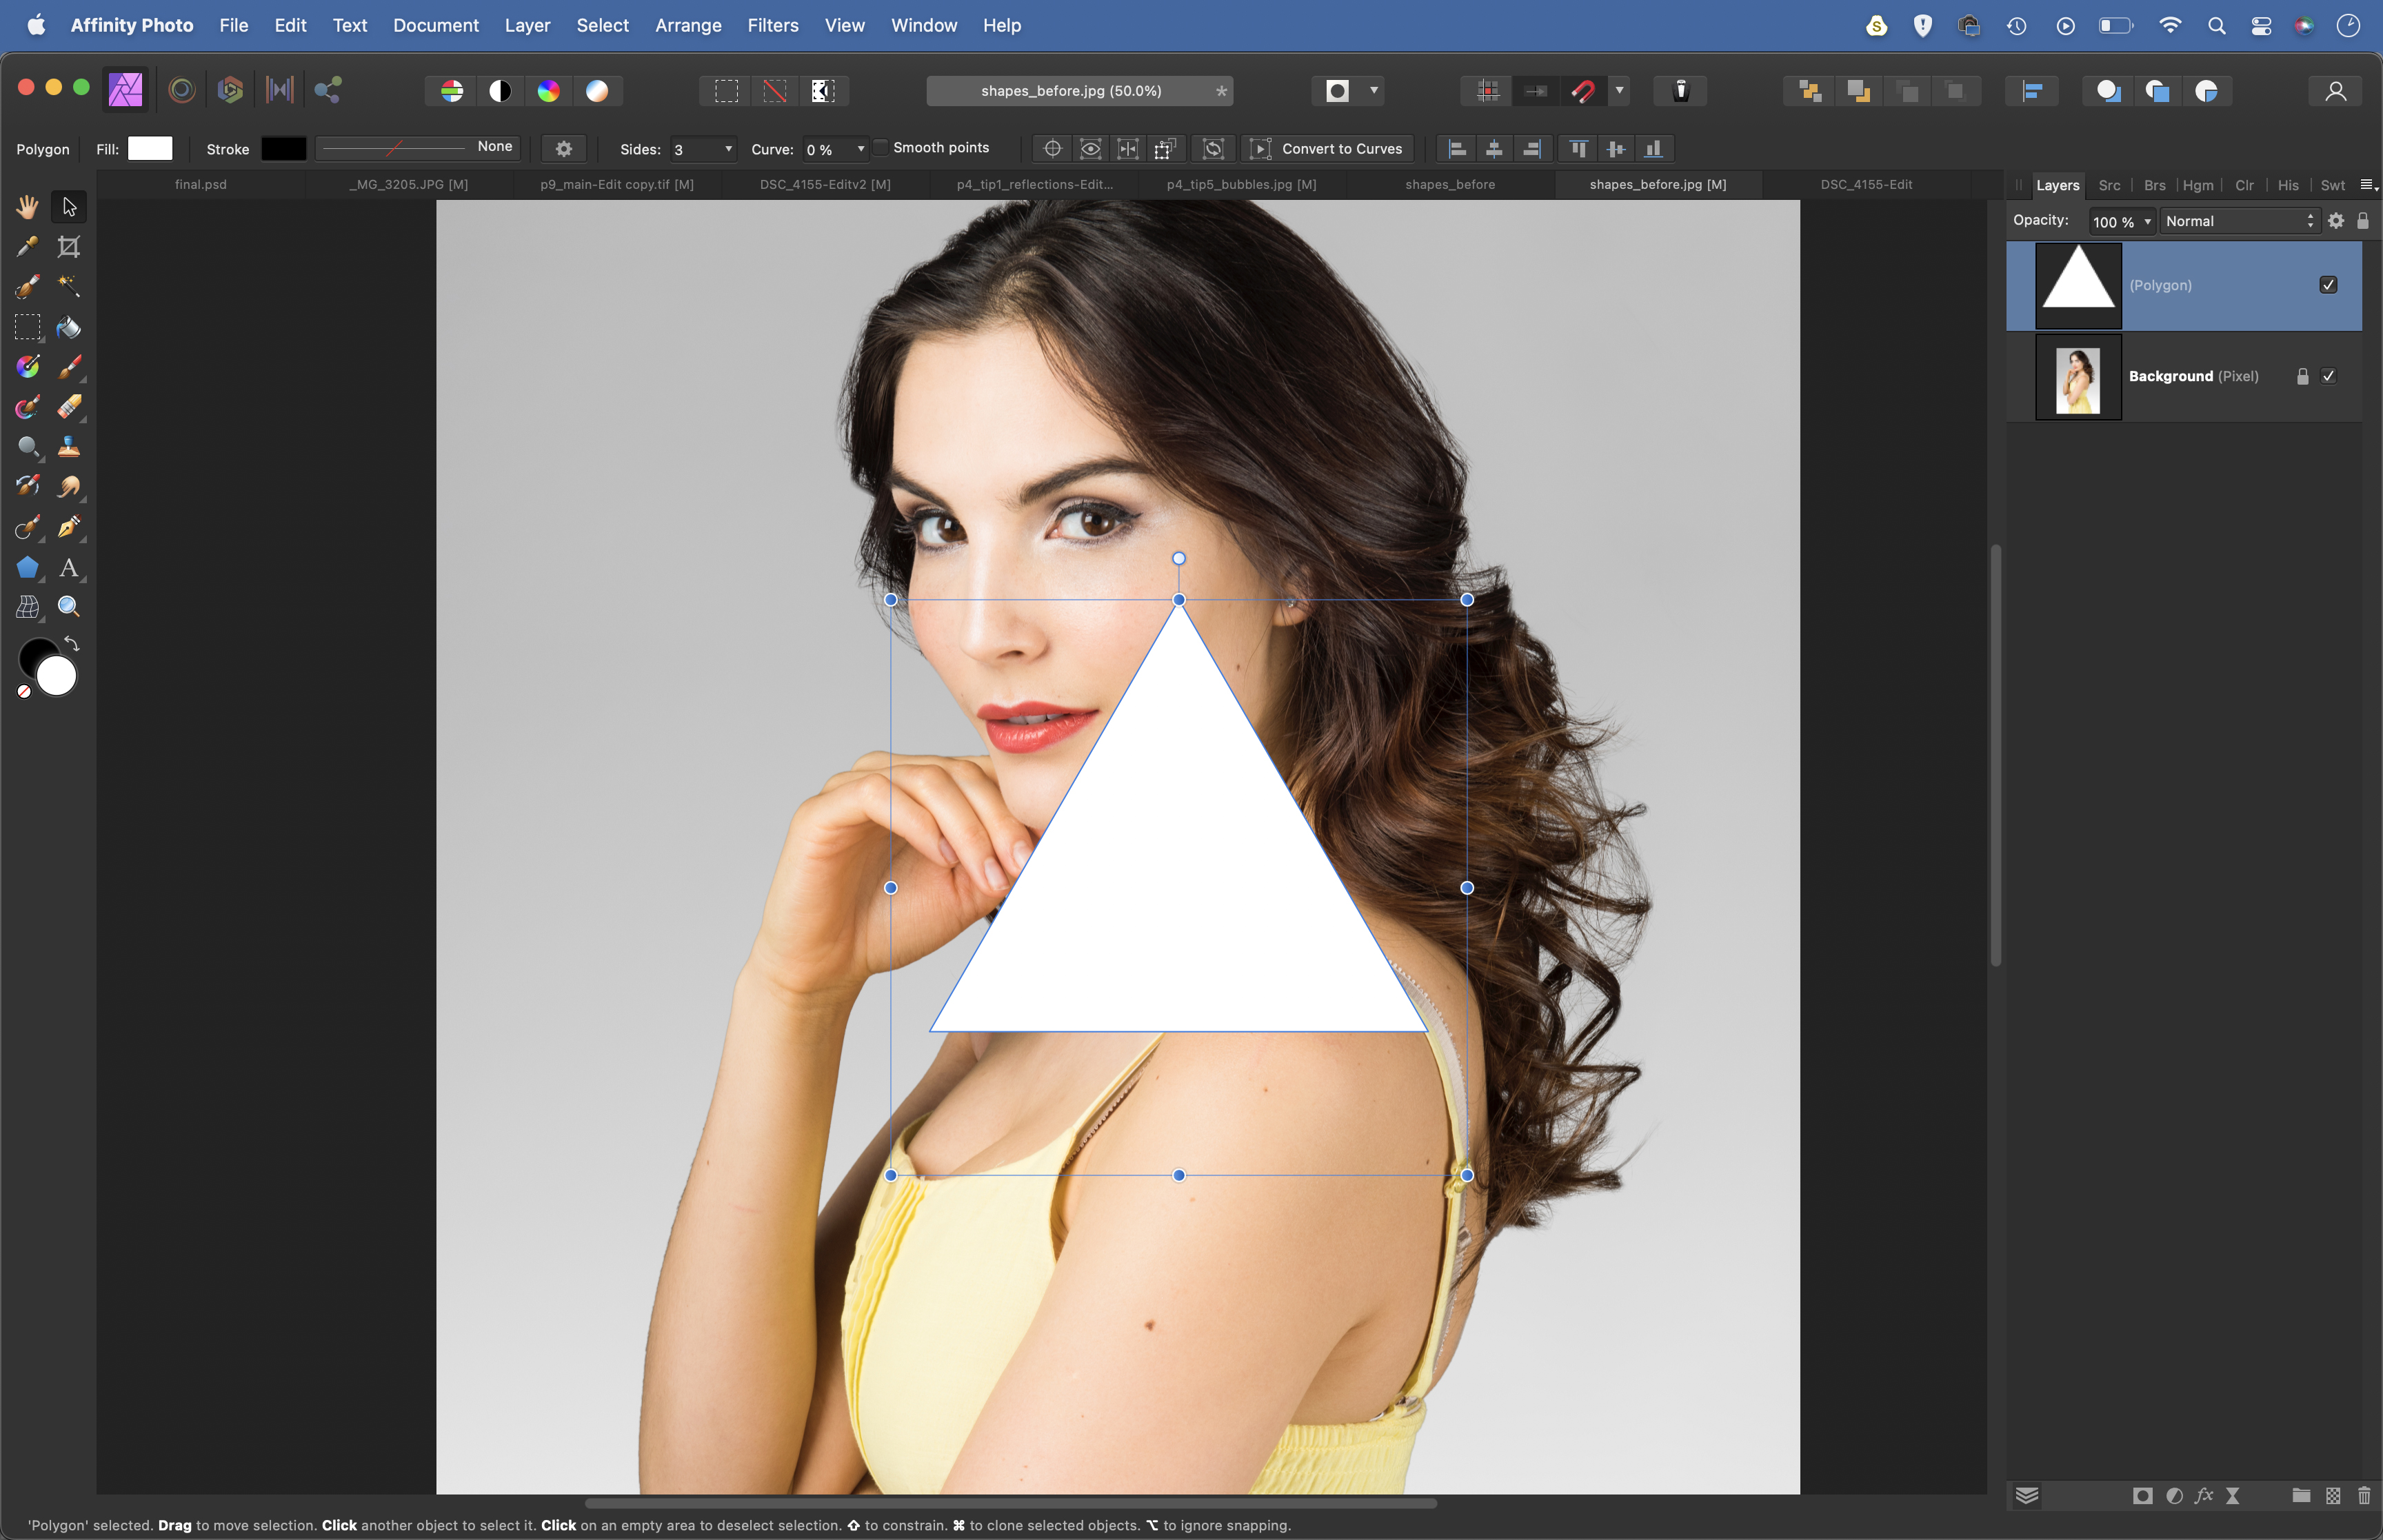
Open your portrait and grab the Polygon tool from the toolbar. You can set a number of sides for the polygon in the options at the top. Set it to 3 (the Polygon tool makes it easier to plot equilateral triangles than the Triangle tool). Hold Shift and drag to make a triangle.
2. Copy and rotate
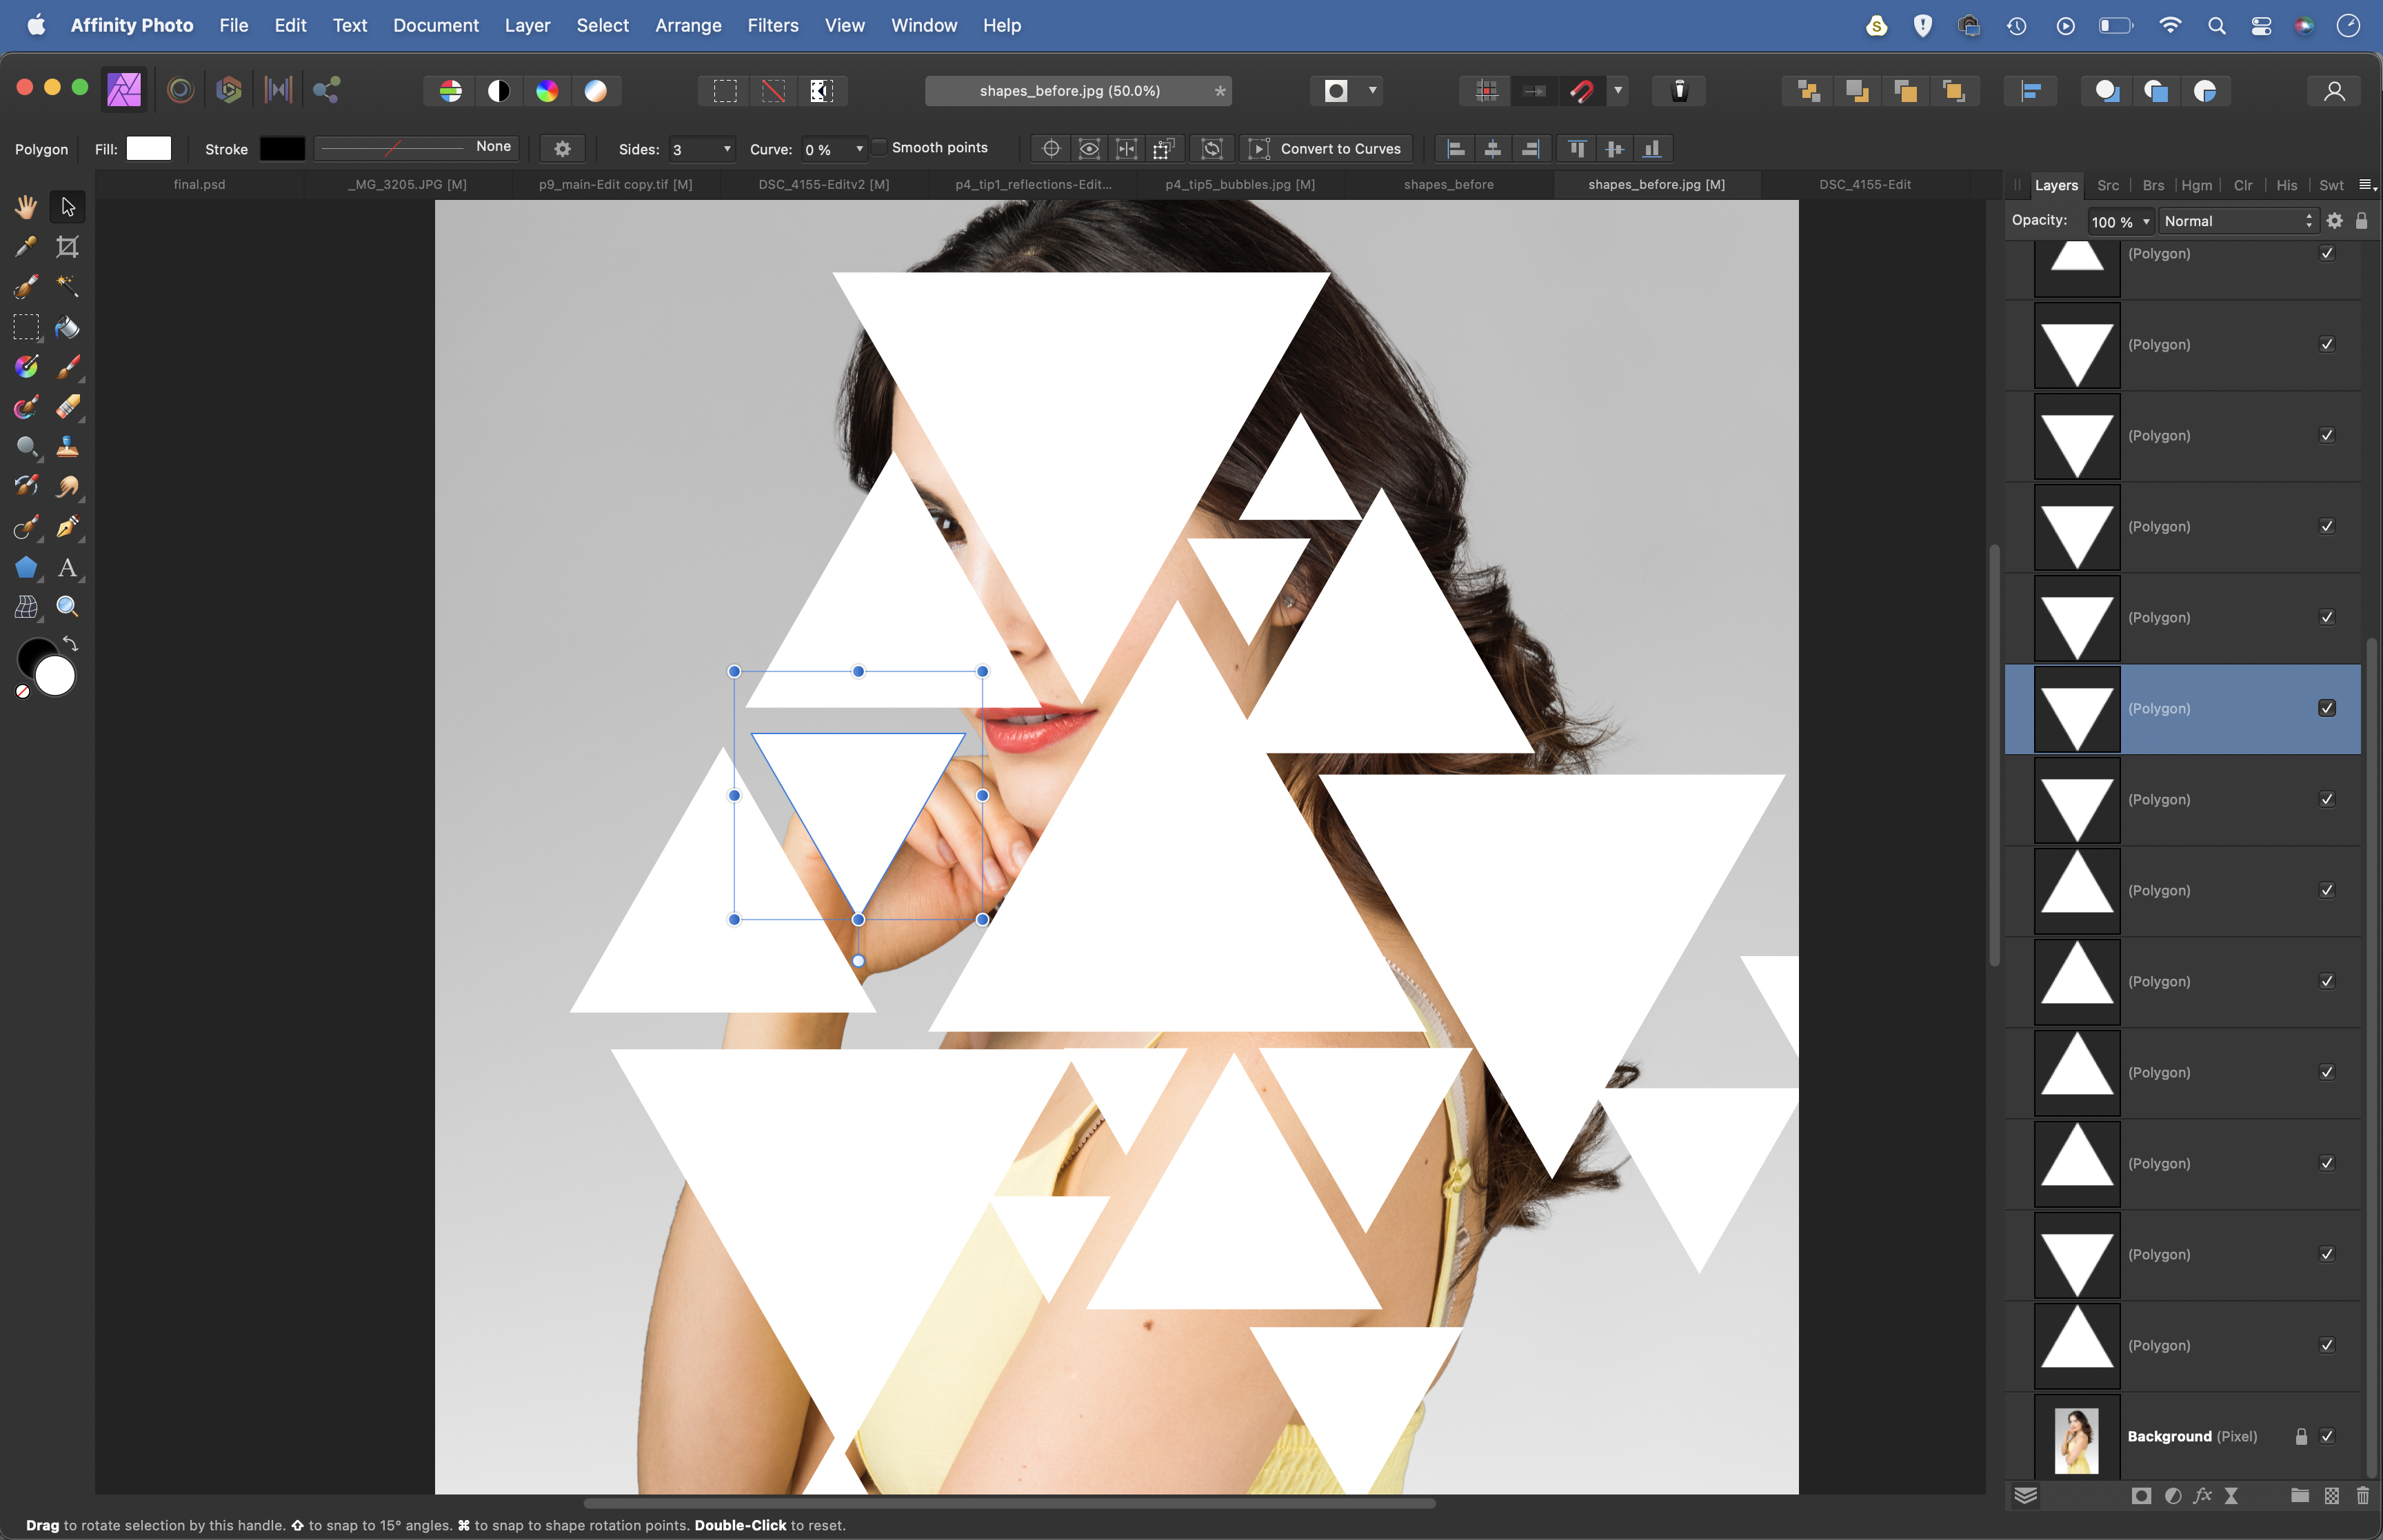
Grab the Move tool, hold Alt and drag the triangle to make a copy. Position it elsewhere. Hold Shift and drag the rotation control at the top of the bounding box to rotate the triangle 180 degrees. Continue making more copies, resizing and positioning them.
3. Group and rasterize
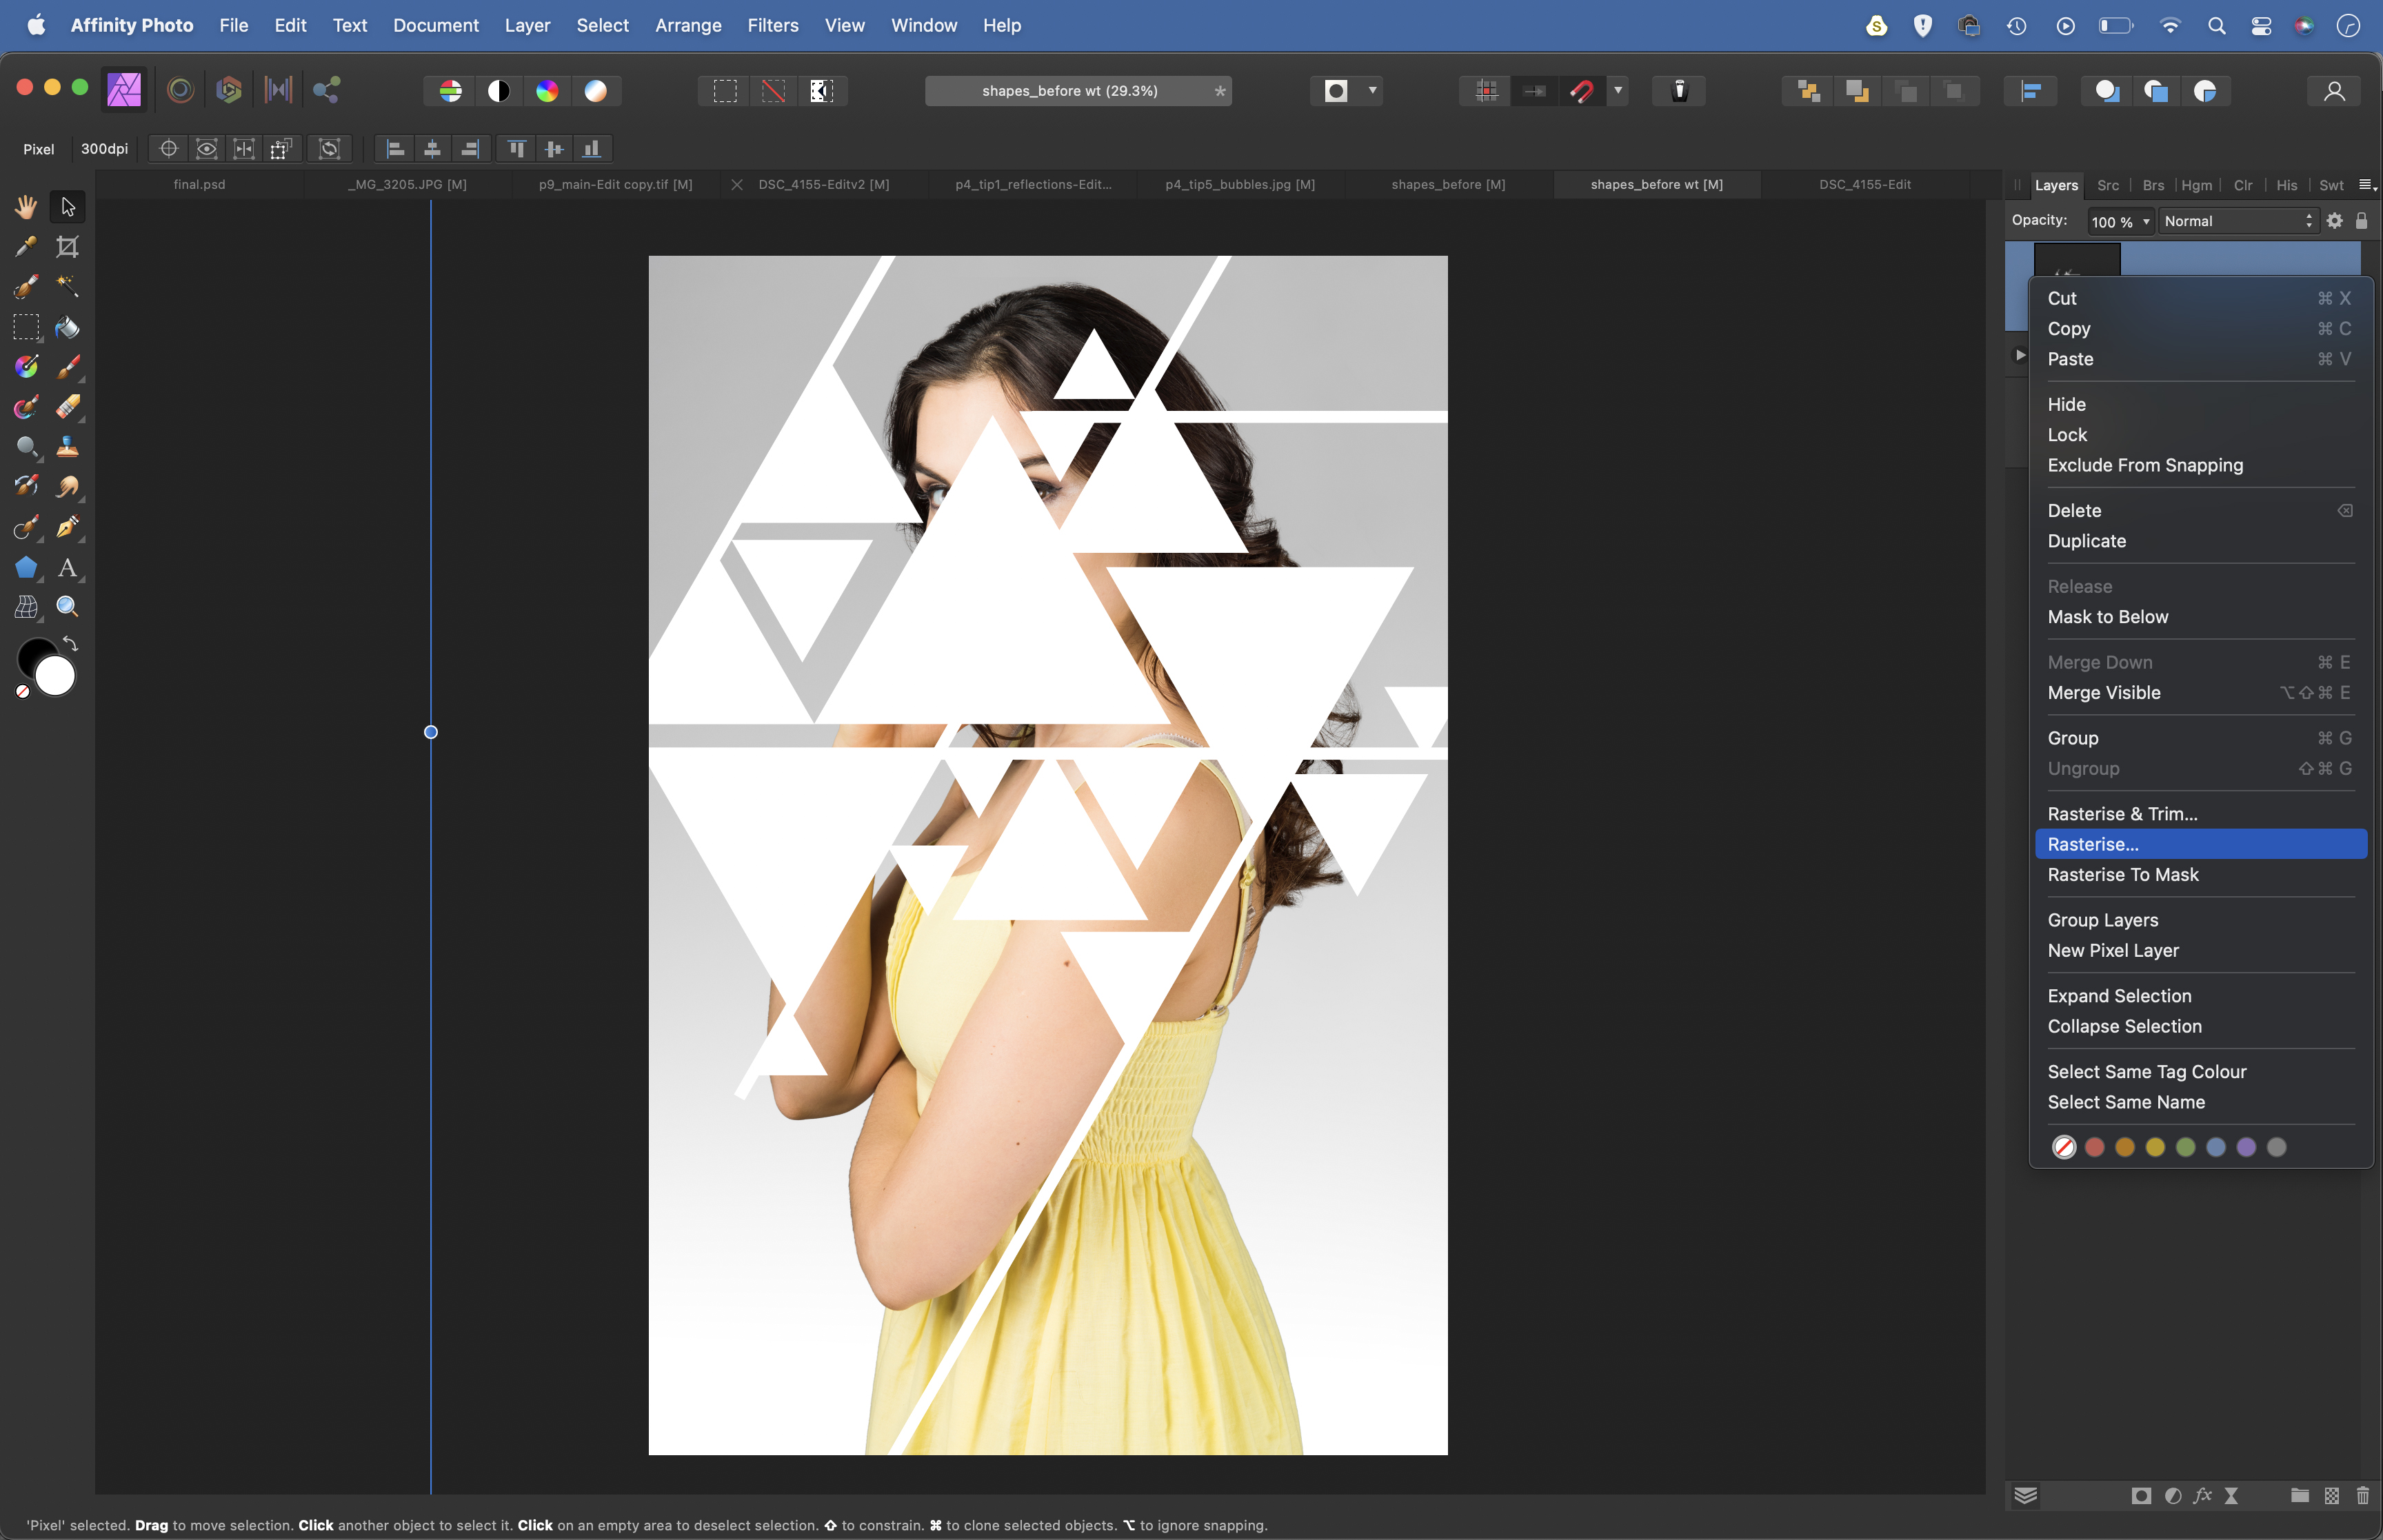
Grab the Rectangle tool and plot thin lines between the triangles. When happy, highlight the bottom shape layer, then shift-click on the top-most shape layer. Hit Cmd/Ctrl + G to group them. Press Cmd/Ctrl + J to copy the group, then right-click it and Rasterize.
4. Add a background
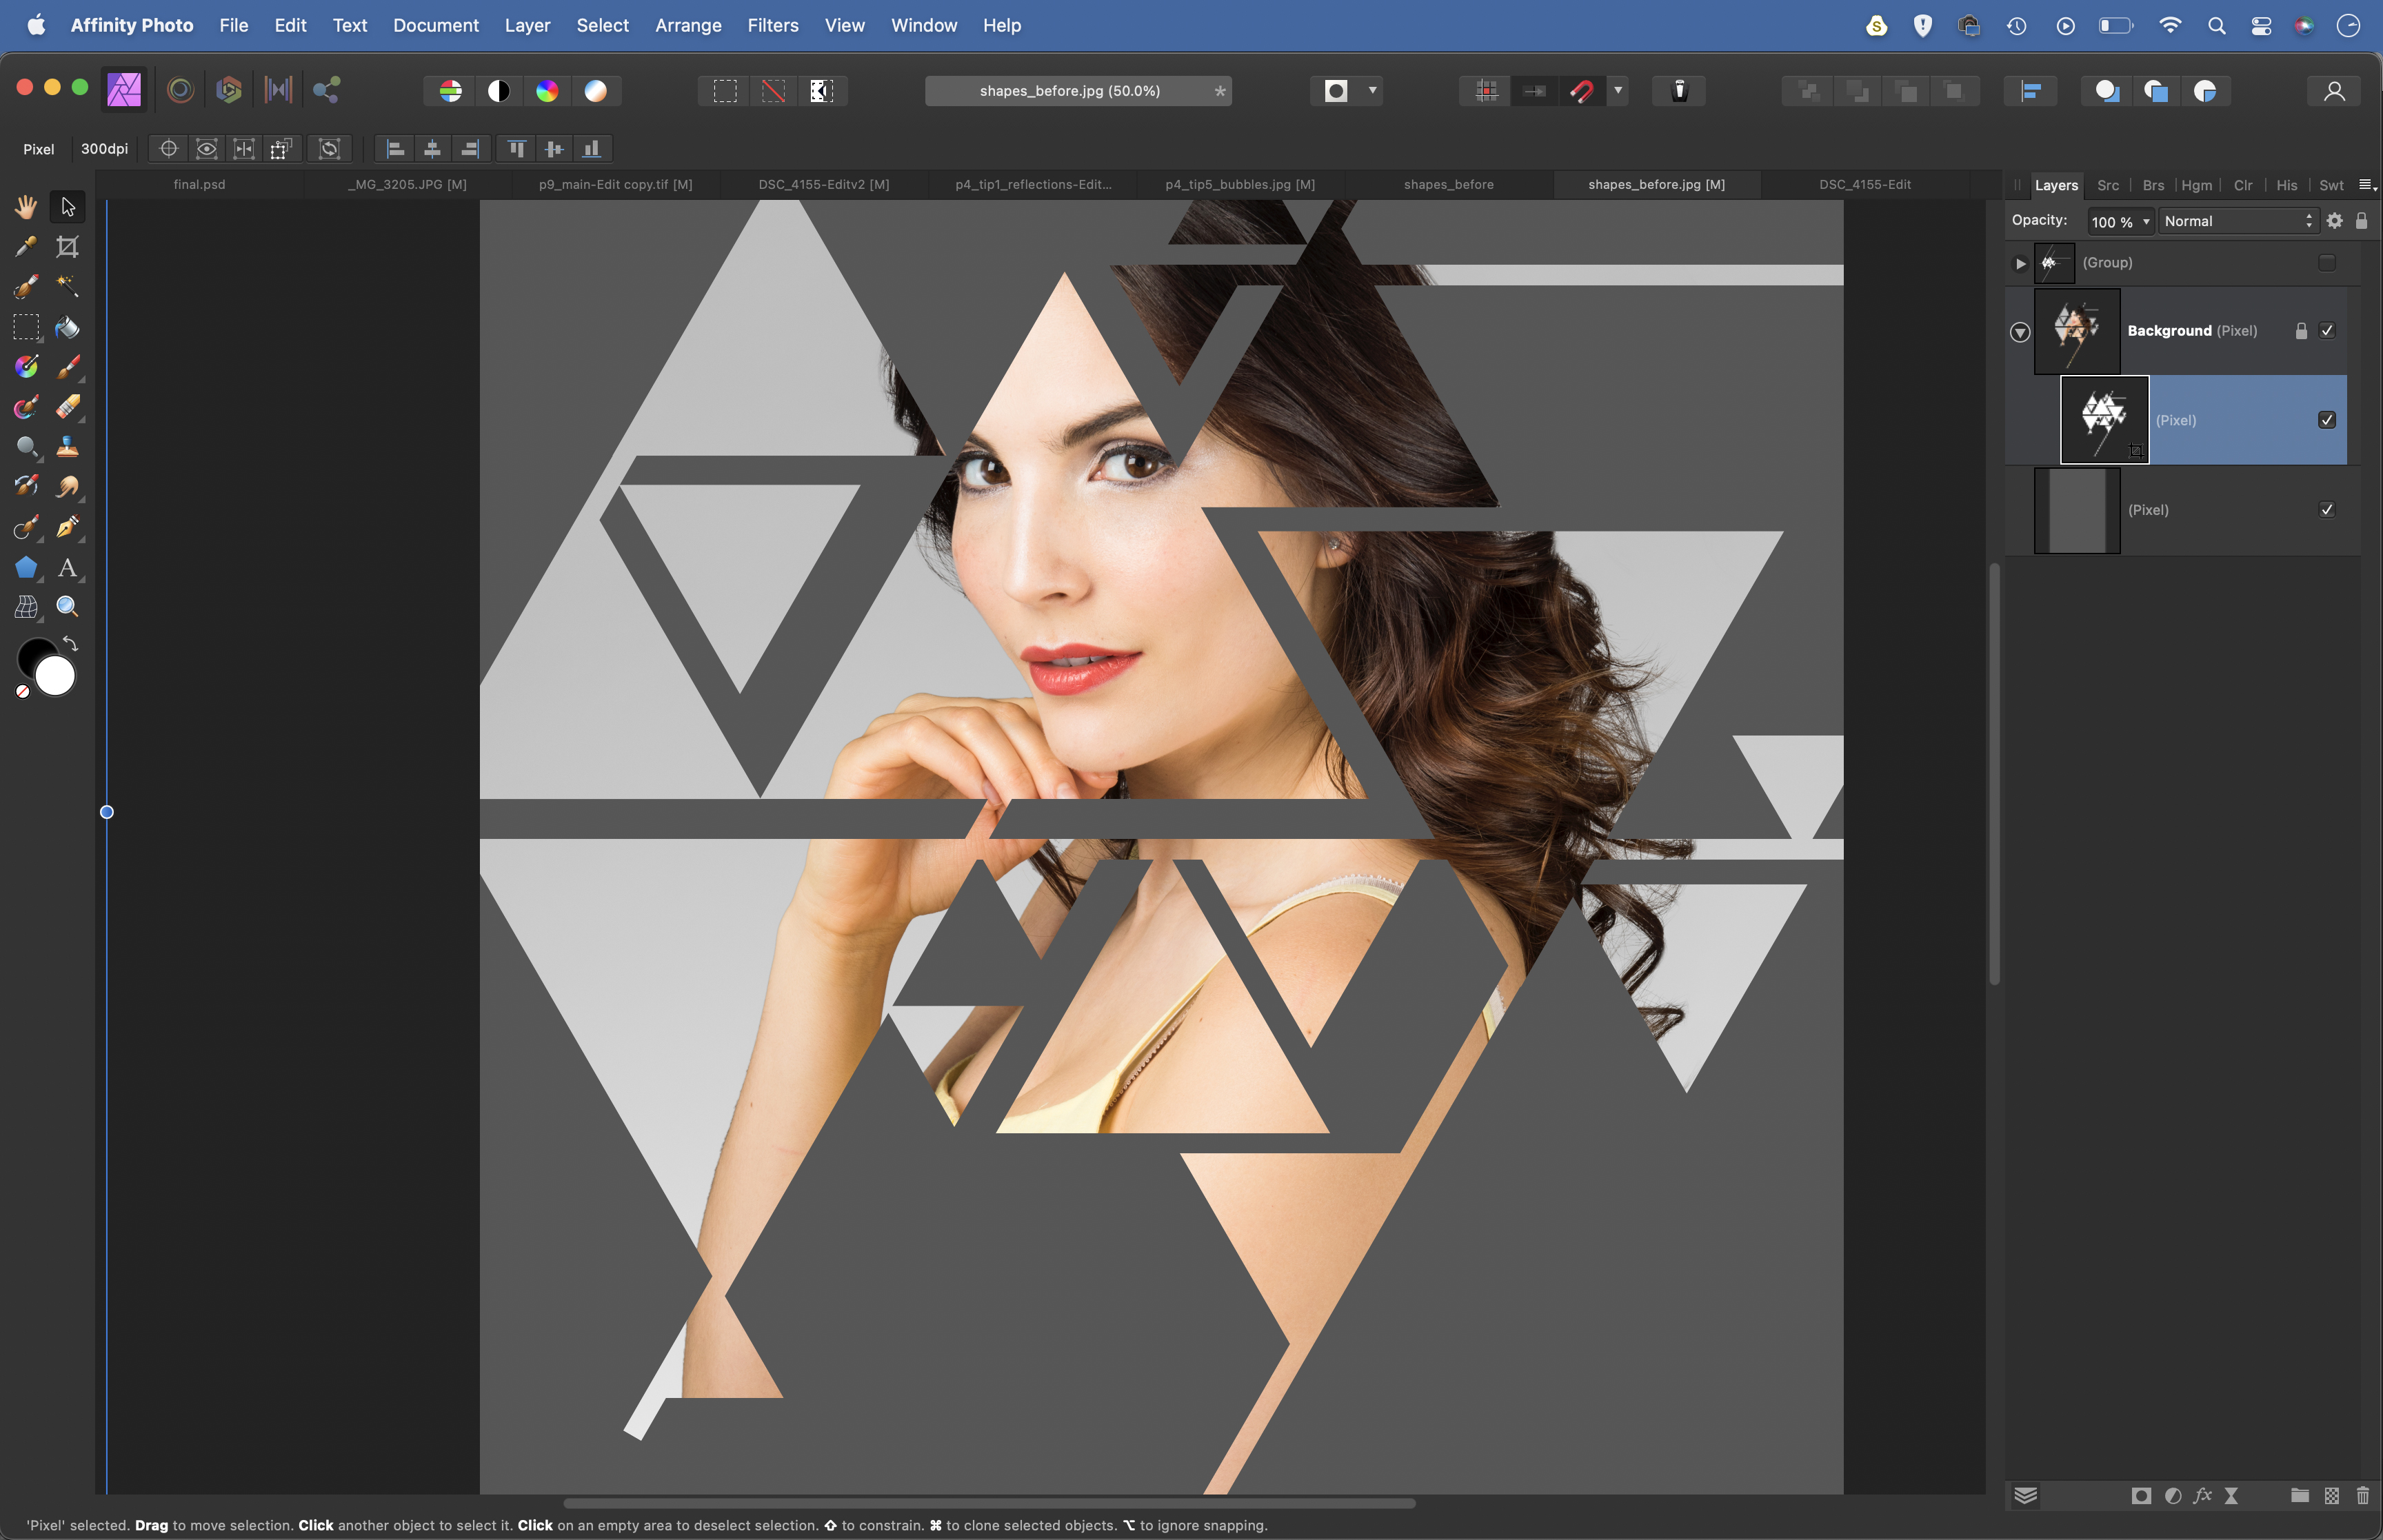
Click the tick to hide the group below, then drag the rasterized layer on top of the portrait layer, so that it indents to the right side of the layer thumbnail. Next, make a new layer and drag it to the bottom of the stack. Go to Edit > Fill and fill it with a dark grey.
5. Make a shadow
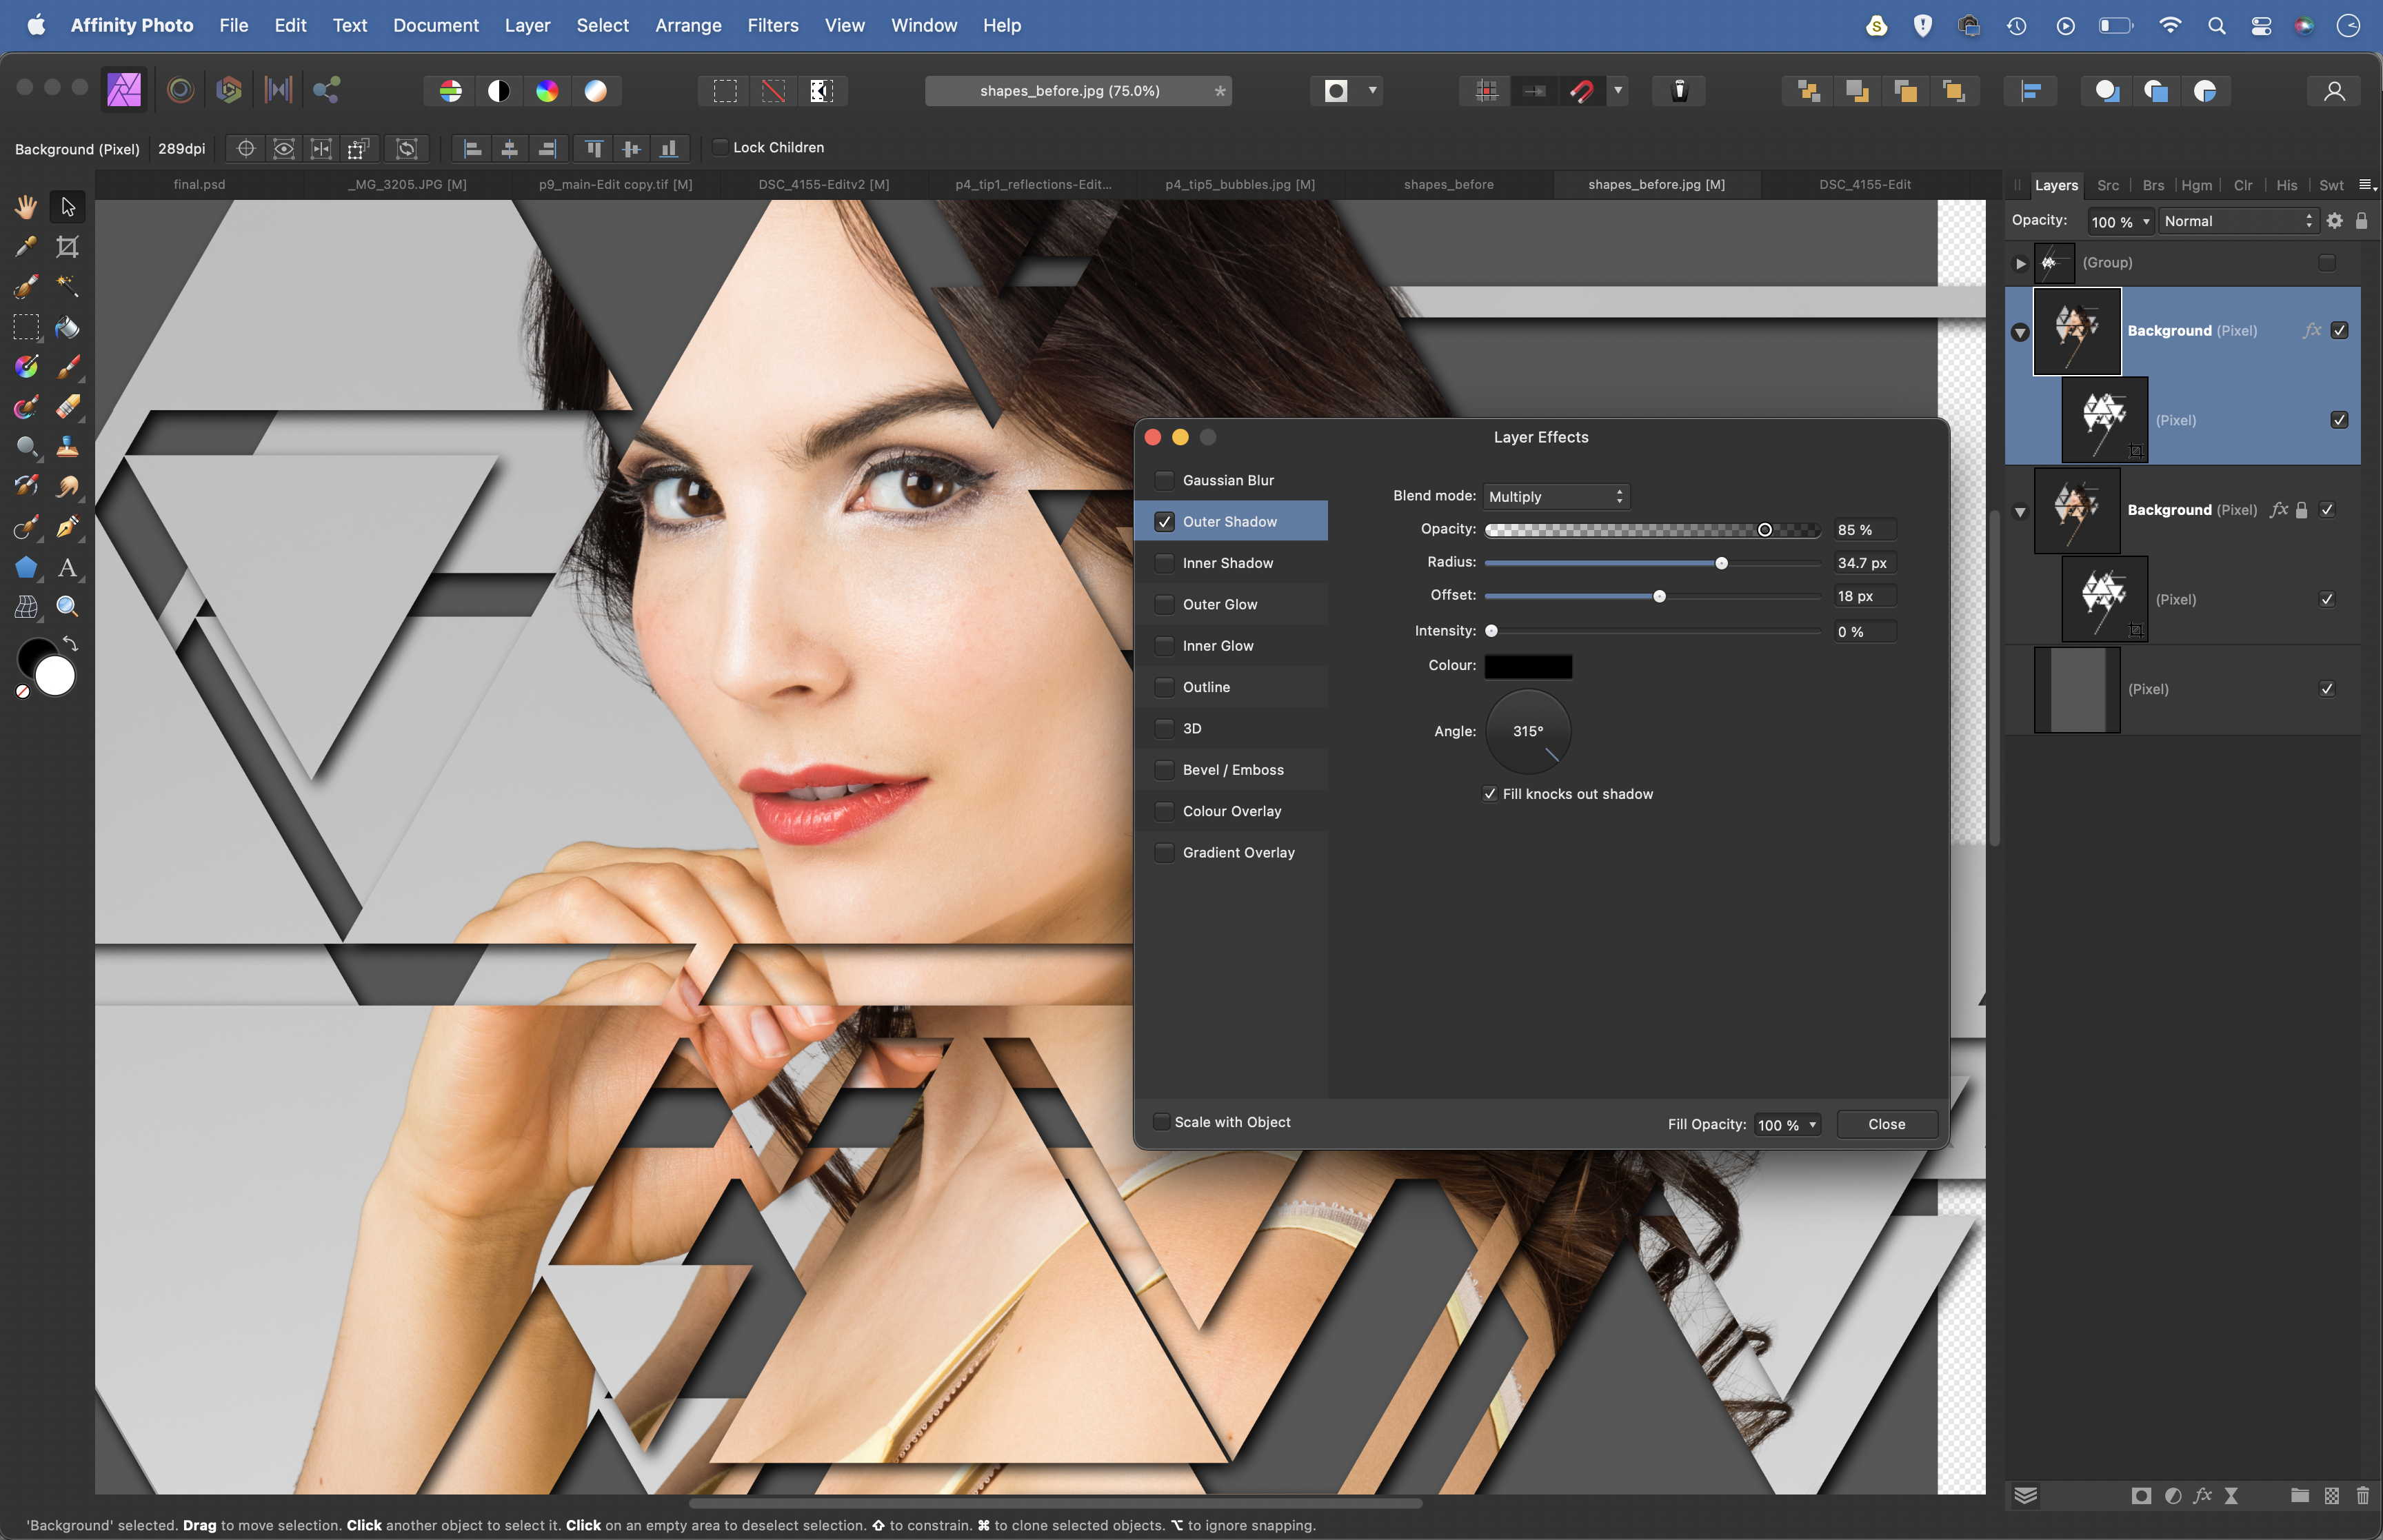
Highlight the portrait layer and click the FX button in the Layers Panel. Tick Outer Shadow. Use the settings to add a shadow effect to the shapes. Duplicate the portrait layer with Cmd/Ctrl + J. Enlarge it slightly, then highlight the duplicate shapes layer and offset it.
6. Build it up
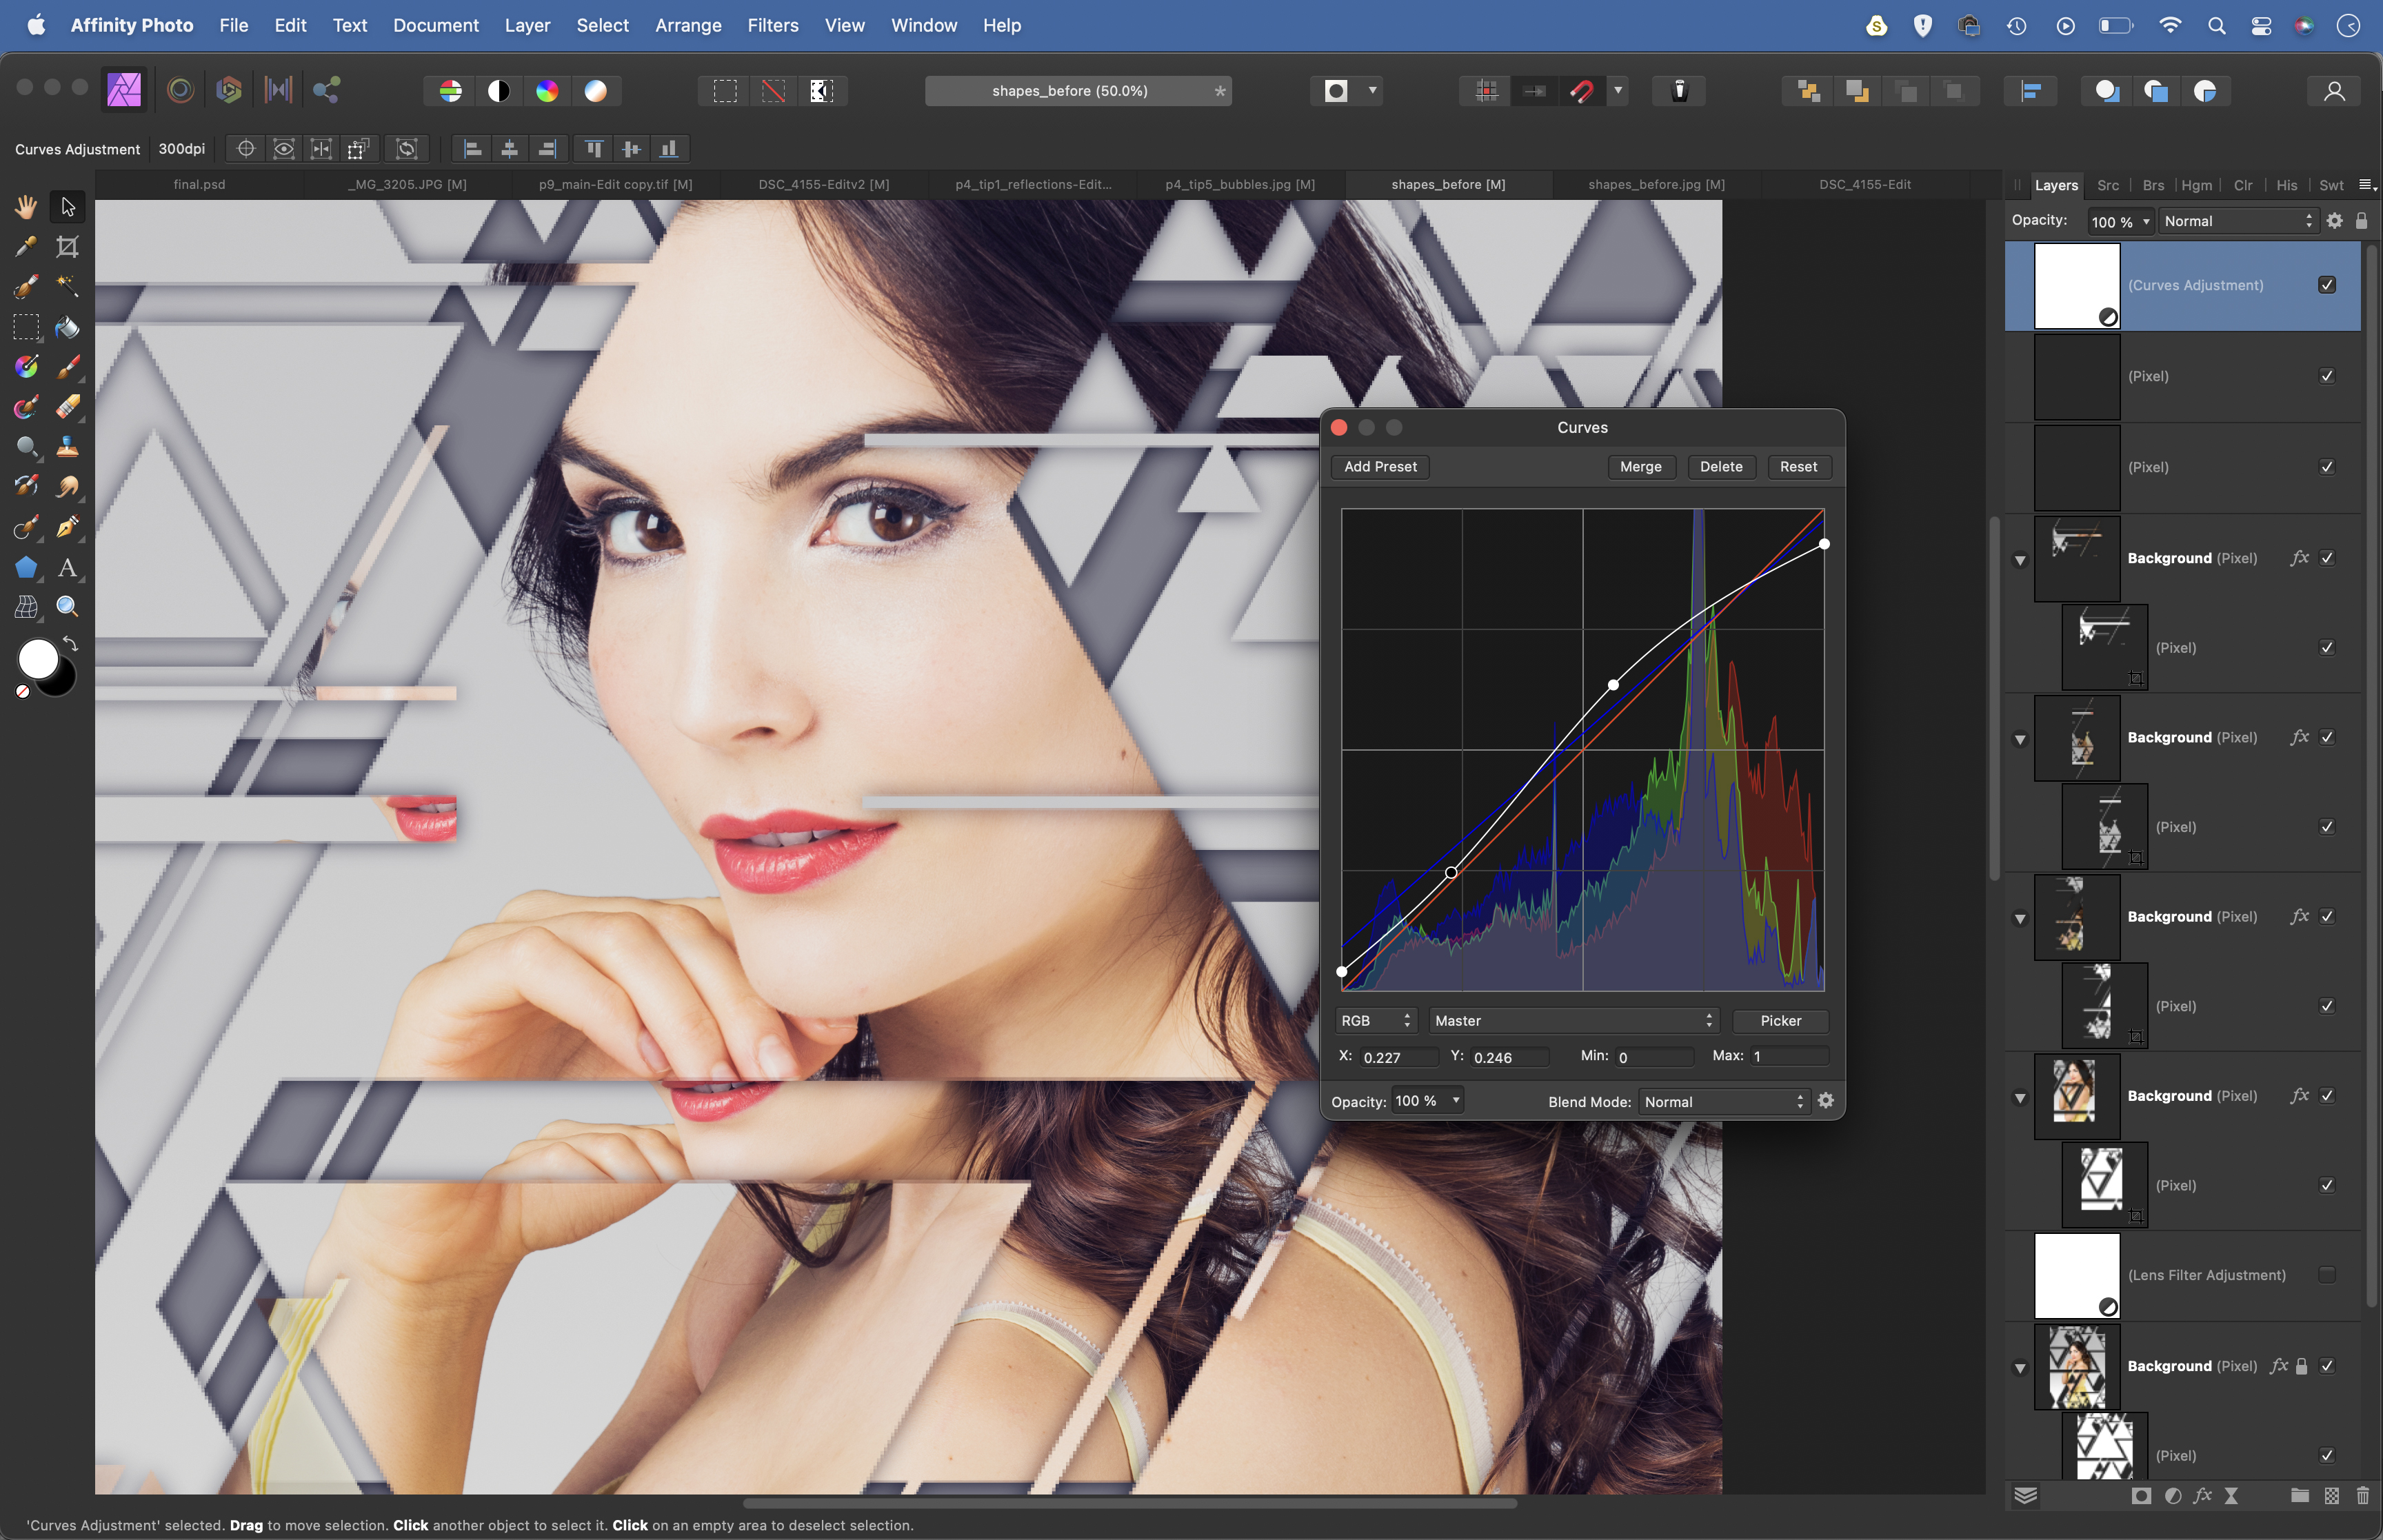
Continue duplicating and offsetting the image layer (with attached triangles), experimenting with position. Finally, highlight the top layer, click the Create Adjustment Layer icon and choose Curves. Plot a curve line to flatten the highlights and boost contrast.
• See more of our Affinity Photo tutorials
PhotoPlus: The Canon Magazine is the world's only monthly newsstand title that's 100% devoted to Canon, so you can be sure the magazine is completely relevant to your system.
If you enjoyed this tutorial but want a bit more power from your laptop, why not look at the best photo-editing laptops? If you're really keen to improve your skills further than online photography courses could be the way to go.
Get the Digital Camera World Newsletter
The best camera deals, reviews, product advice, and unmissable photography news, direct to your inbox!
The lead technique writer on Digital Camera Magazine, PhotoPlus: The Canon Magazine and N-Photo: The Nikon Magazine, James is a fantastic general practice photographer with an enviable array of skills across every genre of photography.
Whether it's flash photography techniques like stroboscopic portraits, astrophotography projects like photographing the Northern Lights, or turning sound into art by making paint dance on a set of speakers, James' tutorials and projects are as creative as they are enjoyable.
He's also a wizard at the dark arts of Photoshop, Lightroom and Affinity Photo, and is capable of some genuine black magic in the digital darkroom, making him one of the leading authorities on photo editing software and techniques.


