Discover how I perfect colors the easy way with HSL sliders in Affinity Photo
James Paterson shows you how to enhance colors in the budget-friendly Affinity Photo with using the HSL sliders
Watch video (above): Perfect your colours with HSL
Bold colors can really help to make an image pop, whether on screen or in print. But the colors in a photo can come out disappointingly weak or lacking in punch. Thankfully, there are lots of ways to tease out the color and give our images a greater impact.
One such tool is the HSL adjustment in Affinity Photo. HSL stands for Hue, Saturation and Luminosity. The tool gives us independent control over these three parameters. The Hue lets us shift color to something different, while the Saturation lets us control the intensity of the color, and lastly, the Luminance slider lets us adjust the brightness of color ranges.
Check out Half price Affinity Black Friday deal
The great thing about the HSL tool in Affinity Photo is how we can fine-tune what is targeted. Six color points let us target broad ranges like reds or blues, making it easy to zero in on the red petals here and adjust them. But we can also go beyond those six standard ranges and define our own by adjusting the color wheel, so we can, for instance, ensure we pick up all the green and yellow colors in the plant here and boost them all at once.
Whether you want to boost colors or shift them to something completely different, the HSL control can be very useful. In this project, we’ll show you how to use it to recolor our flower image, then go on to target and color the backdrop.
1. Add an HSL layer
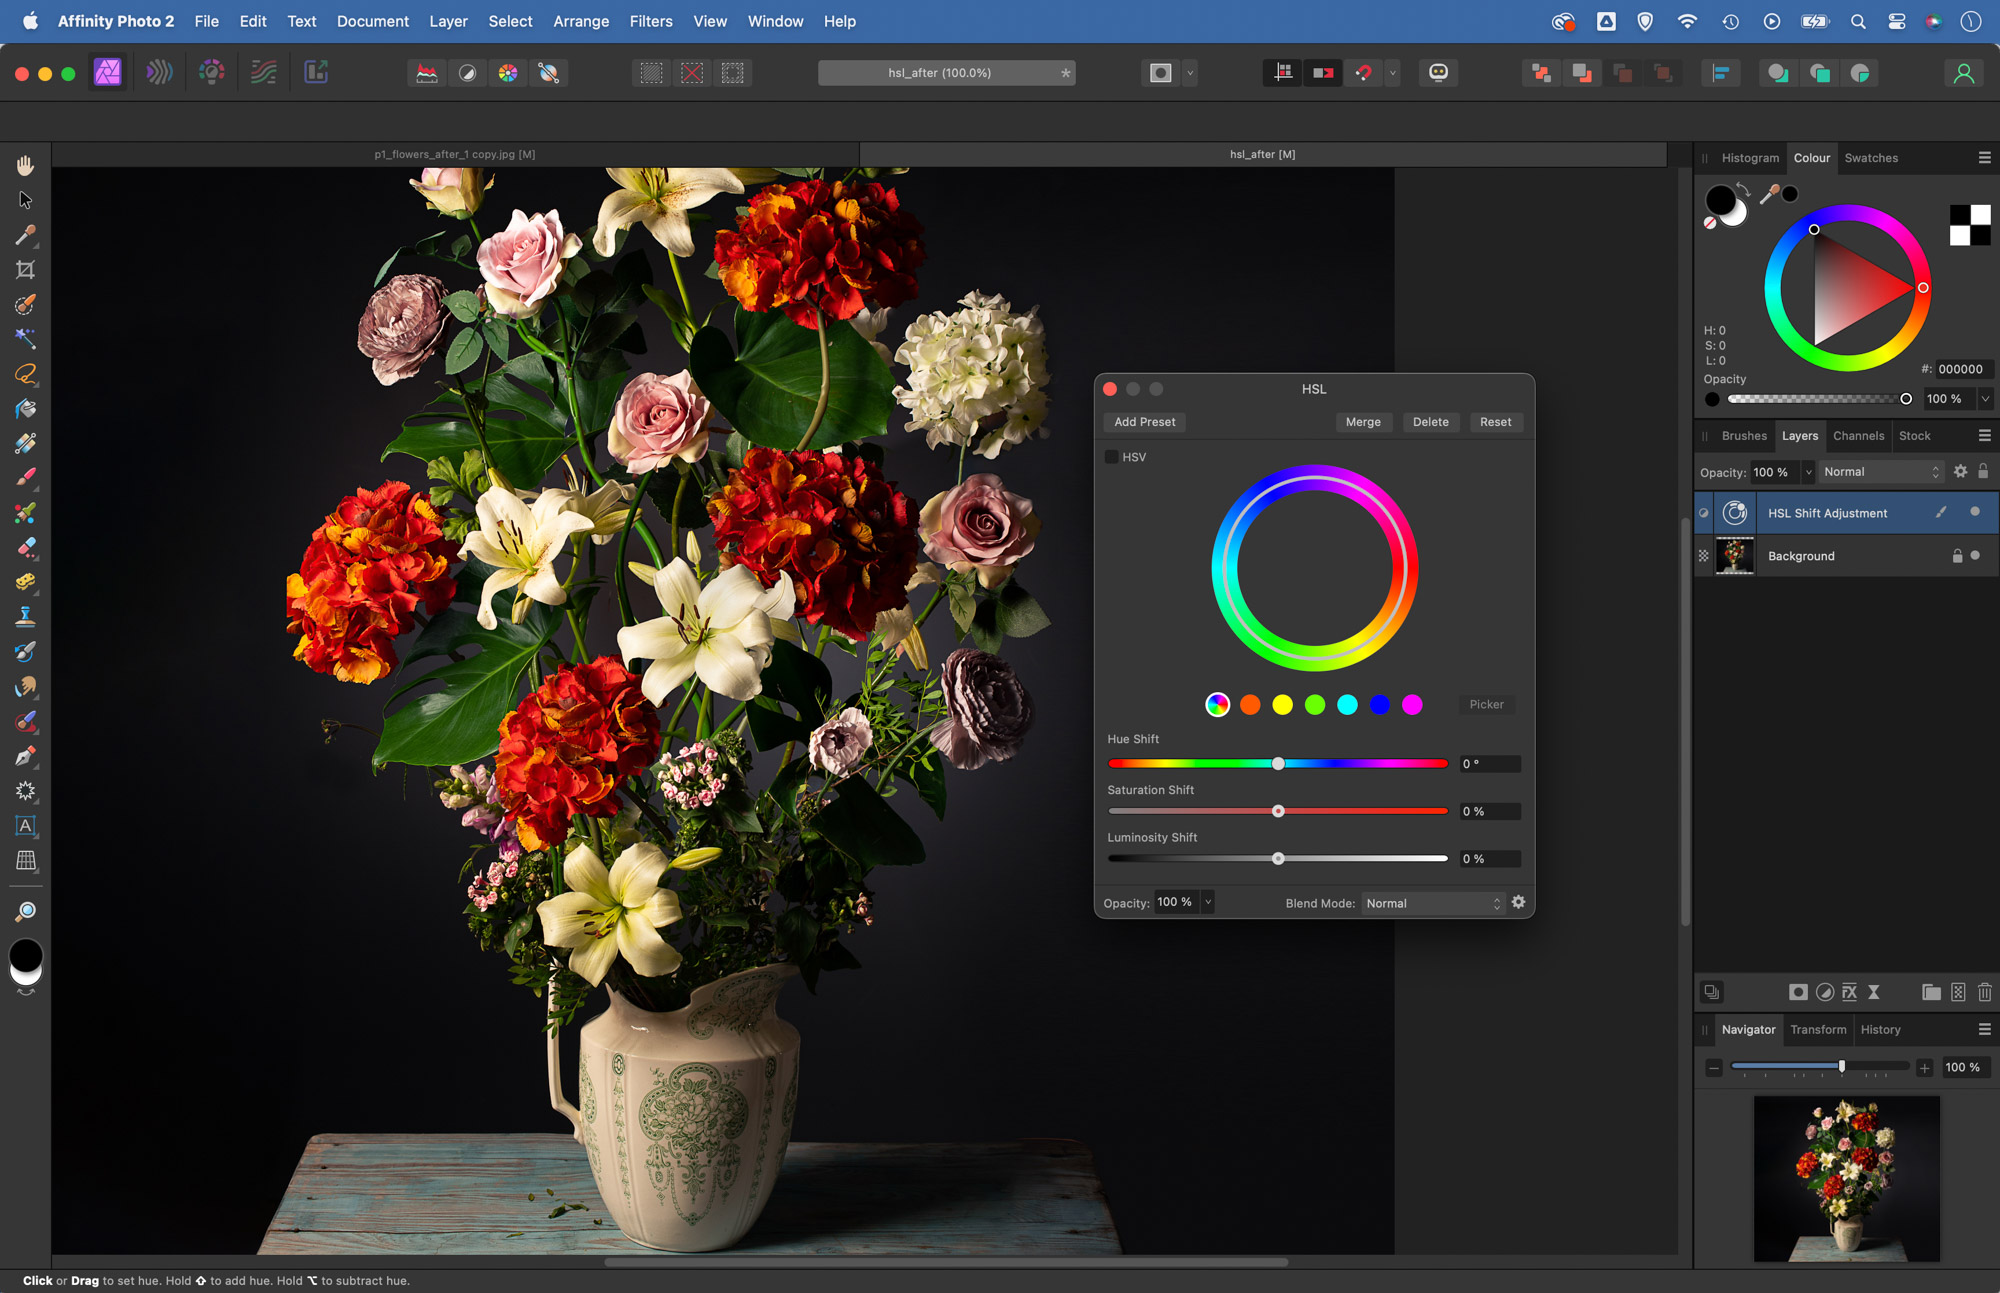
Open the start.jpg image into Affinity Photo. Go to the Layers Panel, click the Adjustment icon and choose HSL. The six colour spots below the circle let you target different colour ranges. It’s set to target all colours but its power comes from choosing your own.
2. Alter the reds
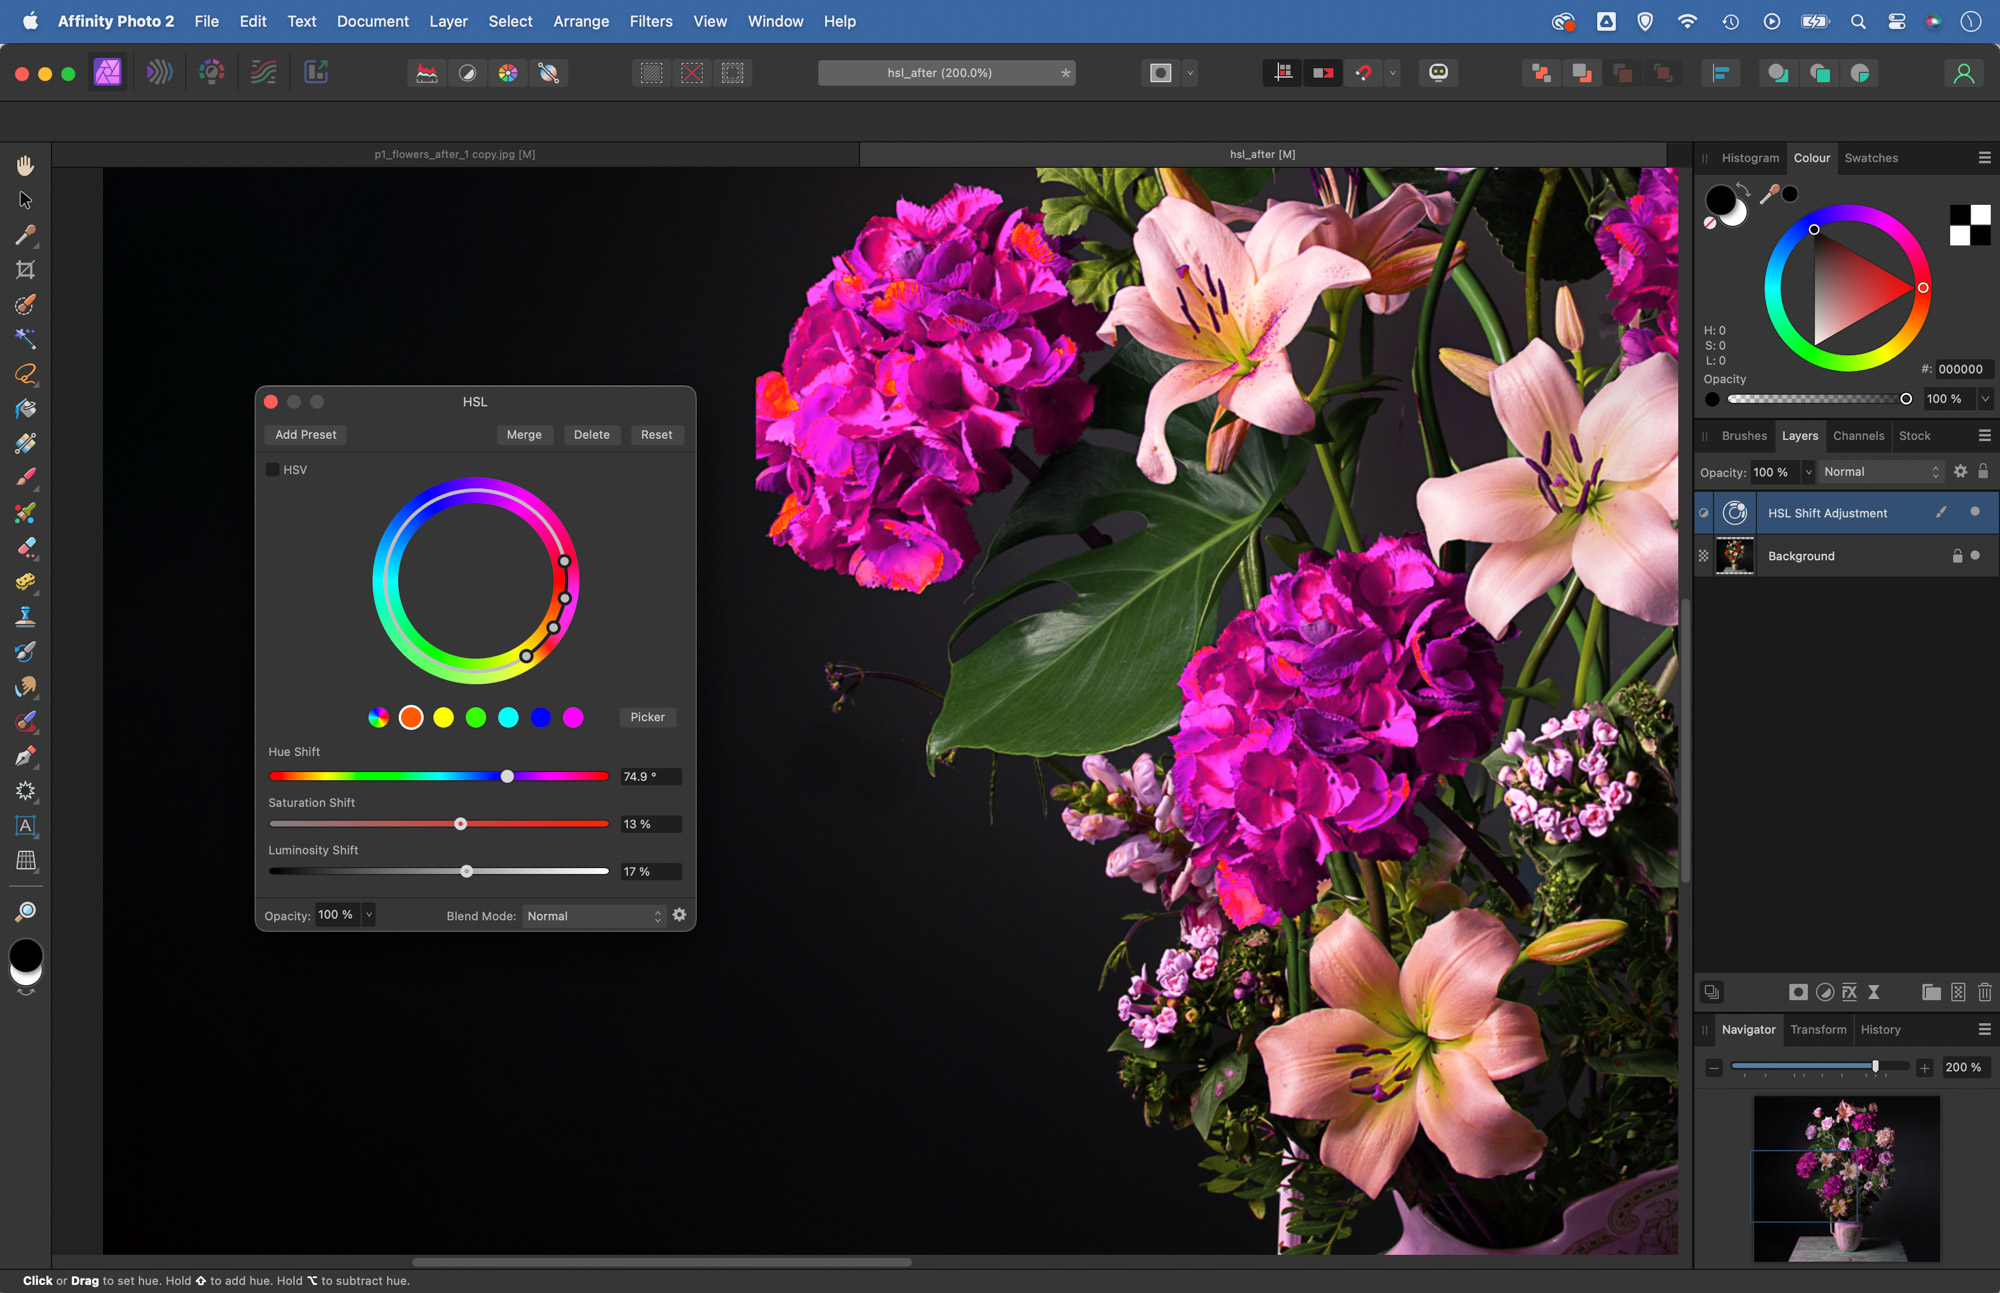
Click on the red spot then try dragging the Hue slider to alter the red range. If you need to reset any slider, double-click it. Next click on the green spot and drag the Hue slider to the left and the Saturation slider to the right to make the greens more intense.
3. Fine-tune the range
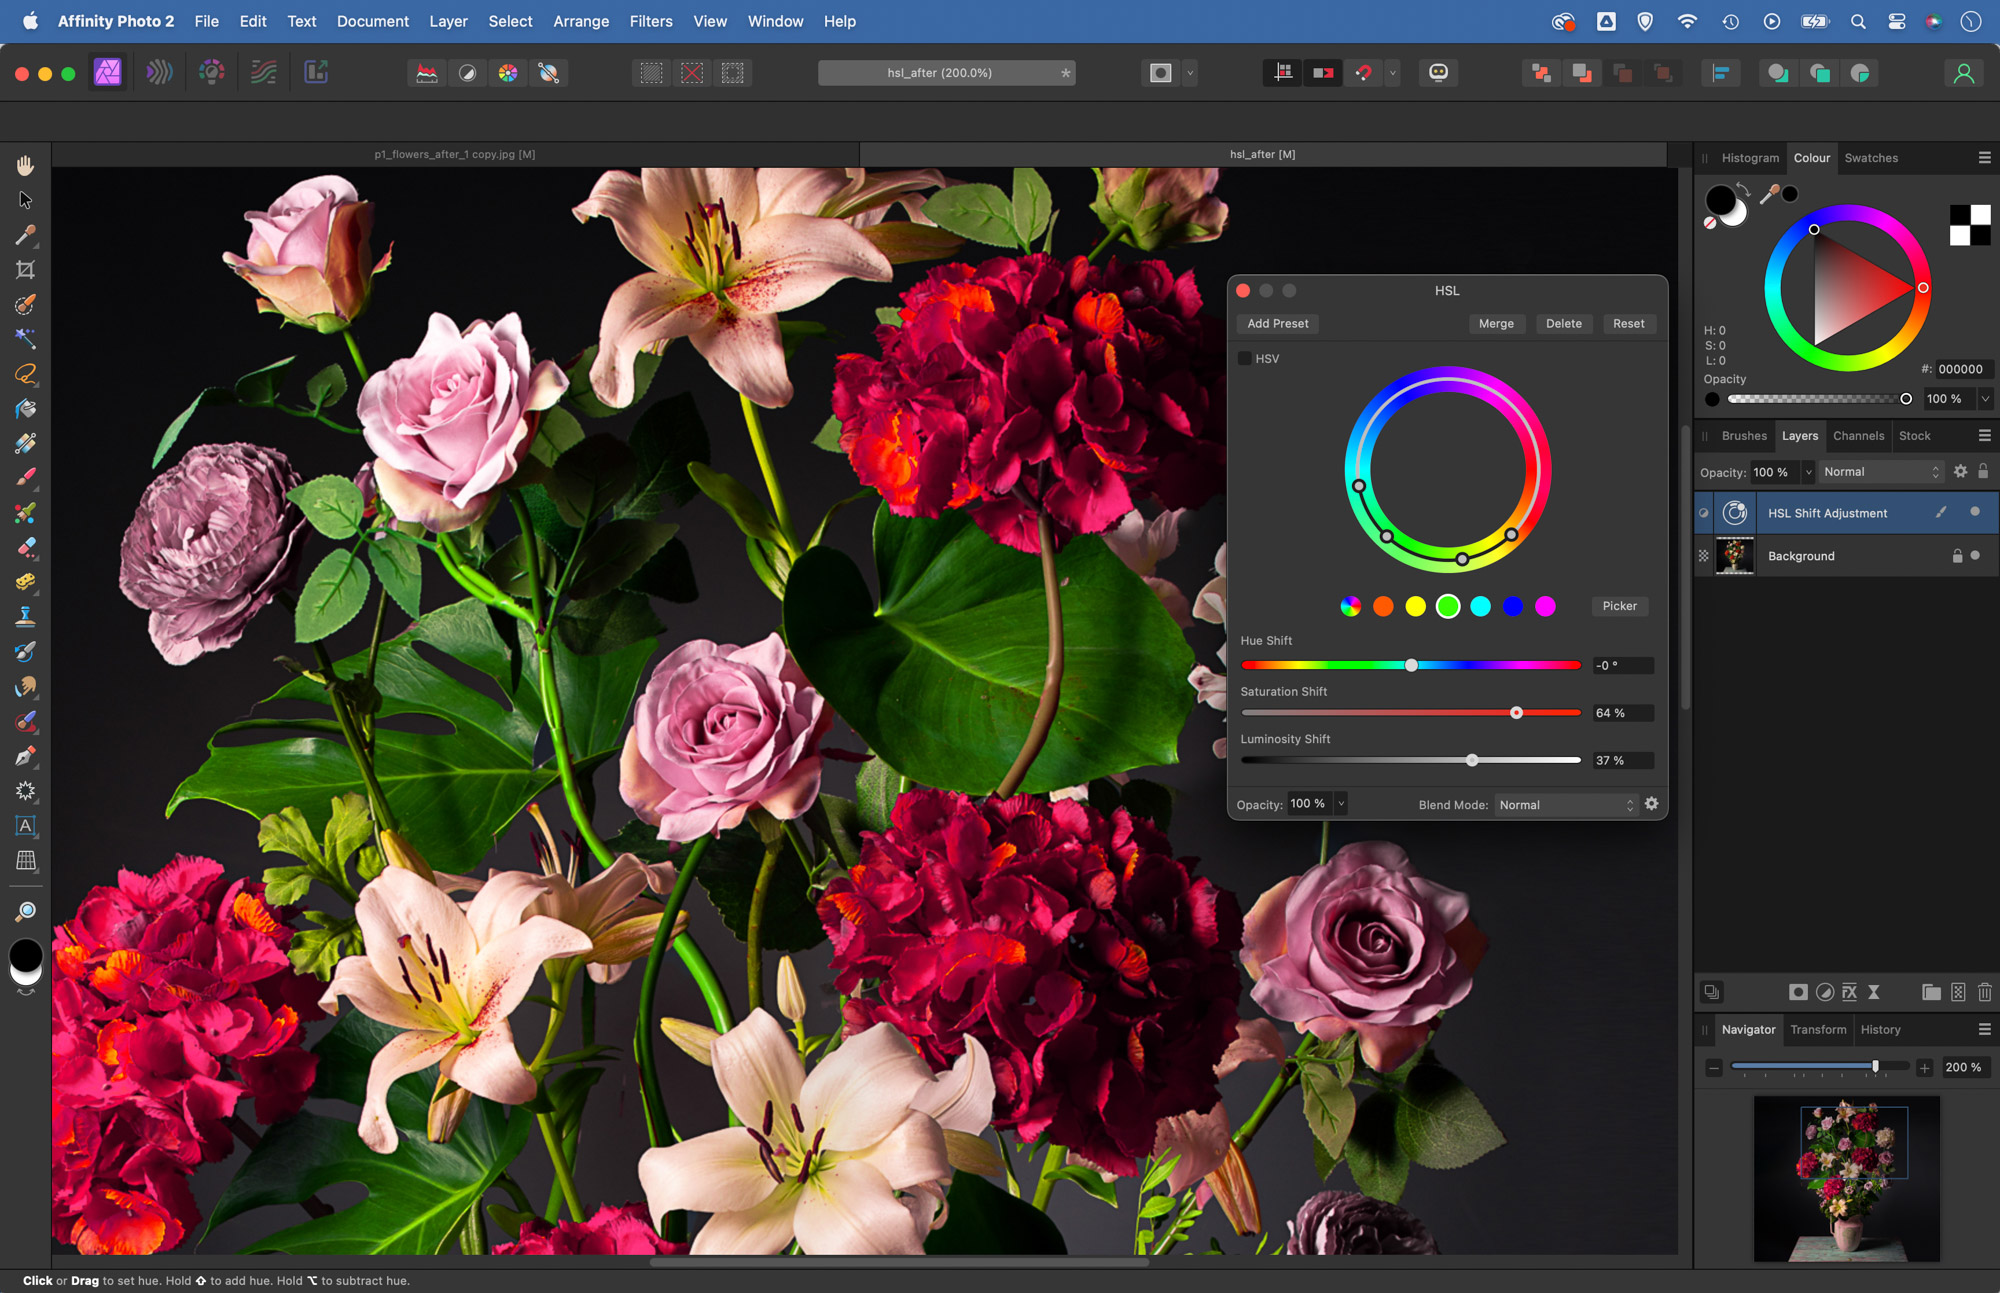
The green range doesn’t target all the colours we want here. We can adjust the four points on the colour wheel to fine-tune what is included or excluded. The outer points set the transition and the inner points set the part that’s fully affected.
4. Paint a mask
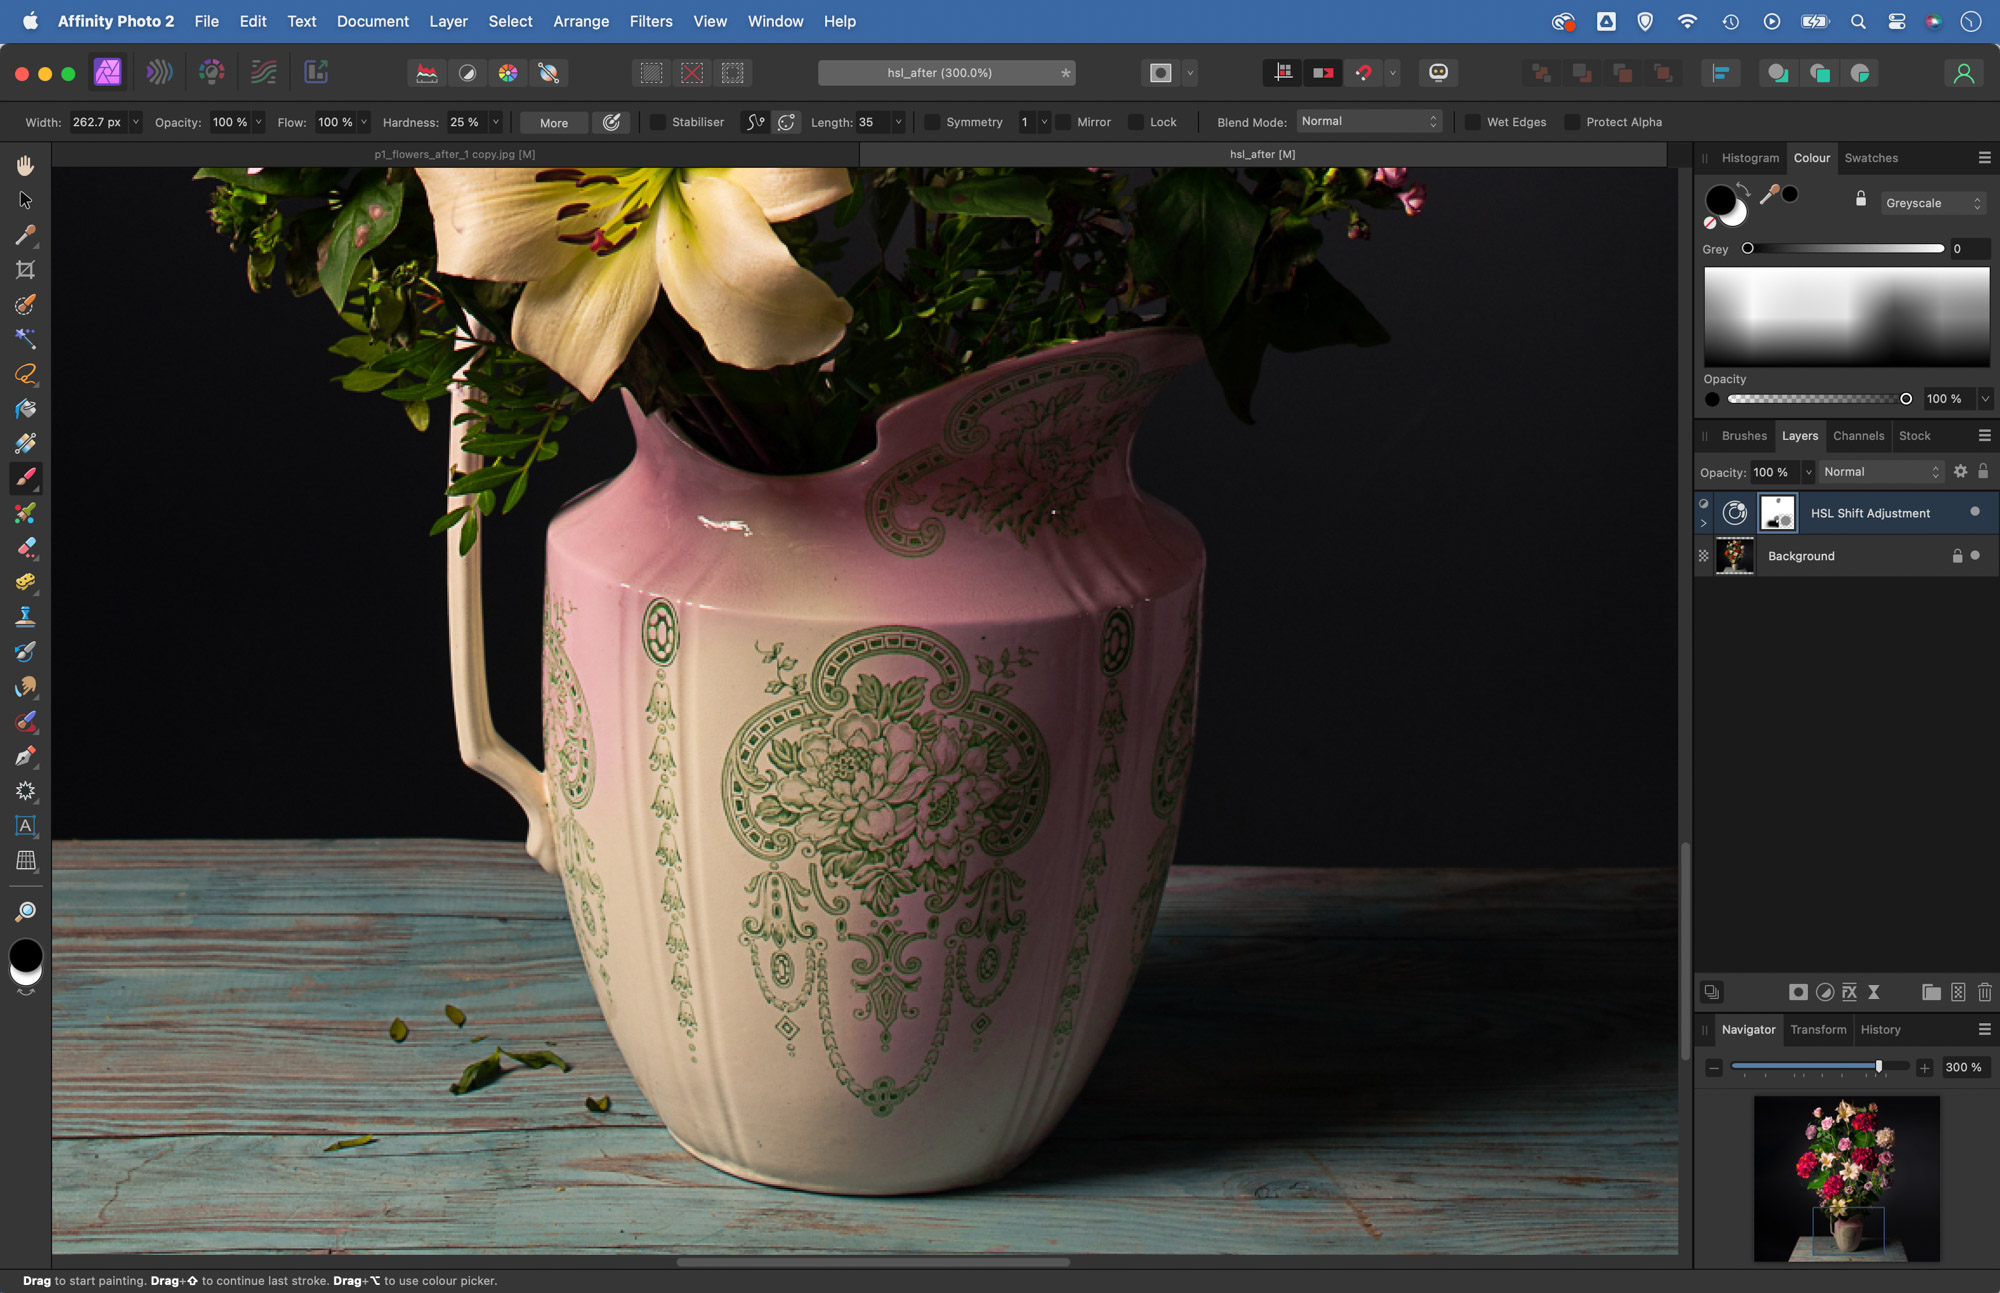
You might find that the HSL adjustment affects parts of the image you want unchanged but we can paint a quick layer mask. Click the Mask icon to add a mask to the HSL layer. Grab the Brush tool, set colour to black and paint over areas to hide the colour change effect.
5. Select the background
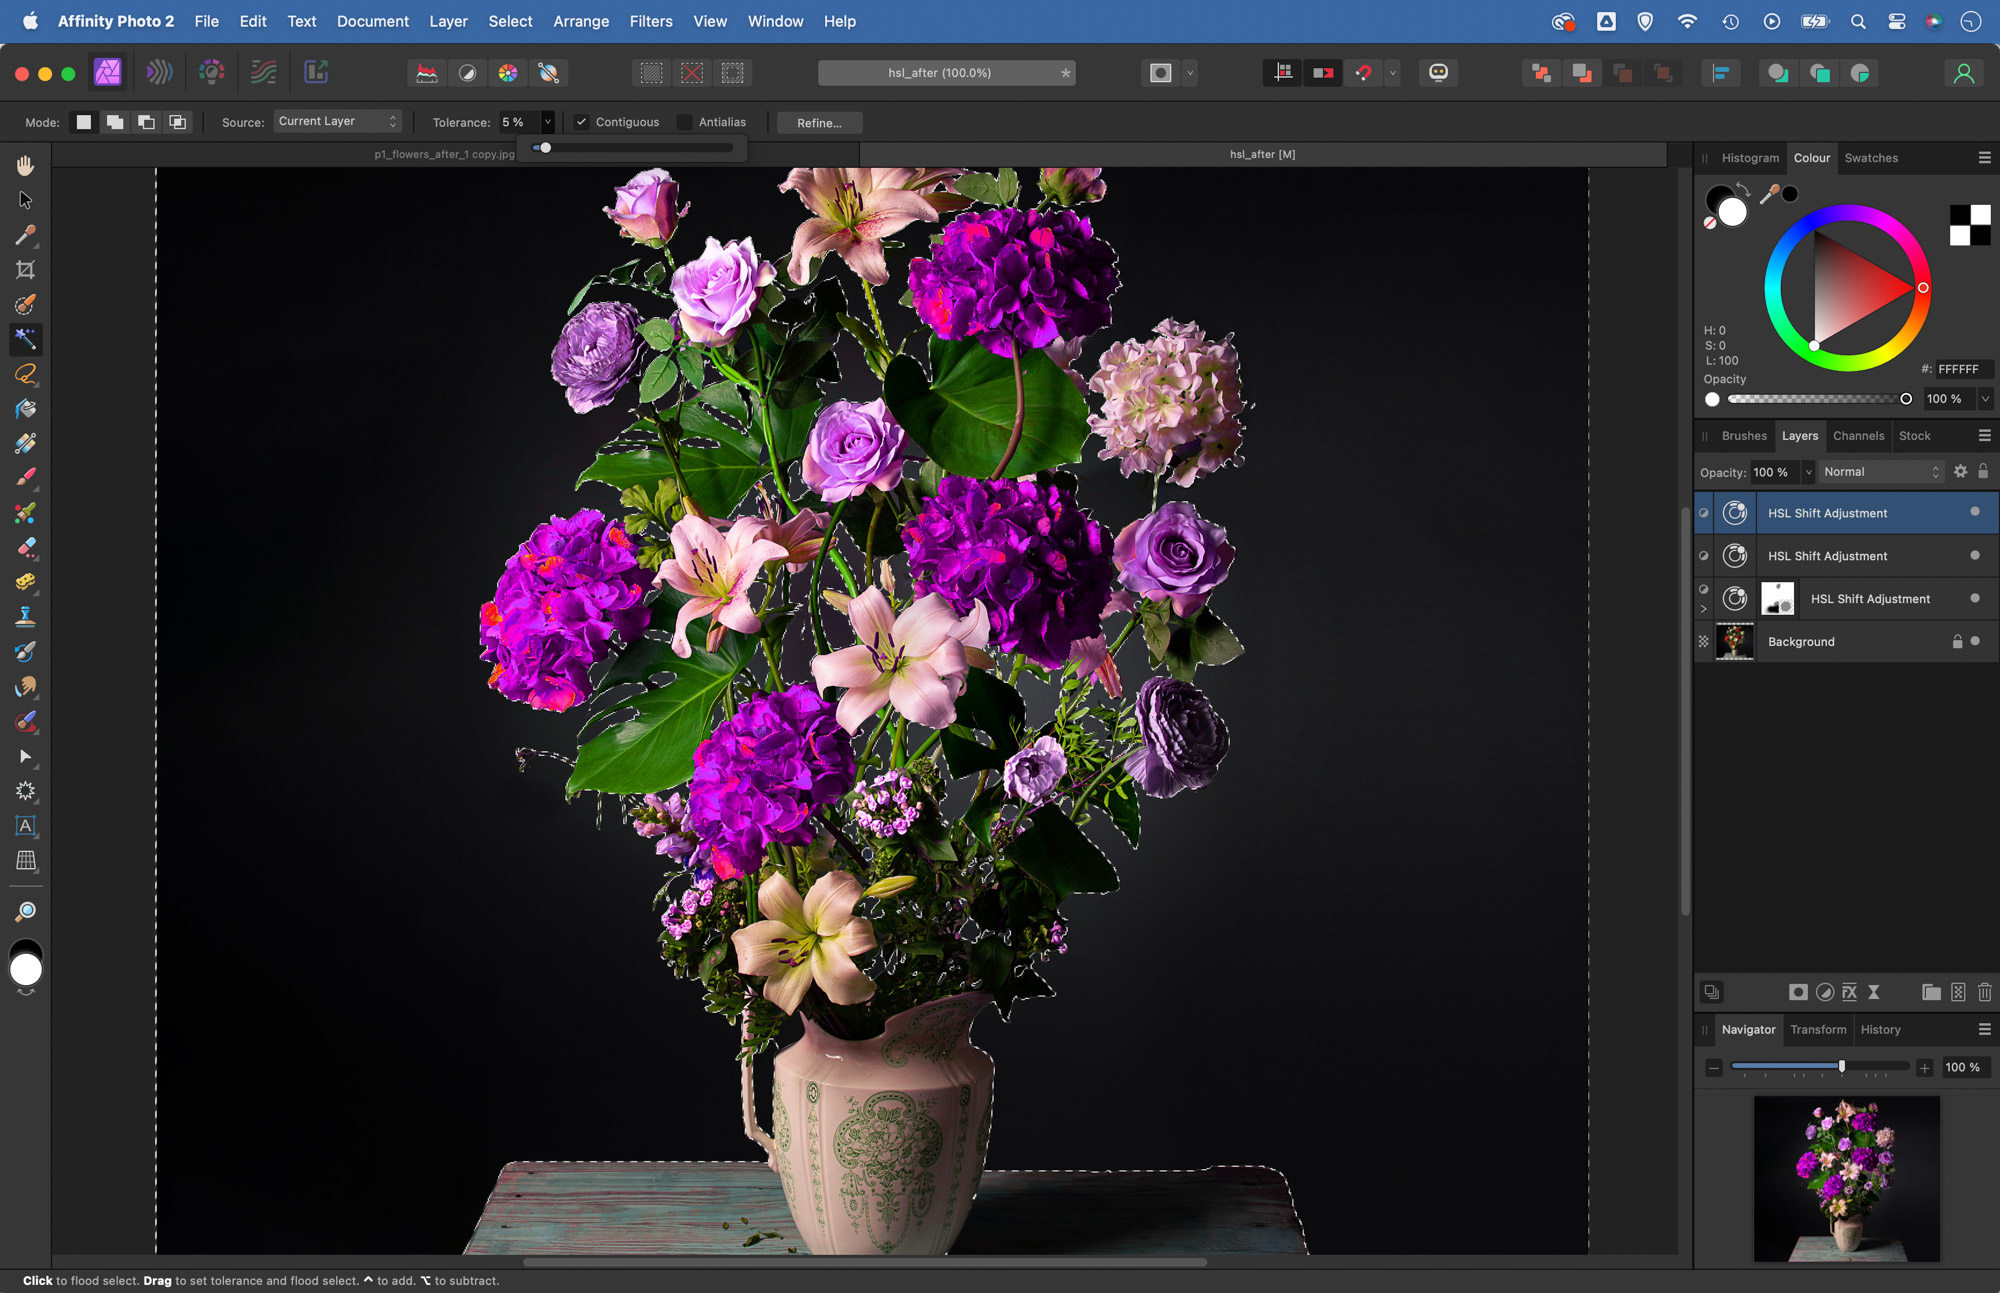
We can add more HSL layers to fine-tune colors. Next we can change the background with a Recolour layer. Make a selection – grab the Magic Wand tool, set Mode to Add, Tolerance 5%, and check Contiguous, then click repeatedly on the background to select all.
6. Color the backdrop
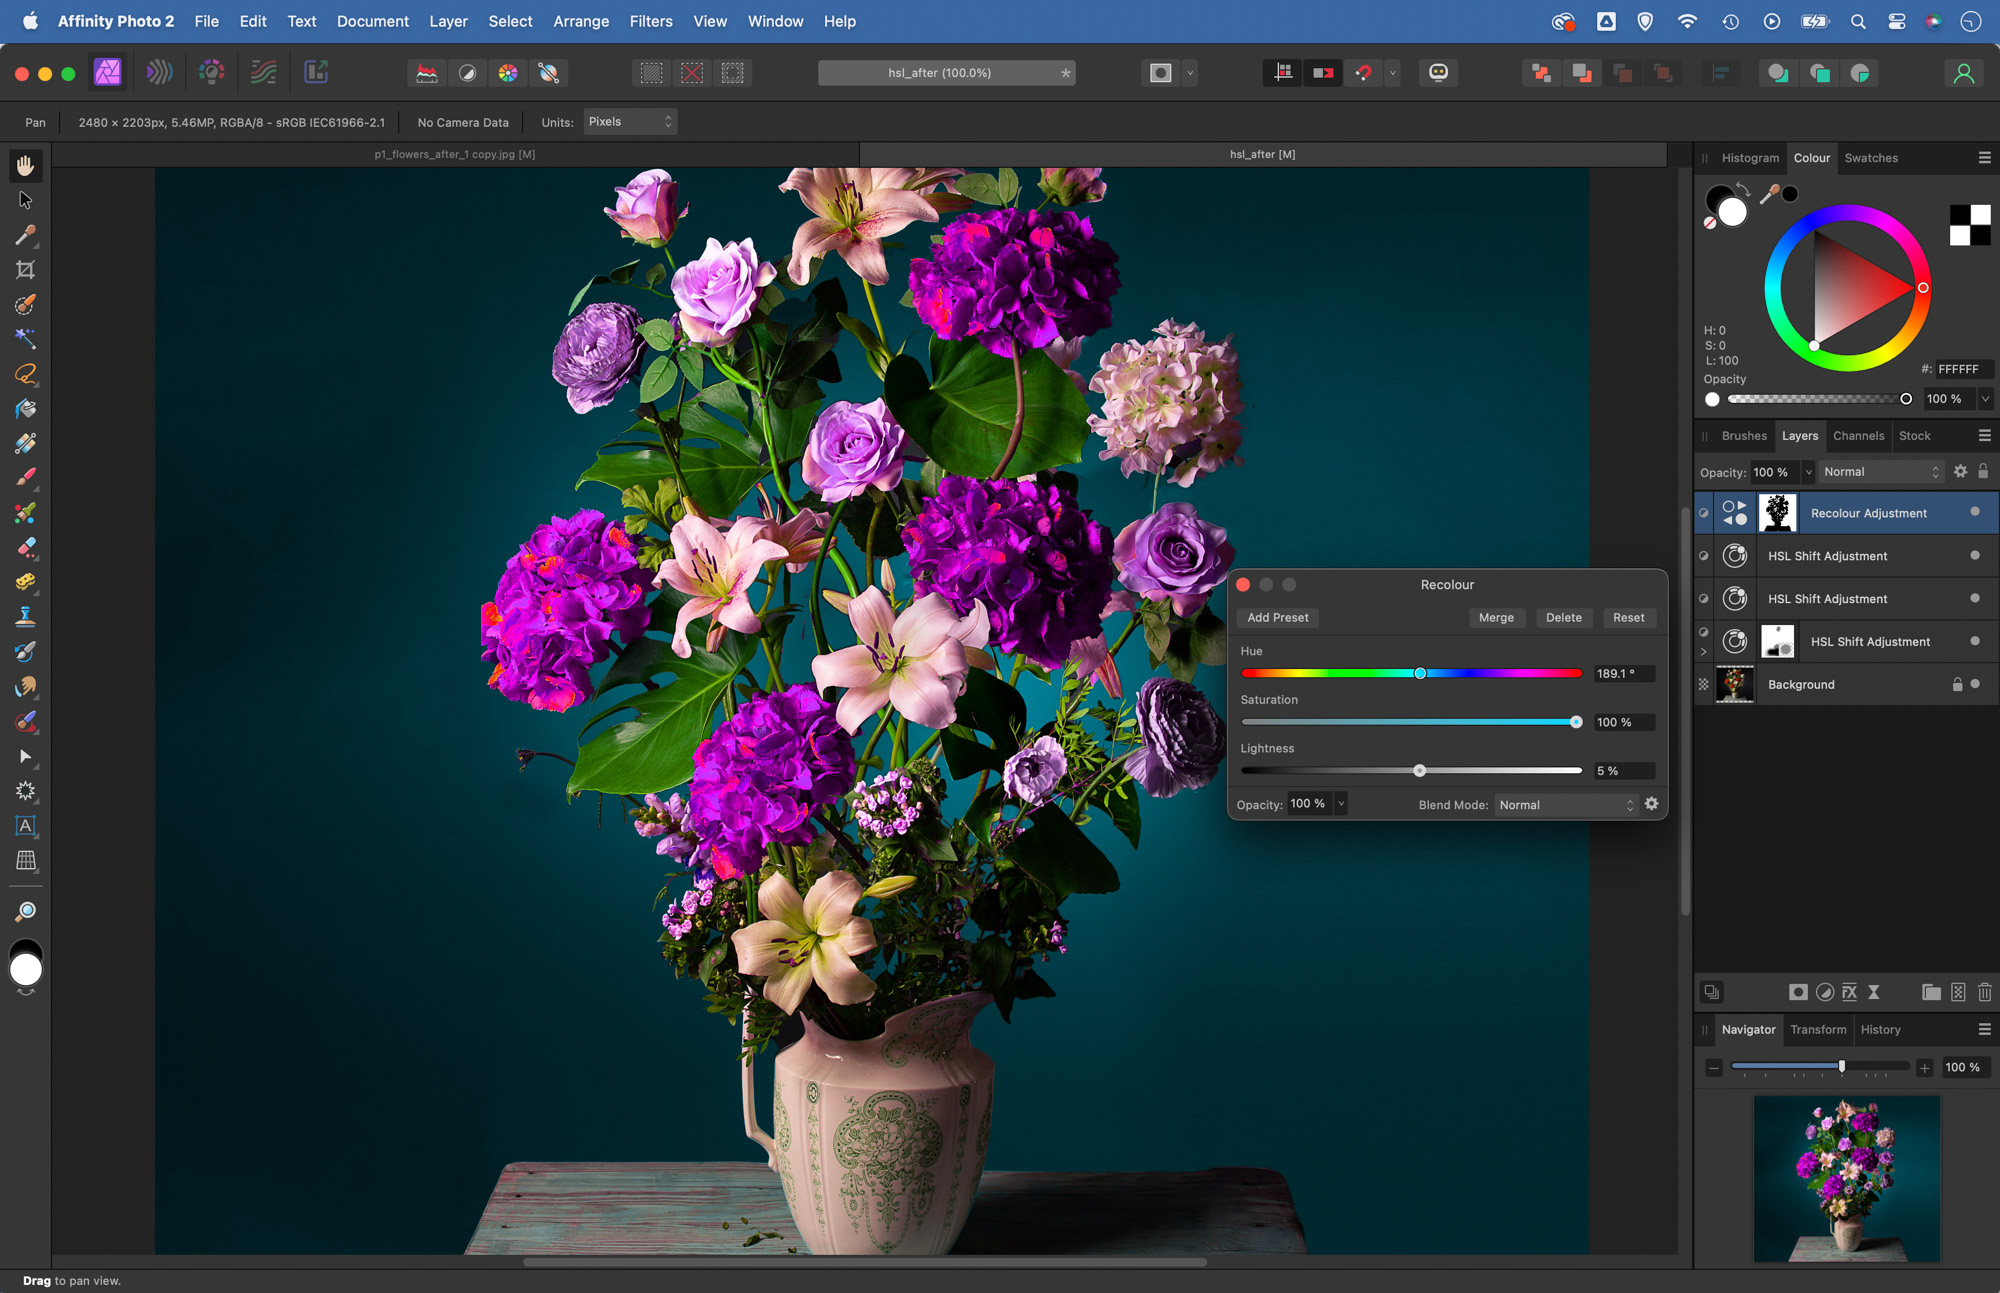
Click the Adjustment icon and choose Recolour. Alter the Hue, Saturation and Luminance sliders to change the colour of the backdrop. Zoom in close to check the colours and fine-tune the mask by painting white to reveal the colour change or black to hide it.
• See more of our Affinity Photo tutorials
If you enjoyed this tutorial but want a bit more power from your laptop, why not look at the best photo-editing laptops? If you're really keen to improve your skills further then online photography courses could be the way to go.
PhotoPlus: The Canon Magazine is the world's only monthly newsstand title that's 100% devoted to Canon, so you can be sure the magazine is completely relevant to your system.
Get the Digital Camera World Newsletter
The best camera deals, reviews, product advice, and unmissable photography news, direct to your inbox!
The lead technique writer on Digital Camera Magazine, PhotoPlus: The Canon Magazine and N-Photo: The Nikon Magazine, James is a fantastic general practice photographer with an enviable array of skills across every genre of photography.
Whether it's flash photography techniques like stroboscopic portraits, astrophotography projects like photographing the Northern Lights, or turning sound into art by making paint dance on a set of speakers, James' tutorials and projects are as creative as they are enjoyable.
He's also a wizard at the dark arts of Photoshop, Lightroom and Affinity Photo, and is capable of some genuine black magic in the digital darkroom, making him one of the leading authorities on photo editing software and techniques.


