Discover the power of creating your own Lightroom presets
Alistair Campbell demonstrates how to create your own presets to get a certain look in Lightroom and save it
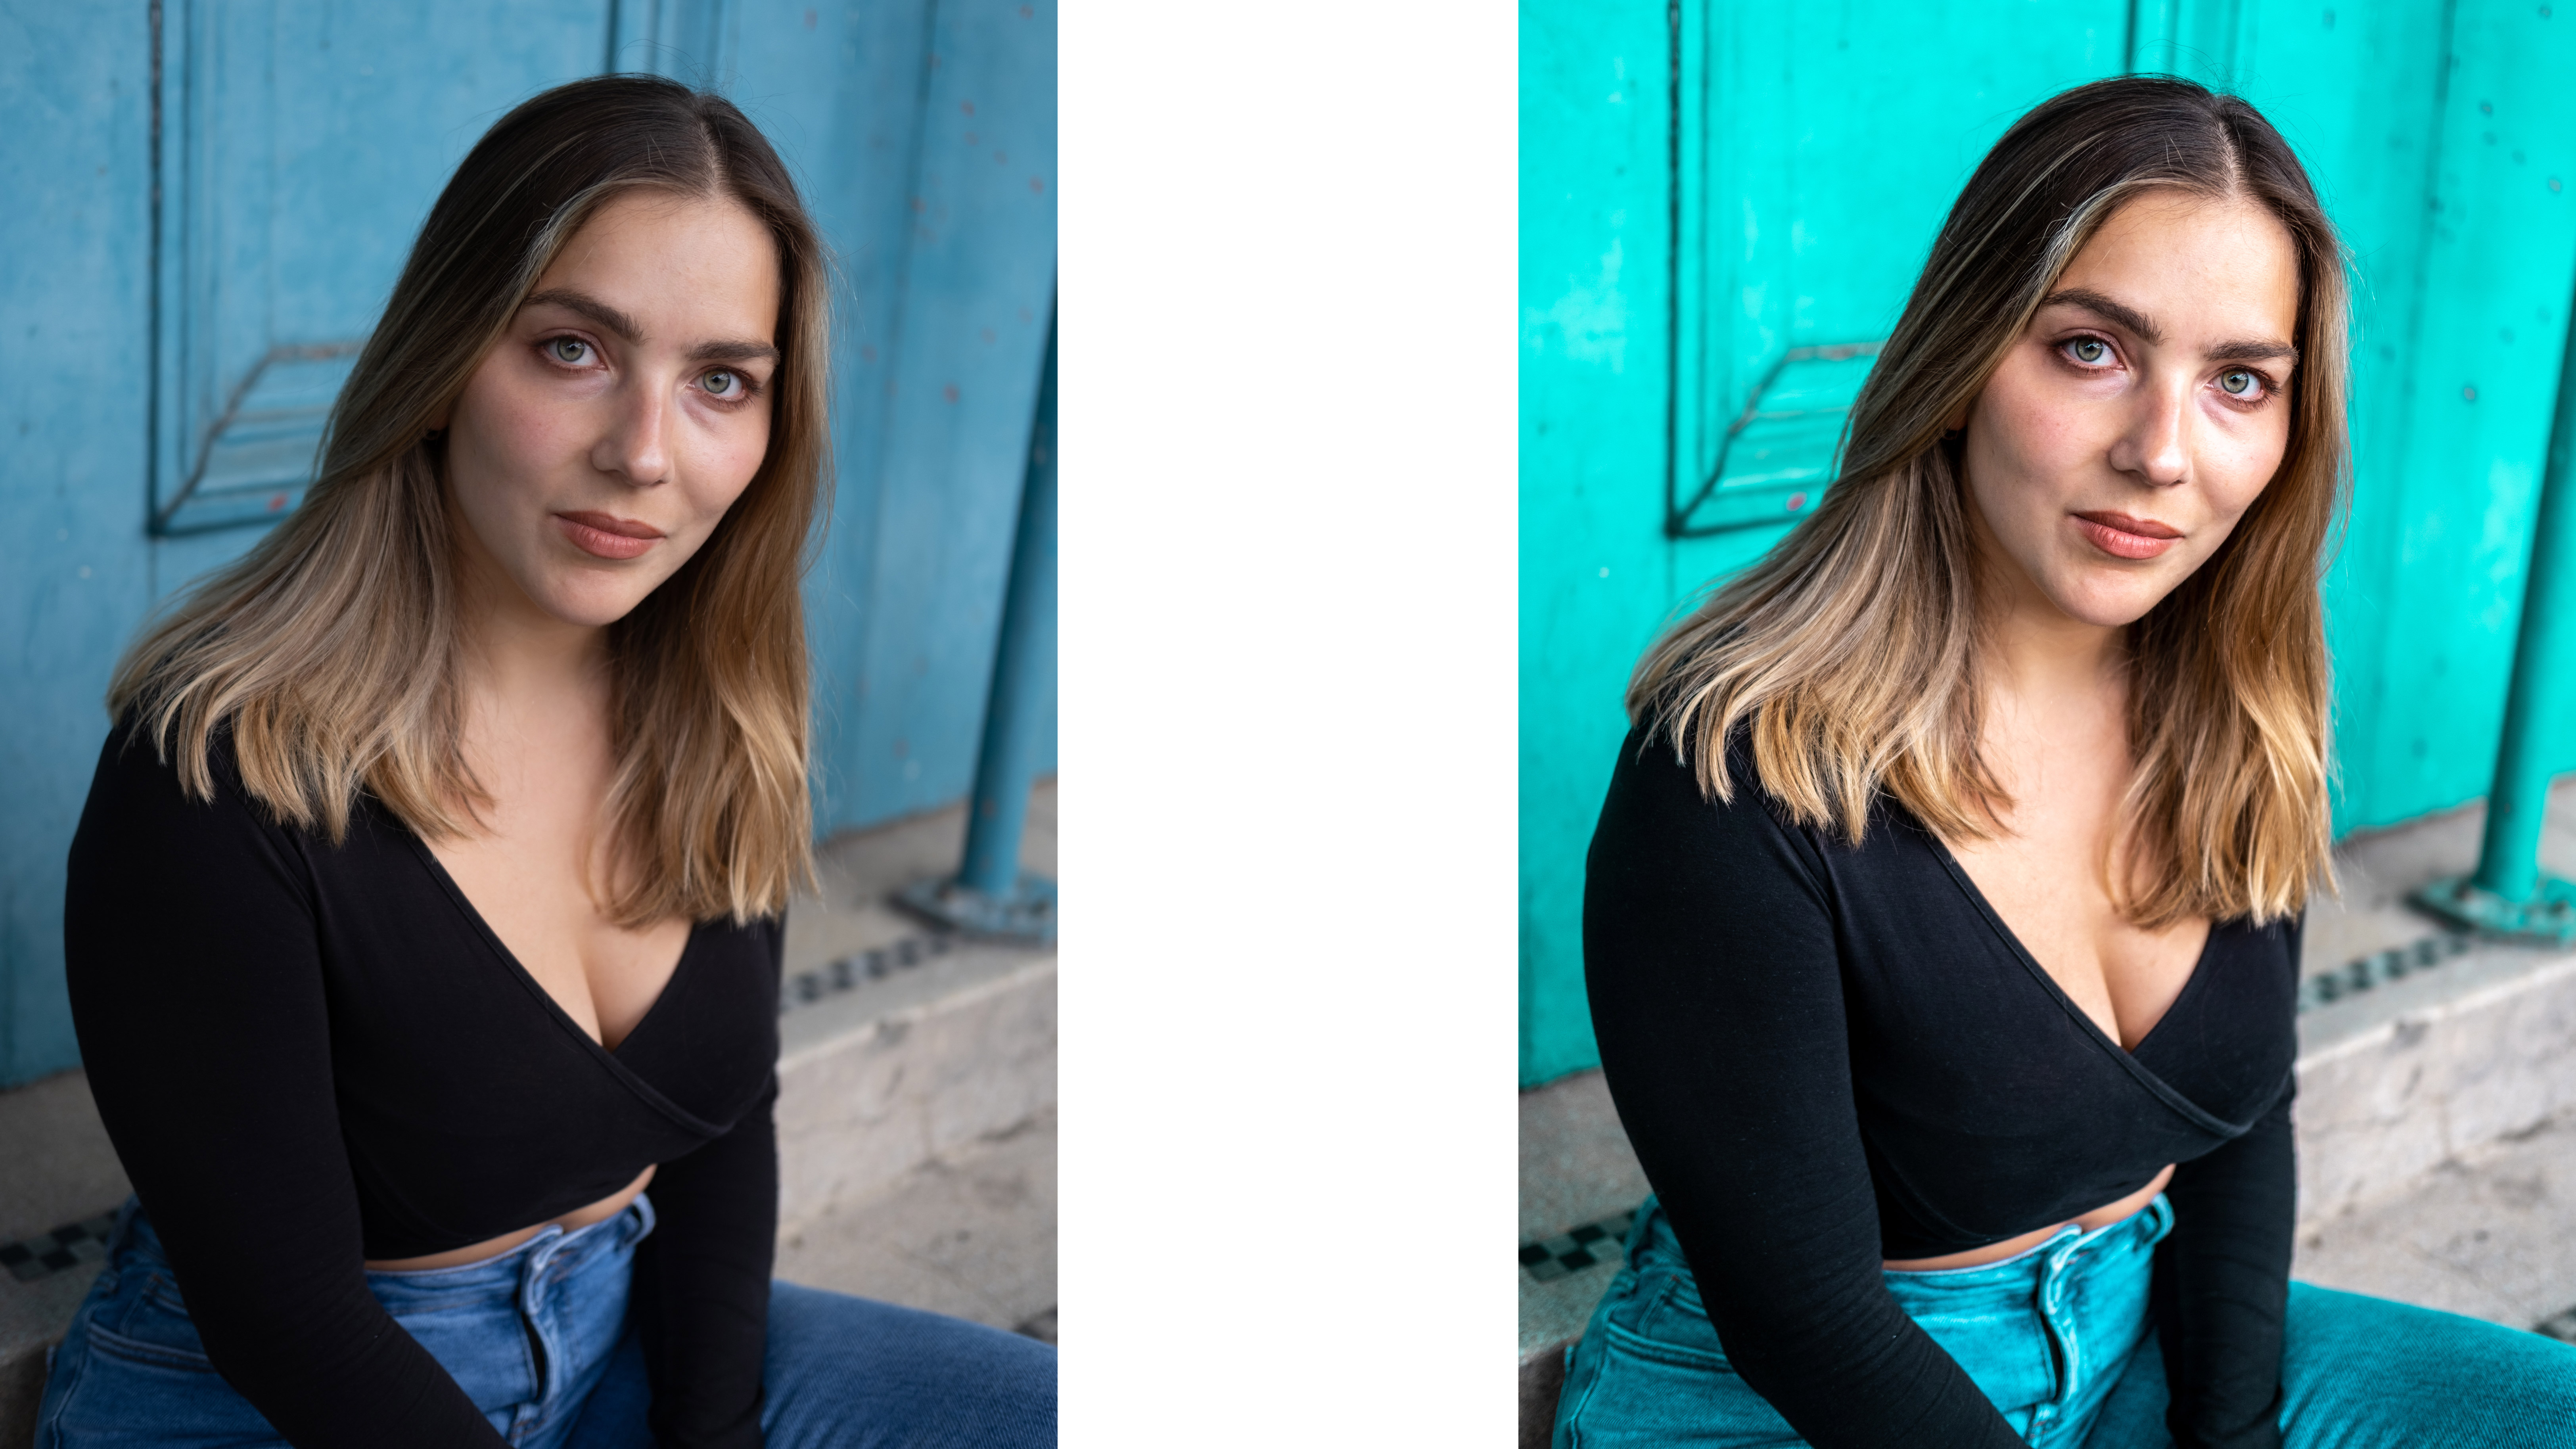
Lightroom presets can save you a lot of time when you’re editing photos on a regular basis. With the click of a button, you can quickly apply your most common adjustments to many images at once. Lightroom comes with ready-made presets, and there are plenty of free Lightroom presets available – but their real power is when you make your own.
• See also: Why I dumped Lightroom CC and went back to Lightroom Classic
Taking a great photo is only half the battle in achieving a memorable image: applying your finely tuned presets can bring out the best elements, colors and sharpness in your images, or even just be used to apply your signature style to your images.
• Read more: Lightroom tutorials
Creating your own presets in Lightroom
01. Find a style
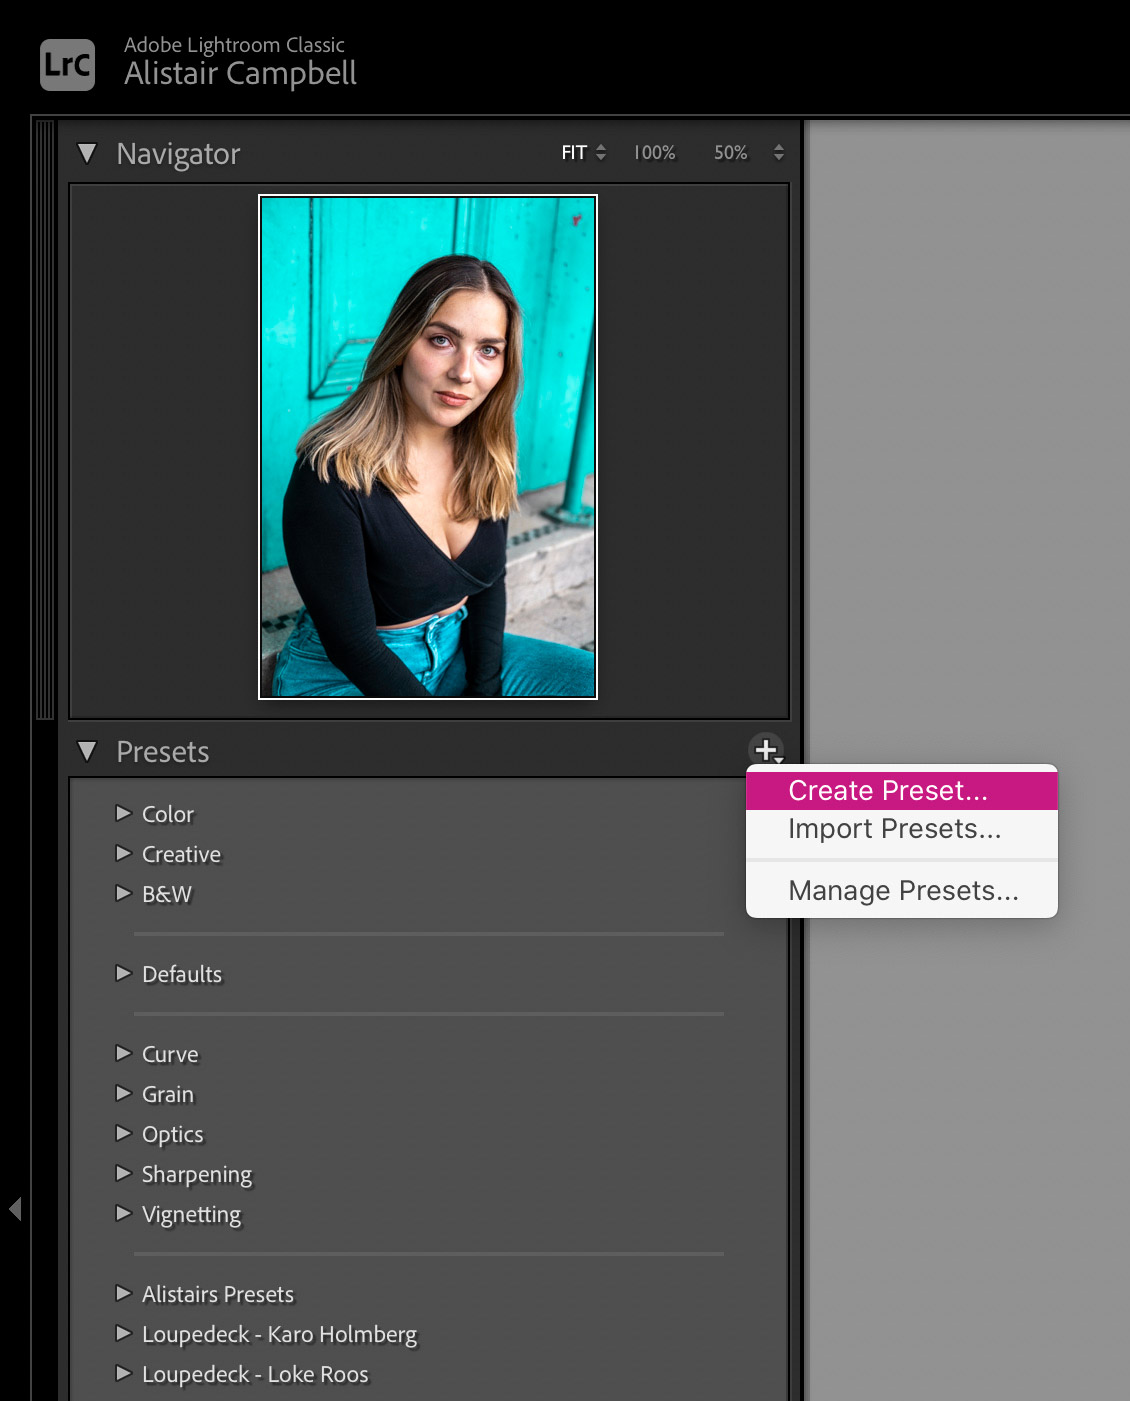
On the right-hand side of the screen, you have all the usual sliders for editing your photos. So first edit your image to your liking. For this shot, I have taken the blues and changed their hue to create a modern, electric-blue feel; I also increased Clarity and Contrast to add punch. Once you’re happy, go to the left-hand side of the screen, where you will find the Presets panel.
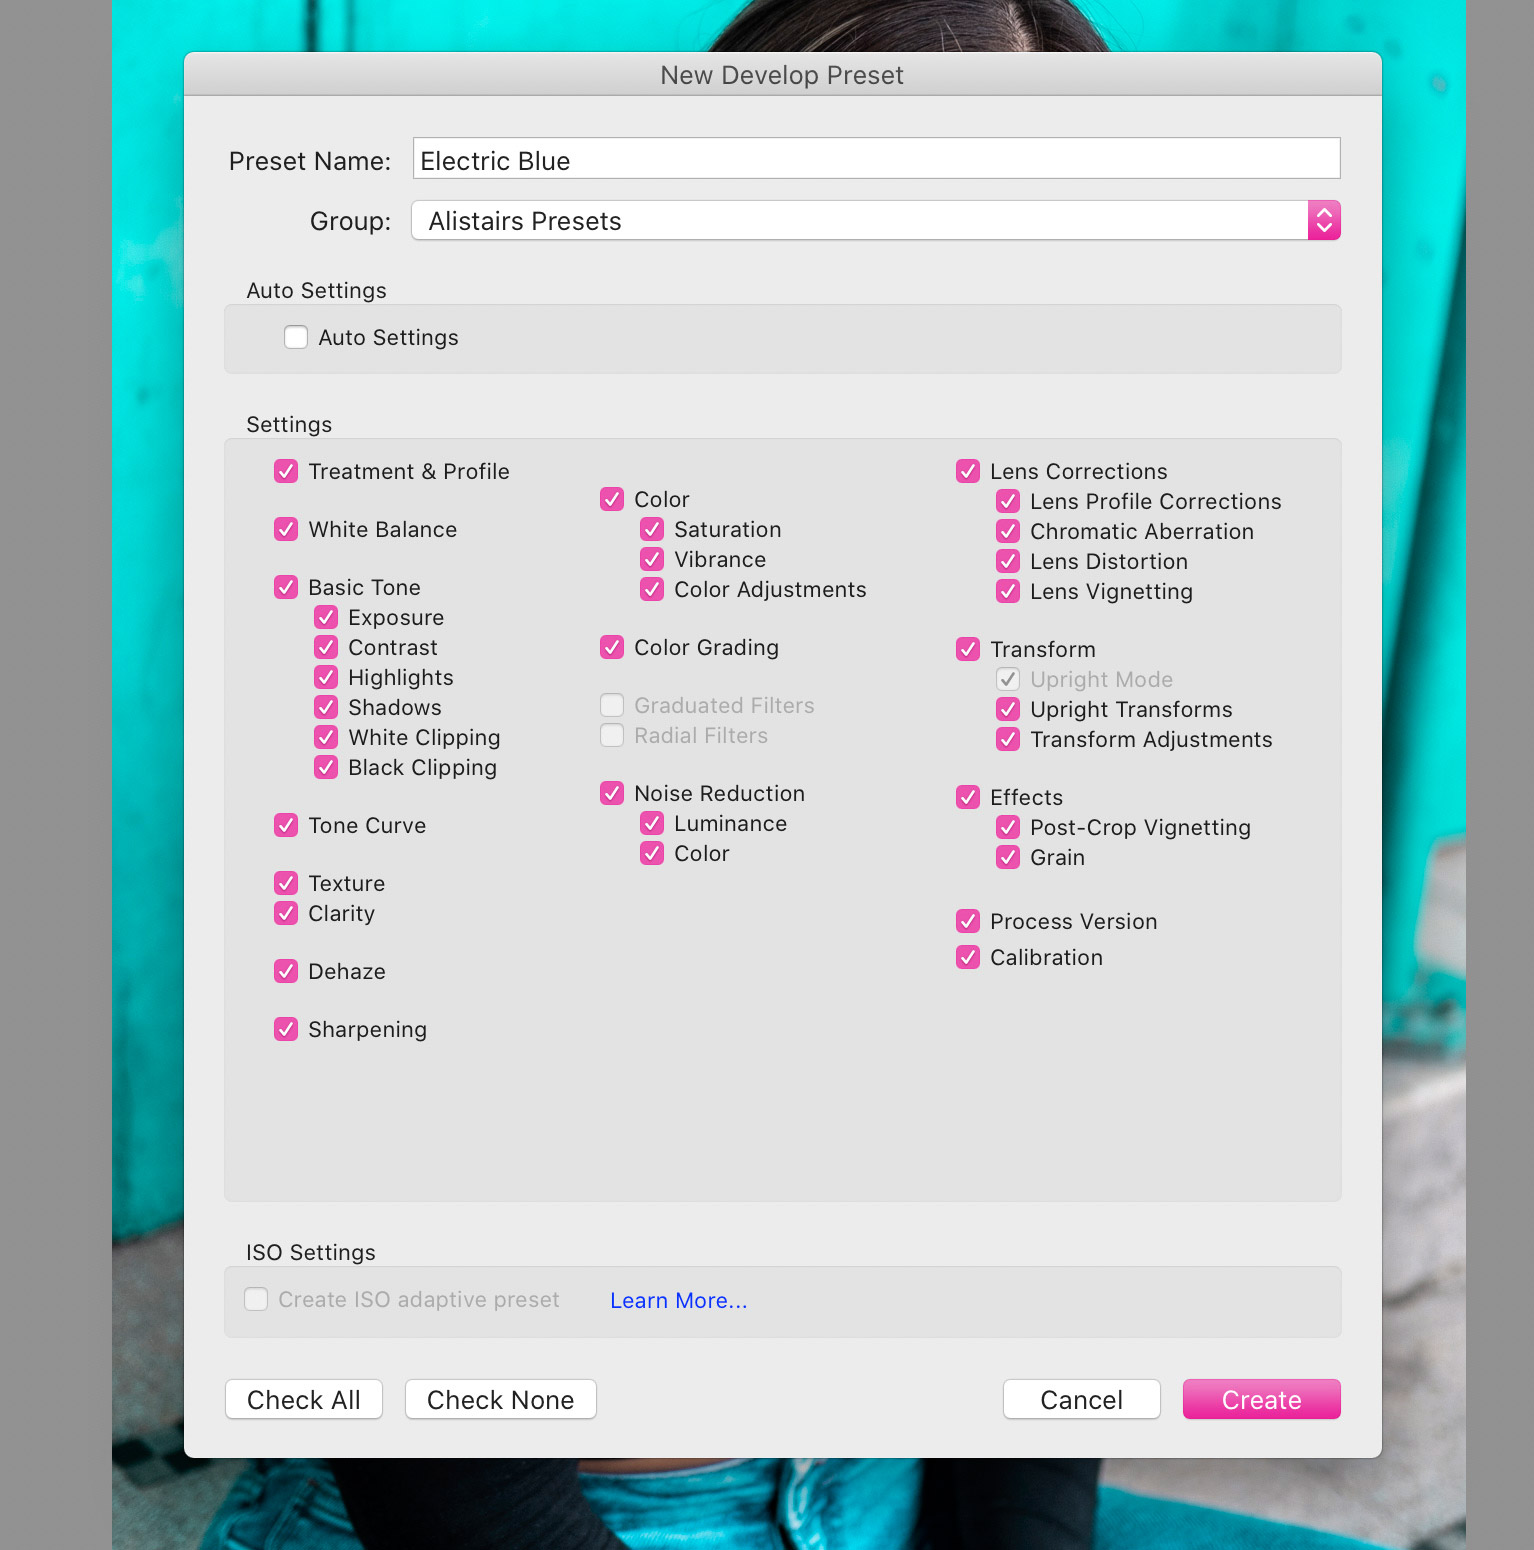
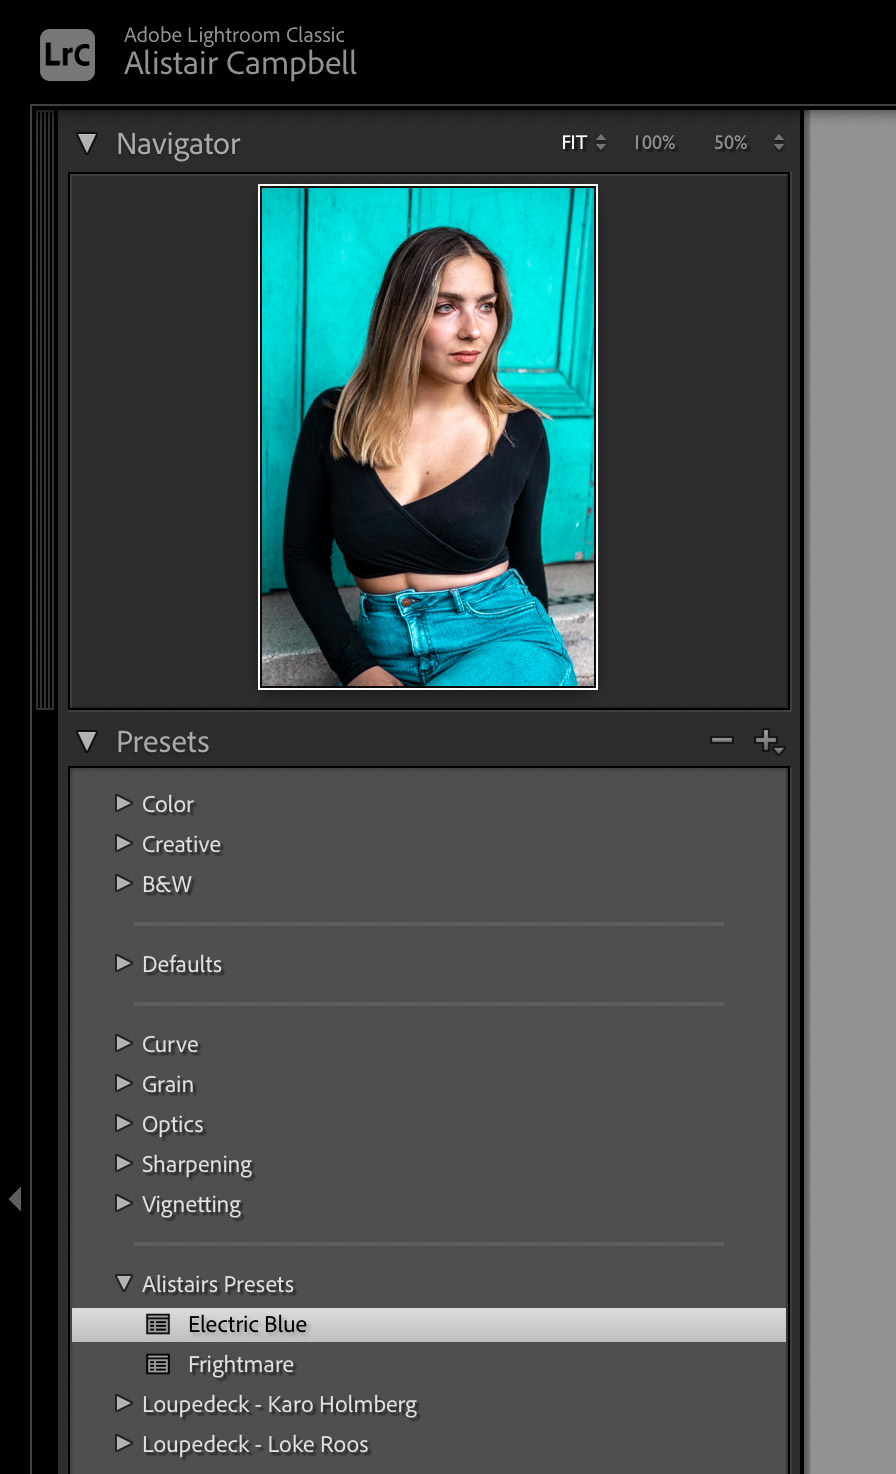
02. Name your preset
Click the + symbol to the right of the Presets header. This opens a new window. Name your preset and select the settings that you used, or just select them all. (If you have cropped your image, this will also be part of the preset). You can save your preset within a specific folder.
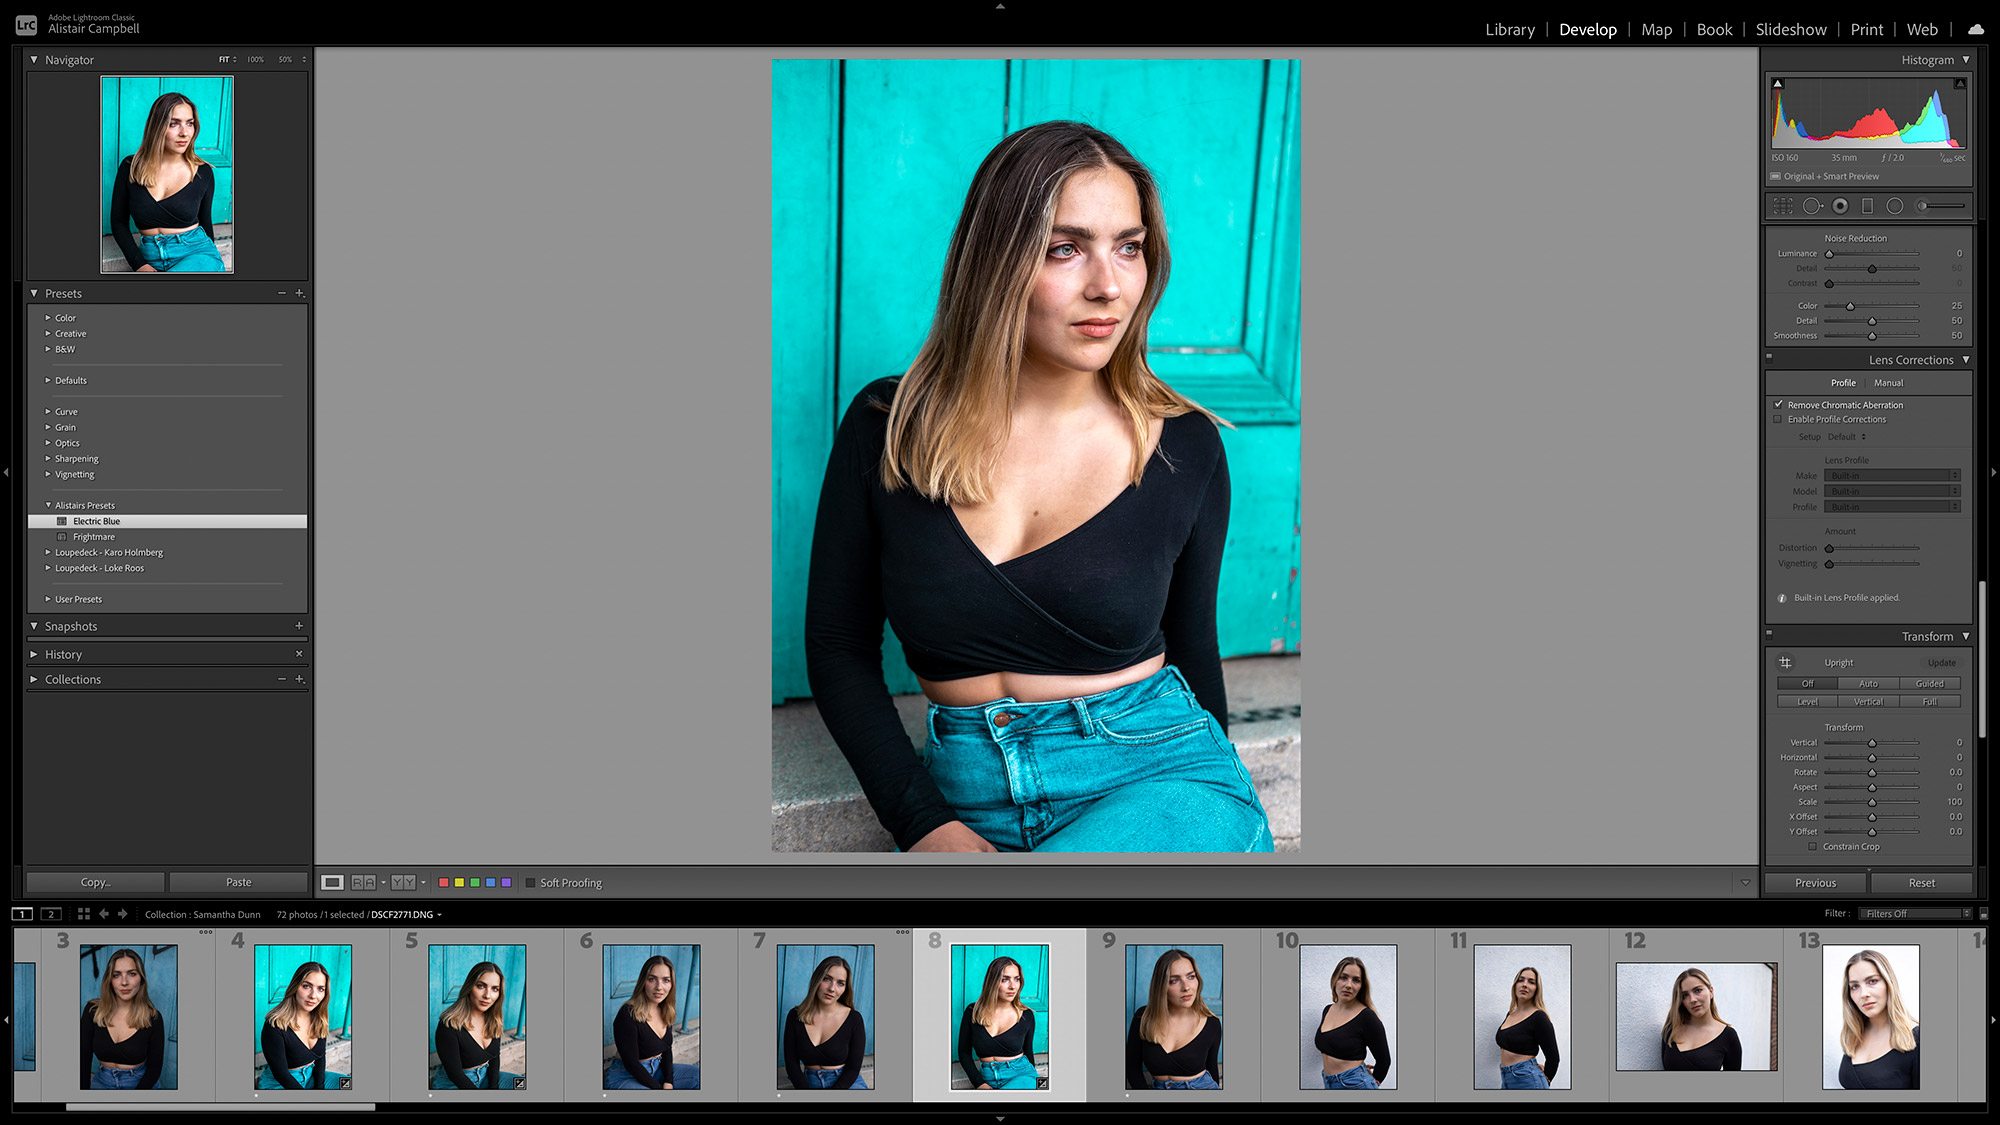
03. Apply the preset
Once your preset is saved, it will appear on the left, under the folder you selected. Now you can apply it to any other image in the Develop Module: simply have the image highlighted at the bottom, then click the preset. (You can even Select All and apply it to hundreds of images at once!) It will not be exactly the same as your first image, but it’s still a big time-saver.
Read more:
Download Lightroom and try it for free!`
25 premium Lightroom presets and plugins for serious photographers
Free Lightroom presets
Best photo-editing software
Get the Digital Camera World Newsletter
The best camera deals, reviews, product advice, and unmissable photography news, direct to your inbox!
Alistair is the Features Editor of Digital Camera magazine, and has worked as a professional photographer and video producer.
