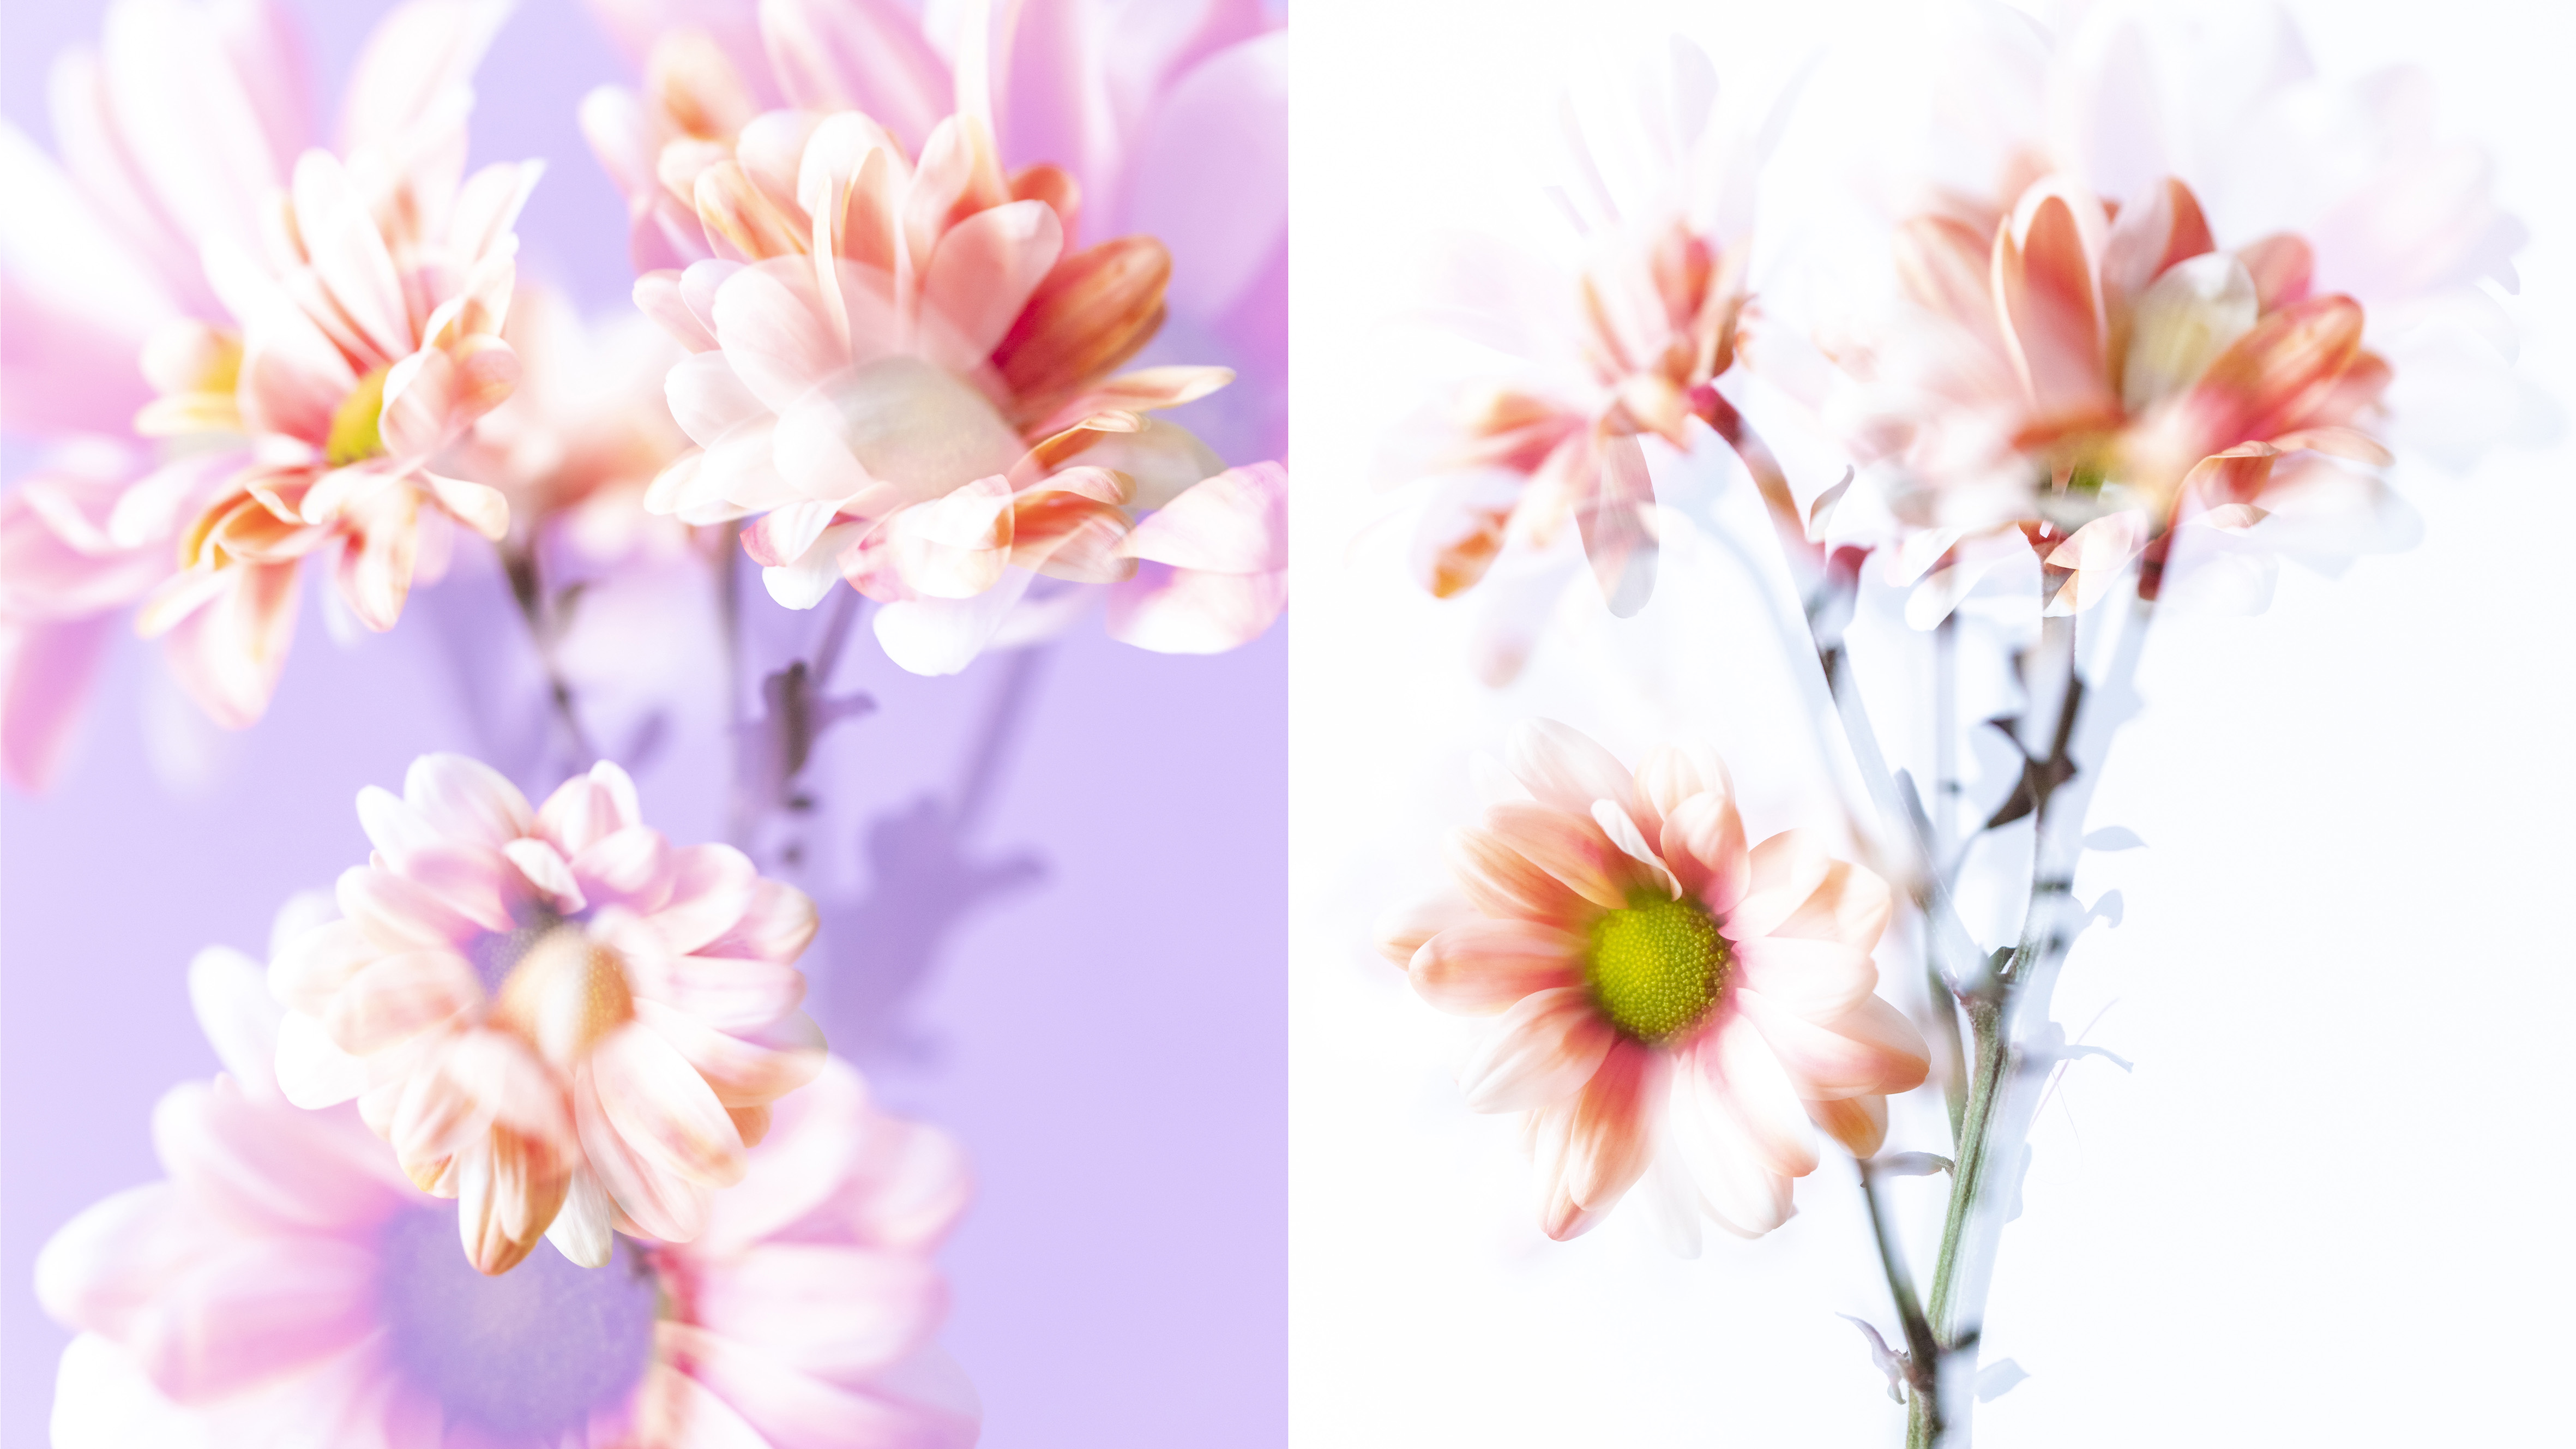
Even non-photographers will be familiar with the term double exposure. It’s the effect created when two separate photos are merged with each other to create an artistic picture combining the colors and shapes of each into a new abstract shot.
While the technique originally started with film photography, we’re now able to create them digitally in-camera or in software, the best Canon EOS cameras have a multiple exposure mode that make it easy to pull off.
Above: see our video on shooting a double exposure
Unlike film however, you don’t have to wait for your pictures to be developed. You can see your results instantly and even use the LCD screen on your Canon to help you see the overlay in real time so you can compose more accurately.
Of course, you don’t have to stop at a double exposure, Canon’s menu allows you to blend however many pictures you wish. Here, we’ll explain what all the options do and how to use them.
Read more: How to create a double exposure in Photoshop Elements
1. Enable multiple exposure shooting
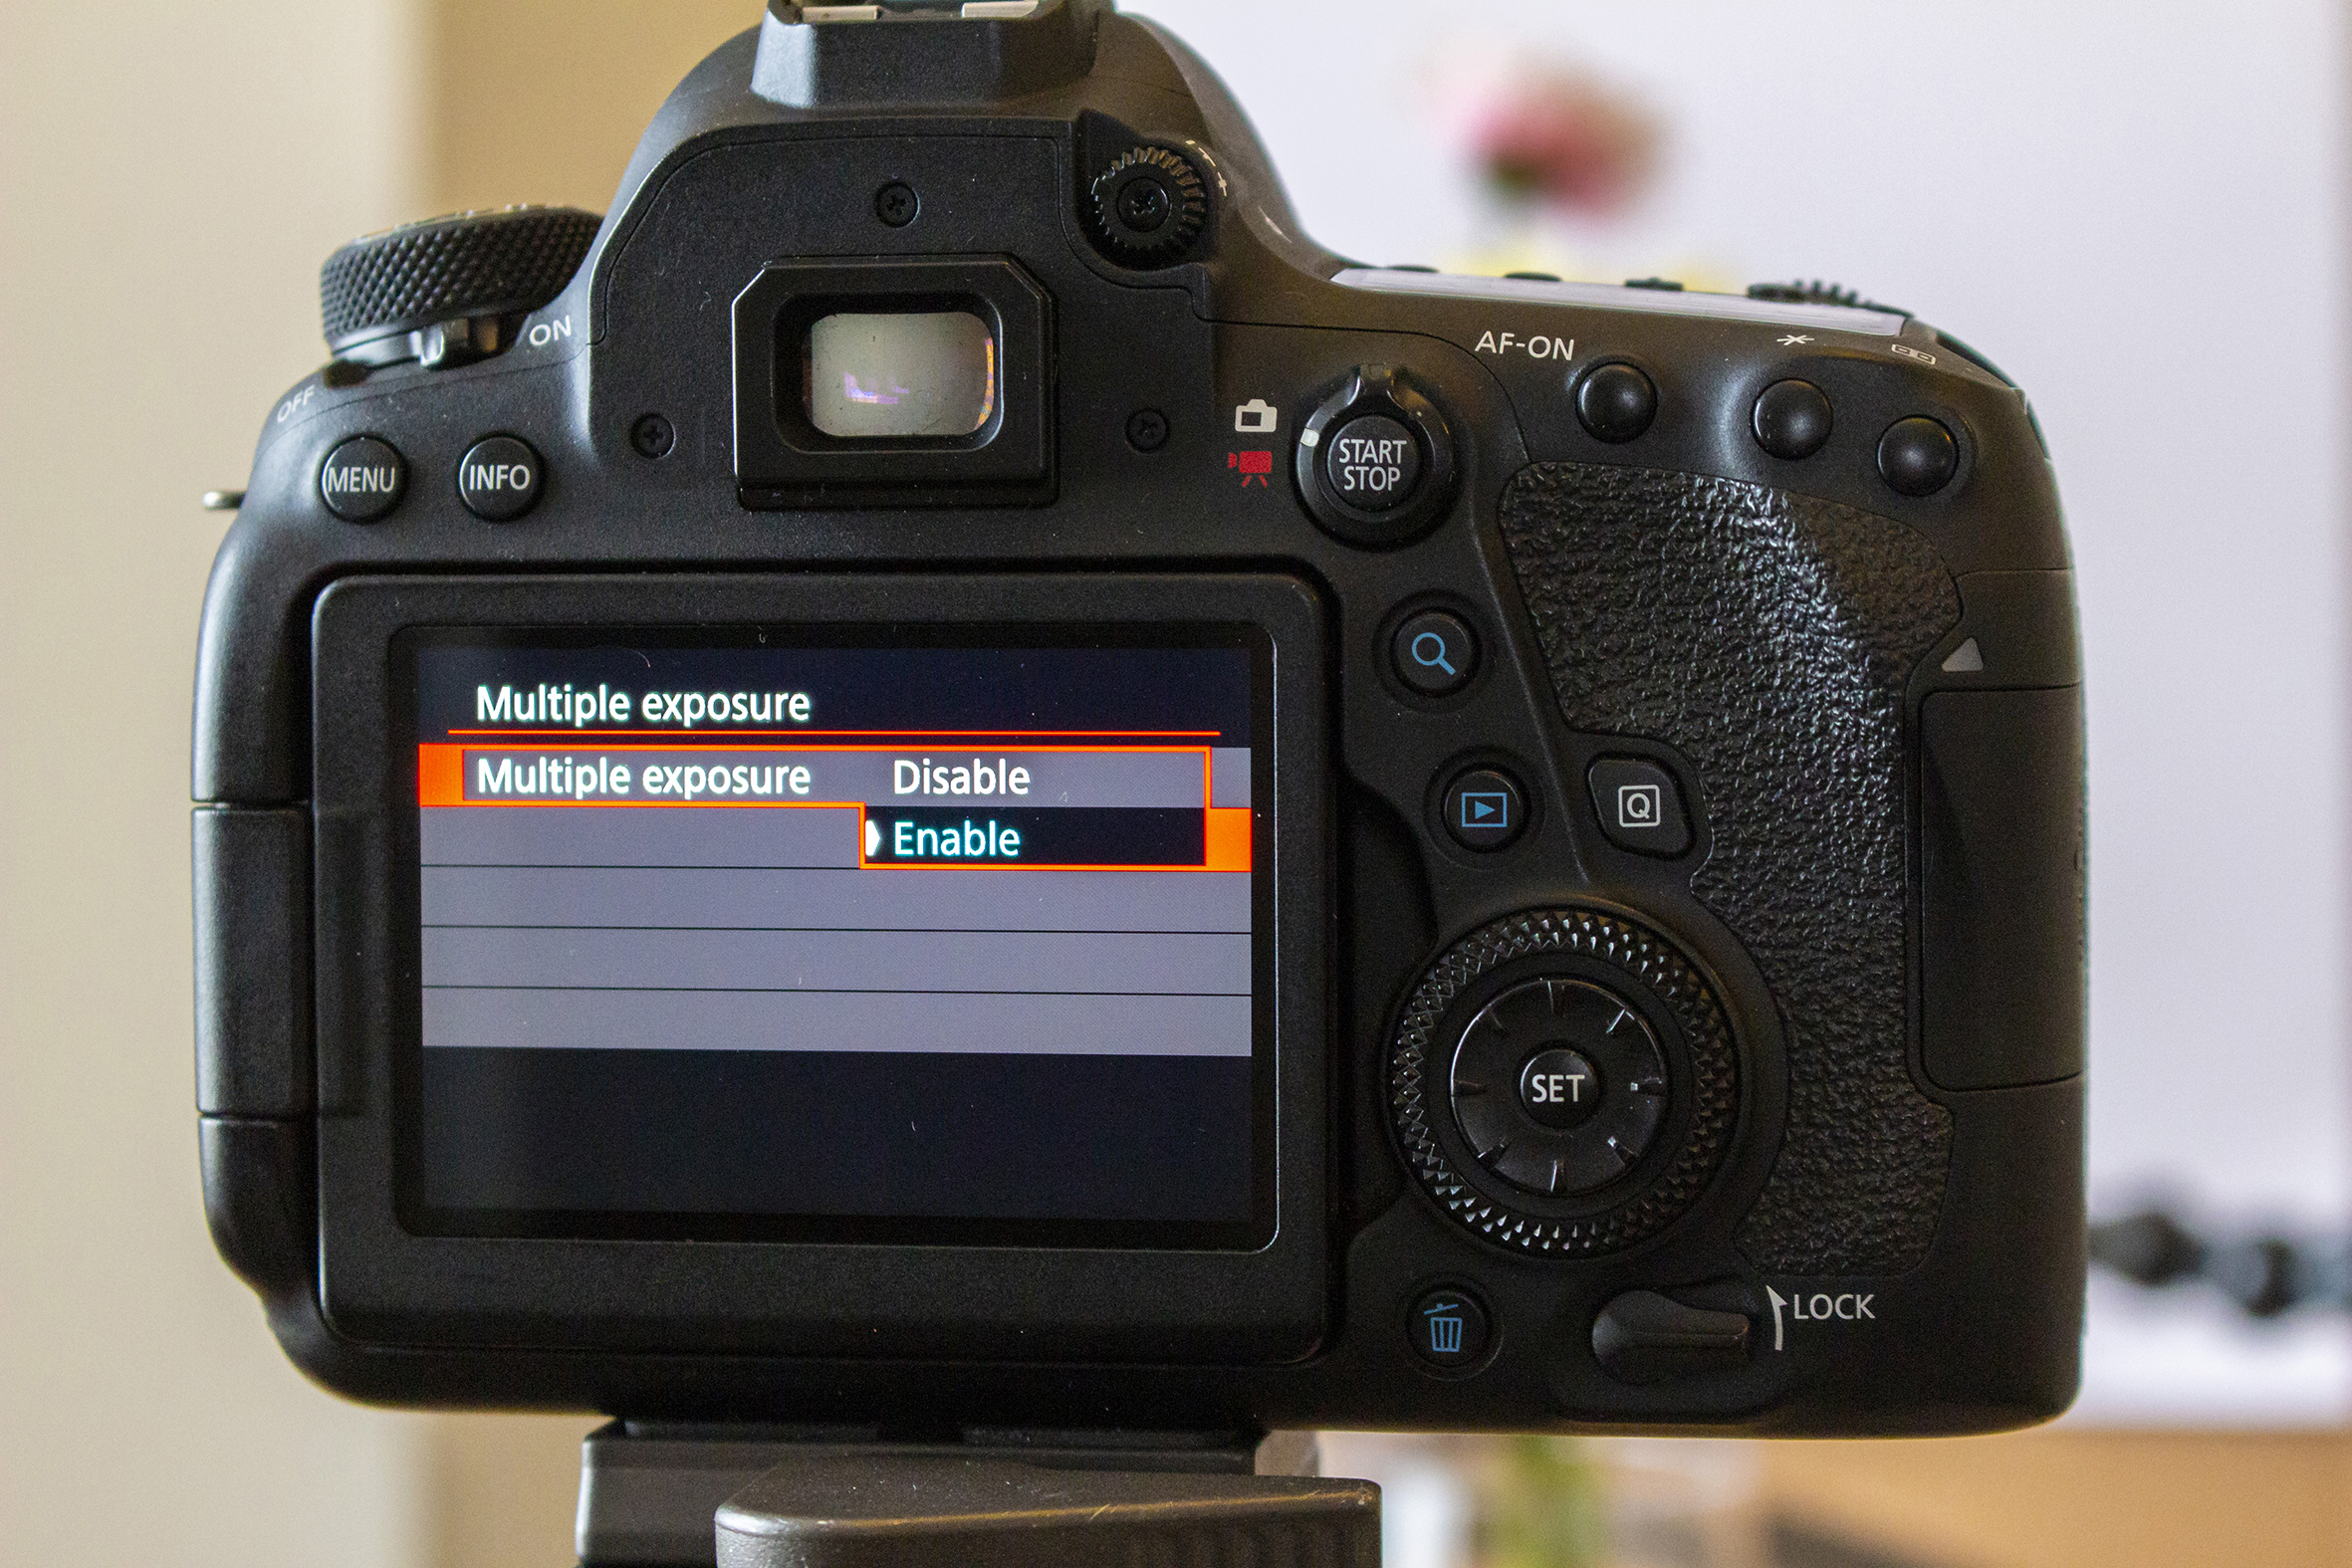
Go into your Canon EOS camera’s menu and find the Multiple Exposure setting in the red camera menu, then click it and choose Enable. Then you can choose how many exposures you want to take, we set ours to 2.
2. Additive or average
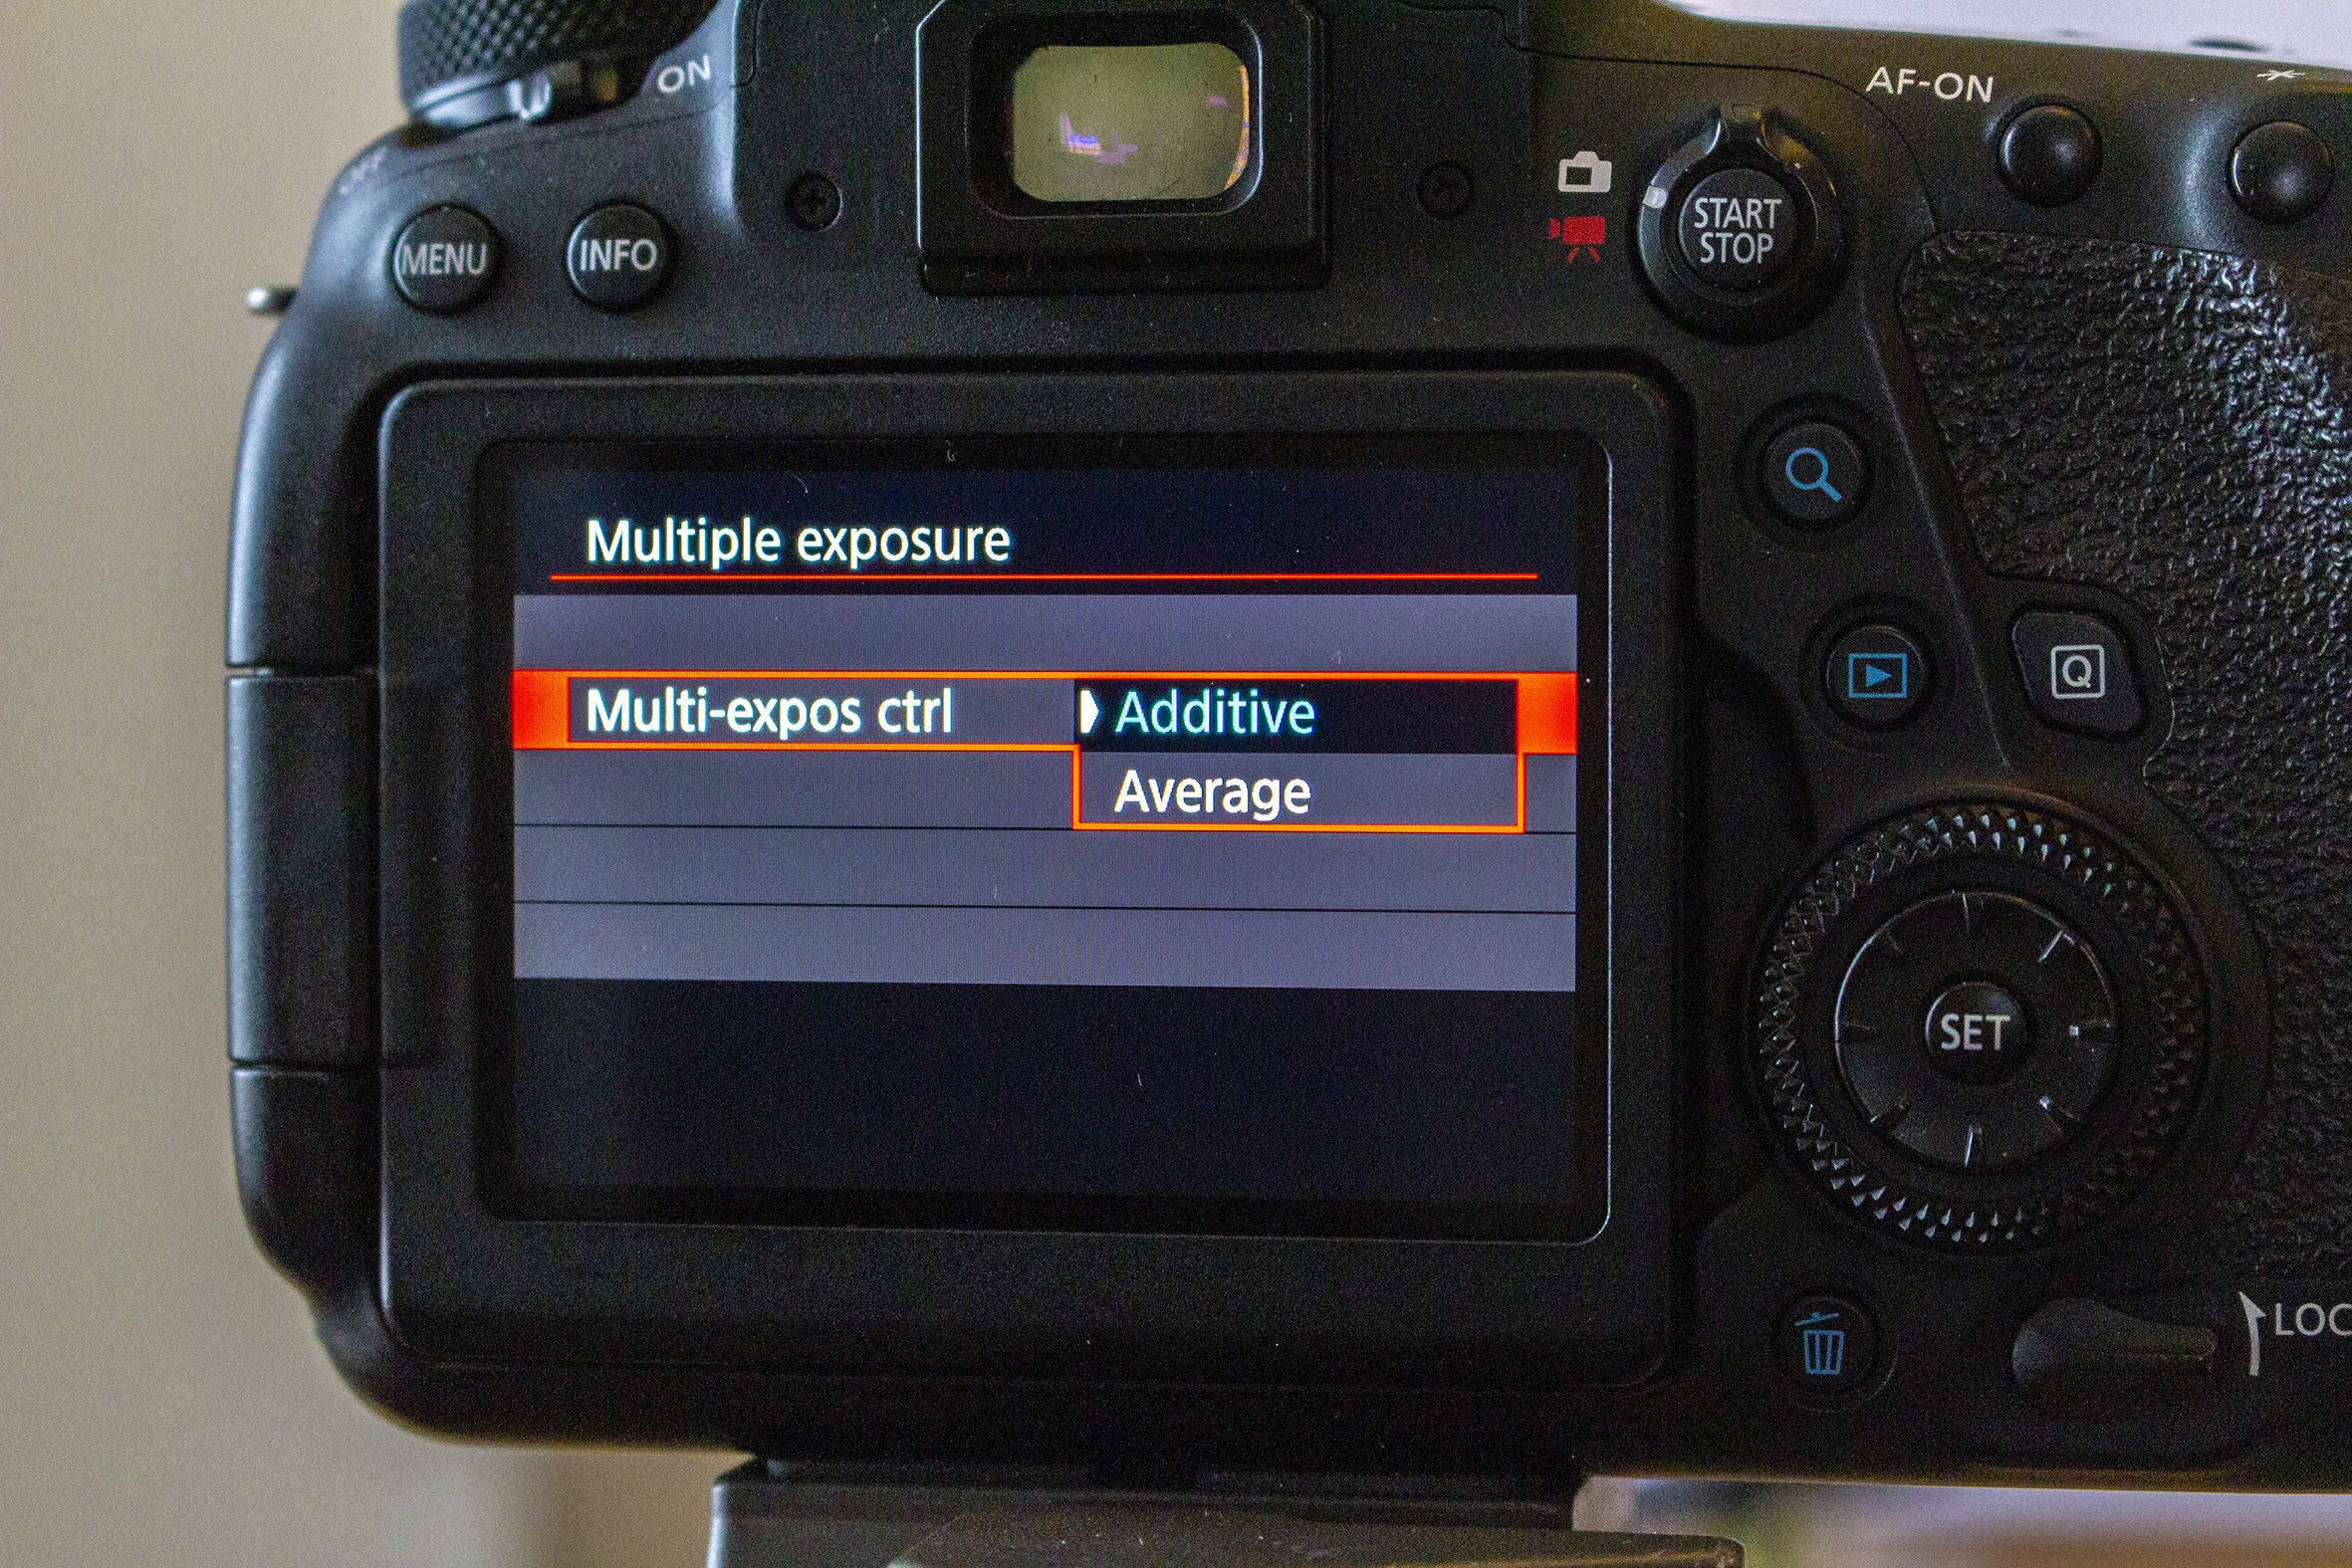
Pick between Additive or Average blending modes. Additive adds more light cumulatively and may require some negative exposure compensation, while Average works out the negative exposure compensation automatically for you.
3. 1-shot or continuous
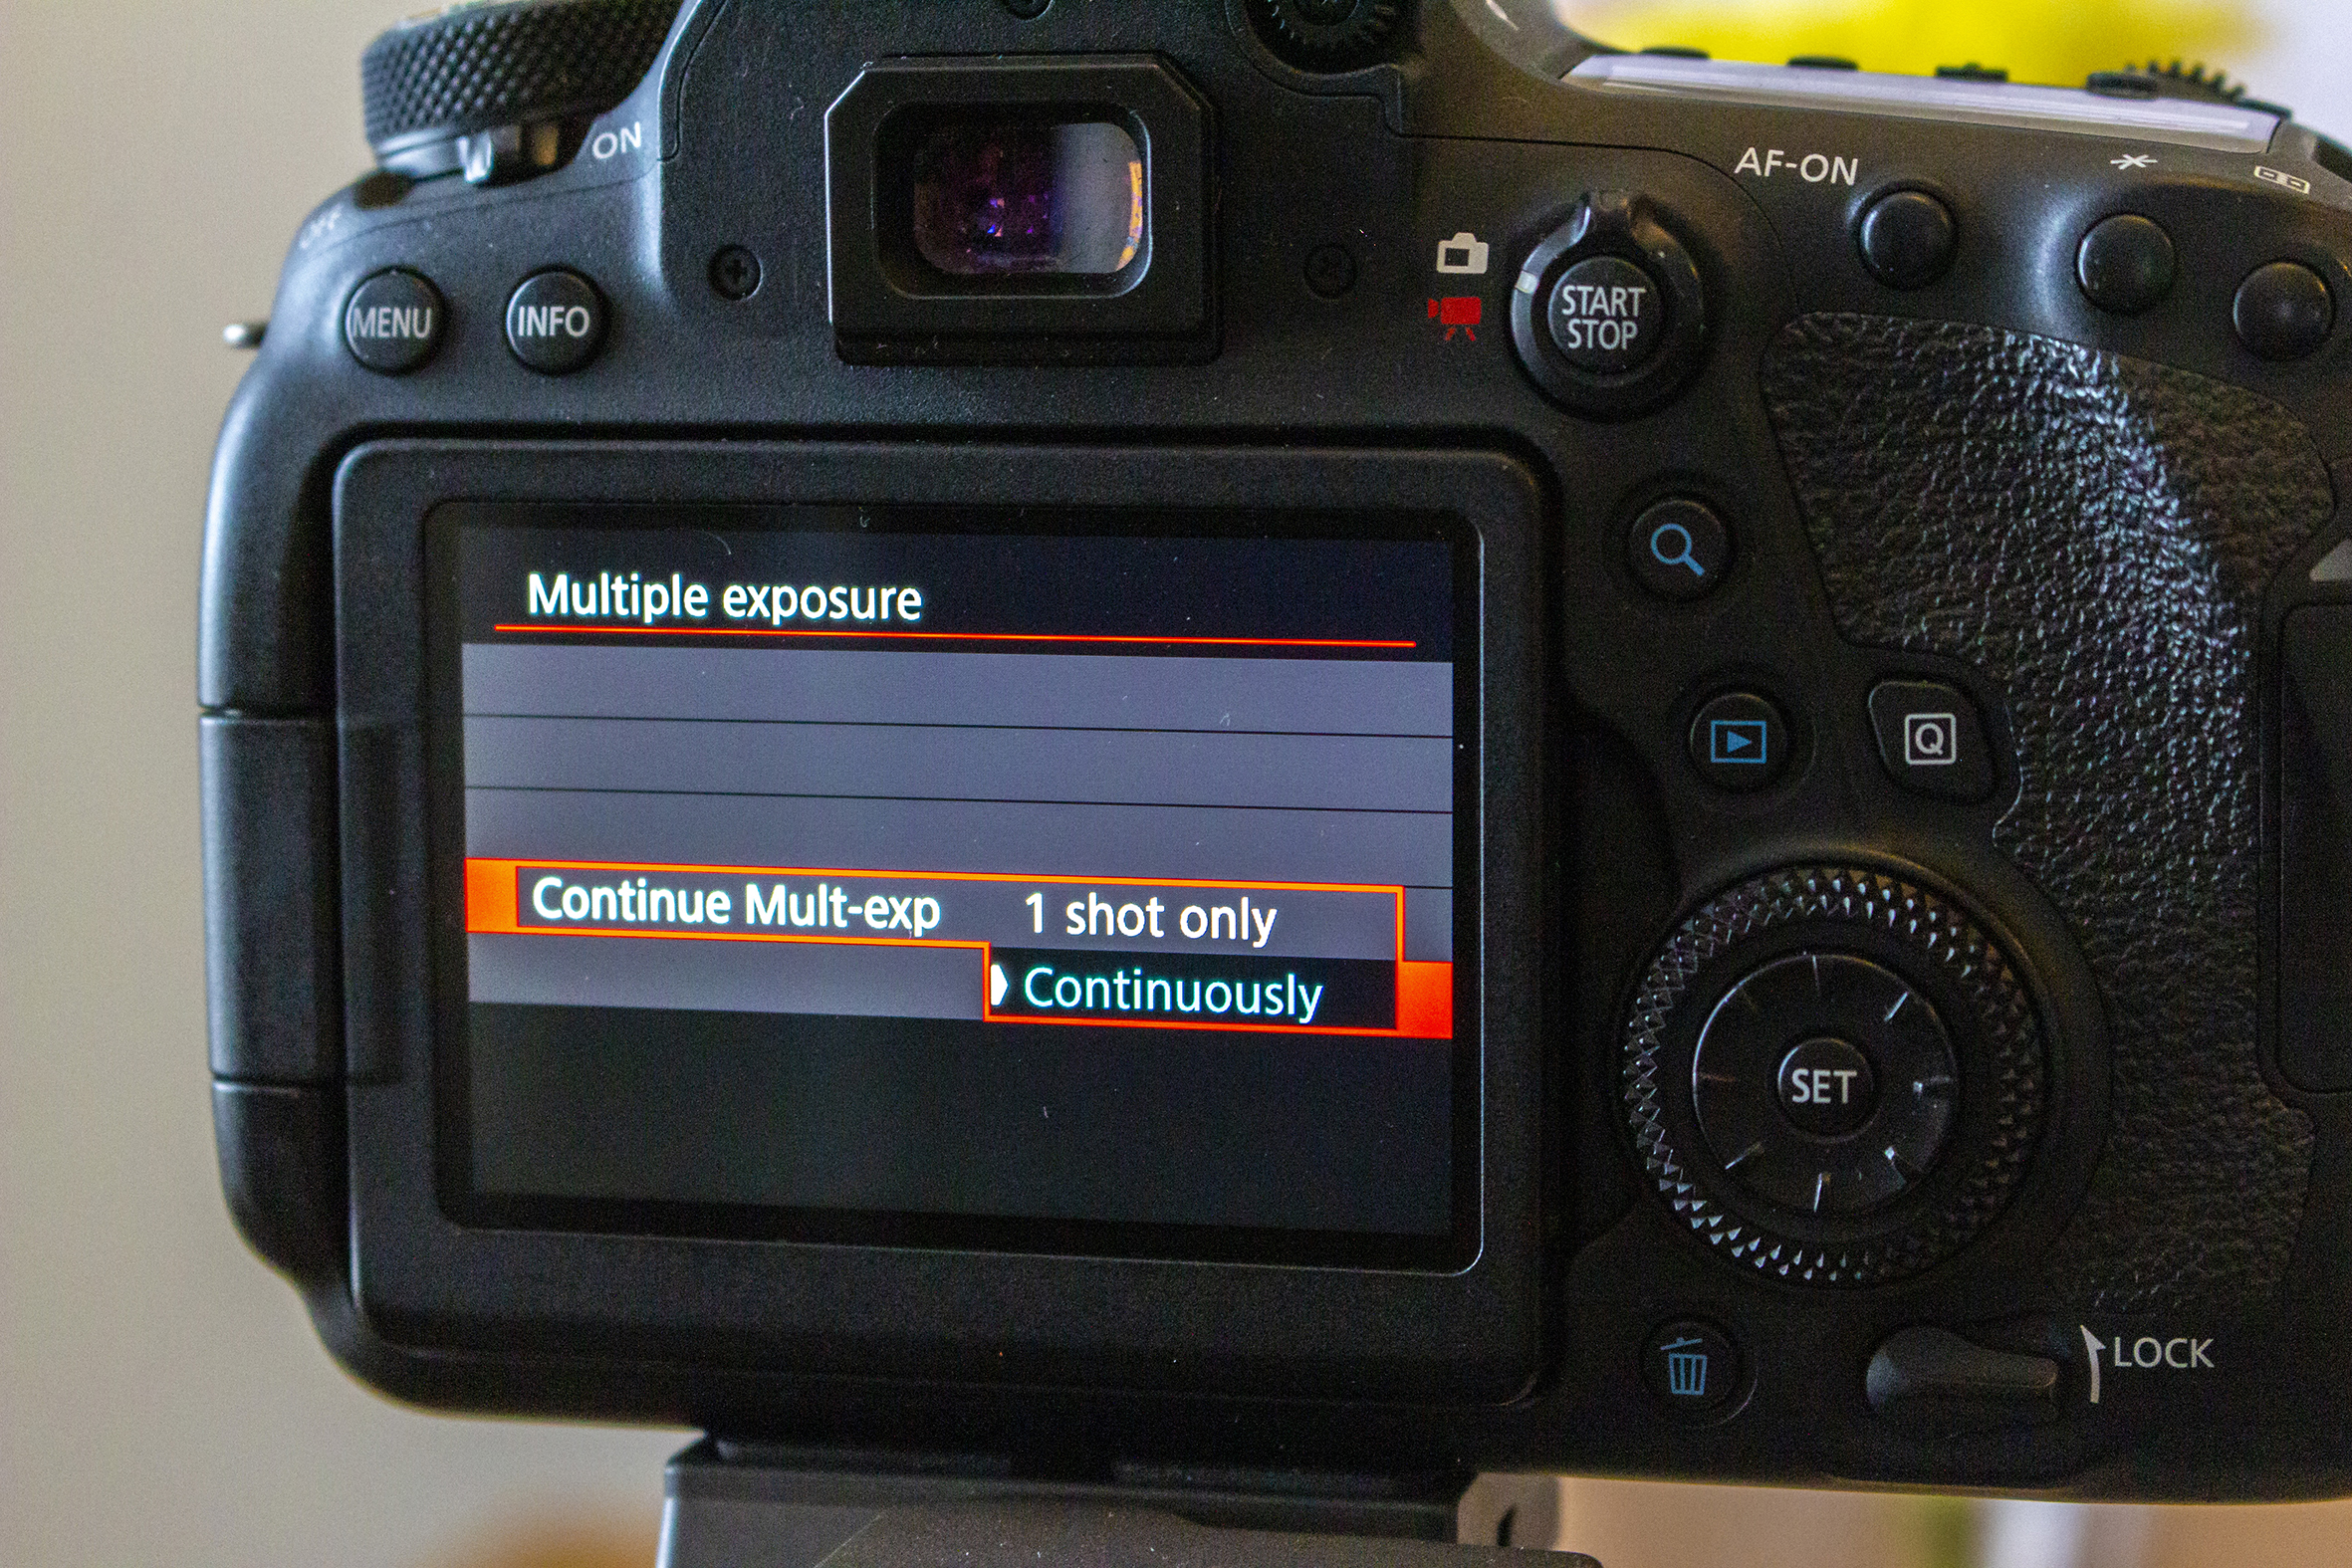
‘1 shot only’ means that after you’ve finished your multiple exposure the multiple exposure setting will be disabled and you’ll go back to normal exposures. Set it to Continuously if you’d like to take several multiple exposures in a row.
4. Take the first exposure
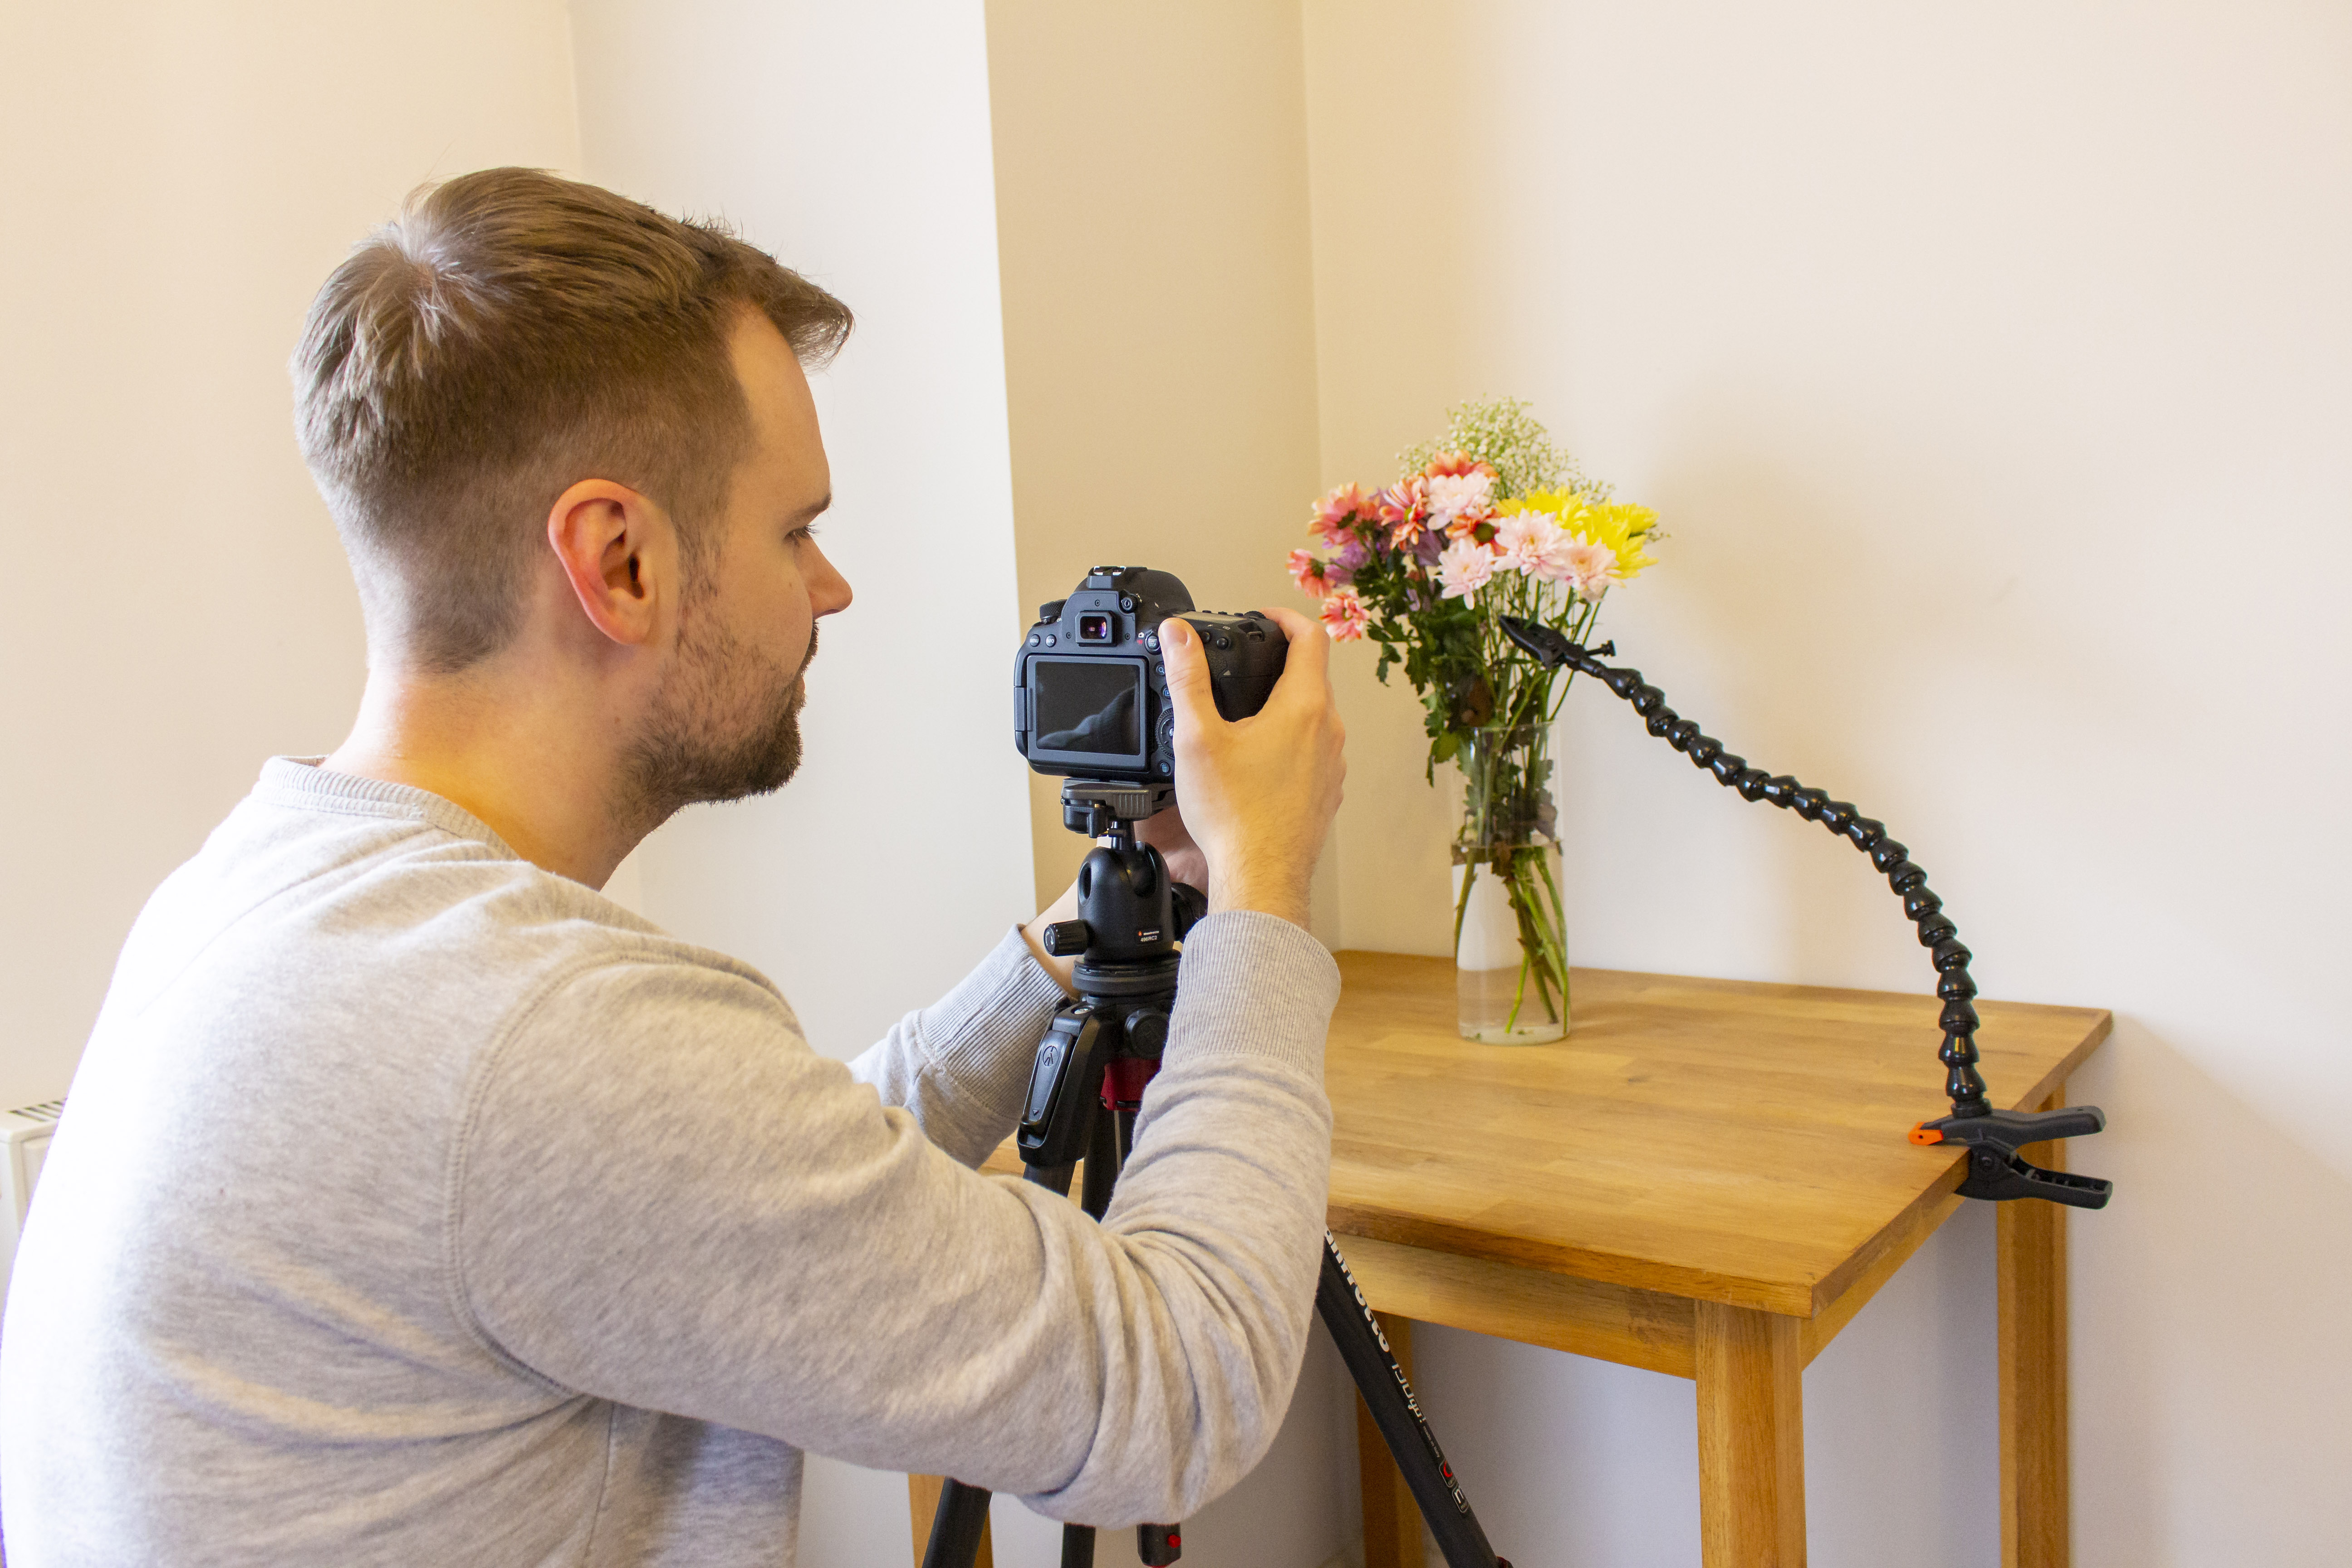
Go into Live View to take the first shot. All the usual camera rules apply here so make sure your ISO is high enough so that you can get a fast shutter speed to eliminate camera shake, or use a tripod. We focused on a flower and then took the first shot.
5. Shoot your second exposure
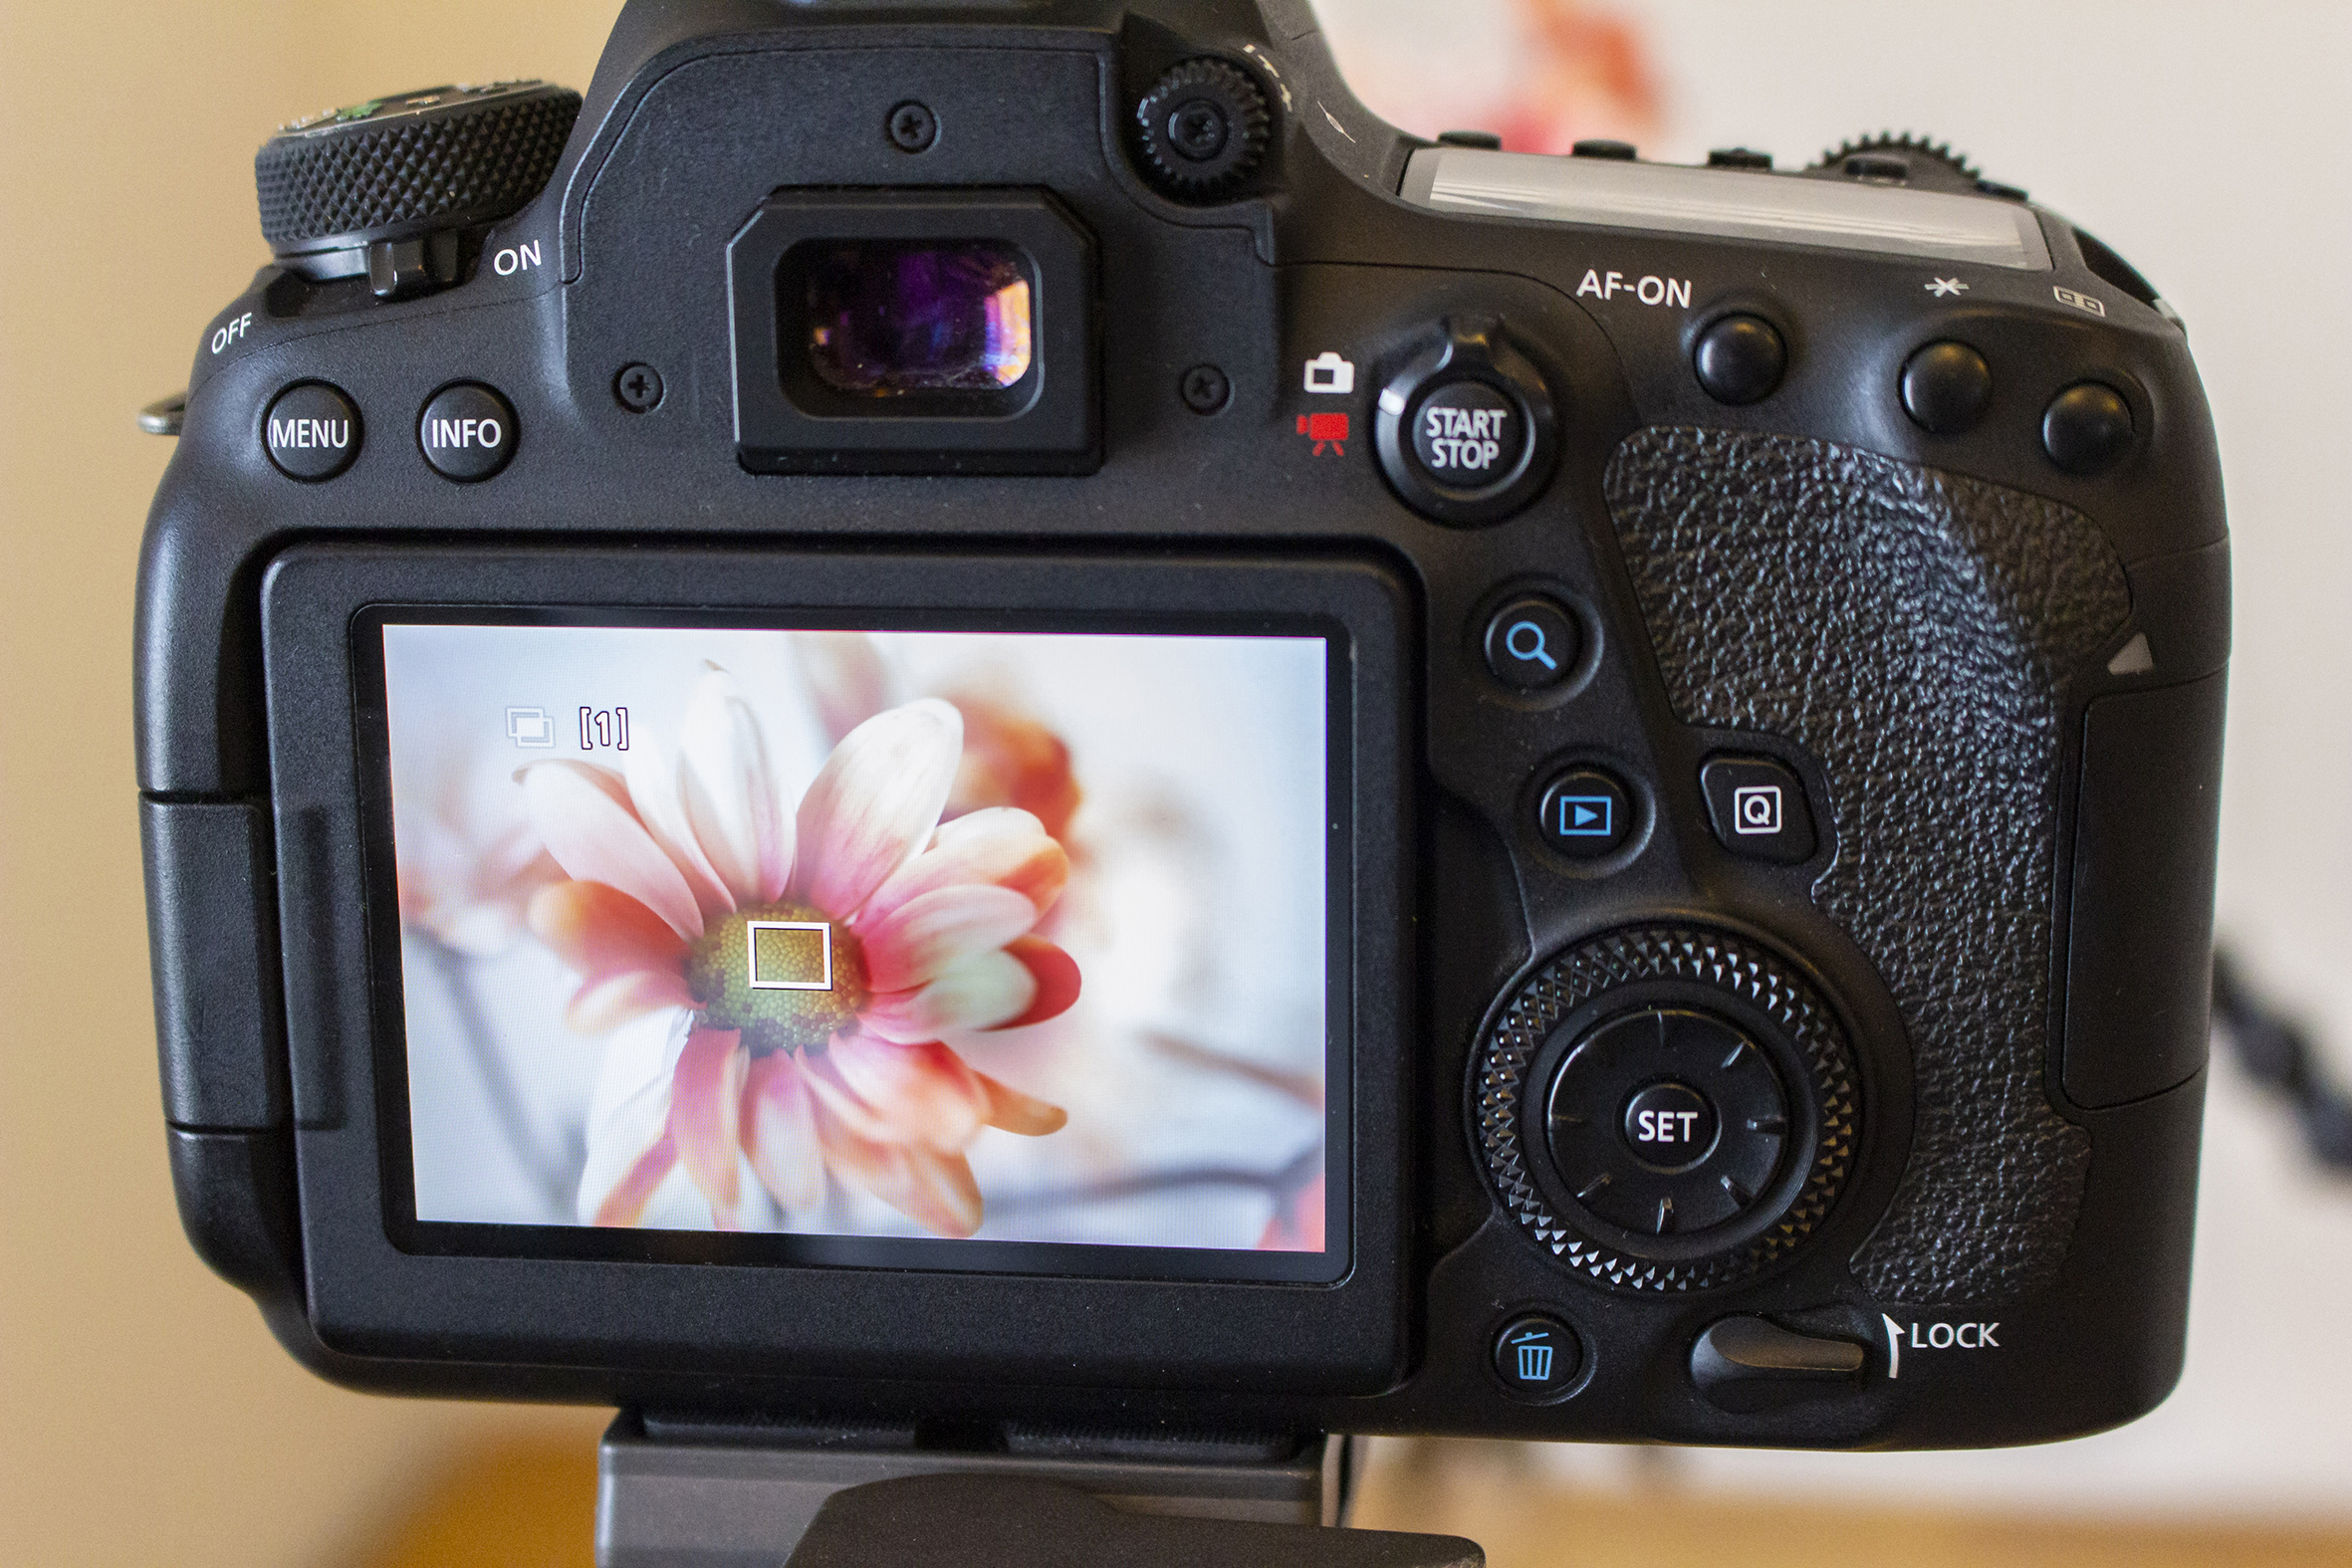
Staying in Live View, you’ll see your first exposure overlaid on the screen. This helps you to line up your second shot and get it in the right position. Once you’ve fired the shutter the two images will be fused into a single Raw file.
6. Finish in Photoshop
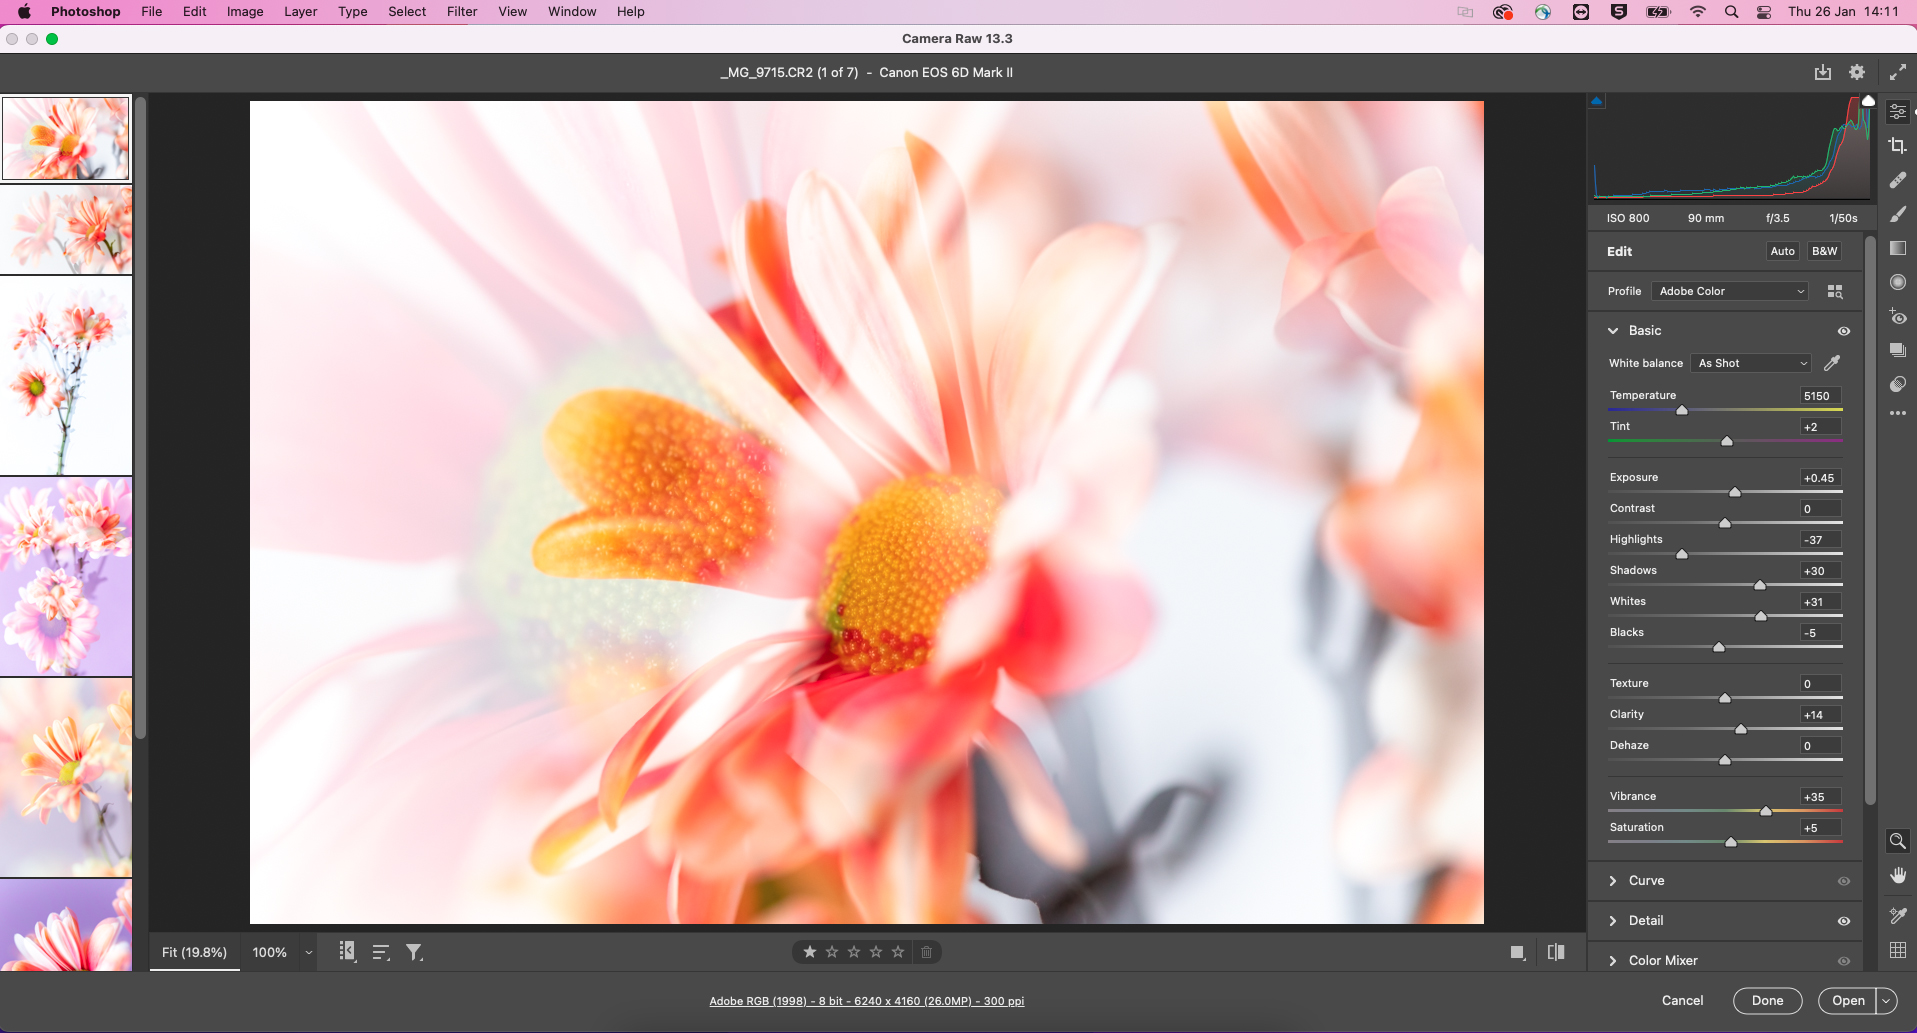
Your final merged exposure will likely be a little too bright or dark, so the next step is to bring the Raw file into Photoshop. Here you can adjust and fine-tune the Exposure as well as other core settings like White Balance, Saturation and Sharpness.
PhotoPlus: The Canon Magazine is the world's only monthly newsstand title that's 100% devoted to Canon, so you can be sure the magazine is completely relevant to your system. Every issue comes with downloadable video tutorials too.
These are the best cameras for portraits and the best portrait photography tips. You might also like the best photo editing software and the best photo-editing laptops.
Get the Digital Camera World Newsletter
The best camera deals, reviews, product advice, and unmissable photography news, direct to your inbox!
Deputy Editor on PhotoPlus: The Canon Magazine, Dan also brings his technical wizardry and editing skills to Digital Camera World. He has been writing about all aspects of photography for over 10 years, having previously served as technical writer and technical editor for Practical Photography magazine, as well as Photoshop editor on Digital Photo.
Dan is an Adobe-certified Photoshop guru, making him officially a beast at post-processing – so he’s the perfect person to share tips and tricks both in-camera and in post. Able to shoot all genres, Dan provides news, techniques and tutorials on everything from portraits and landscapes to macro and wildlife, helping photographers get the most out of their cameras, lenses, filters, lighting, tripods, and, of course, editing software.

