Enhance your image’s tones and colors with layer blend modes in Affinity Photo
Try out these tricks to enhance your tones and colors with the layer blend modes in Affinity Photo
Watch video: Enhance tones in Affinity Photo
Landscapes will often benefit from local adjustments to pull out detail, enhance colors or reveal textures in specific parts of the scene. One way this can be achieved is with layer blend modes. These are often thought of as a means to combine two or more images into one, but Affinity Photo's blend modes can also be hugely useful for enhancing colors and tones.
In this project we’ll look at how to use blend modes in combination with other tools and adjustments to enhance the famous landscape of Meteora in Greece. We’ll break the scene down into different areas – trees, sky, buildings, rocks – and apply tailored edits to each. Whatever landscape you choose to edit, it can usually be divided up in a similar way.
Two of the most useful blend modes for this effect are Overlay and Soft Light. By painting colors on a layer set to the Soft Light mode we can enhance and enrich the existing colors in the scene. We can also paint in extra punch using the Overlay blend mode, and add drama to the sky.
The Linear Light mode is another useful one for boosting colors. We’ve used it here to lift the reds in the roof of the monastery, which helps to draw the eye towards the subject and contrasts with the surrounding greens and greys. Finally, the Multiply blend mode is handy for darkening down overly bright areas, so we can use it here to balance out the bright sky with the land below.
01 Make a new layer
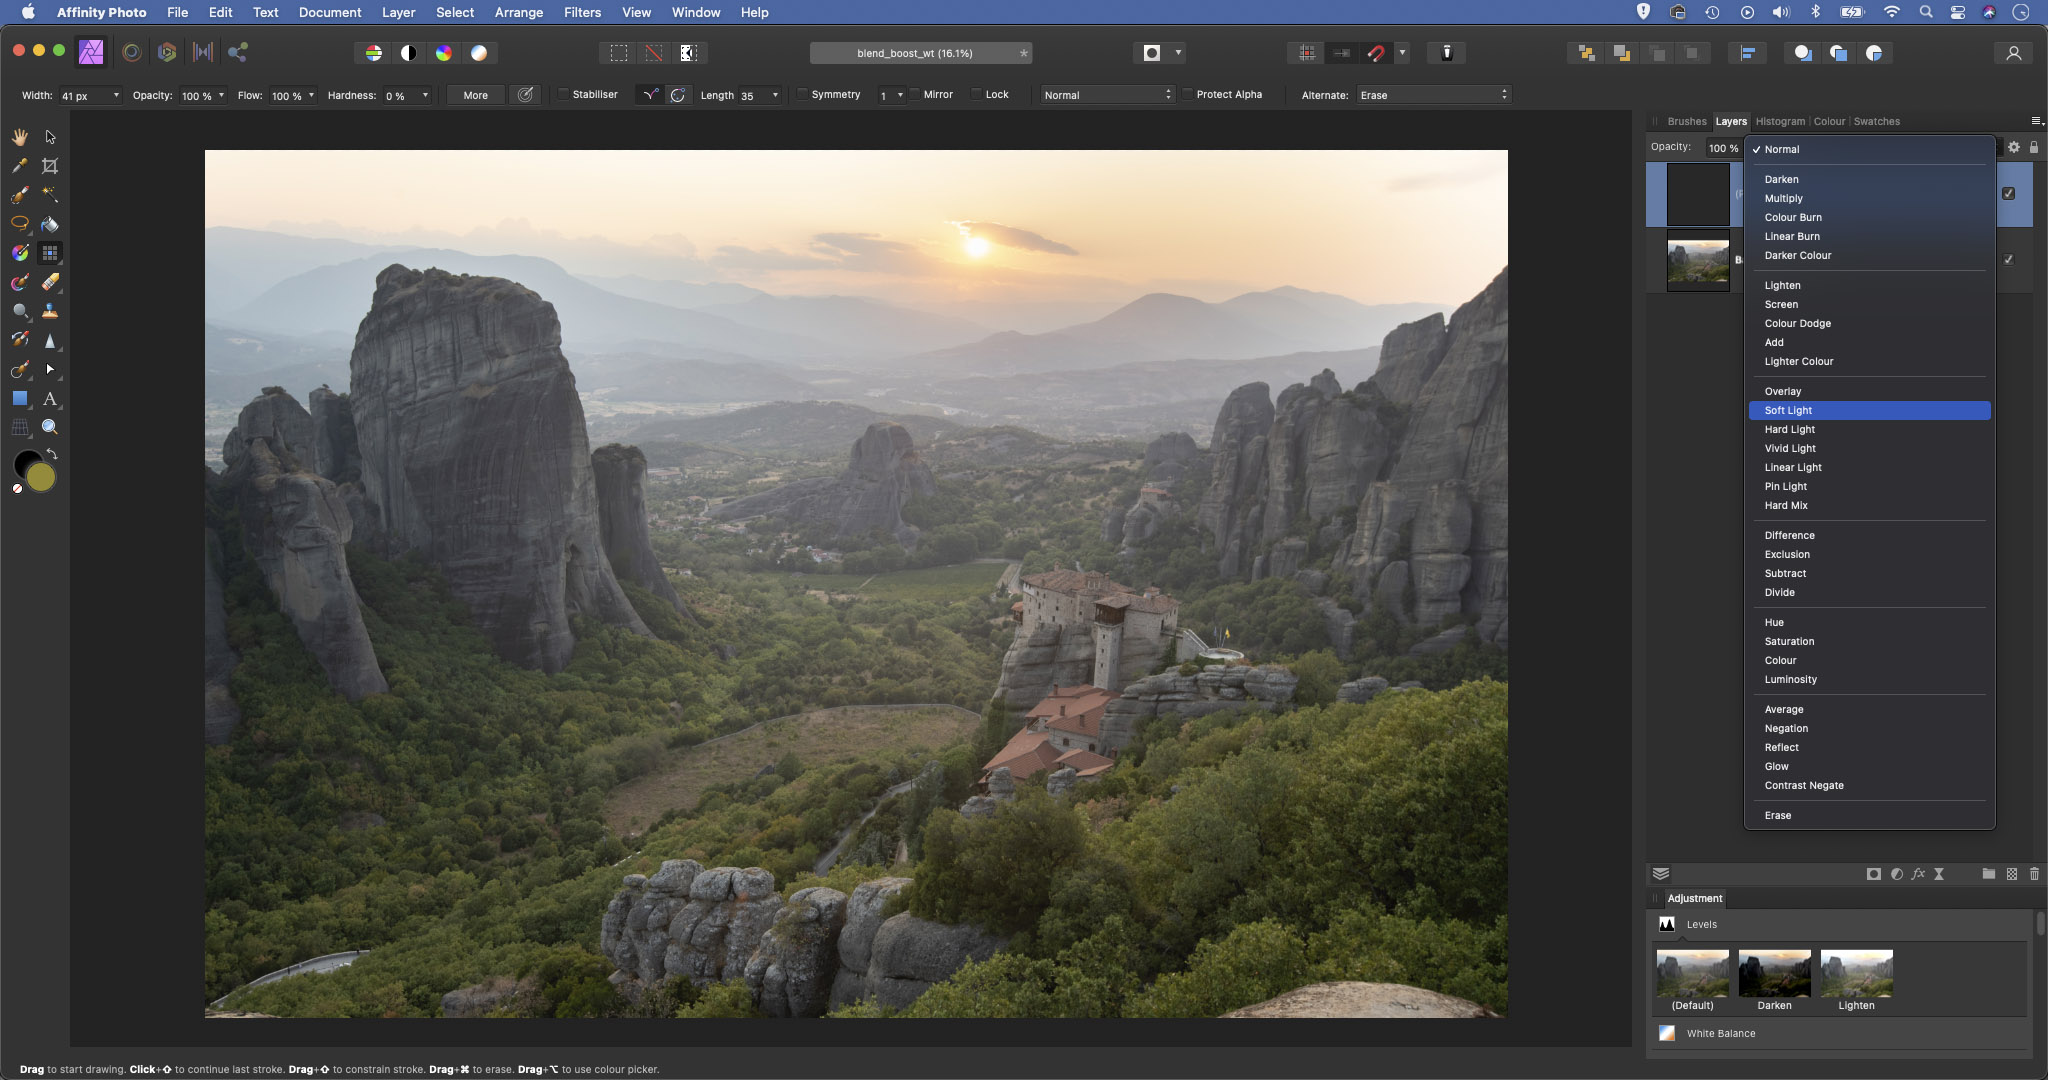
Open your image and click the new pixel layer icon in the Layers panel. Next, click the Blend Mode dropdown at the top of the Layers panel and change it from Normal to Overlay. Grab the Brush tool, zoom in close to the trees and hold Alt to sample one of the brighter green colors.
02 Paint bold colors
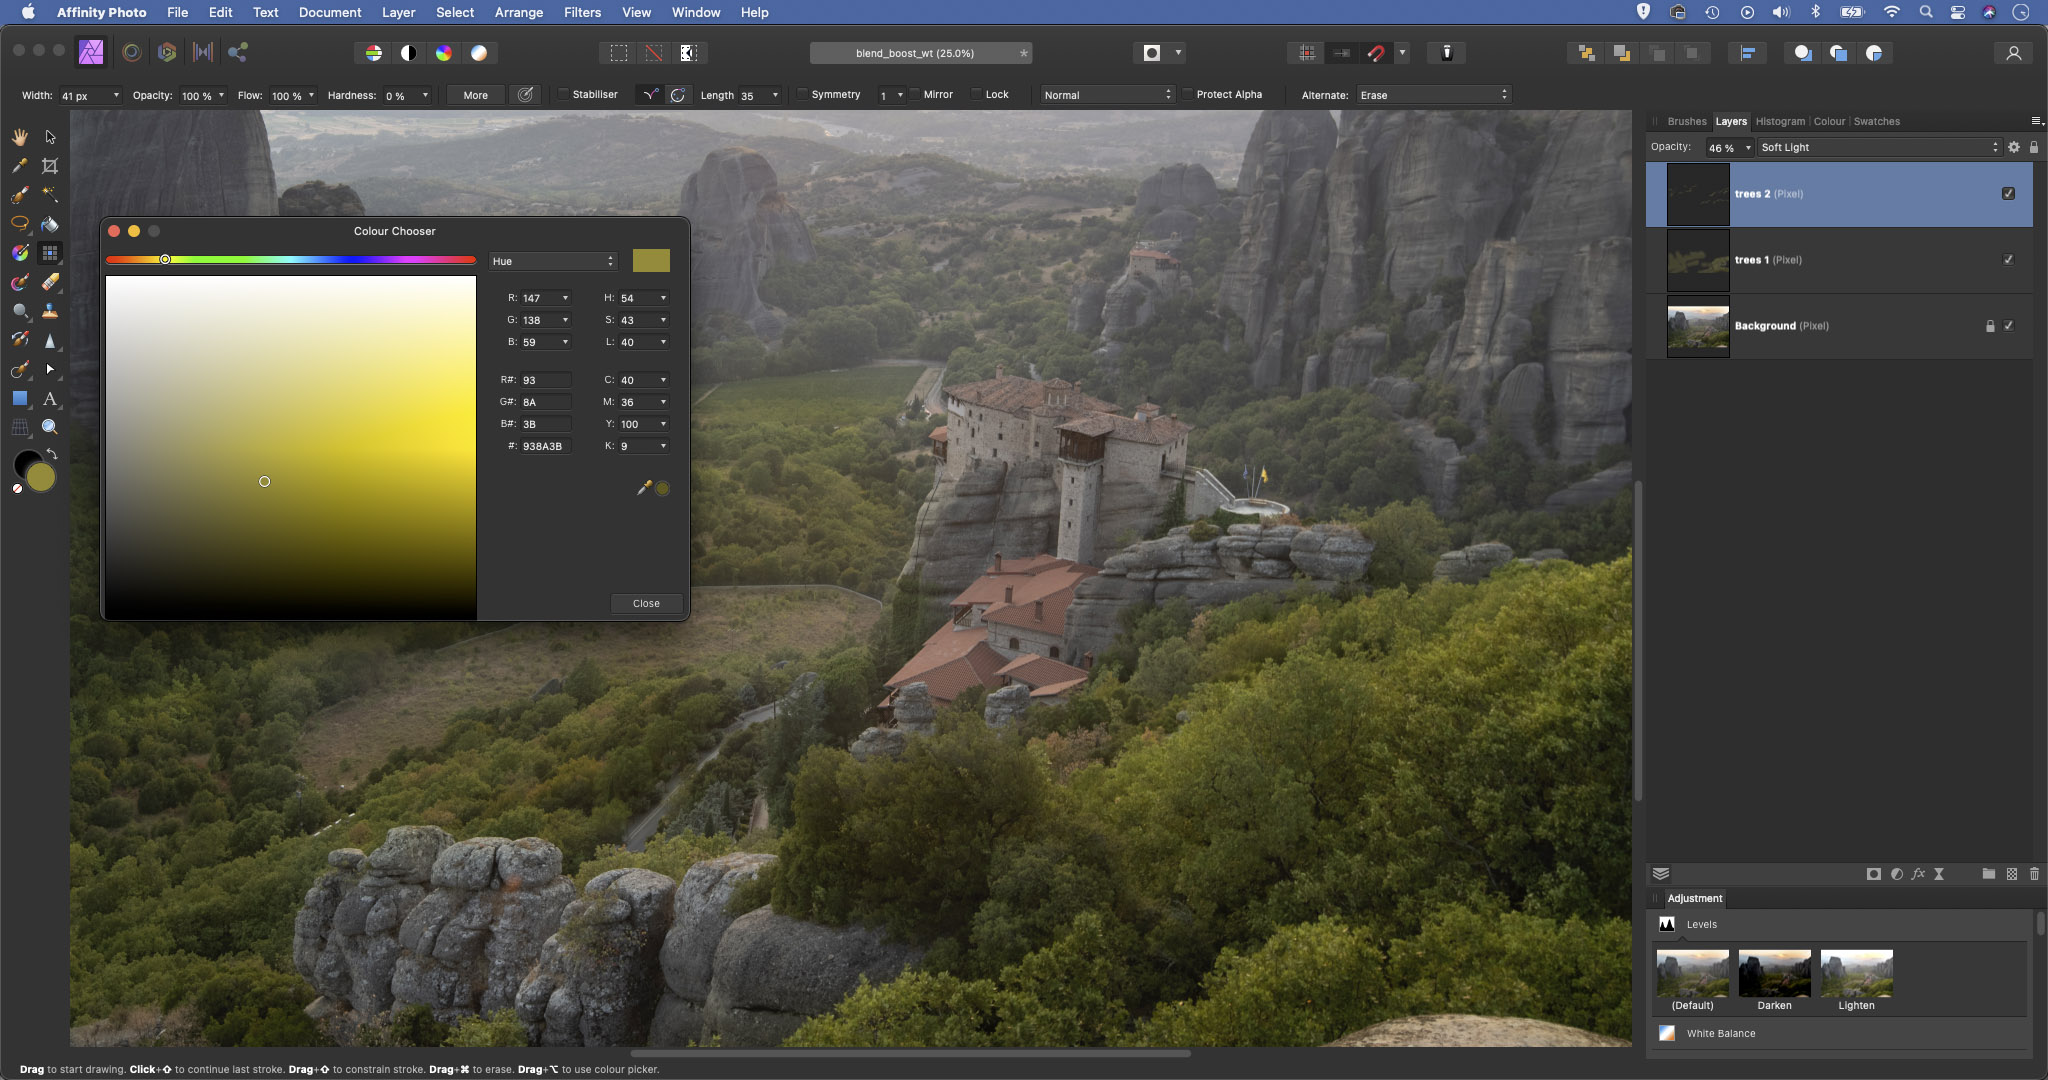
Hit 5 to set the brush opacity to 50%. Paint over the trees with the green color to lift the tops of them where the sunlight highlights the edges. Vary the color if you like, and choose a darker green to add depth to the shadows in the foliage. If the effect is too strong, lower the layer opacity slightly.
03 Lift the rooftop
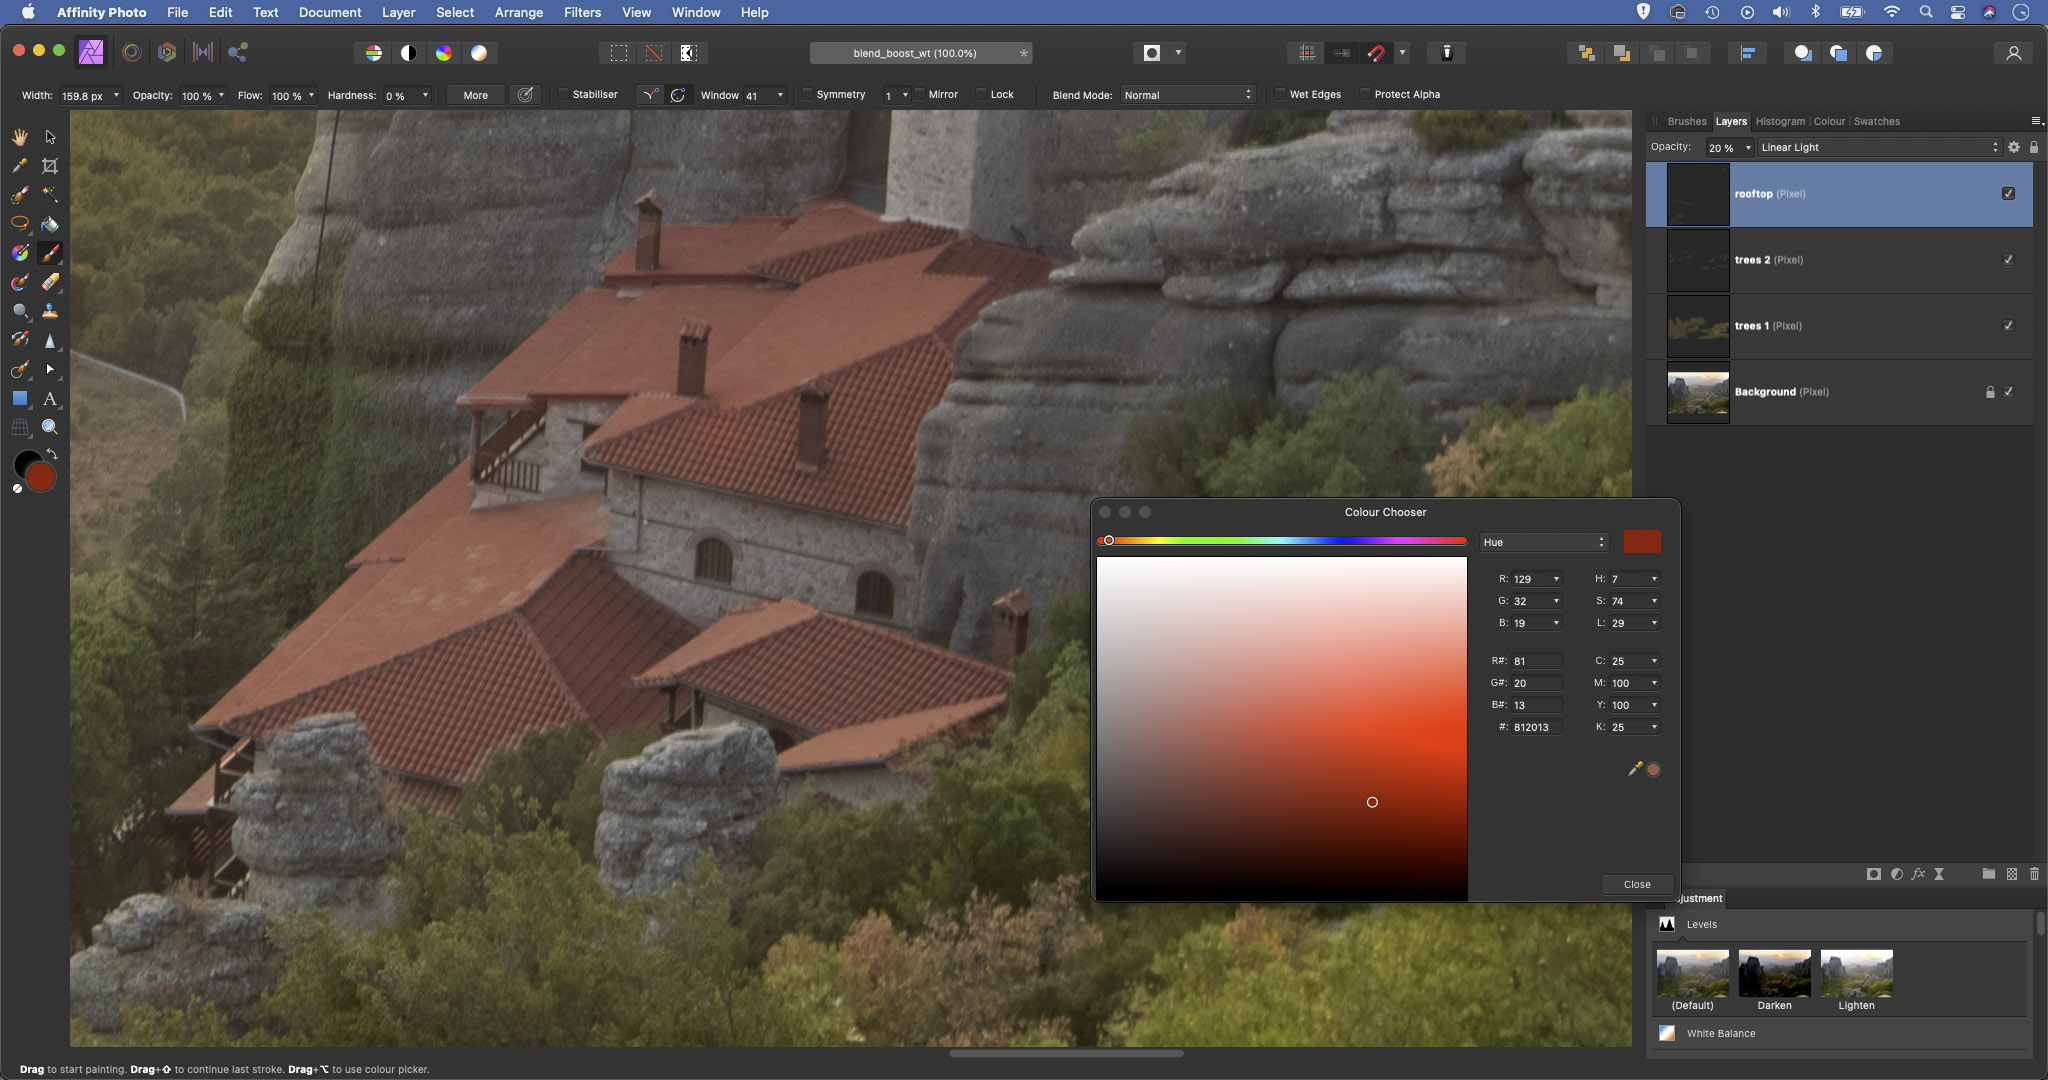
Make another new layer and set the blend mode to Linear Light. This time zoom in close to the tops of the monastery and Alt-click with the Brush tool to sample the red color. Paint to boost the red roof of the building. If you need to erase areas, hit E to switch to the Eraser tool.
04 Boost the sky
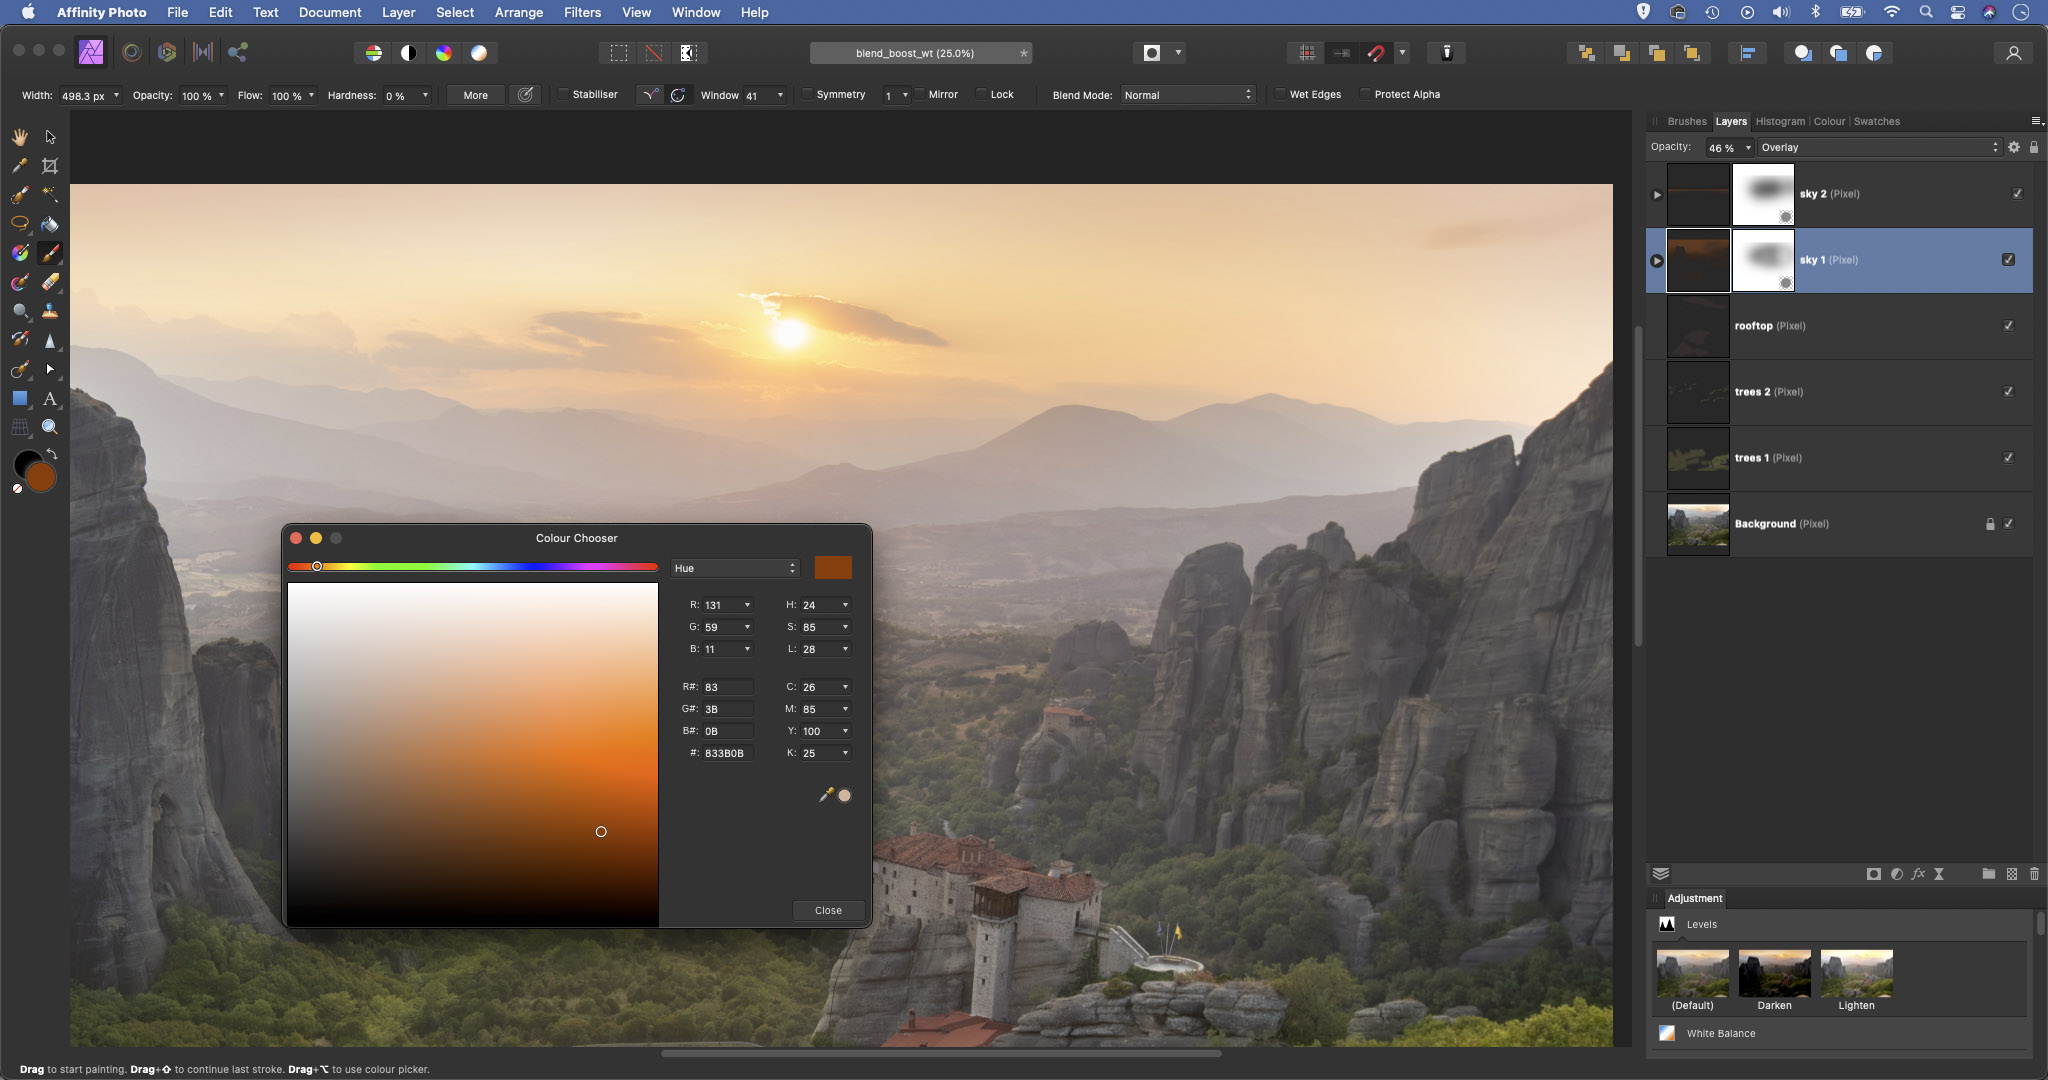
Make a new layer. Choose a dark orange color and paint over the sky, then change the blend mode to Overlay. Make another new layer and change the blend mode to Multiply, then paint over the top part of the sky to darken it further. Reduce the layer opacity to soften the effect.
05 Add punch to rocks
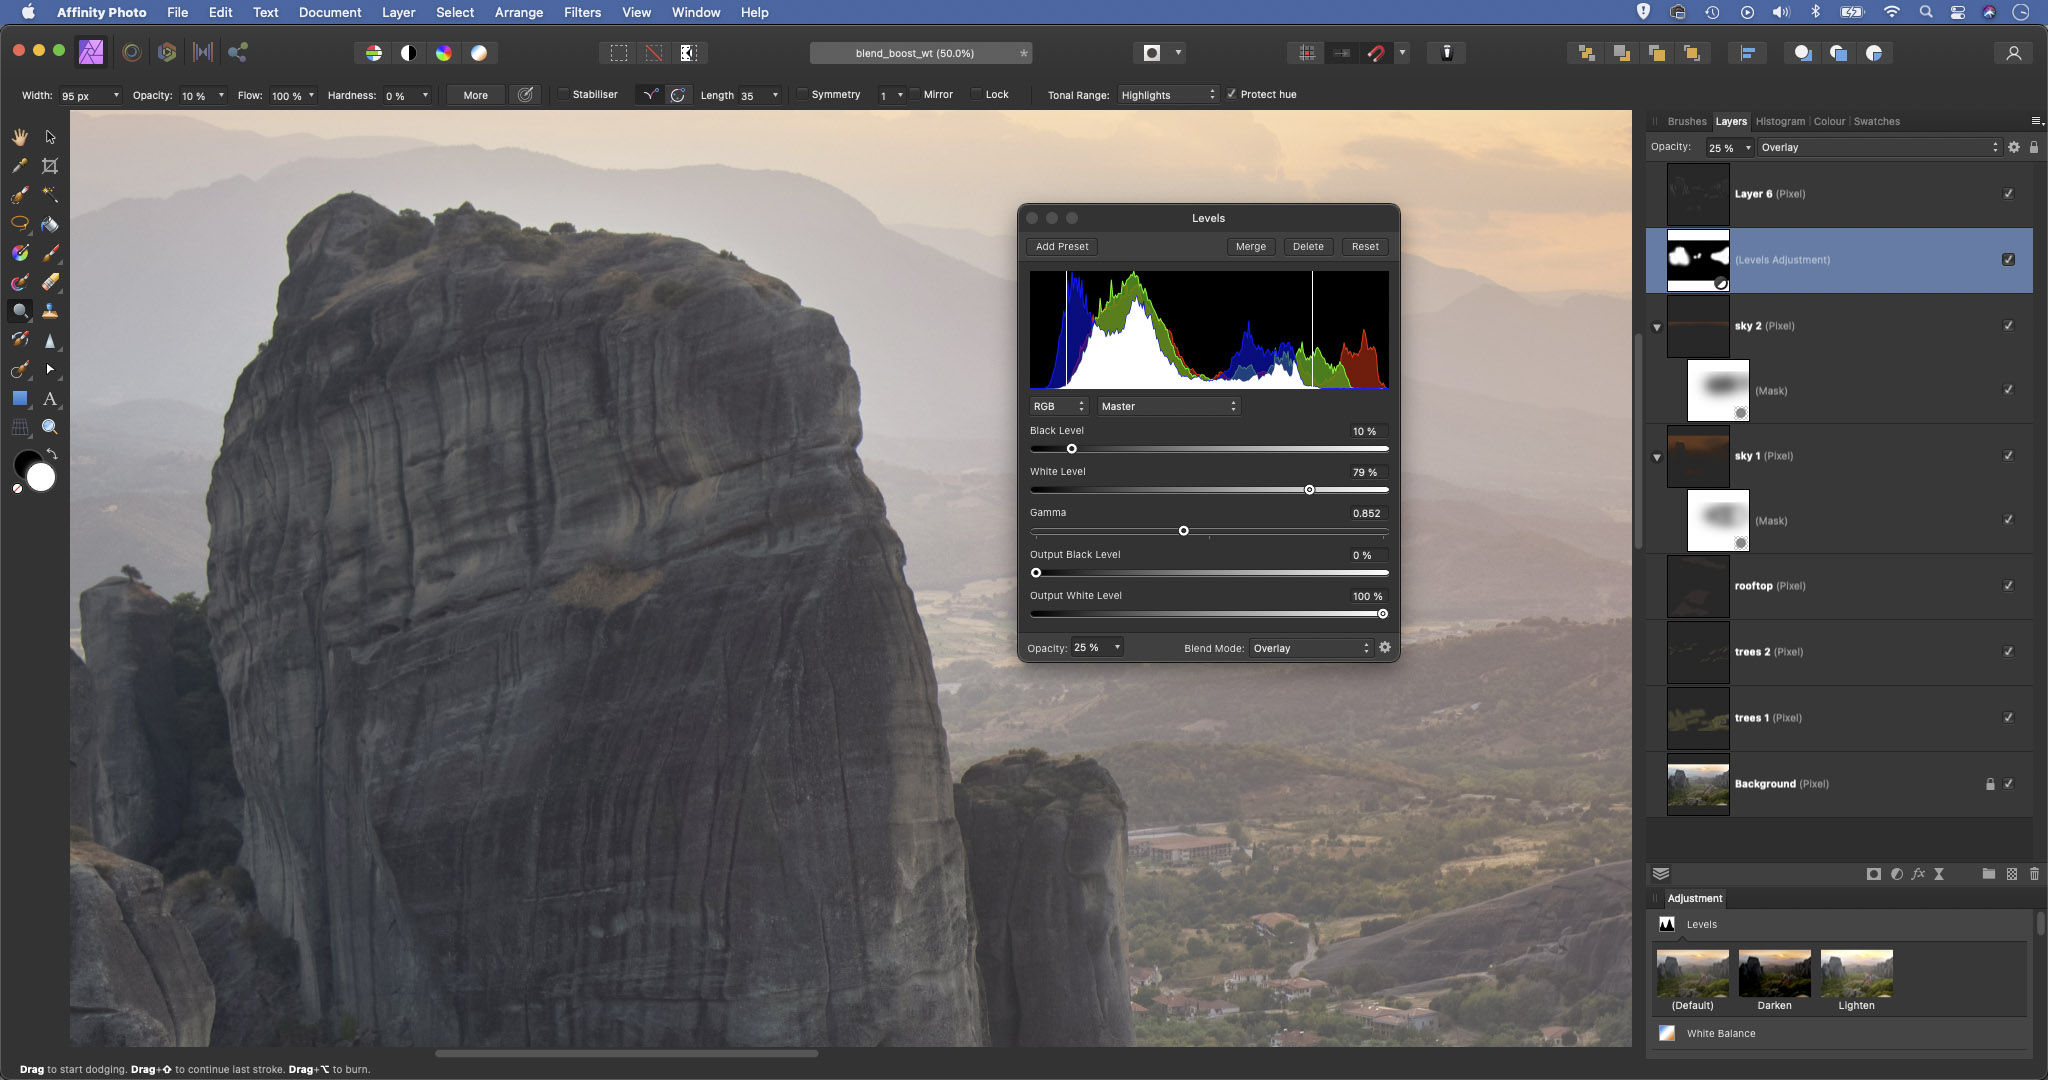
Click the Adjustment icon in the Layers panel and choose Levels. Change the blend mode to Overlay and hit Cmd/Ctrl + I to invert the mask to black, hiding the layer. Grab the Brush tool and paint white to reveal the change in contrast over the rocks. If you like, repeat step 1-2 over the rocks to boost the highlights.
06 Color and contrast
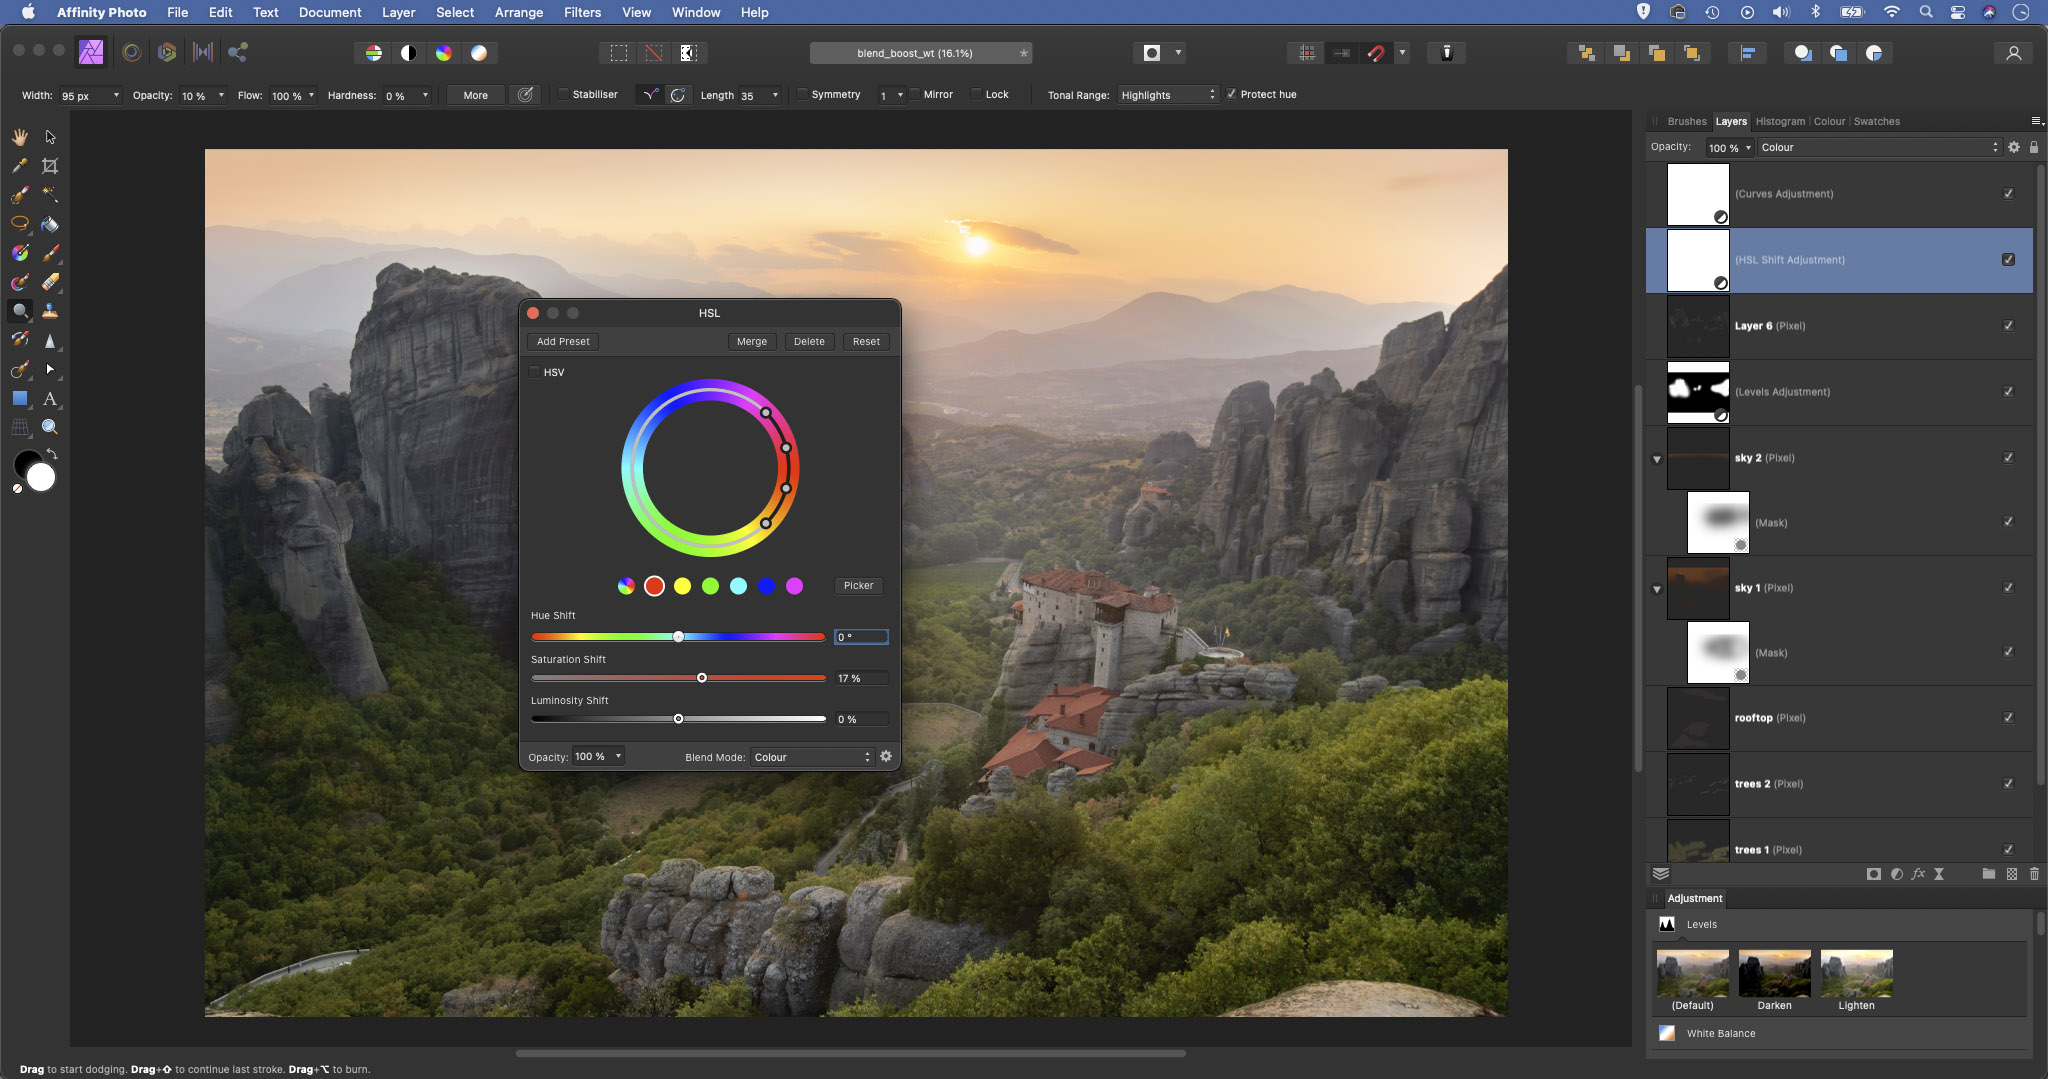
Add a HSL Adjustment. Click the red and yellow spots and increase Saturation. Change the blend mode to Color so only the color is changed. Finally, add a Curves Adjustment and plot an S-shaped curve to boost contrast. Set the blend mode to Luminosity so only brightness is changed and colors stay the same.
PhotoPlus: The Canon Magazine is the world's only monthly newsstand title that's 100% devoted to Canon, so you can be sure the magazine is completely relevant to your system.
Read more:
Best photo-editing laptops
Best photo editing software
Best online photography courses
Get the Digital Camera World Newsletter
The best camera deals, reviews, product advice, and unmissable photography news, direct to your inbox!
The lead technique writer on Digital Camera Magazine, PhotoPlus: The Canon Magazine and N-Photo: The Nikon Magazine, James is a fantastic general practice photographer with an enviable array of skills across every genre of photography.
Whether it's flash photography techniques like stroboscopic portraits, astrophotography projects like photographing the Northern Lights, or turning sound into art by making paint dance on a set of speakers, James' tutorials and projects are as creative as they are enjoyable.
He's also a wizard at the dark arts of Photoshop, Lightroom and Affinity Photo, and is capable of some genuine black magic in the digital darkroom, making him one of the leading authorities on photo editing software and techniques.


