FREE Photoshop brush adds realistic mist to your landscapes!
Transform your landscapes from bright sunshine to moody mist with our free custom Photoshop CC brush
Watch video: Add mist in Photoshop CC with free brush
Mist can greatly enhance the atmosphere in a landscape, but more often than not when we reach a stunning spot we’re met with bright sunshine instead. That won't stop you from adding the atmosphere later on, though, using this simple Photoshop CC technique.
It’s not the same as capturing a misty scene in the flesh, of course, but it’s a striking mood-changer and also introduces several key Photoshop tools. Using simple layer tricks and brushes, we’ll transform a scene bathed in sunlight to one shrouded in atmospheric mist. Along the way we’ll learn key Photoshop skills, from isolating parts of an image with selections, to using creative brush tips.
The effect will work best on landscapes that can be separated into a foreground, mid-ground and background like Machu Picchu here. This way, we can paint in the mist so that it looks as if it’s floating behind parts of the scene, which helps to create a sense of depth.
We’ve supplied a free custom mist brush file, which you can download here. If you rarely go beyond a circular brush tip in Photoshop, then you’re missing out on a whole world of creative effects. The brush engine houses a multitude of different shaped brushes that can be used for all kinds of effects, from painterly strokes to textured tips.
Here we’ll look at how to load in the new brush, then adjust the settings for a range of wonderful results. Our misty brush can be used on any landscape image you like to give it a moody, foggy, atmosphere.
Read more:
• Best cameras for landscapes
• Best lenses for landscapes
01 Select the foreground
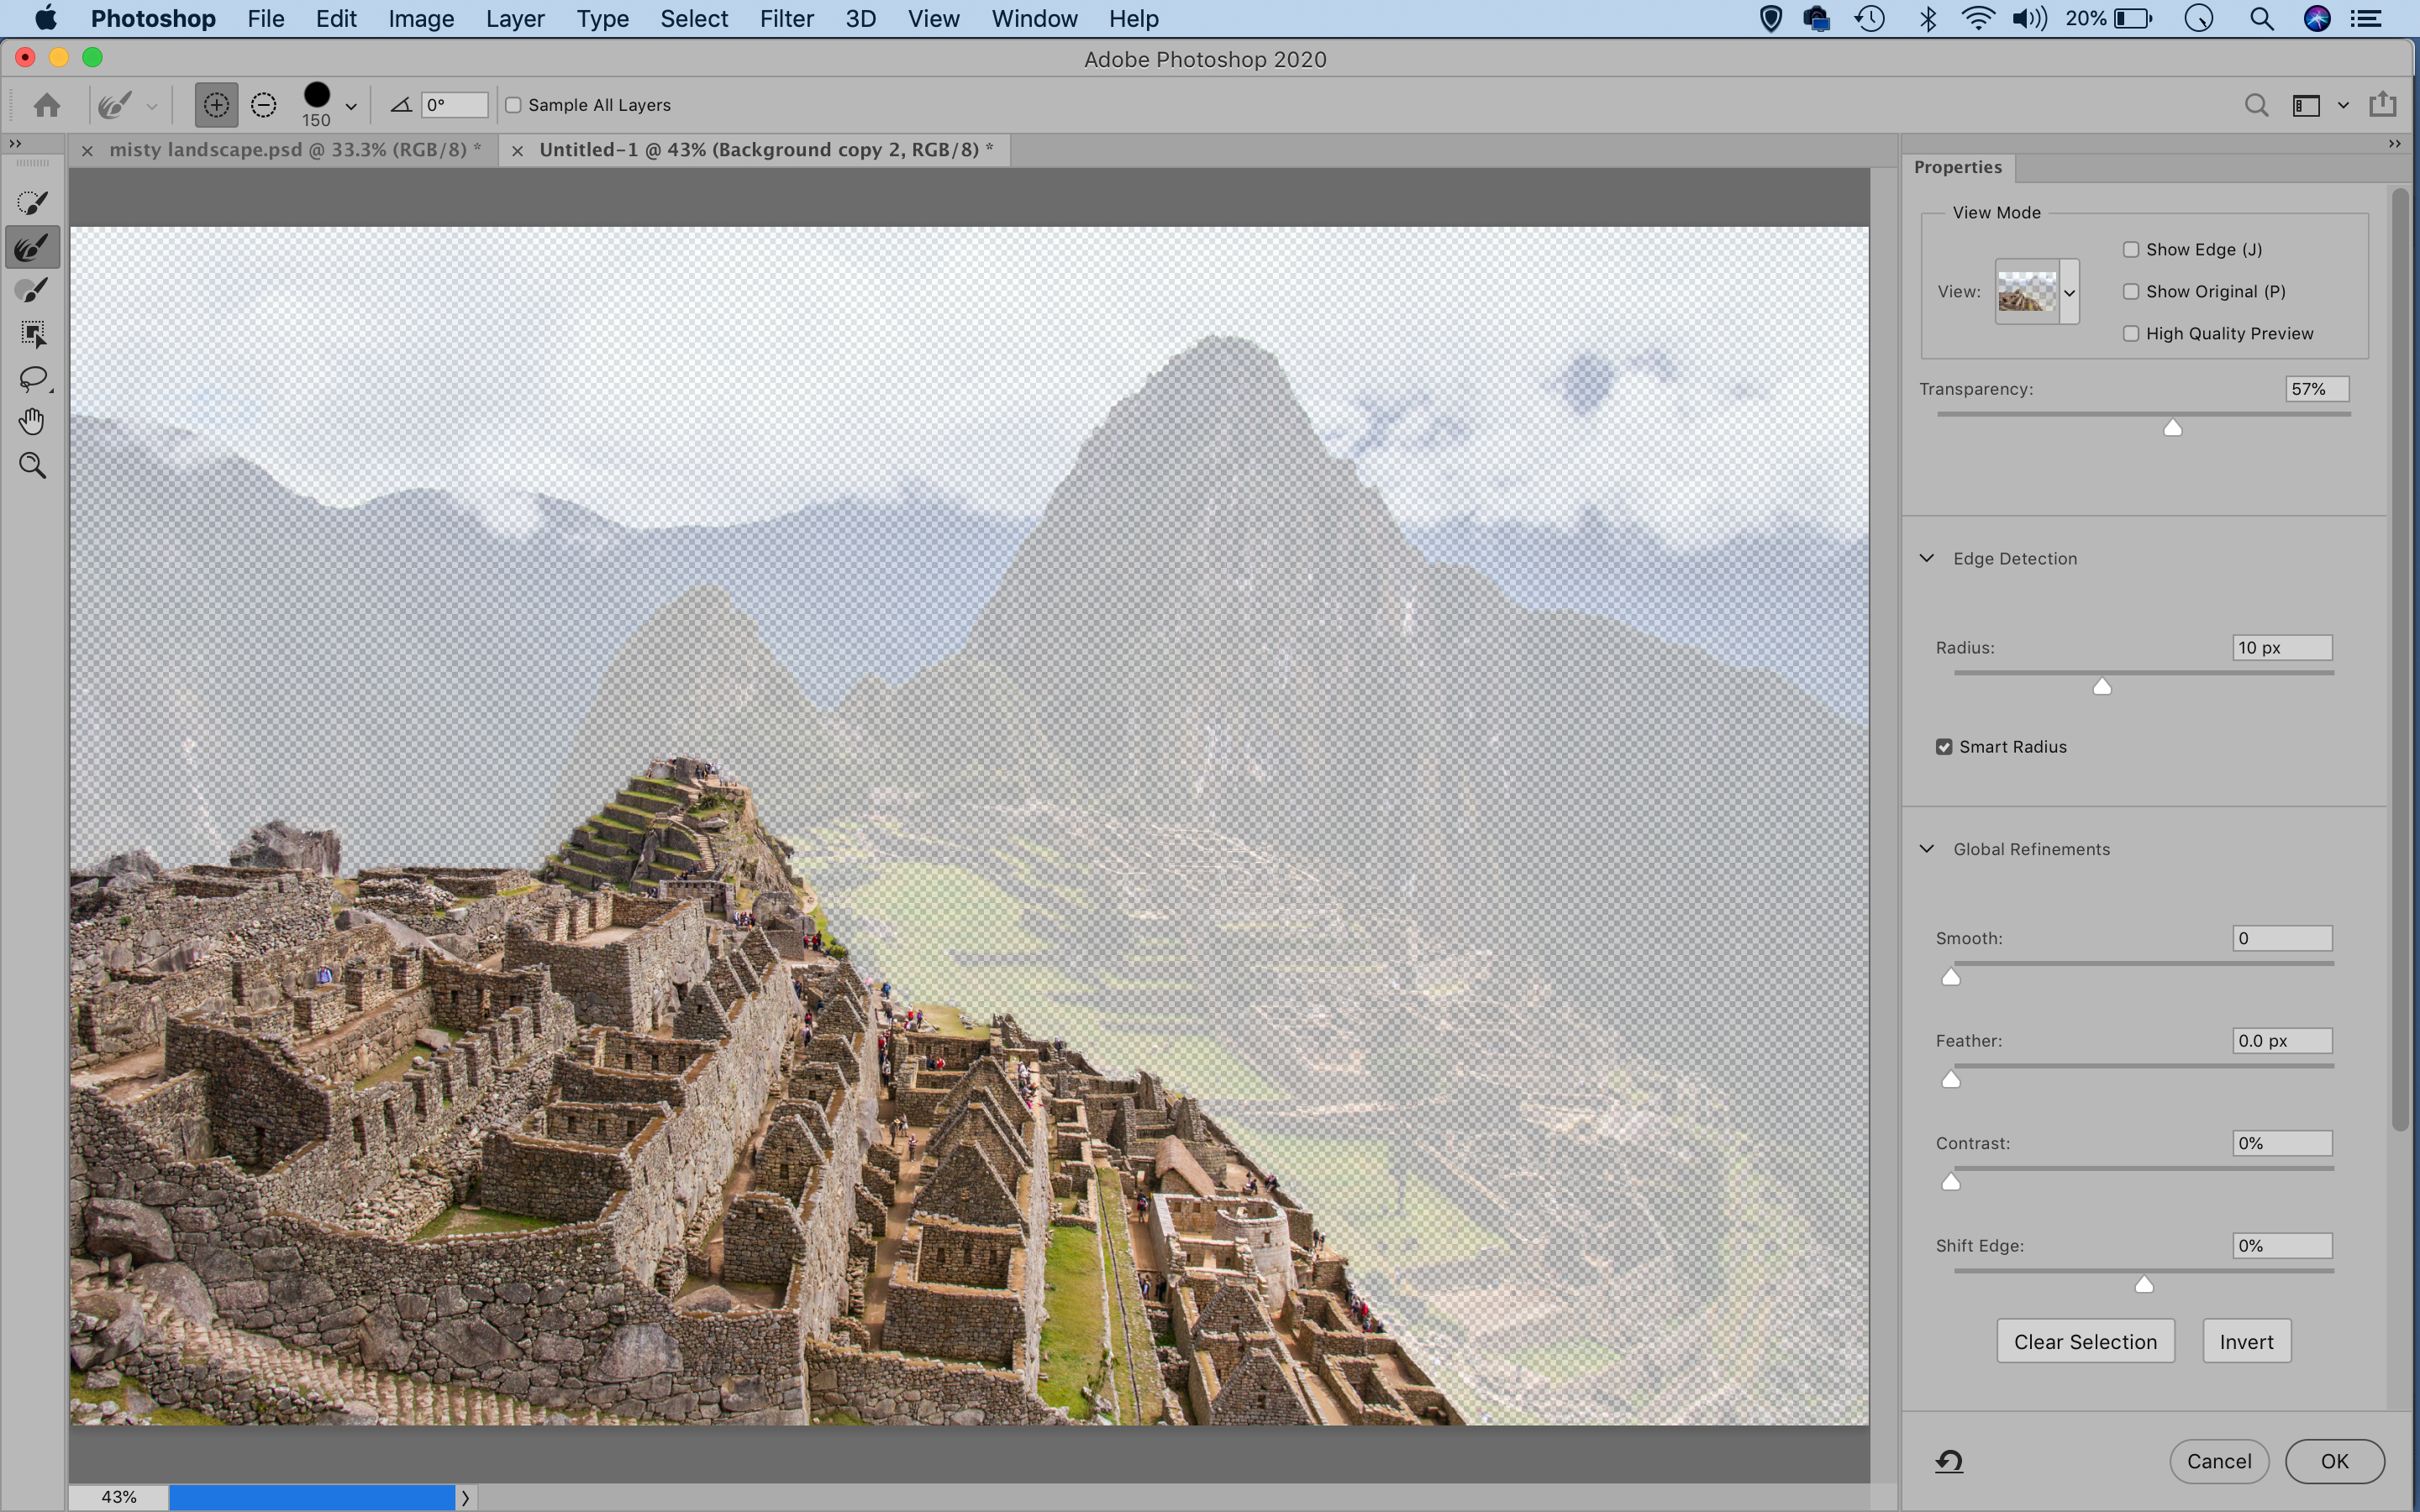
Open a landscape (or download our start file here) and duplicate the background twice with Cmd / Ctrl + J. Hide the lower two layers. Go to Select > Select and Mask. Use the Quick Selection brush to paint the foreground. Increase the Radius to 10px to improve the selection. Set ‘Output to: Layer Mask’ and hit OK.
02 Layer the landscape
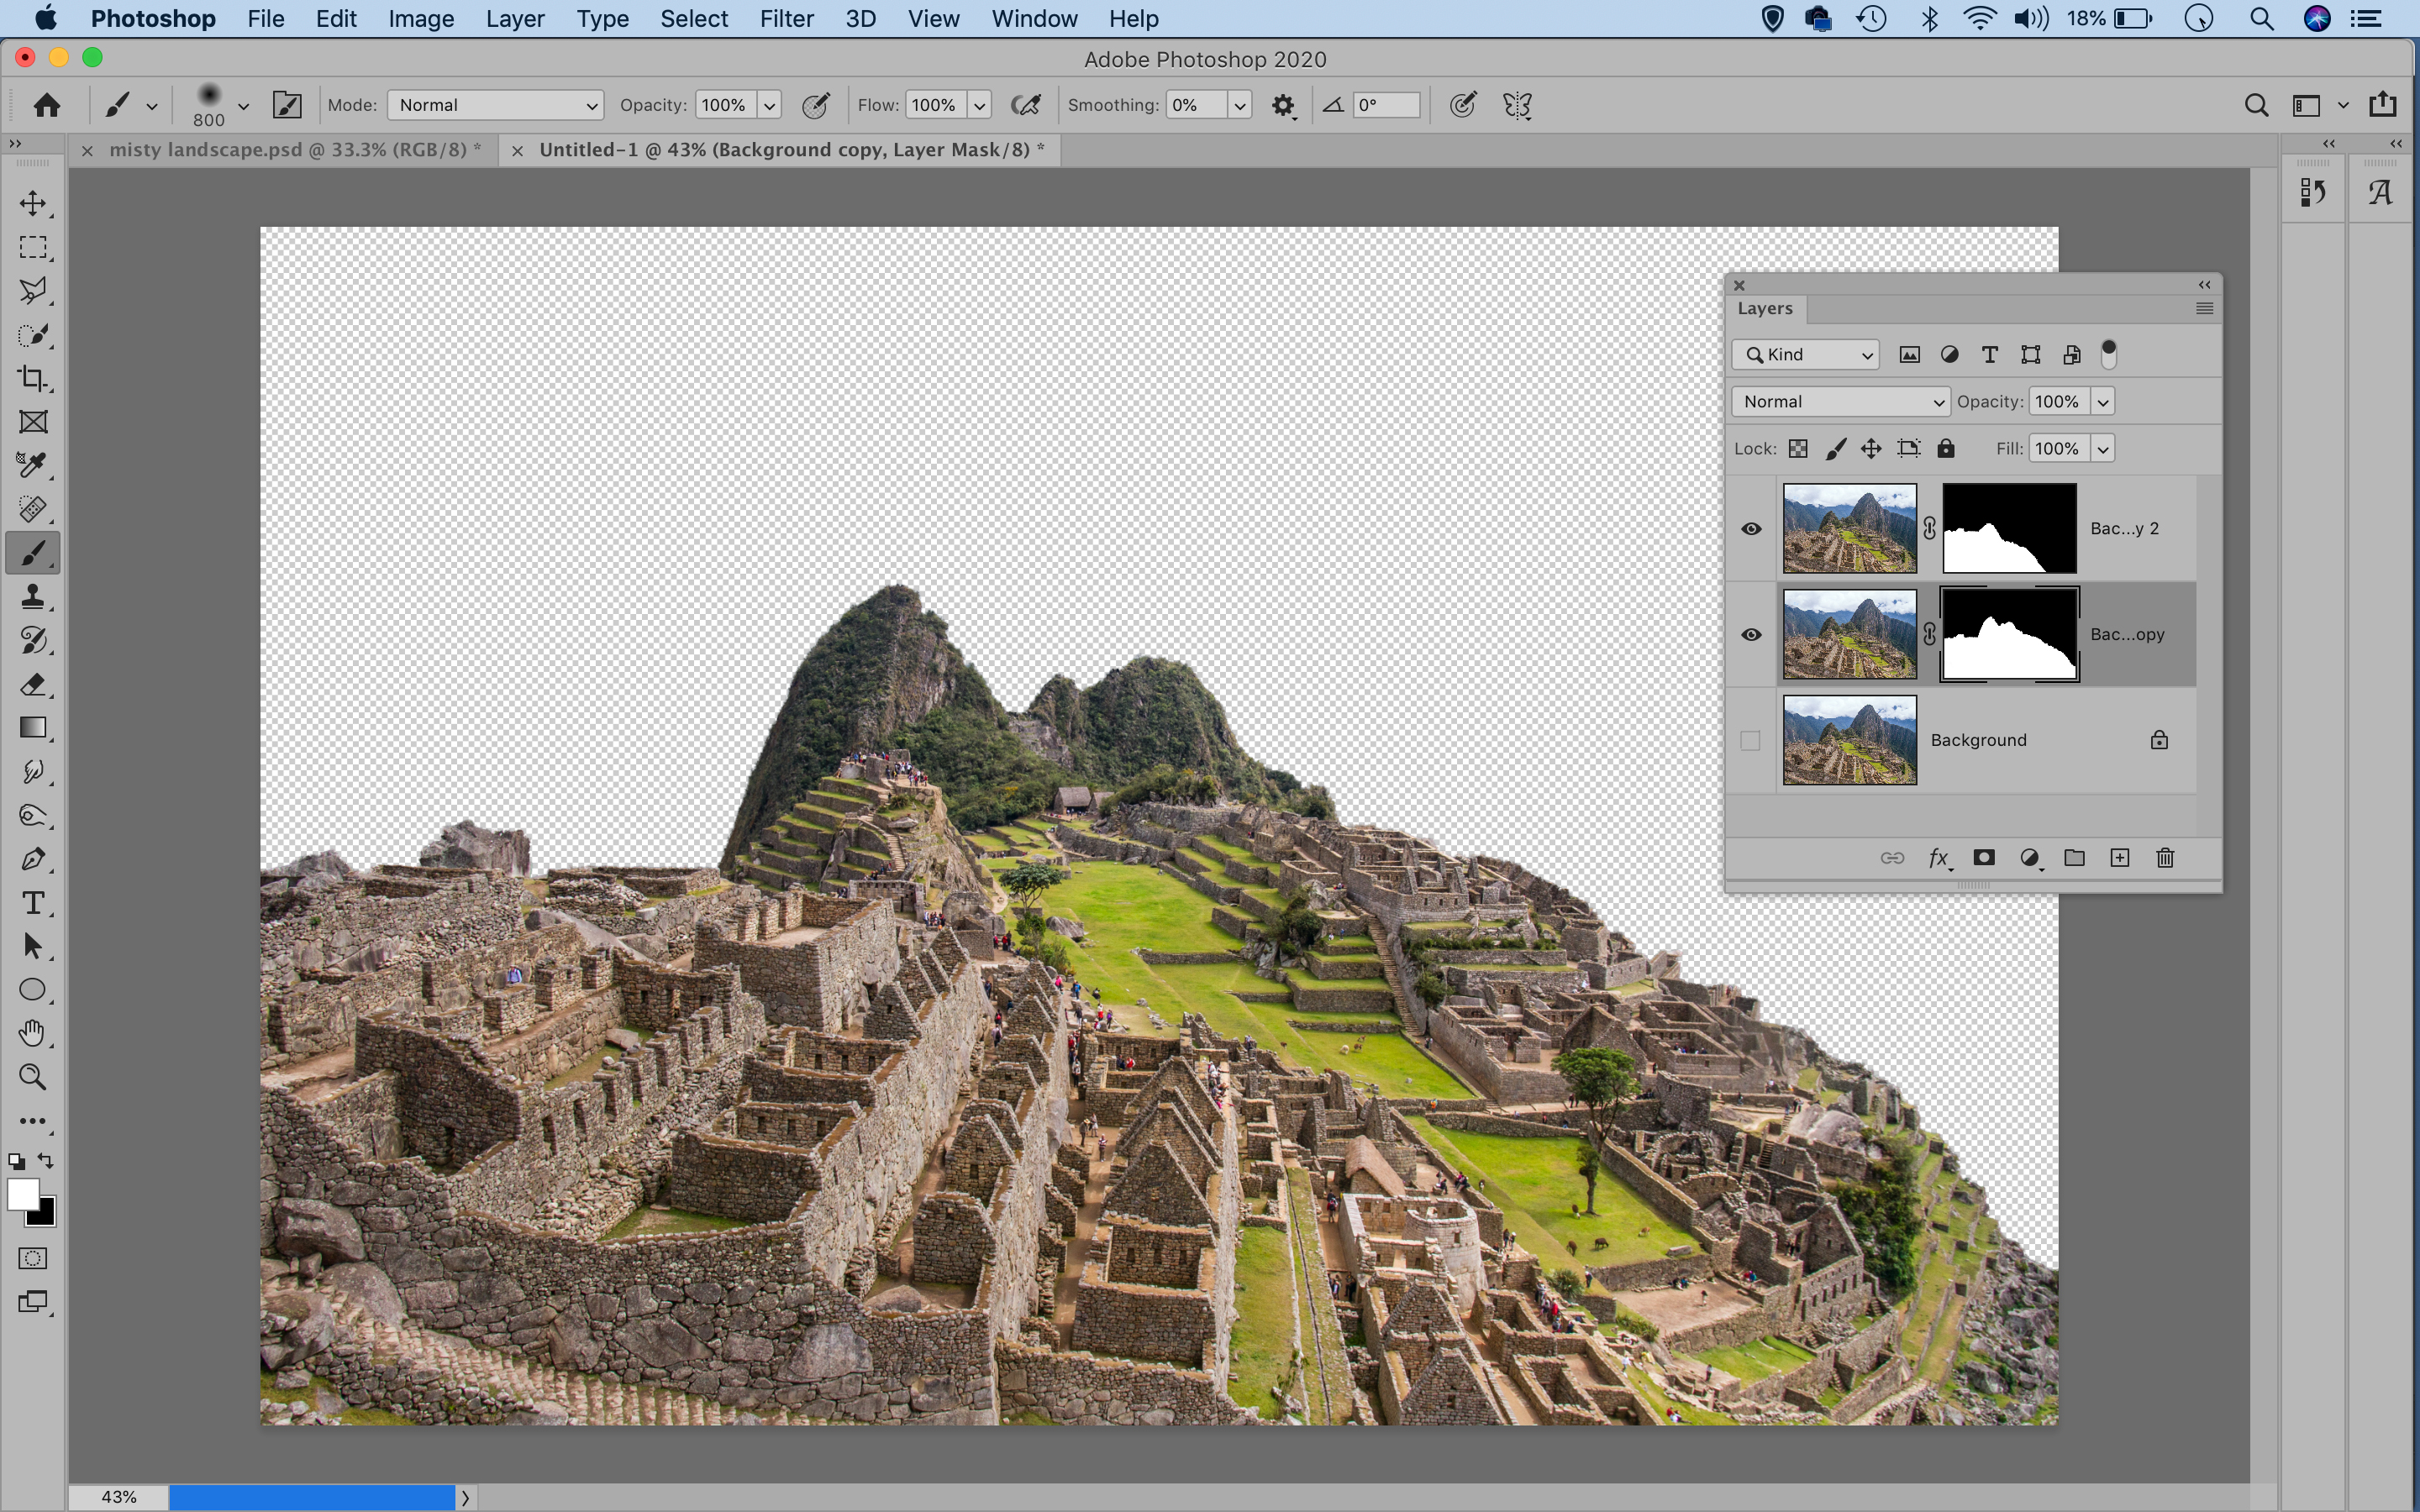
Highlight and reveal the middle layer, then go to Select and Mask. This time make a selection of the foreground and mid-ground as shown. Again adjust the radius to improve the selection, set Output to Layer Mask and hit OK. Now we’ve divided our scene into three.
03 Set up the brush

Drag the mist.abr file into Photoshop, then grab the Brush Tool. Select the new brush tip, which will be at the bottom. Go to Window > Brushes. In Shape Dynamics increase Size and Angle Jitters and check Flip X and Y jitters. Click Scattering and increase Scatter to 75%.
04 Paint backgroud mist
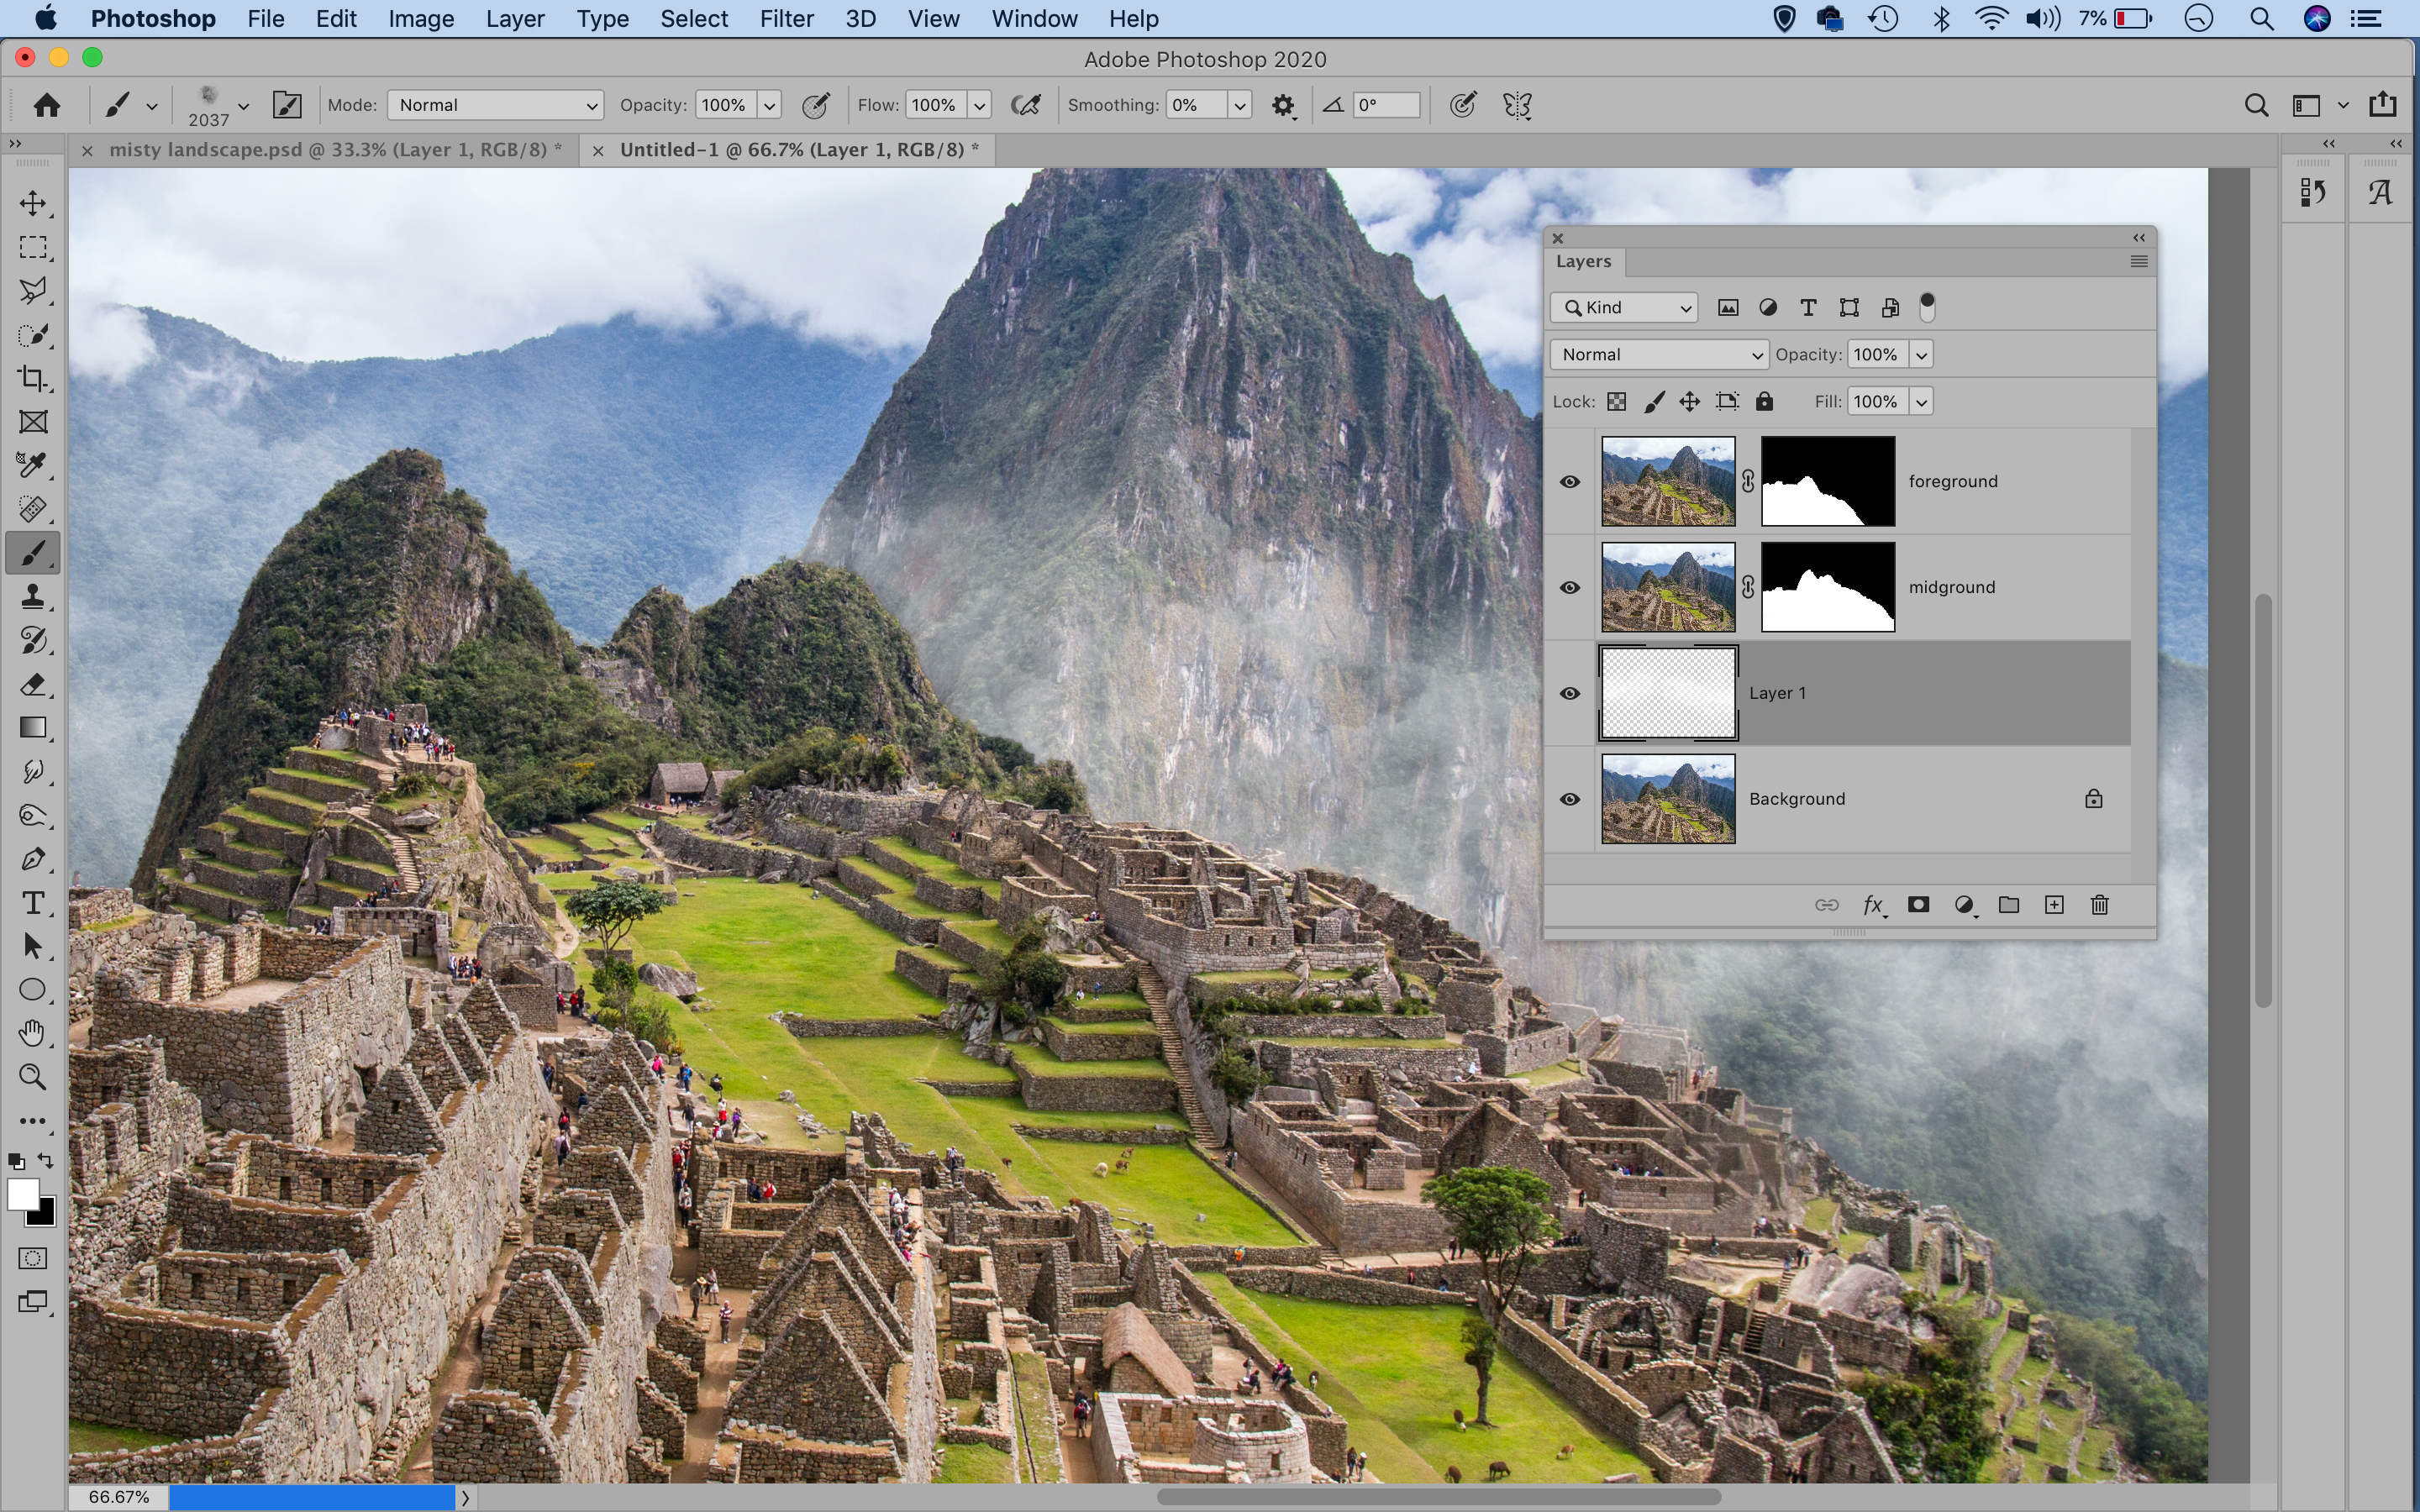
Highlight the bottom layer, then click the new layer icon. Hit D then X to set the color to white, then click on the image to start dabbing mist around the scene. Build up the effect around the base of the mountains, using the [ and ] keys to resize the brush tip as you go.
05 Build up the effect
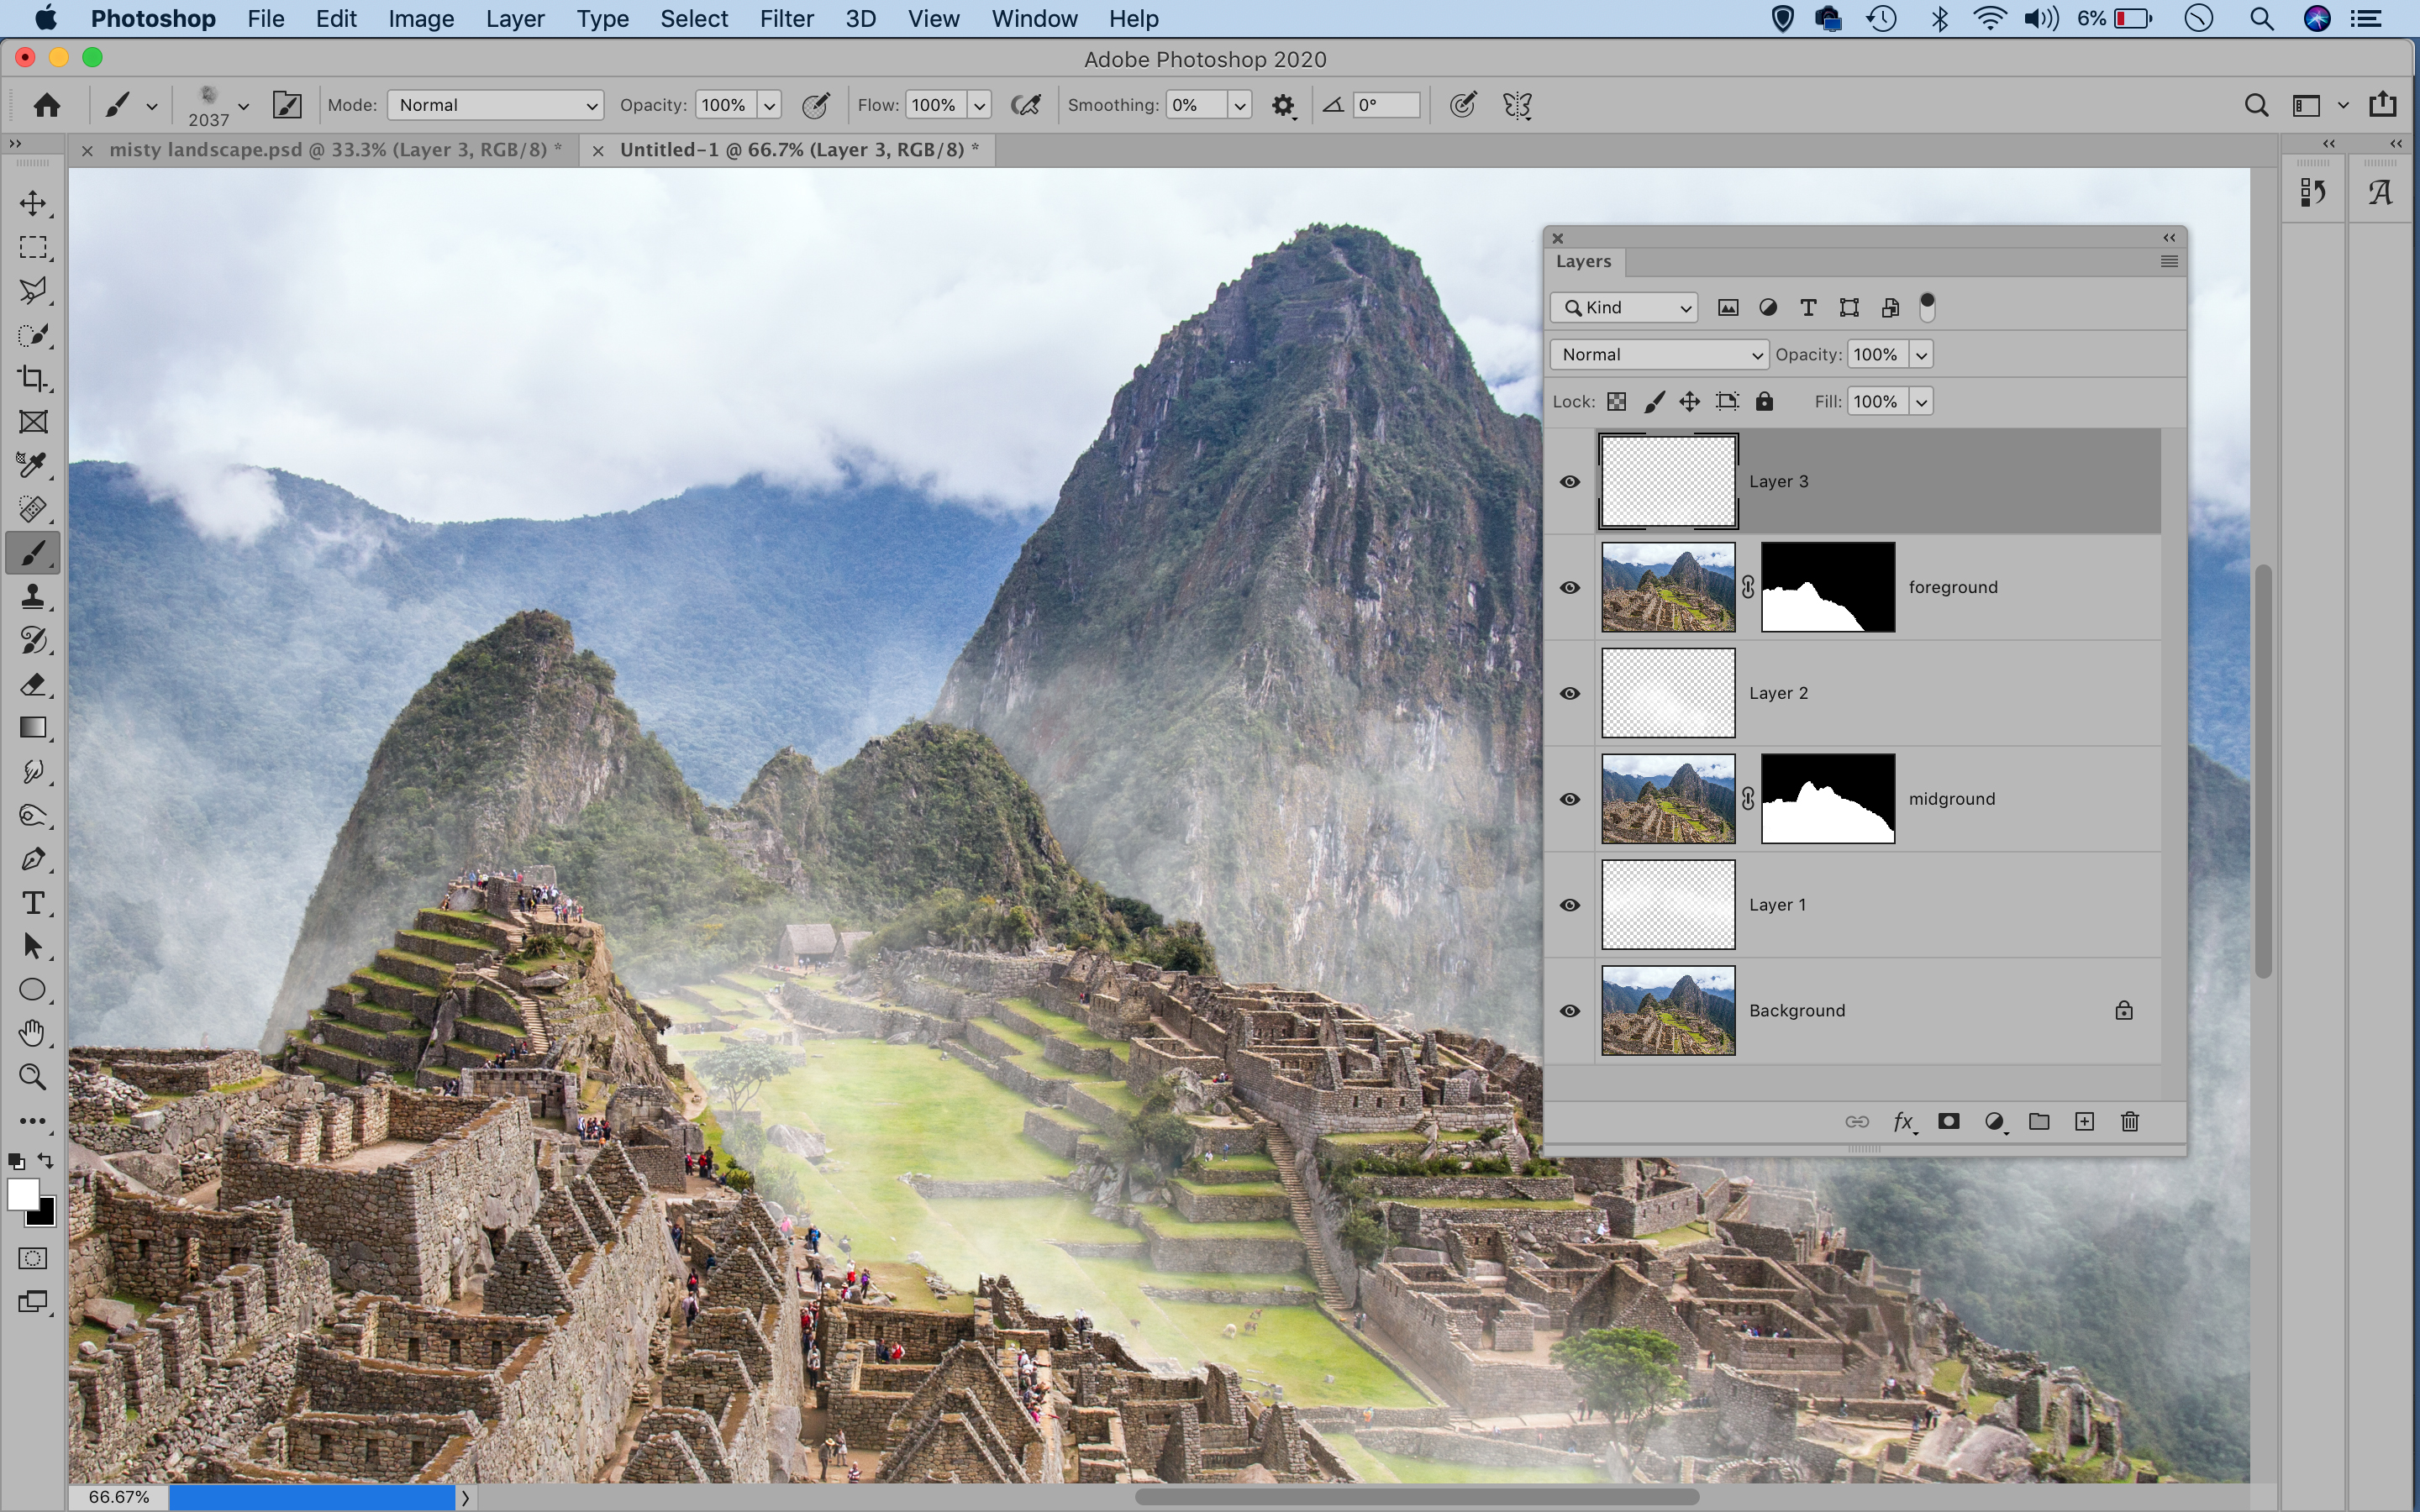
Make another new layer above the middle layer, then dab more mist over the image to create another strip of fog. Make another layer at the top of the stack and paint over the bottom of the frame, to add mist in front of the foreground and around the edges of the image.
06 Tone the image
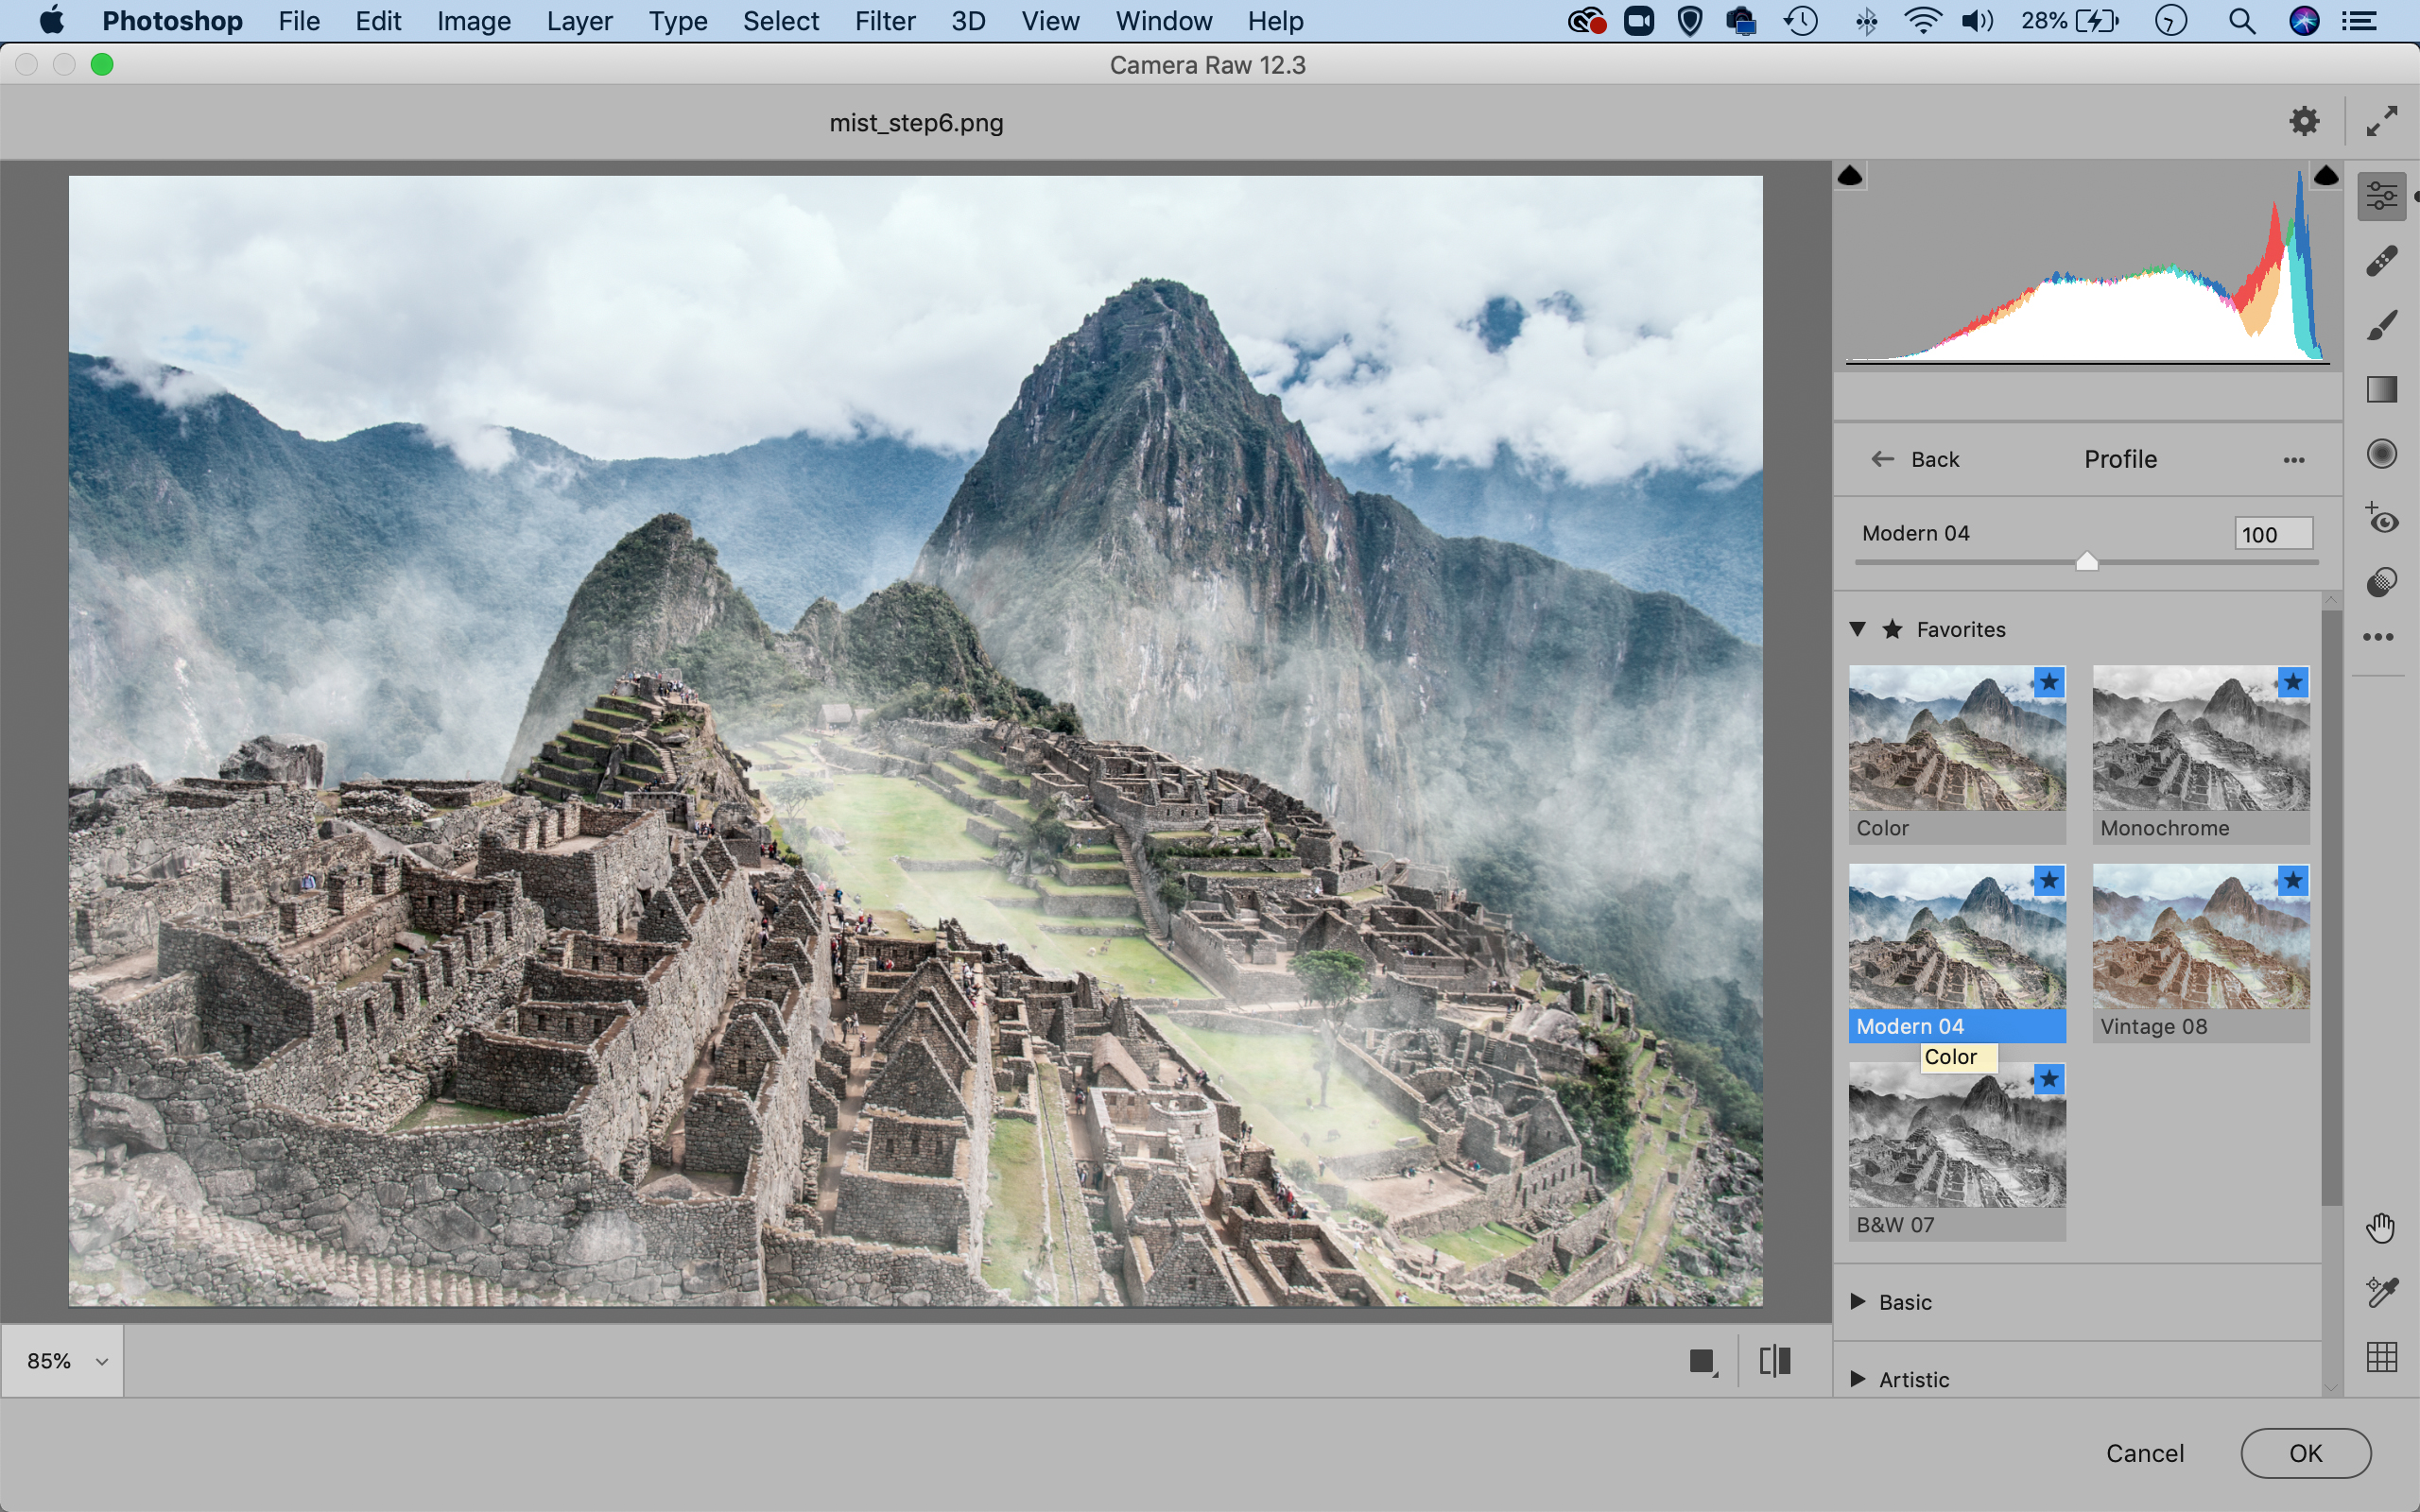
Highlight the top layer and press Cmd / Ctrl + Shift + Alt + E to merge a new layer. Go to Filter > Camera Raw Filter. Click the Profile Browser and choose a subdued look (we used Modern 5). Go to the Basic panel and decrease Dehaze, then make any final tonal changes.
PhotoPlus: The Canon Magazine is the world's only monthly newsstand title that's 100% devoted to Canon, so you can be sure the magazine is completely relevant to your system.
Read more:
The best photo editing software: image editors for novices through to pros
The best photo-editing laptops: top laptops for photographers
10 best online photography courses – from beginner guides to masterclasses
Get the Digital Camera World Newsletter
The best camera deals, reviews, product advice, and unmissable photography news, direct to your inbox!
The lead technique writer on Digital Camera Magazine, PhotoPlus: The Canon Magazine and N-Photo: The Nikon Magazine, James is a fantastic general practice photographer with an enviable array of skills across every genre of photography.
Whether it's flash photography techniques like stroboscopic portraits, astrophotography projects like photographing the Northern Lights, or turning sound into art by making paint dance on a set of speakers, James' tutorials and projects are as creative as they are enjoyable.
He's also a wizard at the dark arts of Photoshop, Lightroom and Affinity Photo, and is capable of some genuine black magic in the digital darkroom, making him one of the leading authorities on photo editing software and techniques.


