Want the infrared film look, without specialized camera kit? Here's how
This is how to get the iconic look of infrared film, without special camera gear, using post-production effects
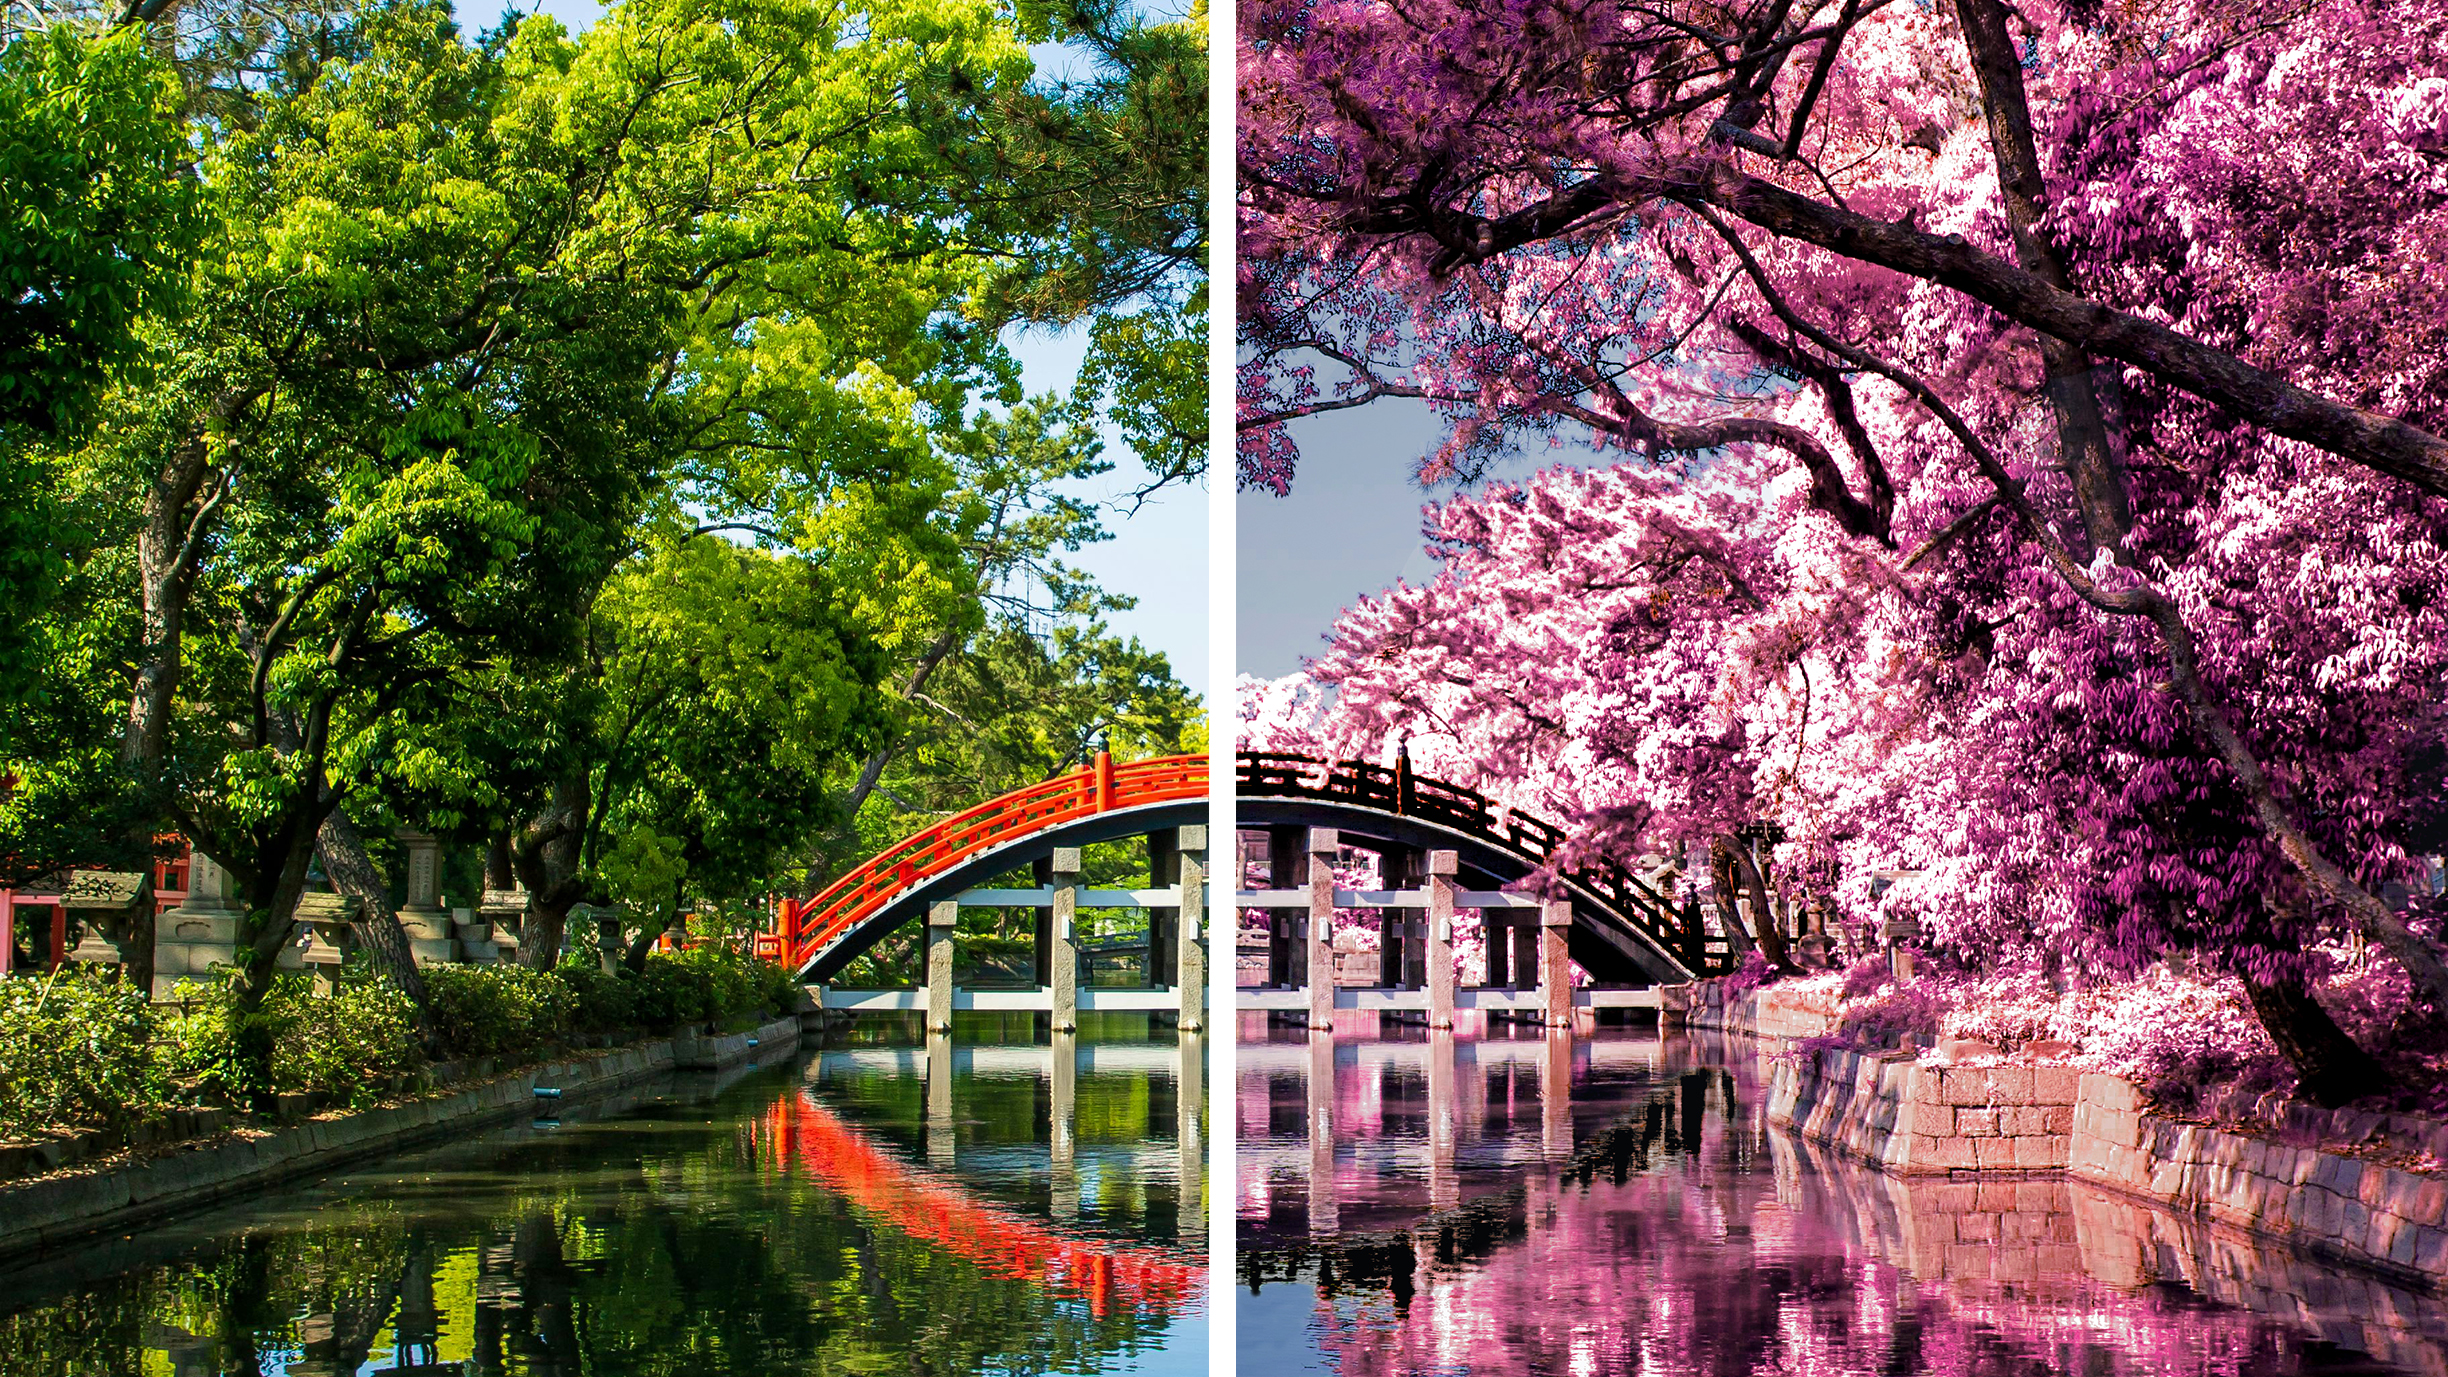
Infrared light is present all around us, but is invisible to the human eye. Capturing infrared images requires specialized camera equipment that only records the red wavelengths.
This creates distinctive-looking images; green or yellow objects are transformed into red tones, while blue and cyan subjects appear darker. If you don’t have an infrared-converted camera or infrared film, here’s how to simulate this style using Affinity Photo 2.
What you'll be using:
- Black and White Adjustment Layer
- Invert Adjustment Layer
- Channel Mixer Adjustment Layer
- HSL Adjustment Layer
- Selective Colour Layer
Affinity Photo 2 save 50% now $34.99 (£33.99/AU$59.99)
A powerful image editing program that works on PC or Mac, where the price buys you the latest version of the software outright – so there are no monthly fees! Affinity is always a great value buy, but this price makes it an absolute steal.
Before and after
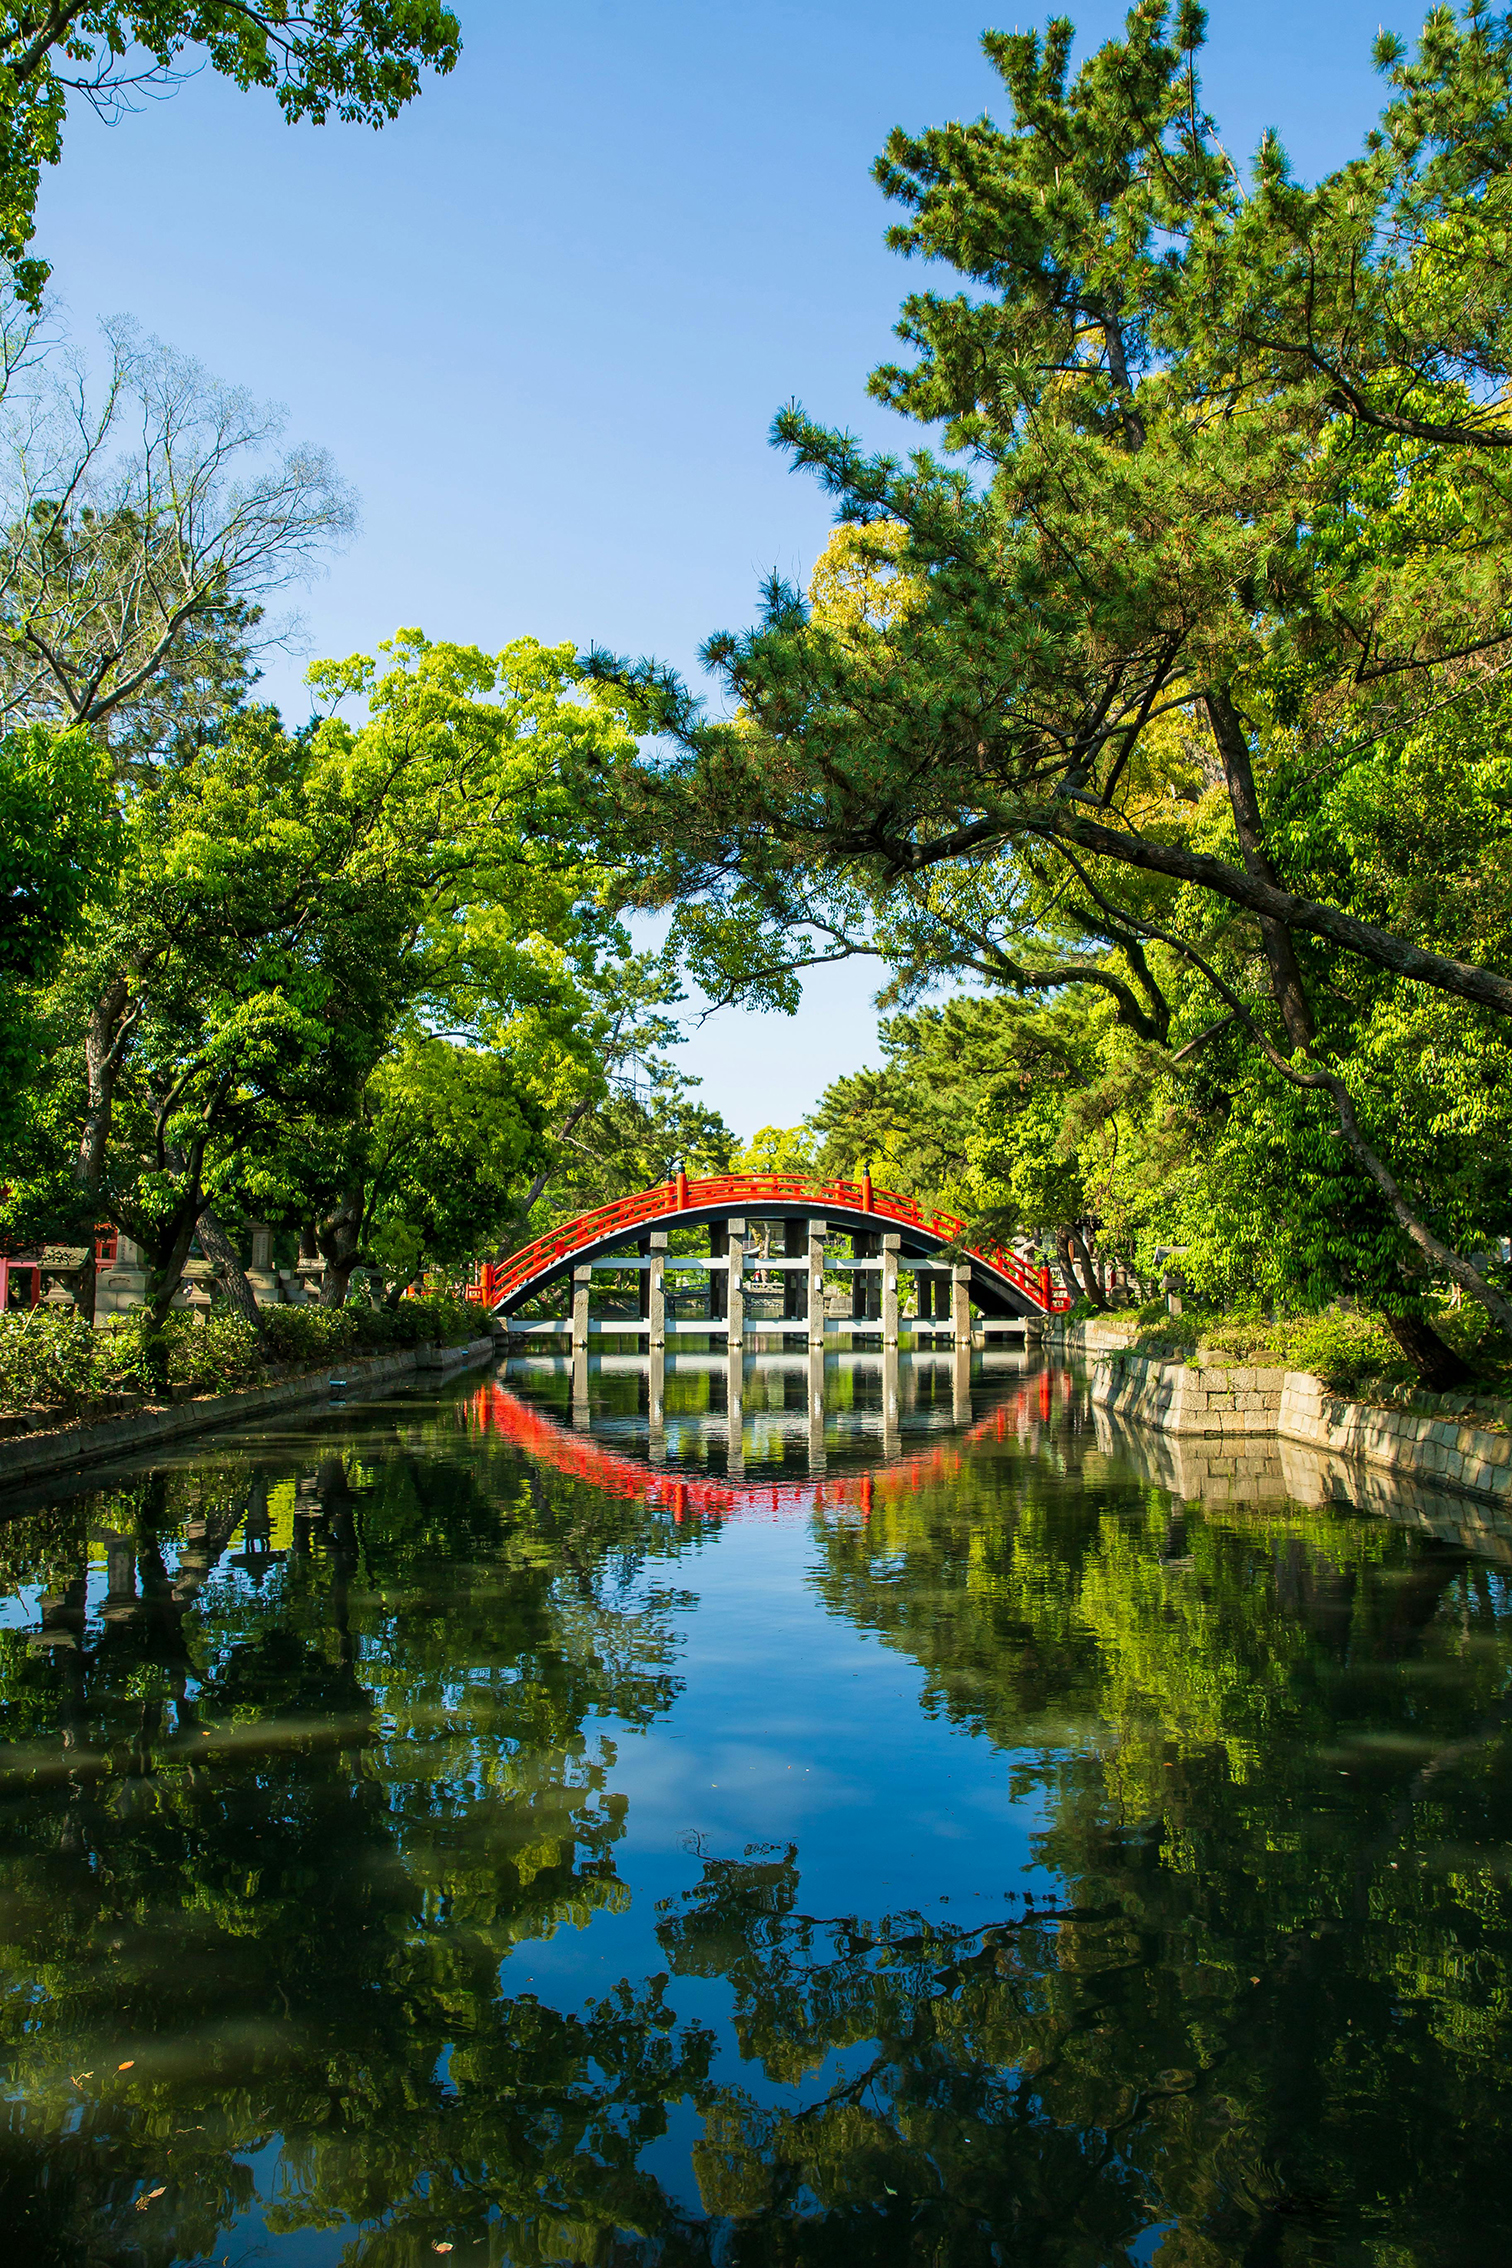
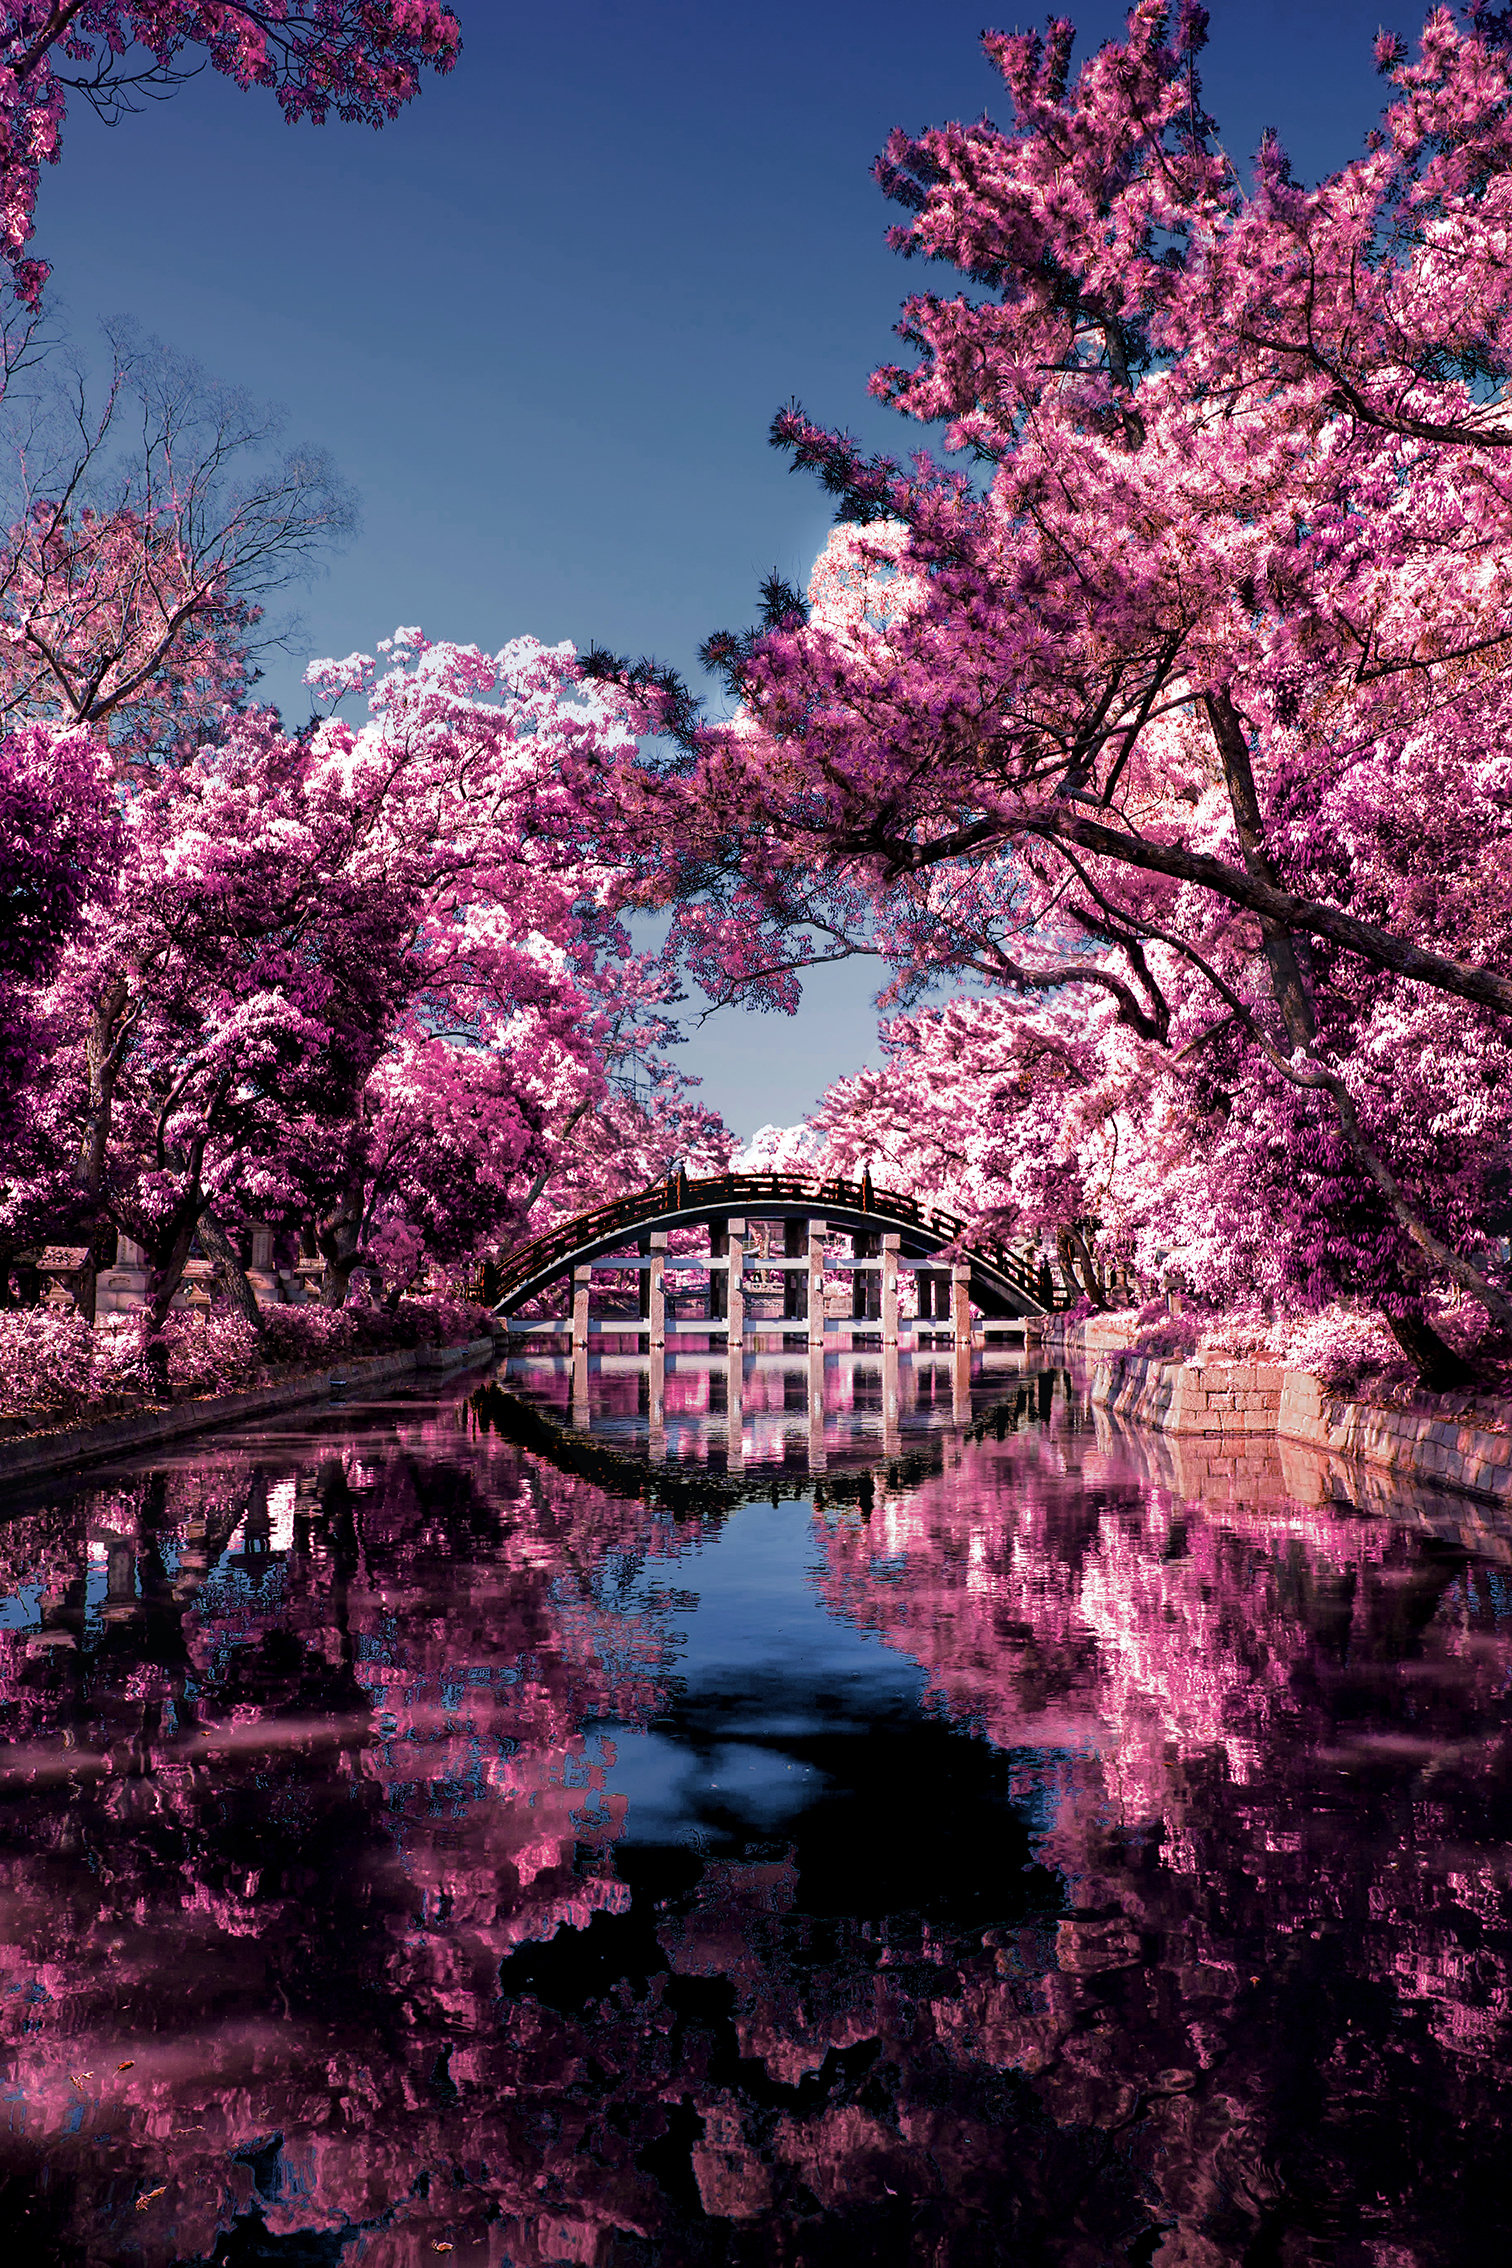
Editing steps
1. Work on brightness
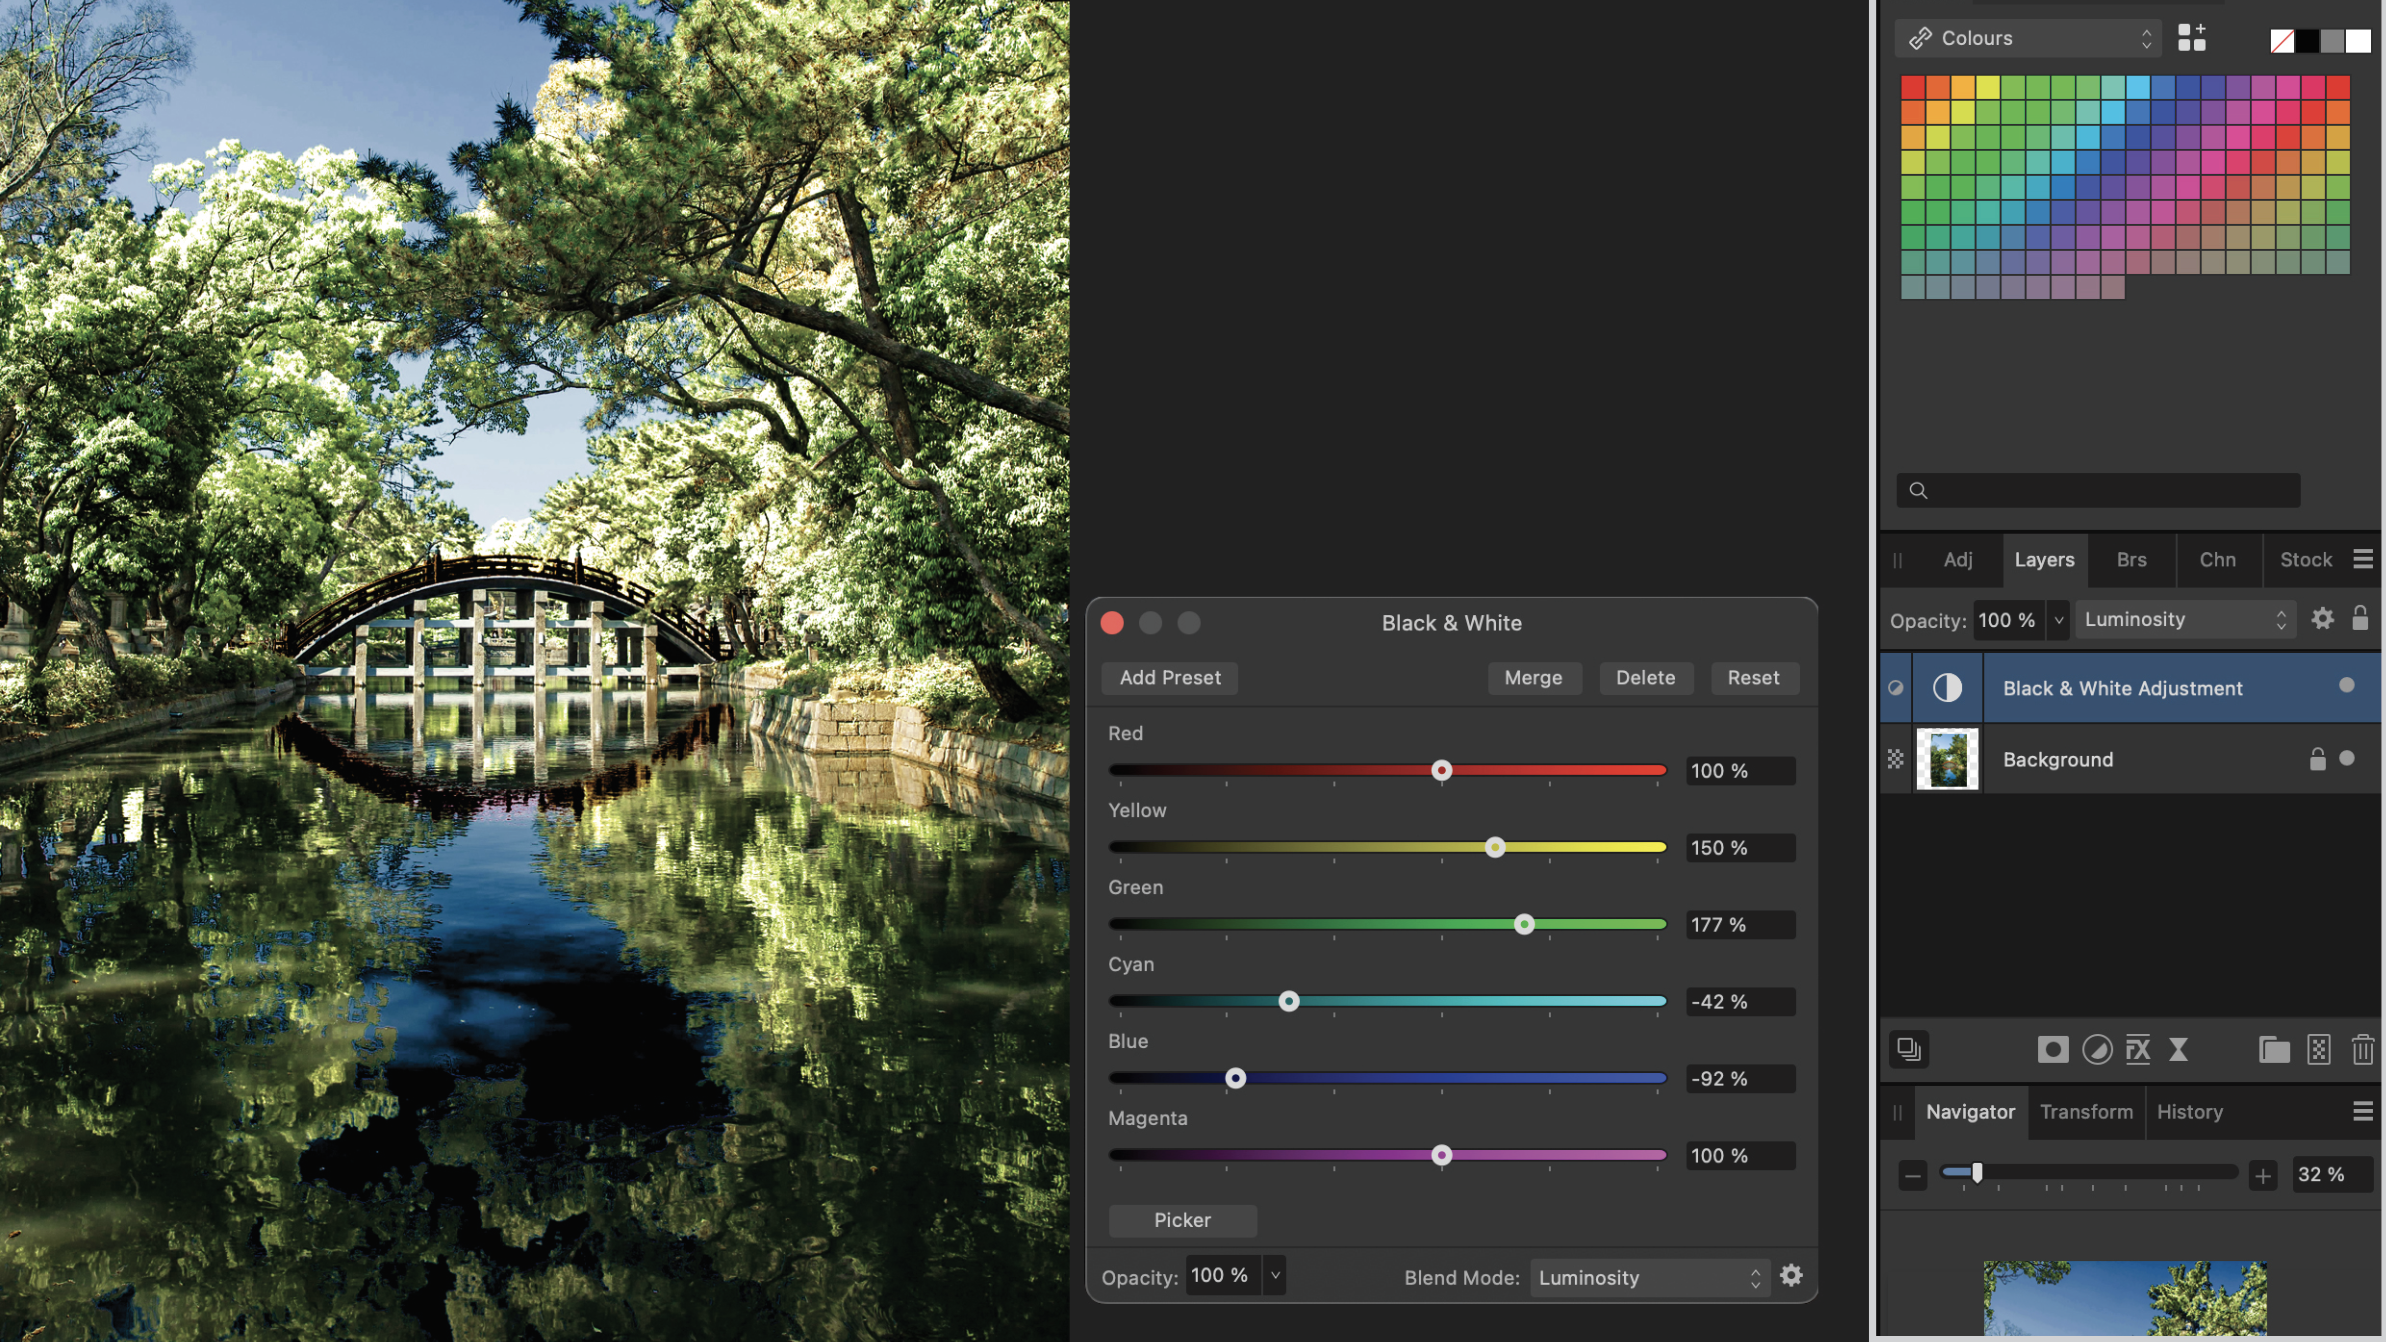
To achieve the infrared look, start by adjusting the color brightness. Add a Black and White Adjustment Layer on top of the Background Layer and change the Blend mode from Normal to Luminosity. Decrease the Blue and Cyan sliders while boosting the Green and Yellow sliders.
2. Invert to negative
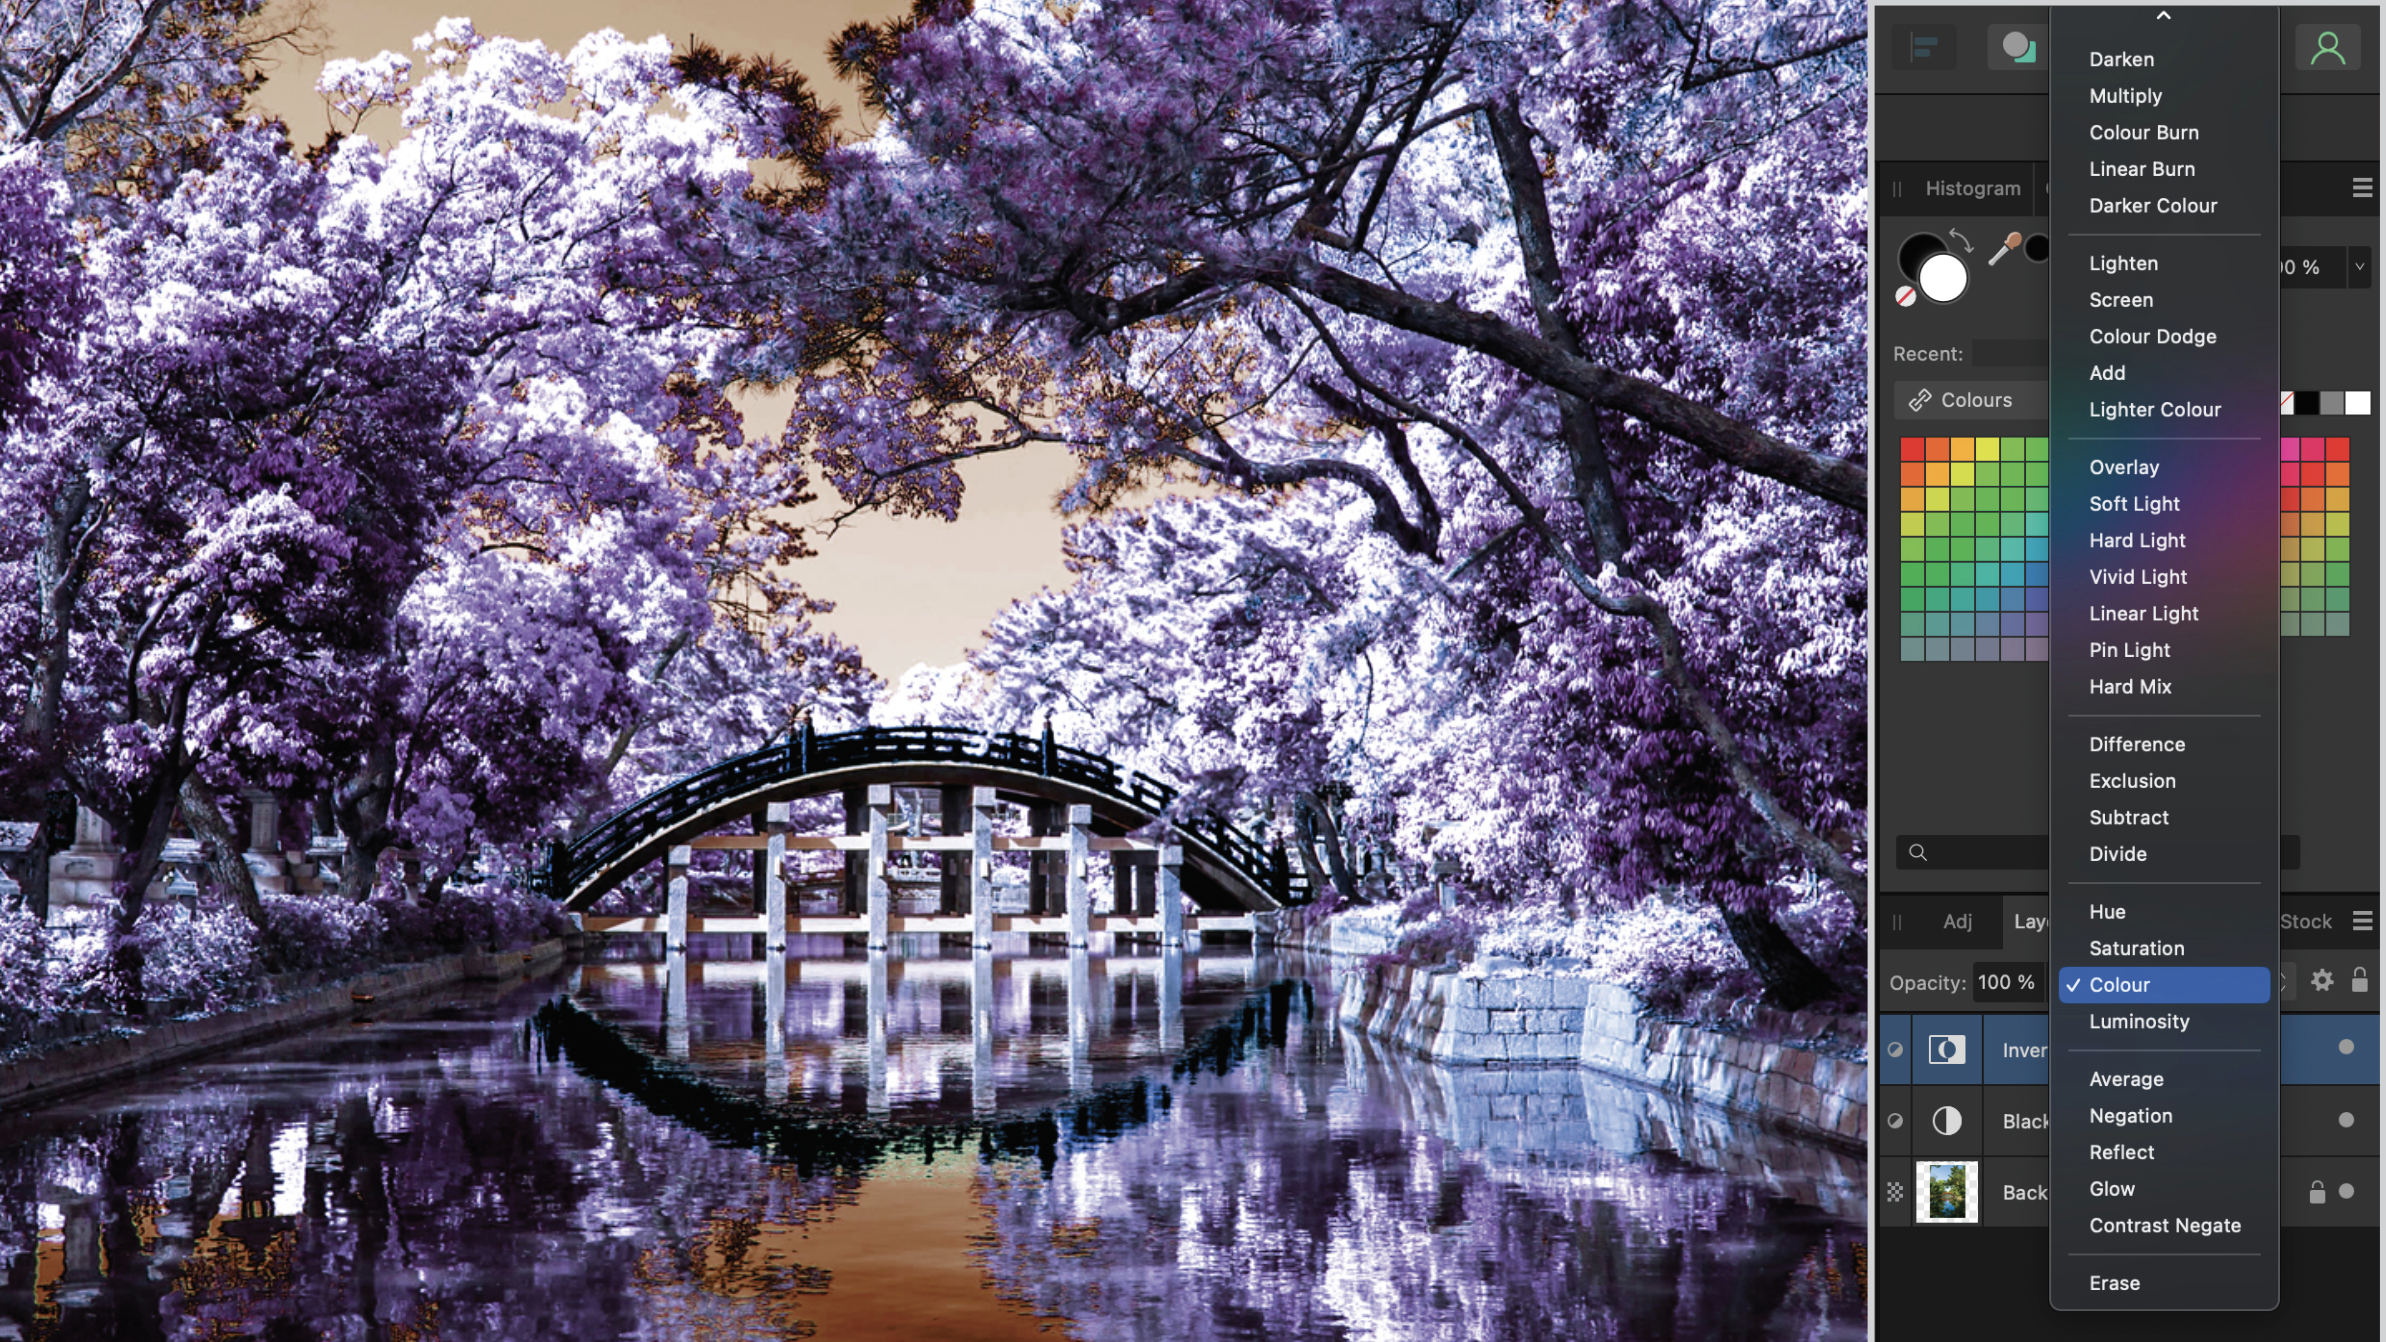
Now, let's begin the infrared color processing that would be done in-camera with a converted model. Click the Adjustment Layer icon and choose the Invert option to convert the image into a negative. An additional Layer will be added, so here change the Blend mode to Color.
3. Adjust color channels
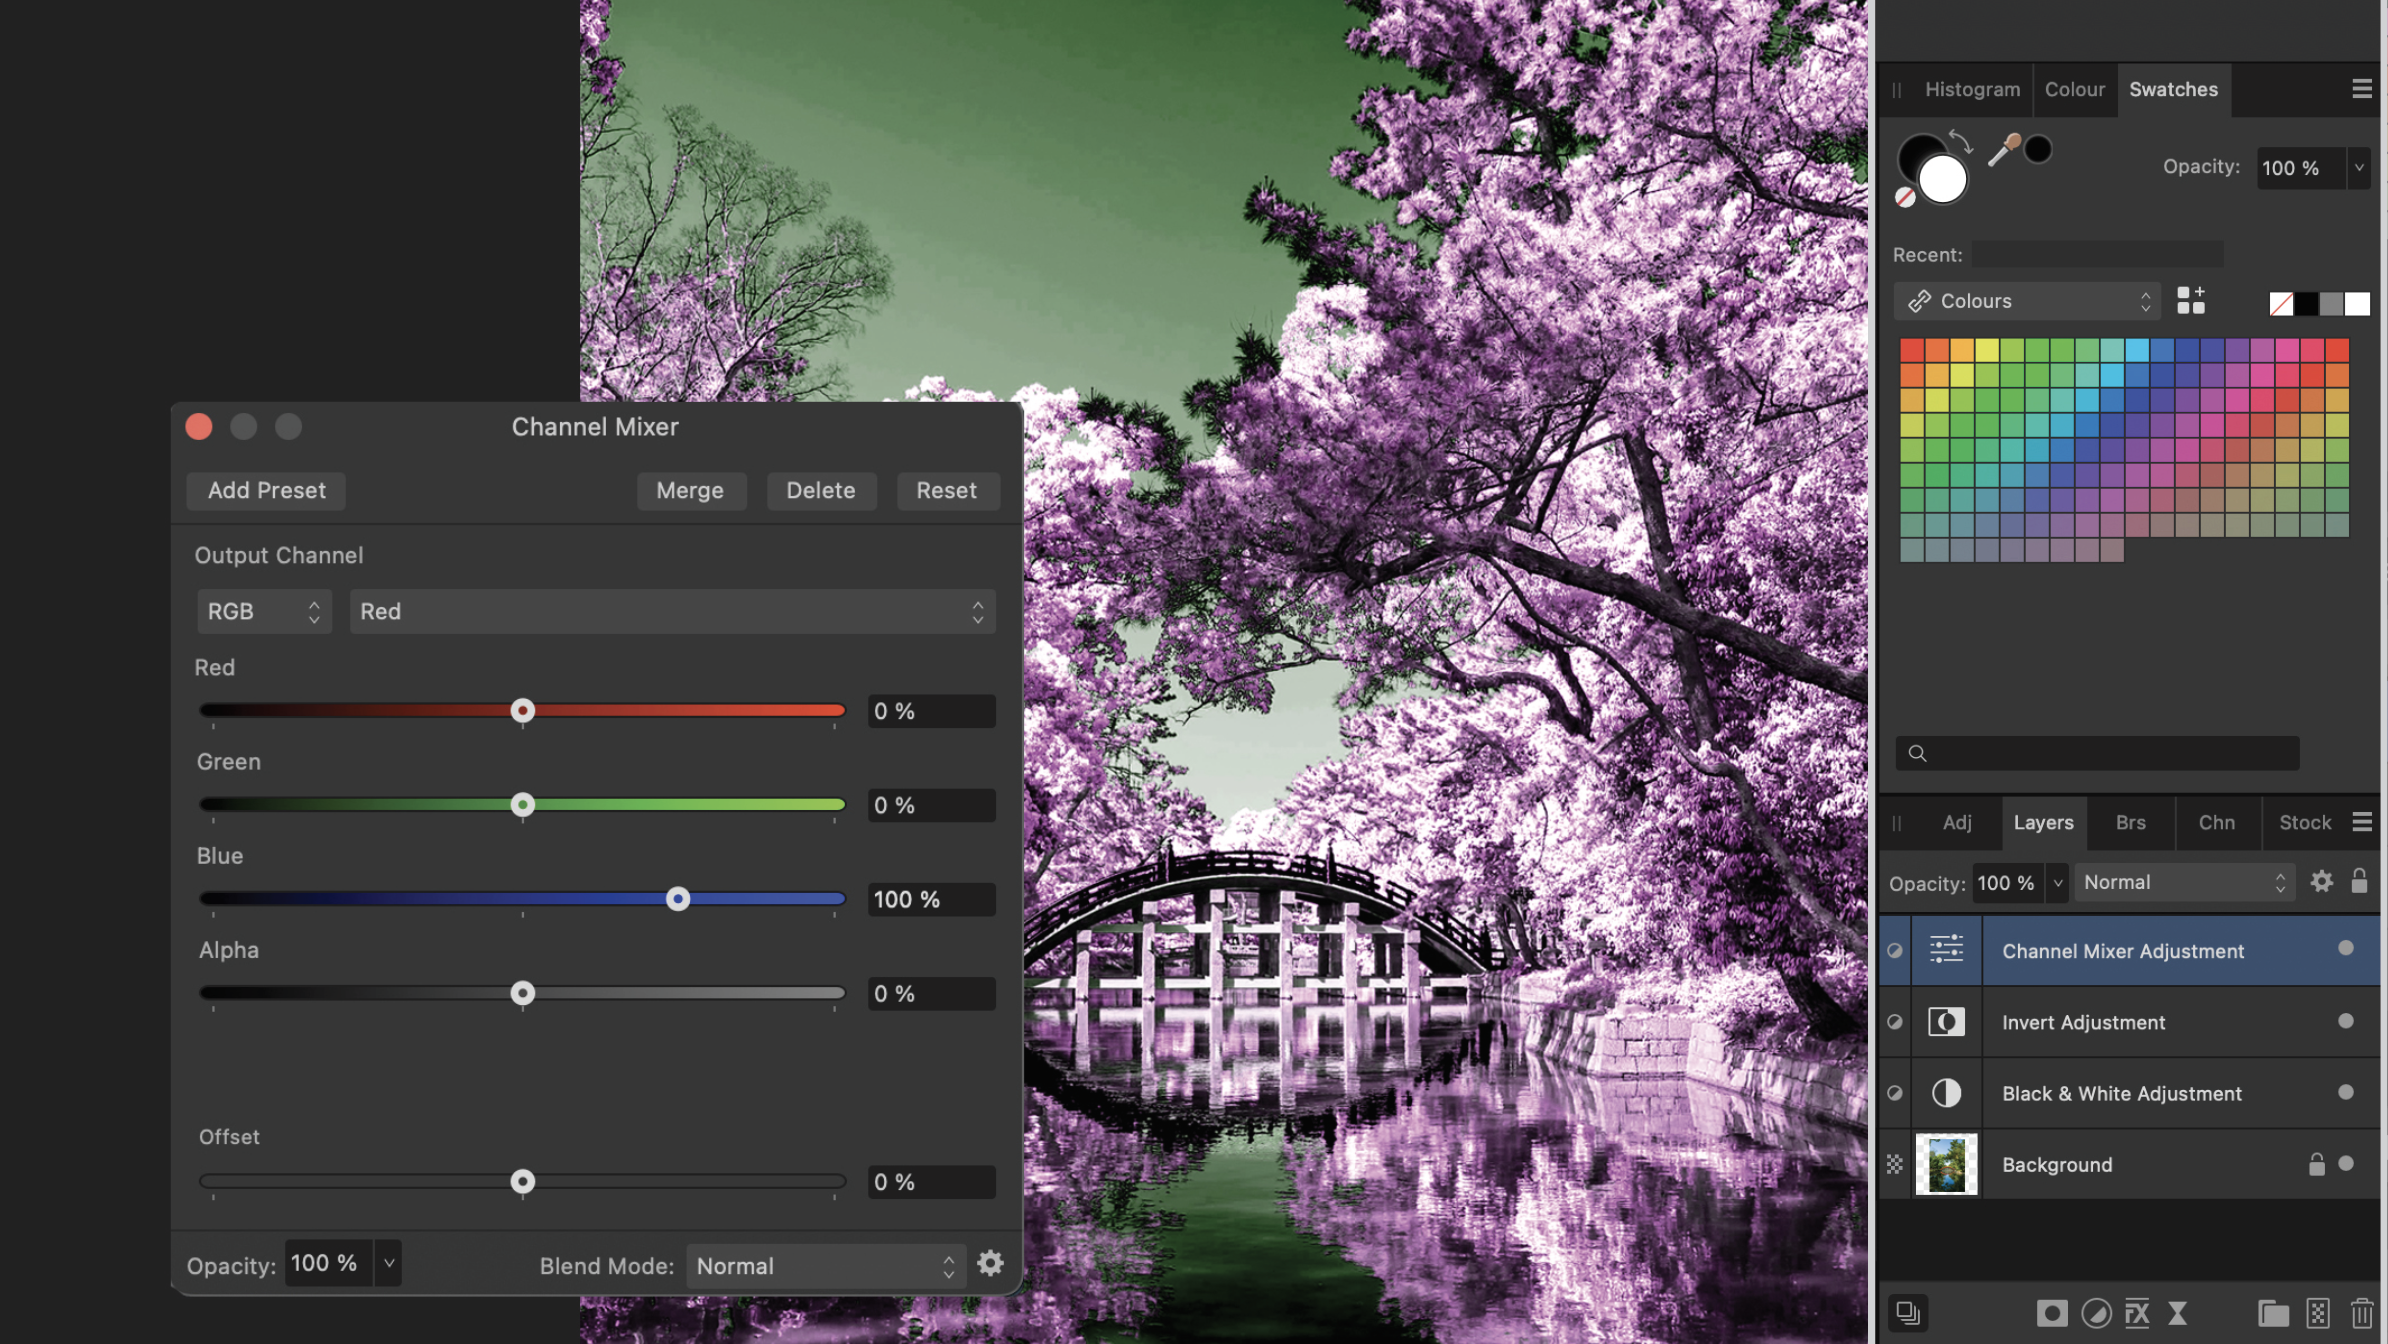
Add a Channel Mixer Adjustment Layer. In the Channel Mixer window, select RGB and choose Red as the Output Channel. Drag the Red slider to zero and the Blue slider to 100%. Select Blue as the Output Channel and set the Red slider
to 100% and the Blue slider to zero.
4. Underline blue tones
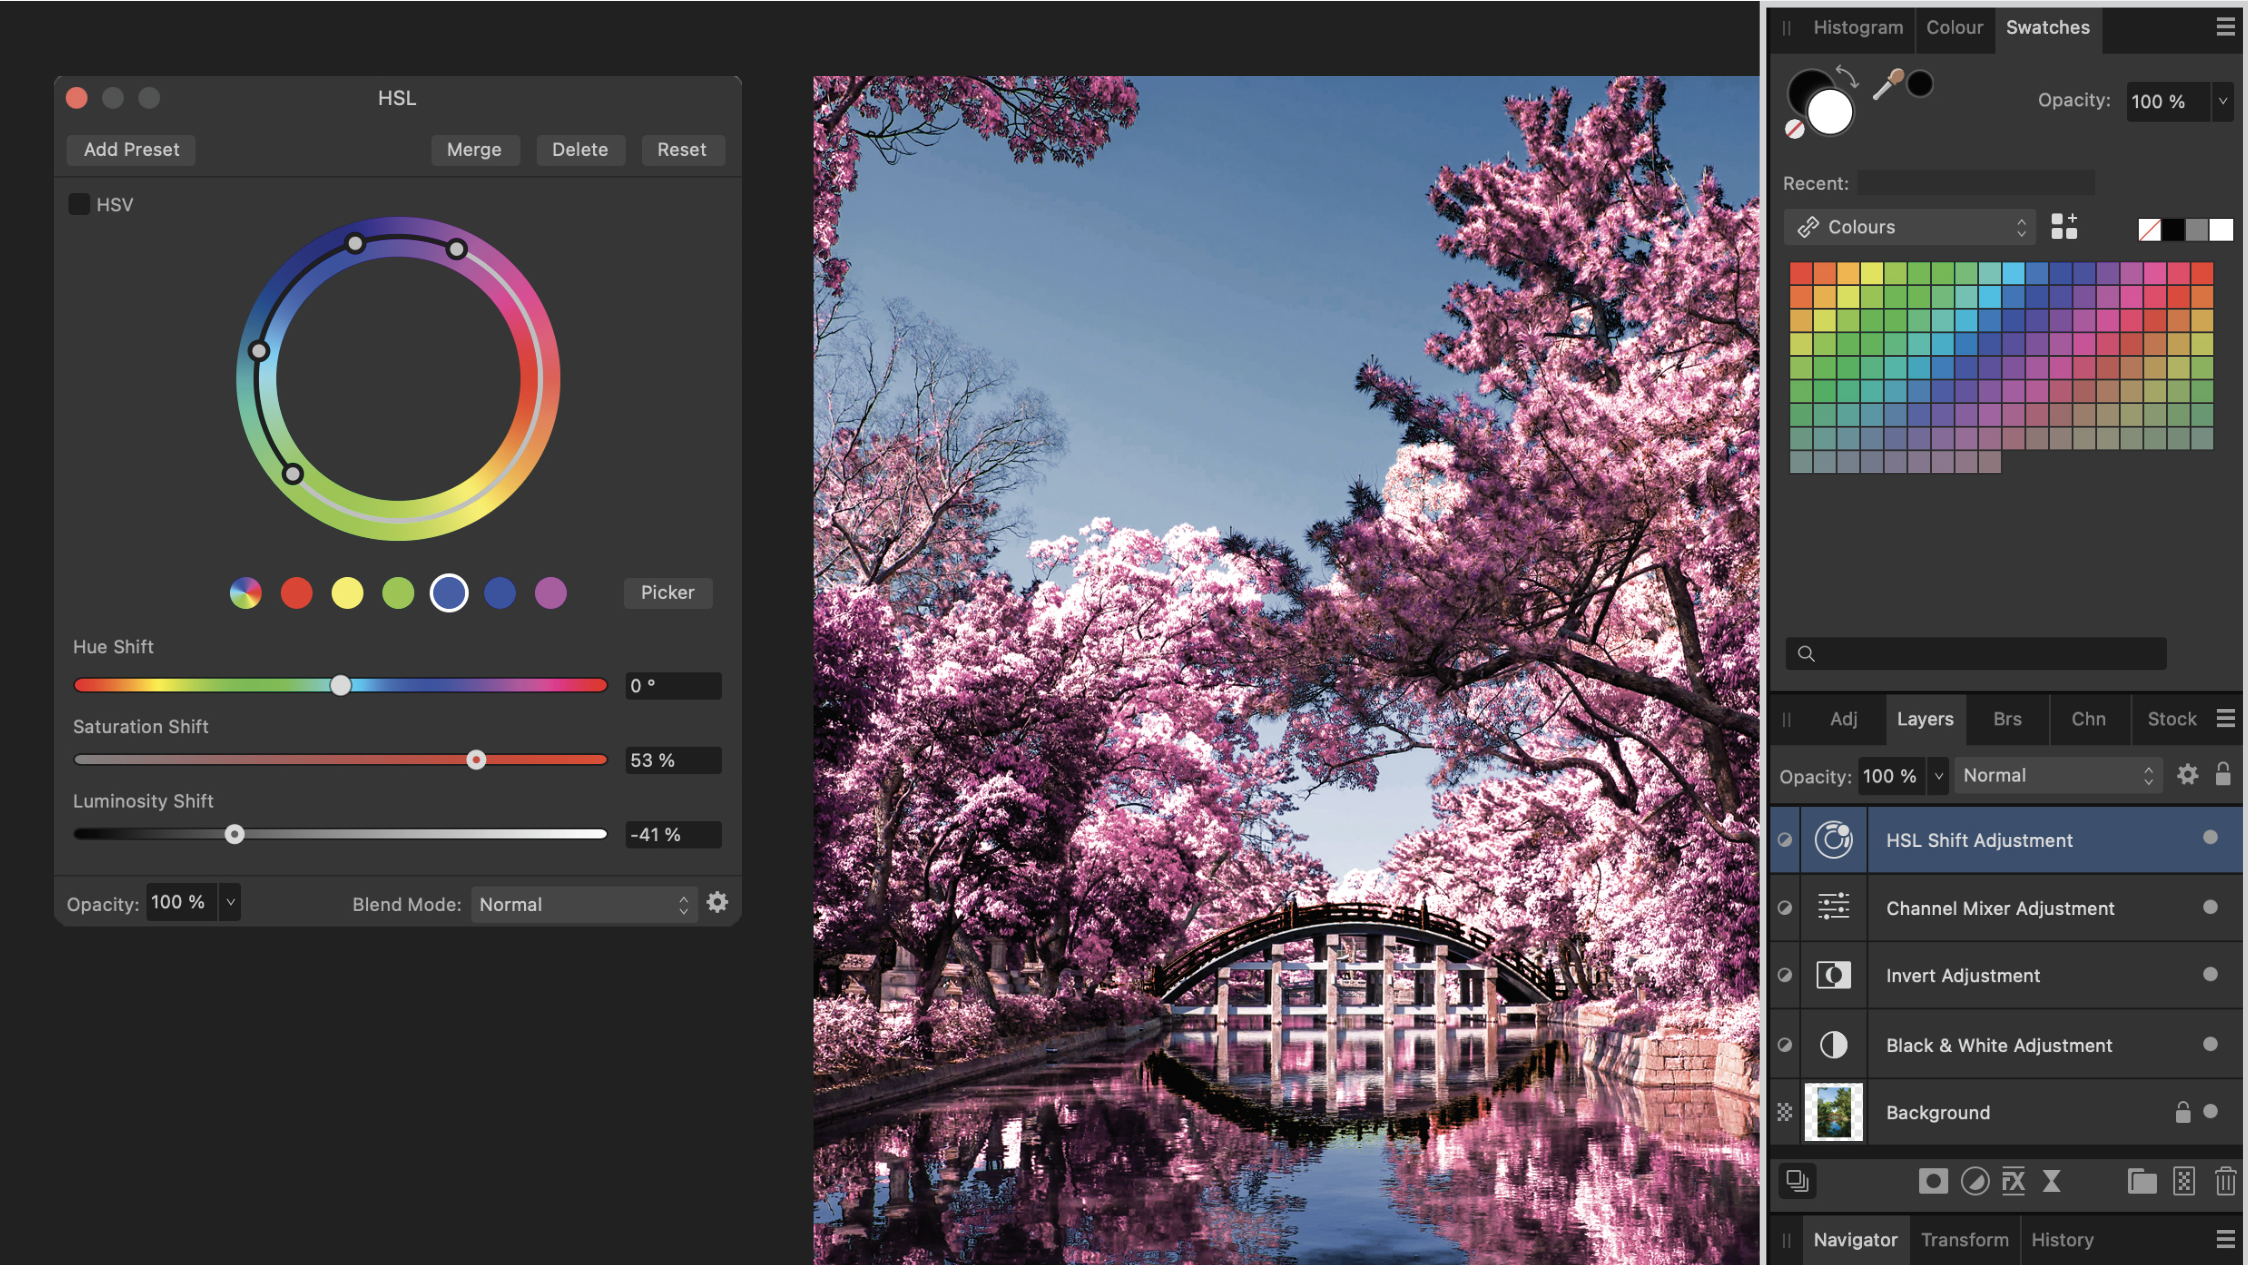
To fine-tune the color of blue elements add an HSL Adjustment Layer, select the Cyan color, then increase the Saturation value and decrease the Luminosity slider. To adjust tones, select the dots in the blue section of the color wheel and experiment with Saturation and Luminosity.
5. Work out red hues
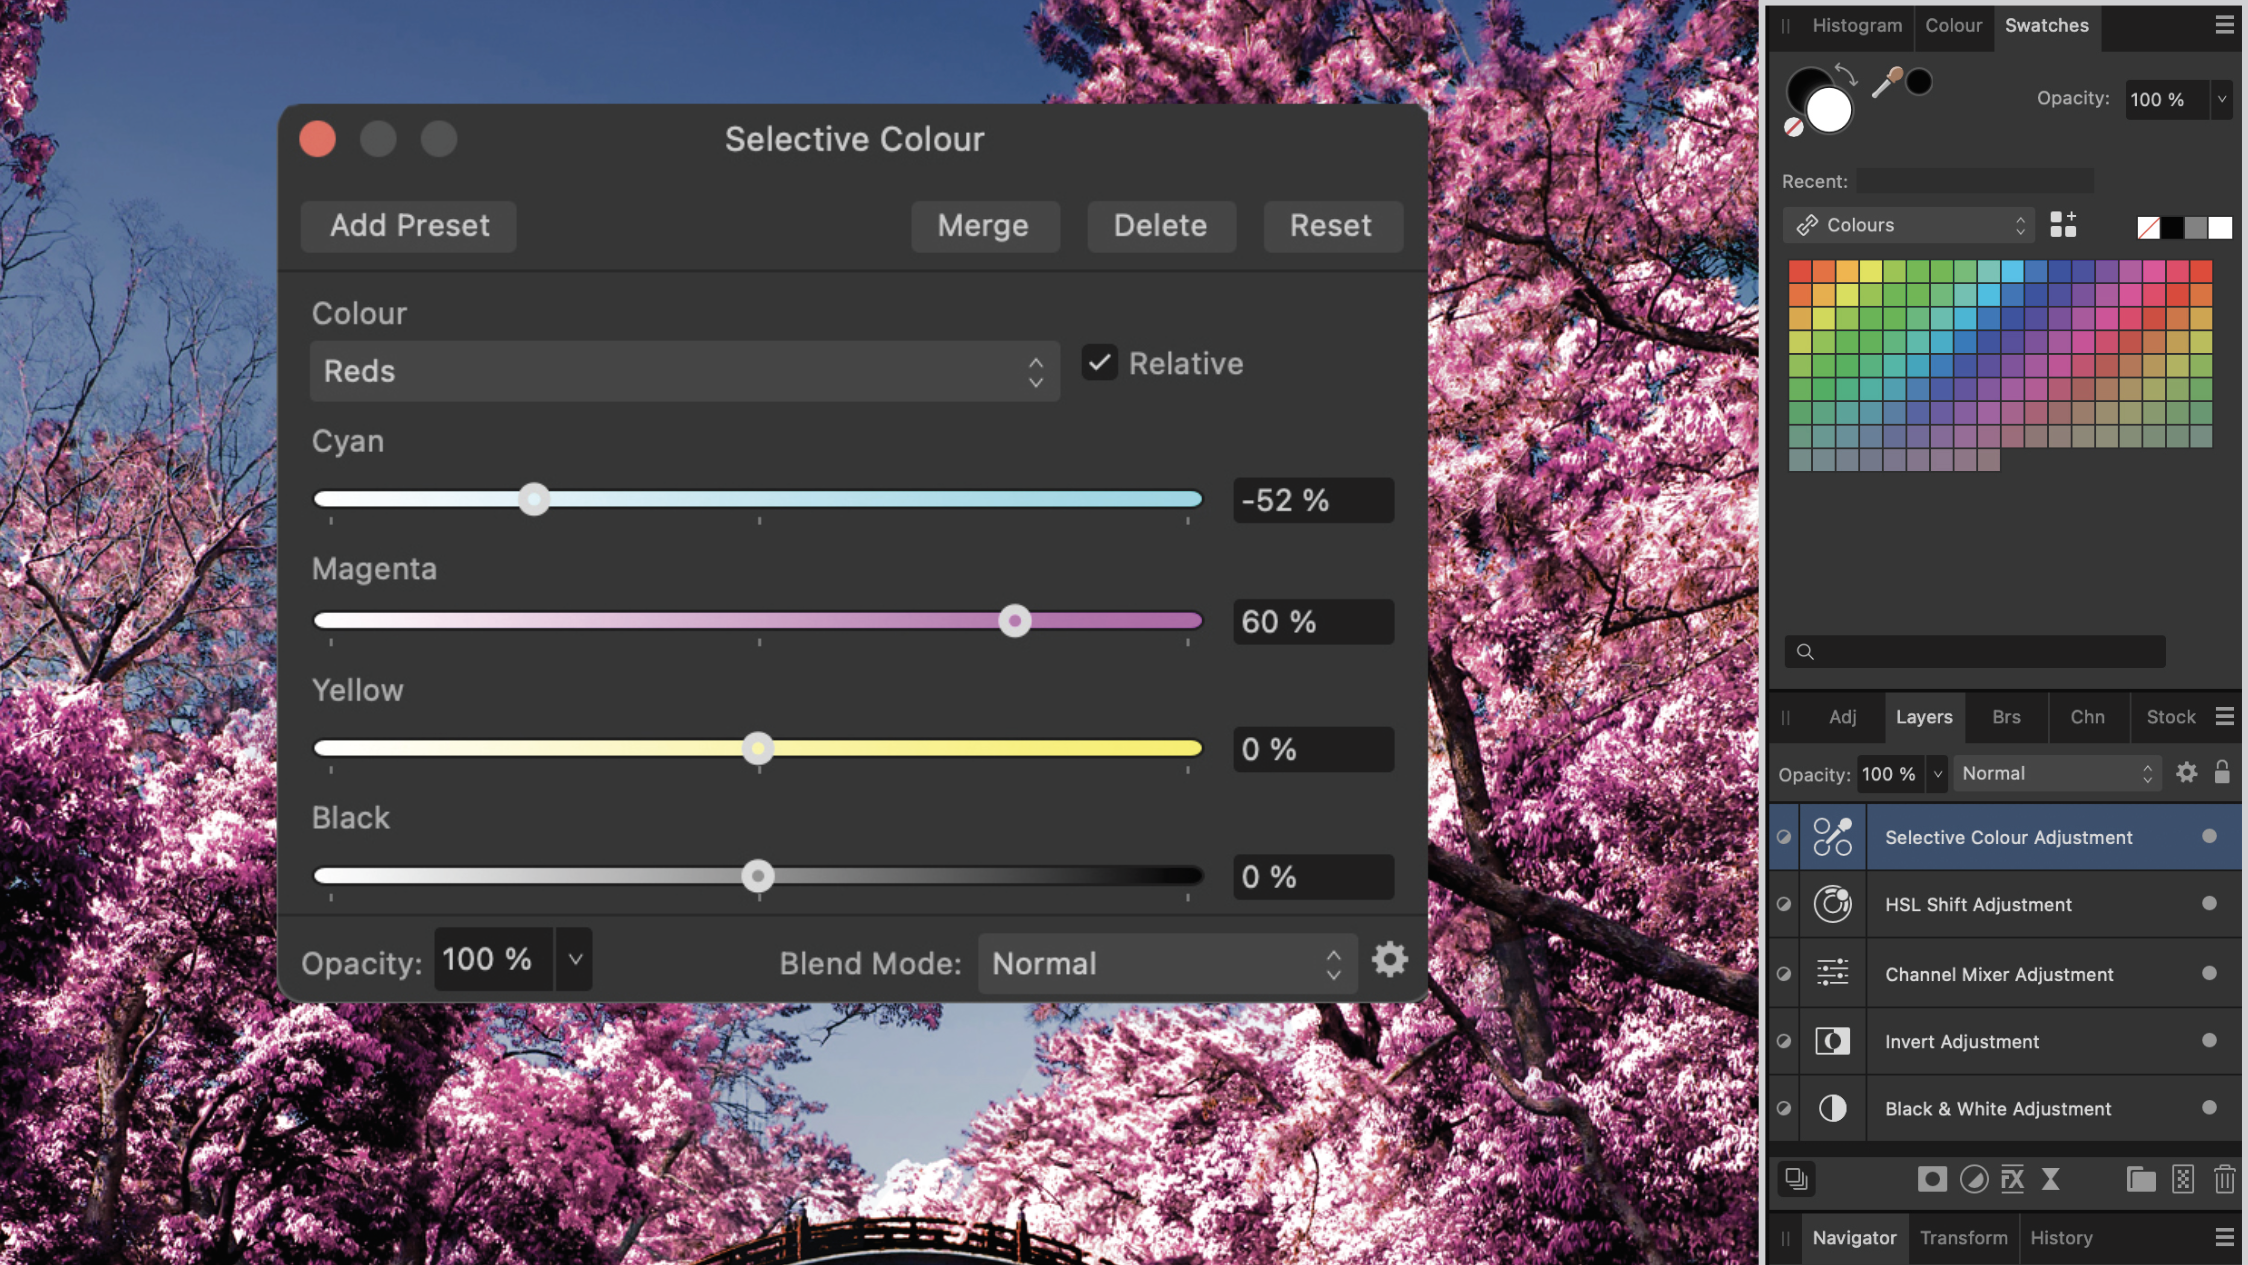
To achieve the maximum infrared look, the final step is to intensify the red tones. To gain control, add a Selective Color Layer on top of the HSL Adjustment Layer. In the window, select Reds as the Color and increase the Magenta slider, while also decreasing the Cyan slider.
Key tip
Add some glow
Due to its effect on film, infrared photos are often associated with a glow. Adding this touch to your images can enhance their effect. Add a Live Filter Layer and click on Blur to find the Diffuse Glow option. Experiment with settings while choosing a smaller Radius of about 8px.
This article originally appeared in Digital Photographer, a monthly magazine, and the kitbag essential for pros, enthusiasts, and amateurs alike!
Inside, you'll find practical guides, shooting tips, and techniques from working photographers, plus all the latest industry news.
Take a look at the best infrared lens filters to achieve the IR look in-camera. You might also be interested in the best photo editing software and the best free photo editing software.
Get the Digital Camera World Newsletter
The best camera deals, reviews, product advice, and unmissable photography news, direct to your inbox!

Kim is the Staff Writer on Digital Camera World, and formerly Technique Editor at Digital Photographer, focusing on the art and science of photography. With a Master’s degree in Photography and Media, she is driven to educate through an analytical approach, visually and technically. With her guides and tutorials, Kim seeks to uncover new facets of this time-honoured medium and foster a deeper understanding of its profound role in culture. Kim highlights topics that resonate with modern society, including women in photography and critical issues such as environmental conservation. She also discusses and reviews camera gear, giving you an overview to find the best fit for your photography journey.

