Got blur? Discover how to capture wonderful waterfall photos!
Go beyond simple long exposures with these essential tips for capturing wonderful waterfall photos
The best camera deals, reviews, product advice, and unmissable photography news, direct to your inbox!
You are now subscribed
Your newsletter sign-up was successful
Watch video: How to capture wonderful waterfall photos
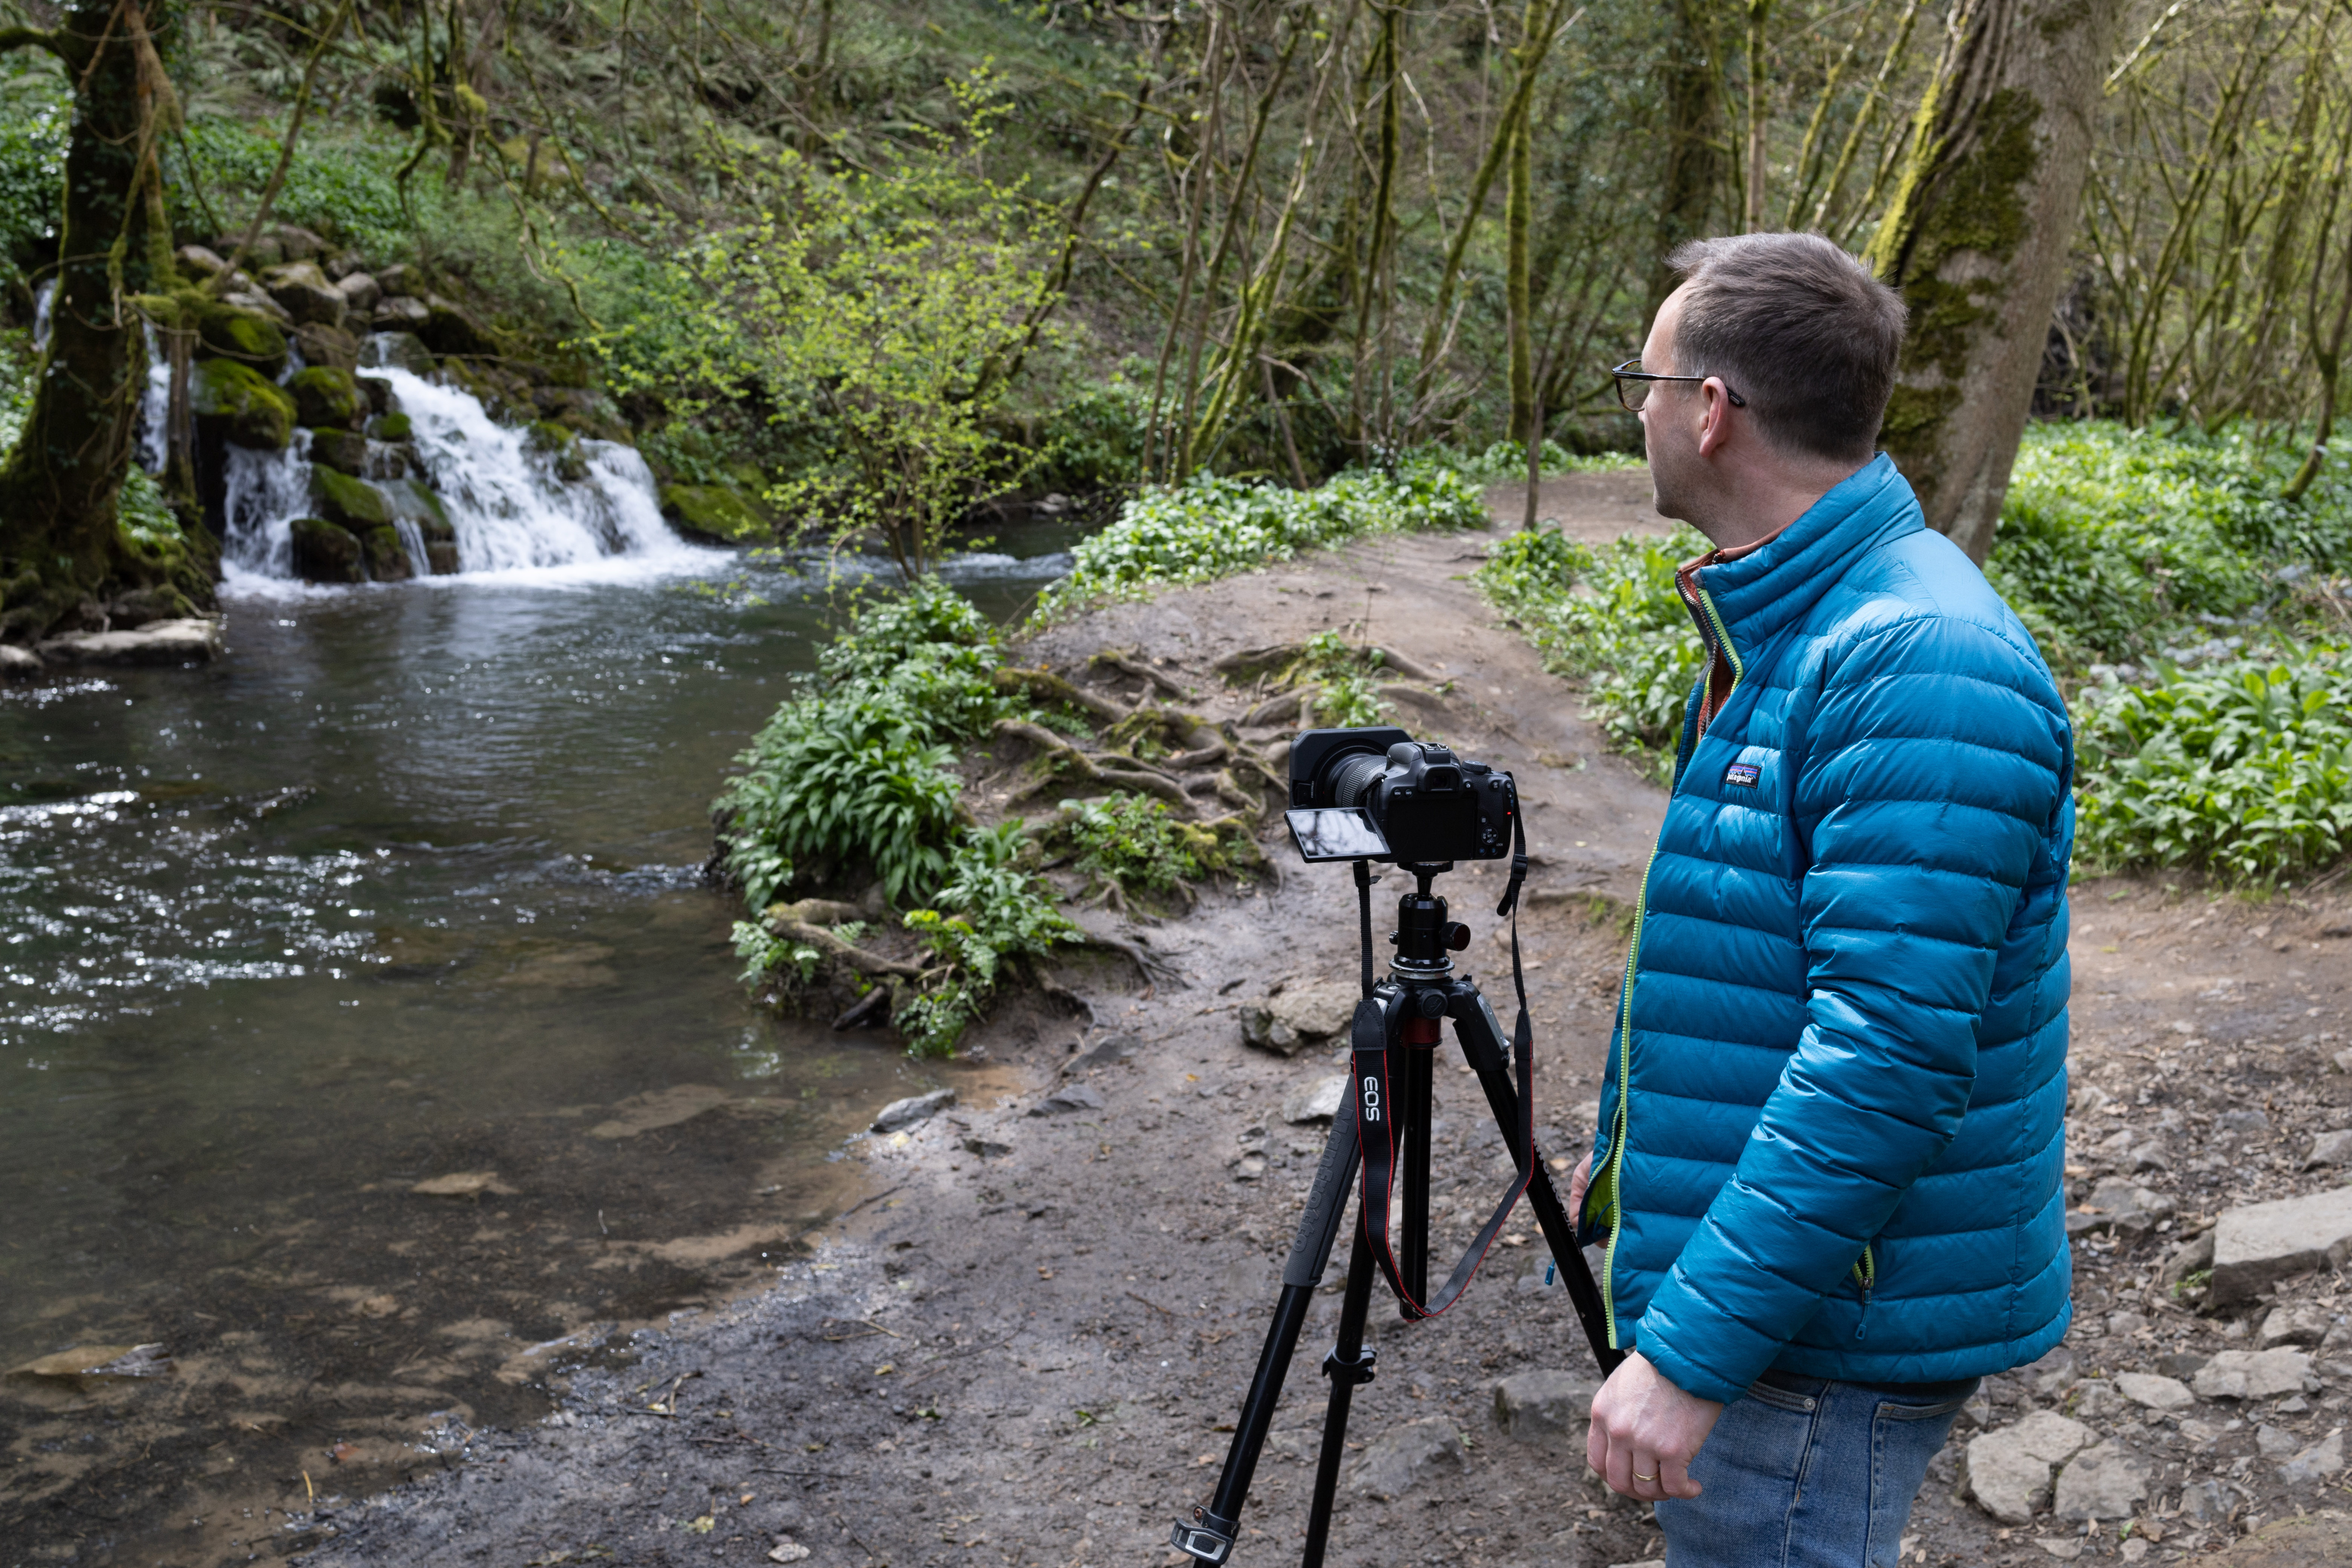
Waterfalls are one of the most enticing of landscape subjects. From an enthusiast photographer’s perspective there’s so much potential. First and foremost there’s the movement of the cascading water, which we can transform into silky smooth blur with a long exposure. Then there are surrounding details like rocks, rivers and foliage, which can all add wonderful foreground interest.
As such, any self-respecting photographer would reach for a neutral density filter, set up a long exposure and capture the motion in the water as a beautiful blur. While this is usually the best course of action, there are other less obvious tricks and skills we can use with our long exposures to further develop our waterfall photos.
Article continues belowRead more: Best neutral density filters
A few of these tricks are purely camera skills, while others require a mix of camera and Photoshop techniques. One such technique is shutter blending. Waterfall scenes tend to have a mix of fast-moving water in the falls and slower moving water in the river below. As such, the right shutter speed for one area may not be ideal for another. With shutter blending, we can combine the most attractive blur from different frames using Photoshop.
We’ll also explore simple exposure blending techniques and focus stacking, and explain how to get rid of troublesome tourists. You won’t need to apply all of the skills to every waterfall photo, but it helps to be aware of them all, so that you can use them when and if the situation calls for it…
01 Shoot varying speeds
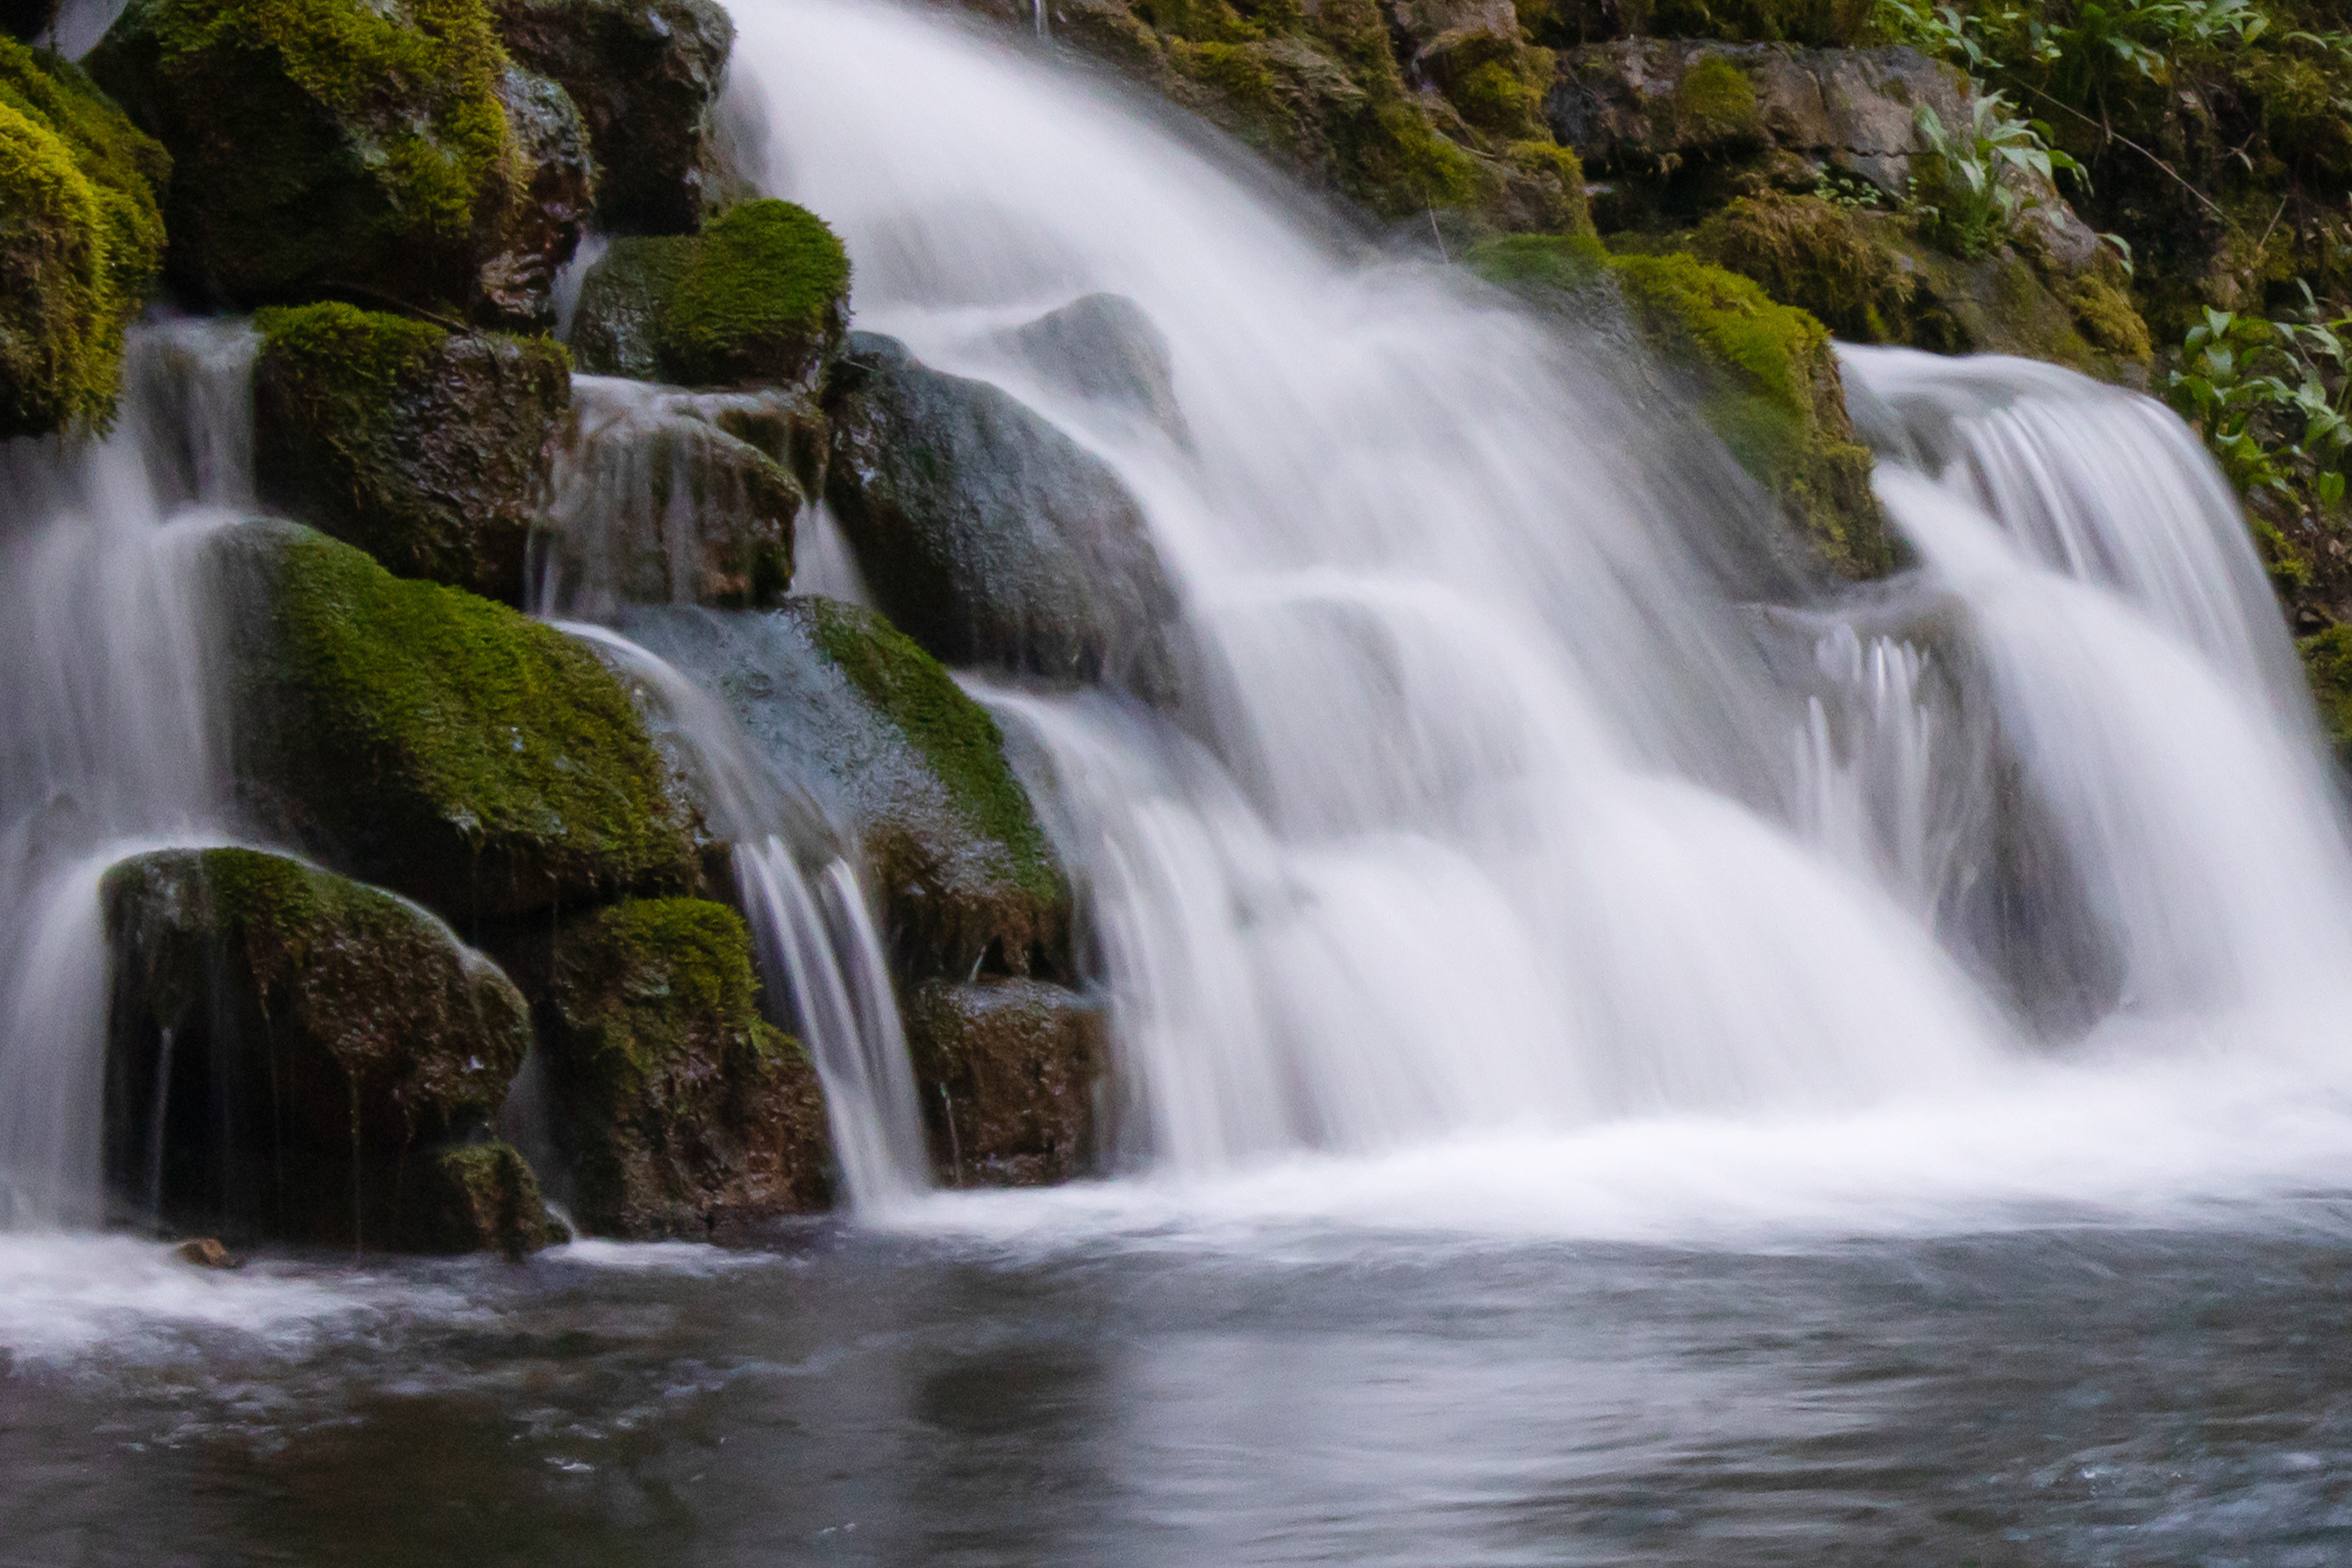
Try shooting the falls at several different shutter speeds to get a variety of blurry bodies of water. Start off with a speed around 4 seconds at ISO100, then half your shutter speed and double the ISO. Repeat a couple more times.
The best camera deals, reviews, product advice, and unmissable photography news, direct to your inbox!
02 Choose the best blur
A 1/2 second shutter speed gives us nice blur in the falls here, but the slower-moving water in the river below looks too detailed. By contrast, a 4-second exposure blurs the river water nicely. We can combine the best blur from each frame with compositing skills.
03 Combine in Photoshop
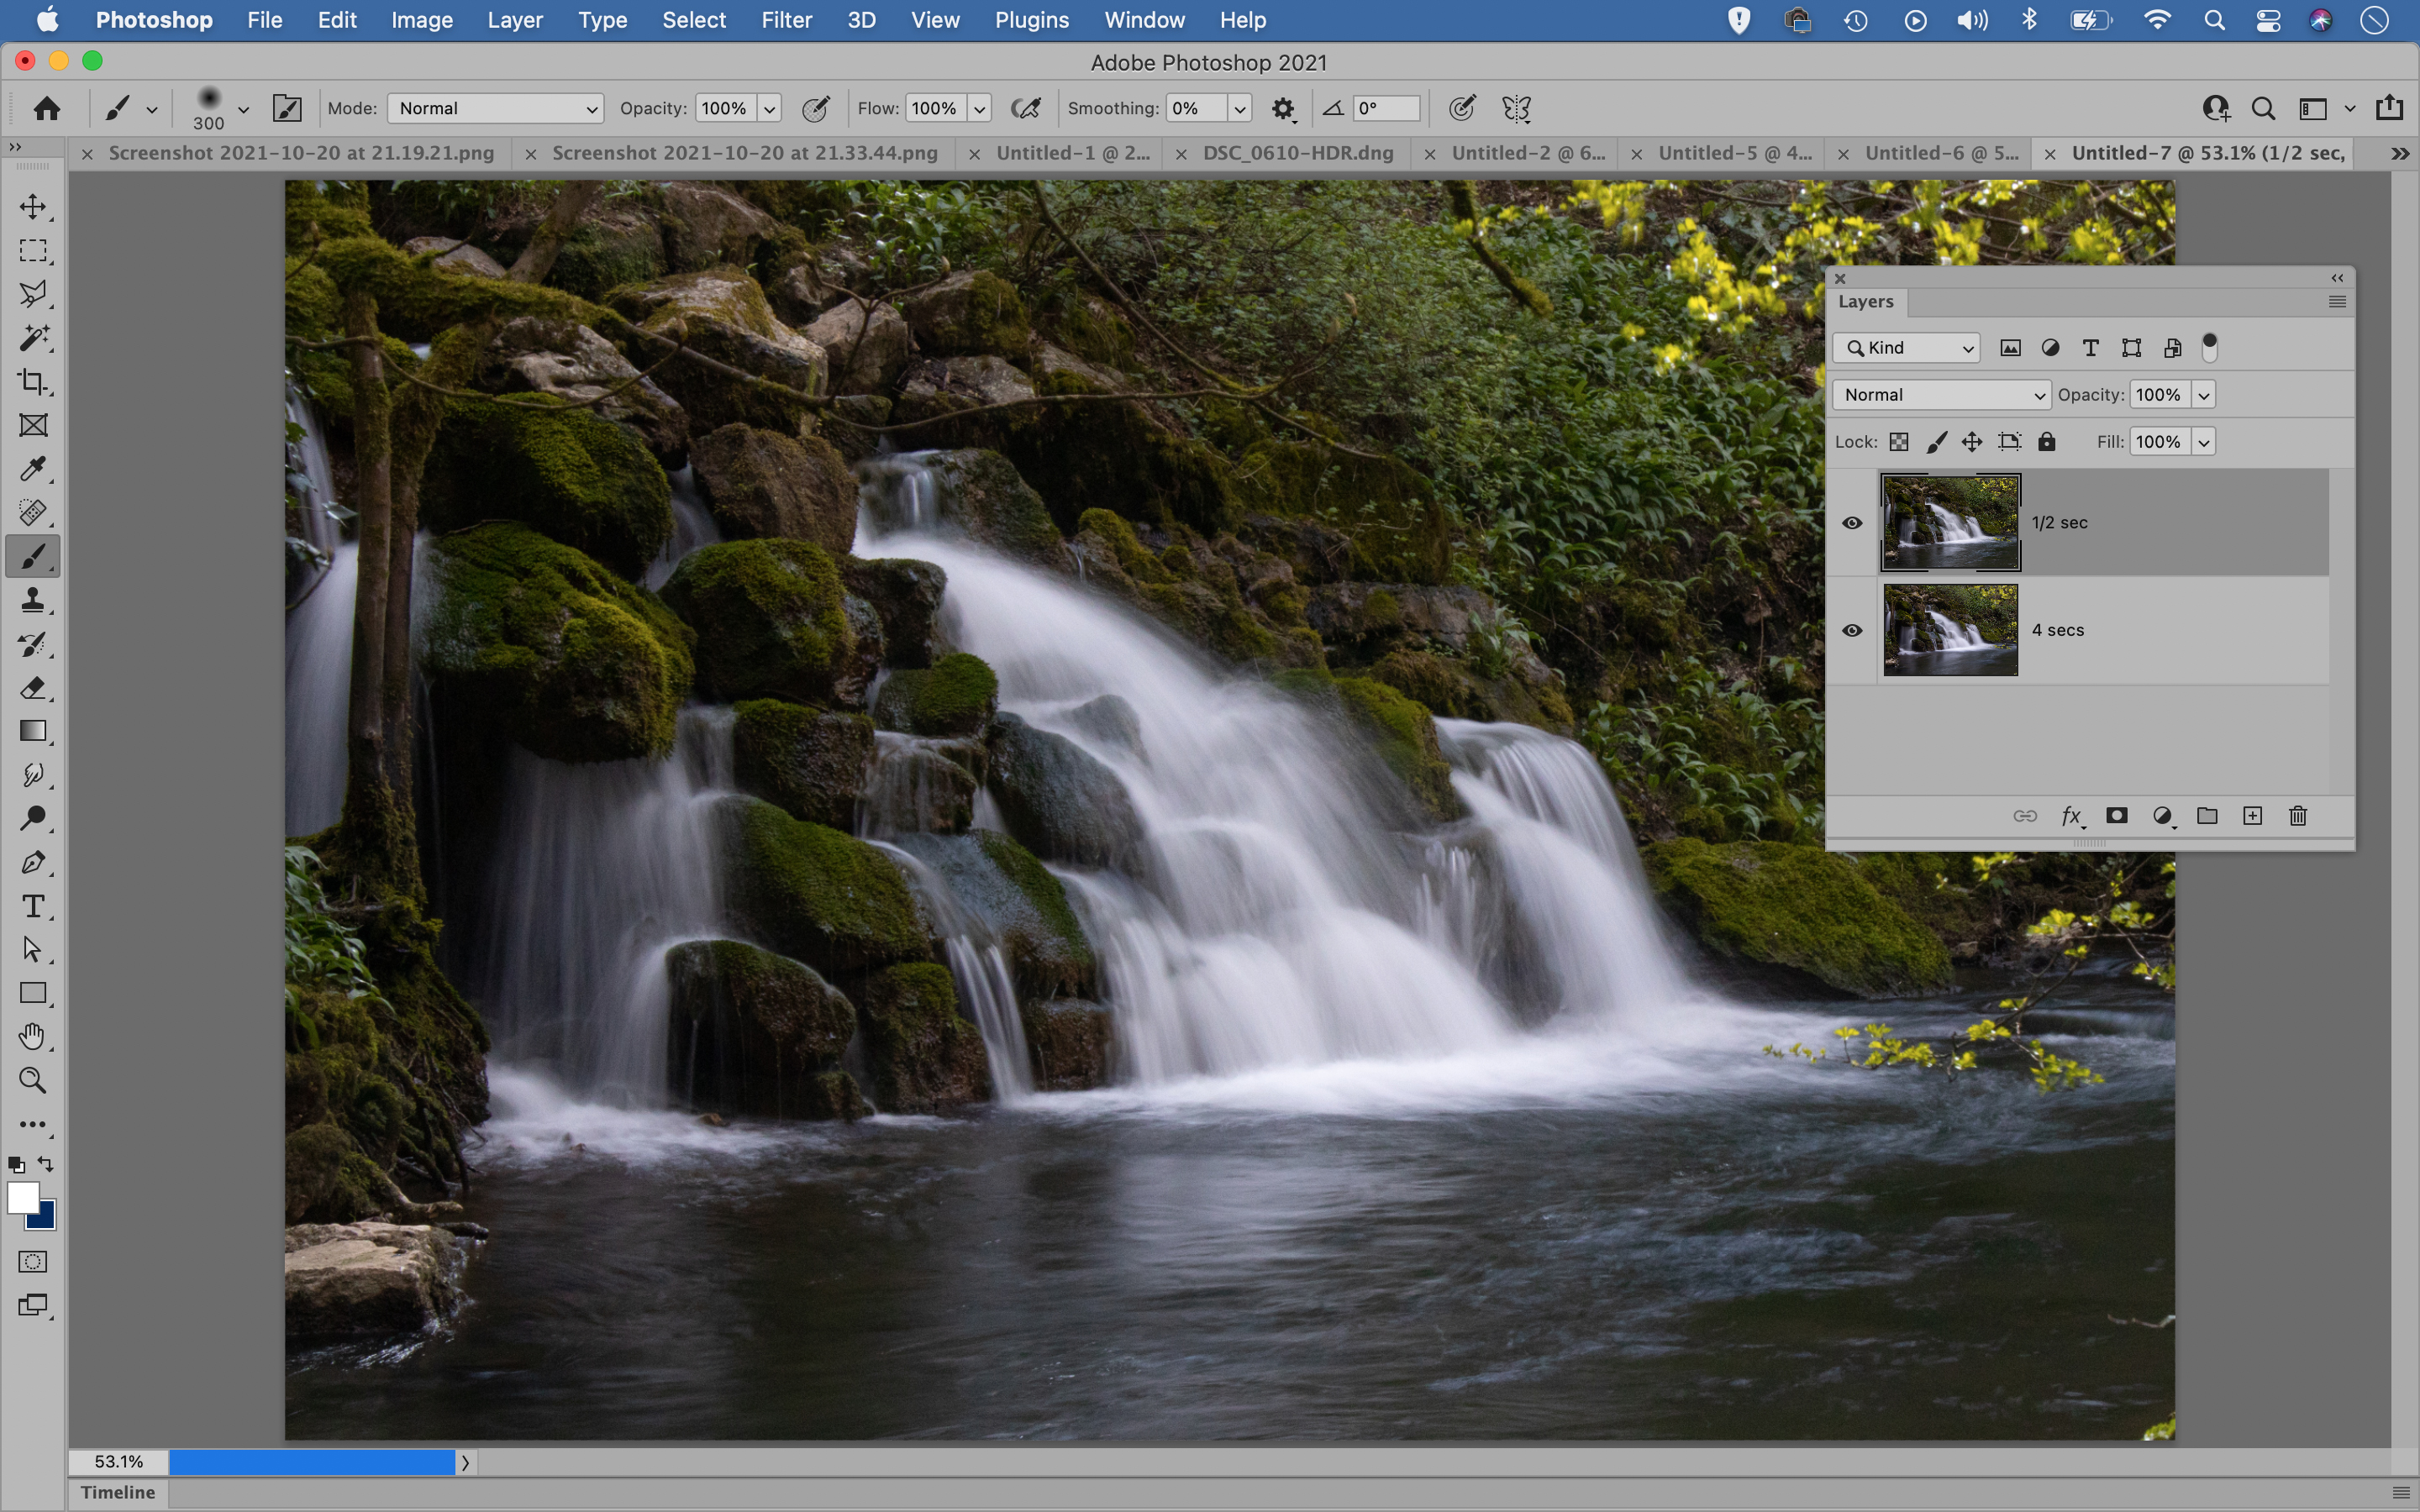
Open the images you want, then go to the faster frame and copy (Cmd/Ctrl + C) and paste (Cmd/Ctrl + V) it into the slowest frame. Use the frame with the lowest ISO as a base to blend the others. If the shot with the higher ISO looks noisy go Filter > Noise > Reduce Noise.
04 Mask the frames
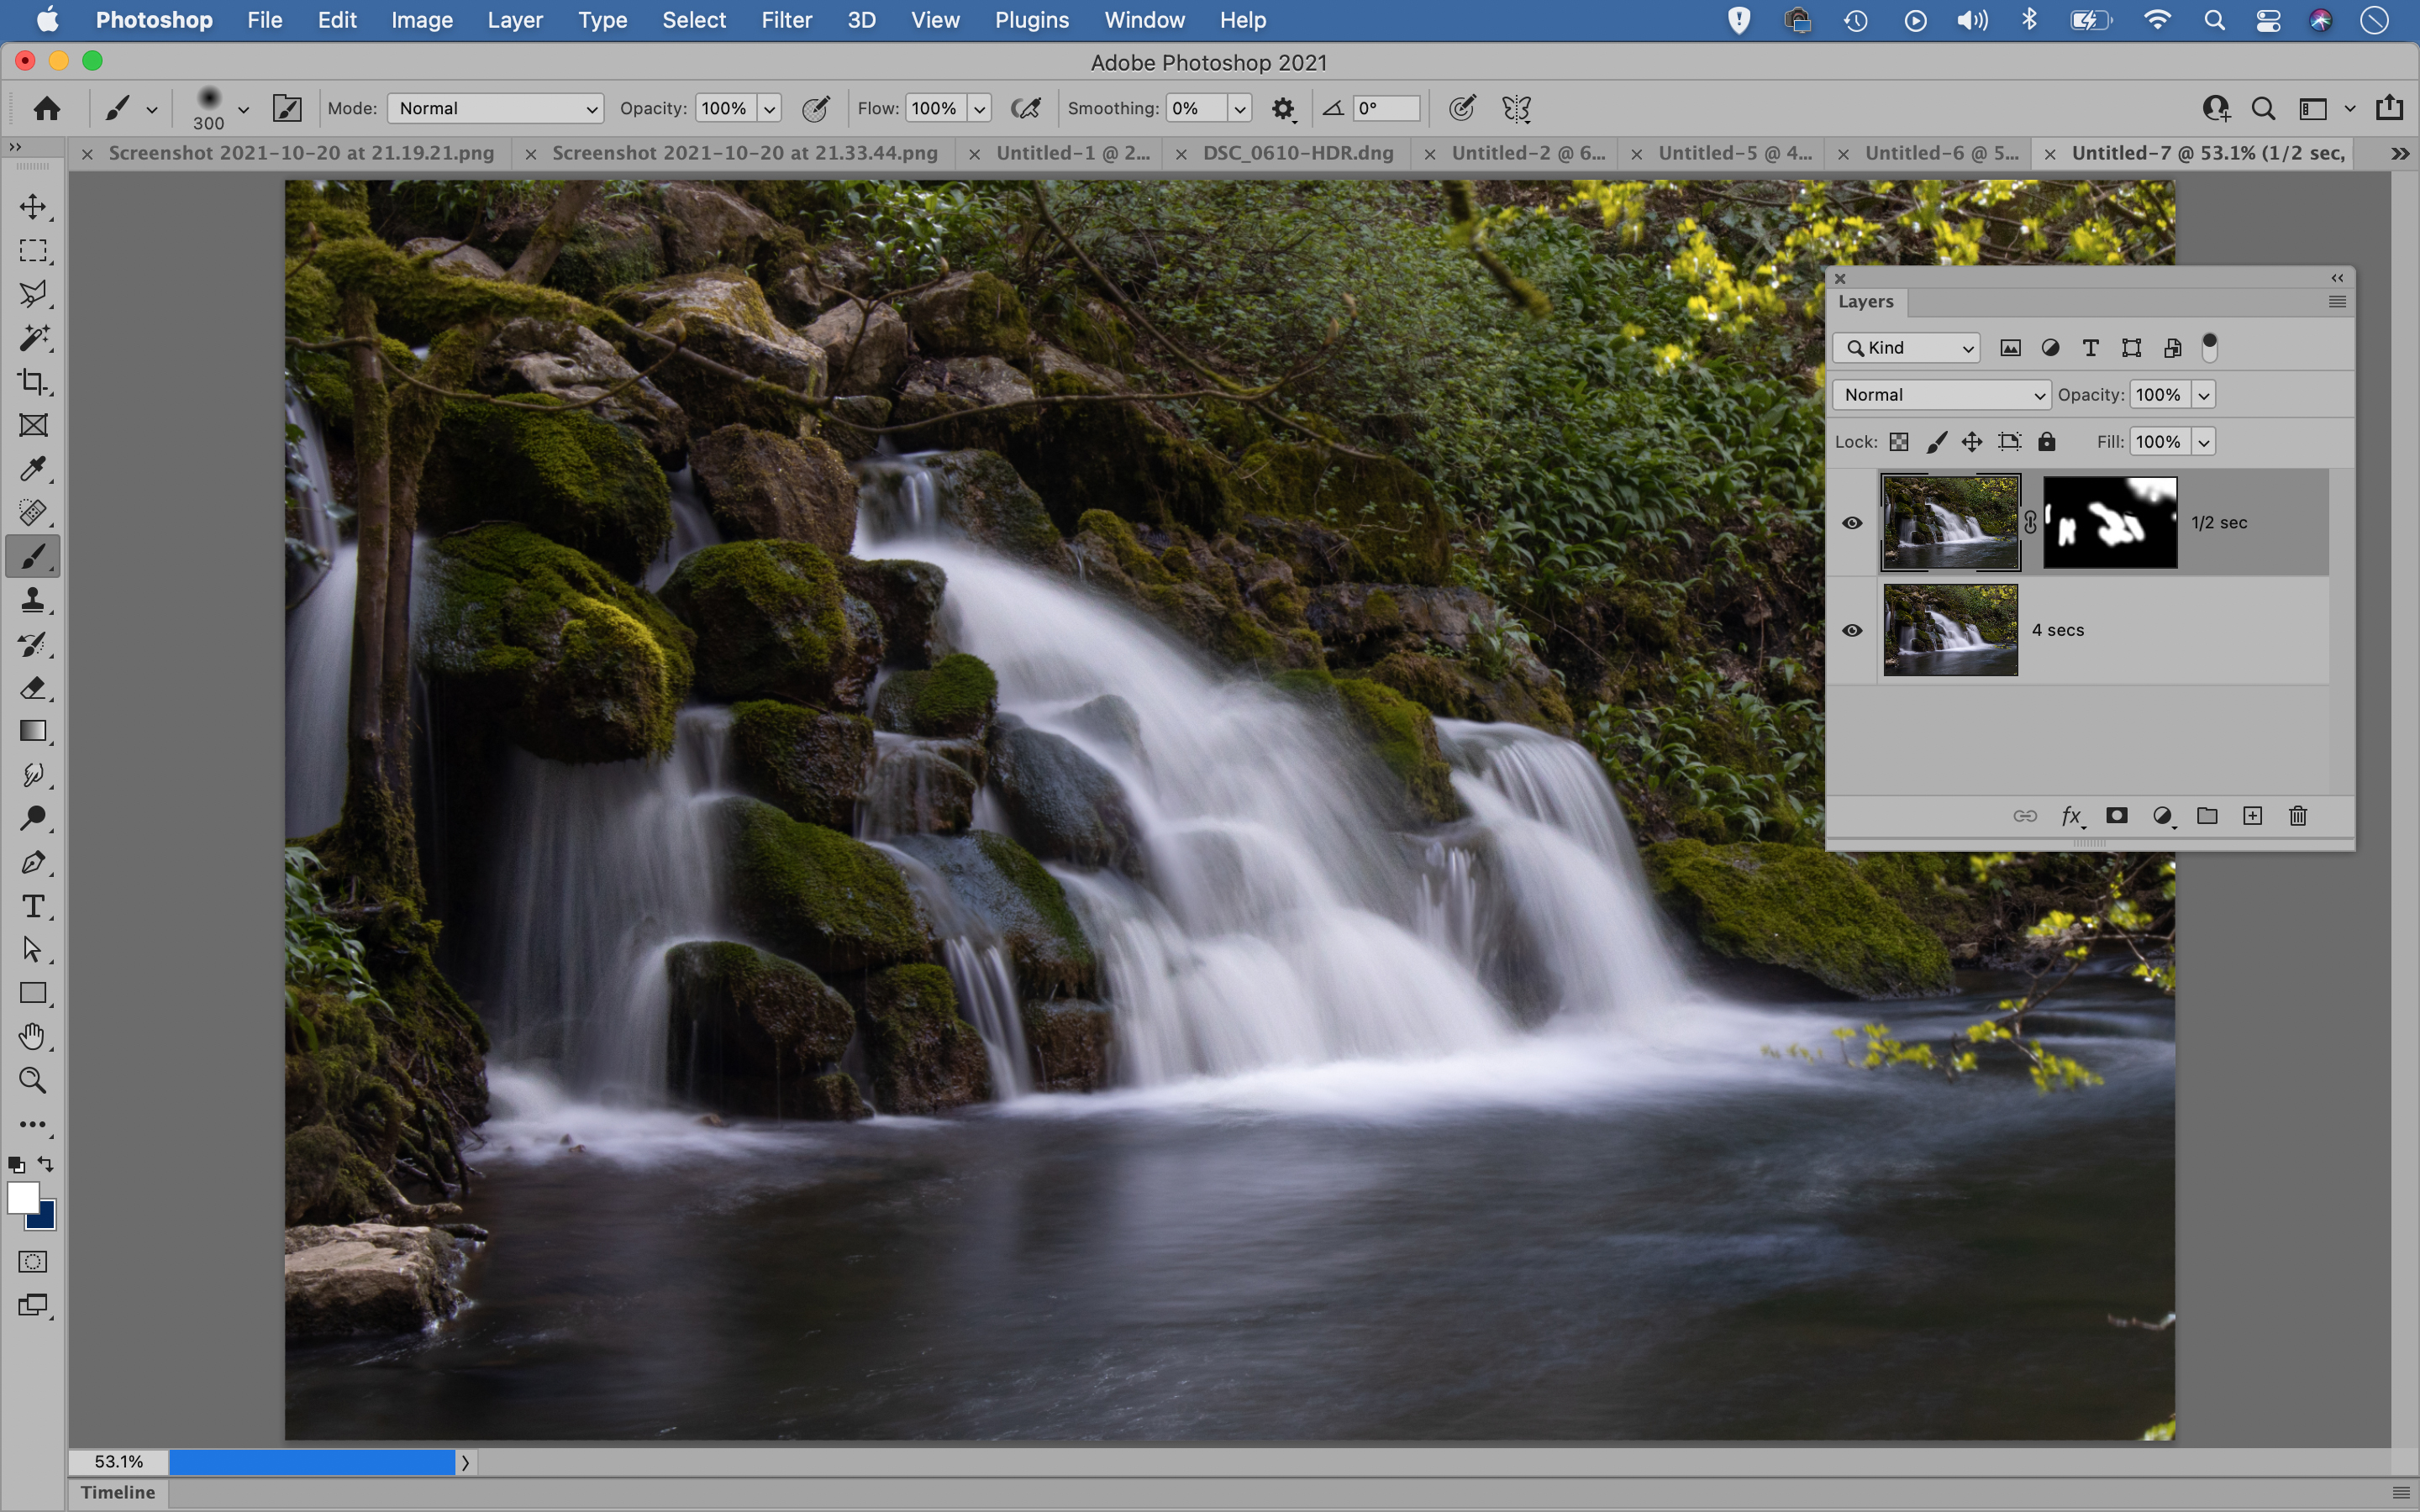
Hold Alt and click the Add Mask icon at the bottom of the layers panel to hide the top layer. Now simply grab the brush tool, set the color to white, choose a soft-edged brush tip and paint to reveal the better blur in the areas where you want it.
05 Shoot several frames
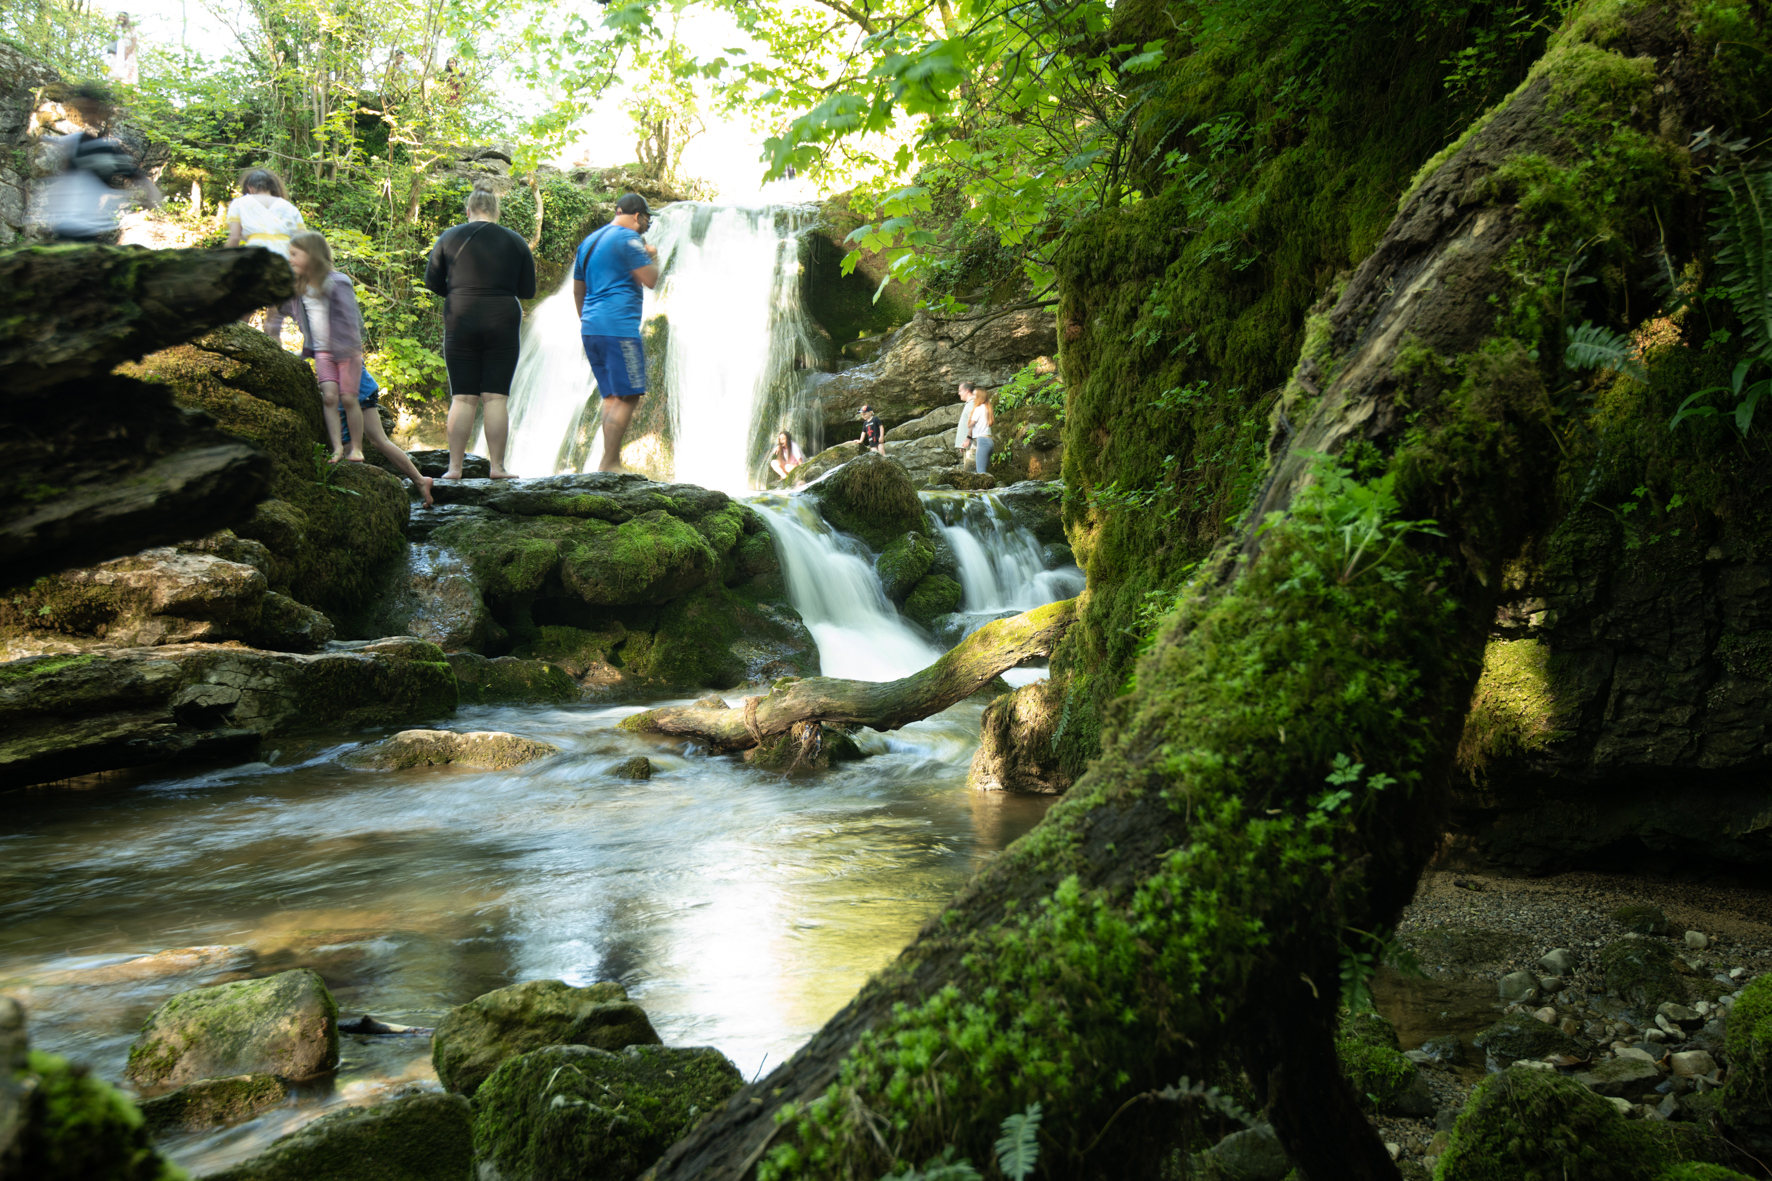
Beautiful spots can often be overrun with tourists. If it’s not possible to visit at a quieter time, try shooting several frames as people move around. Later you can combine the clean parts using layer masking in Photoshop using the shutter blending trick that we described earlier.
06 Look for open shade
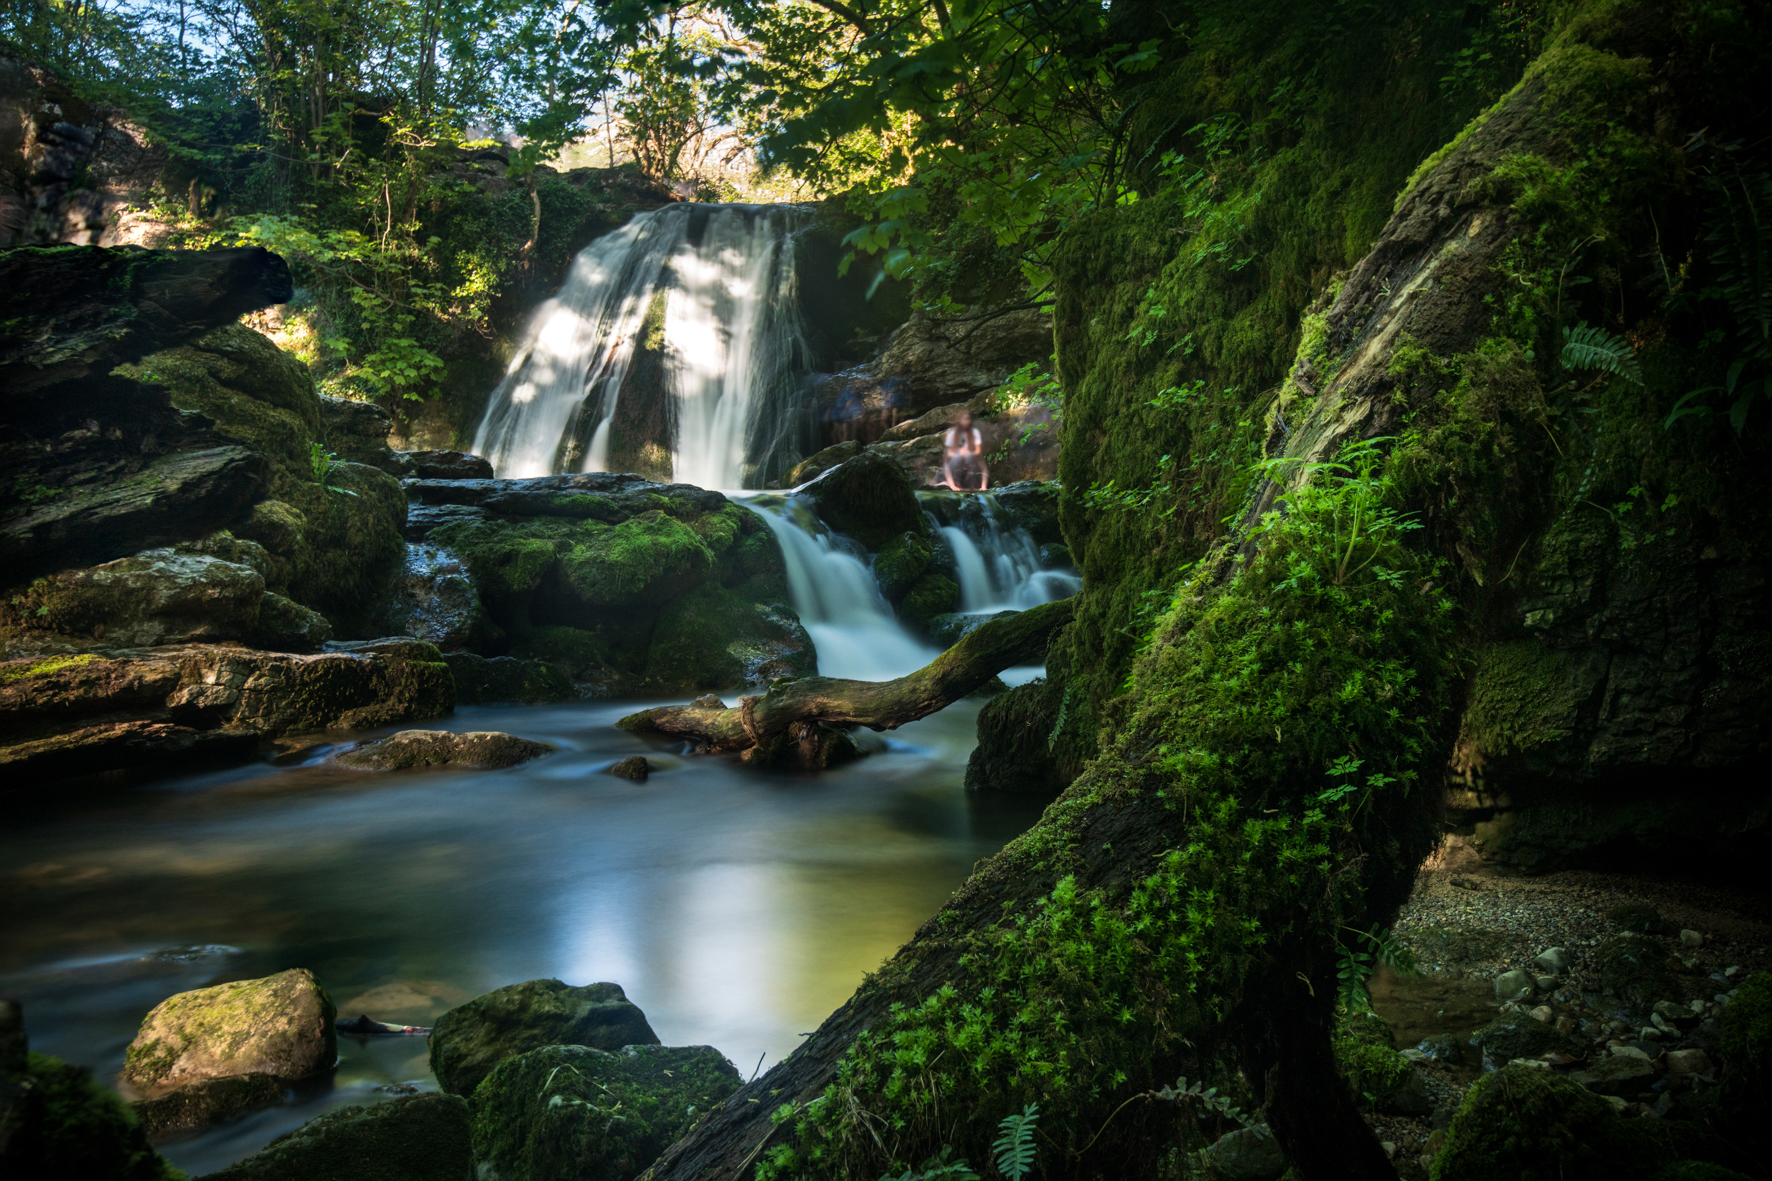
Fit a 10-stop ND filter to your lens and set up your camera for a 30-second exposure, or use a bulb exposure instead and shoot for even longer. People moving around the scene will disappear over the course of the long exposure, or if they’re sat still then they’ll be recorded as ghostly shapes.
07 Clone people out
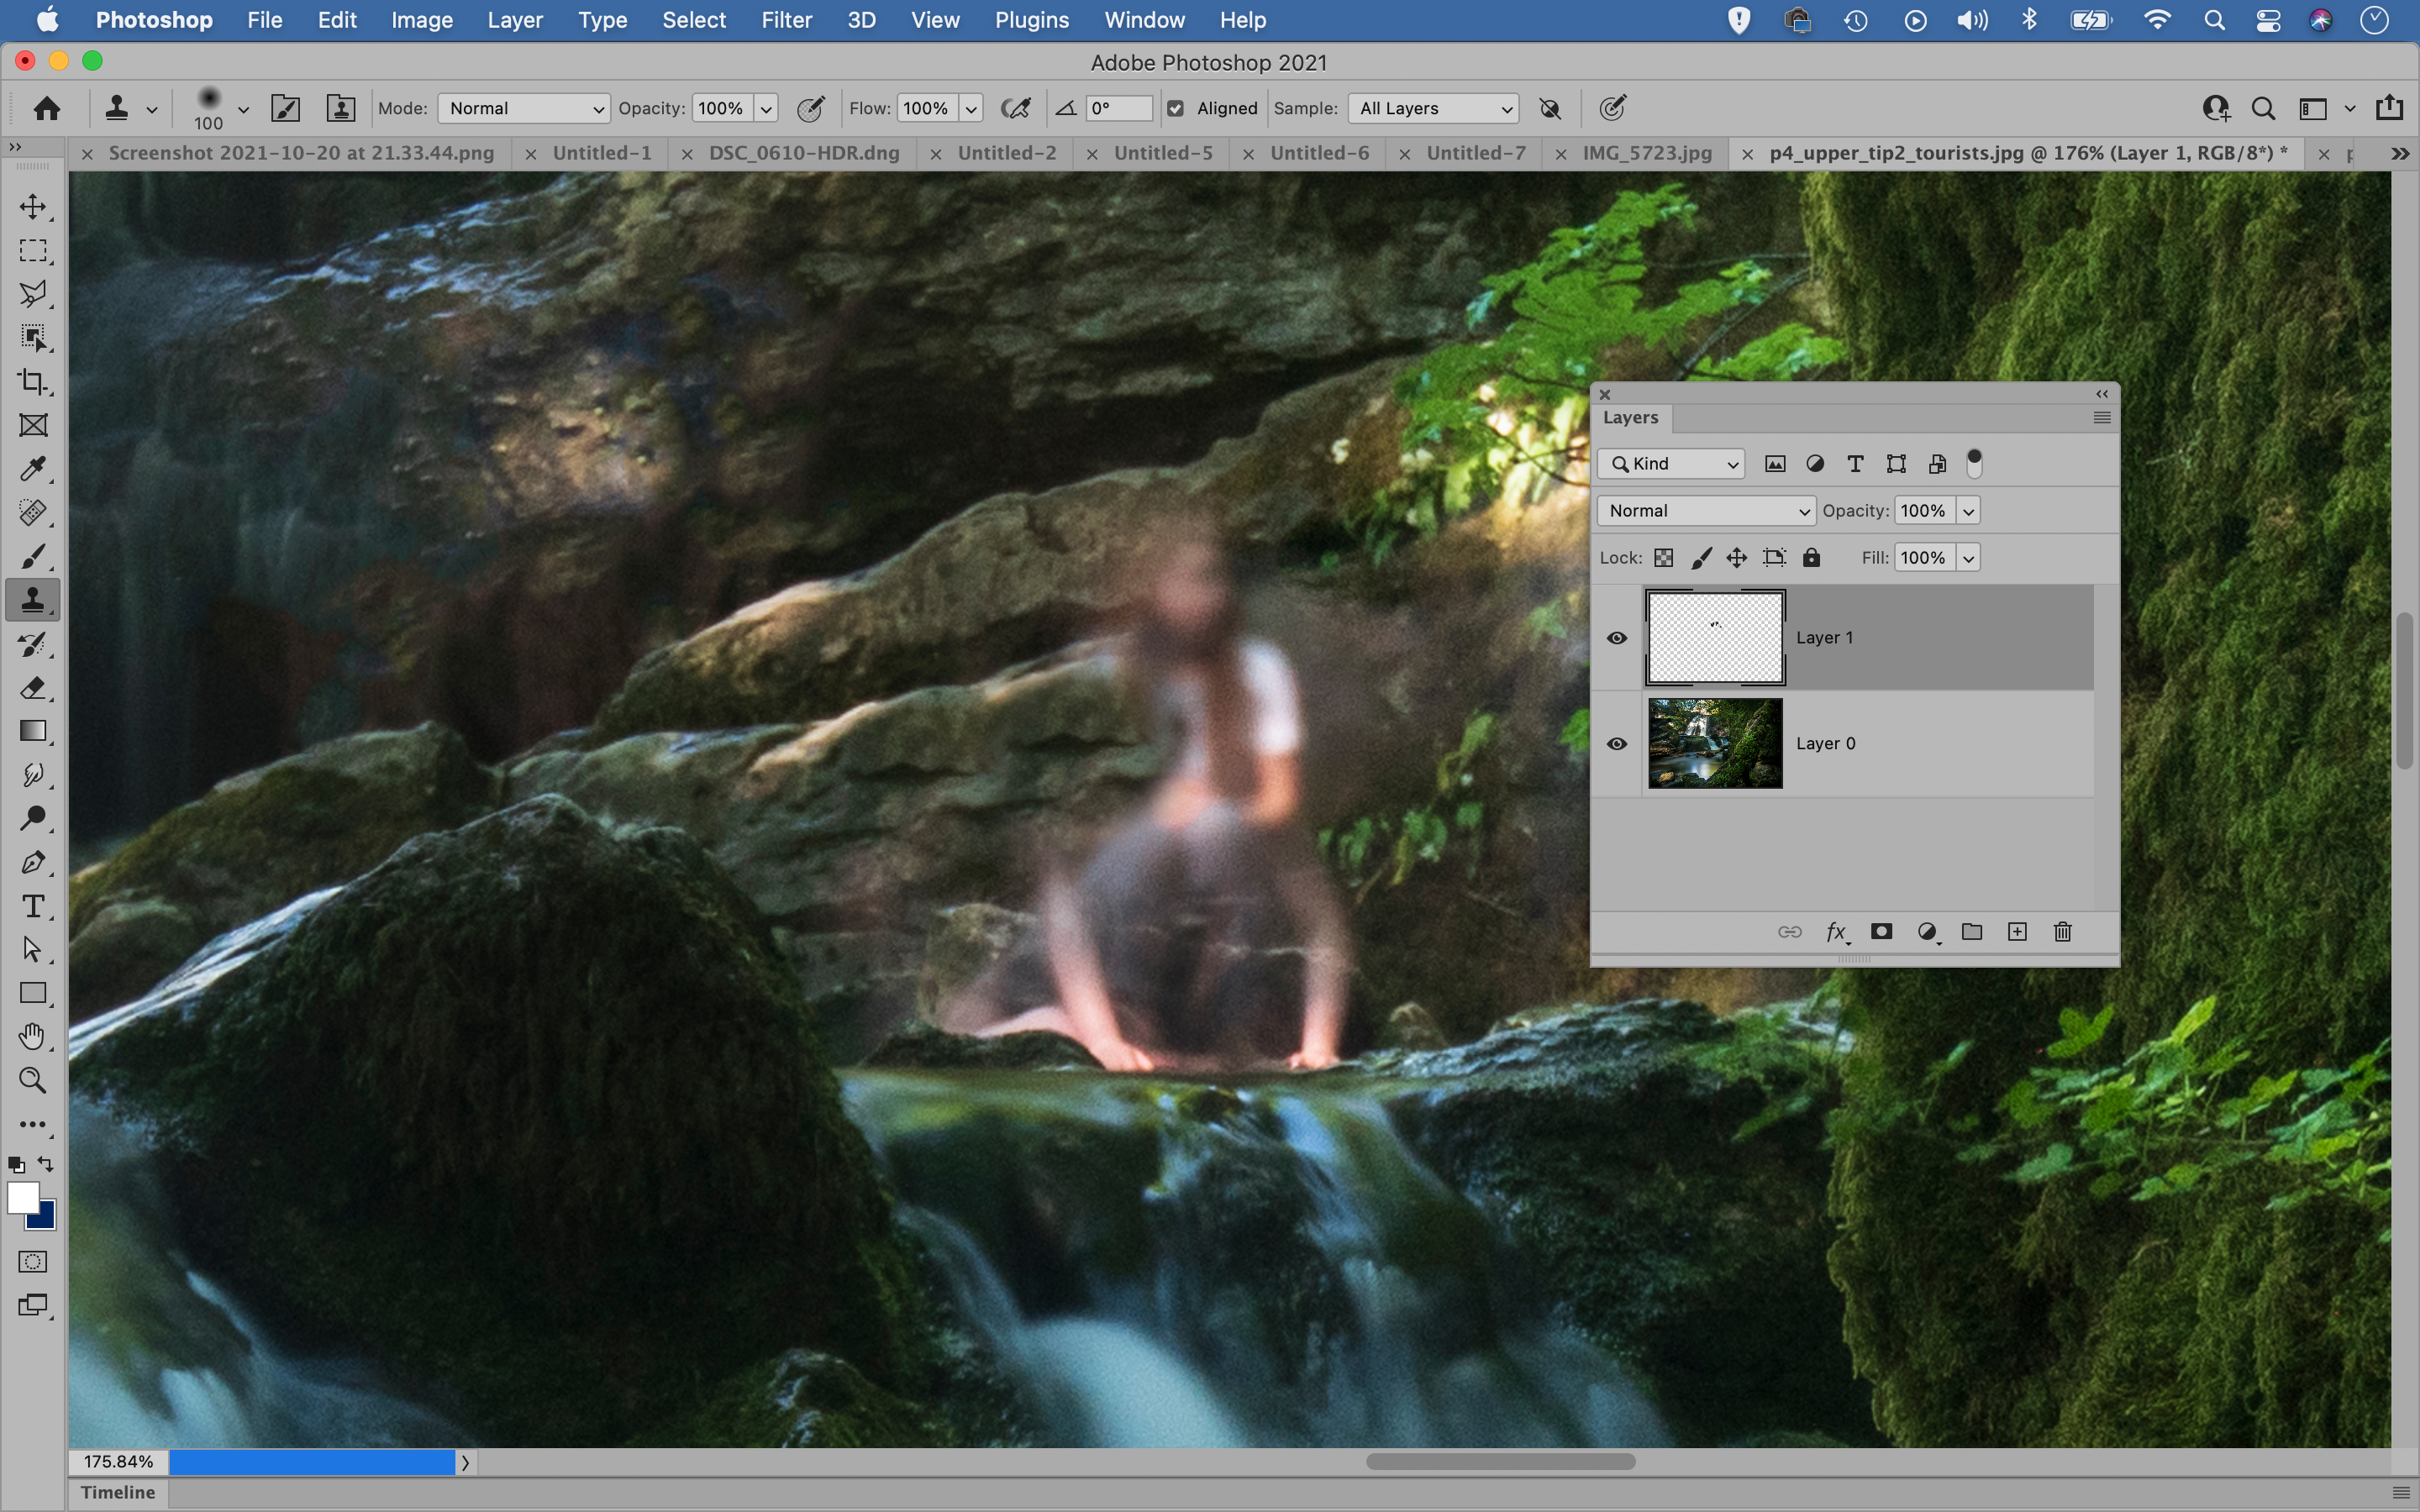
Sometimes it’s impossible to get a clean shot, so you’ll need to resort to cloning in Photoshop to remove figures by copy pixels from elsewhere. Make a new layer, grab the Clone tool and set it to Sample: All Layers, then Alt-click to sample a clean area and paint to clone out the people.
08 Merge exposures together in Photoshop
It’s often the case with landscape photography that if we expose for the foreground then the sky will be overexposed. The difference between sky and land can be more extreme in waterfall scenes, as waterfalls are often surrounded by dense woodland or shaded by rocky cliffs, which cuts out more ambient light. This makes it a challenge to balance out the two in a single frame.
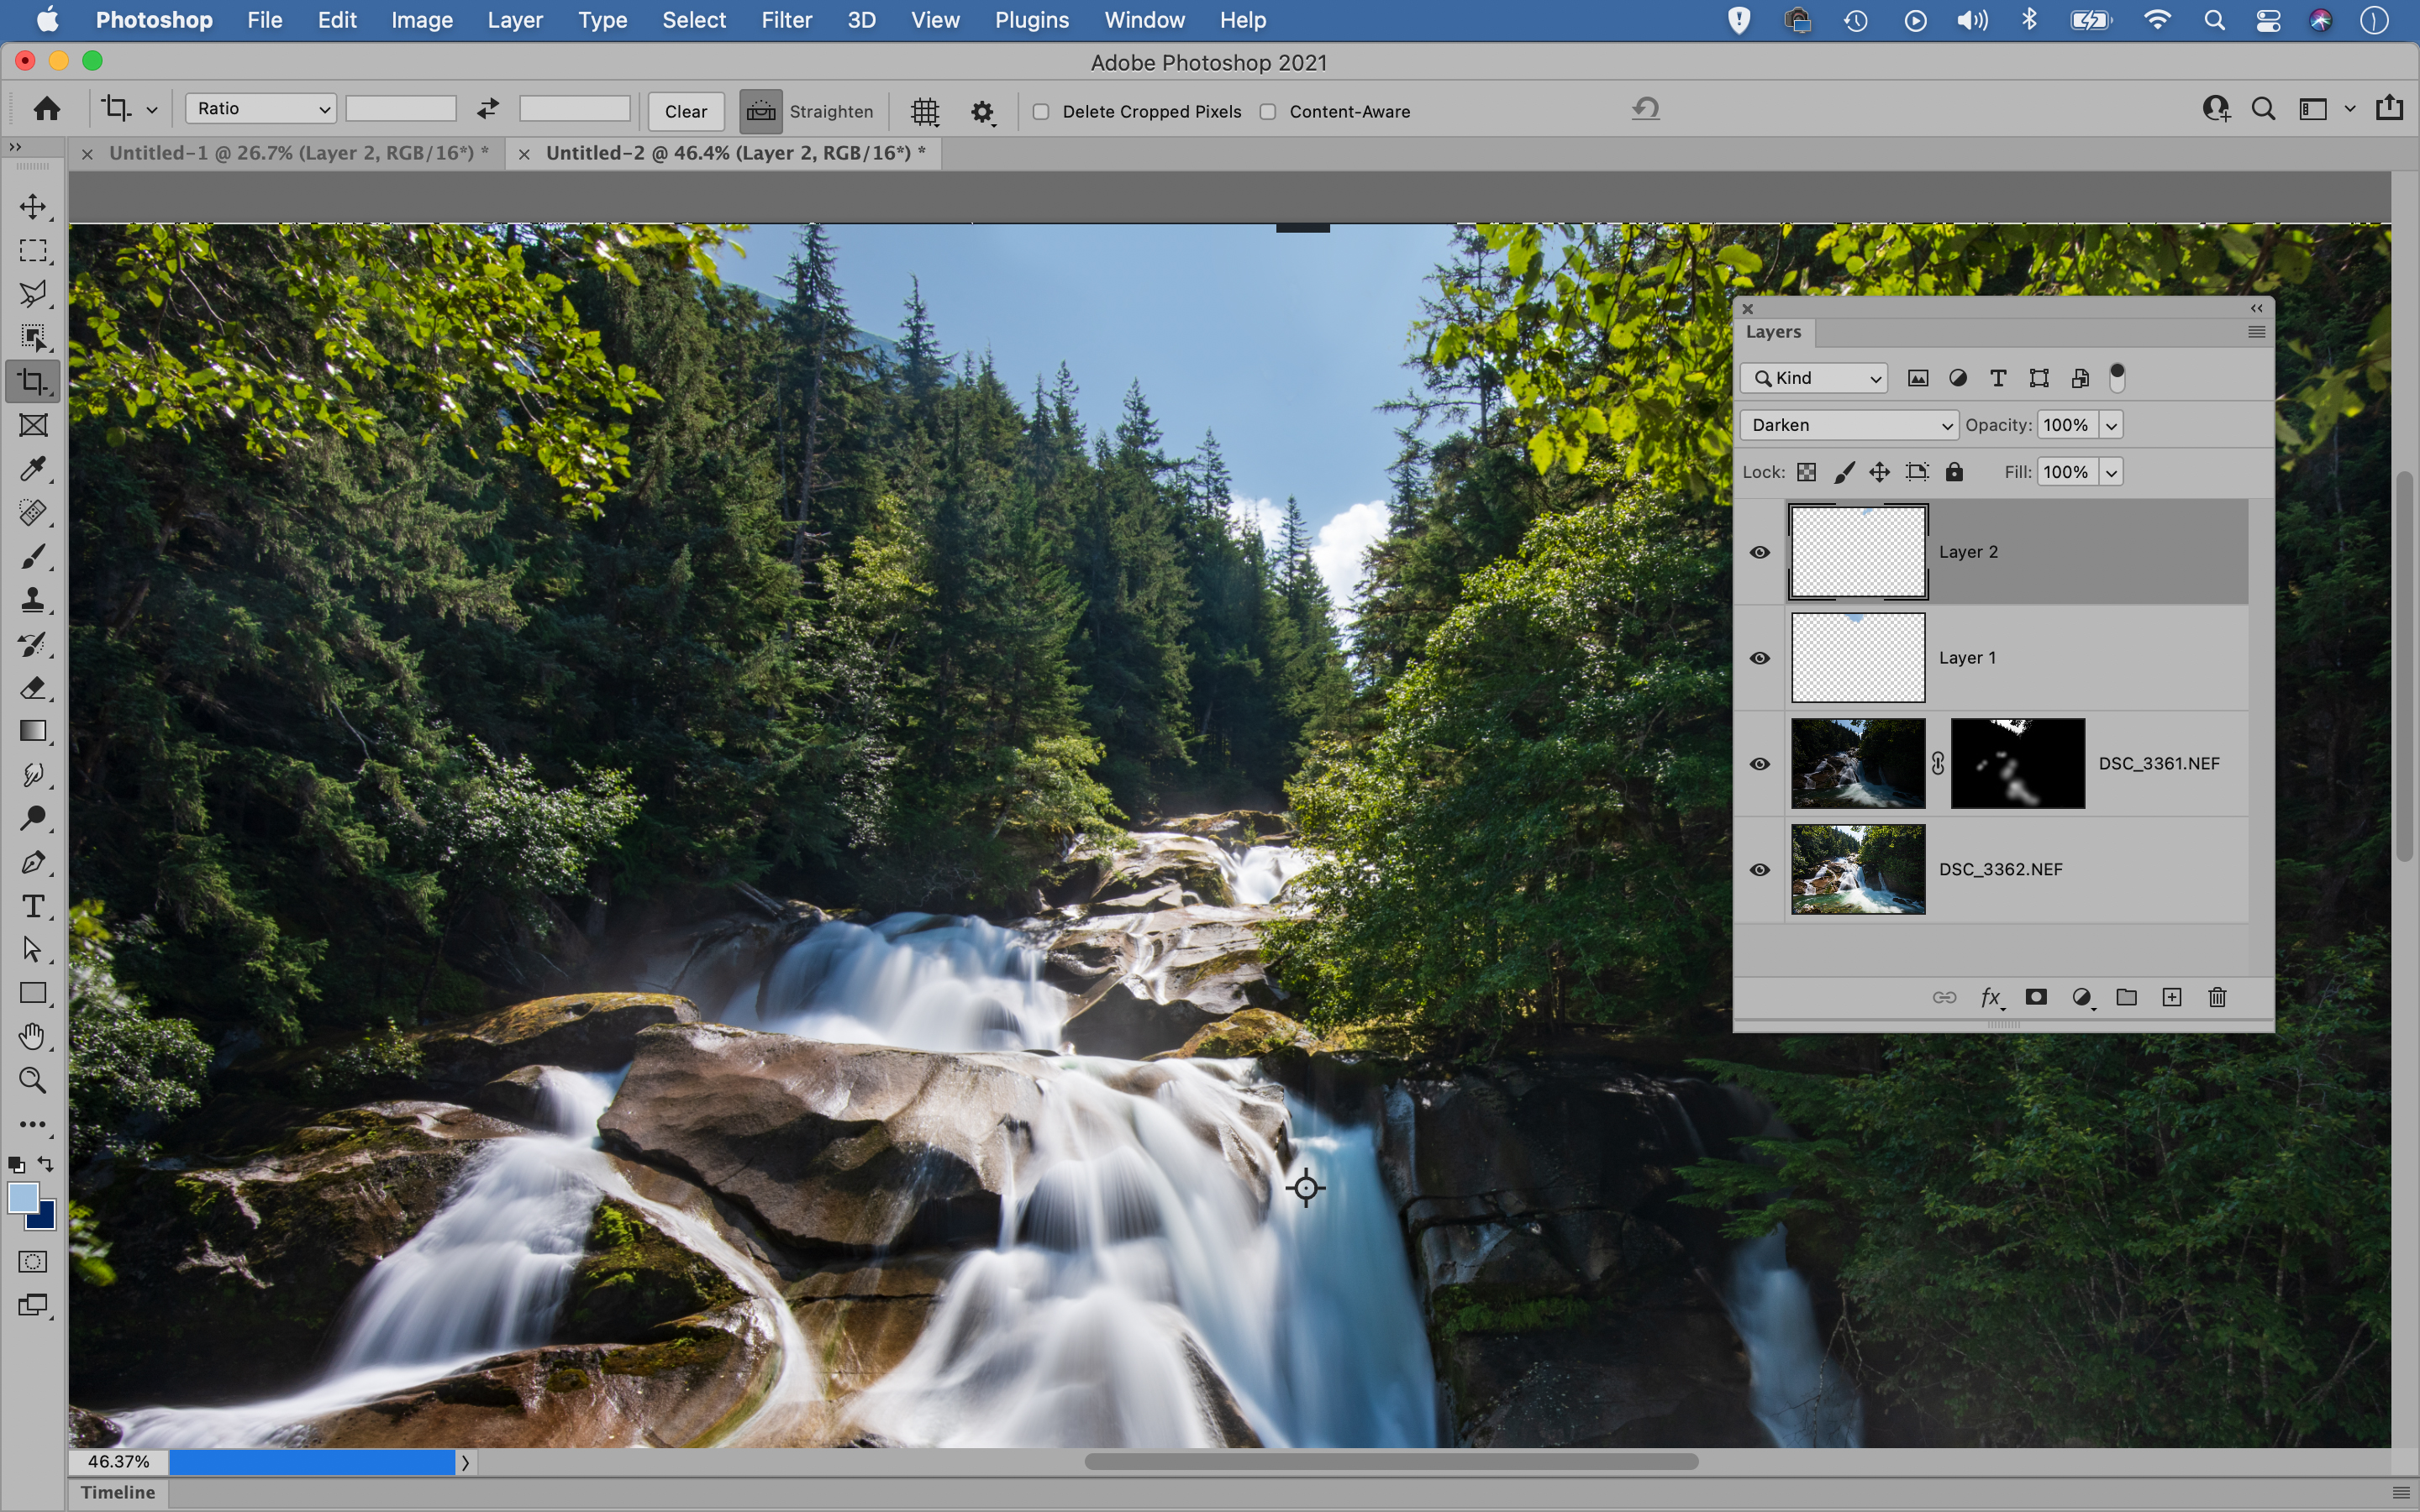
The solution is to take a series of bracketed frames (using a tripod), then combine the sky and land afterwards in Photoshop. You could employ HDR techniques for this, but often we get better results with manual exposure blending. To do this we copy, paste and mask in much the same way as the shutter blending technique, thereby blending the better sky with the lighter foreground in the layer below.
PhotoPlus: The Canon Magazine is the world's only monthly newsstand title that's 100% devoted to Canon, so you can be sure the magazine is completely relevant to your system.
Read more:
Best cameras for portraits
Best portrait photography tips
The best photo editing software: image editors for novices through to pros
The best photo-editing laptops: top laptops for photographers
10 best online photography courses – from beginner guides to masterclasses
The lead technique writer on Digital Camera Magazine, PhotoPlus: The Canon Magazine and N-Photo: The Nikon Magazine, James is a fantastic general practice photographer with an enviable array of skills across every genre of photography.
Whether it's flash photography techniques like stroboscopic portraits, astrophotography projects like photographing the Northern Lights, or turning sound into art by making paint dance on a set of speakers, James' tutorials and projects are as creative as they are enjoyable.
He's also a wizard at the dark arts of Photoshop, Lightroom and Affinity Photo, and is capable of some genuine black magic in the digital darkroom, making him one of the leading authorities on photo editing software and techniques.
