Home photography idea: Perfect perfume bottle product shots
Perfume bottles are perfect still life subjects. Here's how to get high-end product shots using lighting and Photoshop
Watch video: Home photography ideas – Perfect perfume bottle product shots
Photography projects at home
• Home photography ideas
Useful home photography kit
• Best tripods
• Best lighting kits
• Best reflectors
• Best macro lenses
Product photography is about making an object look its absolute best – through lighting, arrangement and post-production skills. As such it’s an exercise in perfection, and misplaced reflections or dodgy shadows are unacceptable flaws.
Perfection can be a challenge, but it can also be very lucrative – product photography is among the best paid jobs in the industry. Whether you want to get into paid product work or you simply fancy flogging a few items on eBay, good product photo skills can be a real benefit.
In this project, we’ll look at a setup for shooting a perfume bottle – a killer combination of glass and reflective metal makes this one of the trickiest of subjects, but we can master the challenge with a few tricks of our own.

We’ll use a basic home studio flash kit to light our product. These typically come with two heads, which gives us the flexibility to light the backdrop with one head and the product with the other.
It can be very tricky to nail everything in one perfect frame but thankfully, in a controlled setup like this with a fixed camera, we have the freedom to build up our lighting over several frames, by moving the front light into different positions, or using a reflector to bounce it across our subject.
And once we’ve captured the frames we need, we can piece the best bits together in Photoshop using simple compositing skills. Let's see how it's done…
• Best online photography courses
Set up perfect product shots
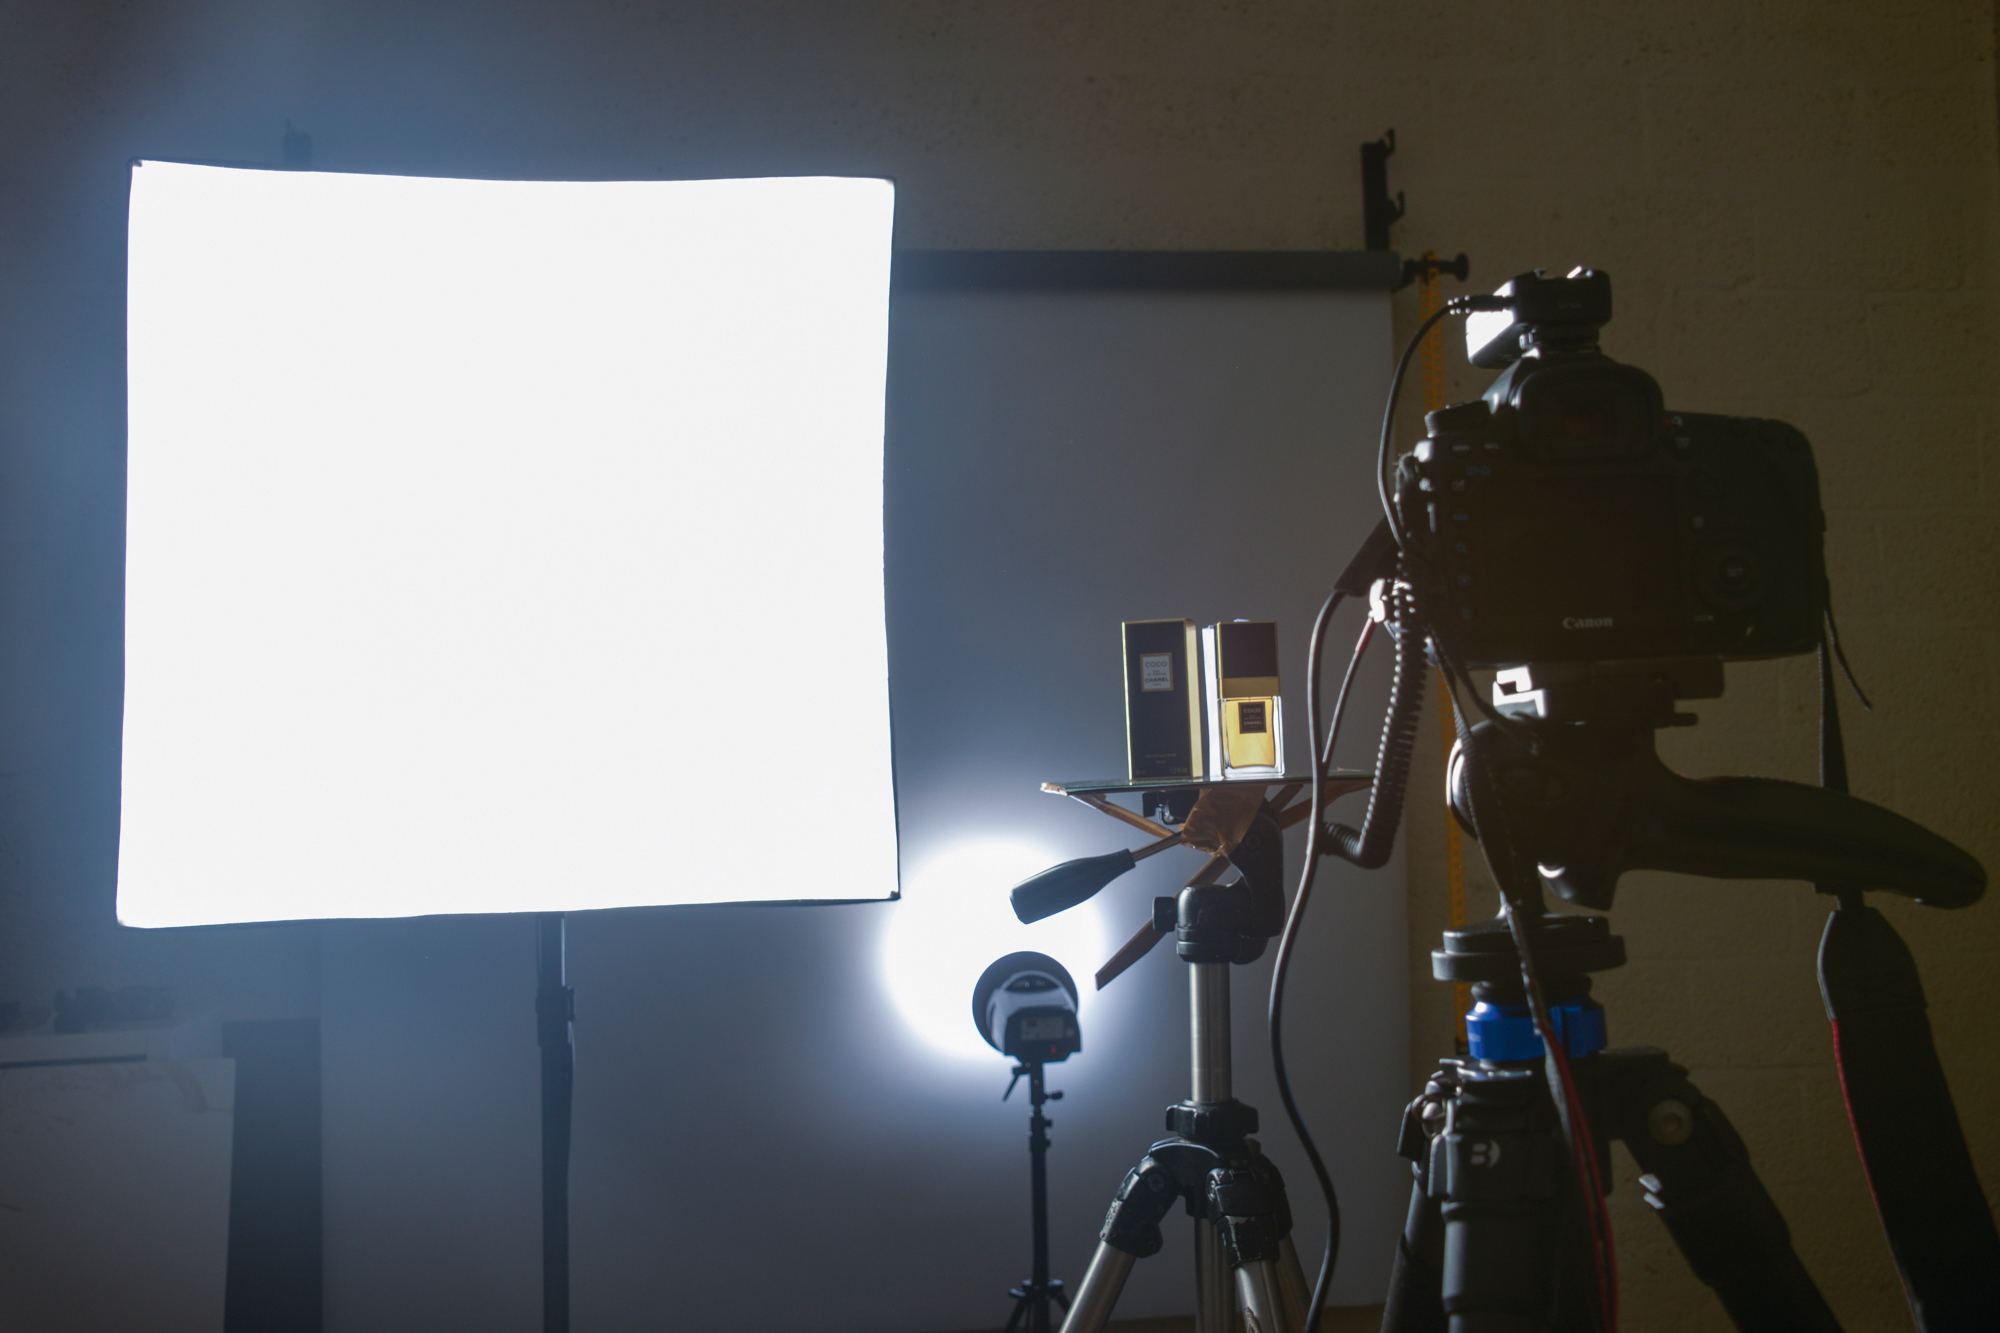
01 Position the lights
One flash here faces the background, fitted with a reflector and honeycomb grid for a tight spotlight beam. The other flash is fitted with a softbox and initially positioned behind the subject on the left.
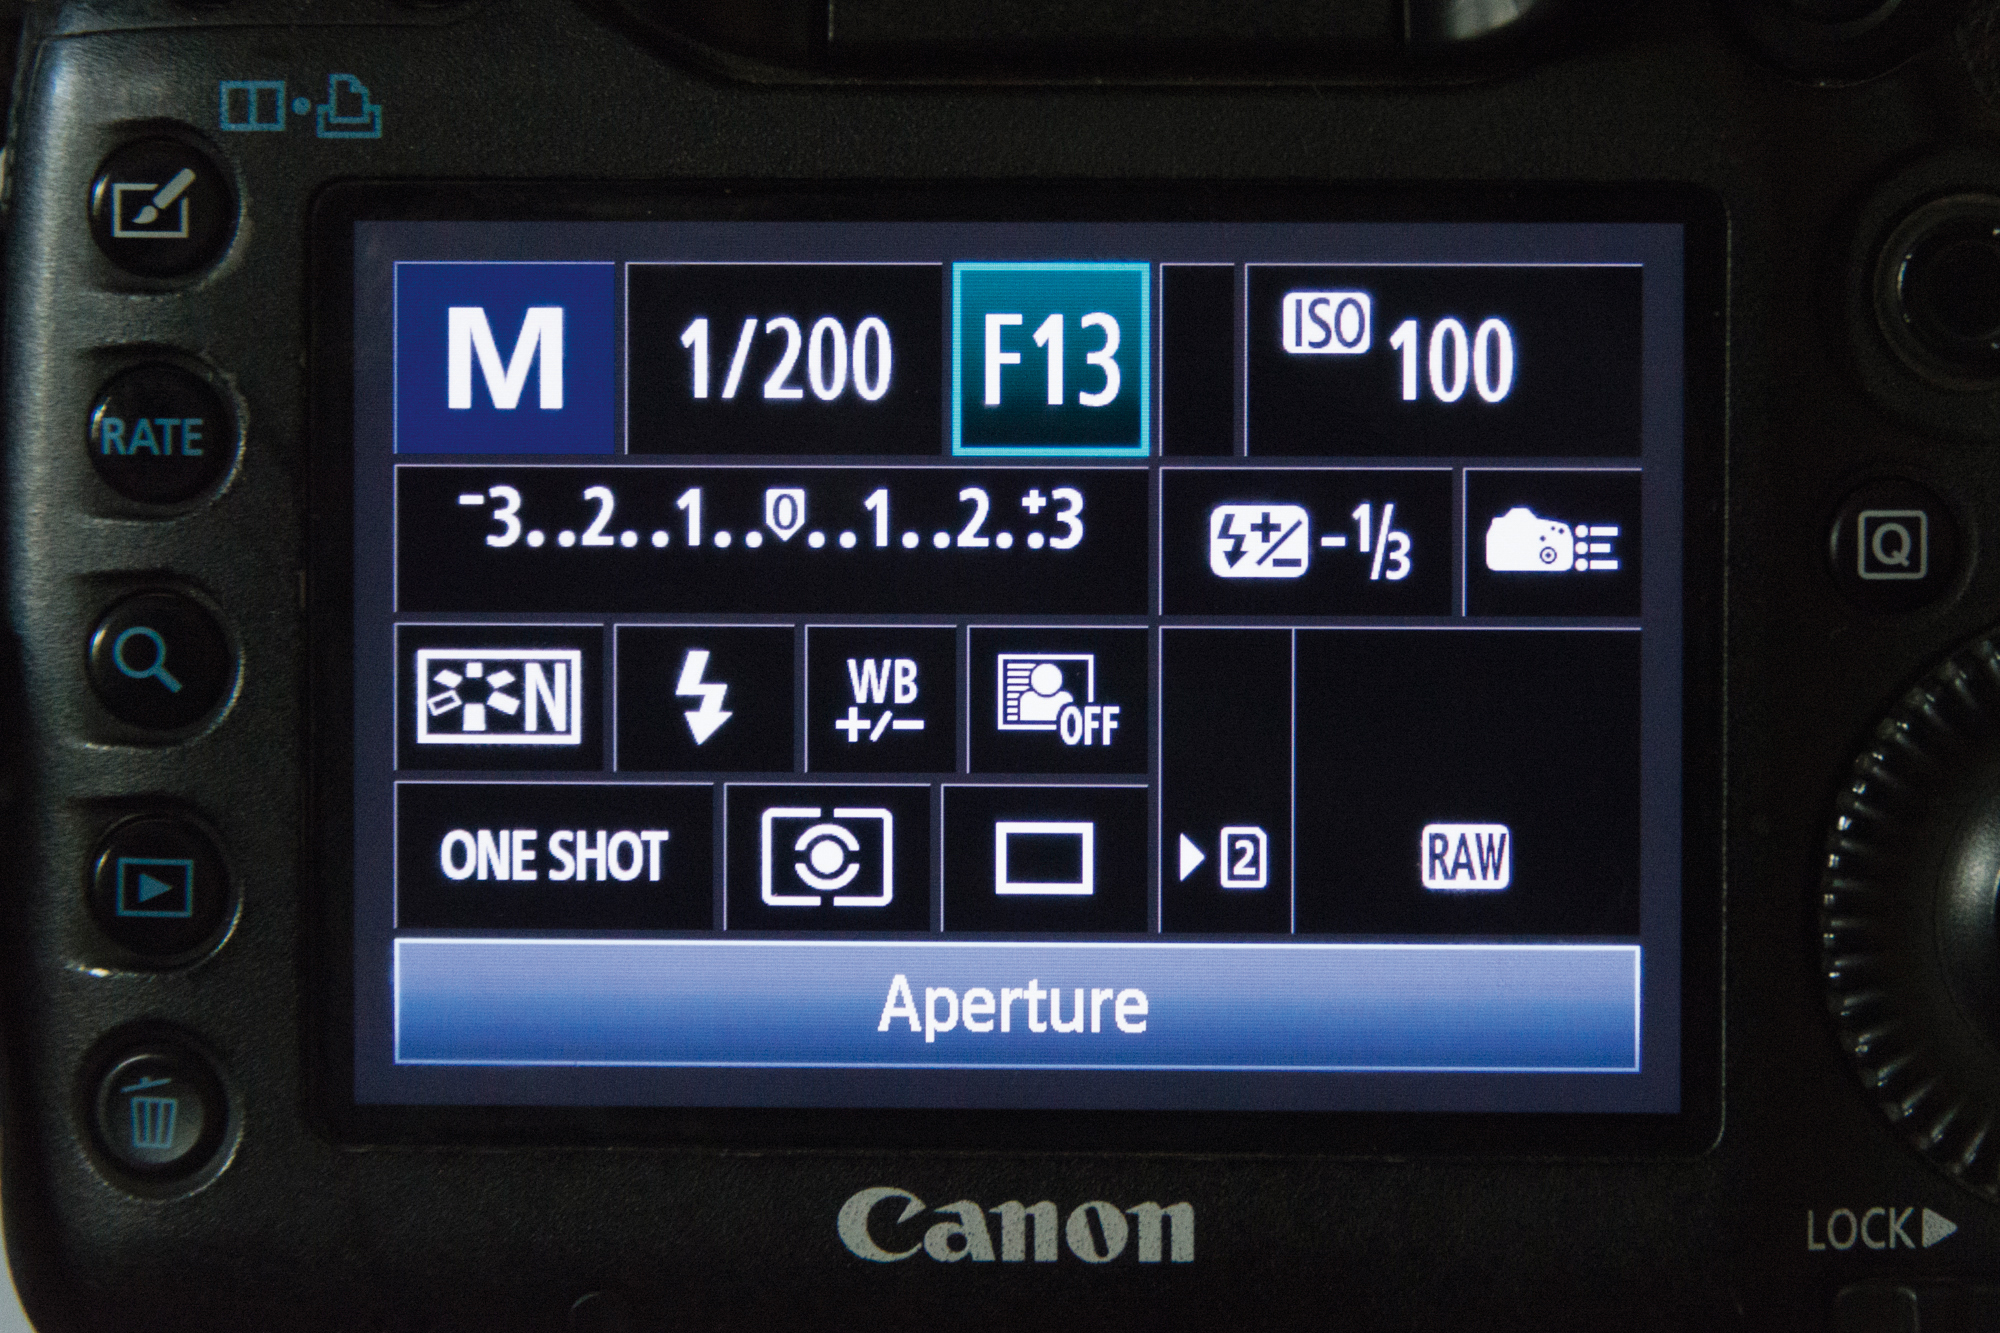
02 Adjust your exposure
Use manual mode for exposure, with ISO100 and 1/200 sec shutter speed. Strike a balance between the aperture and the power of the lights; a narrow aperture like f/13 ensures sufficient depth of field.
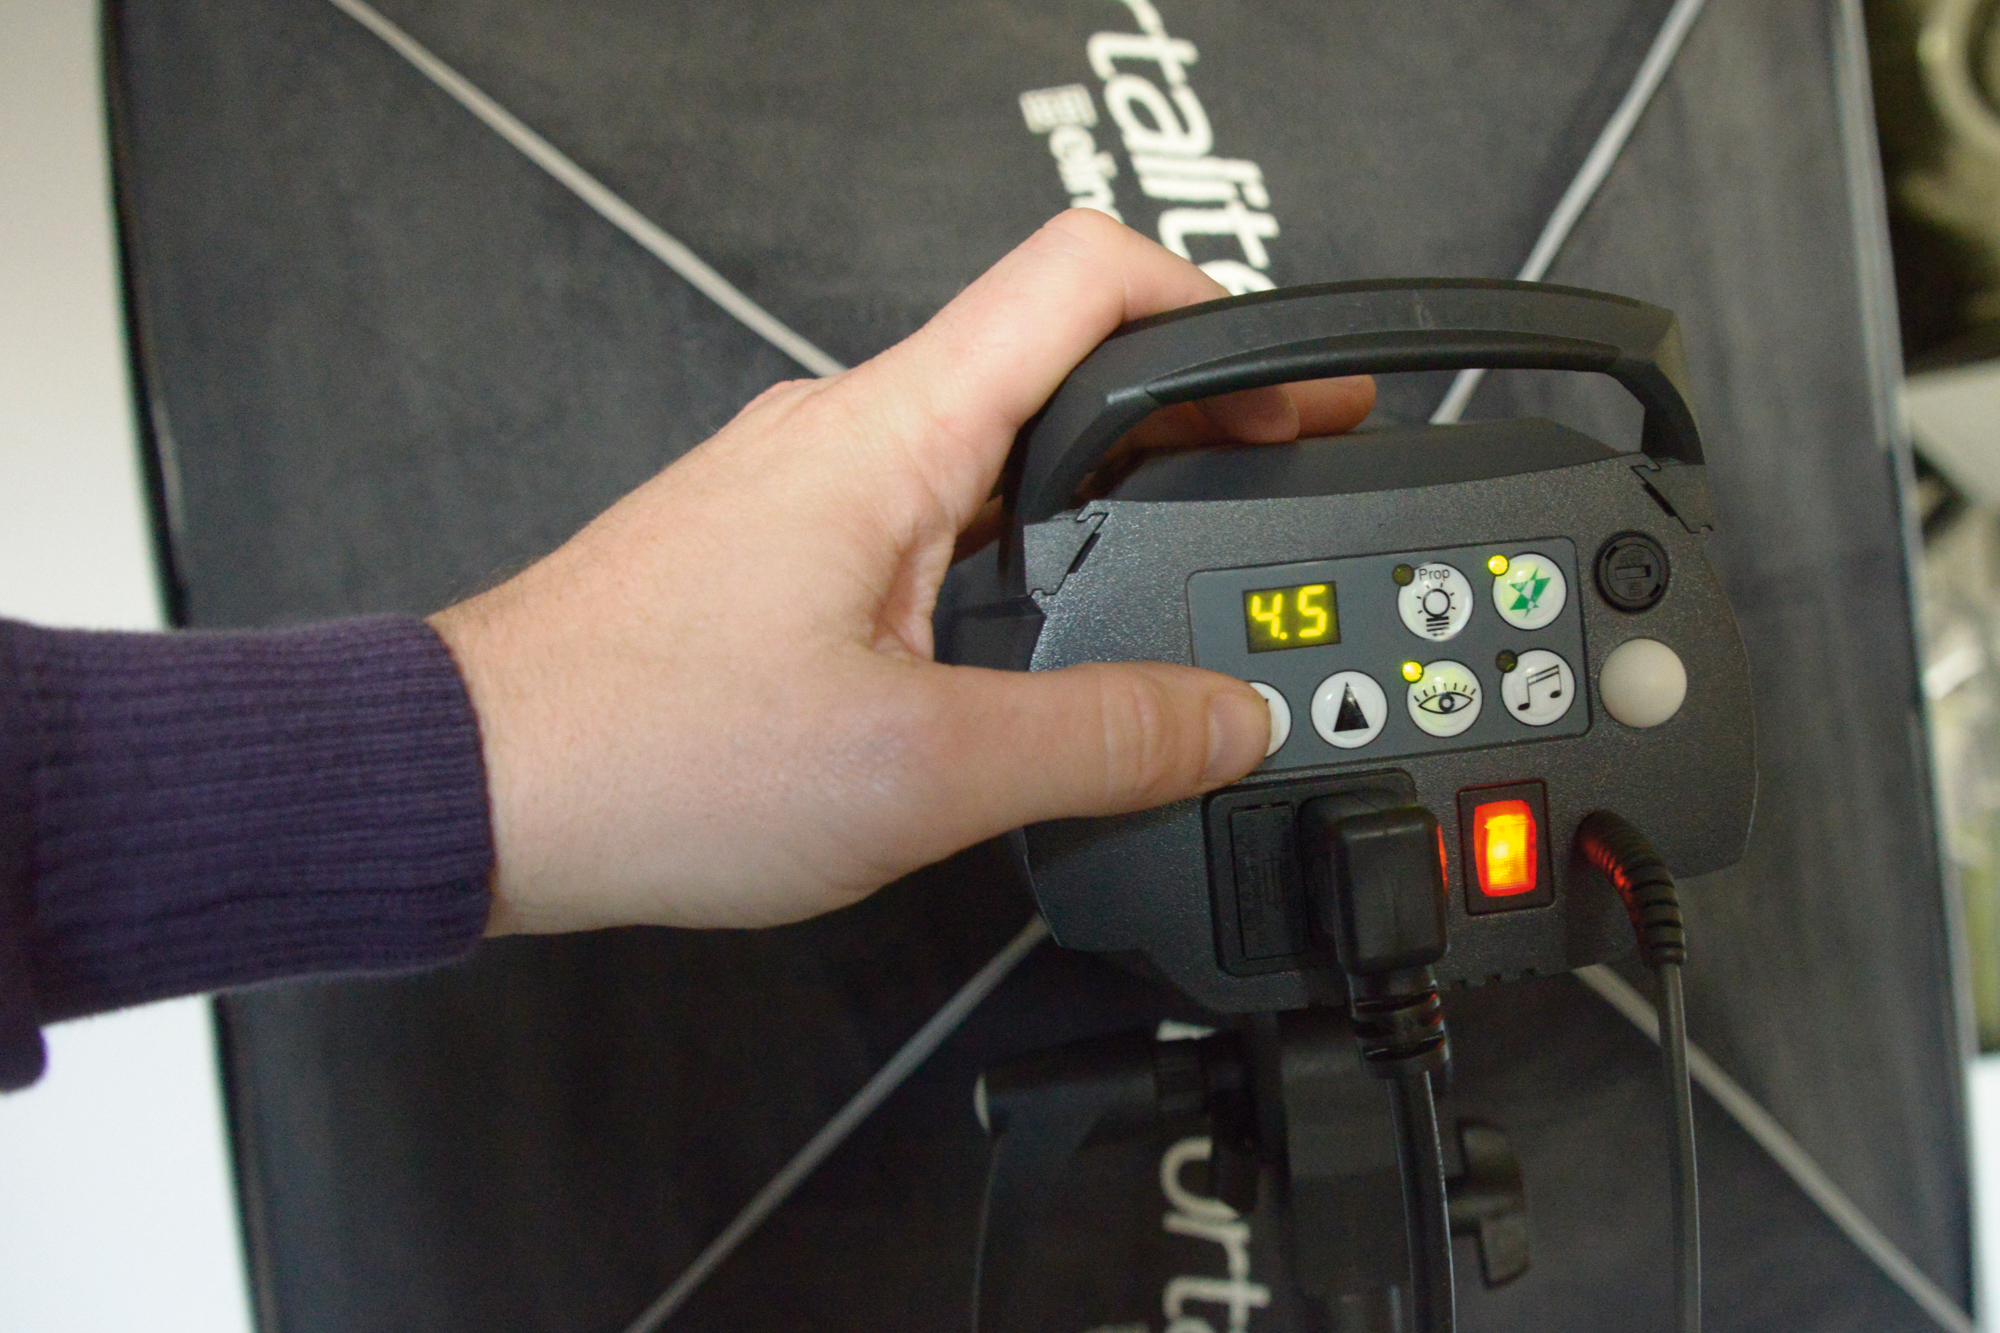
03 Set the power
How do you work out the right power for the lights? The easiest way is trial and error. Set your exposure then match the lights to it by tweaking the power while taking test shots. You can adjust the strength of a light either by altering the settings or moving it closer or further. Build the lights one by one – we started off with just the background light switched on, while leaving the other head off, then once this was correct we moved on to adjust the softbox used to light the product.
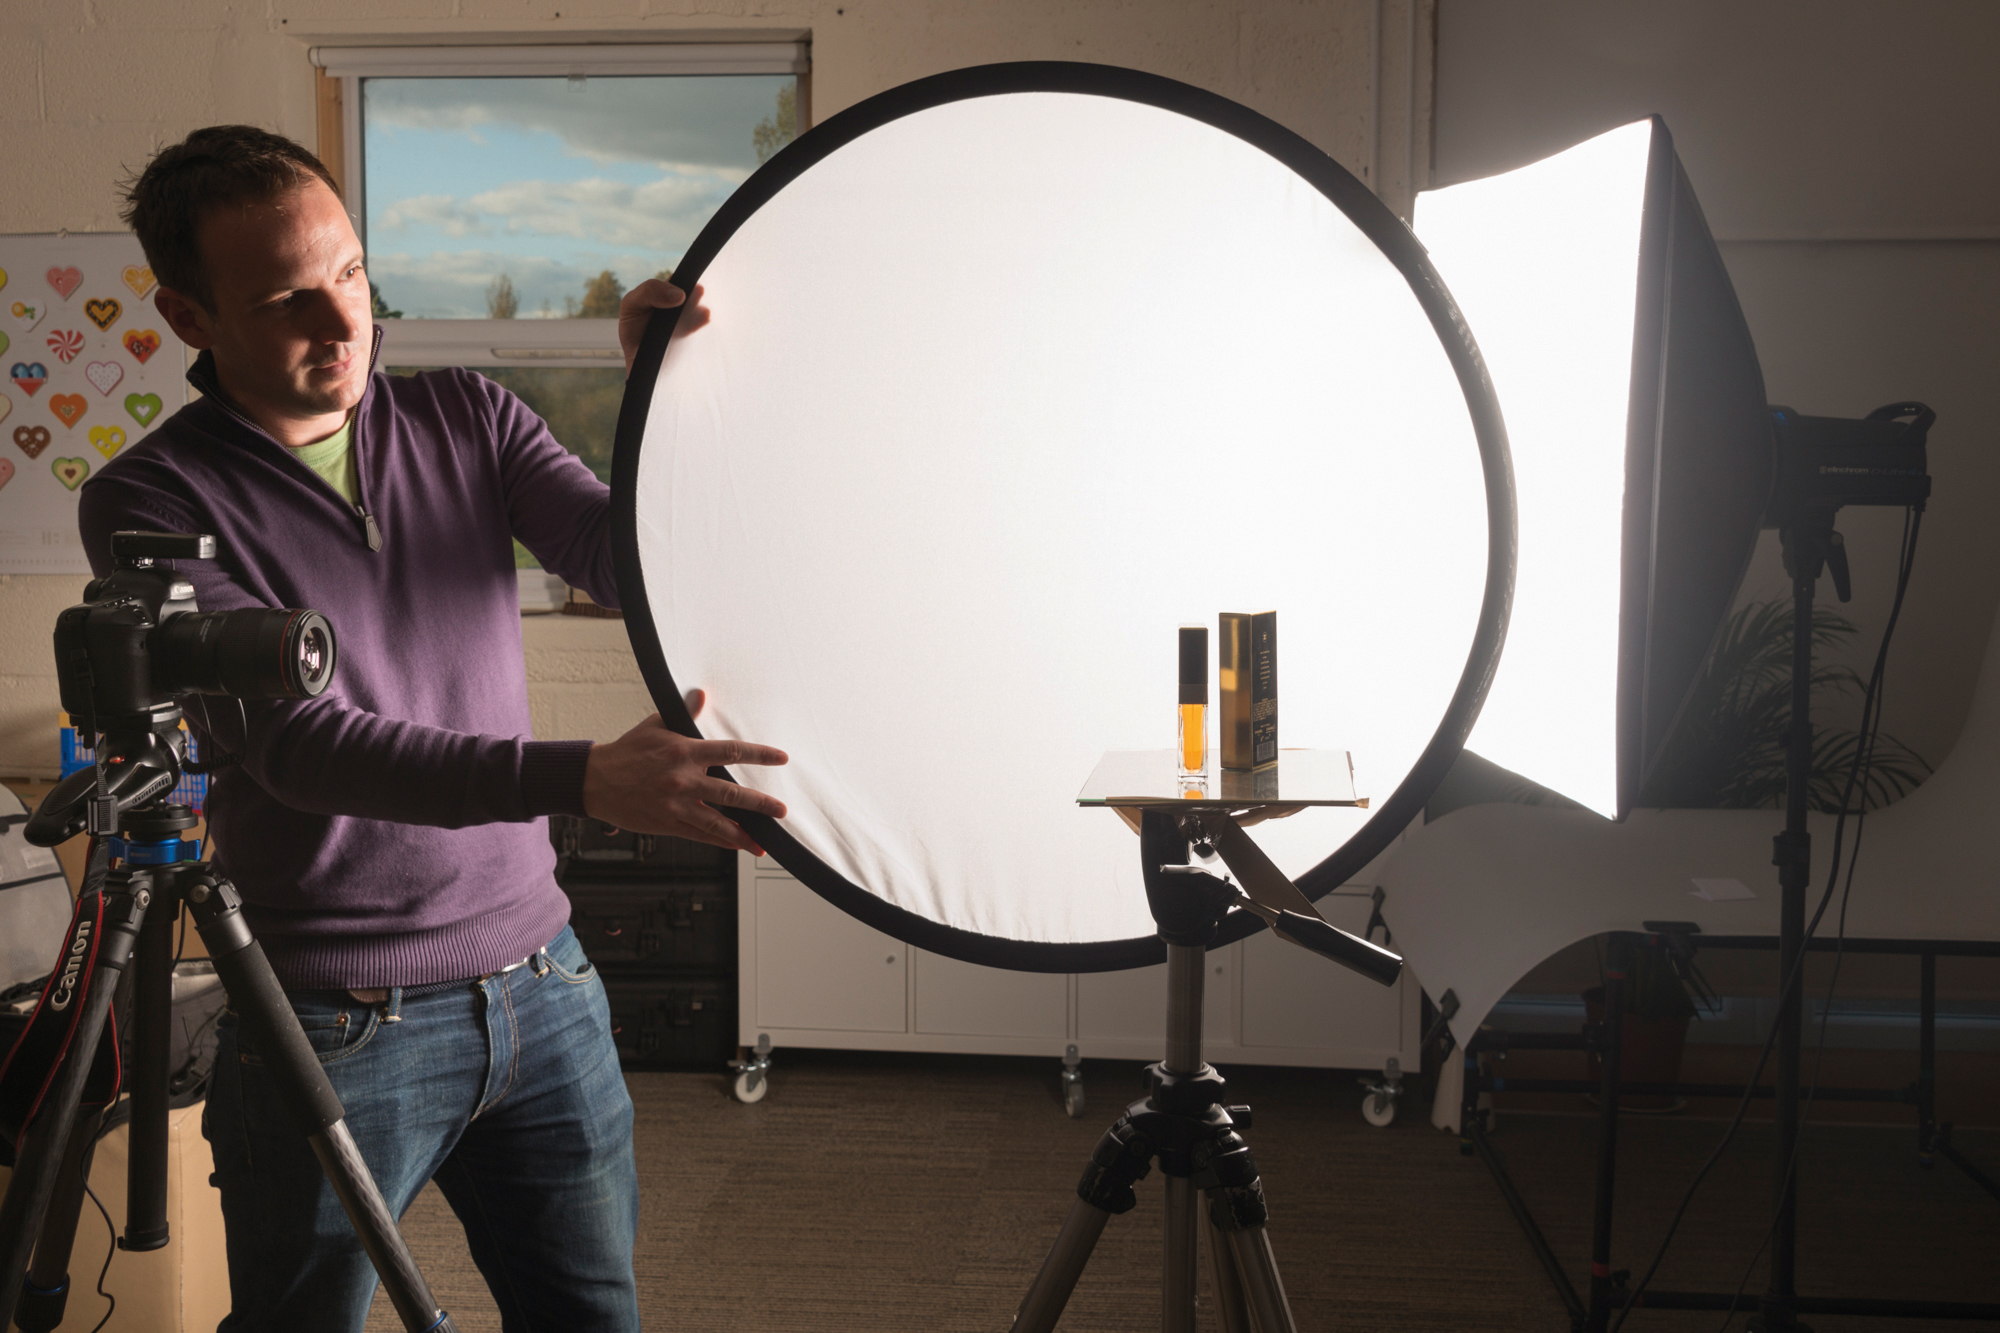
03 Experiment with lighting
Take several shots, experimenting with a reflector to bounce light into different parts, or tweaking the front softbox as you go. By holding a diffuser panel to the side we can wrap the light around the product here.
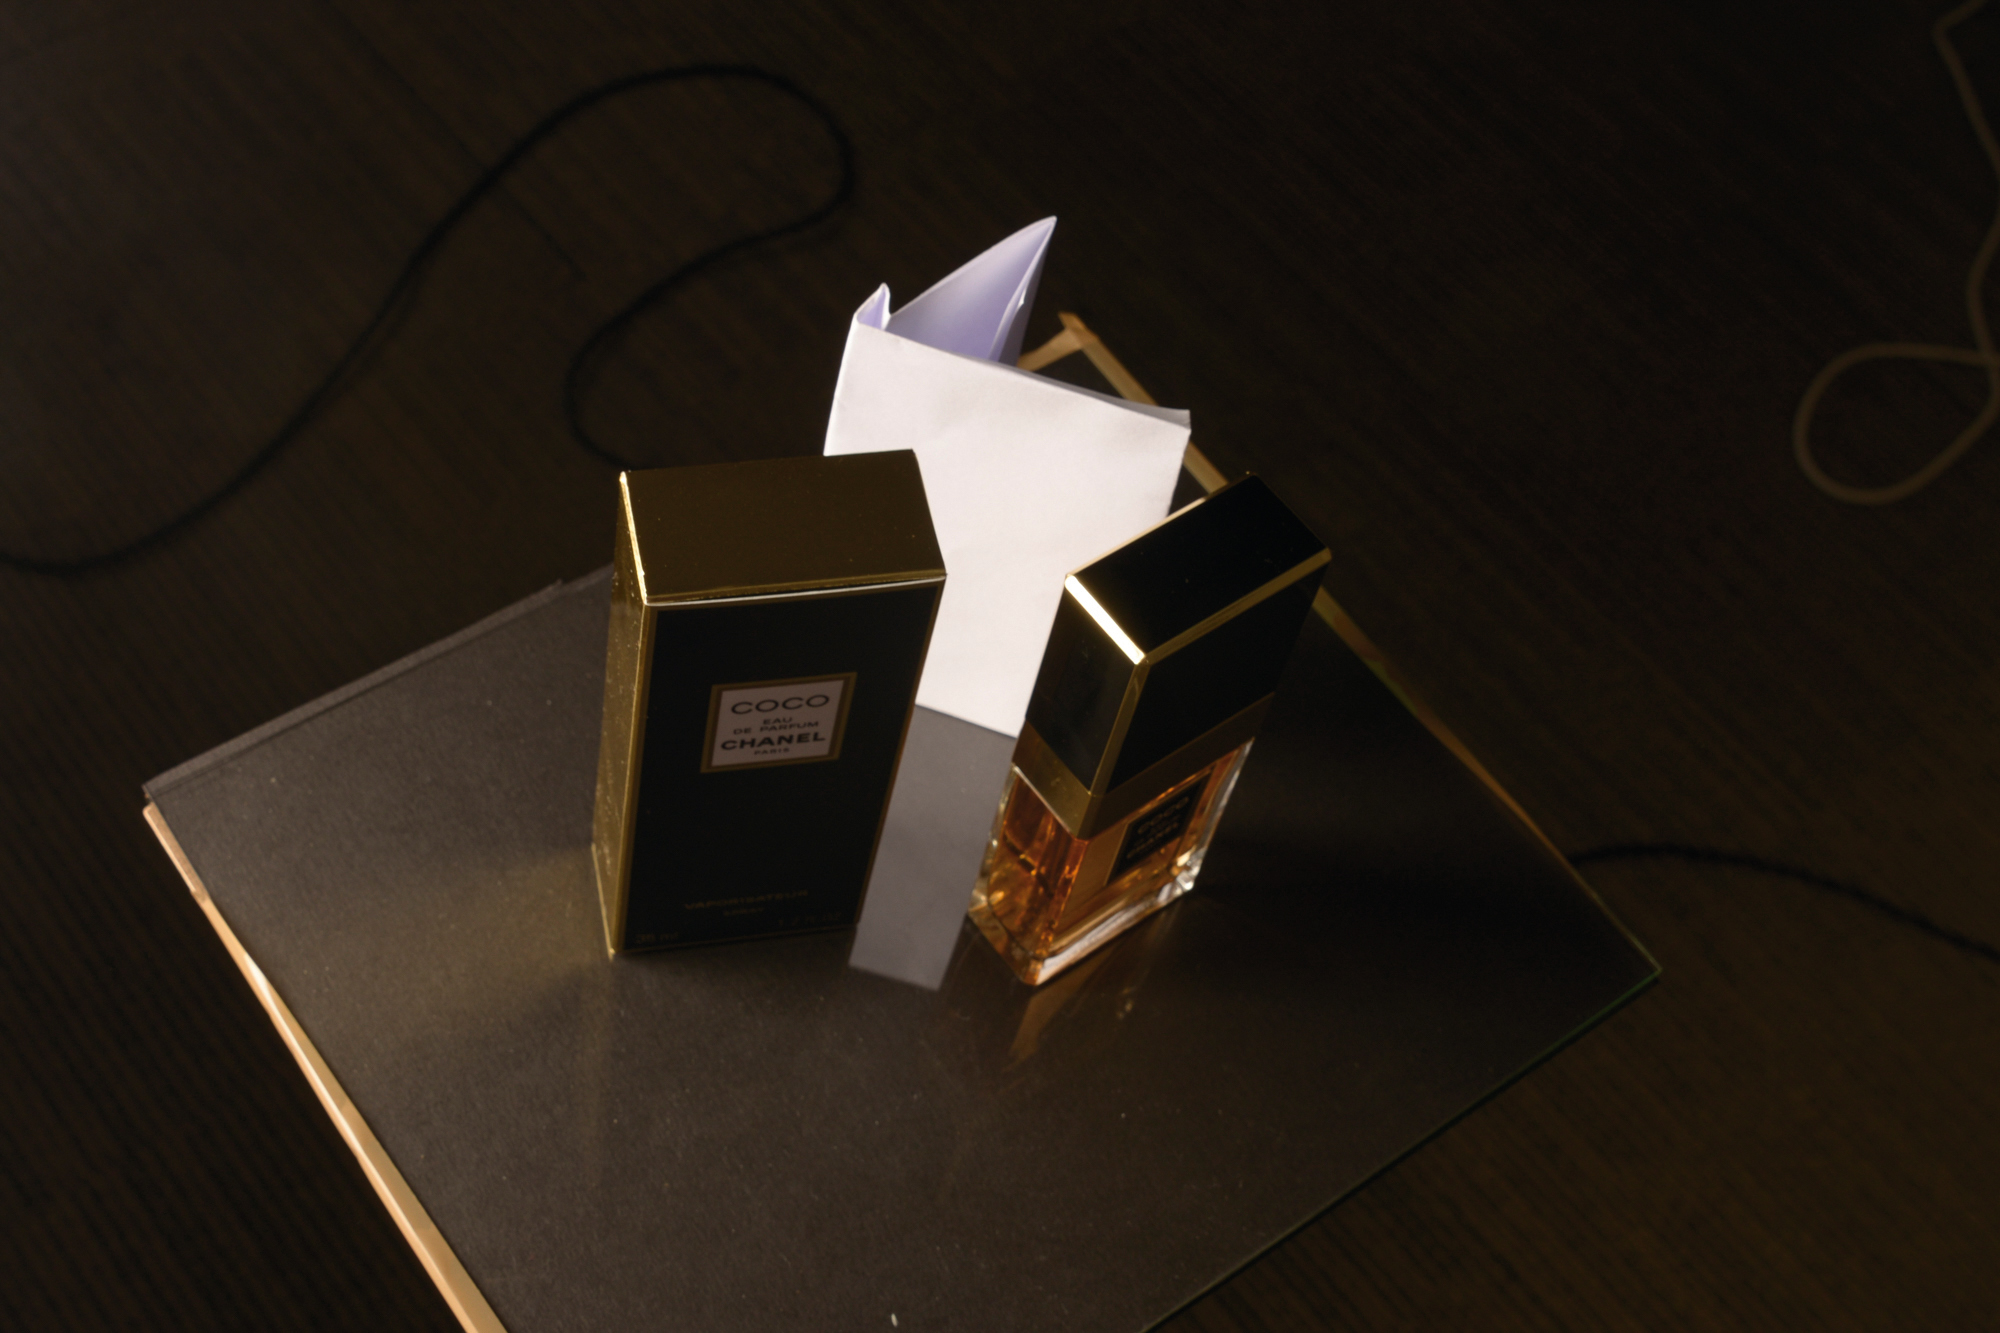
04 Bounce the light
In our initial shots the liquid looked dull. The solution was to place a white card behind the bottle, shaped to be hidden from the camera and angled to bounce light (from the softbox on the left) through the liquid.
Photoshop product skills
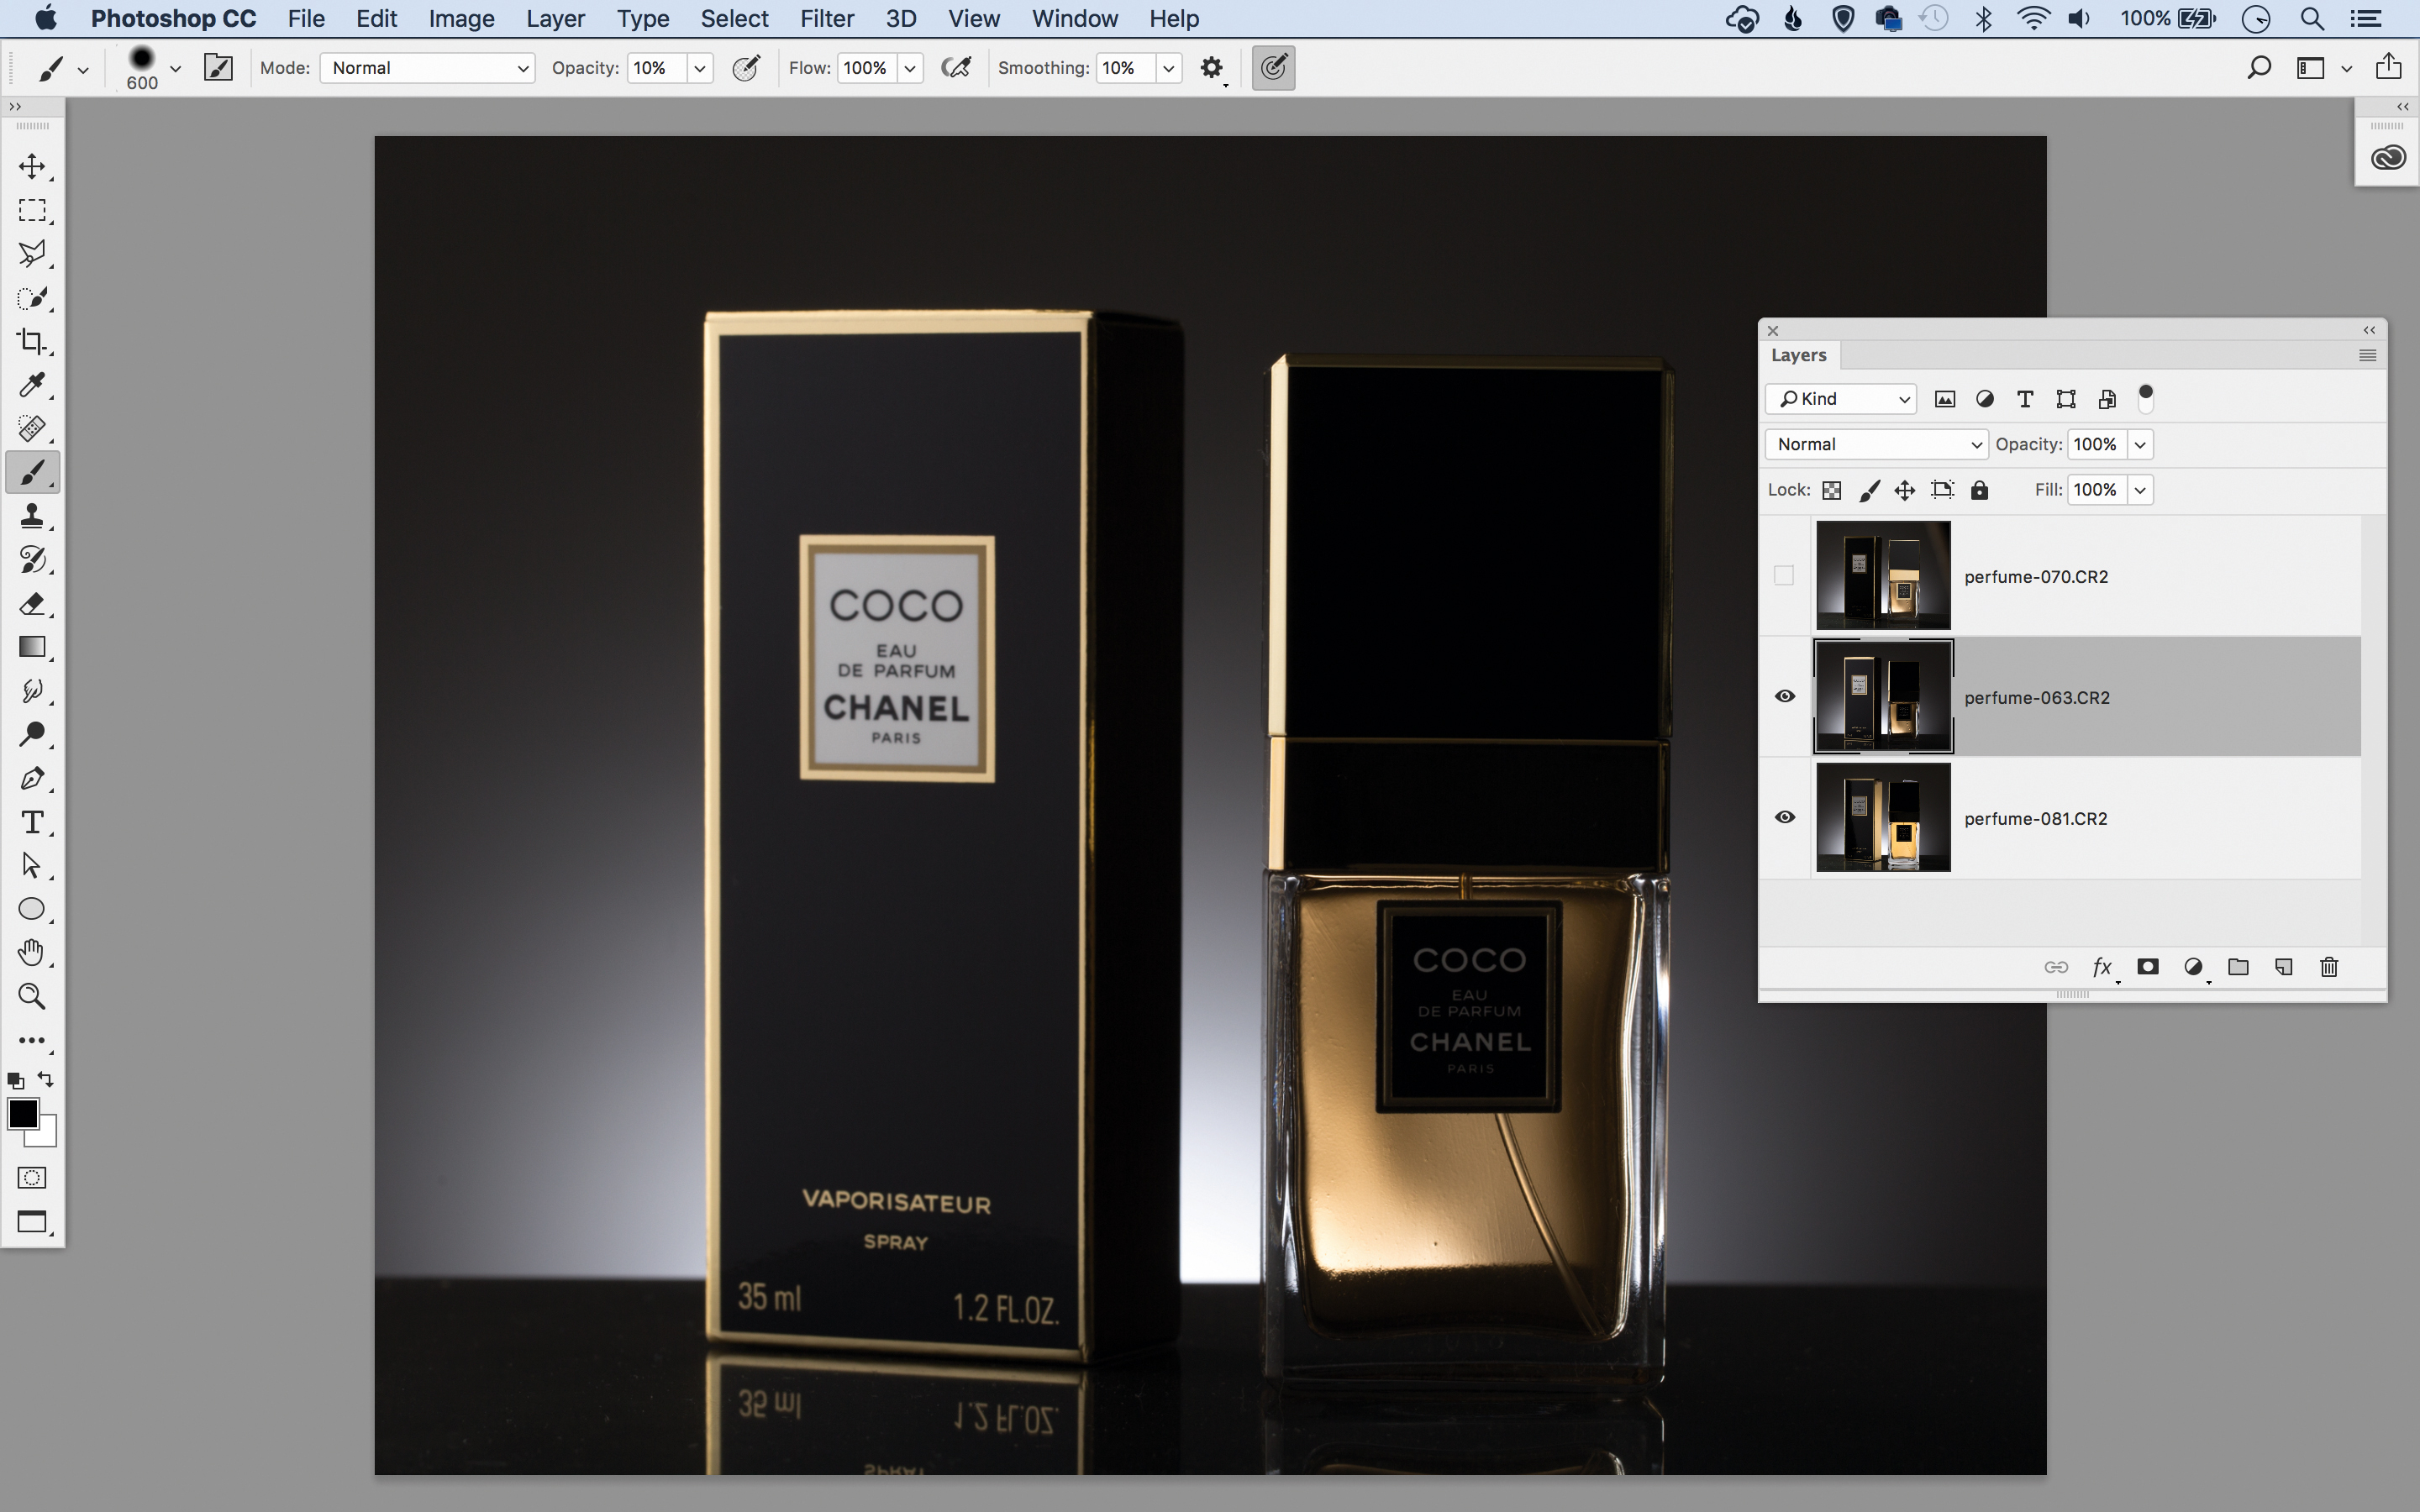
01 Combine the frames
Open images. Go to Edit>Scripts>Load into Stack, choose Open Files and hit OK. Once combined, open the Layers Panel (Window>Layers). Click the eye icons to hide all but the bottom two layers, then highlight the layer above the bottom layer.
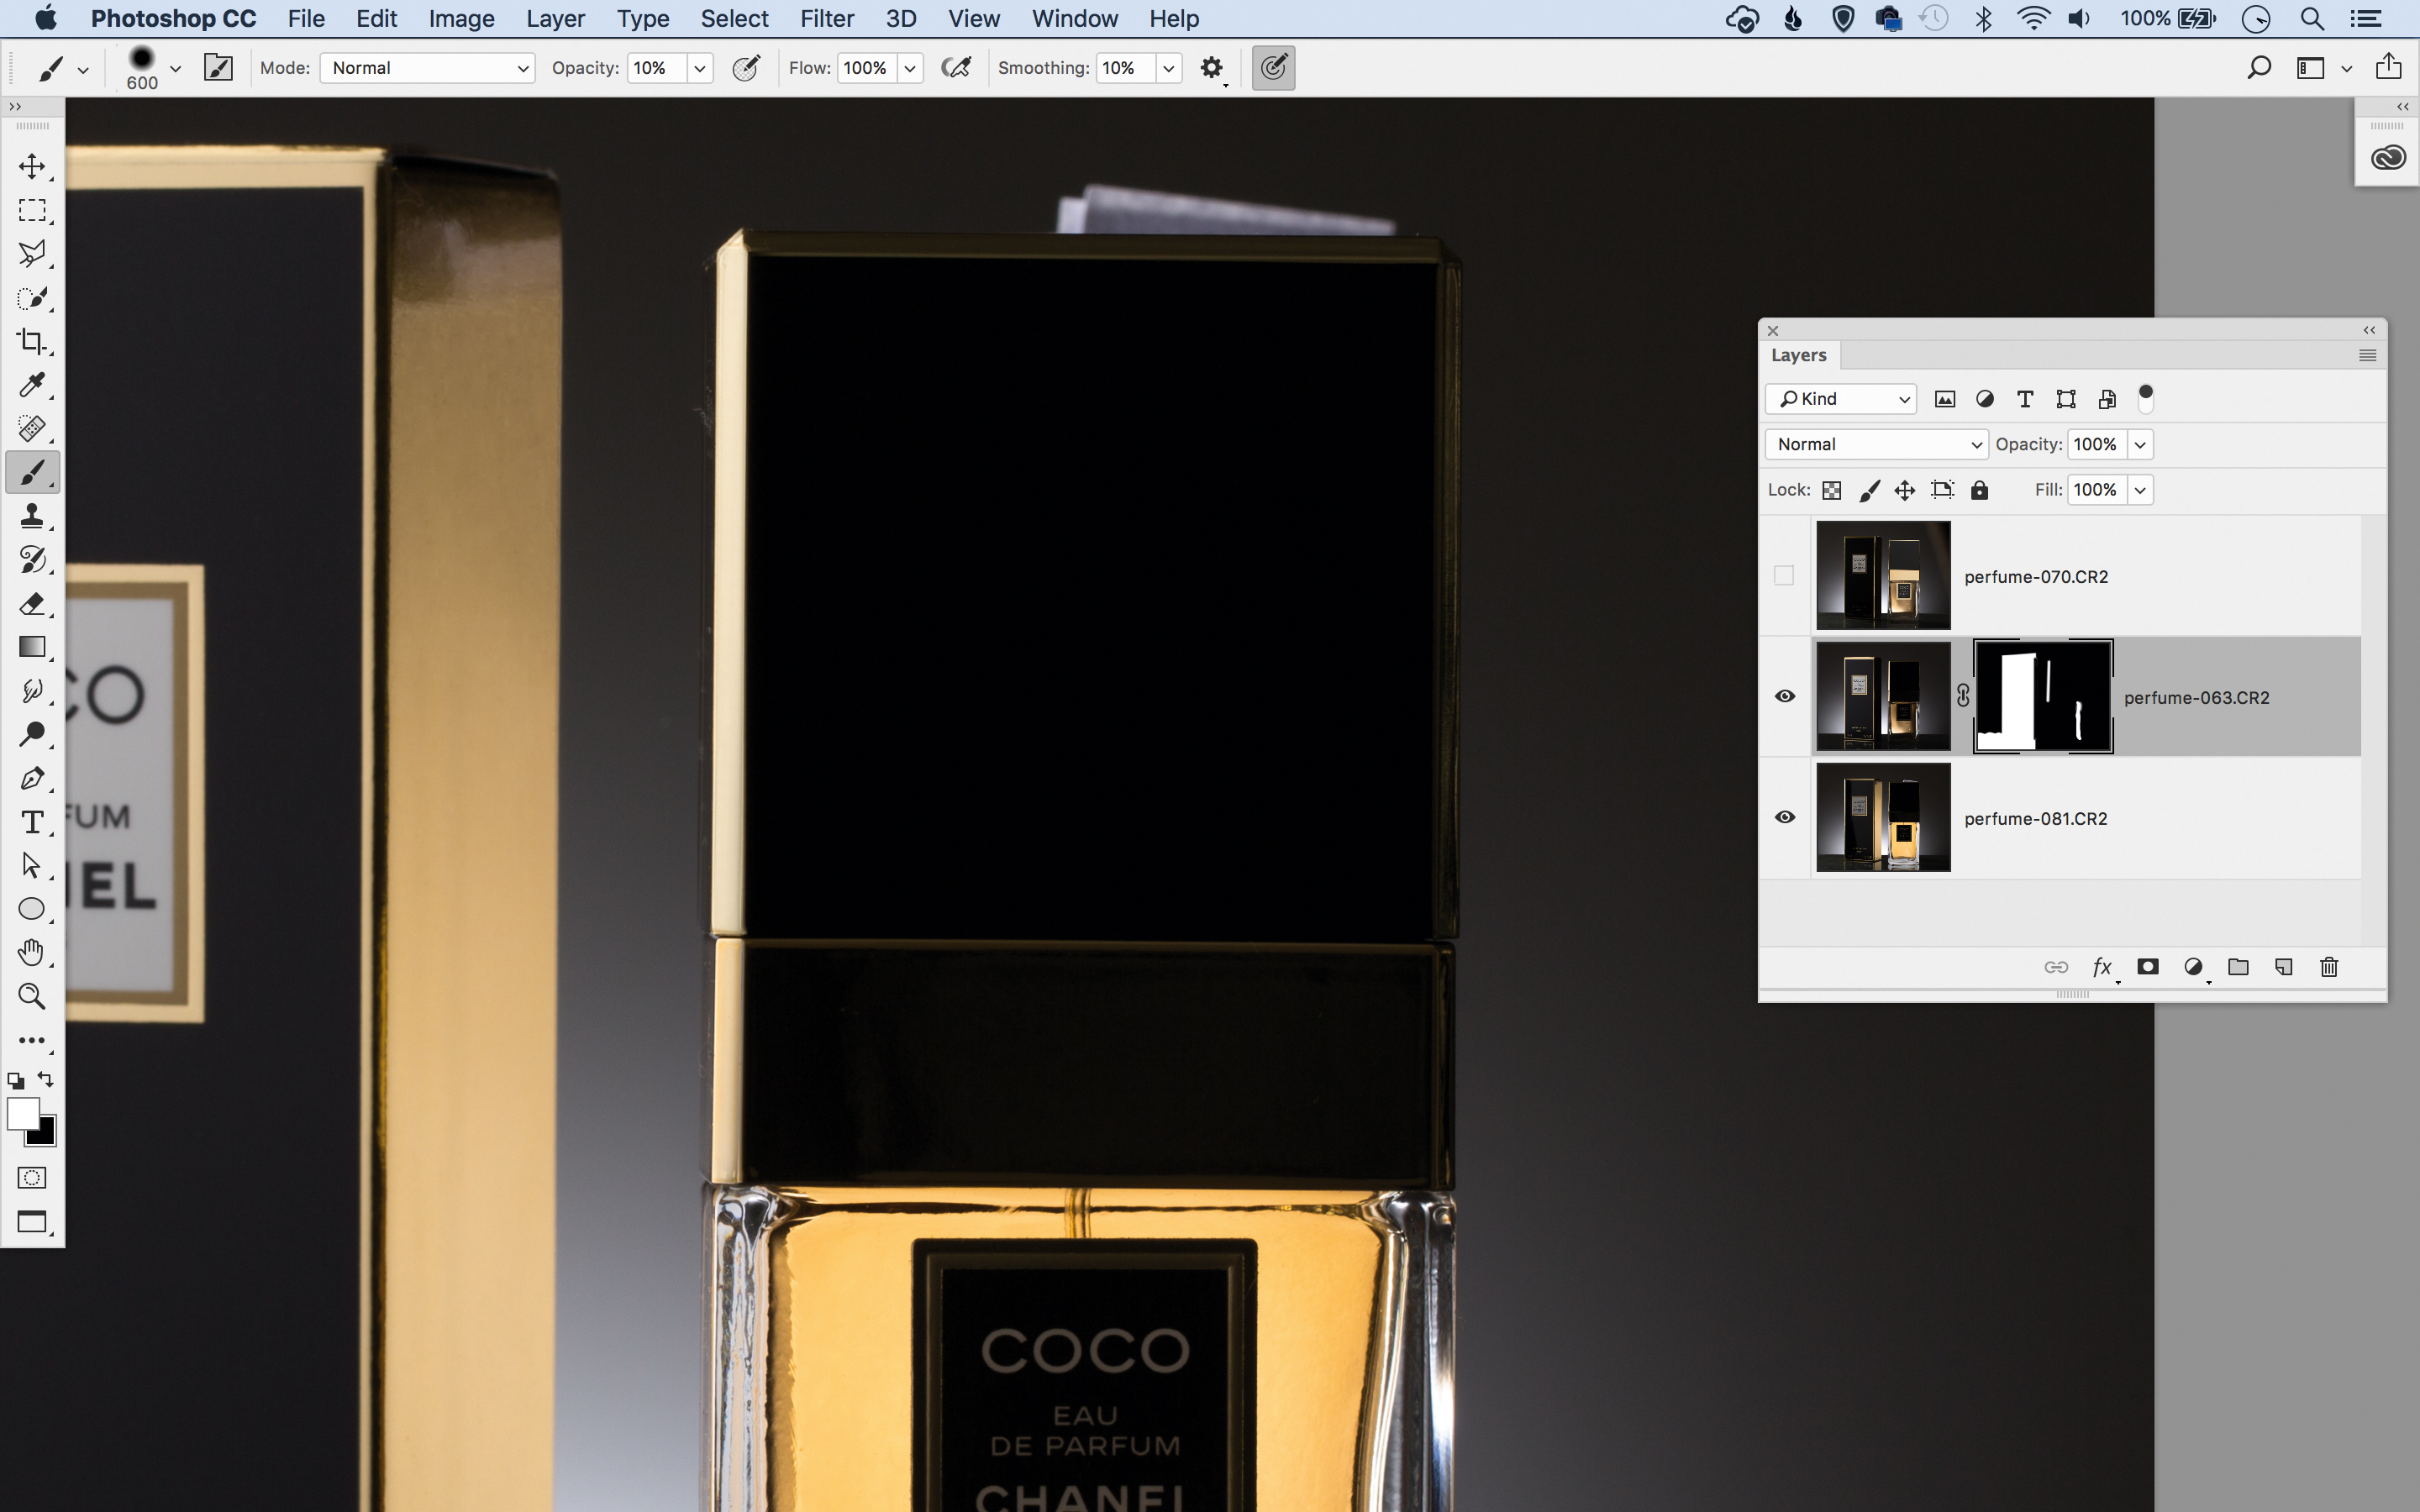
02 Paint a mask
Hold Alt and click the Add Layer Mask icon to add a mask that hides the layer. With the mask highlighted, paint with white to reveal parts of the layer. Grab the Brush tool, press D then X to set color to white. Paint to reveal parts of the layer you want to include.
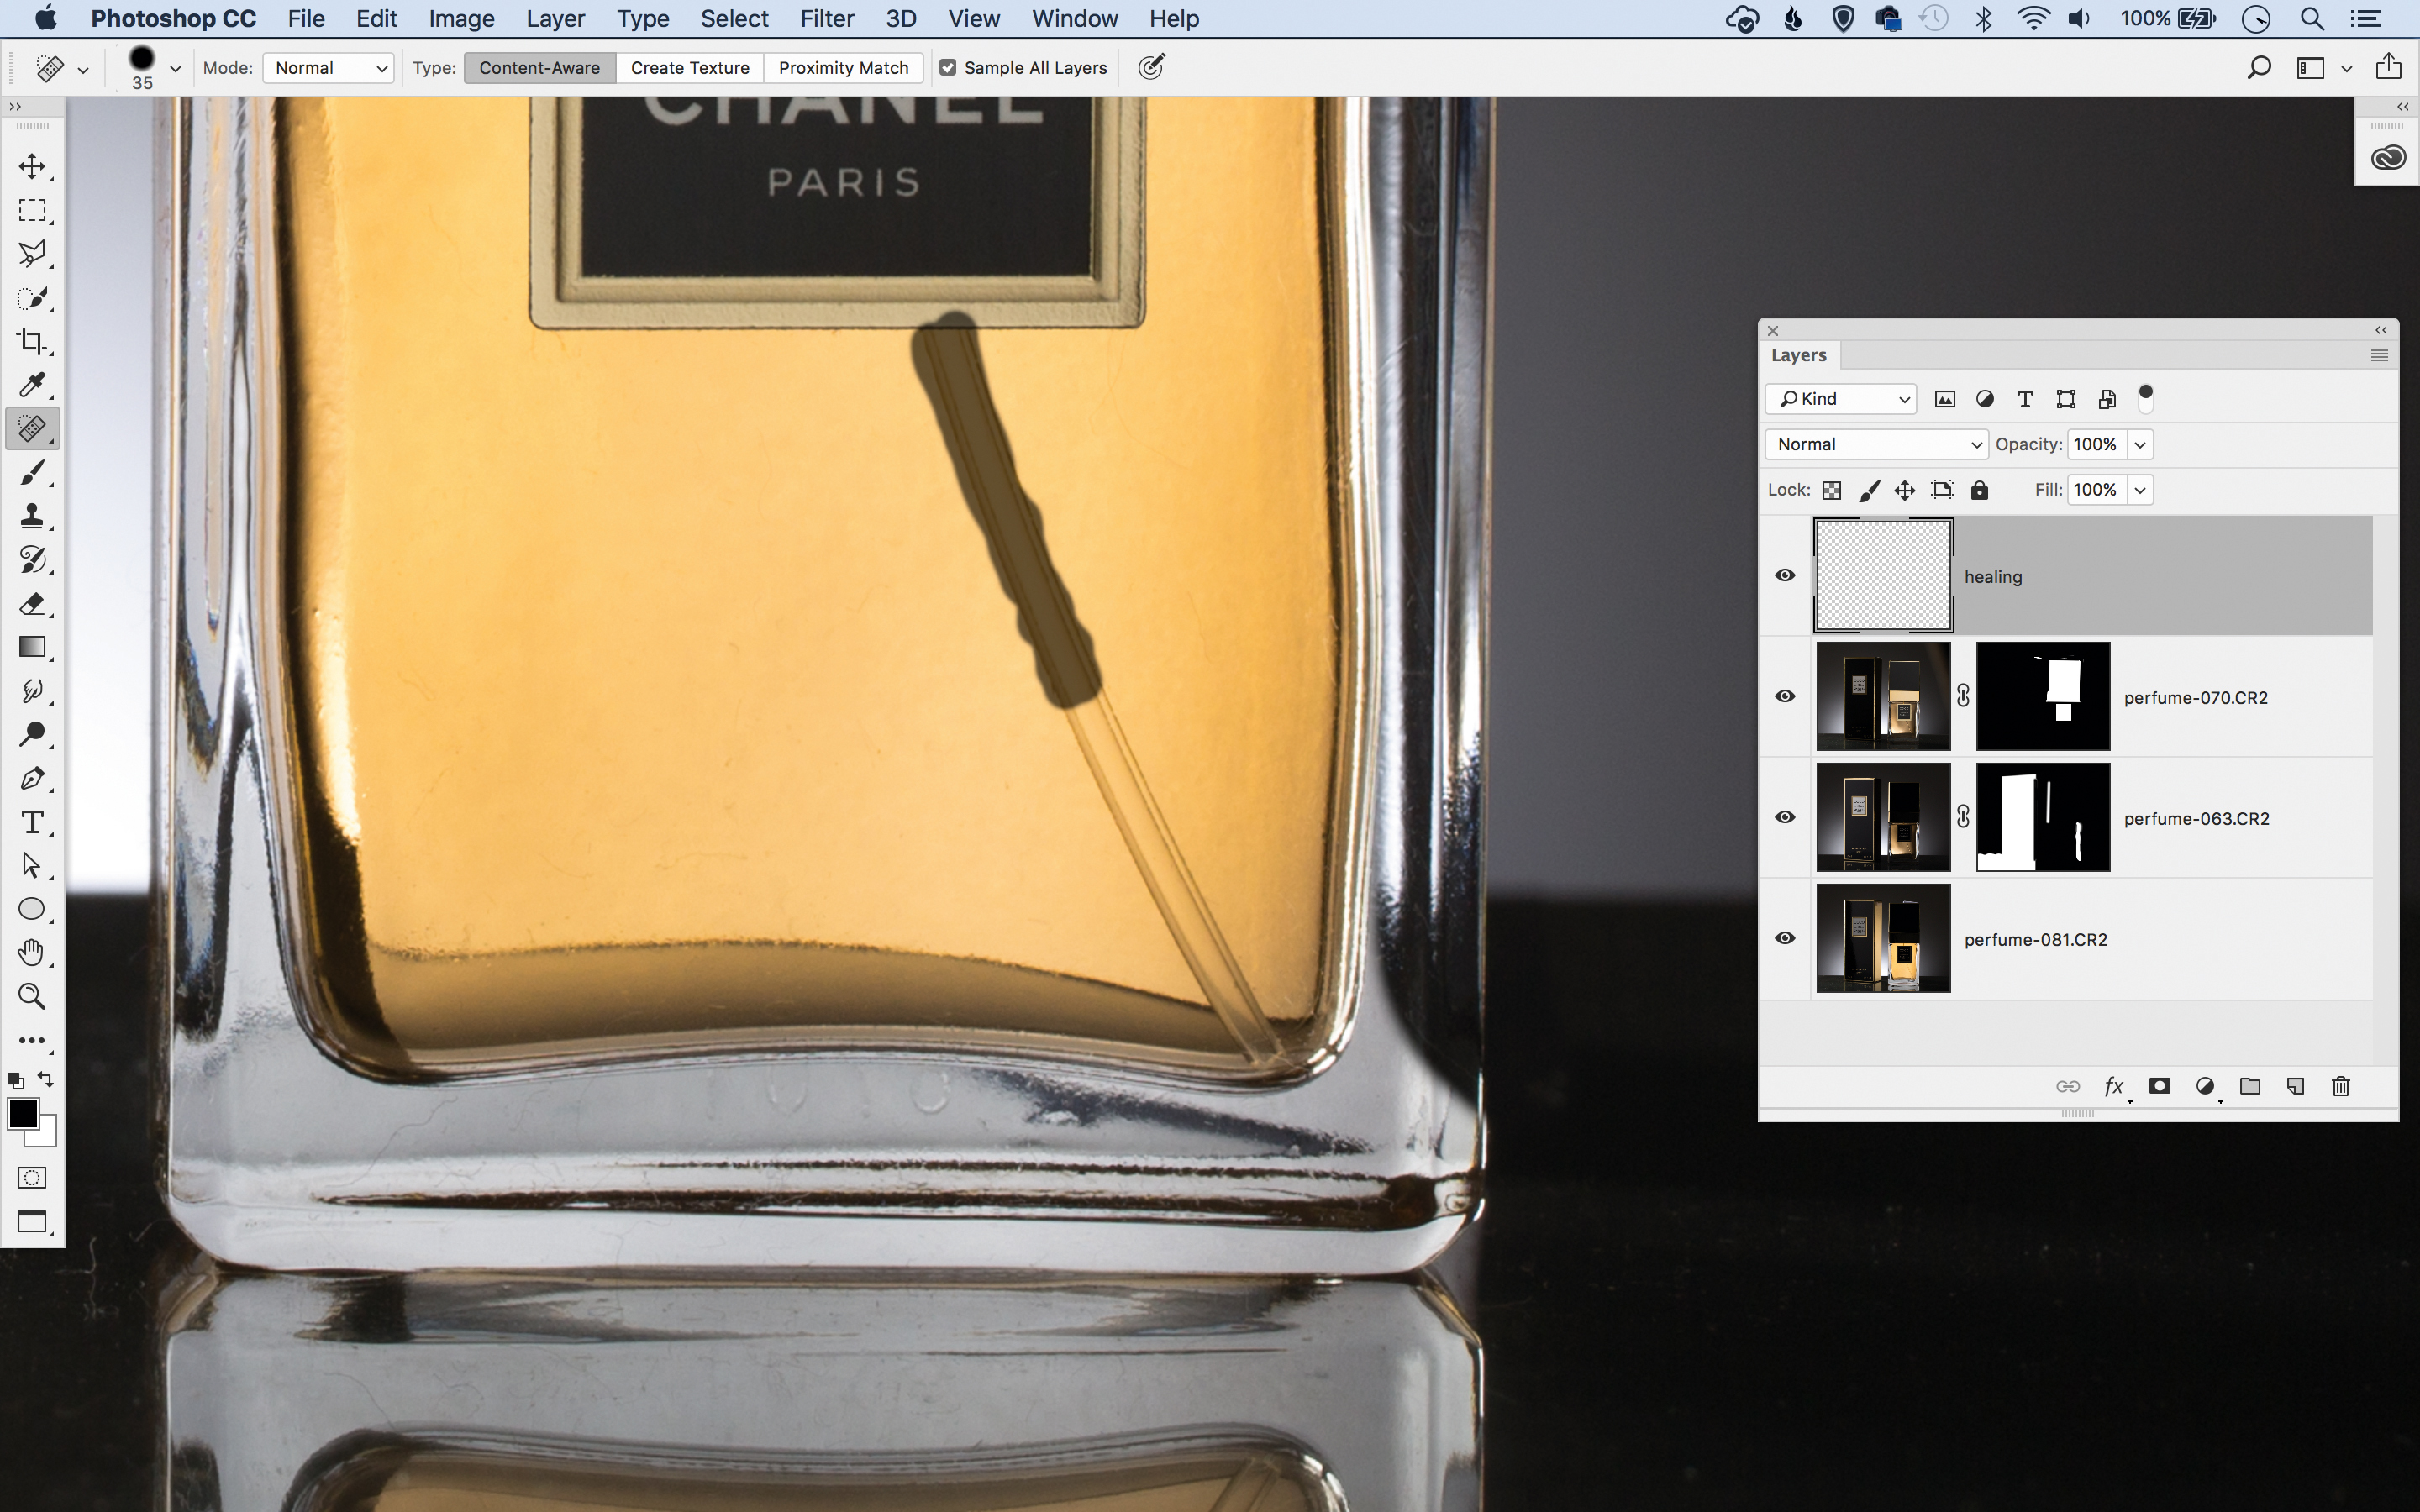
03 Remove marks
Continue masking and revealing for all layers until the best bits are seamlessly blended. Next highlight the top layer and click the ‘Create New Layer’ icon in the Layers Panel. Grab the Spot Healing Brush tool, check ‘Sample All Layers’, then paint to remove messy bits.
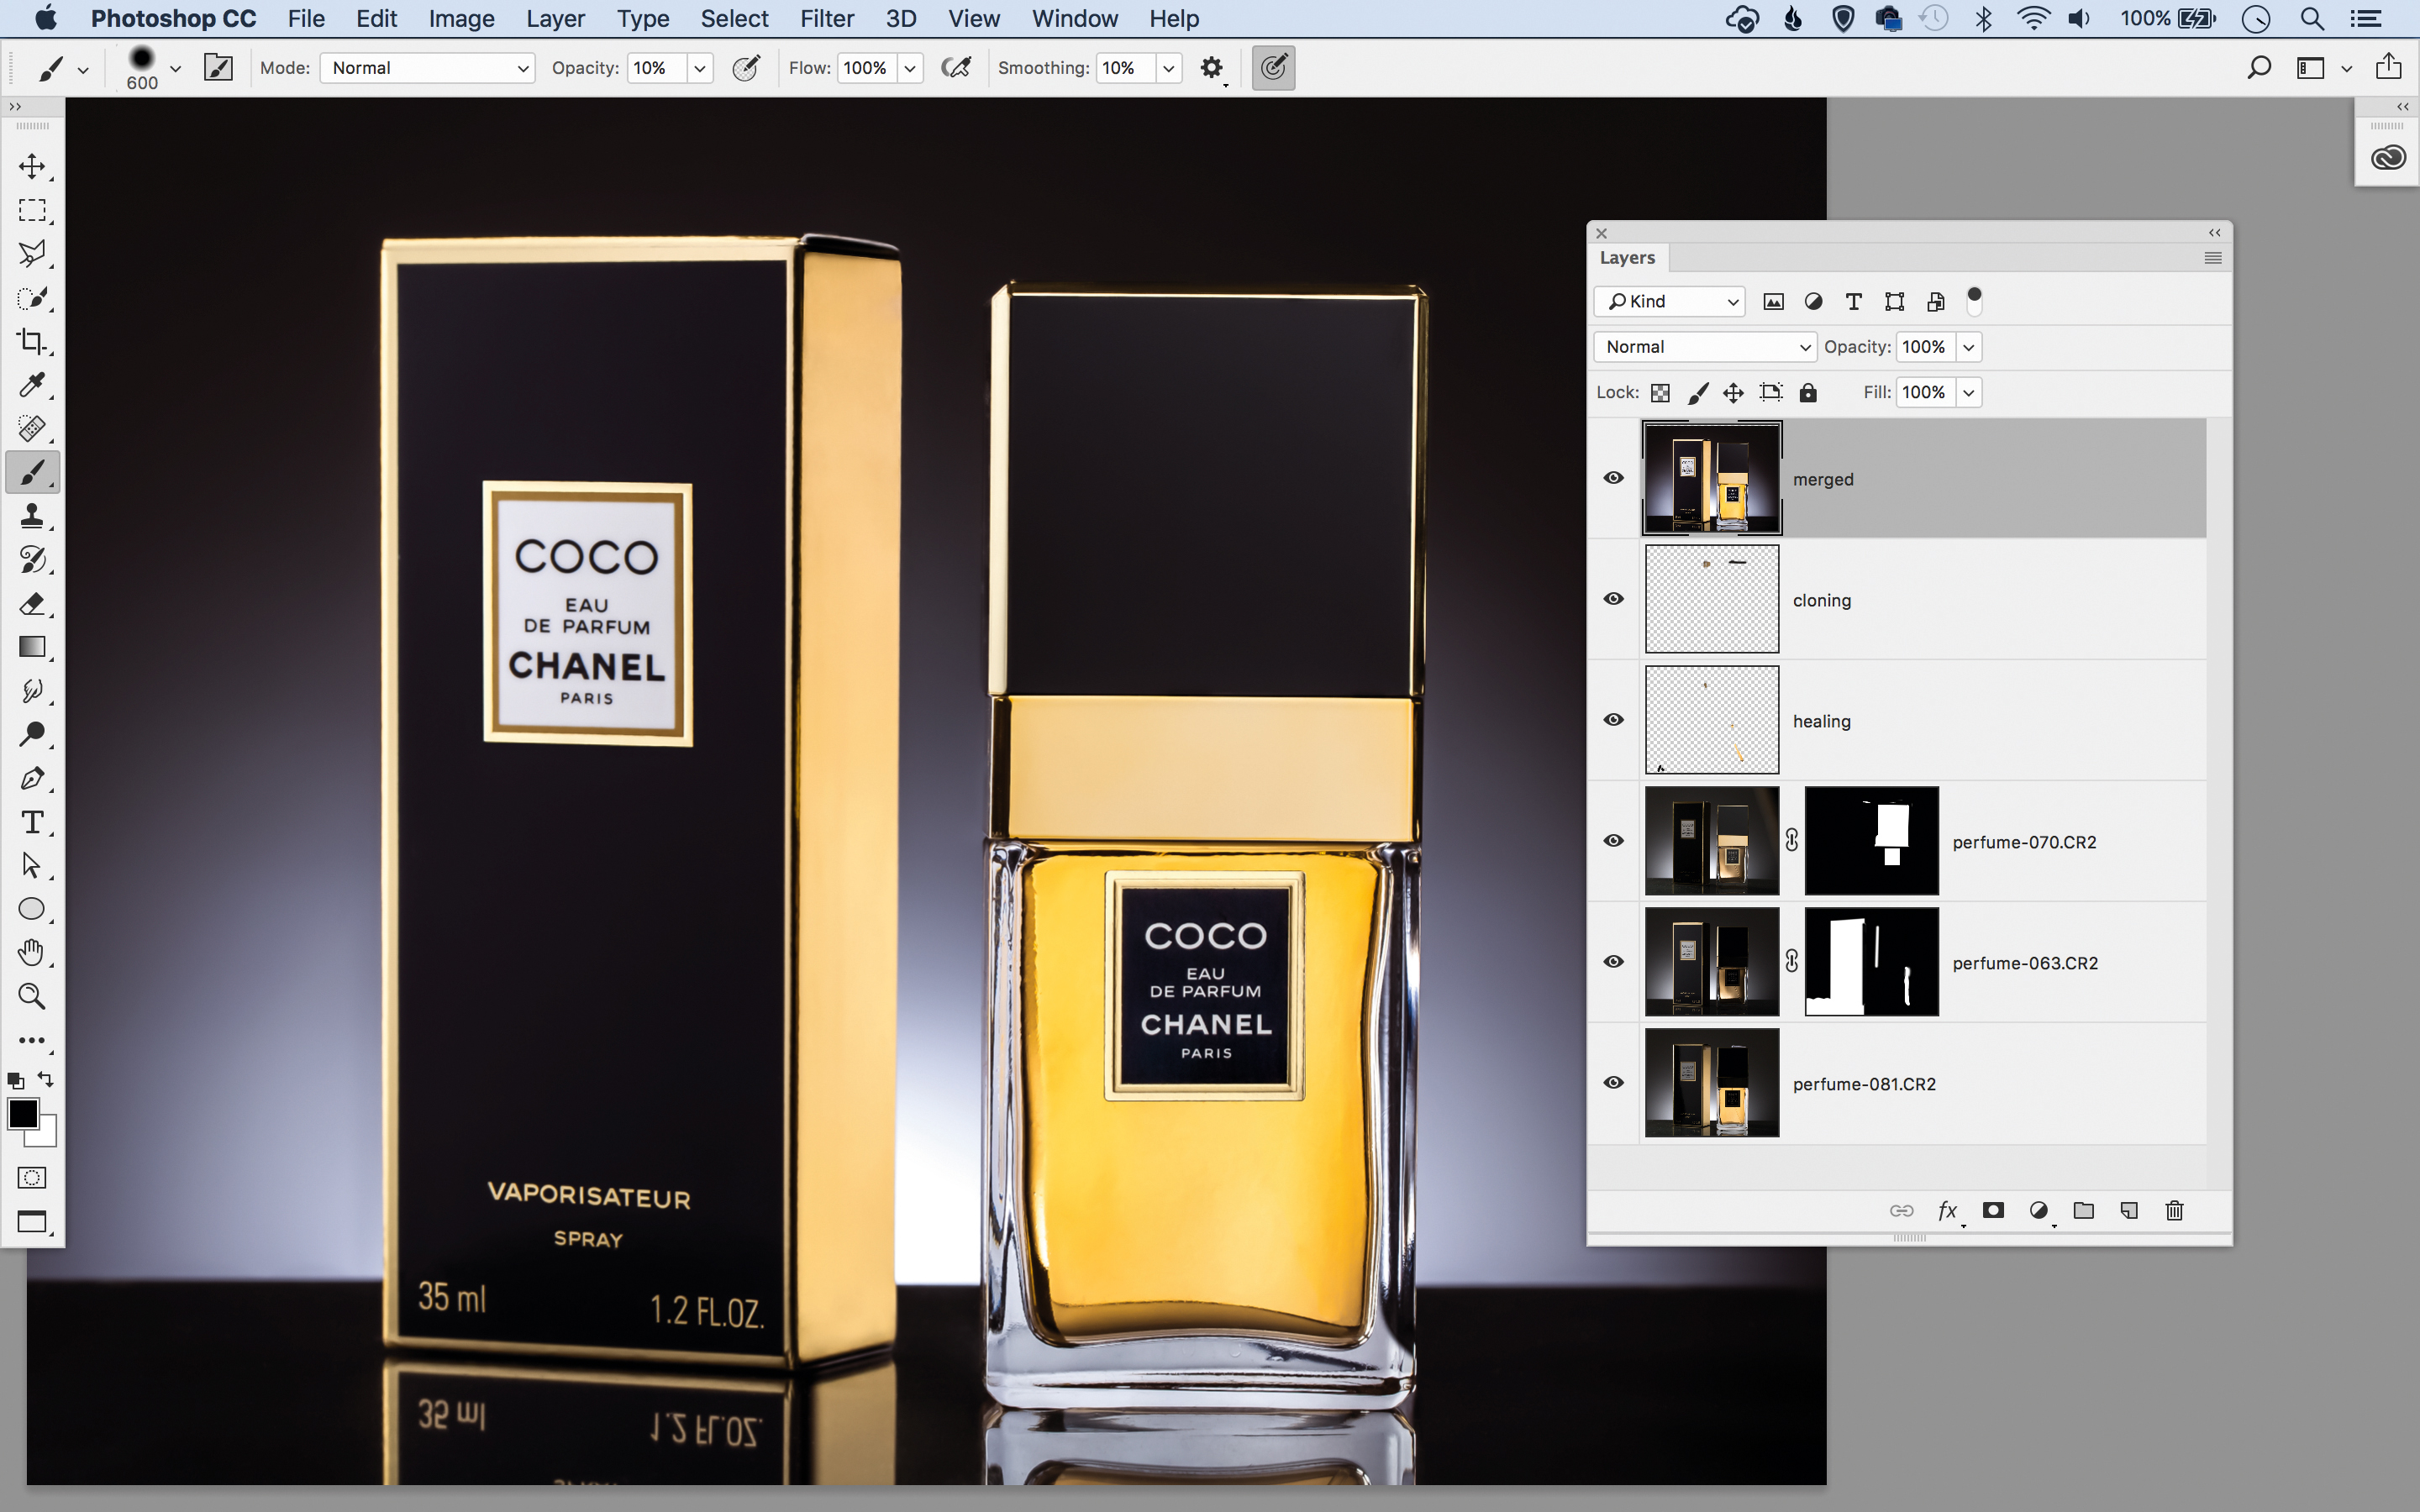
04 Tone and tidy
Make a new layer, then grab the Clone Tool. Set it to Sample: All Layers then Alt-click to sample a clean source and paint to clone messy patches and extend the black base. Hit Cmd/Ctrl+Shift+Alt+E to merge a copy. Go to Filter>Camera Raw Filter for tonal tweaks.
PhotoPlus: The Canon Magazine is the world's only monthly newsstand title that's 100% devoted to Canon, so you can be sure the magazine is completely relevant to your system.
Read more:
10 best online photography courses – from beginner guides to masterclasses
The best macro lenses in 2020: get closer to your subjects than ever before!
The best flashgun: the best strobe units for Canon cameras, Nikon and more
Get the Digital Camera World Newsletter
The best camera deals, reviews, product advice, and unmissable photography news, direct to your inbox!
The lead technique writer on Digital Camera Magazine, PhotoPlus: The Canon Magazine and N-Photo: The Nikon Magazine, James is a fantastic general practice photographer with an enviable array of skills across every genre of photography.
Whether it's flash photography techniques like stroboscopic portraits, astrophotography projects like photographing the Northern Lights, or turning sound into art by making paint dance on a set of speakers, James' tutorials and projects are as creative as they are enjoyable.
He's also a wizard at the dark arts of Photoshop, Lightroom and Affinity Photo, and is capable of some genuine black magic in the digital darkroom, making him one of the leading authorities on photo editing software and techniques.


