Home photography ideas: Make a splash with food and drink photography
Shoot still-life images with a difference and add a splash of action to static setups
Watch video: Home photography ideas – Add a splash to food photography
If you're running dry of ideas to shoot during the current isolation period, we have the cure for what ails you… a nice splash of your favorite beverage for a still life shoot with a difference!
• Get more Home photography ideas
Still life photography enables us to take control of every aspect of our image. We can arrange our props how we like and change the lighting to our heart’s content, until we achieve the exact image we want. With the camera on a tripod, we can tweak compositions and shoot in moody low light if we desire; with a static shot, shutter speed becomes irrelevant.
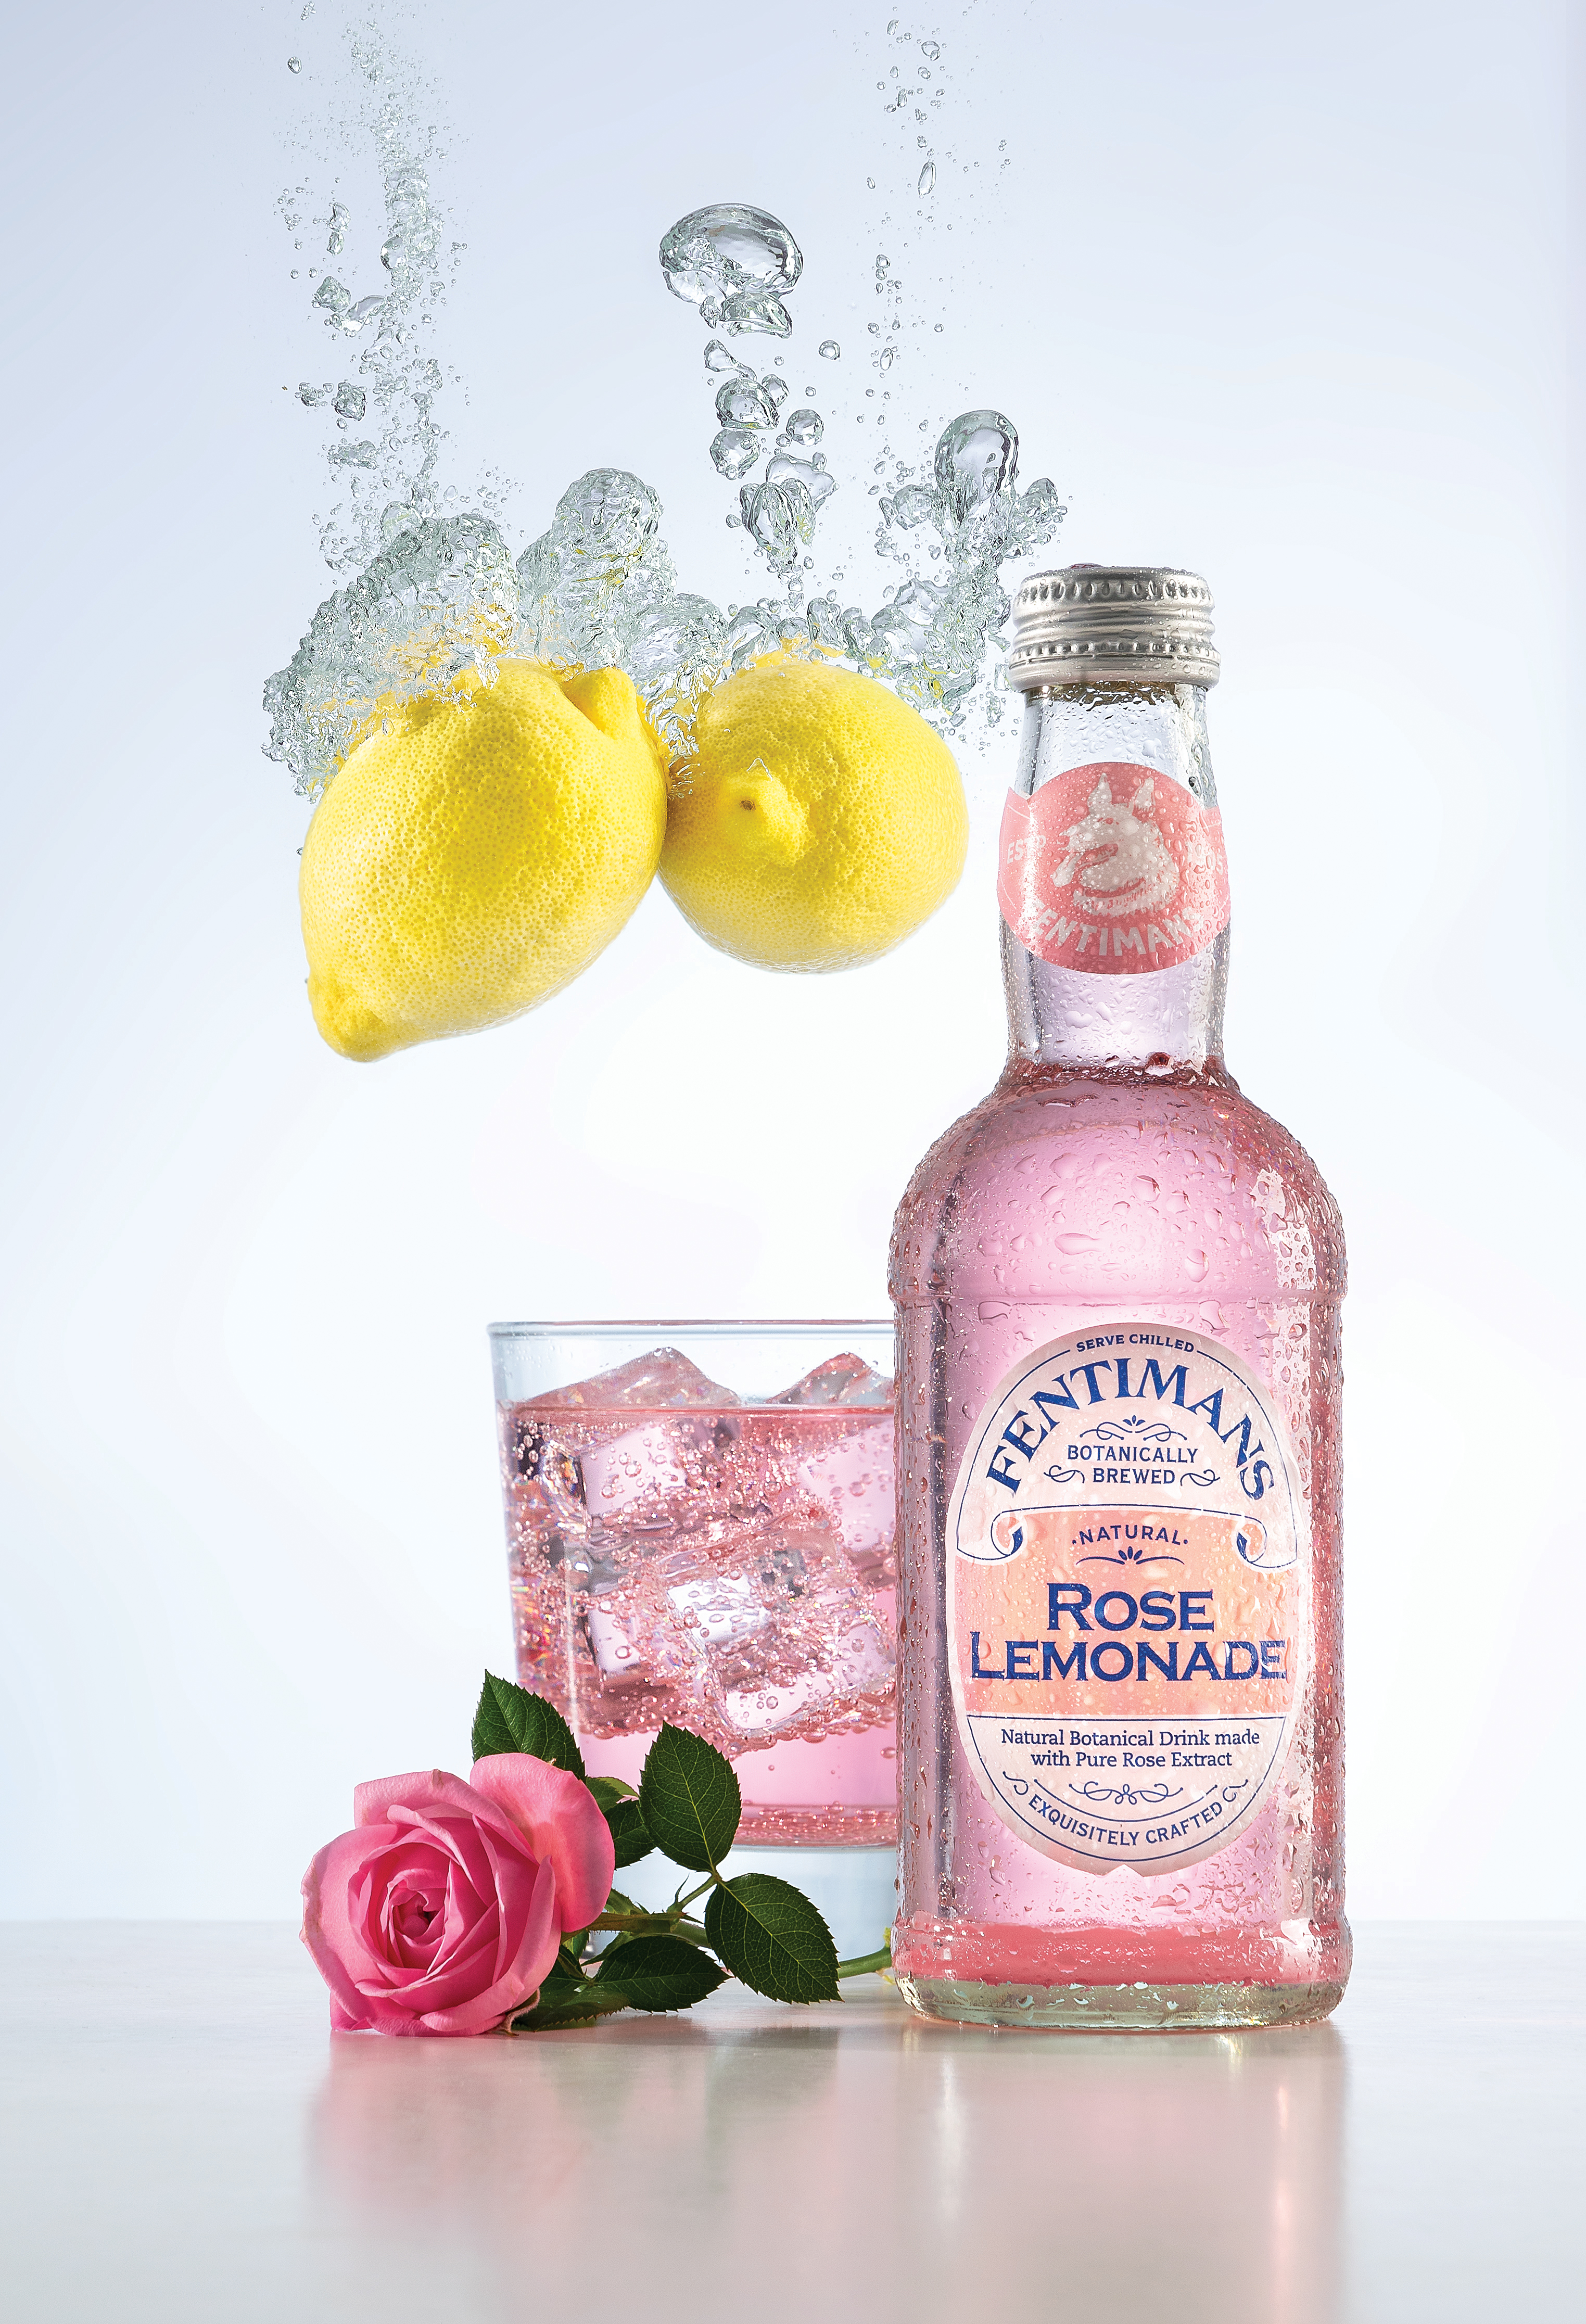
However, we’re going to show you how to add a little expression to a still life by including a sense of movement in your scene. Our subject is a bottle of rose lemonade, and to add interest we’ll dress the scene with a glass of the sparkling beverage, include an actual rose and a couple of lemons as the backdrop – frozen as they splash into a container of water.
• See also Best camera for food photography
While our camera is still locked solidly in place on a tripod, timing becomes everything. As well as ensuring that we hit the shutter at the precise moment that the falling lemons enter the frame, we have to freeze the moment to avoid unsightly subject blur – and we’ll achieve this with a set of studio lights.
The best camera deals, reviews, product advice, and unmissable photography news, direct to your inbox!
We’ll employ some other tricks, too. We want our lemonade to look ice-cold and refreshing, with that straight-from-the-fridge look. However, hot studio lights would quickly melt ice cubes in our drink and evaporate any condensation forming on the bottle and glass, so we’re going to have to fake things a little…
• The best books on food photography
01 Prep your frame
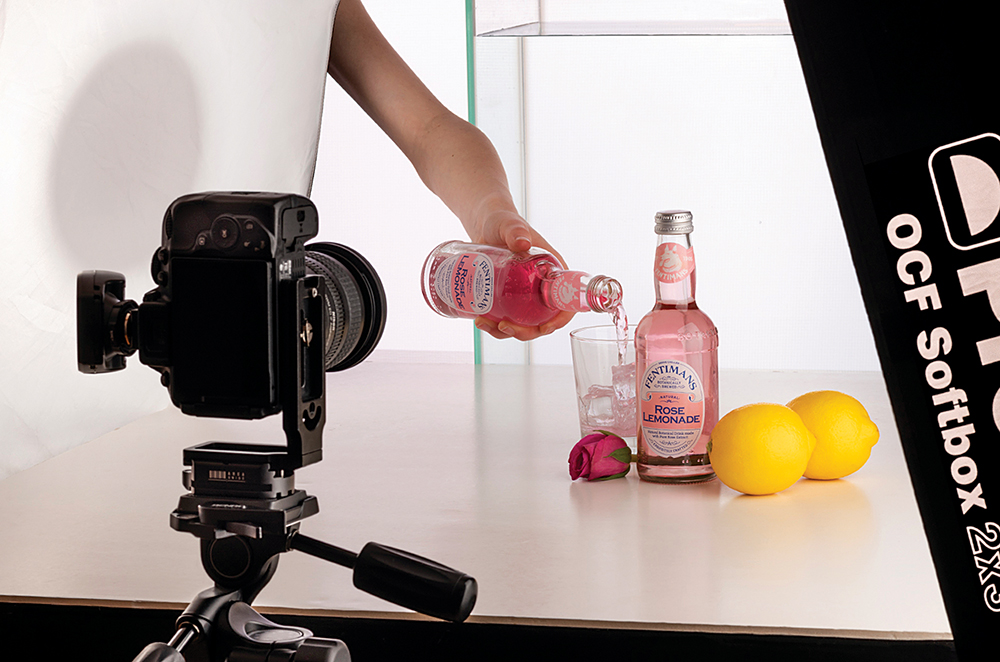
You’ll need two bottles of your chosen beverage – it’s best to choose stylish ‘boutique’ bottles, rather than something from the supermarket ‘value’ range. Coat the label of one with clear varnish so that it remains waterproof when the water droplets are applied. Then pour some of the sparkling drink from the second bottle into a clean glass tumbler until it’s half-full, and place them on a reflective surface.
02 Dress the scene
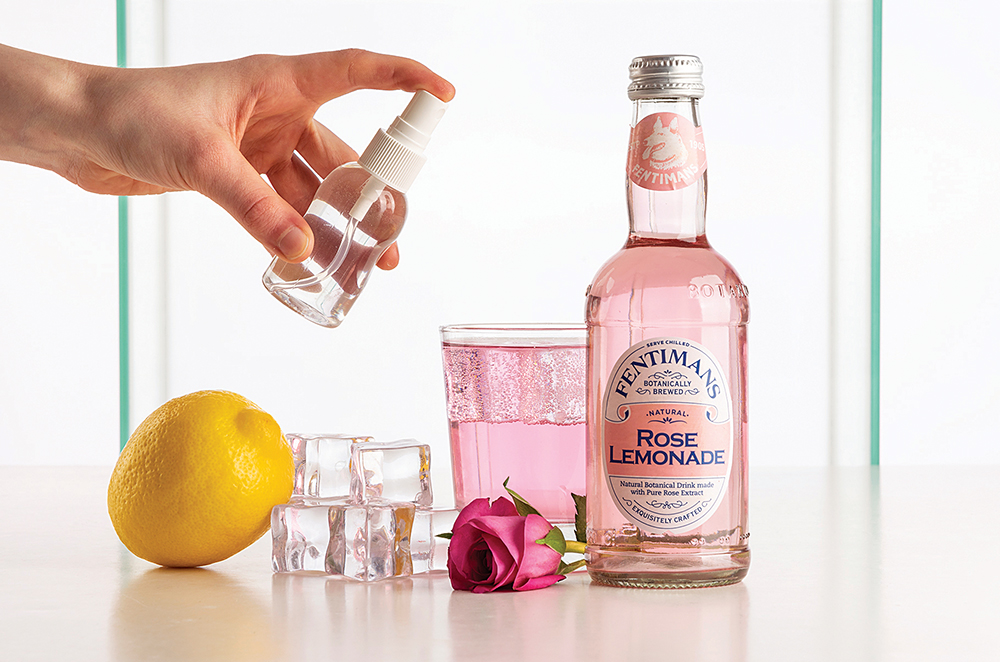
We positioned a rose between the bottle and the glass, in front of a tank full of water. Top up the tumbler with acrylic ice cubes – real ice will melt too quickly. Next, mix a combination of water to glycerine at a ratio of approximately 2:1 and spray onto the bottle and glass tumbler to give them that refreshingly chilled look.
03 Camera settings
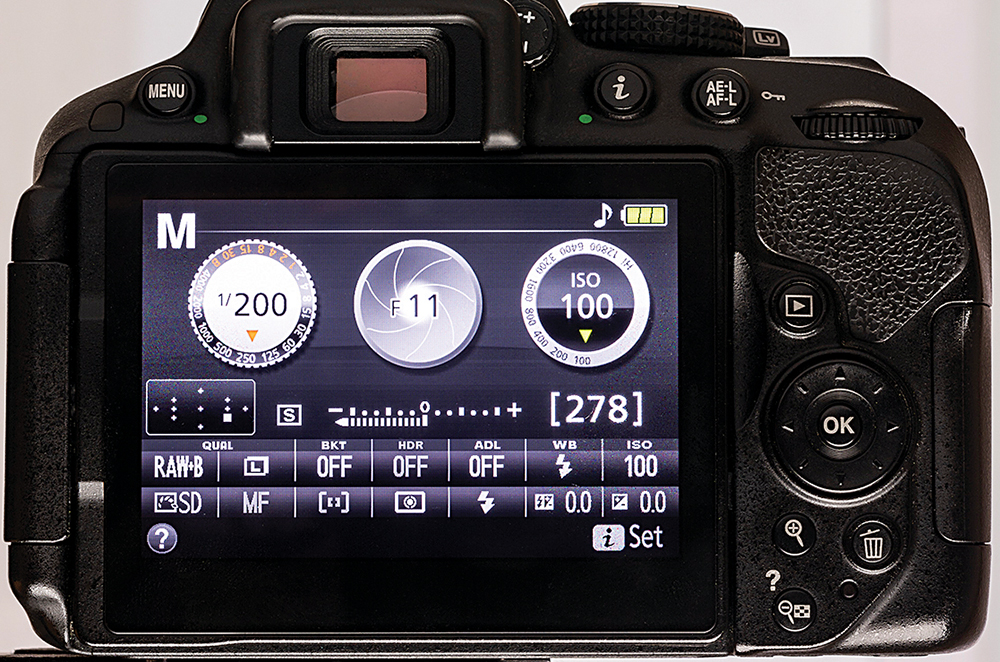
Set the shutter speed to the flash sync determined by your camera body – in this case, we're shooting at 1/200 sec. Set an aperture of f/11 to give plenty of depth of field, and your lowest possible ISO for maximum image quality. Focus on the bottle, then switch to manual focus to lock it in place and turn off the lights. A test shot should produce a very underexposed dark frame.
04 Let there be light
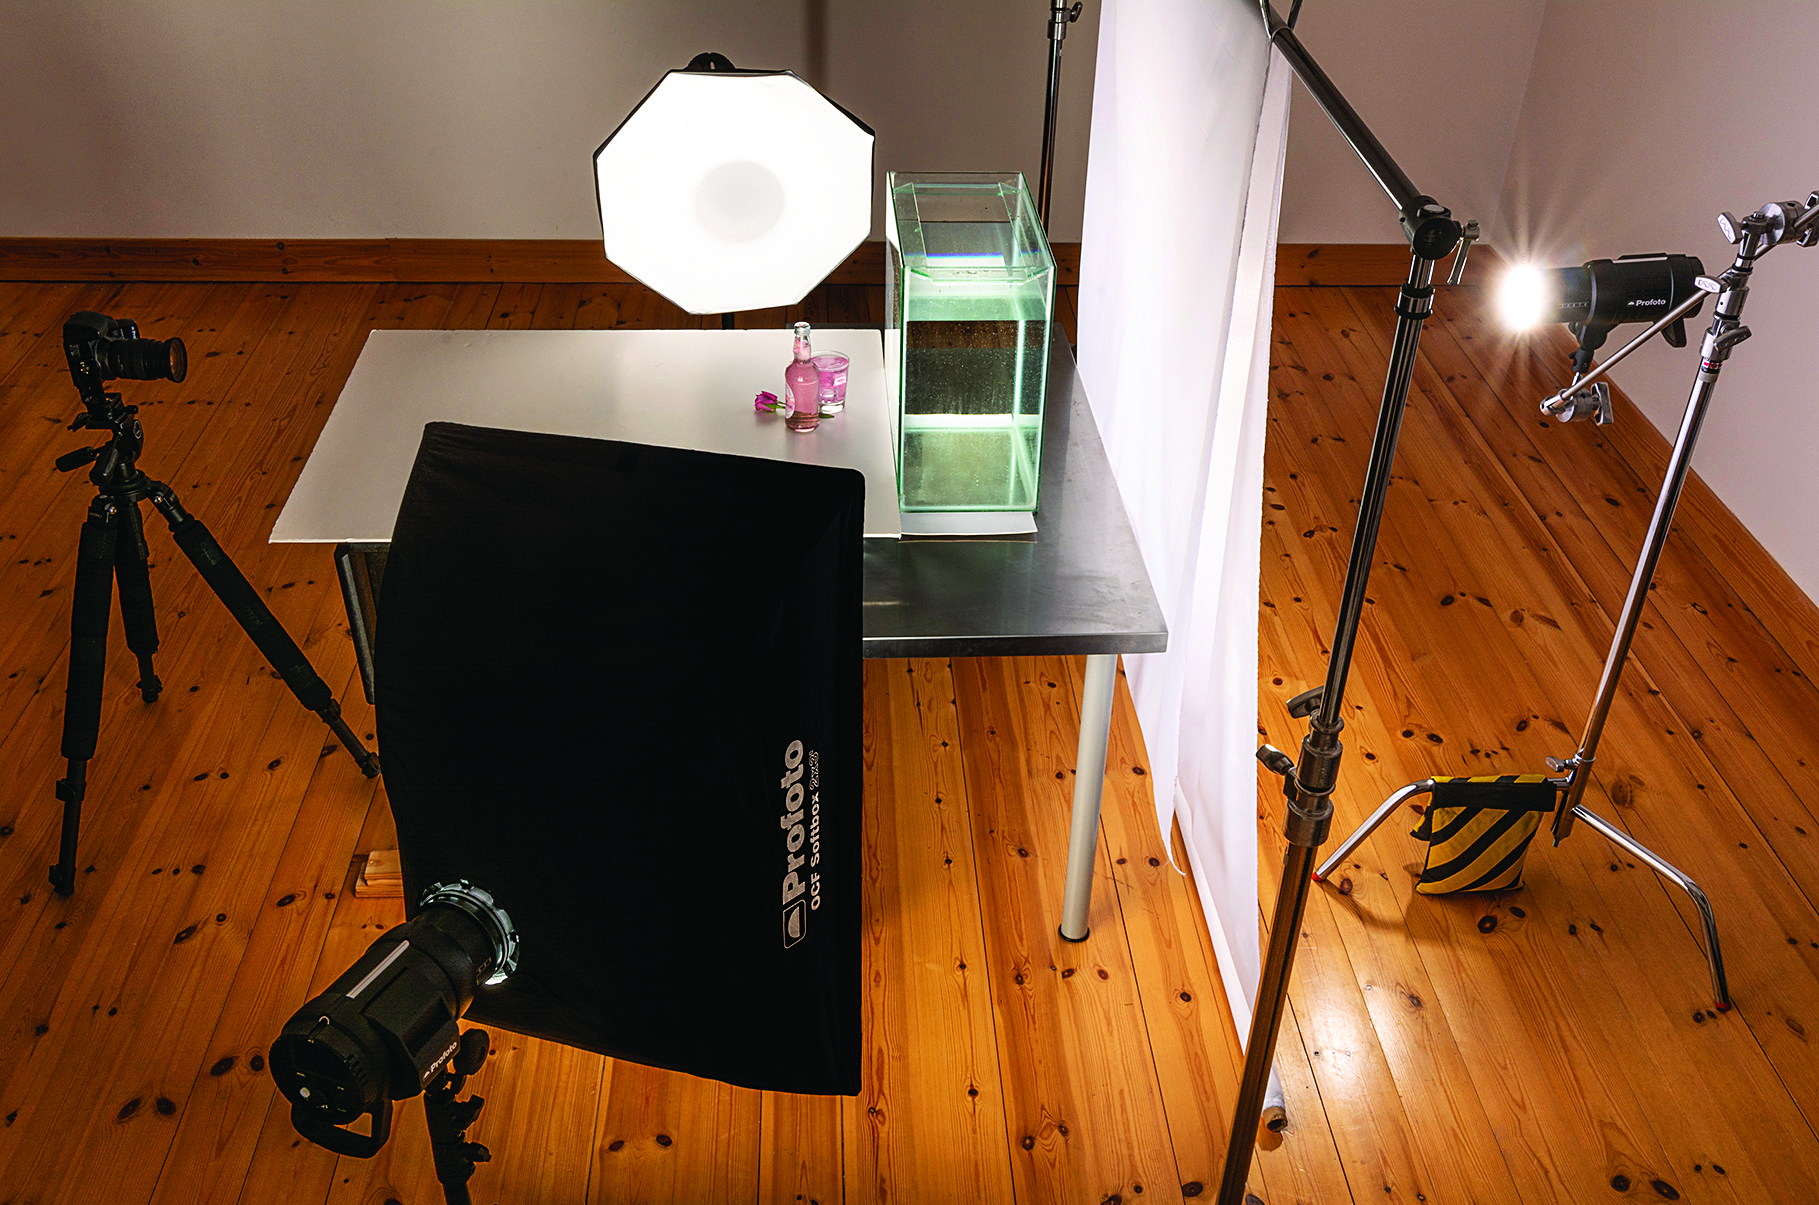
In this project we’re using three Profoto studio lights – a key, a fill and a backlight – all set at different power outputs to light our scene in a subtly balanced way. (You can also use speed lights to achieve the same results, though you'll need to pump up the power as strobes pack less of a punch.) Position the key light to the right of the setup; the fill to the left and the third light behind the tank, with a translucent diffuser in between to soften up the lighting in the backdrop.
05 Power to the lights
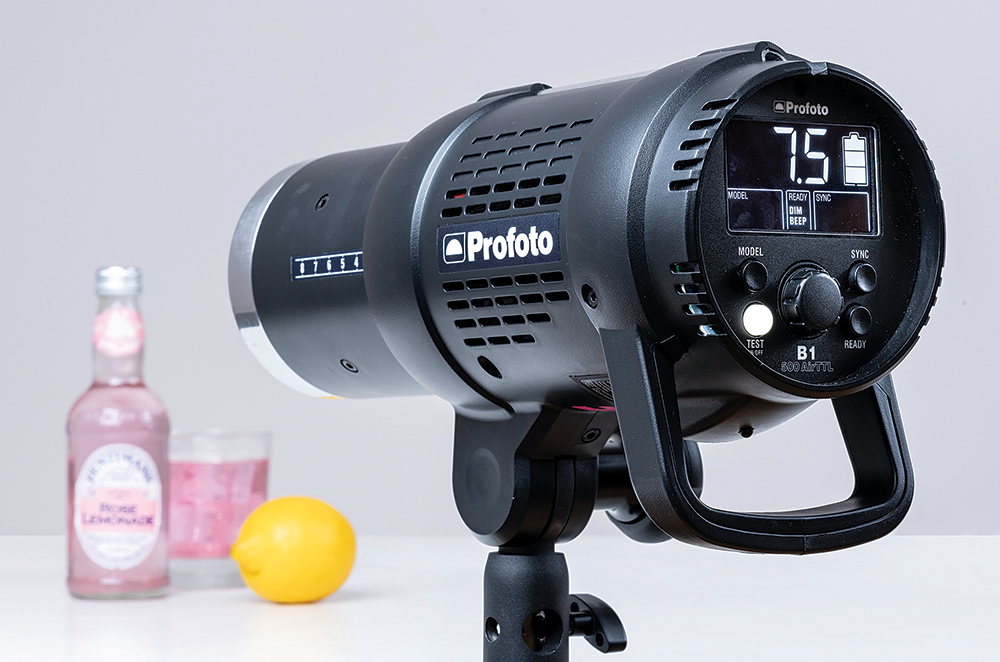
Having lit our scene, the very short flash duration will freeze the lemons as they splash into the tank behind. It’s the varying power of the key and fill that give form to our bottle and props. The rear light diffuses through the liquid in the bottle and the glass, emphasizing the drink. Take a test shot and adjust the power of the lights until you have a balanced setup. We had the key at three quarters power (7.5), the fill at half (5) and the back light at full (10), creating a soft, even light through the double diffuser we used.
06 Take the plunge
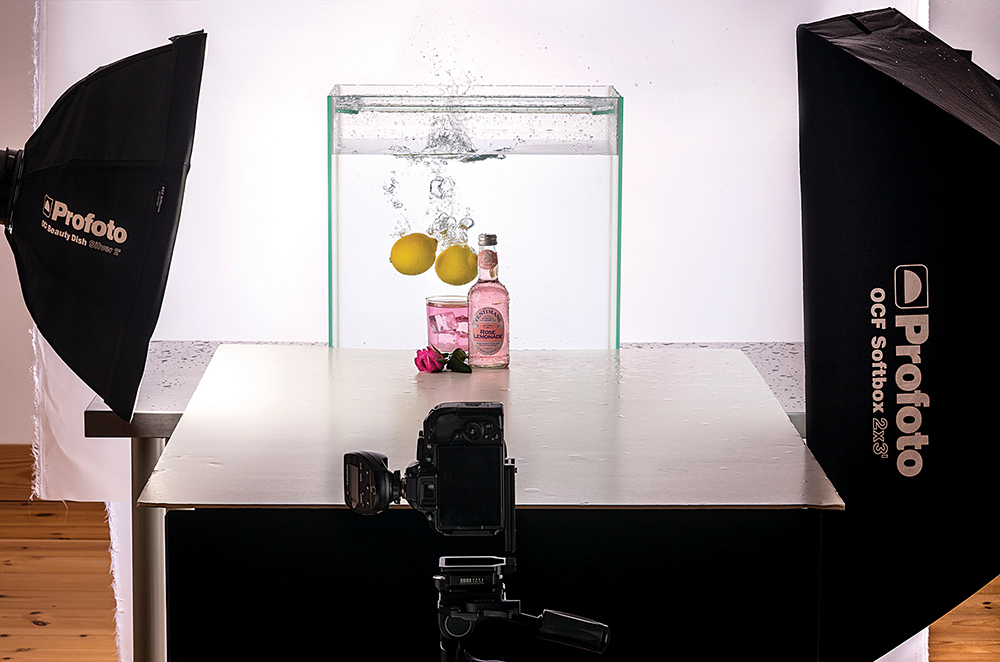
Ask your assistant to drop the lemons into the tank on the count of three and estimate when to release the shutter. It’ll take a few attempts to nail the shot, so use a squeegee to clean the front and rear of the water tank of splashes, ready for the next shot. If you shoot tethered, you’ll be able to better inspect the detail on your computer screen.
More videos:
147 photography tips, video tutorials and techniques to take photos of anything
What is the exposure triangle?
What is aperture on a camera?
What is depth of field in photography?
N-Photo: The Nikon Magazine is a monthly publication that's entirely dedicated to Nikon users. As a 100% independent magazine, you can be assured of unbiased opinion from a trustworthy team of devoted photography experts including editor Adam Waring and Deputy Editor Mike Harris.
Aimed at all users, from camera newcomers to working pros, every issue is packed with practical, Nikon-specific advice for taking better photos, in-depth reviews of Nikon-compatible gear, and inspiring projects and exciting video lessons for mastering camera, lens and Photoshop techniques.
Written by Nikon users for Nikon users, N-Photo is your one-stop shop for everything to do with cameras, lenses, tripods, bags, tips, tricks and techniques to get the most out of your photography.
