Home photography ideas: Make models life-size with forced perspective
Play with scale and force perspective to transform model cars into life-size vehicles
Watch video: Home photography ideas – Forced perspective with models
Photography projects at home
• Home photography ideas
Useful home photography kit
• Best tripods
• Best lighting kits
• Best reflectors
• Best macro lenses
Forced perspective photography is one of the oldest visual tricks in the book – and also one of the most fun. With careful arrangement of objects in a scene, we can fool the eye by combining small and large elements into a believable whole.
Even better, it gives us the perfect excuse to play with model cars! This project is a prime opportunity to make use of shooting skills and Photoshop magic, as it requires a little of both.
We’ll start off by setting up our model car. The height of objects plays an important role in how our eyes perceives them in a standard 2D image. So in order to create our illusion, we must raise the car off the ground and line it up with the scene behind it.
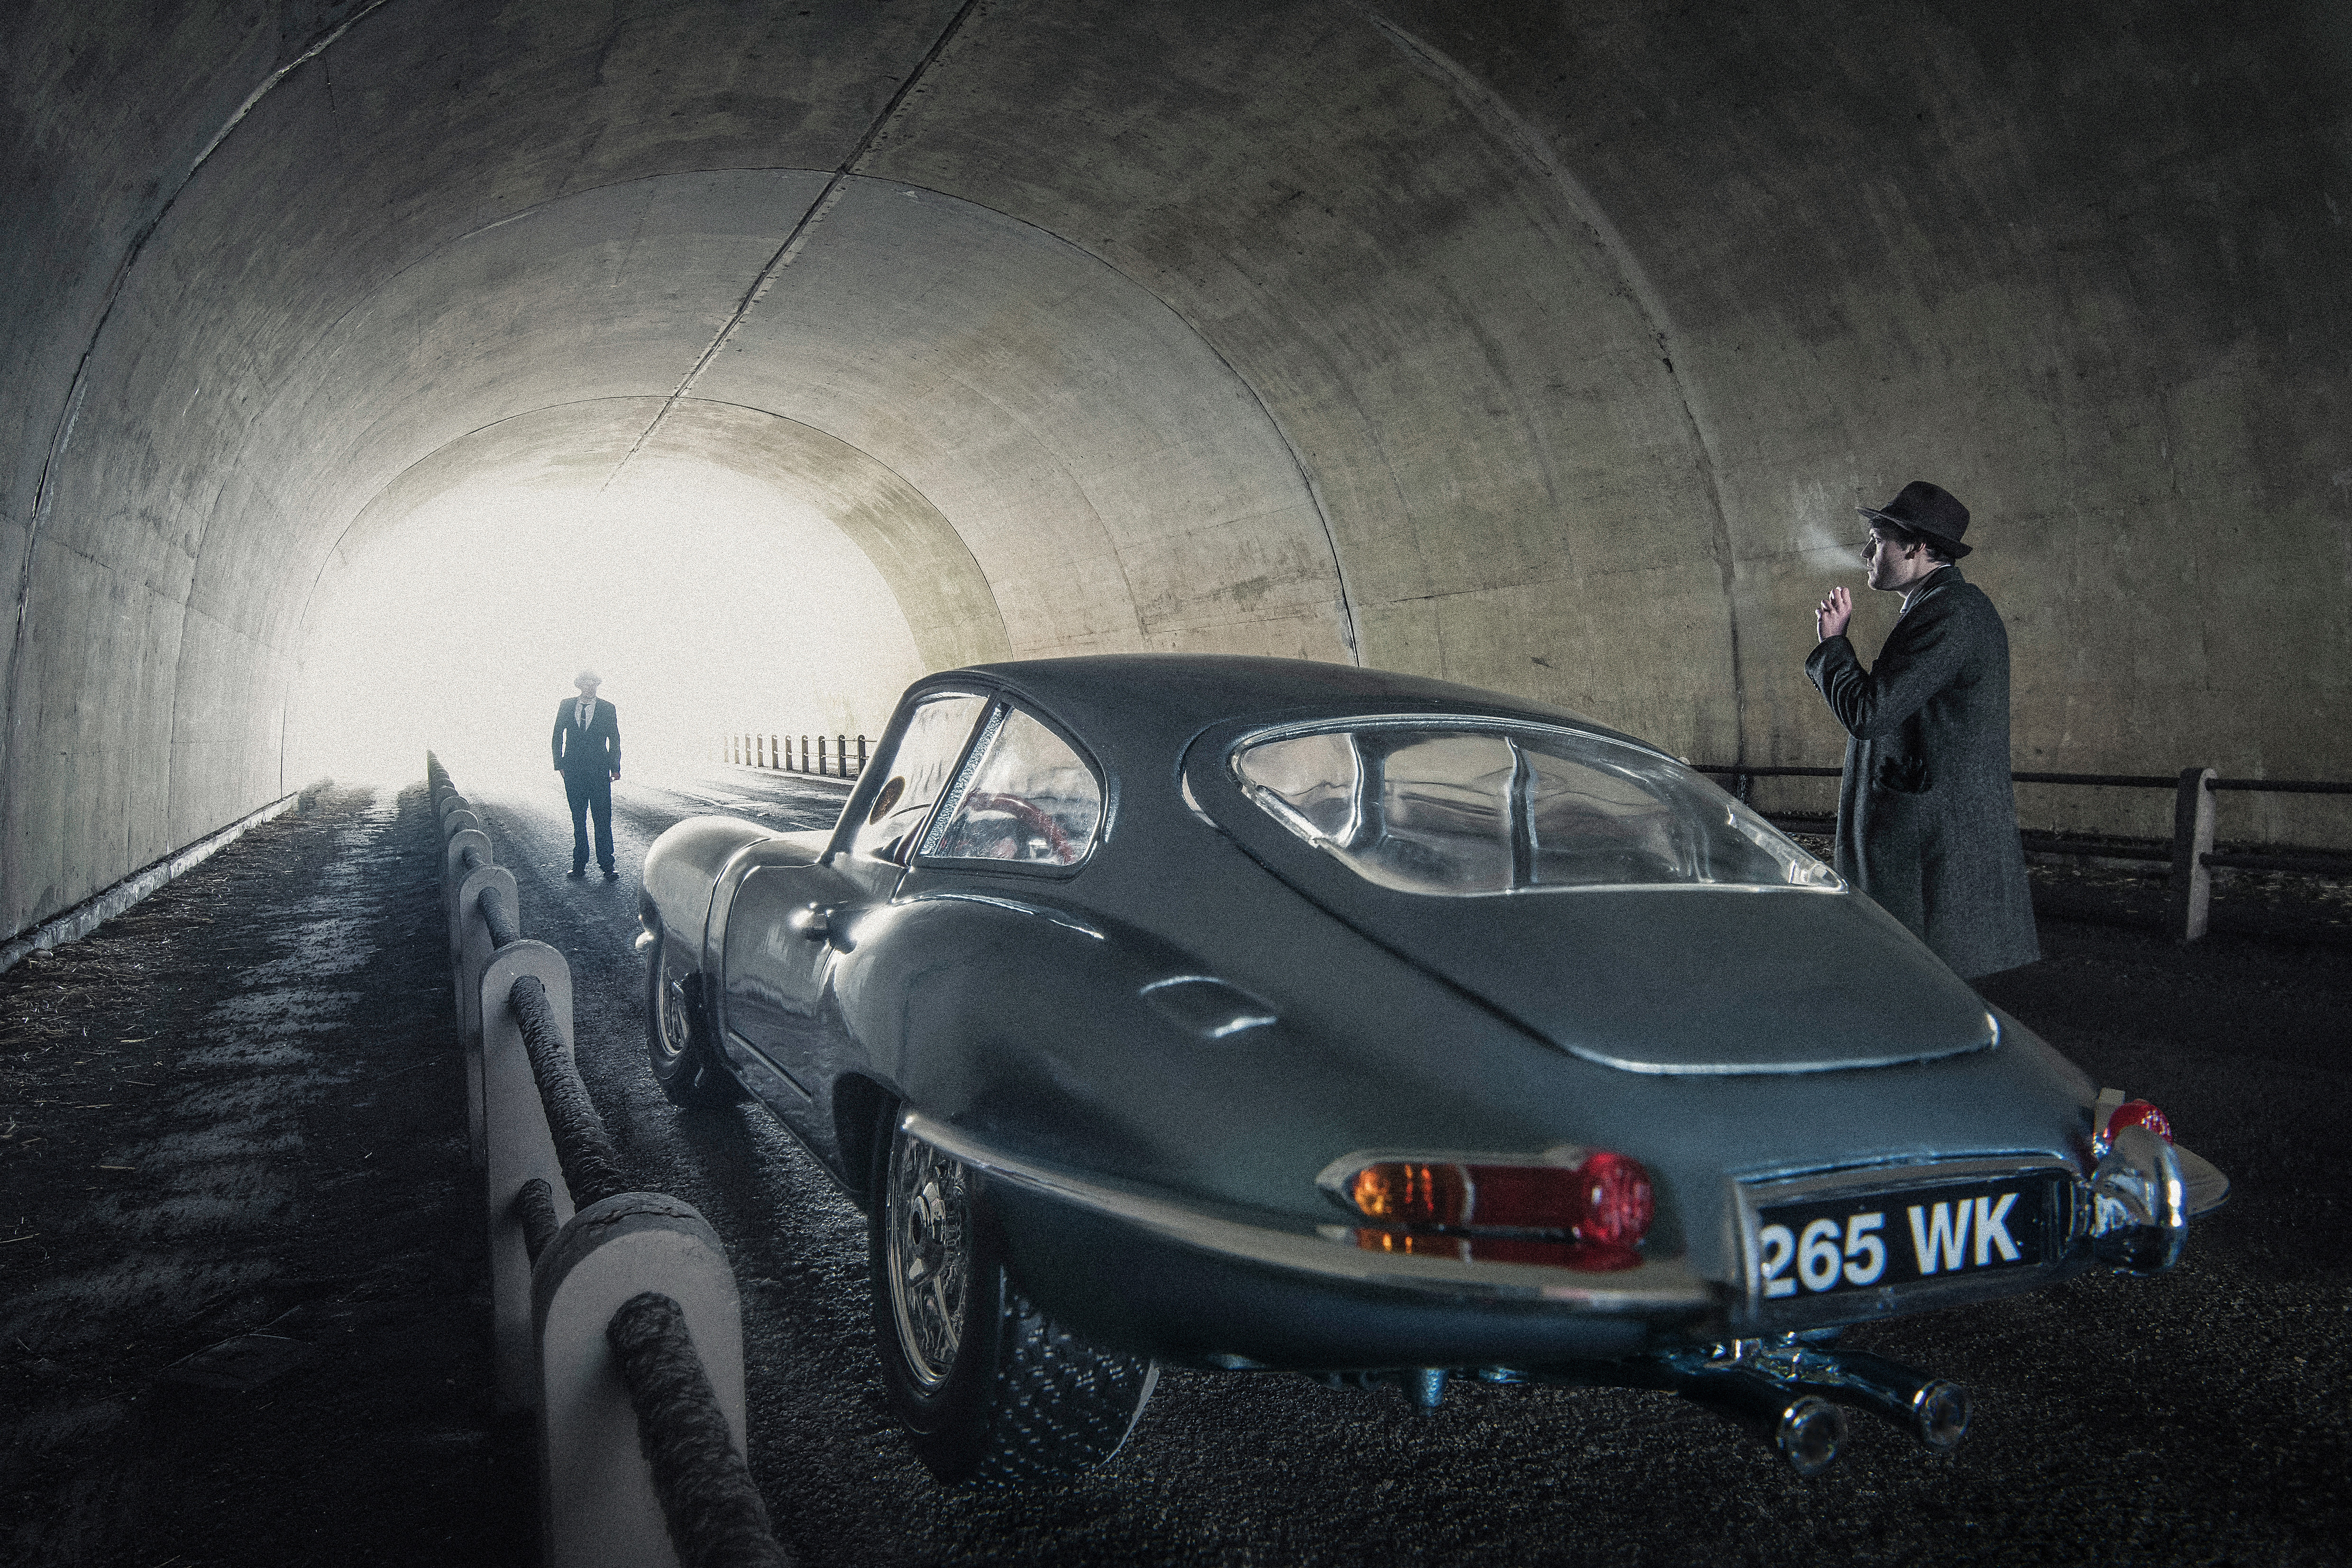
From a technical point of view, the main hurdle we have to overcome is depth of field. We need to bring the car in very close to the lens, and the closer an object is, the less depth of field – so even shooting at the narrowest apertures, the plane of focus is limited.
The solution is to use focus stacking. By shooting a sequence of frames, and then bringing together the sharp parts, we can extend the depth of field to cover everything we need – then we head into Photoshop to piece everything together.
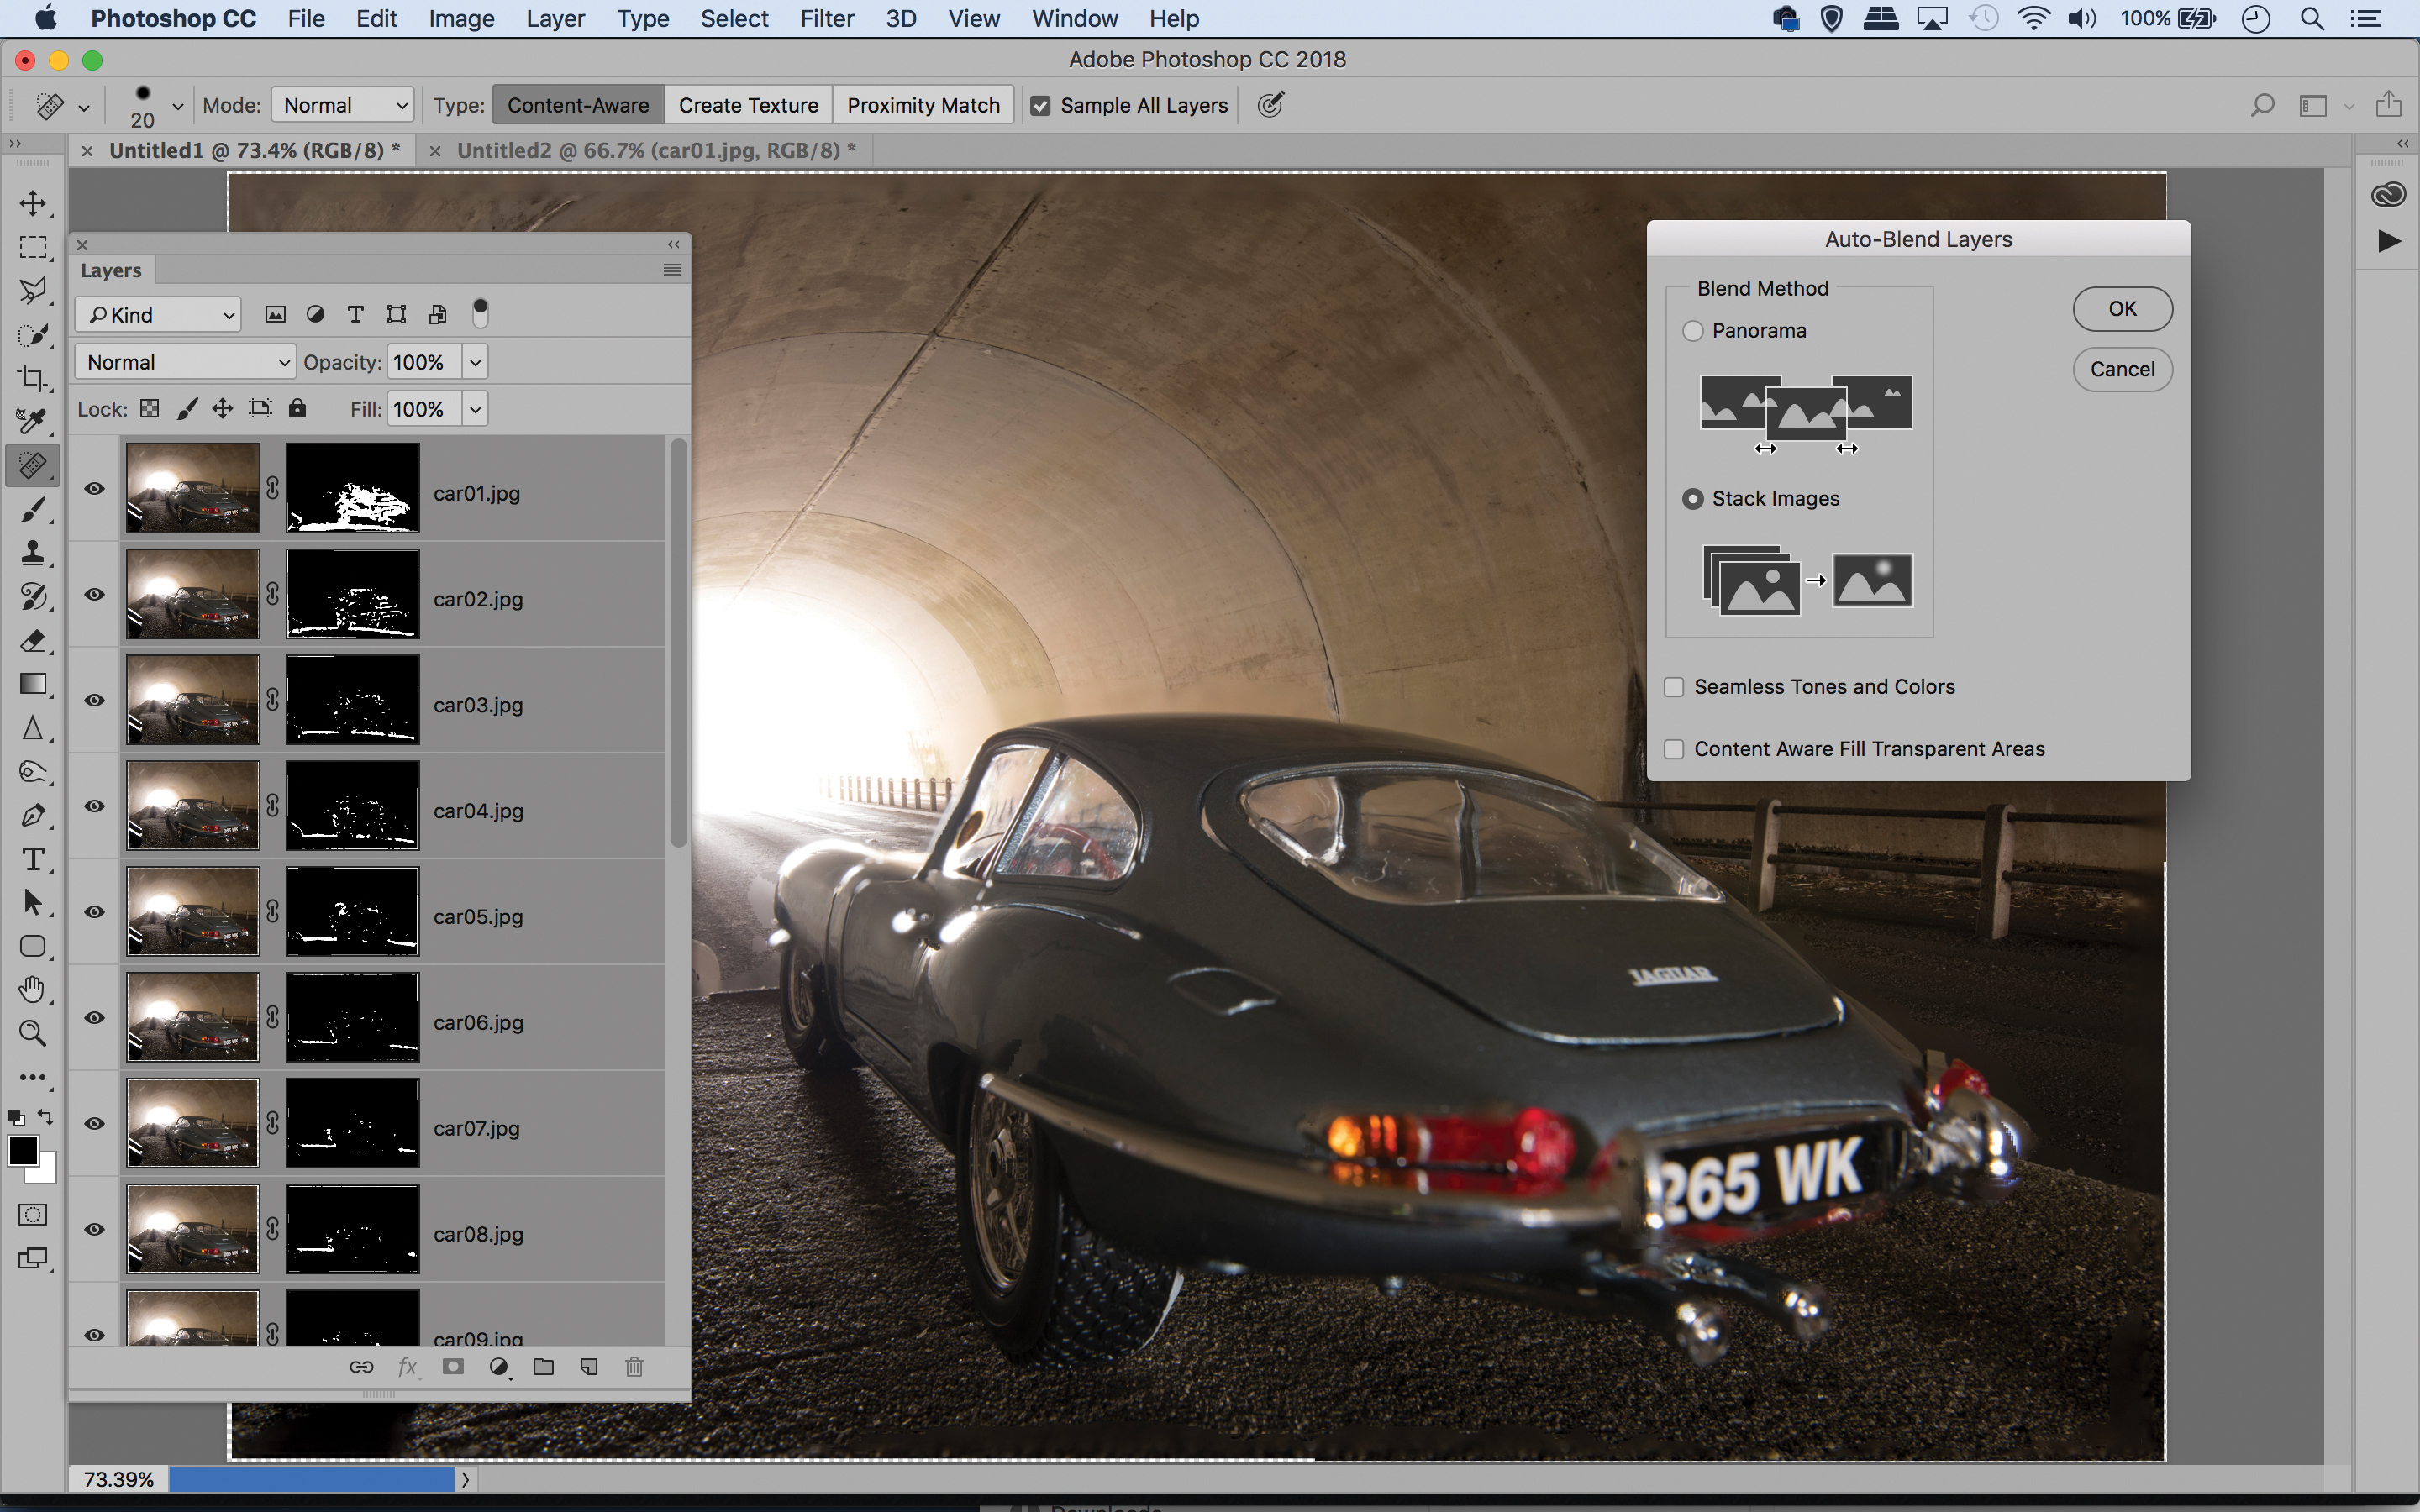
As our set of images is in alignment, this should be a simple task. We can use the Auto-Blend command to focus stack our images, then combine it with the background scene and drop in our two figures using layer masks. Here's how the magic is done!
• Best online photography courses
How to shoot forced perspective shots
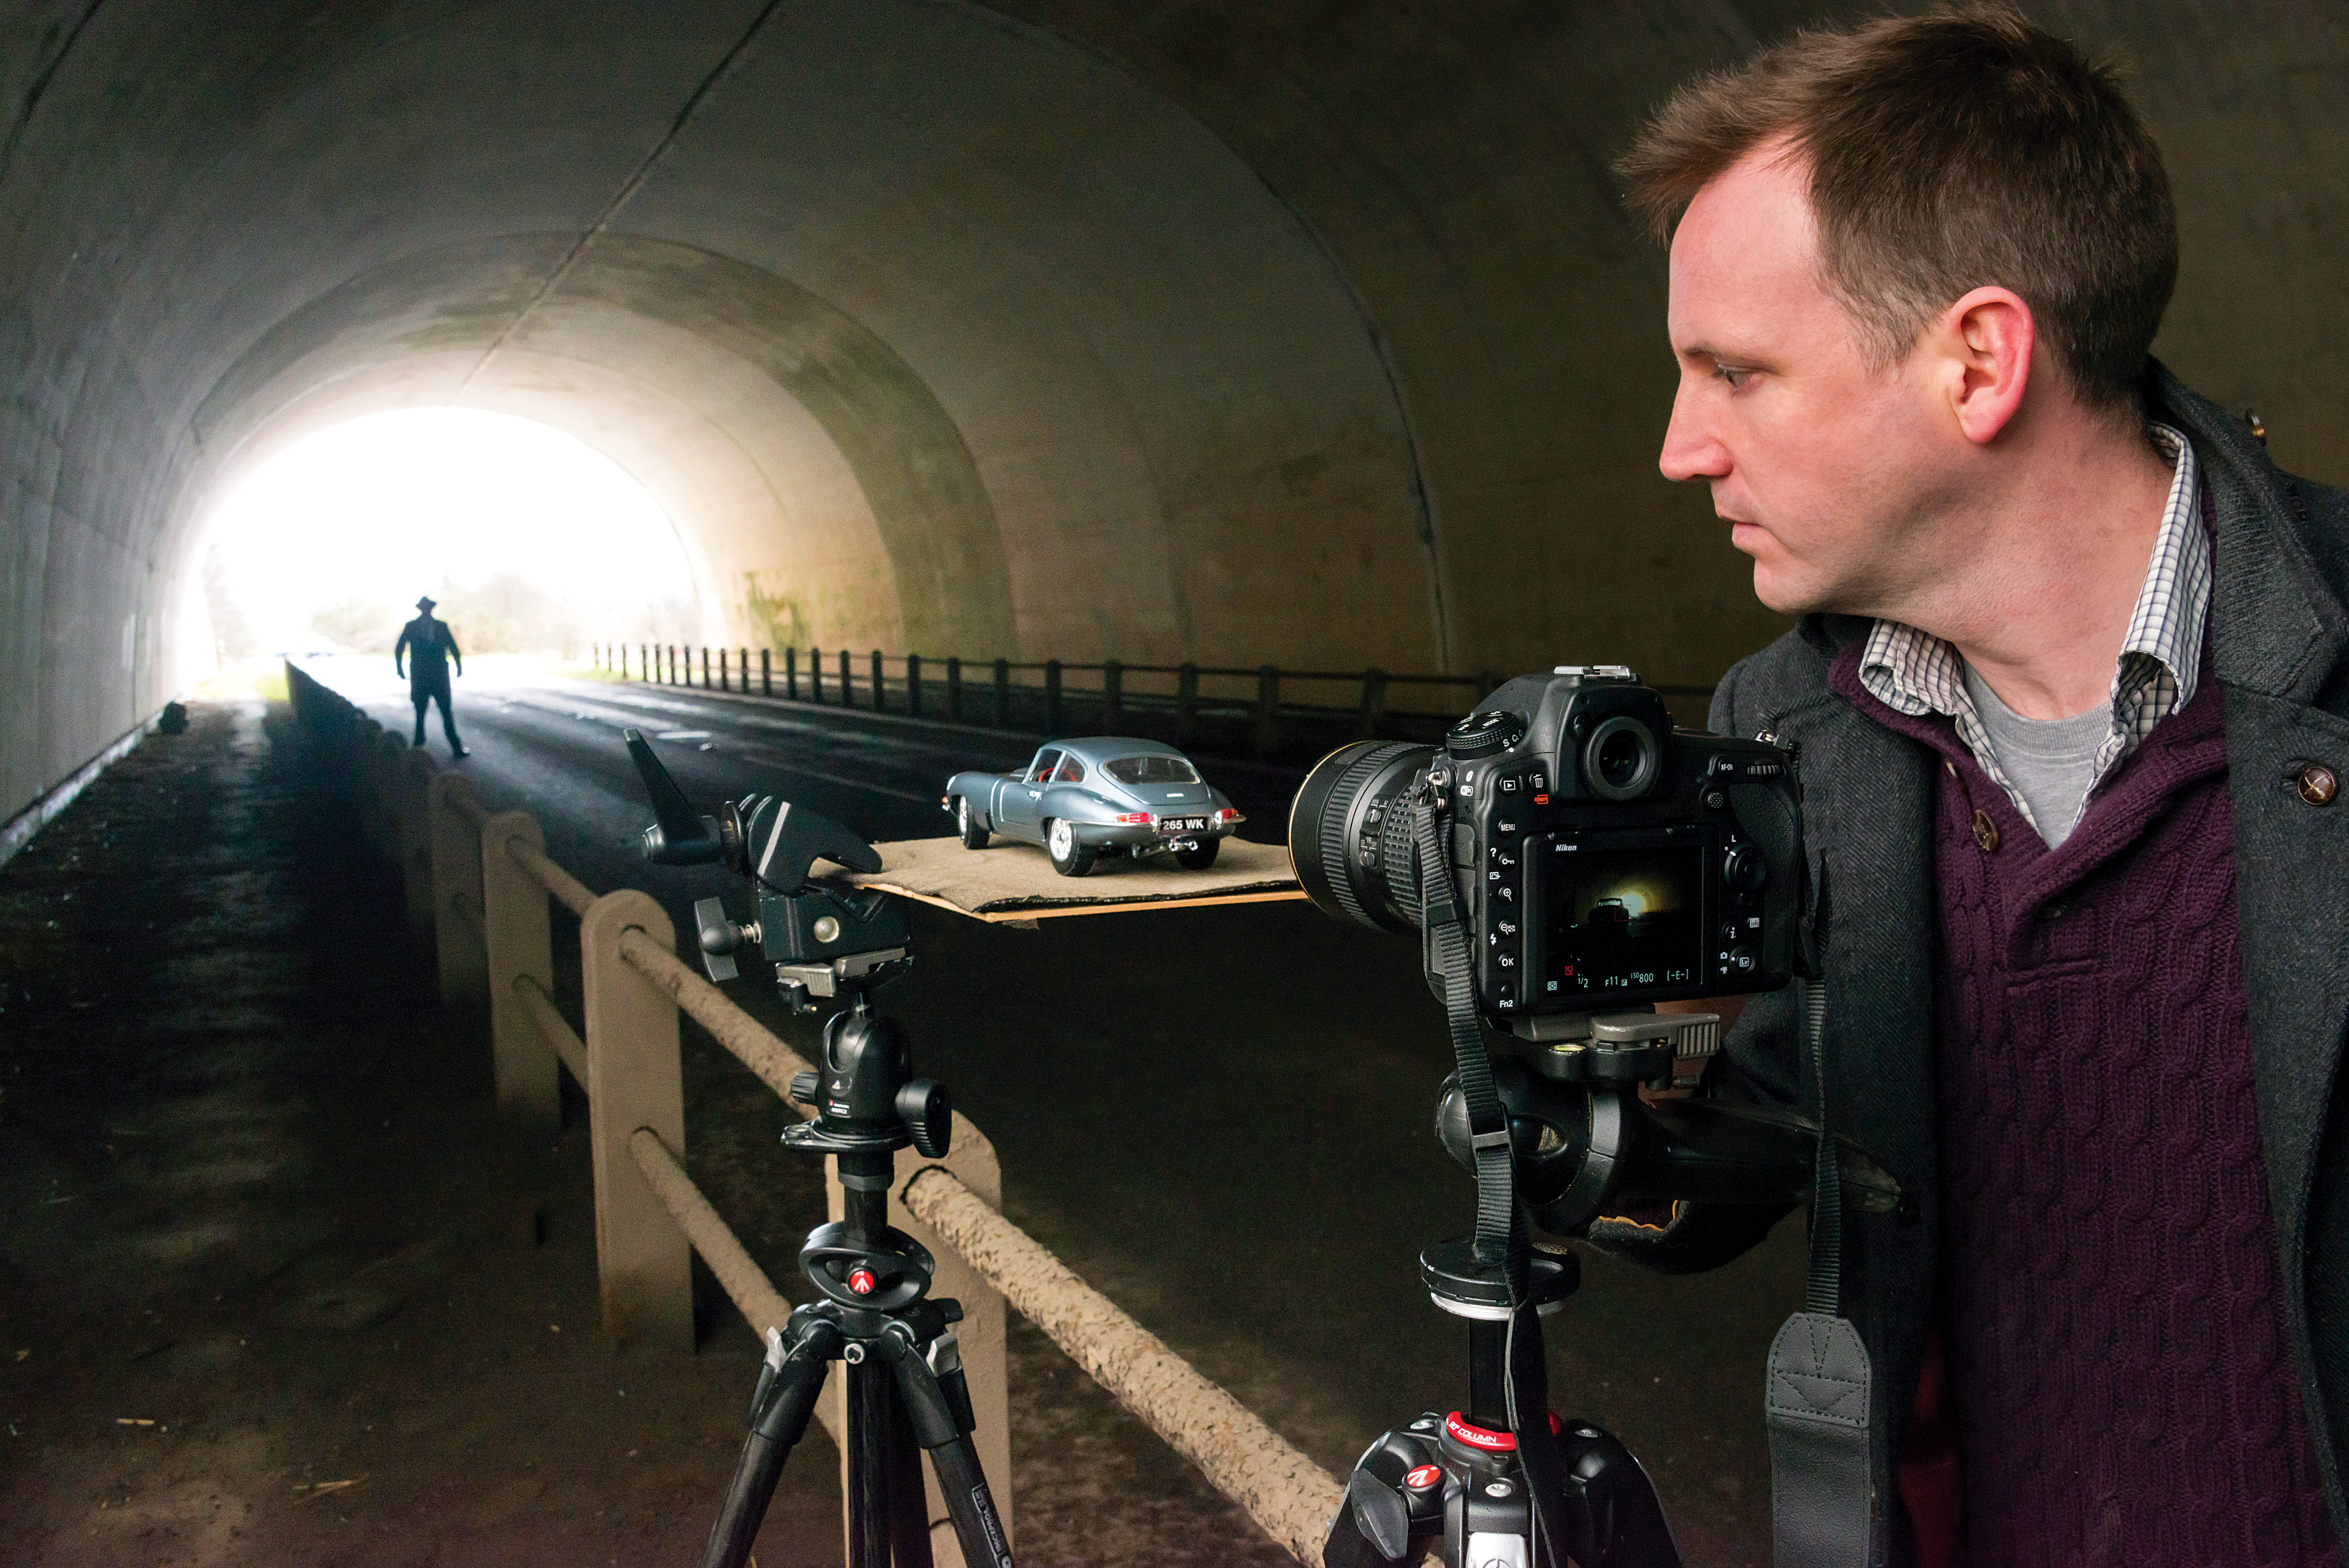
01 The car
The fun in this technique is making a model car look life-size. So, it’s important to use a realistic-looking model vehicle, like the famous Jaguar E-type here. If you’re looking for a similar motor, search for die-cast models. The bigger the better, so go for 1:18 scale or larger.
02 Platform
We need to be able to raise the car upwards to force the perspective to match the background. A small platform is ideal. We used a piece of board. It helps if we can adjust the height, so a light stand or tripod is a good choice. We attached the stand to the tripod with a clamp.
03 Tripod
Fixing the camera to a tripod will allow us to make fine adjustments to the camera angle and study the composition so that everything aligns perfectly. It also allows us to extend depth of field beyond the capabilities of the lens by focus-stacking several aligned frames.
04 The background
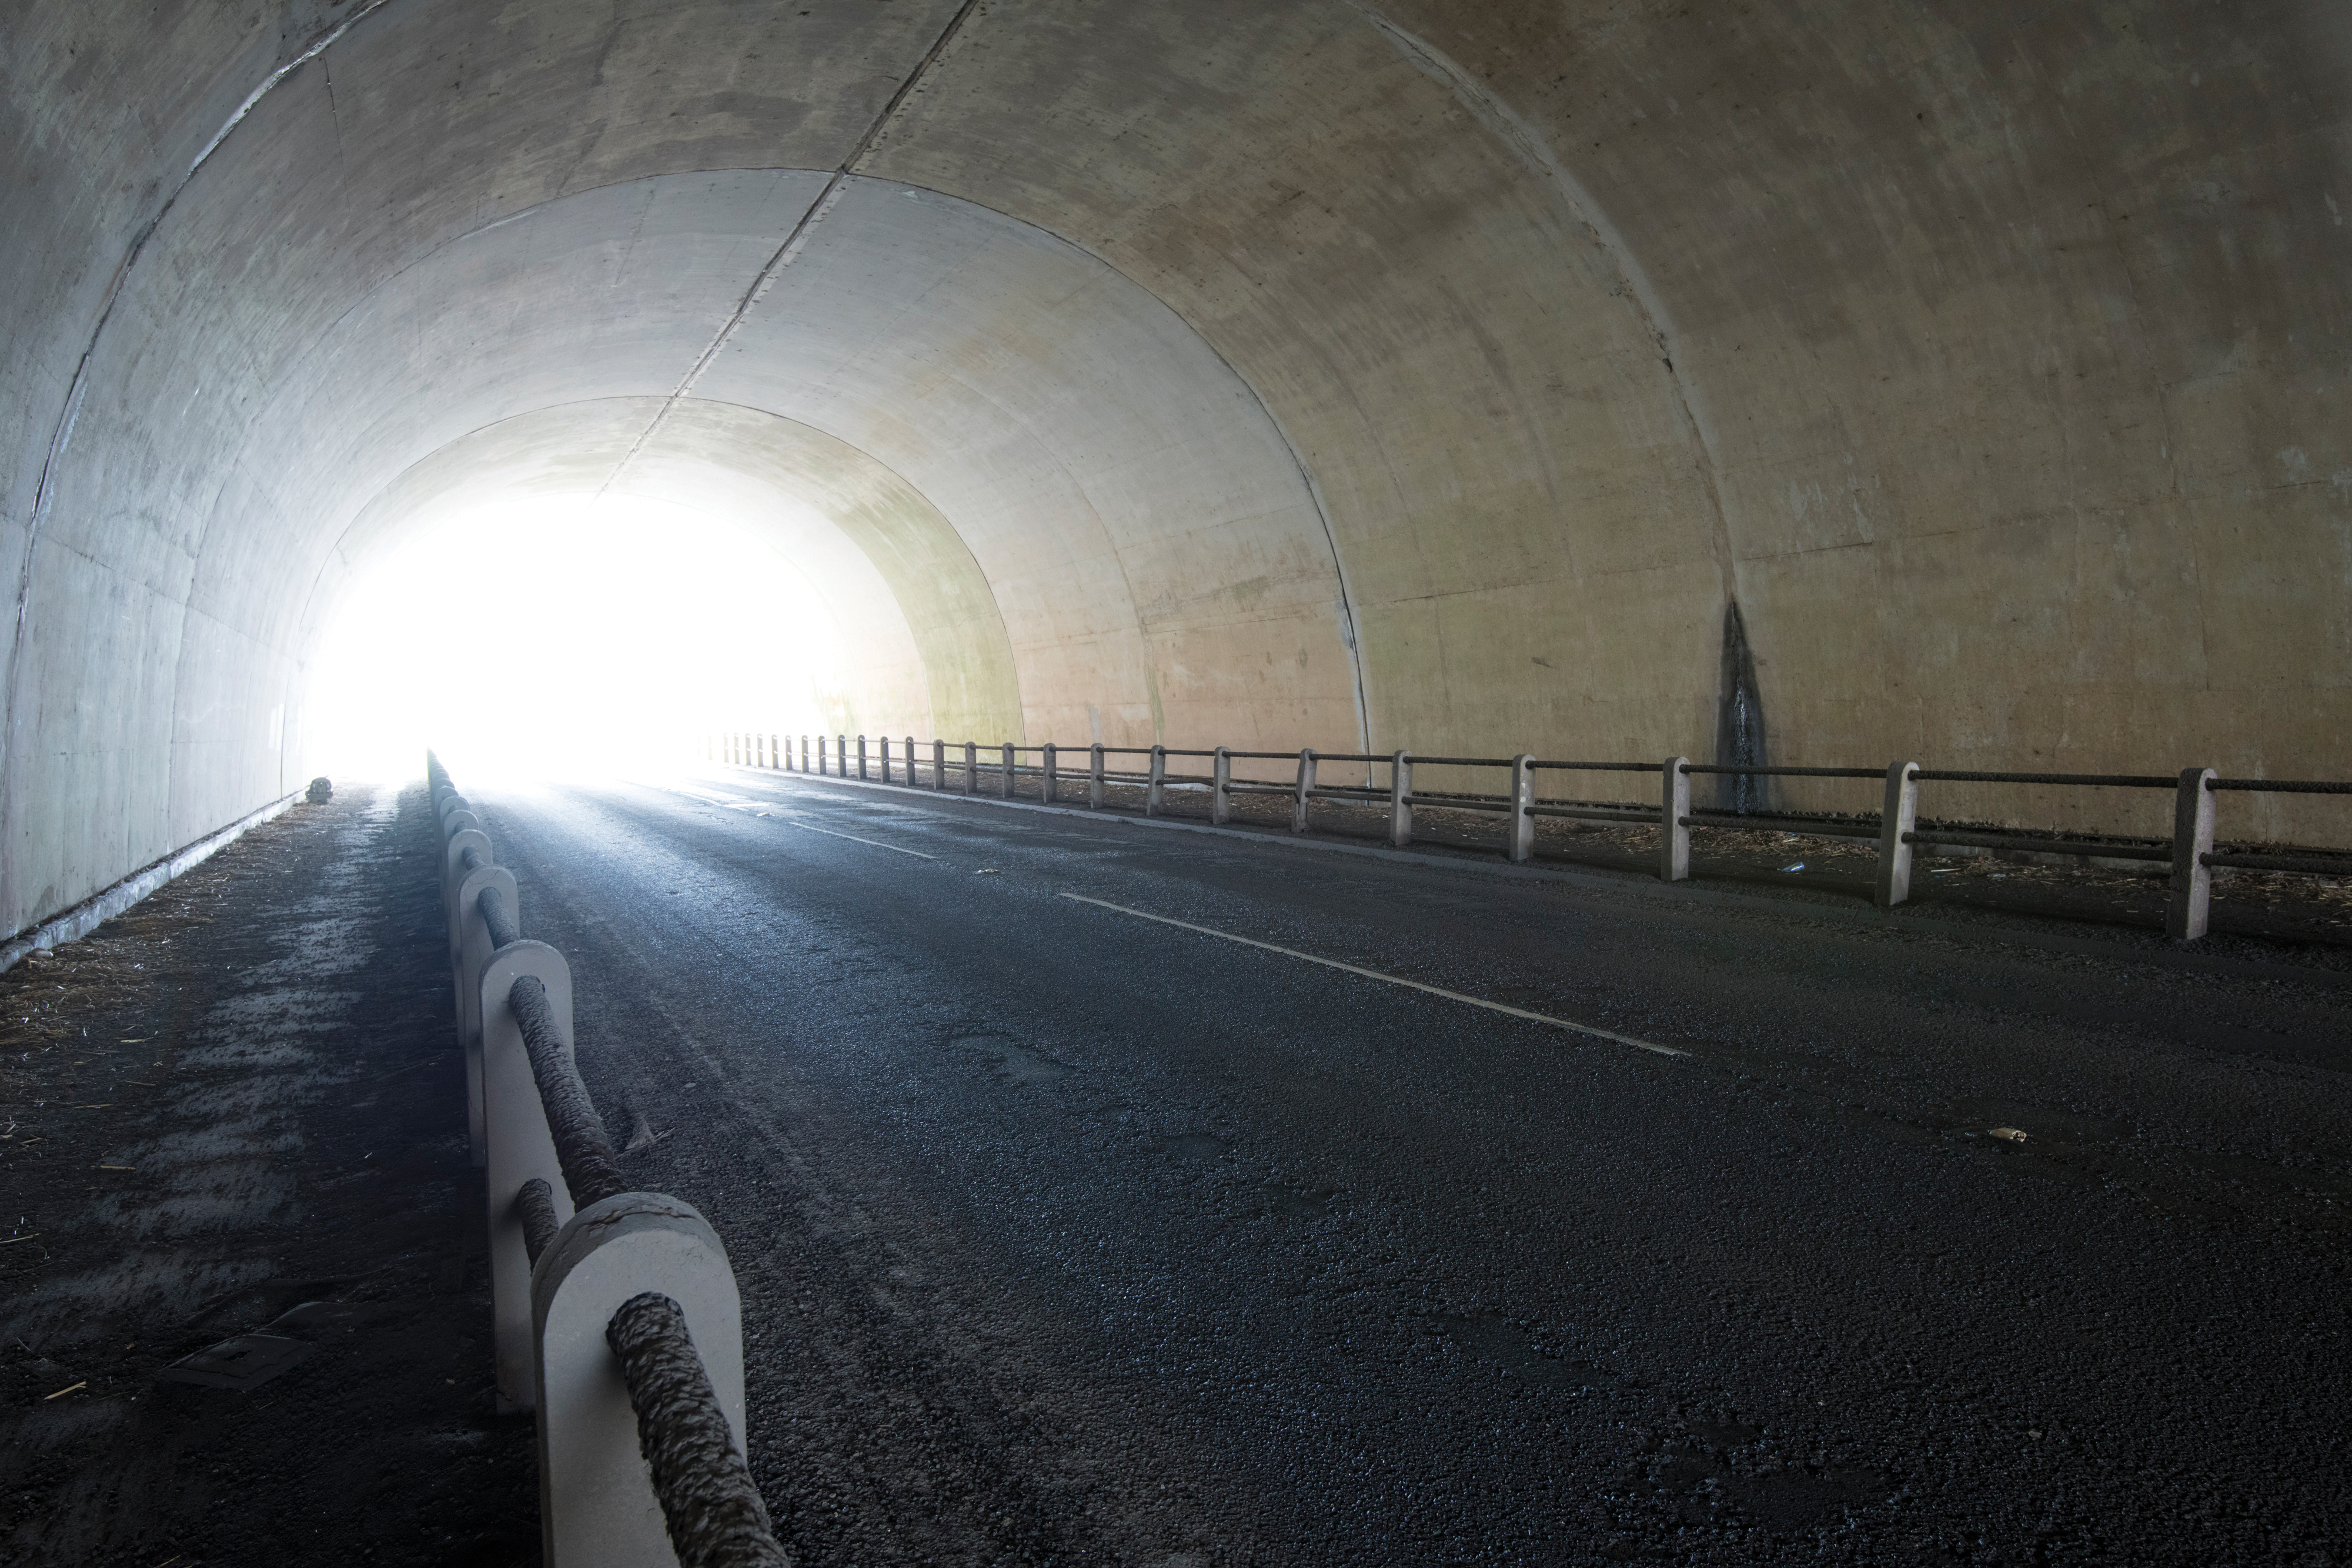
An interesting location will add to the mood. The underpass here gives us atmospheric light spilling in from the end of the tunnel. The darkness also helps hide signs that the car is a model. We also posed a distant figure in period attire to add to the moody film noir atmosphere.
05 Wide lens
Wide-angle lenses distort a scene so objects close to the lens look unnaturally large. We can take advantage of this for our effect. A lens with a close minimum focusing distance is helpful, as we want to get the camera as close to the car as possible.
06 Textured surface
Our vehicle must look as if it belongs in the environment, so we need to mimic the surface of the background on our platform, but in miniature. A piece of textured material, like the roofing felt we used here, closely matches the road beyond in texture and color.
Shoot the scene
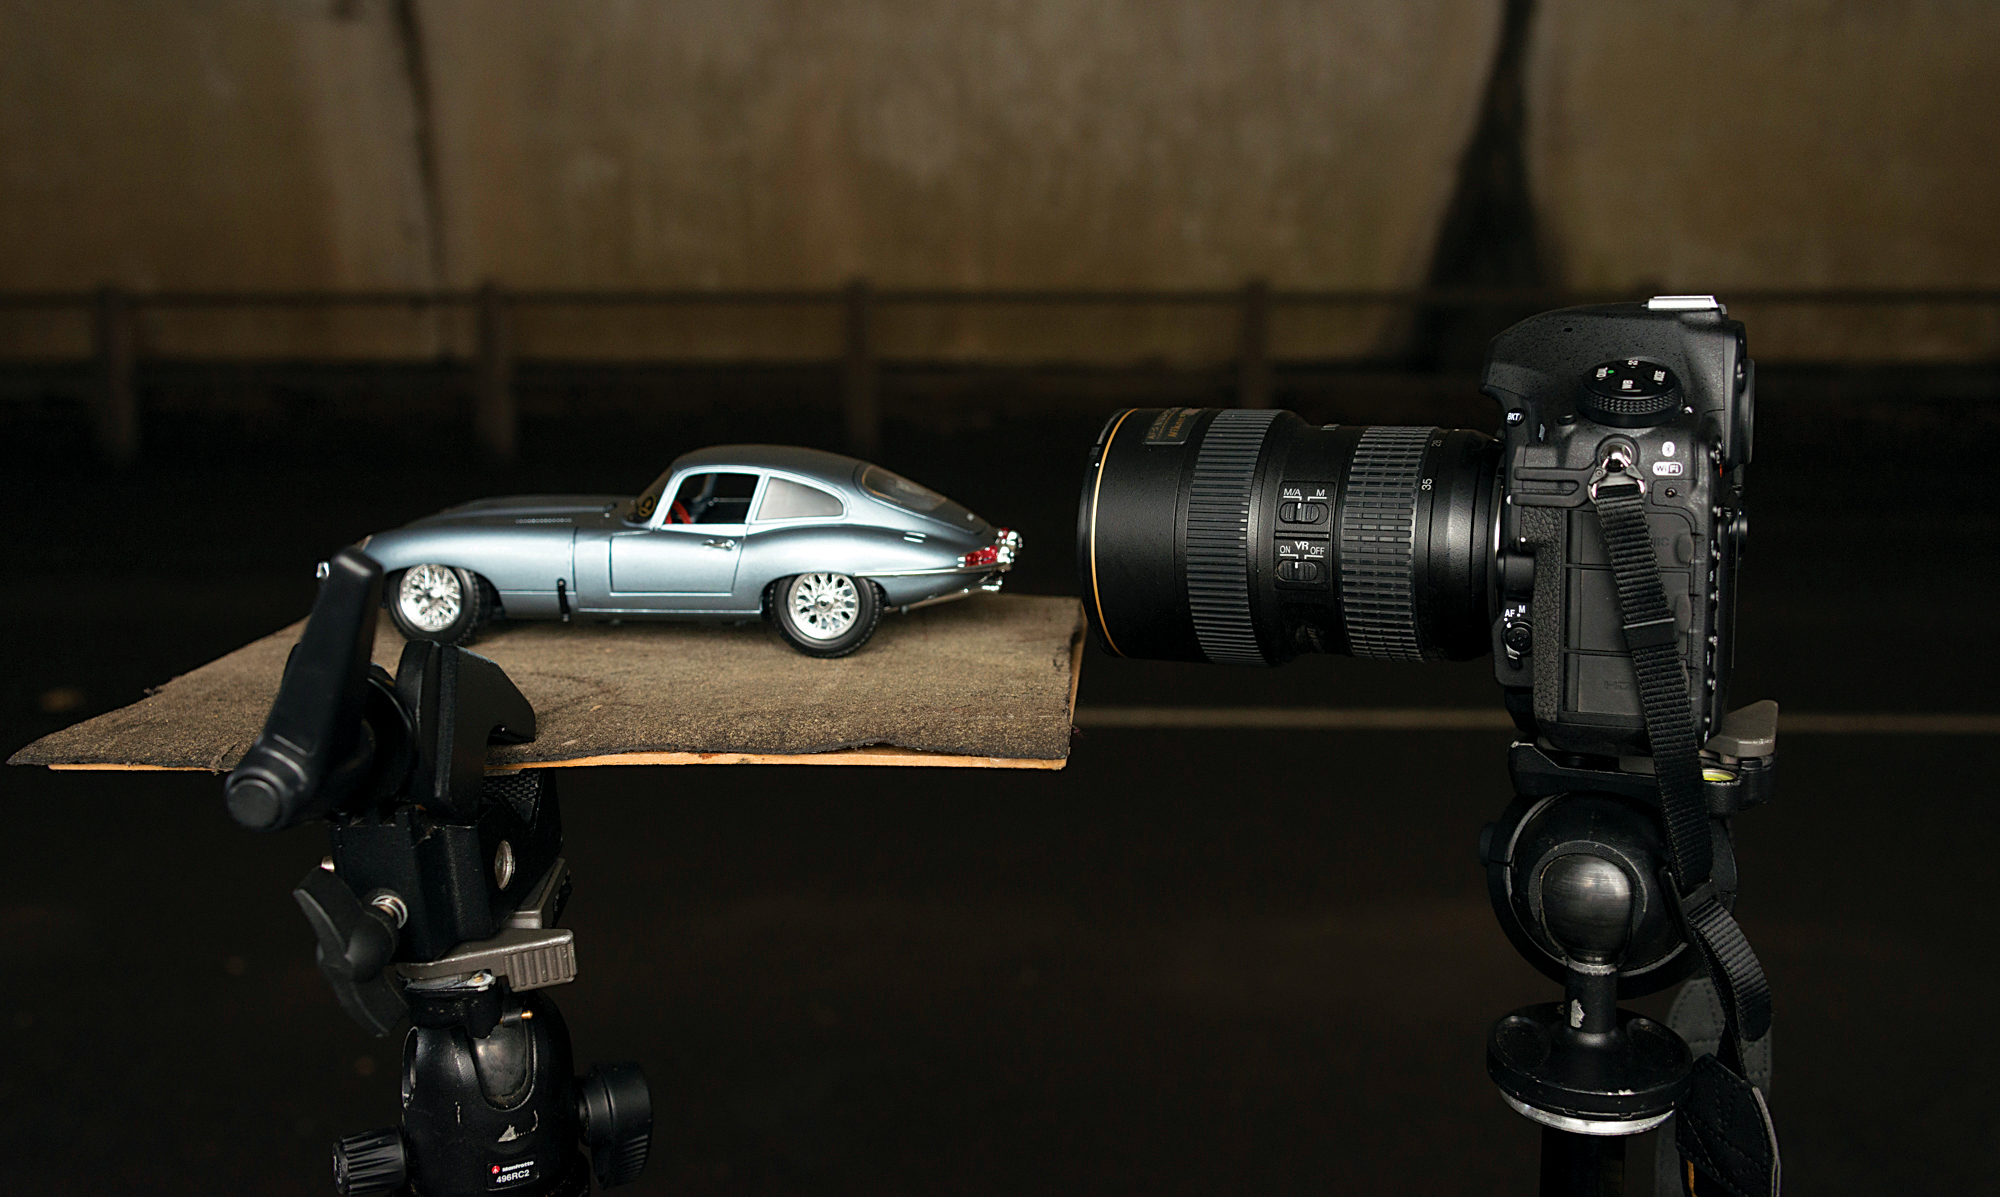
01 Find the angle
After setting up the platform for the car and the camera on a tripod, the most important part of the technique here is fine-tuning the camera angle so that everything looks natural. Bringing the camera in as close as possible to the model will make it seem larger.
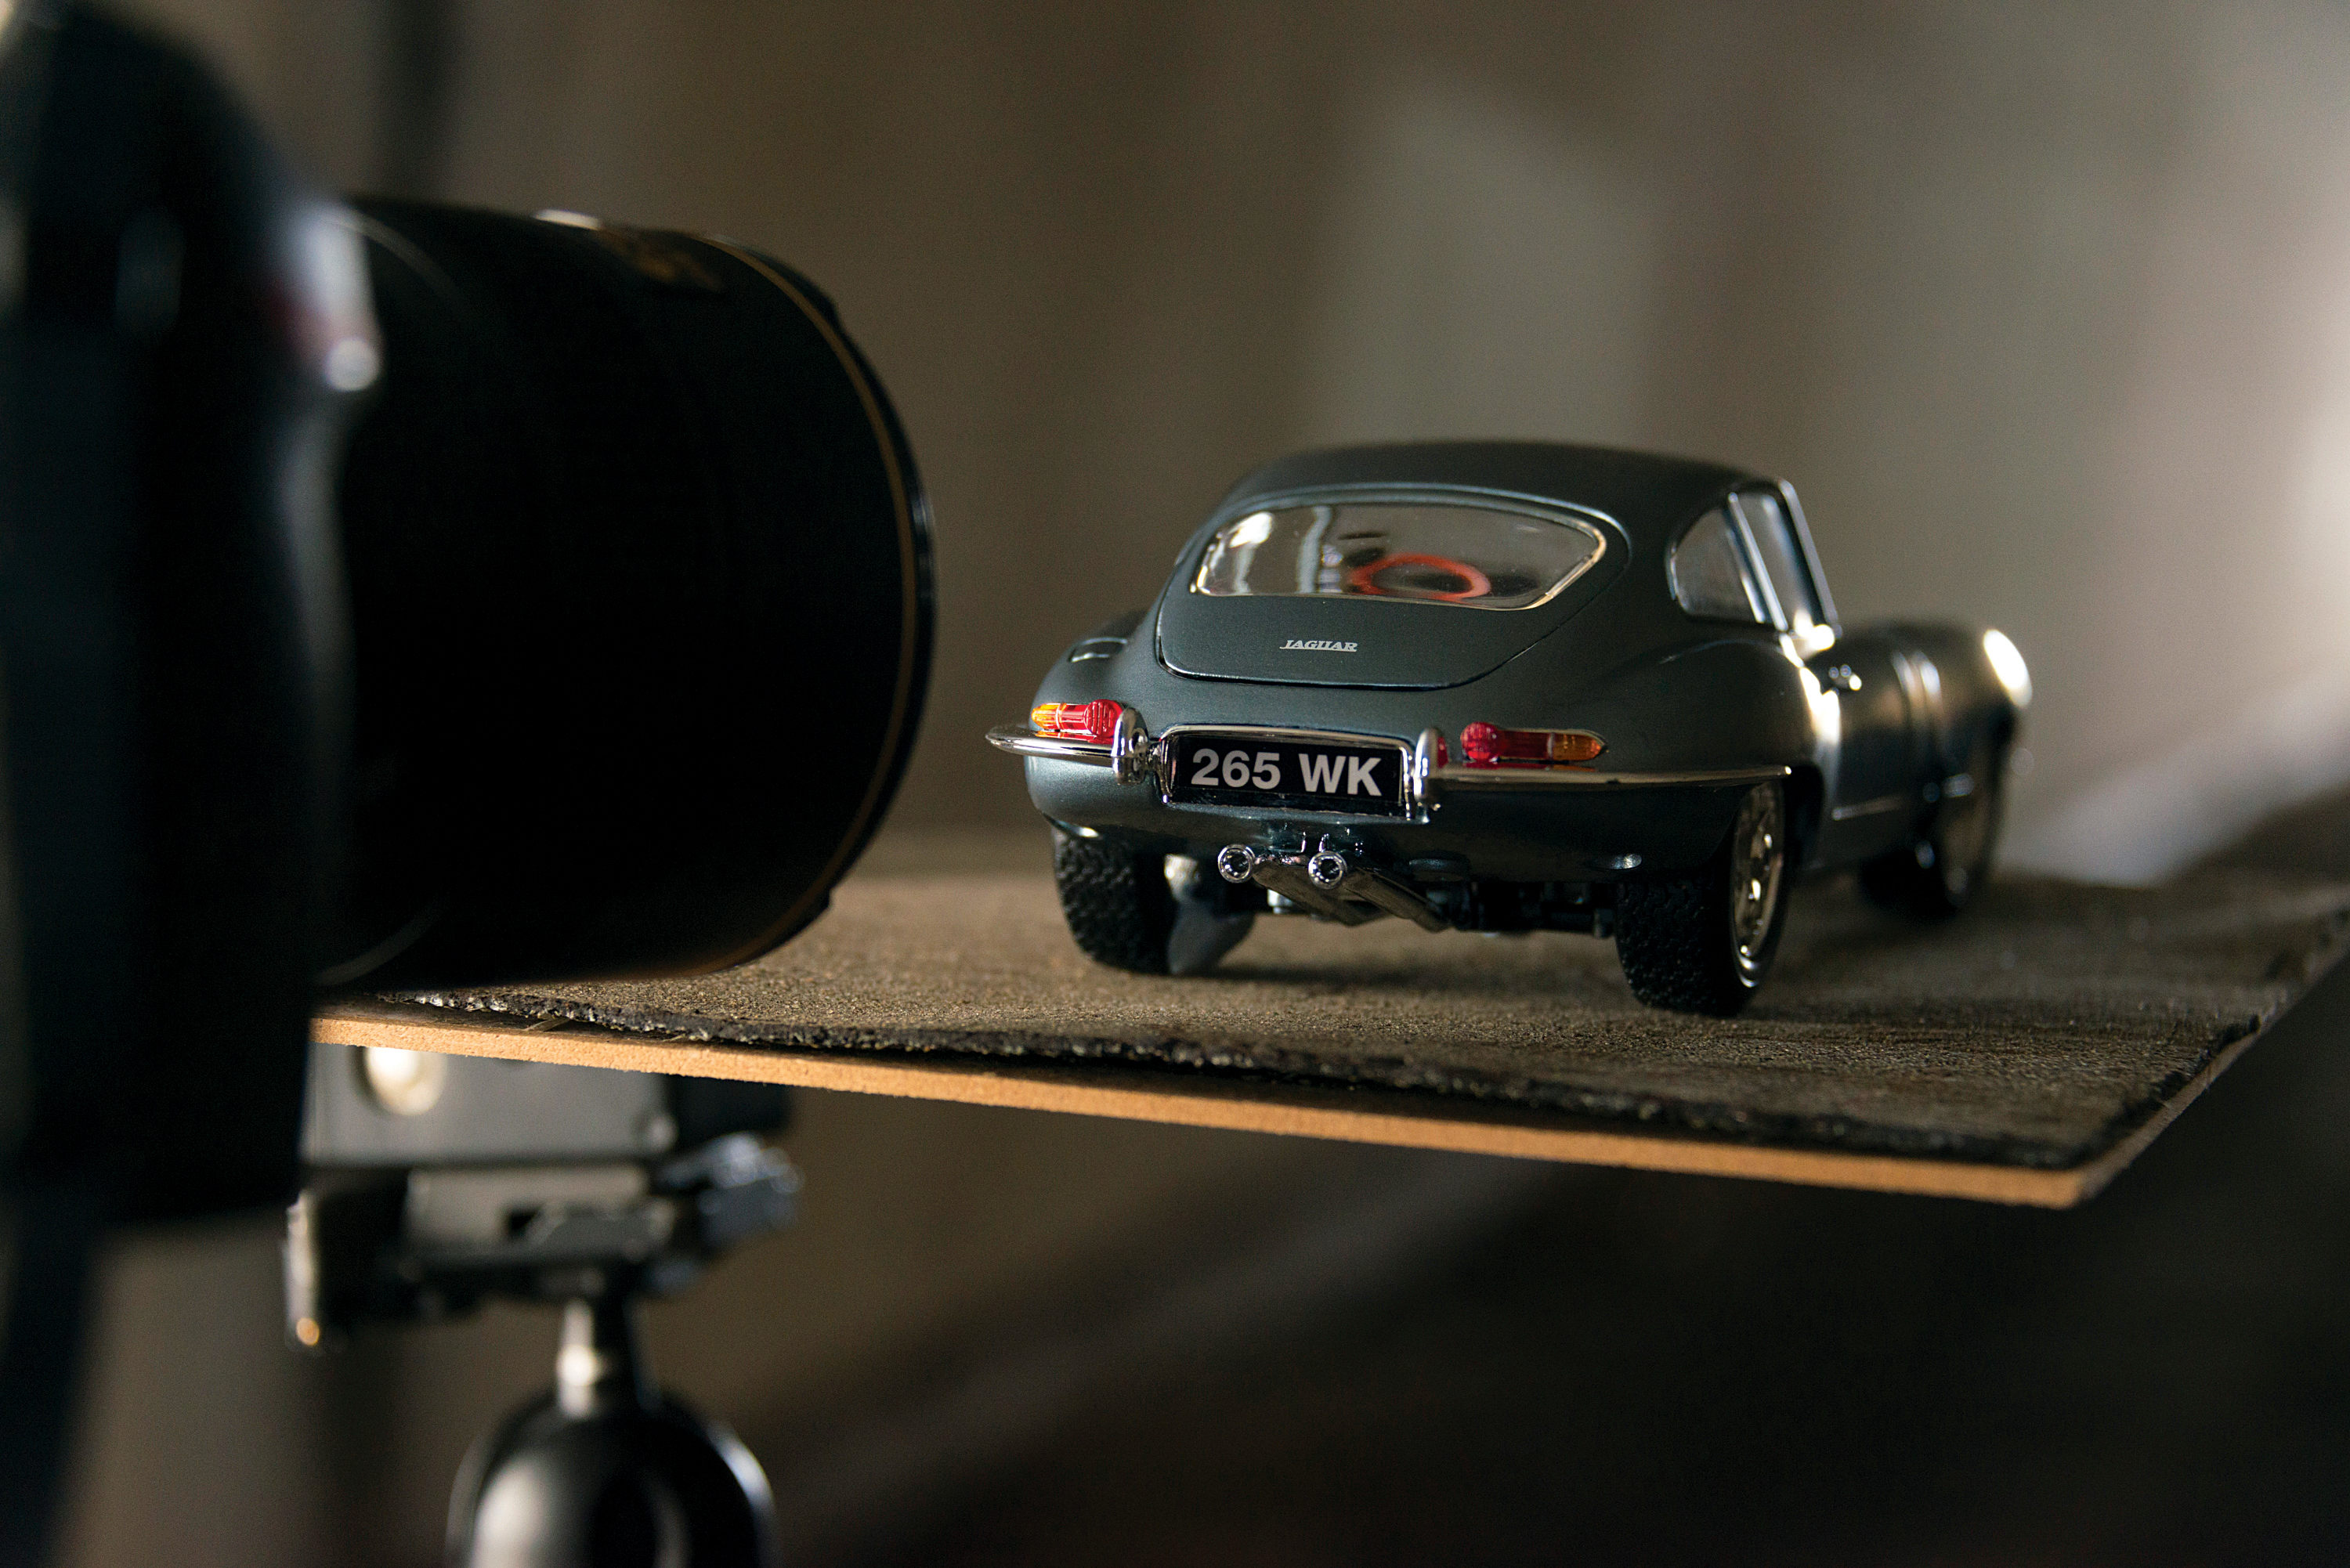
02 Perfect the height
The camera height is important, as it will dictate the angle at which we see the car. For a natural-looking angle, aim to line the camera height up with the roof. Live View is incredibly handy for studying the scene in detail and making small compositional changes like this.
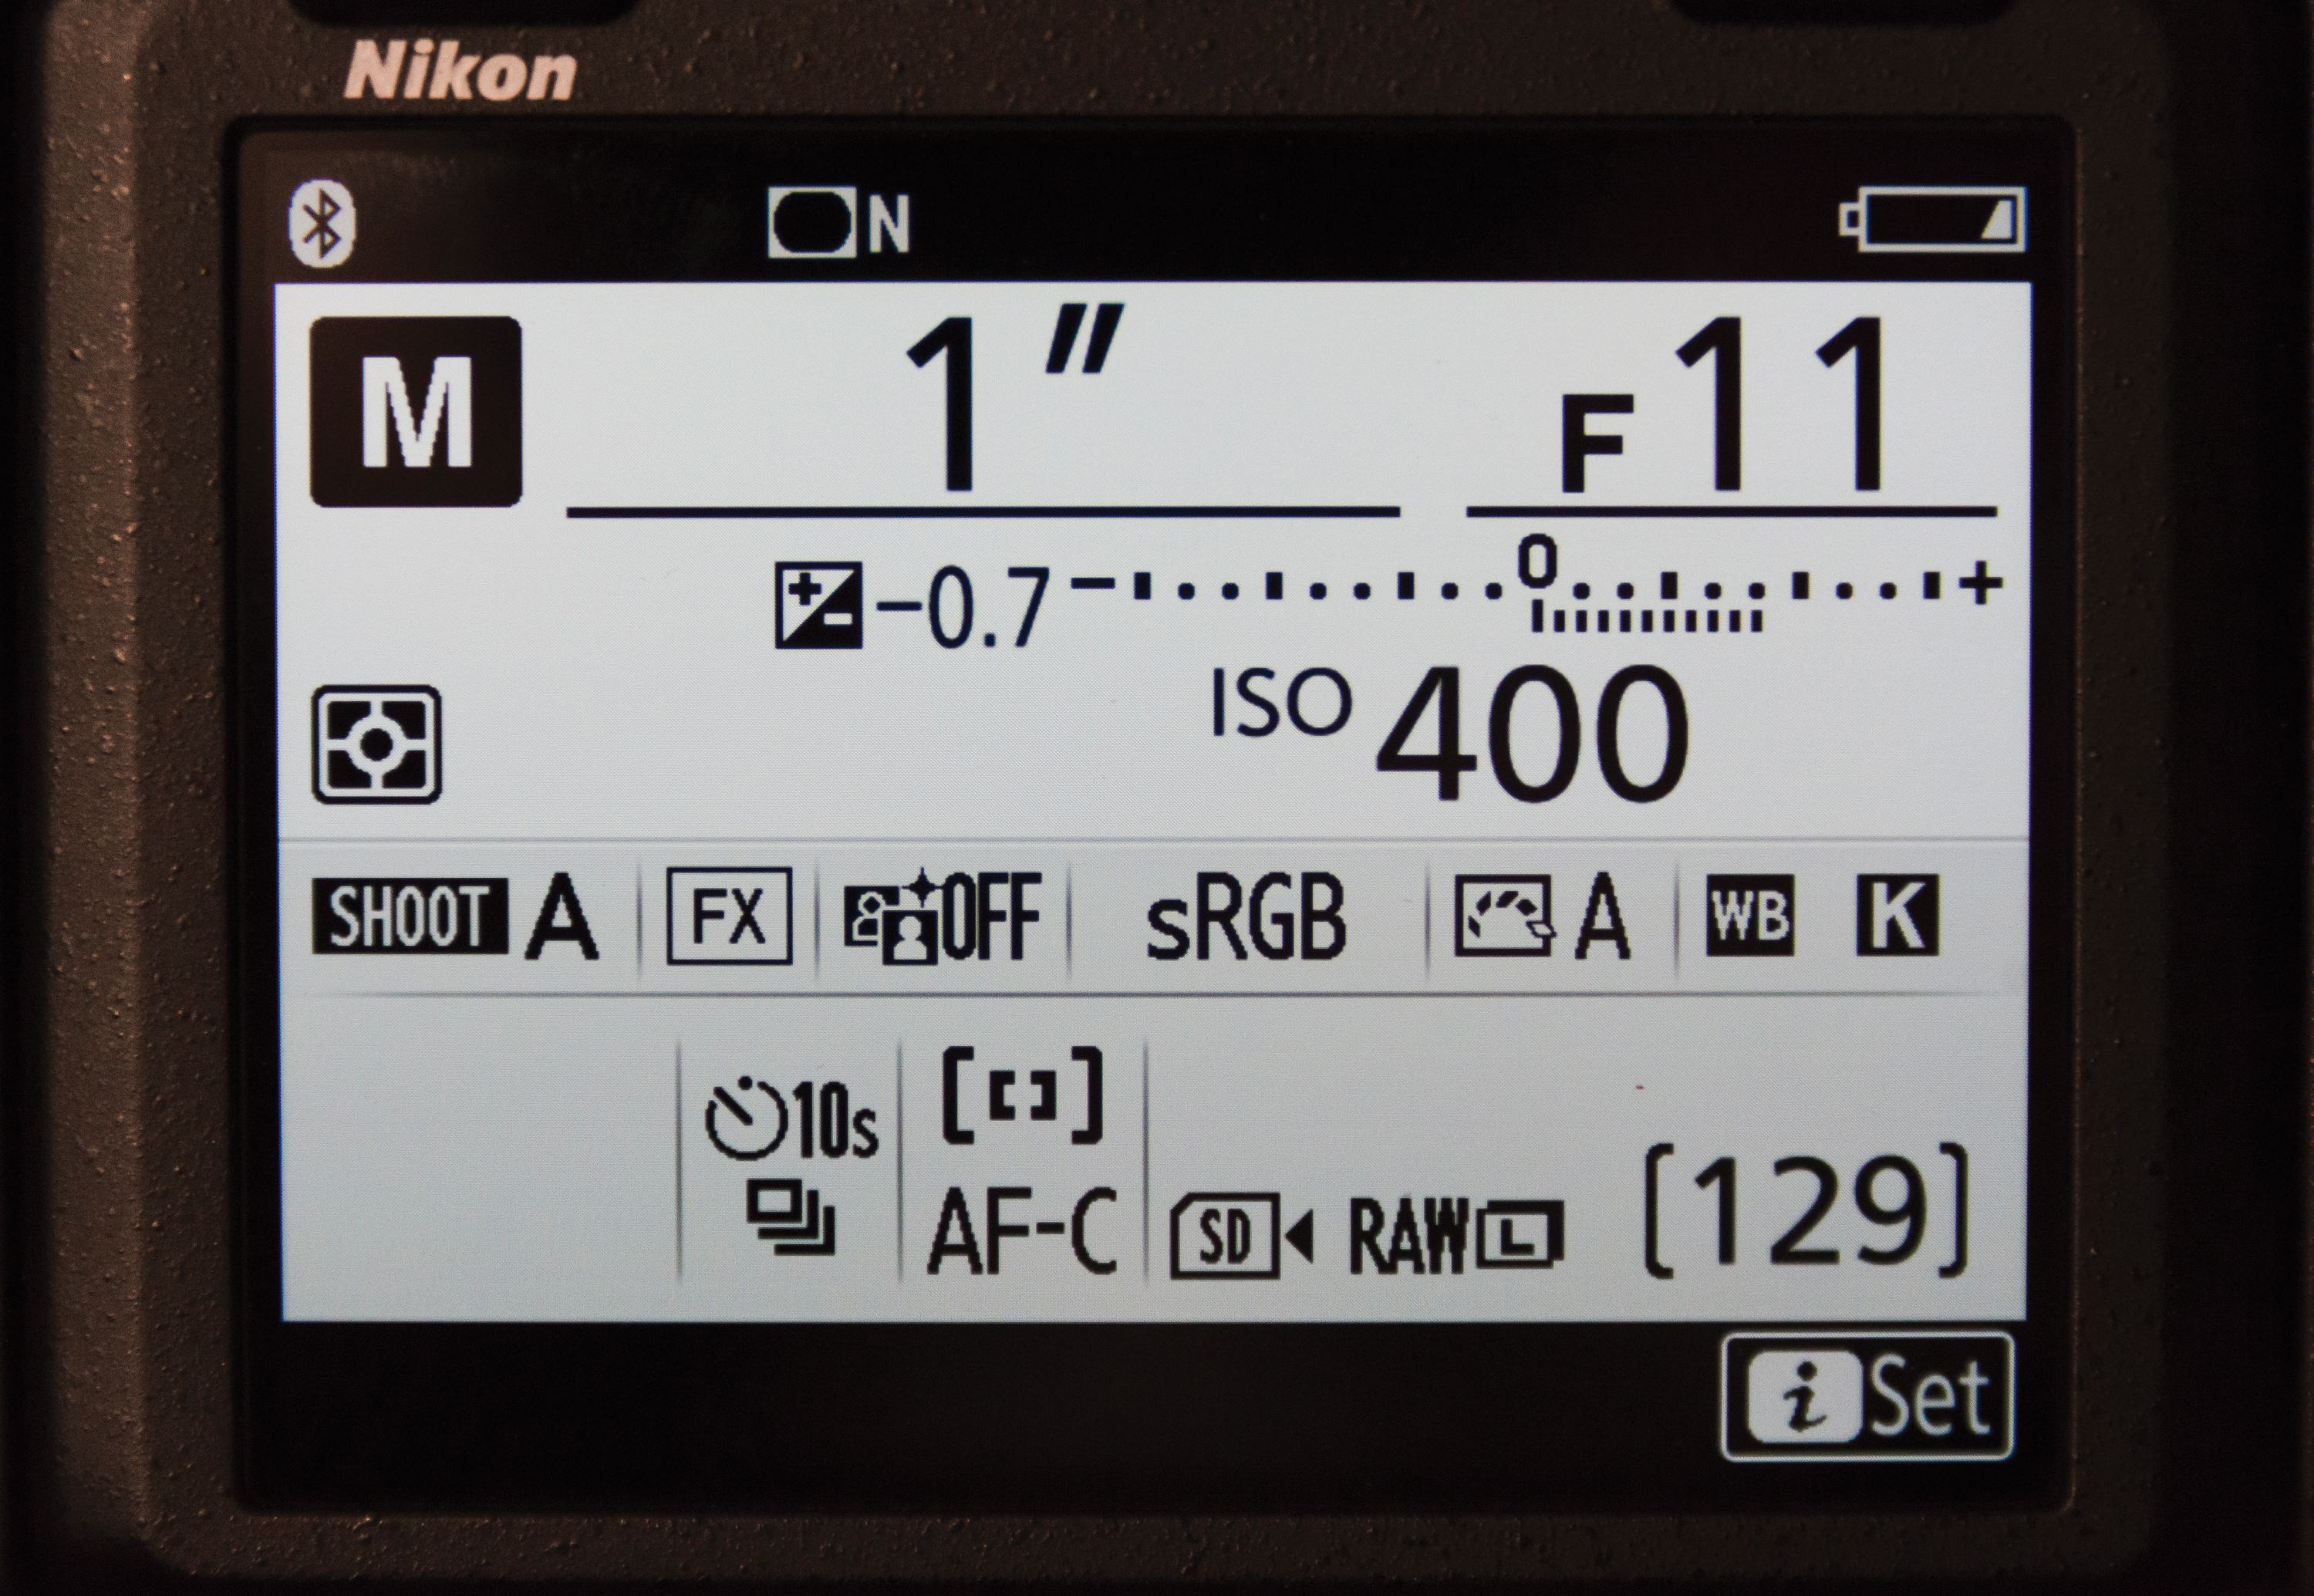
03 Lock the exposure
As we’re combining a set of images here, it’s important that exposure stays consistent throughout the shoot, so Manual mode is the best choice of exposure mode. After taking a few test shots, we settled upon aperture f/11, a shutter speed of 1 sec, and ISO400.
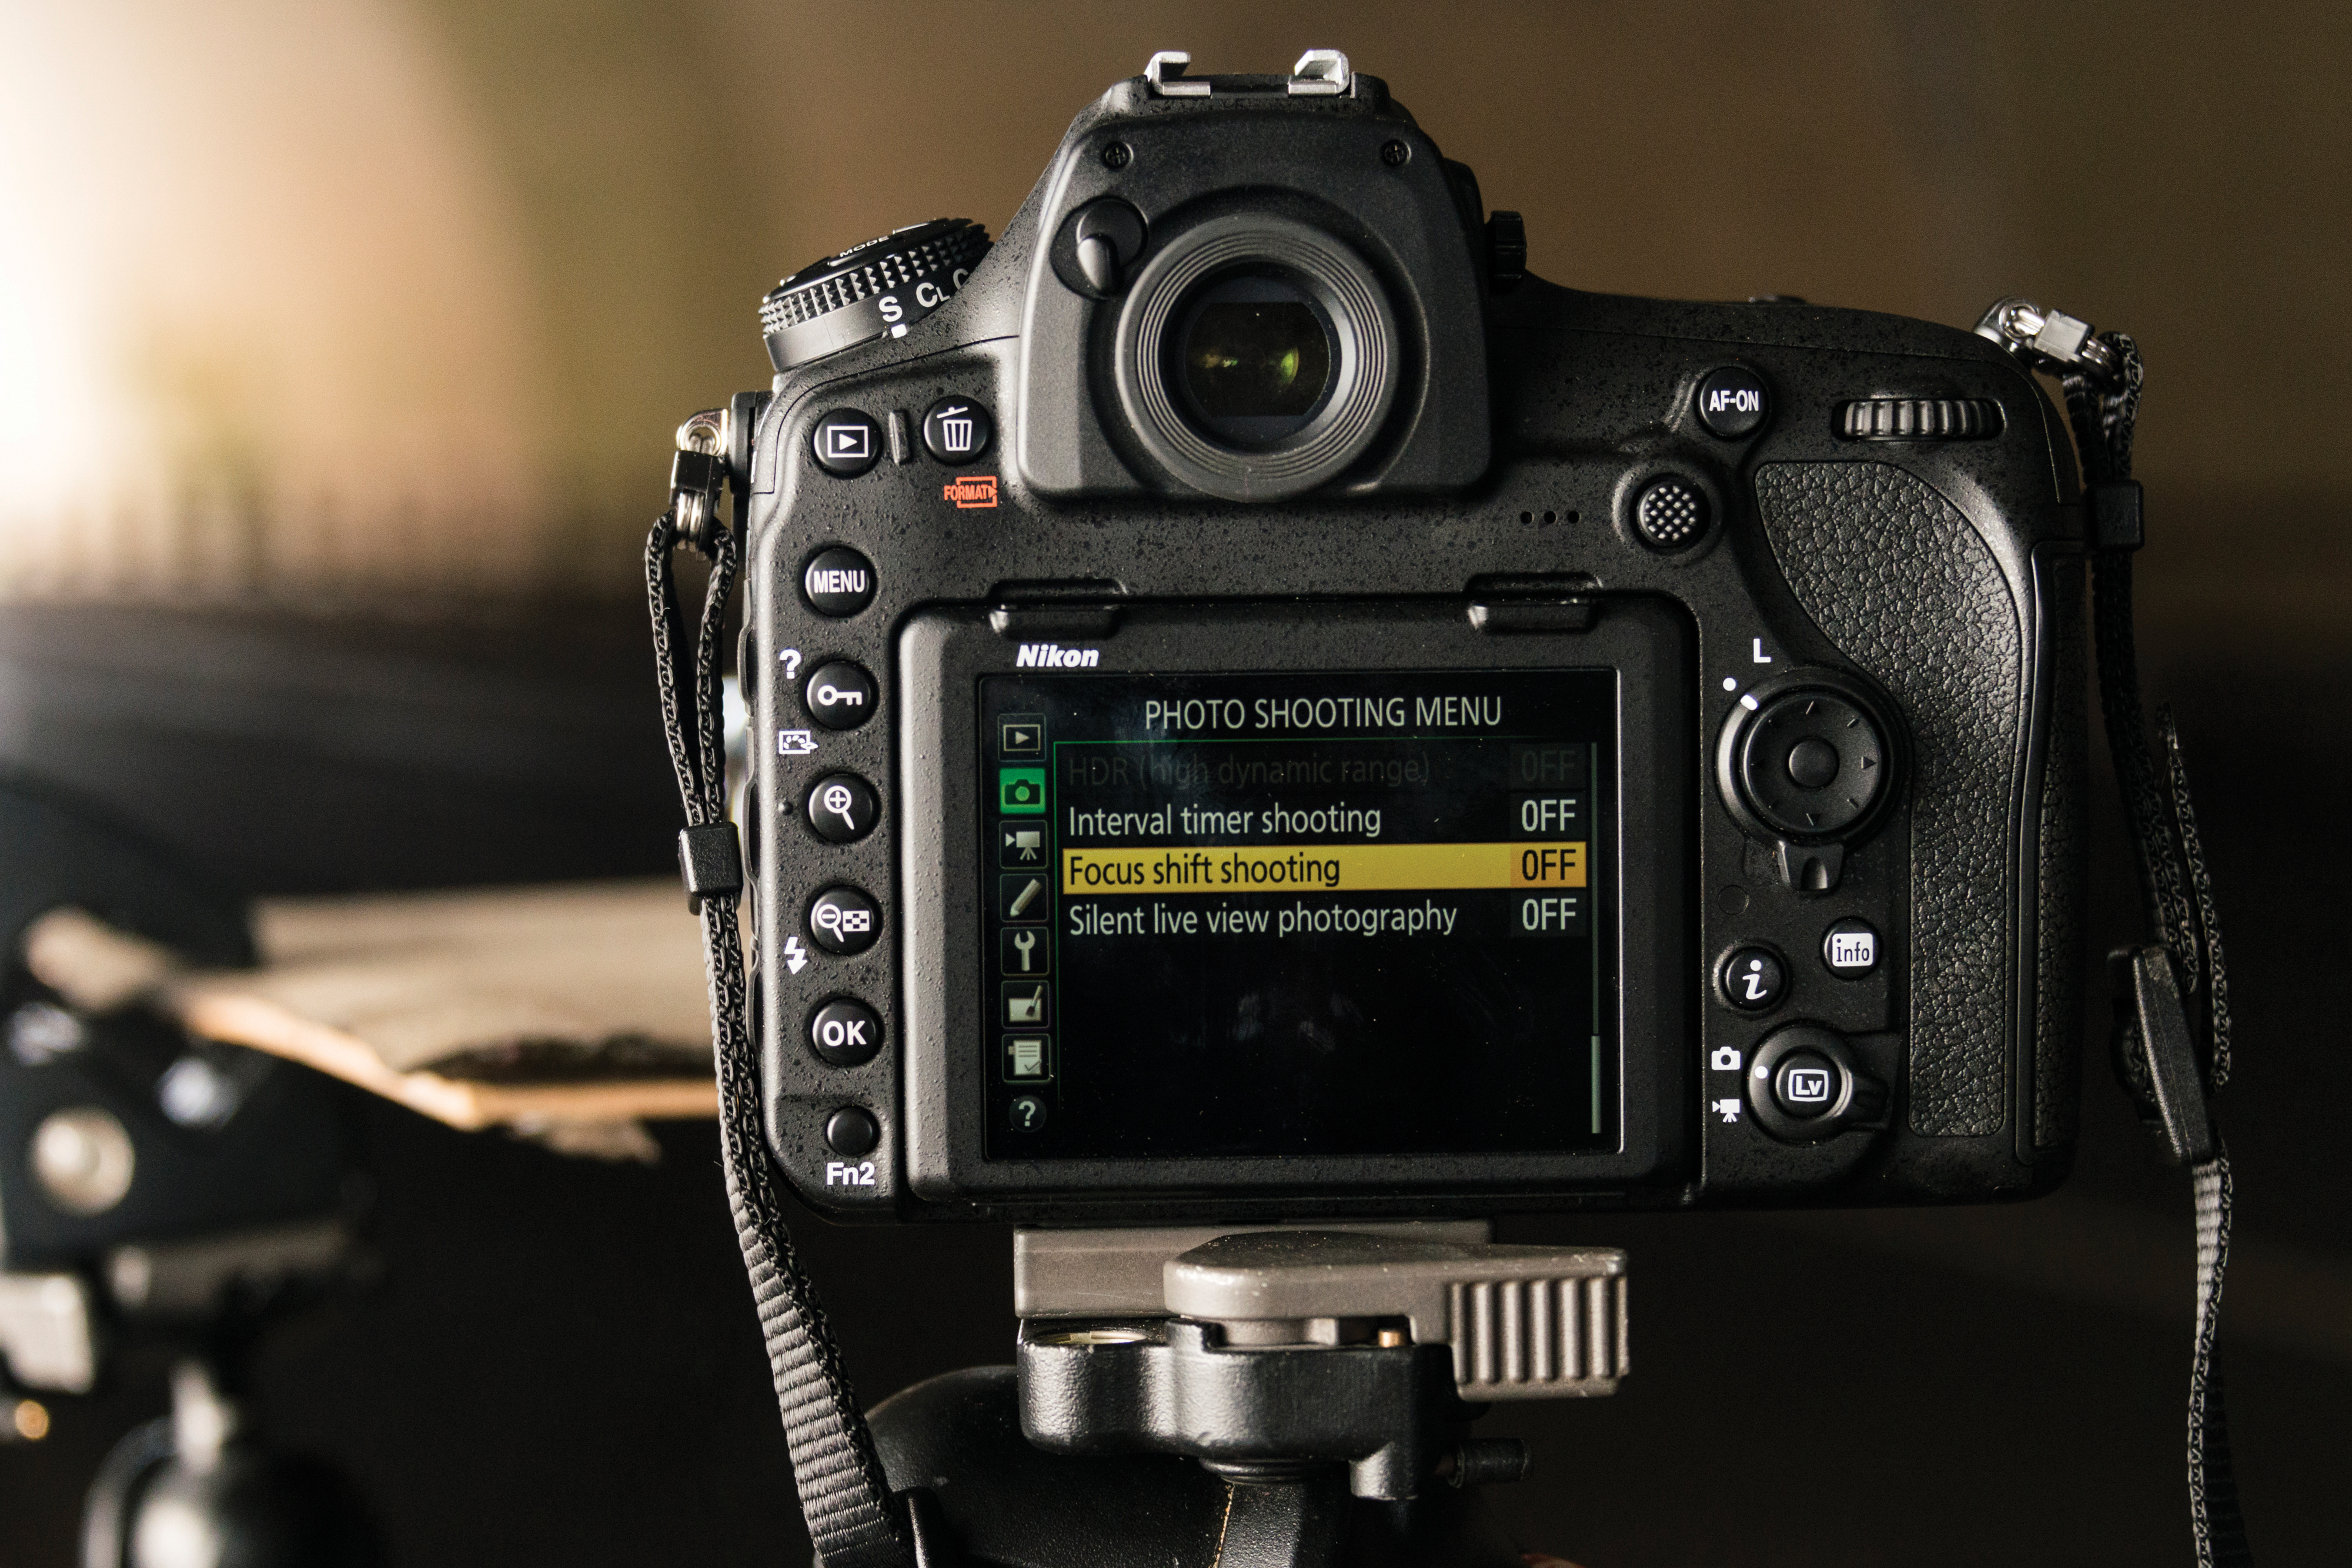
04 Make a focus stack
As the car is very close to the camera, depth of field is limited, so we need to use focus stacking to get it all sharp. This involves taking several shots, adjusting the focus point slightly after each. Cameras like the Nikon D850, Olympus OM-D E-M5 Mark III and Canon EOS 90D have automated focus stacking features to make the process easier.

05 Create a story
If you like, you can include people in the scene, too. We also wanted to create more of a story to our shot, and decided to go for a 1940s noir look, so we positioned our model beyond the car – first in the distance, for a silhouetted figure, then again to the right of the car.
06 Shoot the empty scene
The next step is to remove everything from the scene and take another shot, making sure that our exposure stays consistent. We can use this frame later to fill in any details obscured by the platform that we might want to include in the finished shot.
Piece it together in post
01 Combine the sharp parts
Select all your images in Bridge, then go to Tools > Photoshop > Load into Layers. Next, Shift-click between the top and bottom layer in the Layers panel to highlight them, then go to Edit > Auto-Align Layers. Set Auto and hit OK. Next go to Edit > Auto-Blend Layers.
02 Blend the backdrop
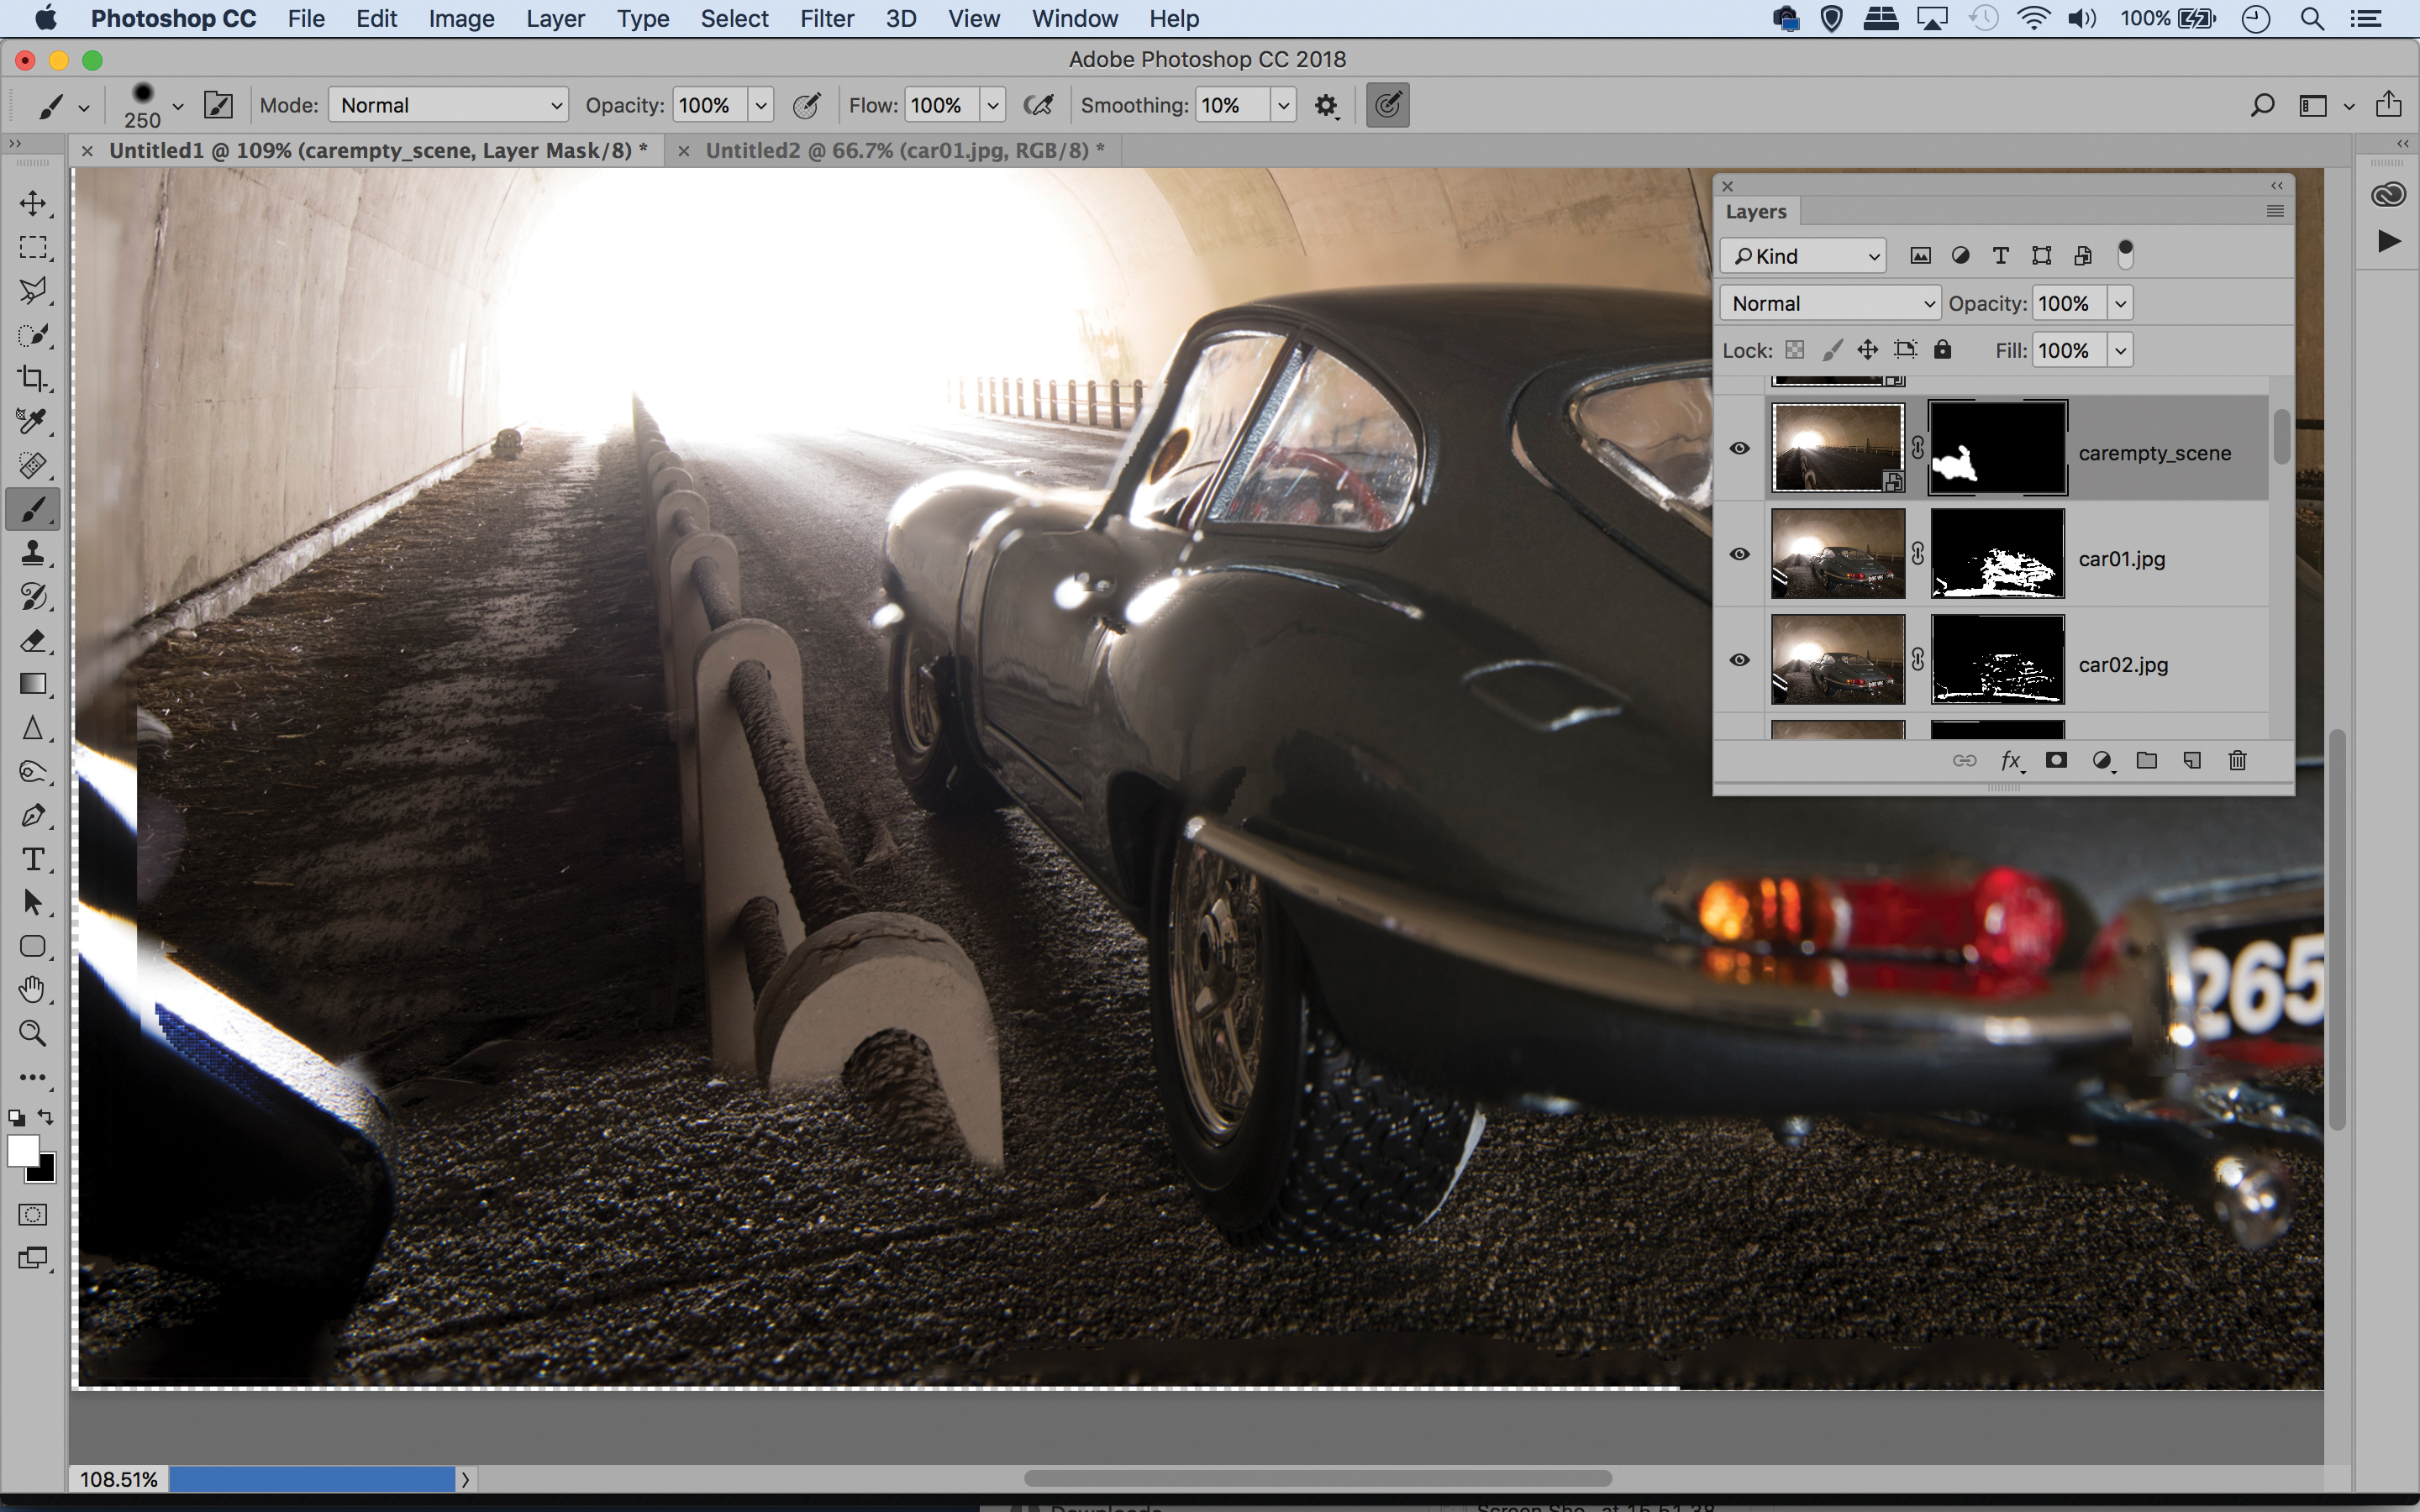
Once the focus stacking is done, open the image of the empty scene. Drag and drop it on top of the focus stack, then Alt-click the Add Layer Mask icon to hide it behind a mask. Paint white over the areas of the scene to reveal them, like the barrier on the left.
03 Add the figures
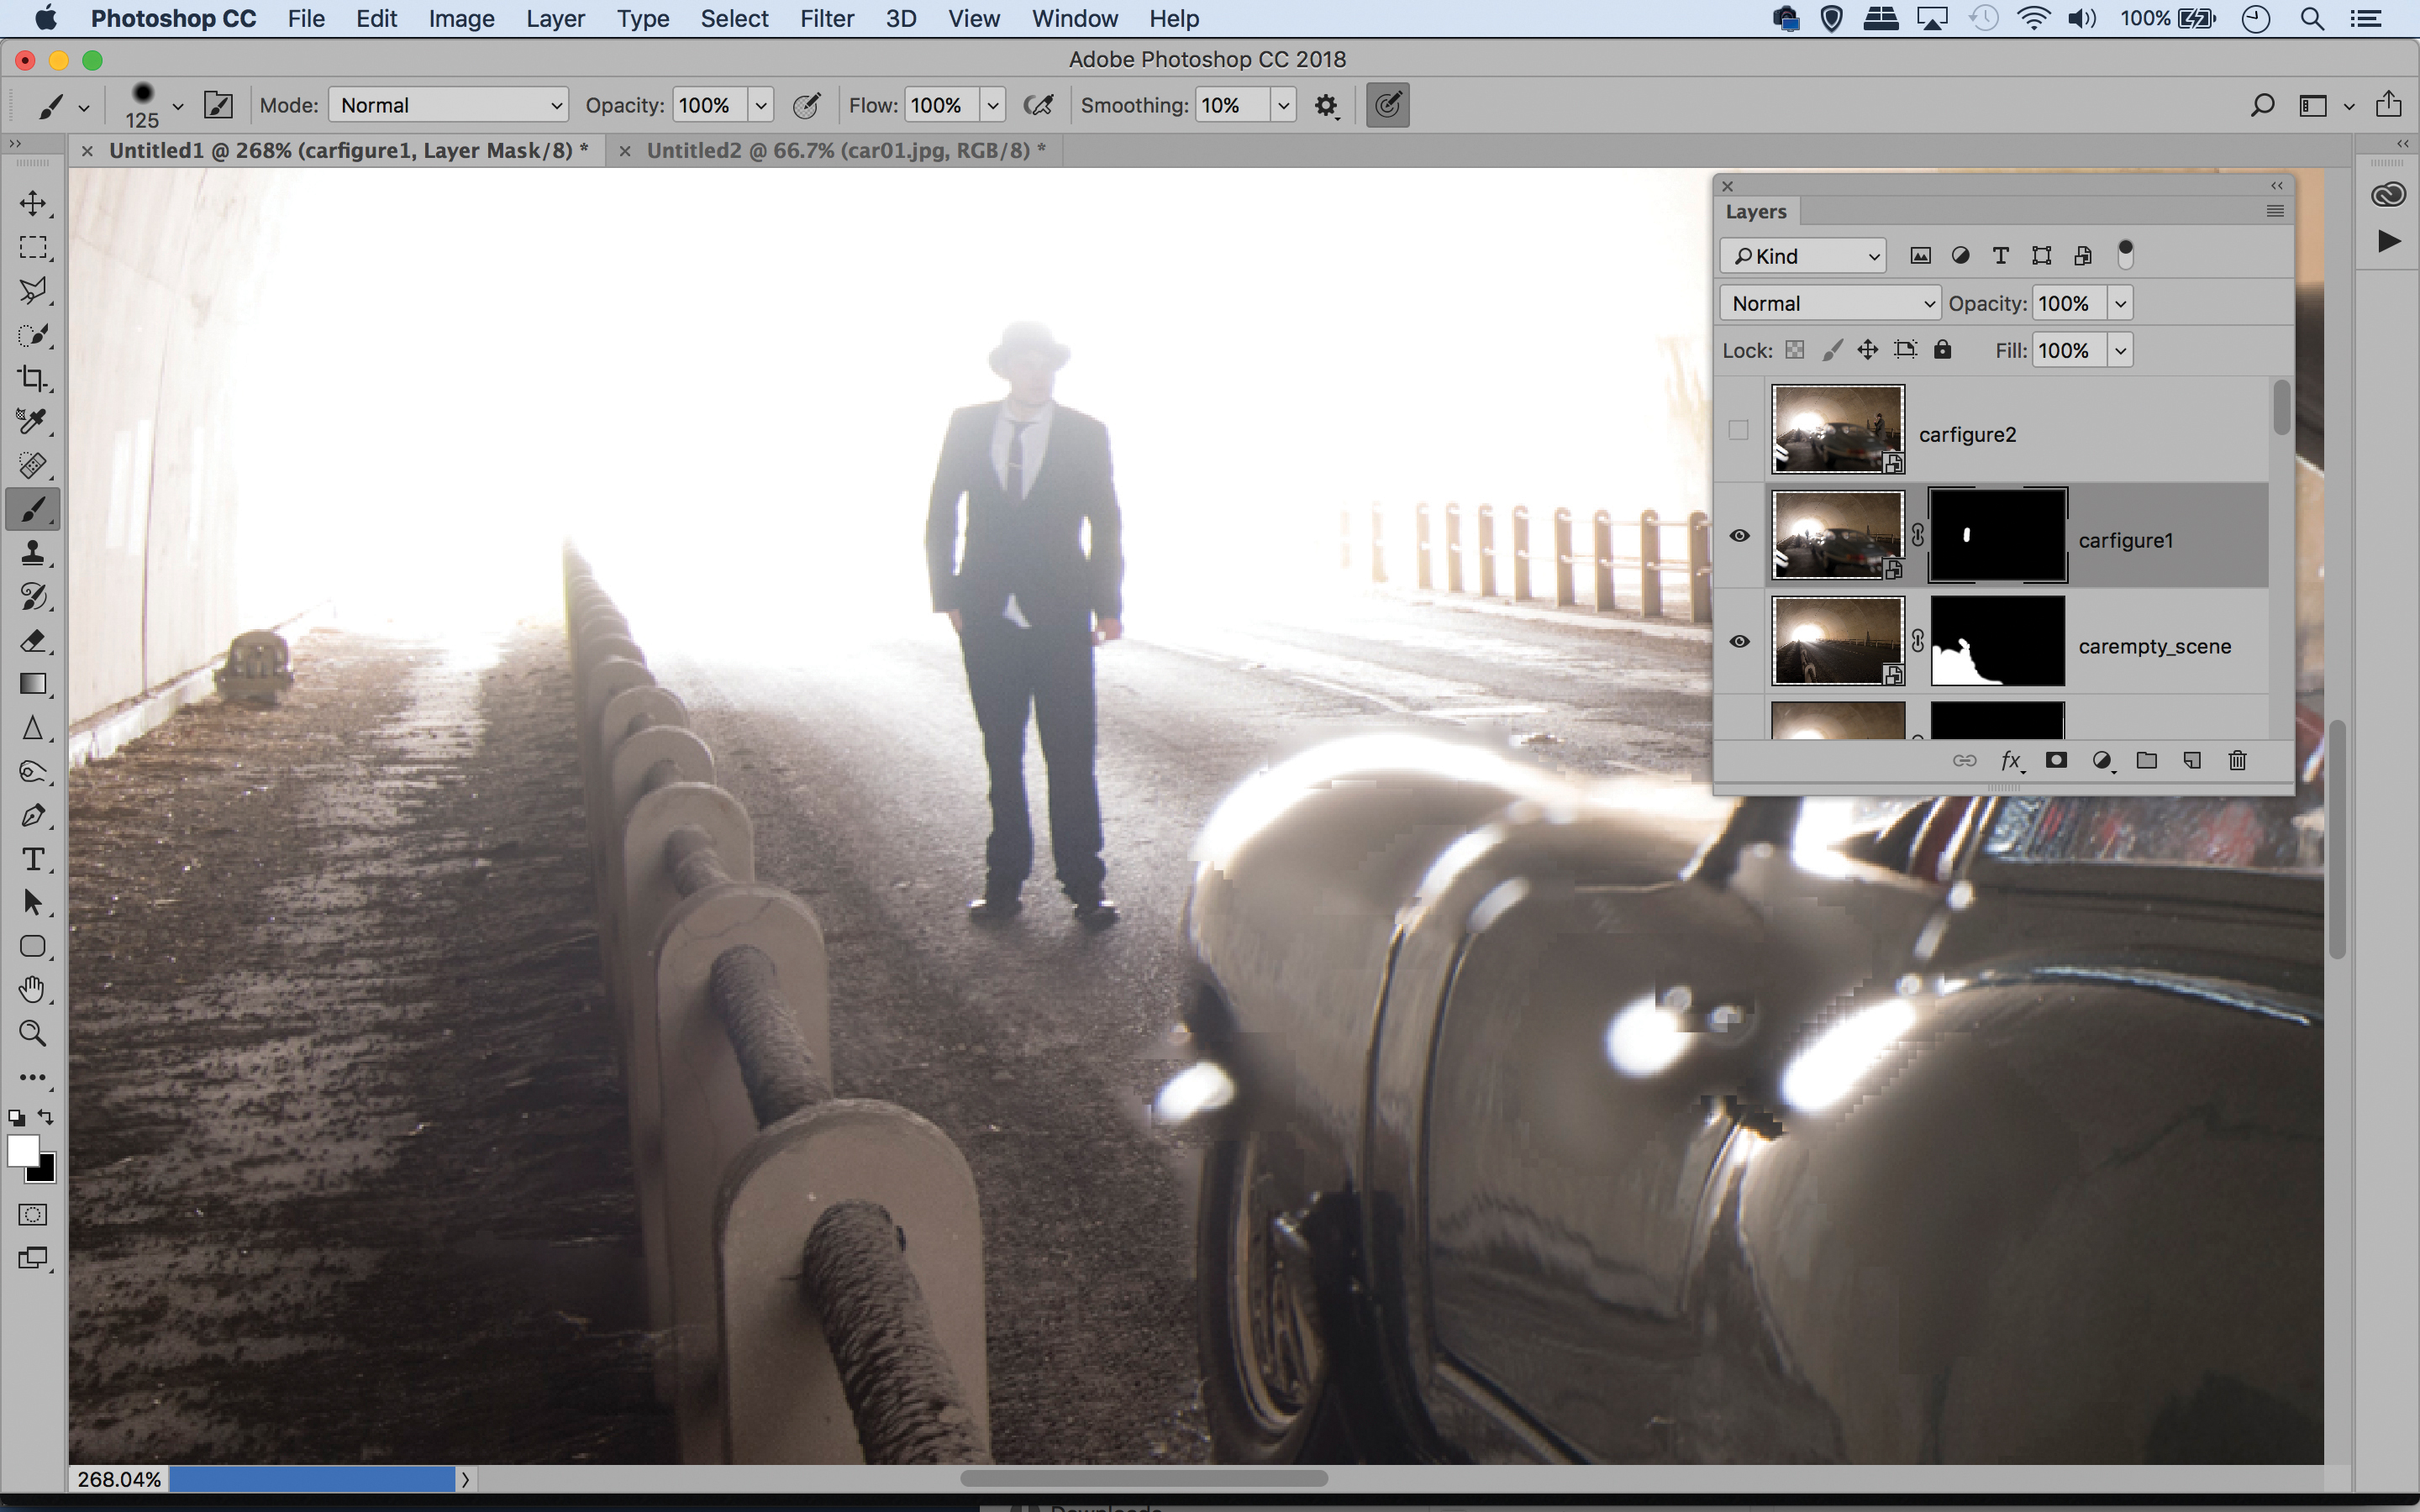
Drop in the images of the figures and mask in the same way. There will inevitably be a few telltale signs, so make a new layer at the top of the layer stack then grab the Clone tool, set it to ‘Sample: All Layers’ then clone over any rough patches that you might see.
N-Photo: The Nikon Magazine is a monthly publication that's entirely dedicated to Nikon users. For the best news, reviews, projects and more, subscribe to N-Photo today!
Read more:
Best wide-angle lens: ultrawide zooms that get everything in the picture
The best tripod for photographers: get sharper shots in any conditions
Photography tips, techniques and tutorial videos
Get the Digital Camera World Newsletter
The best camera deals, reviews, product advice, and unmissable photography news, direct to your inbox!
The lead technique writer on Digital Camera Magazine, PhotoPlus: The Canon Magazine and N-Photo: The Nikon Magazine, James is a fantastic general practice photographer with an enviable array of skills across every genre of photography.
Whether it's flash photography techniques like stroboscopic portraits, astrophotography projects like photographing the Northern Lights, or turning sound into art by making paint dance on a set of speakers, James' tutorials and projects are as creative as they are enjoyable.
He's also a wizard at the dark arts of Photoshop, Lightroom and Affinity Photo, and is capable of some genuine black magic in the digital darkroom, making him one of the leading authorities on photo editing software and techniques.
