Home photography ideas: Shoot stunning sports self-portraits!
With a little help from Photoshop, shoot yourself in an iconic sports pose
Watch video: Home photography ideas – Shoot a stunning sports selfie
The current self-isolation situation makes it a challenge to indulge two of our favorite pastimes: photography and sports. Thankfully, you can scratch both itches with this creative photo project – it's a great reason to break out your lighting kit, a great way to exercise your Photoshop skills, and a great excuse to dust off your golf clubs!
Here we'll show you how to shoot and combine a series of images into a striking composite shot, worthy of an iconic sports cover on a magazine. The aim here isn’t necessarily to make it ultra-realistic, though; we’ll take a more fantastical approach and enhance the image with a few effects and a lightning bolt or two. After all, if you’ve got the chance to make yourself look like a sporting god, why would you hold back on the lightning bolts?
• 10 best online photography courses
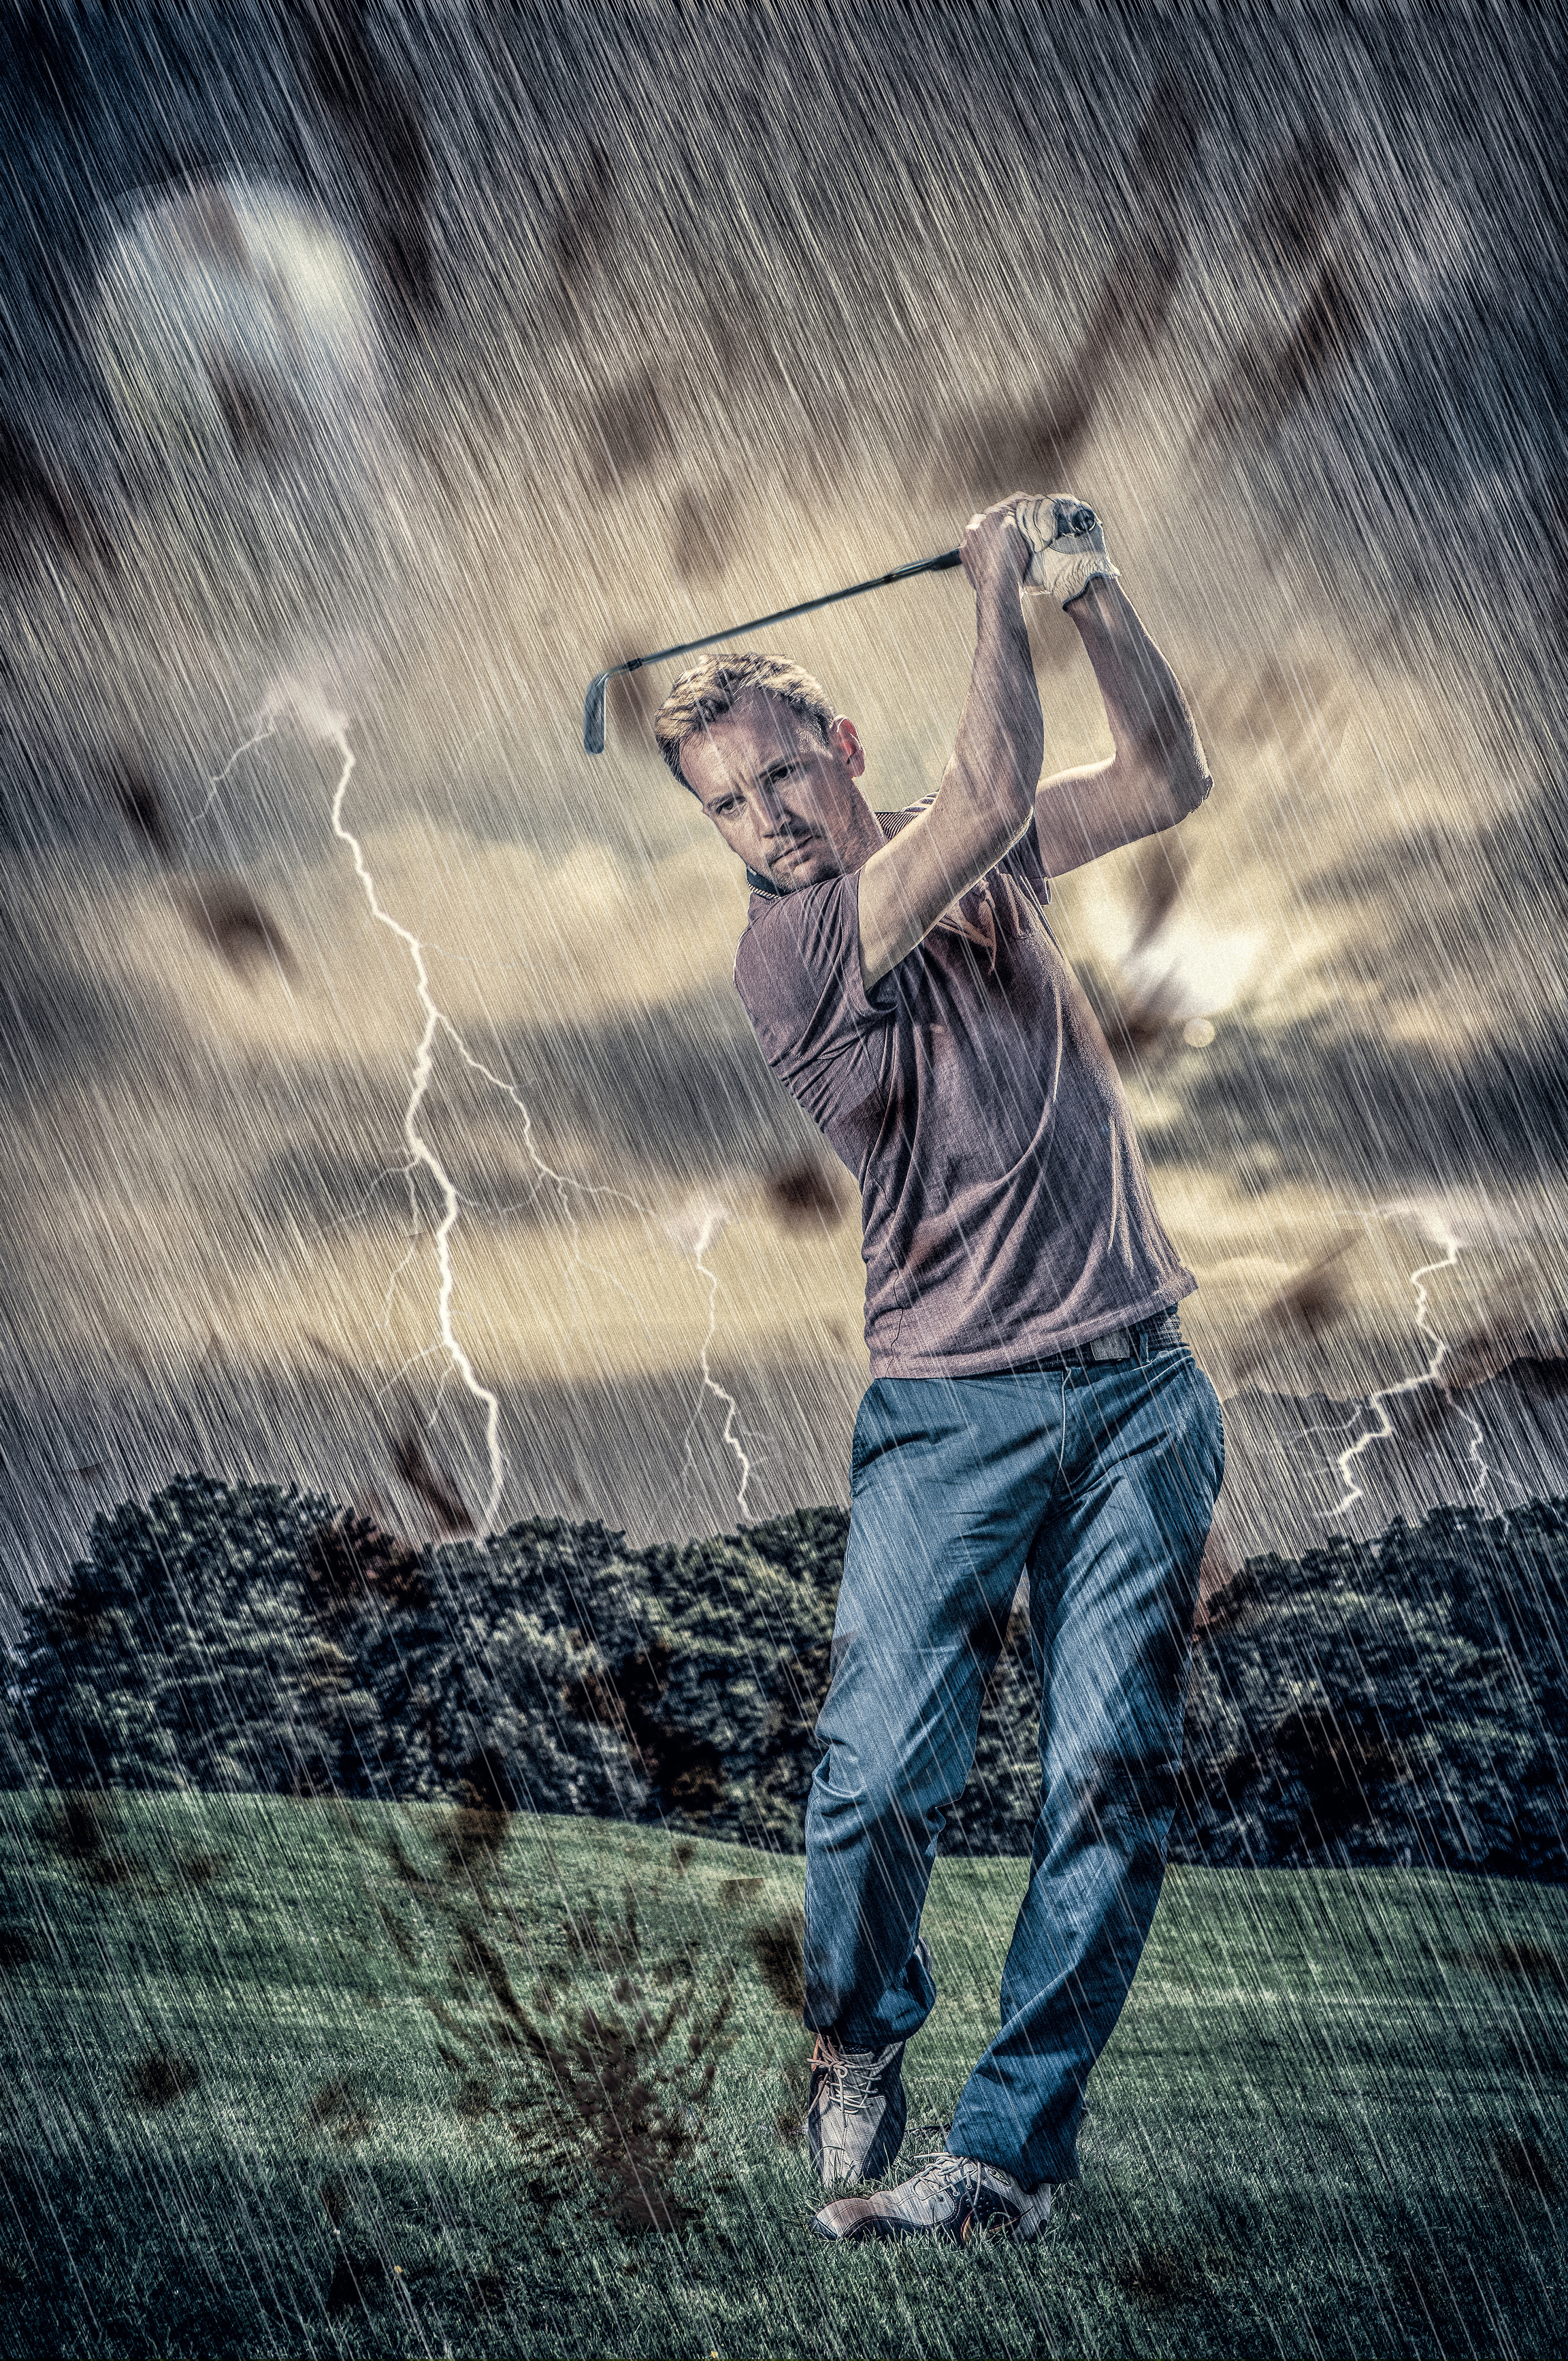
Some might think an image like this is all about the Photoshop skills, but that’s only the back nine – the shooting stage is just as important. Composites are much easier to put together if the lighting and camera angle stays fairly consistent, so we’ll start by explaining how to capture a set of images for a composite, before going on to look at the editing tricks you’ll need to pull it off.
Along the way we’ll explore key skills like how to use flashguns, how to cut out and combine images in Photoshop with selections and masks, and how to add special effects like lightning and rain!
Outdoor lighting with flashguns
Remember that Photoshop may make it easy to combine images, but it can’t perform miracles. When shooting for a composite, consistency is key. Light things from the same angle, try to keep depth of field constant across the images by using the same aperture throughout, and set the focus point to a similar distance from the camera each time.

01 Flashguns and triggers
With two strobes we can make a simple cross-light setup. You don’t need expensive flashguns for this, as they just have to have manual control and an optical slave, and even the cheapest speed lights will offer that. Our bare flashgun has a wireless trigger attached.
02 Set to slave
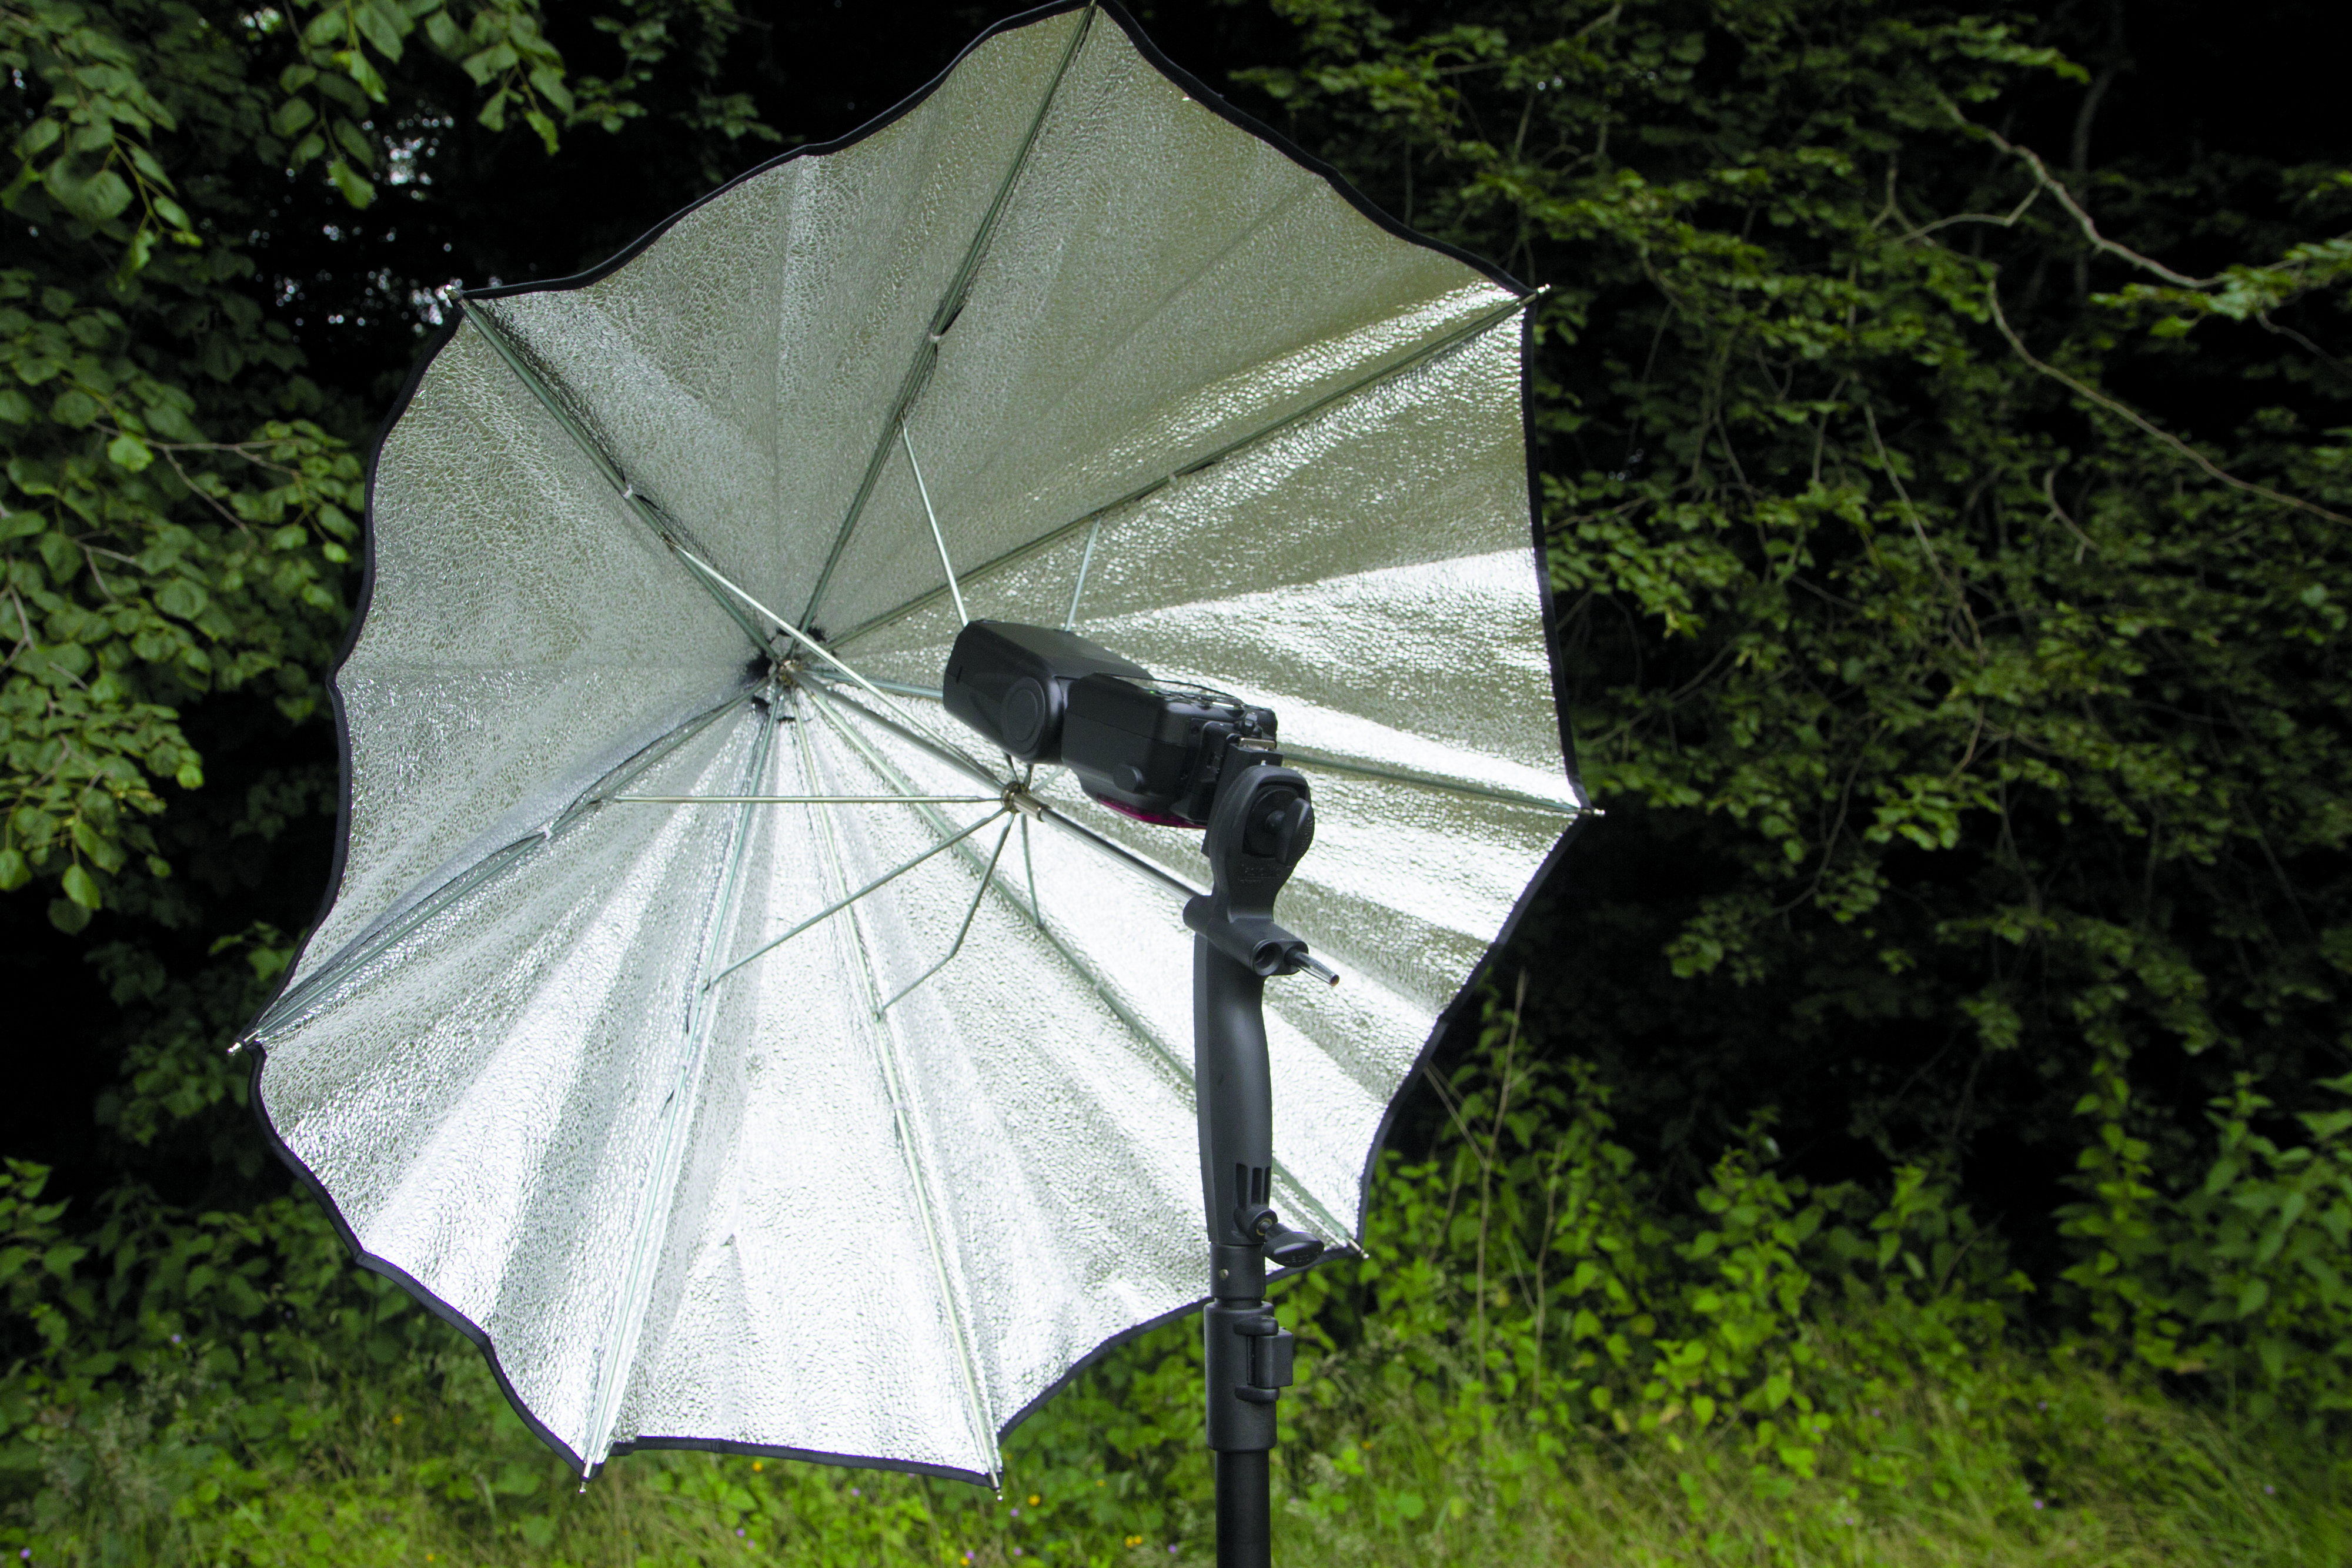
Our second flashgun is set to optical slave. This means that it will fire when it detects the other flash going off, as long as there’s a decent line of sight between the two. Directing the flashgun into a silver umbrella will soften the light.
03 Set up a winning shot
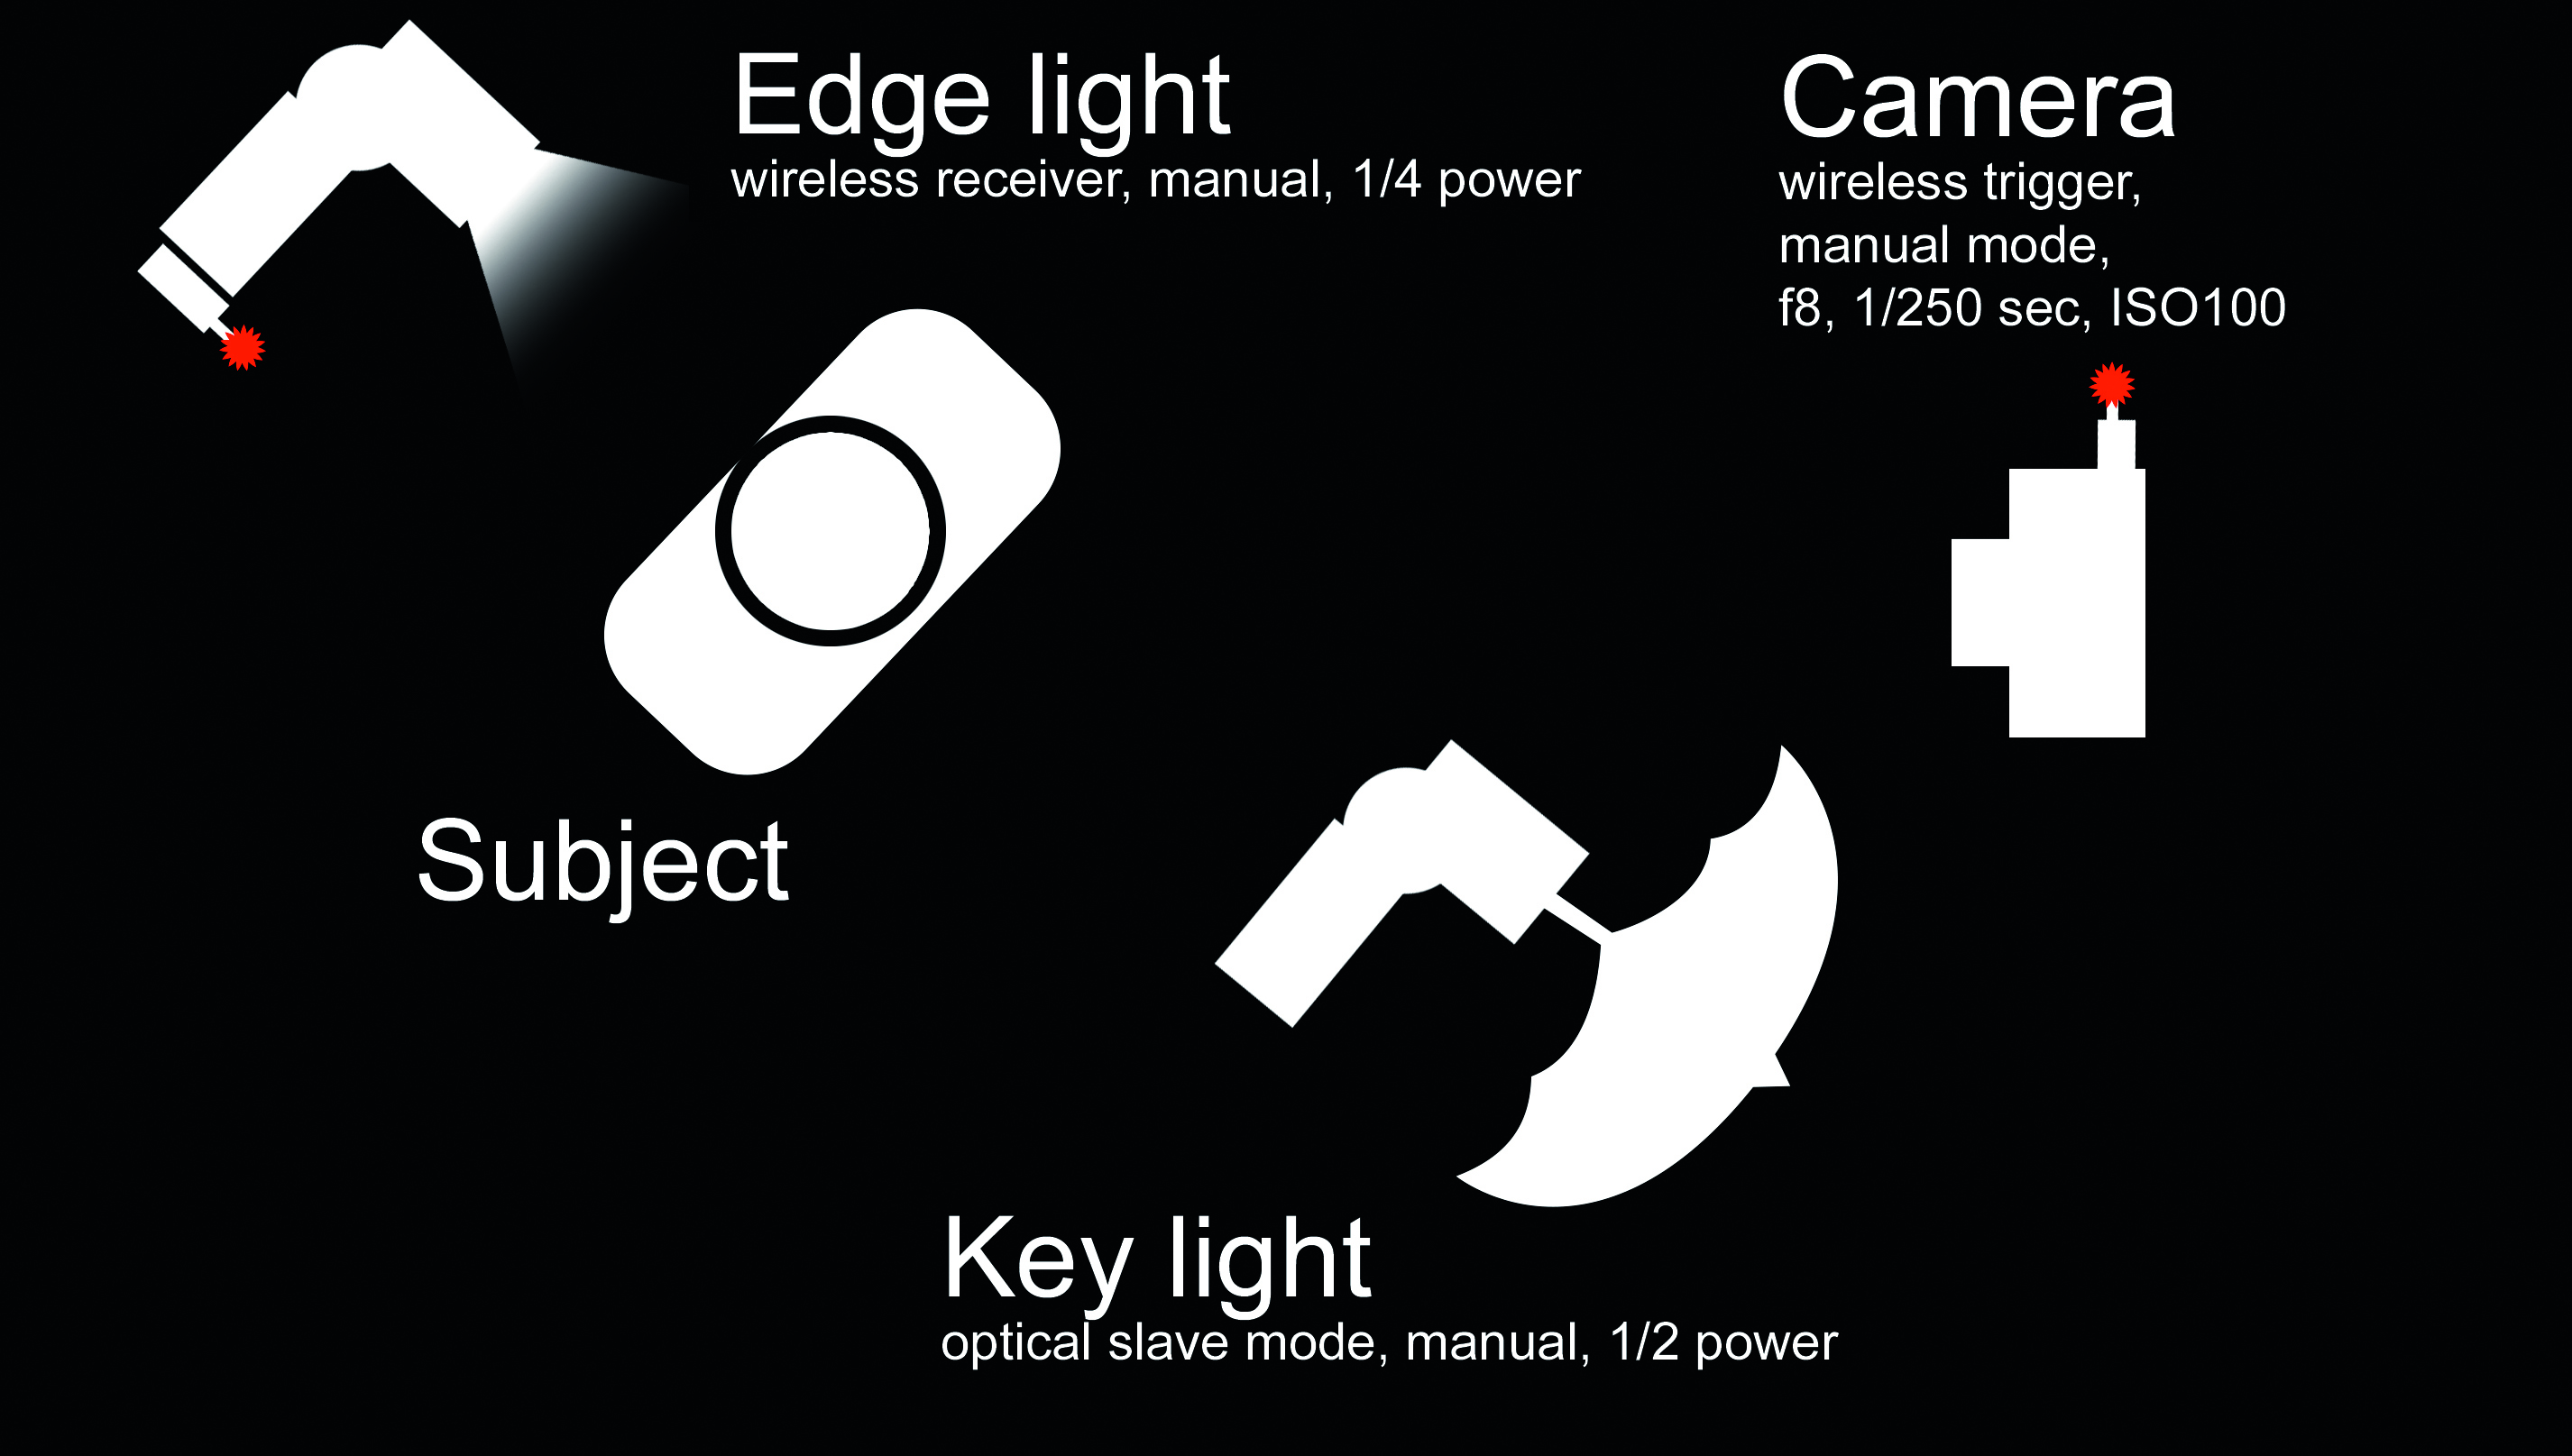
Position one flashgun in front to light the face. We attached a silver umbrella to the frontal light to spread it out, while the rear flash was left bare to create a hard-edged light down one side of the body. Set both to manual, with the front flash at ½ power and the rear at ¼ power. Using a colored backdrop or hanging a colored sheet (either green or blue, depending on what you are wearing) will better enable you to cut out the figure later.
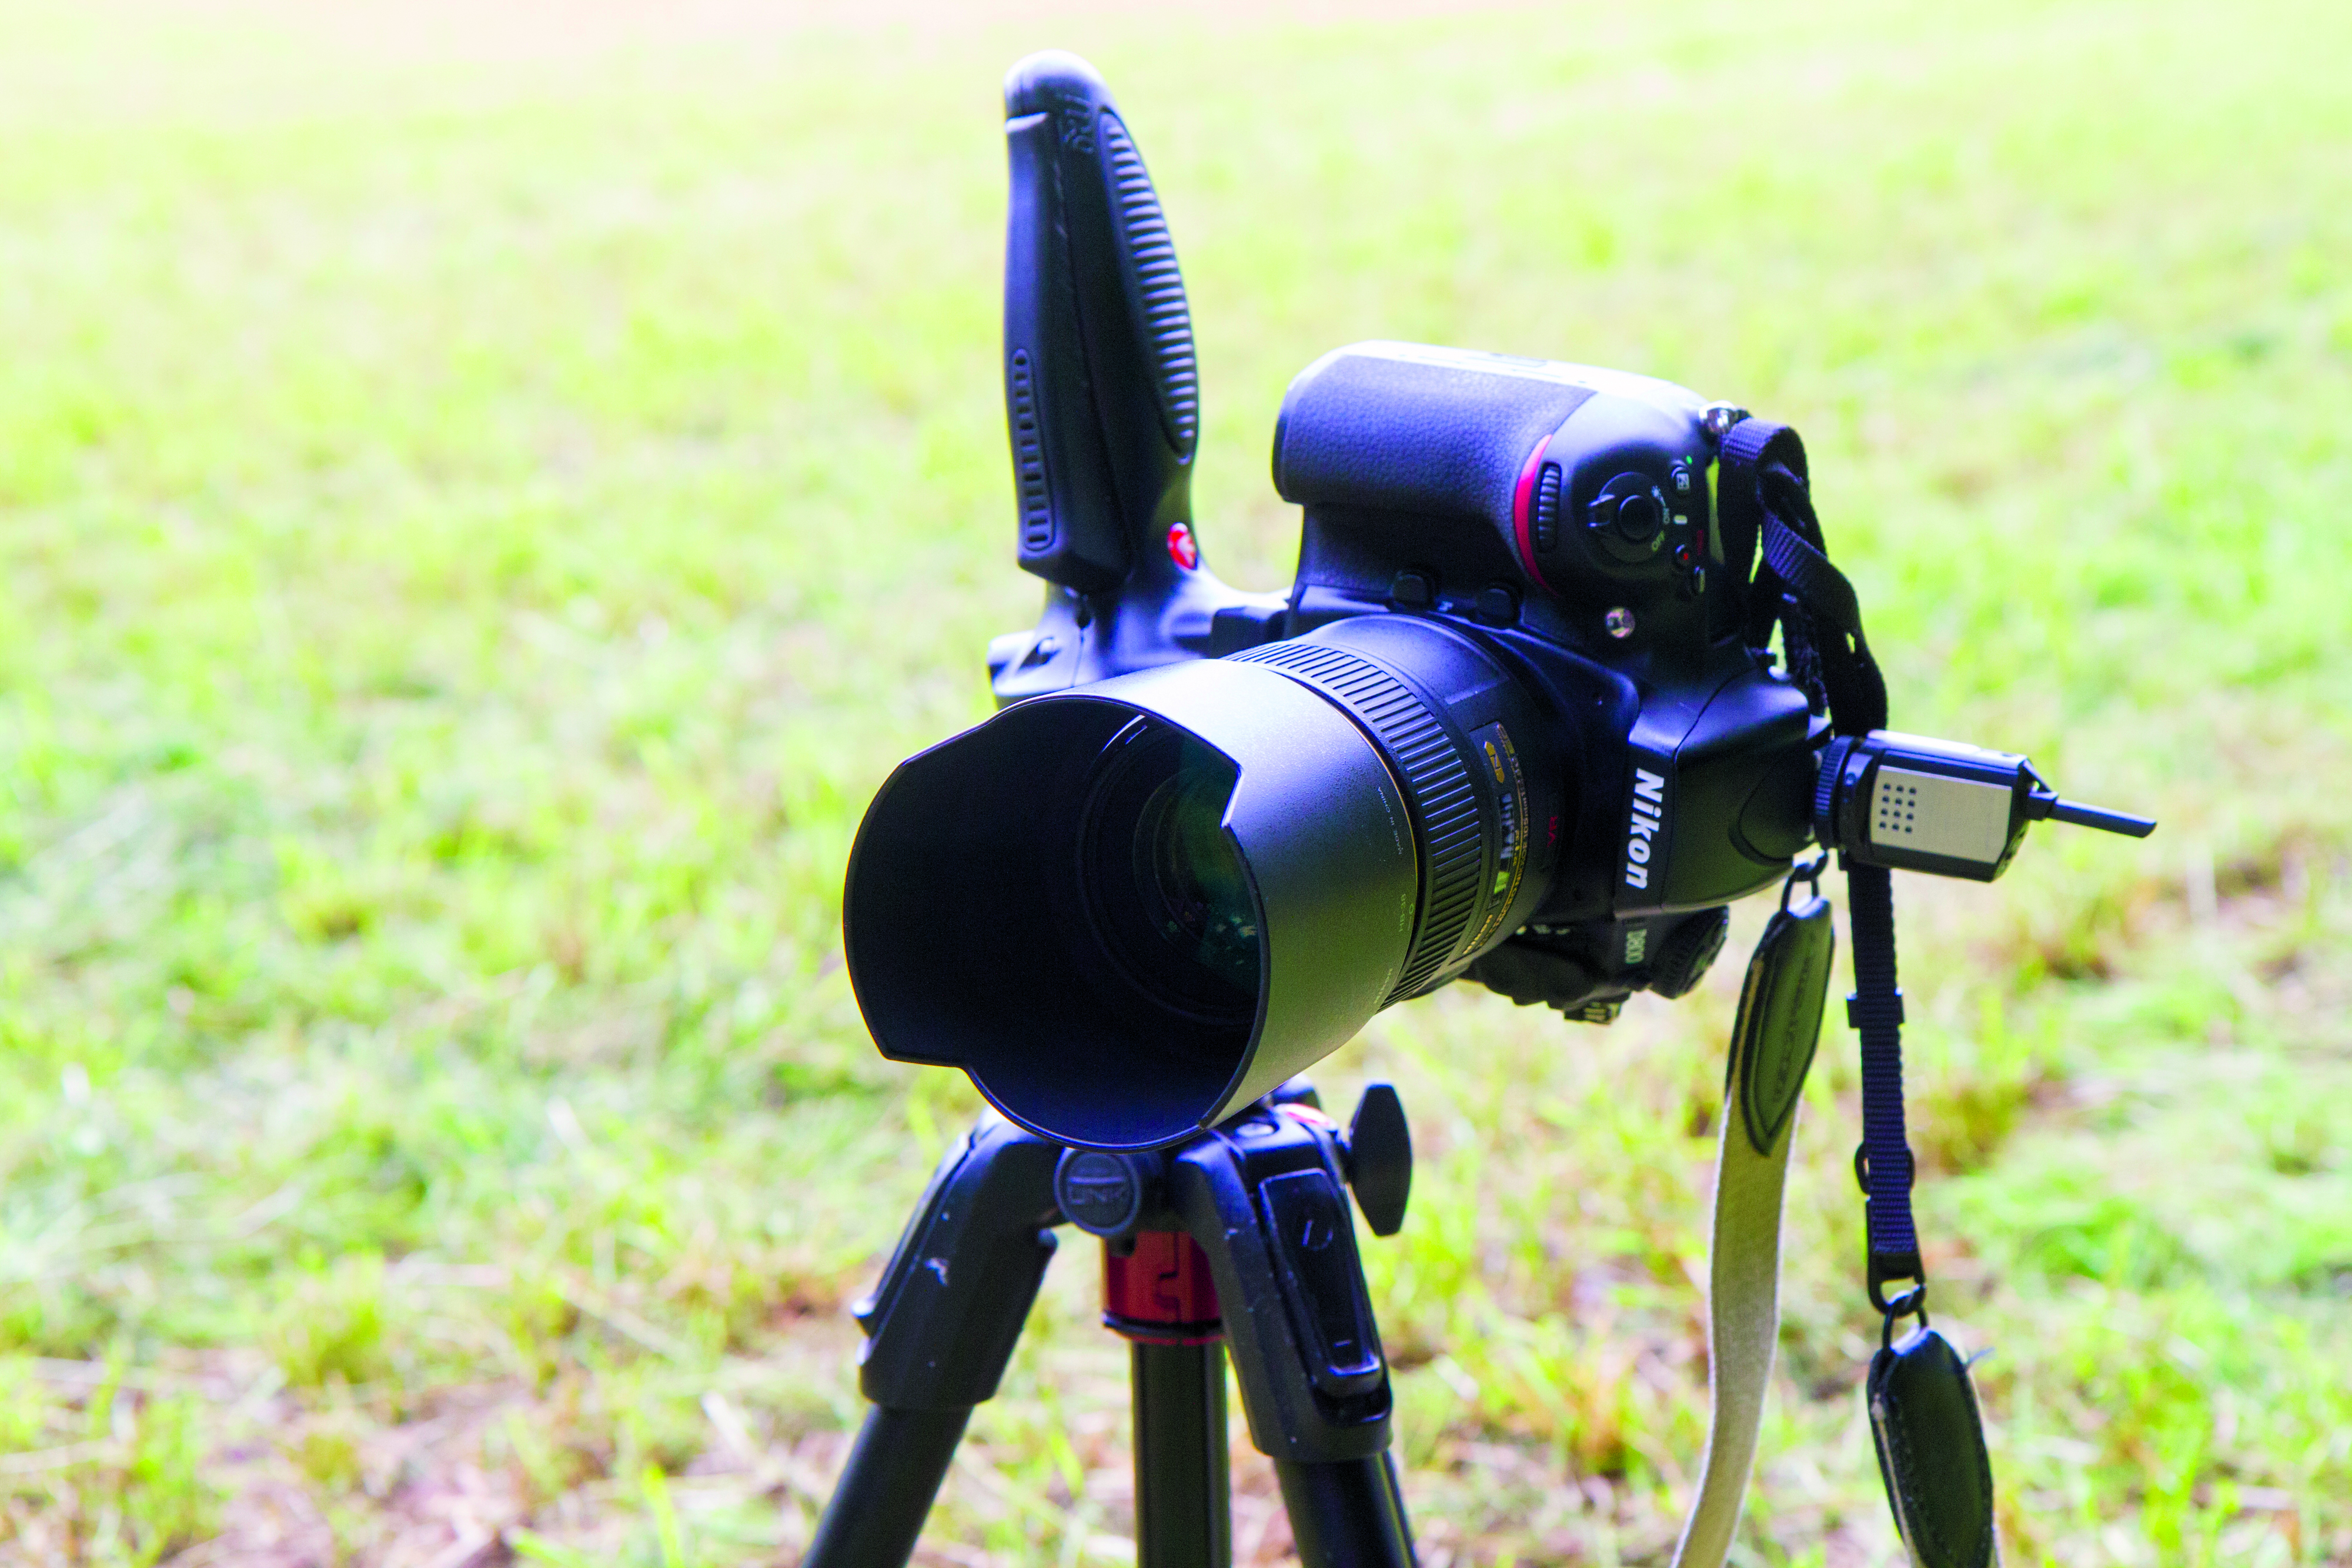
04 Find an exposure
Set your camera to manual. Before turning the flashes on, expose for the existing ambient light and then underexpose slightly by either increasing the aperture or decreasing the ISO. Now turn the flashes on and adjust the power until you’re happy with the light on the subject. We shot at 1/250 sec, f/8, ISO100.
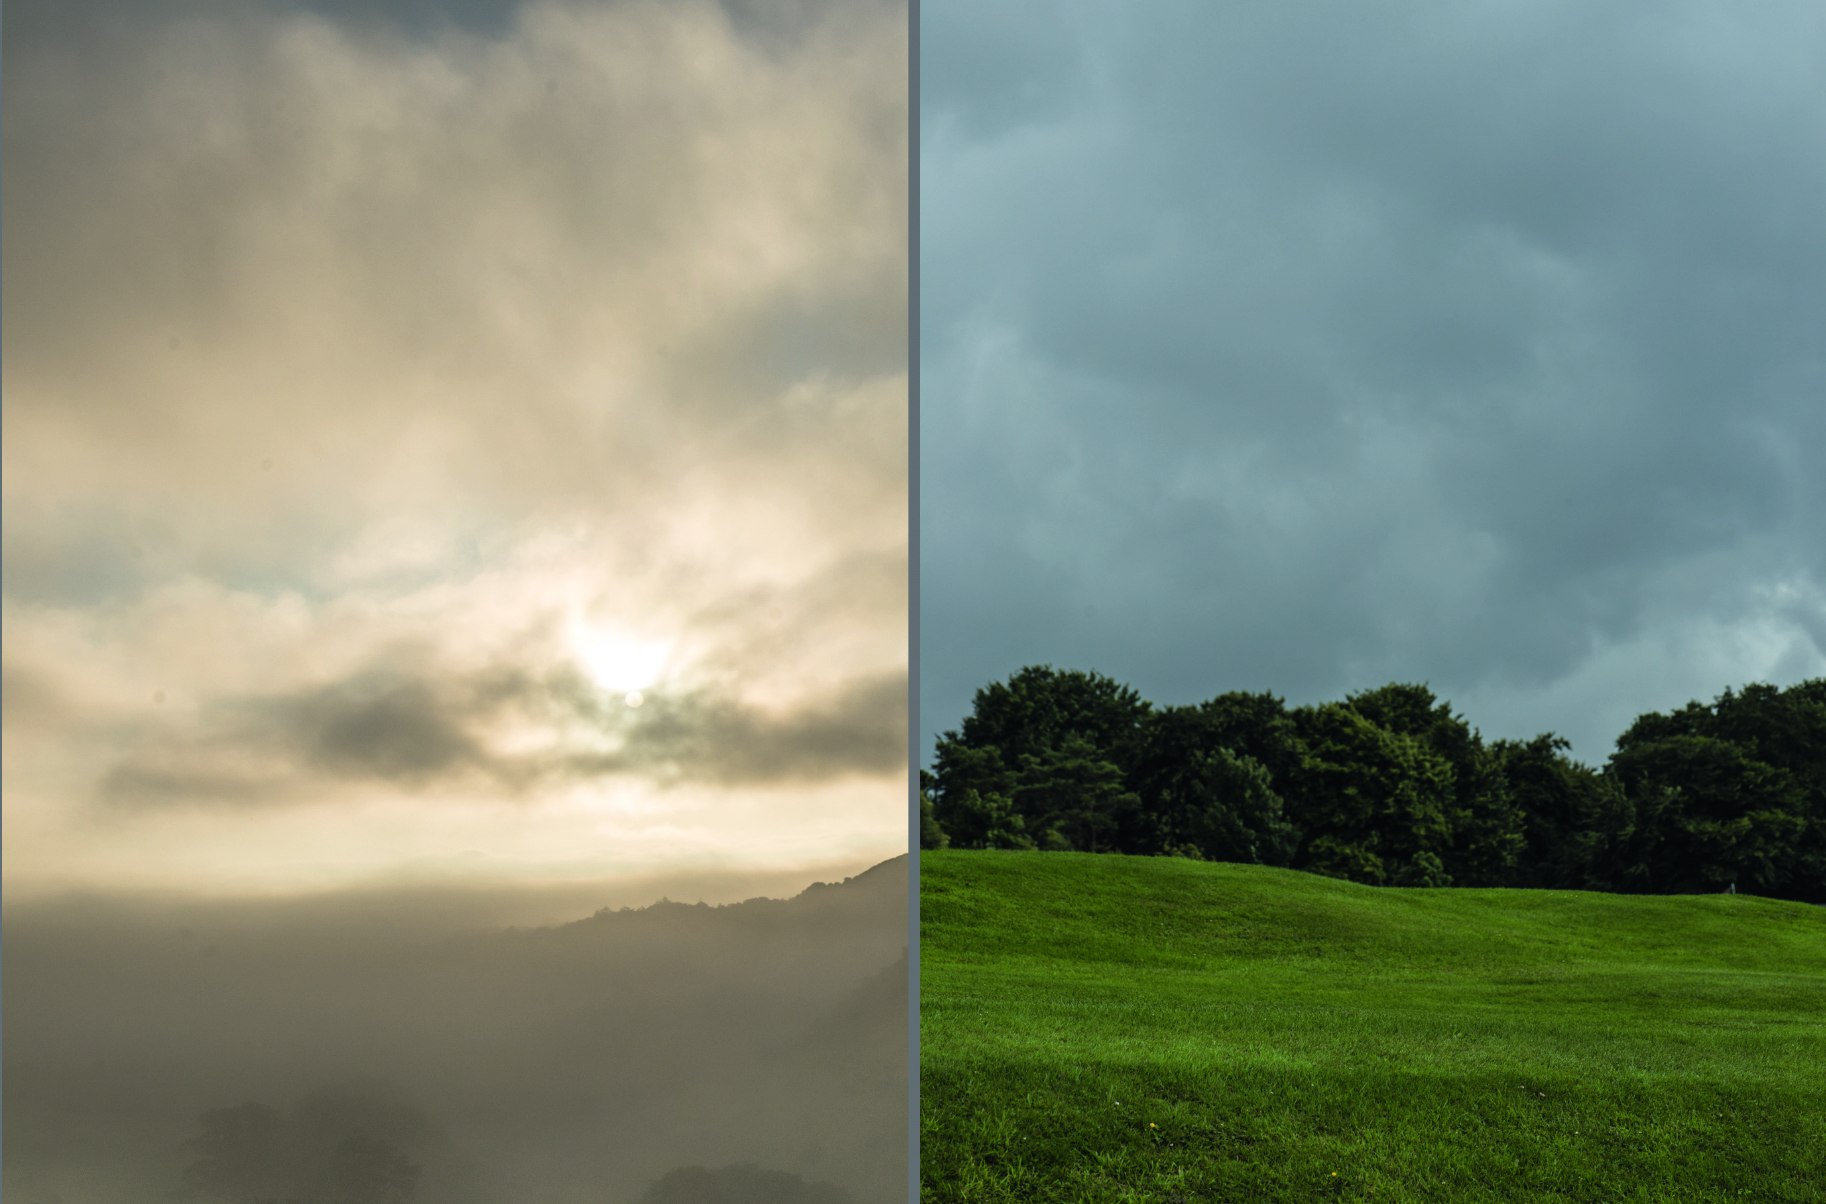
05 Shoot a background
Once you’ve captured the subject, the next step is to shoot a likely backdrop, sky and any other elements you might need. Again, keep everything consistent: the camera height, focal length of the lens, focus point and lighting. We also captured a golf ball up close to the camera, which will add an extra element to the finished shot later.
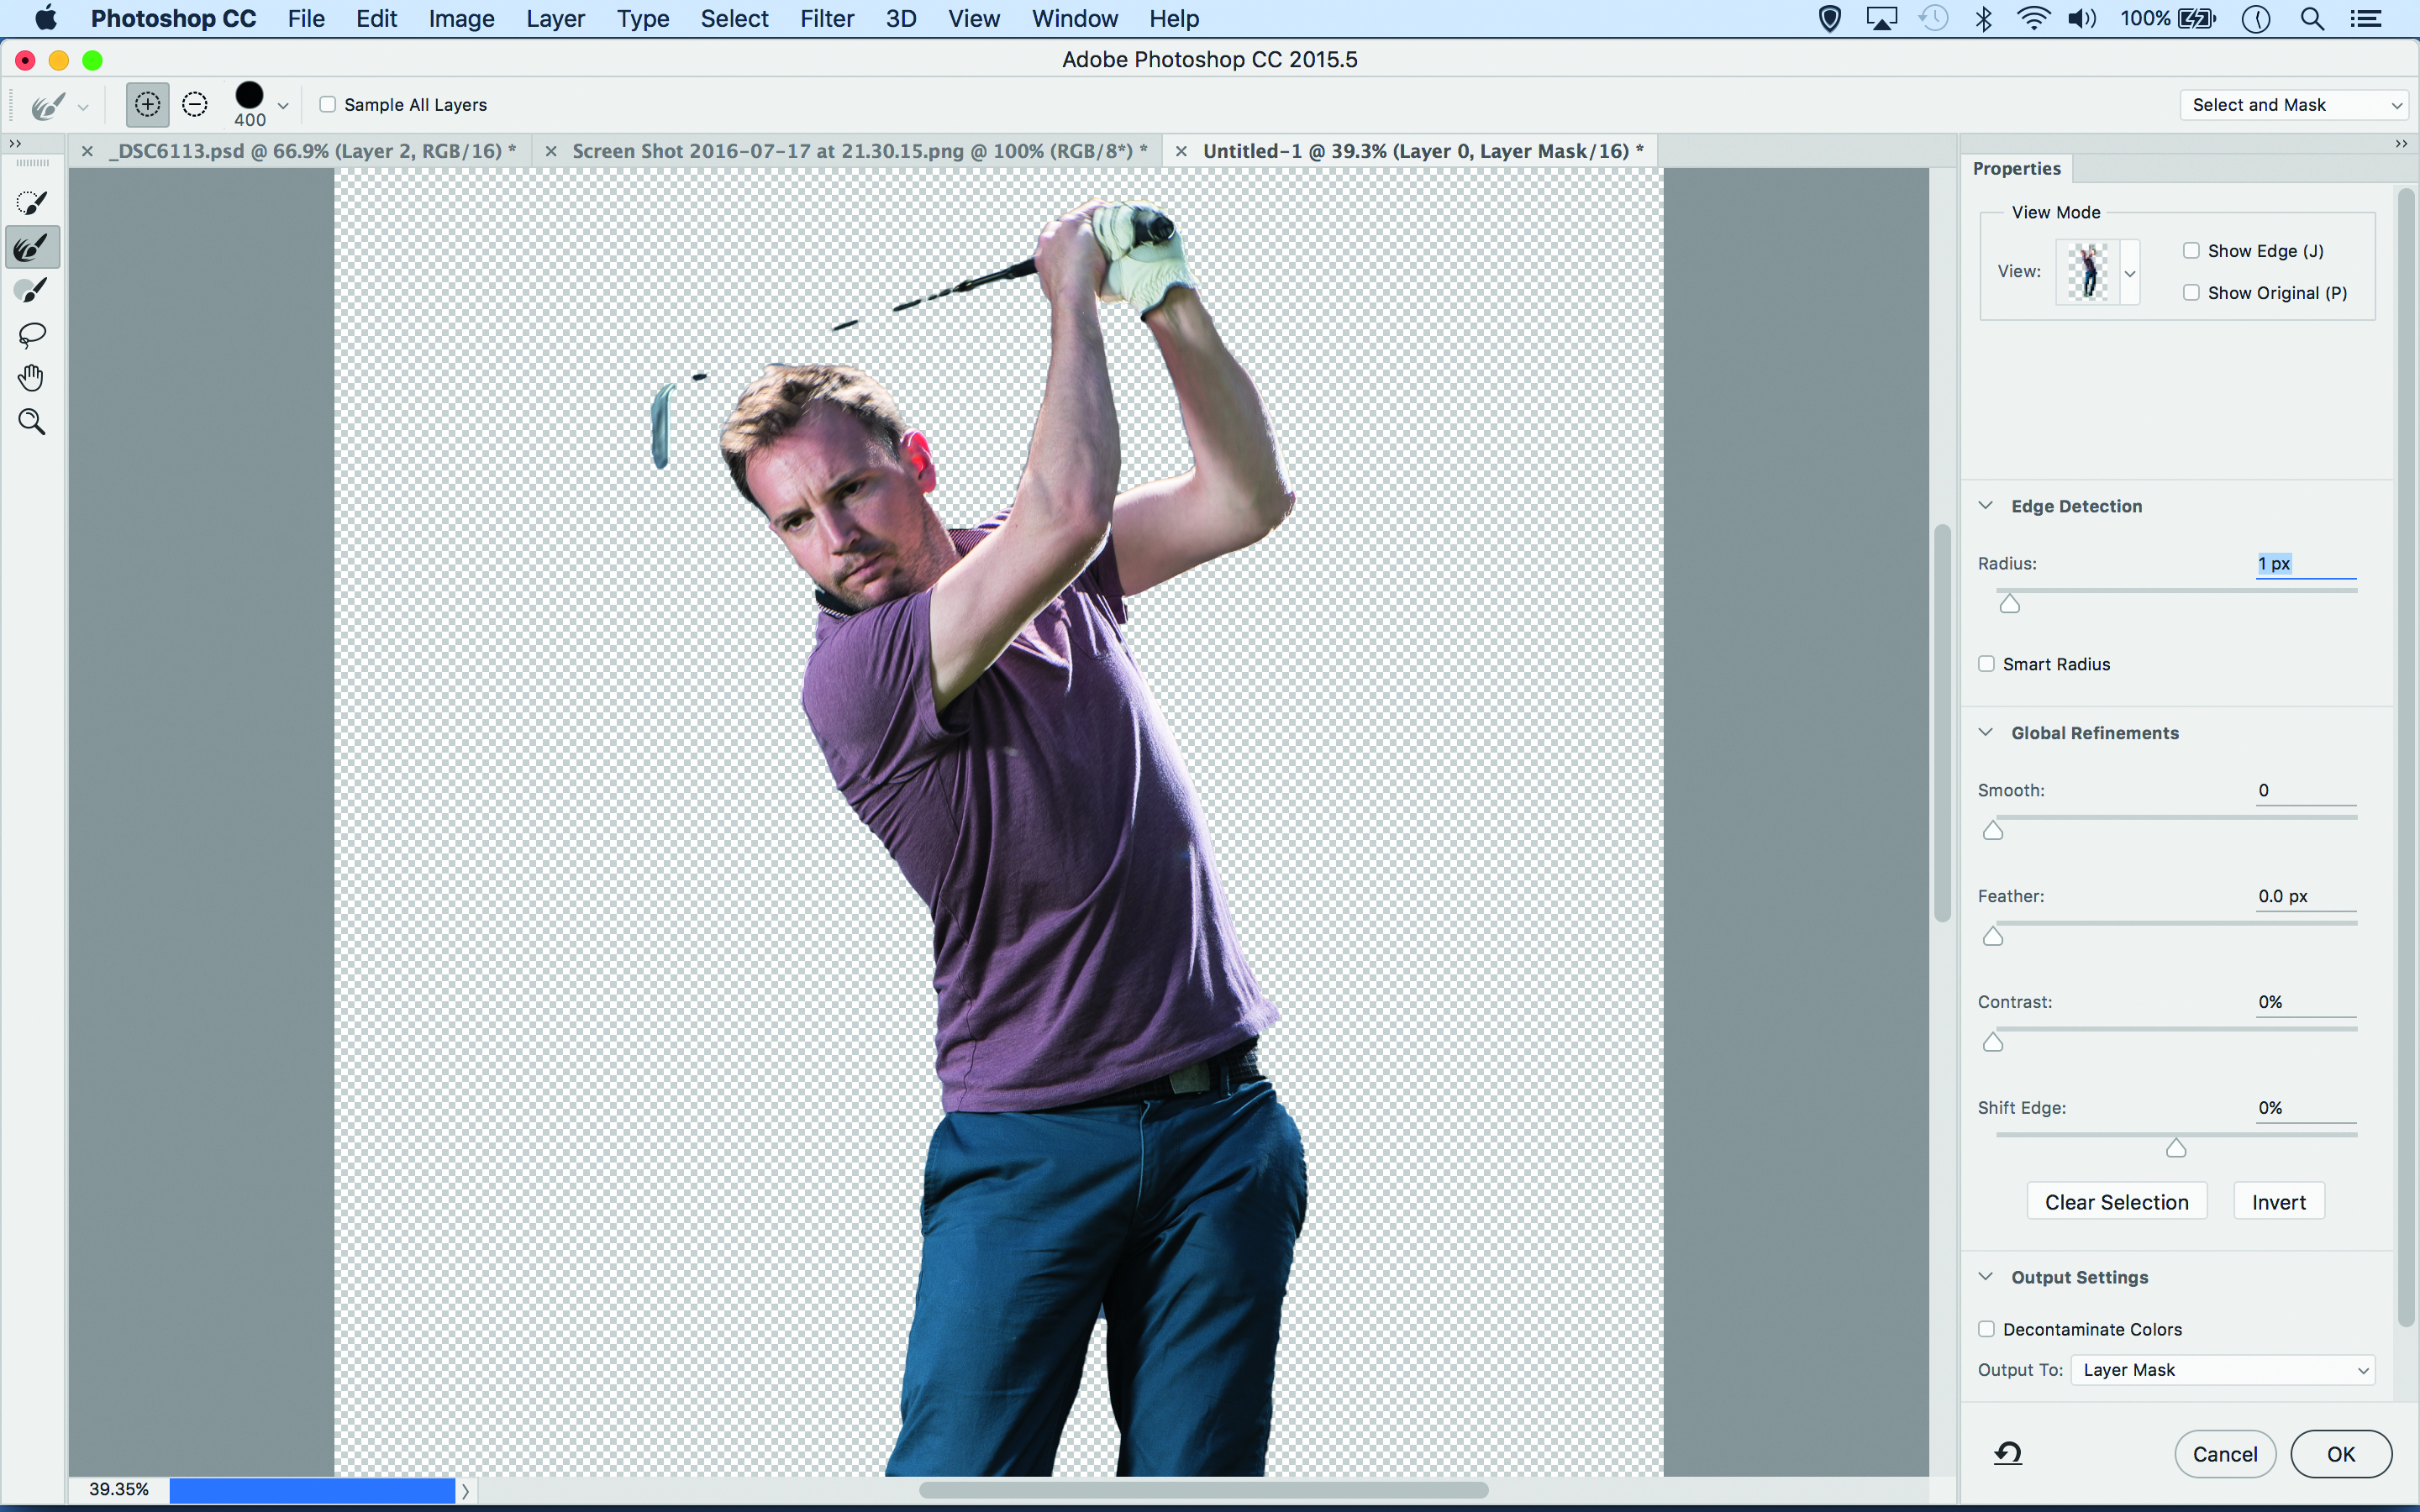
06 Select the subject
Open your portrait in Photoshop, then grab the Quick Selection tool and start painting to select the subject. Click on Select and Mask (Refine Edge in older versions), and paint over fuzzy areas like the hair to improve the edge. Choose Output: Layer Mask and hit OK.
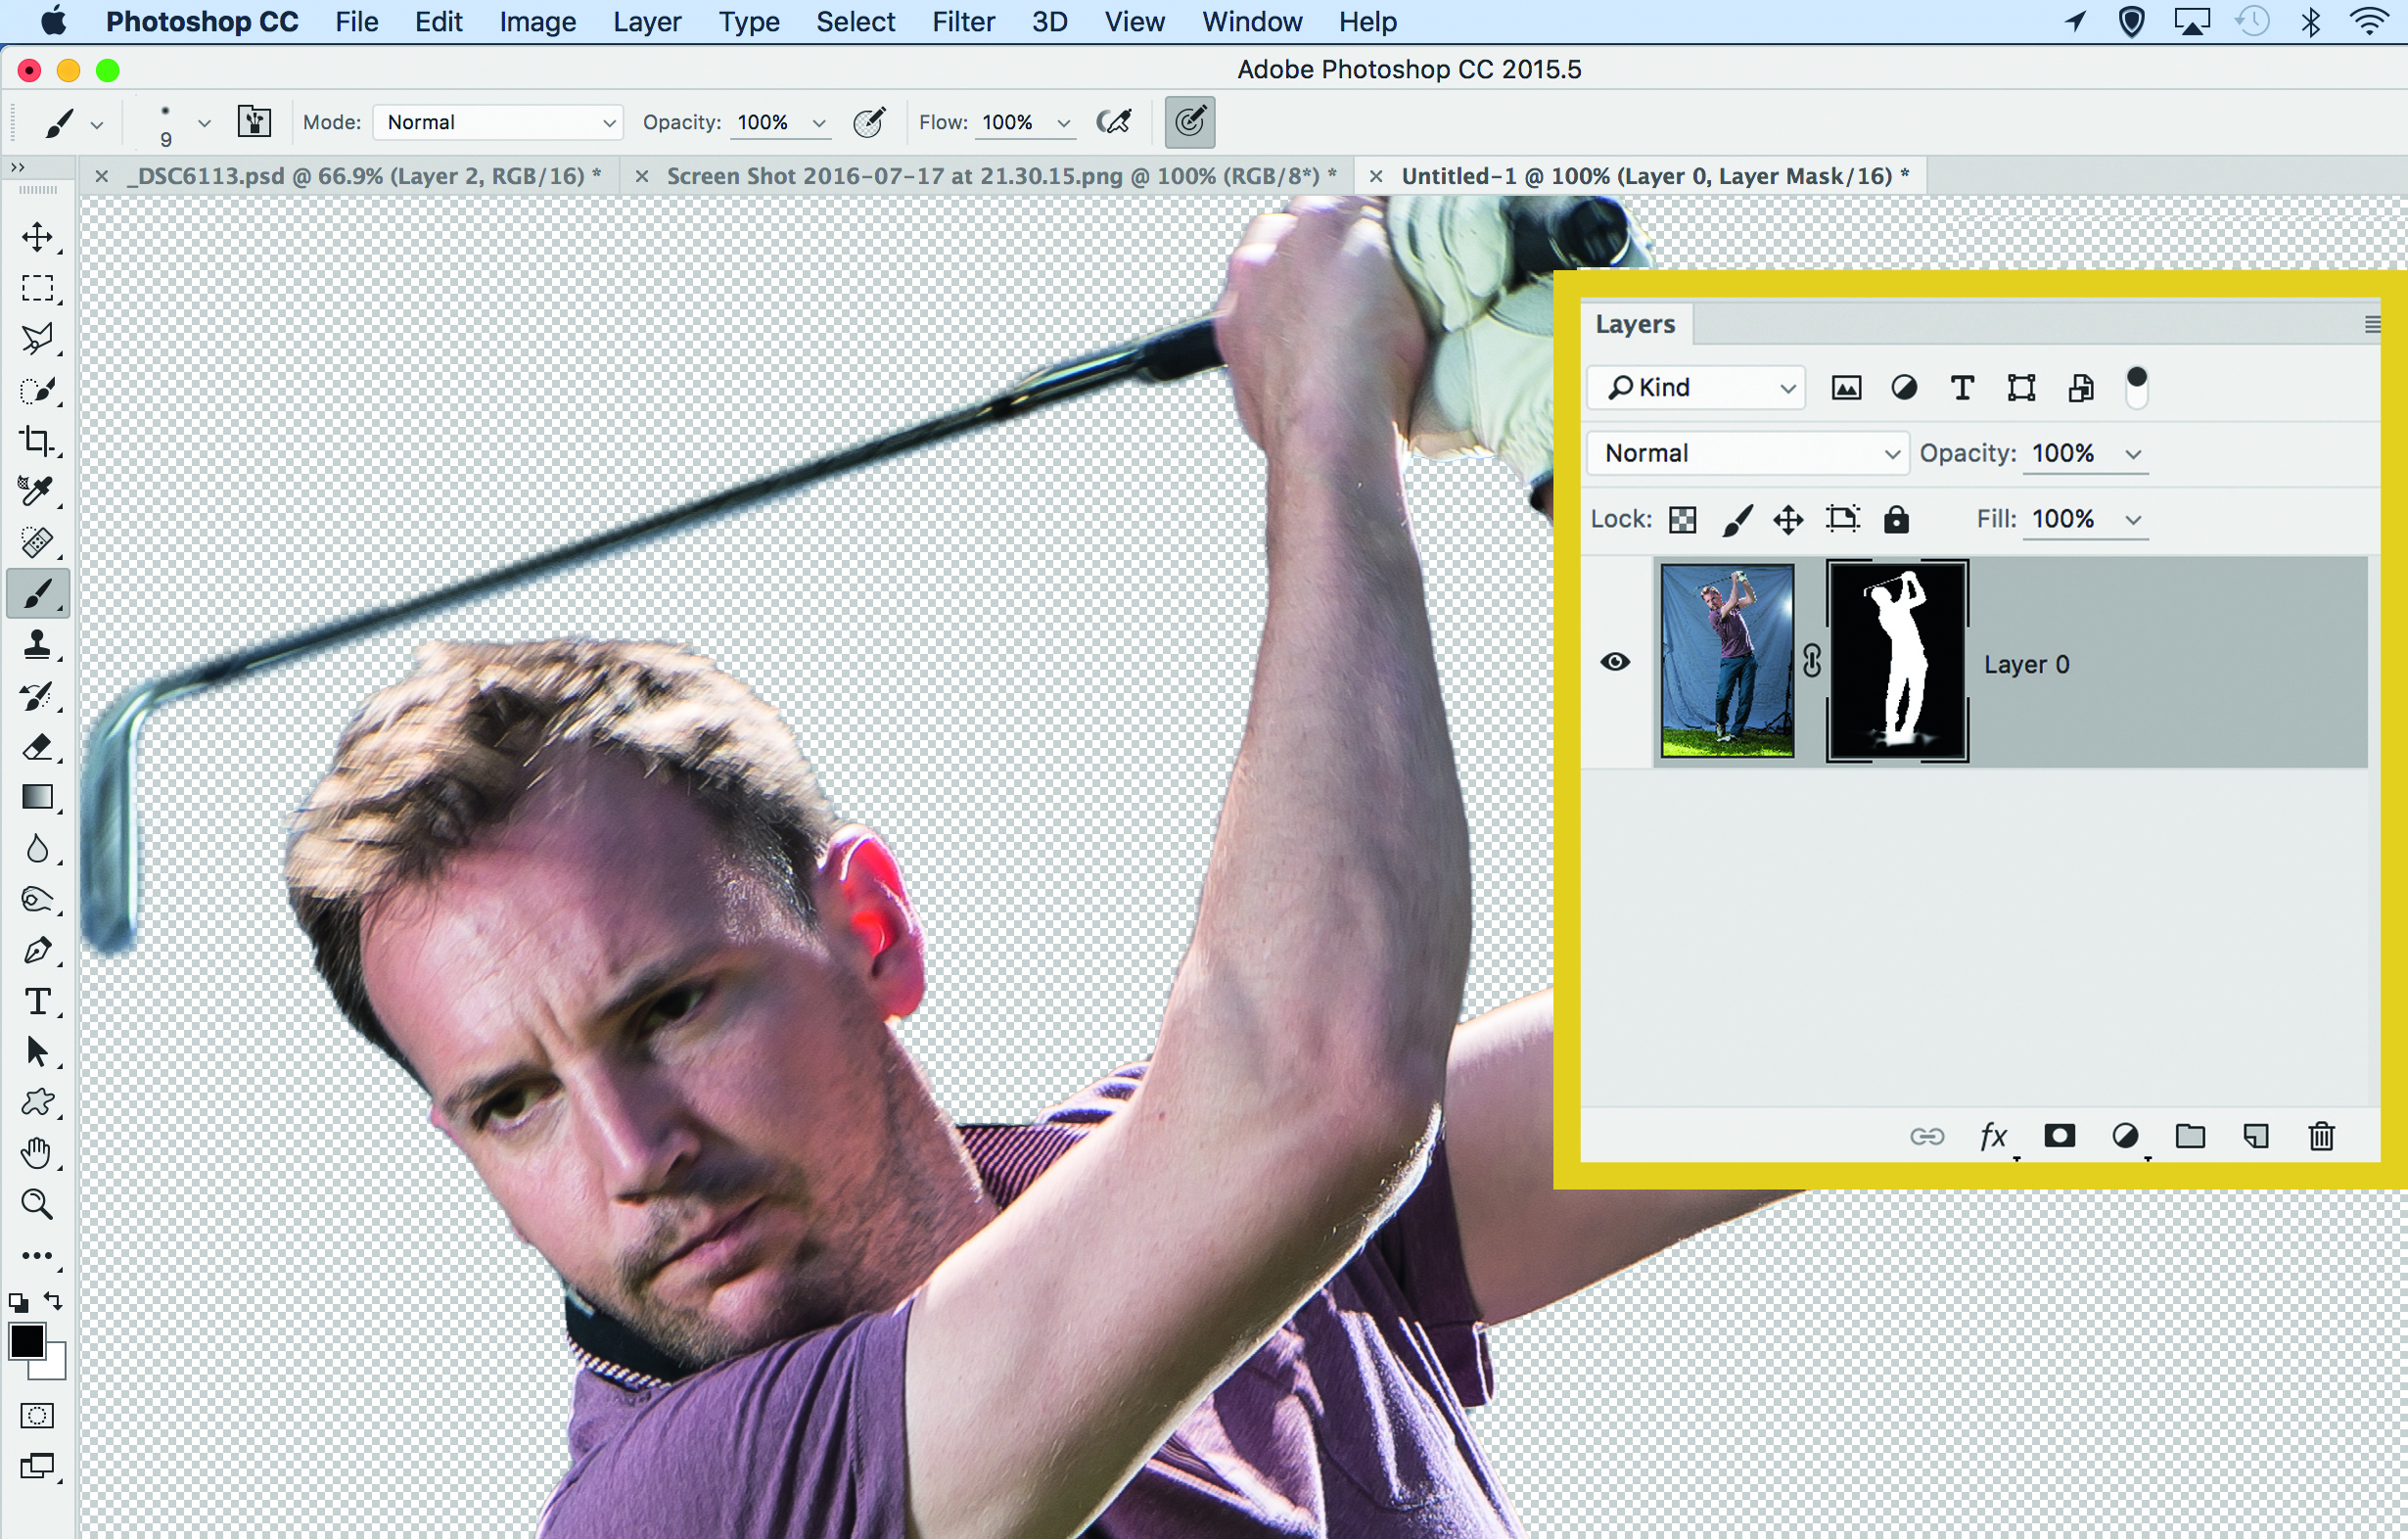
07 Fine-tune the mask
Zoom in closer, highlight the layer mask thumbnail in the Layers panel, then grab the Brush tool and hit D to set colors to black and white. Paint with black to hide parts of the layer, or paint with white to reveal them. Spend some time perfecting the edge of the cutout.
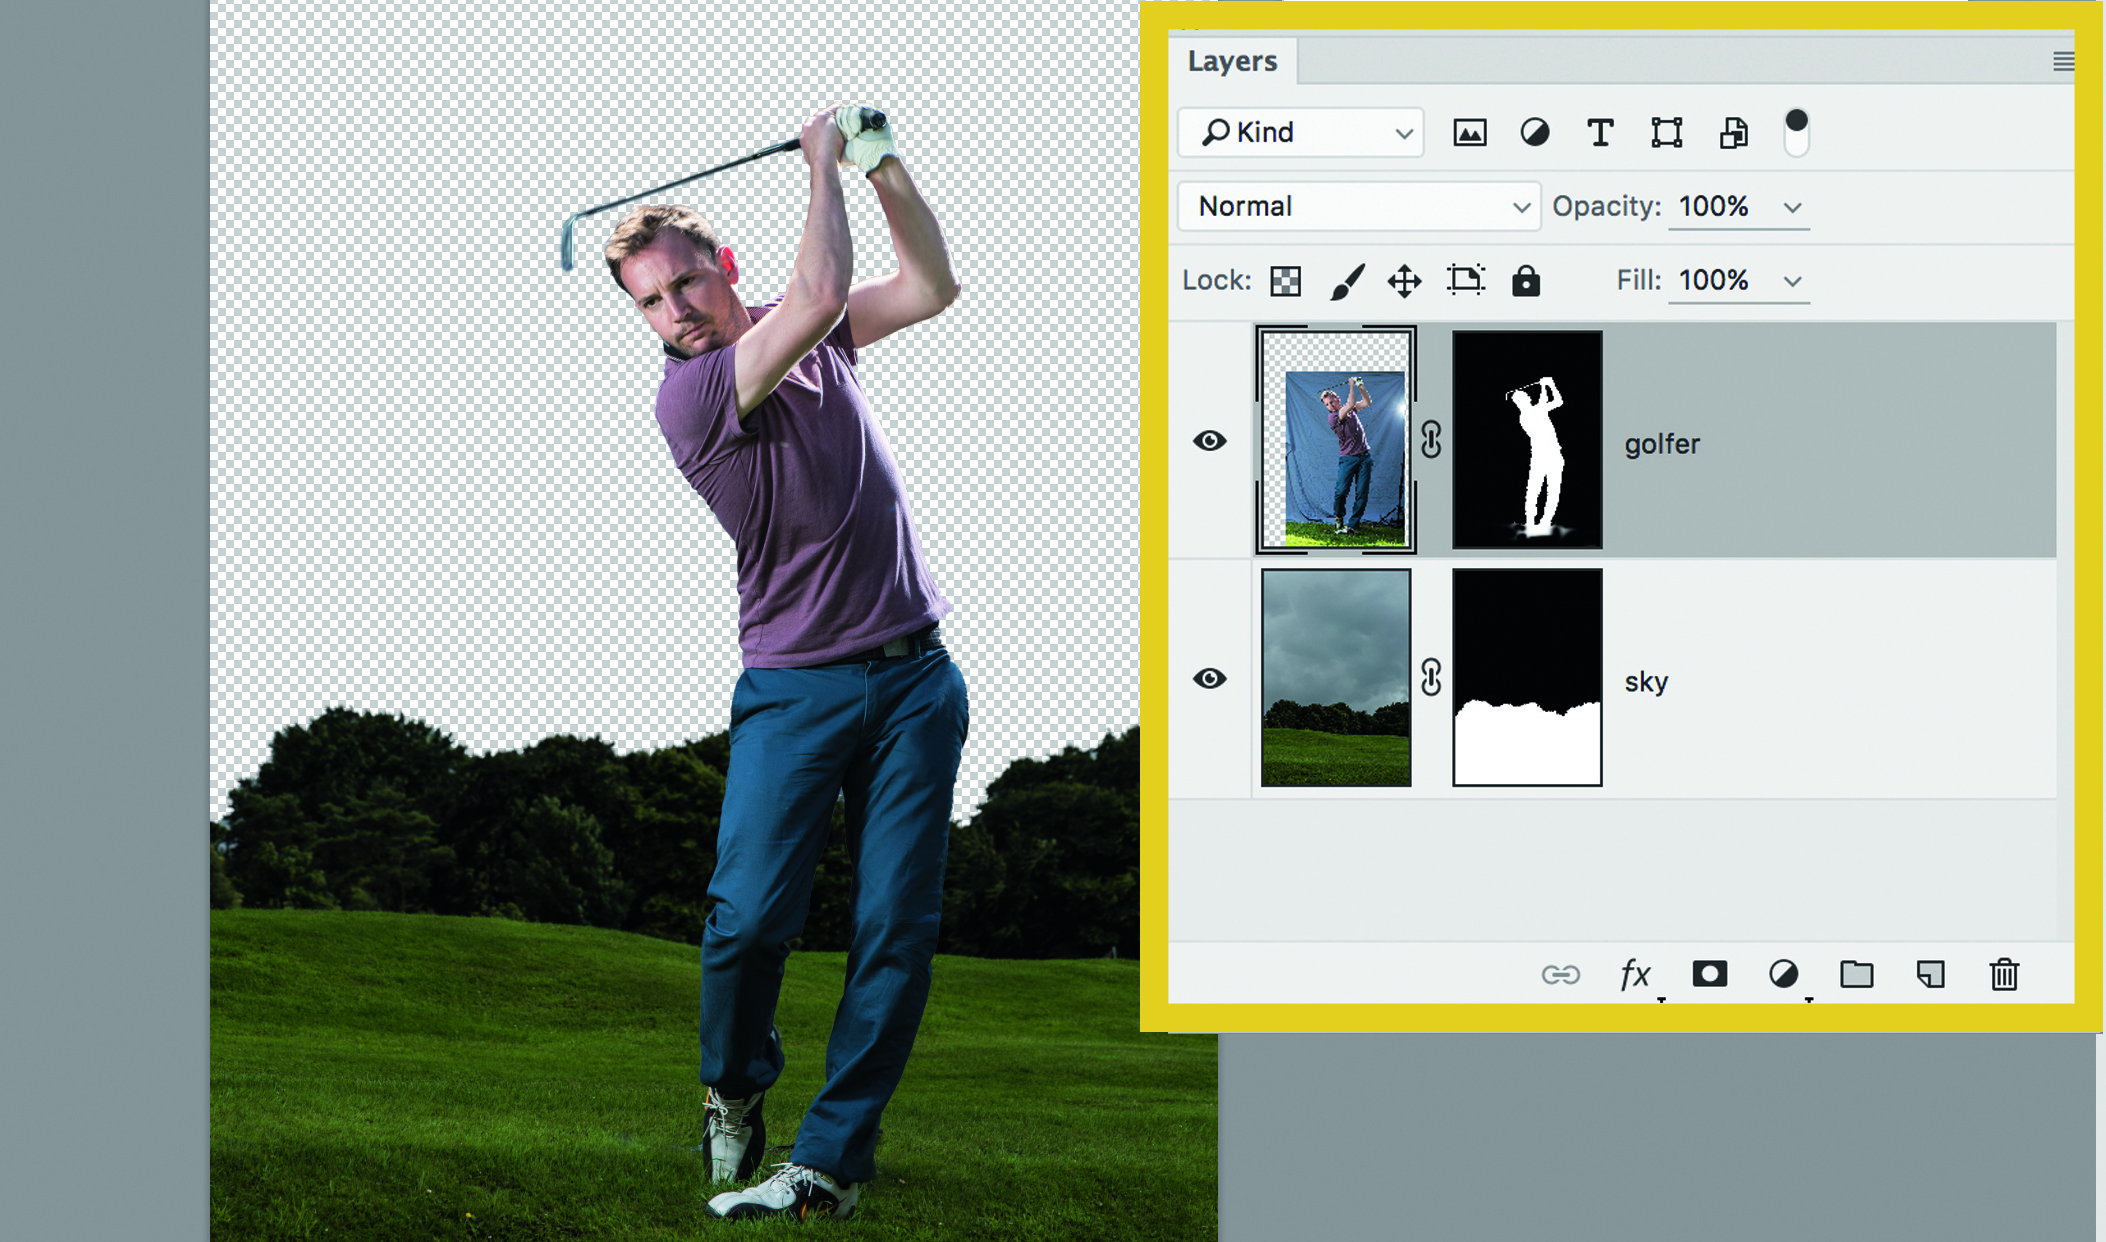
08 Add the backdrop
Open the image of your background, then go back to the cutout. Use the Move tool to drag the cutout over to the background; hit Cmd(Mac) or Ctrl (PC) +T if you need to resize the layer. Once done, make a selection of the sky and Alt-click on the Add Mask icon in the Layers panel to hide it.
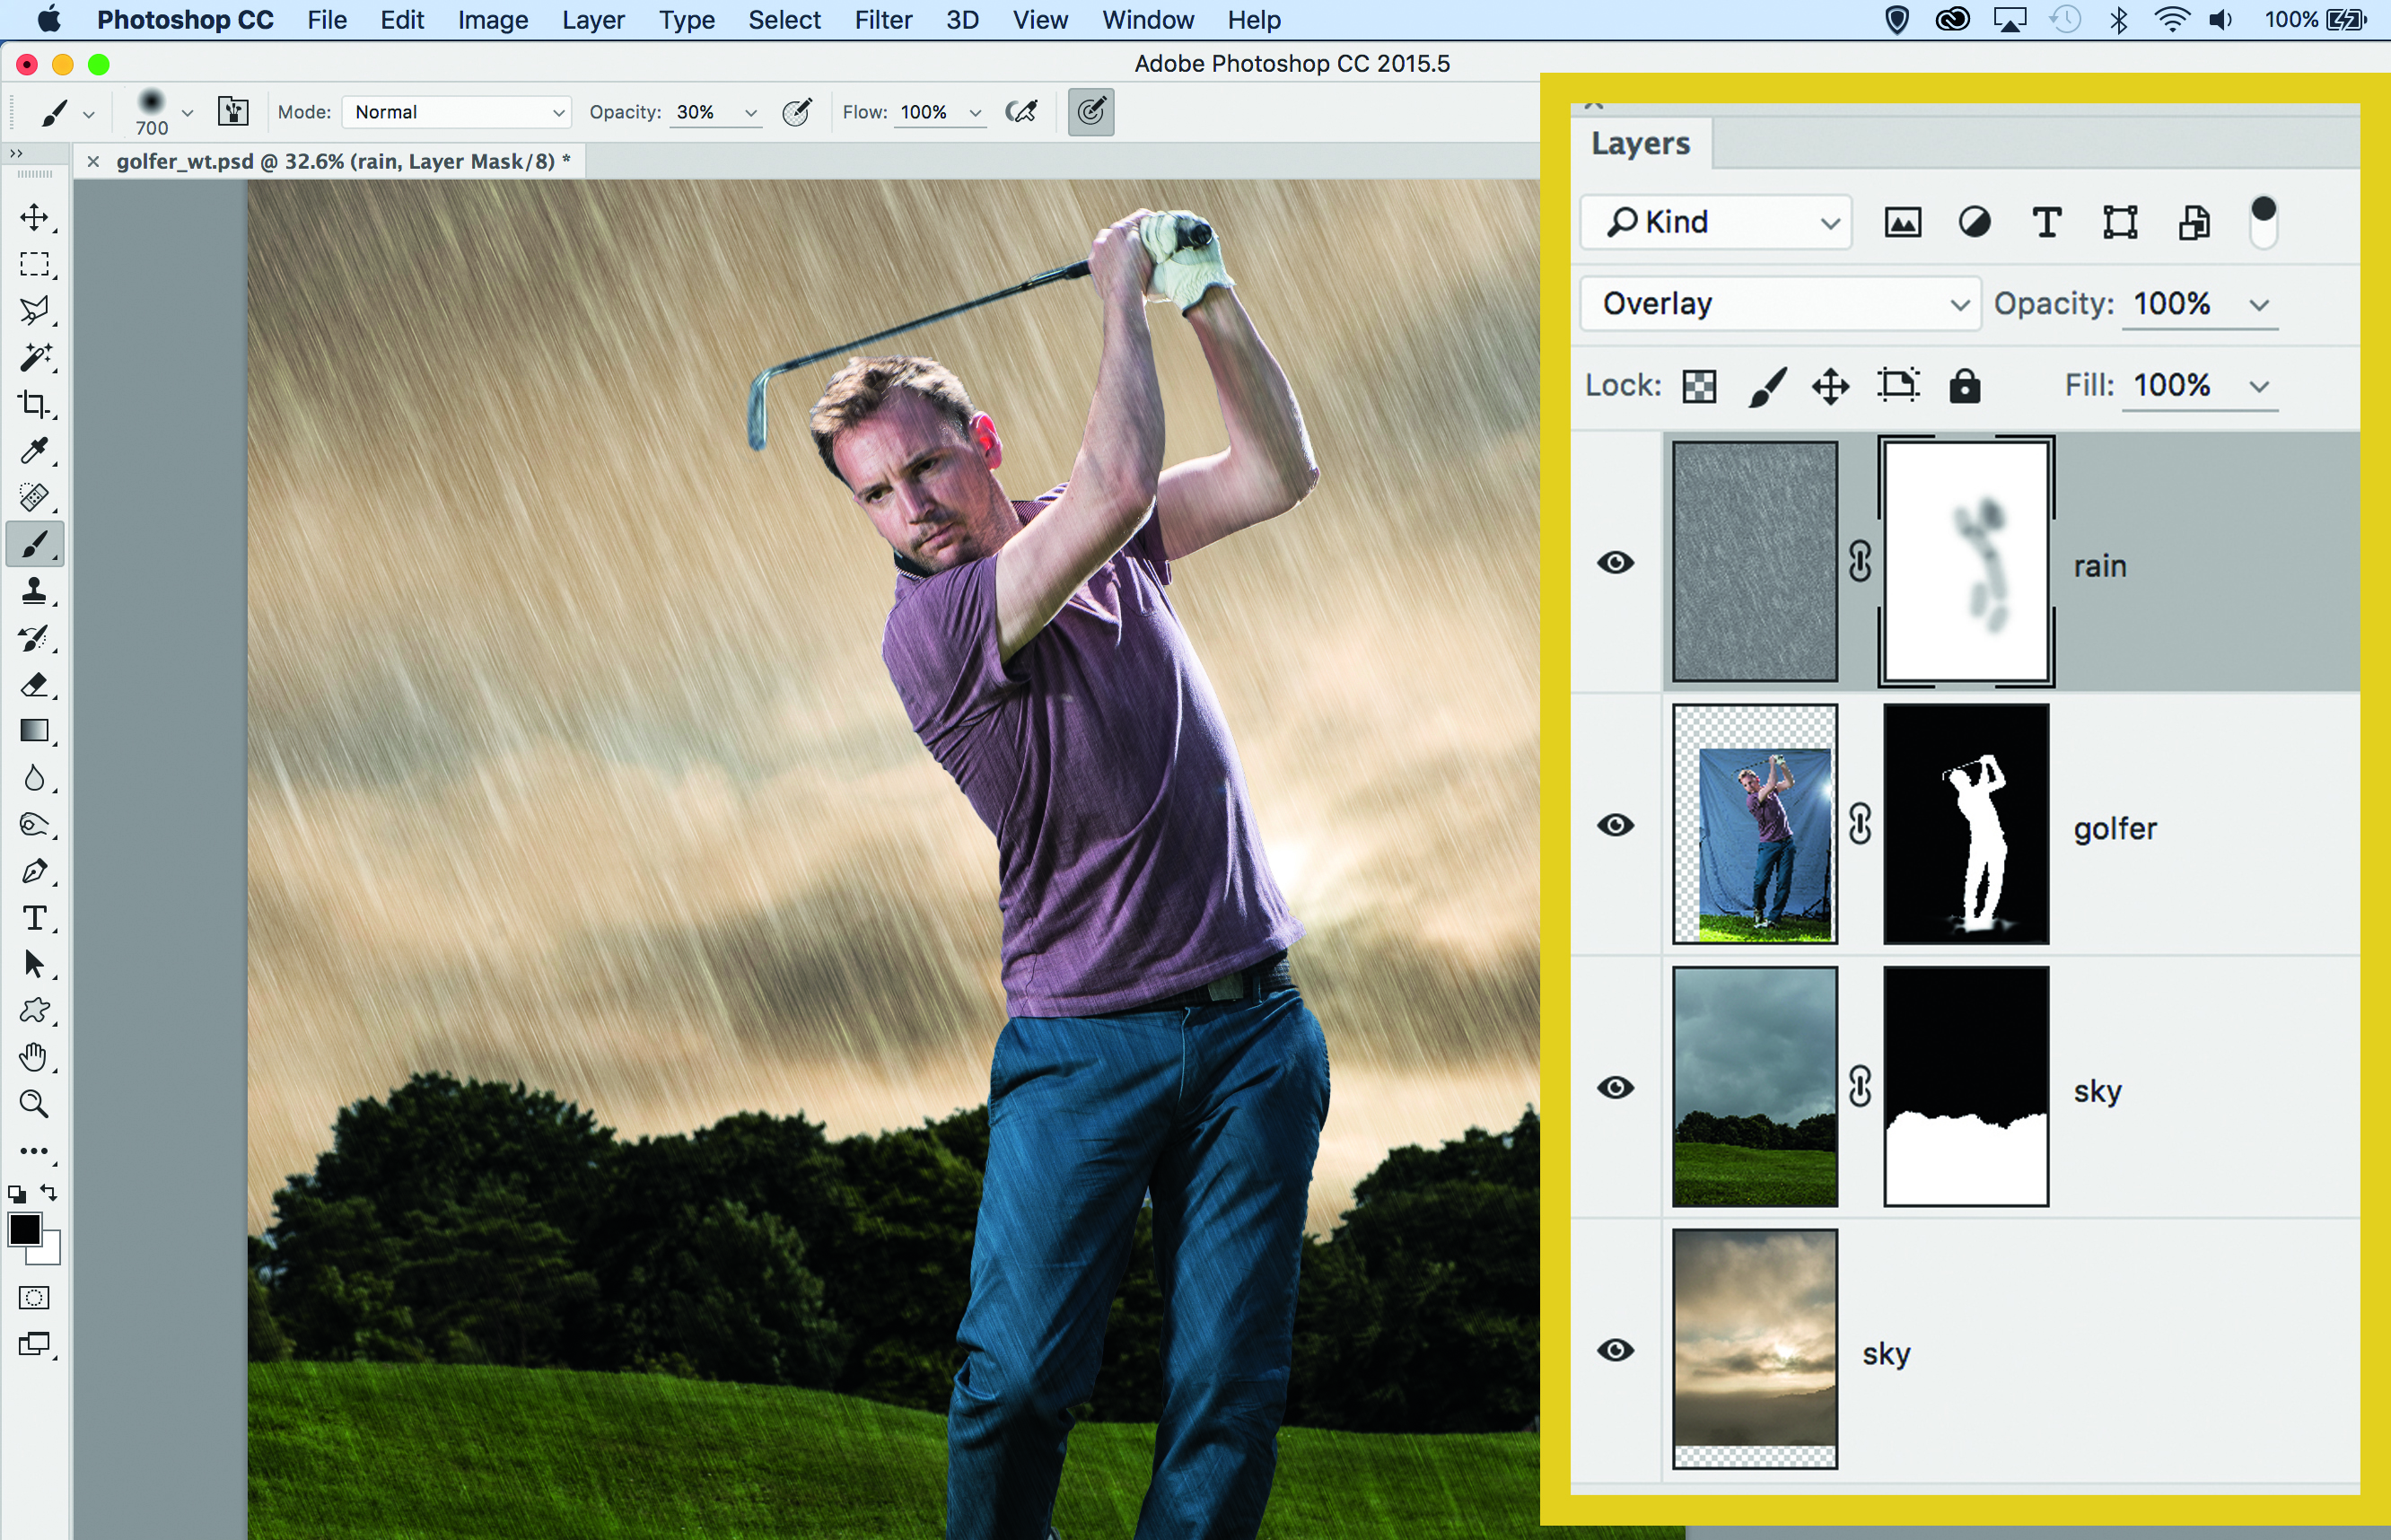
09 Make it rain
Open the sky image and drop it in with the Move tool, then drag that layer to the bottom of the stack. Next, open the rain image and drop it in. Change the blend mode to Overlay, add a layer mask, then paint with black to hide any parts of the rain that look too strong.
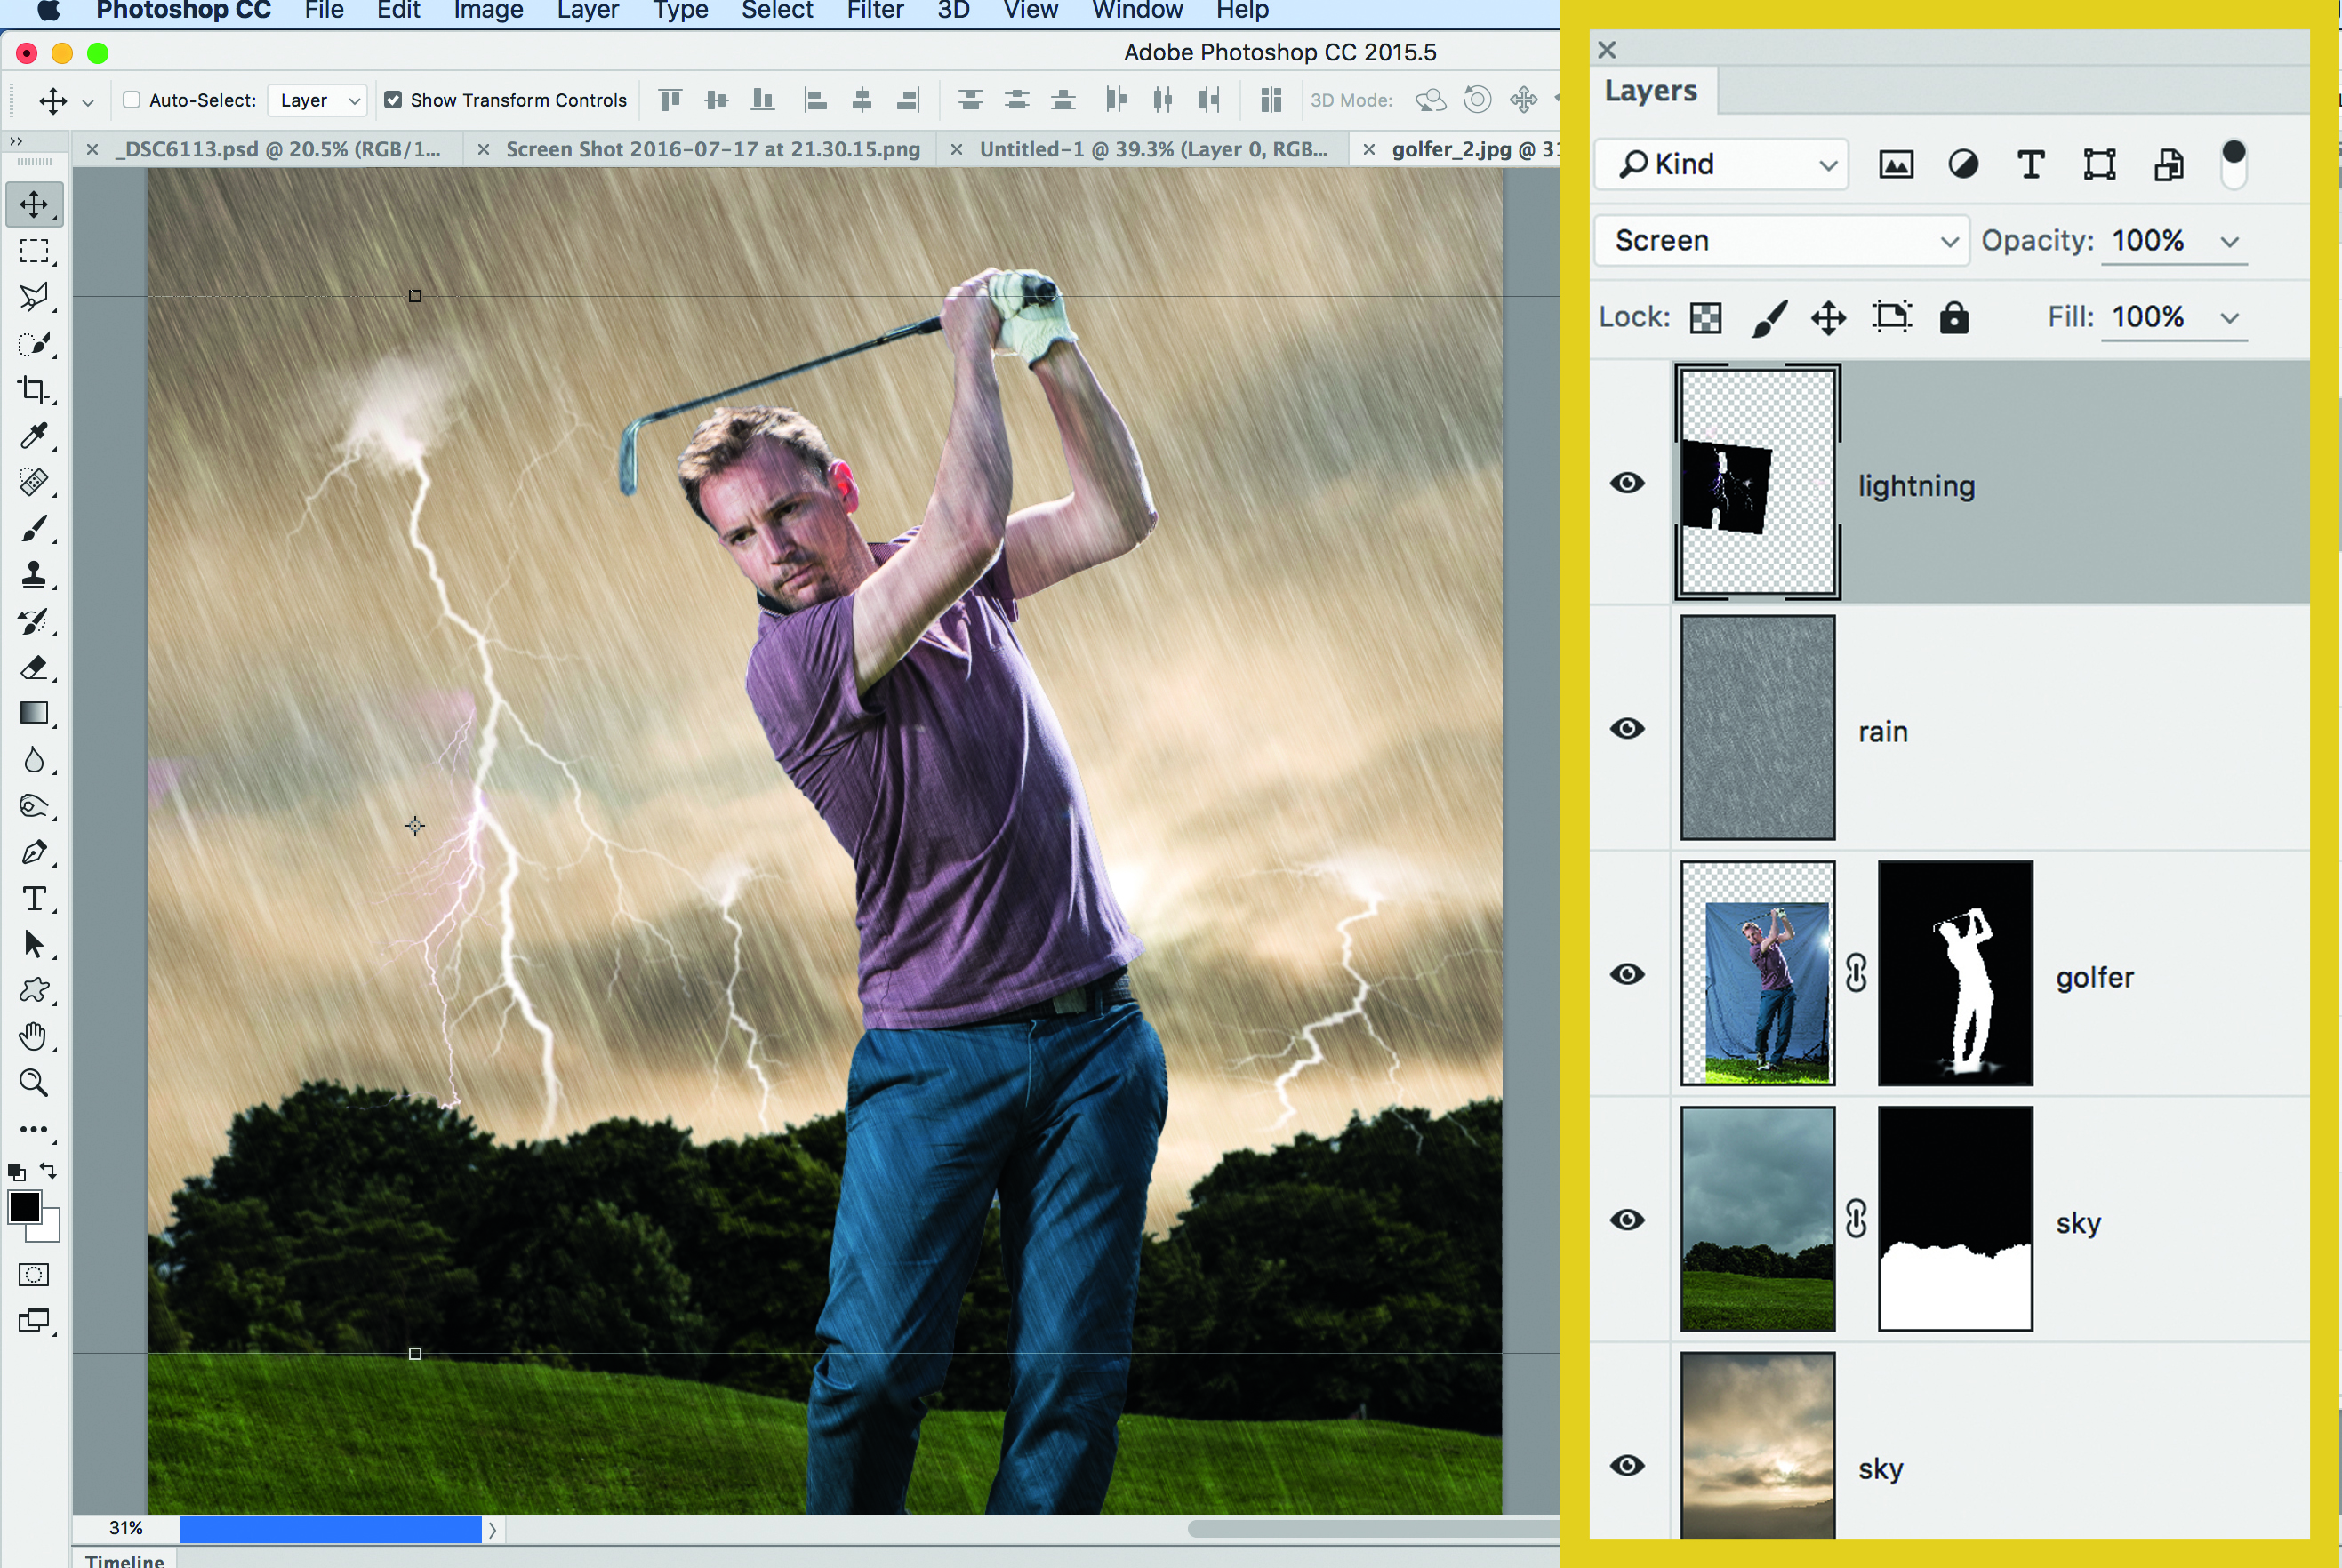
10 Make like Zeus
If you want to add some serious mood, source an image of lightning strikes. Drag it in, change the blend mode to Screen, then mask any unwanted areas. Duplicate the effect around the image to build it up. Now cut out and add any other elements you like, such as the ball and mud.
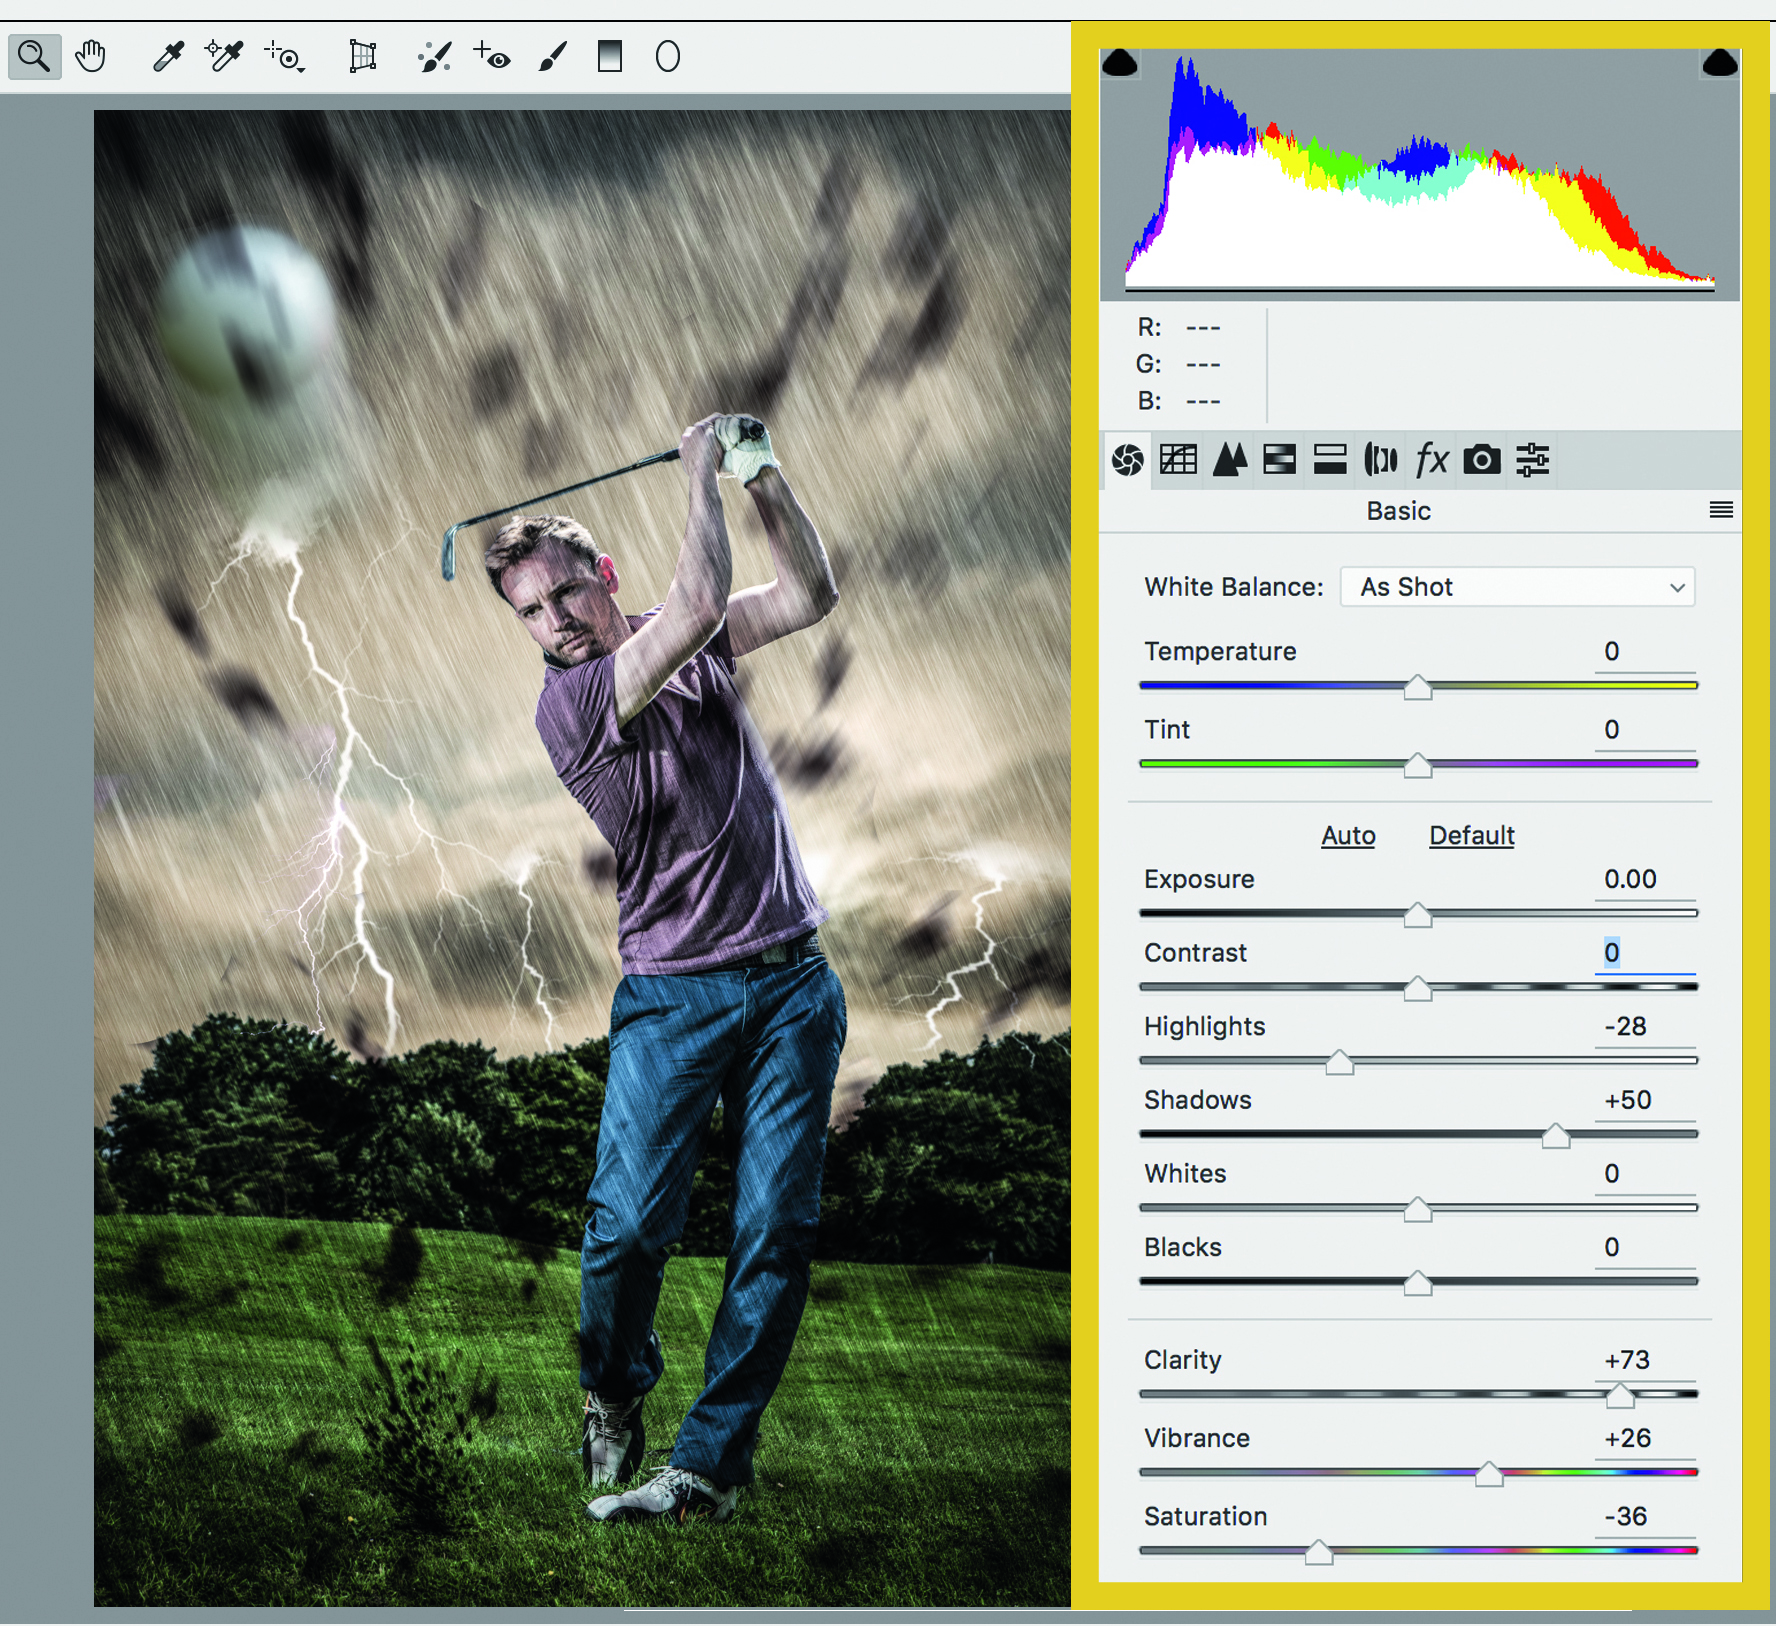
11 Change the tones
Finally, merge a copy of all the layers with Cmd/Ctrl+Shift+Alt+E. Now apply a few tonal effects to this layer using the Camera Raw Filter (Filter>Camera Raw Filter). Boost Clarity, increase Shadows, lower Highlights, reduce Saturation and add a vignette to darken the corners.
Read more:
Stuck at home: 11 photo projects to try indoors during the COVID-19 crisis
Photography tips and techniques videos
Common photo problems and how to fix them in Photoshop: #1 Noisy photos
Get the Digital Camera World Newsletter
The best camera deals, reviews, product advice, and unmissable photography news, direct to your inbox!
The lead technique writer on Digital Camera Magazine, PhotoPlus: The Canon Magazine and N-Photo: The Nikon Magazine, James is a fantastic general practice photographer with an enviable array of skills across every genre of photography.
Whether it's flash photography techniques like stroboscopic portraits, astrophotography projects like photographing the Northern Lights, or turning sound into art by making paint dance on a set of speakers, James' tutorials and projects are as creative as they are enjoyable.
He's also a wizard at the dark arts of Photoshop, Lightroom and Affinity Photo, and is capable of some genuine black magic in the digital darkroom, making him one of the leading authorities on photo editing software and techniques.

