Watch video: Home photography ideas – Take a still life shot
Photography projects at home
• Home photography ideas
Useful home photography kit
• Best camera for product photography
• Best tripods
• Best lighting kits
• Best reflectors
• Best macro lenses
Taking a stunning still life shot is one of the great pleasures of photography – and a great way to squeeze every pixel of detail out of your camera and lenses. However, many people find it hard to find a suitable subject.
It's not often that alcohol is the answer, but in this case the ideal still life subject is sitting in your drinks cabinet, as a well-lit beautiful booze bottle can produce amazing results.
It's also a good challenge for your lighting skills, as glass provides opportunities for striking reflections (whether you want them or not!) so controlling the light is key. We used a bottle and a glass of whiskey to create a classic still-life shot that radiates timeless style – and it’s very easy to set up and shoot images like this at home.
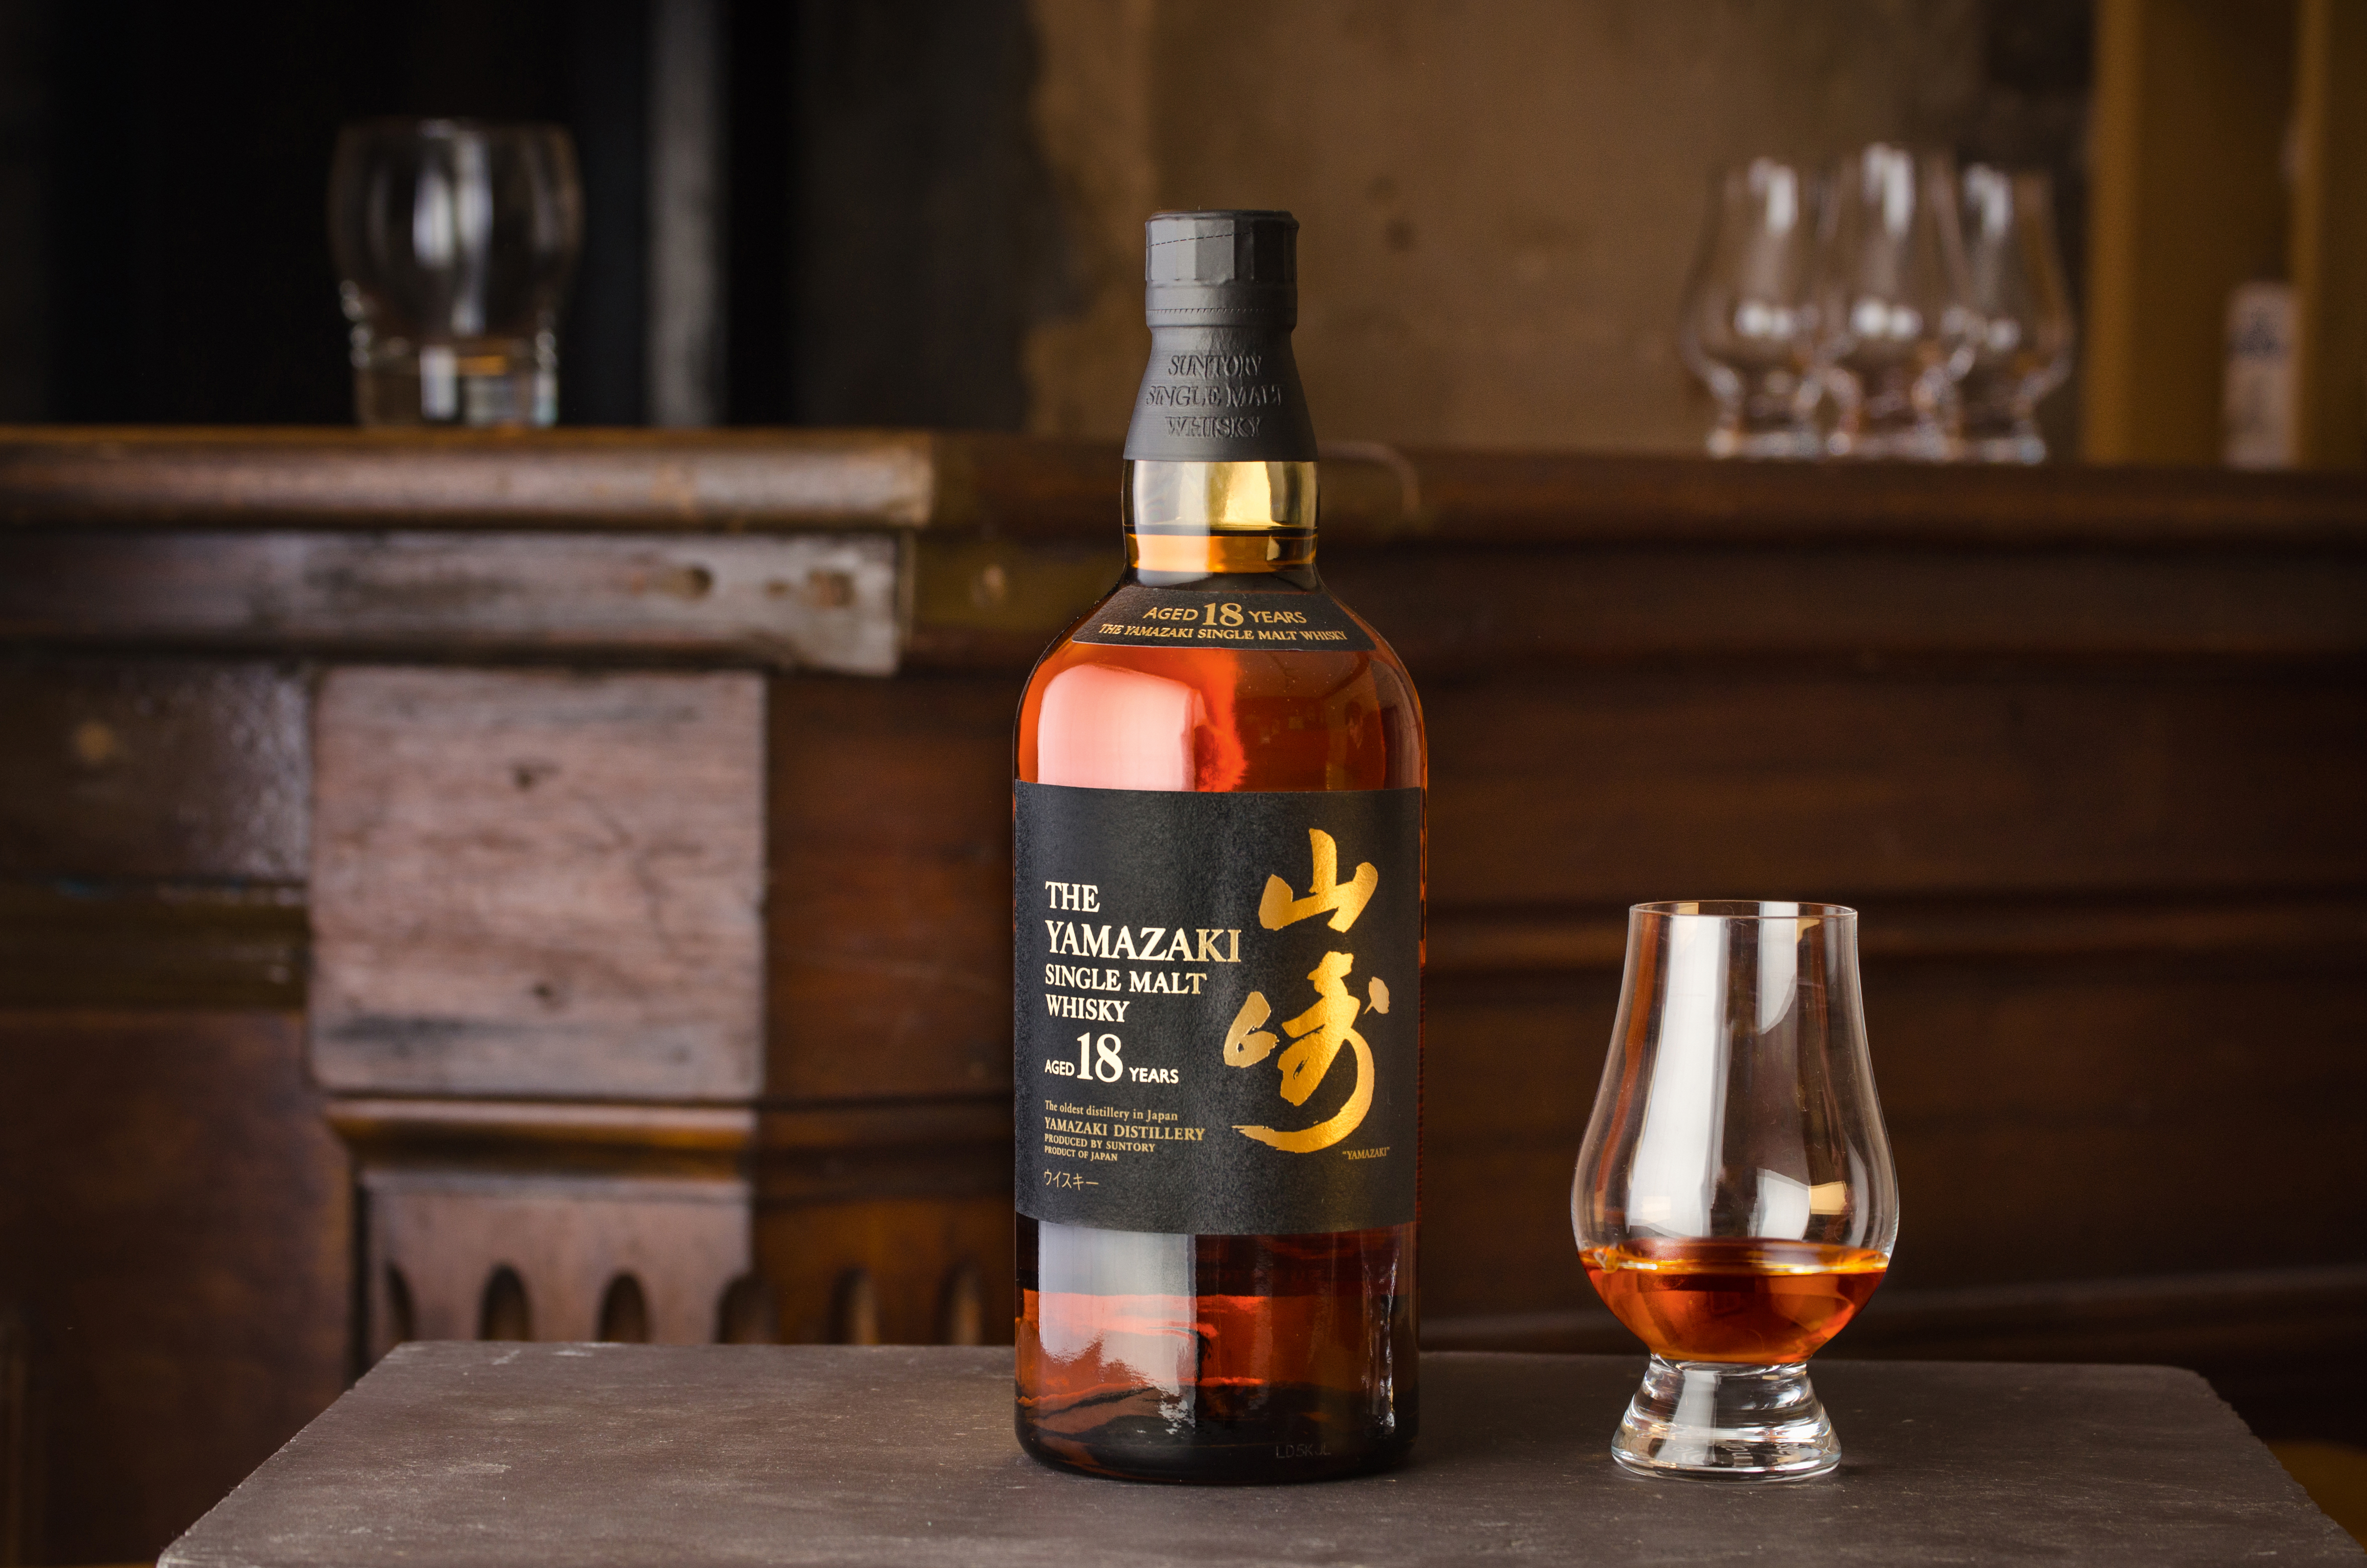
You don’t need any special equipment, just a couple of lights (which could even be home desk lamps, rather than photography studio lights) and some diffusion (which you can also create and enhance using affordable household objects).
We’ve also used a slate tile as an attractive base to pop our product onto, to make it look even more desirable – and we also have one or two tips that other people just won’t tell you about, such as using reflective silver or gold card.
The result is a stunning still life that would look at home in the pages of a glossy magazine advert…
• Best online photography courses
Shooting a still life: Raise a glass!
01 Dress the scene
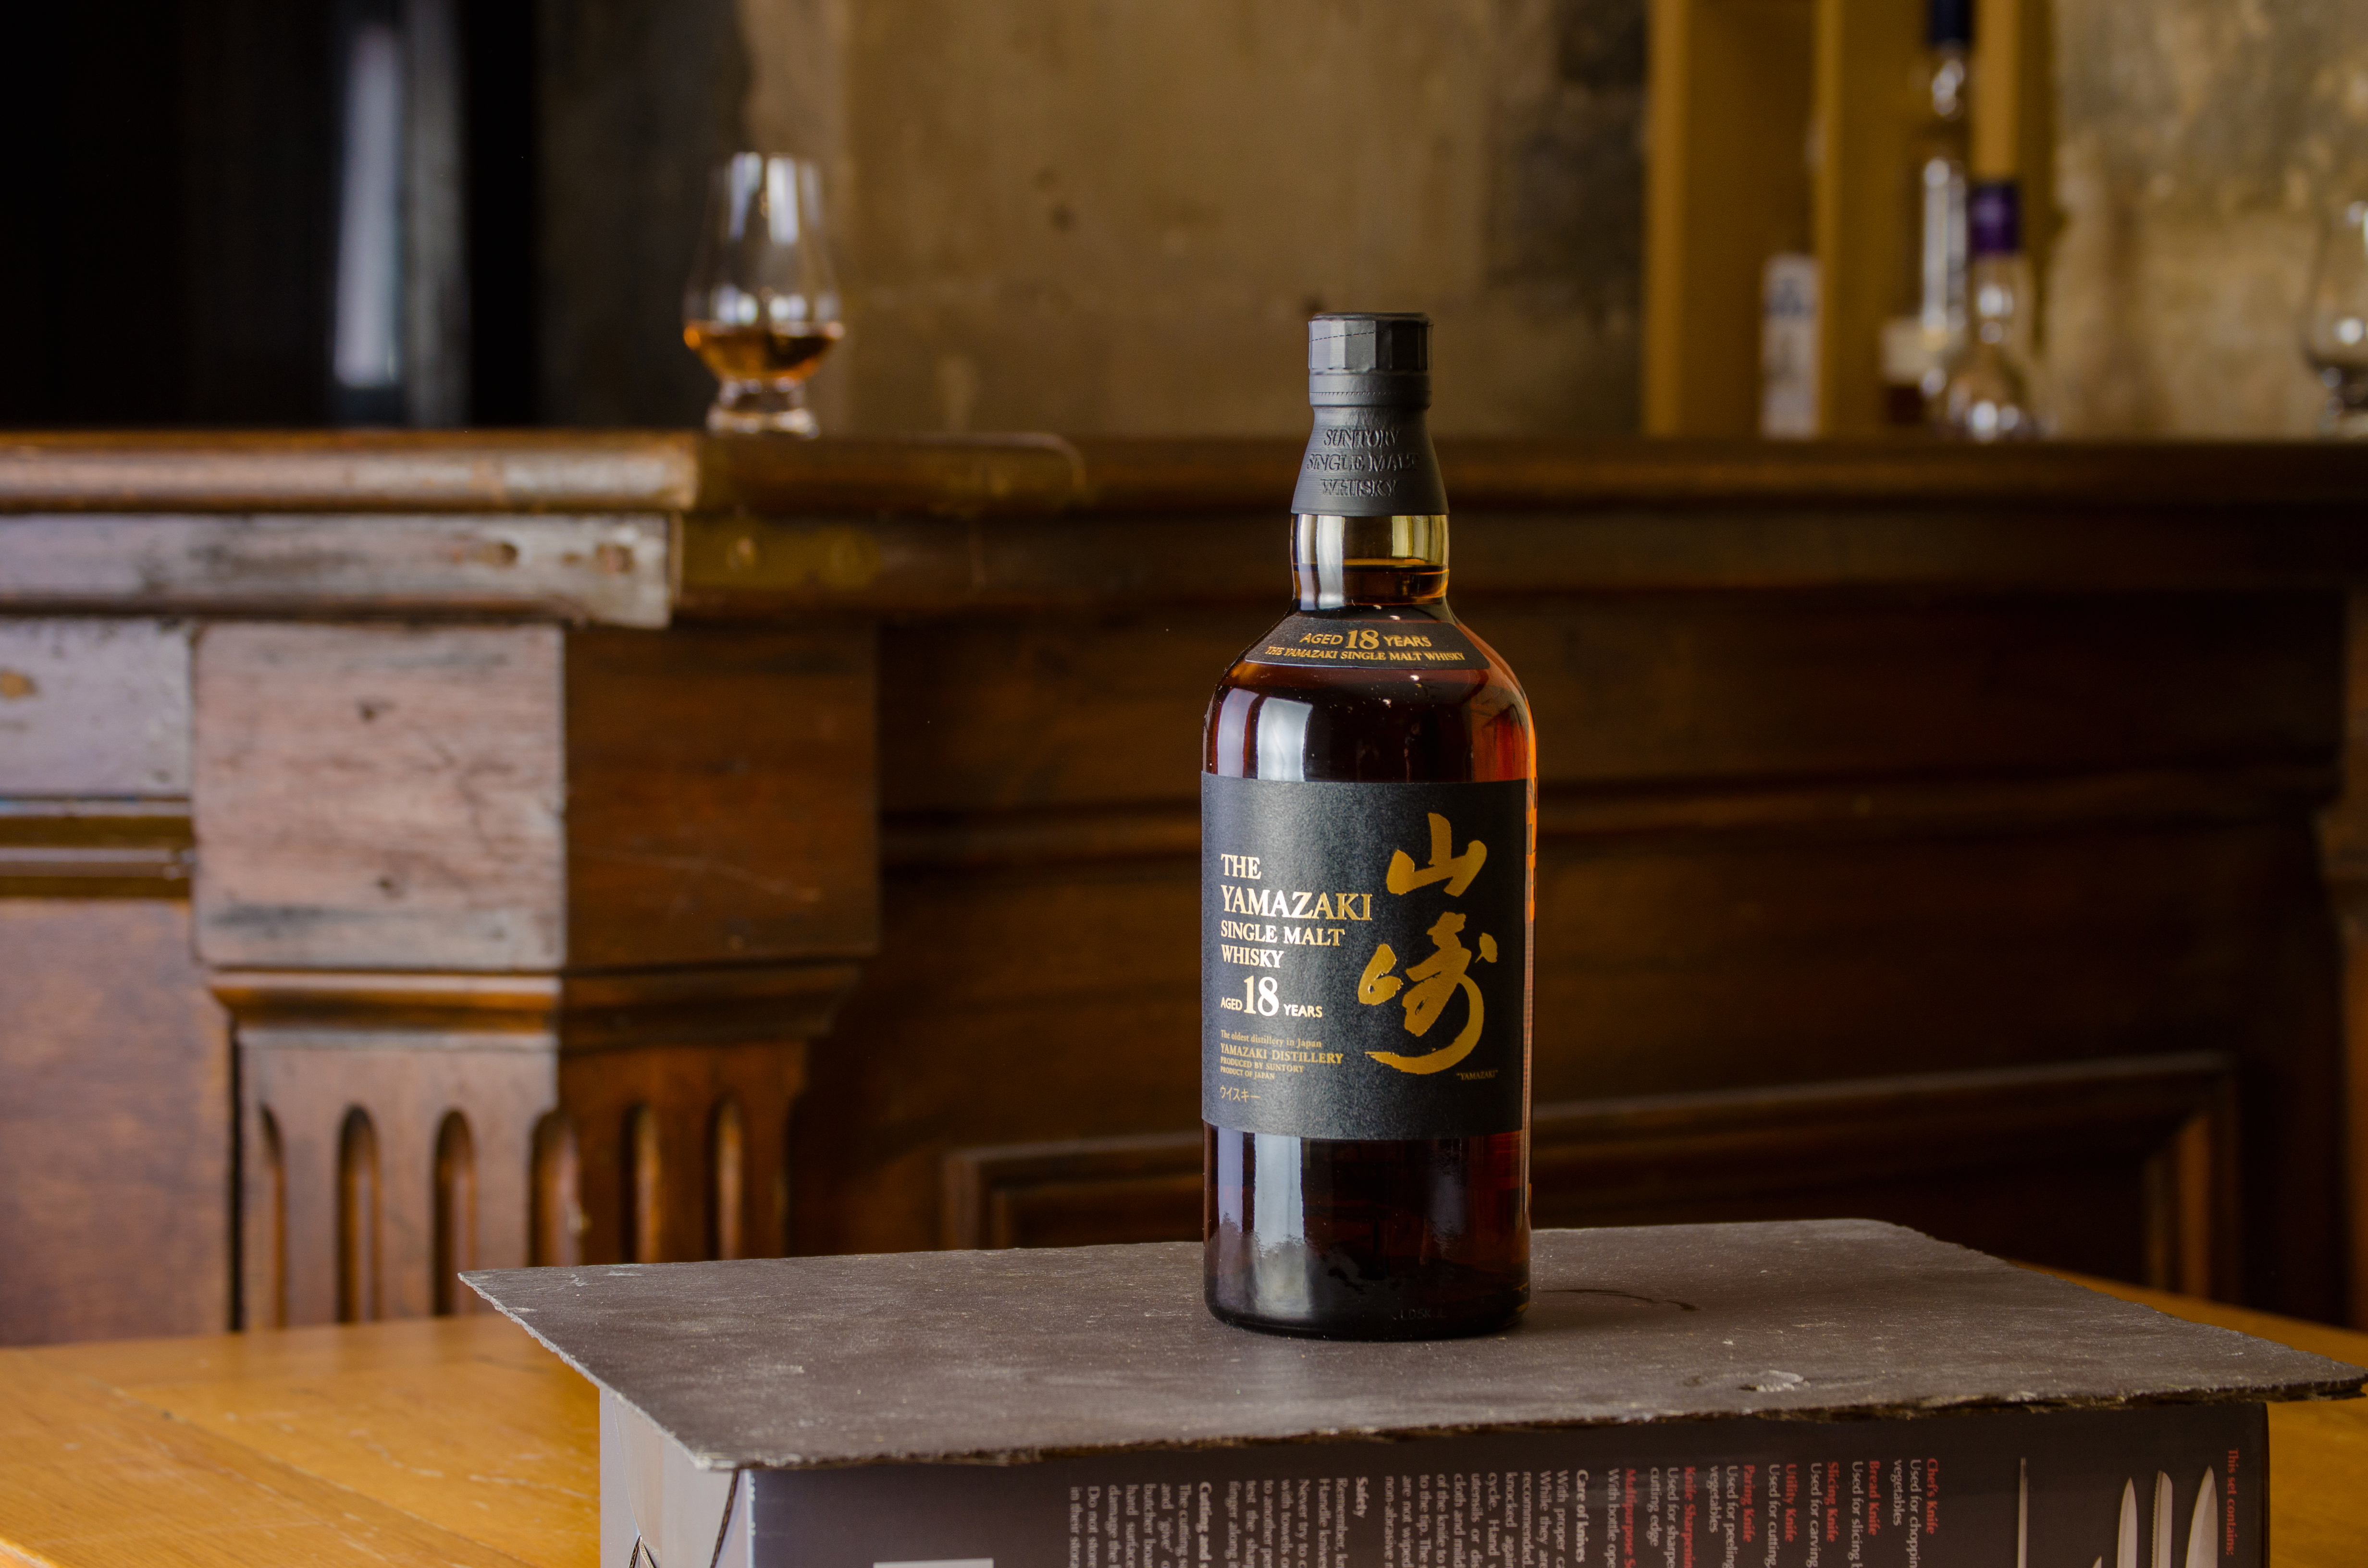
Set up your props in an attractive scene. We rested our props on a slate tile to create some texture, but wood would also work. We framed this in front of the wooden bar in an old whiskey shop, but you could use a fireplace, window or even a printed paper backdrop.
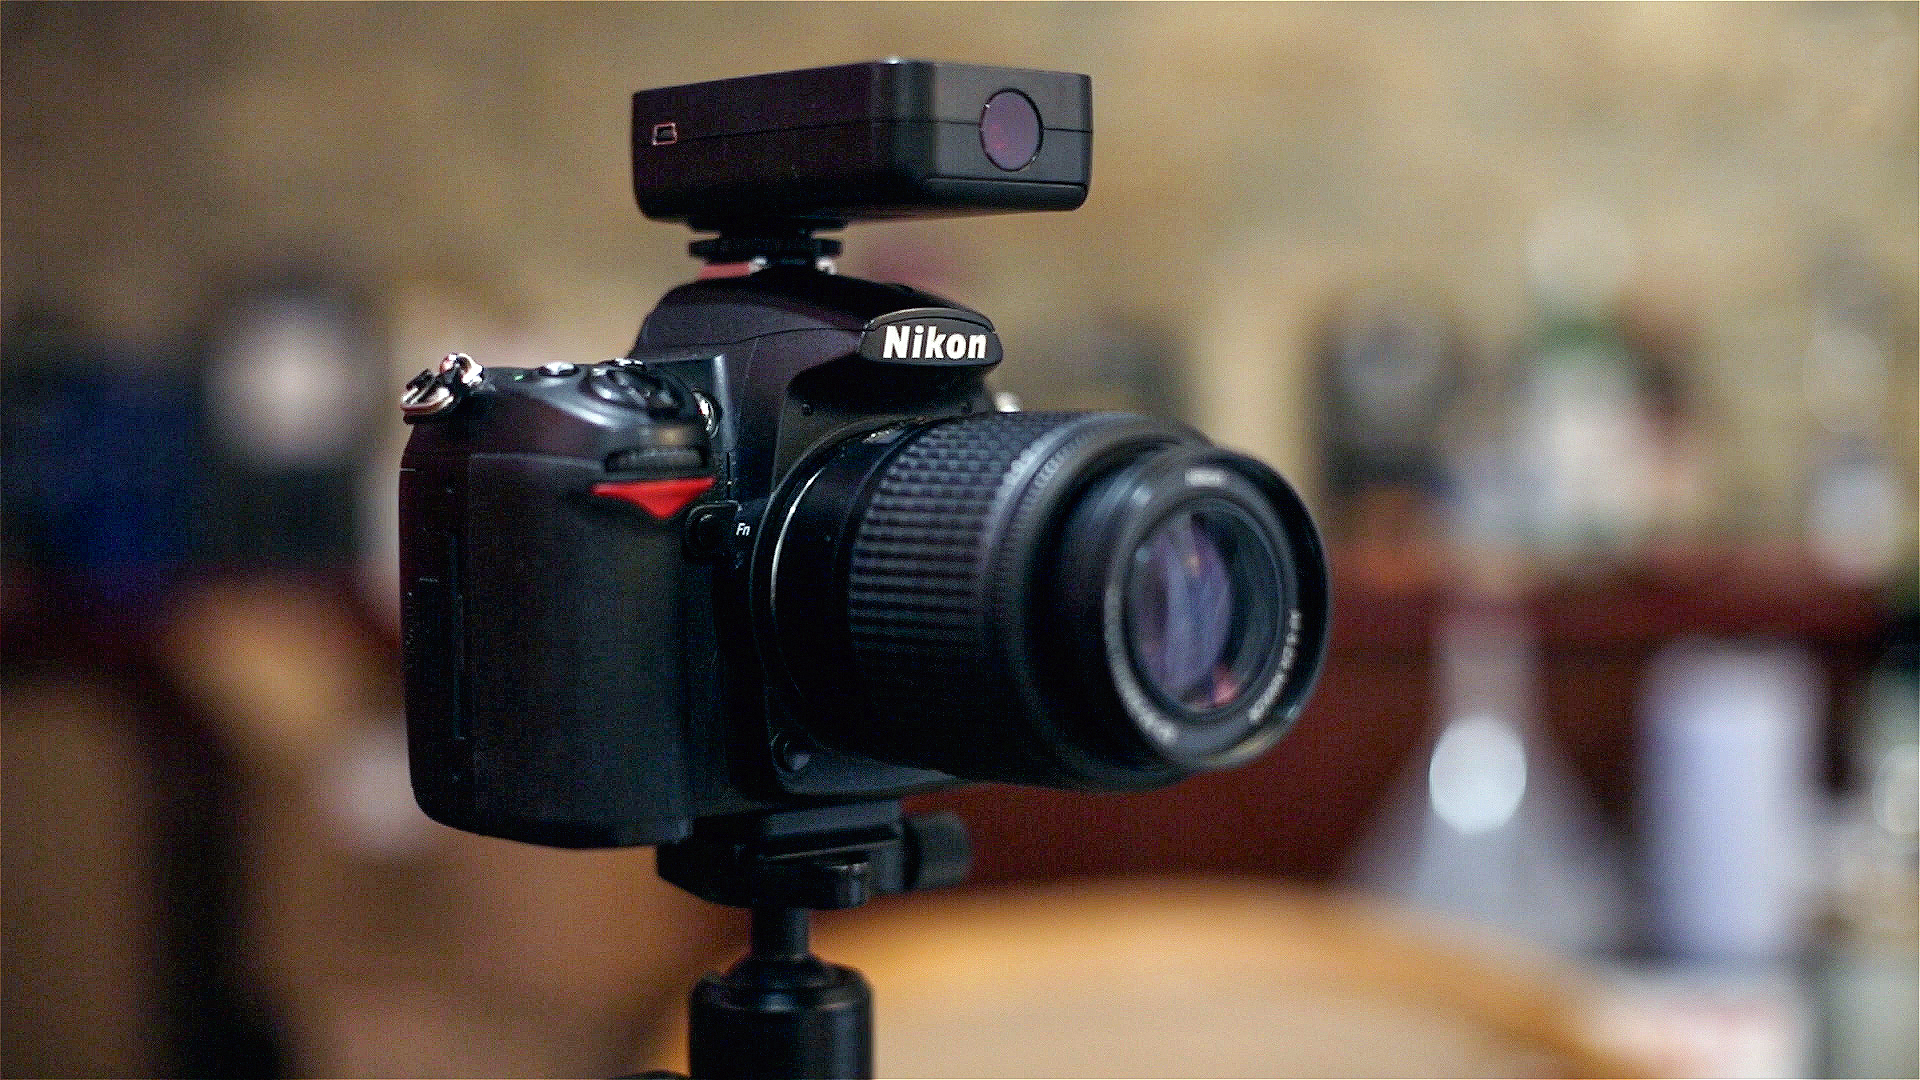
02 Use a tripod
Put your camera on a tripod, so that you can keep your hands free to adjust reflectors and fill up or empty the glass. Your lens choice isn’t that important; we shot at 82mm, so your kit lens or a 70-200mm would be ideal.
• Best tripods
• Best 70-200mm lenses
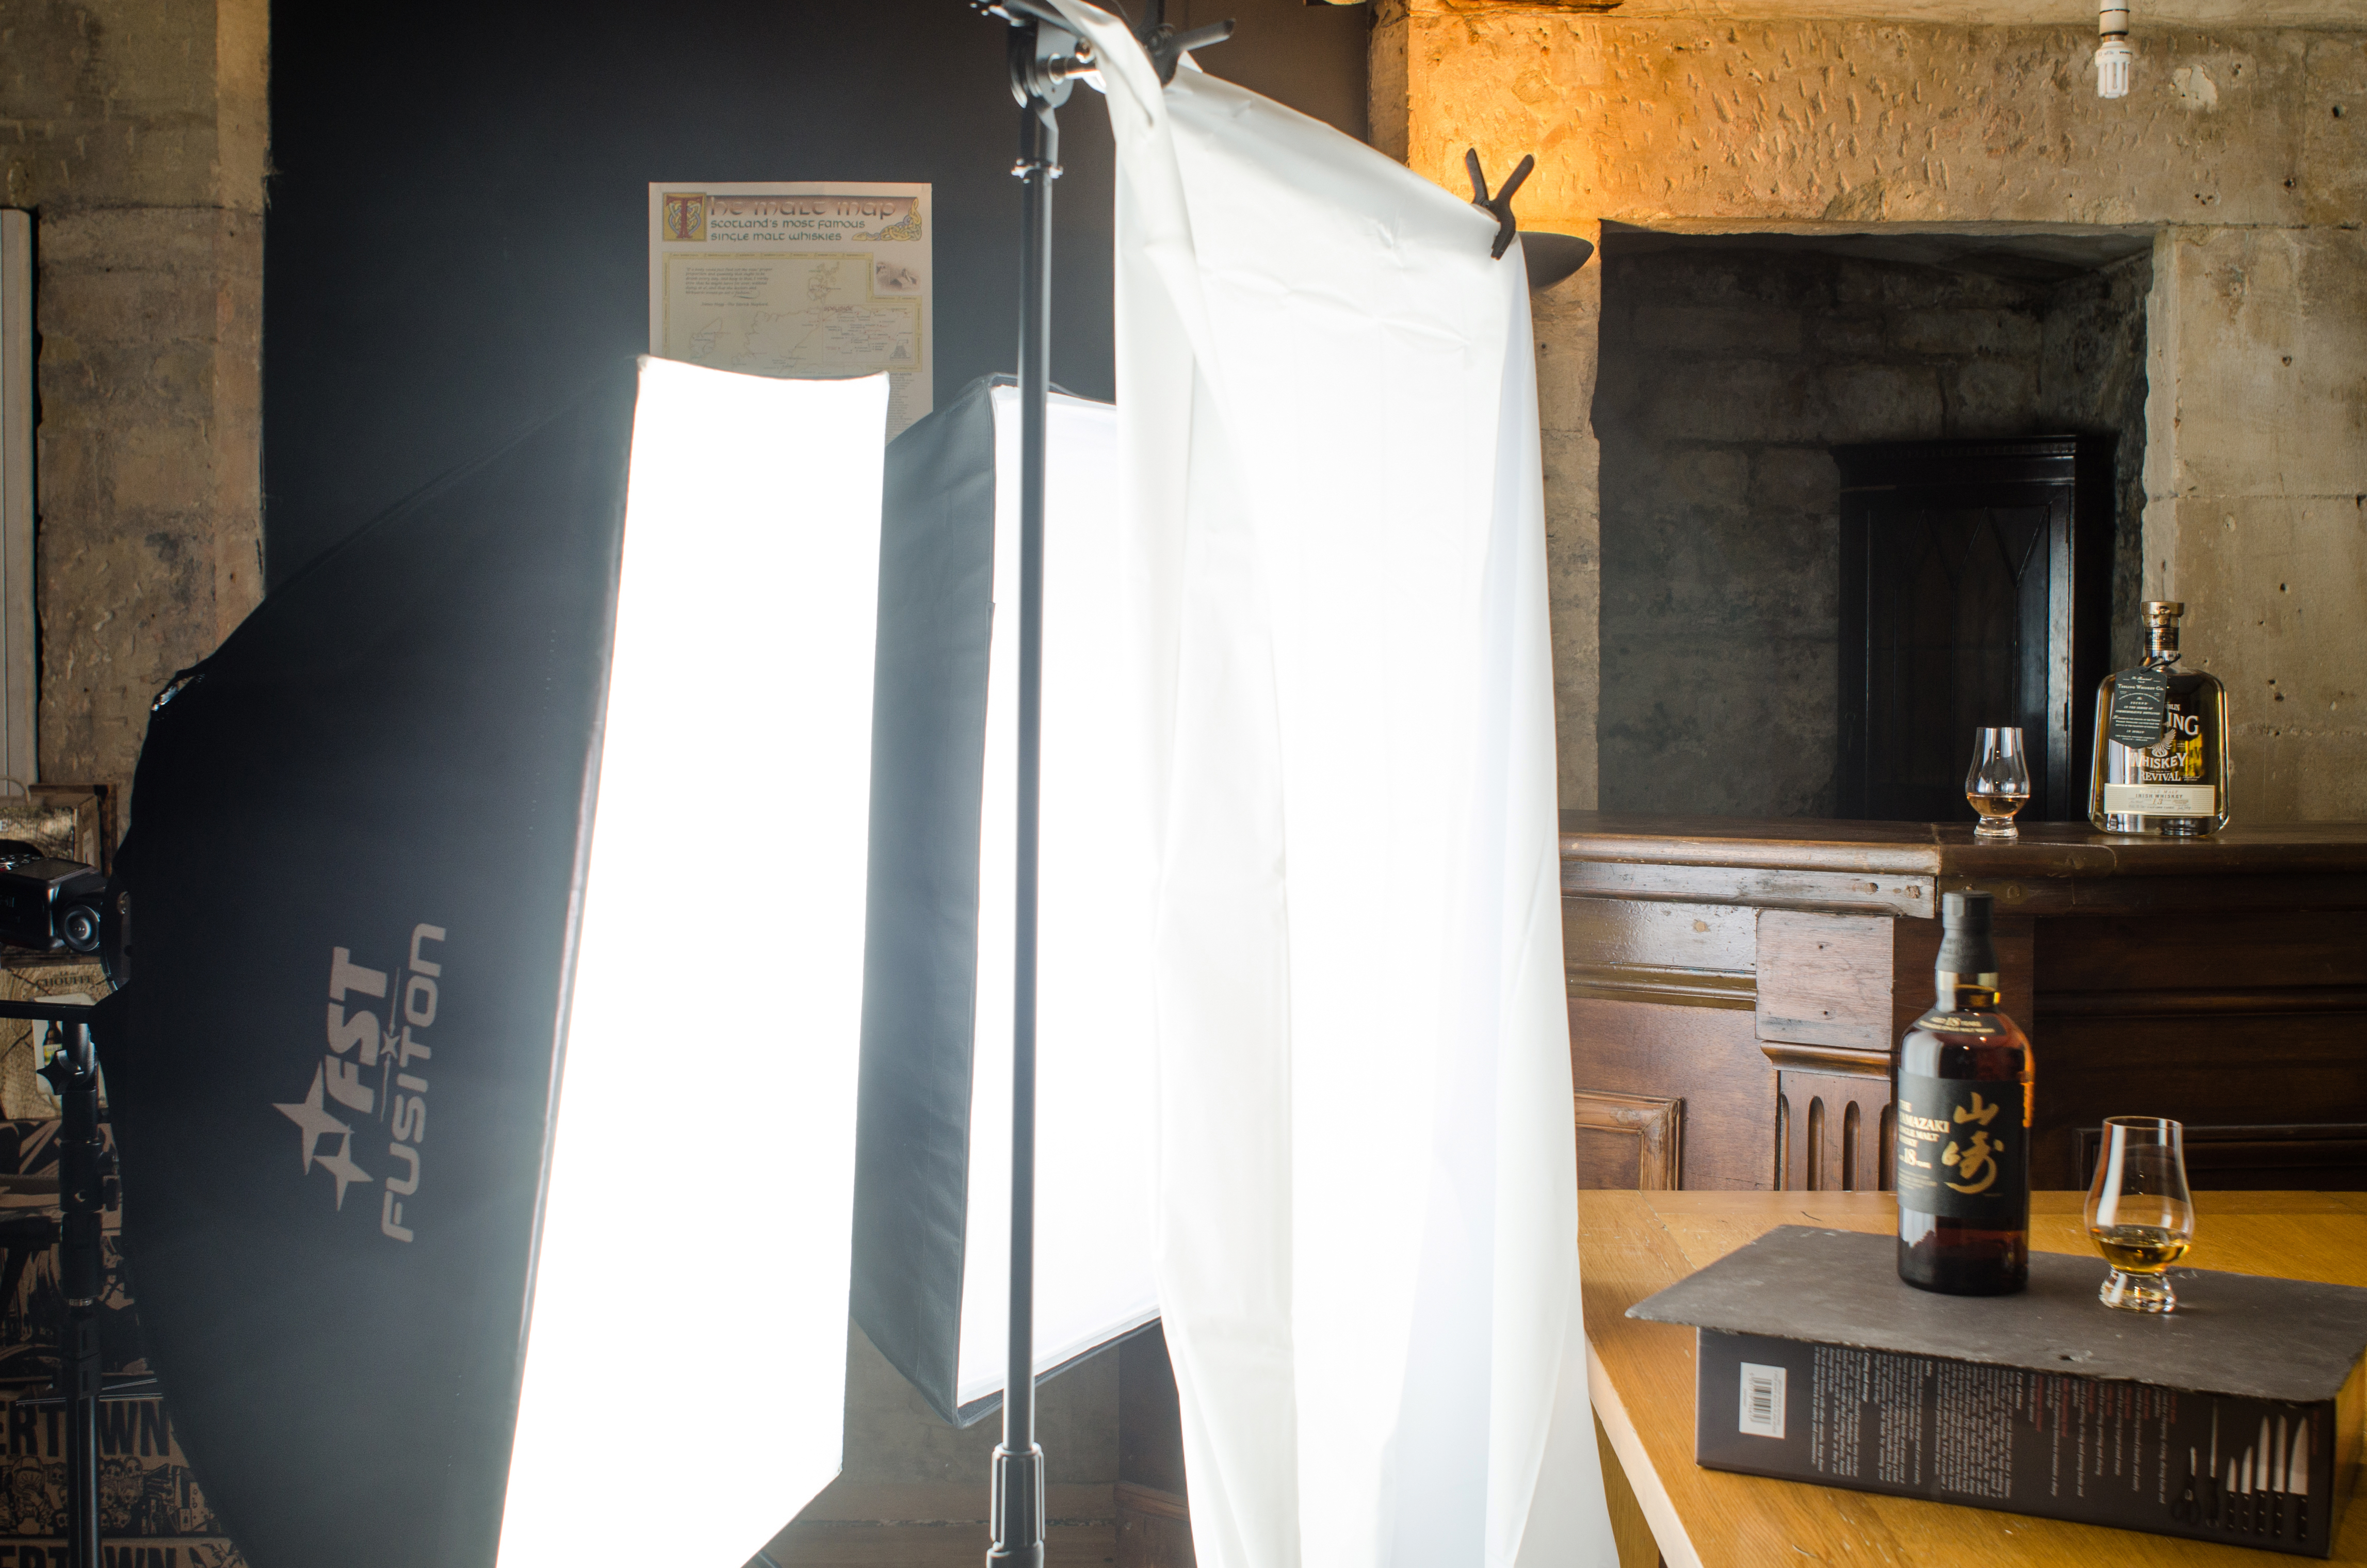
03 Set up the lights
We placed two speed lights in softboxes to the left of the bottle to sidelight the curved edge. They cover a wide area, spreading the light across the whole left-hand side of the bottle. We then hung a white shower curtain in front of the lights for further diffusion.
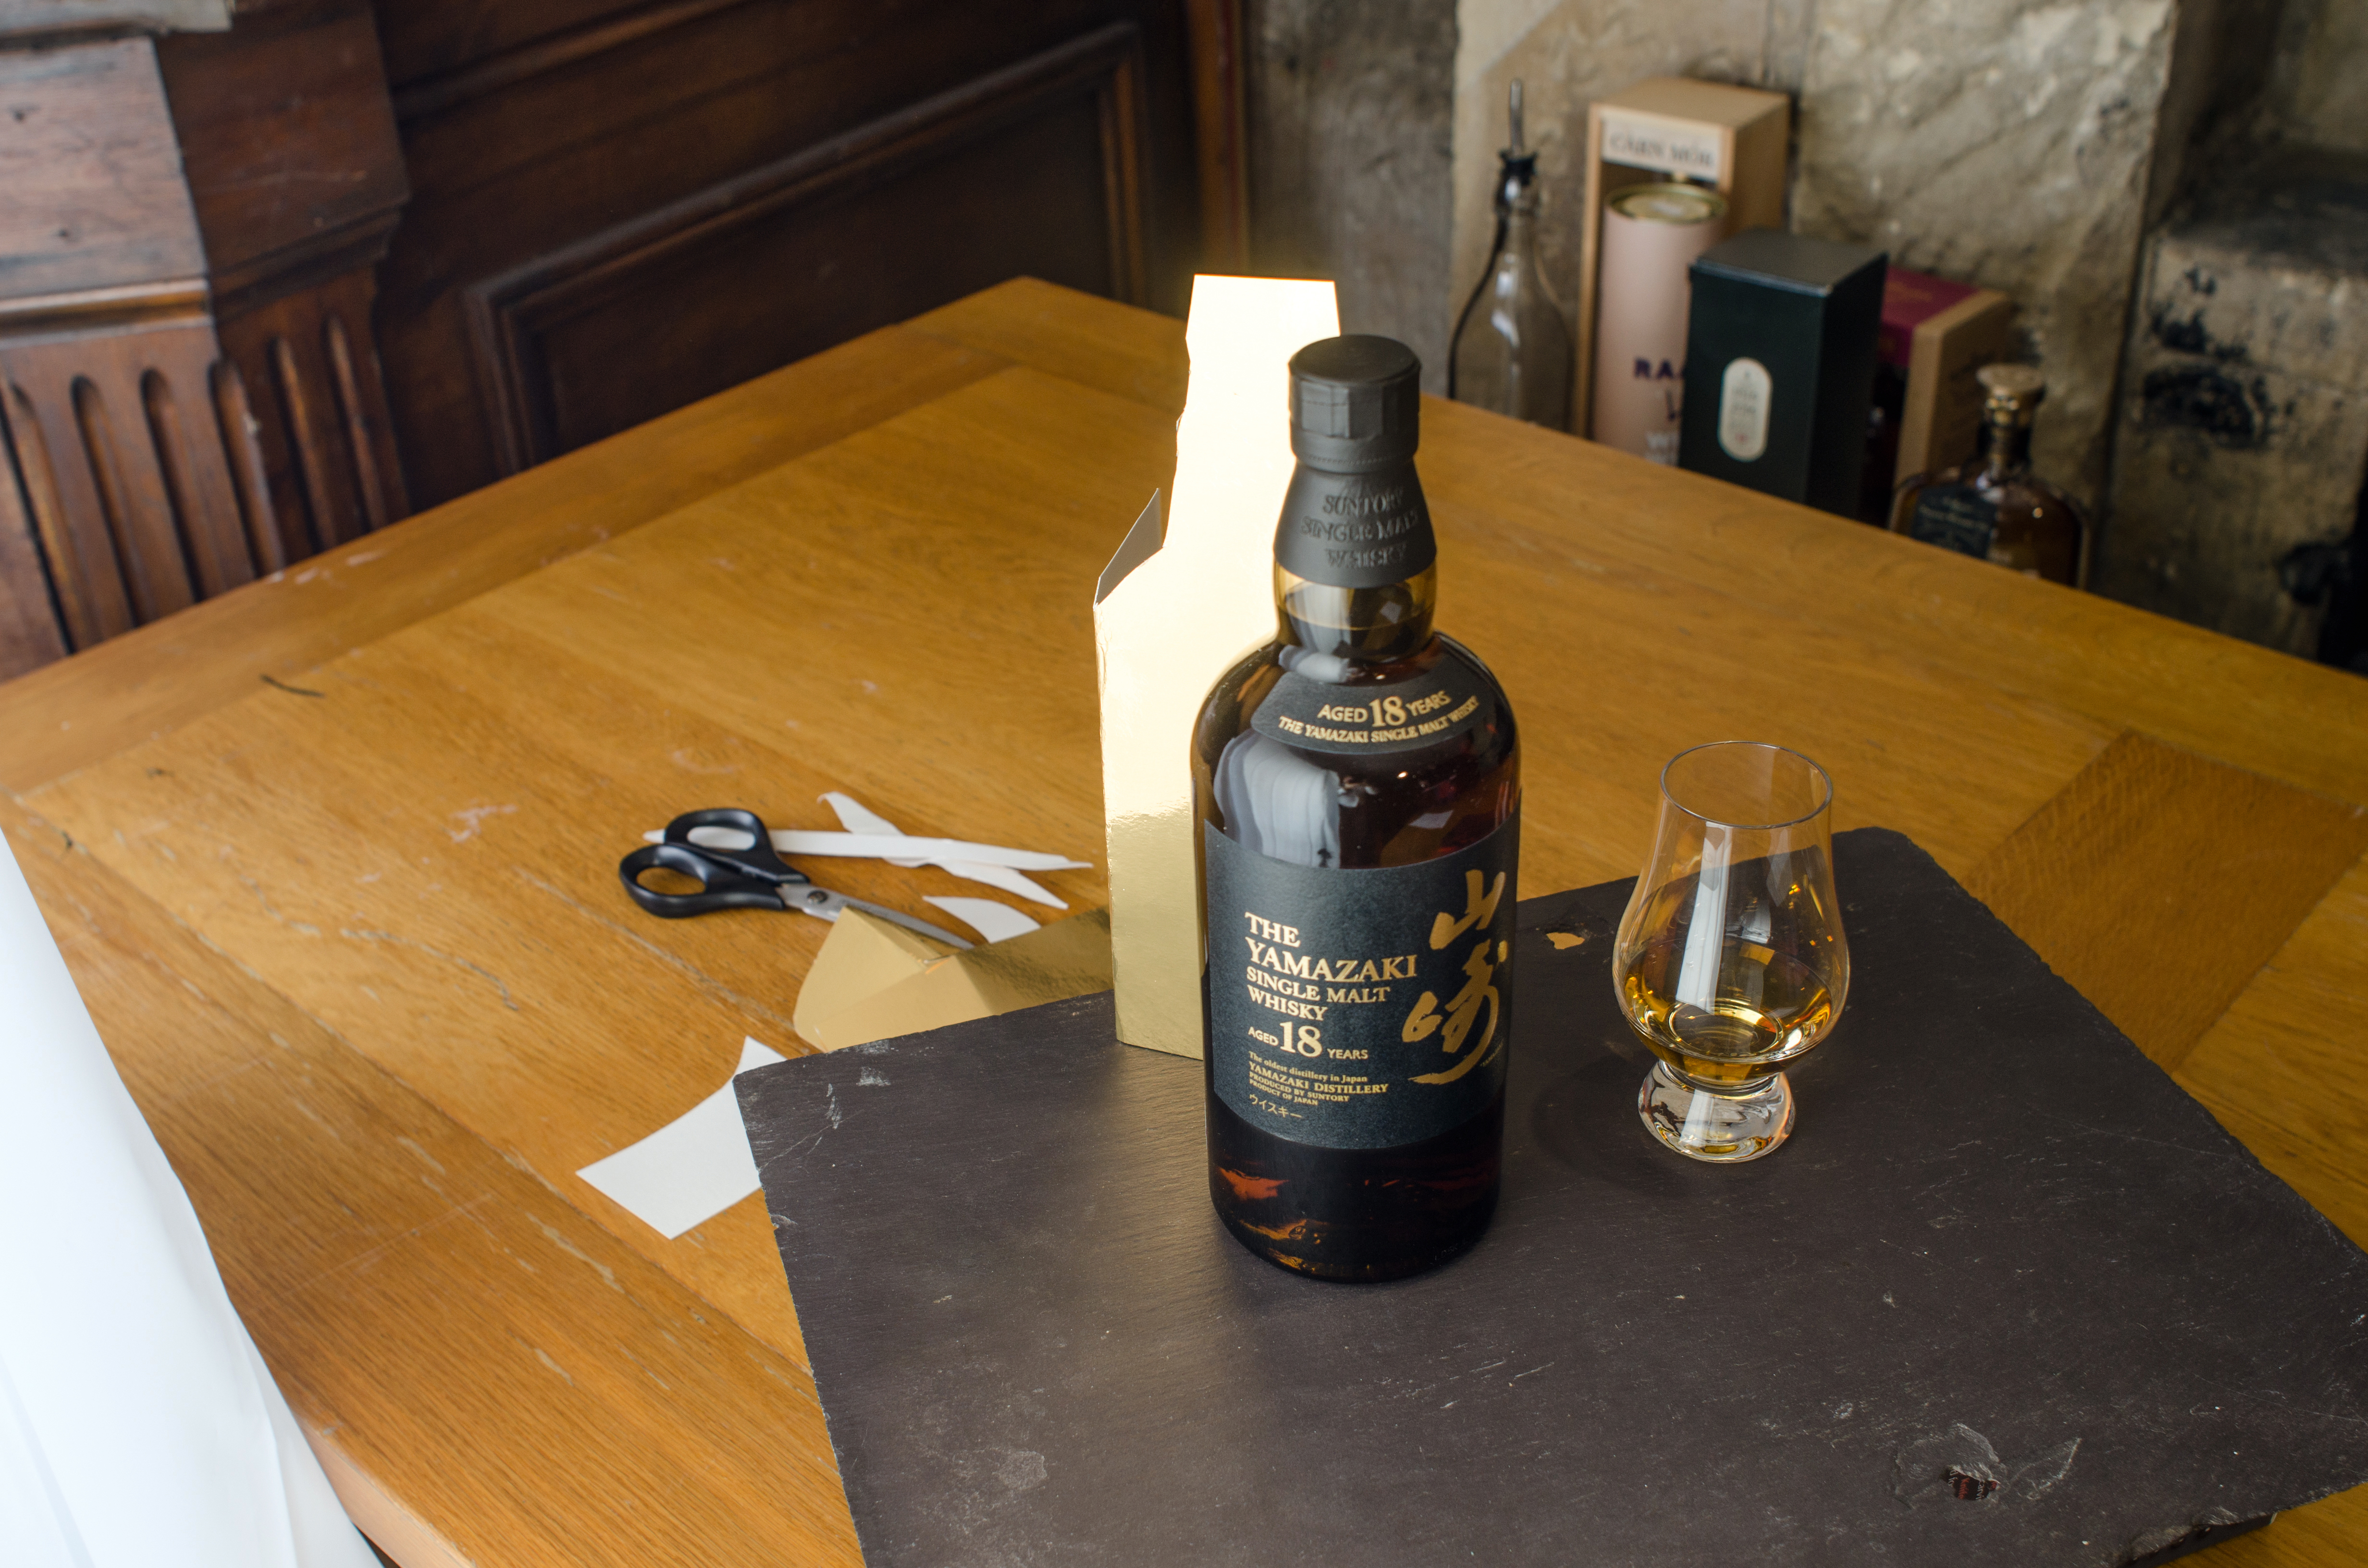
04 Shine a light
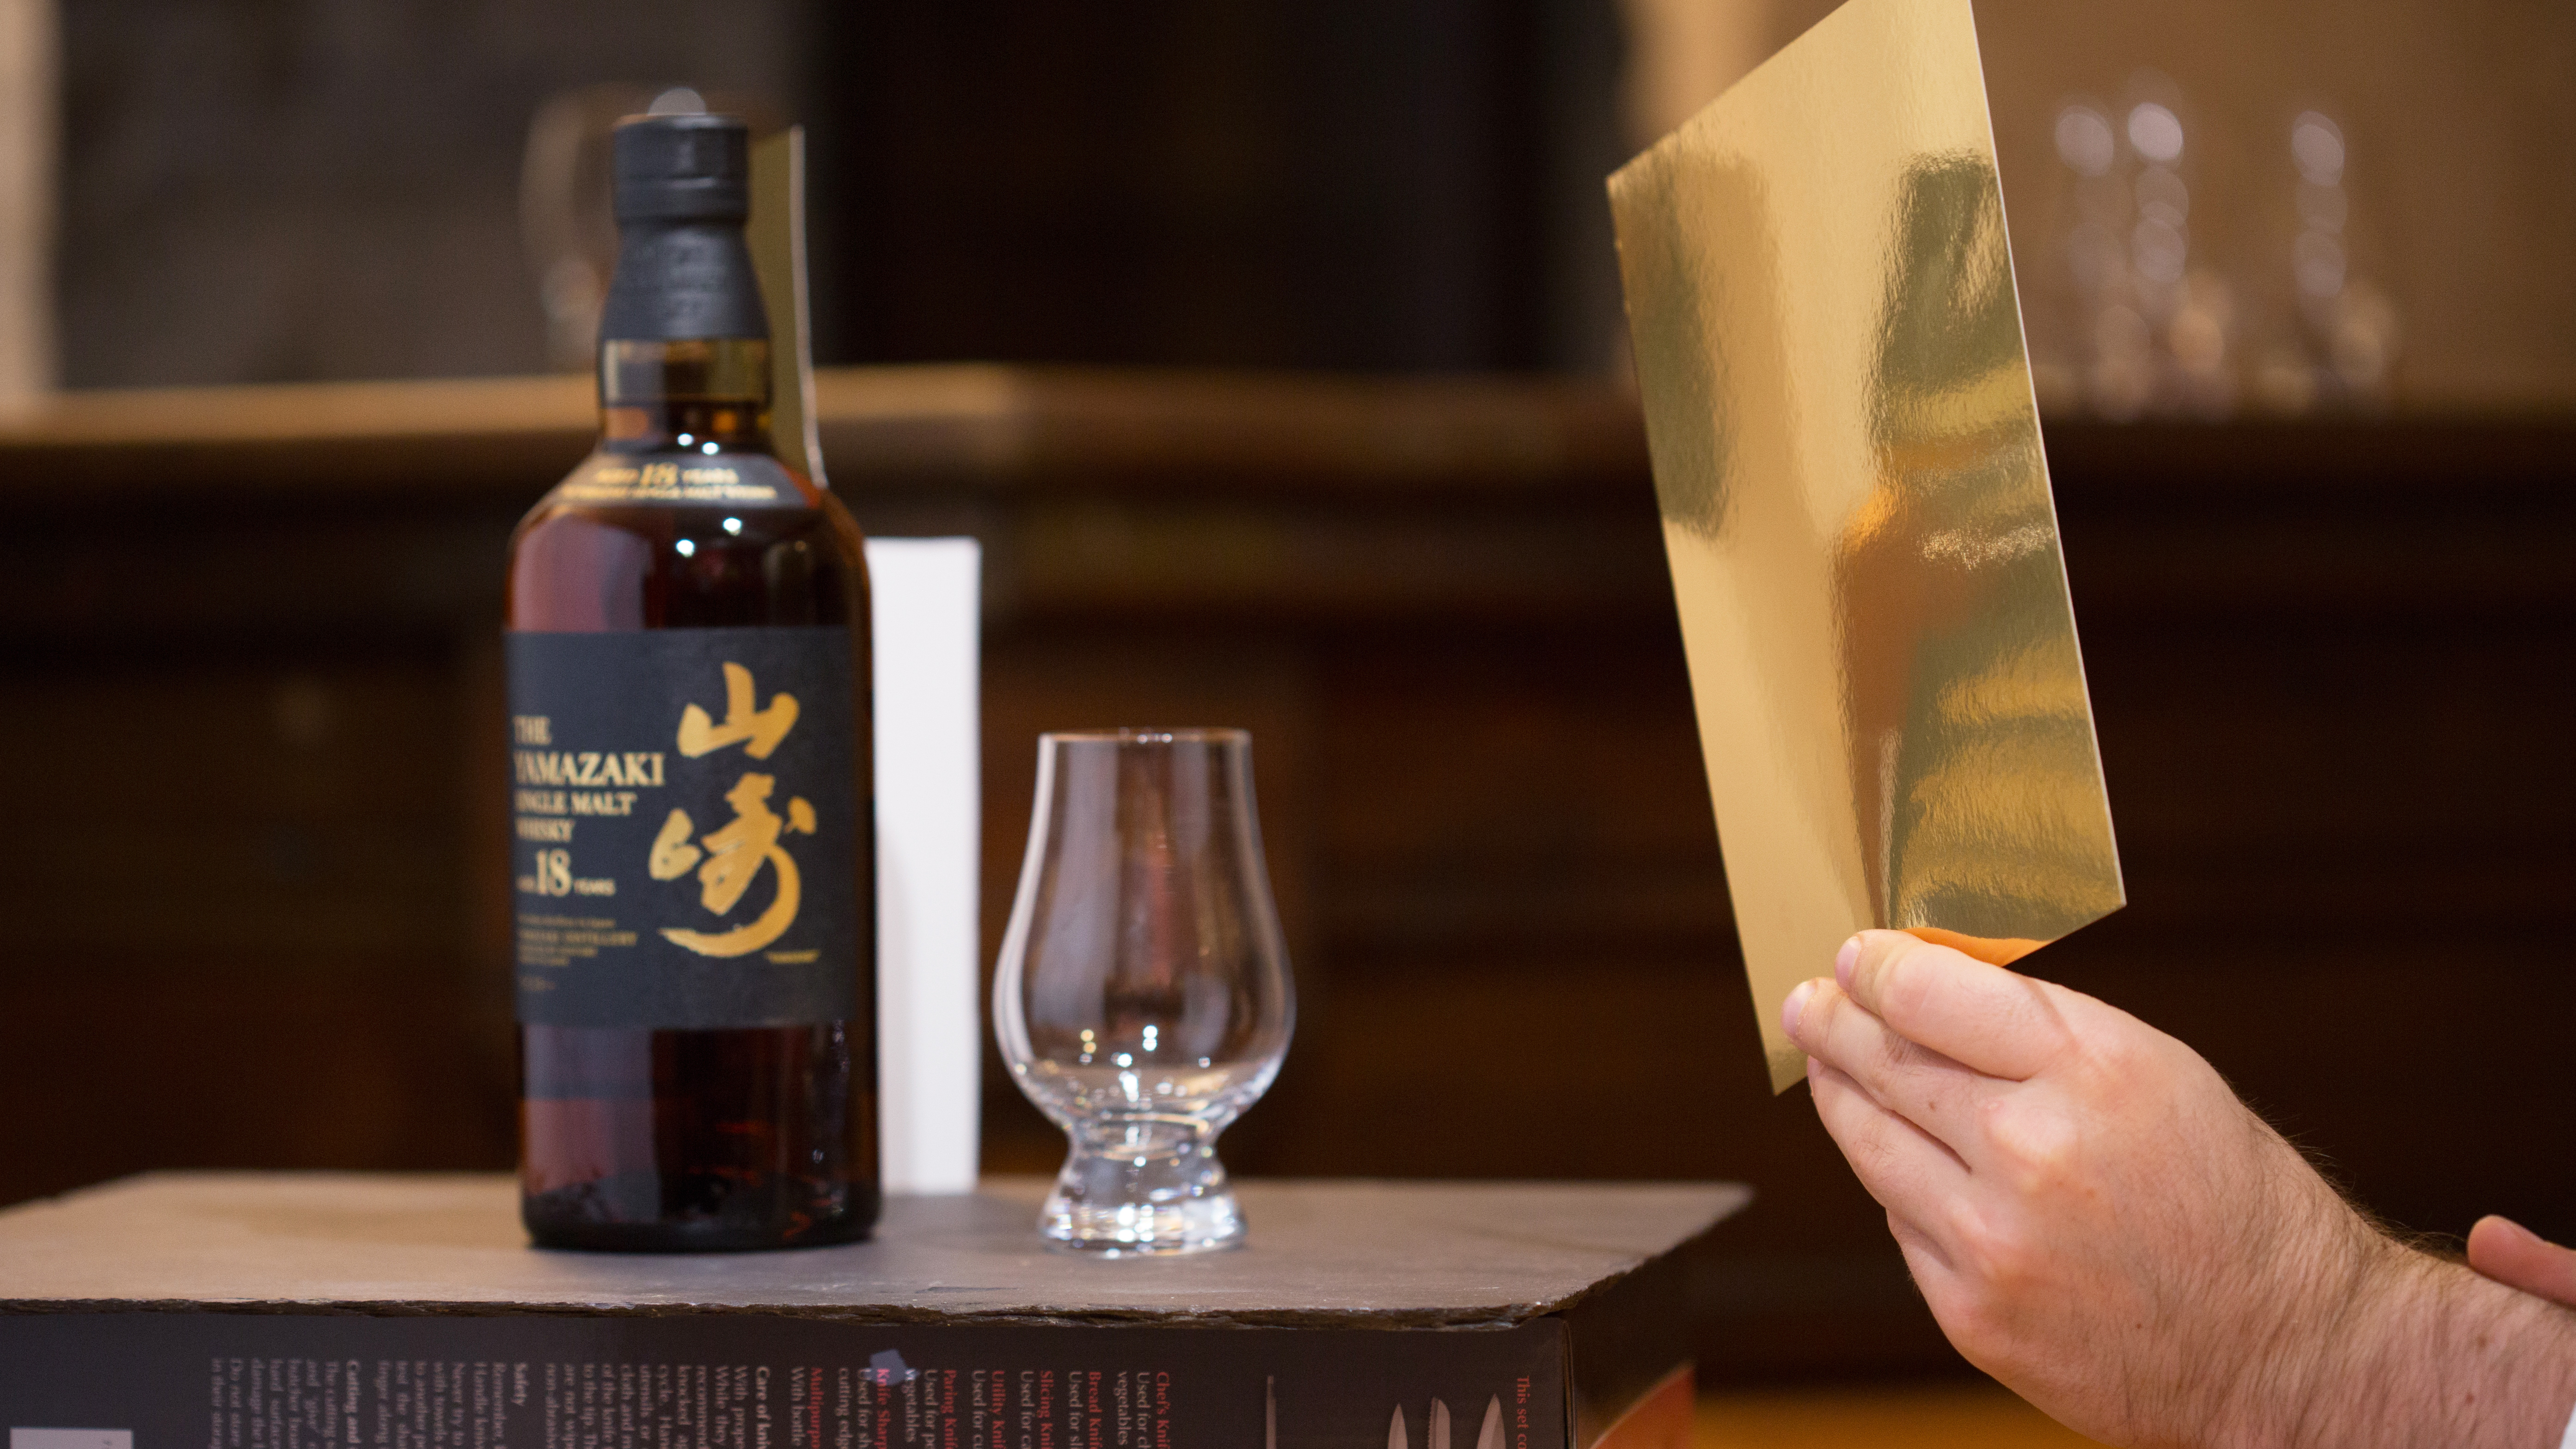
Now that we have the light set up, we need to get some light bouncing through the bottle. Cut some silver or gold card into the shape of the bottle, with a folded arm to prop it up. Position the card opposite the light at 45 degrees, so that it bounces light back through the glass.
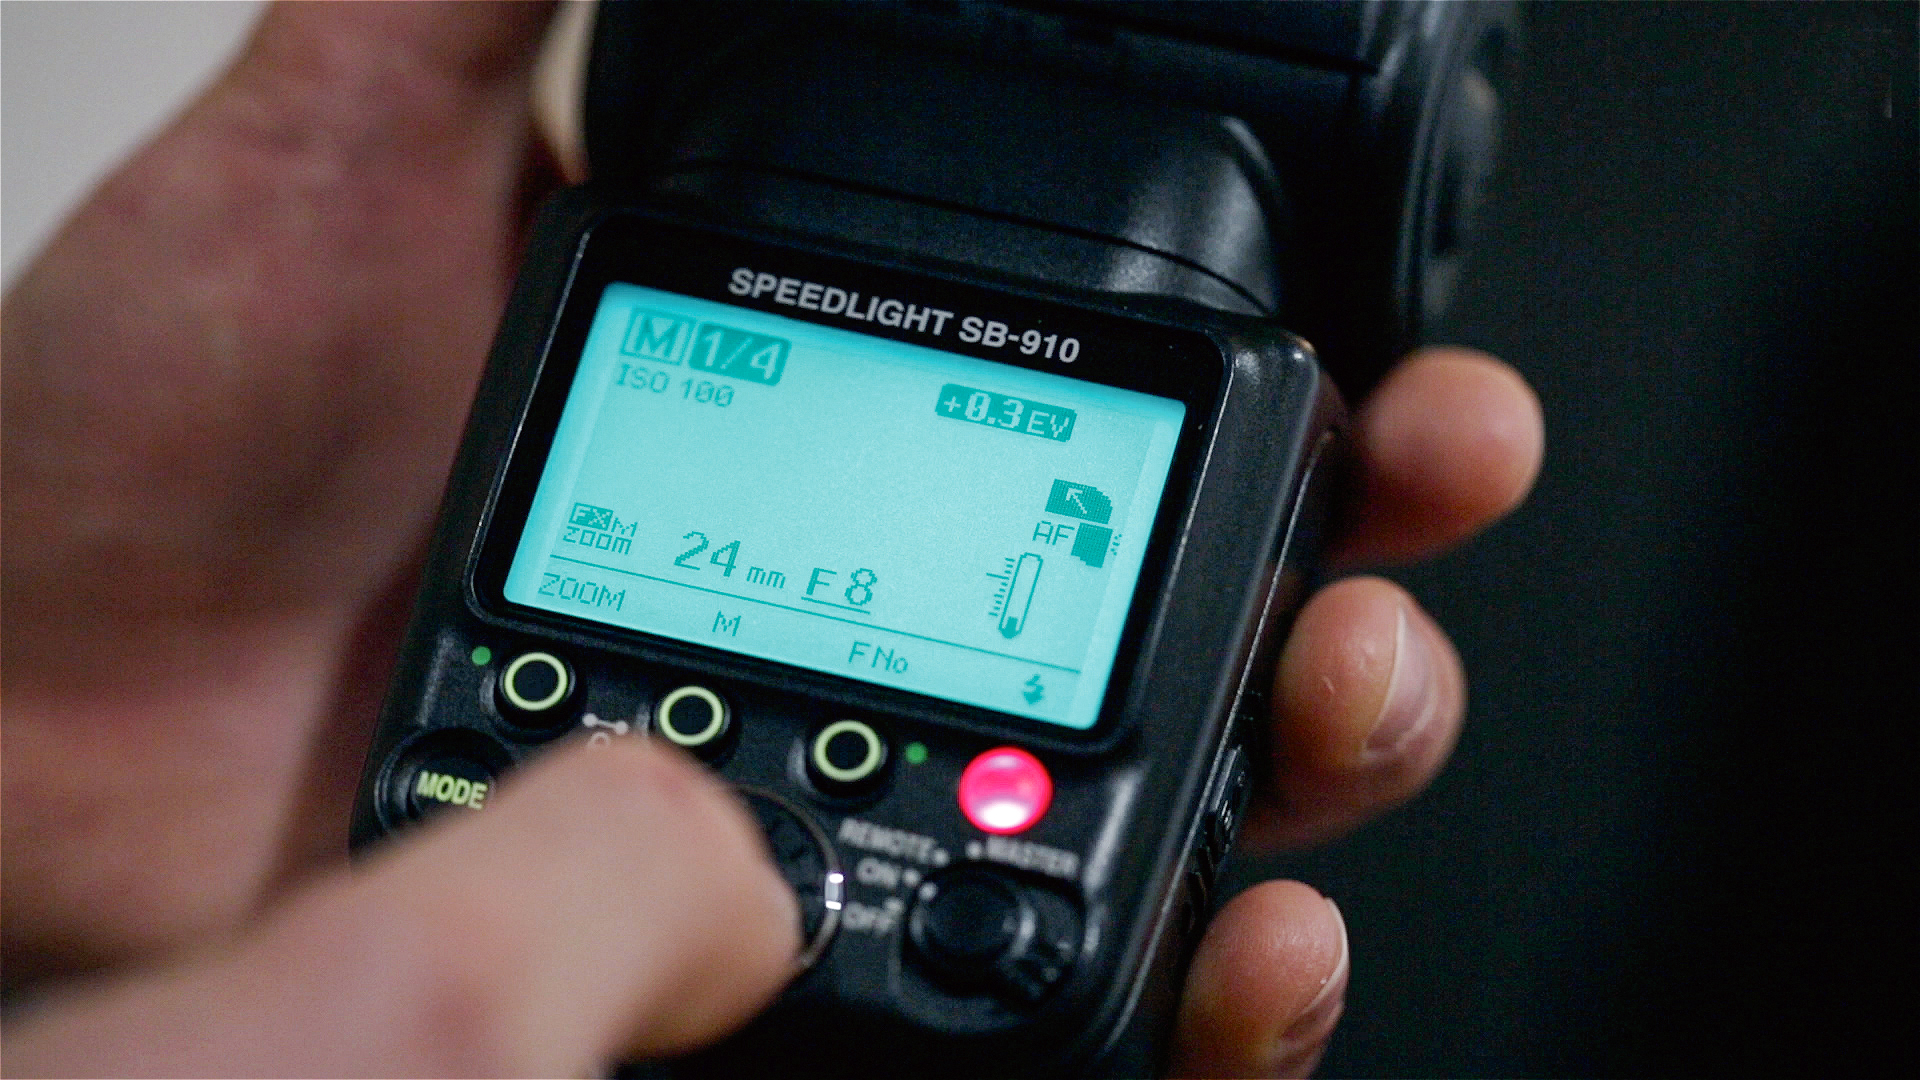
05 Drag the shutter
We set the light to ¼ power, then dialed in an aperture of f/6.3 on the camera to throw the background out of focus. At ISO100, we went from 1/200 sec shutter speed (sync speed) to 1/30 sec to lighten the backdrop.
06 Lift the label
Now that the bottle and glass are starting to sing, the label needs a lift as well. Cut the leftover gold card into a rectangle a bit bigger than the length of the label and hold it opposite the light. Experiment with the placement until you’re happy.
07 Faking it
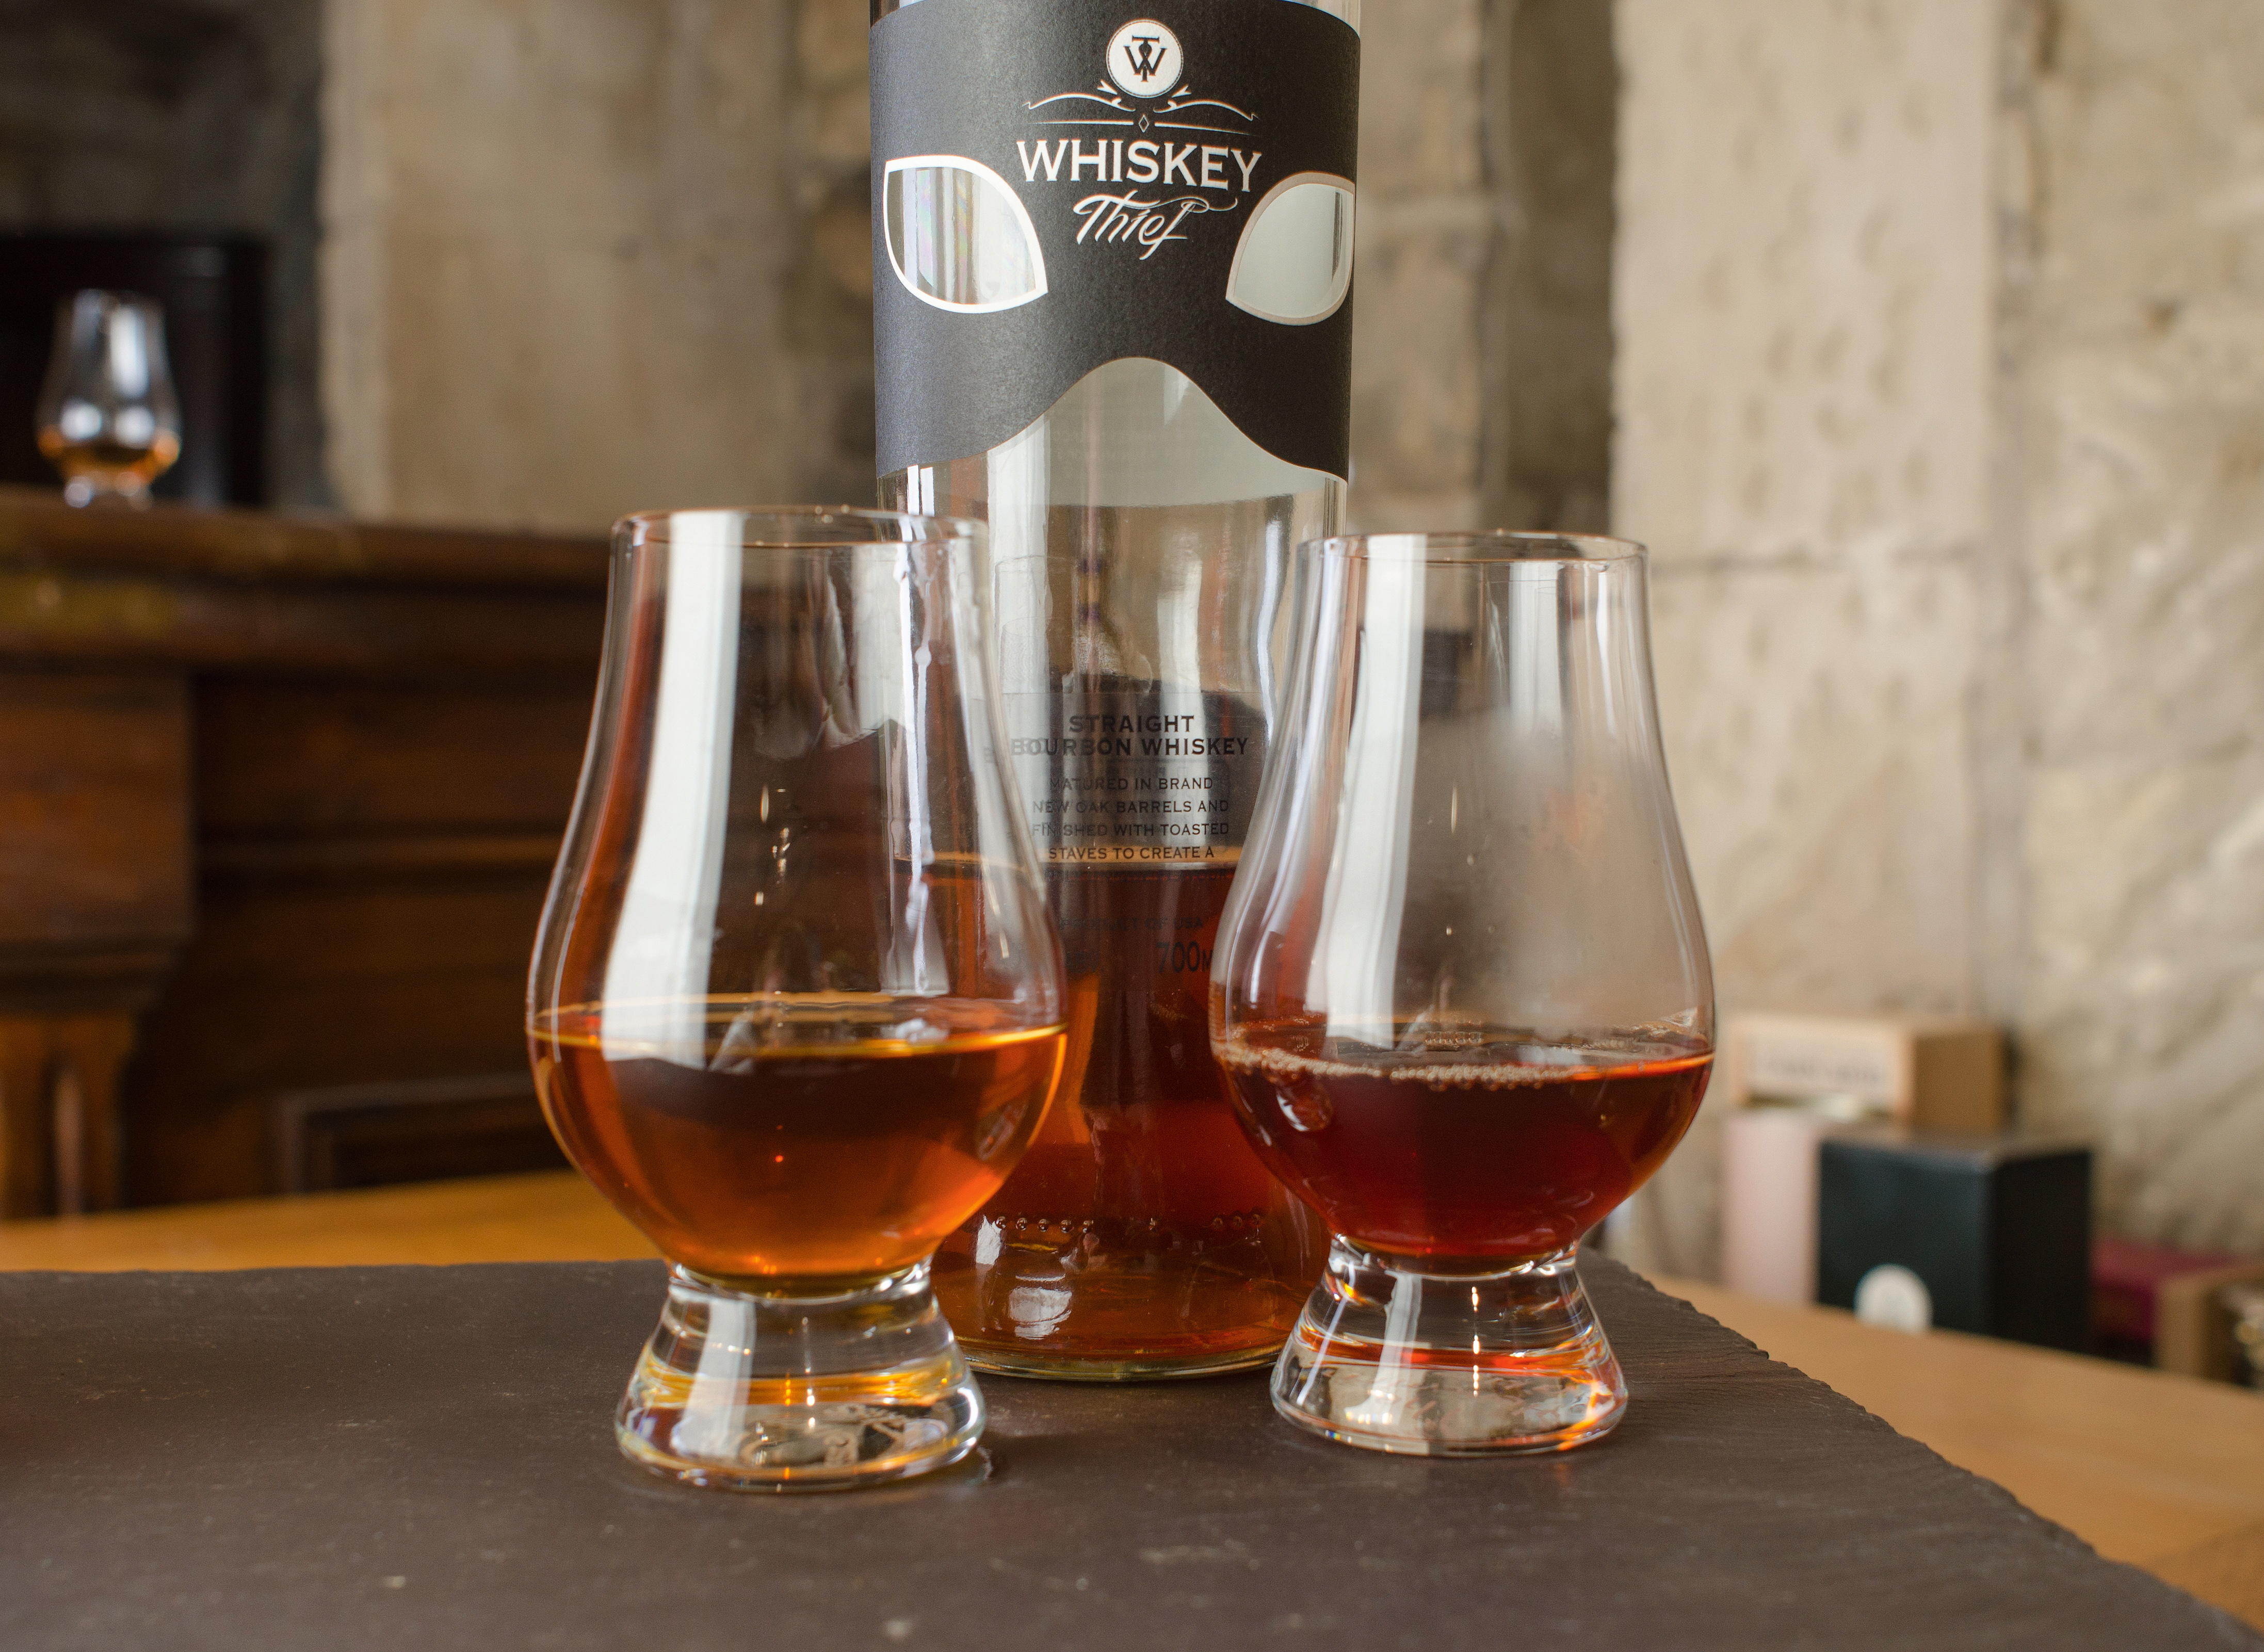
If you can’t afford the whiskey, or just don’t want to waste it for one shot, use some weak tea! It looks the same as whiskey in the photograph and it gives you the opportunity to keep the bottle full. We promise we won’t tell anyone…
N-Photo: The Nikon Magazine is a monthly publication that's entirely dedicated to Nikon users. For the best news, reviews, projects and more, subscribe to N-Photo today!
Read more:
The best 70-200mm telephoto lenses: top constant-aperture zooms
The best flashgun: the best strobe units for Canon cameras, Nikon and more
The best flash triggers: wireless control for off-camera flashguns
Get the Digital Camera World Newsletter
The best camera deals, reviews, product advice, and unmissable photography news, direct to your inbox!
N-Photo: The Nikon Magazine is a monthly publication that's entirely dedicated to Nikon users. As a 100% independent magazine, you can be assured of unbiased opinion from a trustworthy team of devoted photography experts including editor Adam Waring and Deputy Editor Mike Harris.
Aimed at all users, from camera newcomers to working pros, every issue is packed with practical, Nikon-specific advice for taking better photos, in-depth reviews of Nikon-compatible gear, and inspiring projects and exciting video lessons for mastering camera, lens and Photoshop techniques.
Written by Nikon users for Nikon users, N-Photo is your one-stop shop for everything to do with cameras, lenses, tripods, bags, tips, tricks and techniques to get the most out of your photography.
