Home photography ideas: Toy soldiers doing battle with light painting!
Paint toys with light and add a touch of smoke, to create a miniature scene on an epic scale
The best camera deals, reviews, product advice, and unmissable photography news, direct to your inbox!
You are now subscribed
Your newsletter sign-up was successful
Watch video: Home photography ideas – Toy soldiers and light painting!
Photography projects at home
• Home photography ideas
Useful home photography kit
• Best tripods
• Best lighting kits
• Best reflectors
• Best macro lenses
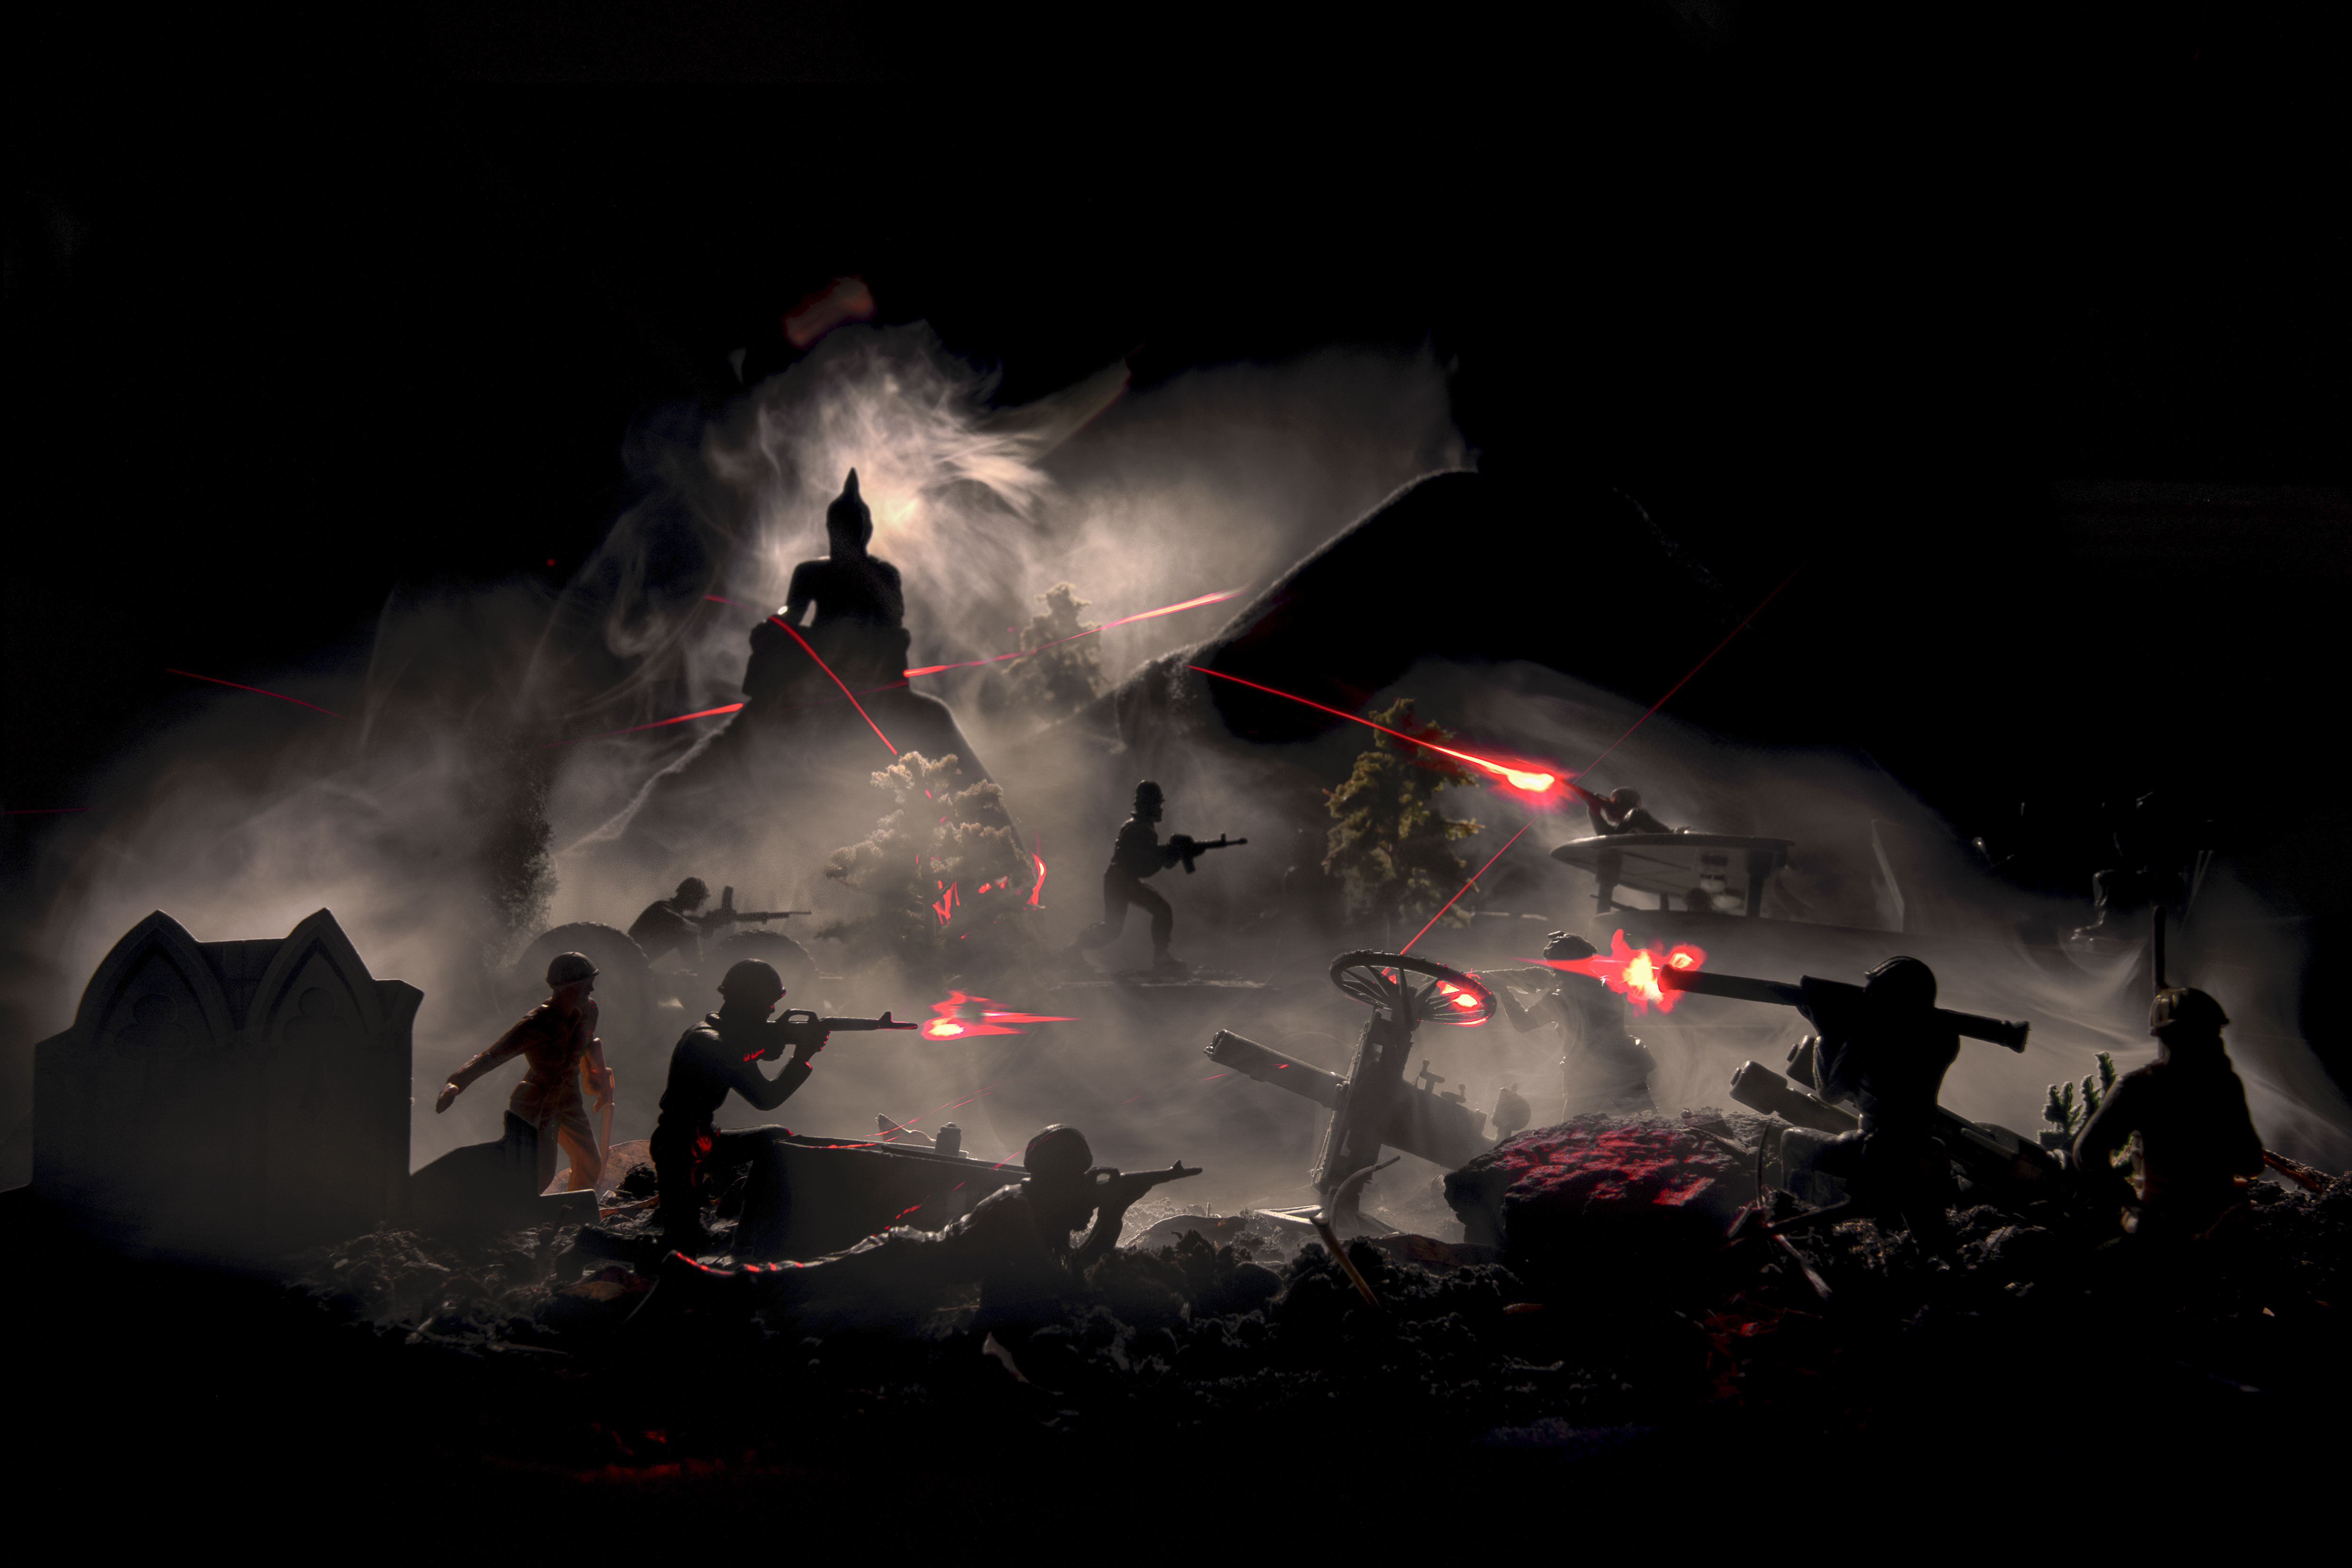
Most of us probably have a few old toy figures tucked away that would be perfect for a fun project like this. But this isn’t just an excuse to get out some cherished playthings – it’s also a lesson in the power of mood lighting.
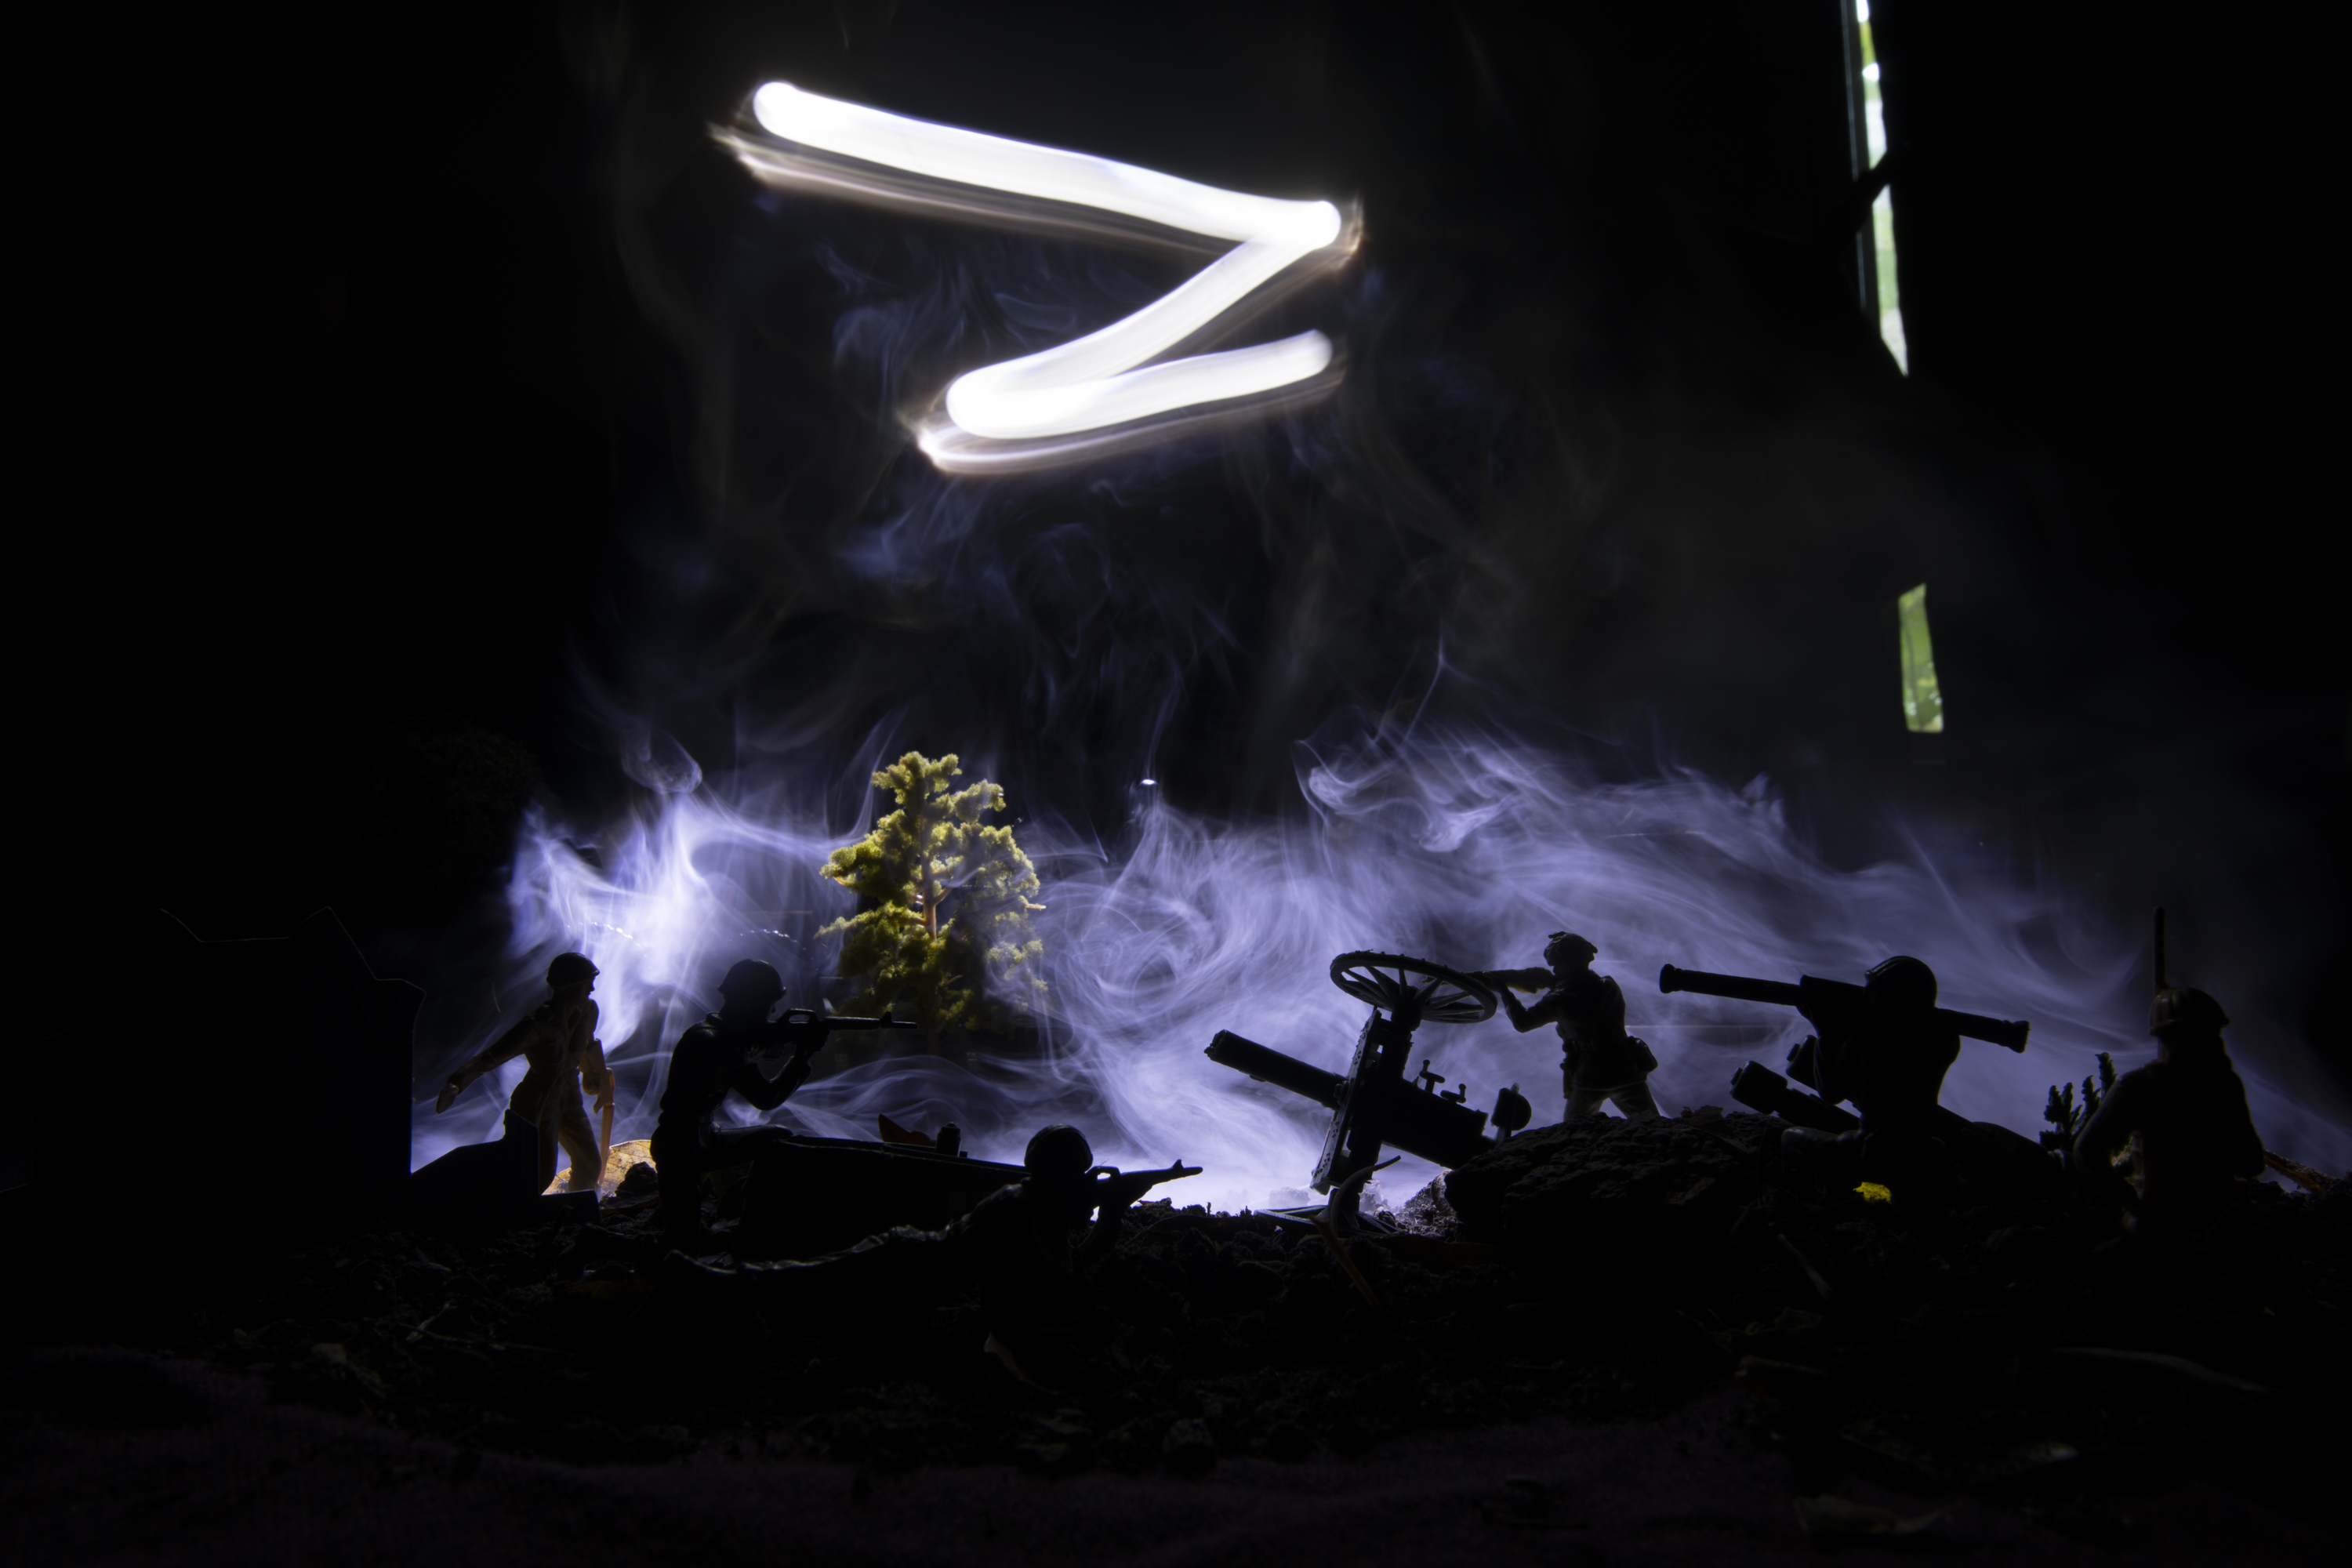
By illuminating a tabletop toy scene with a couple of torches, we can evoke a powerful, cinematic atmosphere. In this project we’ll explain how it’s done, using a long exposure so that we can 'paint' with light.
Article continues belowIf you’re not into the war theme, then look at this purely as an exercise in lighting. These same tricks could be used to create a Jurassic scene, or to bring a Lego landscape to life.
Our finished image here is a composite of several frames. By doing it like this we can have as many attempts at light painting as we like. So we can perfect the lighting and the distribution of smoke in one area, then move on to another.
This involves using Photoshop or your preferred photo editing software to combine frames. It’s easier and quicker than you might think, because the bulk of the work is done in-camera.
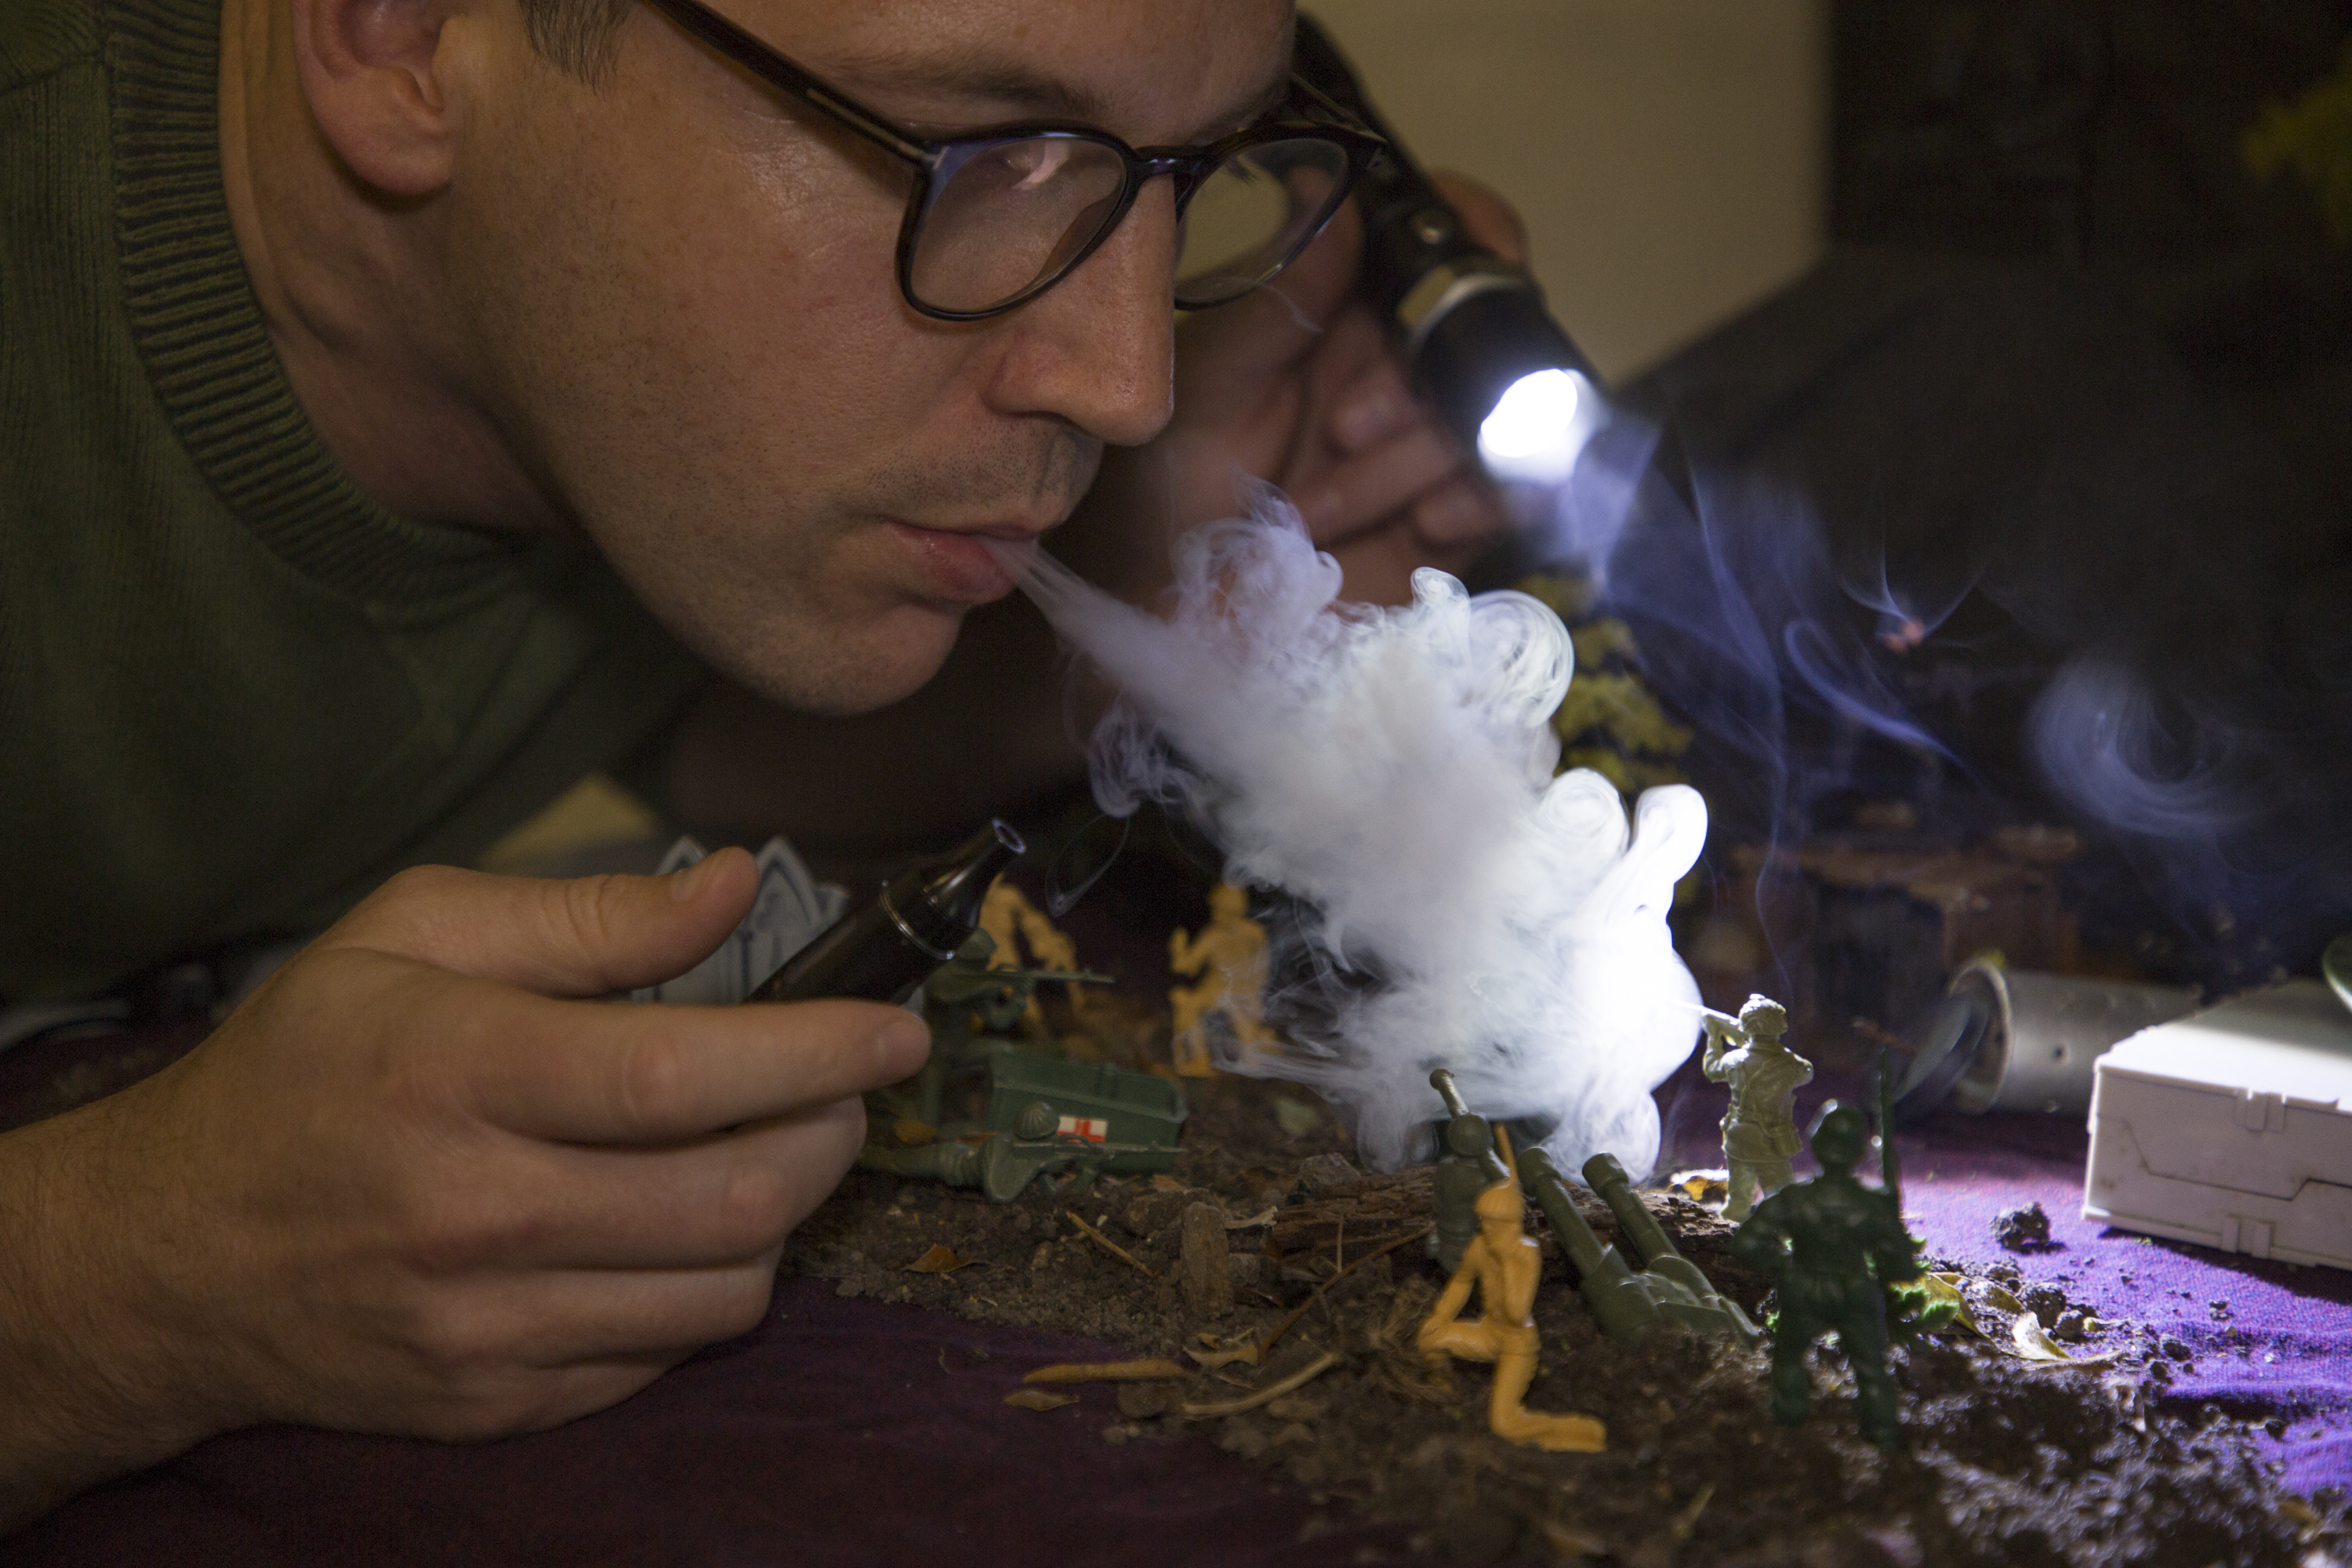
(Before we get cracking we should say that we made use of a vape to create our billowing smoke effect here. Although we used nicotine-free liquid, this method will not be to everyone’s taste – if you prefer not to use a vape, you could use an alternative like a clothes steamer.)
The best camera deals, reviews, product advice, and unmissable photography news, direct to your inbox!
• Best online photography courses
Establish a miniature war zone
01 Toys and props
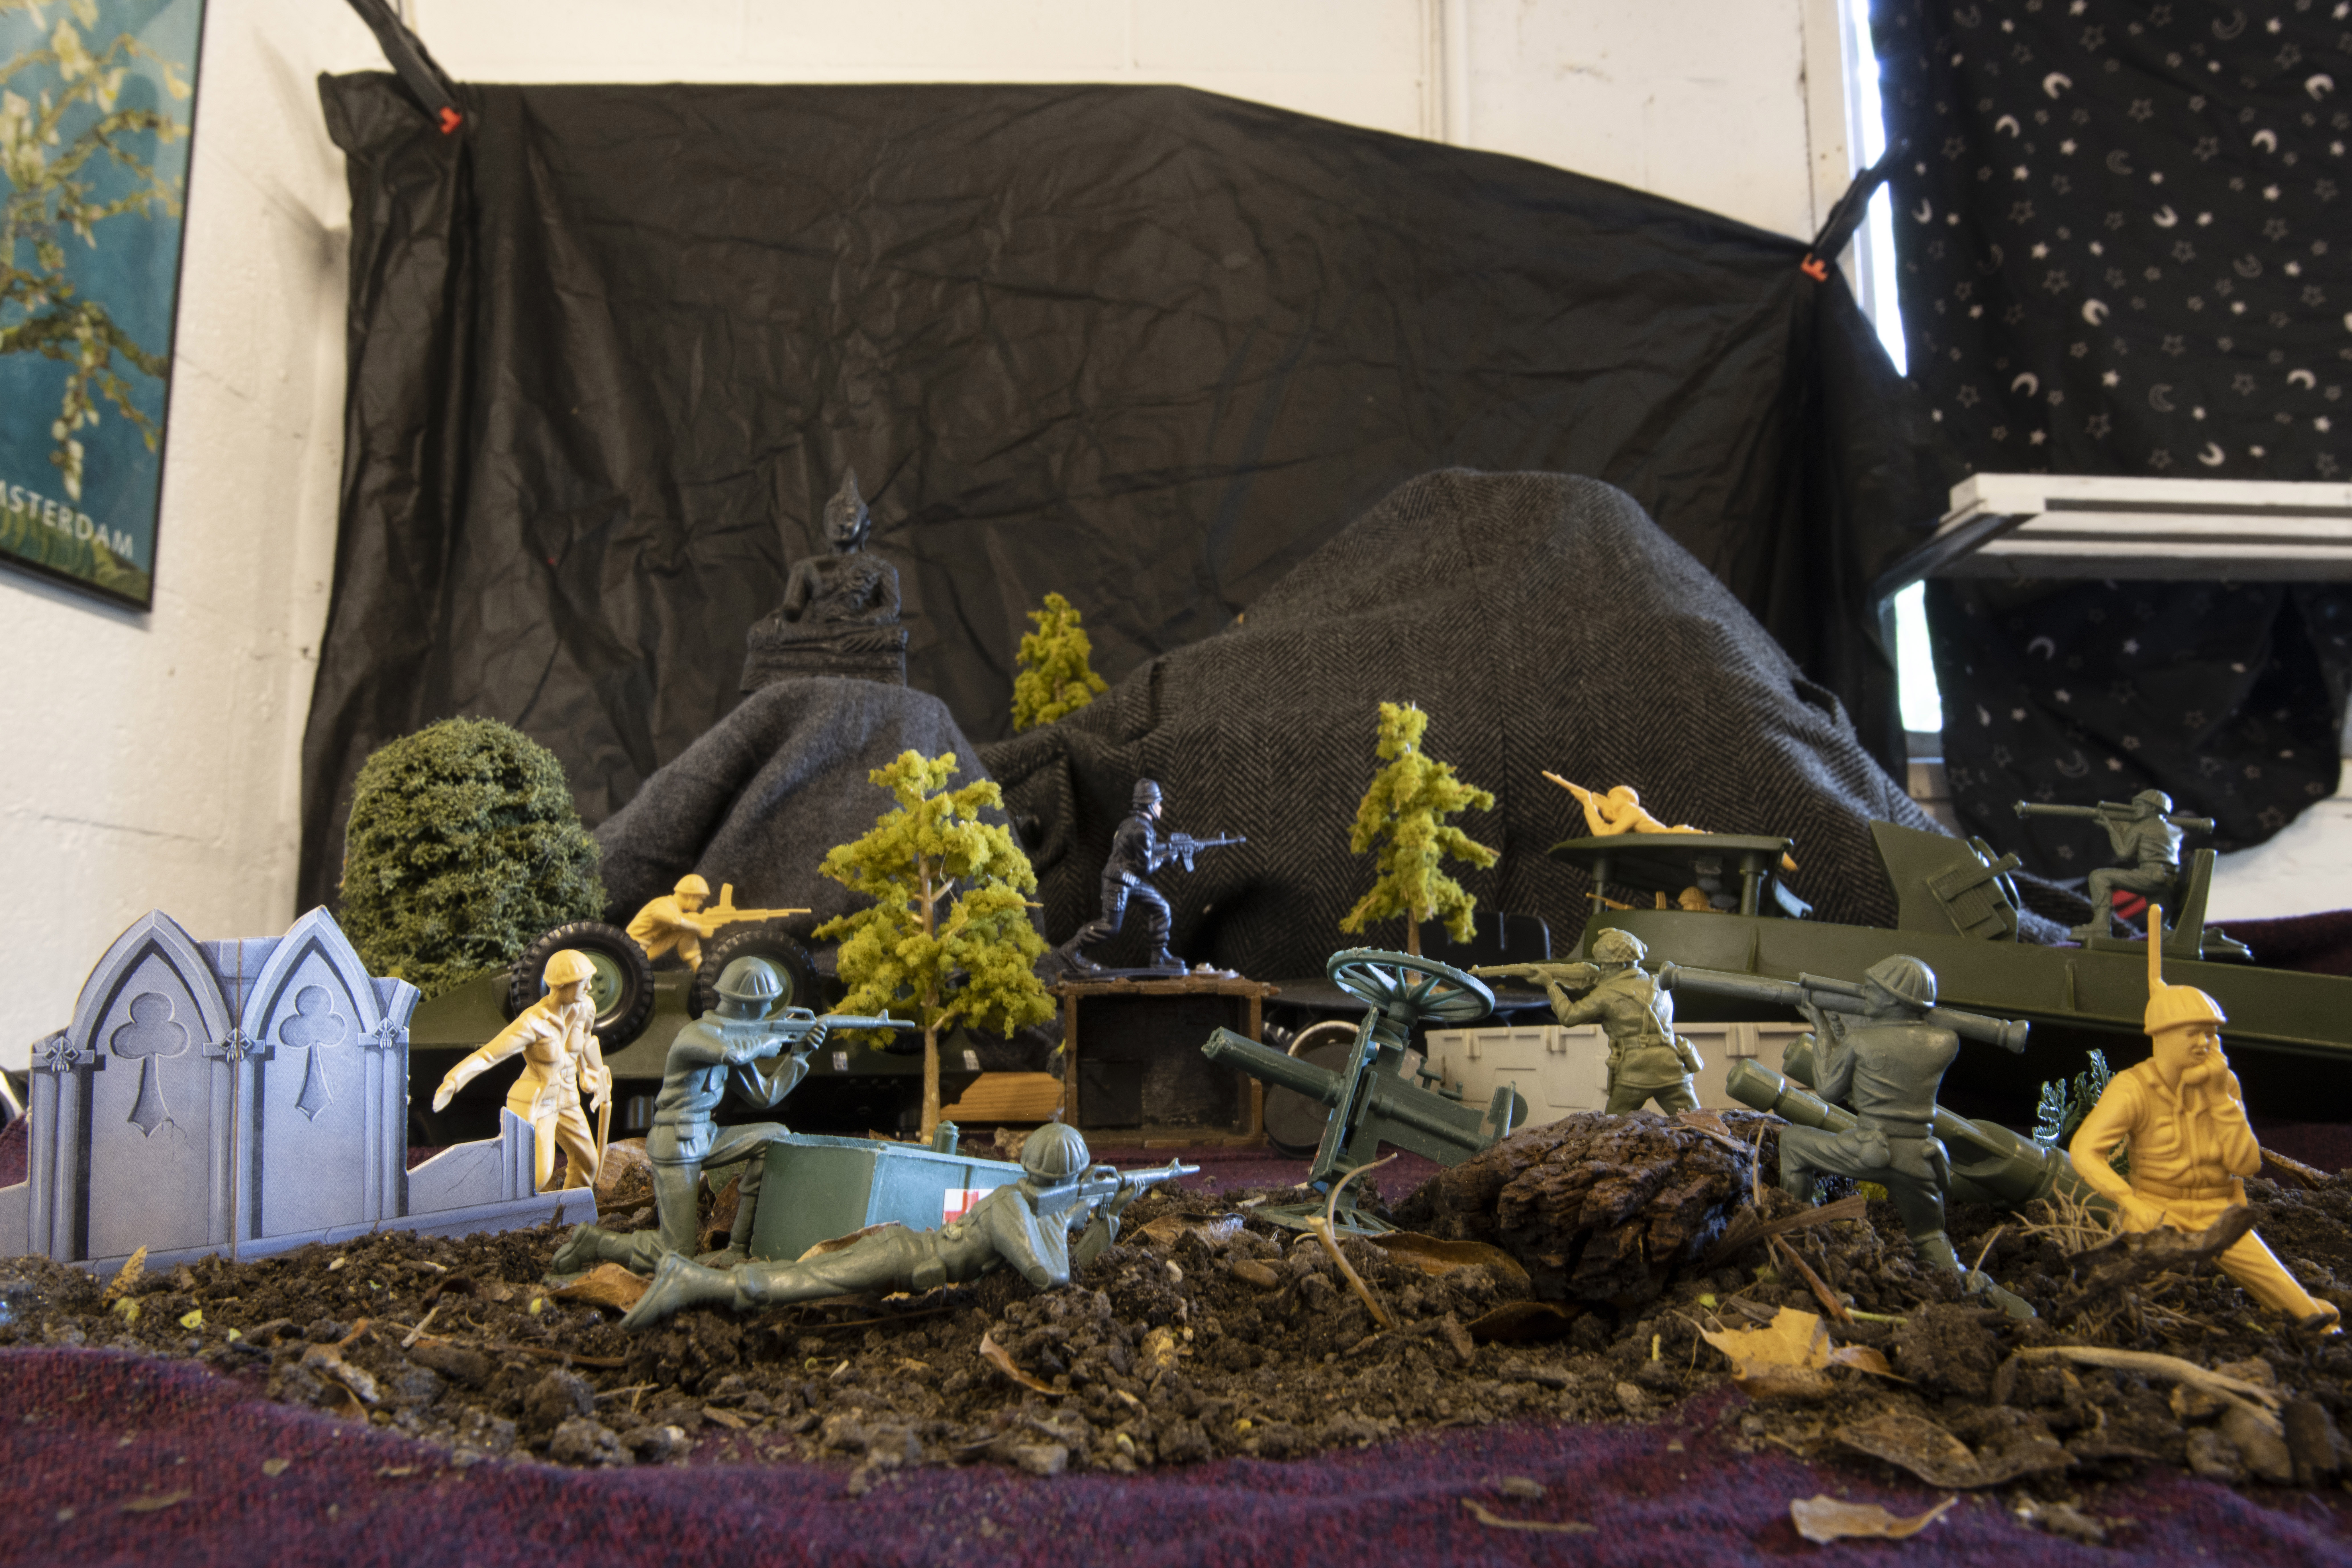
We set up our battlefield with toy soldiers. It helps to have an array of poses to add variety. We also sprinkled some soil in the foreground along with sticks, then used other props for the backdrop.
02 Scene depth
To give our scene some depth, we posed our figures and scenery on three planes – a foreground (the frontmost soldiers) midground (distant soldiers) and background (hills, statue and trees).
03 Tripod
We’ll build our image by capturing several different shots, so we need a tripod to keep them in alignment. It must all stay in the same position, so be careful not to nudge the table or figures between shots.
04 Cable release
A cable release enables us to shoot without having to touch the camera. It also means that we can concentrate on creating the smoke and lighting it with the torch then fire the shutter at the right time.
05 Wide lens
A wide focal length is best, as it enables us to create a sense of epic scale – we shot at 24mm. This also exaggerates perspective, so objects close to the camera appear larger than those further away.
06 Dark room
We’ll be painting with light, so make sure that the room stays dark – which will enable us to use longer exposures. So turn off any lights and seal windows, or try shooting at night. The less ambient light, the better.
Staging an action-packed skirmish
01 Frame silhouettes
Each figure will be in silhouette, so place them side on to make strong shapes. Consider how you’ll separate them from the background and leave room behind each to allow for the smoke. This is how our scene looks through the camera, but with lights on.
02 Create billowing smoke
We used a vape to create our smoky effect (filled with a nicotine-free E-liquid). It’s best not to inhale, as the vapor is thicker when blown out instantly. Aim the vapor behind the figures, which is what we need for silhouettes. (If you’d rather not vape, try alternatives like a clothes steamer.)
03 Set the exposure
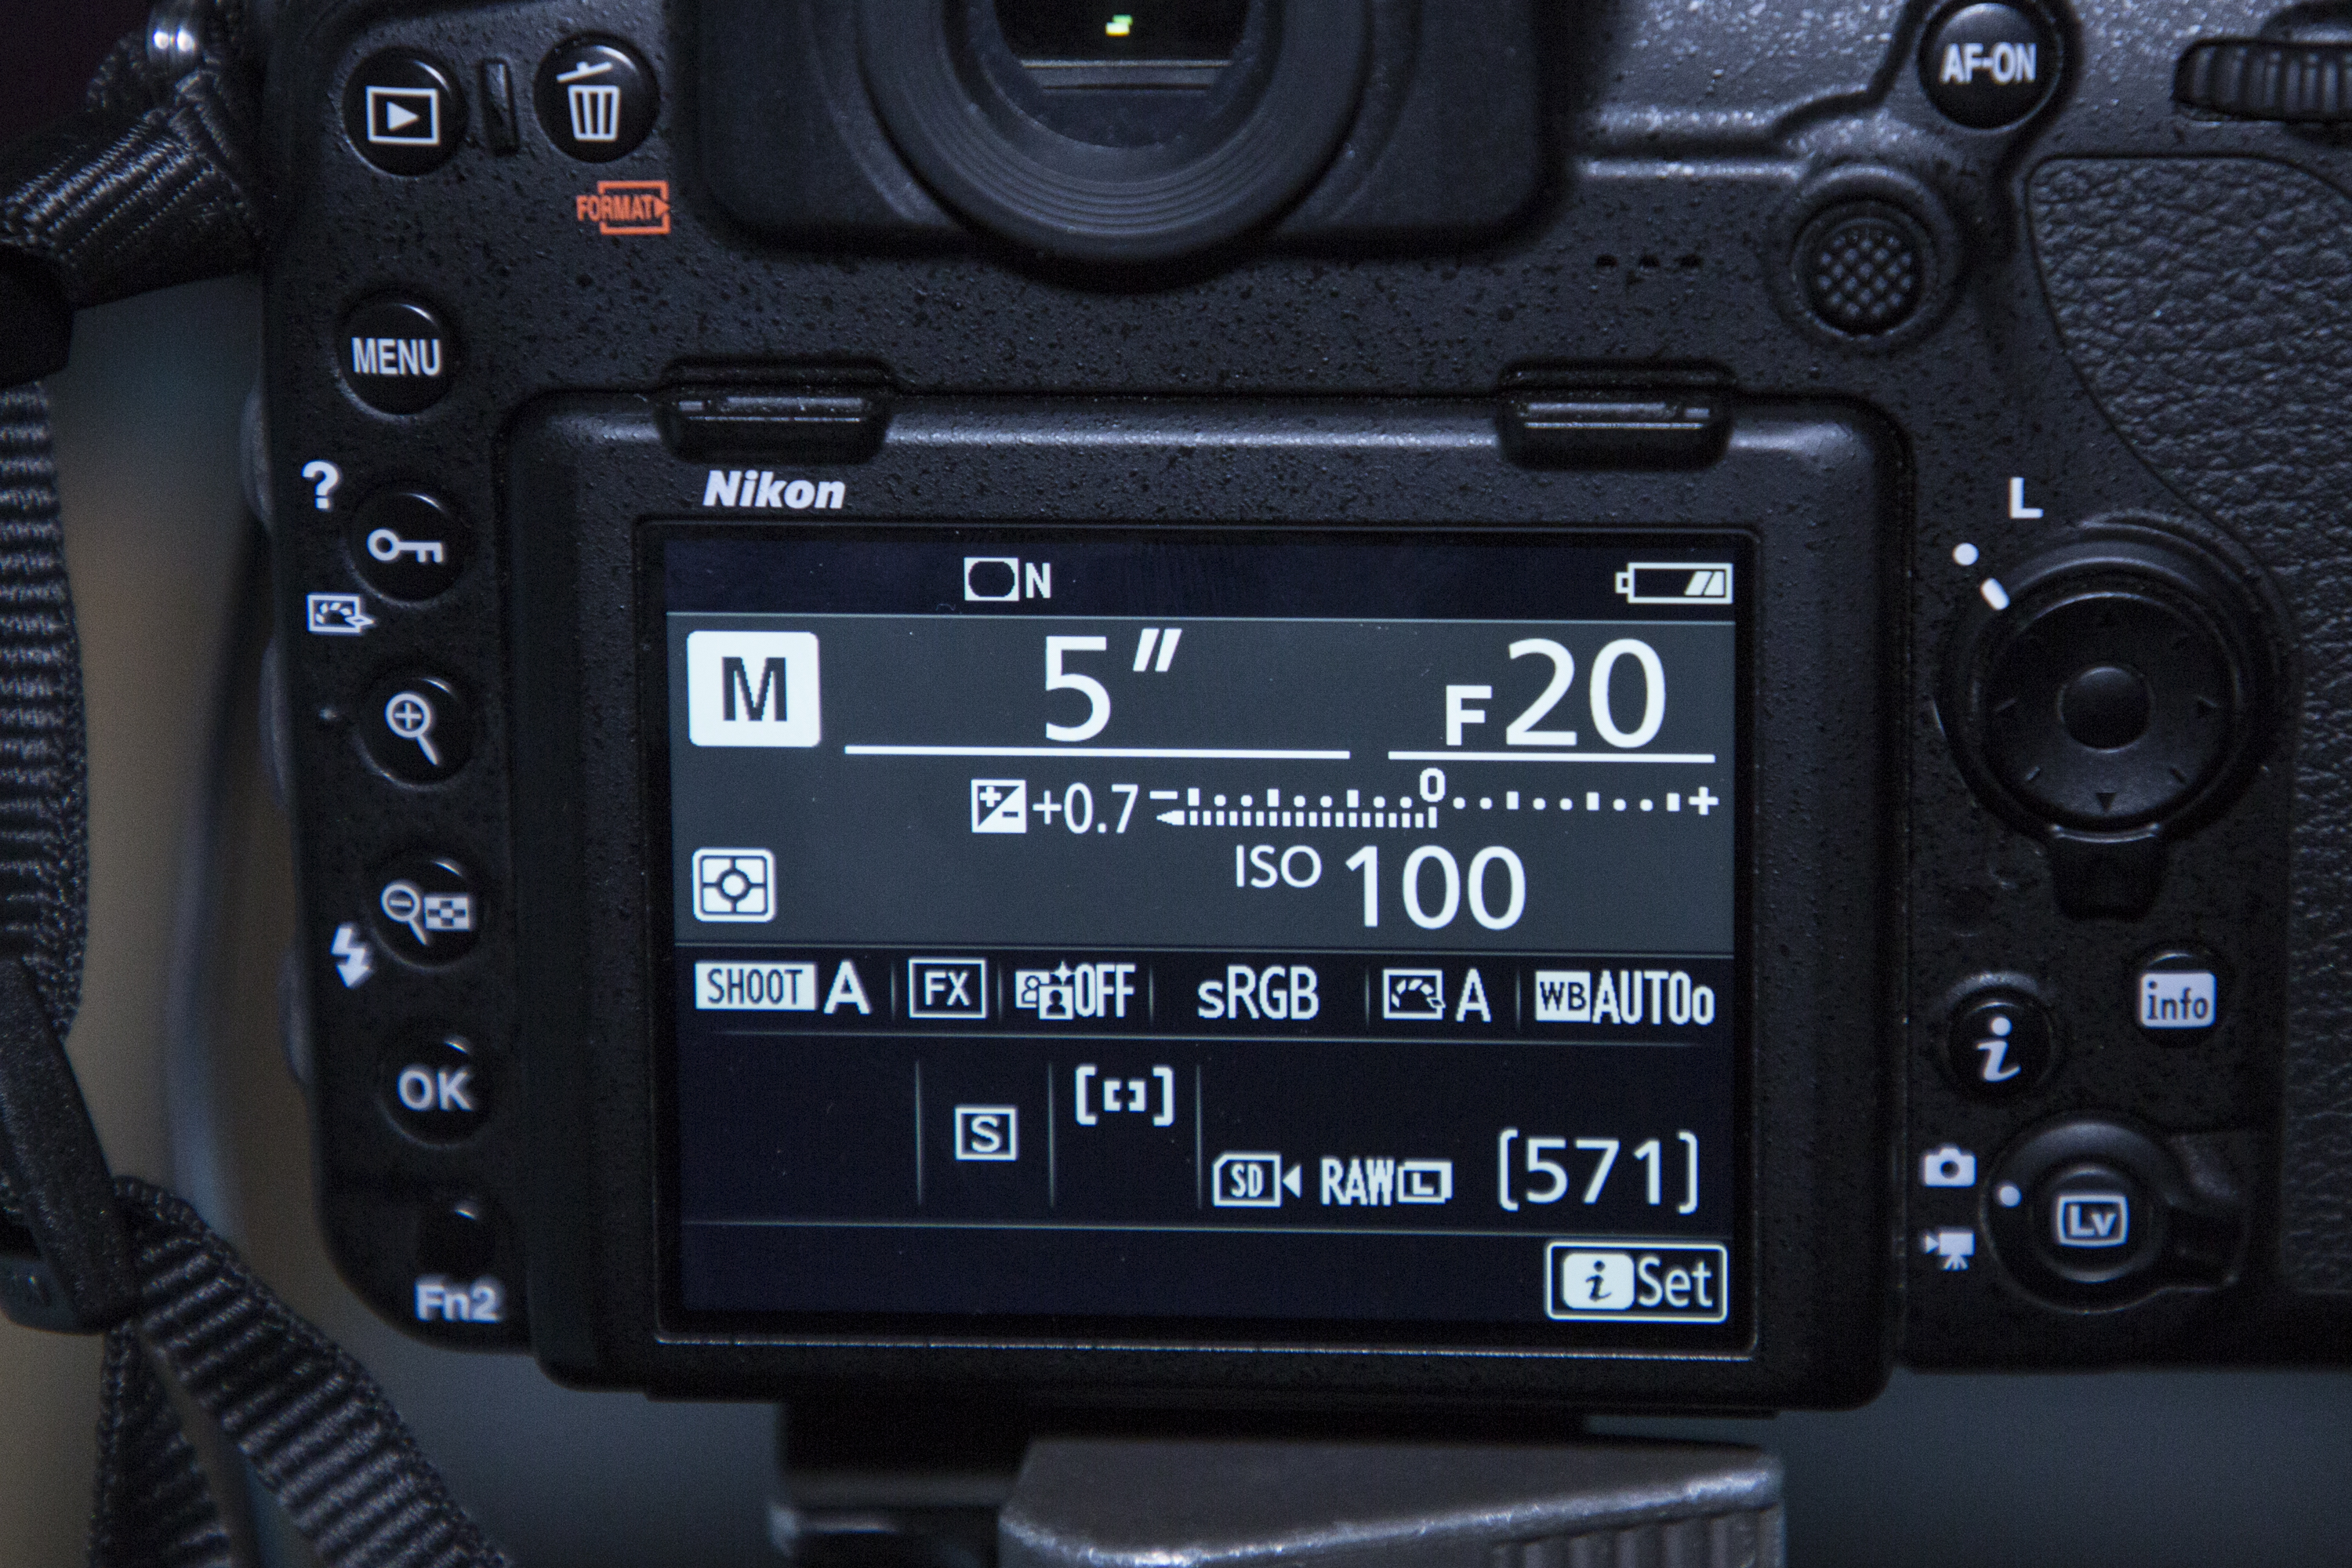
With our camera set up on a tripod and the room made dark, we set our camera to manual then use a low ISO of 100 and a narrow aperture of f/20 to maximize depth of field. We used a five second exposure, but you can experiment with other lengths if you choose.
04 Shining the torch
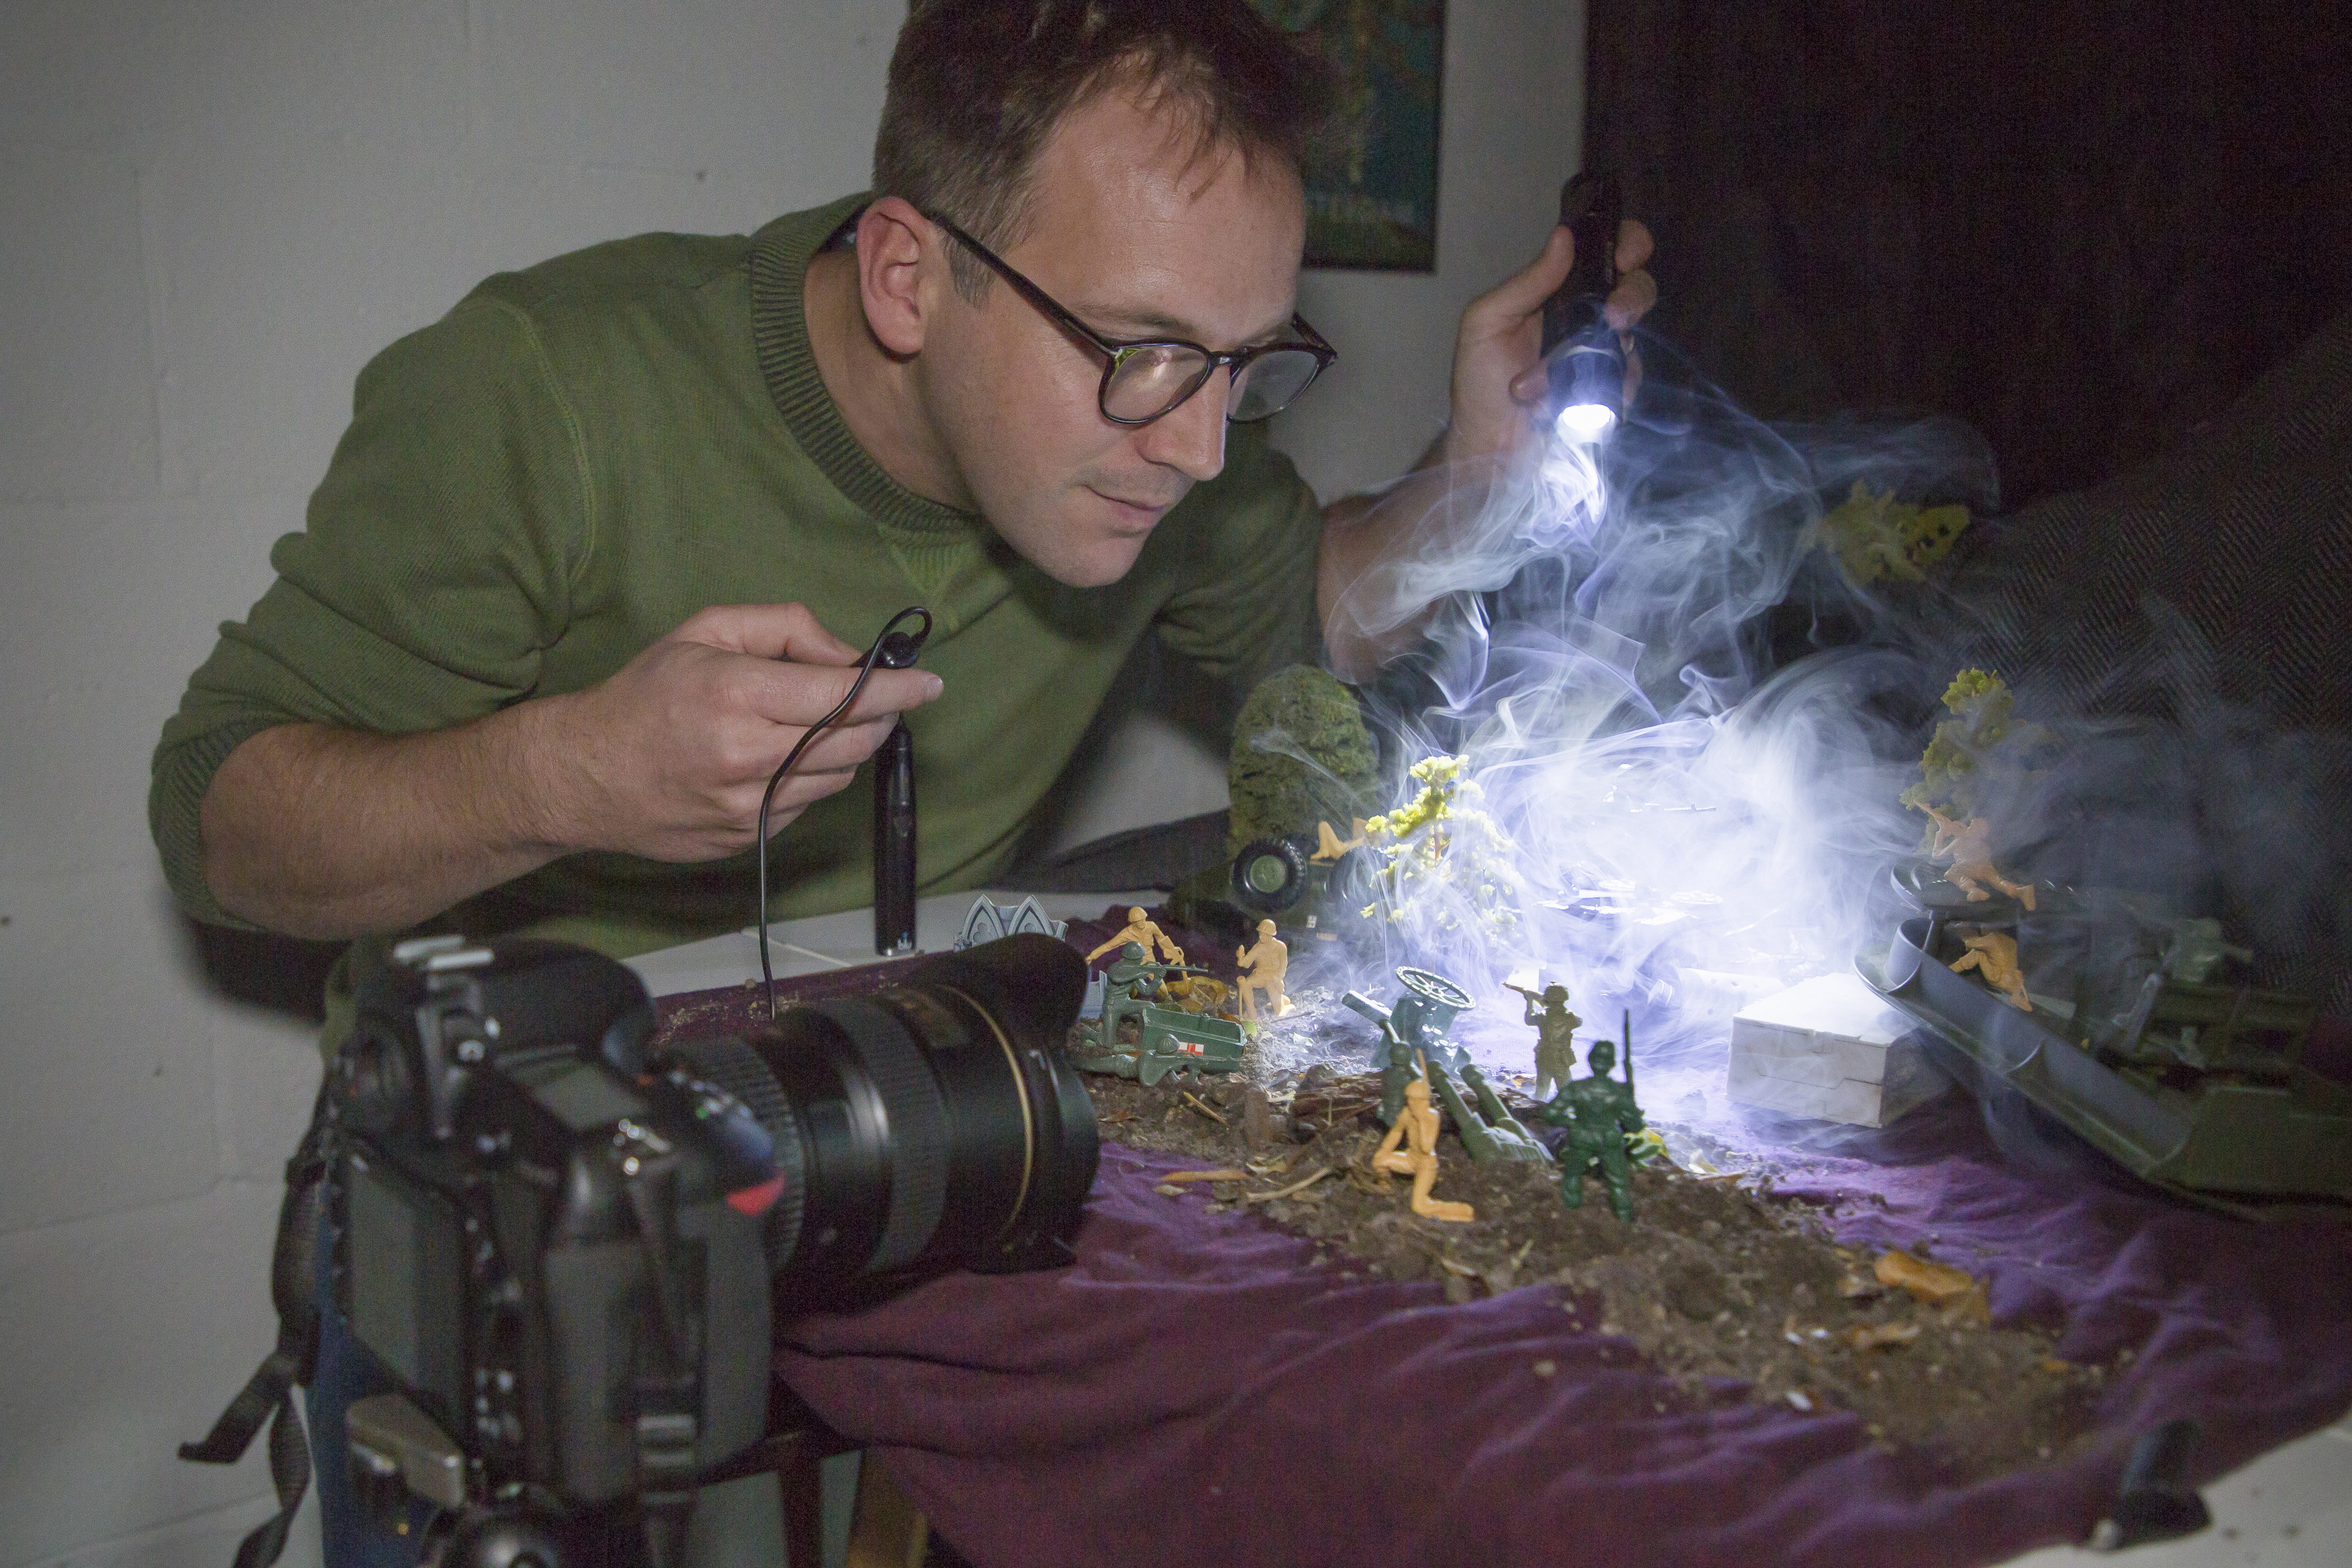
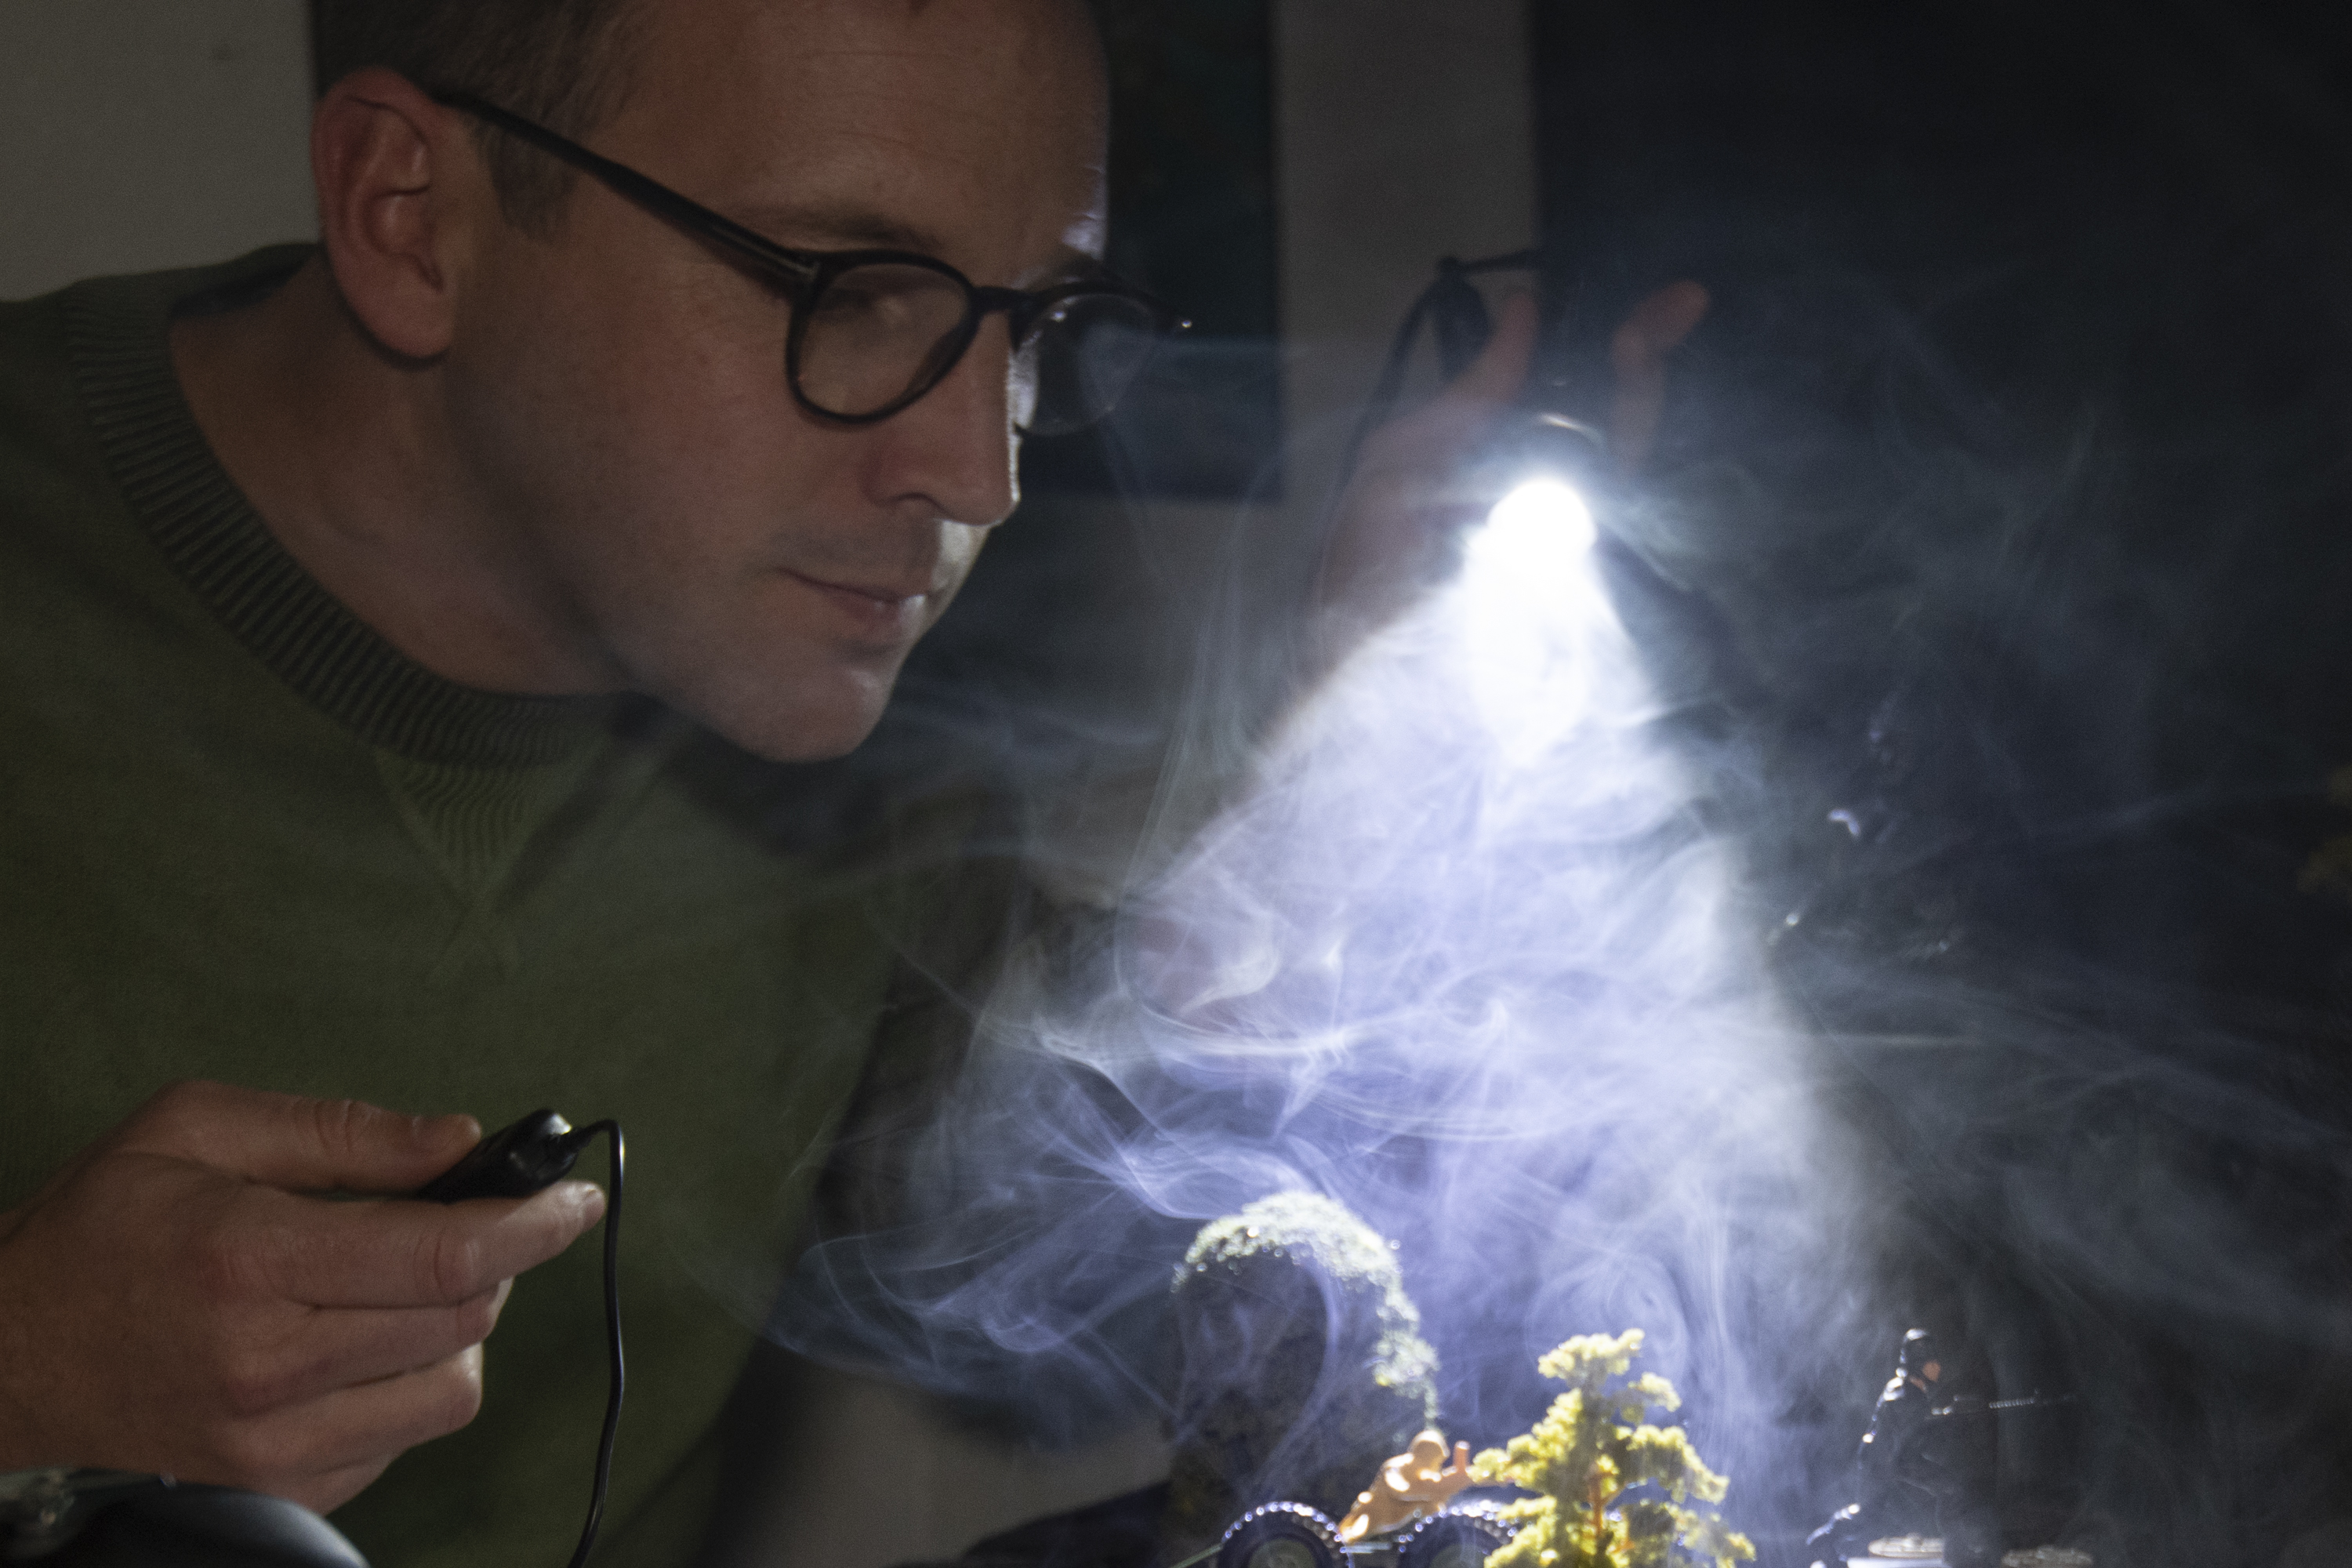
We shine our torch in our scene during the long exposure – you can see how the torch has moved here, creating the Z at the top. Direct the light at the scene from behind; we don’t want to light the figures, rather the smoke behind them to make silhouettes.
05 Light painting tips
We paint with light by moving the torch around the scene to illuminate areas during the exposure. Results can be unpredictable, which is why we use a tripod and cable release. This way we have several chances at lighting the shot – we'll bring them all together later.
06 Make sparks fly
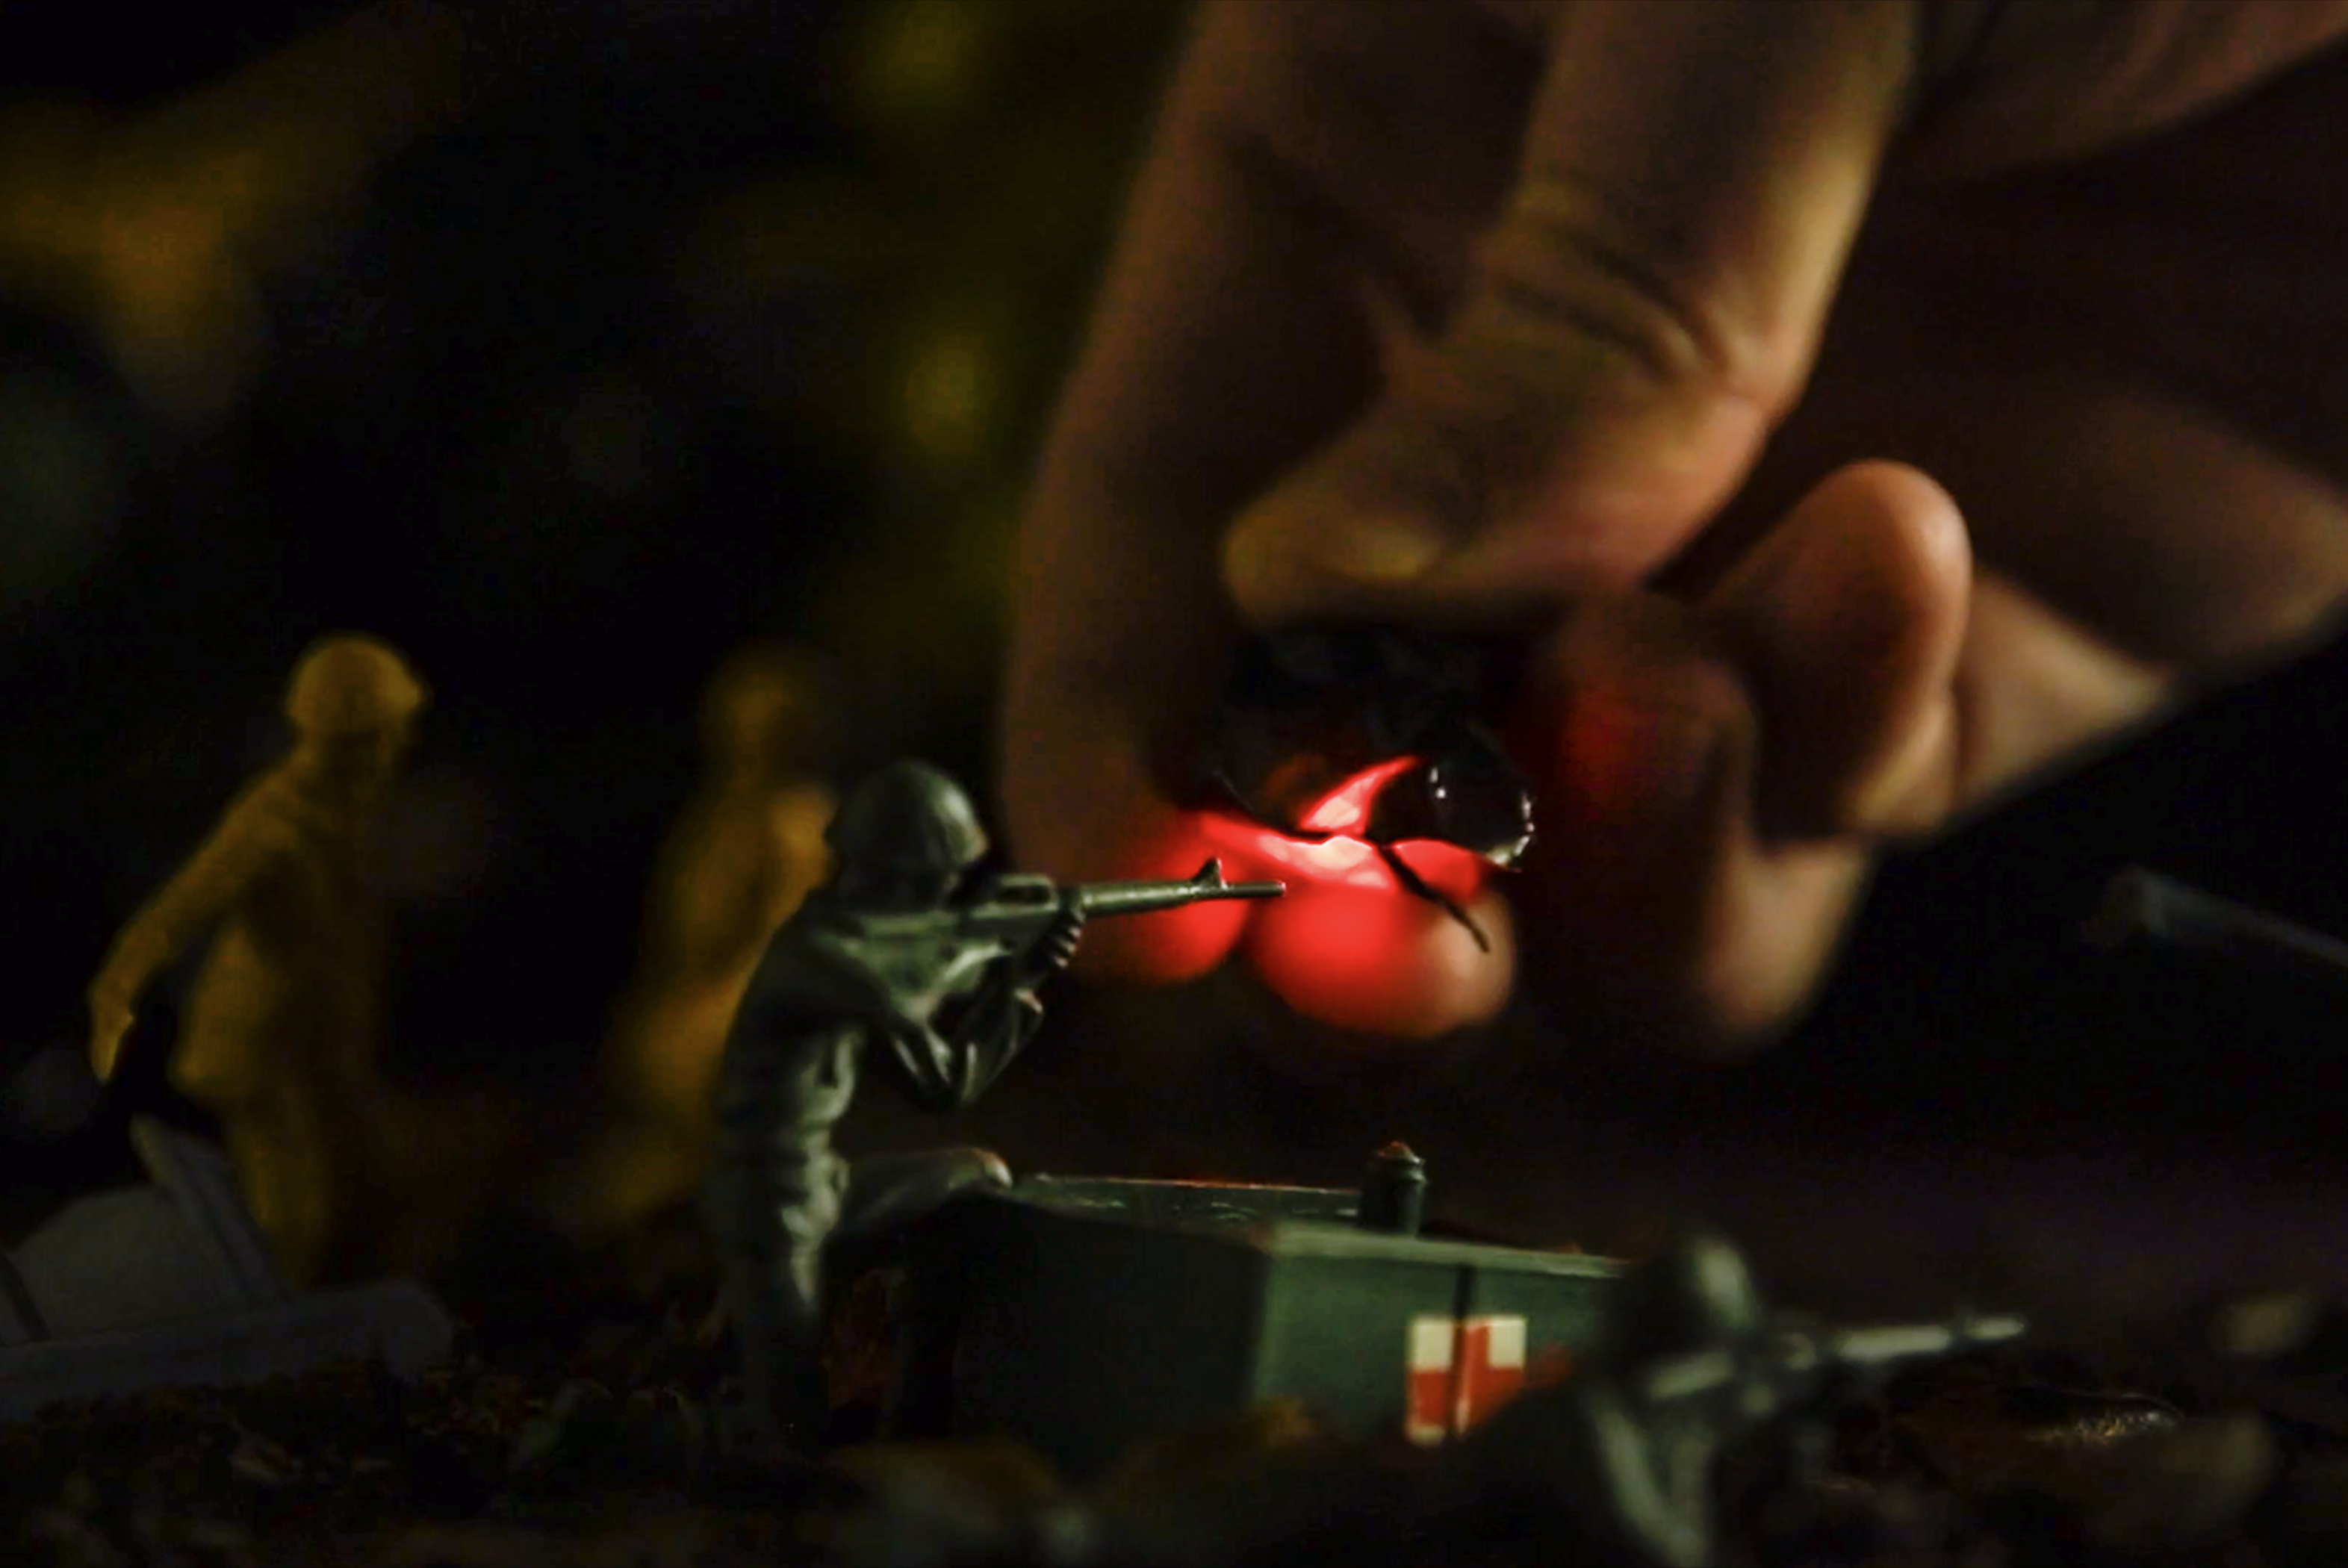
To make red flashes of gunfire we used a red LED, wrapped in gaffer tape to leave a tiny speck of light. By holding the LED at the barrel of a figure's weapon, then pulling it sharply away, we can create streaks of red. It also adds subtle highlights to the figures.
Piecing together the battlefield
01 Choose your shots
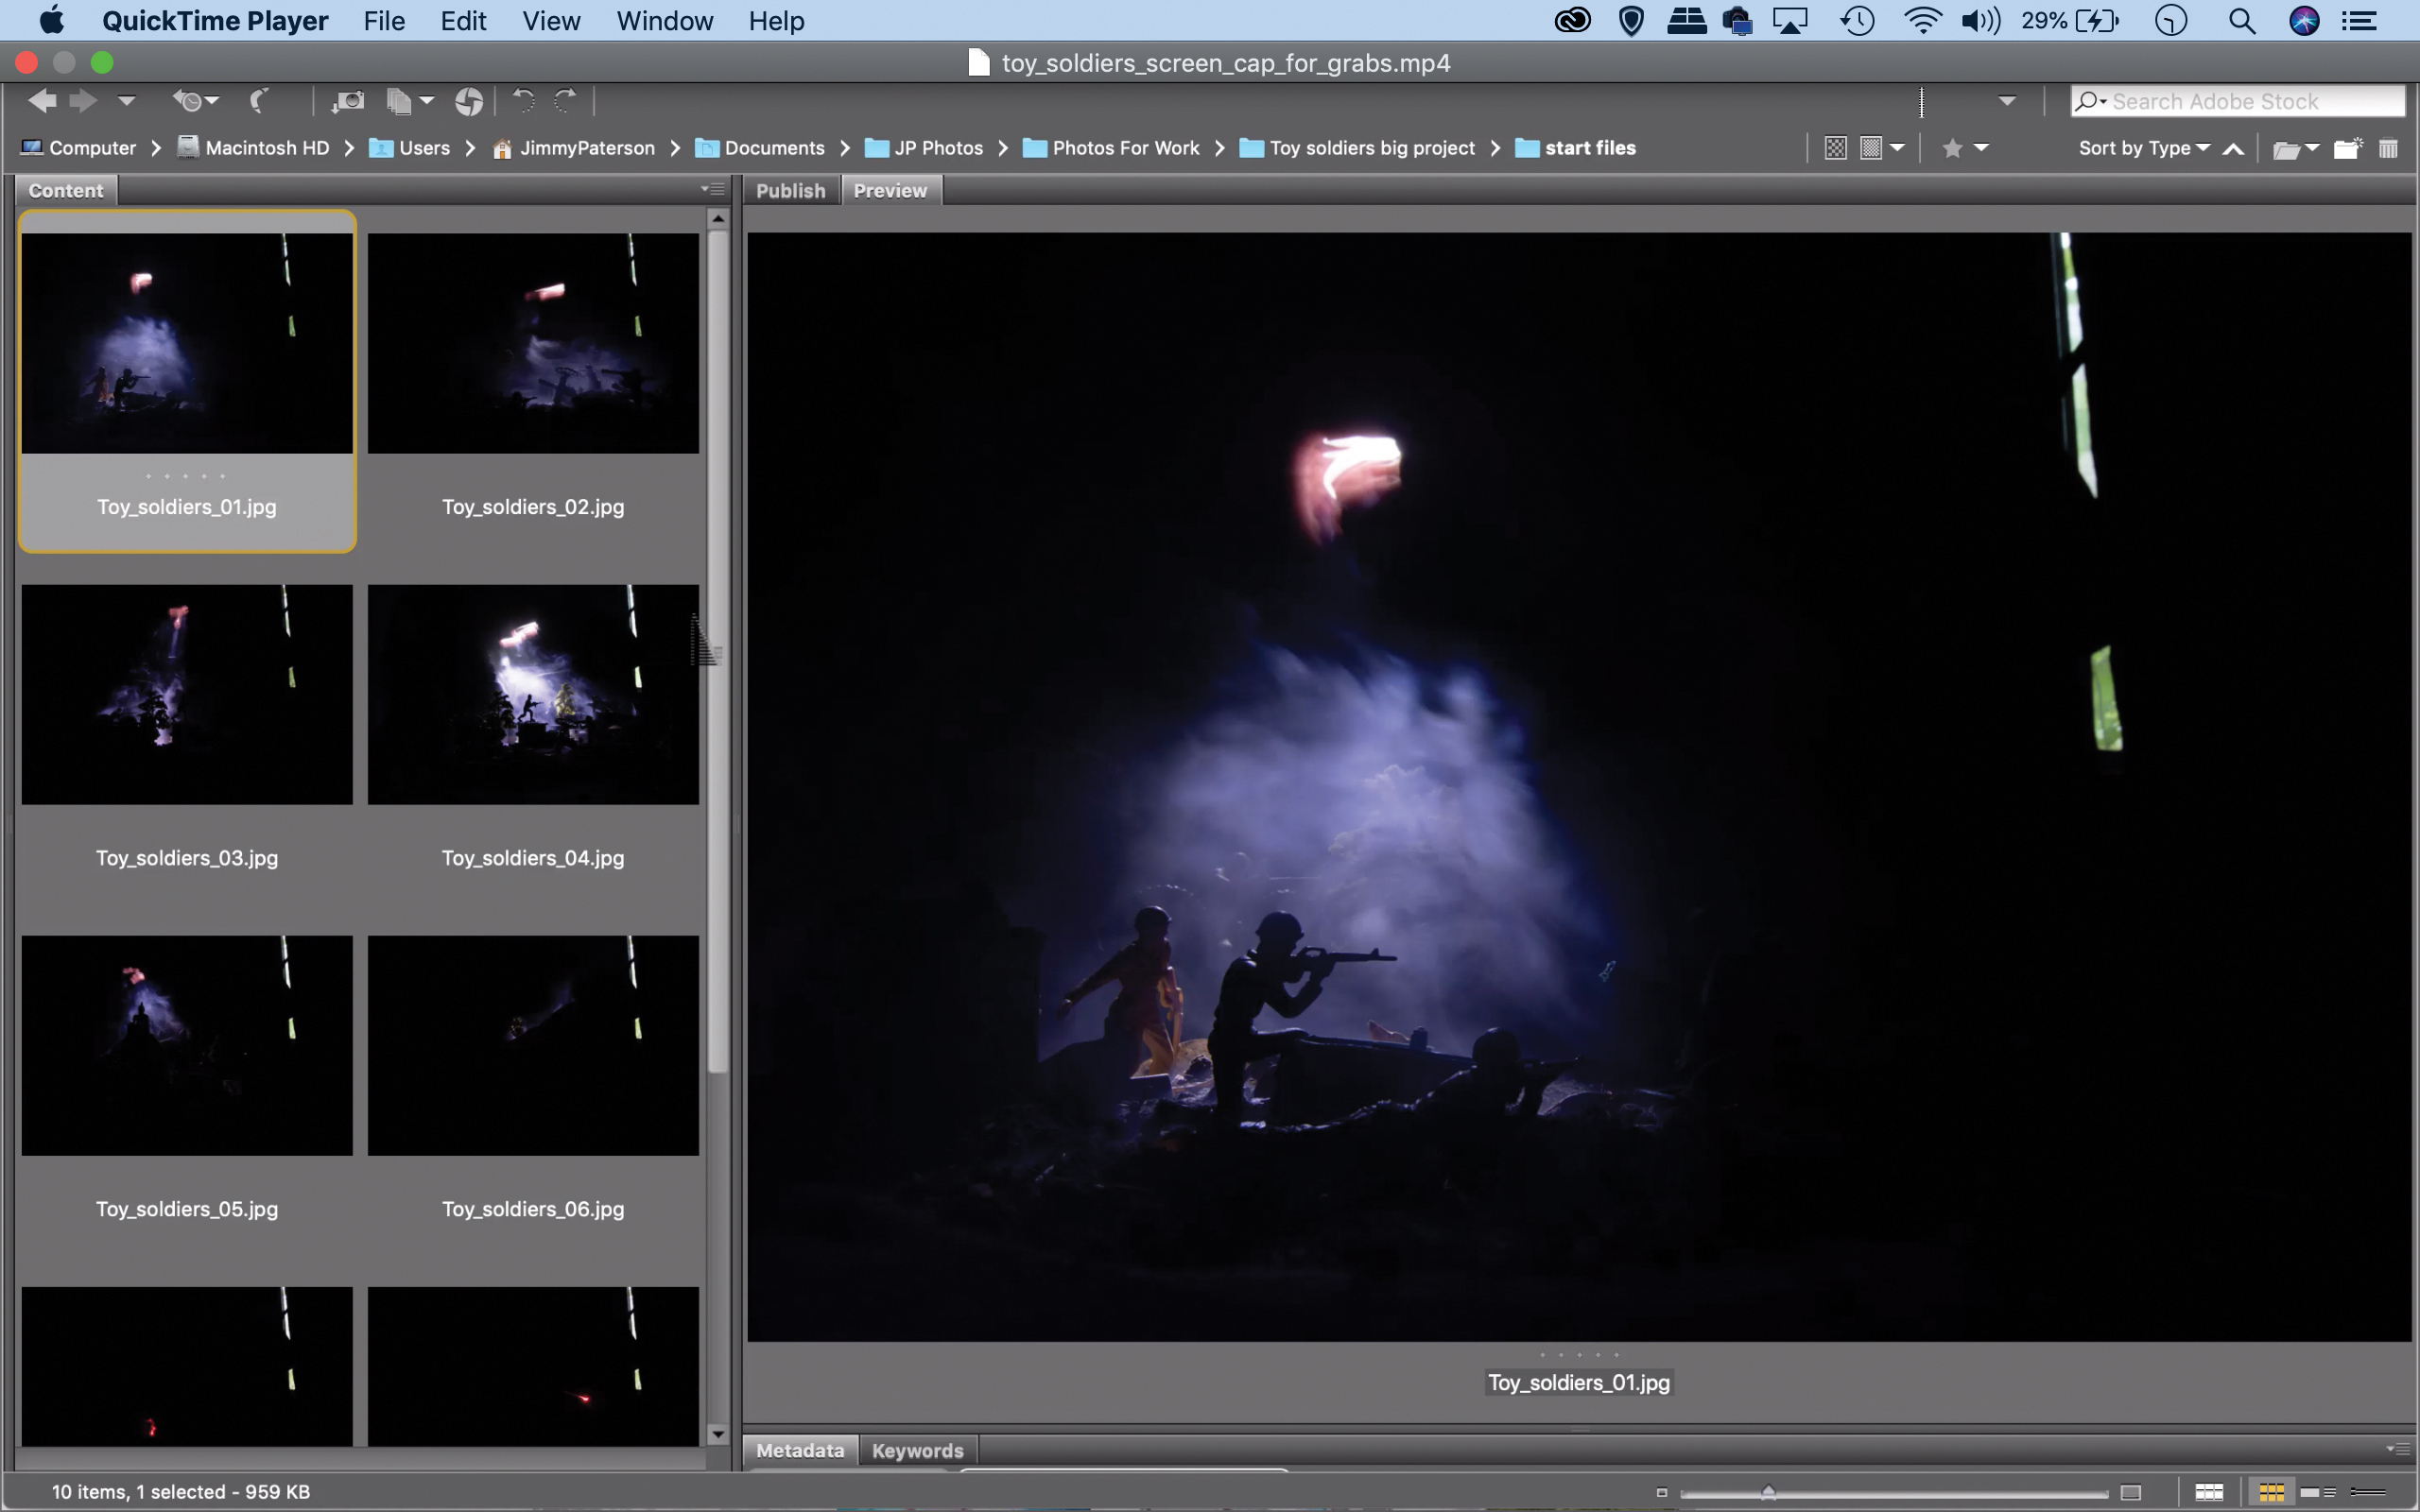
Open the images into Adobe Bridge. Go through and add a star rating (Cmd / Ctrl + 1, 2, 3, 4 or 5) to the photos you’d like to use (leave out the red LED ones), then go to the Filter panel (Window > Filter) and click on the stars to filter so you can see your favorite shots.
02 Load into layers
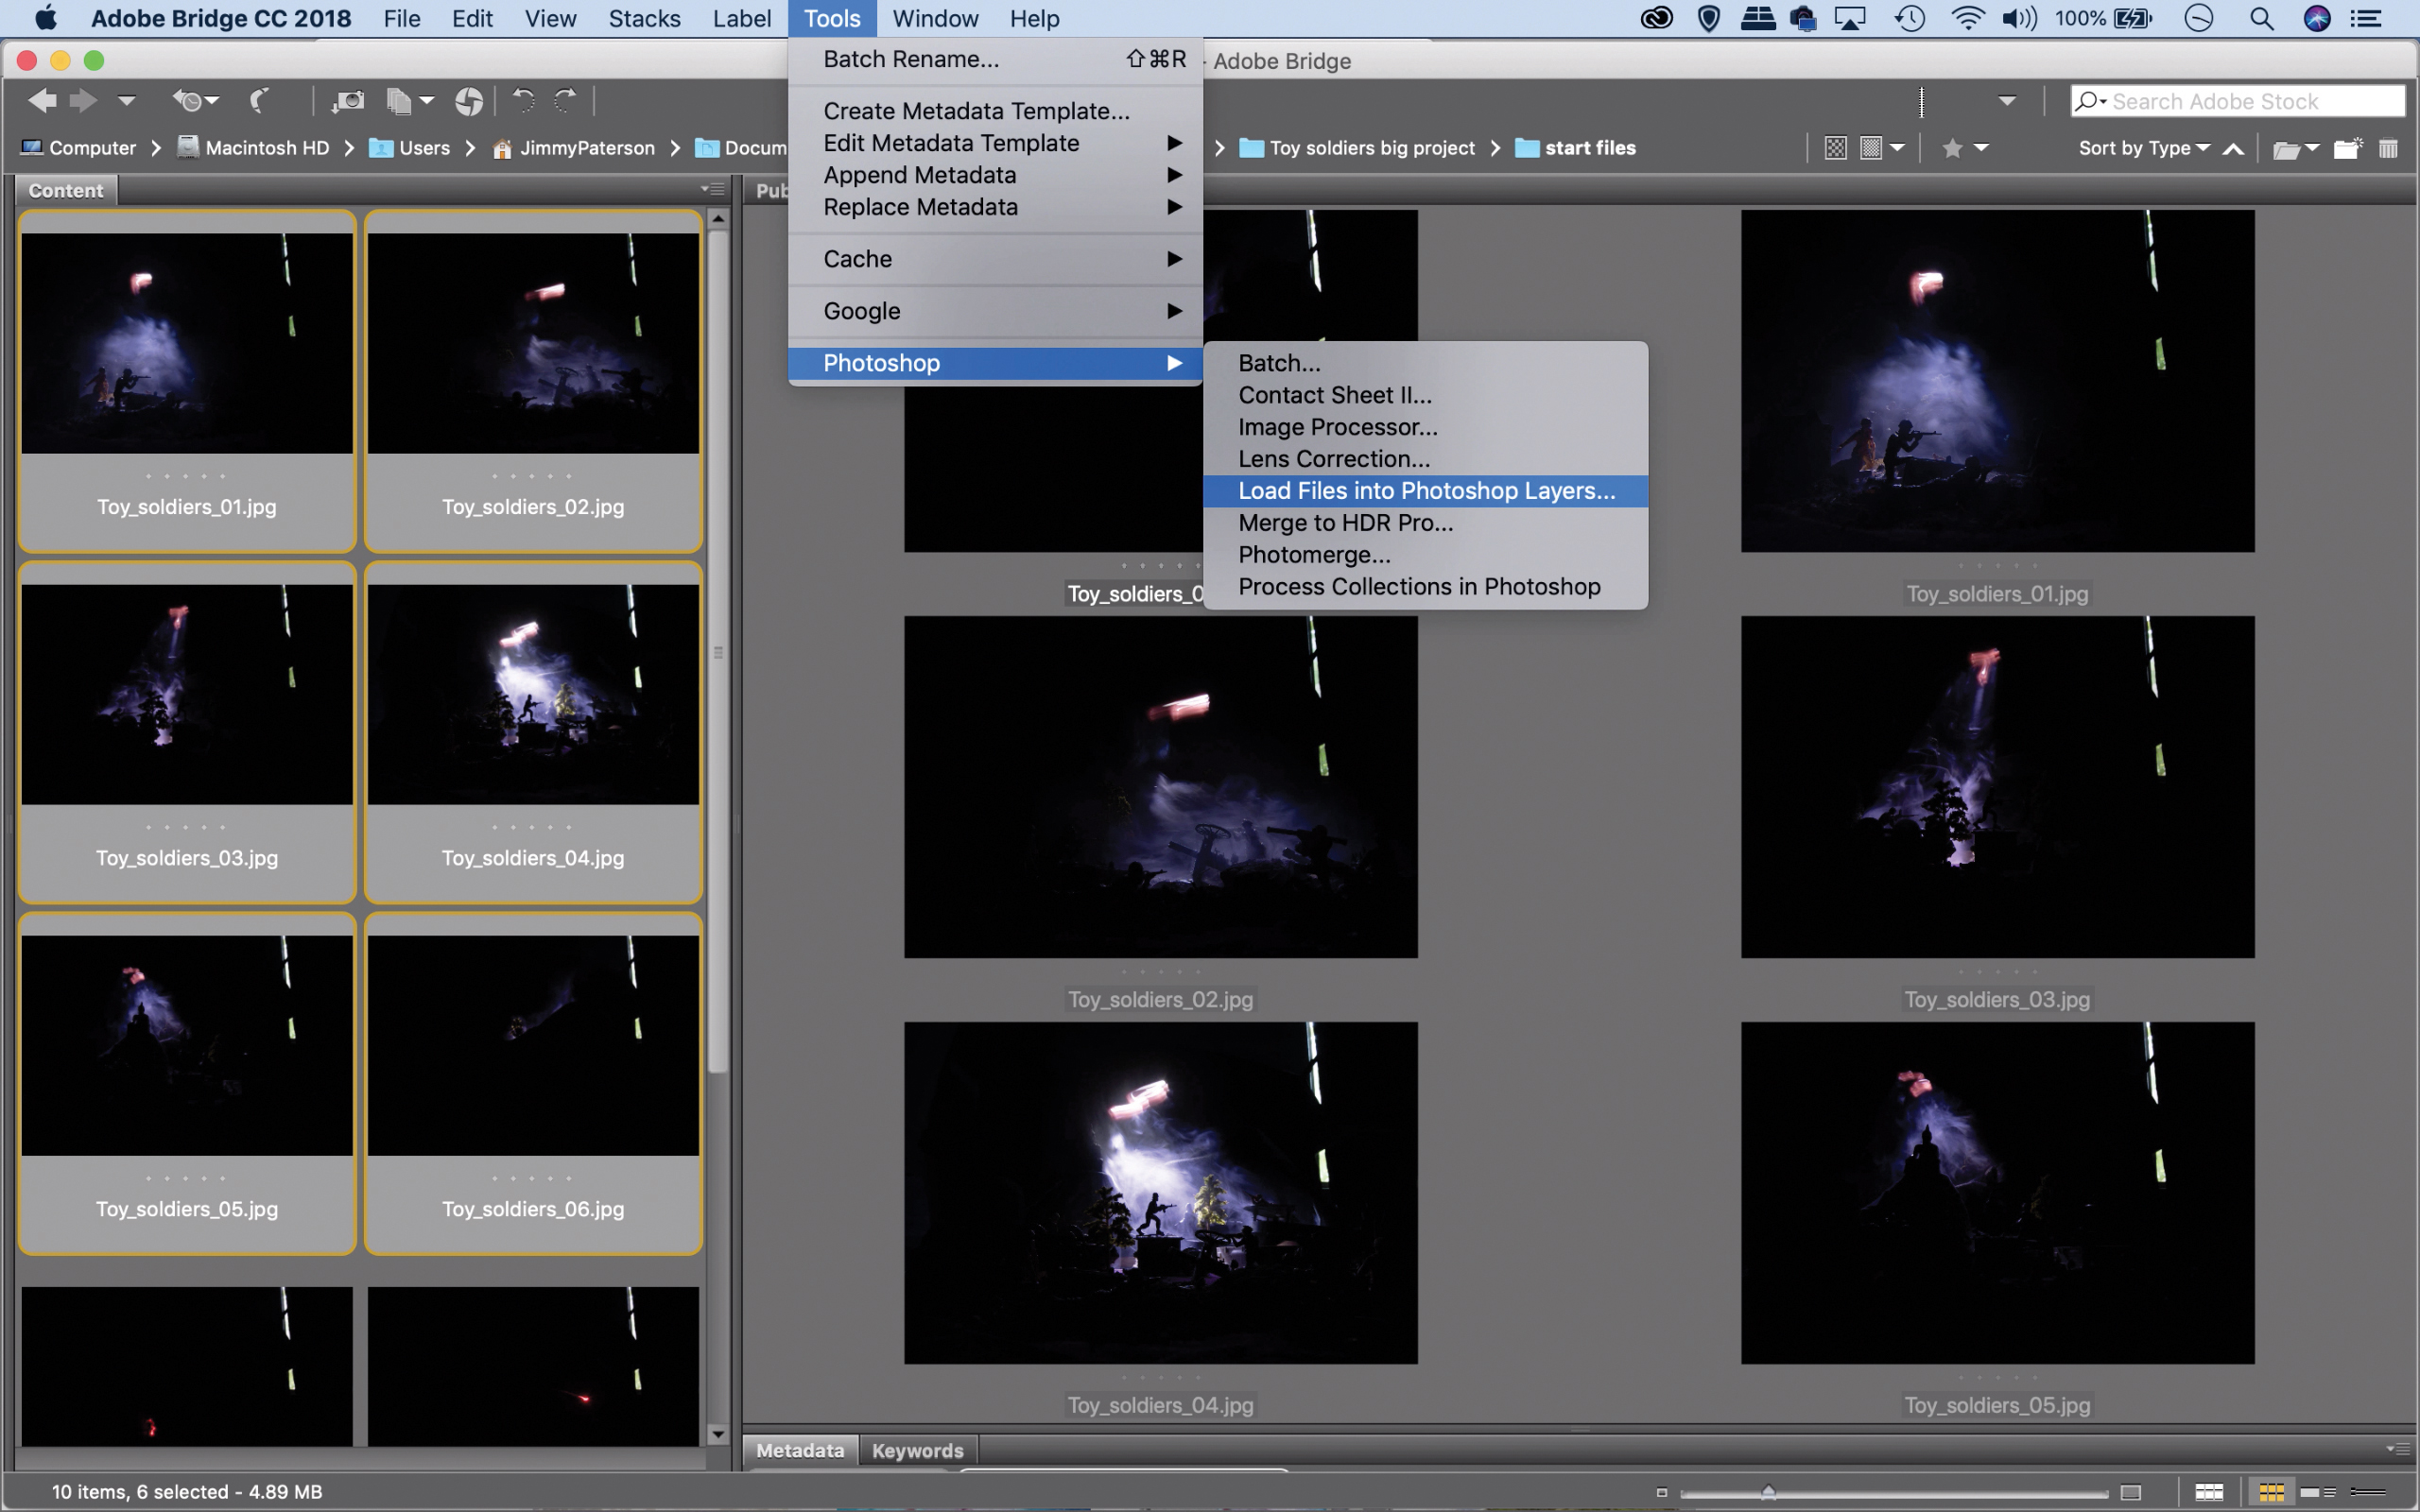
Click on the first image in the sequence then hold Shift and click on the last to select them all, then go to Tools > Photoshop > Load Files into Photoshop Layers. This opens all the images into Photoshop in a single document, with each image on a separate layer.
03 Add a black mask
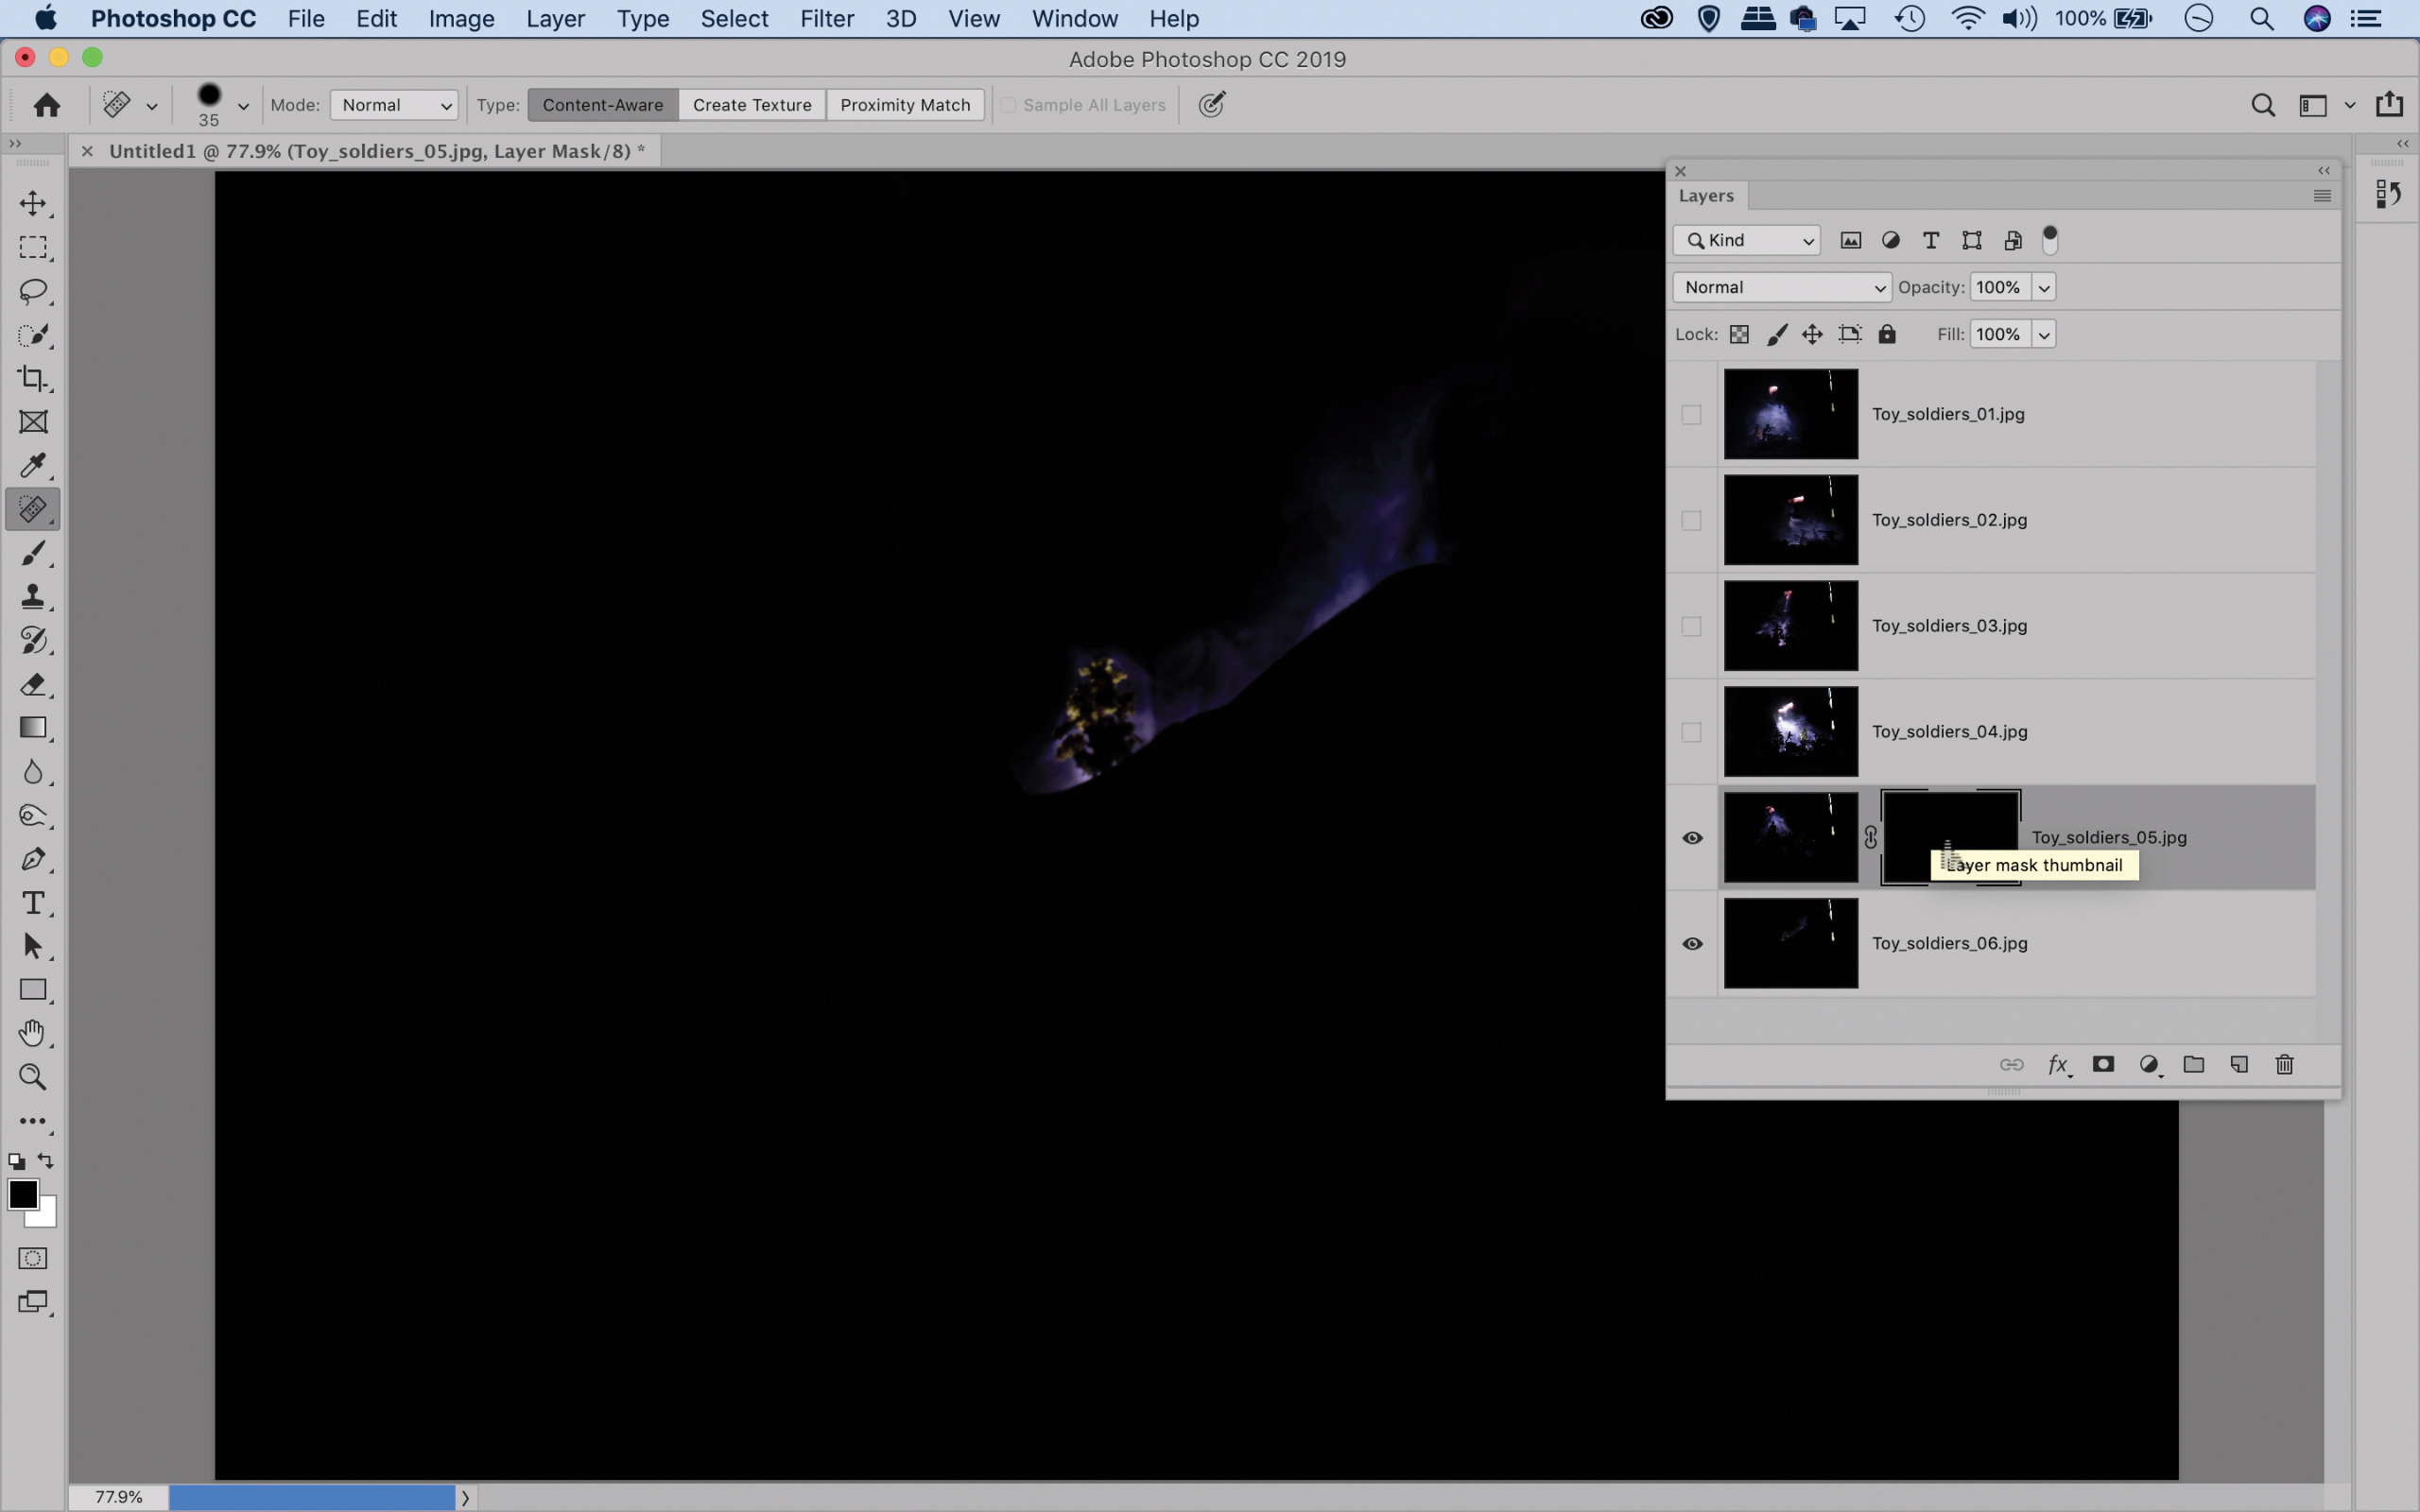
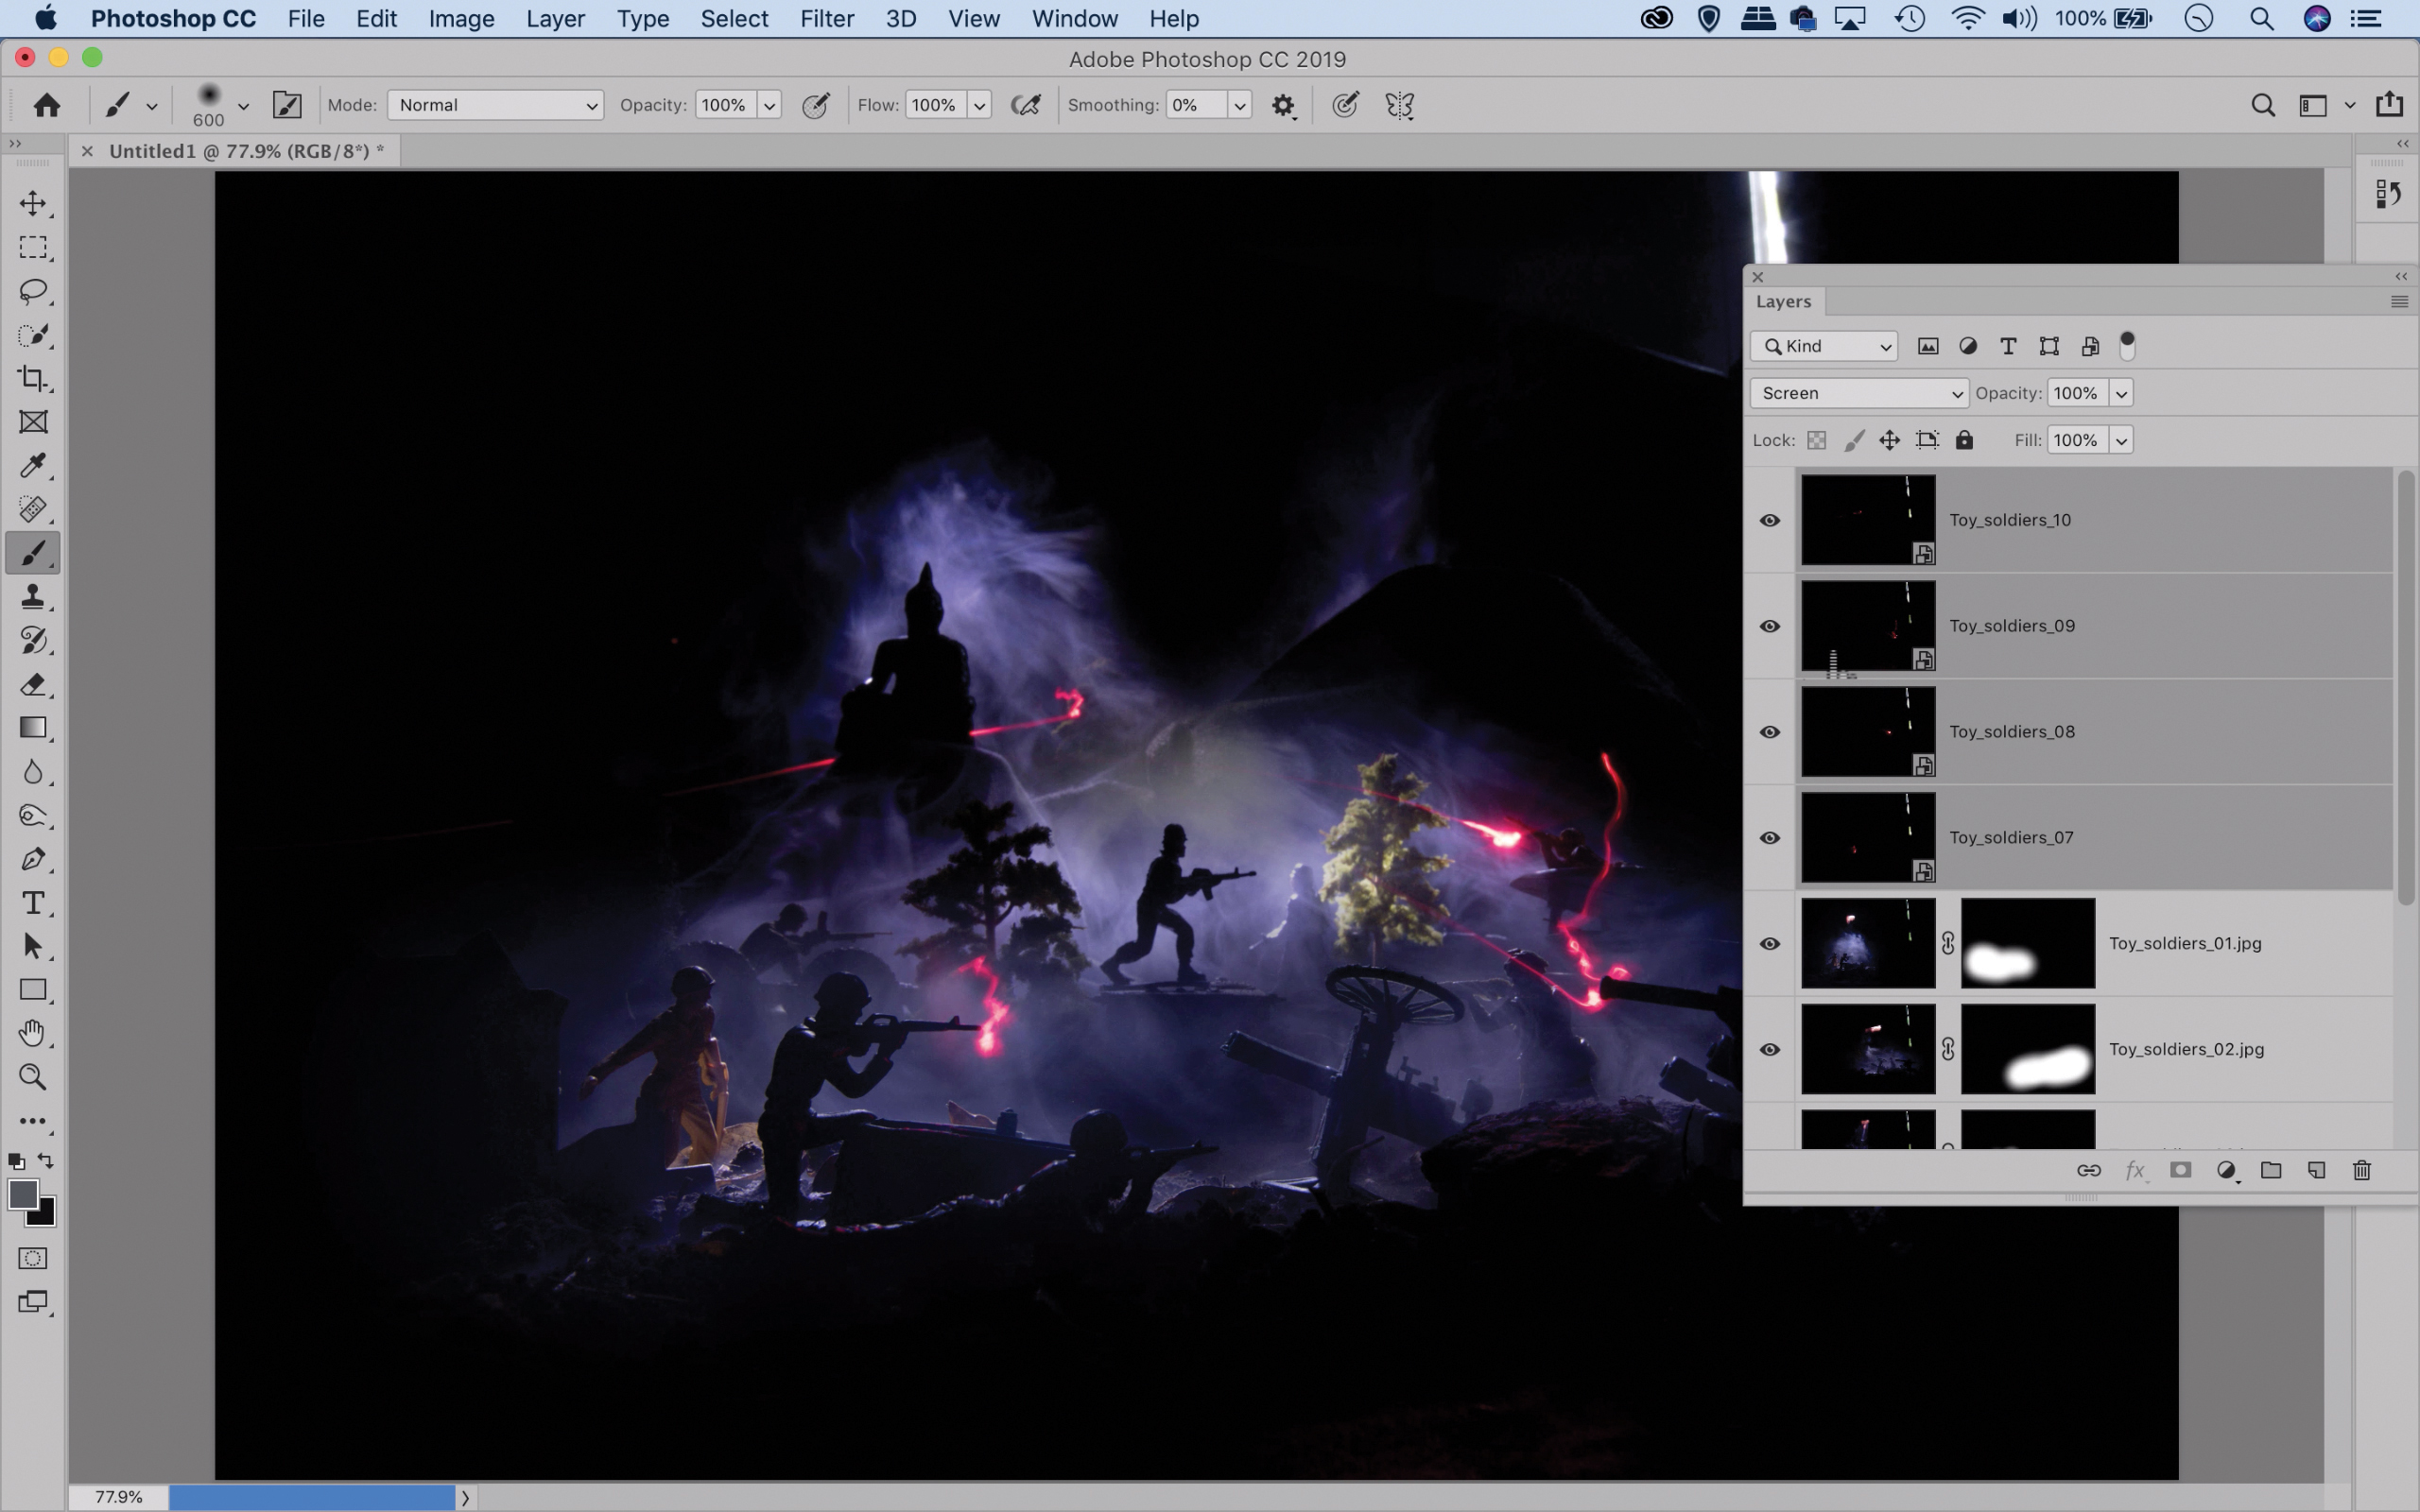
Go to the Layers panel (Window > Layers). Click the eye icon to hide all but the bottom two layers, then look over the image and decide which areas you want to keep visible on the upper layer. Next hold Alt and click the Add Mask icon to hide the entire layer.
04 Paint layer masks
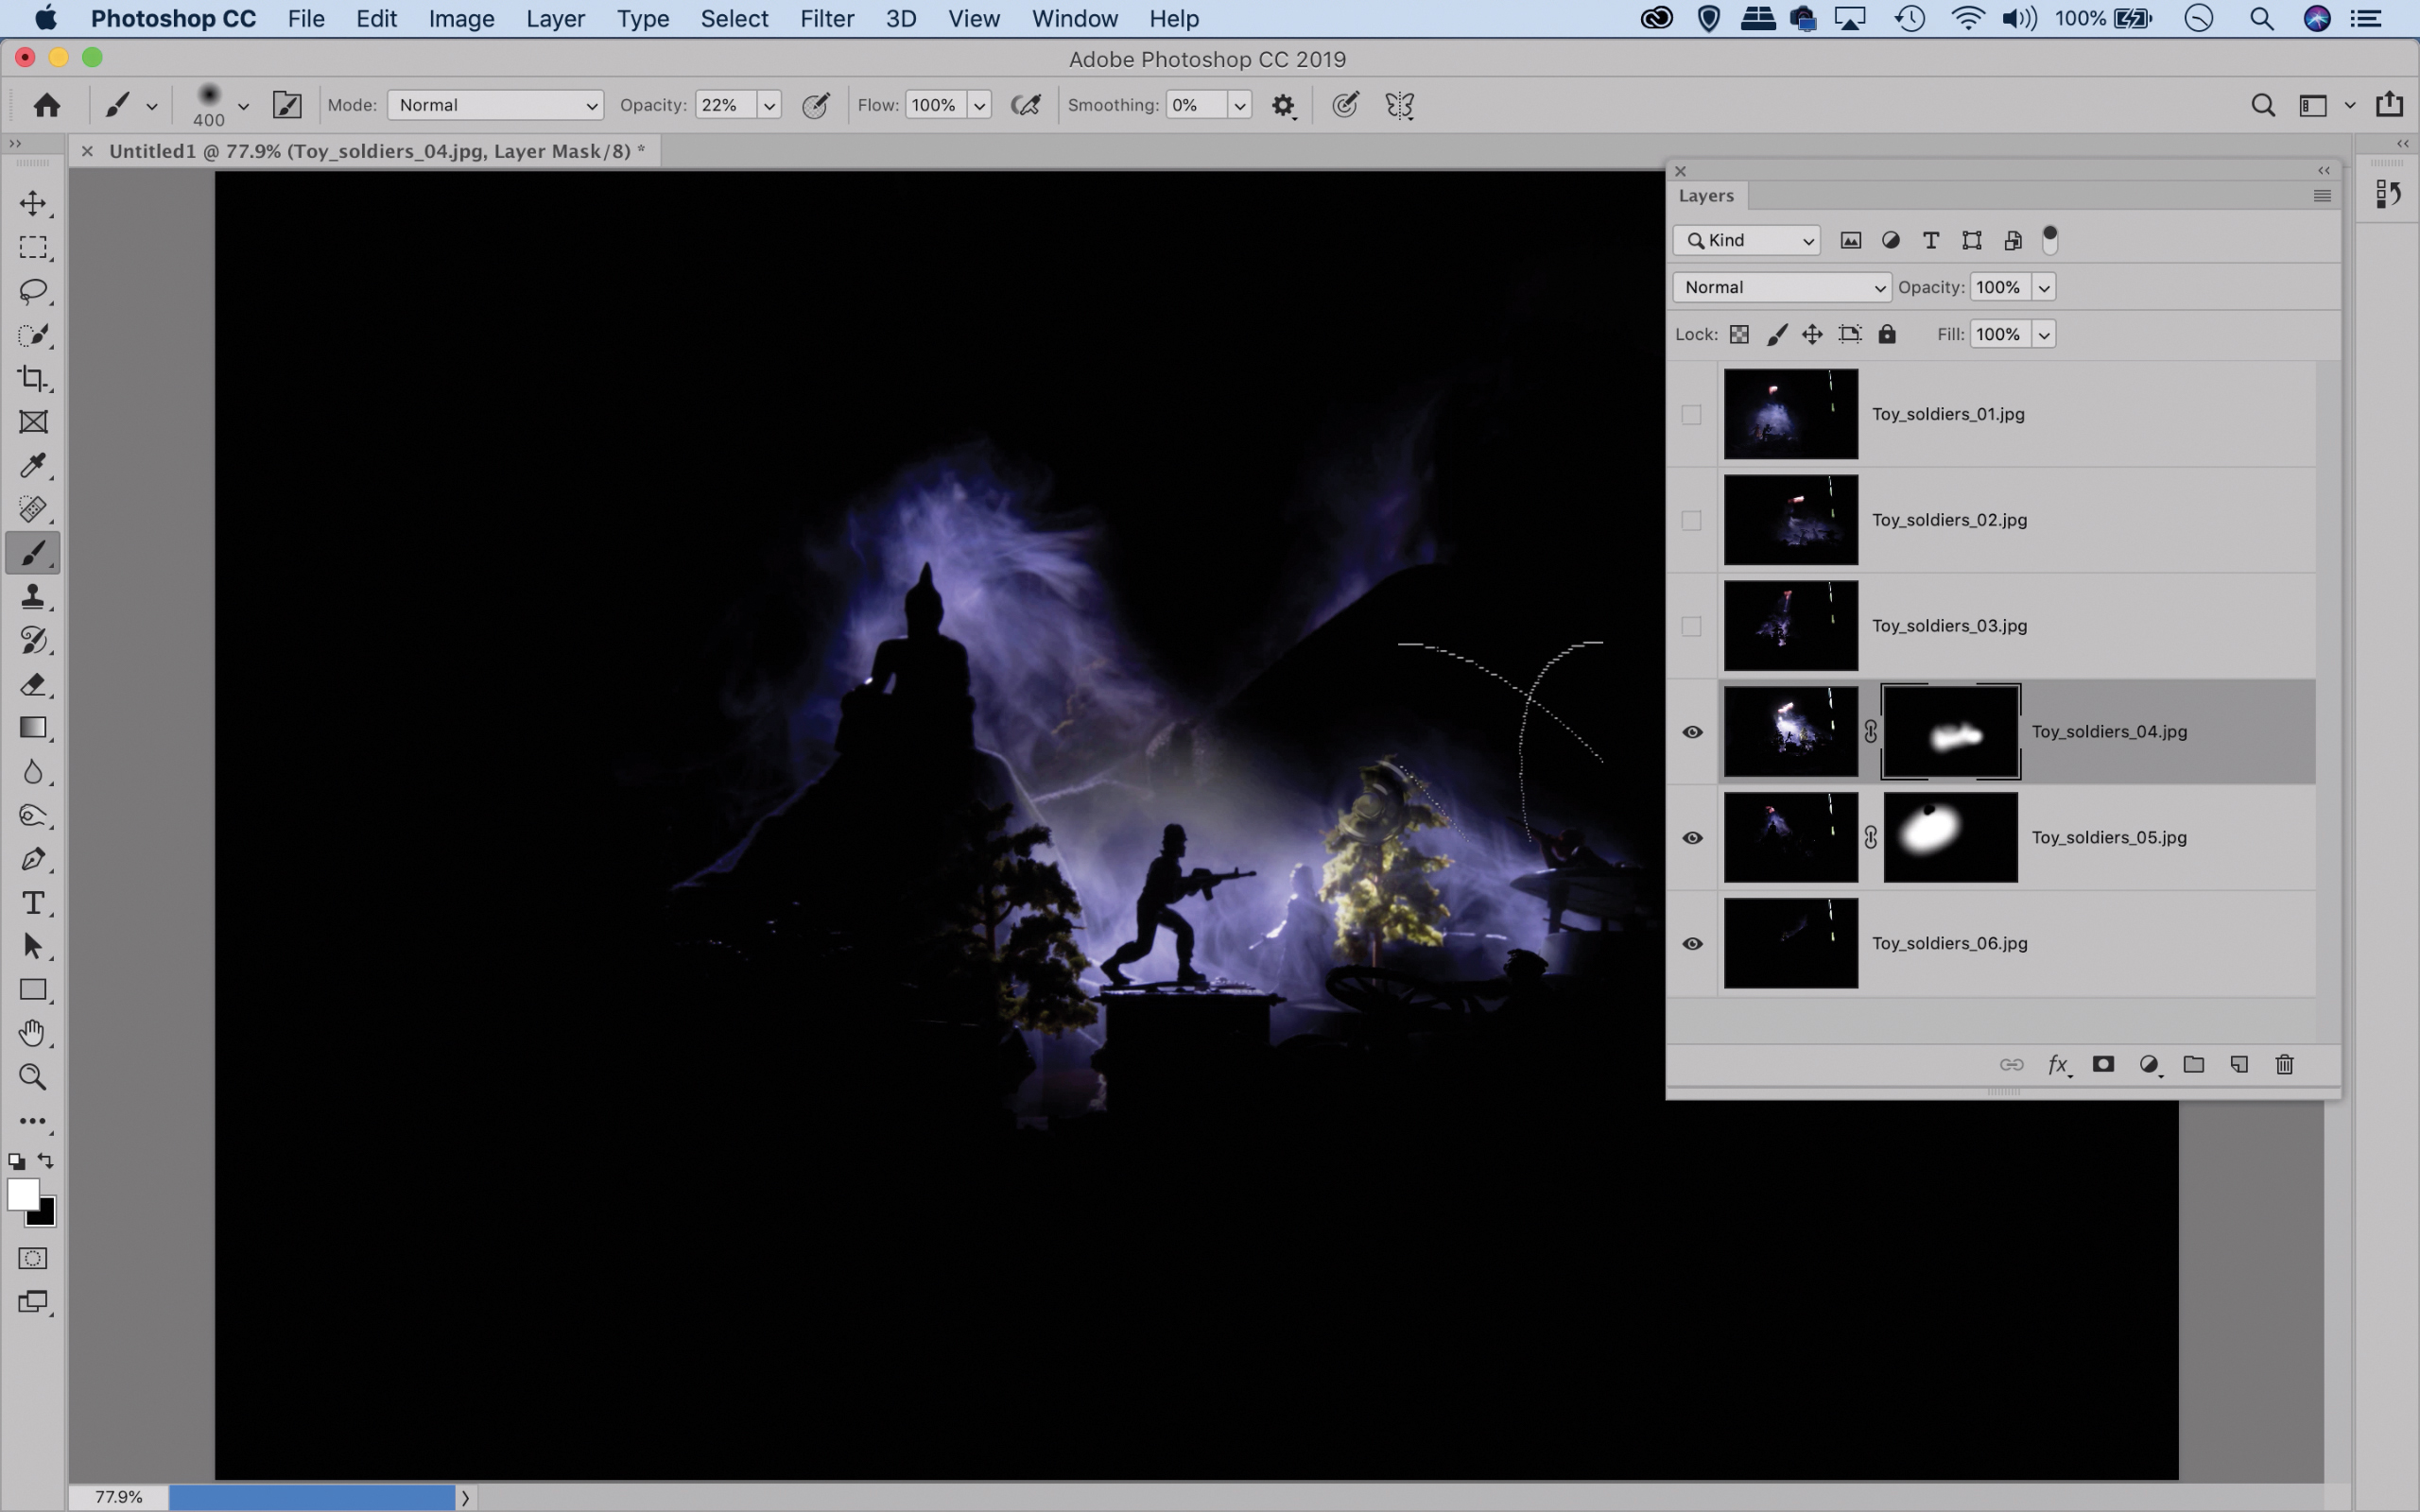
Grab the Brush tool, set your color to white then paint to reveal the area you want visible on the layer. Next, highlight and reveal the next layer up in the stack and repeat the process. Continue until all the separate pieces of the scene have been blended together.
05 Blend the sparks
Go back to Bridge and highlight the red spark shots, then ‘Load Files into Photoshop Layers’. Once done, go to the Layers panel and Shift-click between the top and bottom layer. Go to the Blending Mode drop-down in the Layers panel and change it to Screen.
06 Copy and reshape
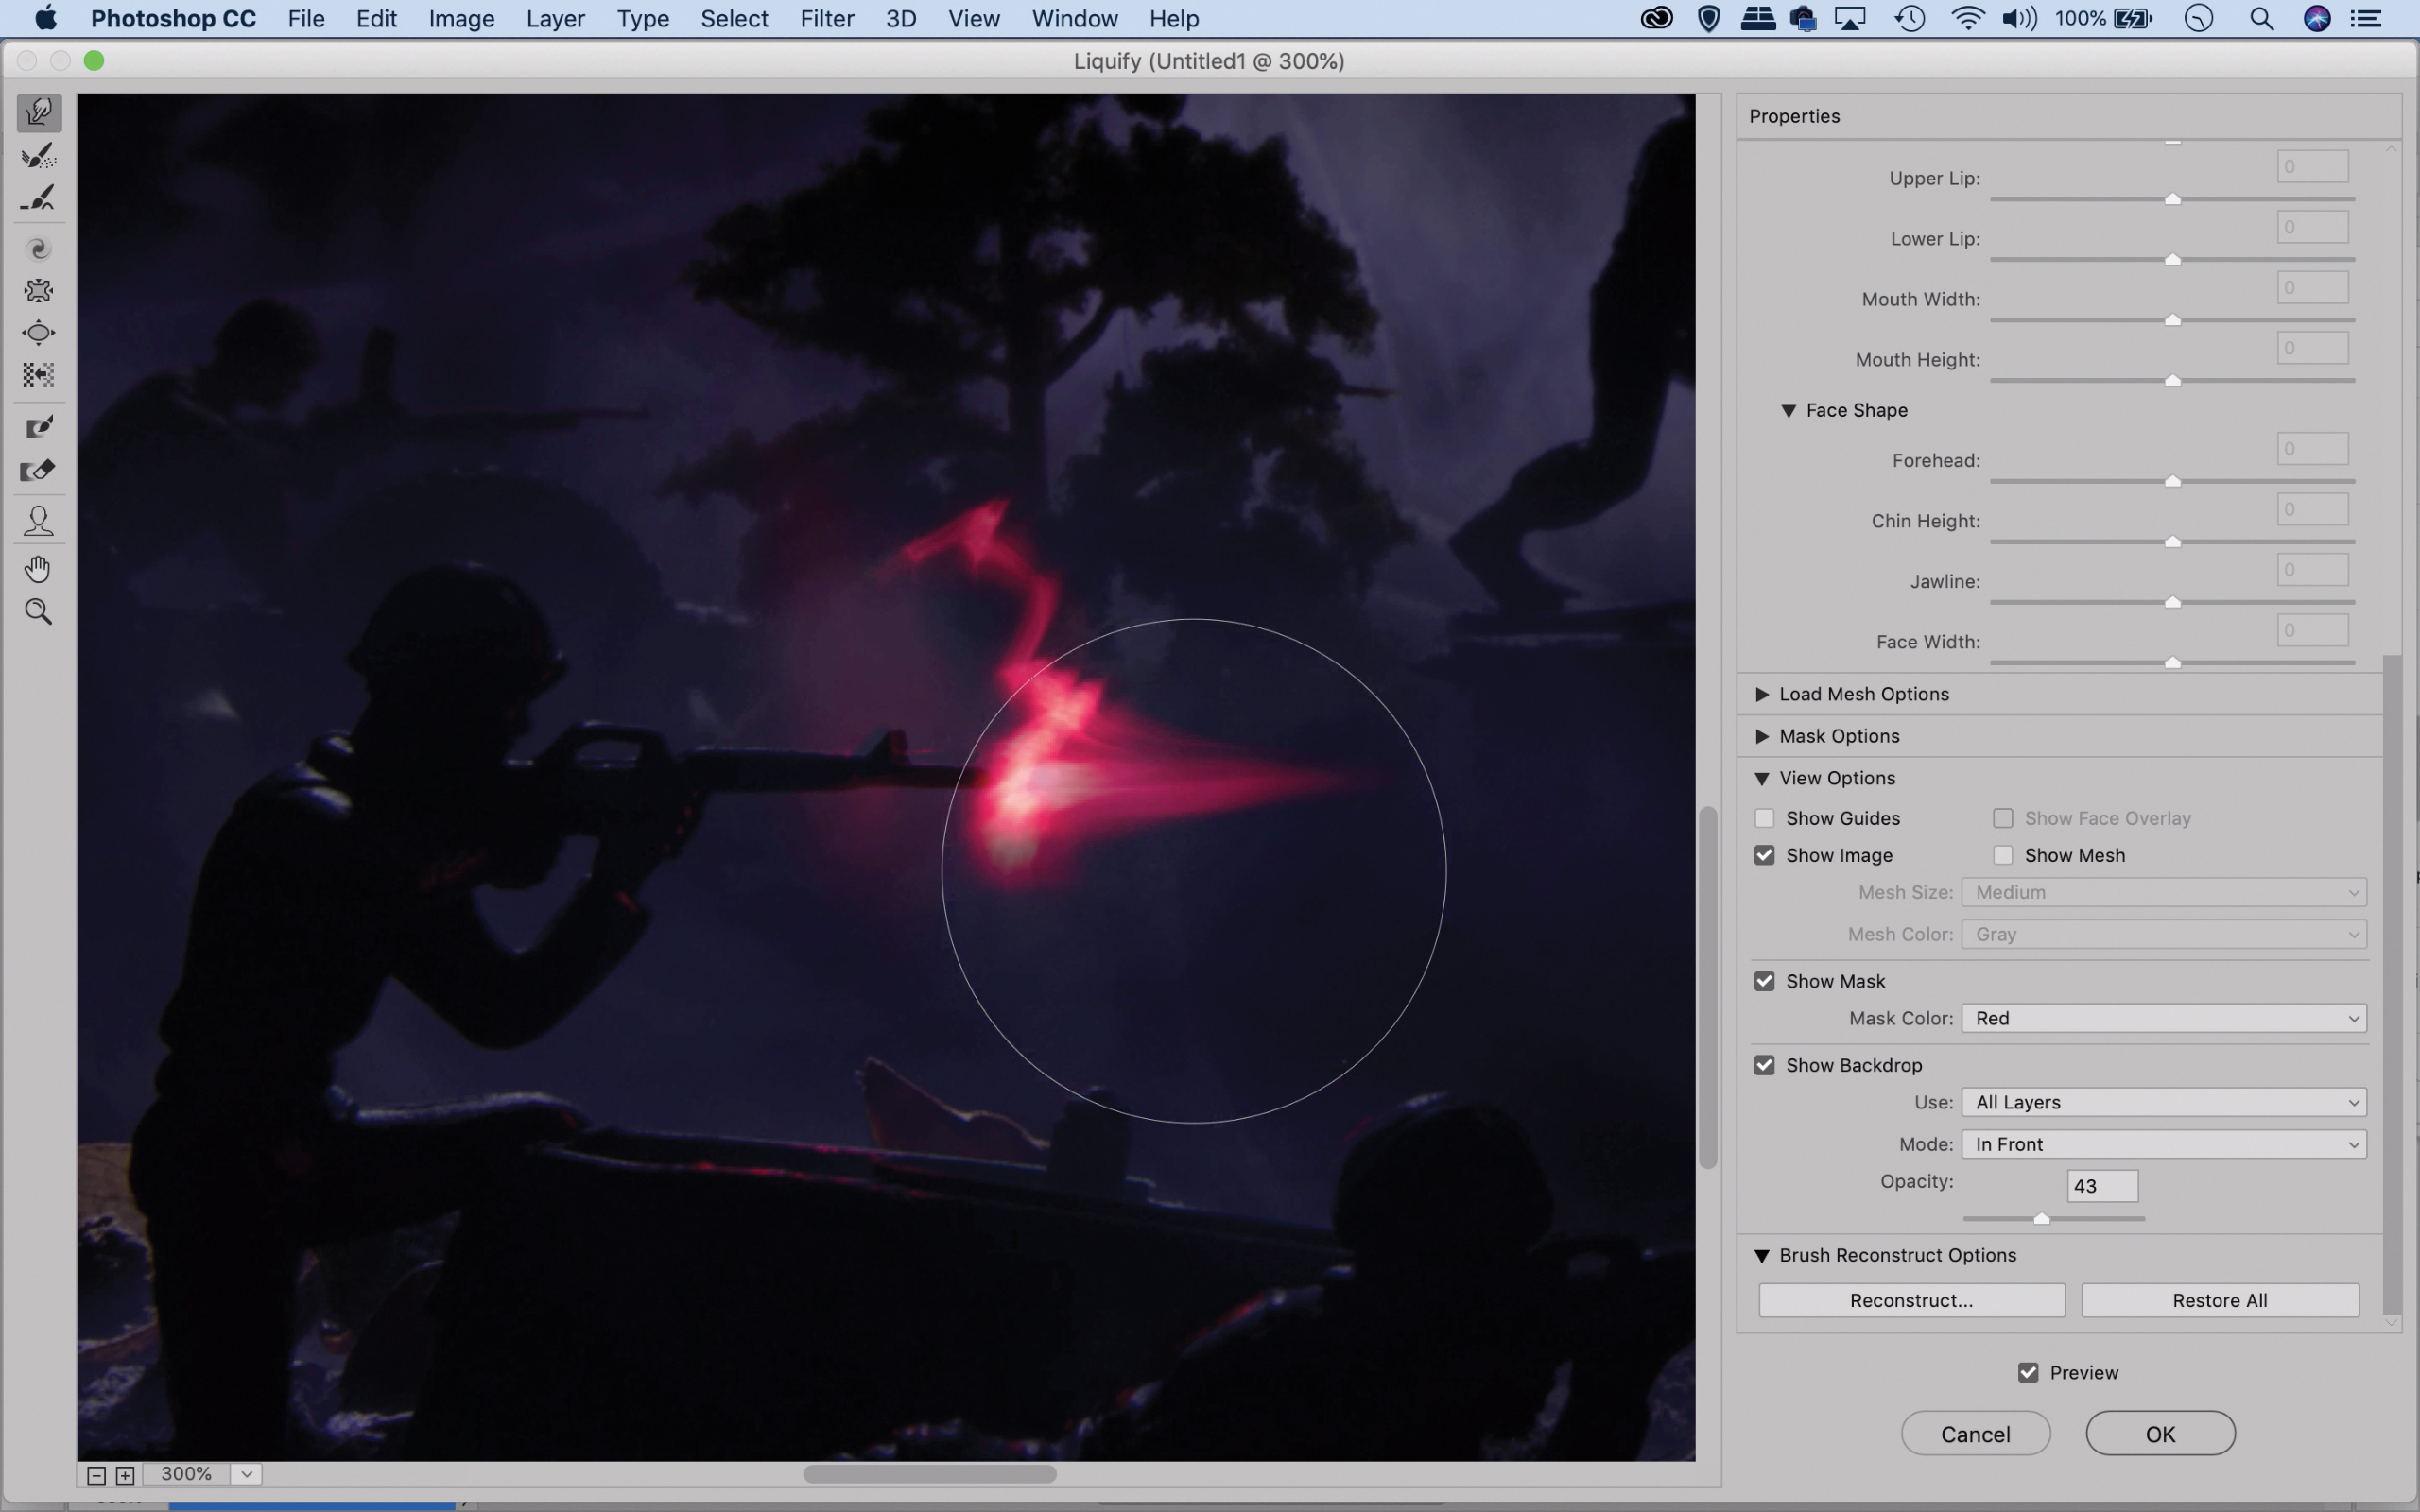
Right-click over the layers in the Layers panel then go to Duplicate > Layers. Set Destination to the other image and hit OK. Go to the other image and click through the sparks layers, adding layer masks to hide areas. You can reshape the sparks using the Liquify filter.
N-Photo: The Nikon Magazine is a monthly publication that's entirely dedicated to Nikon users. For the best news, reviews, projects and more, subscribe to N-Photo today!
Read moreRead less▼
Read more:
Best head torch
Best wide-angle lens: ultrawide zooms that get everything in the picture
Home photography ideas: Make models life-size with forced perspective
Home photography ideas: a seriously cereal-y macro swimming pool scene!
The lead technique writer on Digital Camera Magazine, PhotoPlus: The Canon Magazine and N-Photo: The Nikon Magazine, James is a fantastic general practice photographer with an enviable array of skills across every genre of photography.
Whether it's flash photography techniques like stroboscopic portraits, astrophotography projects like photographing the Northern Lights, or turning sound into art by making paint dance on a set of speakers, James' tutorials and projects are as creative as they are enjoyable.
He's also a wizard at the dark arts of Photoshop, Lightroom and Affinity Photo, and is capable of some genuine black magic in the digital darkroom, making him one of the leading authorities on photo editing software and techniques.
