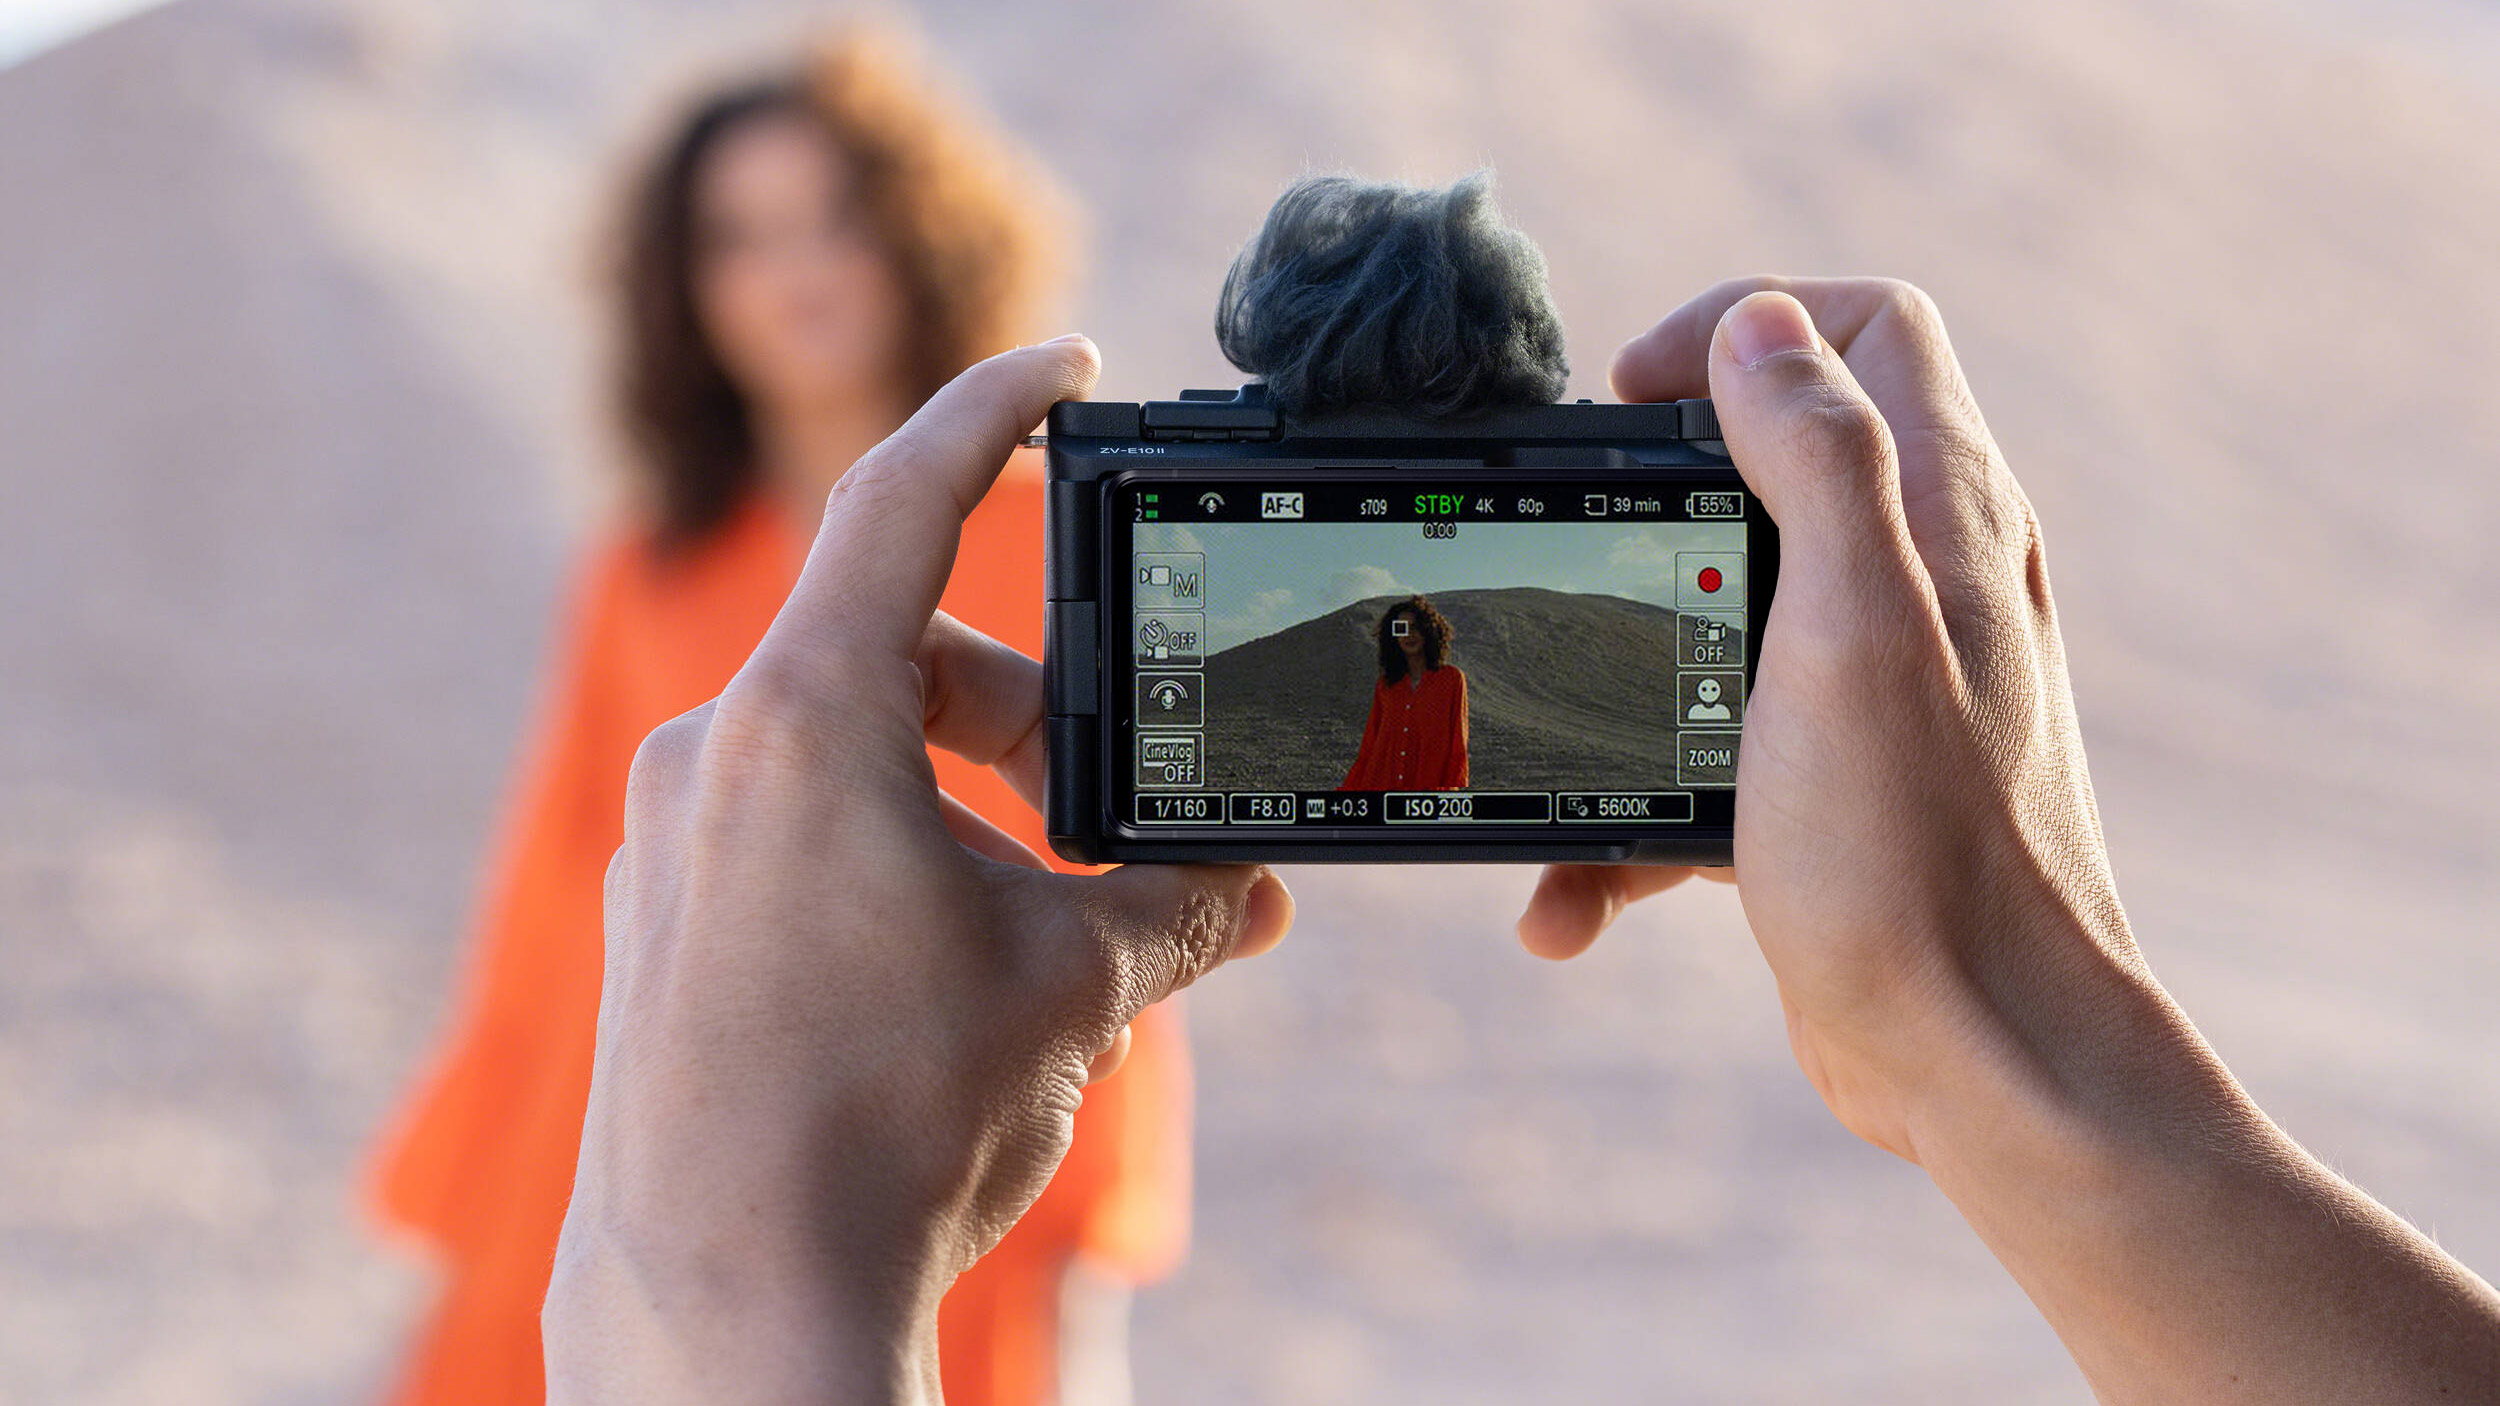
How I use shutter blending to get great photos of waterfalls
James Paterson gets better blur by combining different exposures
Watch video: Learn how to blend shutter speeds together
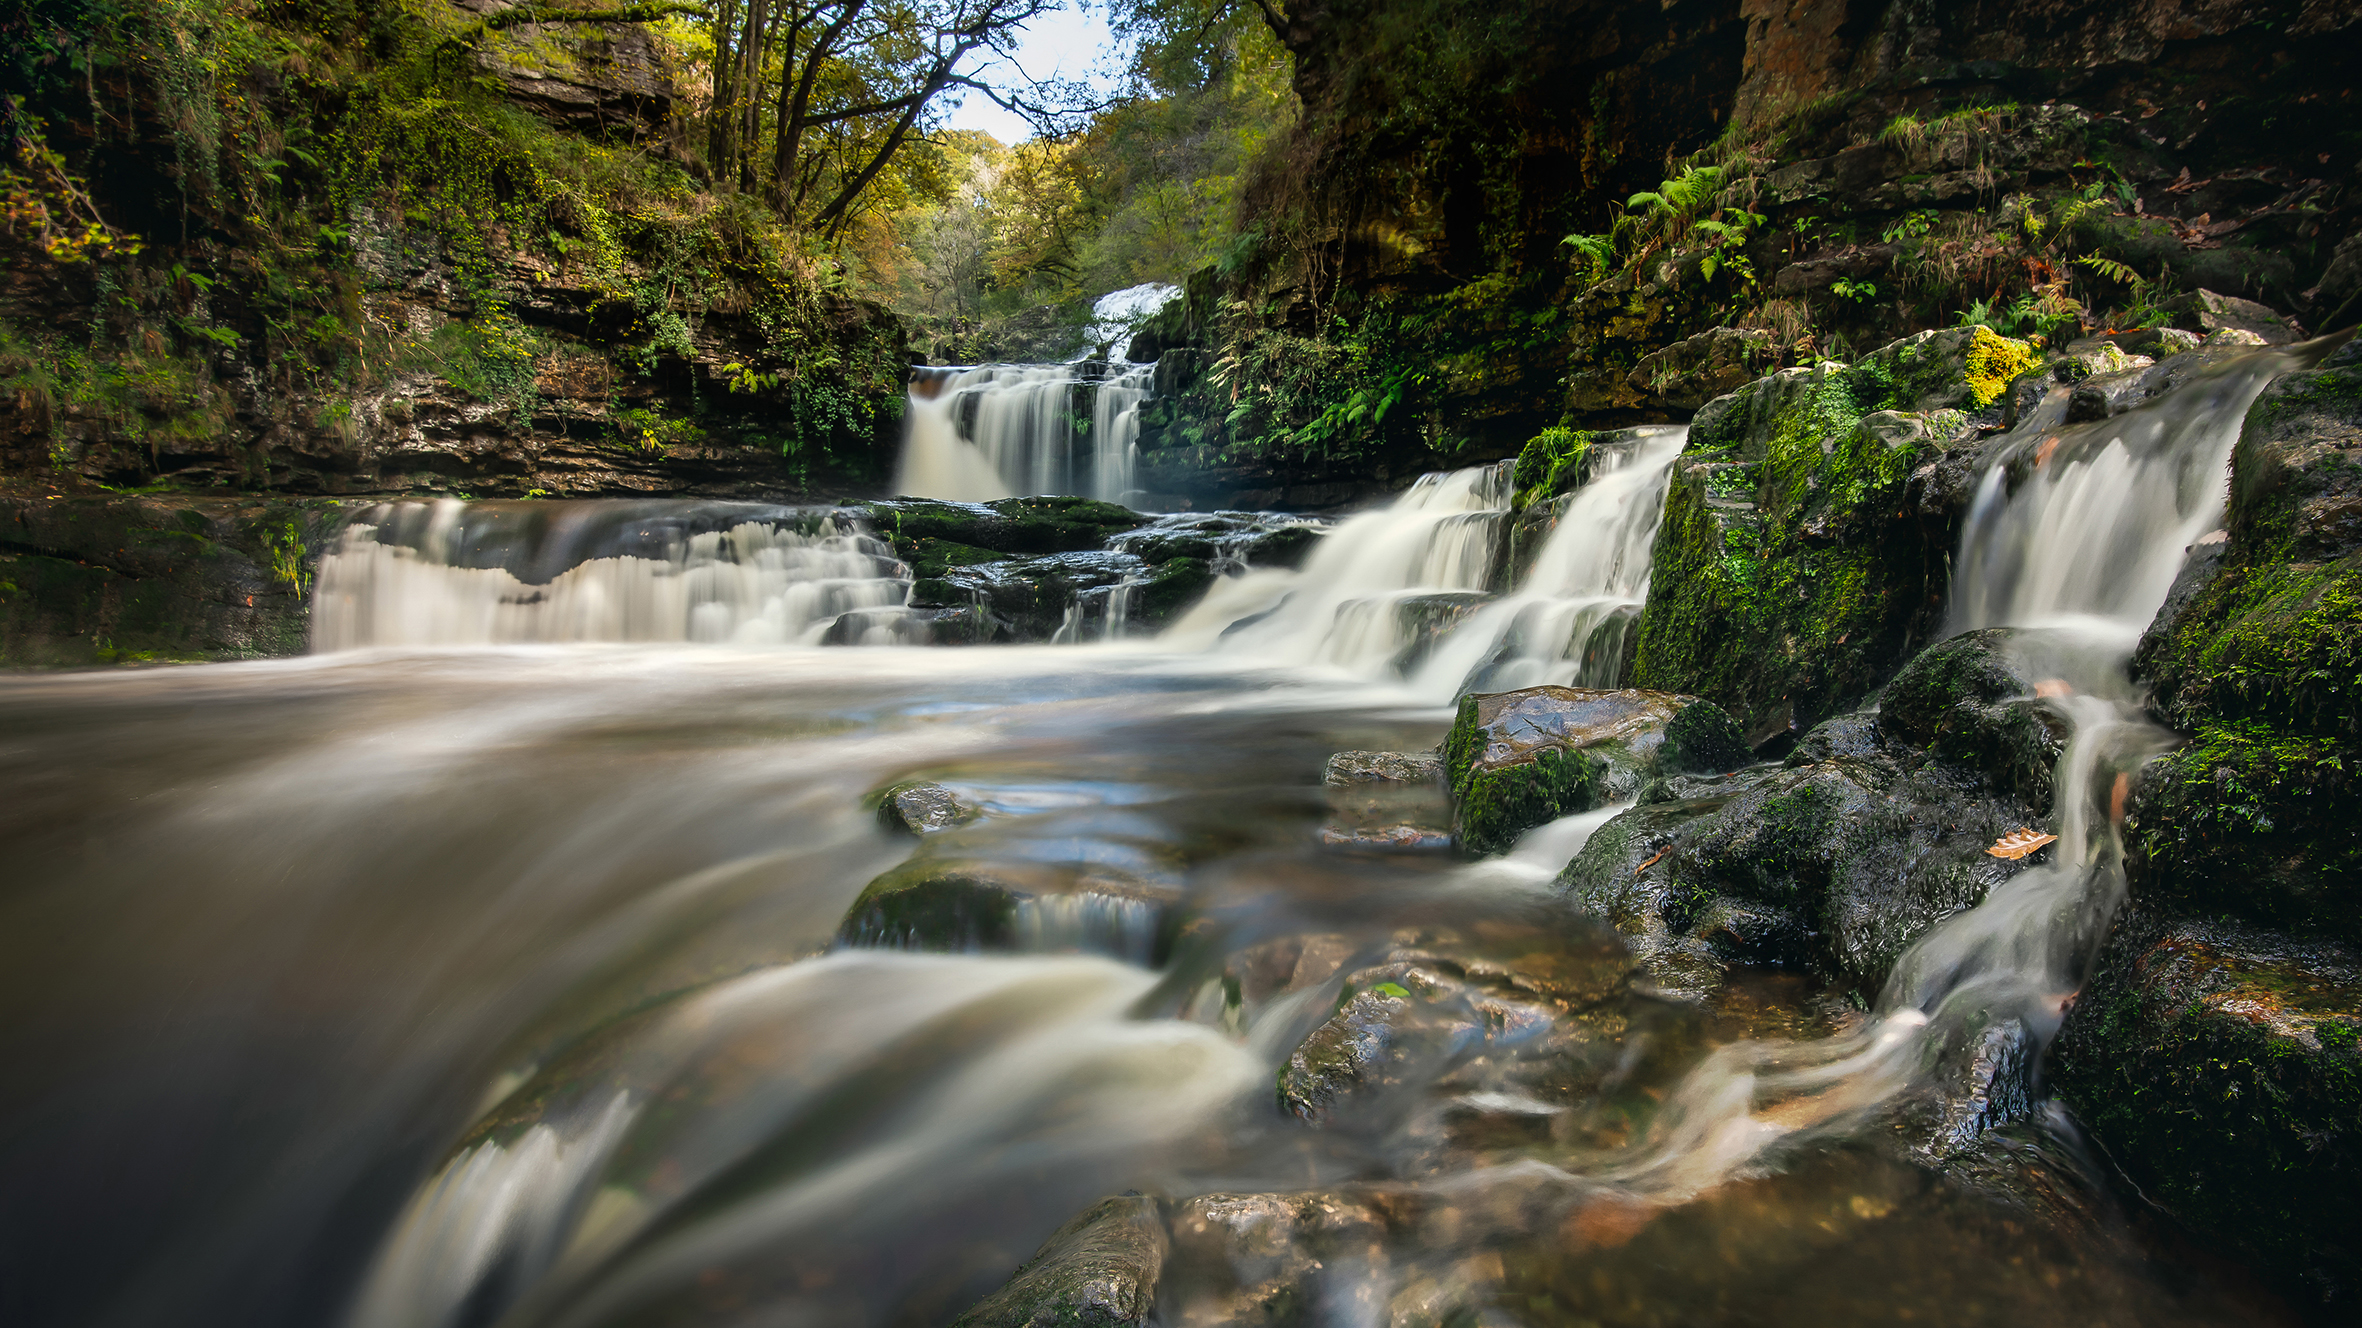
A long exposure is a wonderful way to blur motion in photography. Rivers, waterfalls, waves and clouds can look stunning when captured as streaks of silky blur. But how slow do you go? Some parts of a scene may appear better with a really long exposure of several seconds or even minutes, while others are better with a slightly quicker speed of a second or less.
It all depends on the speed of the movement in the scene, and how that translates to blur in your photograph. In our waterfall scene here, for example, the water is moving faster as it cascades down the waterfalls, but flowing slower in the main body of the river. As such, the optimum shutter speed for the fast-moving waterfall differs from the optimum shutter speed for the slower river.
By shooting separate frames for each while varying our shutter speed, then blending together afterwards, we can have the best of both speeds. Of course, it may not always be clear which shutter speed is best until later on, so in this project, we show you how to get set up to shoot for a variety of shutter speeds, then blend the best blur from each into a single image.
Along the way, we also explore the fundamentals of long exposures plus explain simple Photoshop layer blending tricks. Whether you want to shutter-blend waterfall photos or any long exposure scene, these techniques can help you achieve better blur in your photos every time.
1. Shoot a long exposure
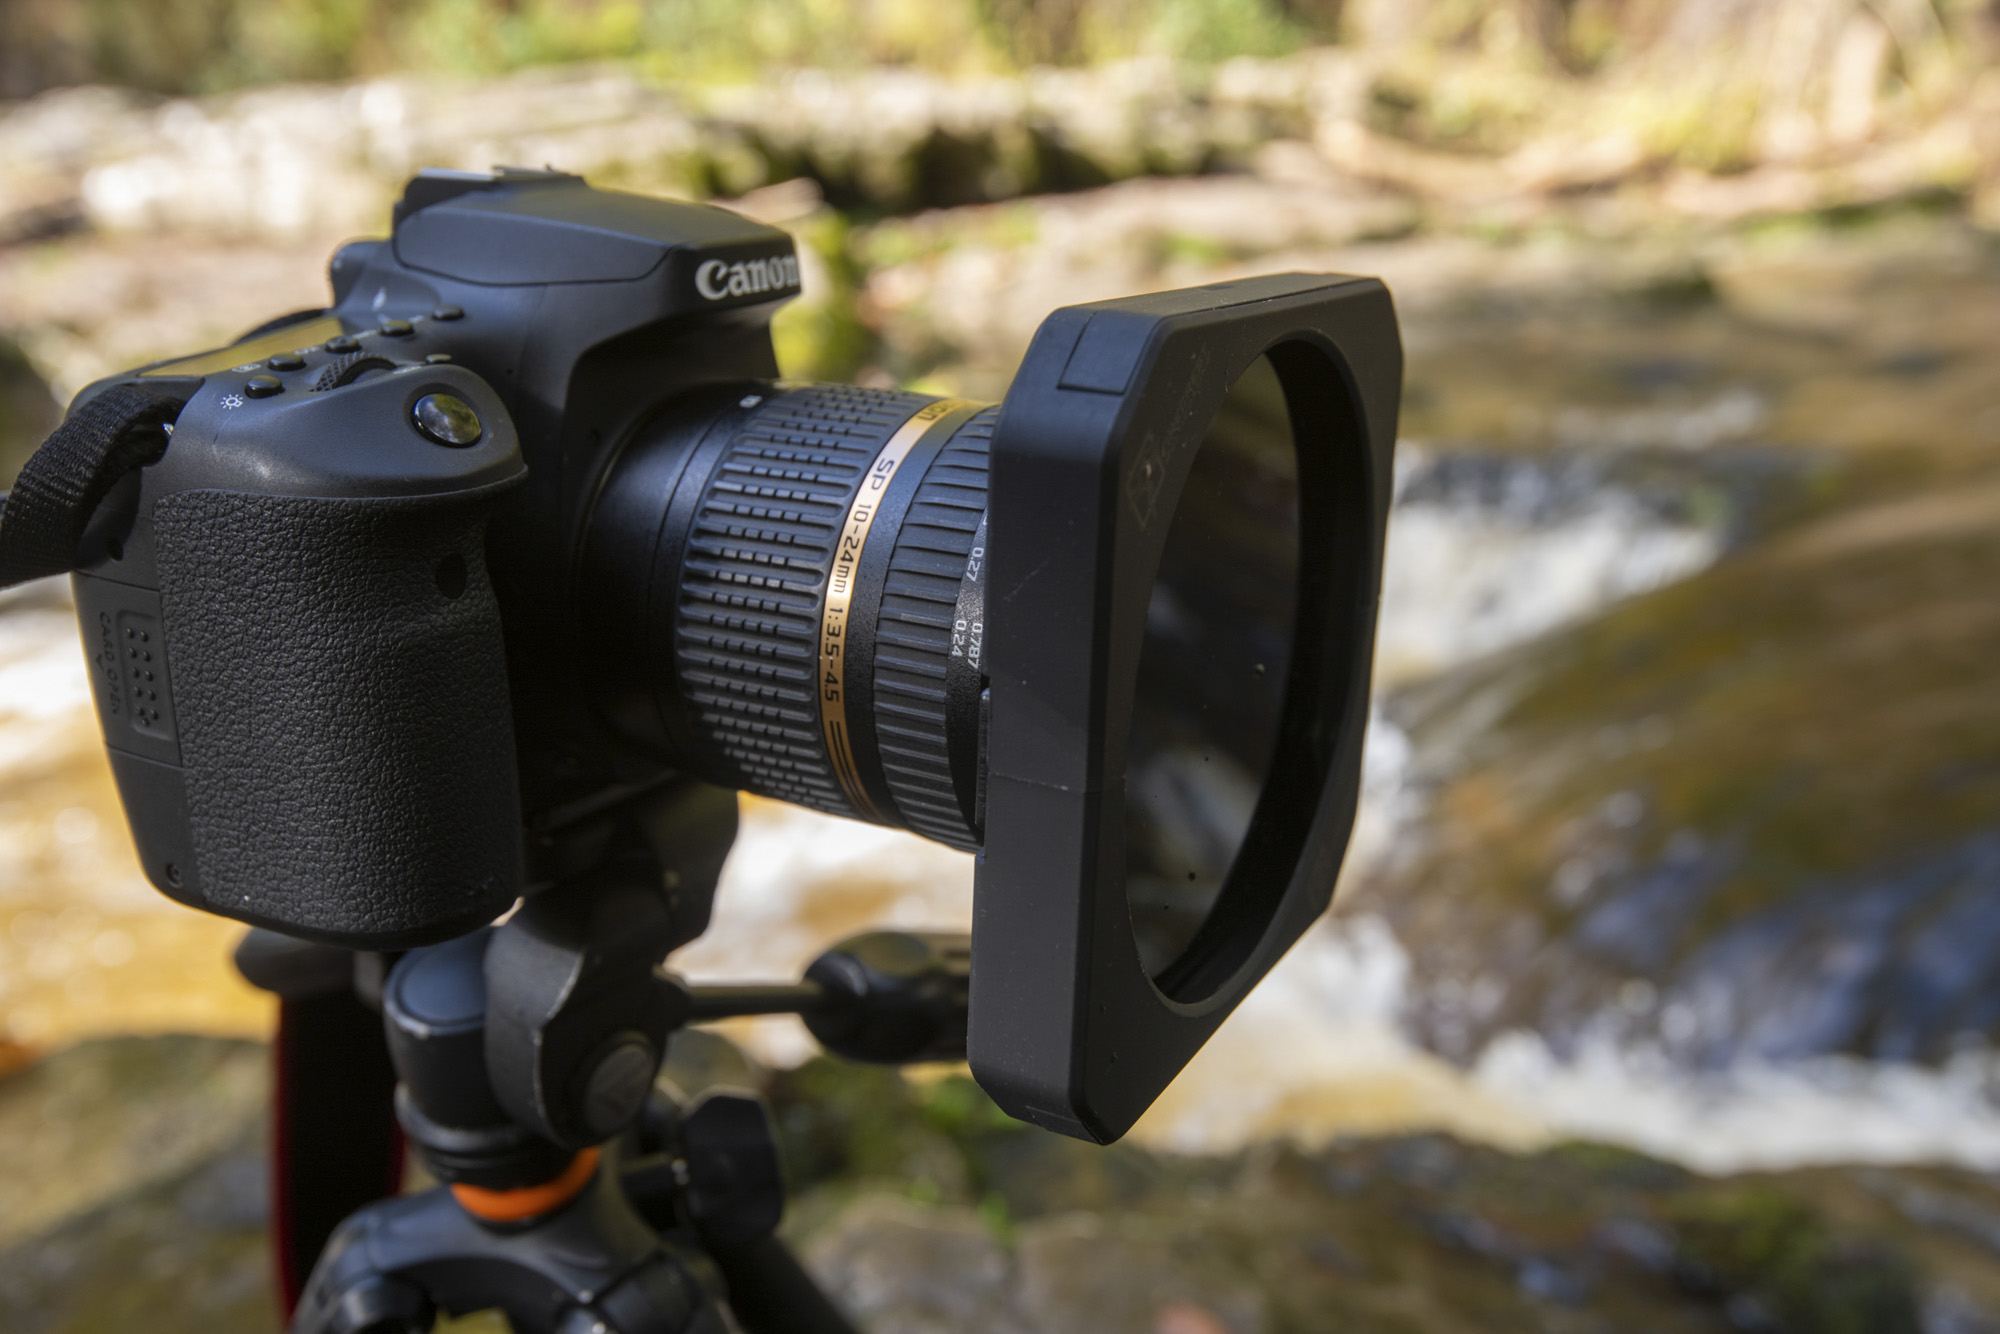
Set up on a tripod and compose the scene, then focus and switch to manual focus to lock it in place. Fit the ND filter, set Manual exposure mode, use aperture f/16 and Auto ISO, and set shutter speed to around 20 secs or whatever results in ISO100. Take a shot.
2. Go faster
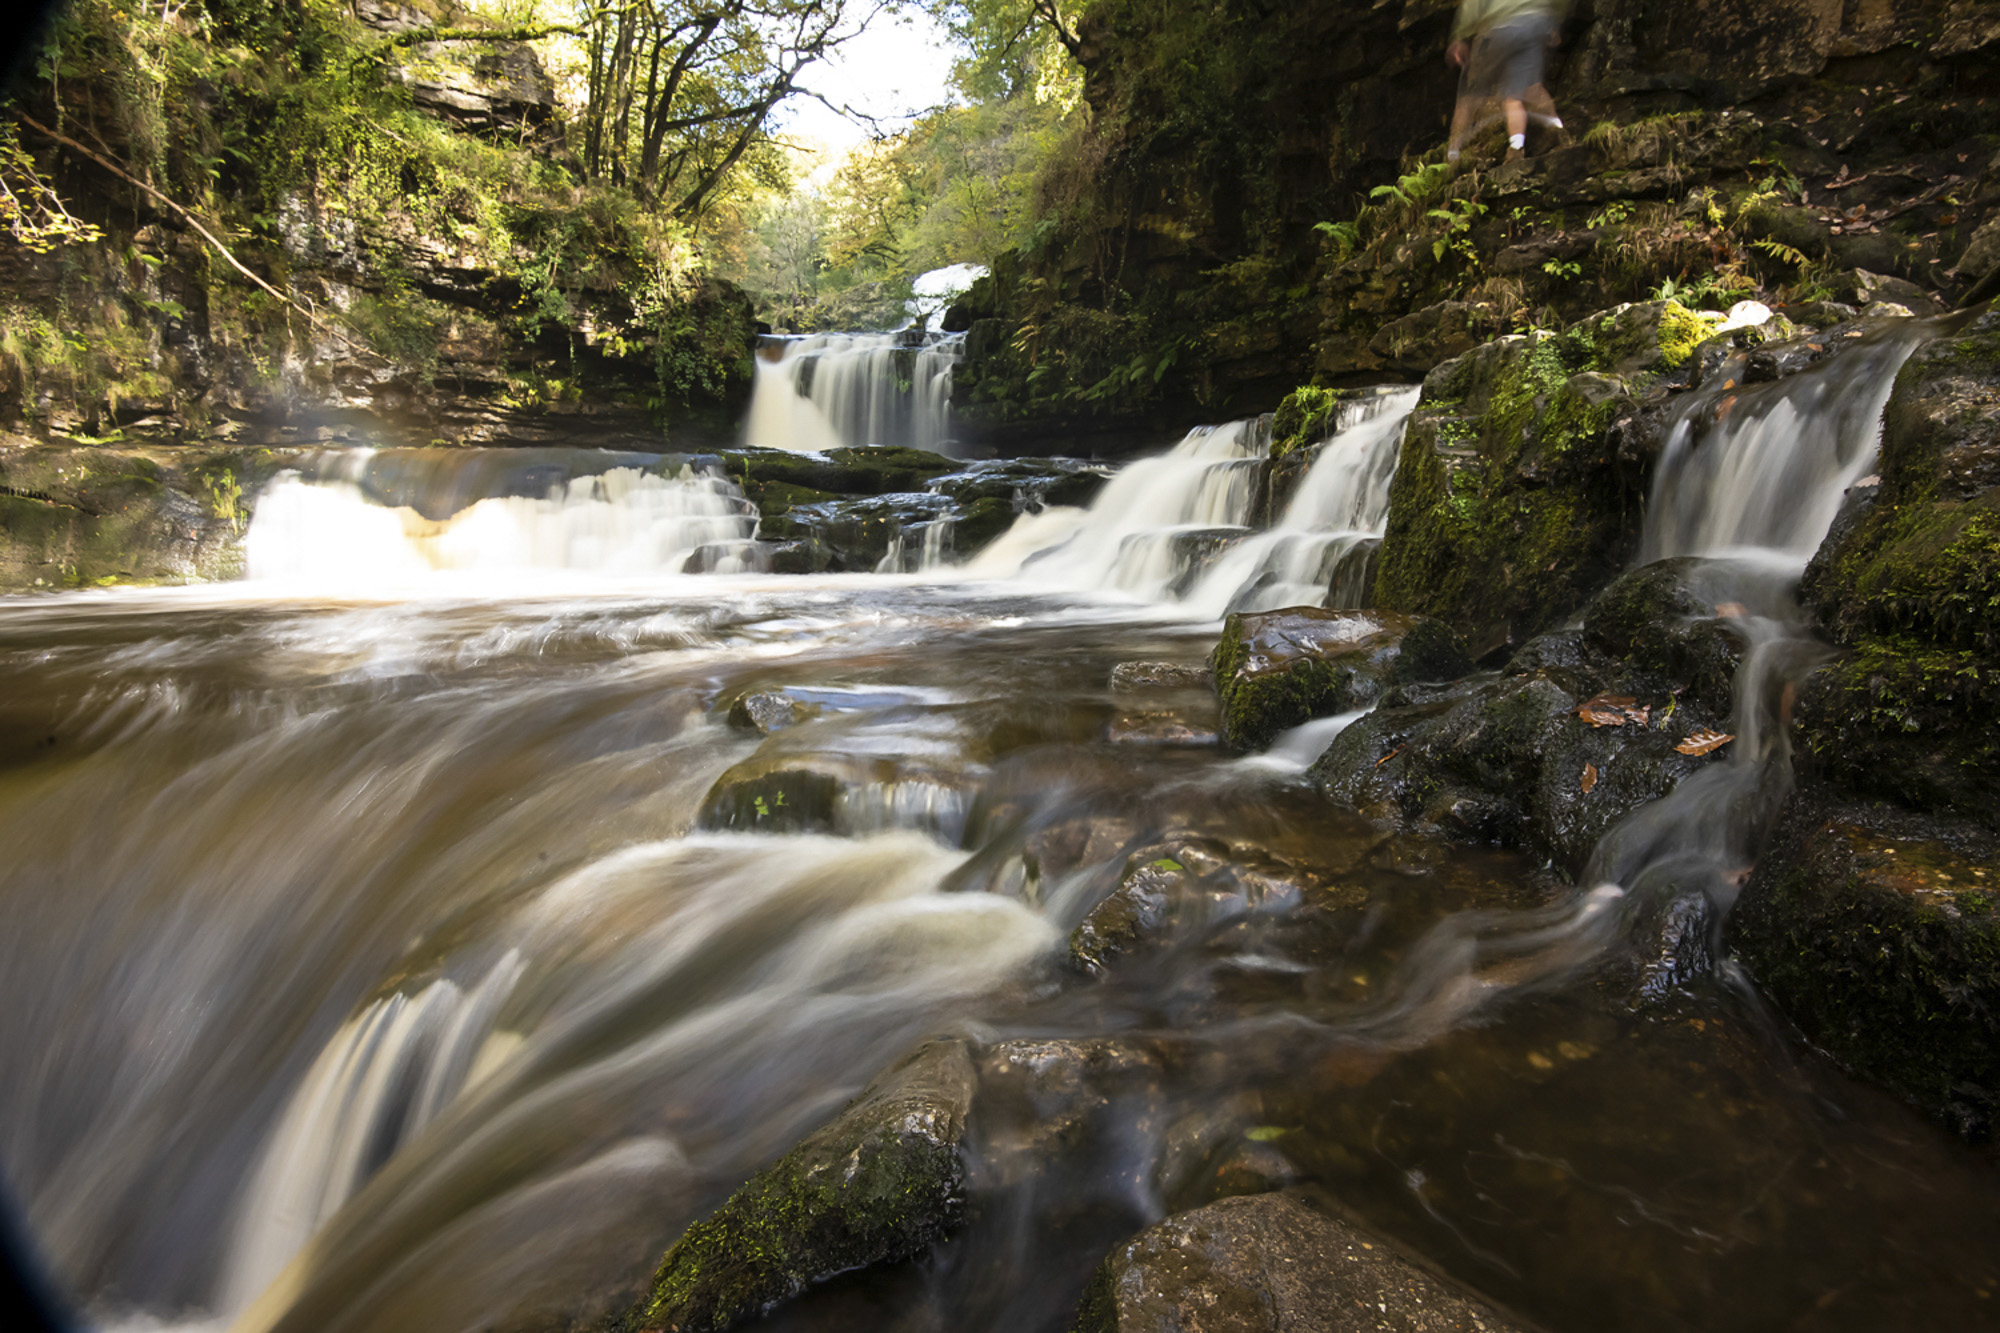
Decrease the shutter speed to 10 seconds, five, two, one and whatever else you like. The faster shutter necessitates a higher ISO, which means more image noise, but as we’re only likely to use the blurred water from the faster frames, we’re not too concerned.
3. Tone in Photoshop
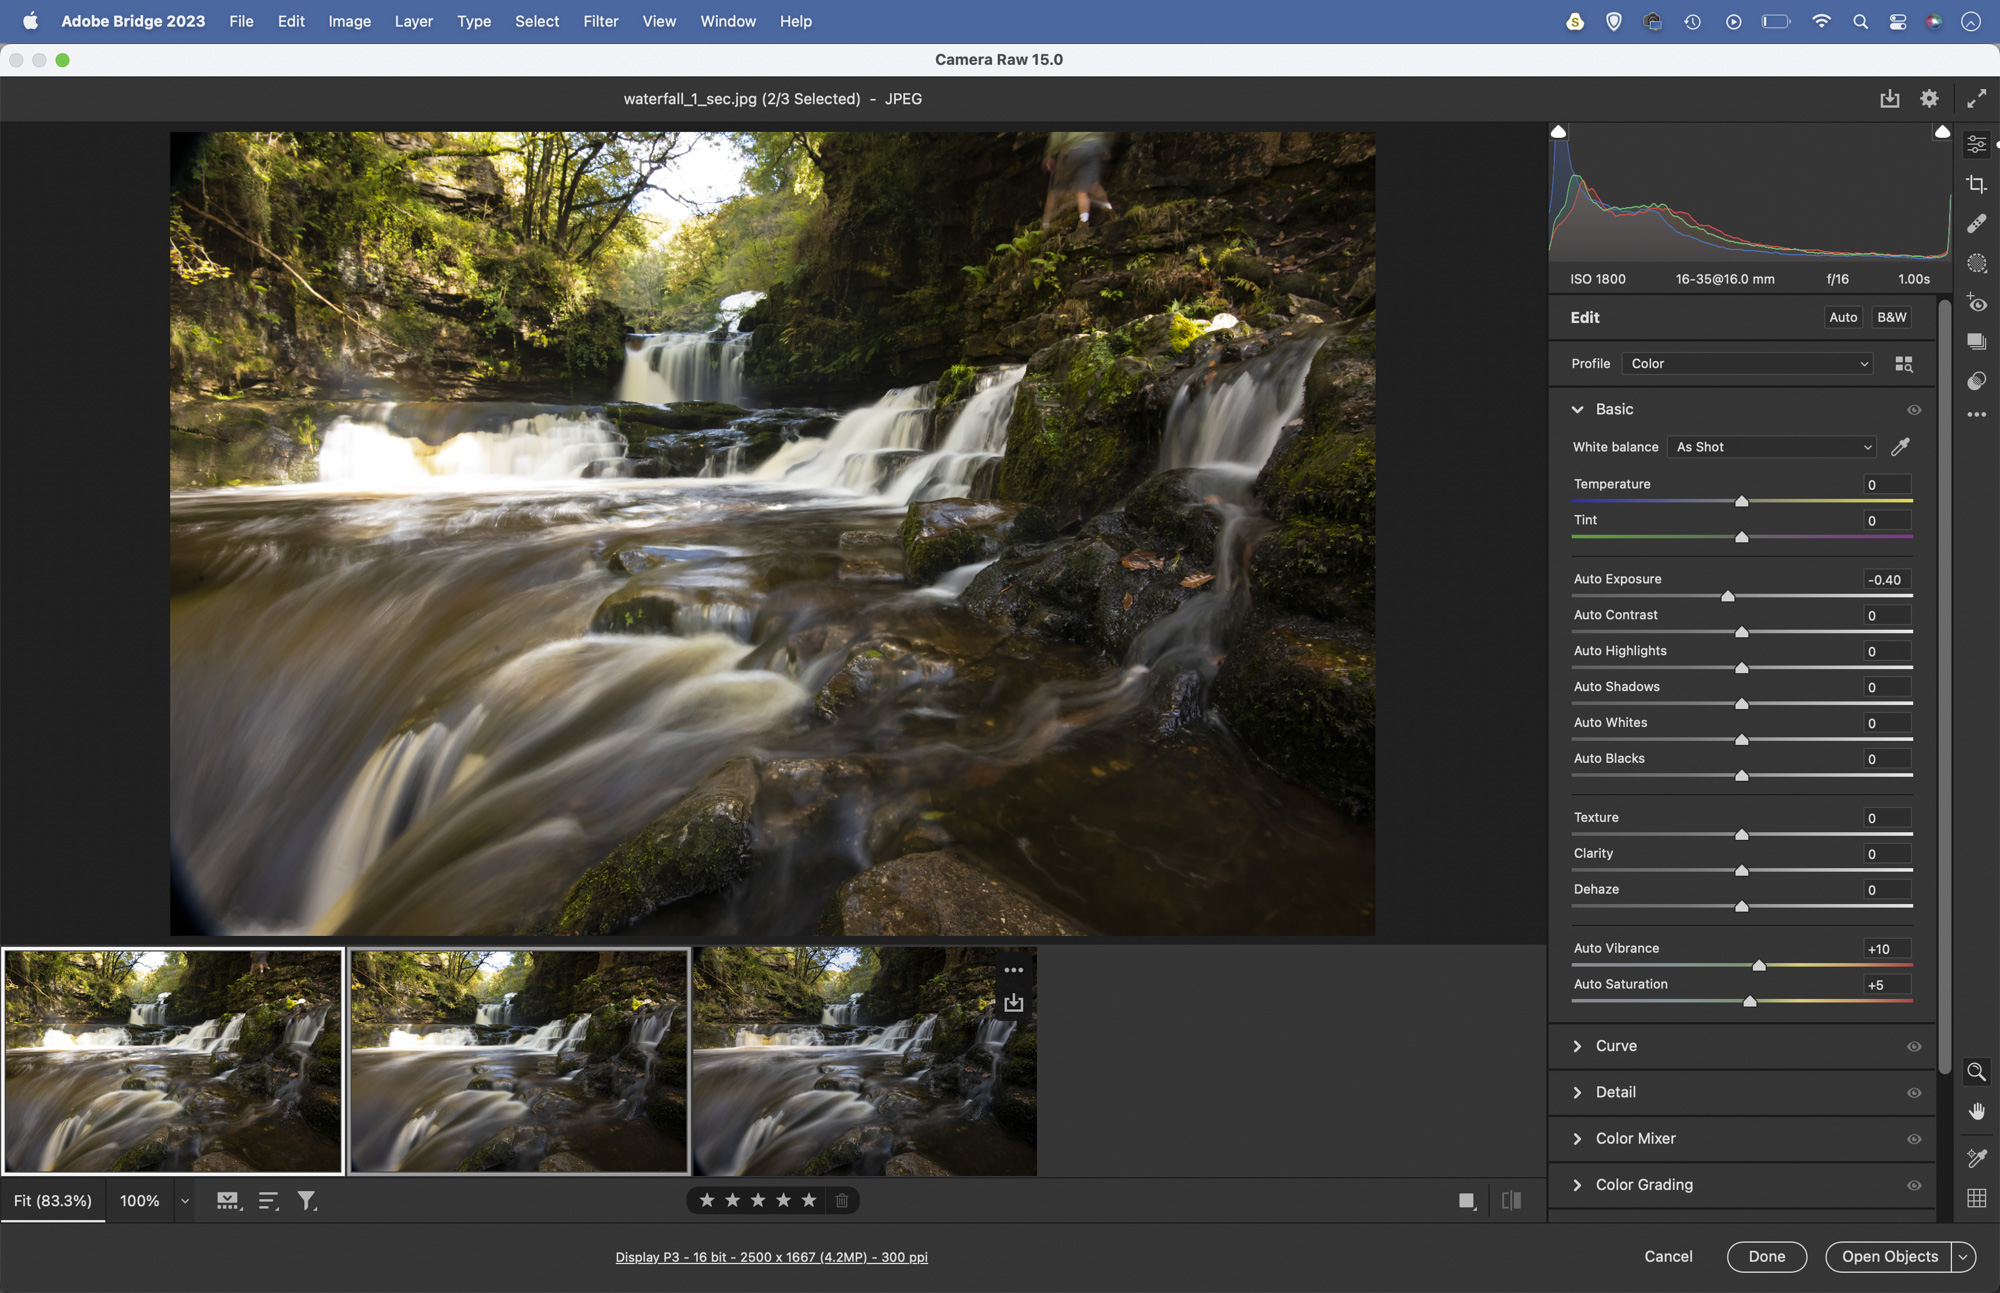
Highlight the frames you want in Adobe Bridge, right-click and Open In Camera Raw. Highlight the frames and adjust tones to boost contrast and colour so they match. Highlight image with higher ISO, go to Detail panel and increase Noise Reduction to tone it down.
4. Load into layers
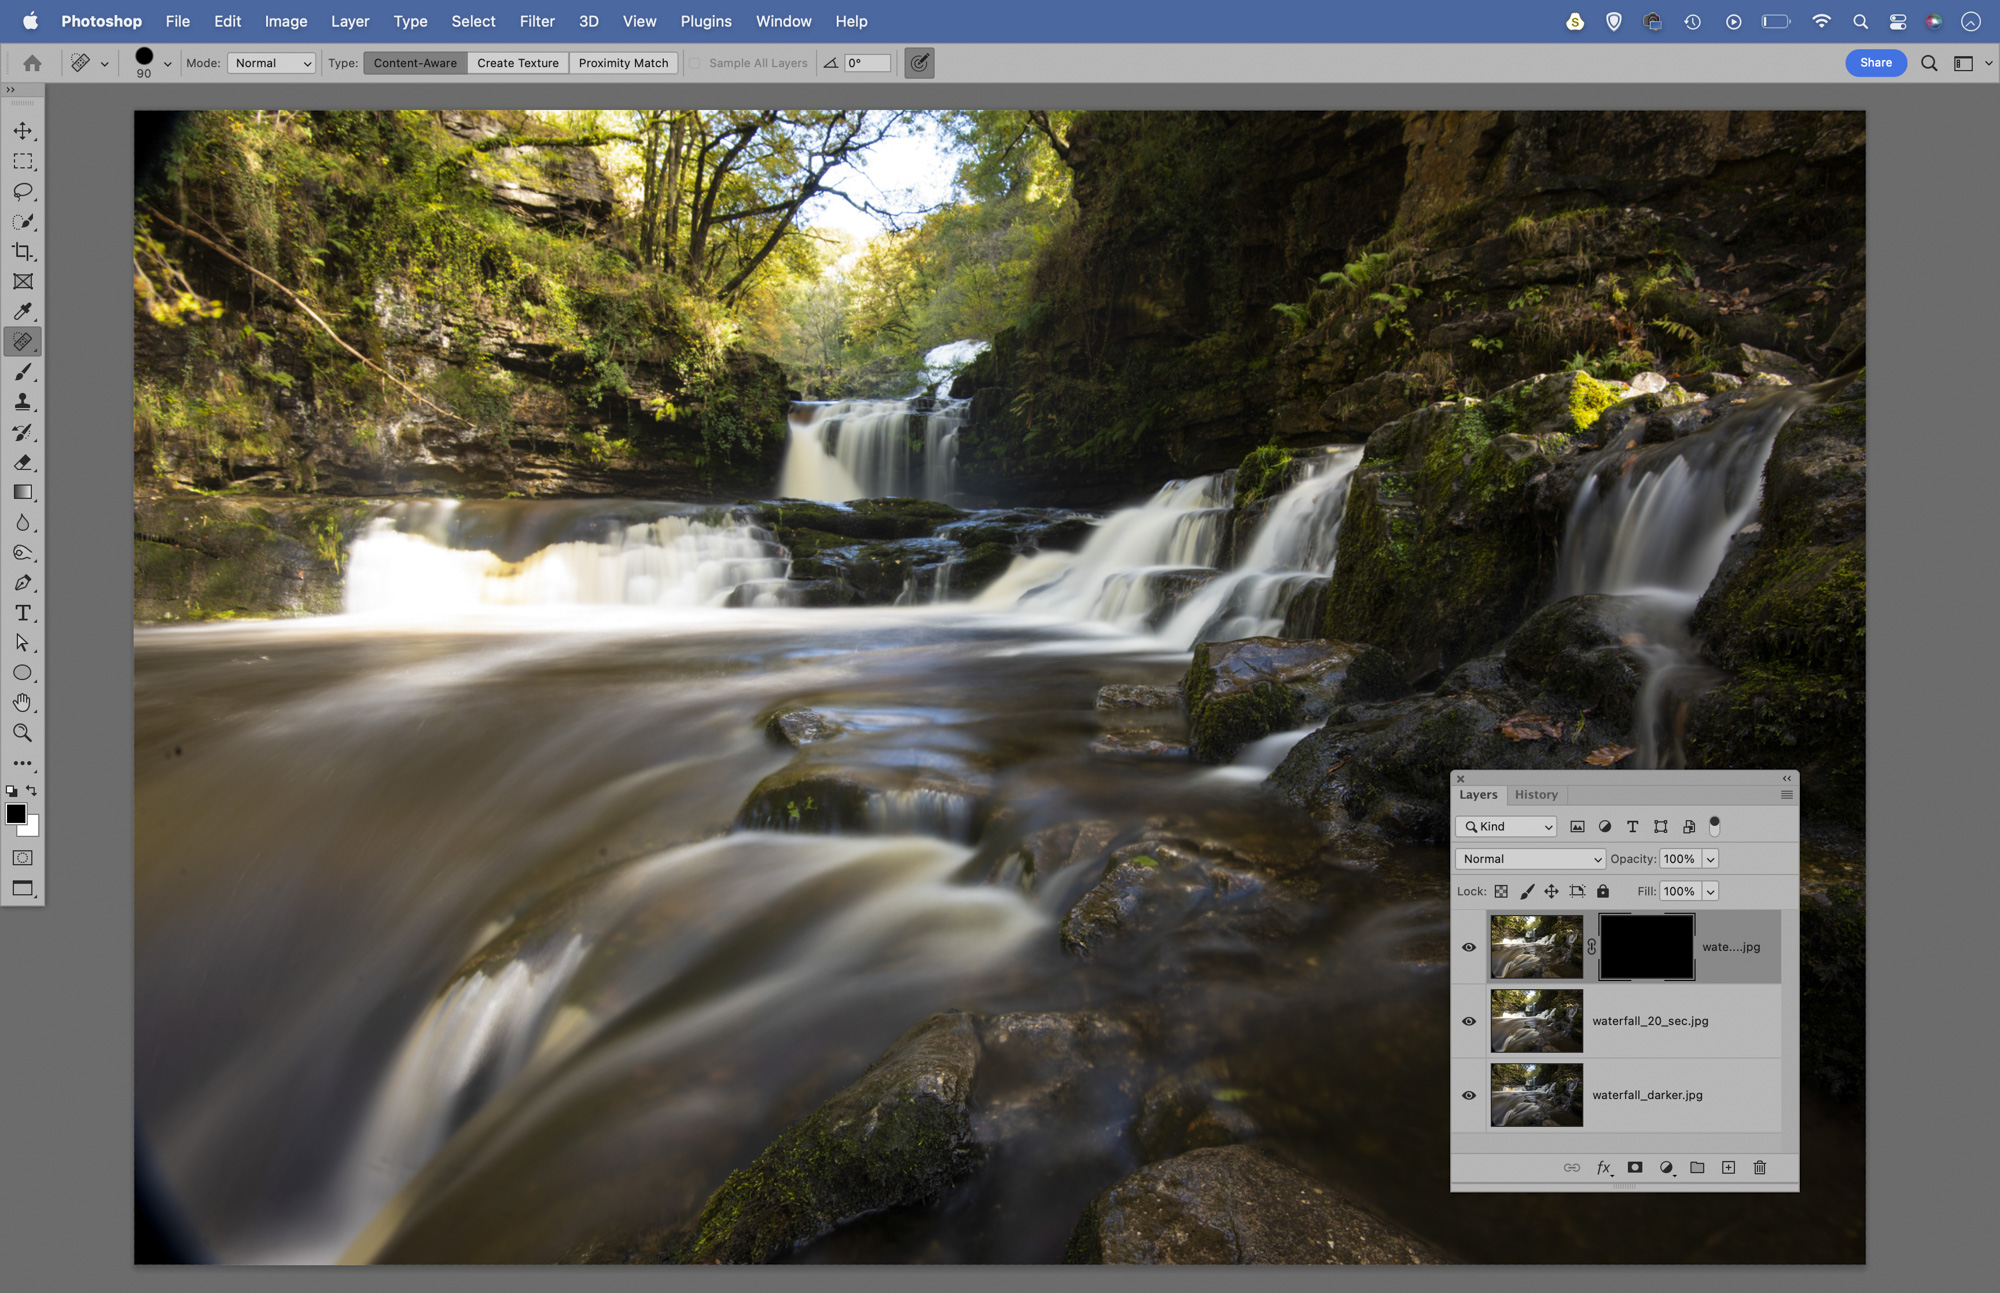
Hit OK to go back to Adobe Bridge, then (with images still highlighted) go to Tools>Photoshop>Load Files Into Layers. Once loaded, drag the faster frame to the top of the stack, then hold Alt and click the Add Layer Mask icon to add a full mask that hides the layer.
5. Reveal the blur
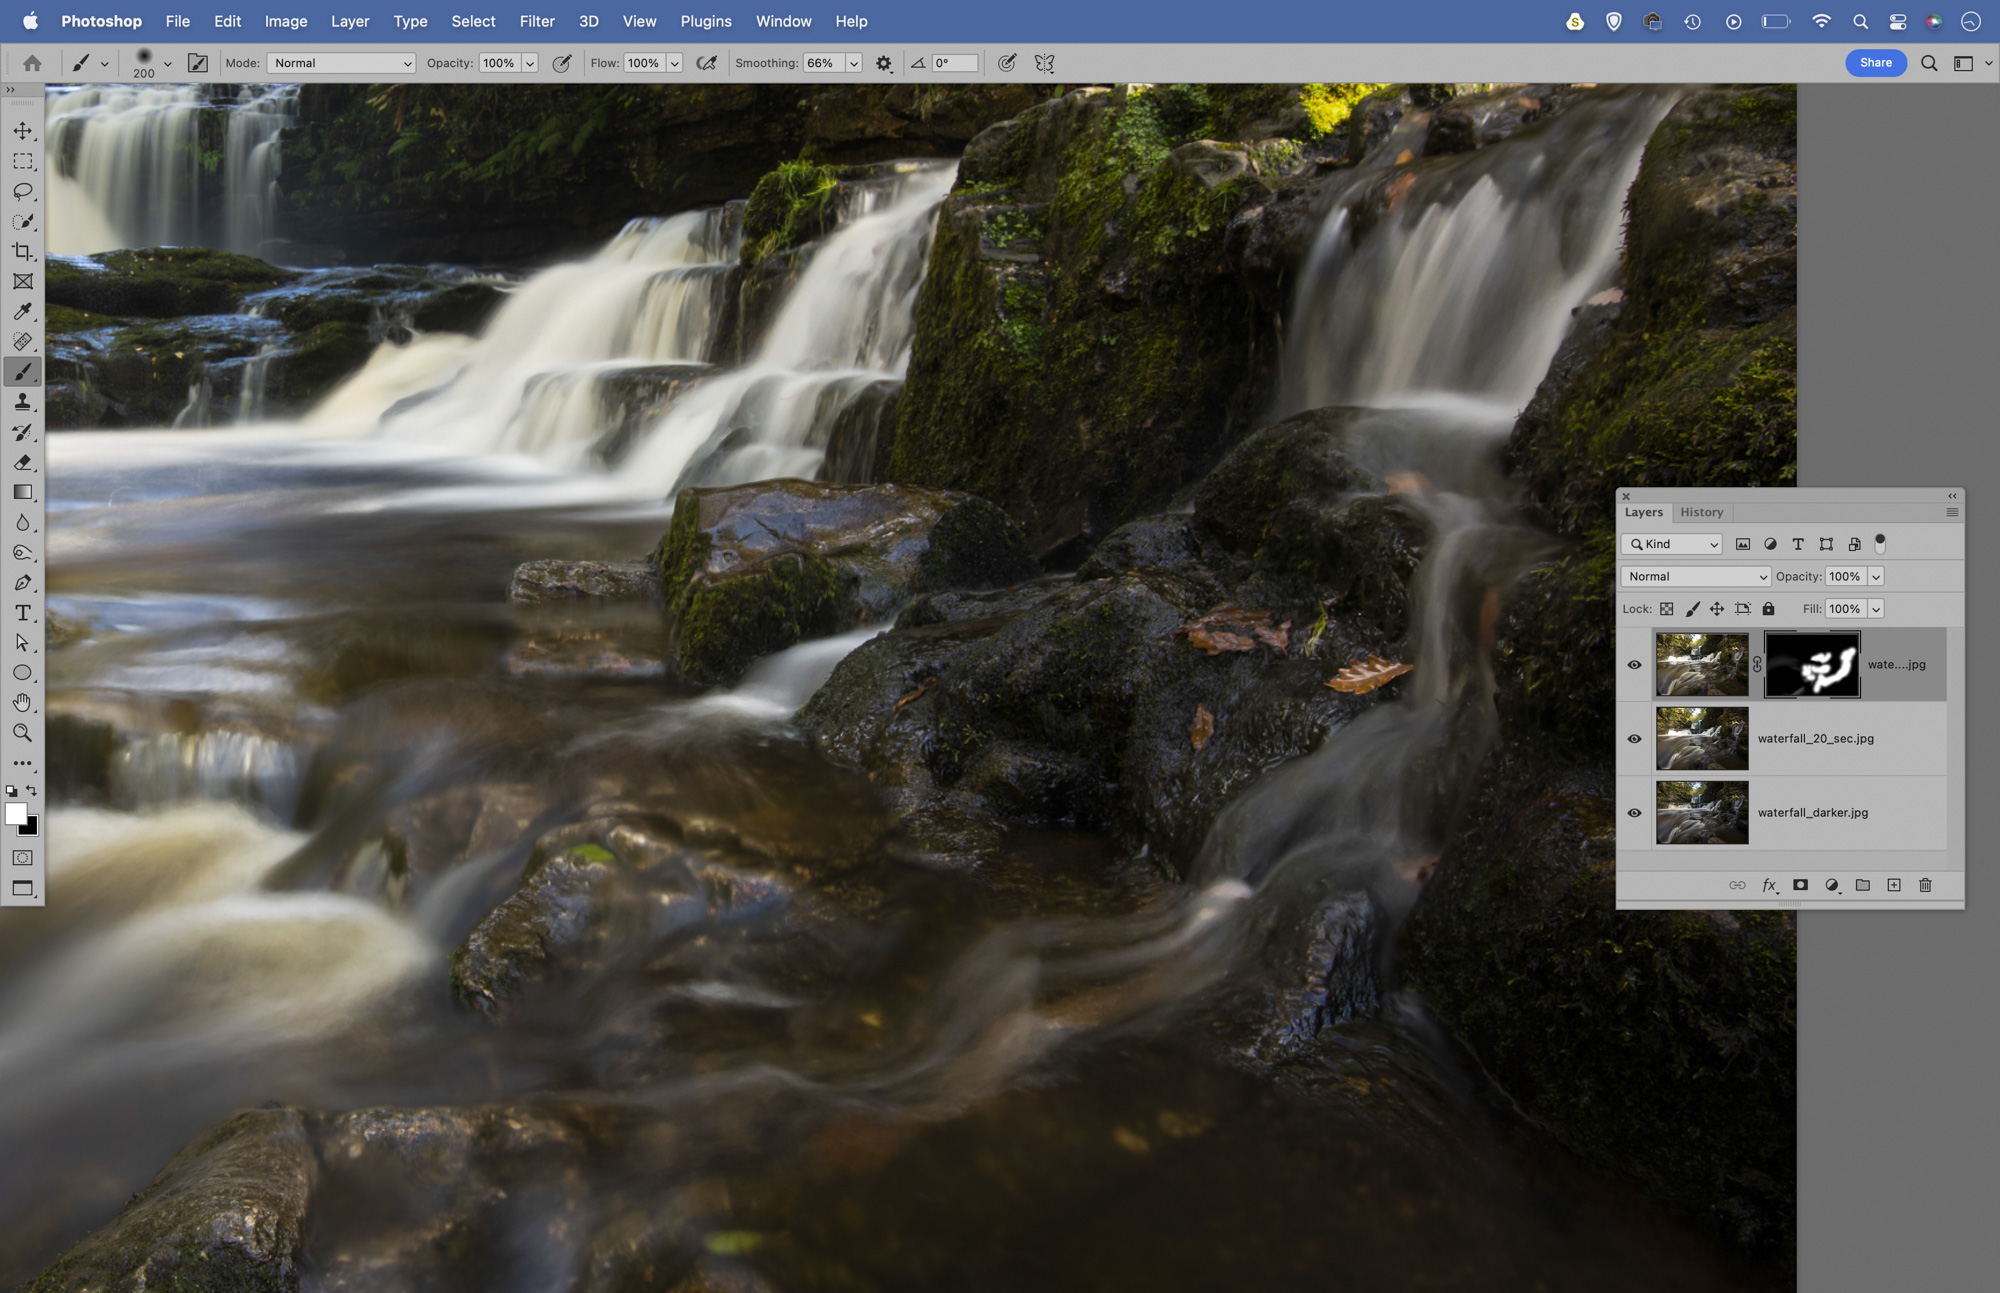
Grab the Brush tool, set the color to white, and paint to reveal the parts of the layer that you want visible – here it’s the streaks of blur in the waterfall. We’ve also blended a third, darker frame here for the brighter details and sky in the distance.
6. Final toning
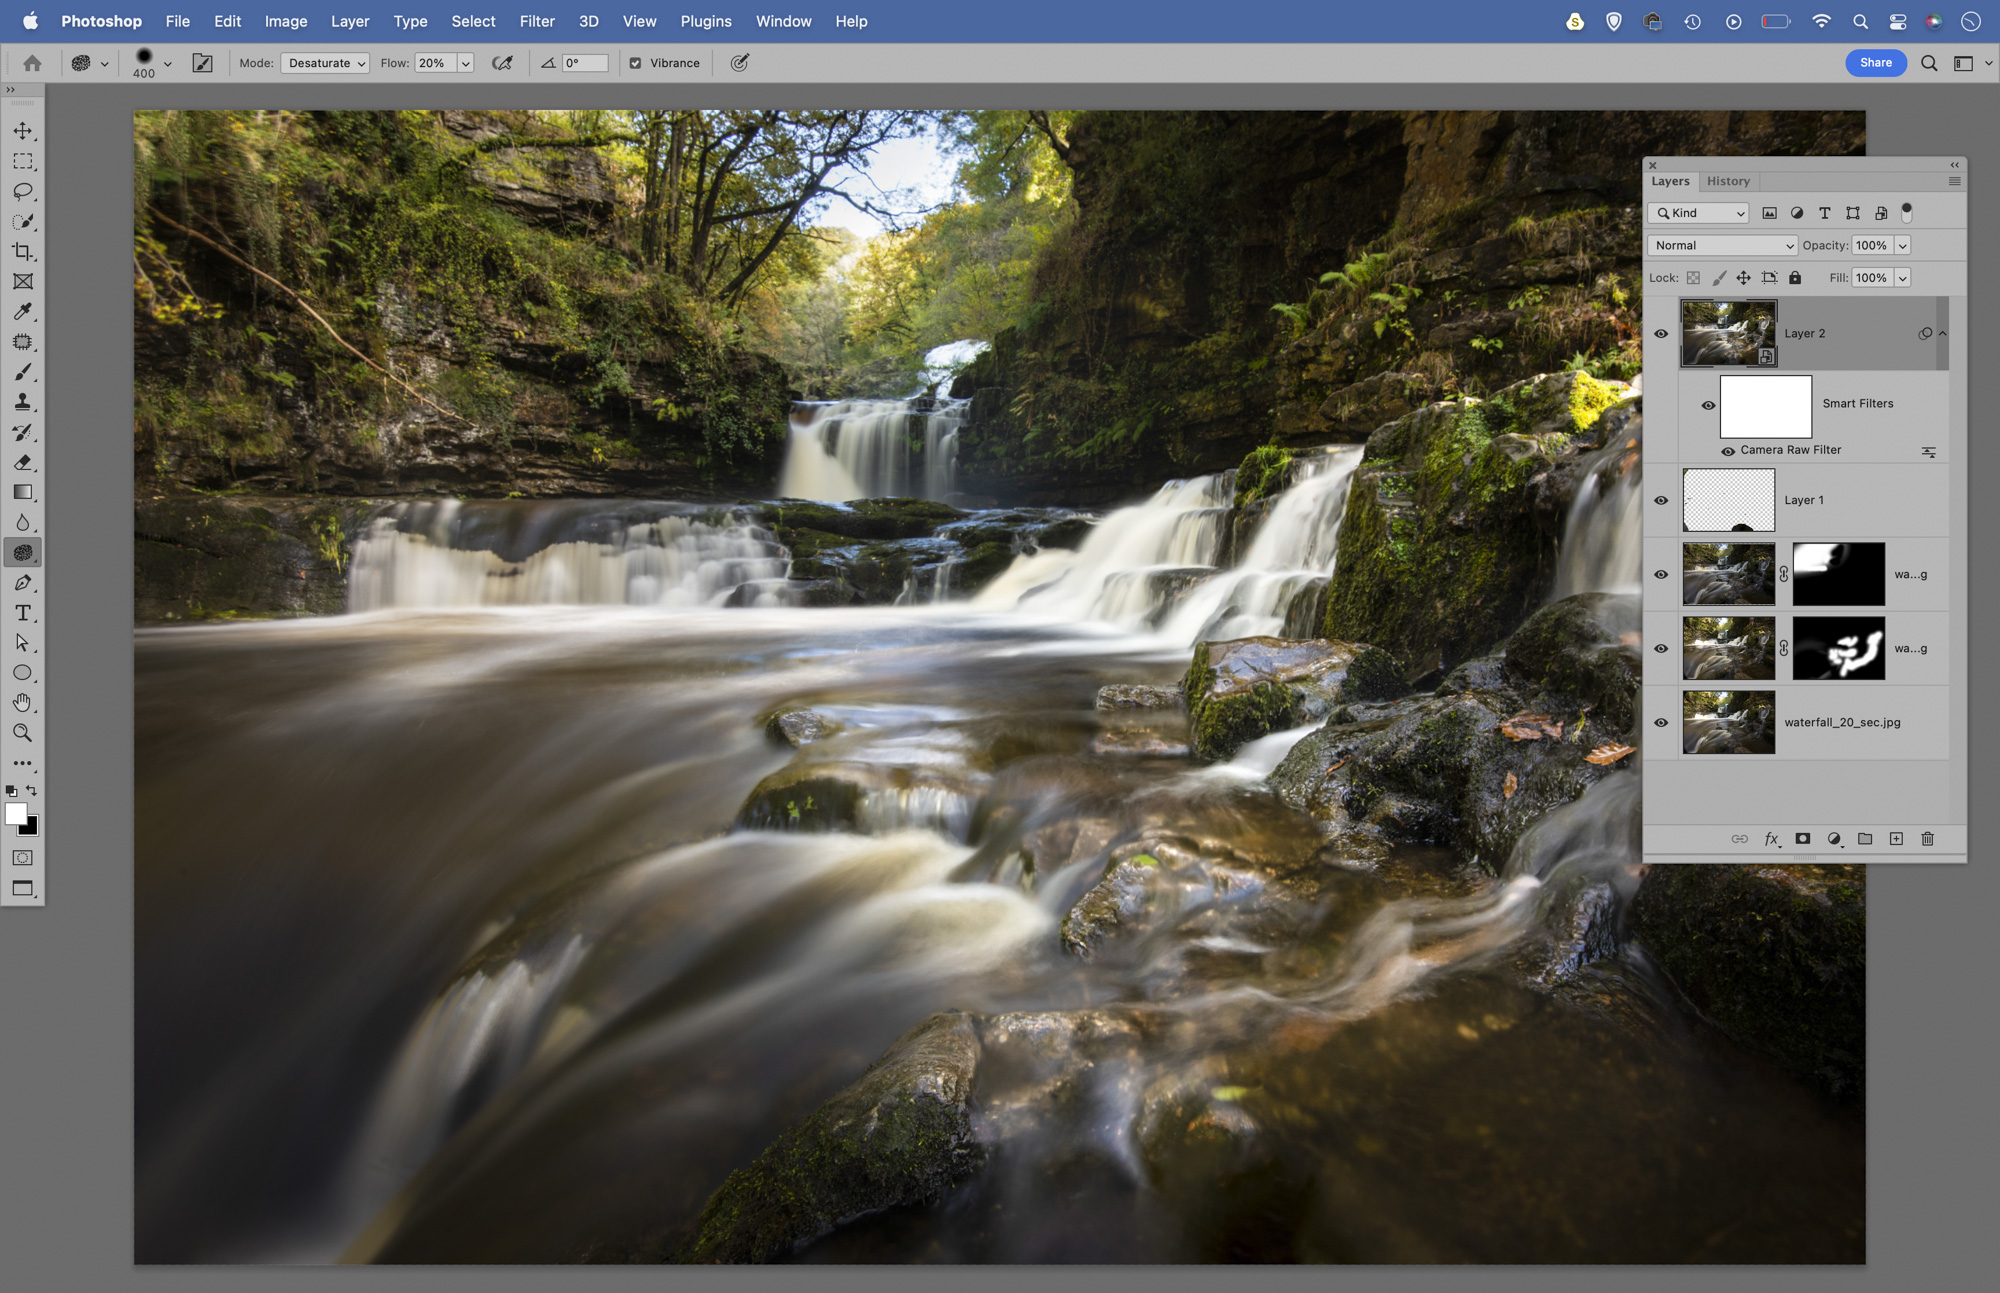
When happy with the blend, hit Cmd/Ctrl+Shift+Alt+E to merge a copy of the layers, then go to Filter>Camera Raw Filter. Use the local adjustment tools to enhance blur. Hit K, paint over blurred water streaks, then increase Clarity and Exposure to lift them.
7. Beach blends
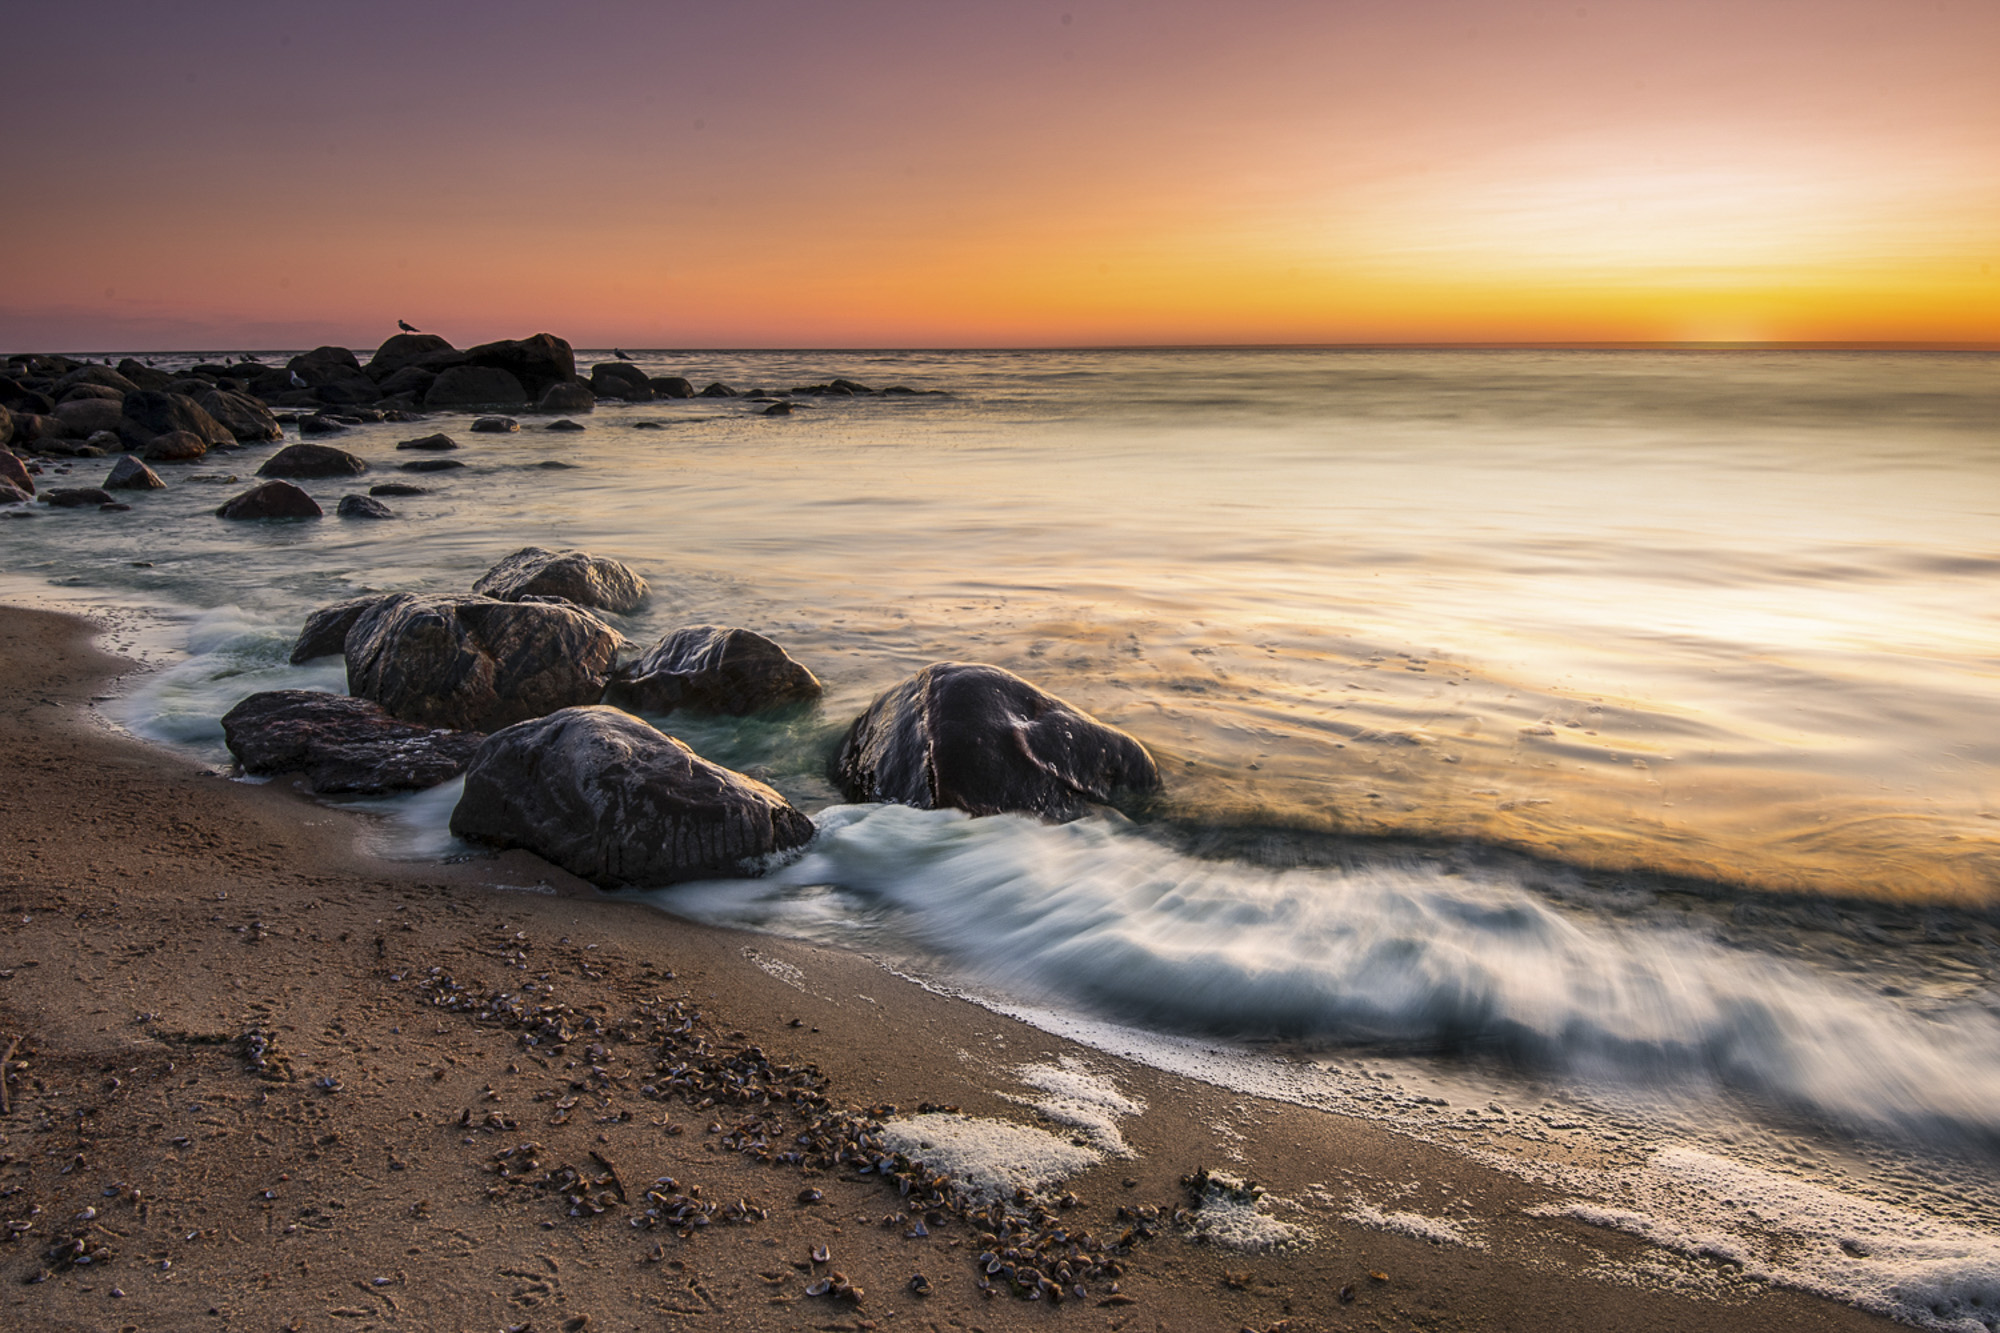
Just like waterfalls and rivers, waves move faster than the bobbing surface of the sea. So for coastal scenes, try blending two frames with differing shutter speeds. Here a 15-second exposure blurs the distant sea, while a one-second exposure captures breaking waves more clearly.
8. Clouds and water
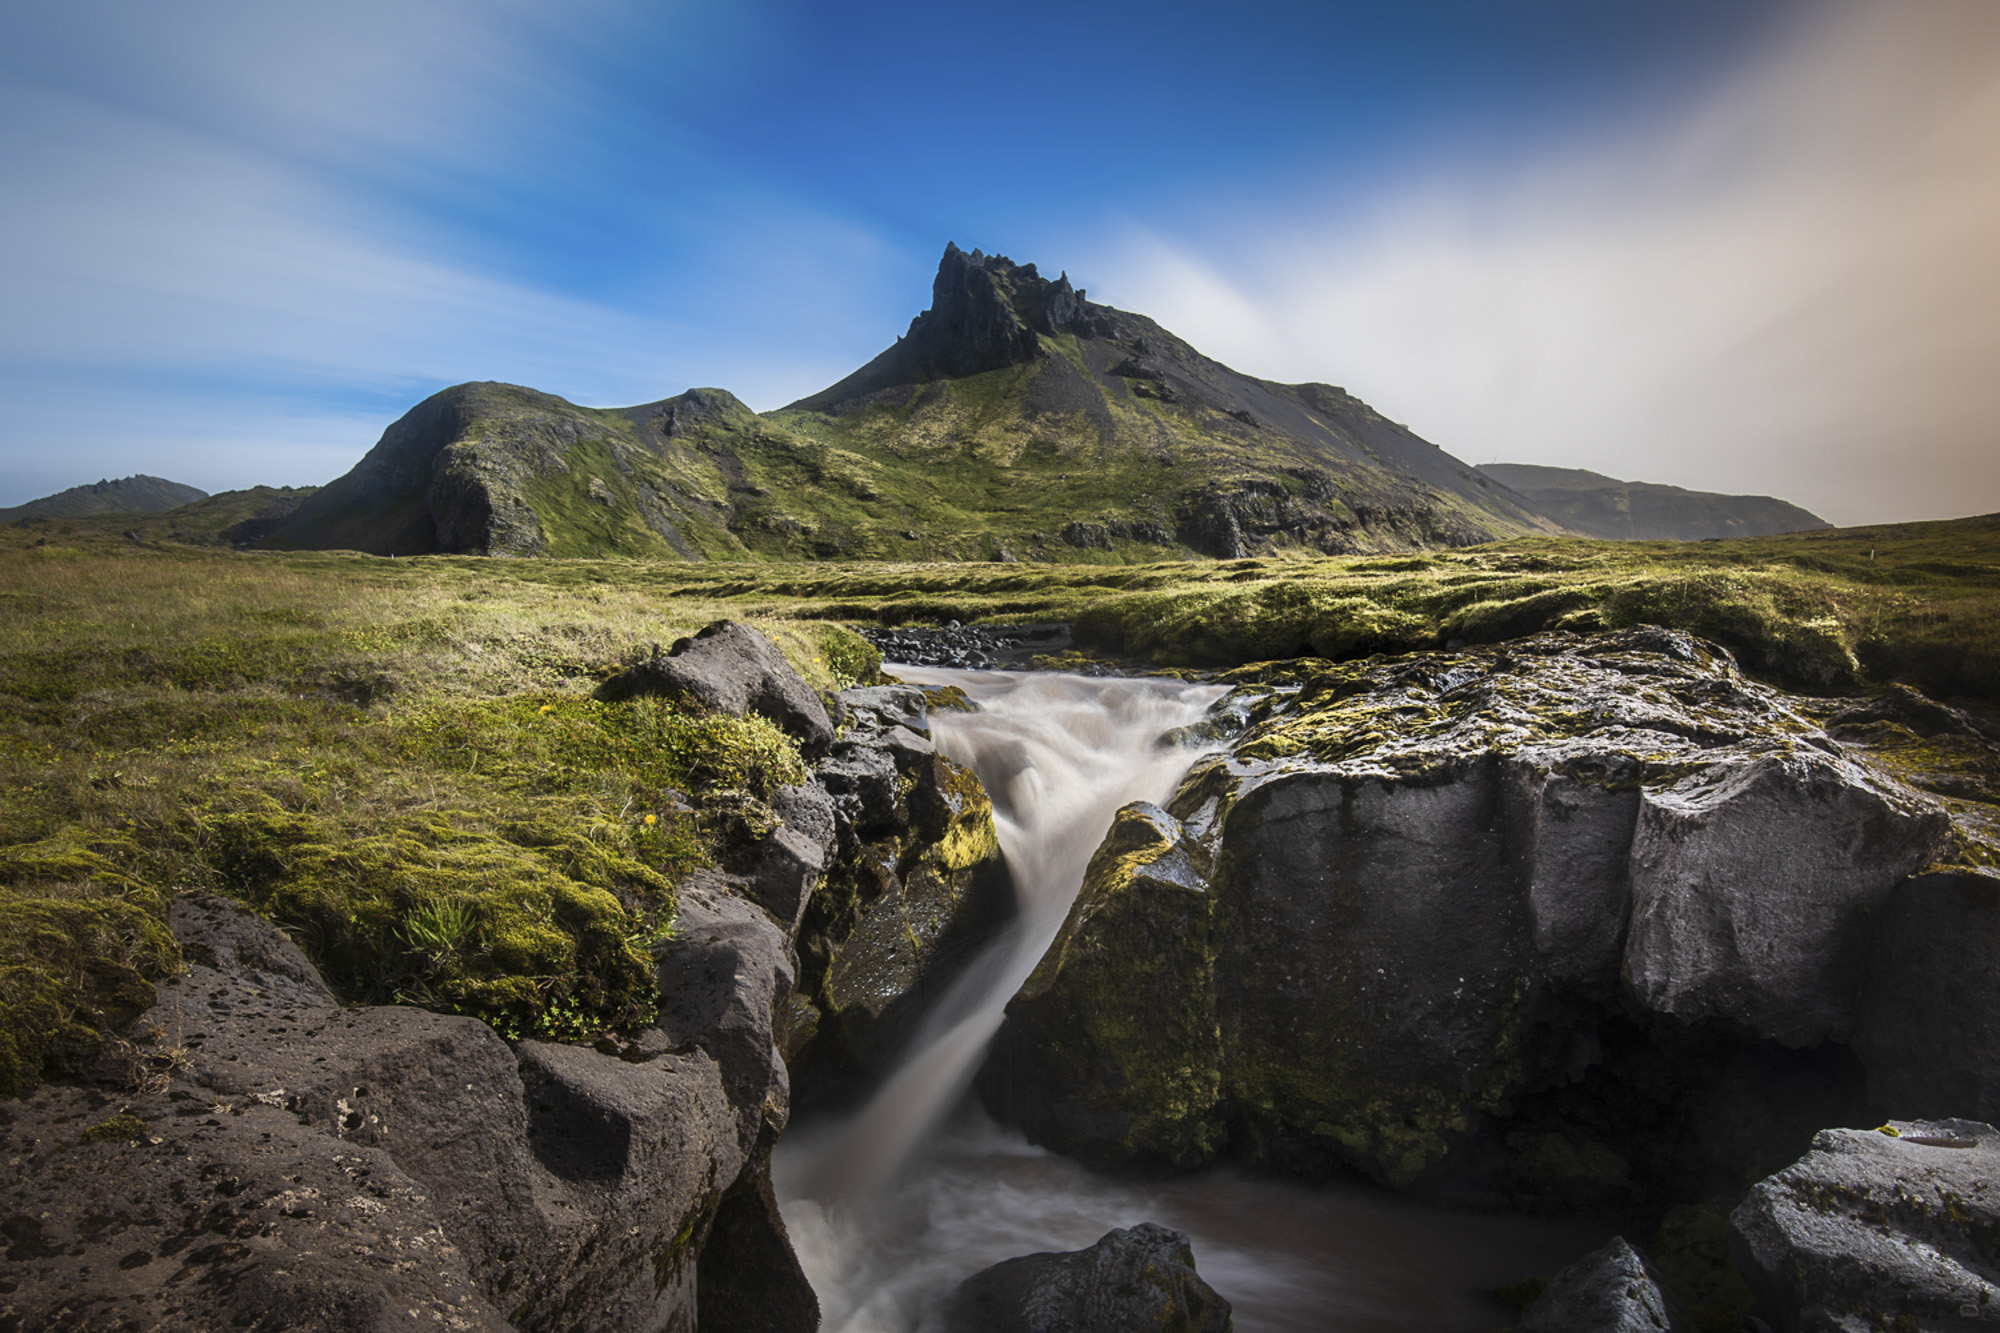
Clouds usually need a minute or more to blur into attractive streaks, but this speed can leave water looking overly misty. Here we shot a minute-long frame for the sky (using a 10-stop ND filter), then captured a two-second frame for the waterfall. The frames were then blended in Photoshop.
9. Combine action and blur
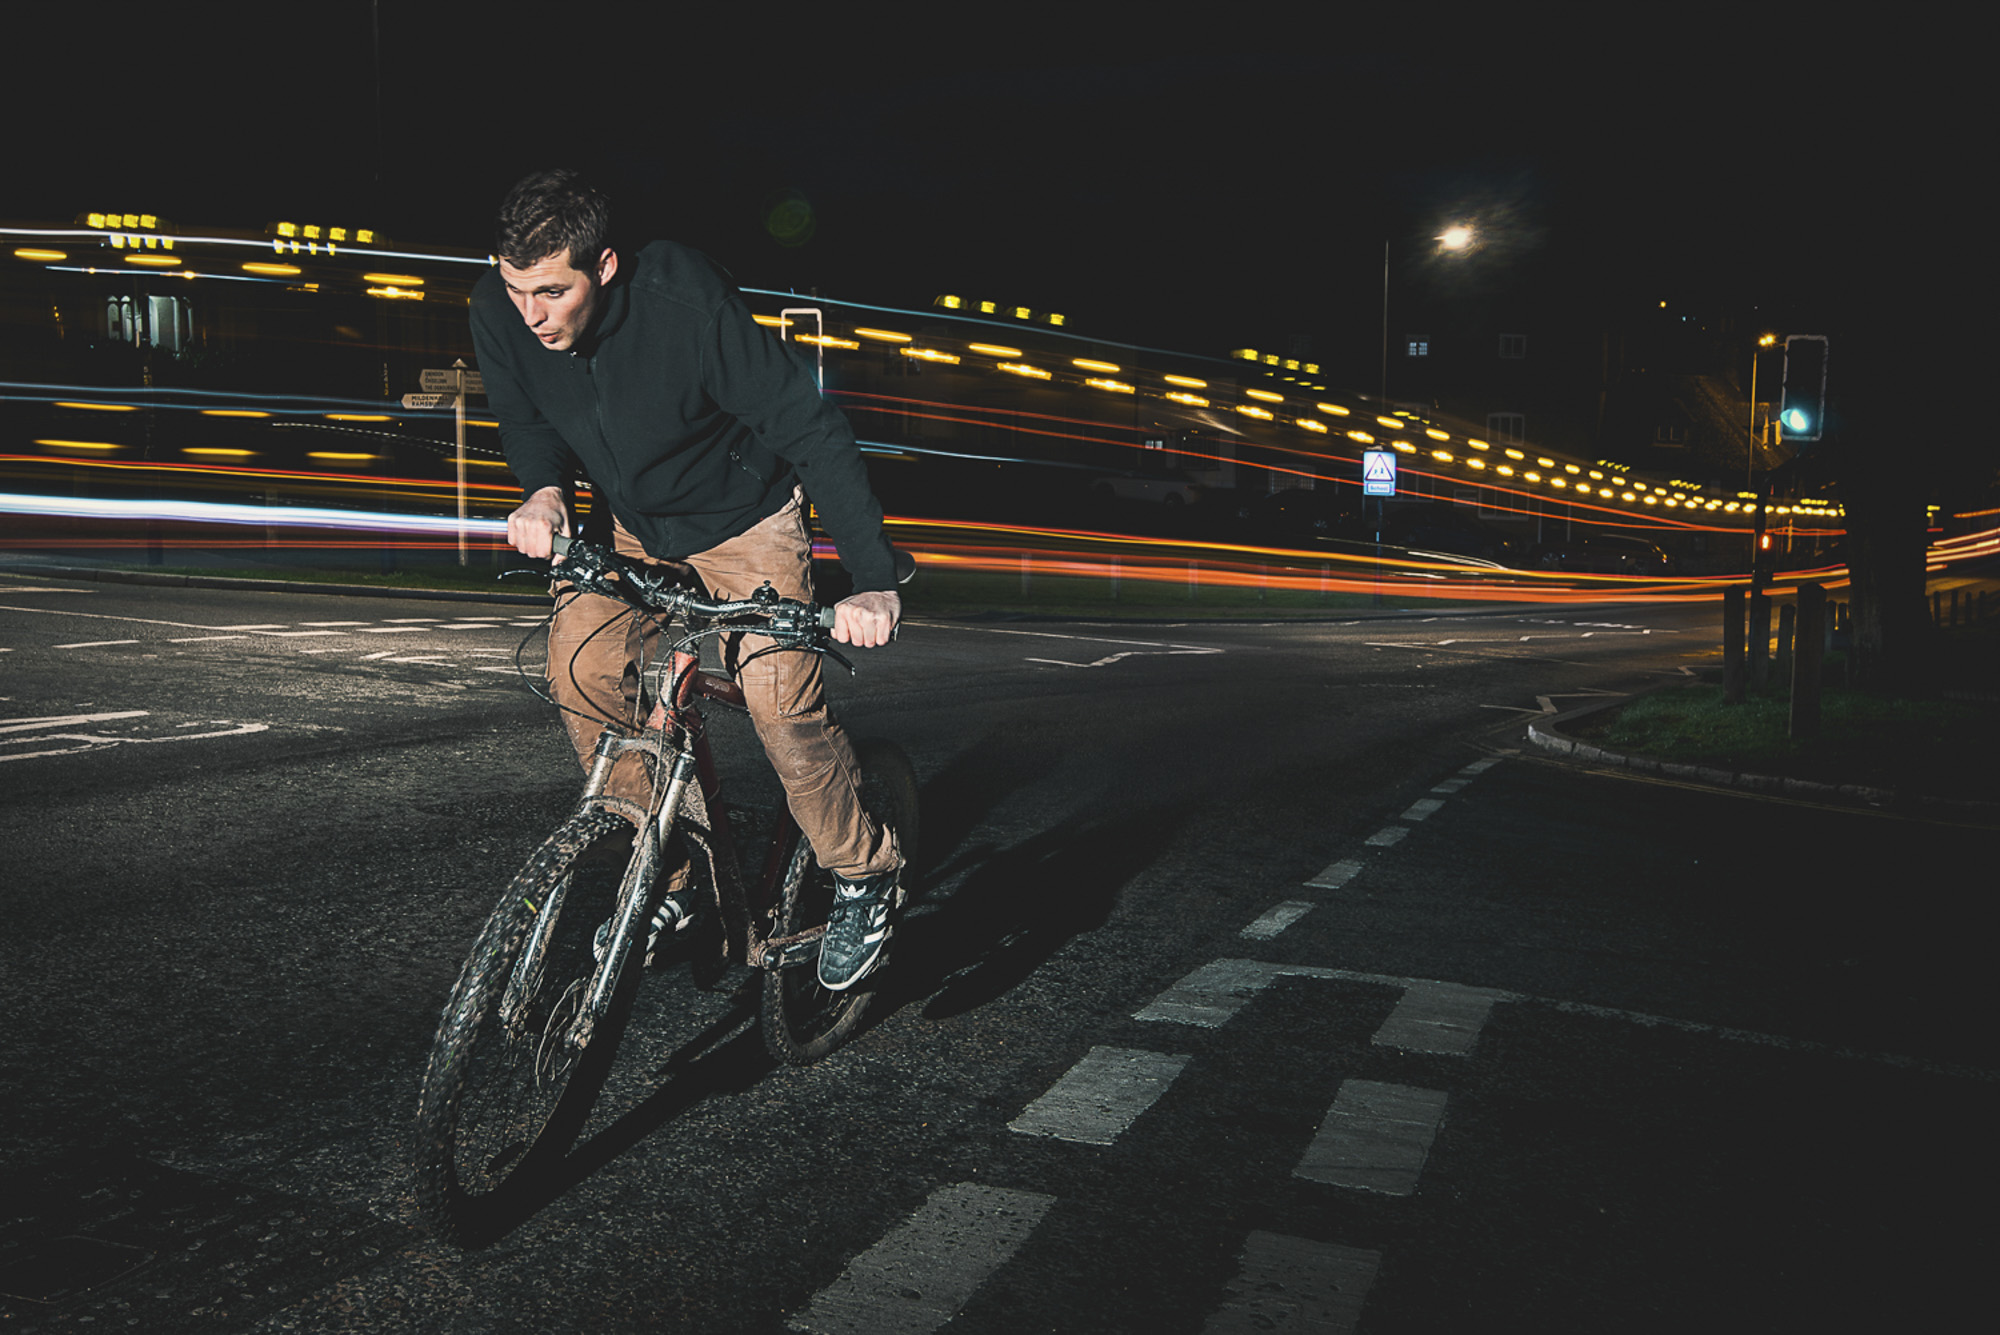
Why not try combining action and long exposures for creative effects? We shot a long exposure to capture traffic as trails of light, then shot a second frame with a flash to freeze the cyclist. We carefully cut out the cyclist in Photoshop and composited him into the long exposure frame.
10. Add or take away stops of light for complete control

There are myriad settings that offer an equivalent level of exposure. As such, we can vary shutter speed, aperture or ISO for creative results, while keeping a balanced overall exposure. This is where stops of light can be useful. For aperture, our f/stop intervals come at 1.4, 2, 2.8, 4, 5.6, 8, 11, 16 and 22.
Similarly, halving or doubling shutter speed or ISO is one stop of light. So, we can add or take away a stop from either aperture, shutter speed or ISO for an equivalent exposure. For a 20-second shutter speed at f/16, ISO100, we can achieve an equivalent exposure by doubling ISO to 200 (+1 stop), then halving shutter speed to 10 seconds (-1 stop).
Our choice of ND filter also impacts our equivalent exposure, so we can use different strength NDs for further variation. An app such as PhotoPils can be useful for calculating equivalent exposures and factoring in ND filters.
You might also like the best photo editing software: image editors for novices through to pros. These are the 10 best online photography courses – from beginner guides to masterclasses.
Get the Digital Camera World Newsletter
The best camera deals, reviews, product advice, and unmissable photography news, direct to your inbox!
The lead technique writer on Digital Camera Magazine, PhotoPlus: The Canon Magazine and N-Photo: The Nikon Magazine, James is a fantastic general practice photographer with an enviable array of skills across every genre of photography.
Whether it's flash photography techniques like stroboscopic portraits, astrophotography projects like photographing the Northern Lights, or turning sound into art by making paint dance on a set of speakers, James' tutorials and projects are as creative as they are enjoyable.
He's also a wizard at the dark arts of Photoshop, Lightroom and Affinity Photo, and is capable of some genuine black magic in the digital darkroom, making him one of the leading authorities on photo editing software and techniques.

