How to add snow to your scenes
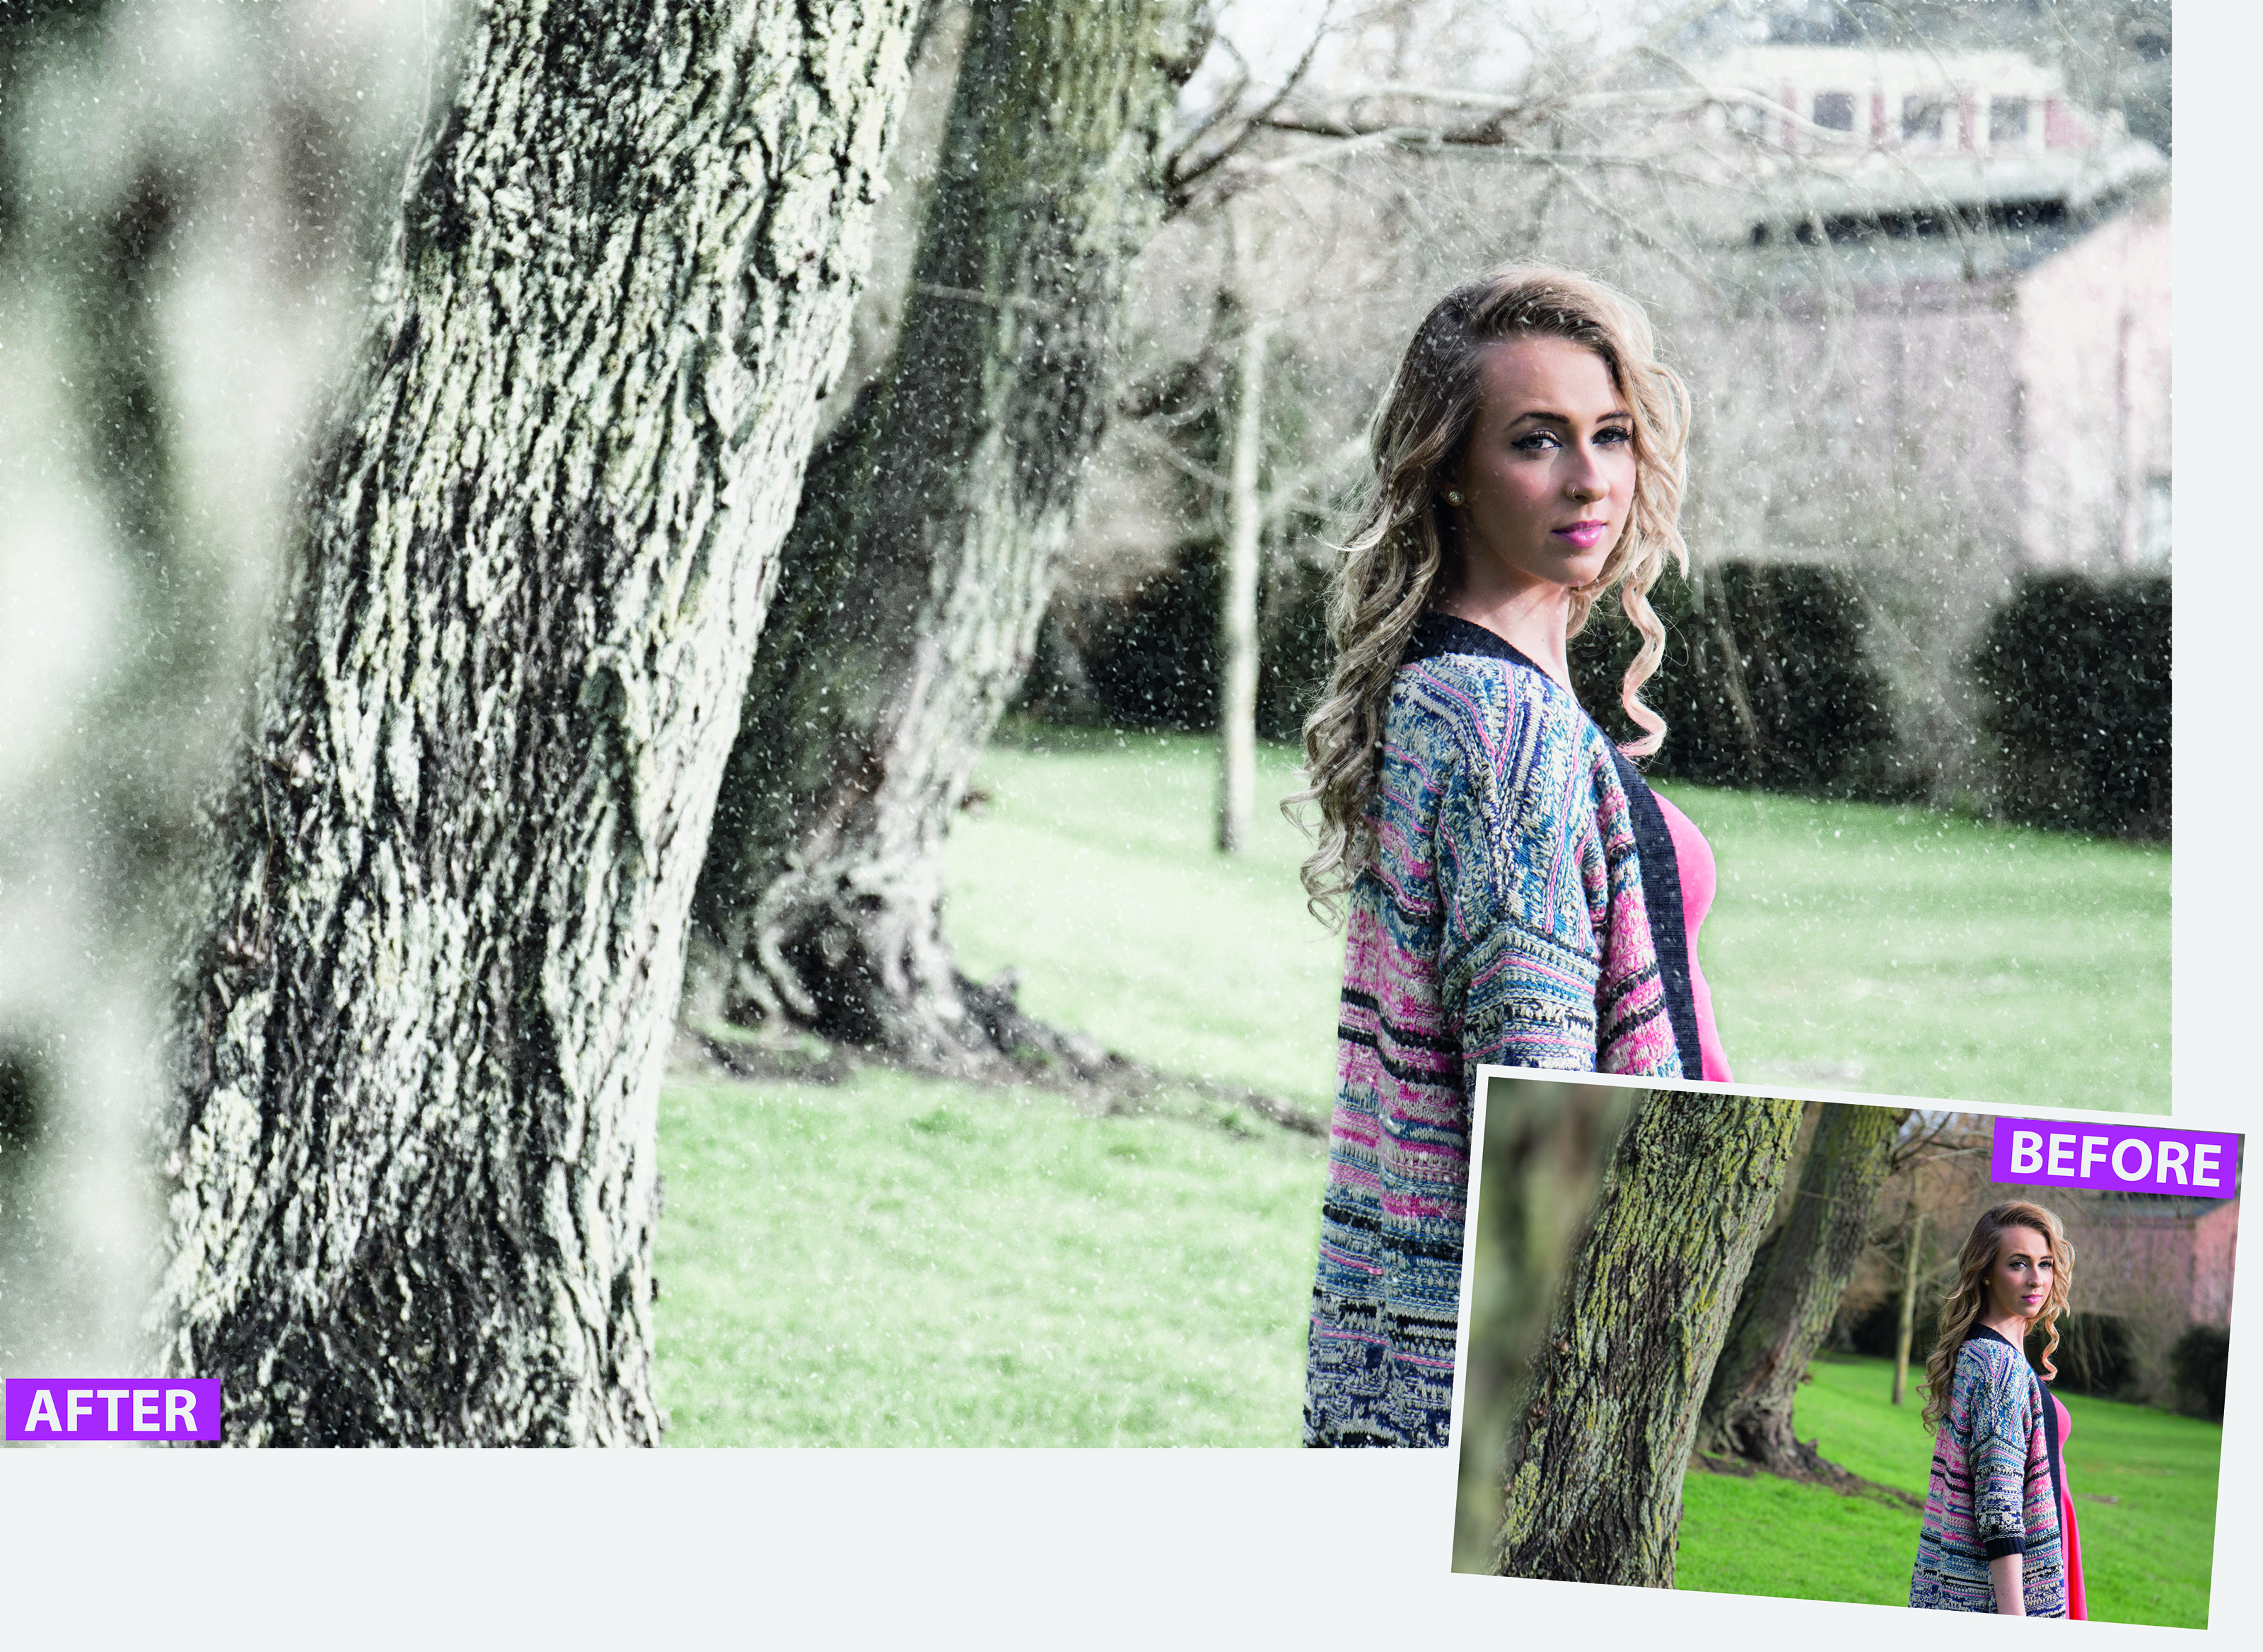
A sprinkling of snow to help lend your portraits a winter feel
Download project files to your computer from: http://downloads.photoplusmag.com/pp121.zip
Create a snowy scene in Photoshop
Time needed: 20 minutes
Skill level: Intermediate
Kit needed: Photoshop CC
We all dream of a white Christmas, but unfortunately it is rare occurrence for most of us. But don’t despair, you can bring your own snow to winter shoots, with a little Photoshop know-how.
In this tutorial we’ll show you how to add some ground frost to your shots using some handy blending skills. The ‘Blend If’ command is a powerful tool and will give you much more control and better results than the standard layer blending modes. We will then add some falling snow using an array of Photoshop’s clever filters, and make the most of layers and masks to selectively apply the adjustments where we want them in our image for a realistic finish.
Not only do you not have to brace the freezing cold weather, you don’t need to worry about your kit getting wet or too cold either. Better still, you won’t need to spend hours cloning out water spots on your lens. So Photoshop saves the day again! Giving your images a wintry feel is also a great way to add some festive spirit to your family shots and create your own Christmas cards for friends and family.
When it comes to adding the frost and snow to your chosen wintry scene, the amount you need will be dependant on the shot you are using. If you’re using your own image to try out this tutorial, use our settings as a starting point and experiment to achieve the best results to suit.
STEP BY STEP: Snowy scenes
How to add falling snow and frost to a winter portrait
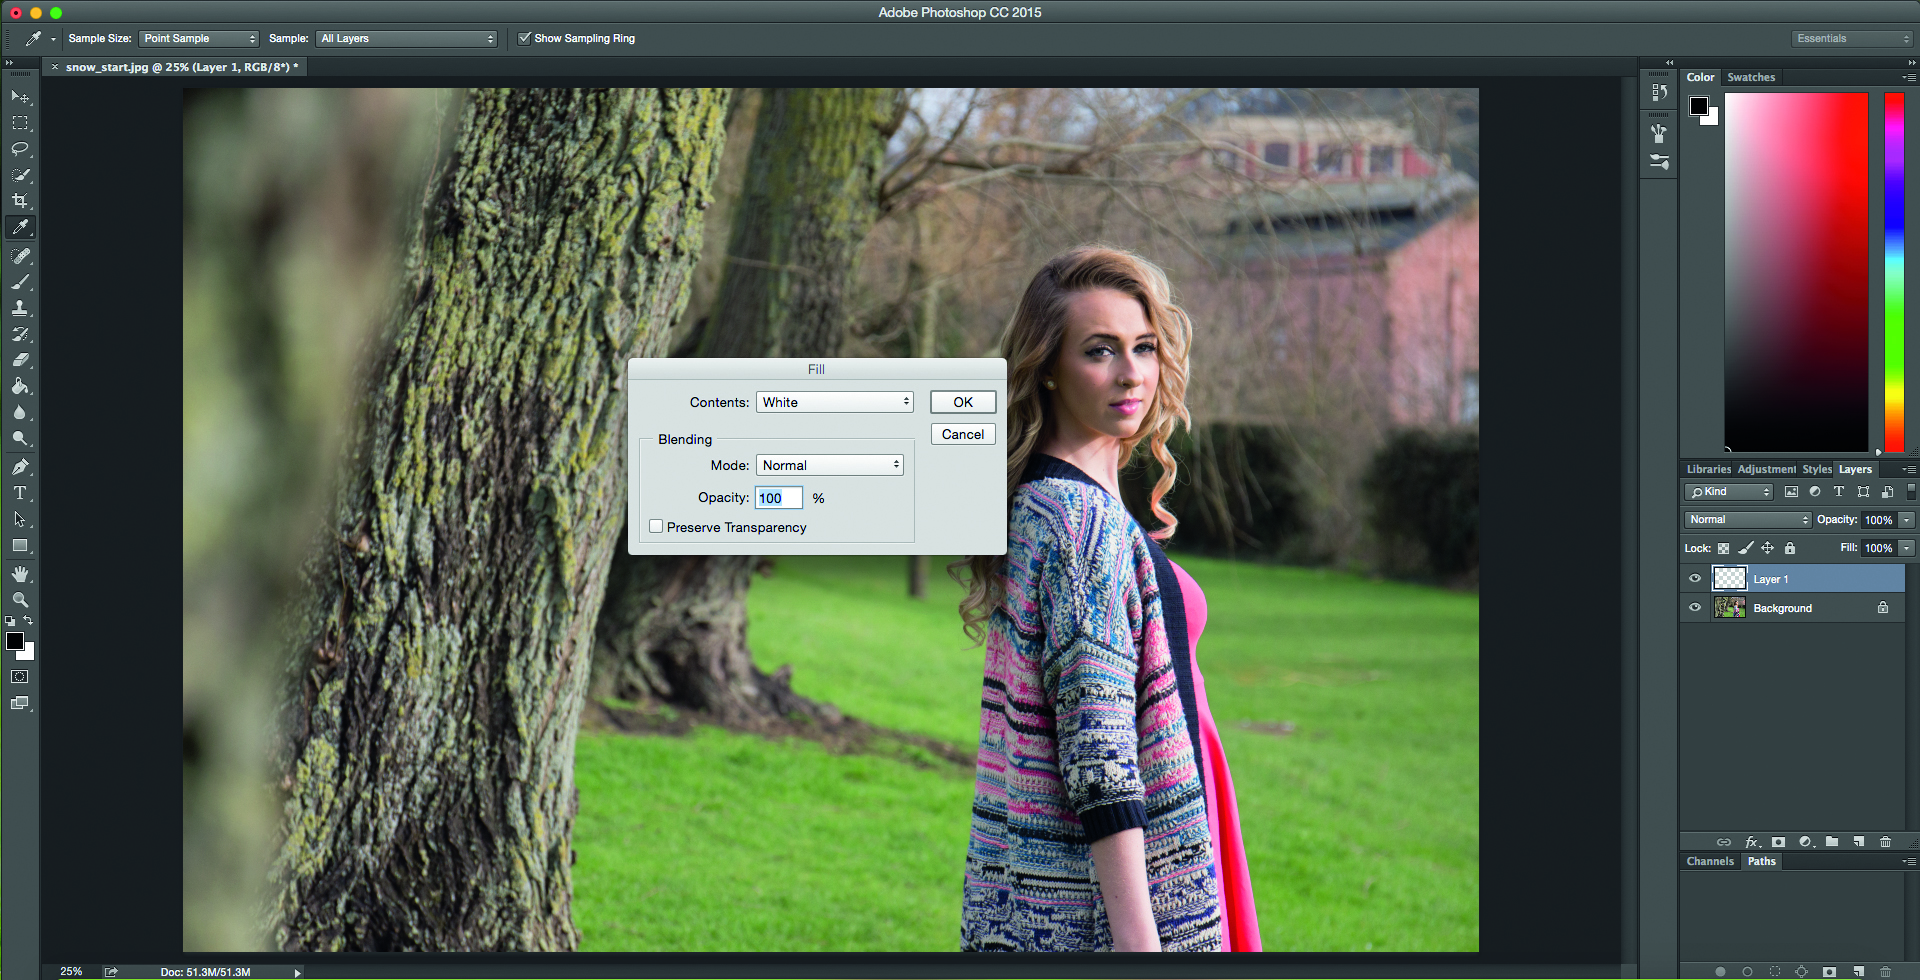
01 CREATE A NEW LAYER
We’re going to start by adding some frost and snow to our subject’s surroundings. Go to Layer>New Layer, then go to Edit>Fill and select White in the Contents drop-down box. Rename the layer ‘Frost’. Double-click the layer thumbnail to open the Layer Style options.
With the top layer in the layer stack highlighted in the Layers panel, add a new layer and fill it with black. Go to Filter> Noise>Add Noise, set Amount to 150% and select Gaussian and Monochromatic. Go to Filter>Blur>Gaussian Blur, set the Radius to 3.7 pixels. Next go to Filter> Pixelate Crystallize and set Cell Size to 16. Set the blending mode to Screen. Add a Curves adjustment layer, like we did in Step 5, clip it to the snow layer beneath, and drag the black and white points close together to hide the grey pixels. Follow Step 6 again, to tone down the snow on the girl’s face.
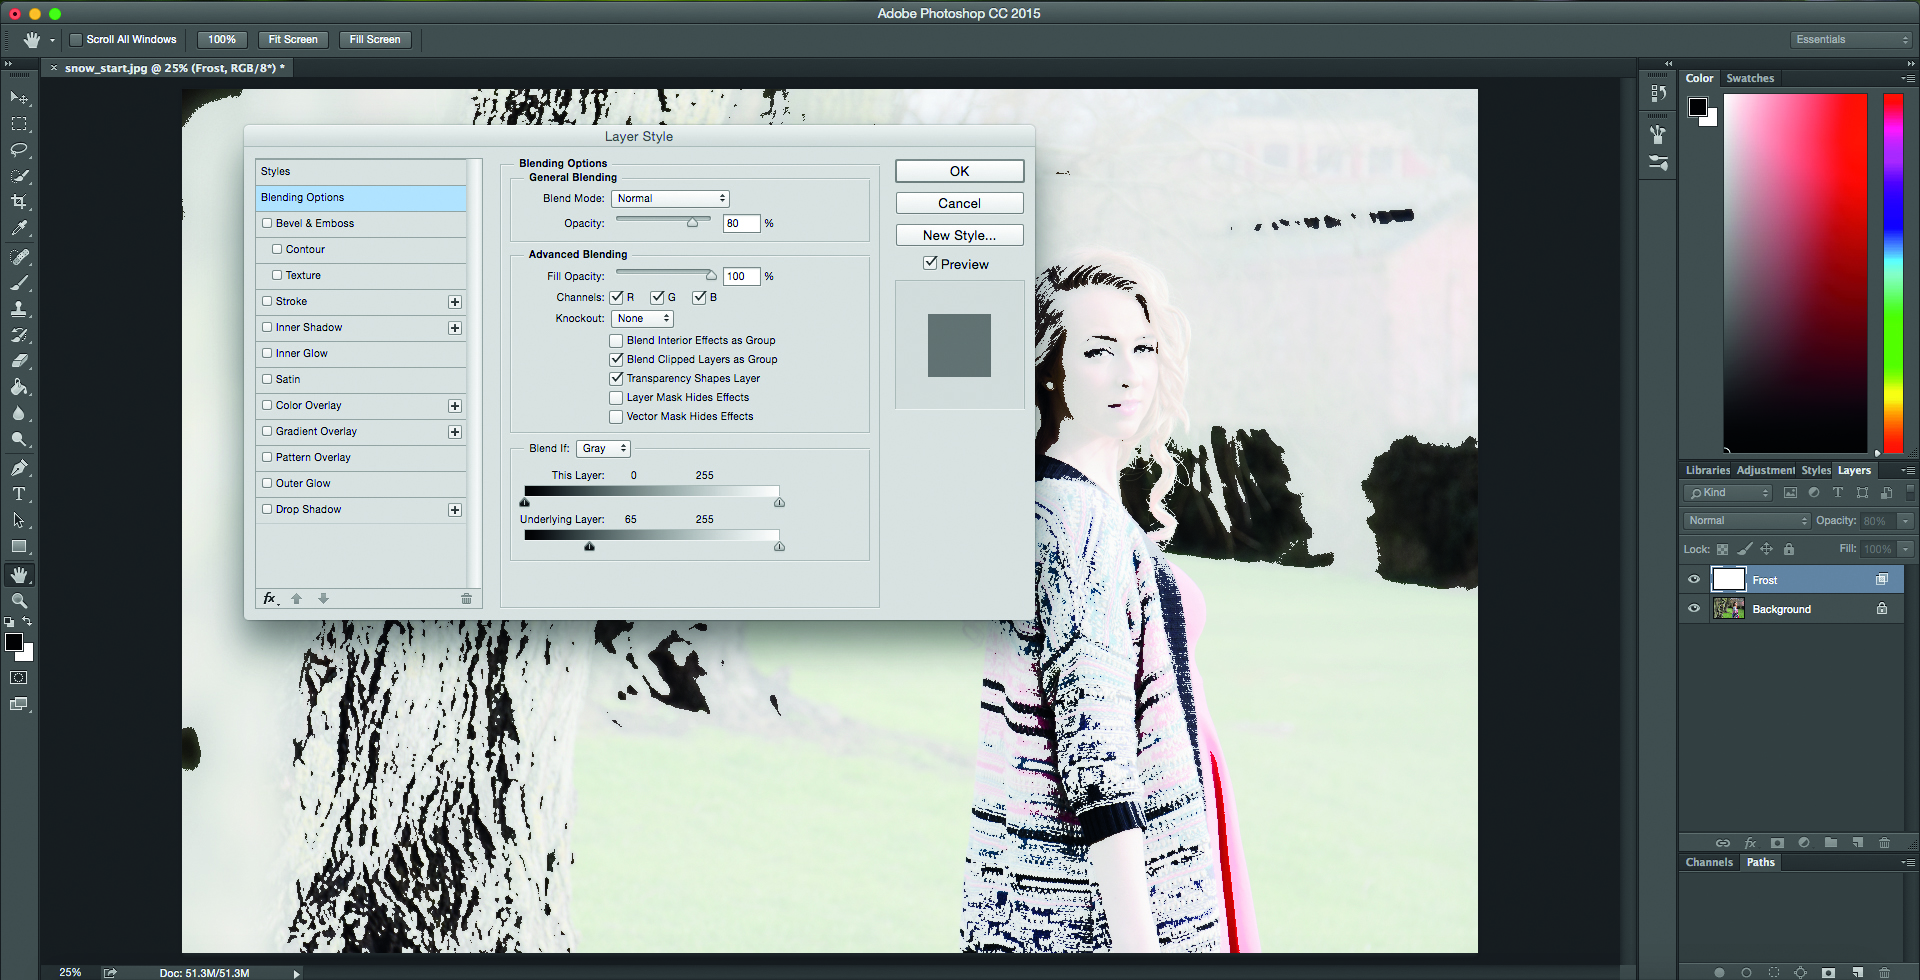
02 ADD SOME FROST
Set the Lighten blending mode with an opacity of around 80%. Drag the bottom Blend If grey slider to the right, to 65, to reveal areas of the ‘Background’ layer. Moving the Black slider will affect the darkest areas of the image, the shadows.
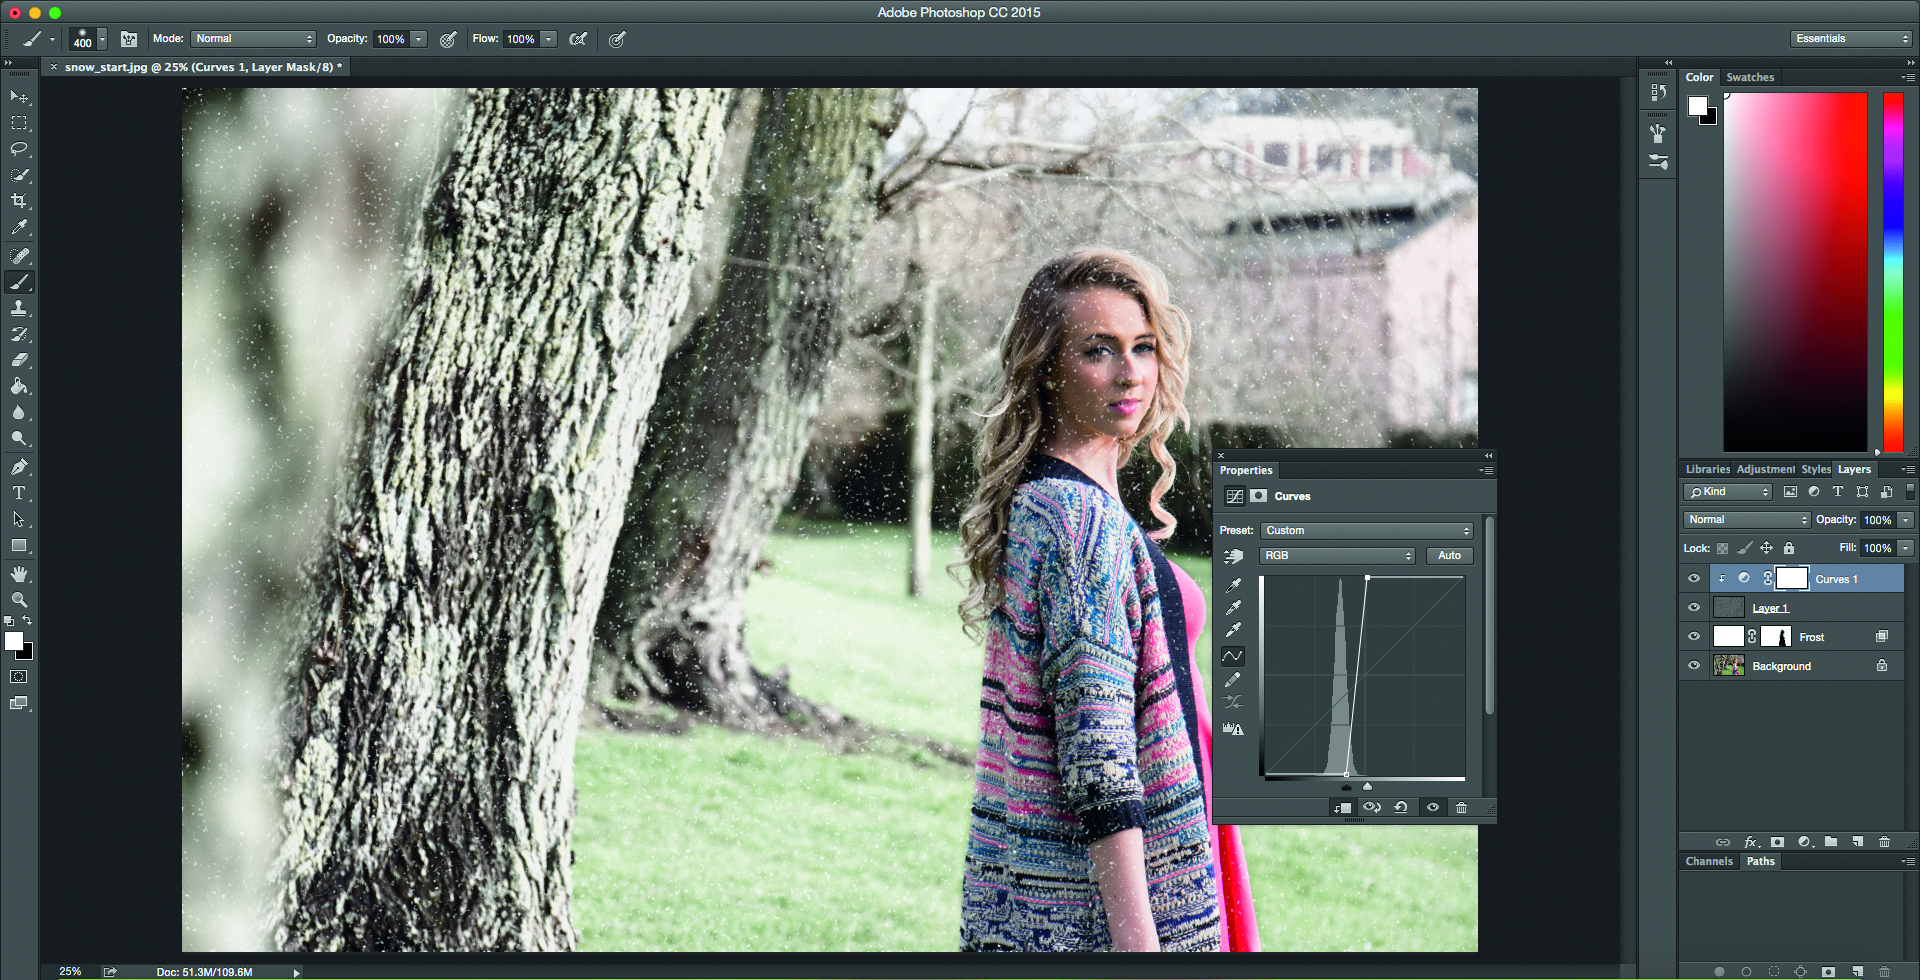
You can adjust the appearance of the snow by double-clicking the Curves adjustment layer and tweaking points in the graph
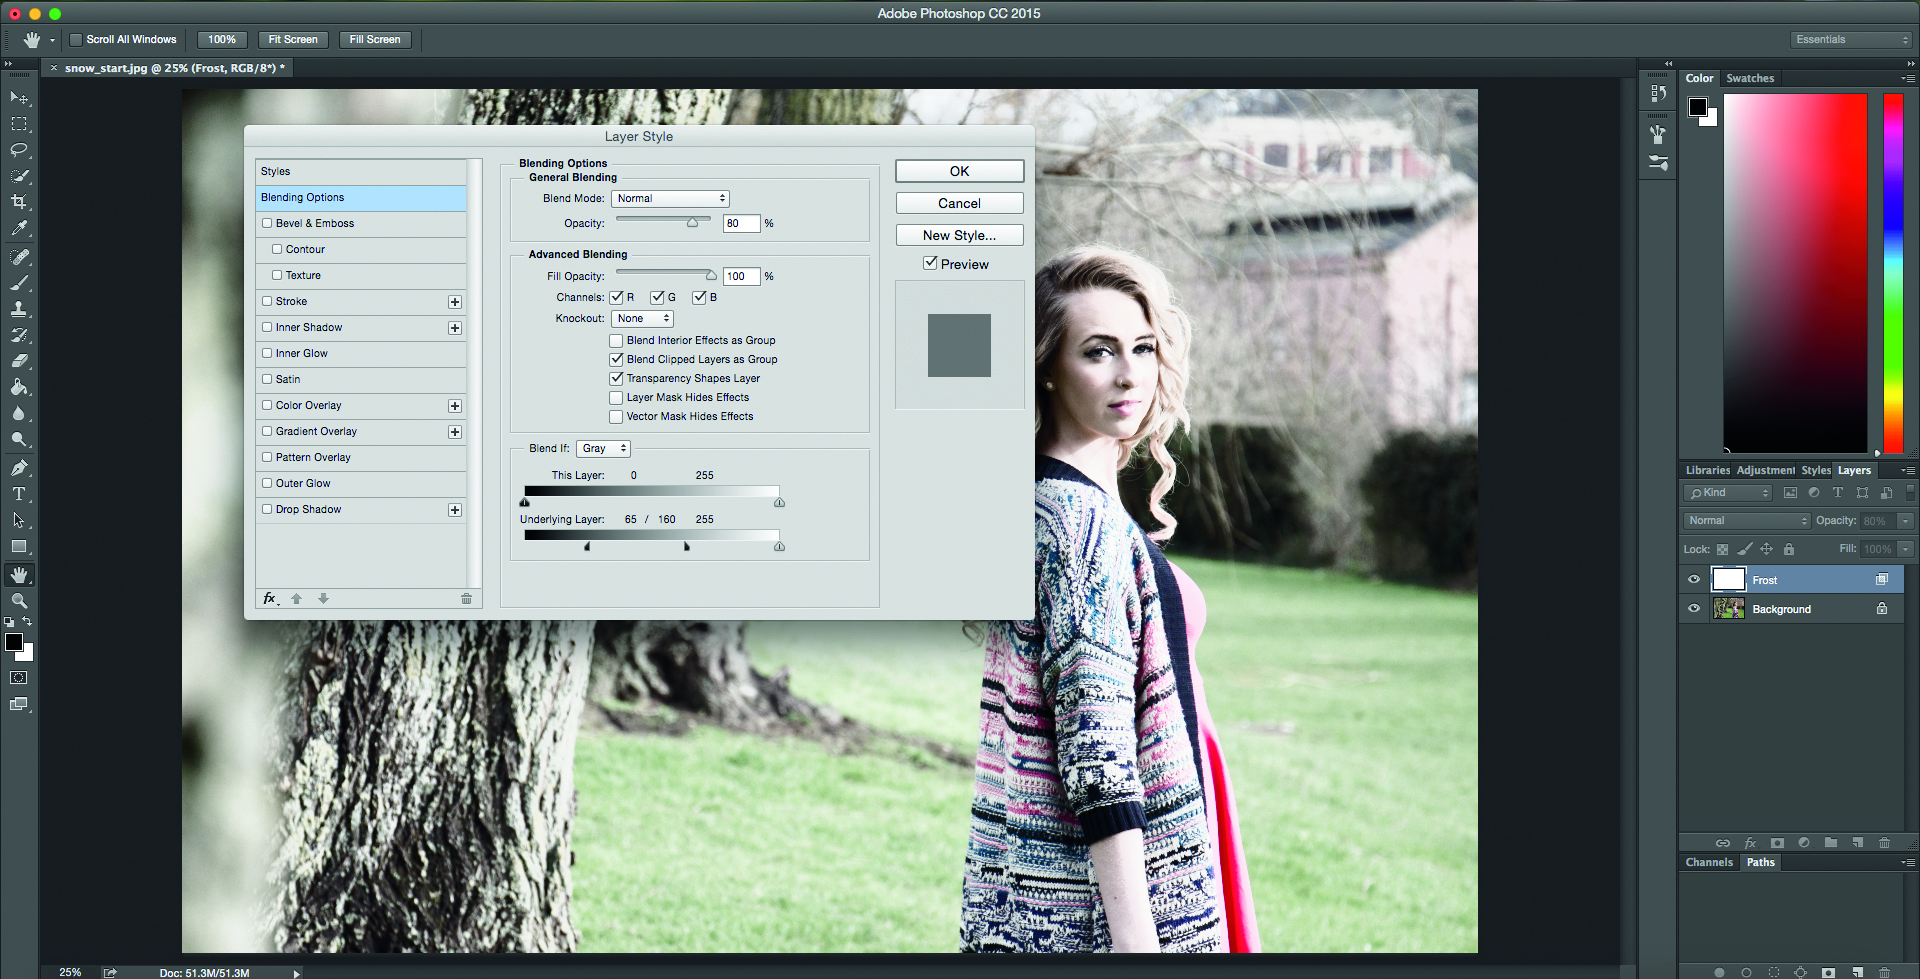
03 SMOOTH BLENDING
To smooth out the blending for a more realistic transition, hold down Alt and drag the black slider further right to split and set it to 160, click OK. Add a layer mask to the ‘Frost’ layer and paint over the girl with black brush to remove the frost effect from her.
04 ADD NOISE
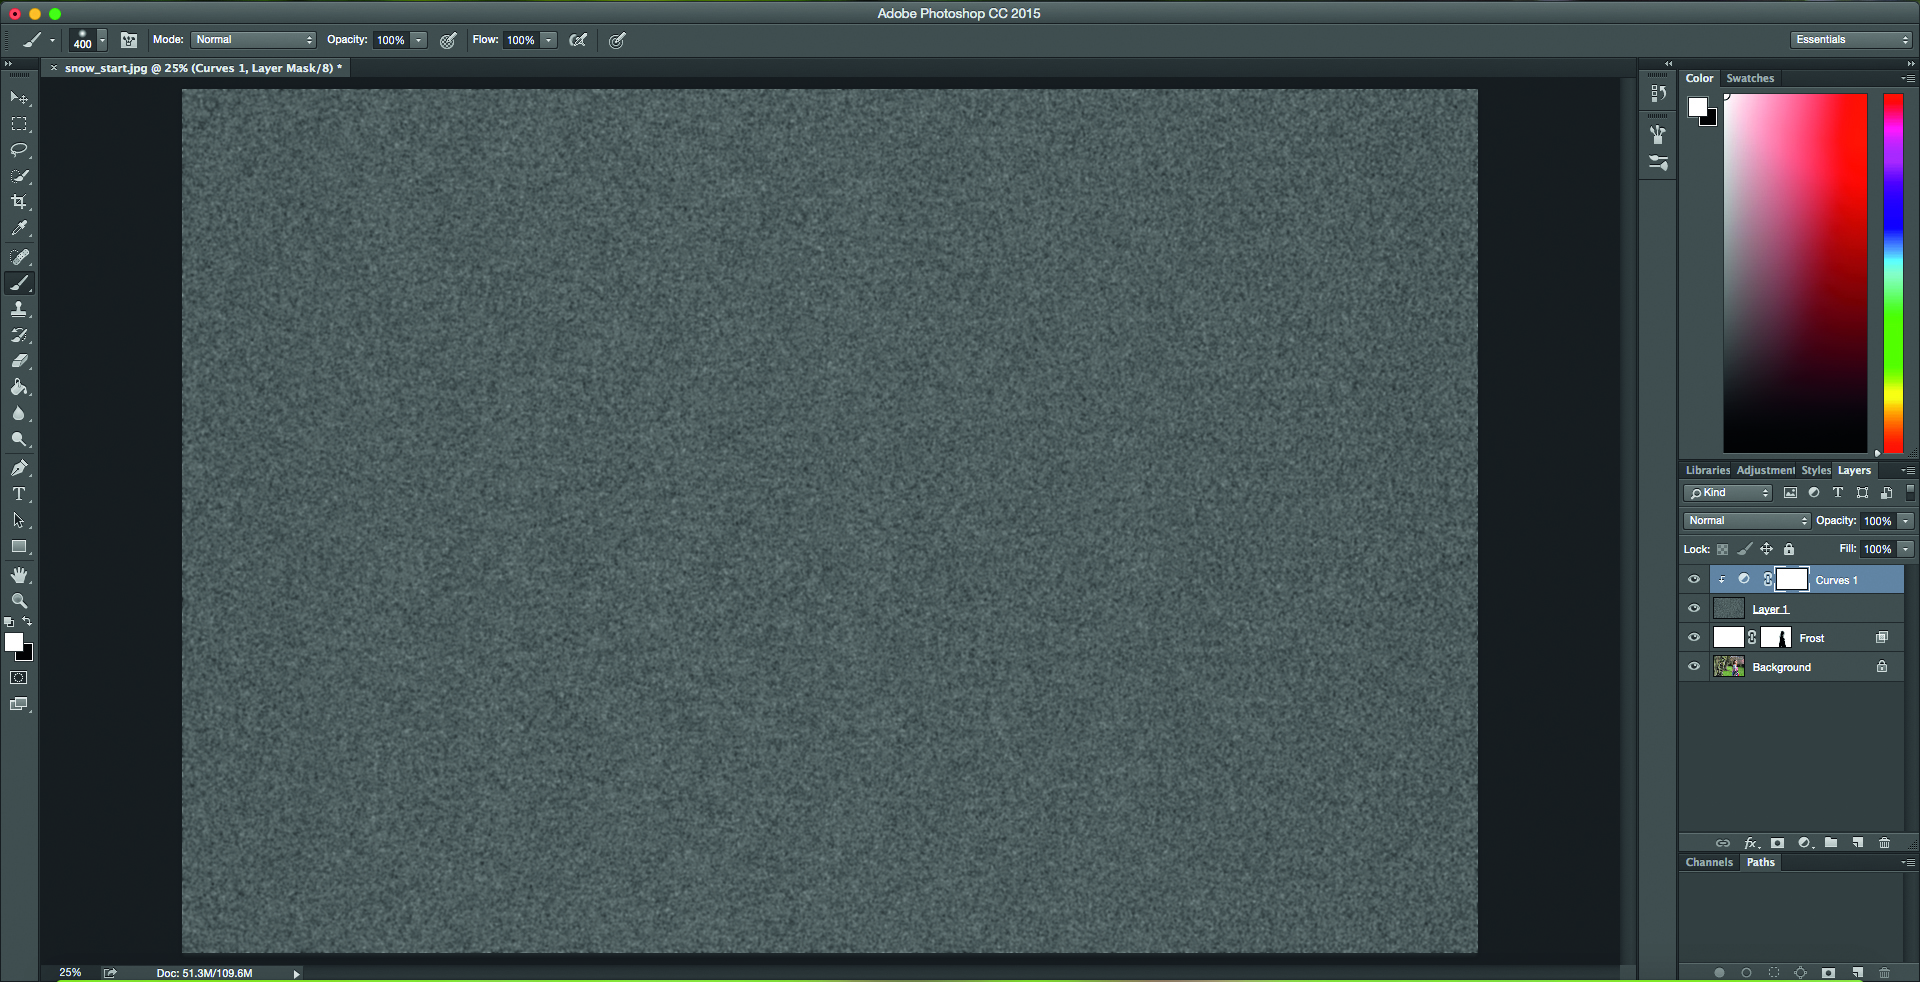
For falling snow add a new layer filled with black. Go to Filter>Noise>Add Noise, set Amount 150%, Gaussian and Monochromatic. Go Filter>Blur>Gaussian Blur, set Radius 3.7 pixels. Add a Curves adjustment layer; Alt-click between the two layers to clip them.
05 MOTION BLUR
To make the noise look more like snow, hide the grey pixels by dragging the black and white sliders closer together. Highlight the snow layer and set the Screen blending mode. For a realistic appearance, go Filter> Blur>Motion Blur, set Angle -61, Distance 9 pixels.
06 ADD A LAYER MASK
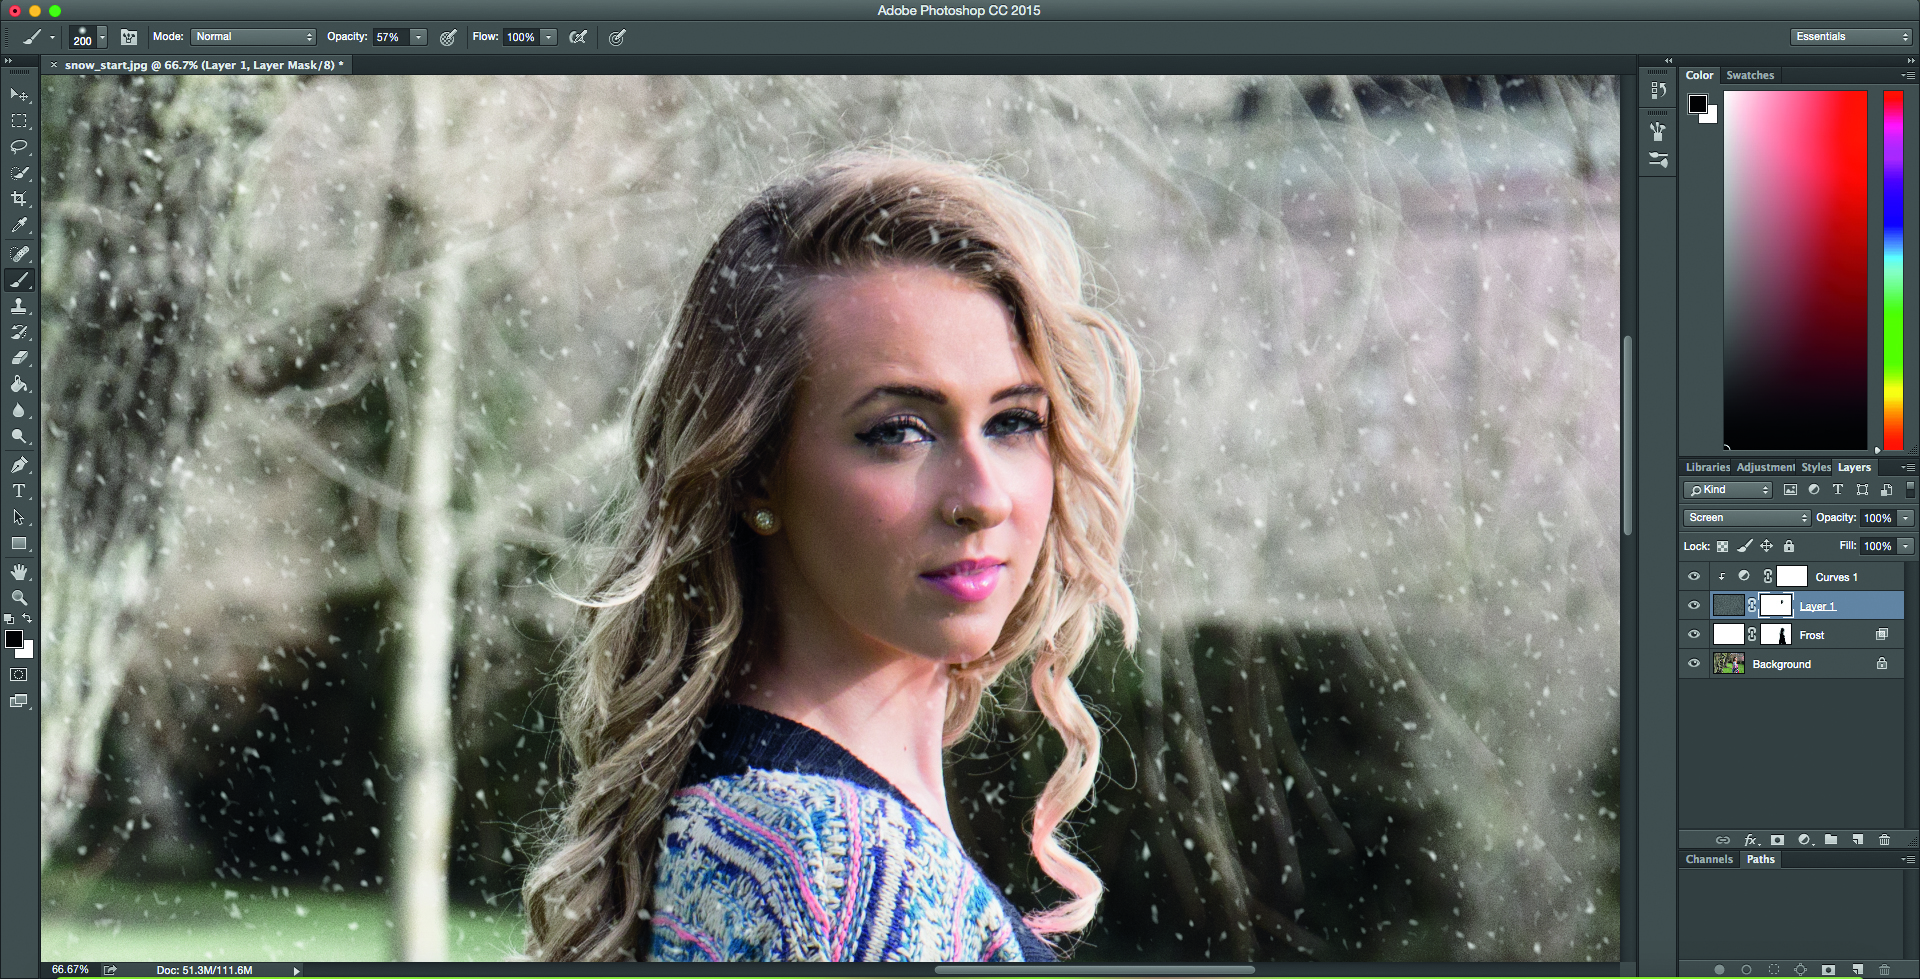
Add a layer mask to the snow layer and use a black brush to remove some of the snowflakes from our subject’s face. Lower the opacity of the brush to 50% to blend around the edges for a realistic finish. To add some more snow to build up the effect, see side bar.
Get the Digital Camera World Newsletter
The best camera deals, reviews, product advice, and unmissable photography news, direct to your inbox!
Hollie Latham-Hucker is a former Technique Editor of PhotoPlus magazine. With a degree in Design Photography from the University of Plymouth, she is currently working as the Technique Editor of Amateur Photographer.
