Learn how to merge text into portraits with this fun Photoshop project
Warp text to the shape of a portrait in Photoshop CC
Watch the video: how to superimpose text over a portrait in Photoshop
Text and images are sometimes hard to pair together well. We’ve all seen the typical work of novice designers, where a black box is simply laid over the image and white or coloured text placed on top. But there’s another way to team the two – and we don’t need to be professional designers to do it.
Don't have Photoshop? You can get a 7-day Adobe Creative Cloud trial to try Photoshop and other Adobe software for free.
• Download Photoshop
• Download Lightroom
• Download Premiere Pro
By using some basic tools in Photoshop, we can make our text wrap around the subject’s face in a portrait and double up on creative content. A photograph will punch through the distorted text in the final image.
Once you’ve done it, you can apply this technique to any portraits – perhaps a homemade birthday card with your favorite person and poem, or a motivational speech by one of your idols. Let’s take a closer look at how it’s done.

STEP BY STEP: Add a few words
1 BLUR THE PICTURE
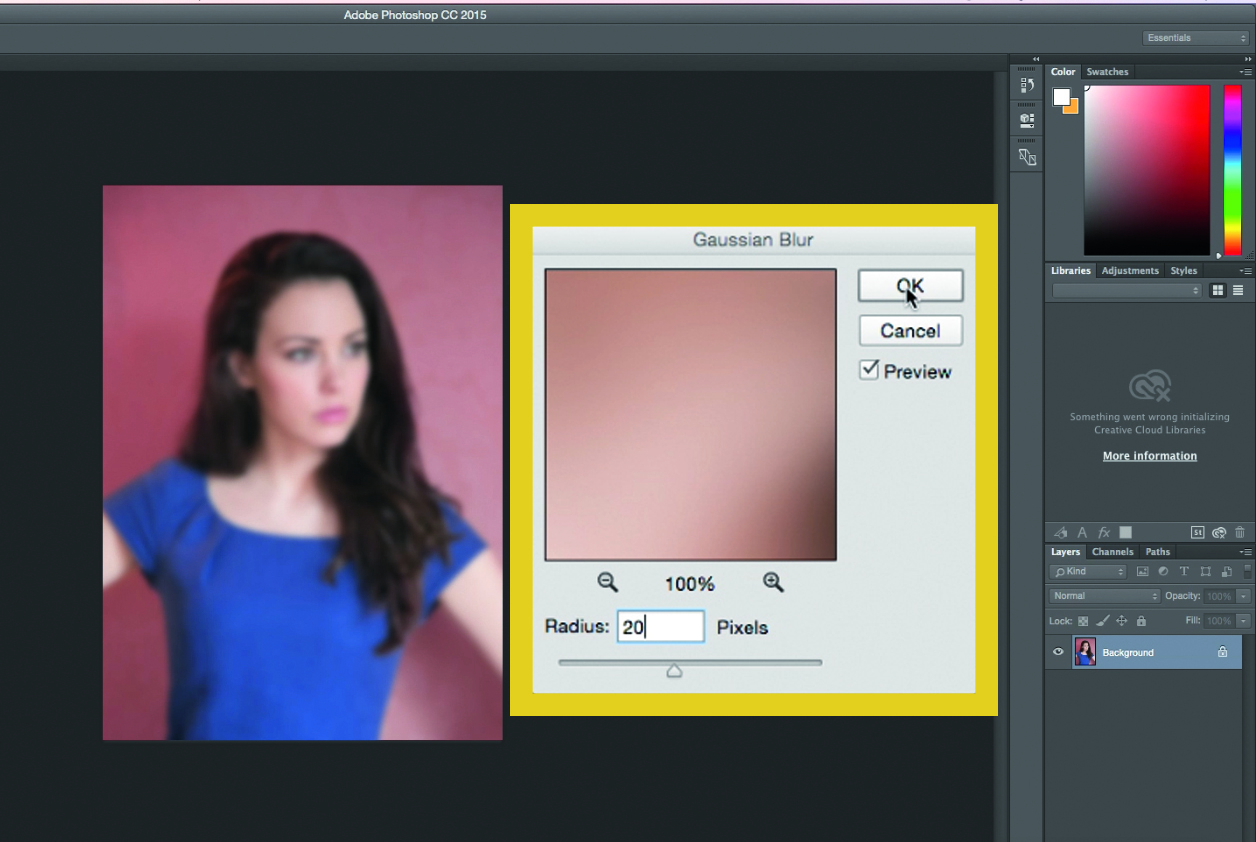
Open a portrait image and go to Filter>Gaussian blur. Add around 20px of blur and click OK. Go to File>Save As and save it as a PSD. We’ll use this image later to map the text distortion (so the text wraps around the face). Ctrl/Cmd+Z to undo until you have your original, clear image back.
2 TYPE YOUR TEXT
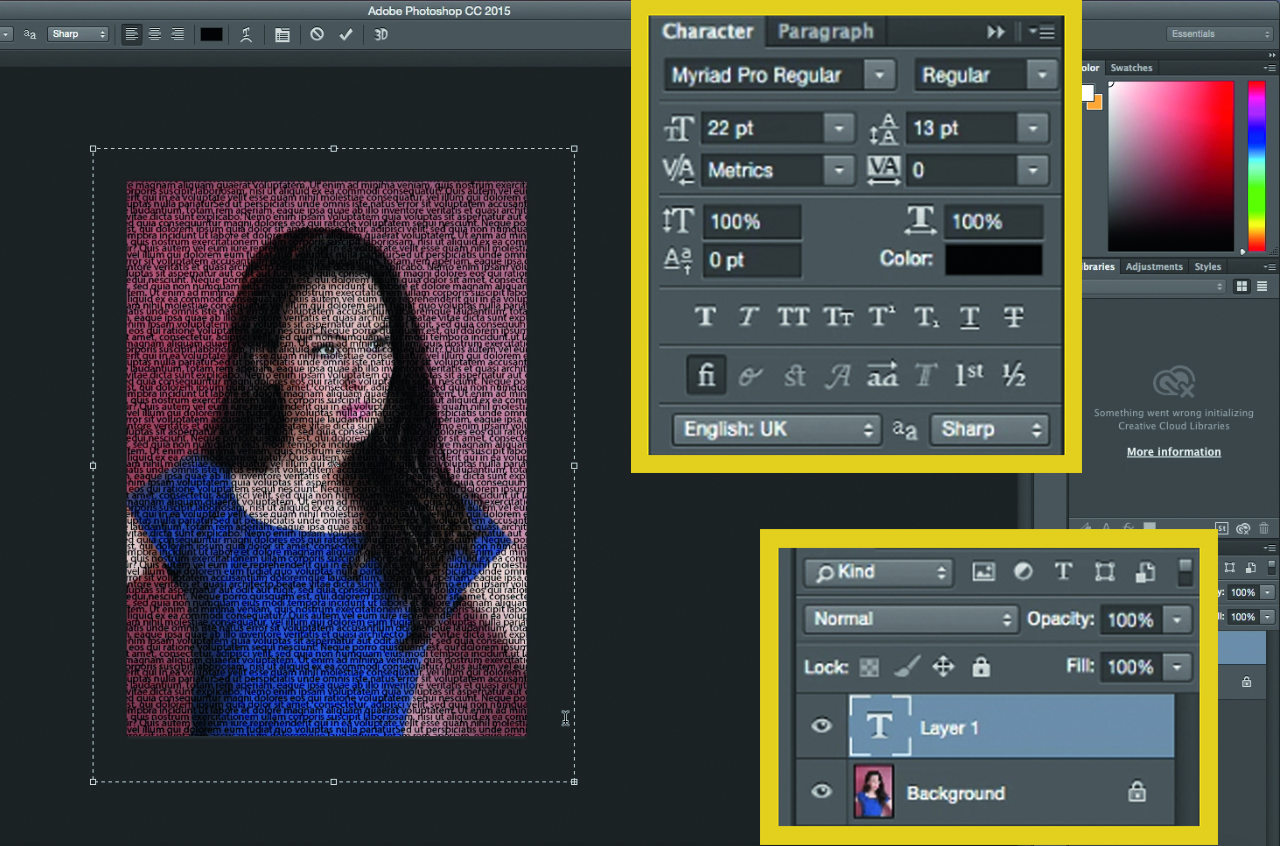
With the Type tool selected, left-click and drag a box out to encompass the whole of your photograph. Copy and paste or type in your favorite text. Delete all line breaks. Highlight all the text (Ctrl/Cmd+A) and navigate to the Paragraph tab. Select Justify All, and untick Hyphenate.
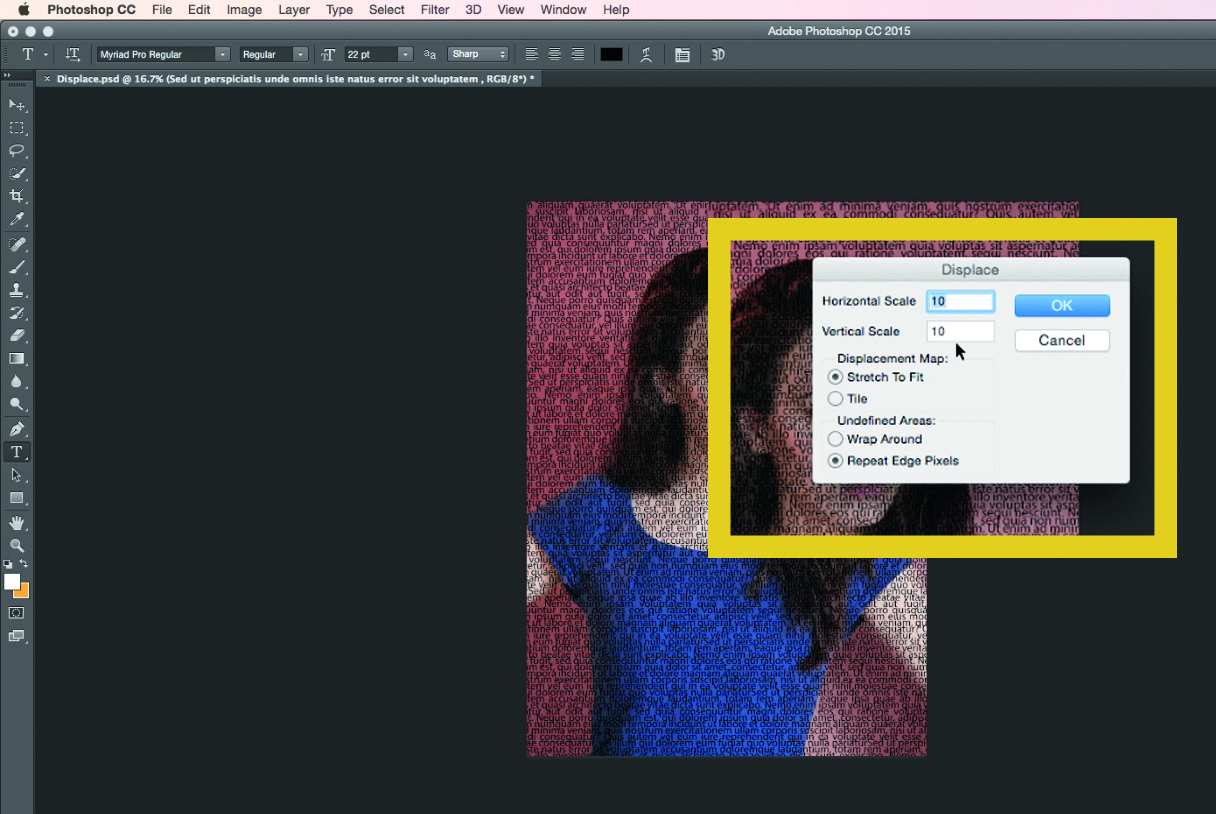
If you have trouble with bending at the edges, make the type box bigger than the image
3 DISPLACE AND RASTERIZE
Copy and paste the formatted text until it fills the whole photo. With the text layer selection, go to Filter>Displace. In the box that appears, hit Rasterize. Choose the default settings and click OK. When another box appears, double-click on the blurred image that you saved earlier.
4 COPY THE LAYER
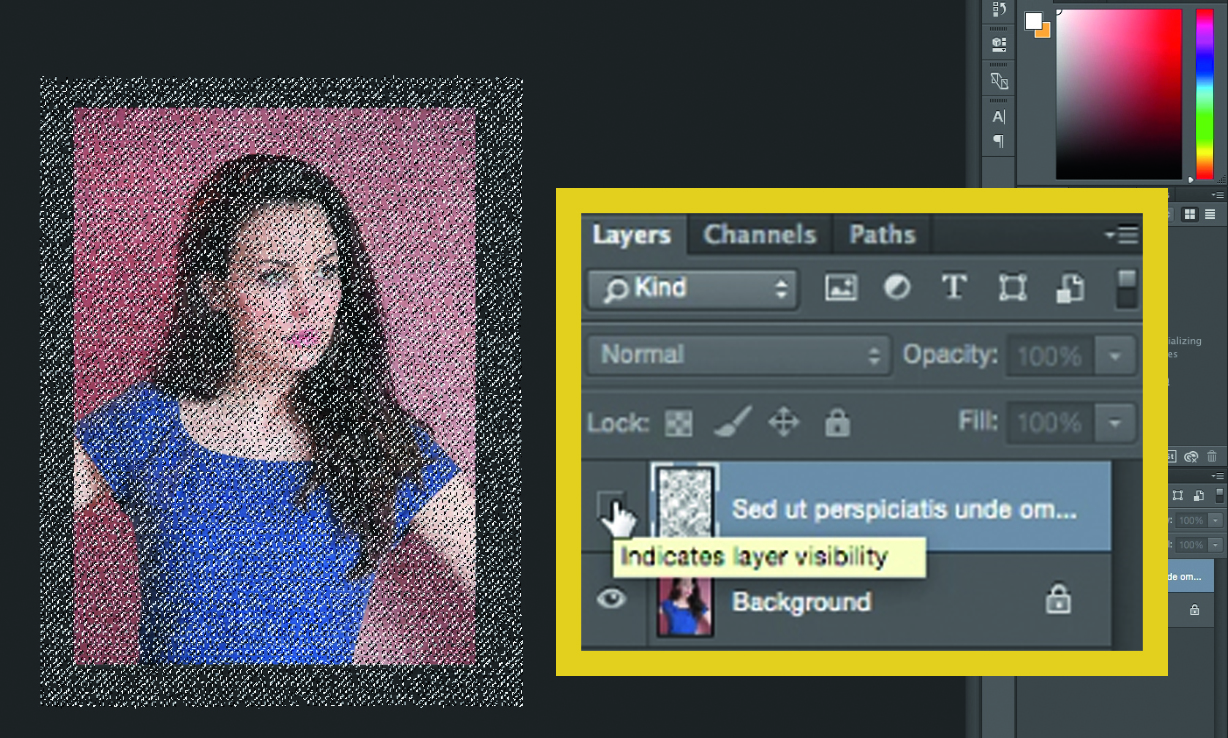
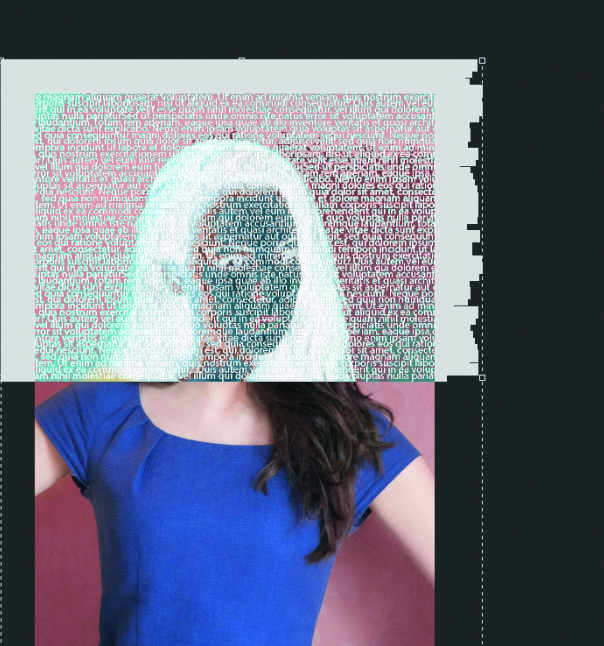
Hold Ctrl/Cmd and left-click on the rasterized text layer, to select the text. You’ll see ‘marching ants’ dancing around the screen in the shape of the text. Make sure you untick the layer’s visibility. Next go to Edit>Copy Merged. This copies the selection into the computer’s clipboard.
5 IT'S ALL IN THE SIZE
Reduce the leading of the type so that there’s a minimal gap between the lines of text. This isn’t essential but you can get a more accurate representation of the face if the text is tighter-fitting. Also use a relatively small point size when choosing the size of your font.
6 MAKE A NEW DOCUMENT
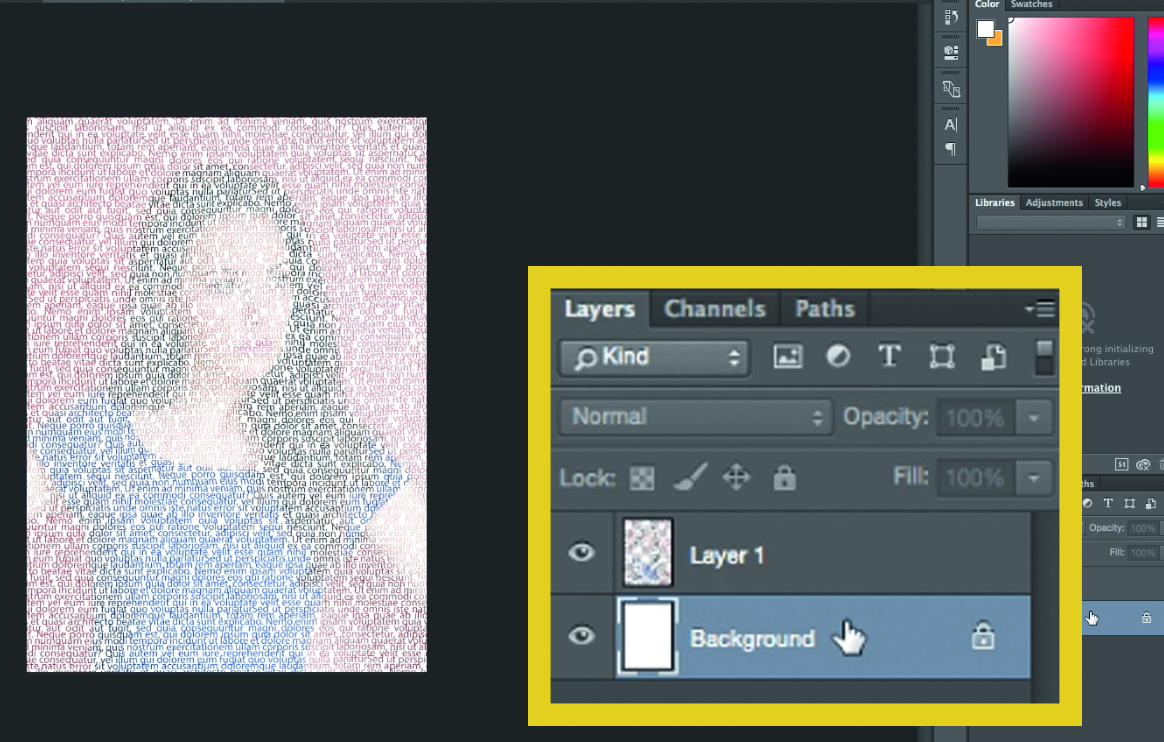
Make a new document and paste in your copied material. The document will be sized to the selection you’ve copied. Then make your background black, double-click on the background layer and click OK to unlock the layer. Now hit Ctrl/Cmd+I to invert the colour from white to black.
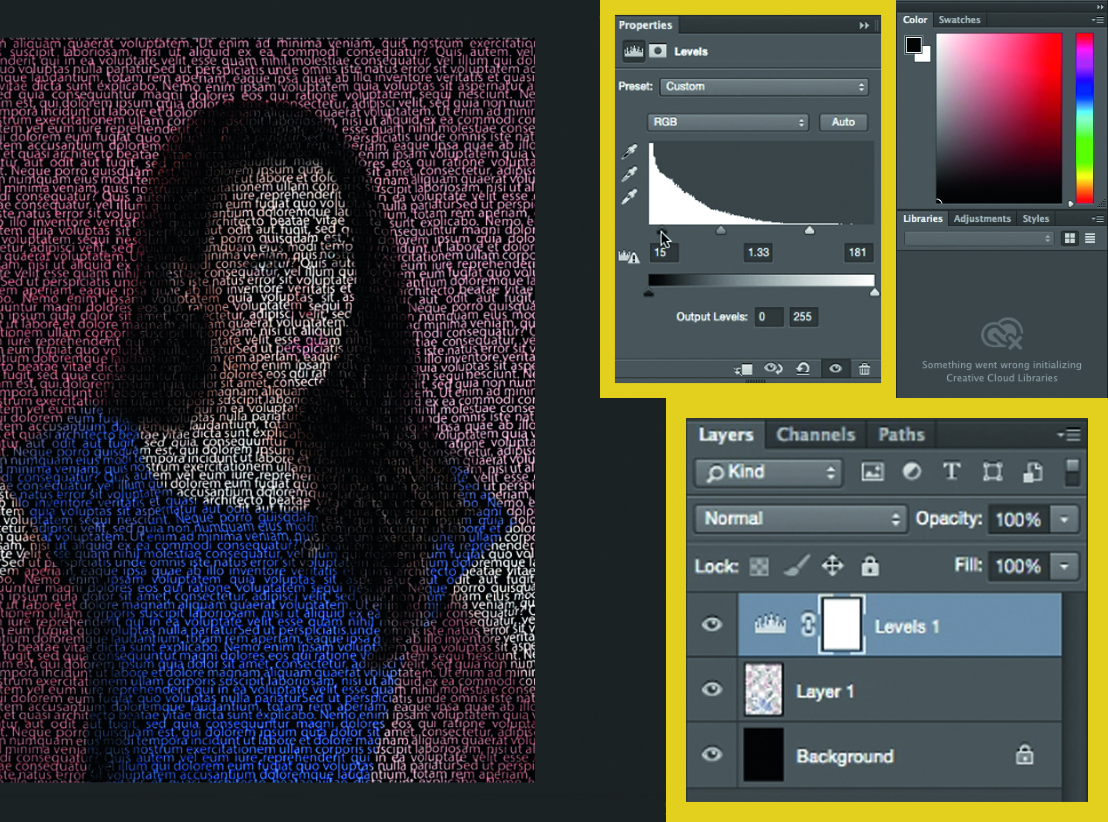
7 SAVE AS A JPEG
As if by magic, your portrait will appear underneath the morphed text. Add a Levels Adjustment layer to increase the contrast in the final image, reduce the highlights and bring up the blacks if needed. Then just save it. Go to File>Save As… and choose JPEG.
Read more:
• Best photo-editing software
• Best laptops for photographers
• Best desktop computers for photo editing
• 11 home photo projects
• 72 tips cards to cut out and keep
• Photography tips for beginners
• Best budget laptops
• Best Chromebooks
• Best desks for home working
• Best video conferencing apps
Get the Digital Camera World Newsletter
The best camera deals, reviews, product advice, and unmissable photography news, direct to your inbox!
Jase Parnell-Brookes is an award-winning photographer, educator and writer based in the UK. They won the Gold Prize award in the Nikon Photo Contest 2018/19 and was named Digital Photographer of the Year in 2014. After completing their Masters Jase has spent a good chunk of two decades studying and working in photography and optics shooting and writing all over the world for big-name brands and media outlets. Now the Channel Editor for Cameras and Skywatching at Space.com their speciality is in low light optics and camera systems.
