How to blend photos taken at different focal lengths for balanced compositions
Combine two different focal lengths with a mix of shooting and Photoshop skills for perfectly balanced compositions
Watch video: How to blend photos from two different focal lengths
One of the great joys of landscape photography is when you’re treated to a combination of enticing foreground details and elements in distant scenery. But composing this into a balanced frame can sometimes be a challenge.
If we use a wide-angle lens to shoot the foreground details – due to the exaggerated perspective – the backdrop can become too small and insignificant. Here, for example, the blurred water in the foreground plays an important part, but to capture it we needed to use a wide-angle lens.
This left the focal point beyond – the Pontsticill Reservoir in Wales – too small. Focal length blending offers a way to get around this. By taking two frames at different focal lengths – one wide, one longer – then blending them, we can enlarge the background.
Compositing in landscape photography is a contentious issue. But combining two versions of the scene like this may arguably bring us closer to how the scene feels in the flesh. Our eyes don’t work like super-wide angle lenses (they’re more like a combination of a sharp 50mm in the center and a blurry 20mm around the edges).
So the exaggerated perspective you get with wide angles – with oversized foreground details and minuscule distant scenery – often feels vastly different to the view when you’re looking at a scene with your own eyes. Blending two focal lengths could be closer to the experience of being there…
1. Prepare your images

Open your images in Adobe Photoshop (if toning in Lightroom first, ensure that both images have identical adjustments). Analyze the scene in the wider of the two images and determine where the easiest join line will be. Here, the dark banks of the lake are ideal.
2. Copy and position
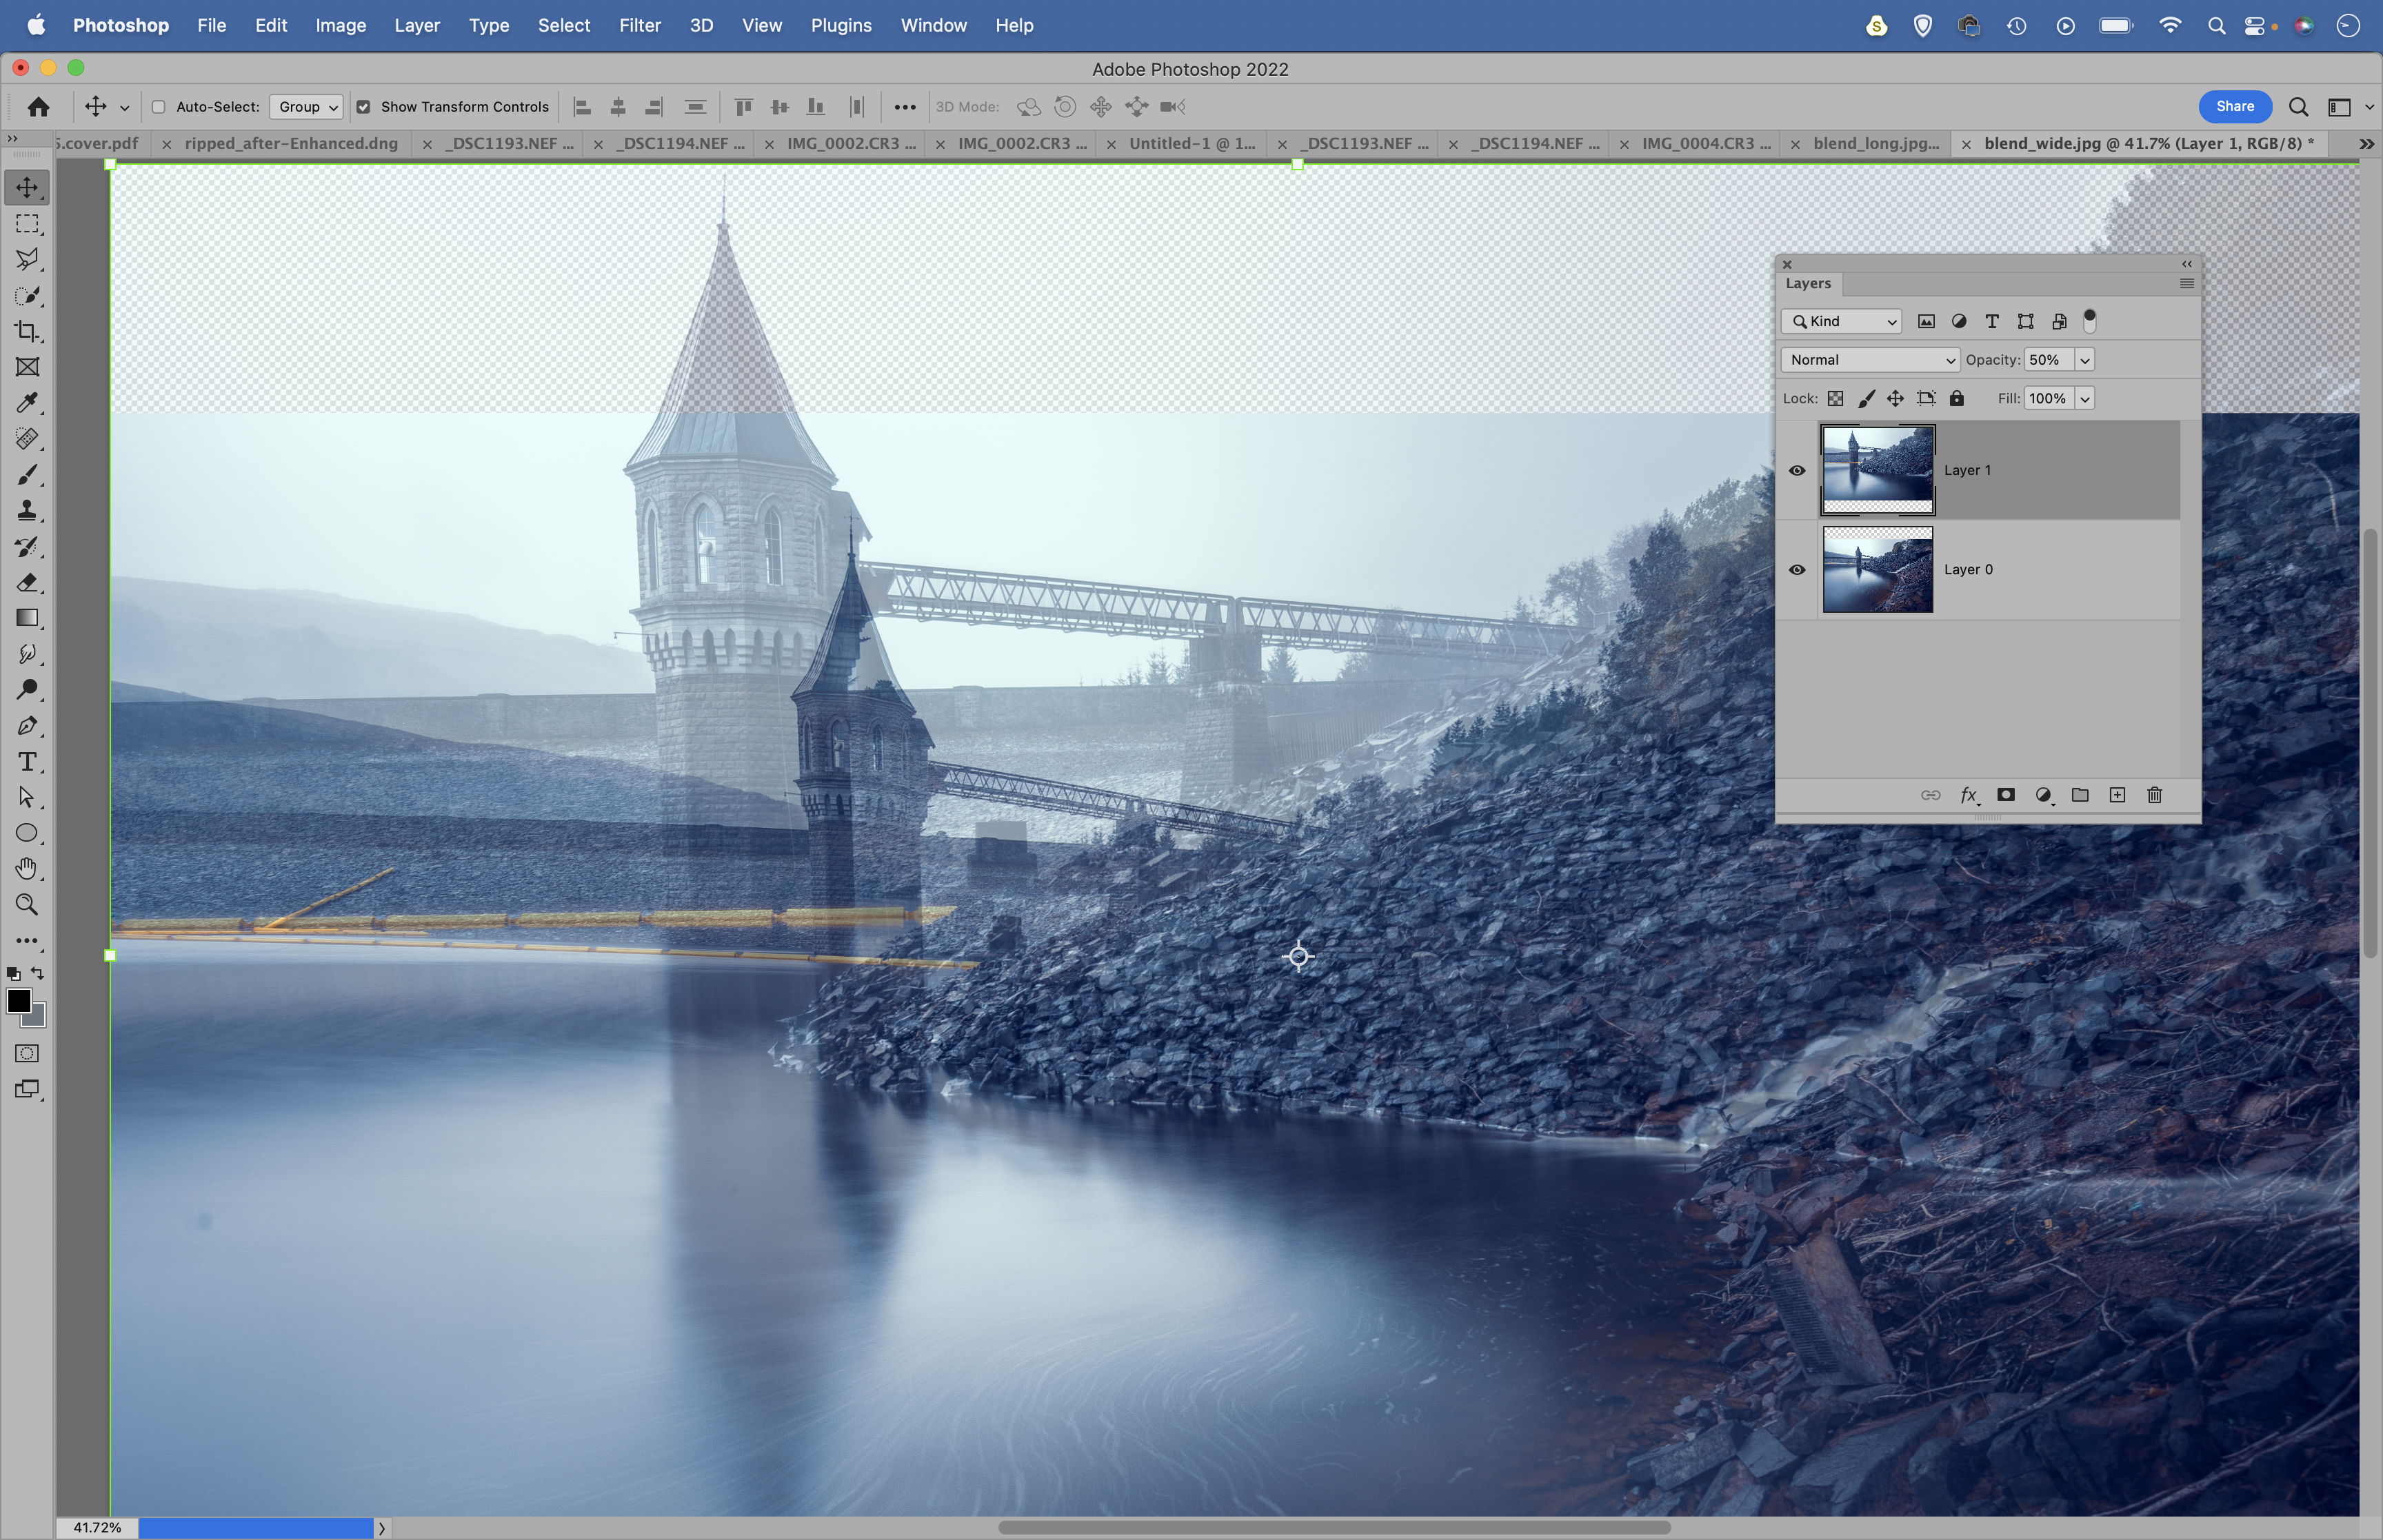
Go to the zoomed-in image then grab the Move tool. Drag it to the tab of the other image and then down and in to copy it over. Lower the layer opacity to around 50% then hit Cmd/Ctrl + T. Use the bounding box to transform, resize and position the image to fit.
3. Paint a mask
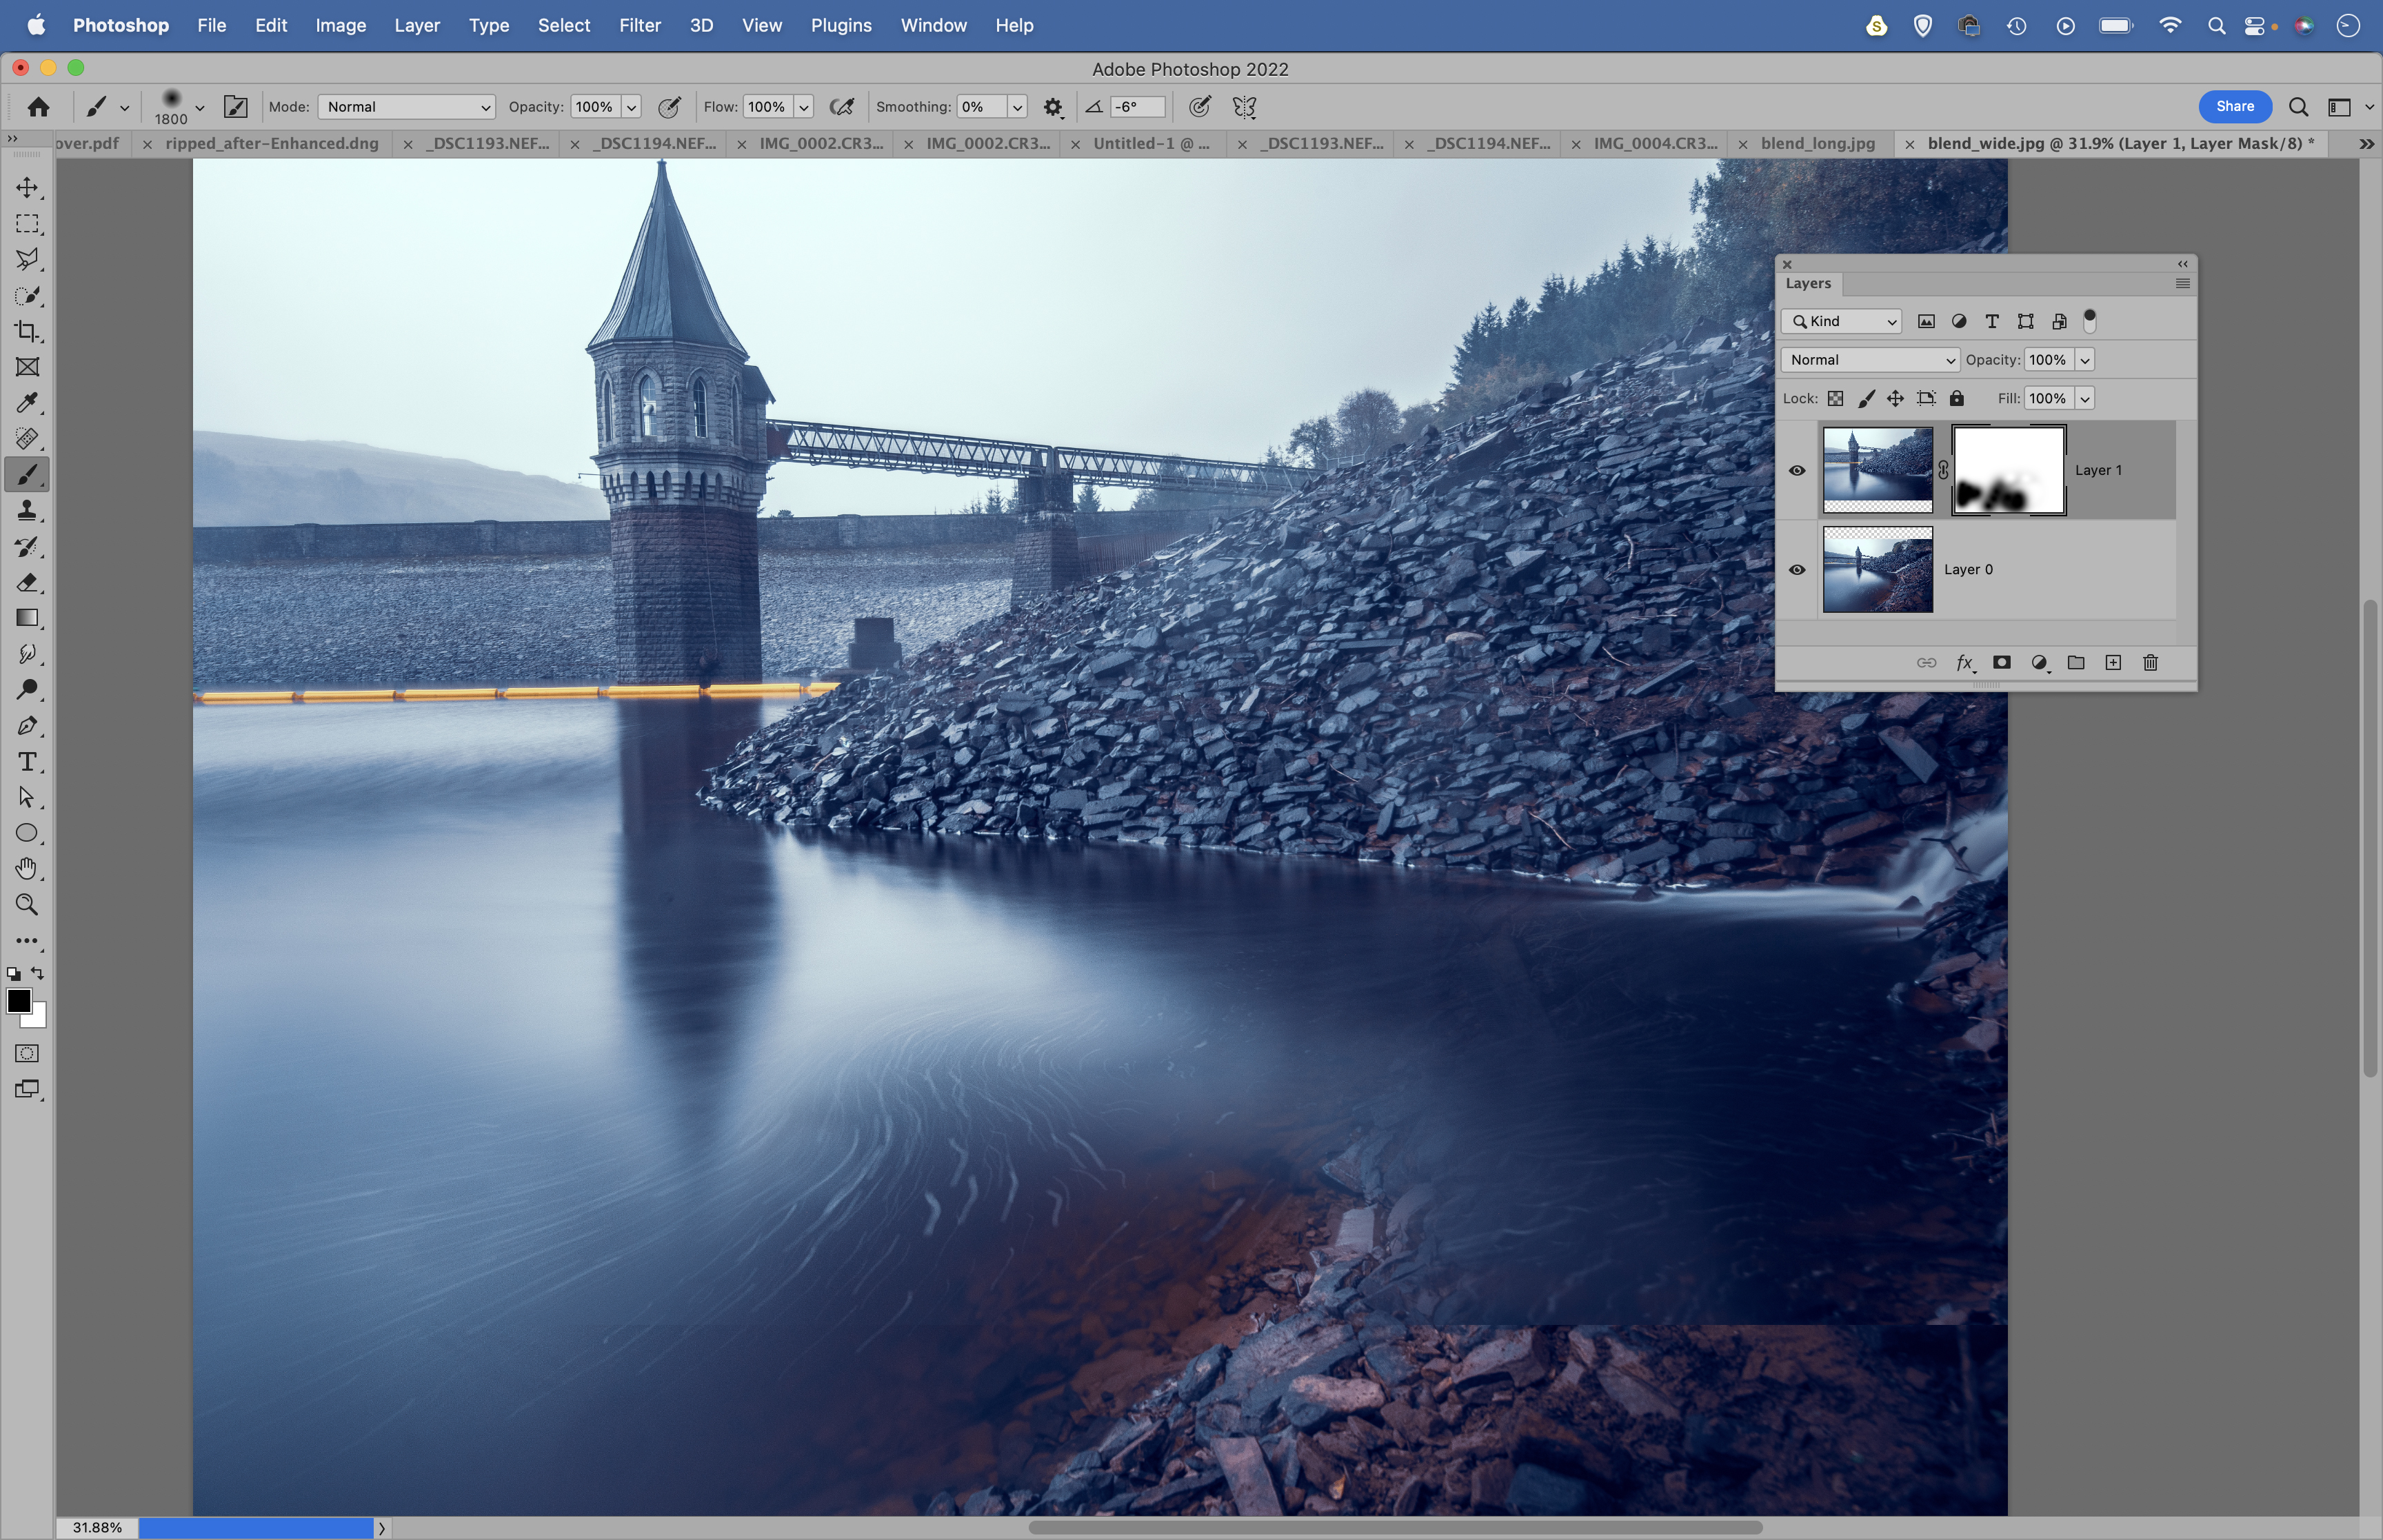
Bring the layer opacity back to 100%. Click the Add Layer Mask icon in the Layers Panel then grab the Brush tool. Paint with black to hide parts of the long image so that it blends with the wide scene. Use a soft-edged brush tip for a gentle transition.
4. Fine tune the blend
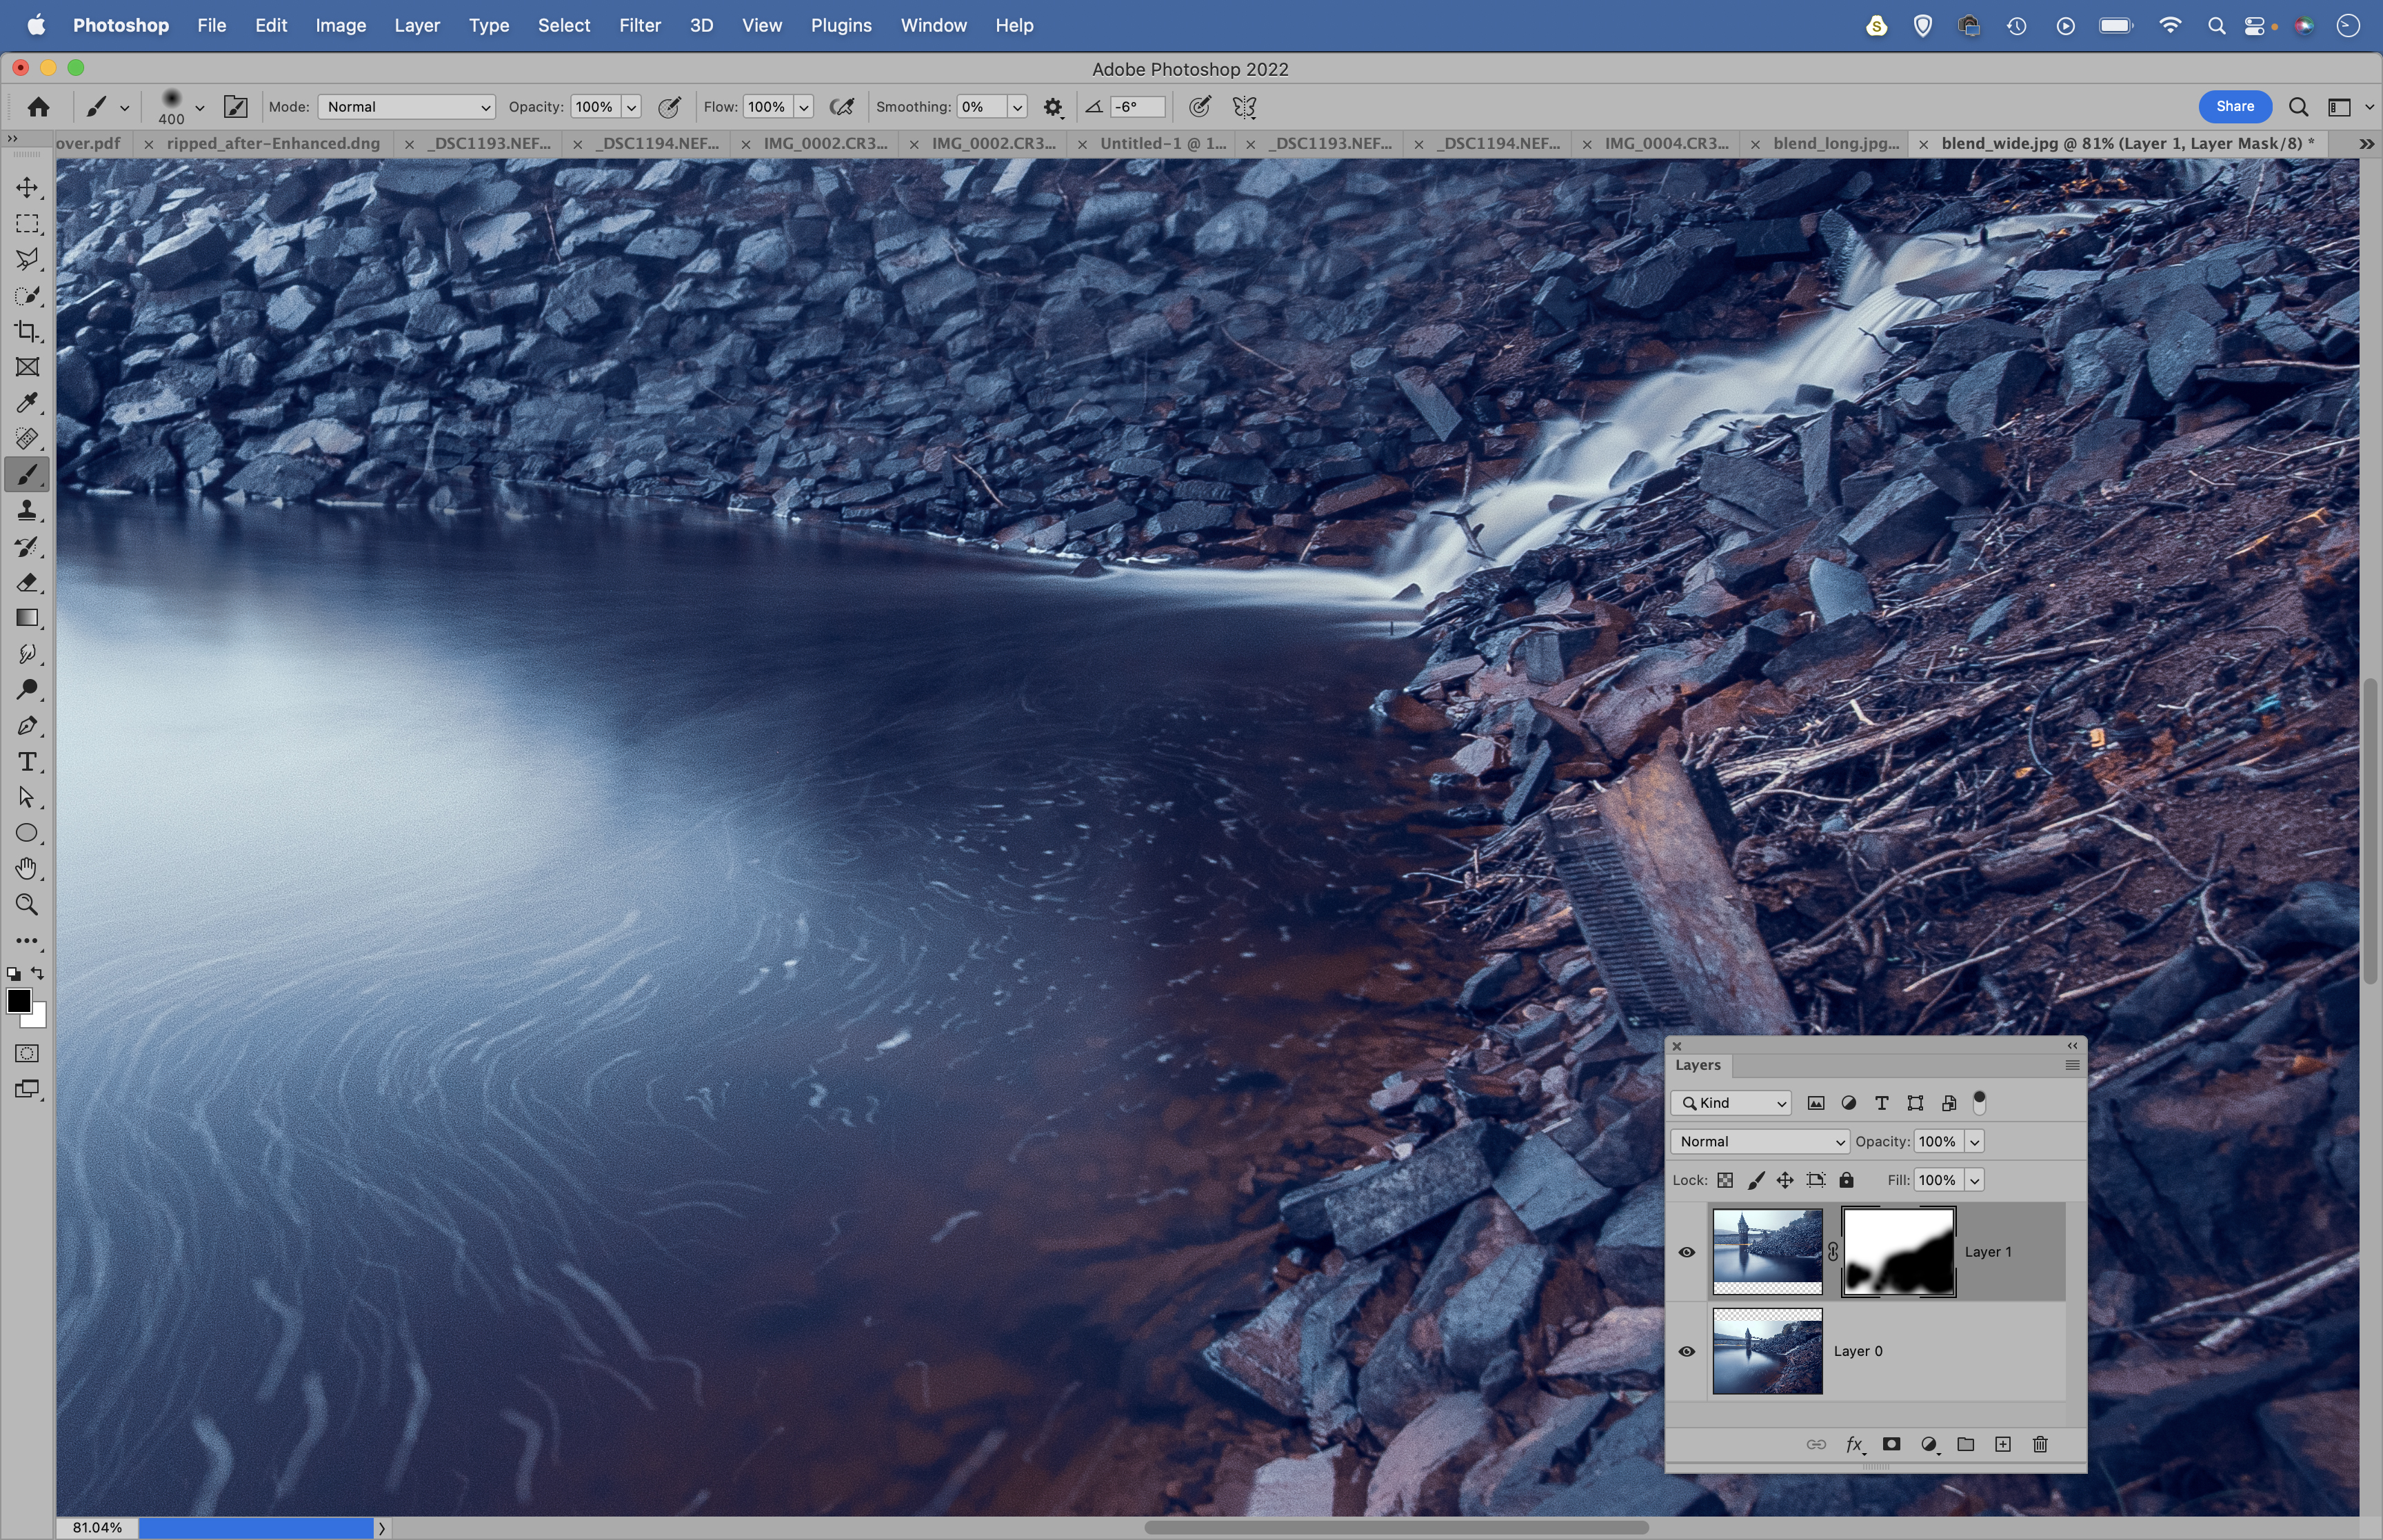
Zoom in close to check the edges of the layer, making sure that the blend looks natural. Using a smaller brush, paint with black to hide parts or hit X to switch to white and paint to reveal hidden areas. You can also paint at a lower opacity for a gentle transition.
5. Clone to tidy
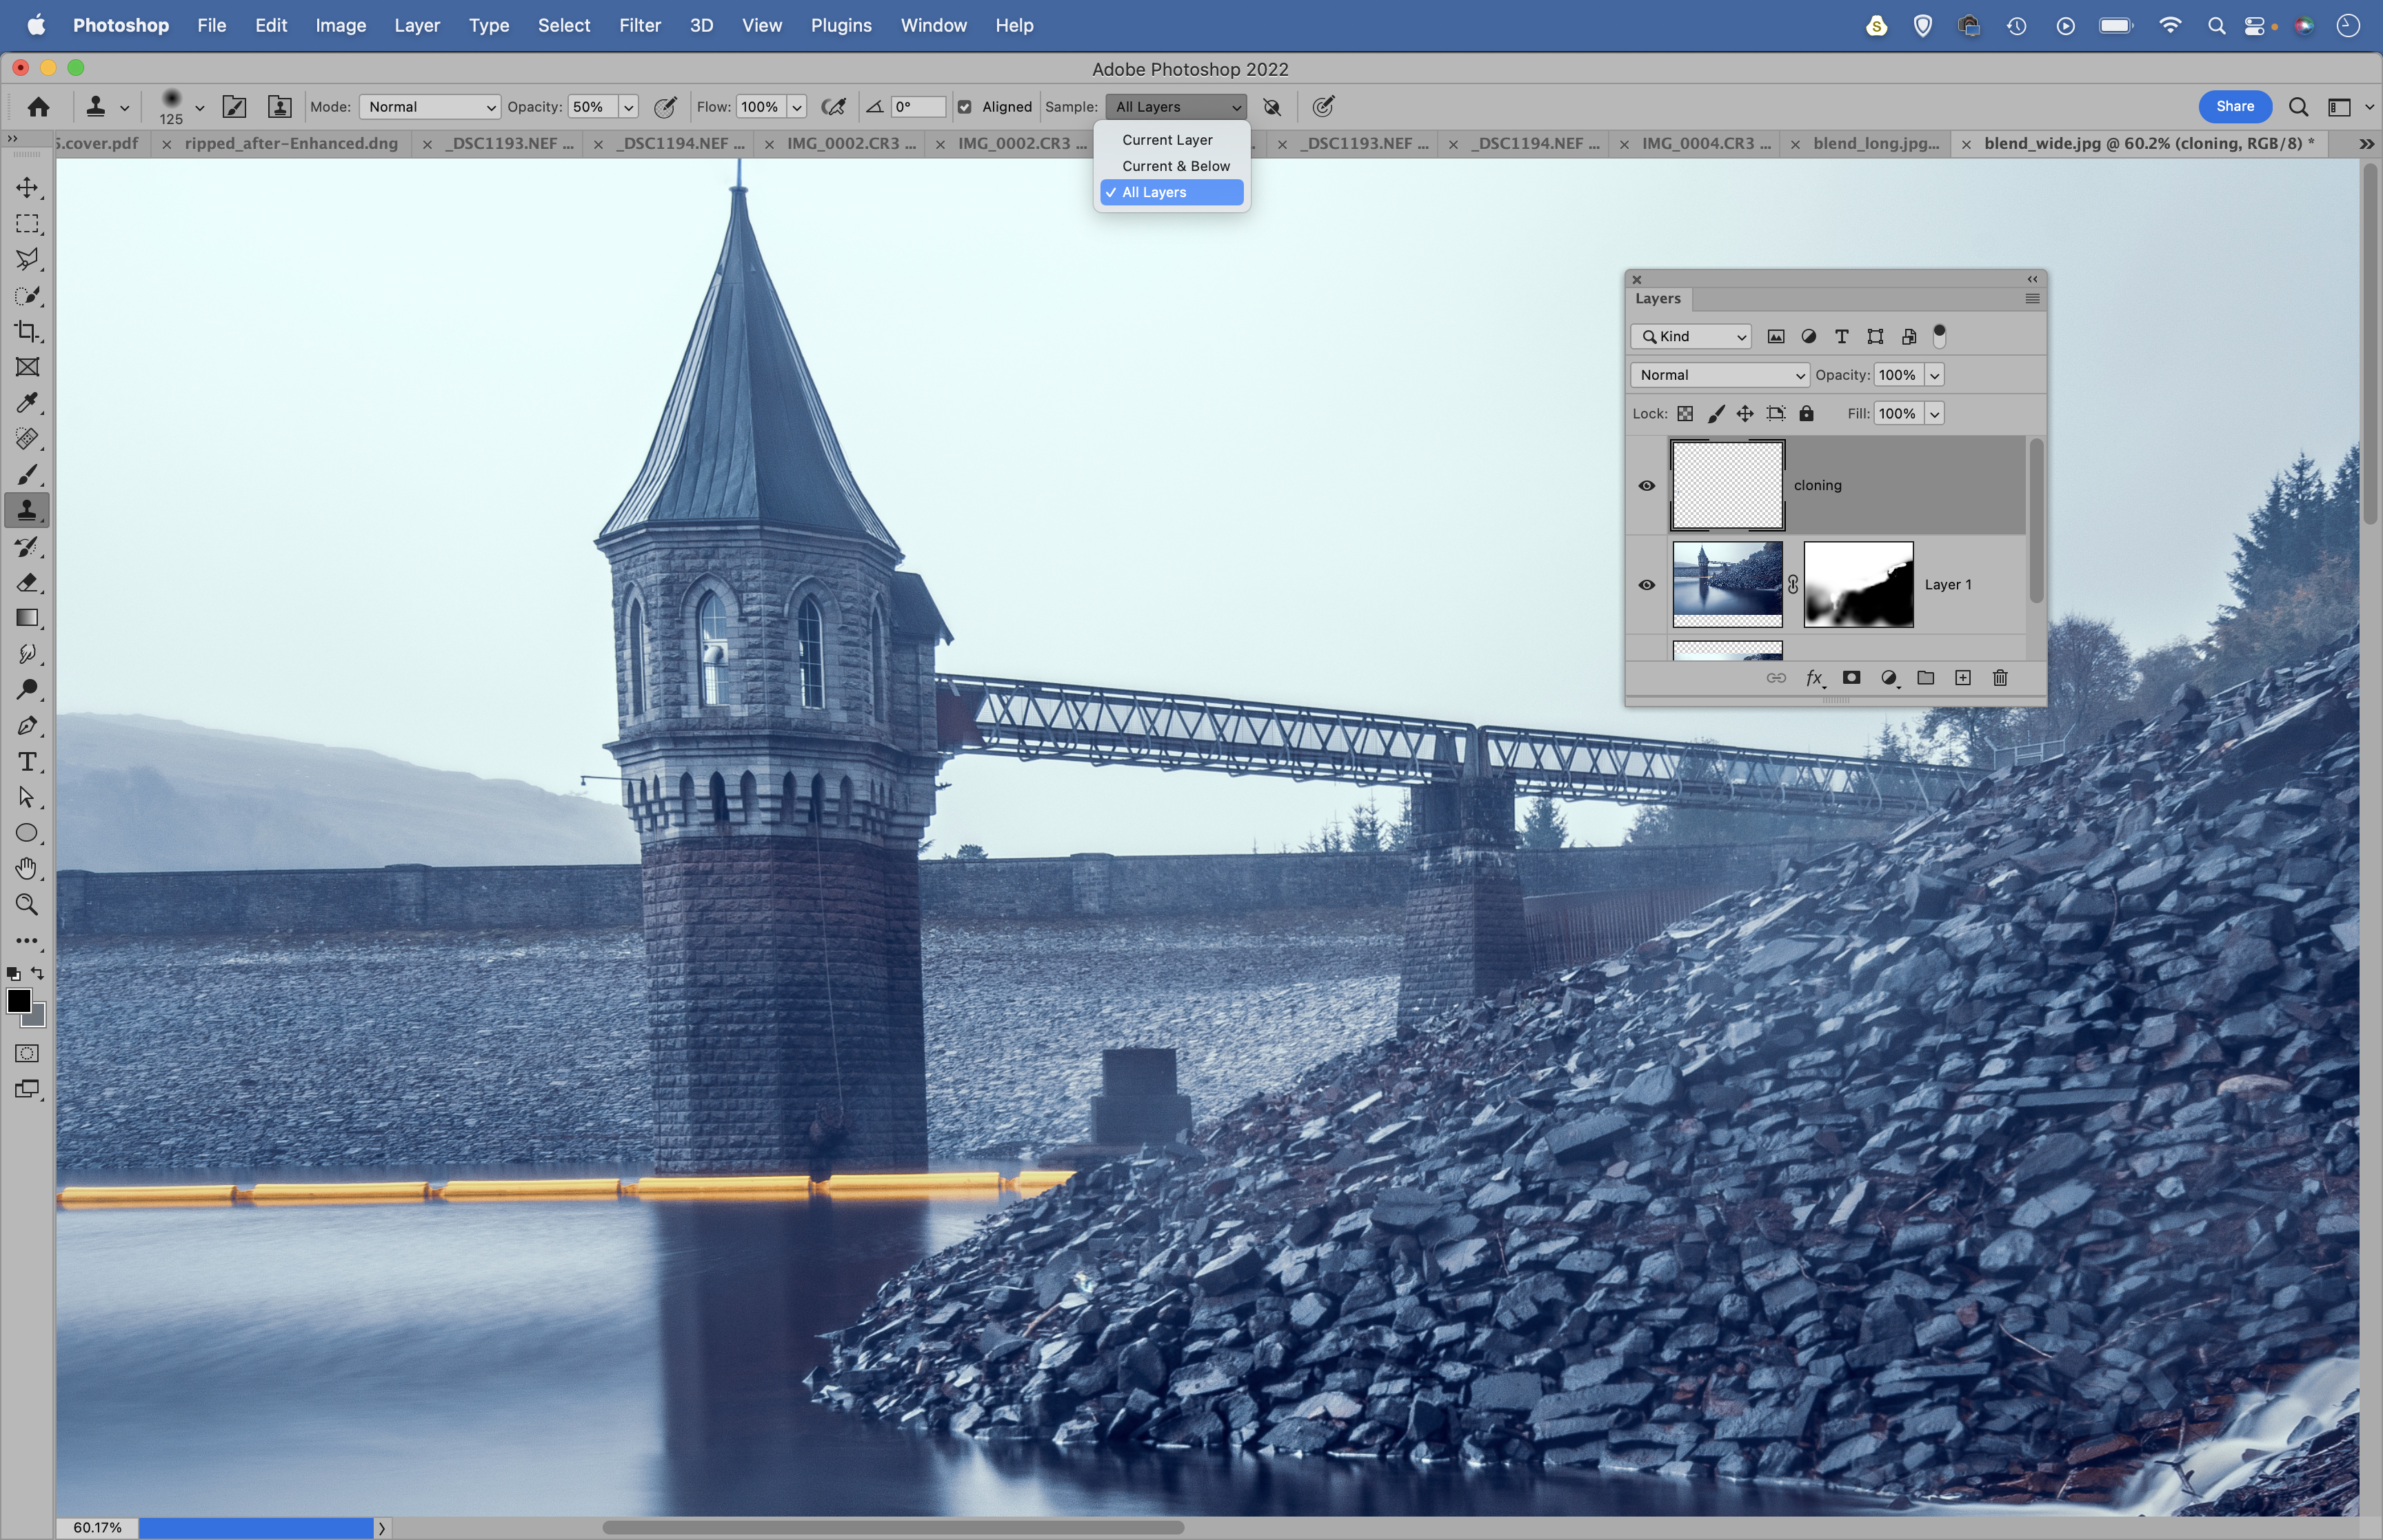
Make a new layer and then grab the Clone tool. We can use it to tidy any rough areas in the composite. Set it to Sample: All Layers in the tool options at the top, then hold Alt and click to sample a clean area and paint to clone over any sketchy patches.
6. Final toning
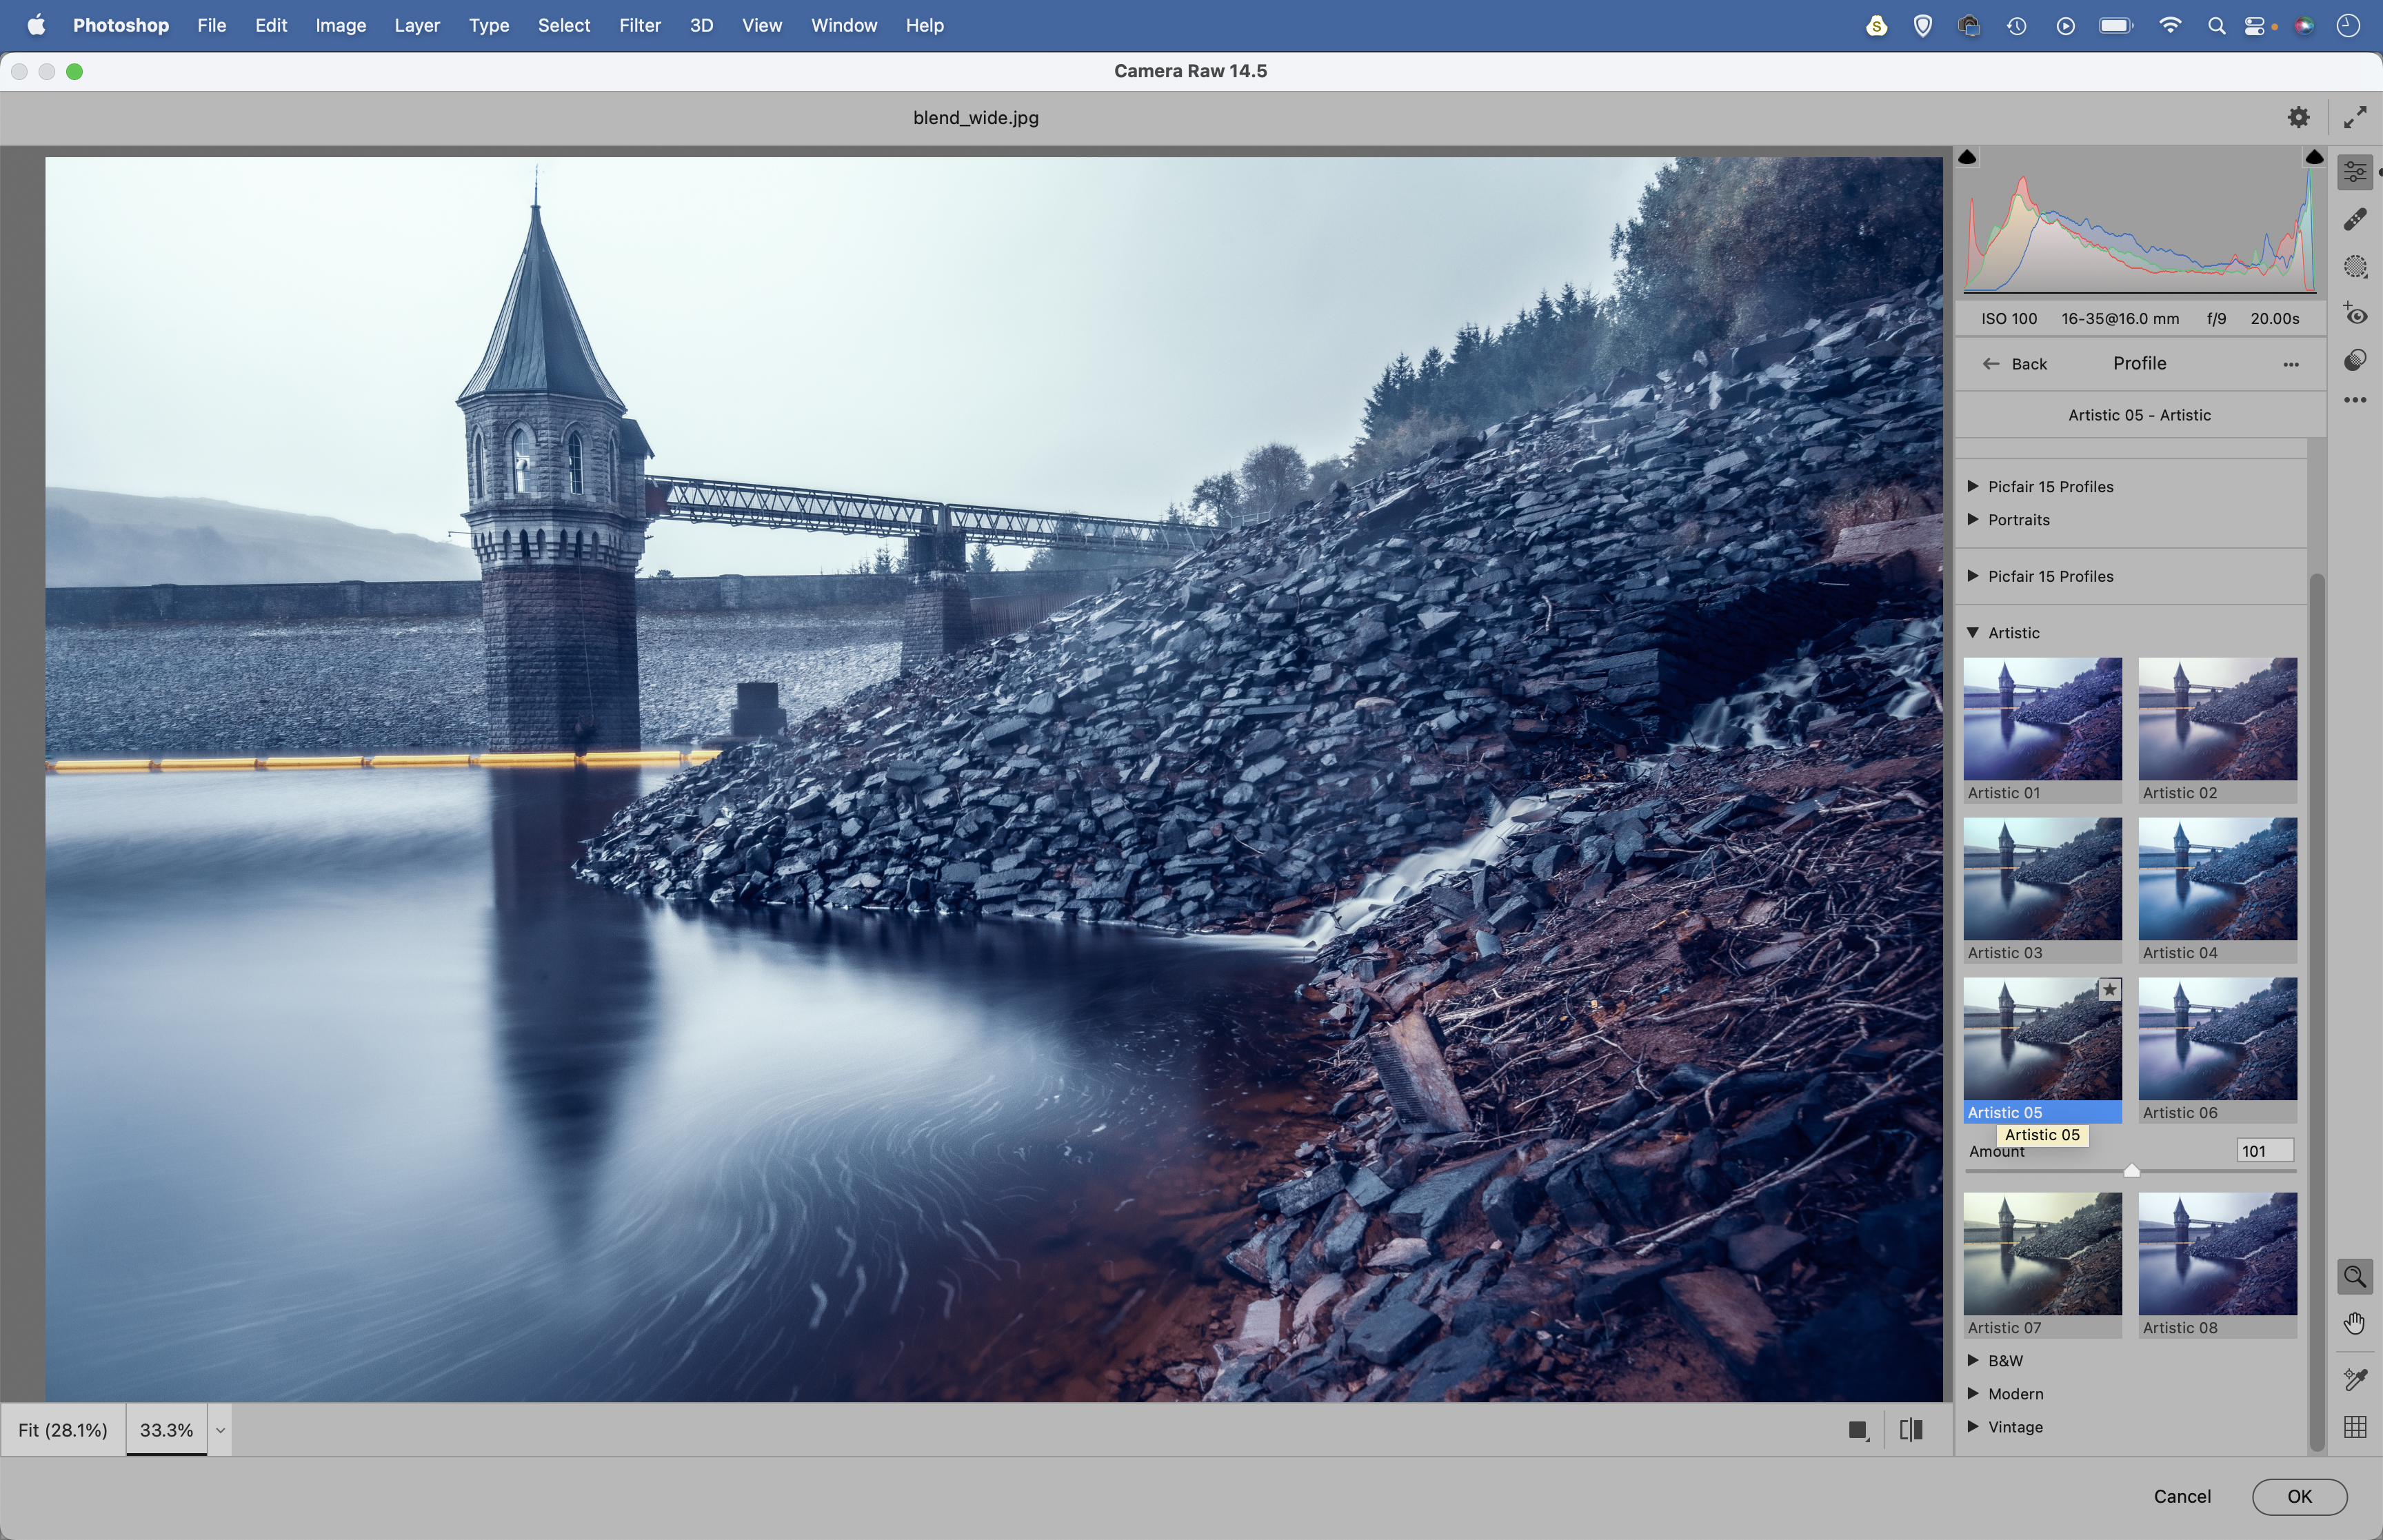
Hit Cmd/Ctrl + Shift + Alt + E to merge a copy of all the layers, then go to Filter > Camera Raw Filter. Try the color-shifting presets in the Profile Browser (click the grid icon in the Basic Panel to access it). Make any other tonal changes or local adjustments you like to finish.
PhotoPlus: The Canon Magazine is the world's only monthly newsstand title that's 100% devoted to Canon, so you can be sure the magazine is completely relevant to your system.
You might like the best photo editing software and the best photo-editing laptops. Check out these 10 landscape photography pro tips.
Get the Digital Camera World Newsletter
The best camera deals, reviews, product advice, and unmissable photography news, direct to your inbox!
The lead technique writer on Digital Camera Magazine, PhotoPlus: The Canon Magazine and N-Photo: The Nikon Magazine, James is a fantastic general practice photographer with an enviable array of skills across every genre of photography.
Whether it's flash photography techniques like stroboscopic portraits, astrophotography projects like photographing the Northern Lights, or turning sound into art by making paint dance on a set of speakers, James' tutorials and projects are as creative as they are enjoyable.
He's also a wizard at the dark arts of Photoshop, Lightroom and Affinity Photo, and is capable of some genuine black magic in the digital darkroom, making him one of the leading authorities on photo editing software and techniques.


