How to clean your Nikon camera’s image sensor
Here’s how to keep your camera’s image sensor squeaky-clean

Let’s kick off with a disclaimer – Nikon recommends that if your camera’s image sensor has any specks of dust that can’t be cleaned away with an unobtrusive waft of air, you should send it off to an authorized service agent for cleaning. Image sensors are very sensitive, after all, and you don’t want to cause any damage. But dust can be the curse of digital photography, and nobody wants to be without their camera on a regular basis.
In contrast to using film, if specks of dust settle on your image sensor, they can be sat there for good. The unfortunate result comes in the shape of dark spots on your images, especially those taken at narrow apertures. How does dust creep in to spoil the digital party? The biggest culprit is motes of dust in the air being ingested by the camera every time you swap between different lenses on the camera body.
The dust dilemma
But that’s not the only reason. If you use a zoom lens that physically extends and contracts when zooming in and out, dust can be sucked into the lens during each extension, and then blasted towards the image sensor during each successive contraction. It’s a messy business.
So what’s the answer? Most Nikon cameras have the option of an automatic cleaning cycle, which can go a long way towards keeping the image sensor neat and tidy. That’s true of recent DSLRs but, surprisingly, not so for DX format Z system mirrorless cameras.
In the Nikon Z30, Z50 and Zfc, where the image sensor isn’t shielded behind a reflex mirror and shutter assembly, there’s no auto cleaning option, despite the sensor being fully exposed to the elements every time you swap lenses. So from making the most of automatic options, where available, to crafty tricks and manual cleaning with the likes of air blowers and wet swabs, let’s take a closer look at how you can keep the important things clean.
Clean now
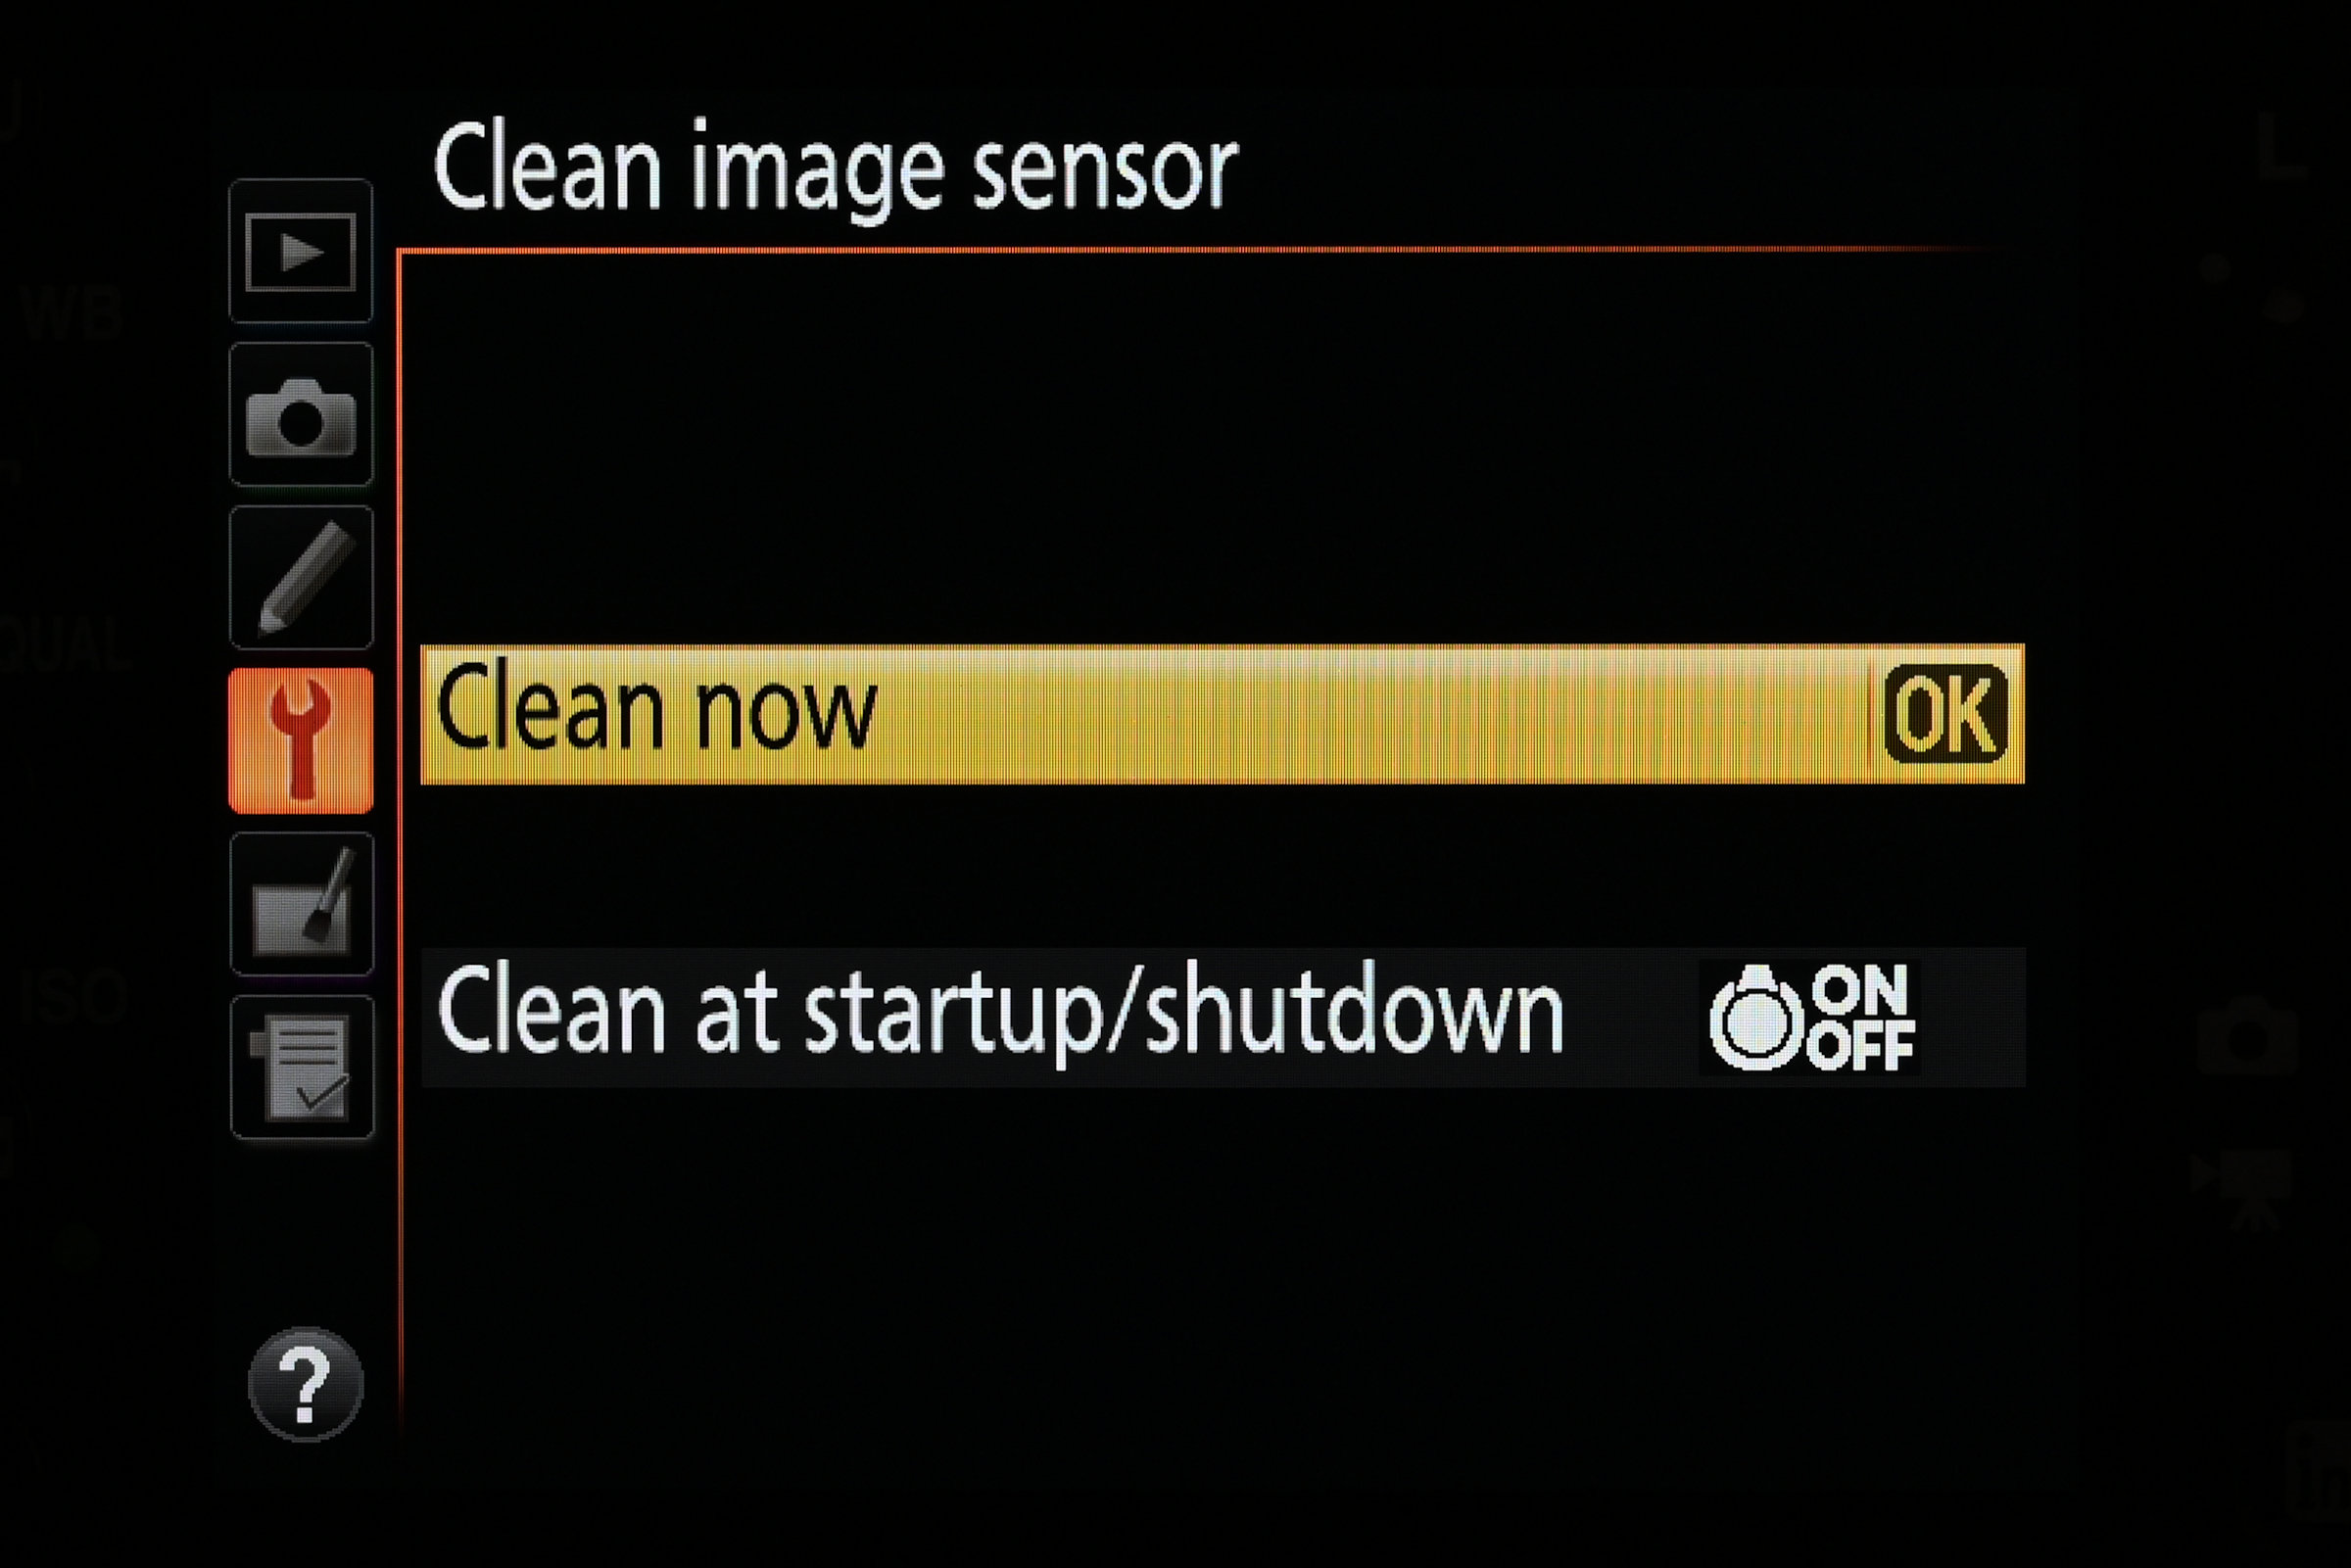
In most recent DSLRs and all full-frame Z system mirrorless cameras, there’s an option in the Setup menu named ‘Clean image sensor’. The upper sub-menu item is ‘Clean now’. Press the OK button and the camera will vibrate the image sensor to shake off any loose dust. Hold the camera sensor facing down while cleaning is in progress, and don’t turn off the camera until cleaning is finished.
Automatic options
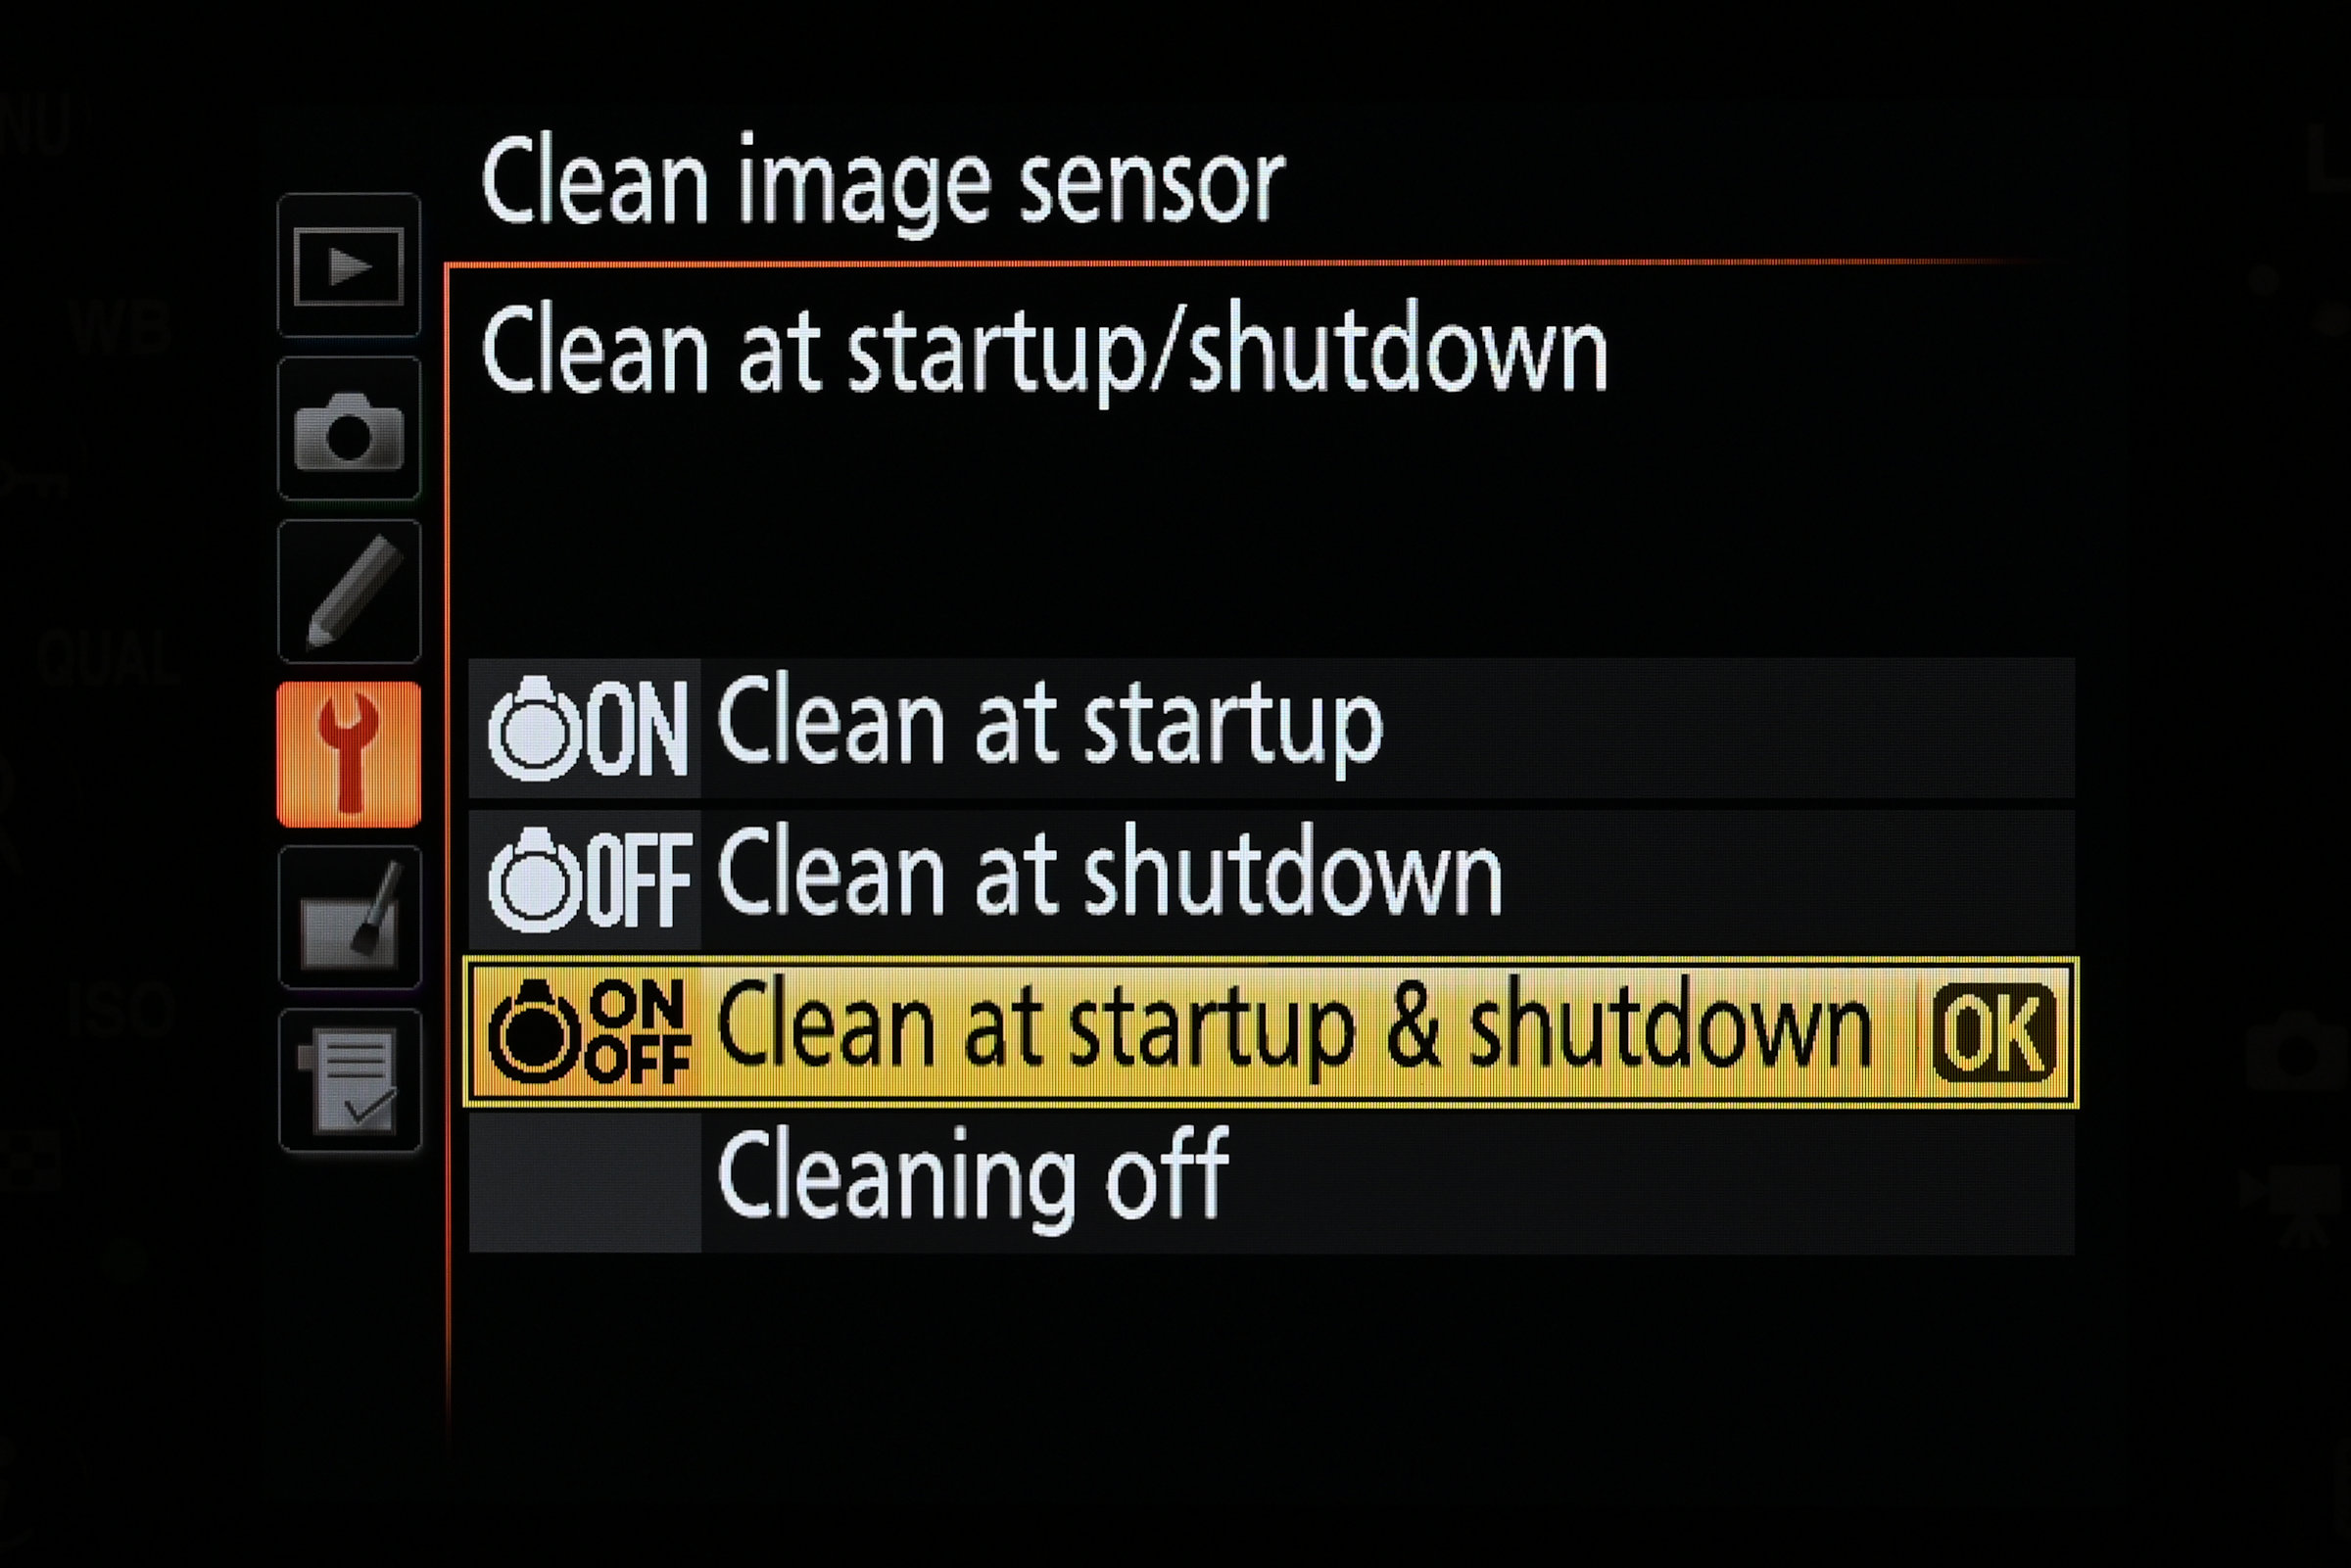
Some DSLRs give you the option to automatically clean the sensor at startup or shutdown, or both. In full-frame mirrorless cameras, there’s typically only an automatic option to clean the sensor at shutdown. A little confusingly, the icon is labelled as ‘Off’ when automatic cleaning is enabled, but this means that cleaning will occur when switching the camera off.
A reference point
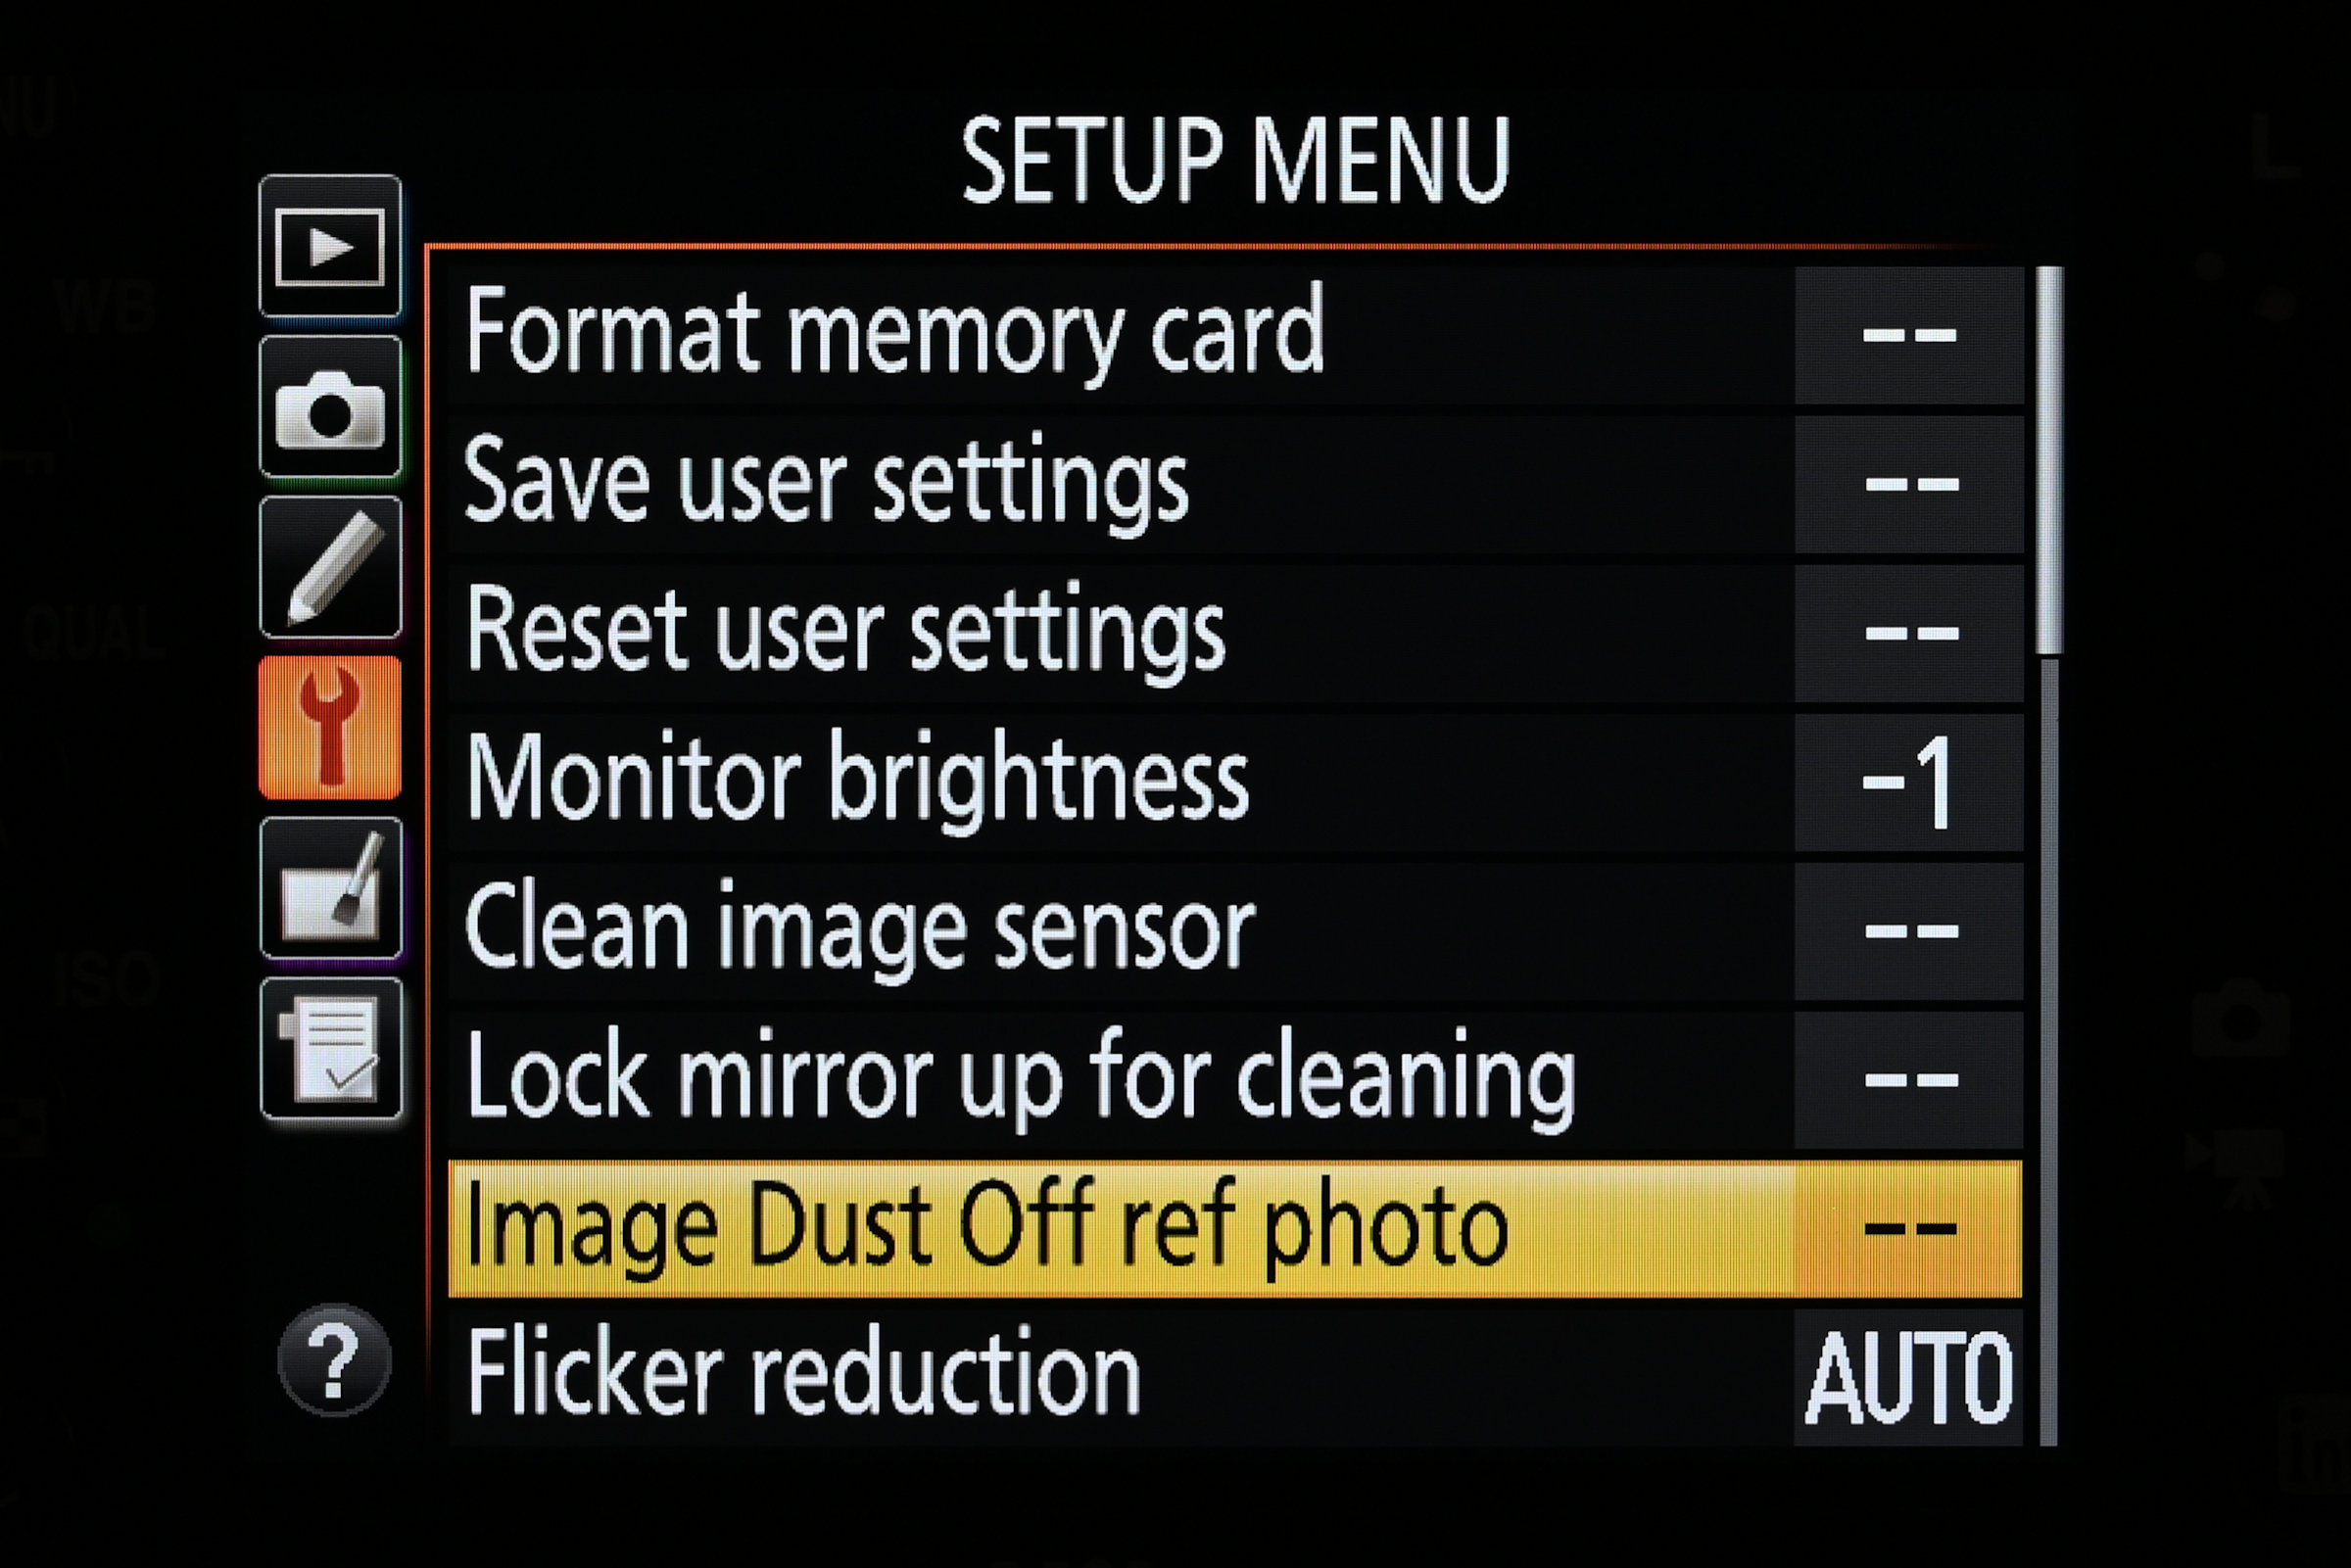
If you’ve got specs of dust that won’t budge, one option is to use the ‘Image Dust Off ref photo’, also in the Setup menu. This is available in many cameras including DX format Z system bodies that don’t have a sensor cleaning menu option. A photo of a blank white wall or other surface is used as a reference to remove spots in full-sized Raw files, when processing them in NX Studio.
Clean and start
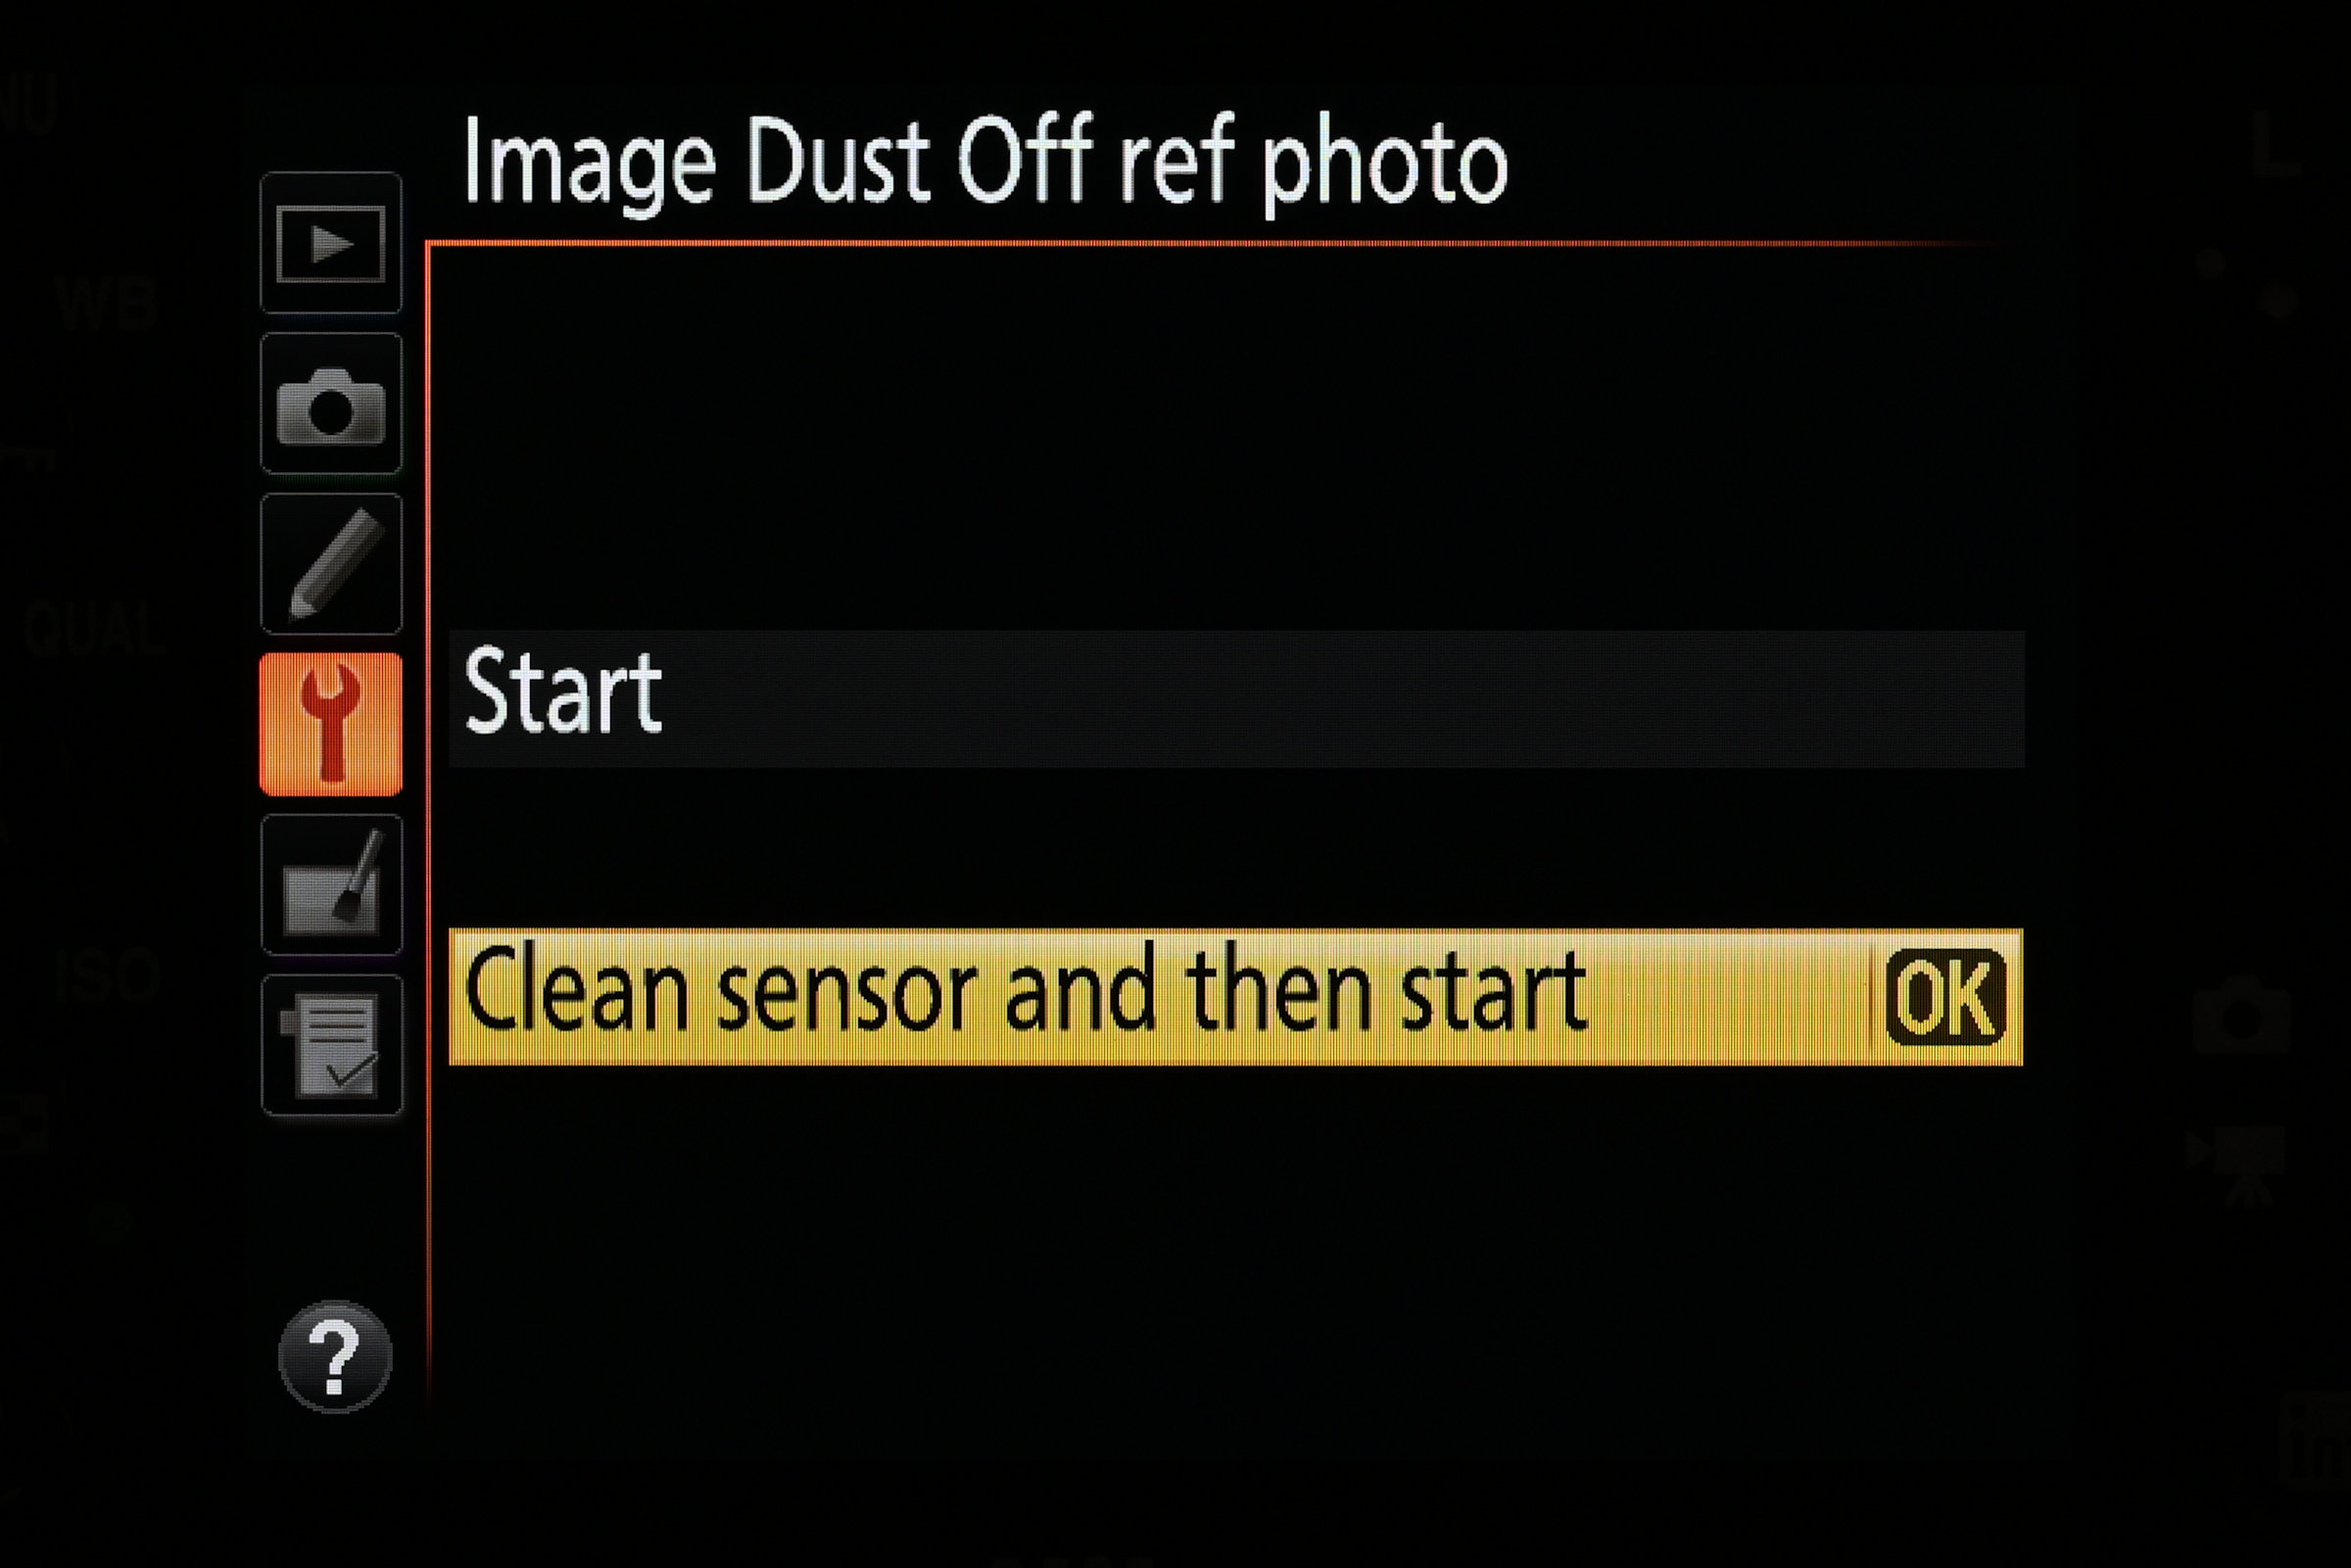
For cameras with sensor cleaning, you can preform a cleaning routine before taking a reference photo. Hold the camera with the lens about 10 centimetres from a blank white surface, autofocus will be at infinity. If the surface is too bright or too dark, you’ll get an error message, so change the lighting. You can’t use the reference data if you subsequently perform image sensor cleaning.
Blow it away
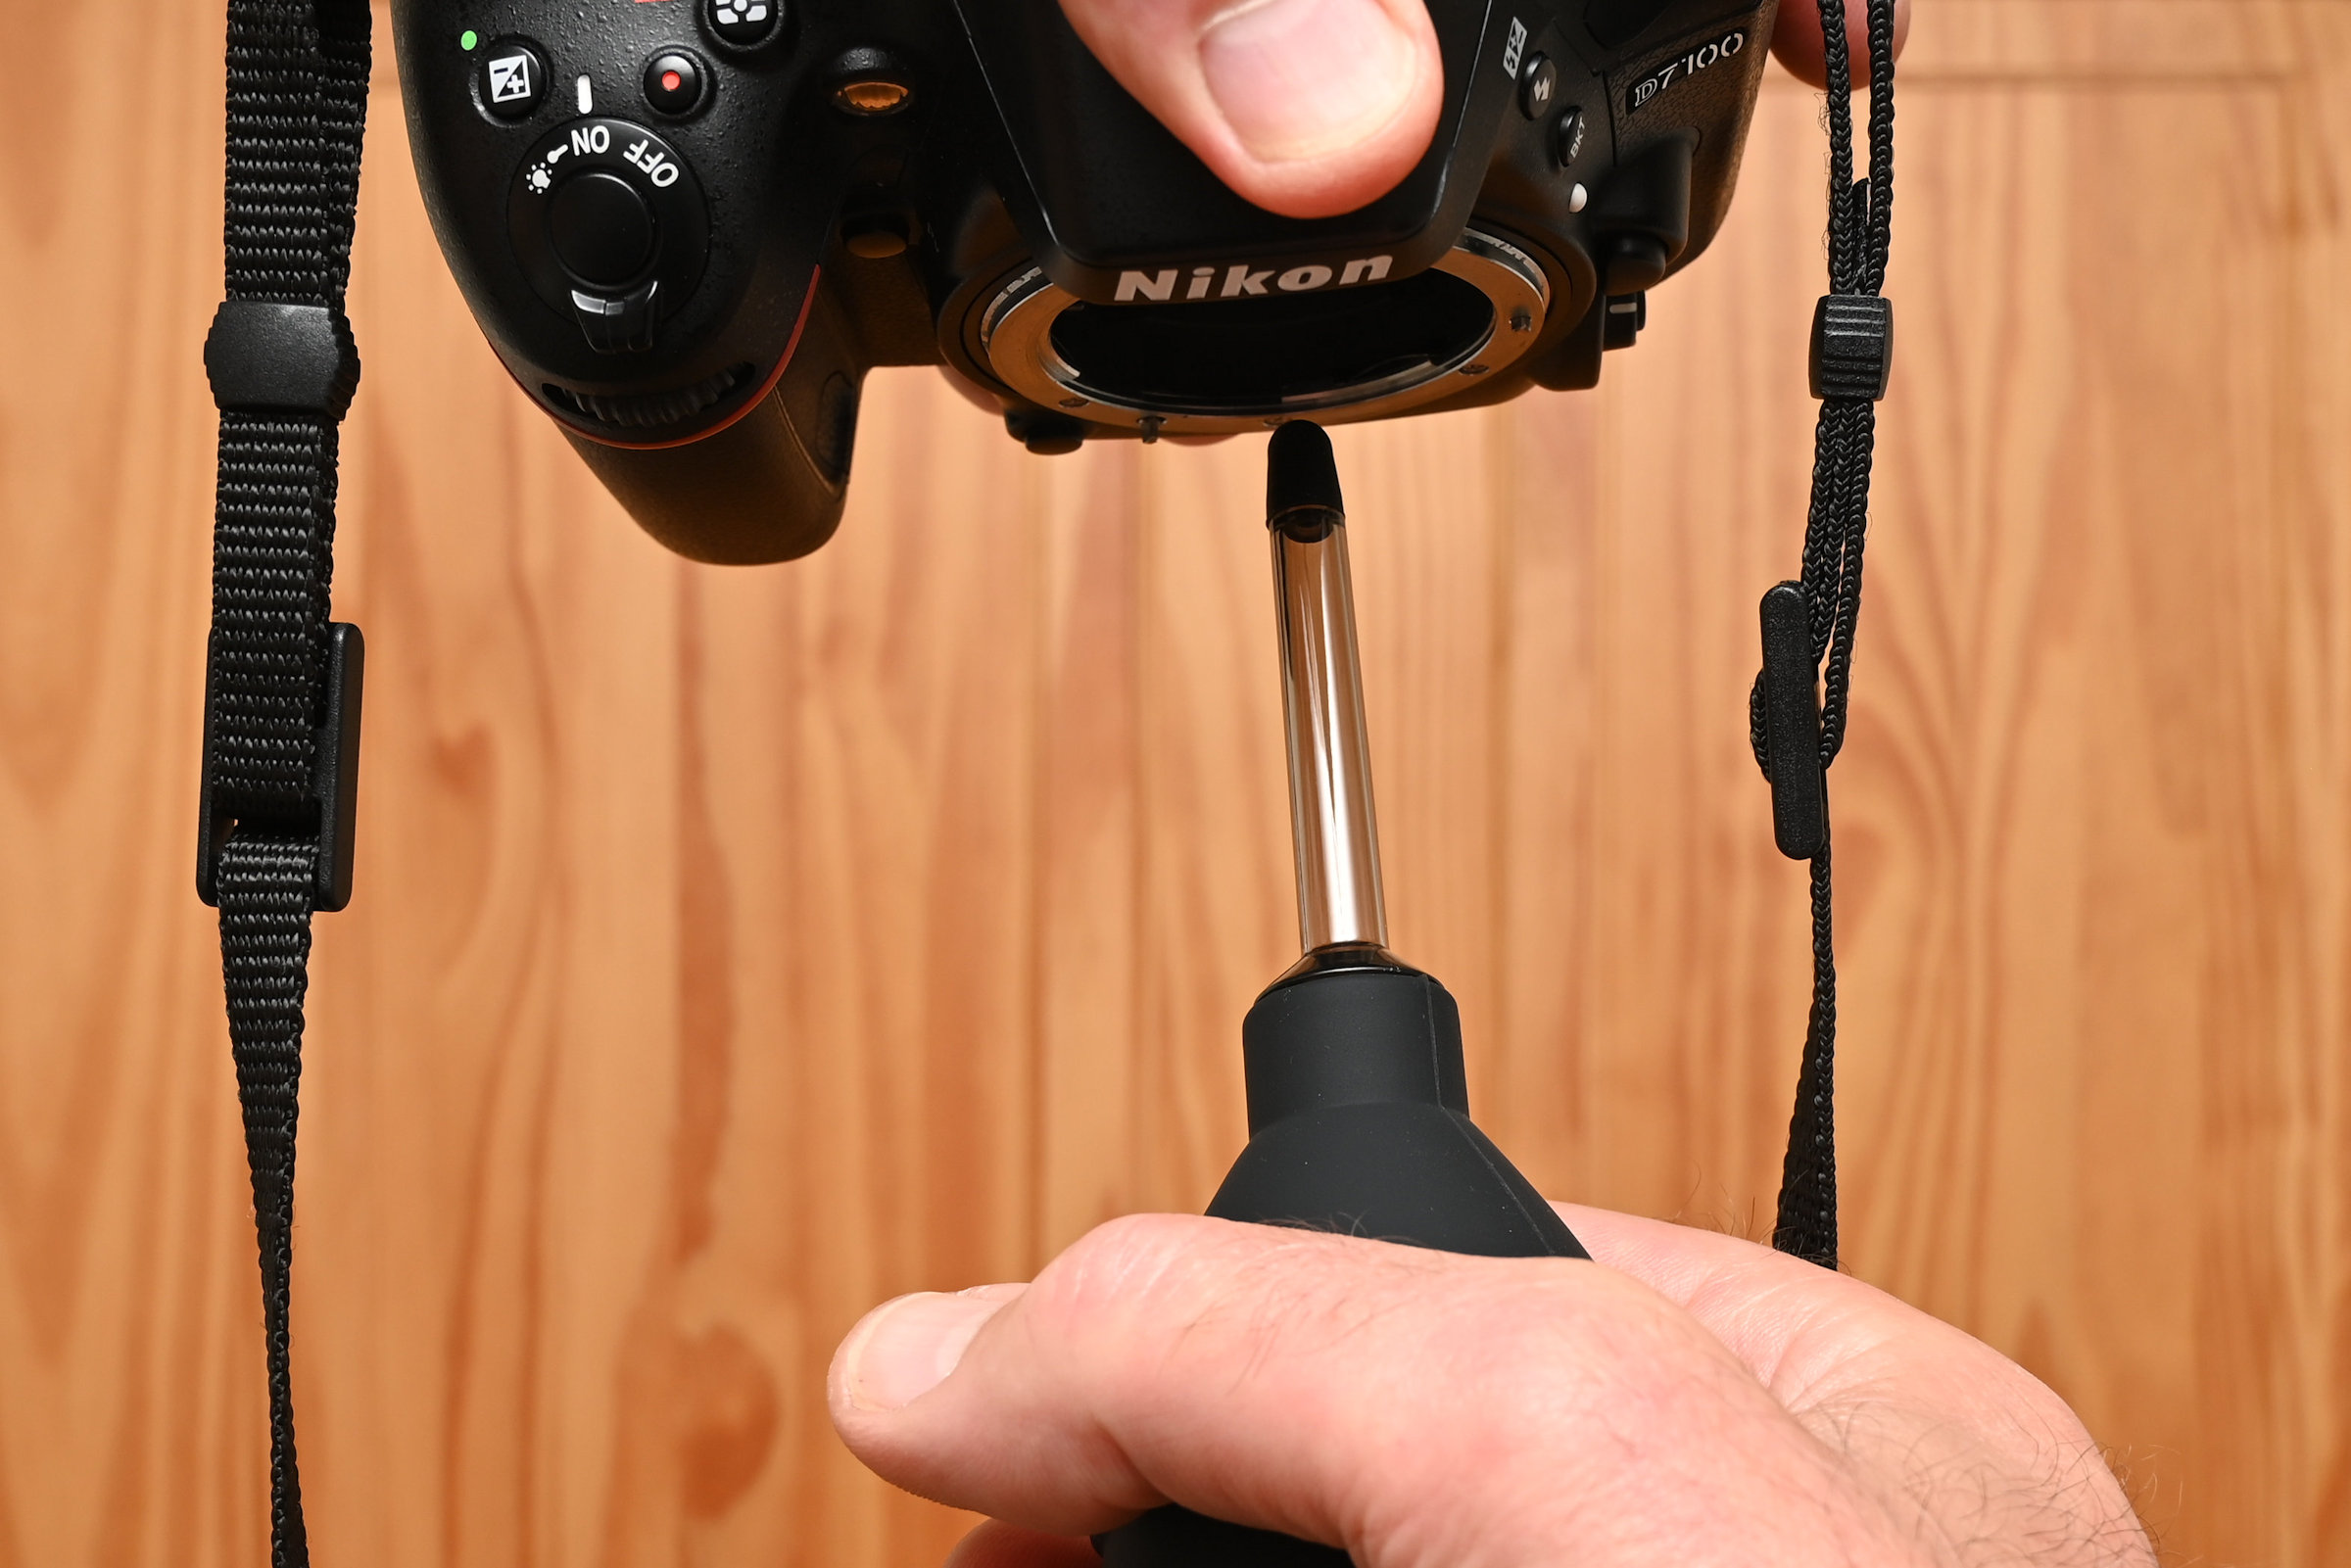
An easy way to clear most loose dust from the image sensor is by using an air blower, but don’t use a pressurised air can or other high-pressure source. With a DSLR rather than mirrorless camera, you’ll need to ‘Lock mirror up for cleaning’ in the setup menu. Use an air blower, taking care not to let it touch the sensor, and hold the camera facing downwards to help dust fall out.
Swab for success
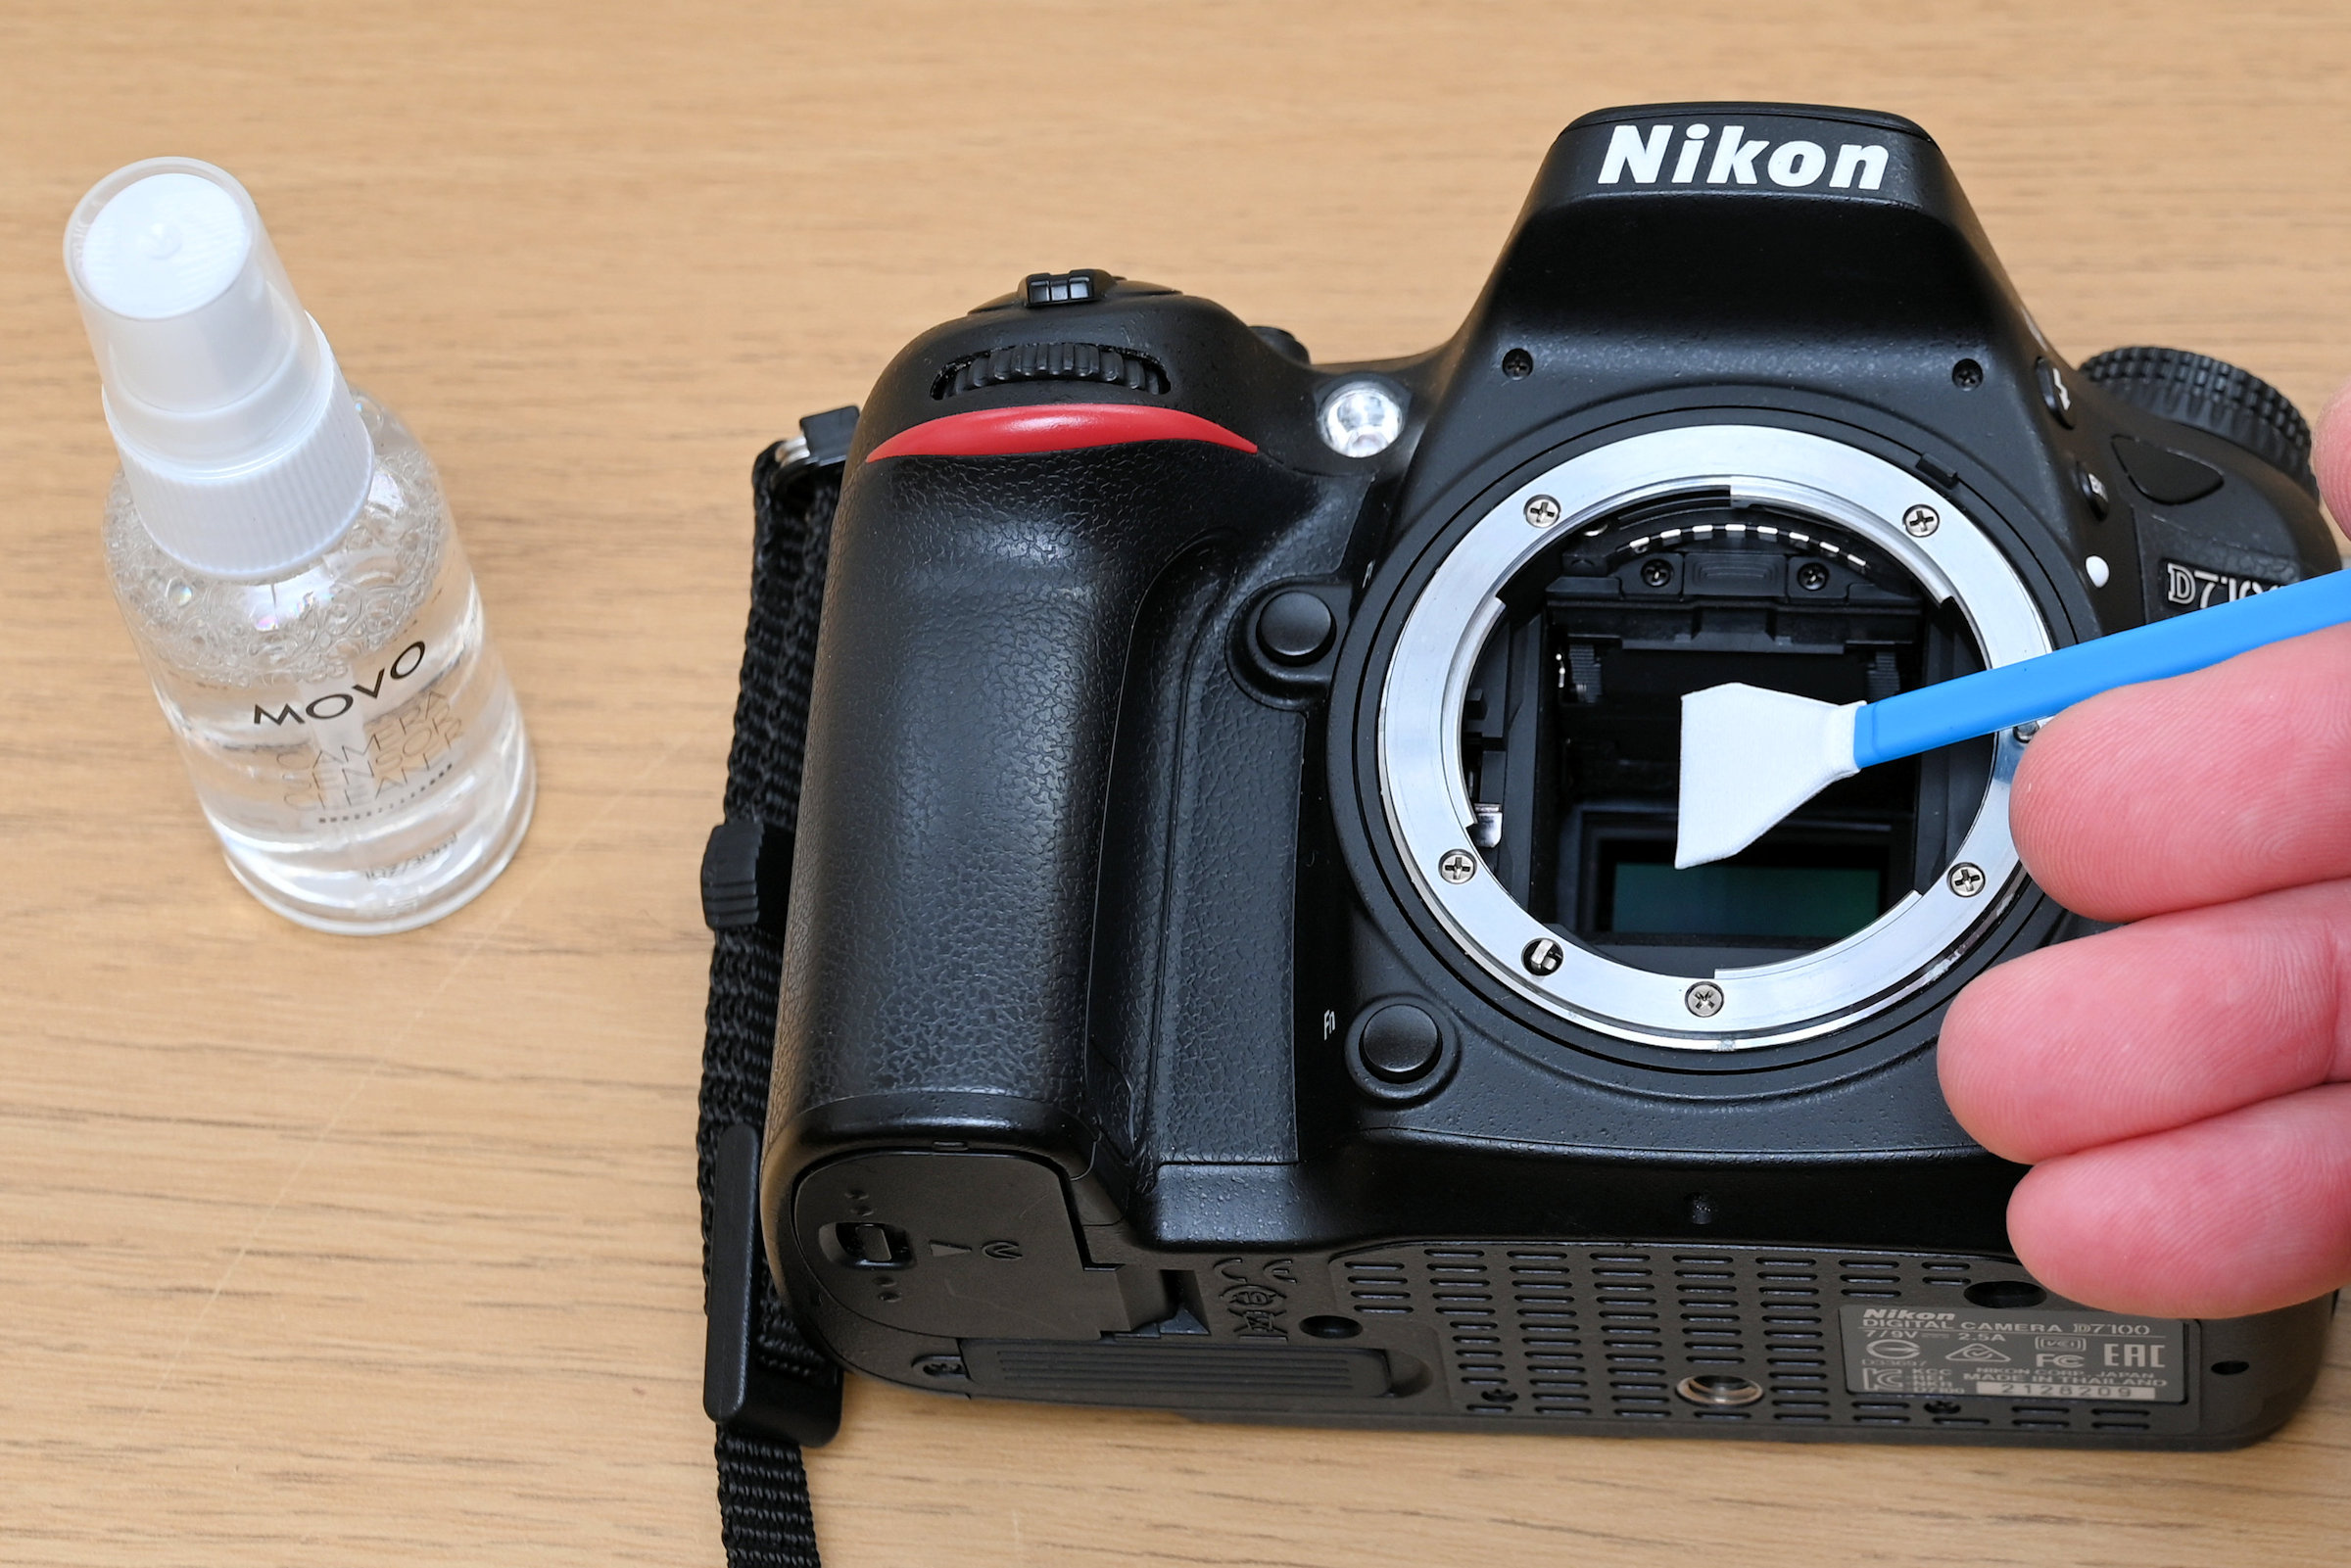
If all else fails, the last resort is to use a specially-made image sensor cleaning kit that comprises swabs and cleaning fluid. Add a few drops of liquid to the swap and, with a very light pressure, drag the swab from one side of the image sensor to the other, then angle it the other way and drag back again. To be clear, Nikon recommends that you don’t do this yourself, to avoid risk of damage! However, if you wan to do it yourself, watch our video tutorial.
Find out more about the best camera sensor cleaning kits
Get the Digital Camera World Newsletter
The best camera deals, reviews, product advice, and unmissable photography news, direct to your inbox!

Prior to joining digitalcameraworld.com as Guides Editor, Adam was the editor of N-Photo: The Nikon Magazine for seven years, and as such is one of Digital Camera World's leading experts when it comes to all things Nikon-related.
Whether it’s reviews and hands-on tests of the latest Nikon cameras and lenses, sharing his skills using filters, tripods, lighting, L brackets and other photography equipment, or trading tips and techniques on shooting landscapes, wildlife and almost any genre of photography, Adam is always on hand to provide his insights.
Prior to his tenure on N-Photo, Adam was also a veteran of publications such as PhotoPlus: The Canon Magazine, so his wealth of photographic knowledge isn’t solely limited to the Big N.
