Watch video: How to convert to black and white in Photoshop Elements
Black-and-white images have a timeless look to them, and have long been a favorite edit for photographers harking back to the glory days of film. However, achieving the very best monotone pictures requires more than simply desaturating your shots.
So we’re going to show you how, by first of all working up a Raw file and squeezing as much out of that extra Raw data as possible. We’ll do this using the Adobe Camera Raw plug-in that comes built into Photoshop Elements 2020, to boost the contrast and sharpen particular details.
Then we’ll take the picture into Elements’ Expert mode to do some dodging and burning – a classic technique that's employed to darken and lighten specific areas of your shot.
We’re going to work on a landscape image, but you could use any picture in your image library, or click here to download our Landscape.CR2 Raw file.
01 Desaturate your image
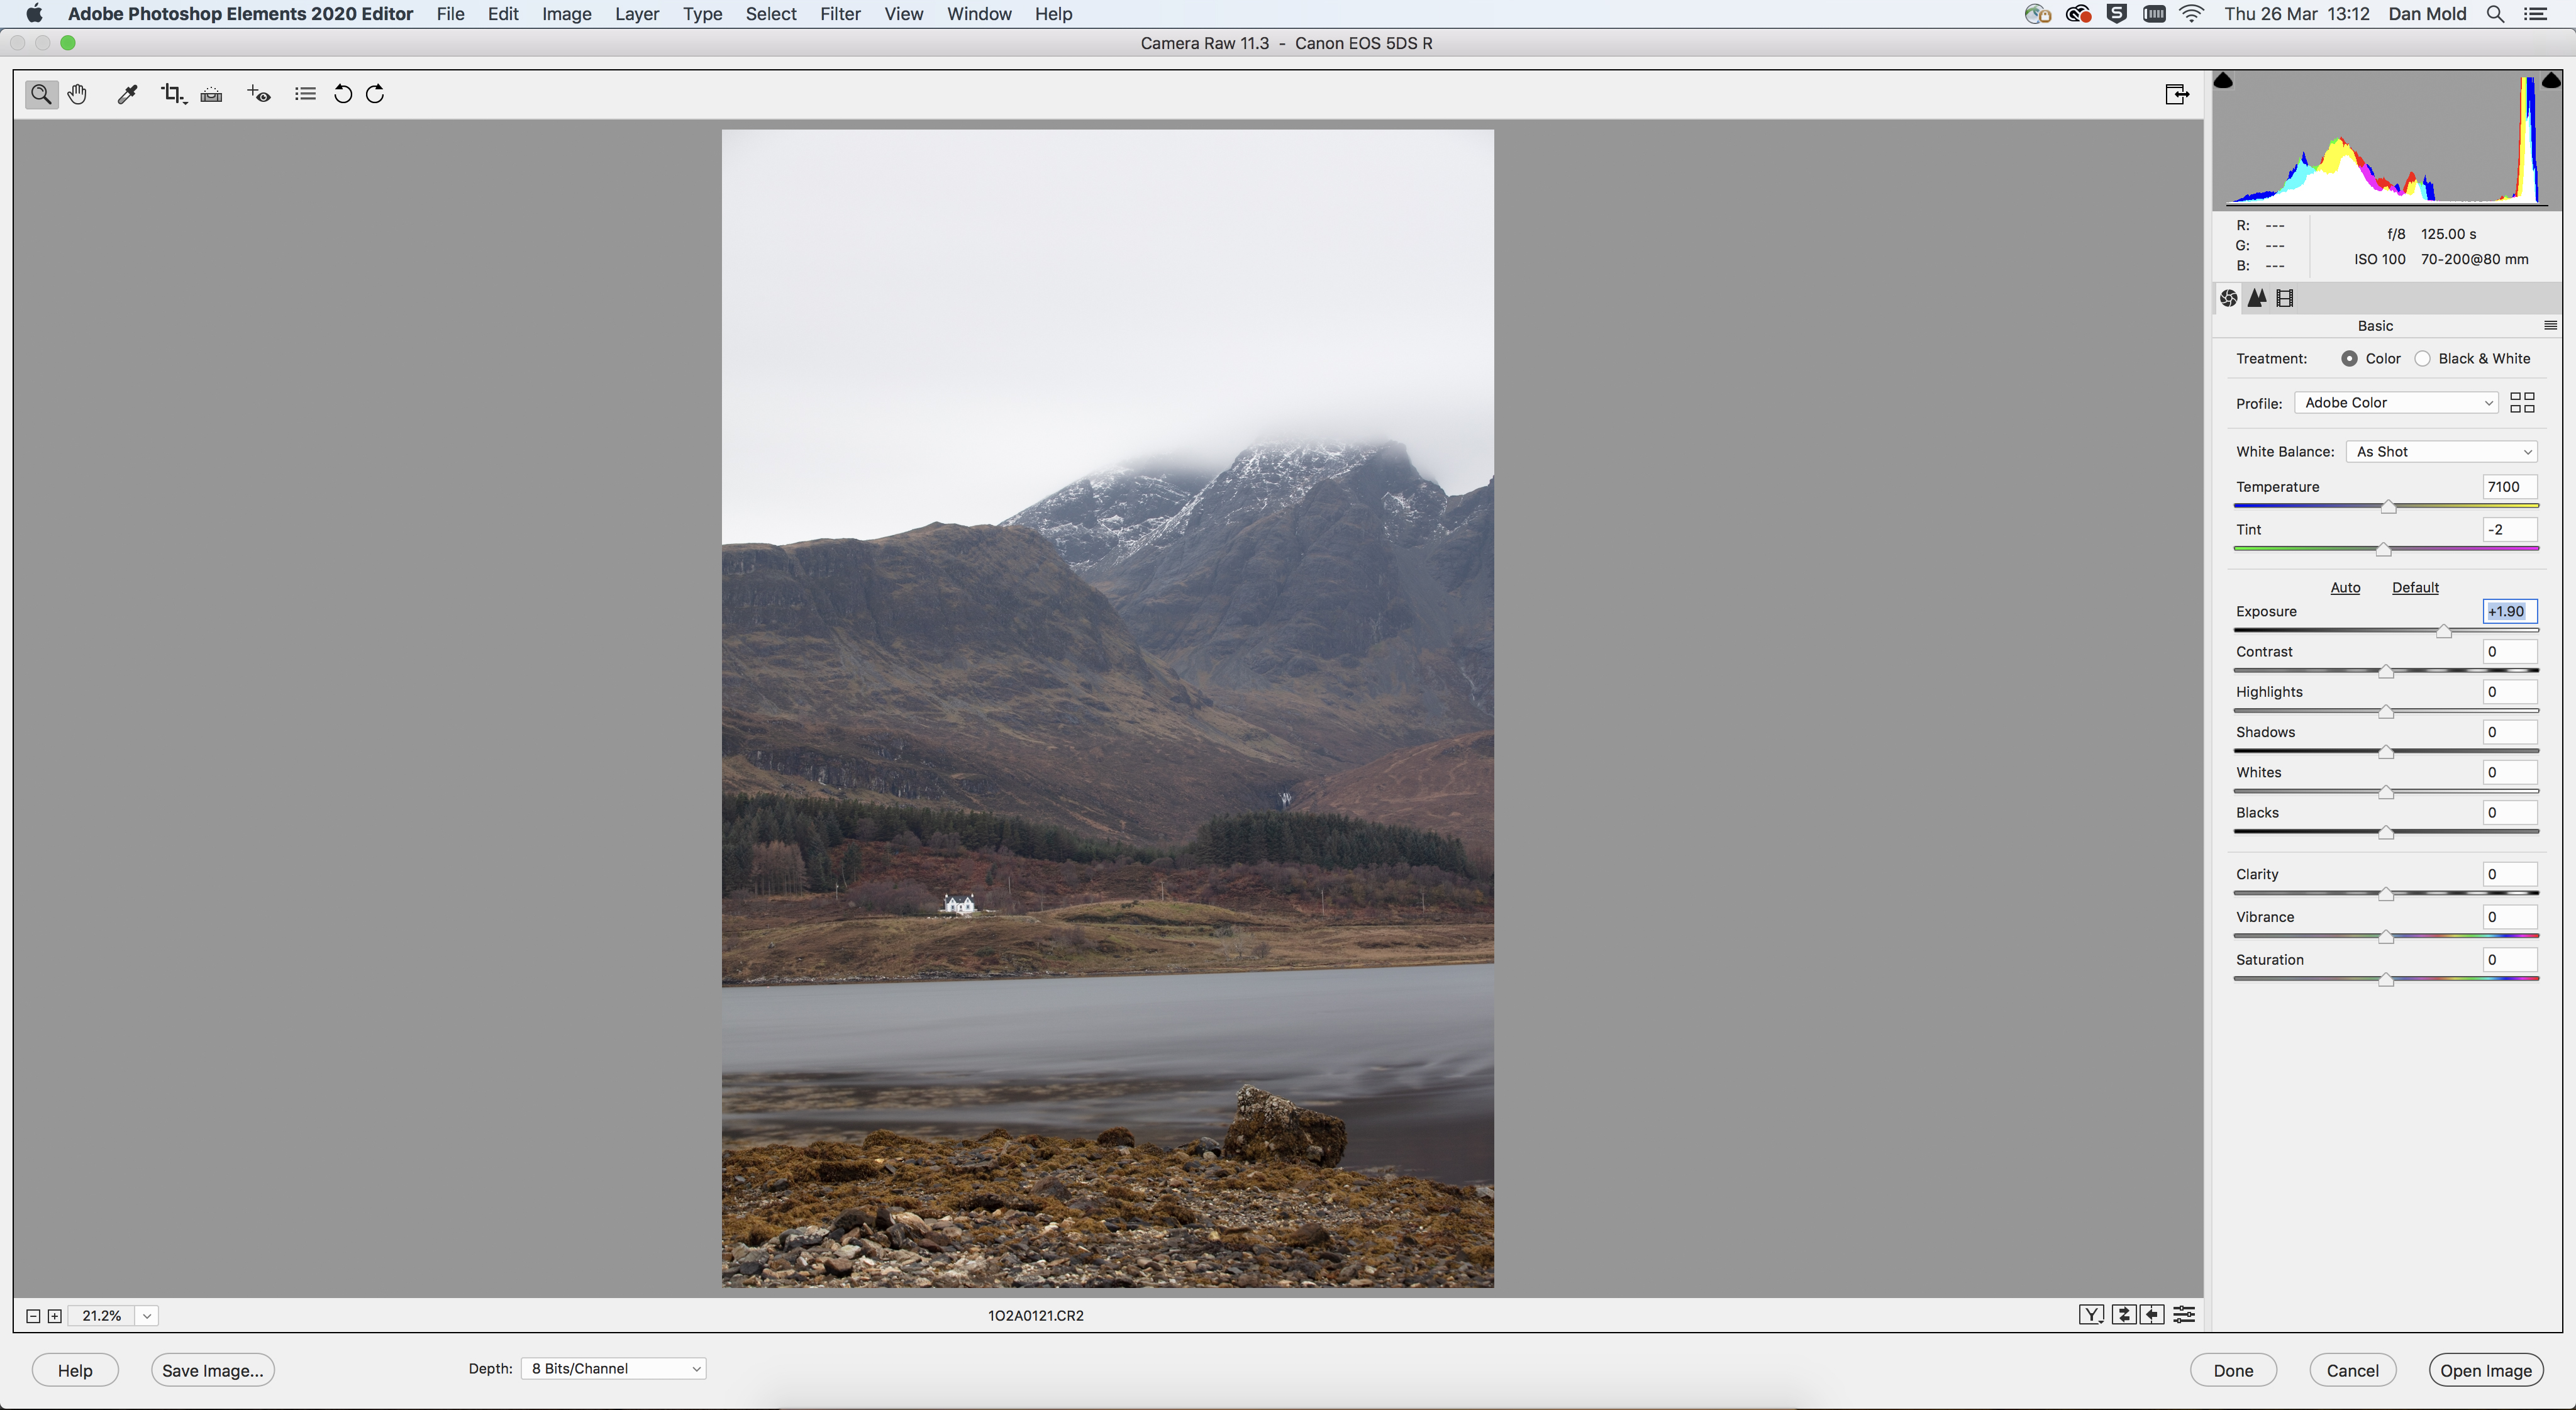
Open your Raw image into Elements and it will be automatically taken into Adobe Camera Raw. In the Basic panel, change the Treatment to Black & White, to start working your shot up in mono.
02 Expand the dynamic range
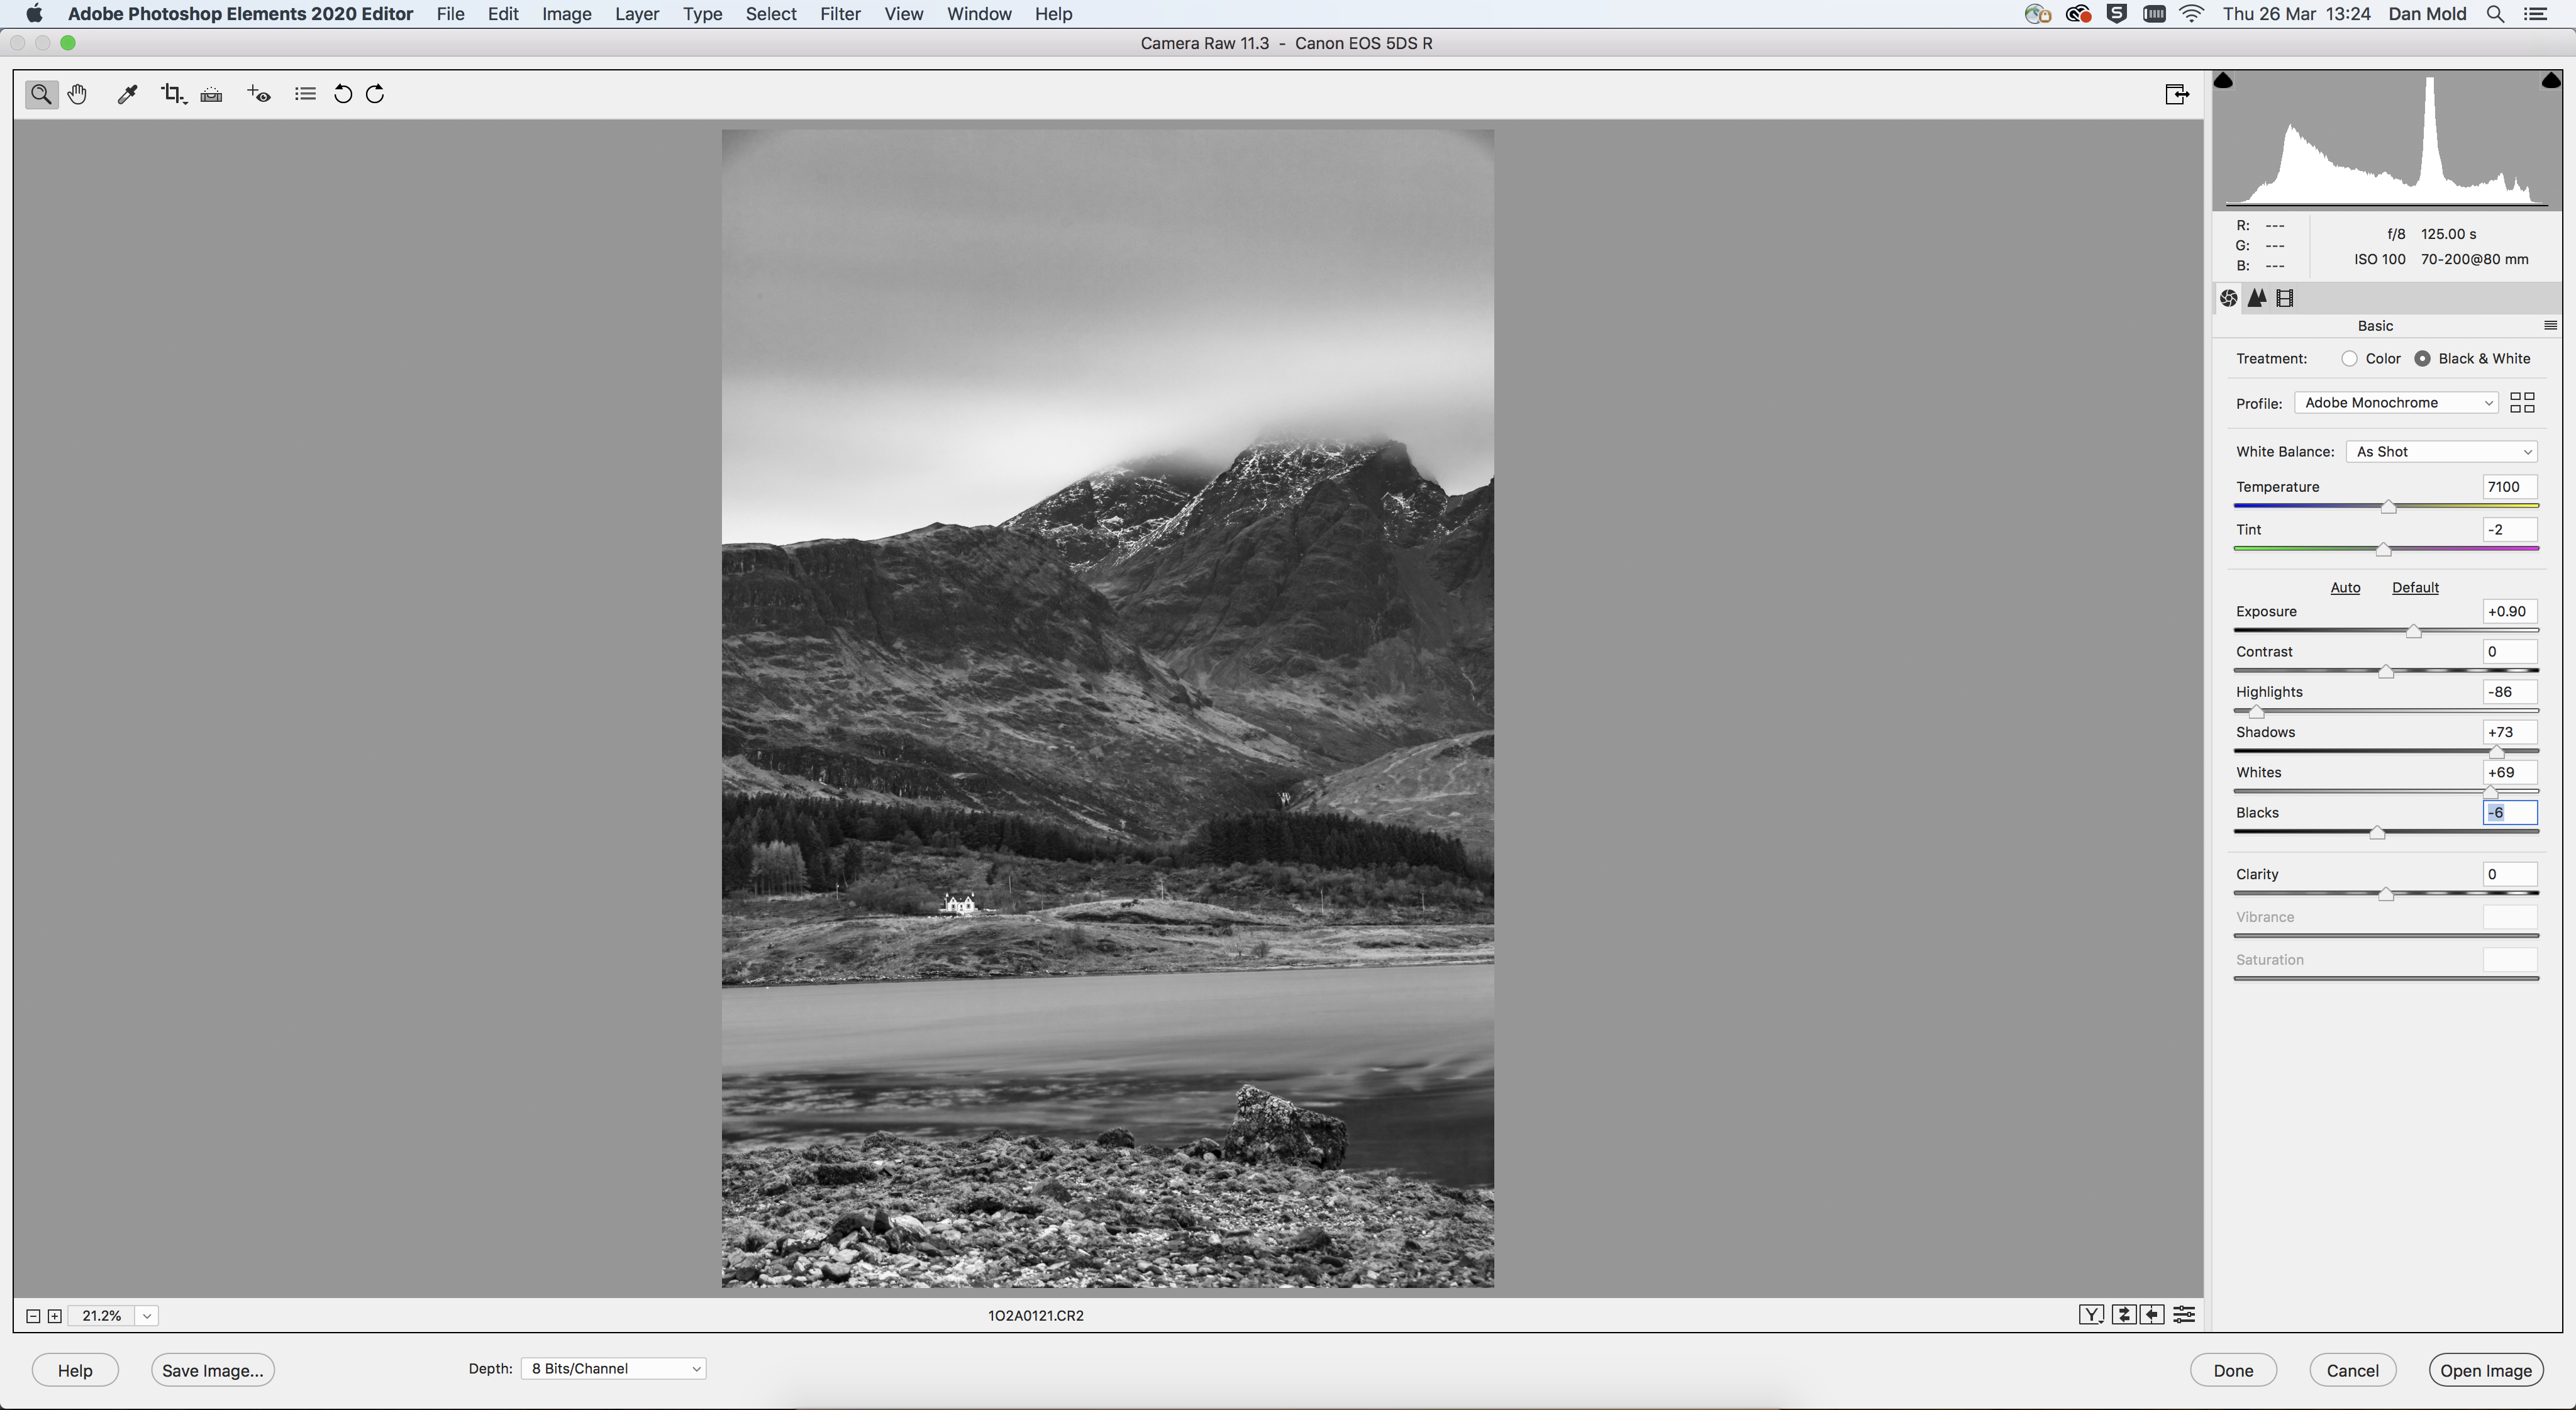
Adjust the Exposure to get the overall brightness looking right. Then pull the Highlights left, and push the Shadows and Whites to the right to expand the dynamic range a little.
03 Boost the contrast
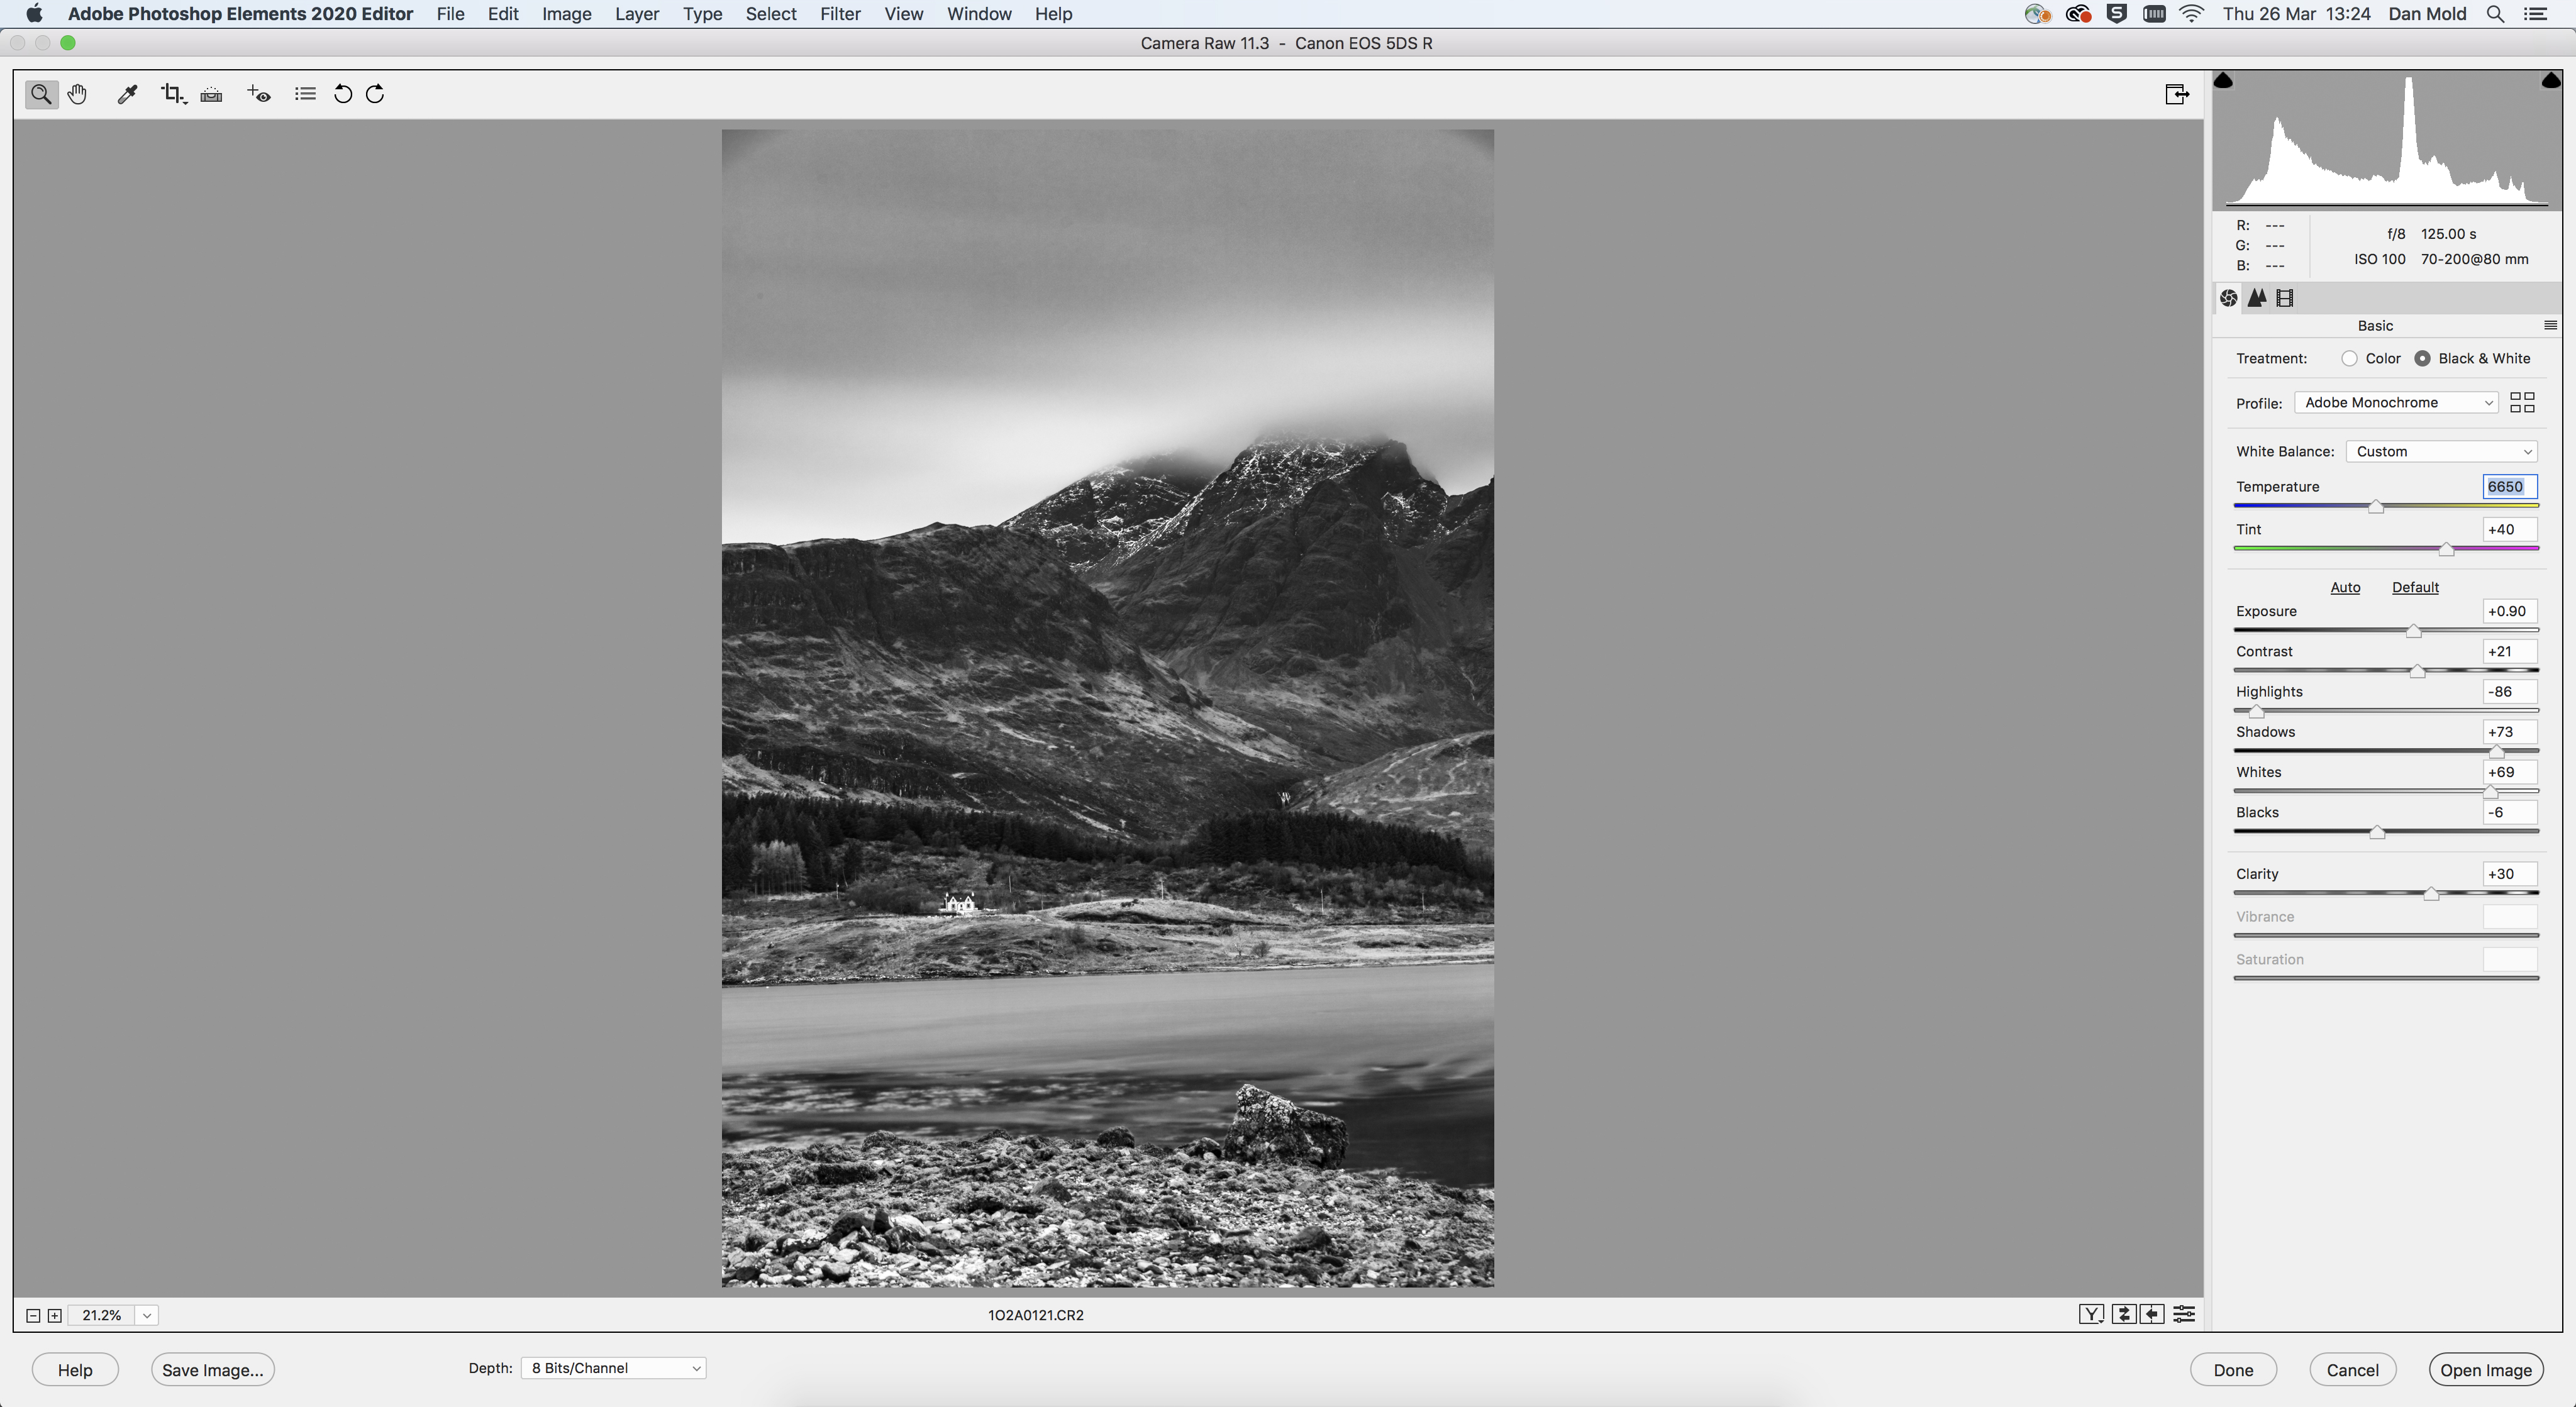
Now, you can increase Clarity and Contrast to give the image some punch. It’s also worth adjusting the Temperature and Tint sliders, as these can have a big impact on the contrast of your shot, even when your picture is converted to mono.
04 Sharpen key details
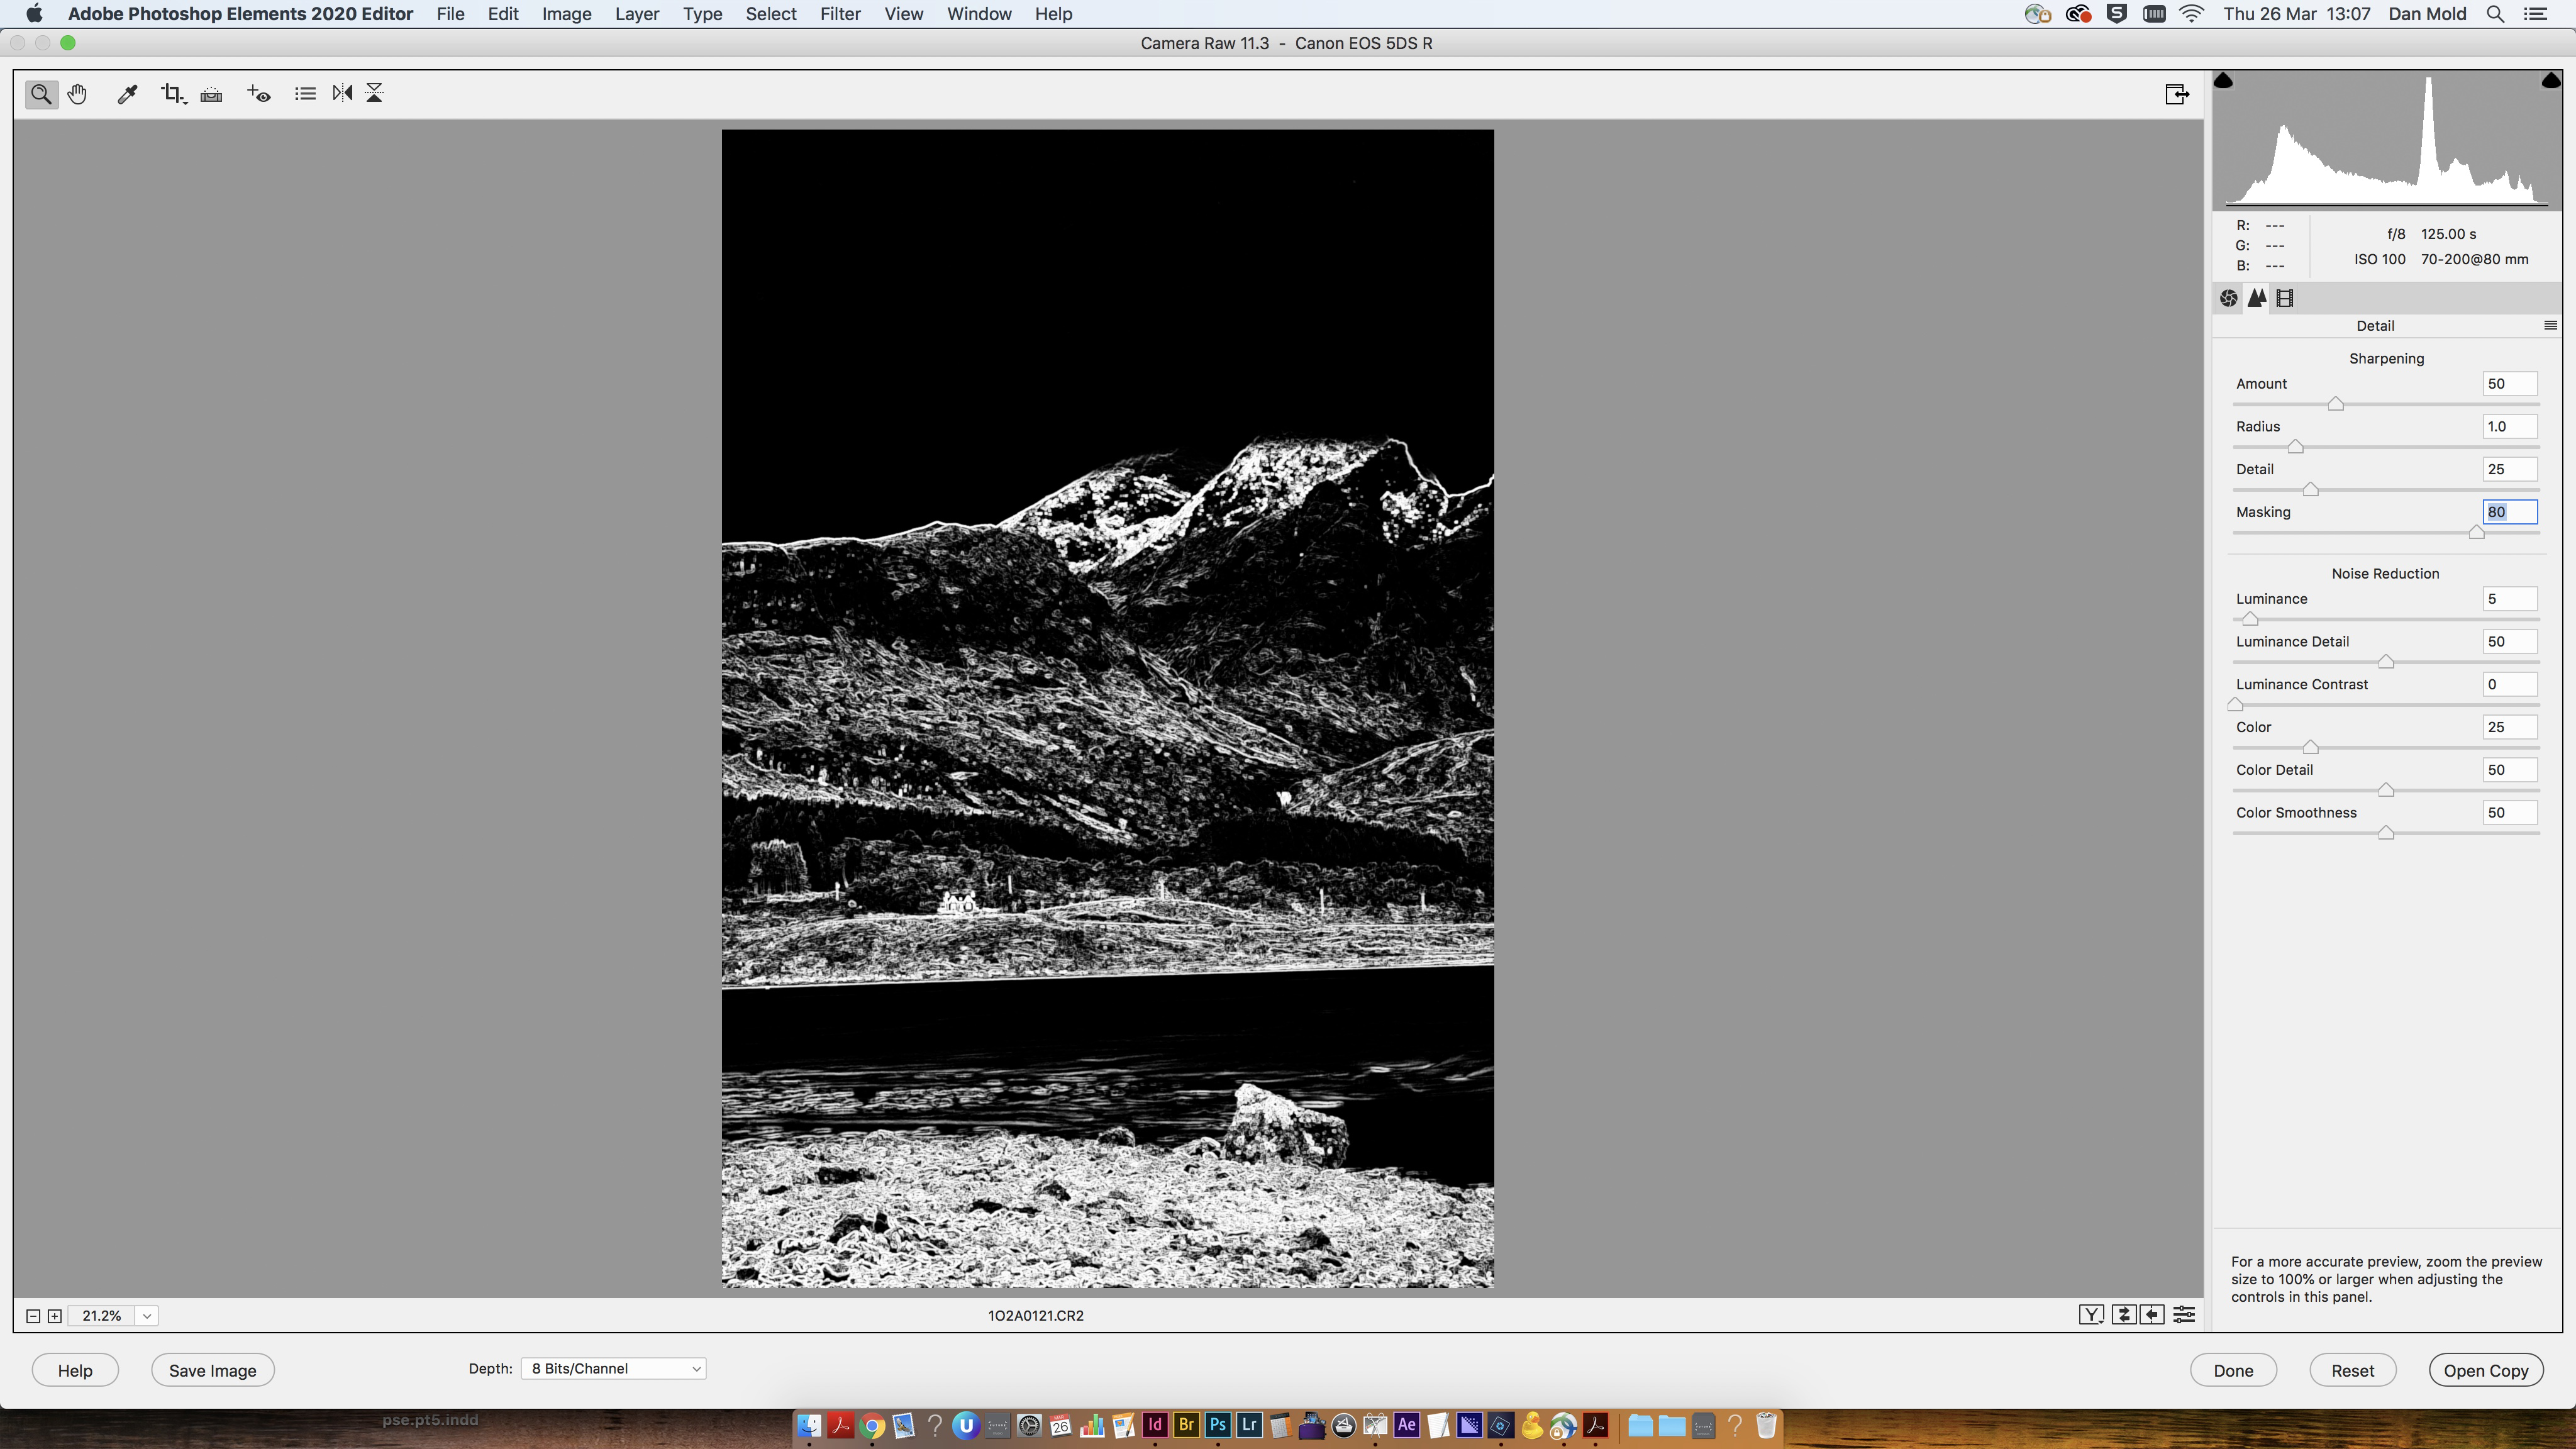
Go to the Detail panel and set Sharpening Amount to 50. Then hold Alt and drag the Masking slider to the right until only the parts you want to sharpen are shown in white. This step ensures that you don't sharpen background noise unnecessarily.
05 Use the Dodge Tool to brighten areas
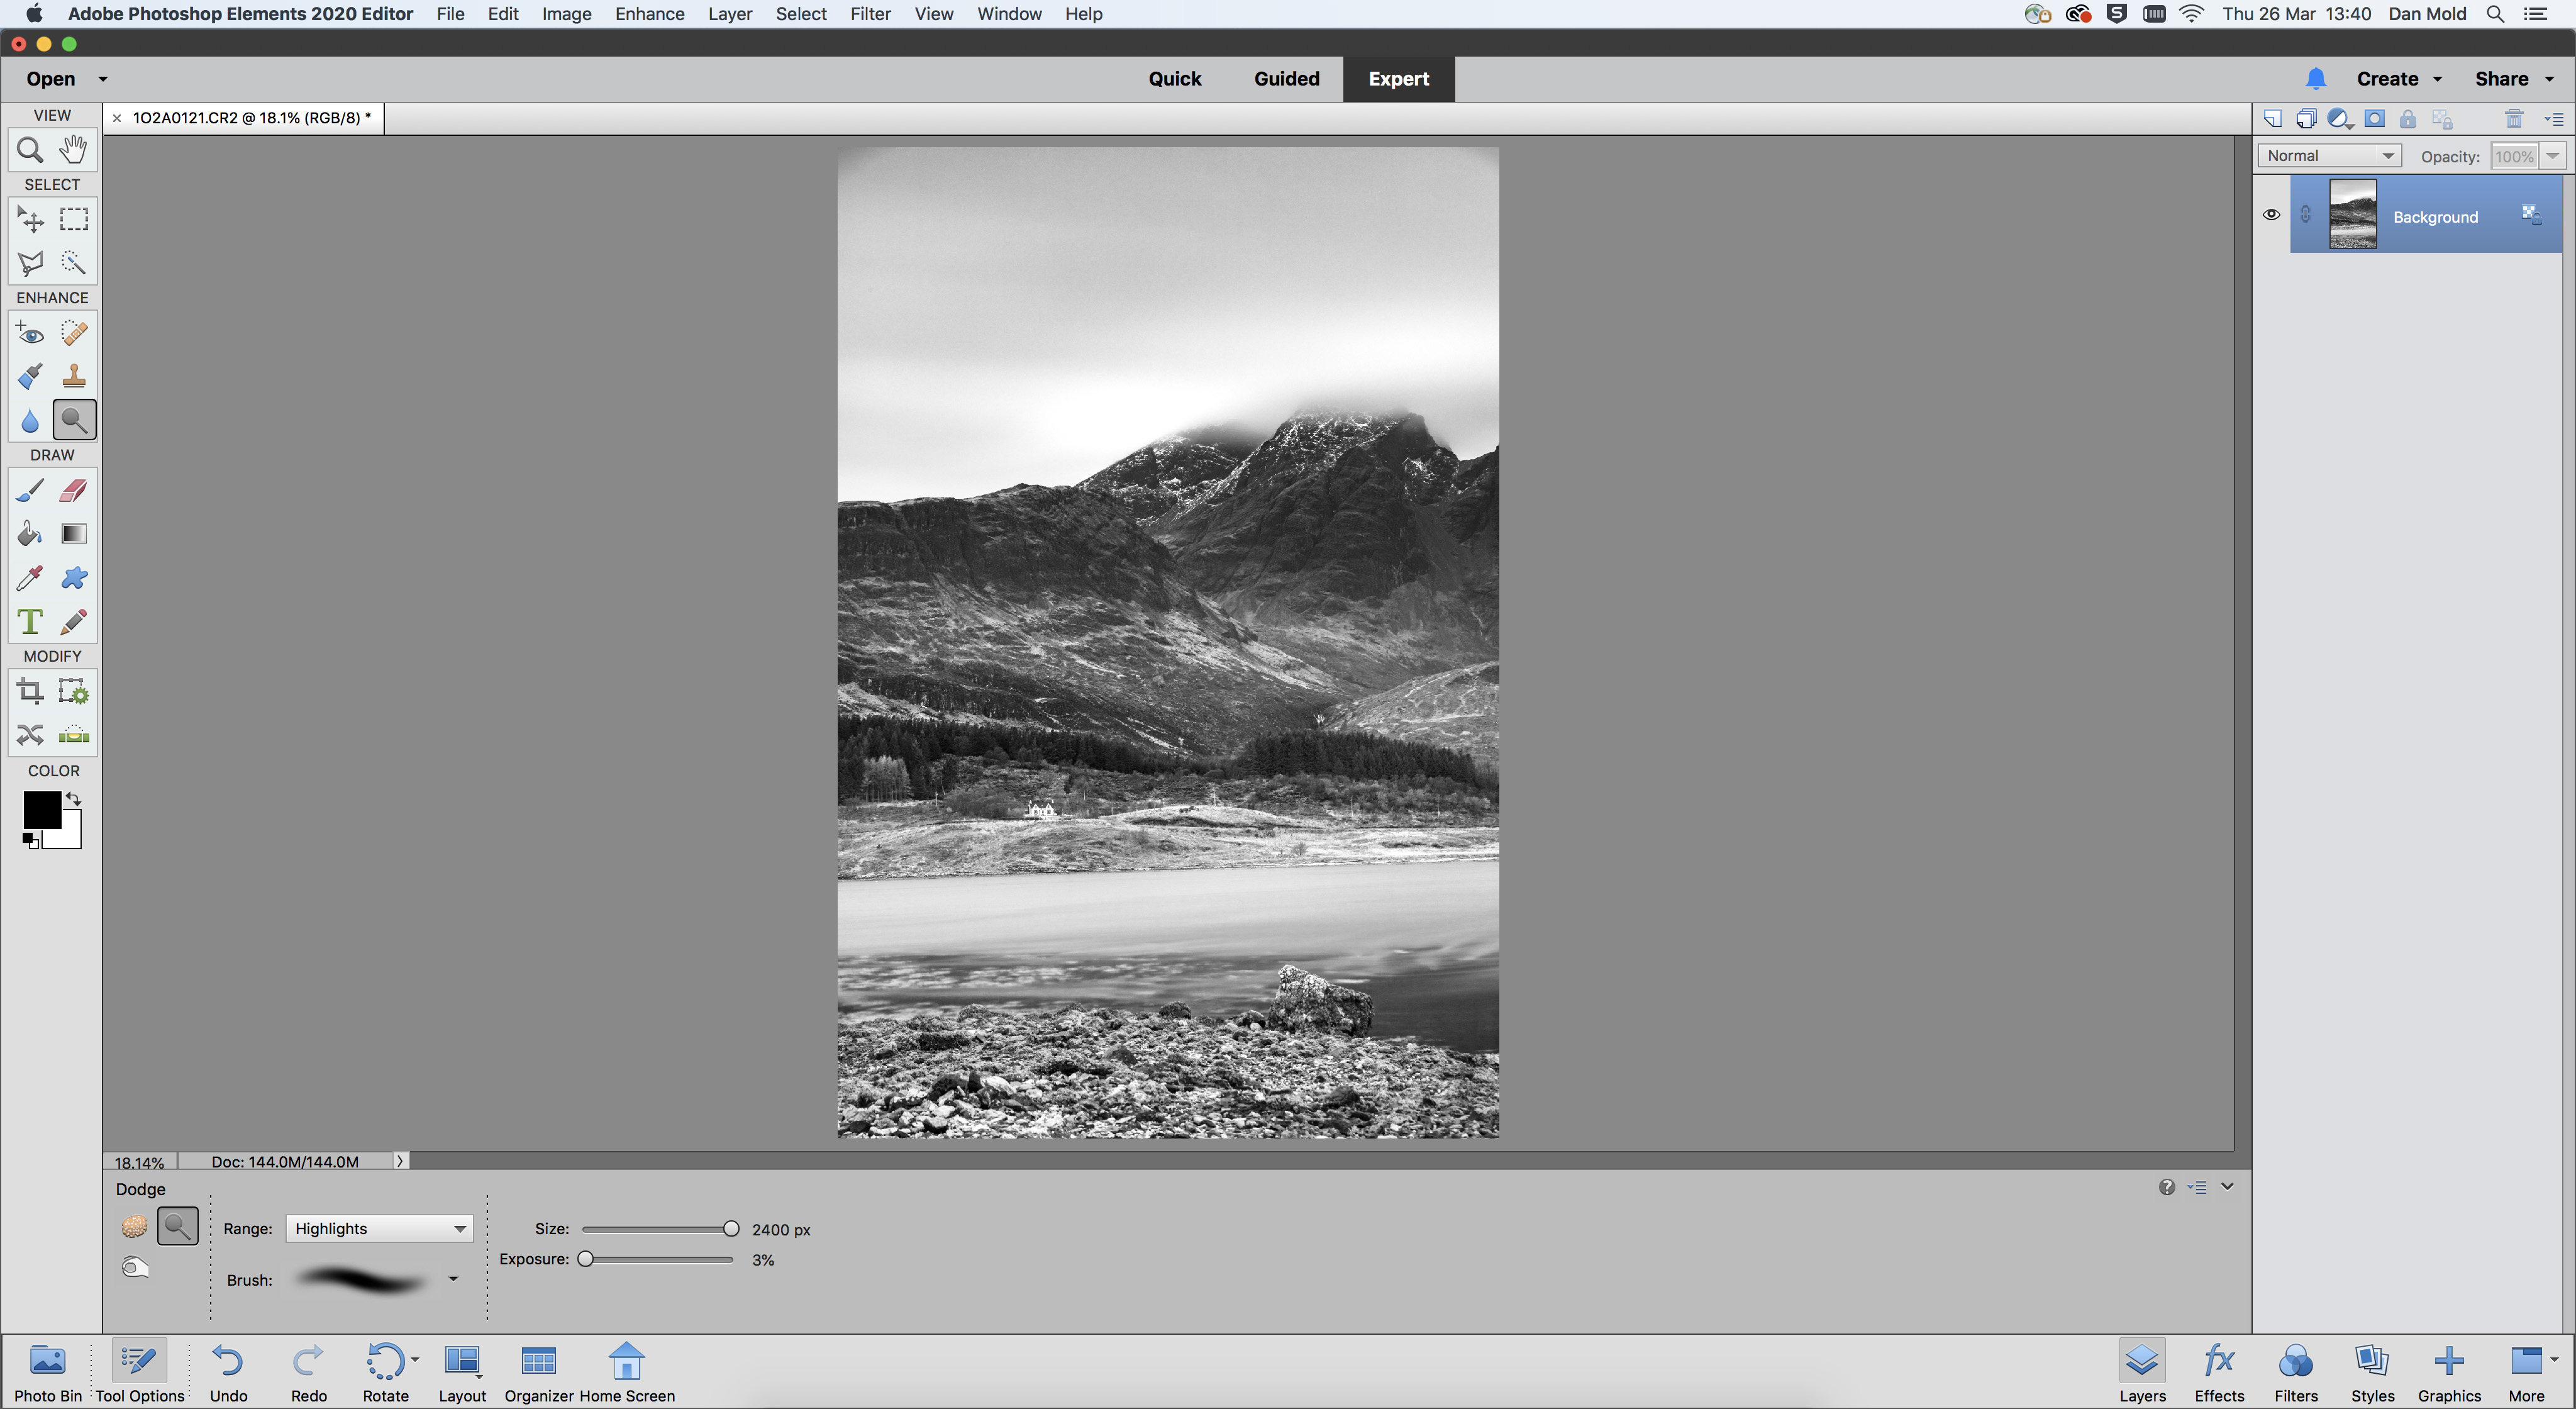
Press Open Image to bring the pic into Elements and grab the Dodge Tool. Set the Range to Midtones or Highlights, Exposure to 3% and brush over parts of the image you’d like to brighten. We did this to the sky and some of the snow on the mountains in our image.
06 Use the Burn Tool to darken

Now it’s time to darken parts of the shot, so grab the Burn Tool, set Exposure to 3% and Range to Midtones, or Shadows, and paint over the parts of your shot you want to darken to increase contrast.
PhotoPlus: The Canon Magazine is the world's only monthly newsstand title that's 100% devoted to Canon, so you can be sure the magazine is completely relevant to your system.
Read more:
The best photo editing software: image editors for novices through to pros
The best photo-editing laptops in 2020: top laptops for photographers
10 best online photography courses – from beginner guides to masterclasses
Get the Digital Camera World Newsletter
The best camera deals, reviews, product advice, and unmissable photography news, direct to your inbox!

Deputy Editor on PhotoPlus: The Canon Magazine, Dan also brings his technical wizardry and editing skills to Digital Camera World. He has been writing about all aspects of photography for over 10 years, having previously served as technical writer and technical editor for Practical Photography magazine, as well as Photoshop editor on Digital Photo.
Dan is an Adobe-certified Photoshop guru, making him officially a beast at post-processing – so he’s the perfect person to share tips and tricks both in-camera and in post. Able to shoot all genres, Dan provides news, techniques and tutorials on everything from portraits and landscapes to macro and wildlife, helping photographers get the most out of their cameras, lenses, filters, lighting, tripods, and, of course, editing software.

