How to convert your Nikon photos into cyano prints – N-Photo 161 video tutorial
Pull this age-old analogue process into the 21st century by using it to convert digital photos into striking physical prints
Trouble streaming the above video? View/download it here
The cyanotype process is one of the earliest photographic techniques that remains popular to this day. Paper is coated with the cyanotype solution then exposed to ultraviolet light. Objects placed on top of the paper – whether natural things like plants, man-made items or negative film – is reproduced on the paper in stark monochrome, the silhouetted details held back to white while the exposed areas bloom into shades of Prussian blue. In the past its simplicity made it especially useful for reproducing documents of building designs, hence the term ‘blueprint’.
• Read more: The best film cameras in 2024
These days you can even use the technique to physically print your digital Nikon photos by first converting them into negatives in Photoshop and printing them onto a sheet of transparency film, before overlaying the physical transparency onto your coated cyanotype paper and exposing it. The process is inexpensive and easy. You’ll need cyanotype chemicals that can be ordered for under £20 – ready-coated paper exists, but coating the paper yourself is easy enough, works out cheaper and allows you to create lovely brushed borders at the edges. Cyanotypes are exposed via daylight or UV light like a black light or UV torch.
Relatively slow exposure times allow us to fine-tune the composition of objects and experiment with movement. With a UV light, we can also finesse our exposure by ‘burning’ areas that need more light, or vignetting the edges of the print. After washing and drying, we’re left with a beautiful piece of analogue art ready to display.
This tutorial does not feature any project files
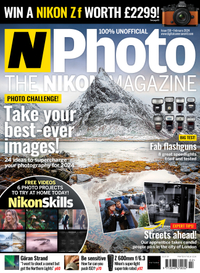
N-Photo: The Nikon Magazine is a monthly magazine that's written by Nikon enthusiasts for Nikon enthusiasts, you can be sure that all the content is 100% relevant to you! So for the best Nikon-focused news, reviews, projects and a whole lot more, subscribe to N-Photo today – with our unmissable sub deal!
Get the Digital Camera World Newsletter
The best camera deals, reviews, product advice, and unmissable photography news, direct to your inbox!
The lead technique writer on Digital Camera Magazine, PhotoPlus: The Canon Magazine and N-Photo: The Nikon Magazine, James is a fantastic general practice photographer with an enviable array of skills across every genre of photography.
Whether it's flash photography techniques like stroboscopic portraits, astrophotography projects like photographing the Northern Lights, or turning sound into art by making paint dance on a set of speakers, James' tutorials and projects are as creative as they are enjoyable.
He's also a wizard at the dark arts of Photoshop, Lightroom and Affinity Photo, and is capable of some genuine black magic in the digital darkroom, making him one of the leading authorities on photo editing software and techniques.


