How to create a fantastical storm in a teacup with Photoshop CC
Whip up incredible conceptual art and demonstrate essential Photoshop compositing skills with layers and masks
Watch video: Create fantastical composites in Photoshop CC
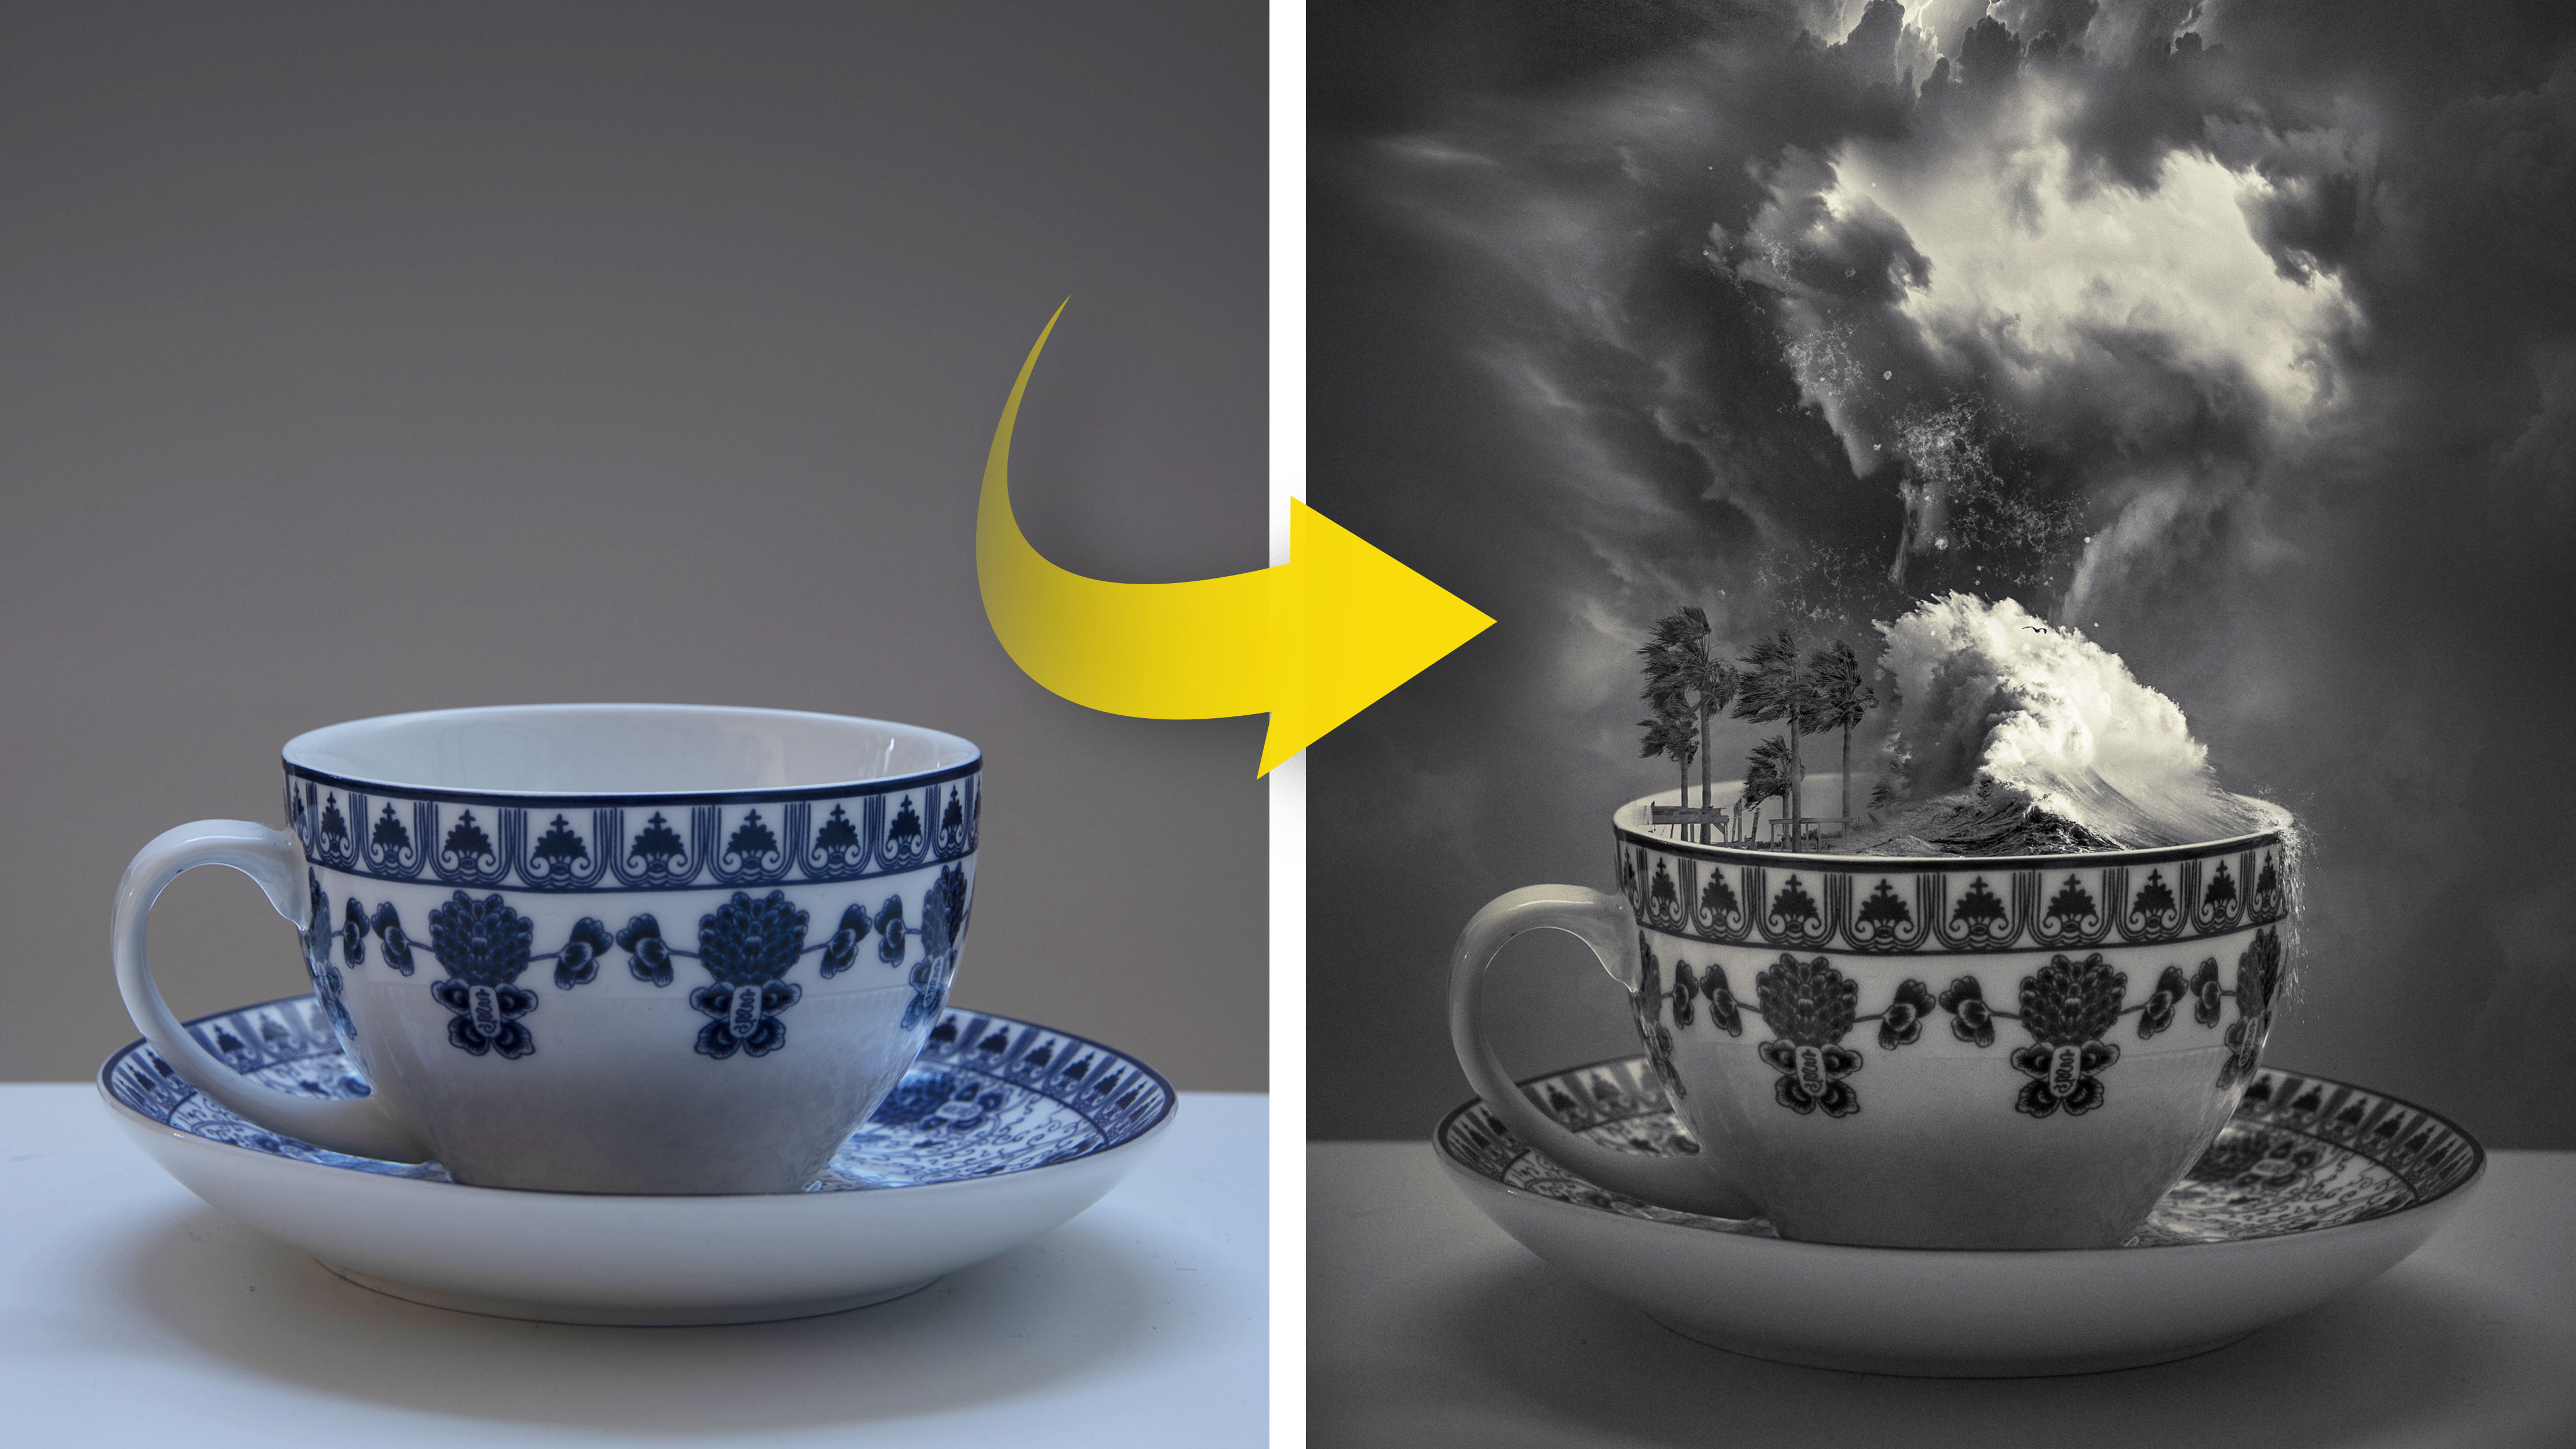
If you can blend photos together in a convincing way, you can create all kinds of imaginative scenes with Photoshop CC.
Five different photos make up our teacup composite here, with the cup image acting as a base for all the others. Then there’s the images of the windswept trees and the wave that fills the teacup – plus two photos of clouds and lightning that have been blended together for the sky. Can you see the seams between each? The trick here is to use layer masks to blend the different shots together.
To build our composite we’ll use of several free photos found on Pixabay, which is a useful resource for free, high-res photos. If you want to follow along, search for these image references on the site: 3158852, 3119563, 3191872. We’ve also made use of another top source of stunning, rights-free, high-res images: the NASA website (search NASA images for image 381727). Furthermore, you’ll find a shot of a teacup with the project files here. Here's how to do it.
01 Cut out the cup
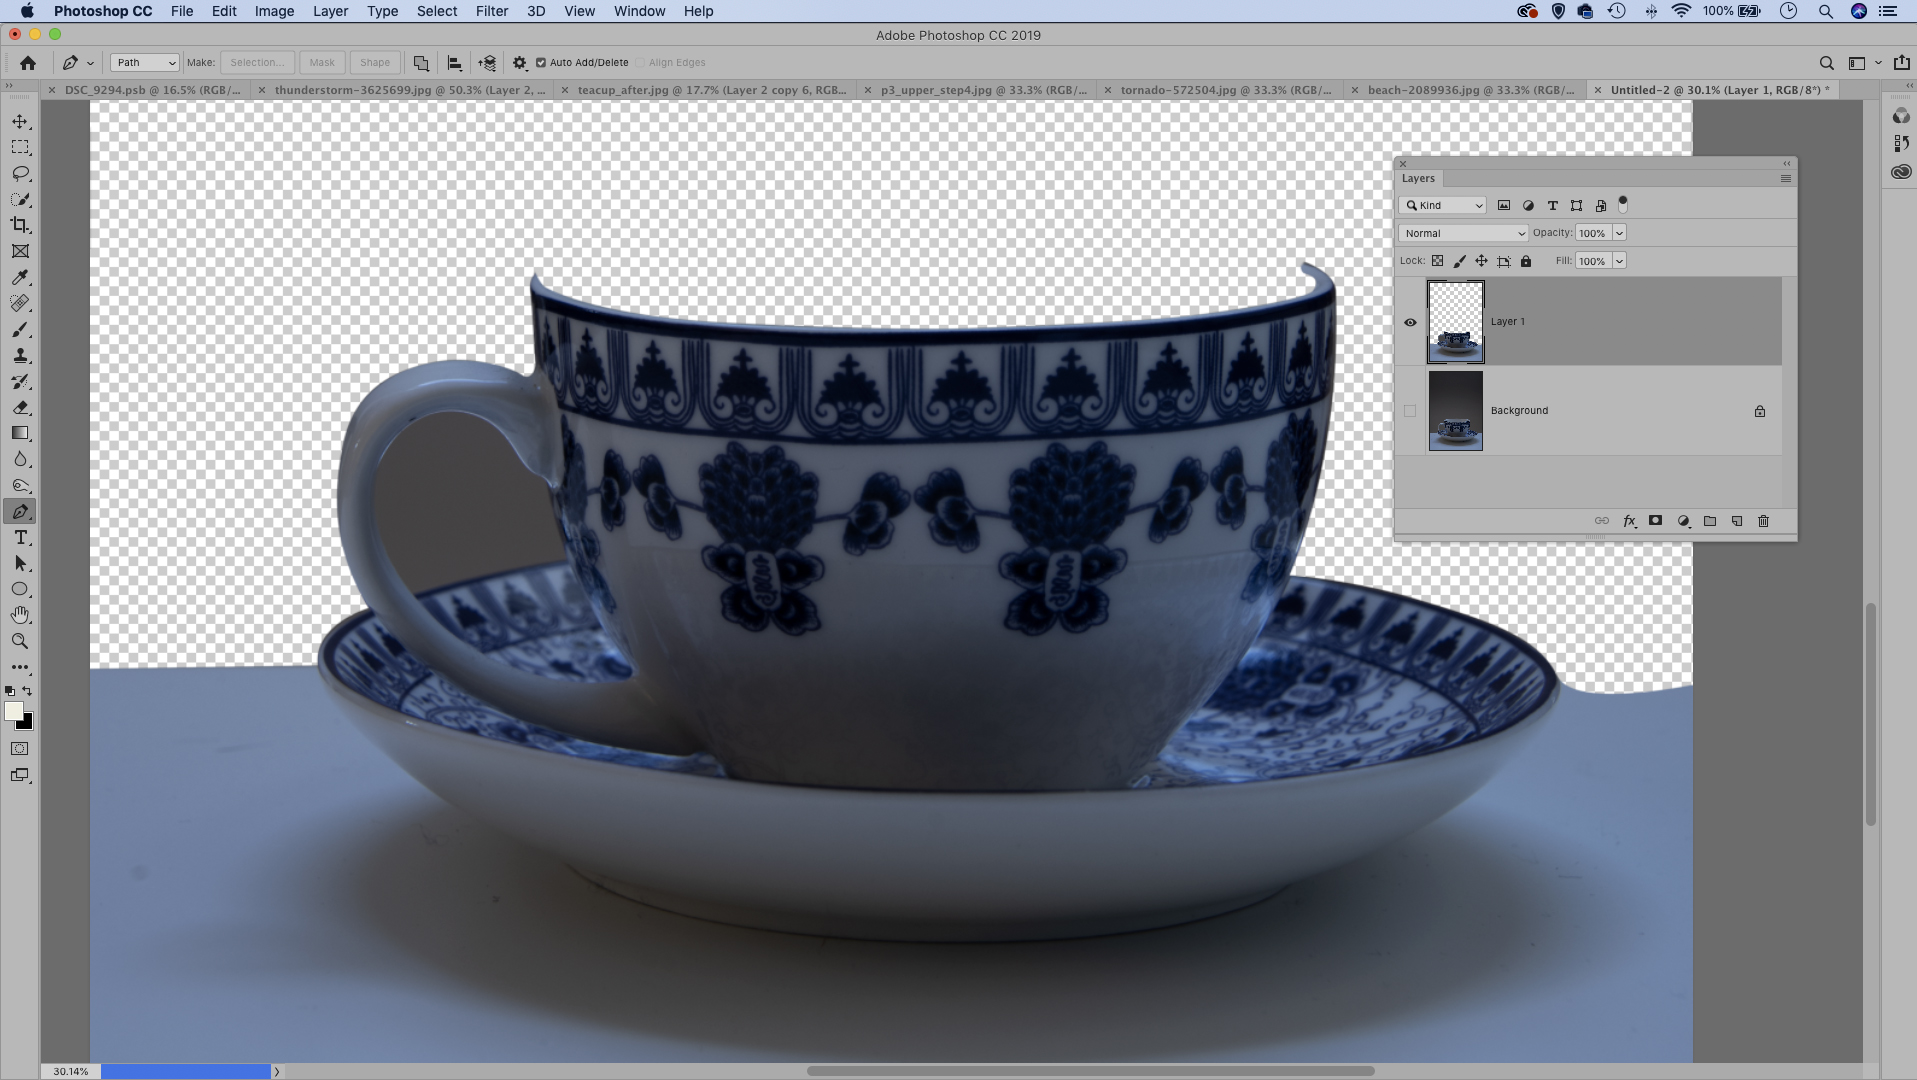
Open teacup.jpg and the Pen tool. Use it to trace the front edge of the teacup as shown (or, use the Quick Selection tool). Once done, right-click and Make Selection, then hit Cmd/Ctrl + J to copy the selection to a new layer. Open the wave shot (Pixabay 3119563).
02 Add a wave
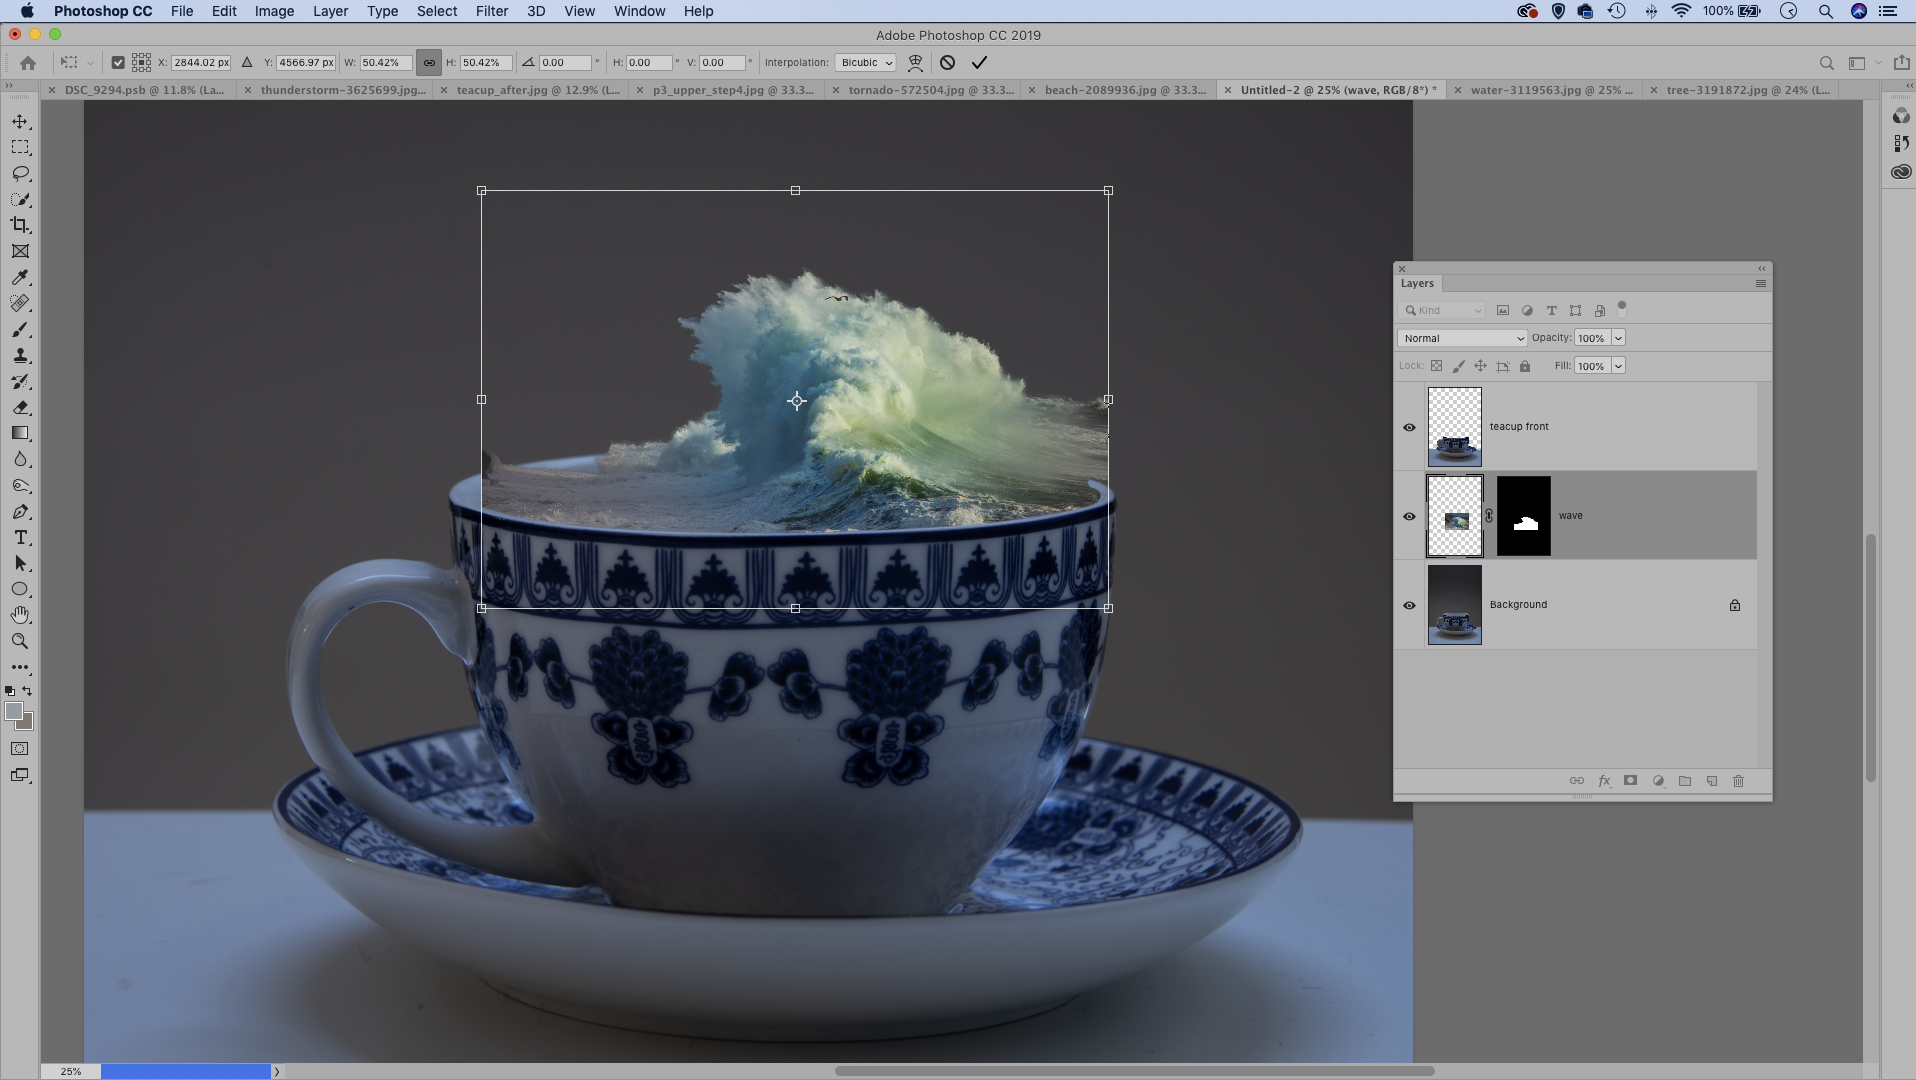
Grab the Quick Selection tool and paint to select the wave. Click ‘Select and mask’ and increase Radius to about 50px. Set Output: Layer Mask and hit OK. Copy the wave over with the Move tool and drag it below the top layer, then hit Cmd/Ctrl + T and move it in the cup.
03 Select the trees
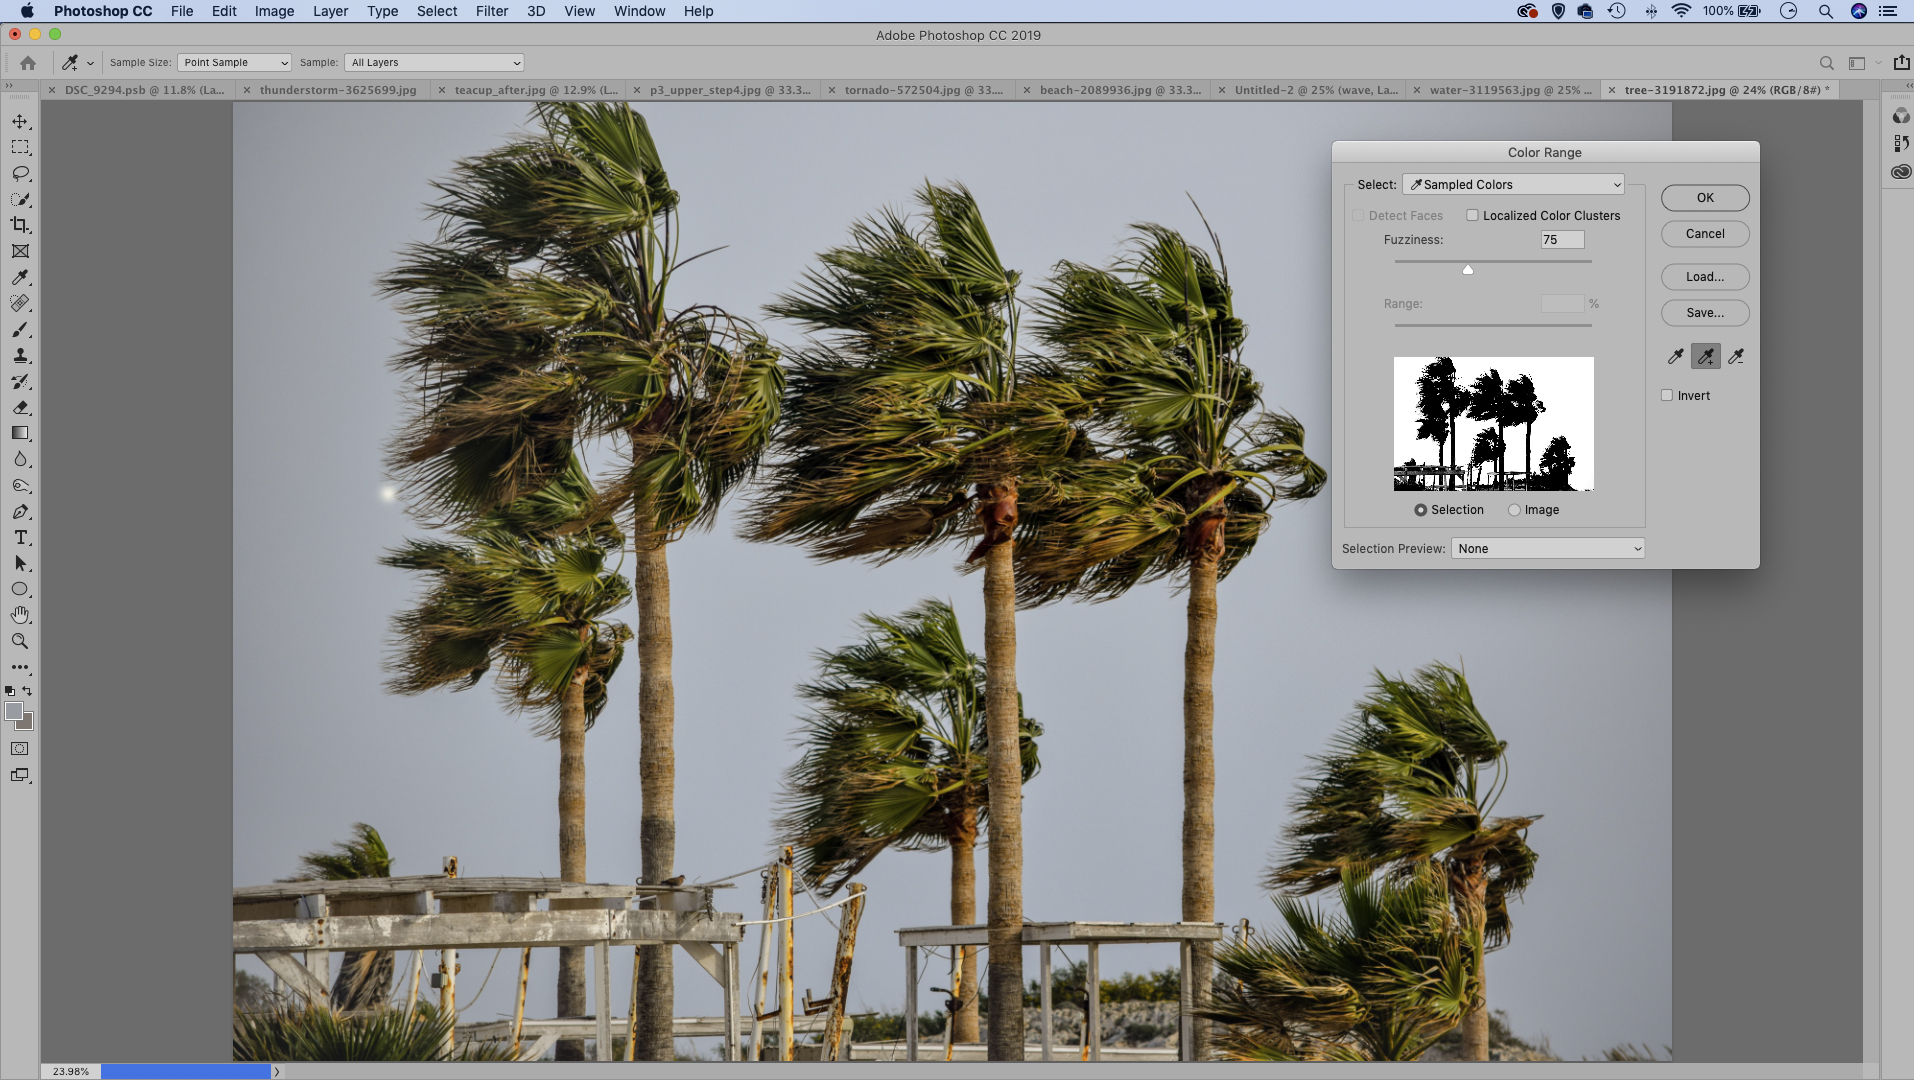
Right-click the wave layer and ‘Convert to Smart Object’ then add a layer mask and paint black to hide any areas that overlap the edge of the cup. Open the tree pic (Pixabay 3191872). Go to Select > Color Range then click to sample the sky. Click Invert, then hit OK.
04 Position the trees
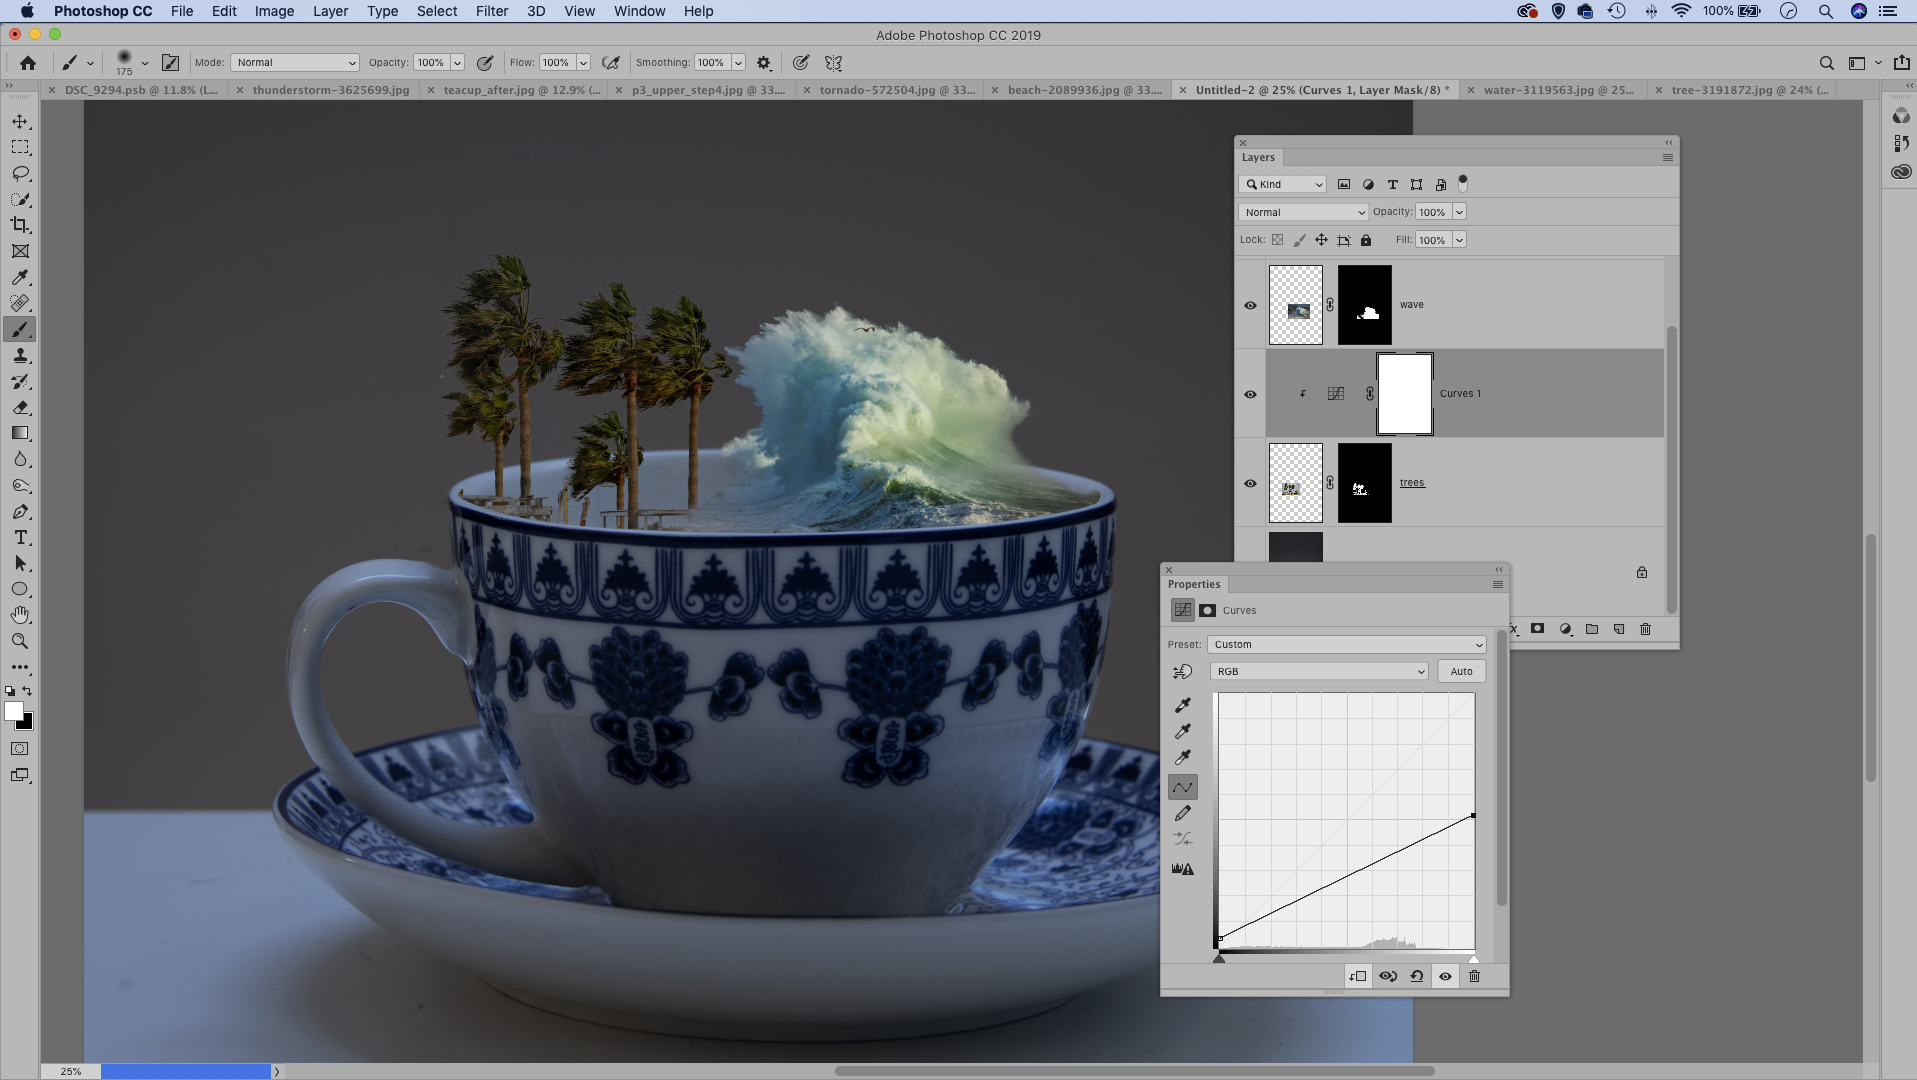
Click Add Layer Mask in the Layers panel to convert the selection to a mask. Copy in the trees and transform, move and mask. Add a Curves Adjustment Layer. Right-click it and ‘Create Clipping Mask’, then drag the right point downwards to darken the trees.
05 Copy the clouds
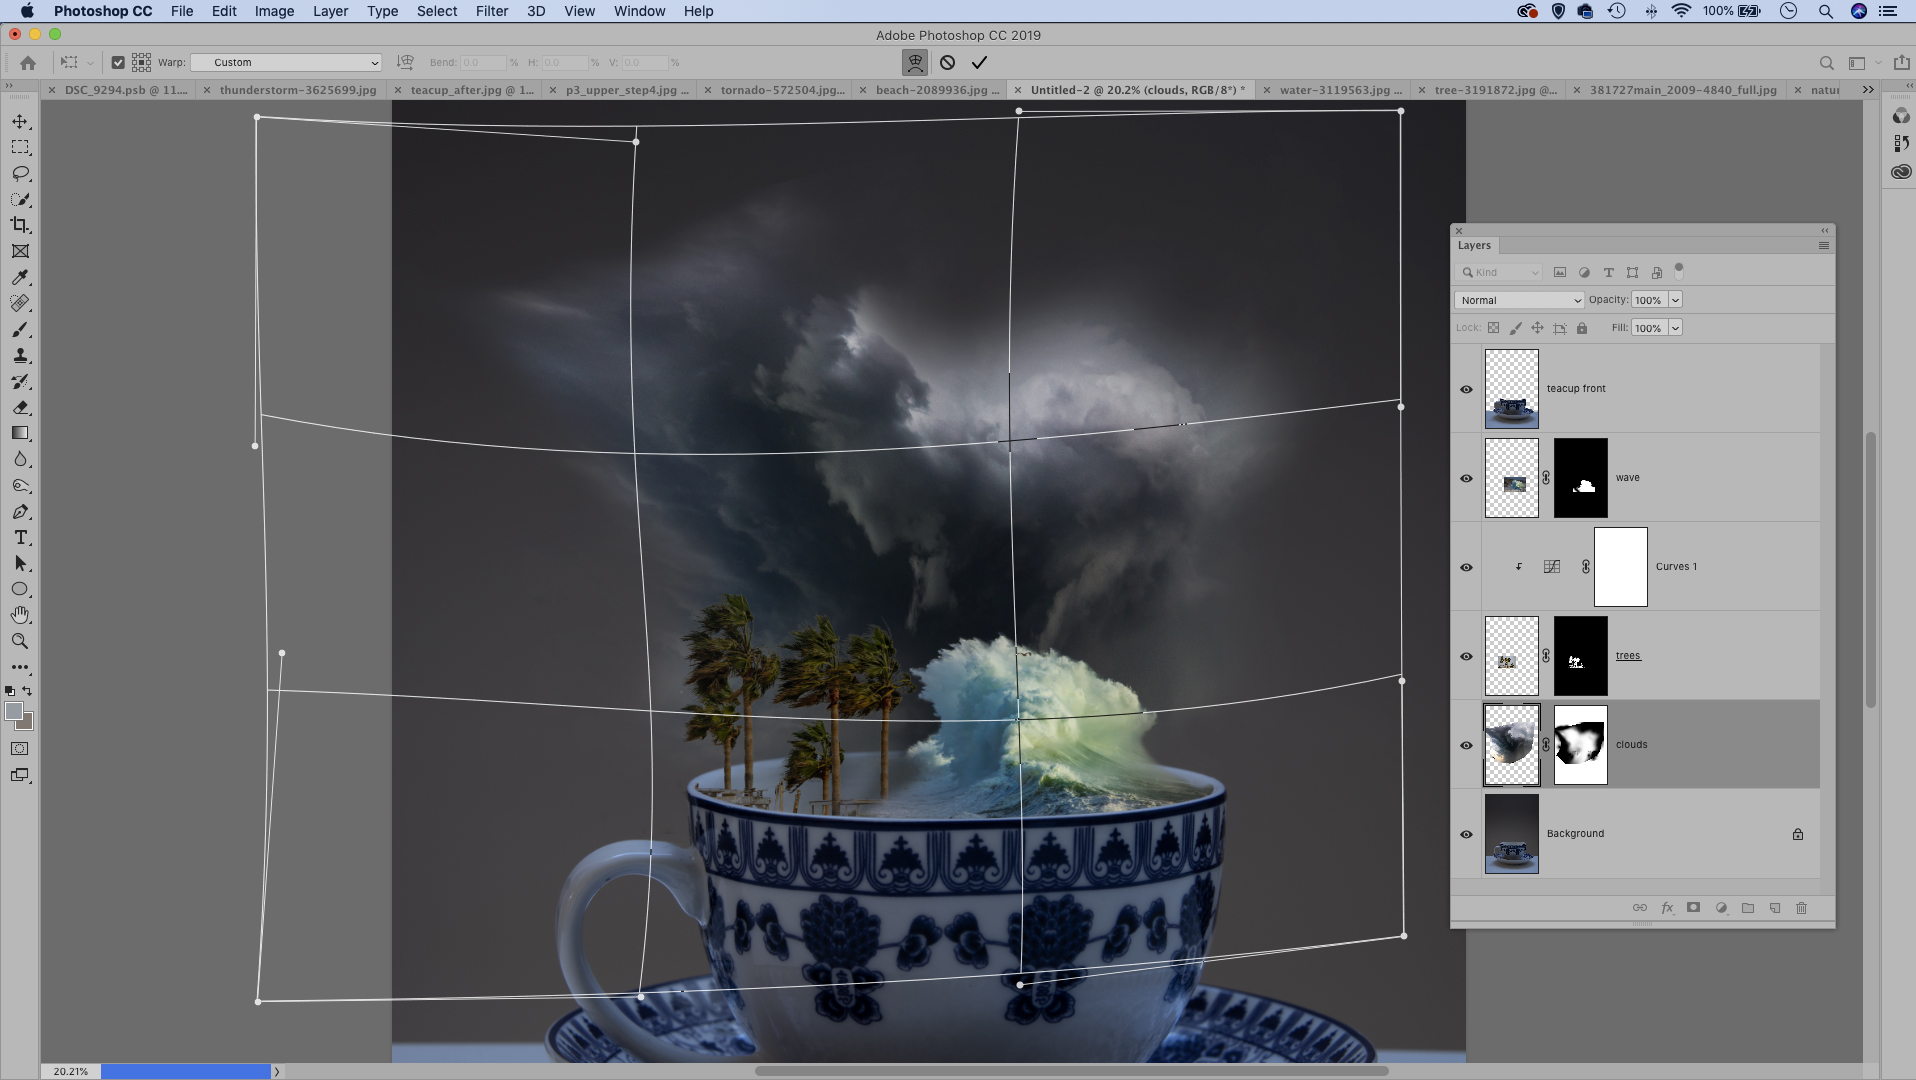
Open the clouds (Pixabay 3158852) then make a selection of the clouds and copy in. Drag them below the trees, add a mask and paint around the edges, using a soft-edged brush. If you need to reshape the layer, right-click while transforming and choose Warp.
06 Add the finishing touches
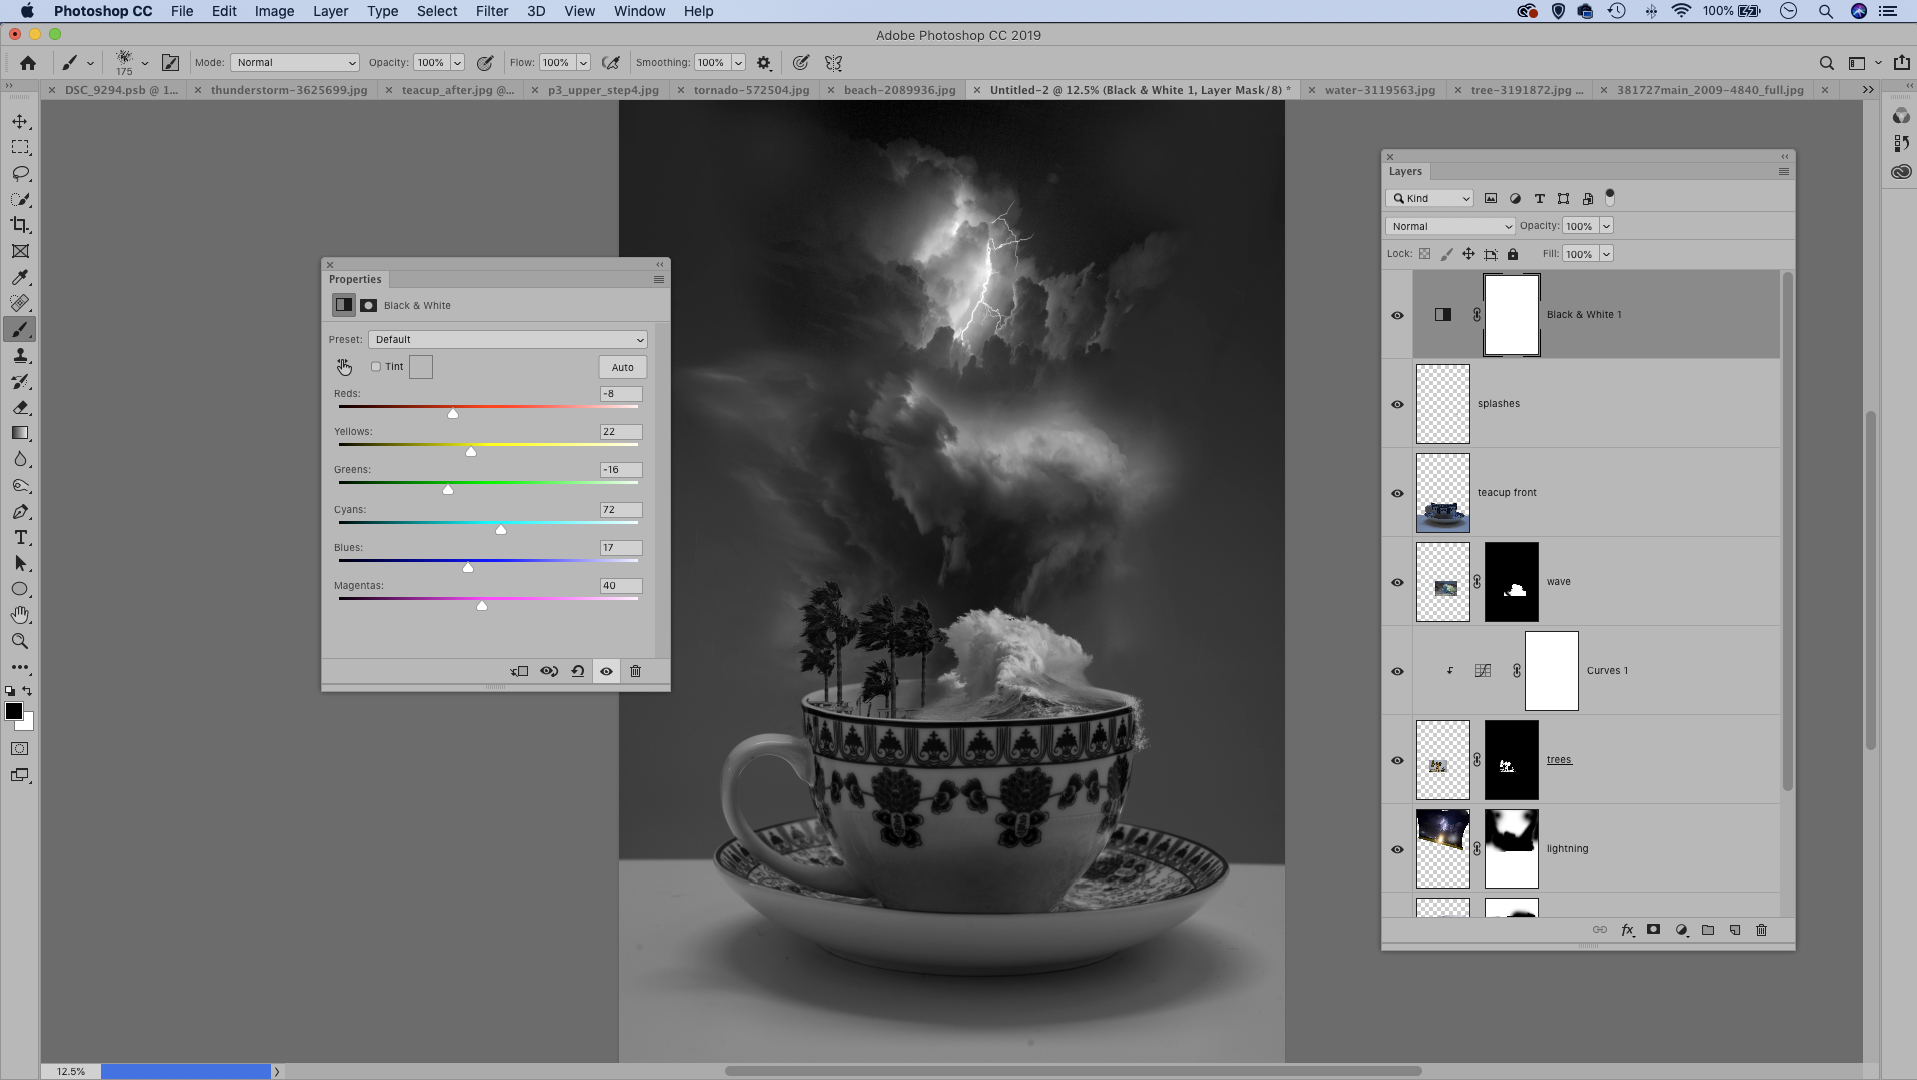
Copy in, position and mask the lightning (NASA 381727). Next add an empty layer. Grab a brush tool, set color to white and choose a messy brush tip (like spatter 27px). Paint a few drops and spills of water around the cup. Finally, add a B&W Adjustment Layer.
PhotoPlus: The Canon Magazine is the world's only monthly newsstand title that's 100% devoted to Canon, so you can be sure the magazine is completely relevant to your system.
Read more:
The best photo editing software: image editors for novices through to pros
The best photo-editing laptops: top laptops for photographers
10 best online photography courses – from beginner guides to masterclasses
Get the Digital Camera World Newsletter
The best camera deals, reviews, product advice, and unmissable photography news, direct to your inbox!
The lead technique writer on Digital Camera Magazine, PhotoPlus: The Canon Magazine and N-Photo: The Nikon Magazine, James is a fantastic general practice photographer with an enviable array of skills across every genre of photography.
Whether it's flash photography techniques like stroboscopic portraits, astrophotography projects like photographing the Northern Lights, or turning sound into art by making paint dance on a set of speakers, James' tutorials and projects are as creative as they are enjoyable.
He's also a wizard at the dark arts of Photoshop, Lightroom and Affinity Photo, and is capable of some genuine black magic in the digital darkroom, making him one of the leading authorities on photo editing software and techniques.


