How to create a photo book in 8 simple steps, to make a beautiful gift or keepsake
We show you how to create a photo book with Mixbook as an example, but the process is much the same with other services

Do you know how to create a photo book? If the only thing putting you off is not knowing what to do, then we are here to help! We will show you how to create a photo book with Mixbook, one of the most popular online photo book services, but the principle is the same whatever service you use.
The fact is, photo books make beautiful gifts or keepsakes. If a single still photograph has the power to capture a moment and preserve it forever, just think what a whole collection of shots can do. Your digital images aren’t much use if they’re buried away on a long-forgotten hard drive, and sending and receiving pictures via social media has become second-nature to many of us but important shots can easily get lost or overlooked in the digital deluge.
A good (not so) old-fashioned photo book has so much more to offer. You can view it anywhere, anytime, and you don’t need to charge it up first!
Hand-picking a selection of shots, arranging them with loving care, and publishing them in a photo book is a great way of telling your own story. What’s more, you can combine words and pictures, adding dates, captions or longer passages of text to flesh out the plot.
So, what’s the story? Your photo book could be about almost anything. It comes down to what’s important to you. If you’re into travel and exploration, you could make books on anything from city breaks to rural landscapes, from coastal walks to mountain ranges and beyond. Your specialist photo subjects might include wildlife safaris or sporting events. Closer to home, photo books are the ideal outlet for recording everything form births and weddings to children’s early years, family holidays and festive occasions.
Whatever your story, here’s how to tell it using a range of photo book styles and publishing options available at Mixbook. It’s quick, easy, fun and great value for money.
01 Size and style
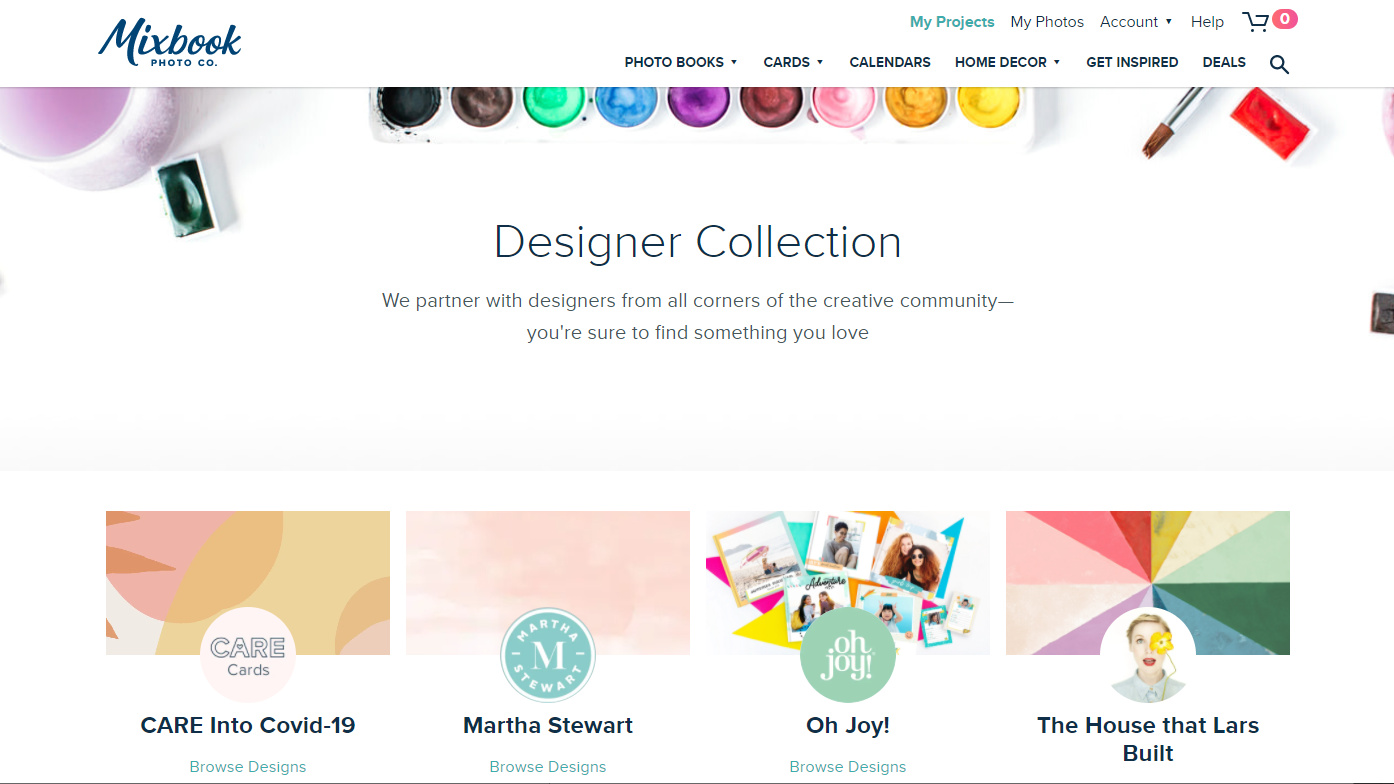
It can be a bit daunting to start with a blank canvas, so to speak, but with Mixbook you naturally have the option to create your photo book from scratch. However, since most of us might prefer to get up and running more quickly, when you first land on the Mixbook website you are offered a vast selection of styles to choose from. These kick off with the likes of ‘everyday’ and ‘quick & easy’ photo books, through themed choices for family, kids, seasonal, holiday, travel, sports, both wedding and wedding guest books, and much more besides. There’s also a wealth of ‘designer’ collections on offer, including a set of Martha Stewart styles.
02 Choose your photos
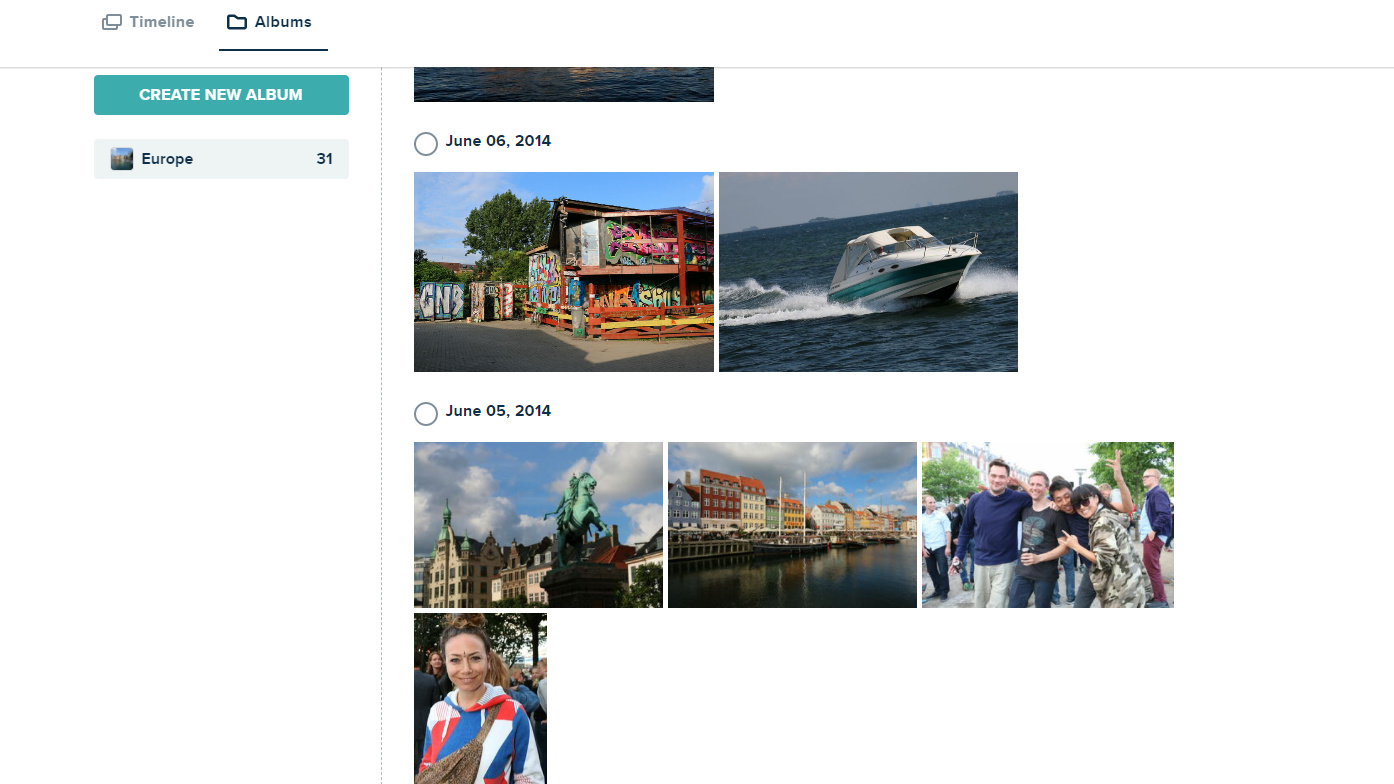
If the aim of your photo book is to tell a story, choose photos that bring to life all of the most important points. For a travel book, for example, you’ll probably want to include images of all the places you visited, some of the people you met along the way, and what your favorite memories are made of. You might also like the book to run in chronological order, so it’s handy that Mixbook can automatically sort your uploaded photos in date and time order. You can also create dedicated albums, containing just the images that you want to use in a particular book or other project.
03 Design options
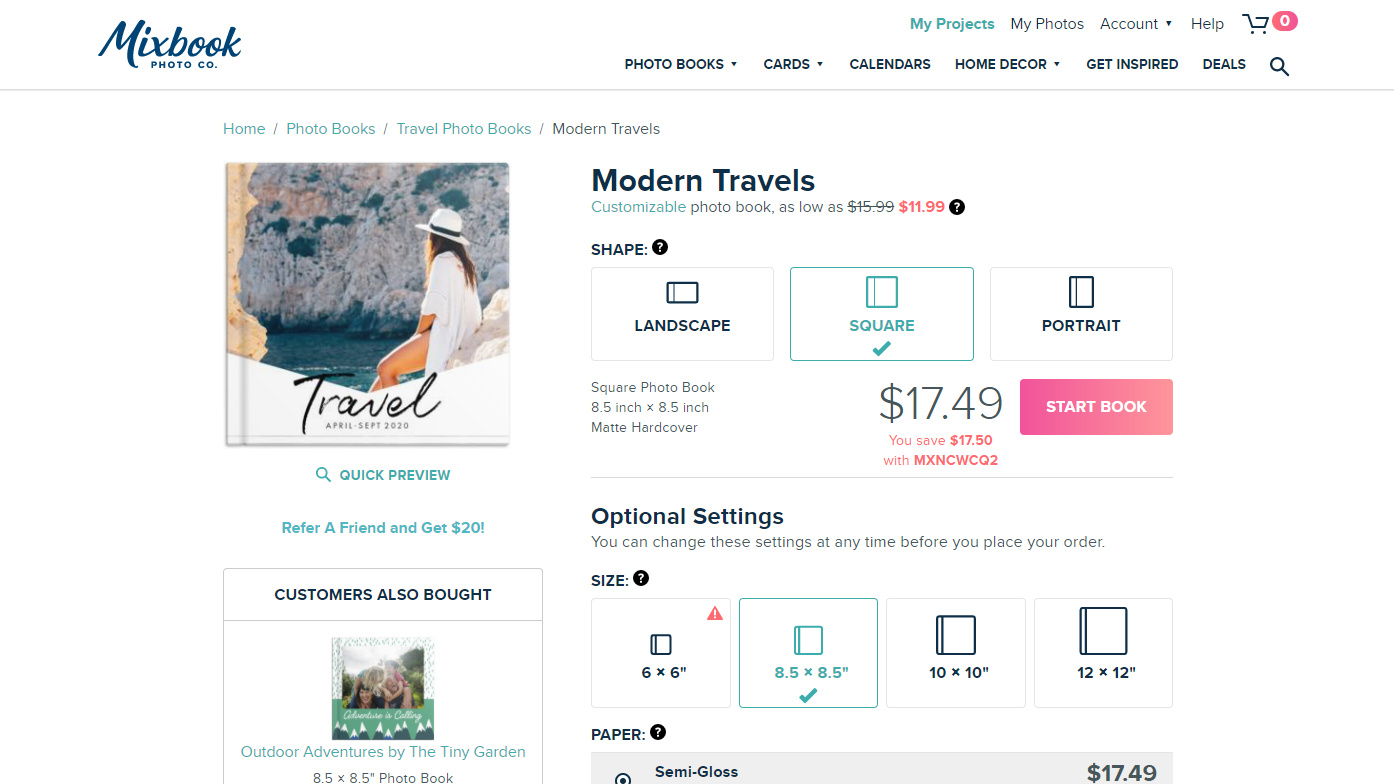
For this tutorial, we’ve chosen the ‘Modern Travels’ design from Mixbook’s ‘Travel Photo Books’ section. As with other designs, it comes with a range of further options. For example, you can choose square, portrait or landscape orientations and a variety of sizes. The default paper style is semi-gloss, but pearl finish, premium matte lay flat and premium lustre lay flat are available at additional cost. Similarly, you can opt for softcover, hardcover with or without a dust jacket, or go for a leather cover with dust jacket. However, some sizes, paper styles and cover options are only available for shipping within the USA and Canada.
04 Design the cover
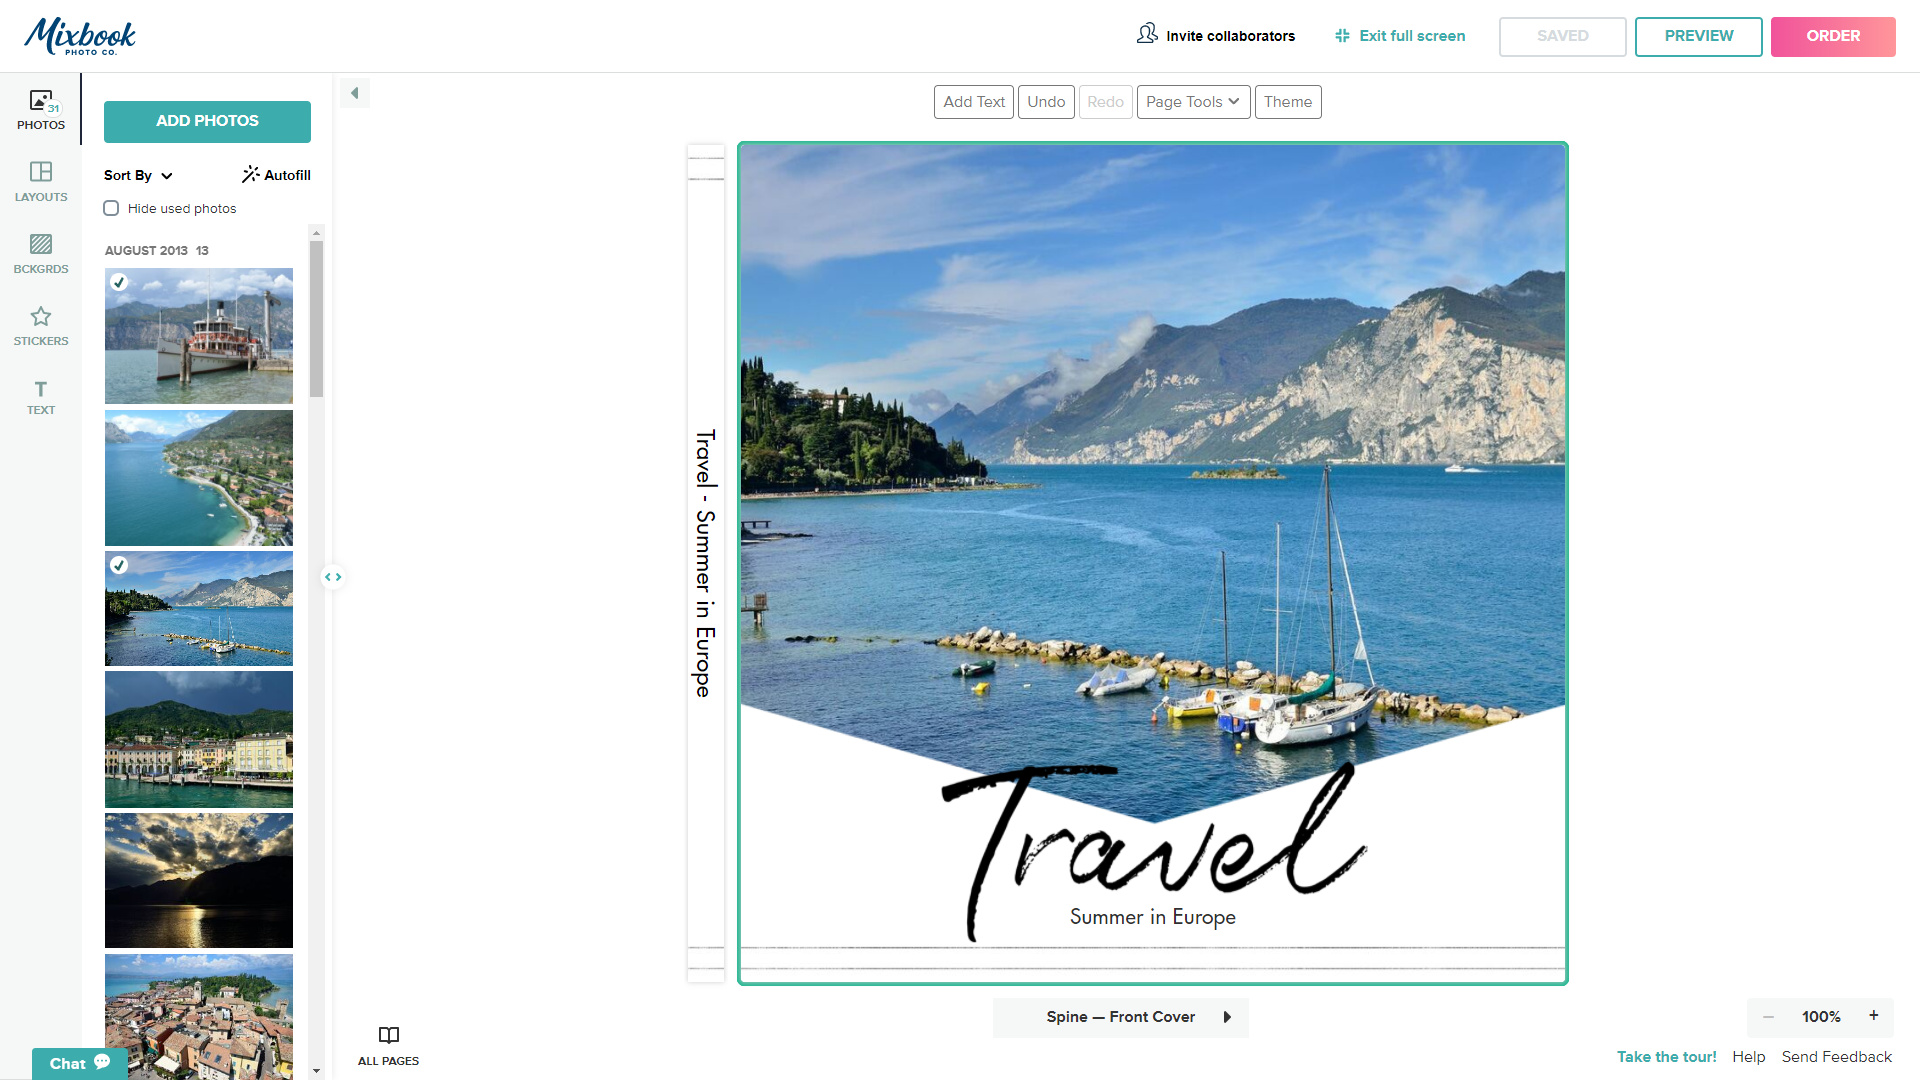
The front cover is a good place to start and it makes sense to use one of your favorite photos from the project as a cover image. Simply drag your chosen image from the photos panel on the left, onto the placeholder in the template. Tools are available for zooming and editing the image, and for adding text. You can also add text to the spine of the book at this stage, although spine text is unavailable for softcover non-lay flat books.
05 Create a layout
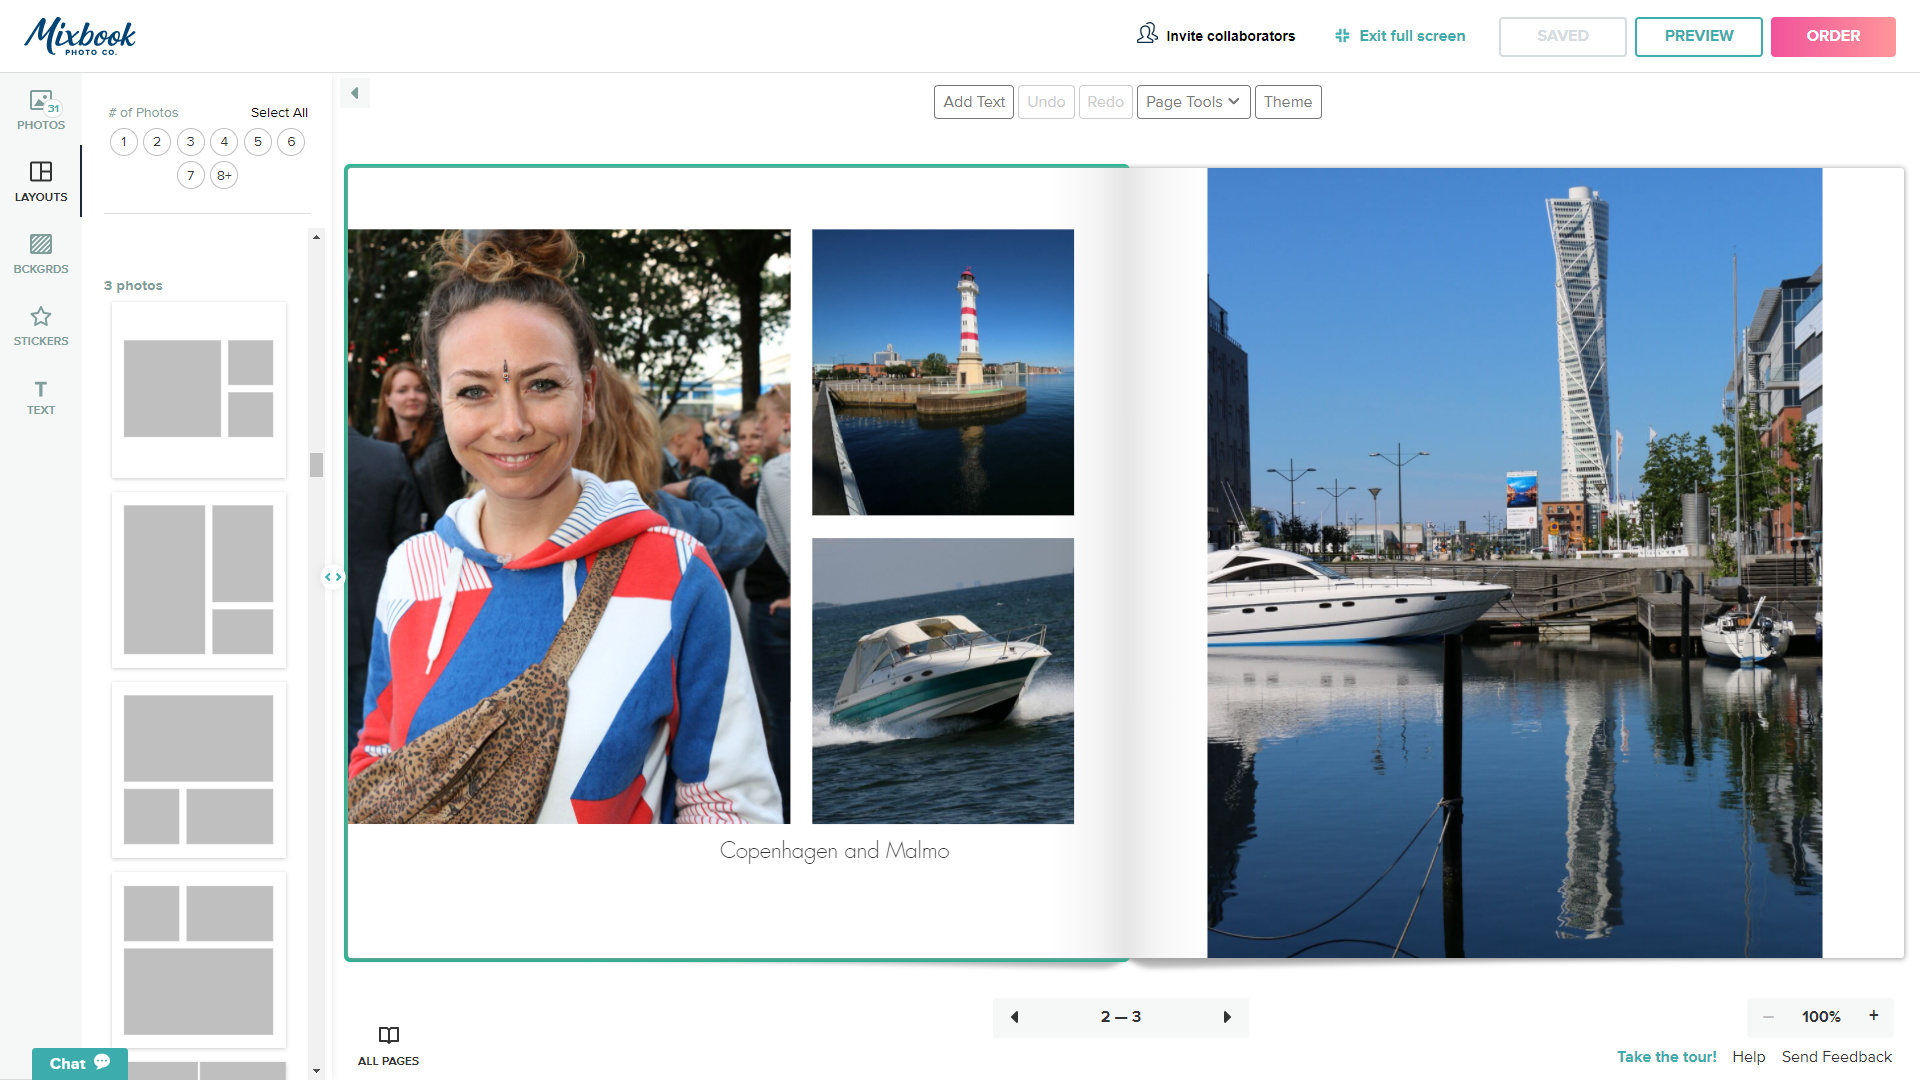
The minimum page quantity for our chosen theme of travel book is 19 pages, based on nine sheets of paper plus the inside back cover. You can add pages at a fixed price per page, up to a maximum of 399 pages in total. For the ultimate in speed and simplicity, you can autofill your book with the photos in your collection, using the default selection of templates. This can work well up to a point, but you’re generally much better off selecting which of the numerous ready-made templates you want to use, to suit each individual page or a double-page spread. You can also customize these templates or create new page layouts from scratch, plus you can run a single image across a double-page spread. It's time to unleash your inner designer!
06 Add some extras
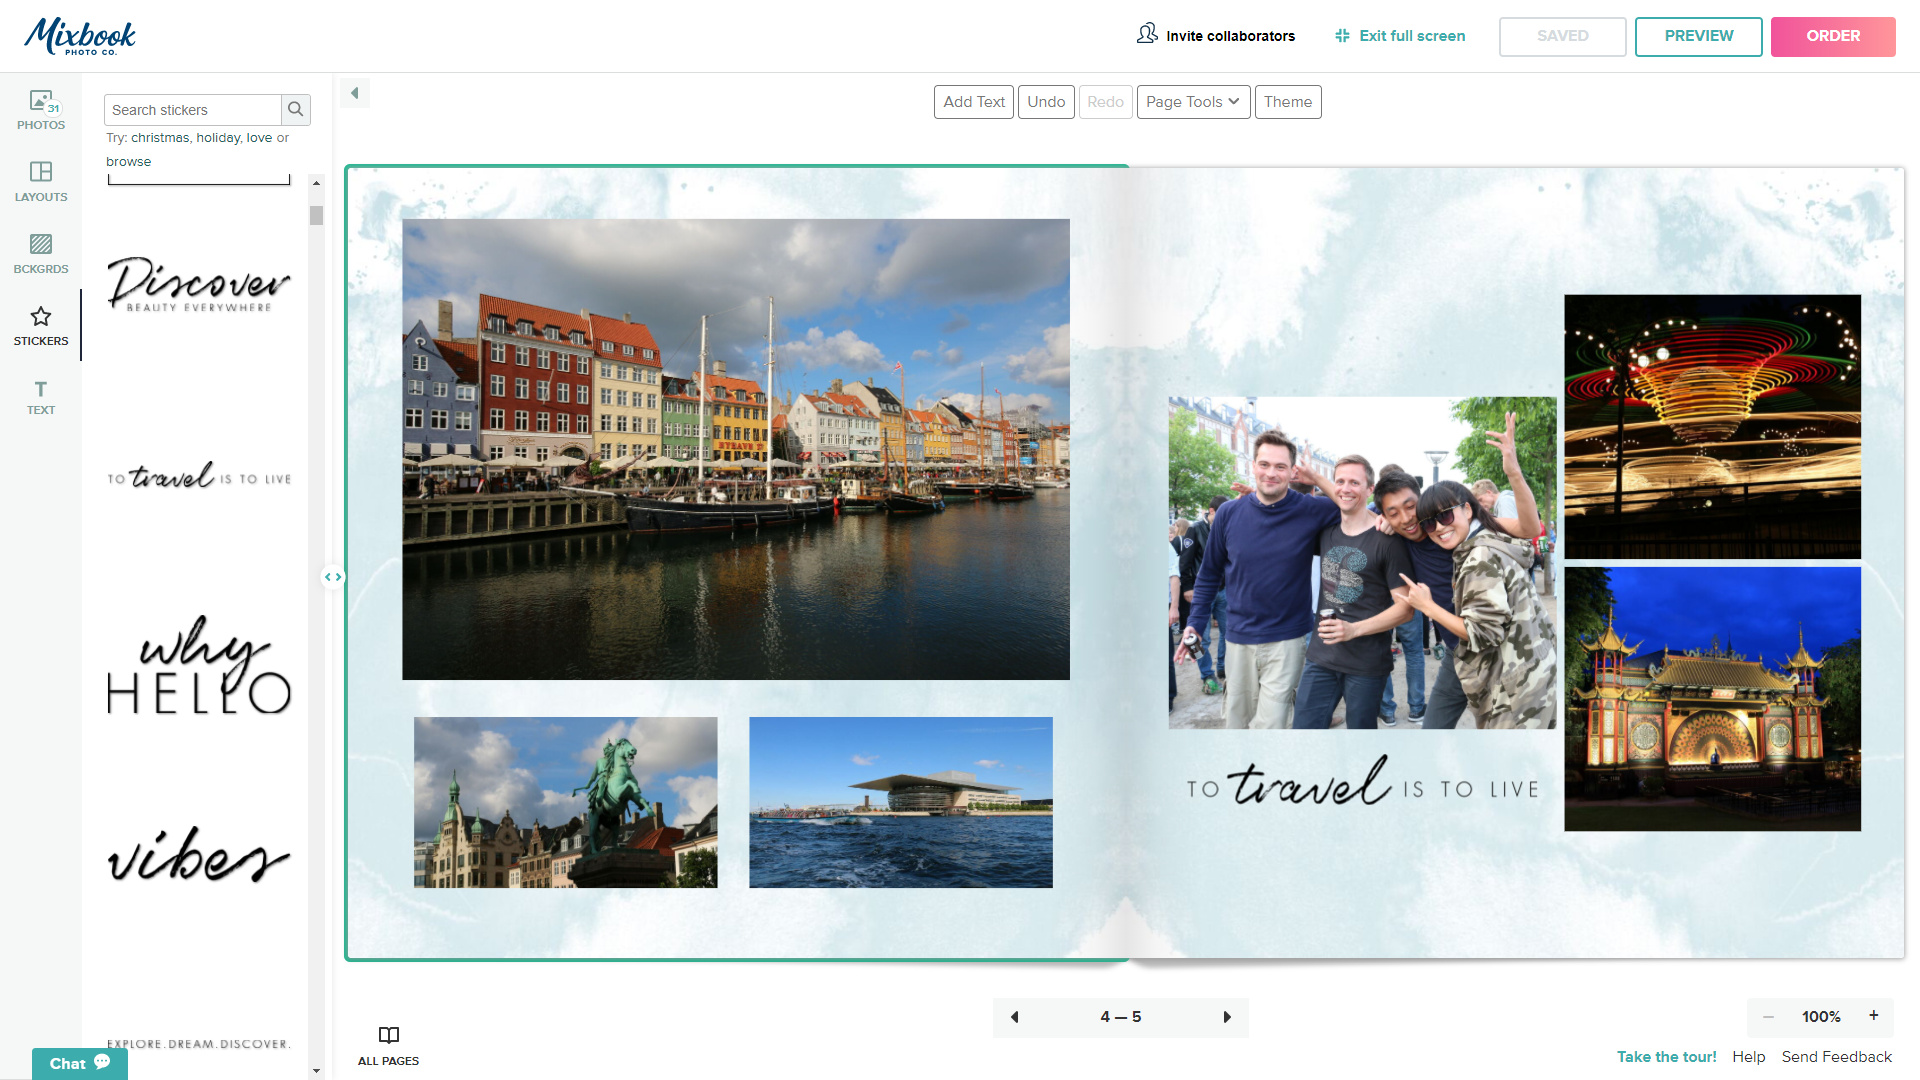
More advanced options enable you to overlay photos on top of one another and to choose which goes in front or behind. You can adjust the brightness, saturation and contrast of individual photos on the page, add effects like black & white and sepia, apply borders and shadows, adjust the opacity, and create custom shapes. You can also add ‘stickers’ like the ‘To travel is to live’ motif shown on this page, as well as choosing from an enormous range of backgrounds. Naturally, you can also add your own text panels.
07 Place your order
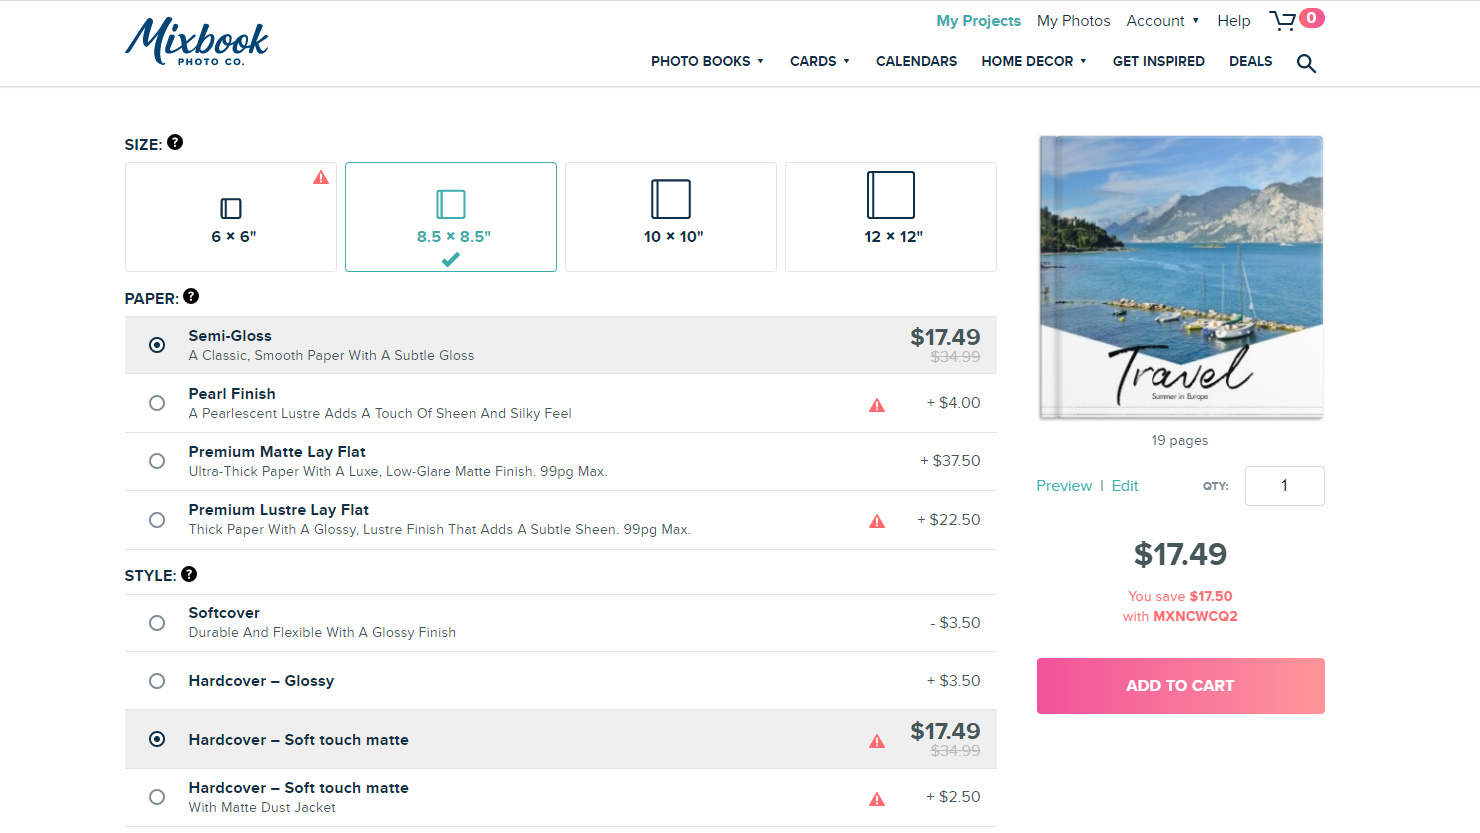
Once you’ve finished laying out your book, it’s well worth checking it through really carefully, especially for any spelling mistakes and typos in text boxes. Next, check that the photo book project is saved, and move on to the ordering page. Here you can make final choices about the size, paper and cover style. Note that exclamation marks in triangles are displayed for options that aren’t available for delivery outside of the USA and Canada. Although Mixbook operates in various countries around the world, some products are only created in the USA and may not be available for shipping elsewhere, or may take longer to arrive.
08 Coming soon
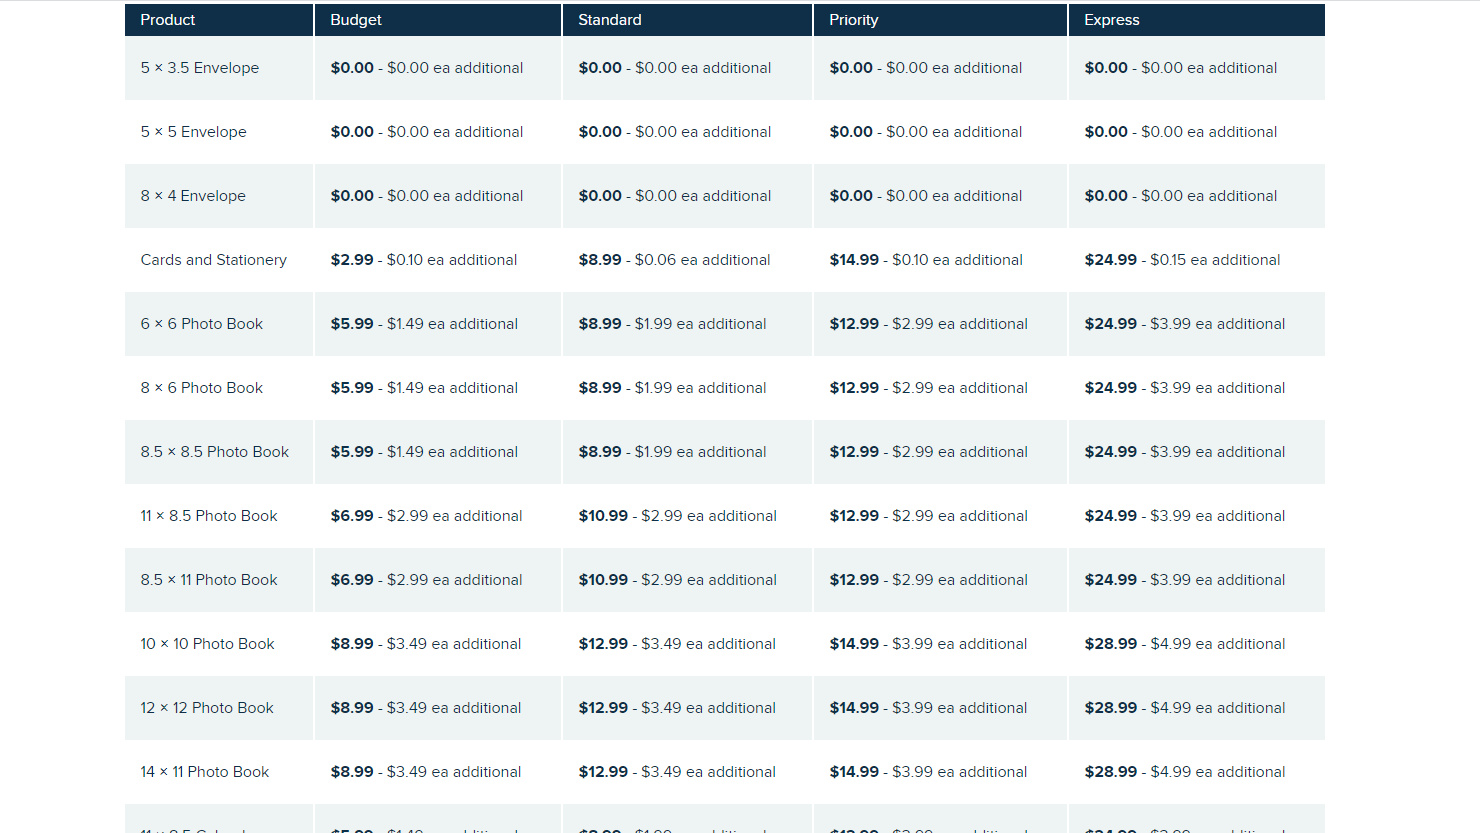
At the checkout stage, you can choose between budget, standard, priority and express delivery options. You can expect to receive your finished photo book within a week using express delivery, with two or three extra days needed for priority or standard dispatch respectively. If you go for the budget delivery option, you should get your photo book within two and a half weeks. Prices vary according to the size of the photo book, and delivery charges are reduced for additional books ordered at the same time.
We ordered our photo book from Mixbook, and we'll let you know how it looks when it arrives. This same process applies across lots of different photo book services, though – see our guide to the best photo books for some more alternatives.
If you would like to try Mixbook, click on the link below. The current price quoted is just a starting point, and what you pay will depend on the book designs and sizes you choose.
Read more:
• Best photo books
• Best photo frames
• Best digital photo frames
• Best gifts for photographers
• Best photo calendars
• The best photo printing online
• Best photo albums
• Best photo gifts
Get the Digital Camera World Newsletter
The best camera deals, reviews, product advice, and unmissable photography news, direct to your inbox!
Matthew Richards is a photographer and journalist who has spent years using and reviewing all manner of photo gear. He is Digital Camera World's principal lens reviewer – and has tested more primes and zooms than most people have had hot dinners!
His expertise with equipment doesn’t end there, though. He is also an encyclopedia when it comes to all manner of cameras, camera holsters and bags, flashguns, tripods and heads, printers, papers and inks, and just about anything imaging-related.
In an earlier life he was a broadcast engineer at the BBC, as well as a former editor of PC Guide.
