How to create a soft focus effect in Photoshop Elements
Want to add dreamy, ethereal glow and softness to your images? It's easy in Photoshop Elements
Watch video:
There are plenty of ways to achieve a soft focus effect – a technique used by portrait photographers in years past to shoot glowing, dreamy portraits (think the black-and-white portraits of movie stars in Hollywood's golden age).
There are a few ways to achieve soft focus in-camera, such as using lens like the Lensbaby Velvet 28 or adding pantyhose to a lens like many cinematographers do (seriously!). With Photoshop Elements, though, you can easily achieve a soft focus effect in post-production – and it can be used to produce creative shots of your non-human subjects as well.
Floral photography can benefit from the uniquely diffused look that soft focus gives you, as it enhances and embellishes the dreamy depth of field that often embodies macro or close-up shots. Other still life subjects also lend themselves well to the technique, giving a painterly touch to a scene.
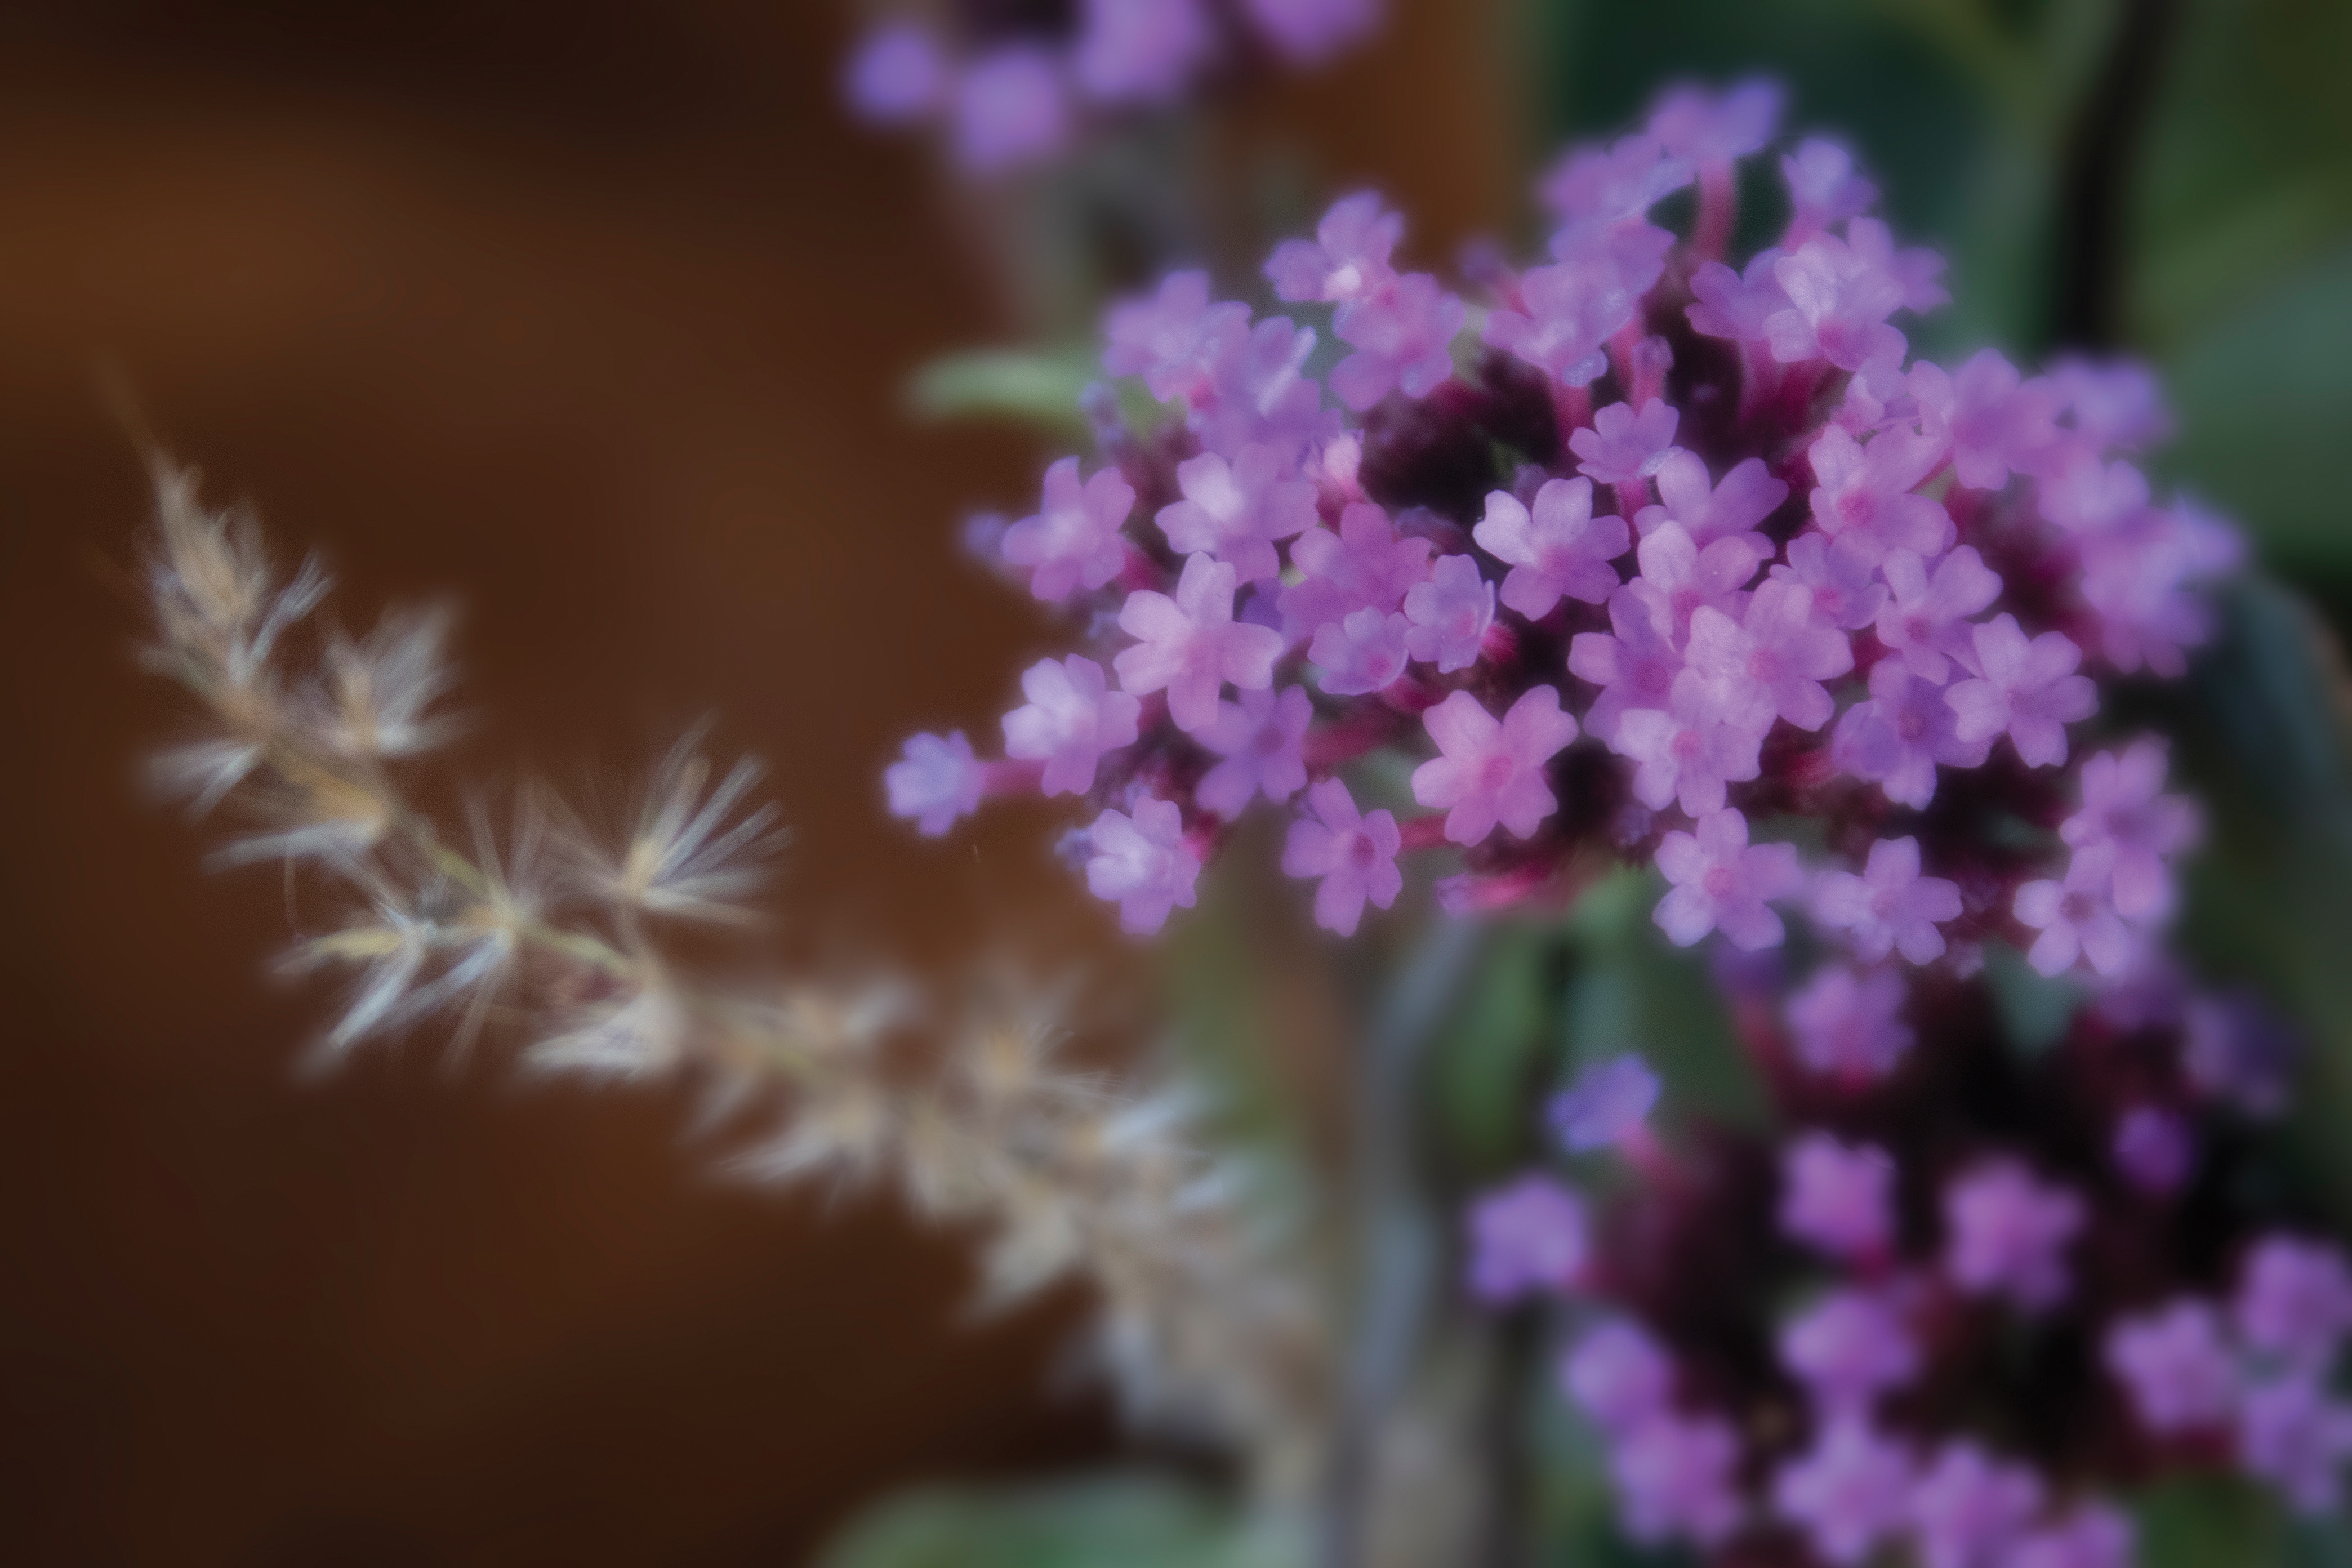

The secret to recreating a soft focus effect in Elements is the Gaussian Blur filter. Used as part of considered post-production, this mimics the ethereal quality that soft focus photography is known for. In this tutorial we’re going to use it in conjunction with a layer mask, and we'll then blend the effect using the Brush or Gradient tool.
The Brush is ideal for situations where only a specific portion of the image features an area of sharpness, such as with floral photography where there is usually a single point of focus.
The gradient tool is best for images where the depth of field gradually falls off from sharpness into blur, such as our still life shot of mushrooms in a basket. Let's see how it's done!
Soft focus in Photoshop Elements: Method 1
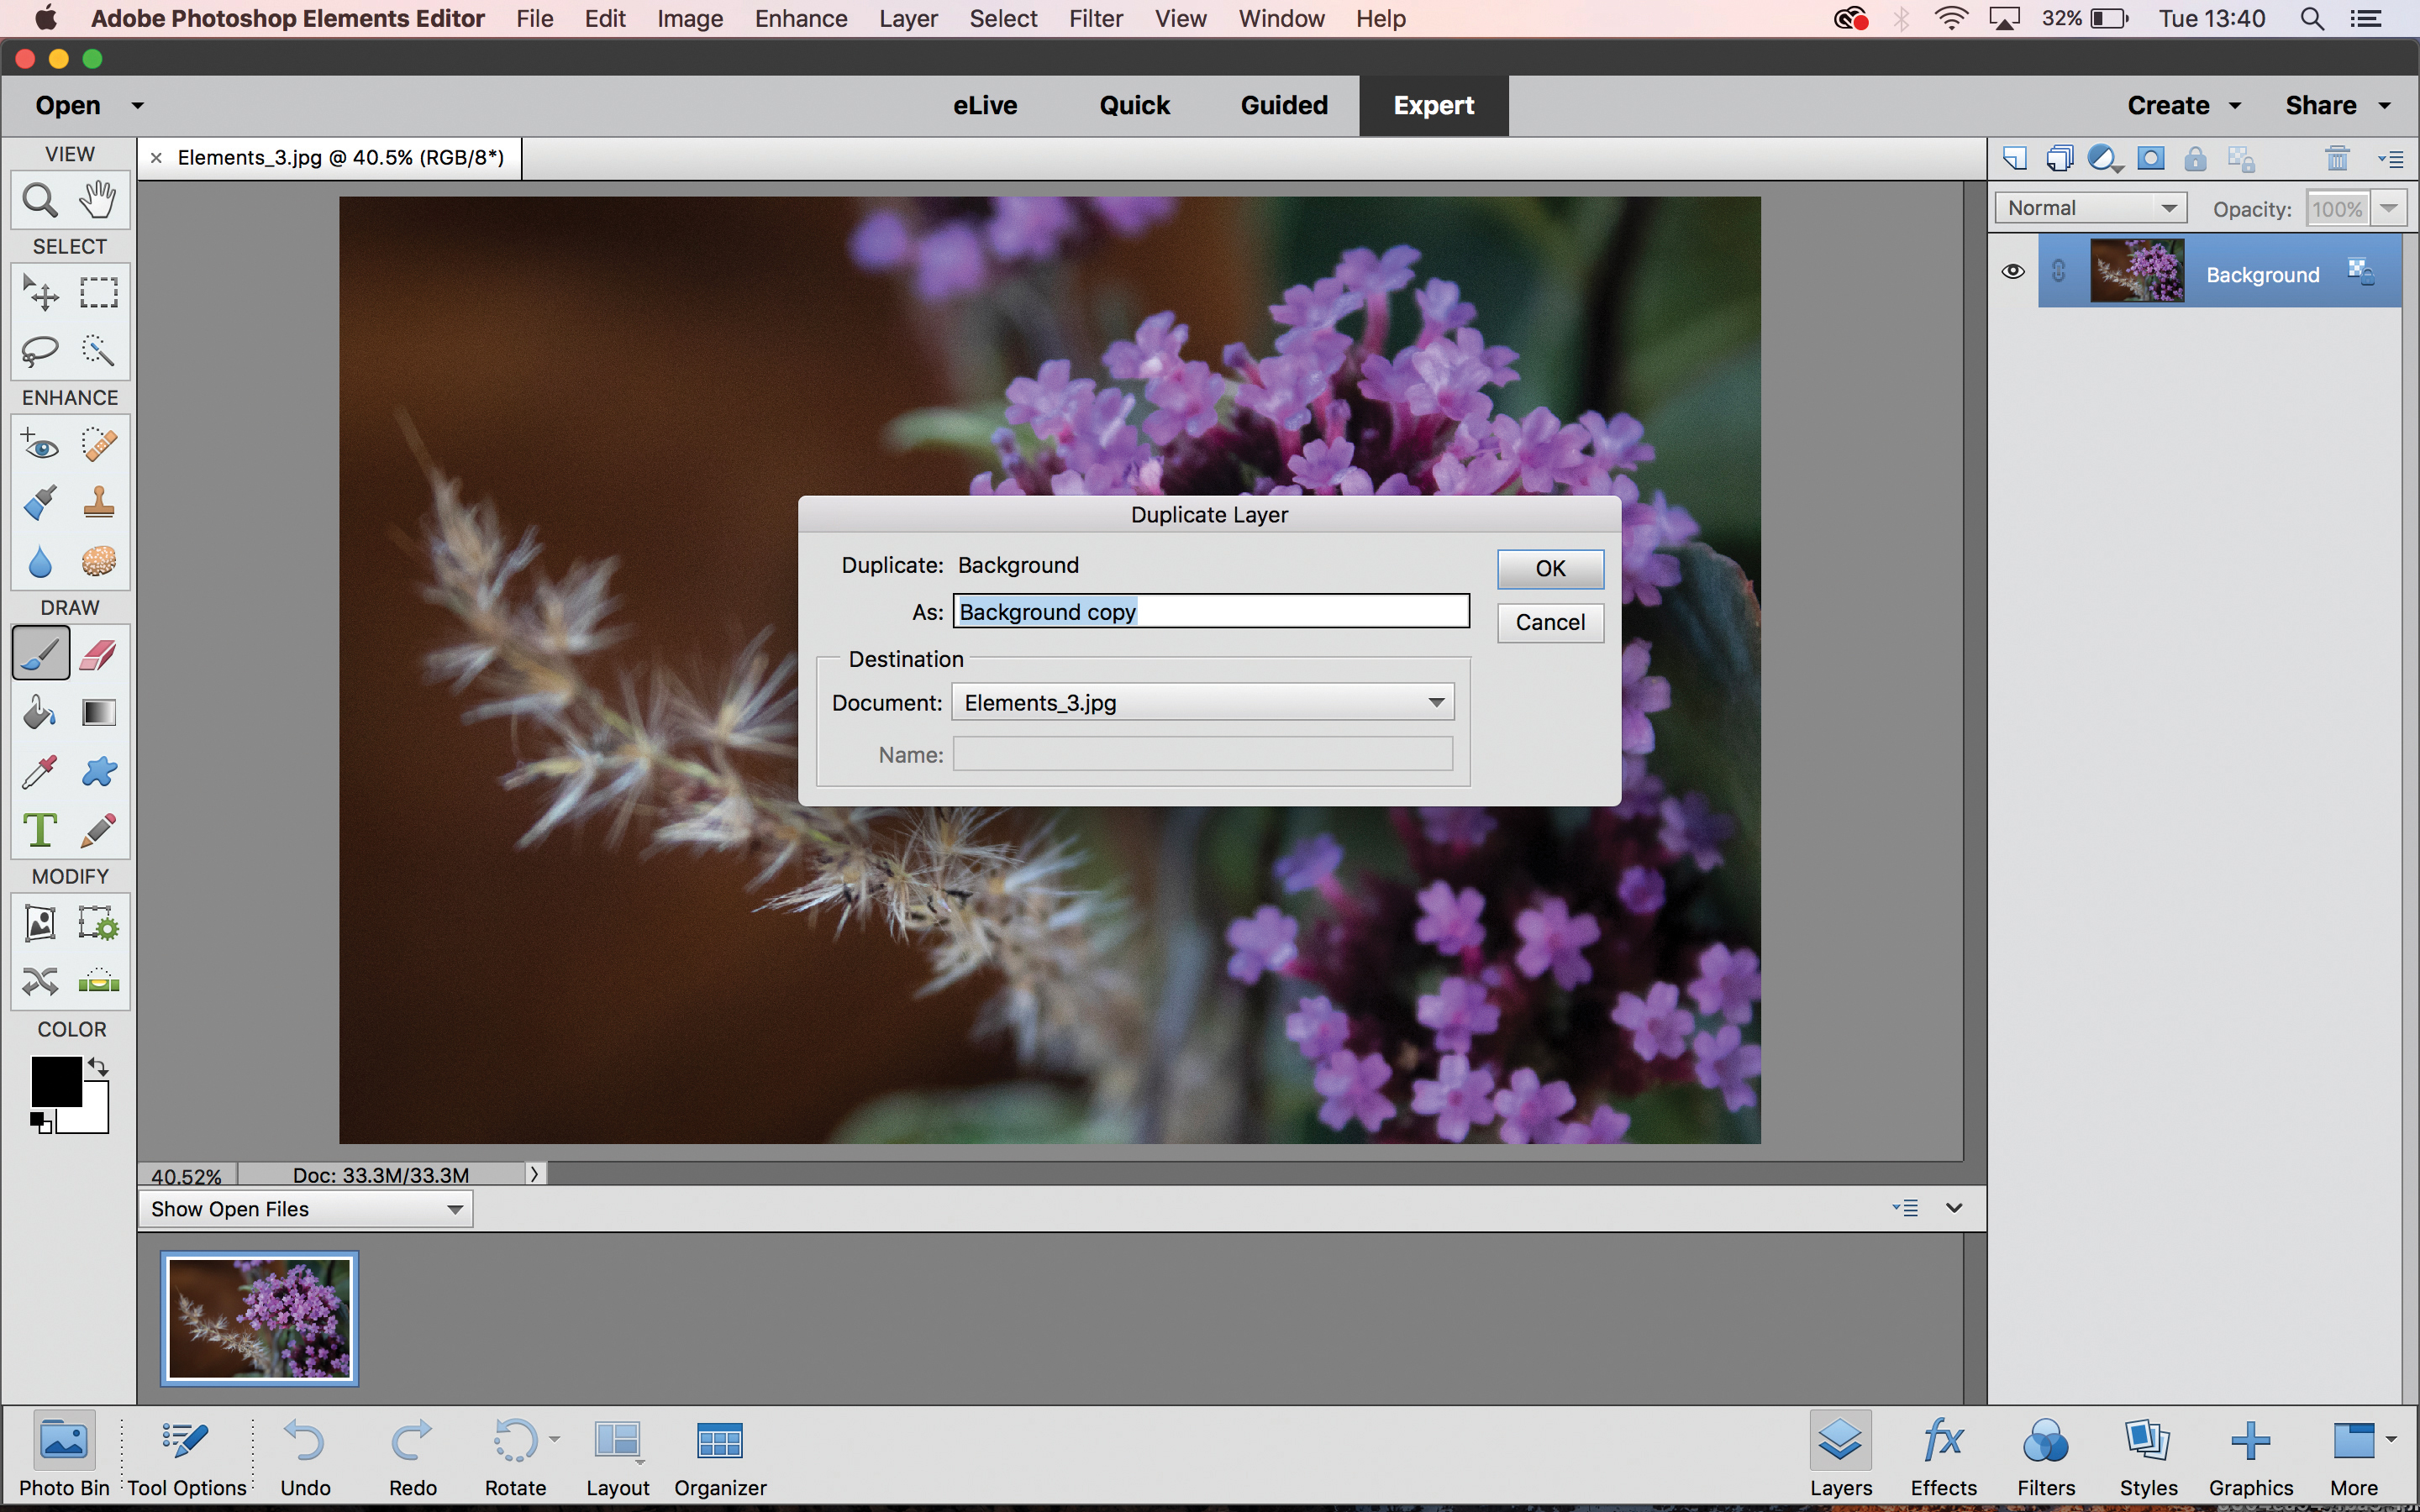
01 Duplicate layer
Start by making a copy of the image. Either click Layer>Duplicate Layer from the drop-down menus, or press Cmd/Ctrl + J (Cmd on a Mac, Ctrl on a PC) to copy the layer without entering the menus.
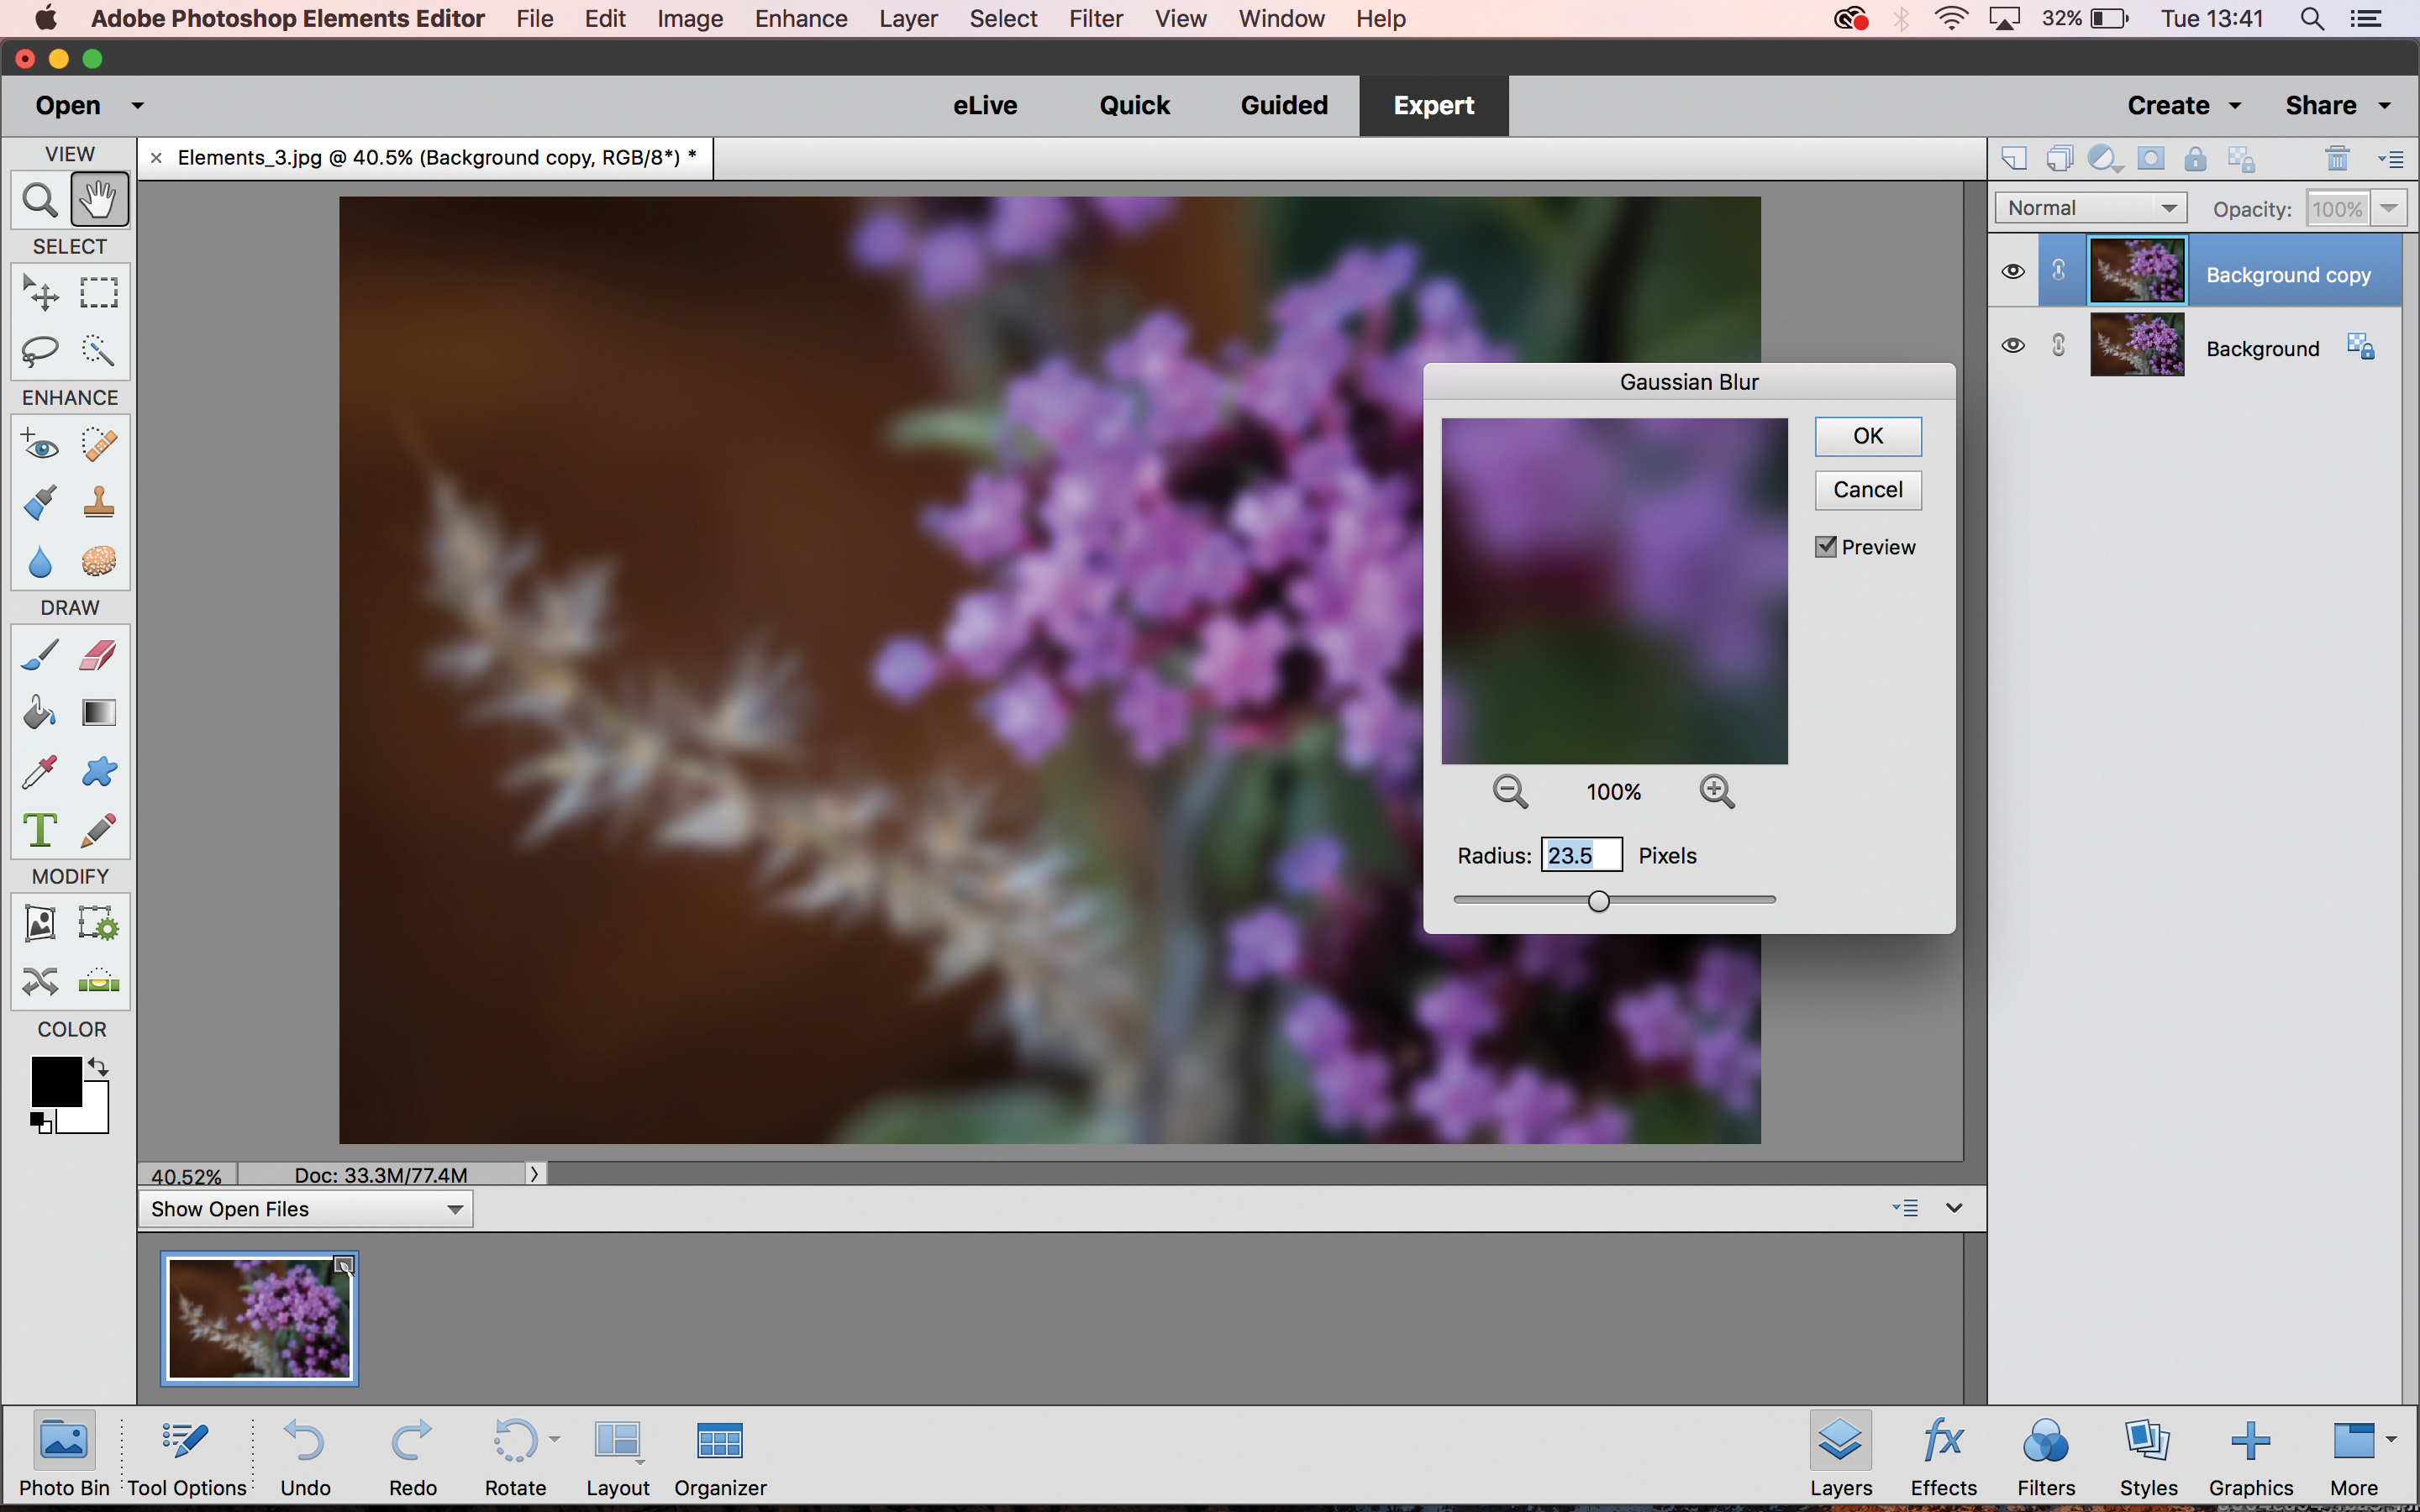
02 Add blur filter
Now we’re going to add a gaussian blur, which will form the backbone of the effect. From the menus, click Filter>Blur>Gaussian Blur. When the filter’s pop-up window appears, set the Radius to about 25%.
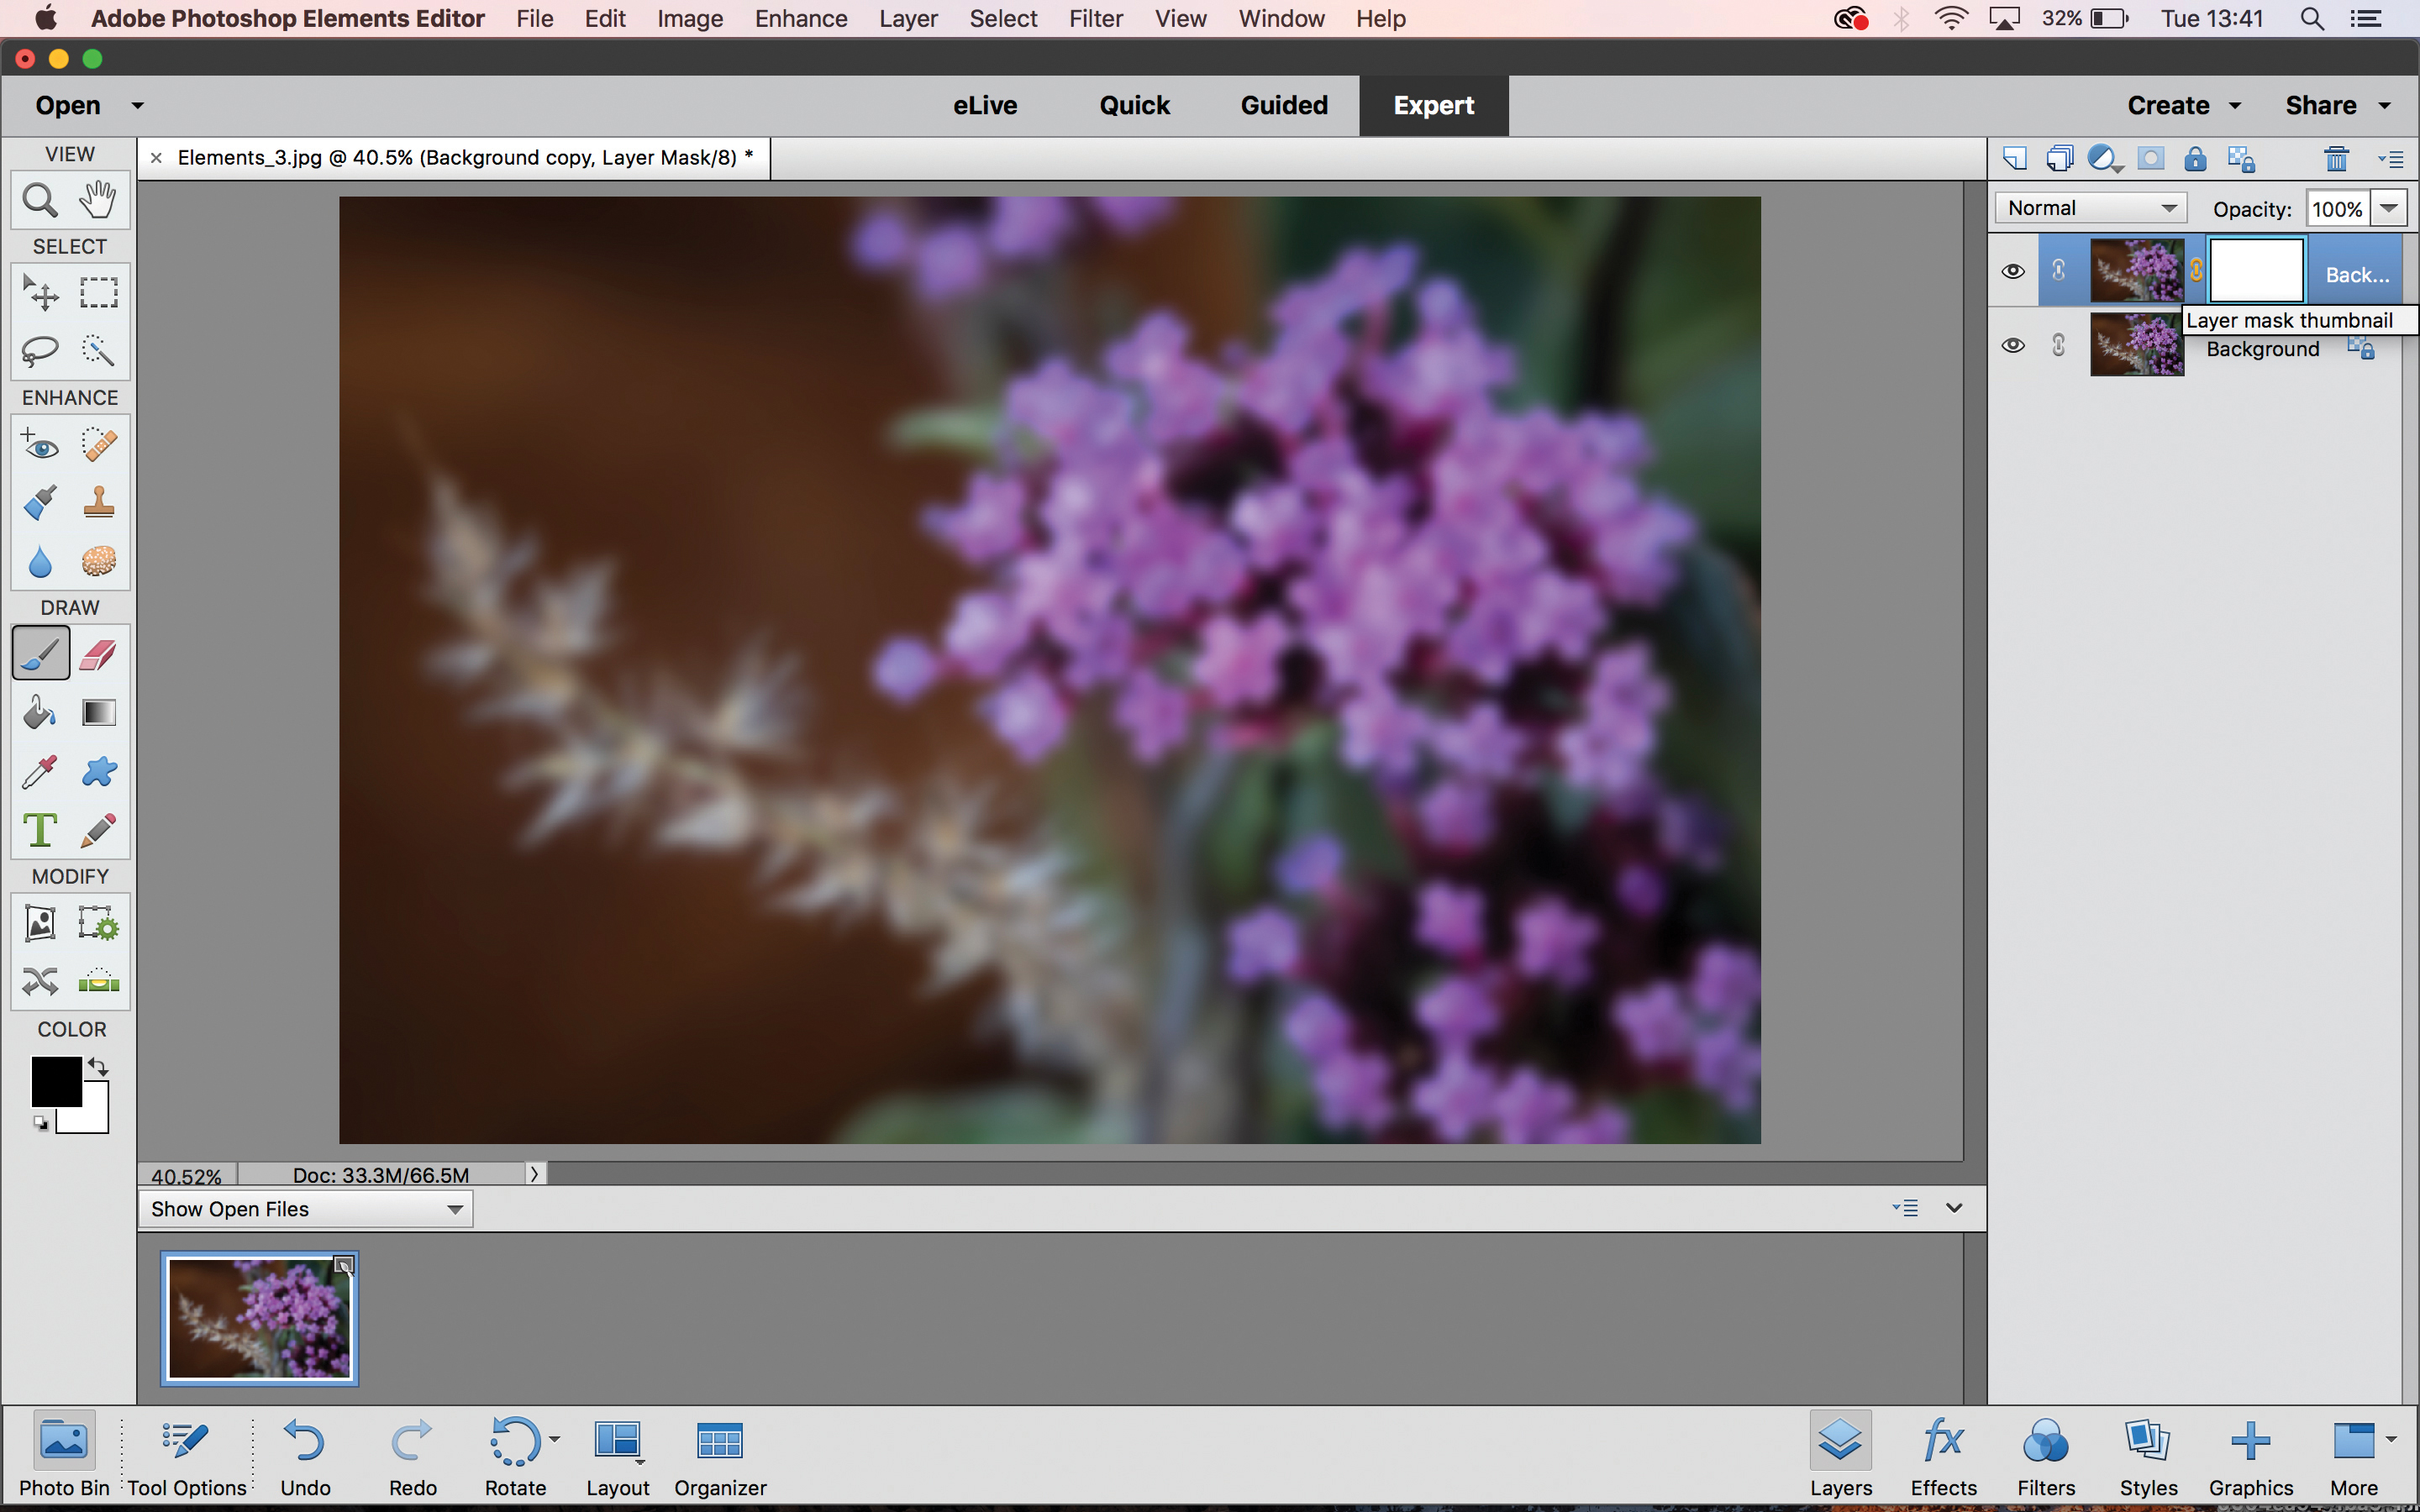
03 Create layer mask
Either click Layer>Layer Mask>Reveal All from the drop-down menus, or click the ‘Add layer mask’ icon in the Layers panel (the fourth icon along, to the left of the padlock). Click the layer mask thumbnail to make sure it is selected.
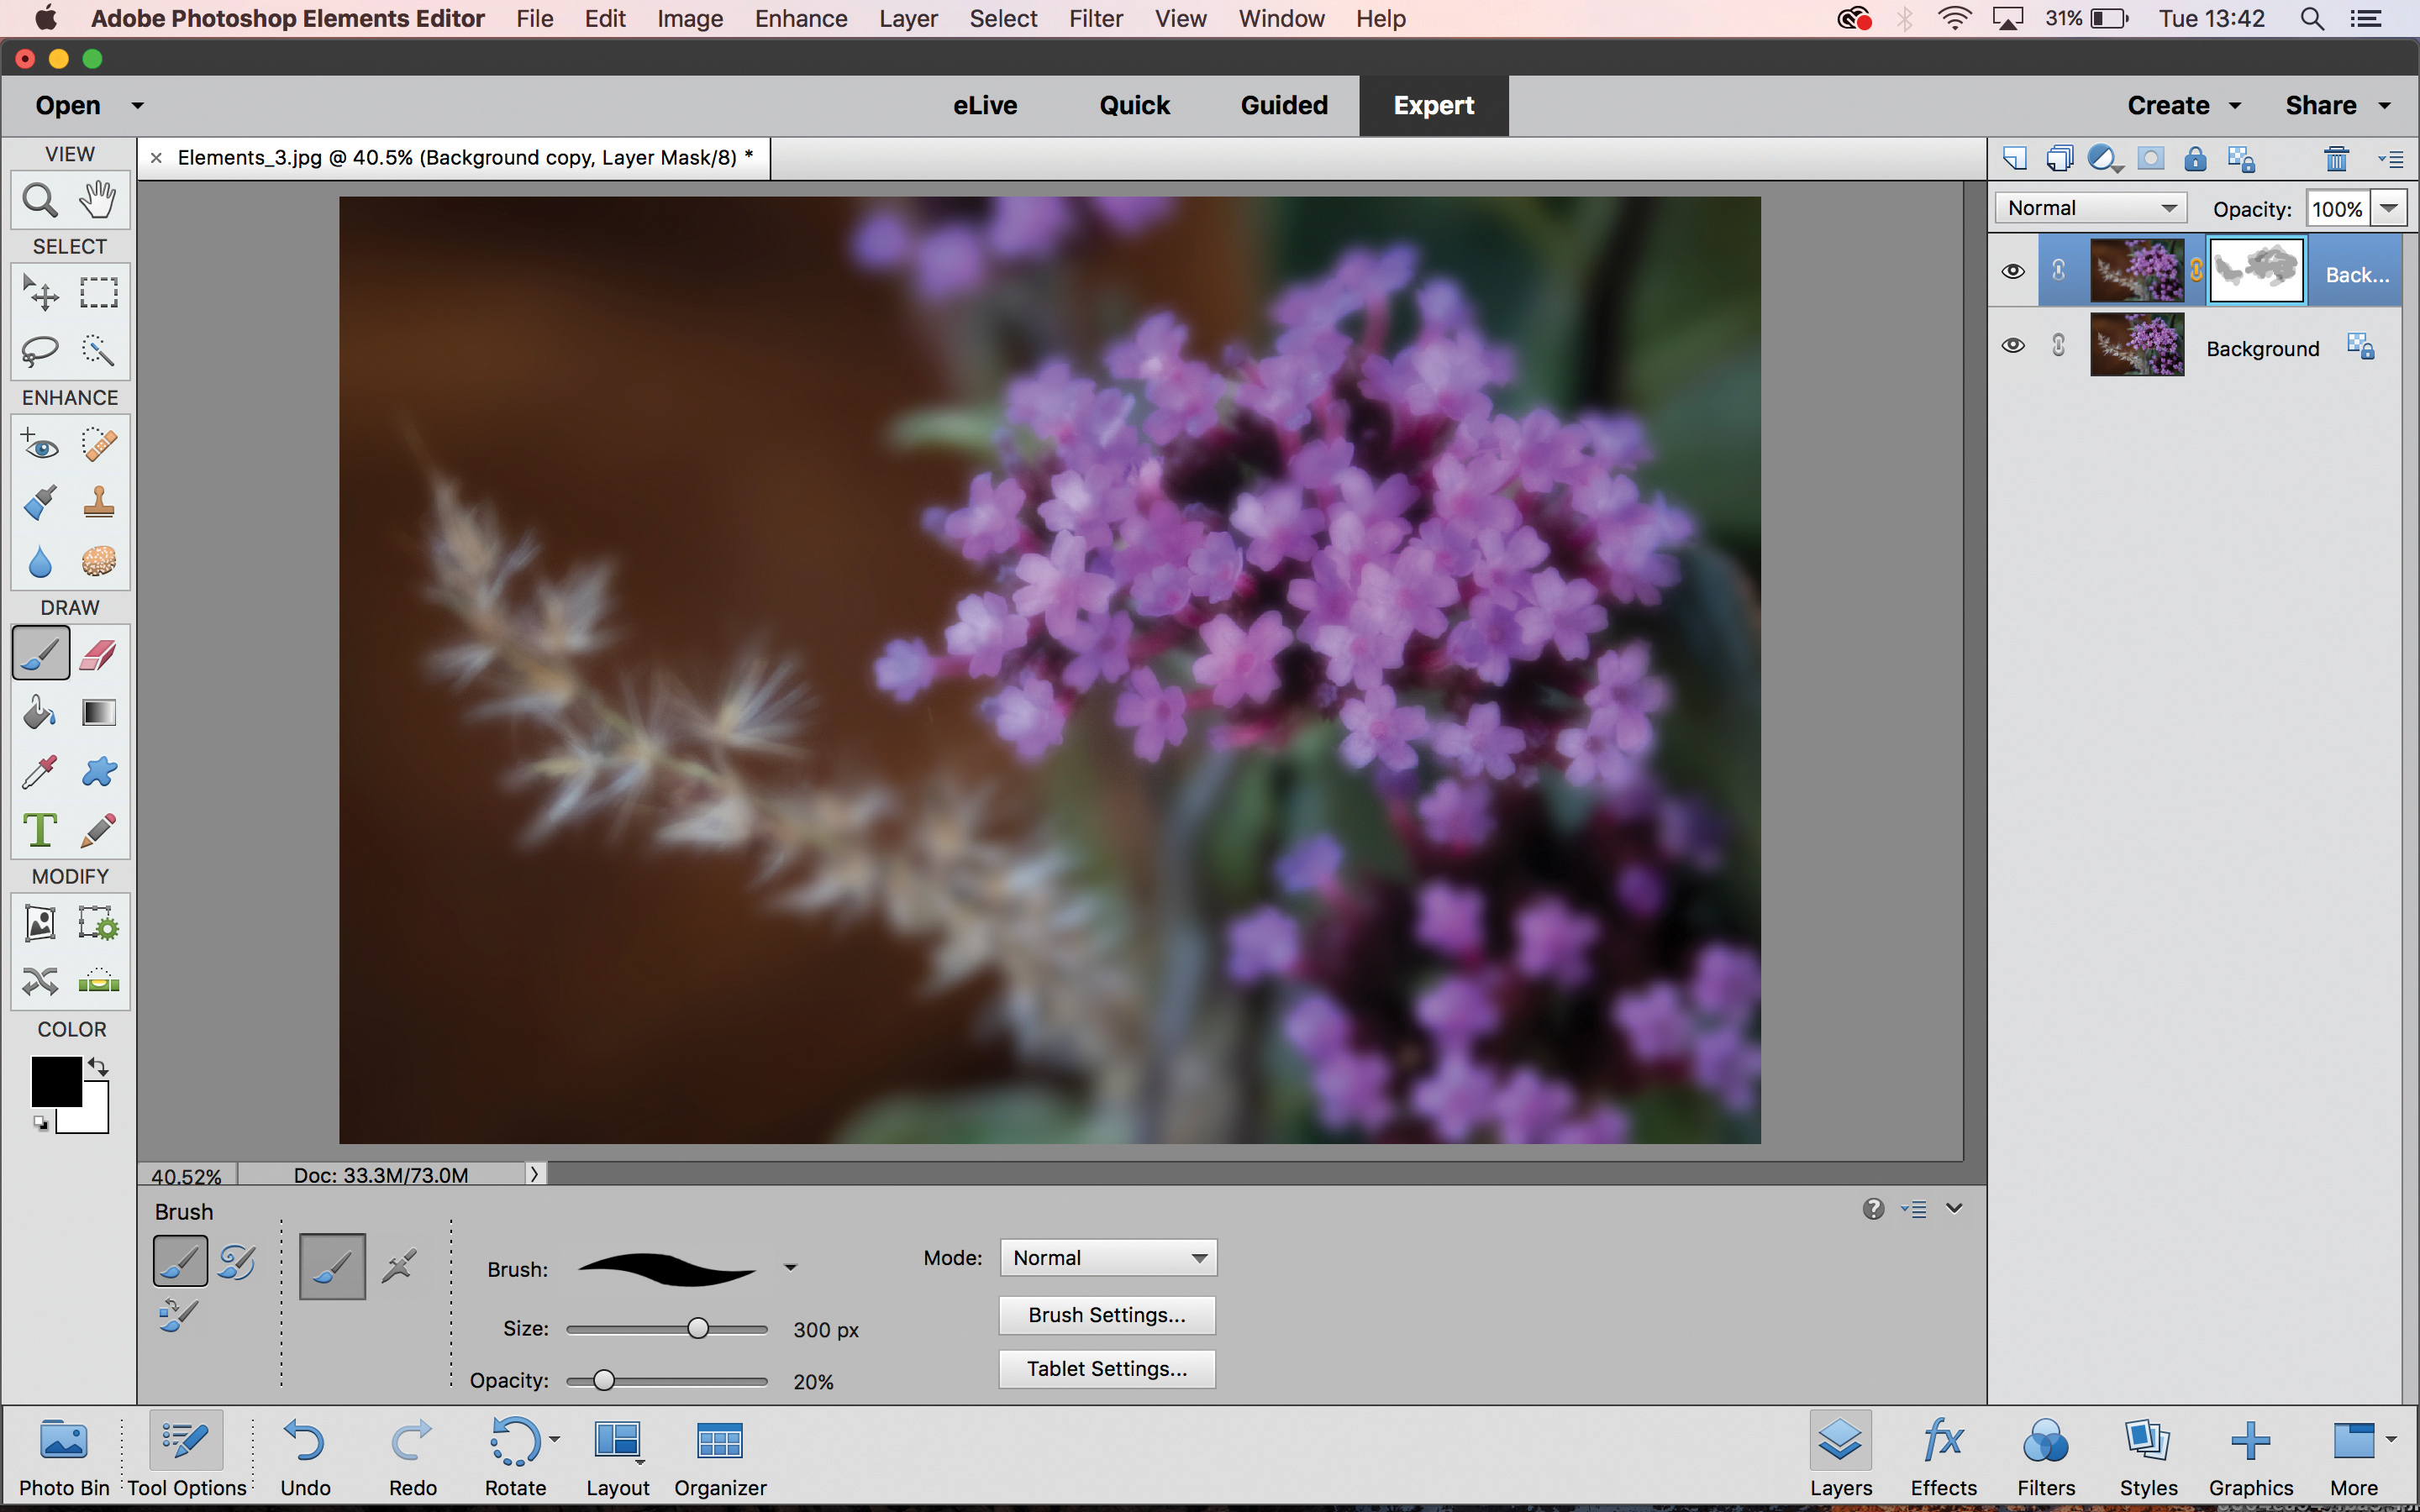
04 Paint the effect
Select the Brush tool, set the opacity to 20% and make your foreground colour black. Now paint in the areas that you want to be sharp; you can paint over an area multiple times until you achieve the desired sharpness.
Soft focus in Photoshop Elements: Method 2
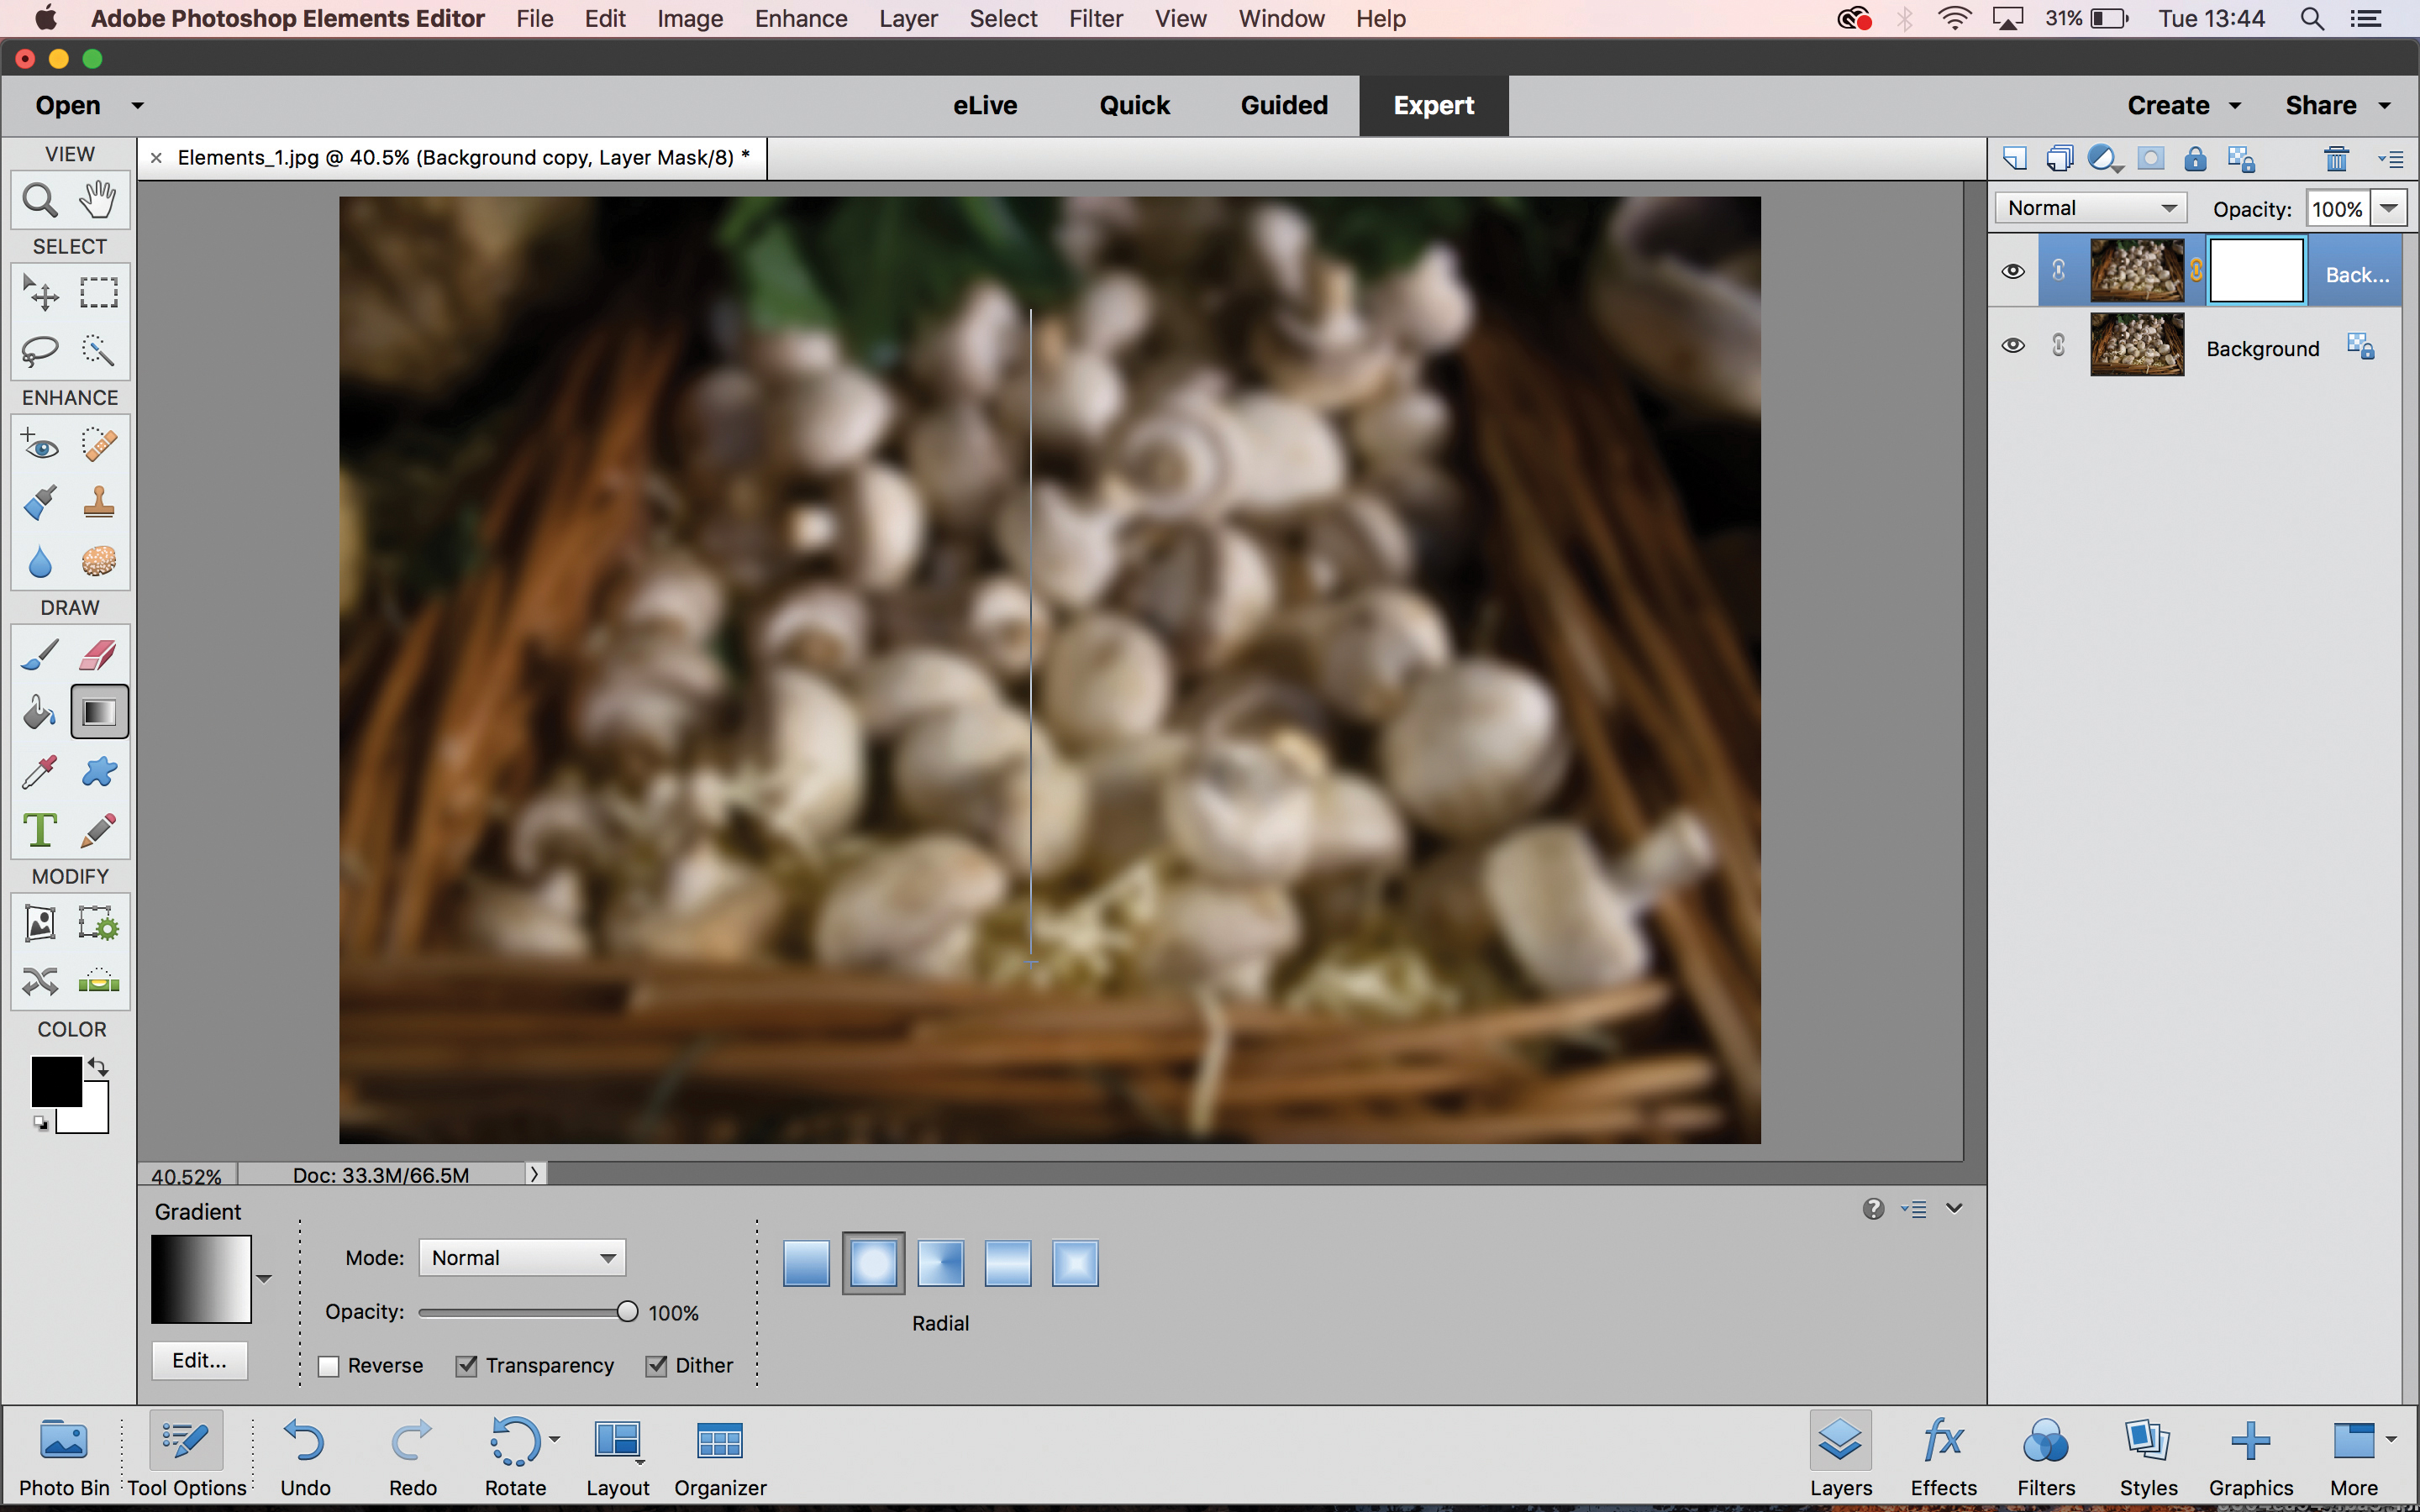
A) Gradient tool
If your image has focus gradually falling off from sharp to blurry, use this method instead. Repeat steps 01 to 03, then select the Gradient tool. Leave its default settings, click on the area where the image is sharpest, and then drag a line to where it is blurriest.
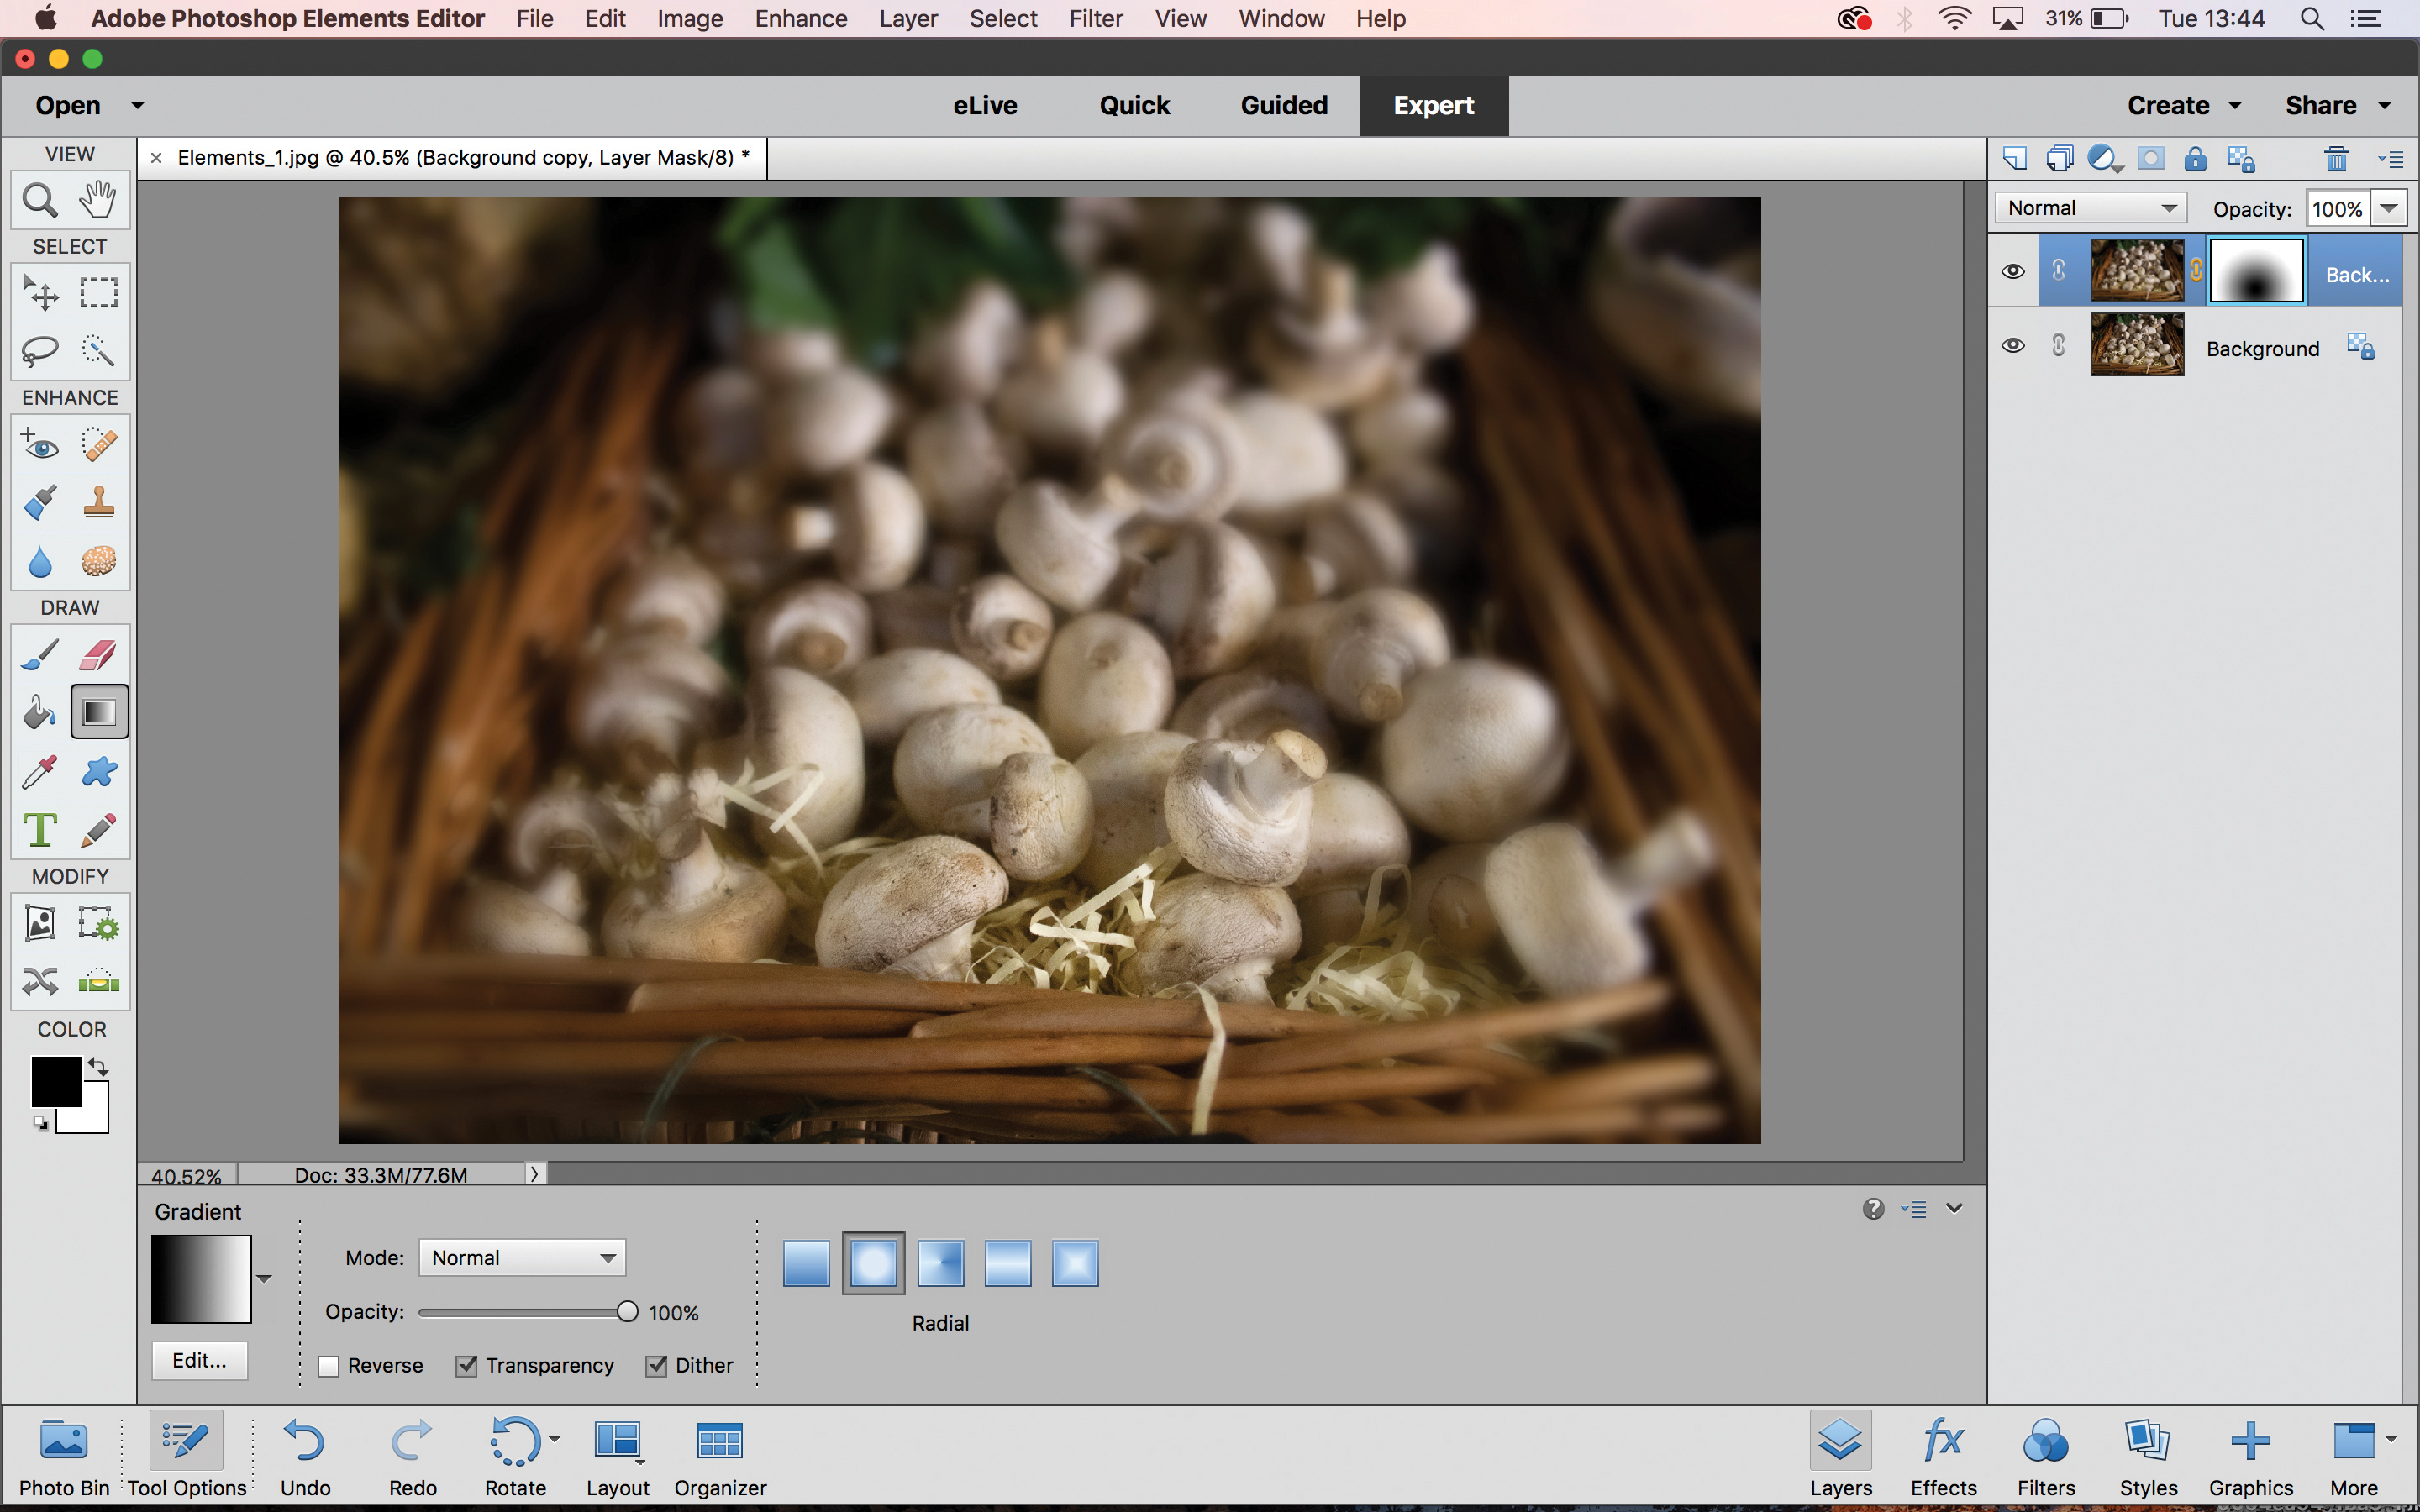
06 Faithful fall-off
Unlike step 04, where we painted in the areas of sharpness manually, by using the Gradient tool to embellish the existing depth of field we can create a faithful soft focus effect, which wouldn’t work as well on the flower image.
PhotoPlus: The Canon Magazine is the world's only monthly newsstand title that's 100% devoted to Canon, so you can be sure the magazine is completely relevant to your system.
Read more:
Lensbaby Velvet 28 review
Home photography ideas: Take Hollywood headshots using pantyhose!
215 photography tips, techniques and video tutorials
Get the Digital Camera World Newsletter
The best camera deals, reviews, product advice, and unmissable photography news, direct to your inbox!

James has 22 years experience as a journalist, serving as editor of Digital Camera World for 6 of them. He started working in the photography industry in 2014, product testing and shooting ad campaigns for Olympus, as well as clients like Aston Martin Racing, Elinchrom and L'Oréal. An Olympus / OM System, Canon and Hasselblad shooter, he has a wealth of knowledge on cameras of all makes – and he loves instant cameras, too.


