How to create a moody sports portrait
Use a couple of Speedlights for a moody backdrop
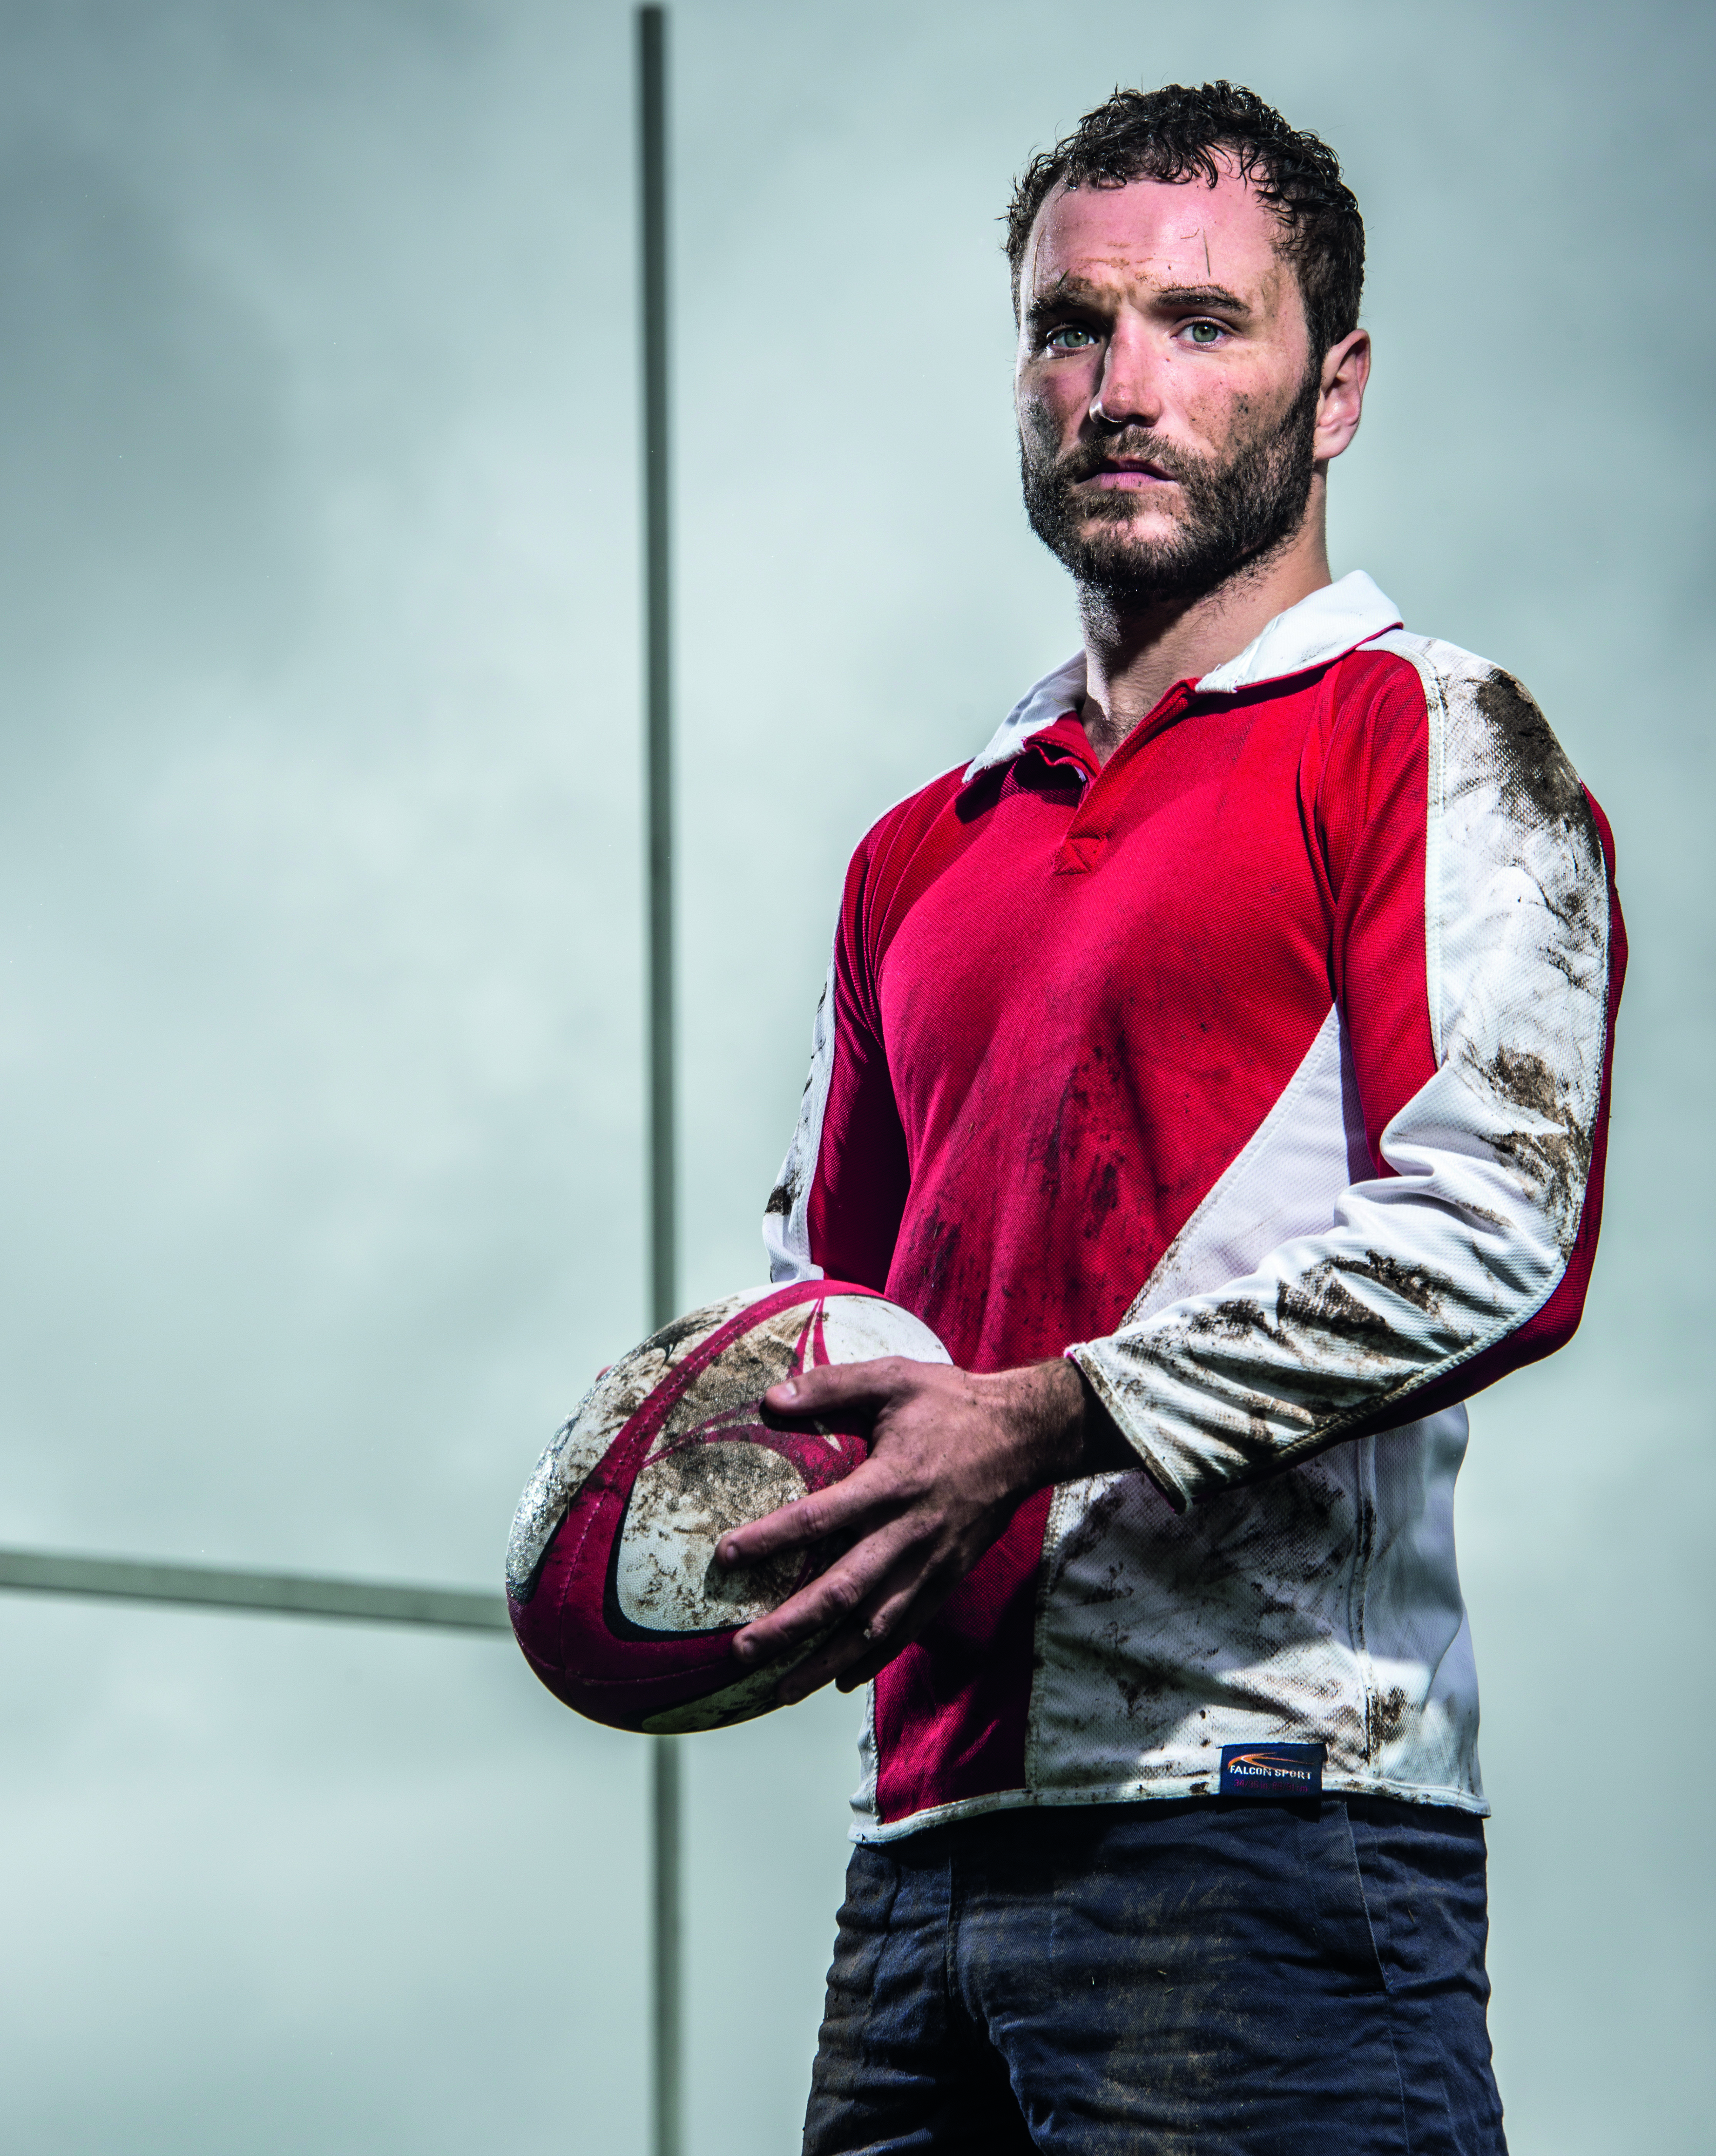
Shoot a sports portrait in daylight using off-camera flash to create a moody, dramatic look
Time needed: One hour
Skill level: Intermediate
Kit needed: D-SLR, Two Speedlights, Wireless flash trigger, Tripod for camera, Two light stands/tripods for flashes
As anyone fan will know, grey, wet weather is par for the course when it comes to rugby. However, when it comes to shooting a dramatic portrait, directionless, overcast light is the photographer’s metaphorical forward pass. But there is a solution: to add drama to a sports portrait on a dreary day, all you need are a pair of off-camera Speedlights to lift your subject. This enables you to augment the natural light and take a shot that will rival the finest World-Cup-winning drop-goal.
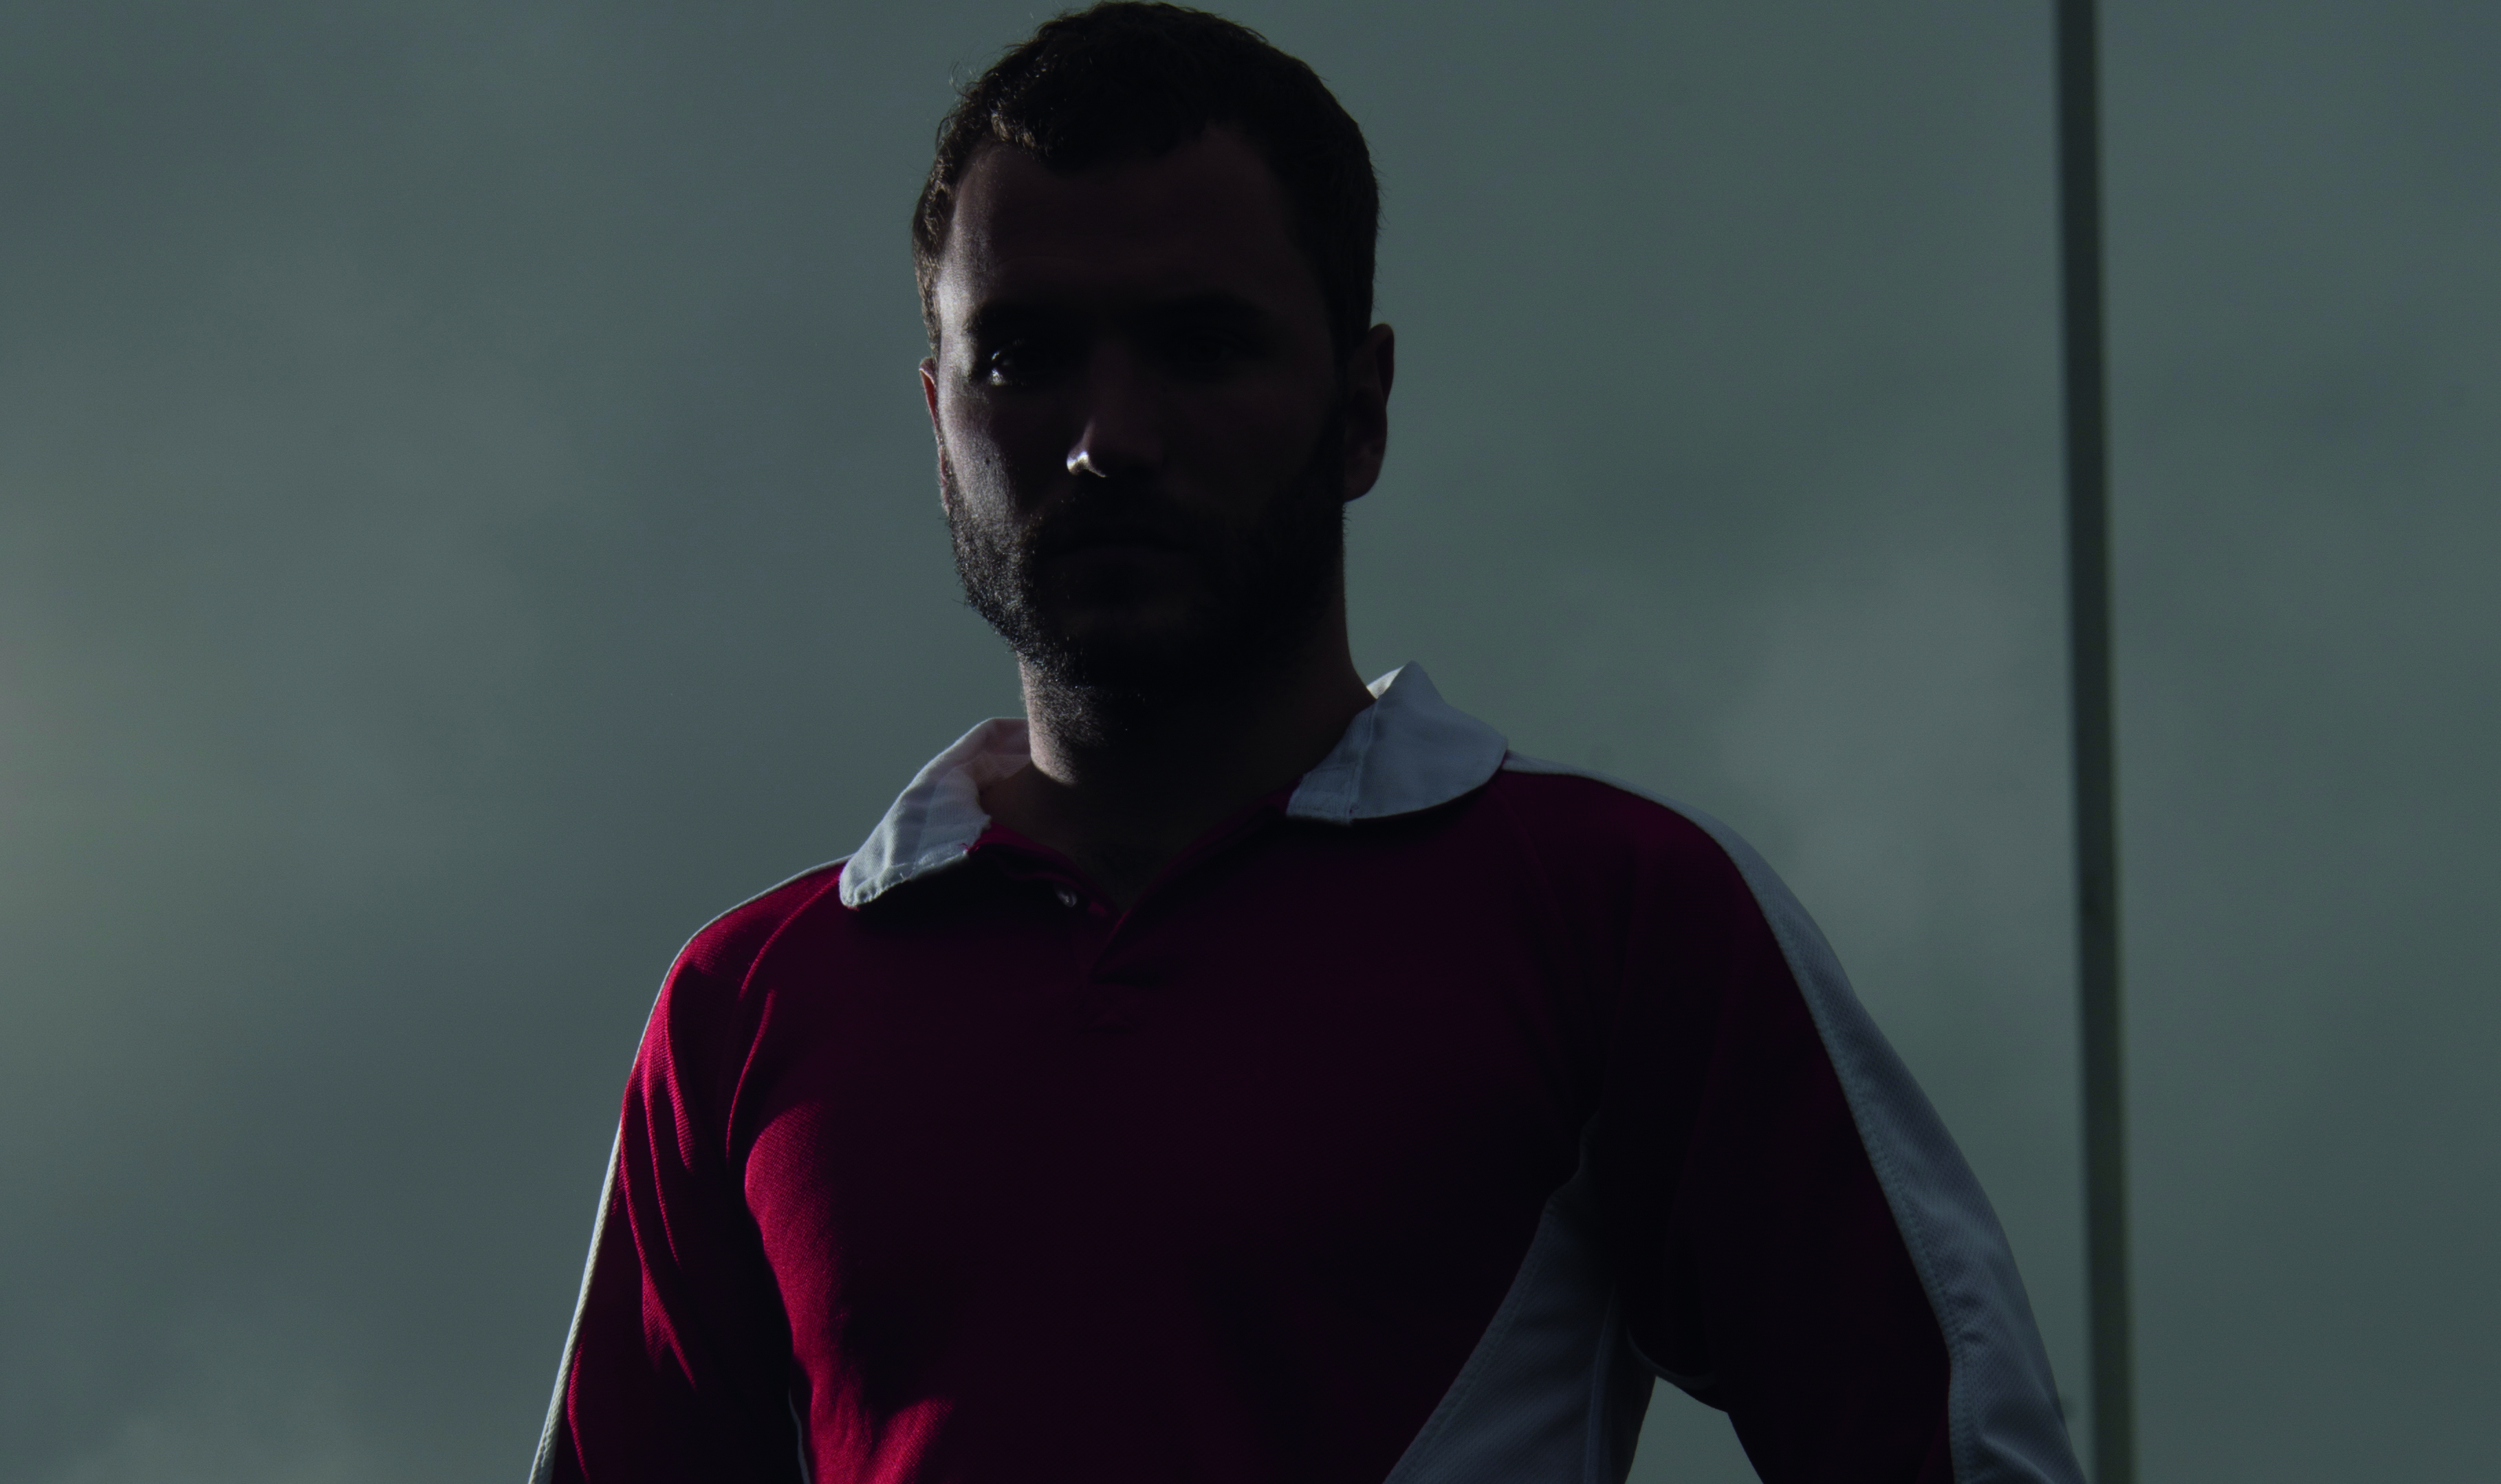
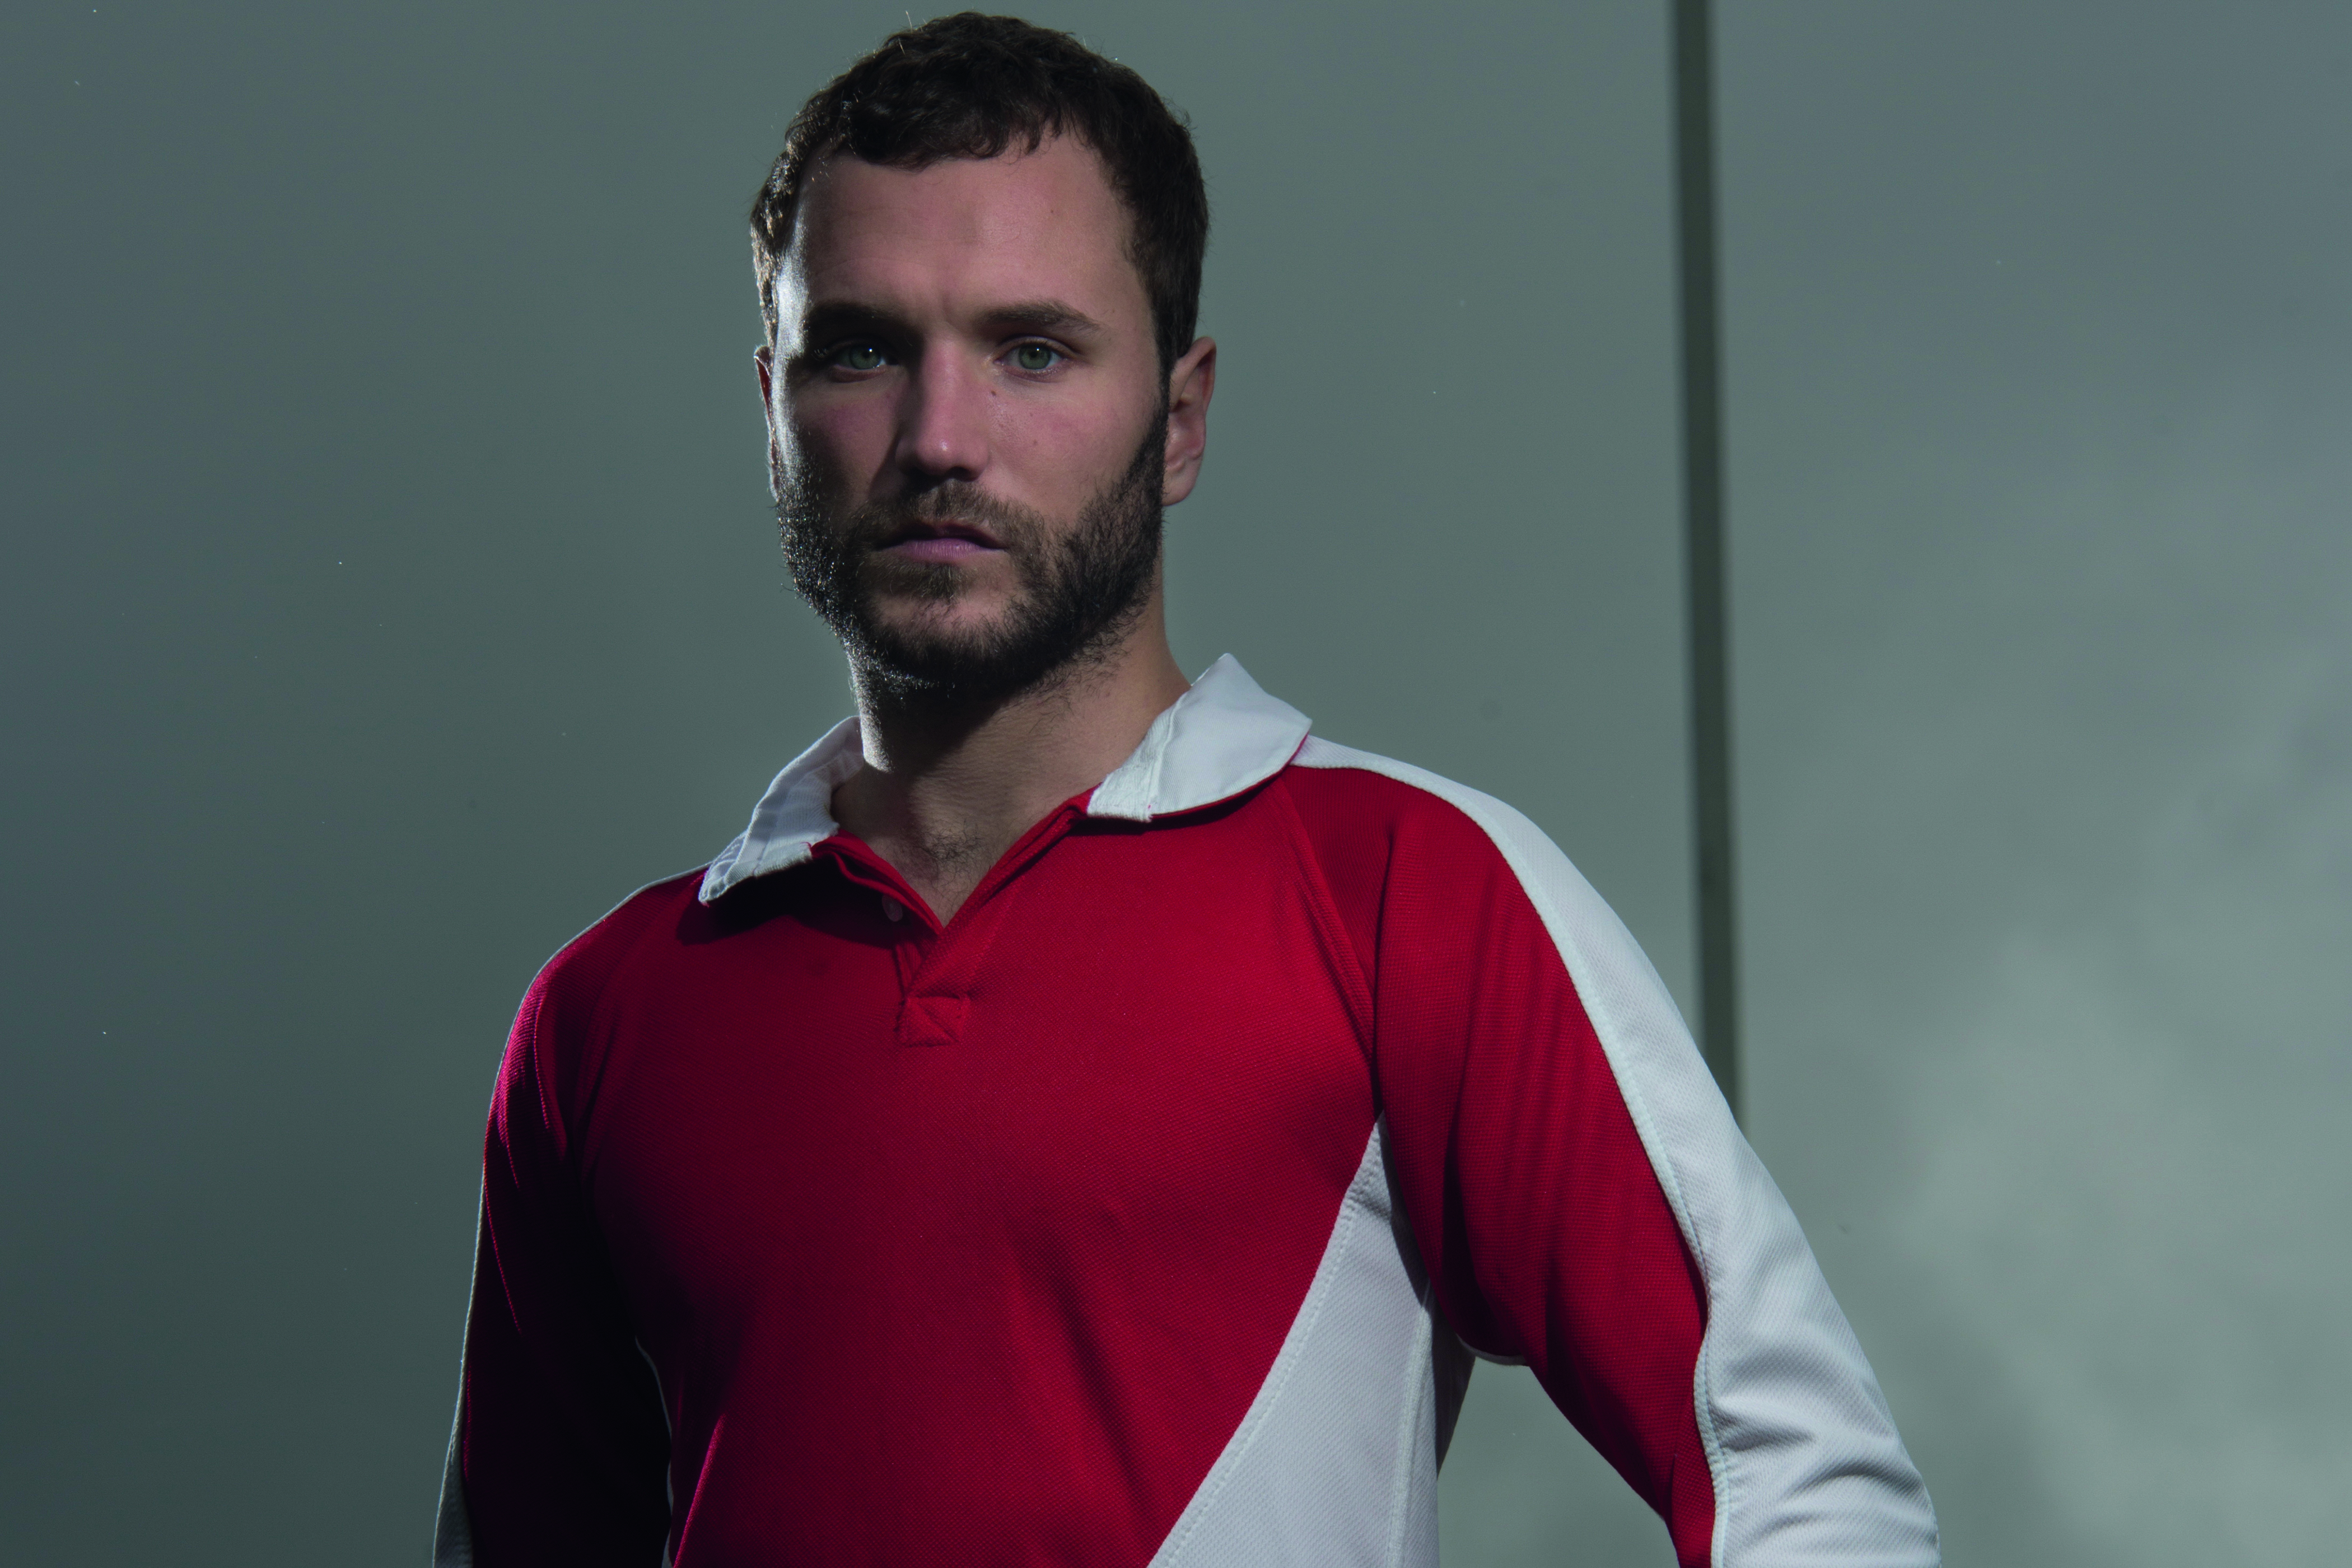
By cross-lighting our rugby player here with two flashes, we recreated the dramatic look that you often see in professional sports portraits. We placed one of our flashes behind our subject, angled back towards the camera; the light from behind hit the edge of the body, creating the bright highlight that separates the subject from the dark moody backdrop. We positioned the second flash in front of him to illuminate his face and body.
In some shooting situations your camera’s Manual mode might seem like the trickiest camera setting to use, but here it actually makes things much easier, as you don’t want the camera’s auto metering system to kick in. Instead you want full control over the exposure. Using Manual mode enables you to under-expose the sky to make it dark and moody.
• Essential portrait photography tips • Get more photoshoot ideas
As for the flashes, Manual mode makes things much easier here too, as once they’re in position you can simply take a few test shots and adjust the power manually until you get the right amount of illumination. When using more than one flash, it helps to simplify things if you add the lights one by one and see the effect of each in turn, rather than turning them all on at once.
STEP BY STEP: Get all moody
Learn how to set up your D-SLR and Speedlight for dramatic outdoor portraits
When shooting in daylight, there’s only ever really one ‘correct’ exposure for the scene, but when you bring your own lights into play you can manipulate the exposure. First you need to work out a ‘normal’ exposure without the flash, then under-expose the scene before setting up two flashes – one to backlight the subject, the other to bring their body and face back up to a correct exposure.
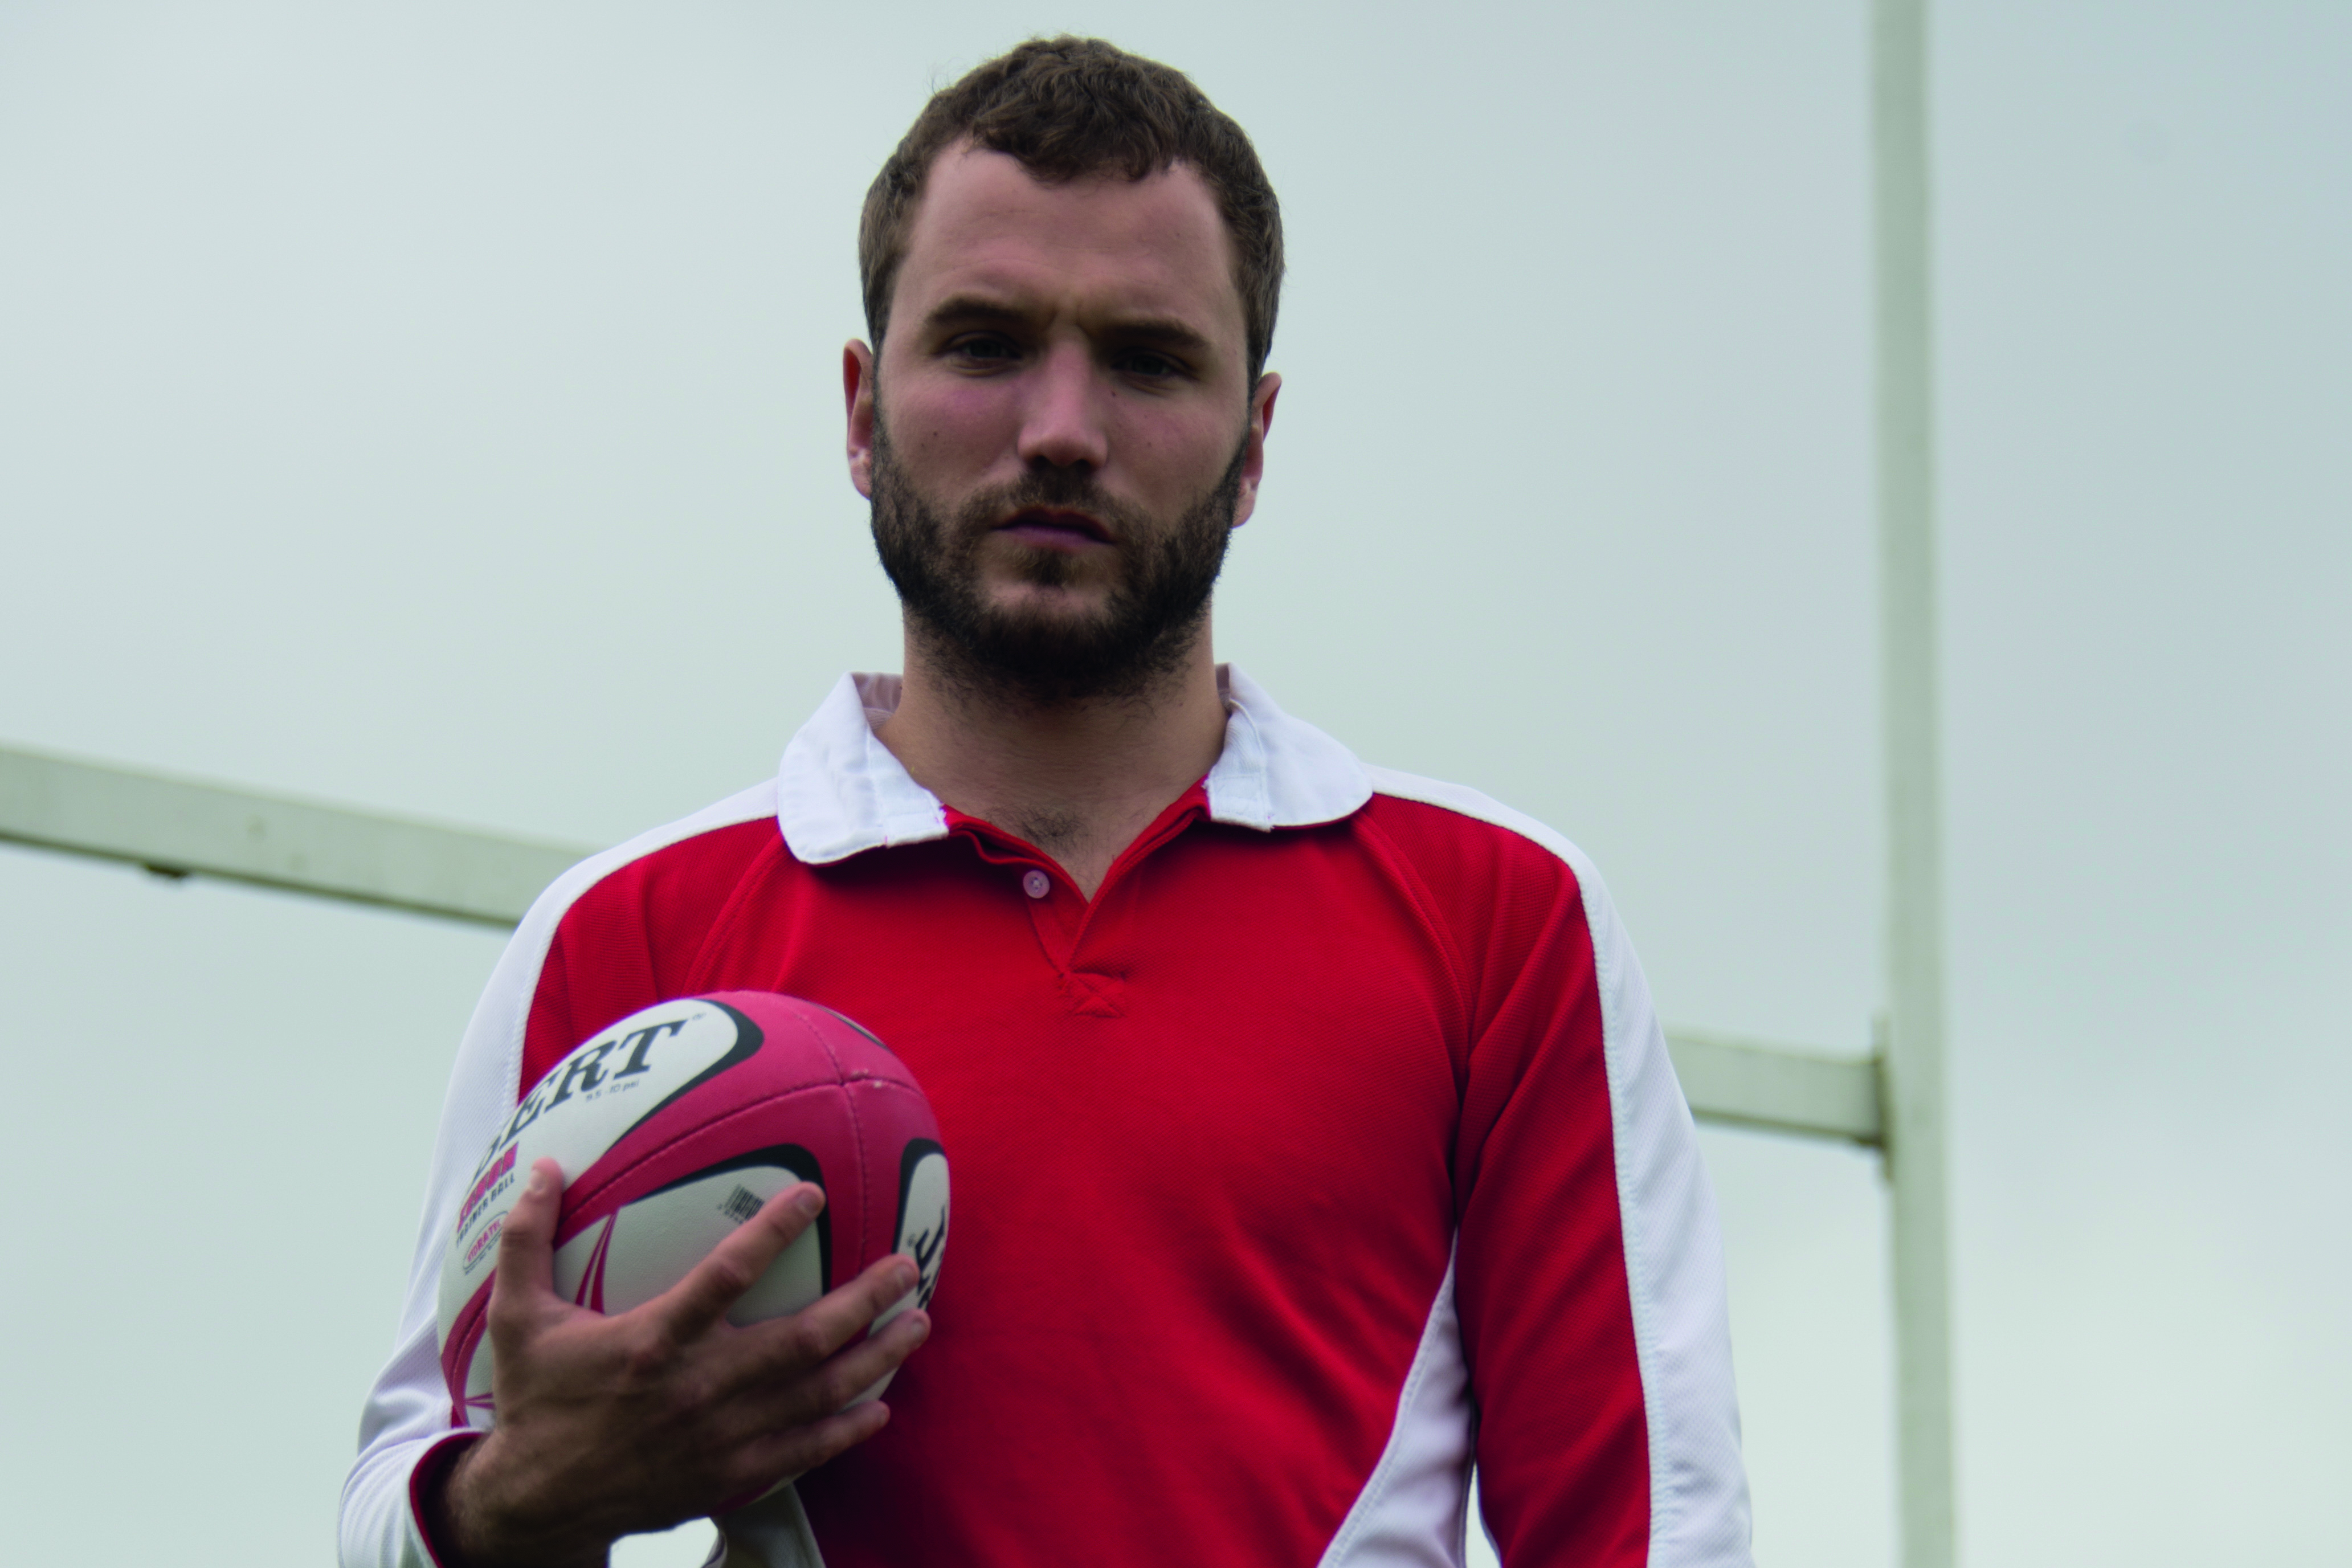
As well as adjusting the manual output of the flash, you can control the flash strength by moving it closer or further away from your subject
1 ACT NATURAL
First work out a ‘normal’ exposure as you would when shooting with natural light alone. Settle on a composition and camera angle, then switch to Manual mode. Set ISO100 and a shutter speed of around 1/200 sec, then take a few test shots and adjust the aperture until the exposure looks about right. We used f/5.6 here.
2 DIAL IT DOWN
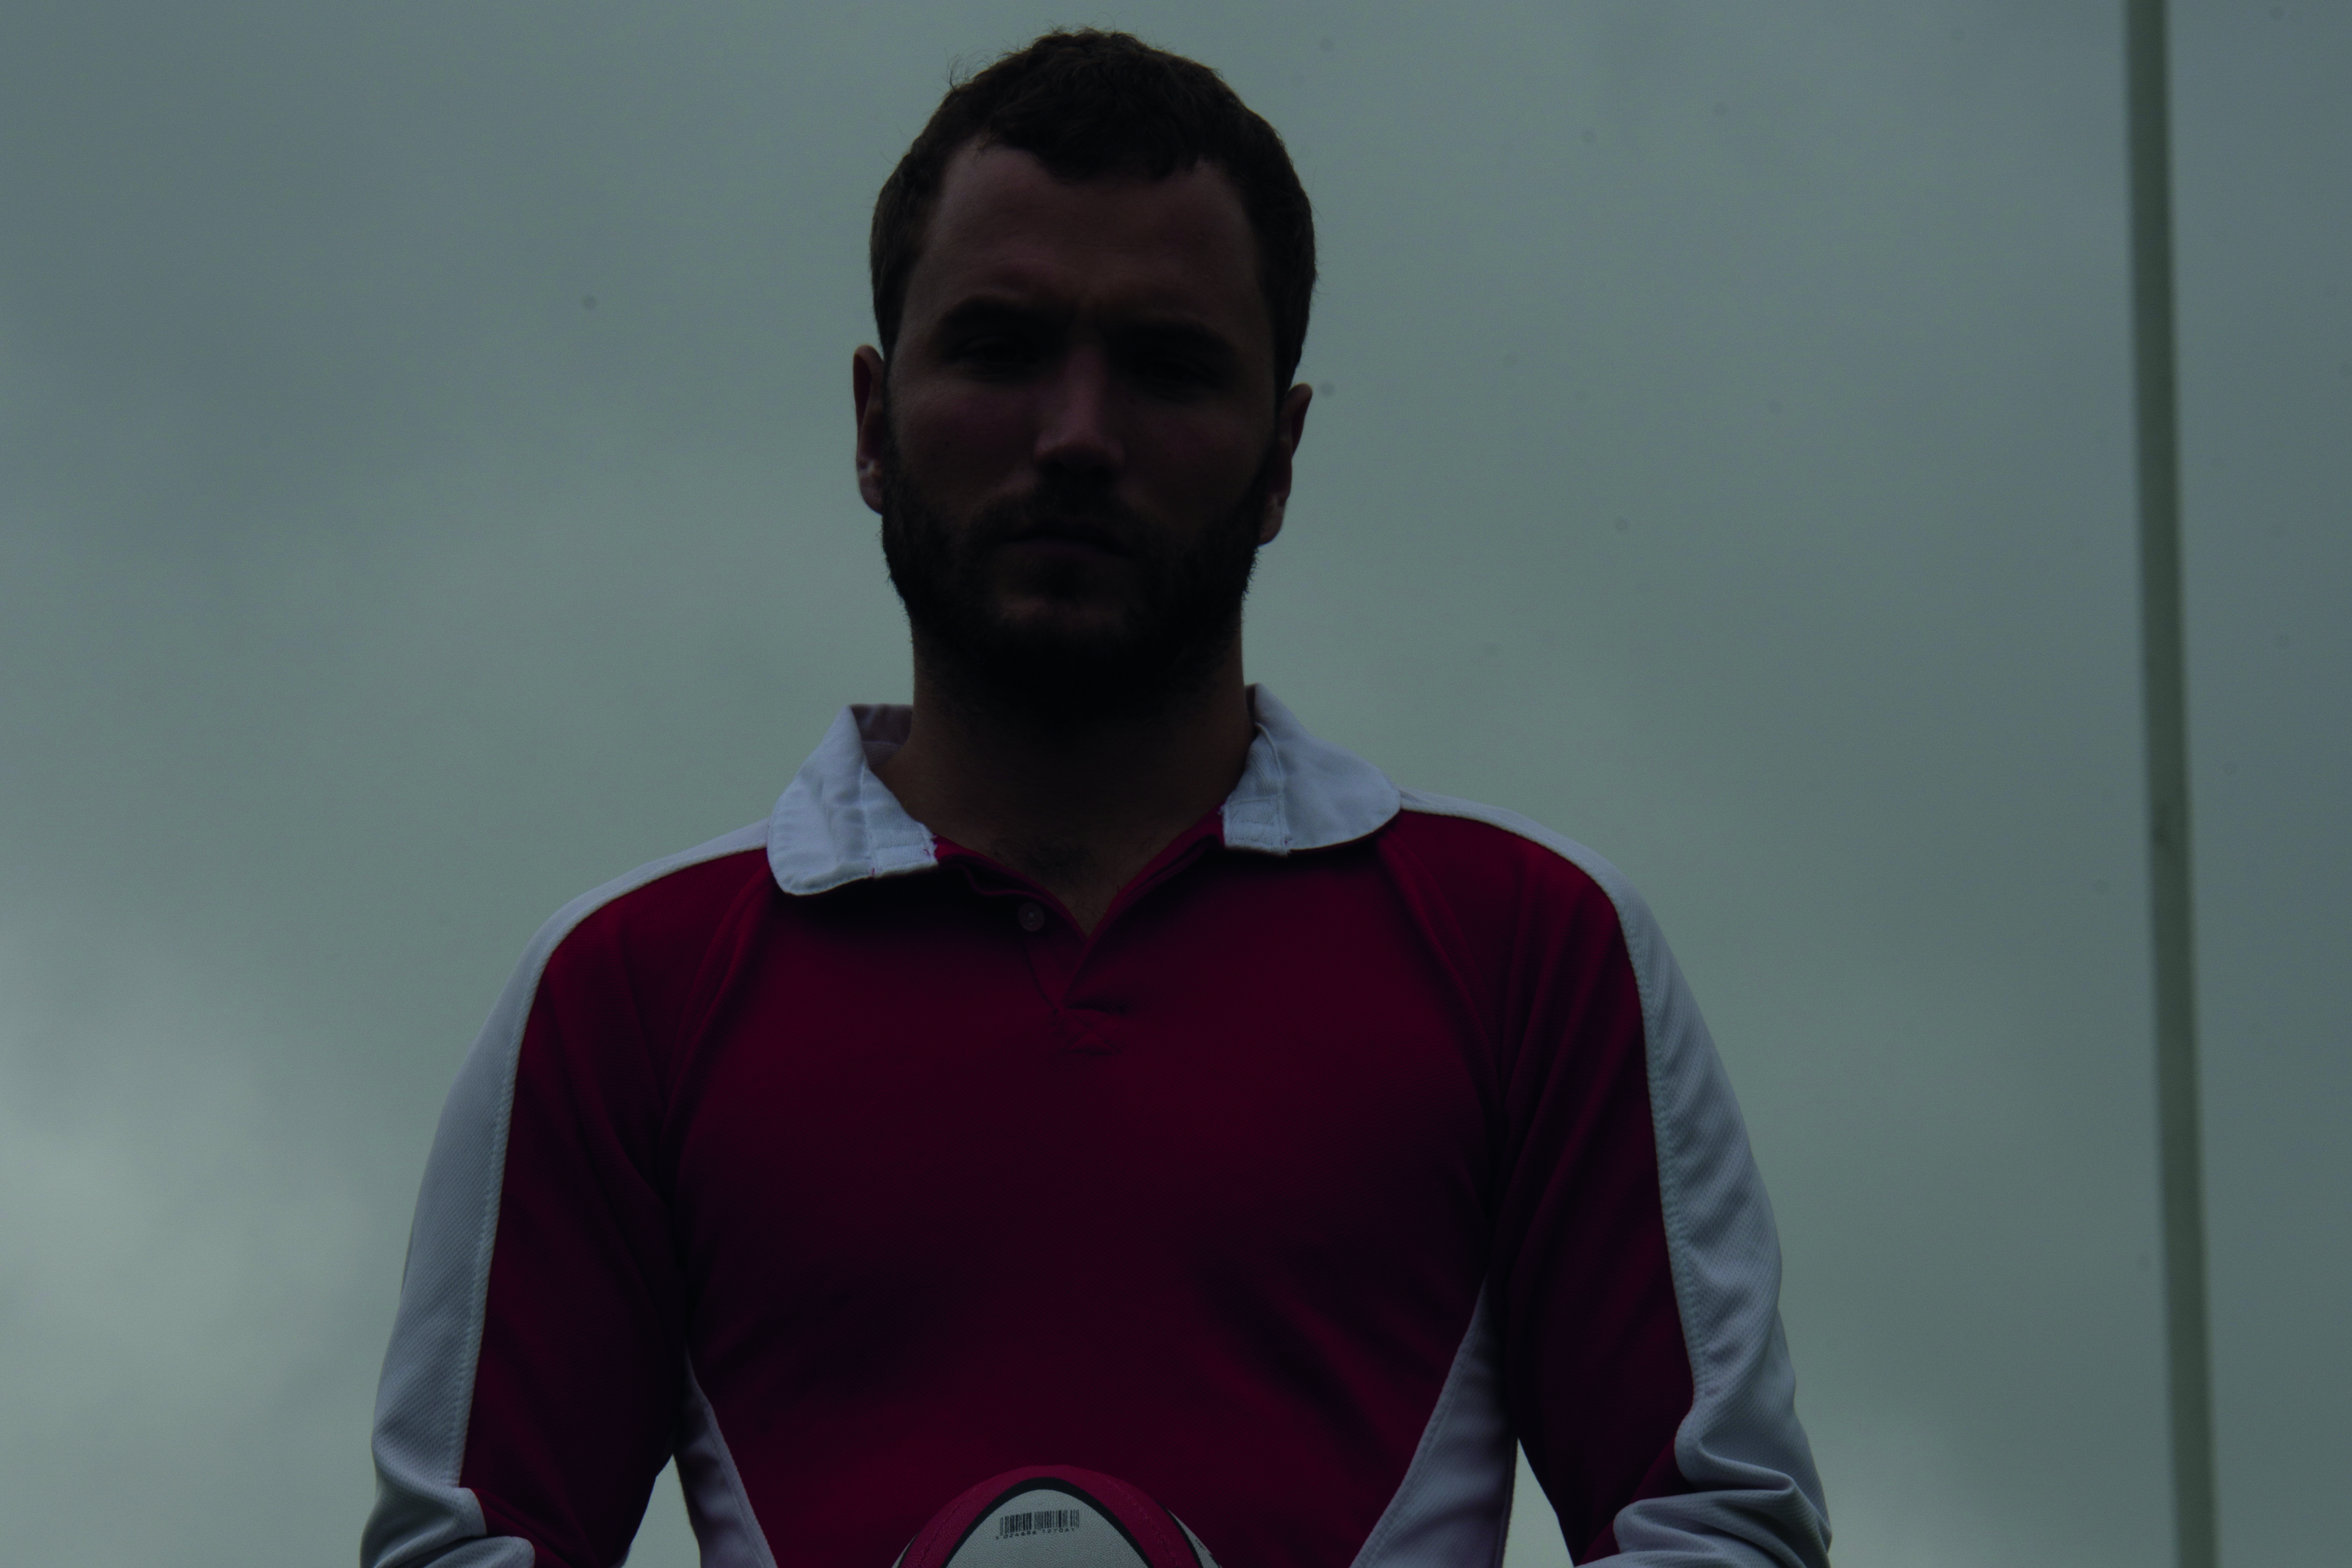
The trick to creating moody, dramatic outdoor lighting is to under-expose the ambient light, so from your starting point of 1/200 sec at f/5.6 and ISO100, you need to narrow the aperture to under-expose (darken) the scene. Around two stops of underexposure will do – in our case, that brought our aperture down to f/11.
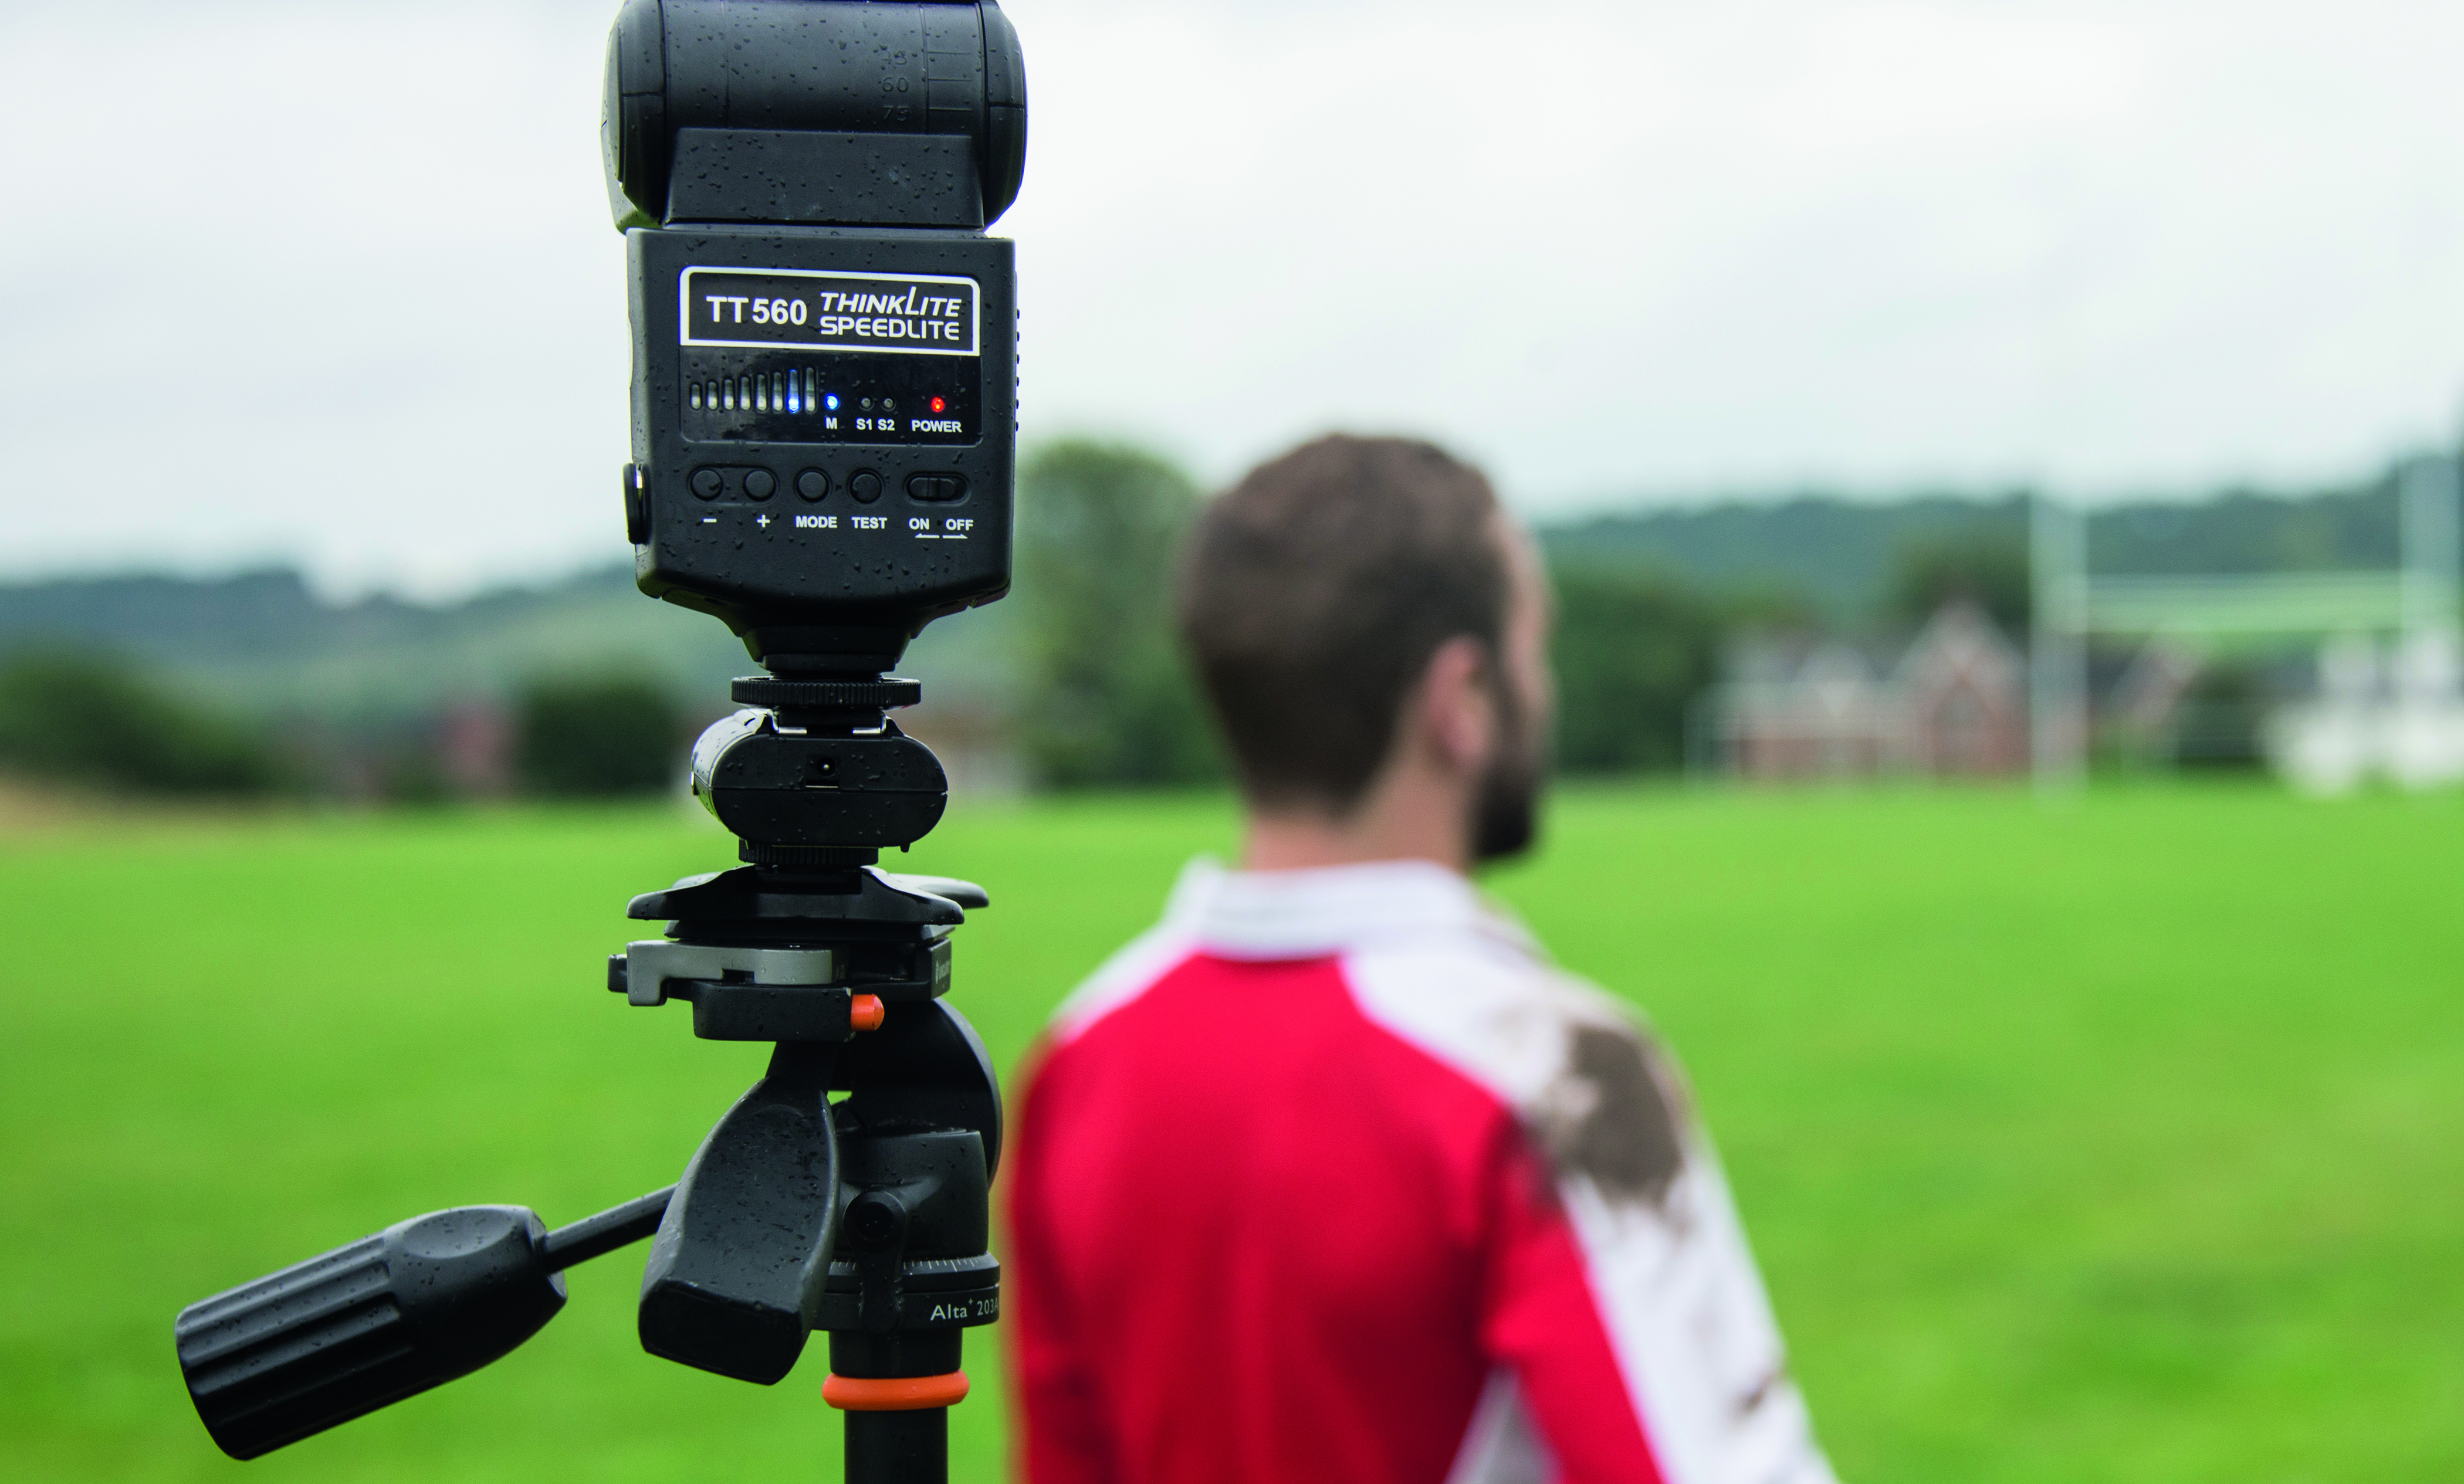
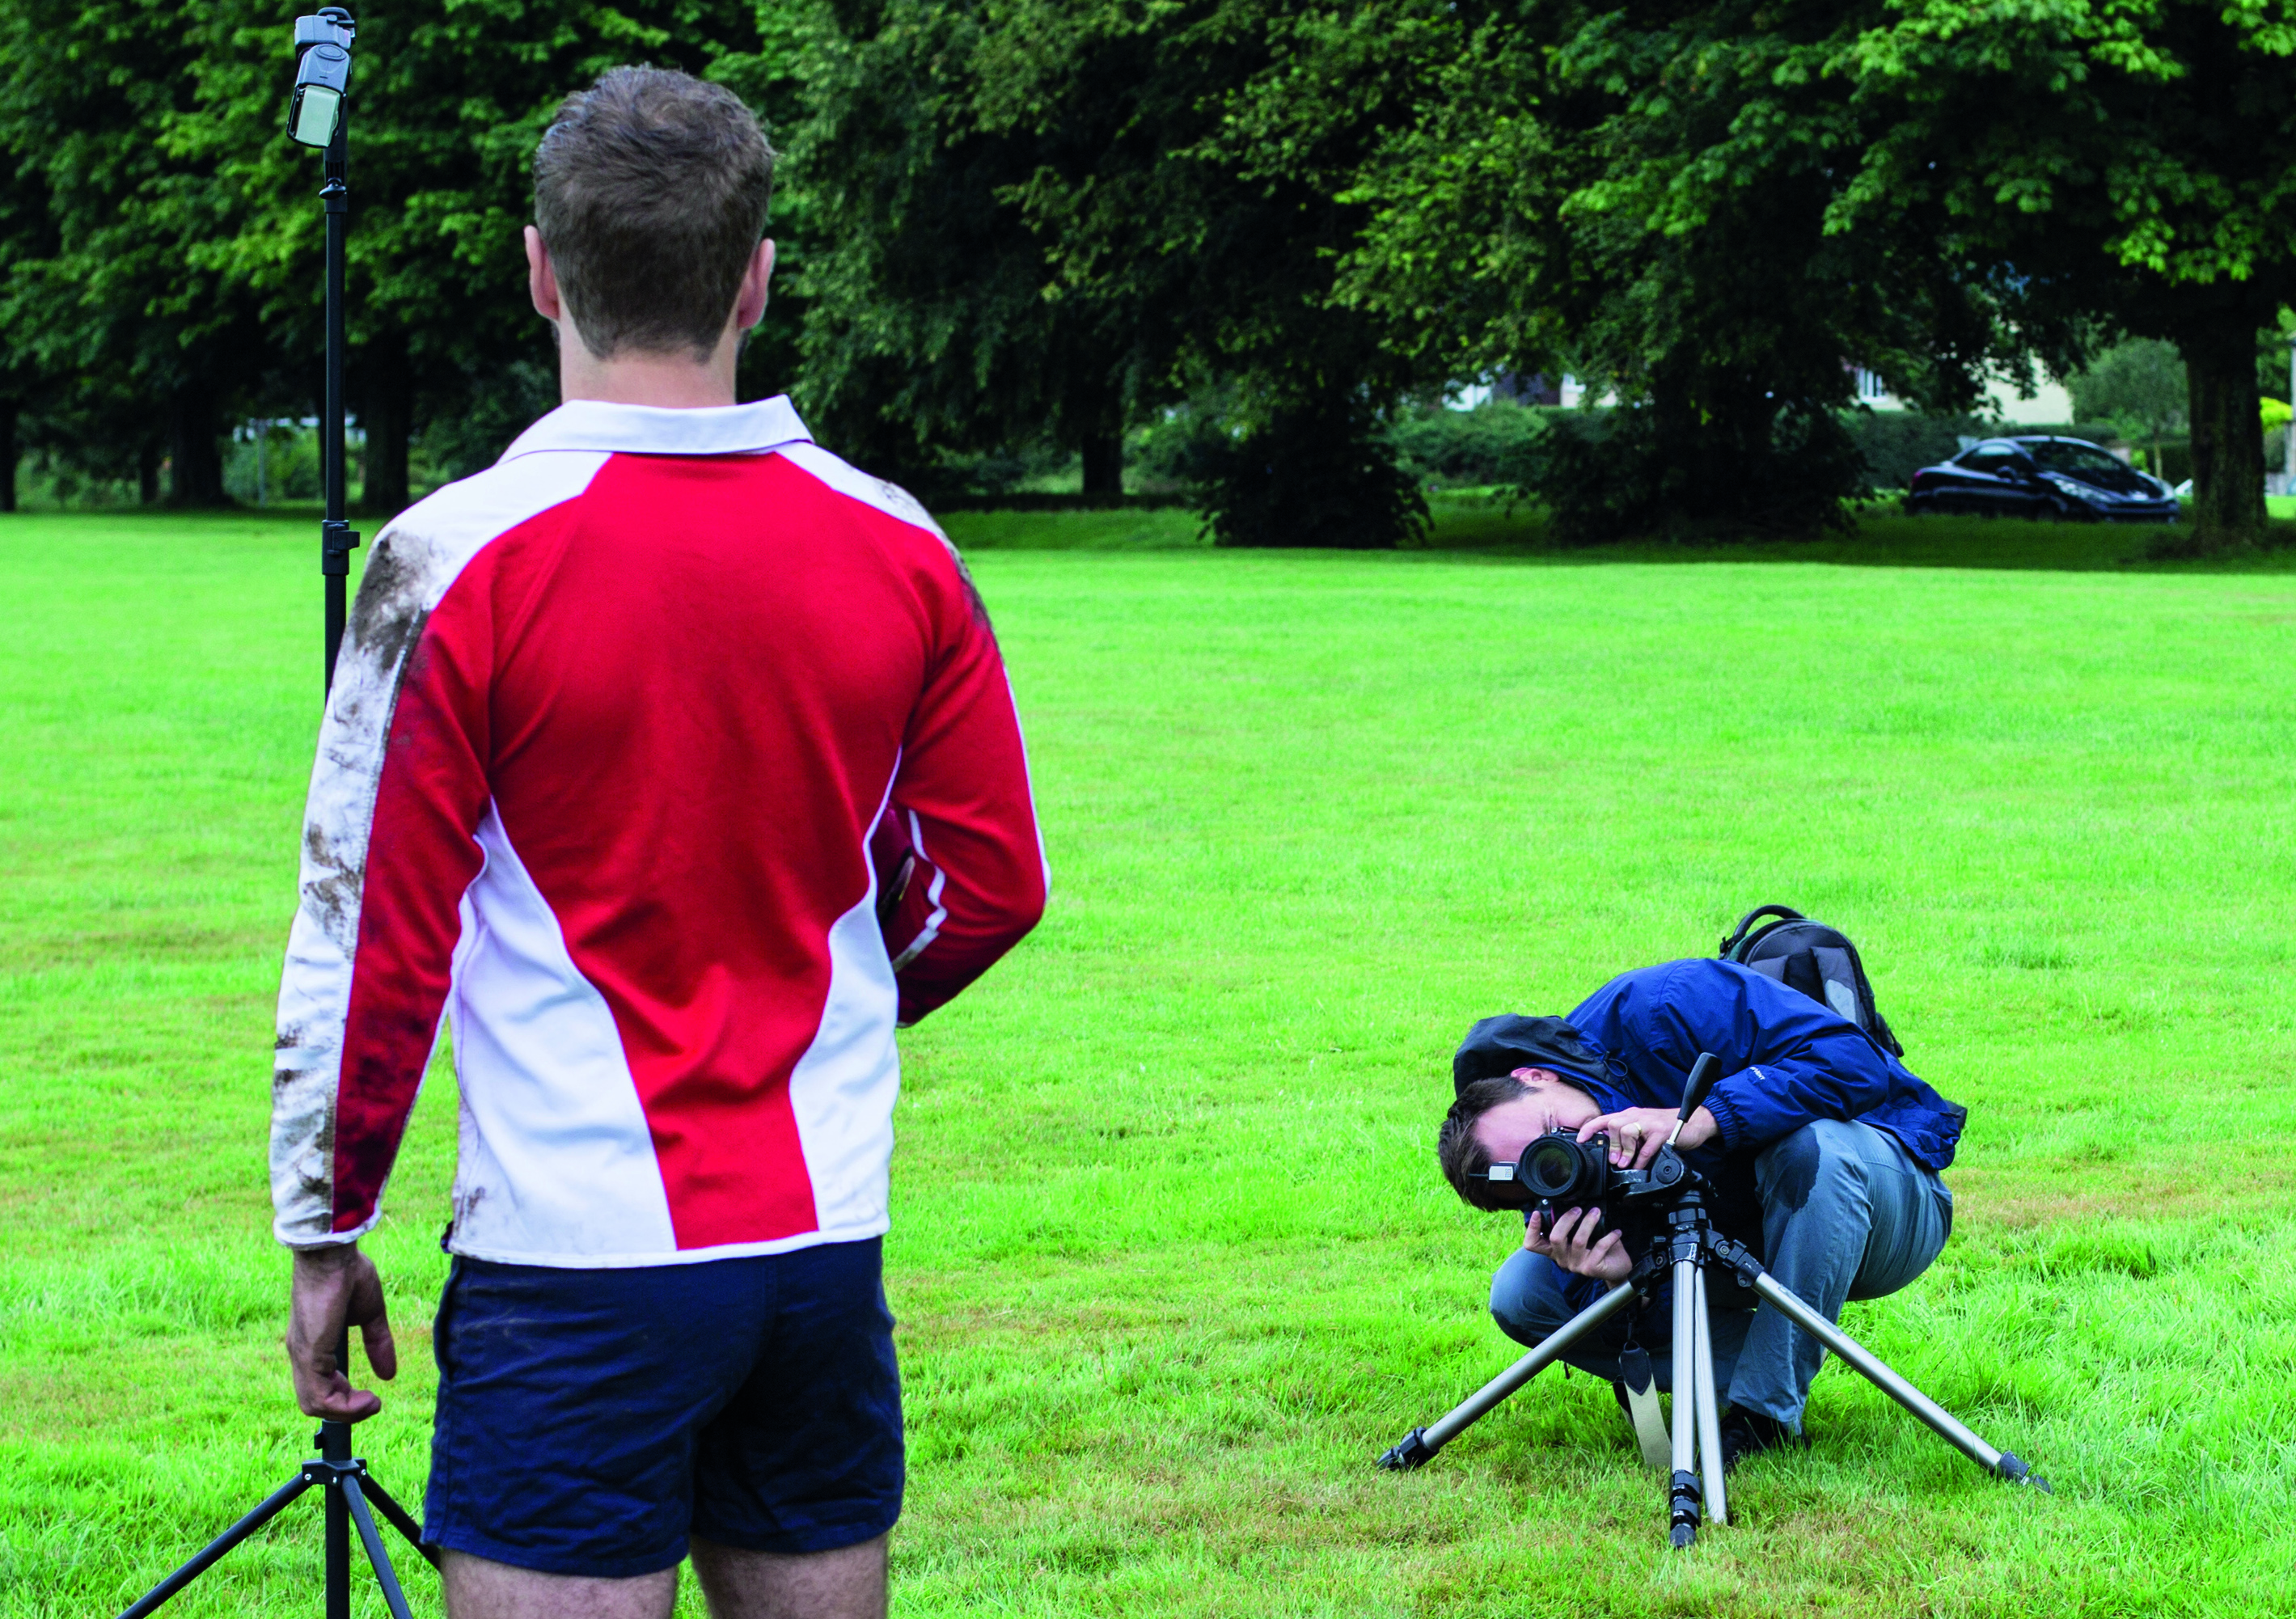
A tripod isn’t essential when using flash, but it helps to keep the camera in roughly the same position while you perfect your composition and work out the lighting. Once the flashes are set up, then you can shoot handheld to experiment with different compositions. Shooting up at your subject from low down will not only let you frame them against the sky, but also has the effect of making them seem big and powerful.
3 EXPERIENCE A FLASH BACK
Start with the edge lighting. Set up your first flash on a stand behind the subject, angled back towards the subject and camera. Most flashes come with a plastic base that enables you to connect it to a stand or tripod. Attach a wireless trigger (see Key Skill, below) and set the flash to Manual power.
4 GIVE YOURSELF AN EDGE
Take a few test shots and adjust the power until the backlighting looks right. The flash should create a highlight along the edge of your subject. You don’t want it to spill across the face, so either adjust the position of the flash or rotate the subject until the light falls across the side of the head without hitting the nose like this.
5 LEAD FROM THE FRONT
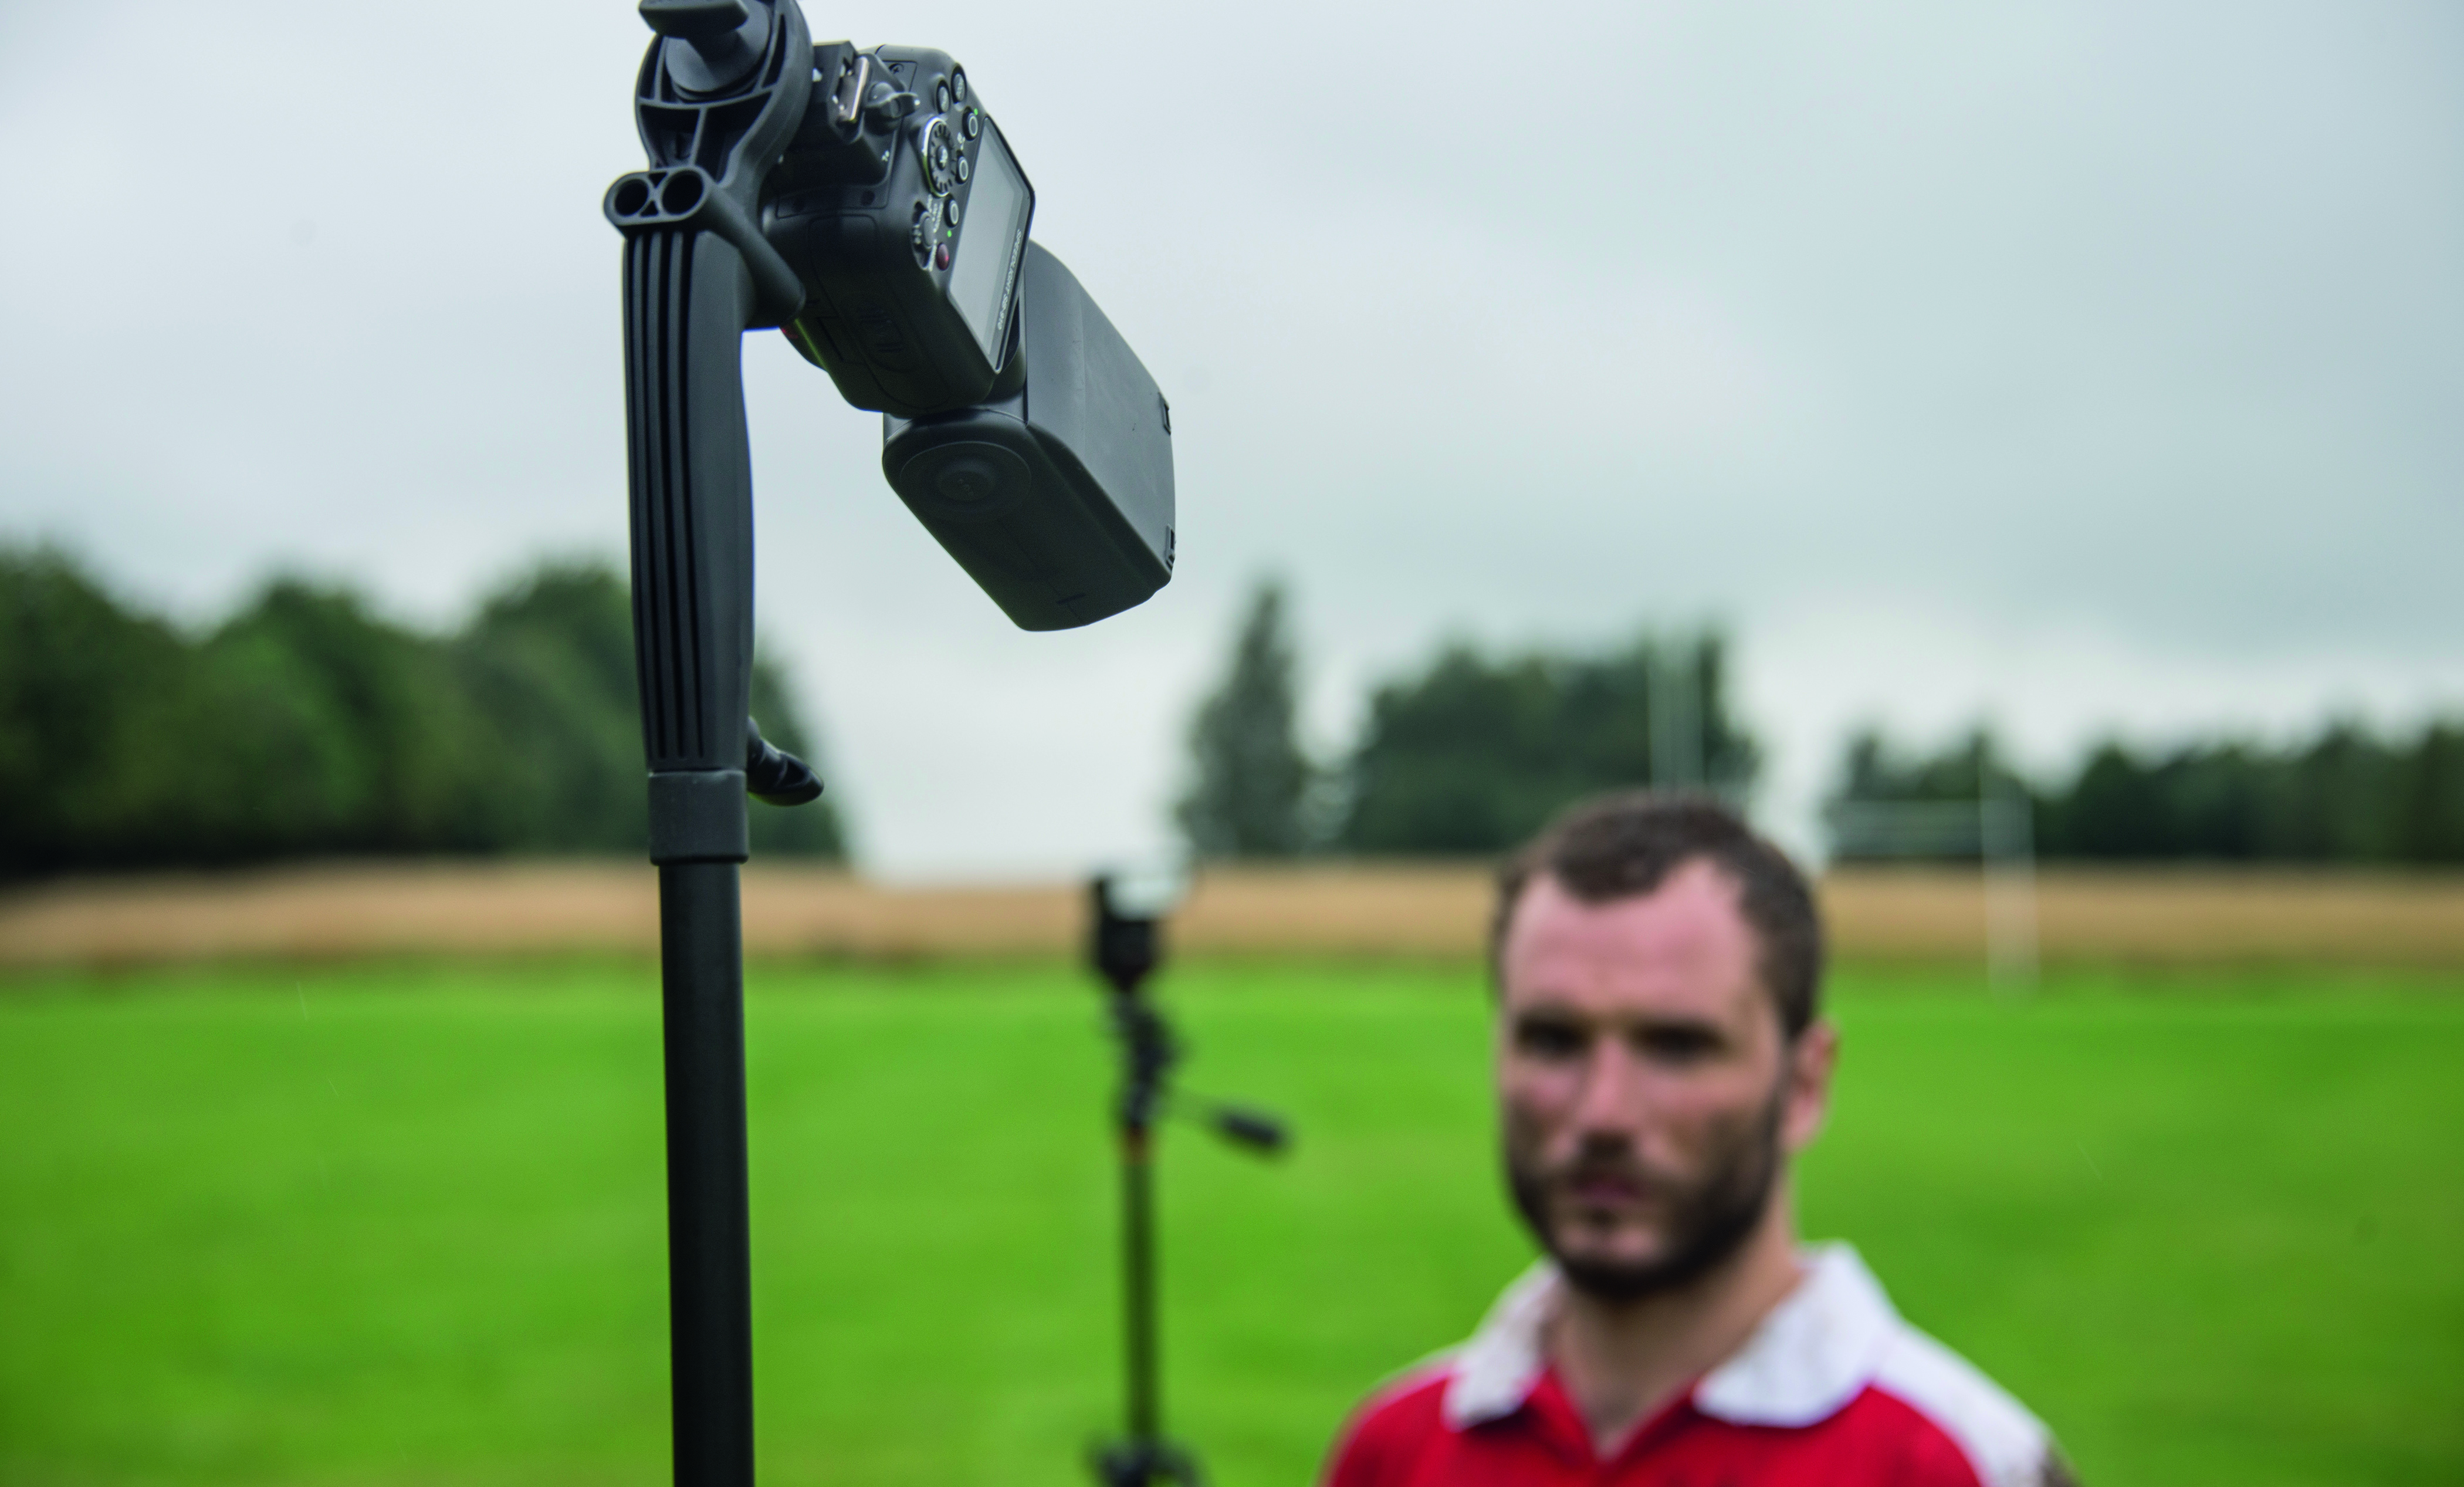
With your backlighting set up, you need to position your second flash in front of your subject to illuminate their face and body. Set the second flash up on a stand and again use Manual power so you have full control over the output. Set it to Optical Slave mode so that it detects the other flash and fires at the same time.
6 LIGHT IT UP
As before, take some test shots and adjust the power of the front light until your subject’s face and body are correctly lit. Here our Speedlight flash was at half-power, which gave the effect we wanted. Direct the light from above so that the shadow cast by the nose is angled down towards the corner of the mouth like this.
KEY SKILL: Take it away
The ability to fire Speedlights off-camera with a wireless trigger and optical slave mode is always useful…
GO WIRELESS
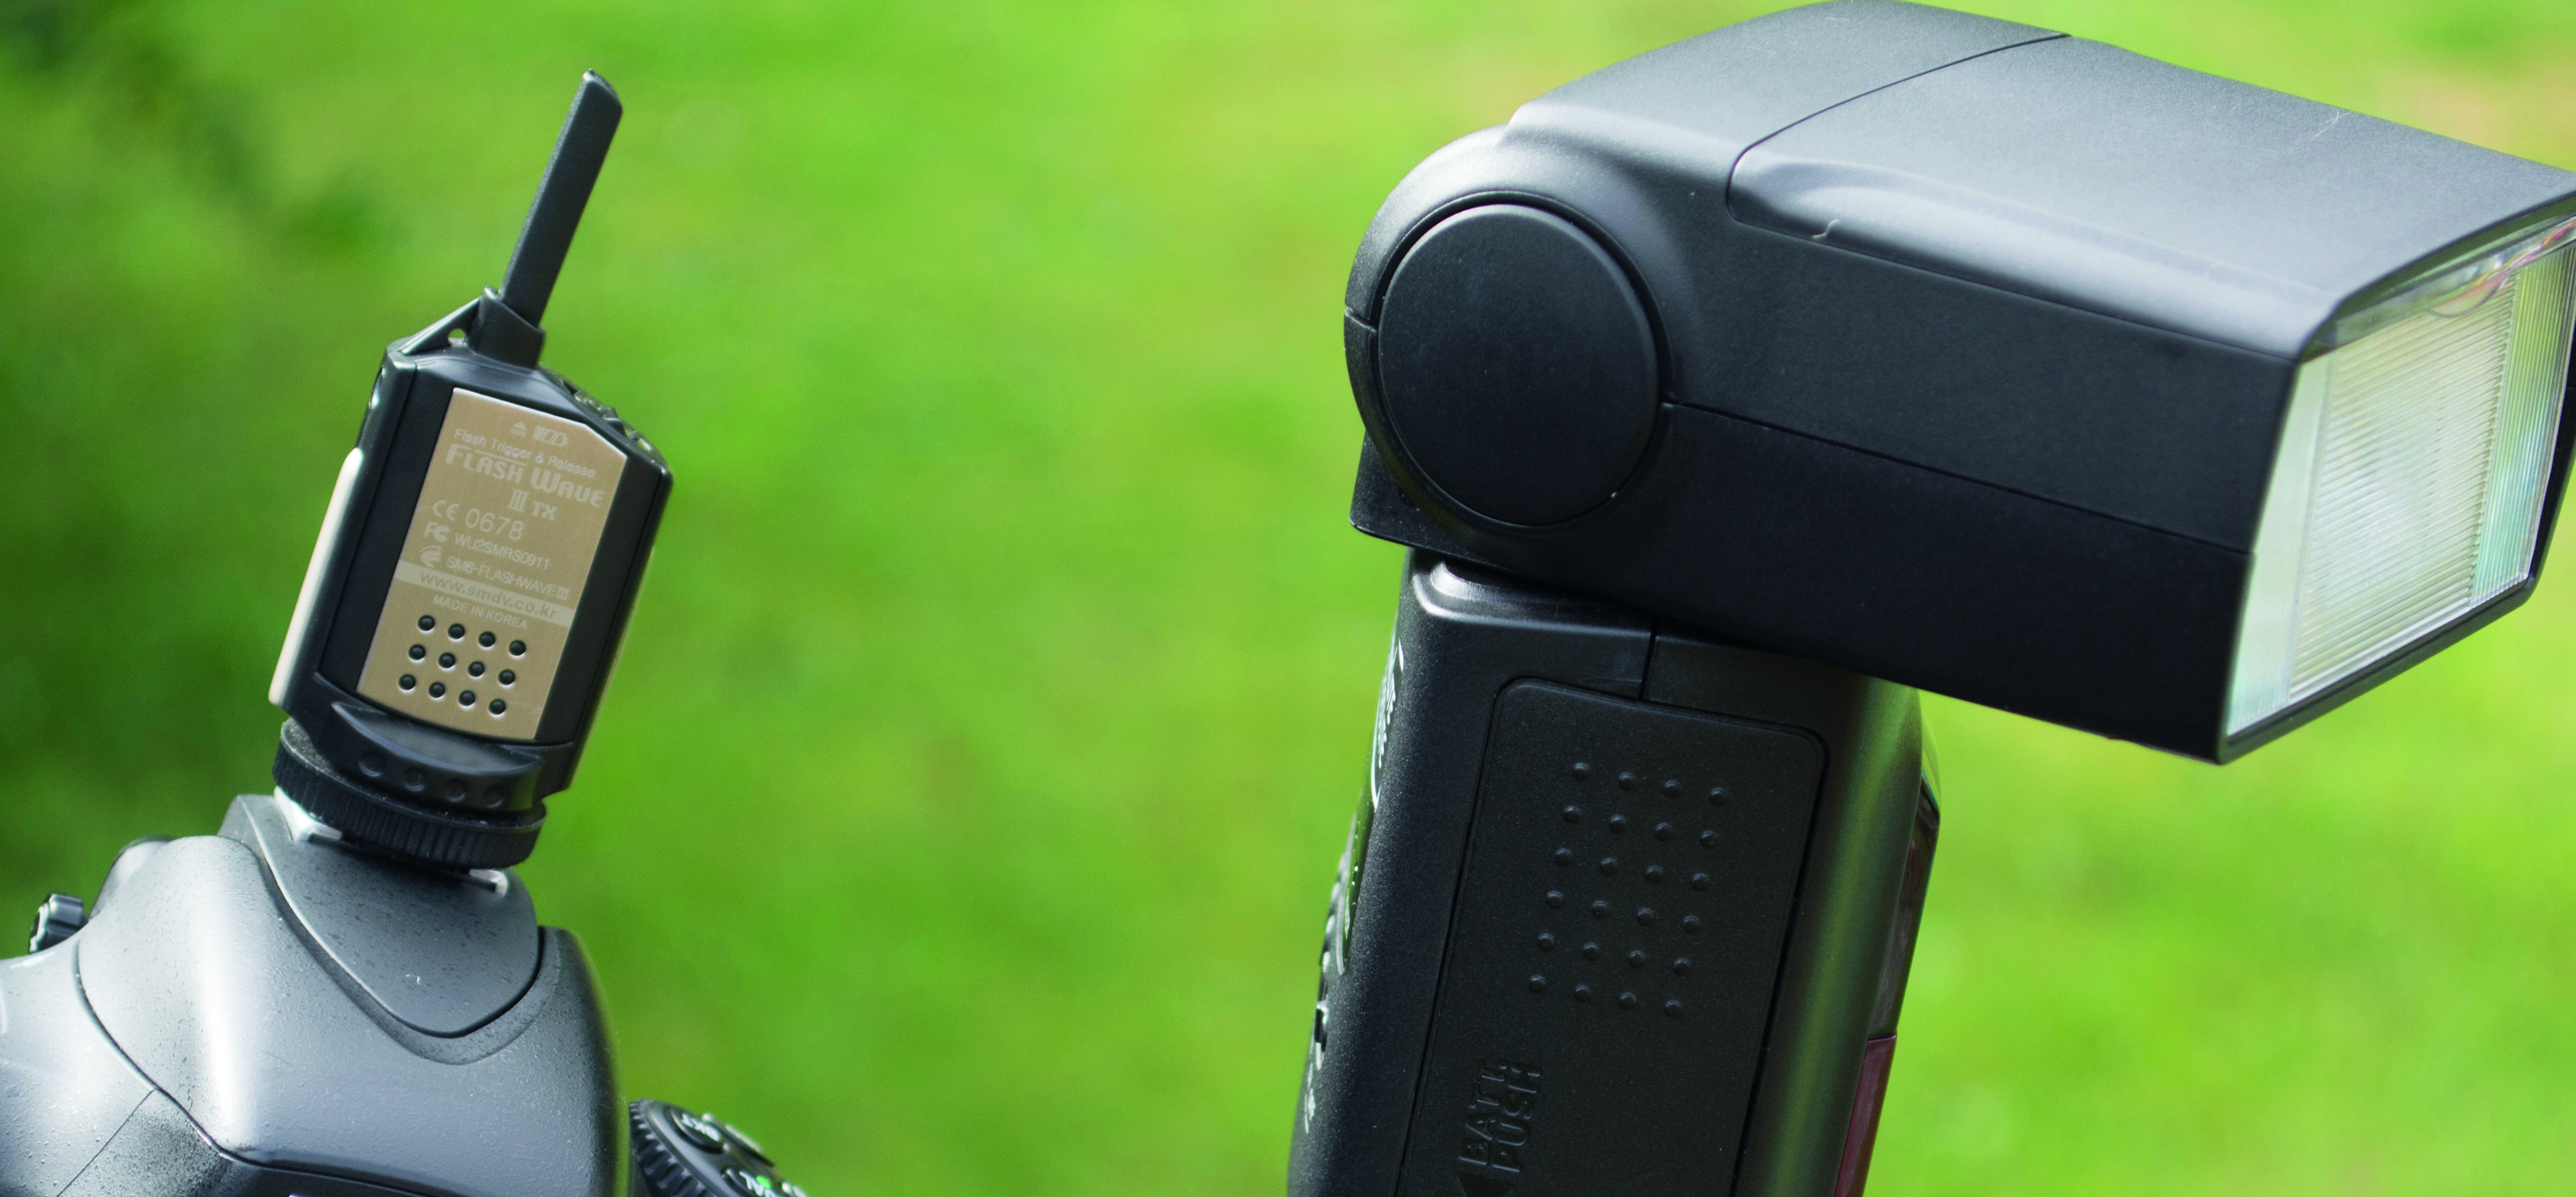
You need a wireless trigger, with the transmitter on the camera’s hotshoe and the receiver attached to the Speedlight. If you don’t have a wireless trigger you could use your camera’s pop-up flash in Commander mode, but this relies on line-of-sight communication.

SET SLAVE MODE
A wireless trigger isn’t necessary to fire the second flash. Instead you can set the flash to Optical Slave mode so it’ll fire when it detects the burst from the first flash. On our Speedlight, first we set the switch to Remote, then we set it to the Optical Slave mode, which is called SU-4.
Get the Digital Camera World Newsletter
The best camera deals, reviews, product advice, and unmissable photography news, direct to your inbox!
The lead technique writer on Digital Camera Magazine, PhotoPlus: The Canon Magazine and N-Photo: The Nikon Magazine, James is a fantastic general practice photographer with an enviable array of skills across every genre of photography.
Whether it's flash photography techniques like stroboscopic portraits, astrophotography projects like photographing the Northern Lights, or turning sound into art by making paint dance on a set of speakers, James' tutorials and projects are as creative as they are enjoyable.
He's also a wizard at the dark arts of Photoshop, Lightroom and Affinity Photo, and is capable of some genuine black magic in the digital darkroom, making him one of the leading authorities on photo editing software and techniques.

