How to create festive food images
Images good enough to eat

Capture beautiful bokeh and festive food in one
Time needed: 2-3 hours
Skill level: Intermediate
Kit needed: Tripod • Fast lens • Mince pies • Fairy lights • Cotton wool • Teacup • Material for backdrop • Microwave
With the season to eat, drink and be merry upon us, the holidays are the perfect time to brush up on your food photography skills. Preparation is key when it comes to working with food. From cooking and presenting the cuisine to setting the scene, there’s lots to consider – and that’s before you even turn your camera on!
As we didn’t have a professional chef on hand, we kept things simple by shooting some mince pies with a cup of steaming tea. When it comes to photographing food, the background is just as important as the subject; a contrasting backdrop makes your subject stand out and helps to emphasize the food, and in this project we’re going to show you how to give it a bit of festive sparkle with the addition of some fairy lights twinkling in the background to create some beautiful bokeh. ‘Bokeh’ is the aesthetic quality of the out-of-focus points of light. This is determined by the way the lens renders these points of light, so wide apertures are a must to achieve those beautiful, soft circles from the fairy lights.
With the subject and background sorted, don’t forget the smaller details; a sprig of holly, dusting of icing sugar and some swirling steam from our hot cuppa will help bring all the elements of our shot together.
TABLETOP STUDIO: Let's get festive
We’ll be relying on natural light to illuminate our subjects, so get set up near a window
01 FAST LENS
Good bokeh requires a wide aperture of at least f/2.8; a fast prime, like our Sigma 50mm f/1.4 DG HSM A, is ideal. When shooting at wide apertures, the smallest of movements could knock the focus, so set your camera on a tripod for full support.
02 BACKDROP
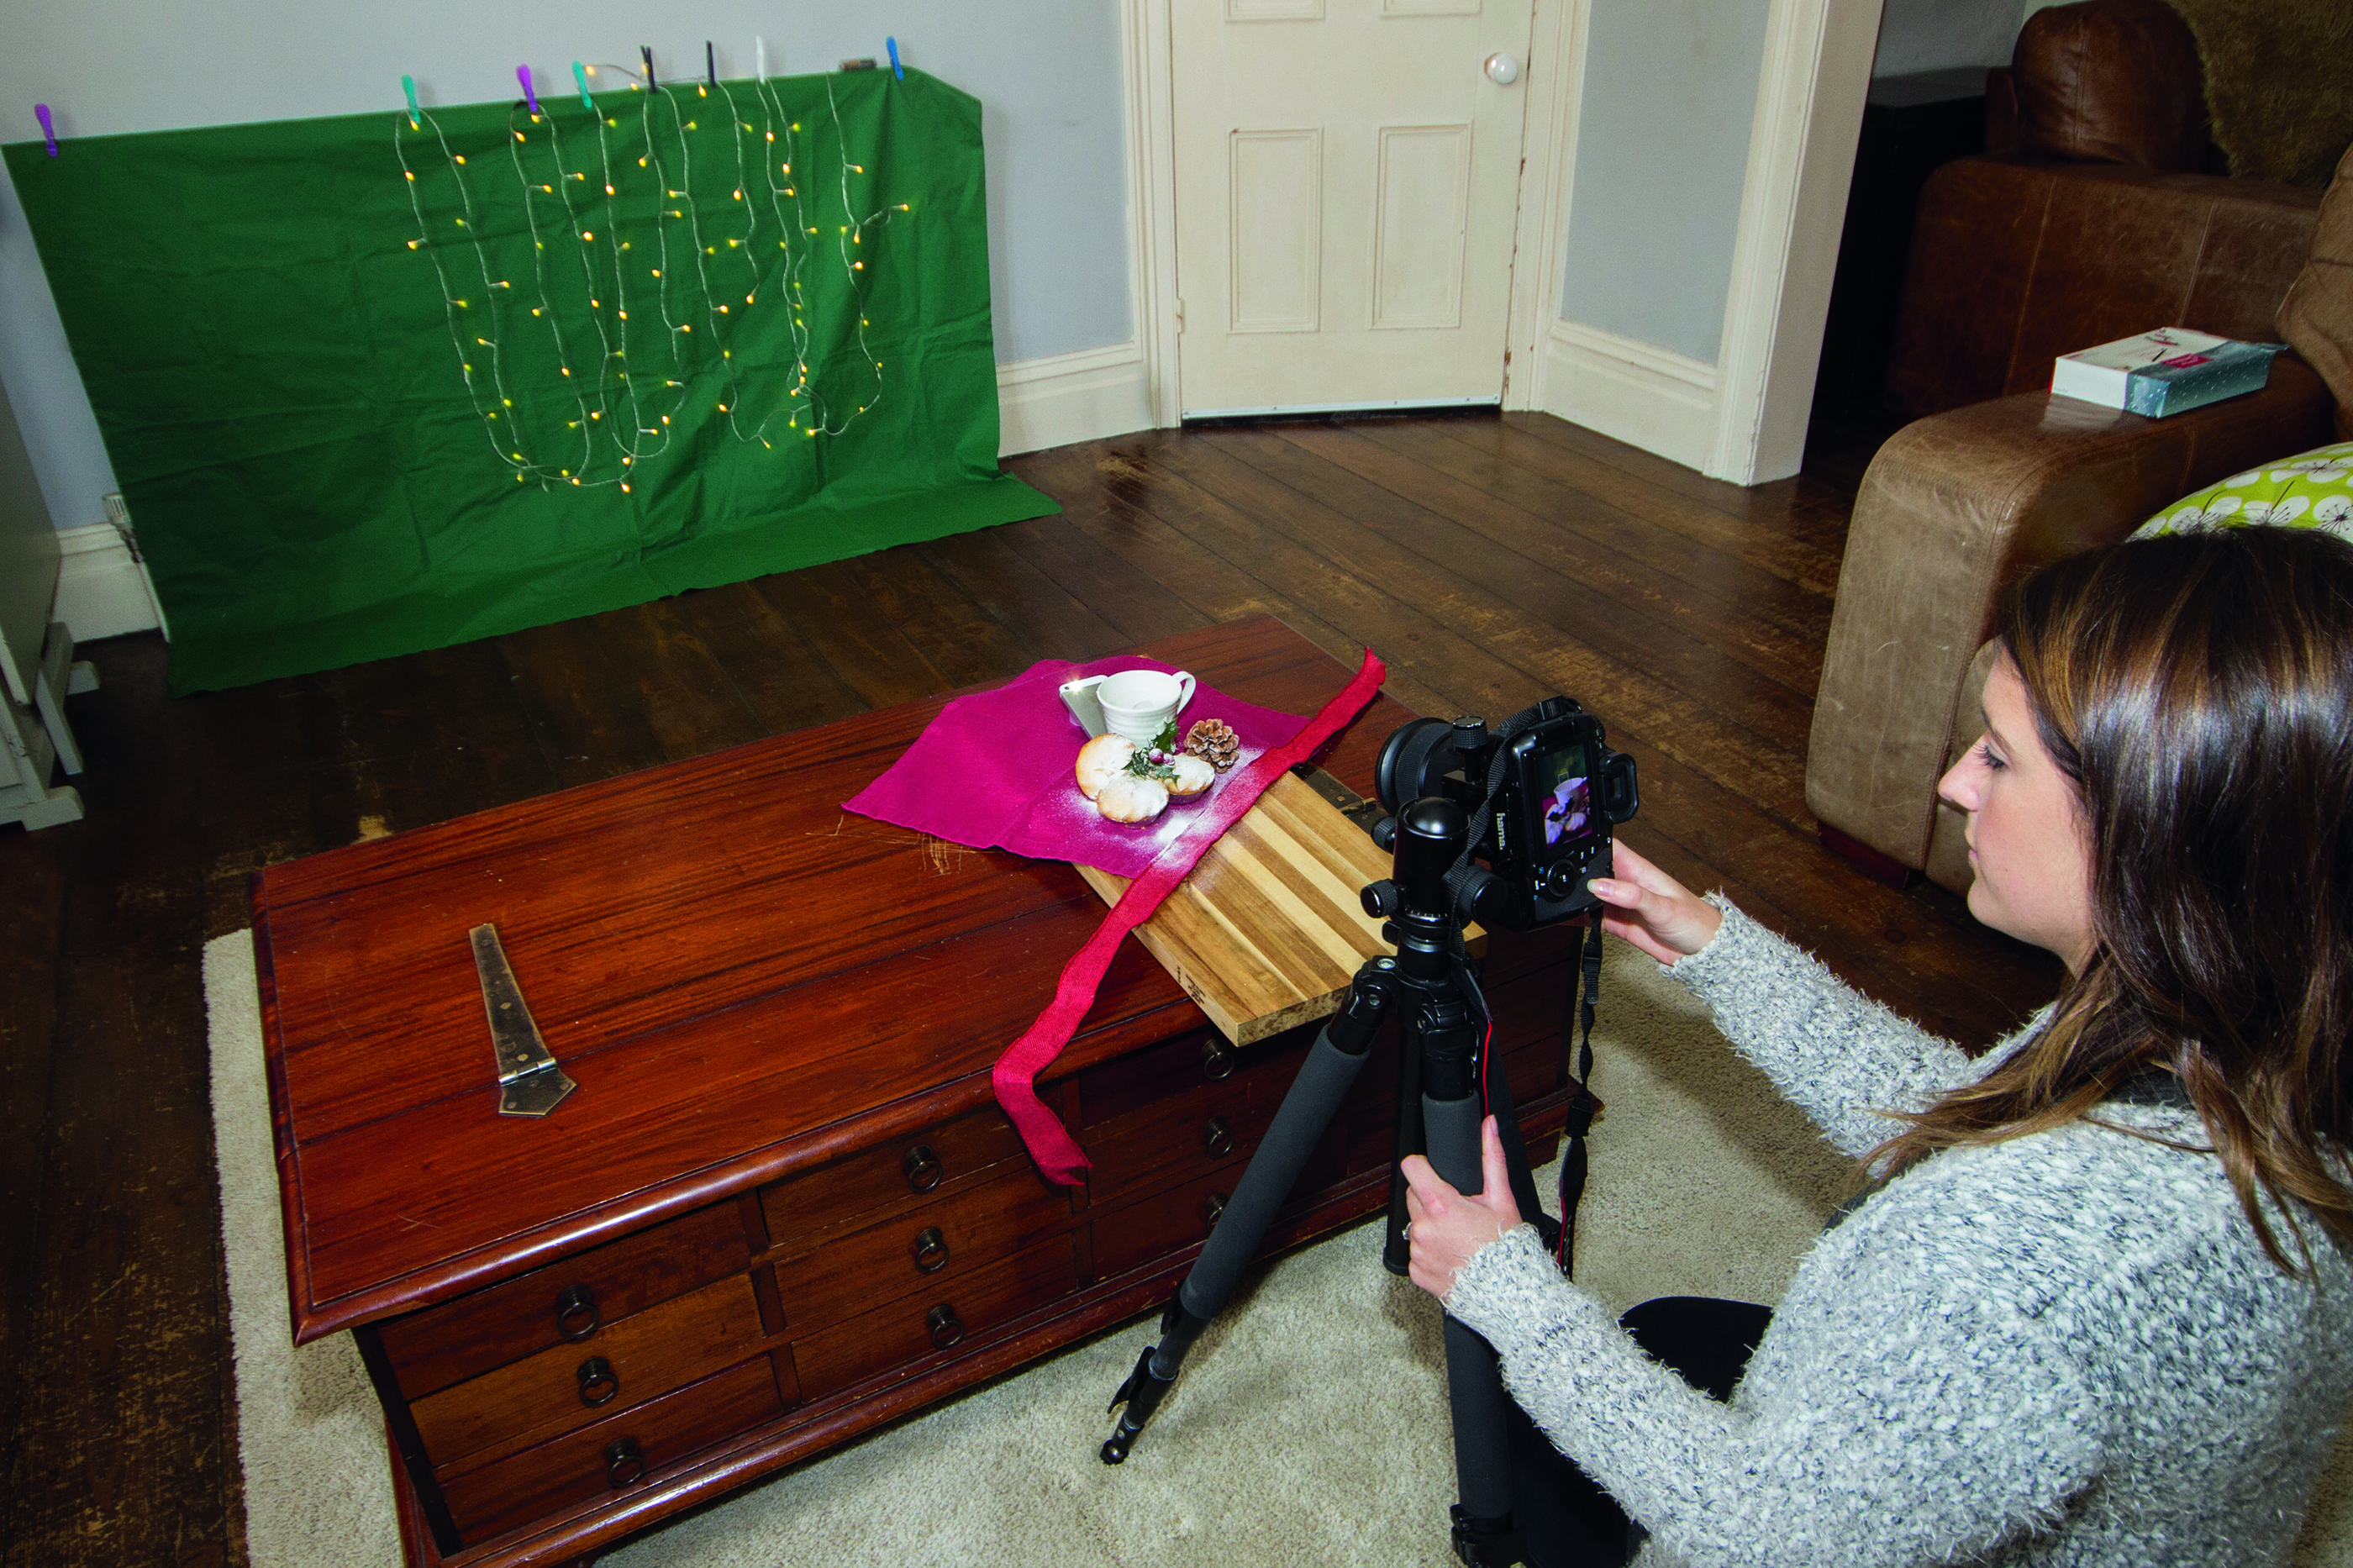
Use a festive red or green backdrop and position the fairy lights in front of it. Check the Live View display to ensure you’ve got an even spread of lights. Keep the amount of ambient light hitting the backdrop to a minimum by closing the nearest curtain.
03 COTTON WOOL TRICK
Microwave some wet cotton wool, then place the wad inside the cup to give the illusion of a steaming hot drink. Be quick as the steam doesn’t last long. Give it a squeeze to create more steam, or pop it back in the microwave and reheat.
04 SMARTPHONE
A dark, contrasting background will reveal the steam well, but if it’s too subtle you can add some backlight. Use the torch on your phone and position it next to the setup. Lean your phone at an angle to ensure the light is shining up at the rising steam.
05 FESTIVE FOOD
A hot cuppa and some mince pies is a sign that Christmas is on its way. Include other festive accessories, such as pine cones and a sprig of holly. To add an extra bit of Christmas sparkle, give your subjects a light dusting of icing sugar.
06 TABLETOP SETUP
For the best bokeh effect, your subject needs to be a few feet away from the backdrop; the greater the distance between foreground and background, the greater the effect will be. Position the table near a window for diffused daylight.
STEP BY STEP: Food for thought
Set the table – and your camera – for some scrumptious food photography
01 FULL SUPPORT
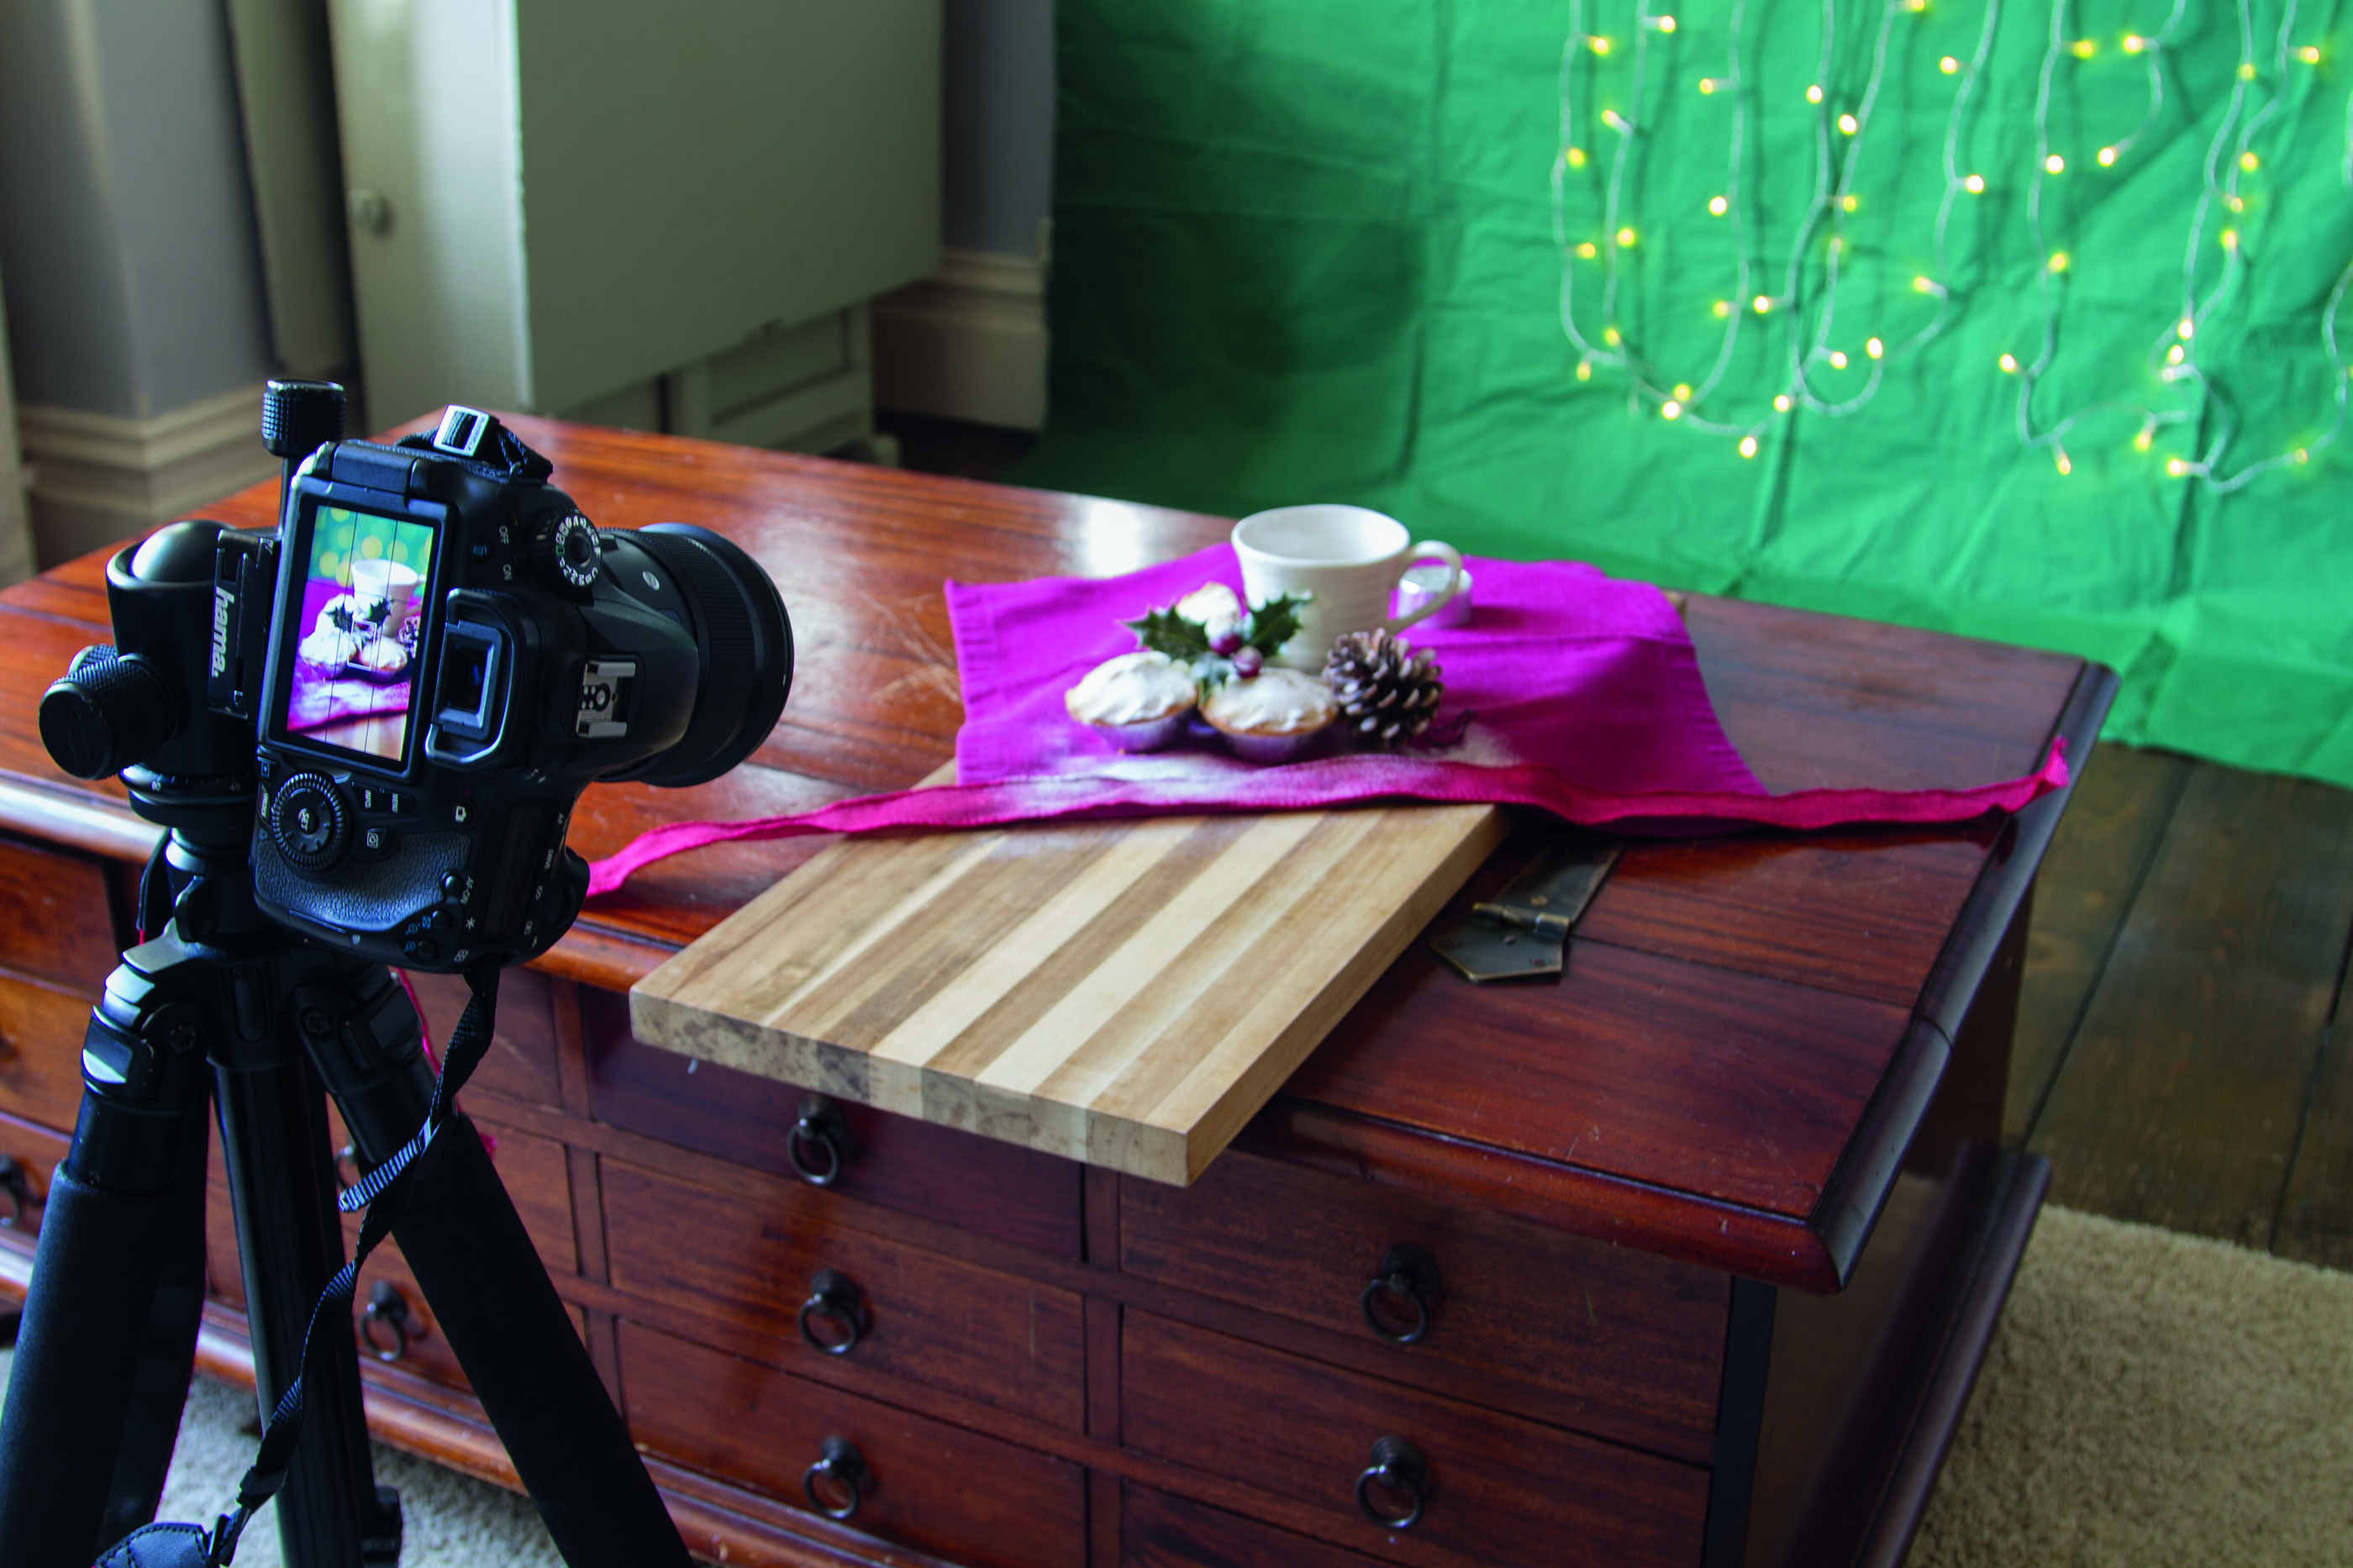
Place your camera on a tripod and position it slightly higher and angled down to your setup. To ensure you include both the subject and bokeh backdrop in the frame, pop the camera in portrait format and enable Live View mode to help you compose the scene.
02 SET A WIDE APERTURE
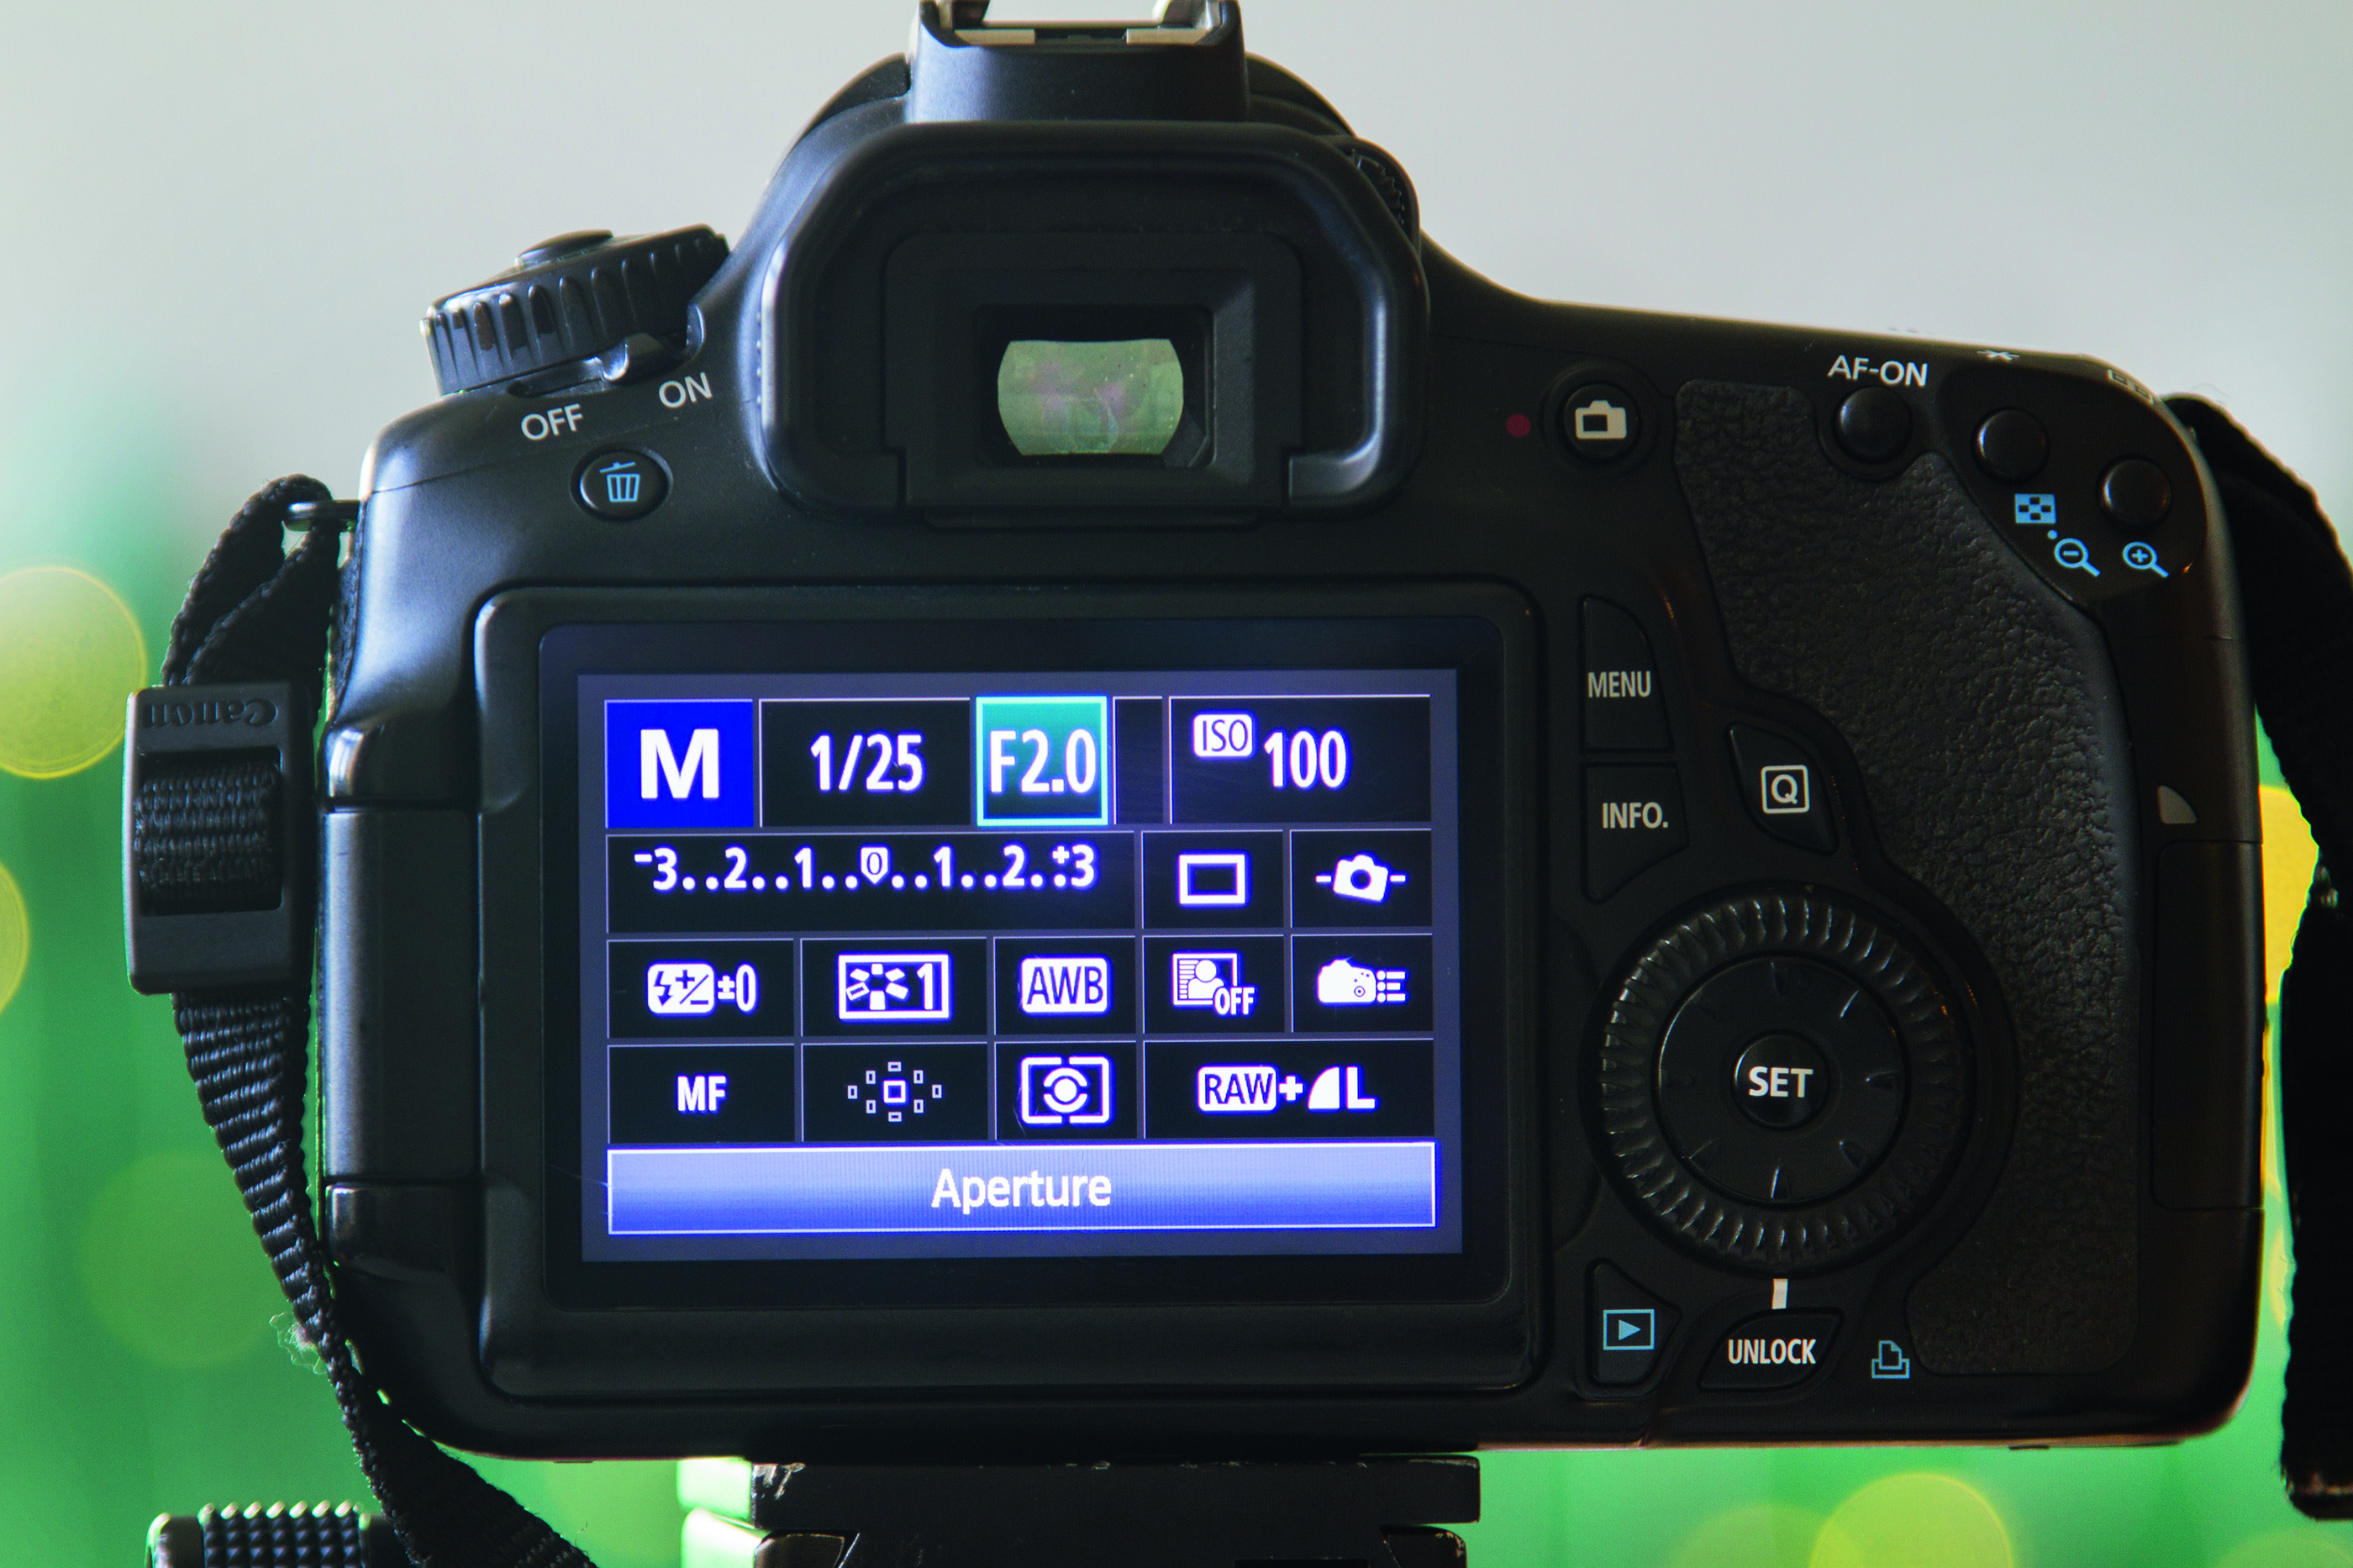
Switch to Manual mode and set ISO to 100. We need a wide aperture to render the fairy lights in the background into beautiful bokeh. Our lens opens up to f/1.4, but this won’t capture much of our subject in sharp focus, so we set f/2 as a happy compromise.
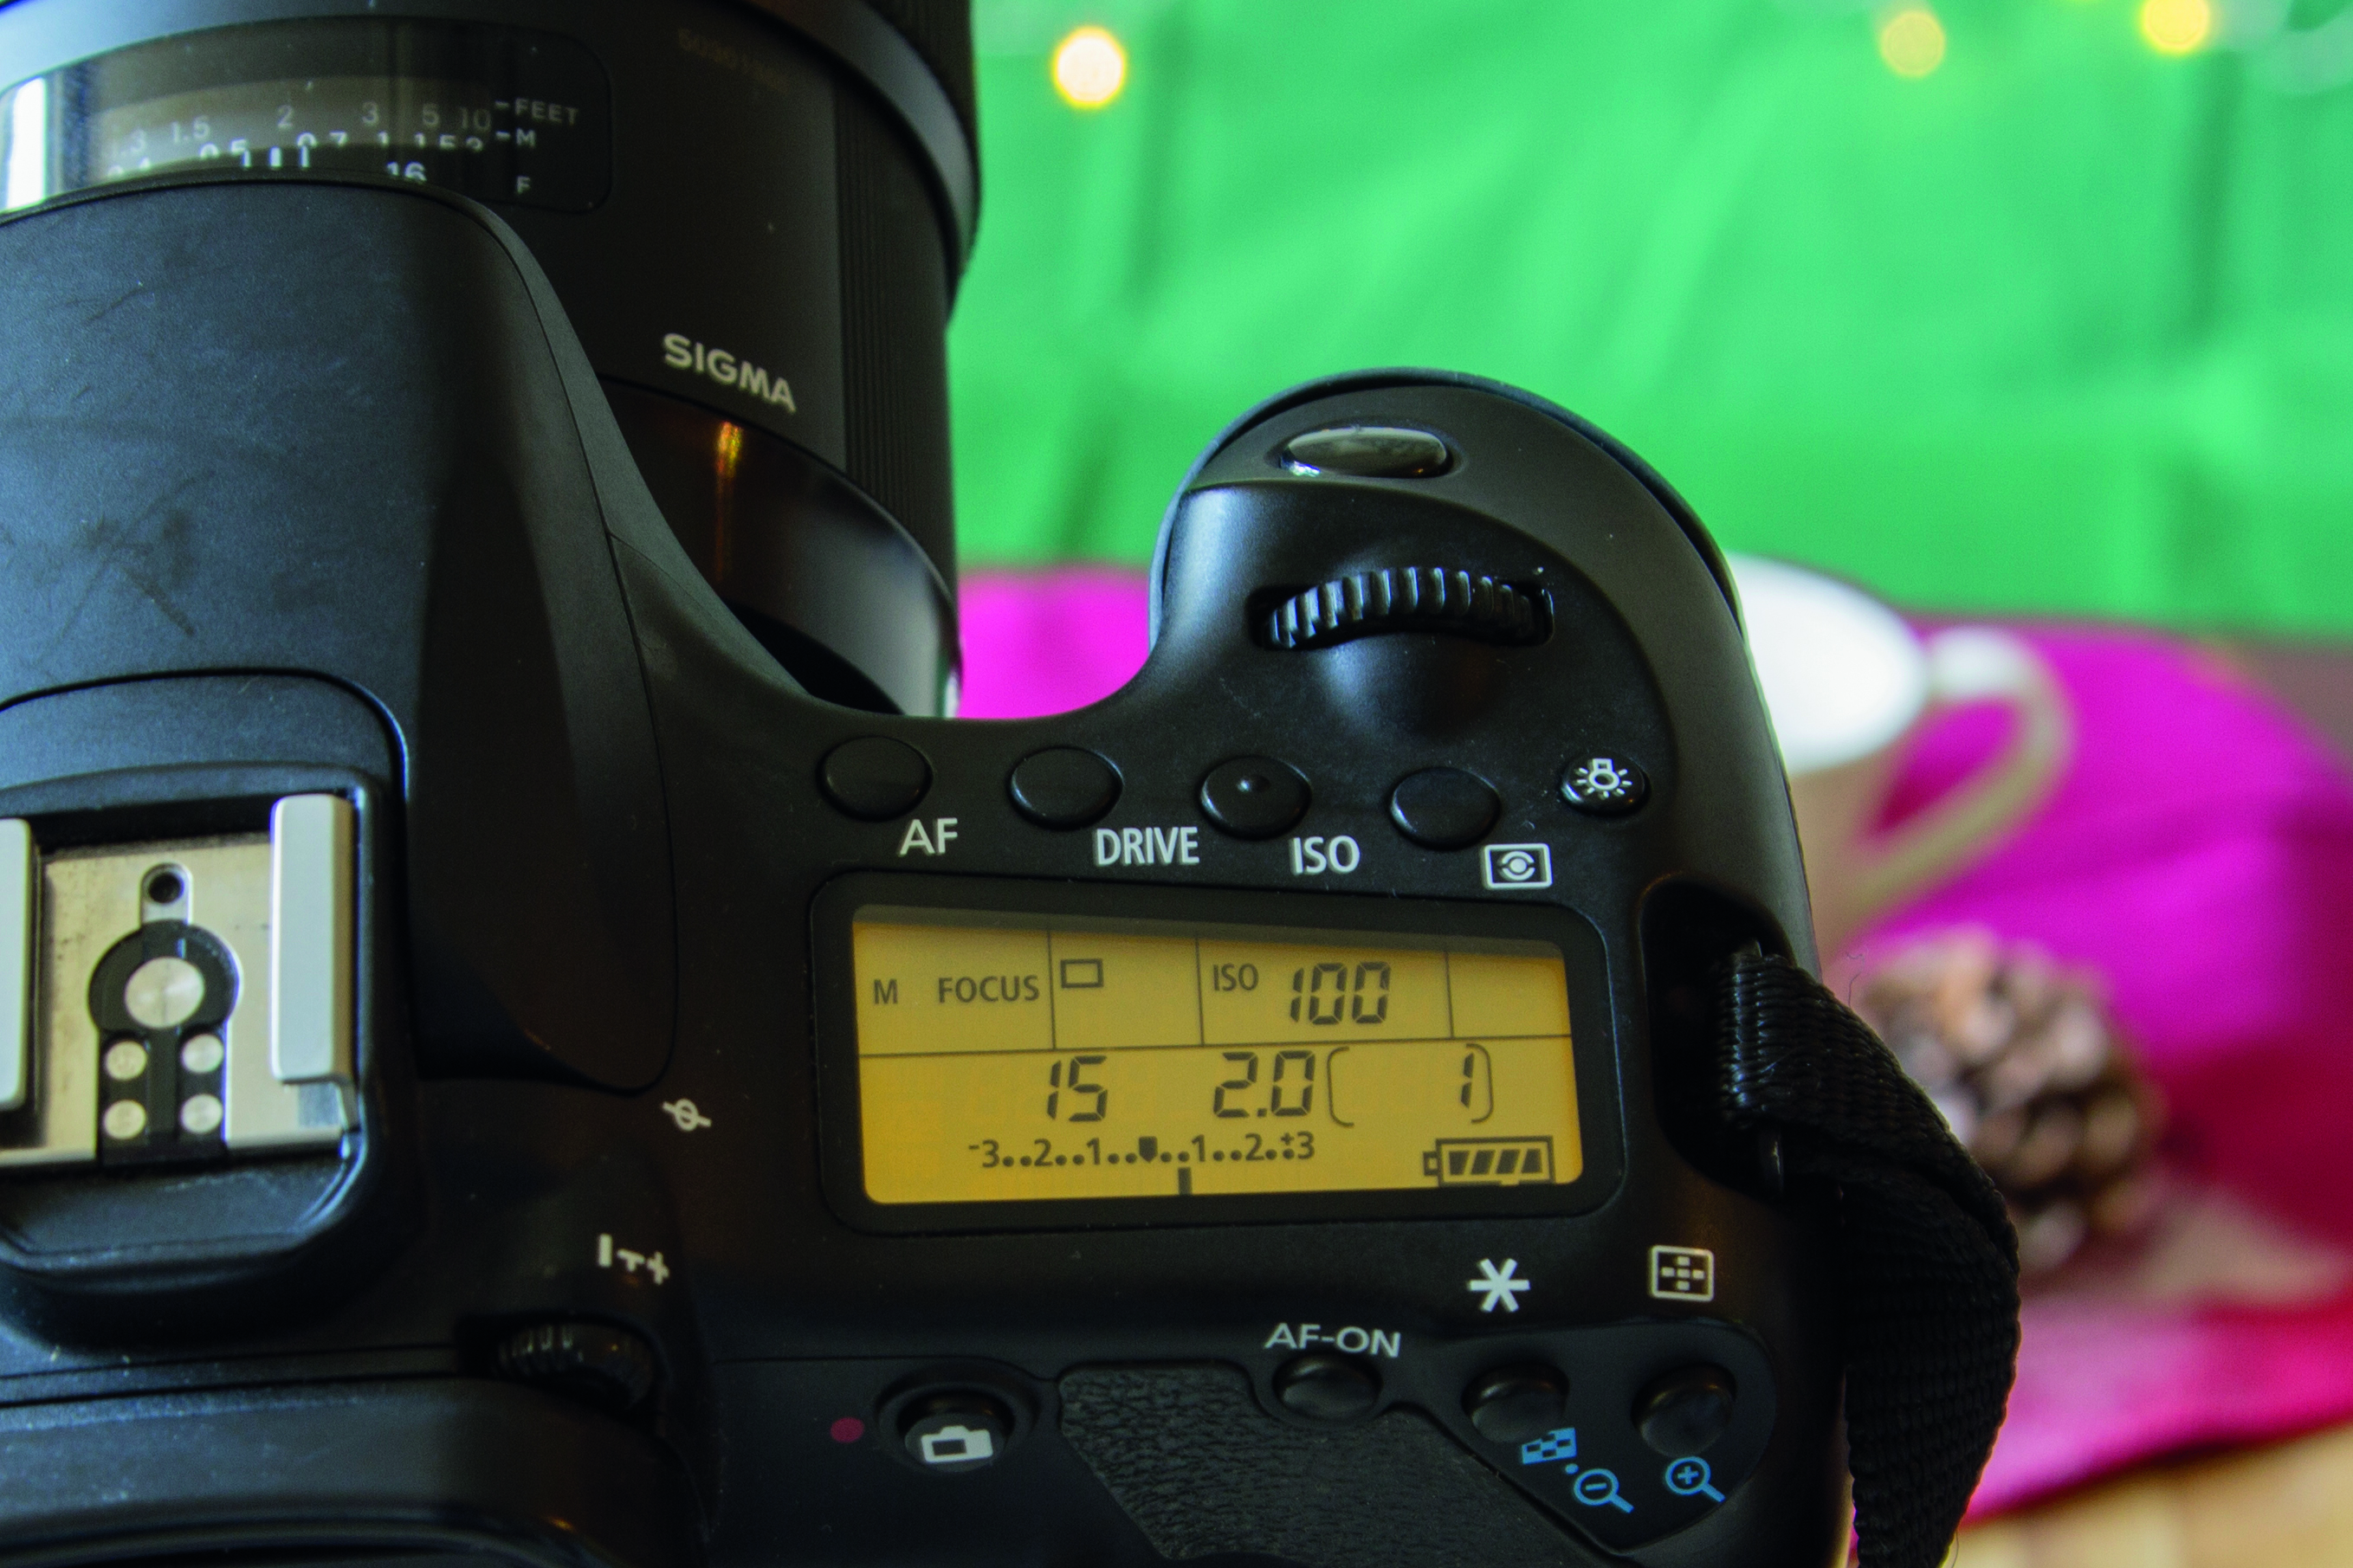

While there’s a lot going on in our shot, we still need to think about the details. We’ve used a chunky wooden chopping board to place our subjects on, giving a rustic feel, but we also could do with a bit of colour. To contrast with the green backdrop, we’ve used a red napkin and some festive ribbon to cover part of the chopping board. The green holly leaves, red berries and brown pine cone for added texture, bring the whole shot together. A sprinkling of icing sugar adds the finishing touch.
03 EXPOSE THE SCENE
Set a shutter speed for a balanced exposure. The fairy lights in the background may fool the camera’s light meter, so overexpose the scene a little. Ensure your camera is set to record in Raw and set Auto White Balance; this can be changed in post-production.
04 GET FOCUSED
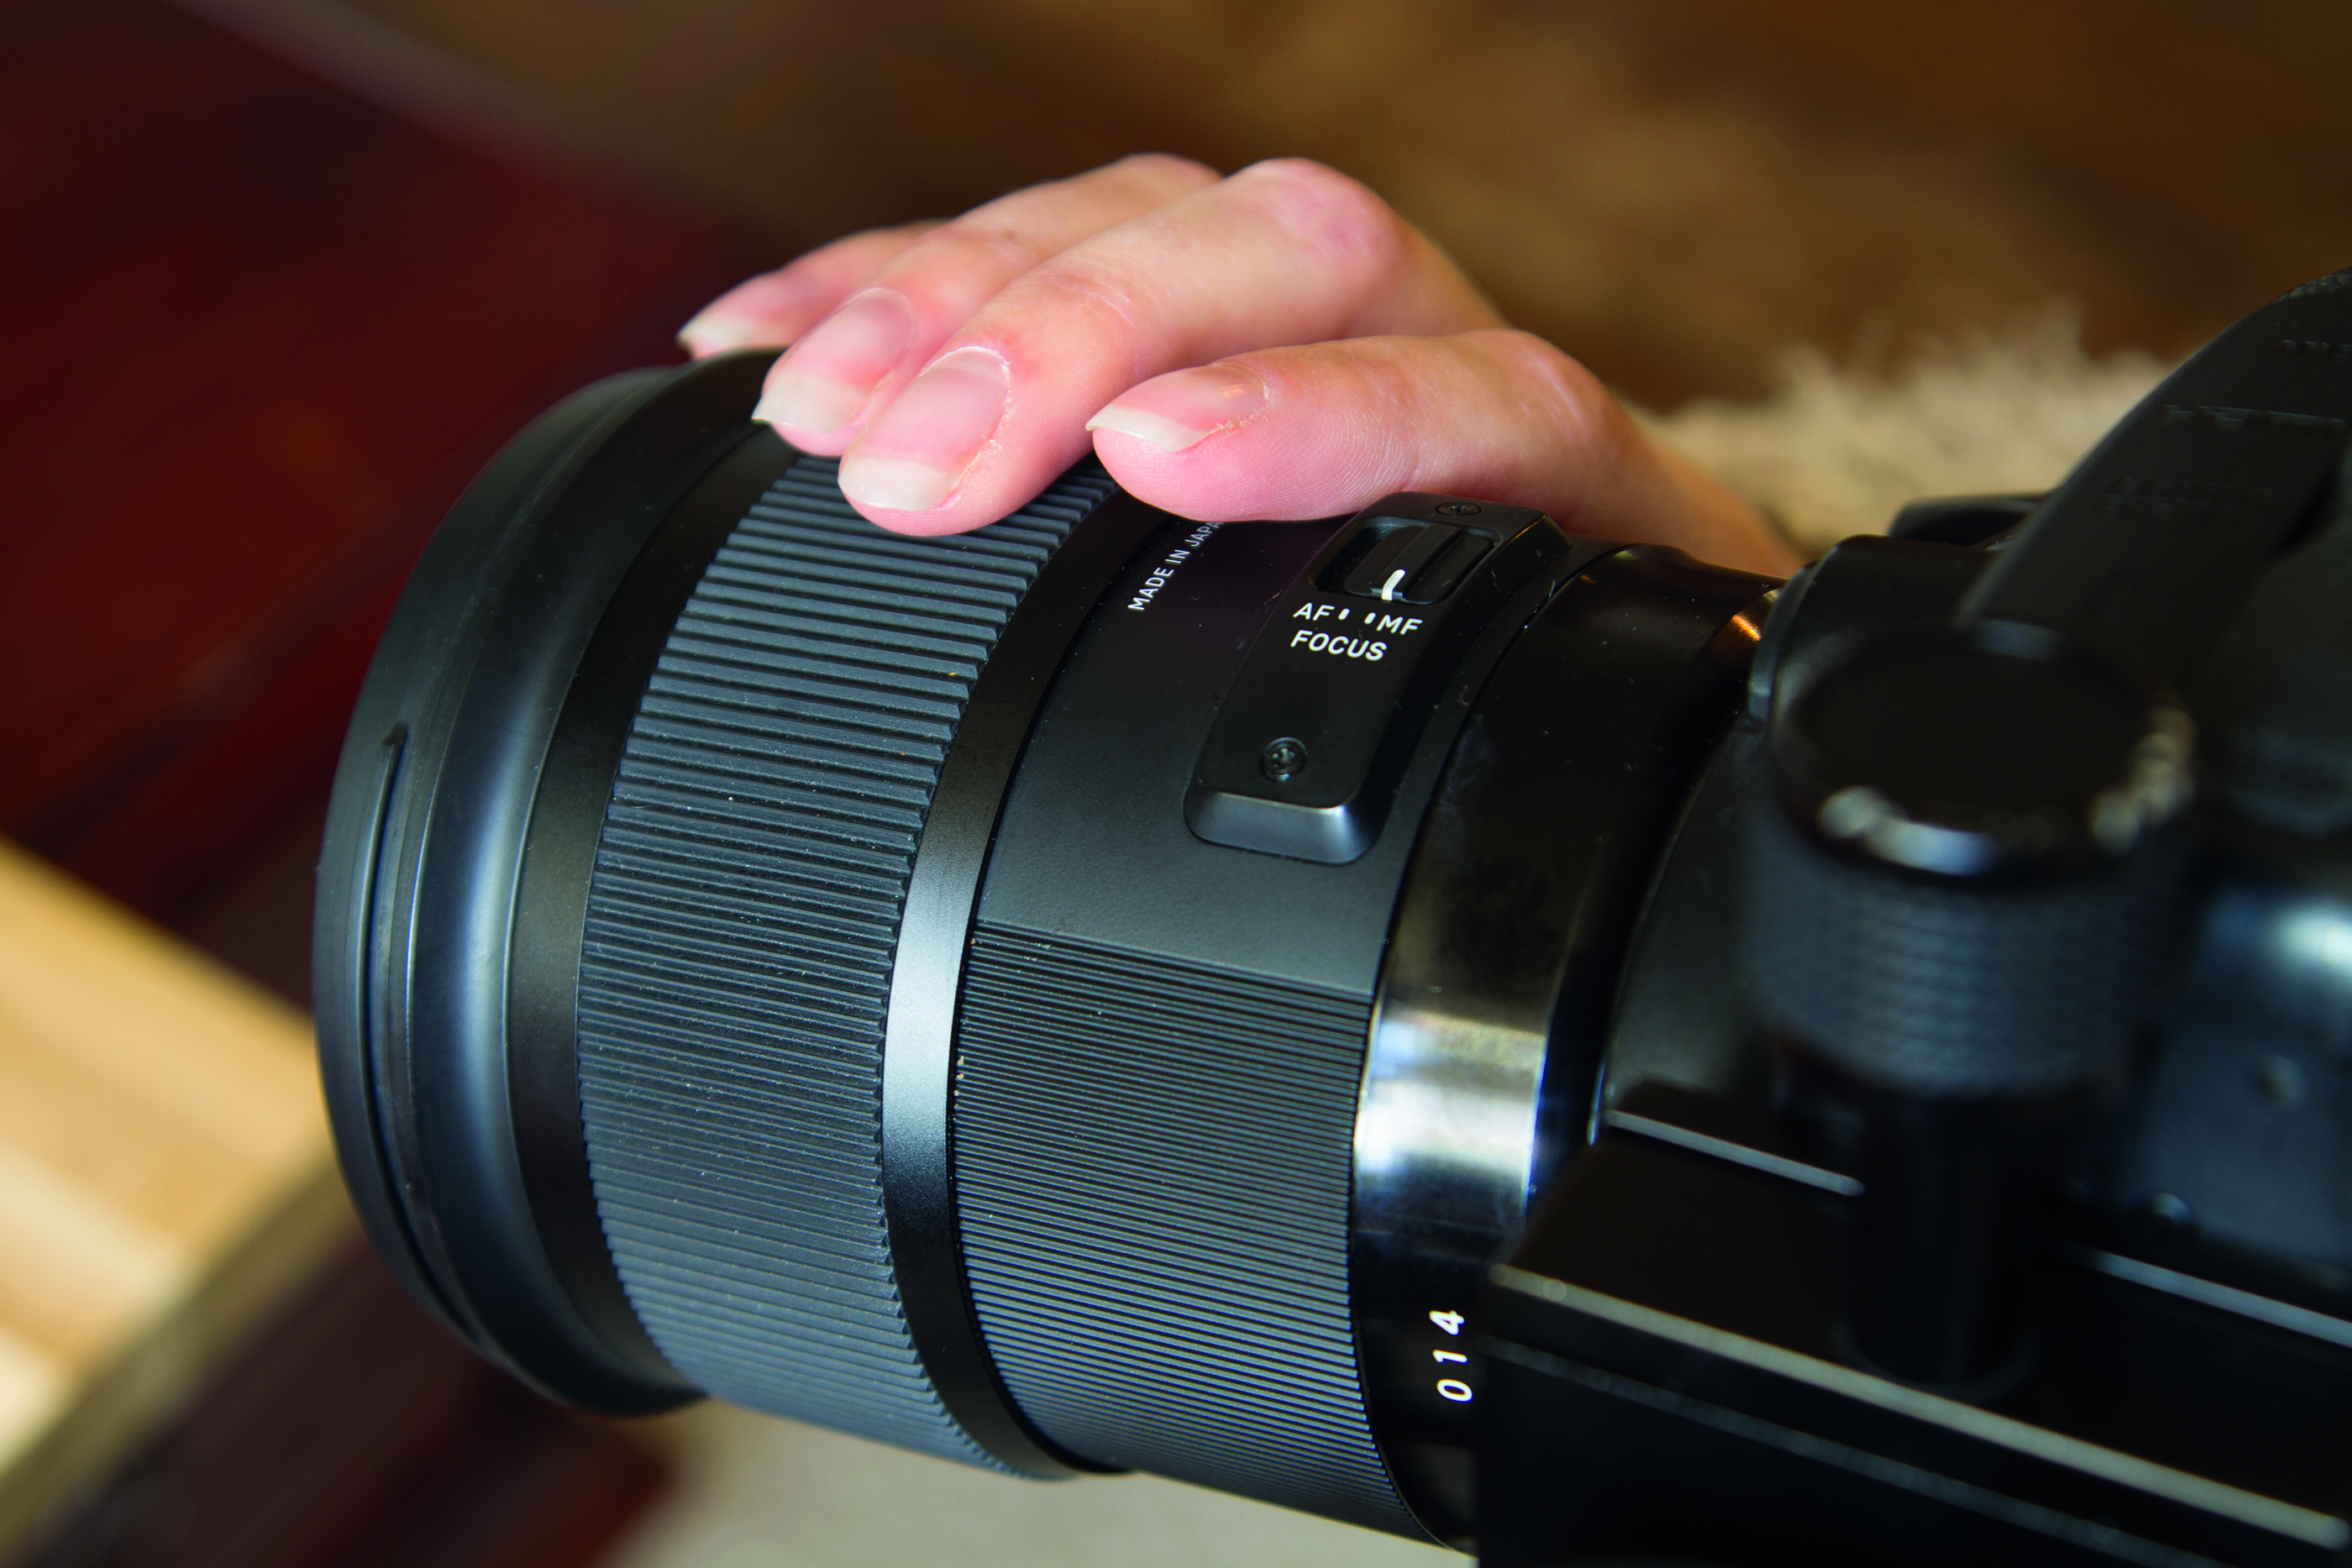
Decide on your main focal point; ours is the second-closest pie. Zoom in at 10x magnification, set the switch on the lens barrel to Manual Focus. Twist the focus ring to bring your subject into sharp focus. Take a test shot and adjust the exposure, if required.
STEP BY STEP: TRICKS OF THE TRADE
Heating up a wad of wet cotton wool is a classic trick for creating steamy shots in food photography
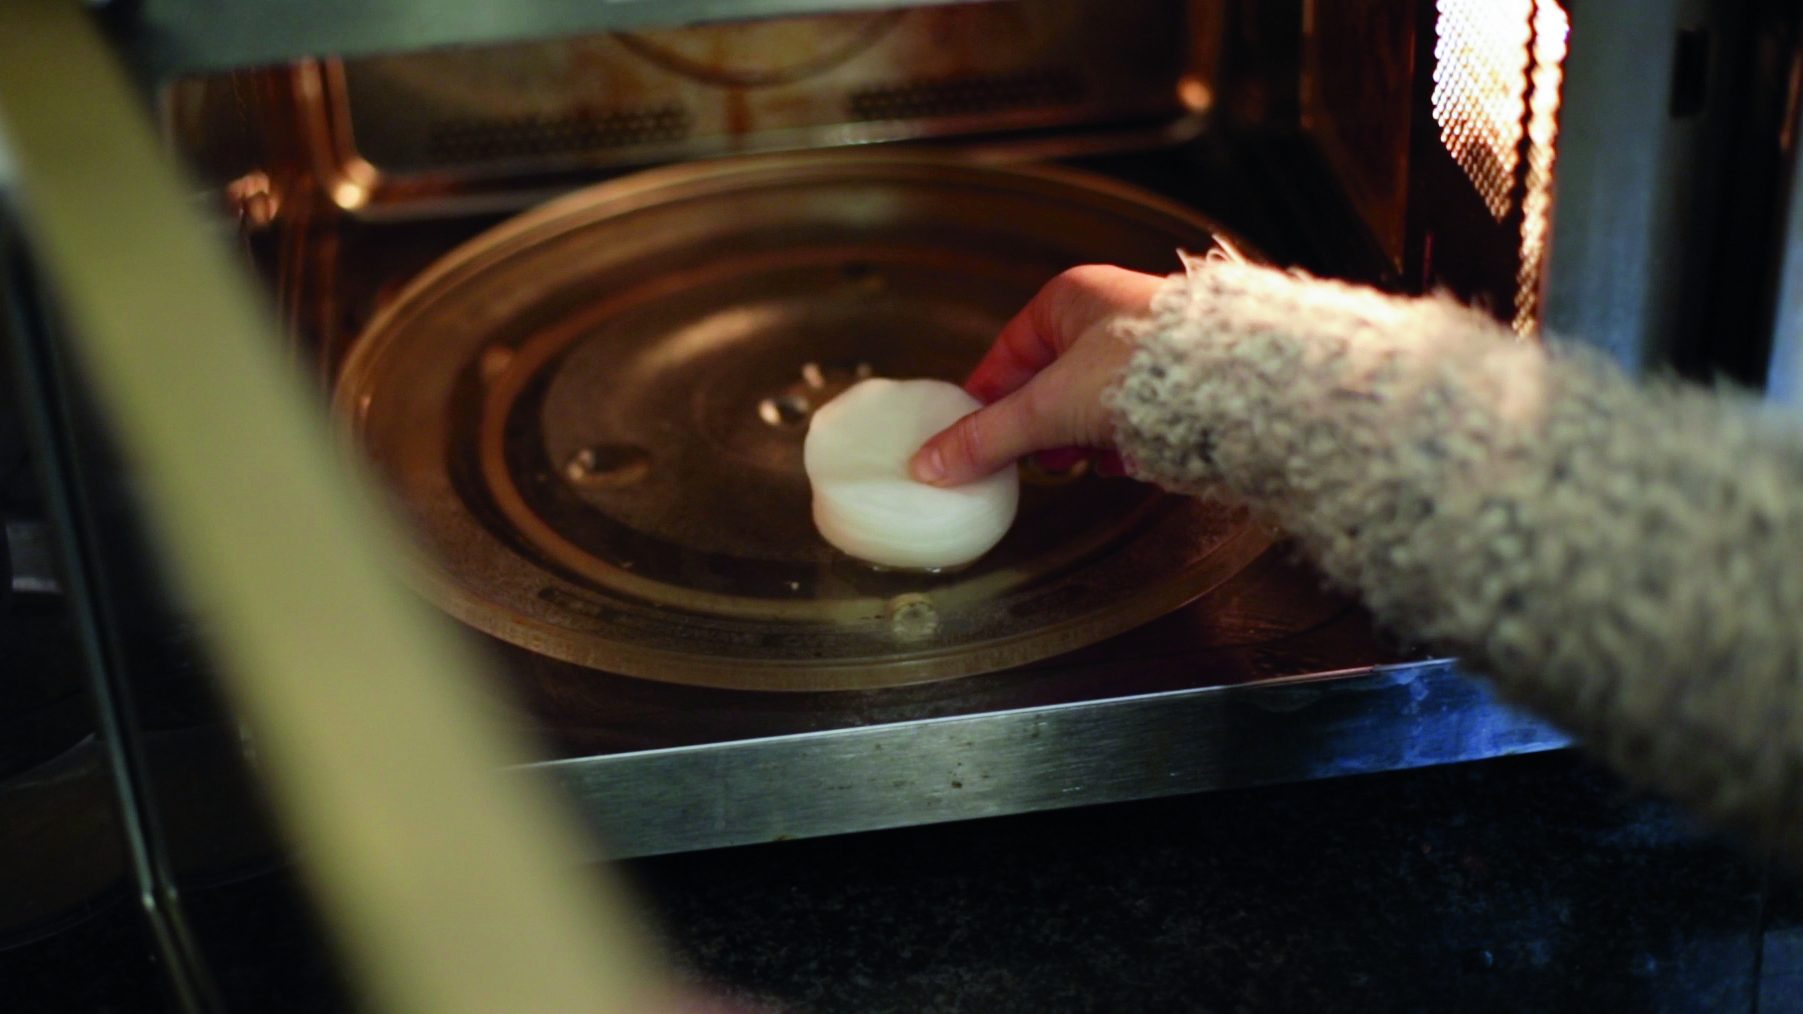
Soak a wad of cotton wool in water, squeeze out the excess liquid, then pop it in the microwave for 30 seconds. Be careful as it will be hot to touch. Gently squeeze the cotton wool to generate more steam and place inside your cup.
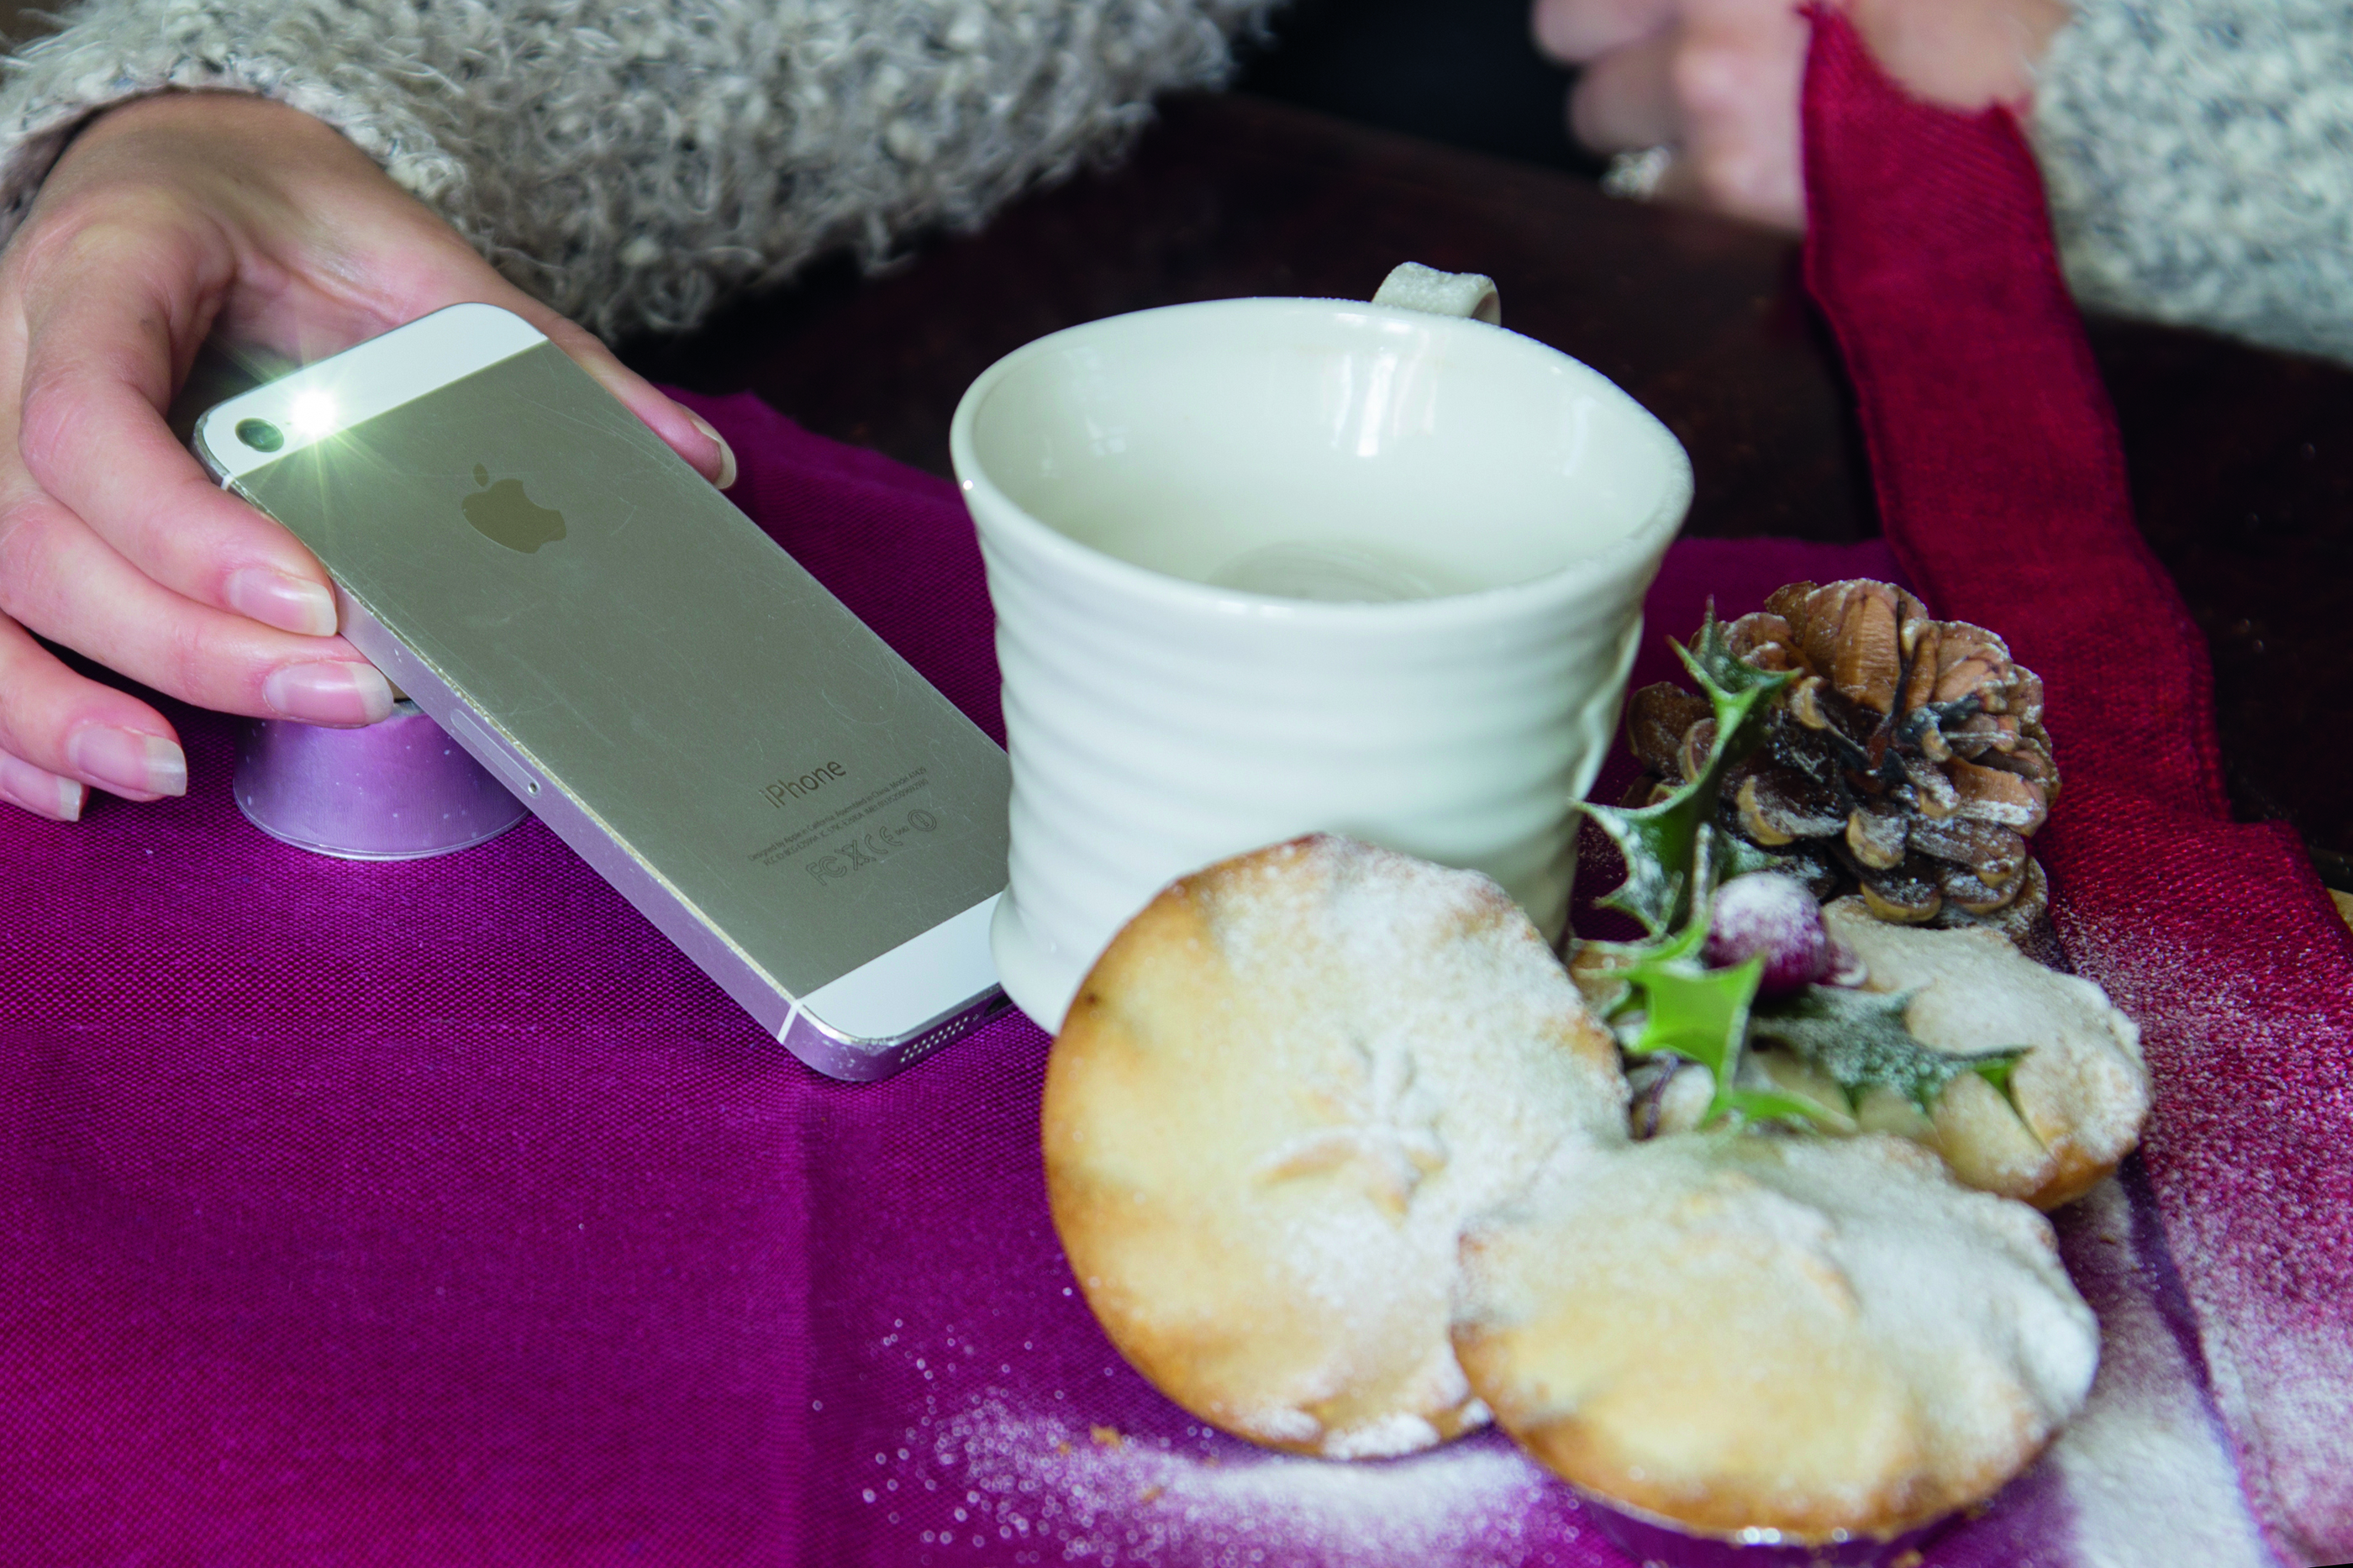
For the best results you’ll need a dark, contrasting background. Our fairy lights are reducing the visibility of the steam; to make it pop out more create backlighting with a torch (we’ve used our phone) positioned behind the cup and out of sight.
Get the Digital Camera World Newsletter
The best camera deals, reviews, product advice, and unmissable photography news, direct to your inbox!
Hollie Latham-Hucker is a former Technique Editor of PhotoPlus magazine. With a degree in Design Photography from the University of Plymouth, she is currently working as the Technique Editor of Amateur Photographer.
